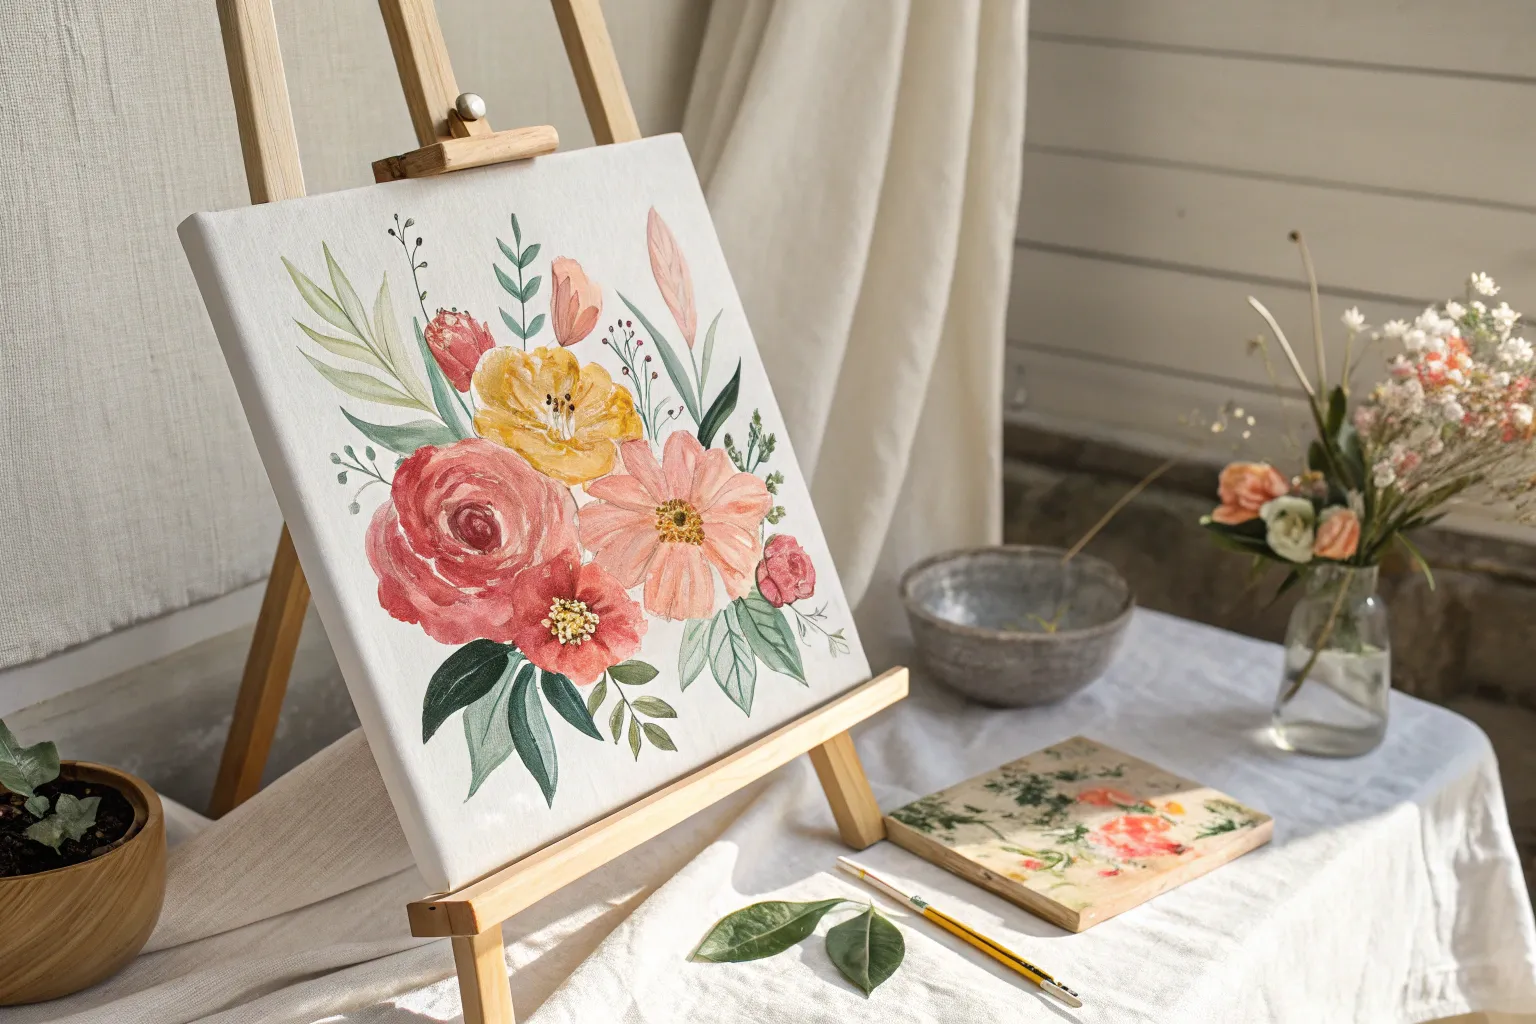
Spring is basically nature’s way of handing us an instant color palette—soft skies, fresh greens, and blooms everywhere you look. Here are my favorite easy spring canvas painting ideas that feel joyful and doable, even if you’re keeping things super simple.
Cherry Blossom Branch With Cotton Swab Blooms
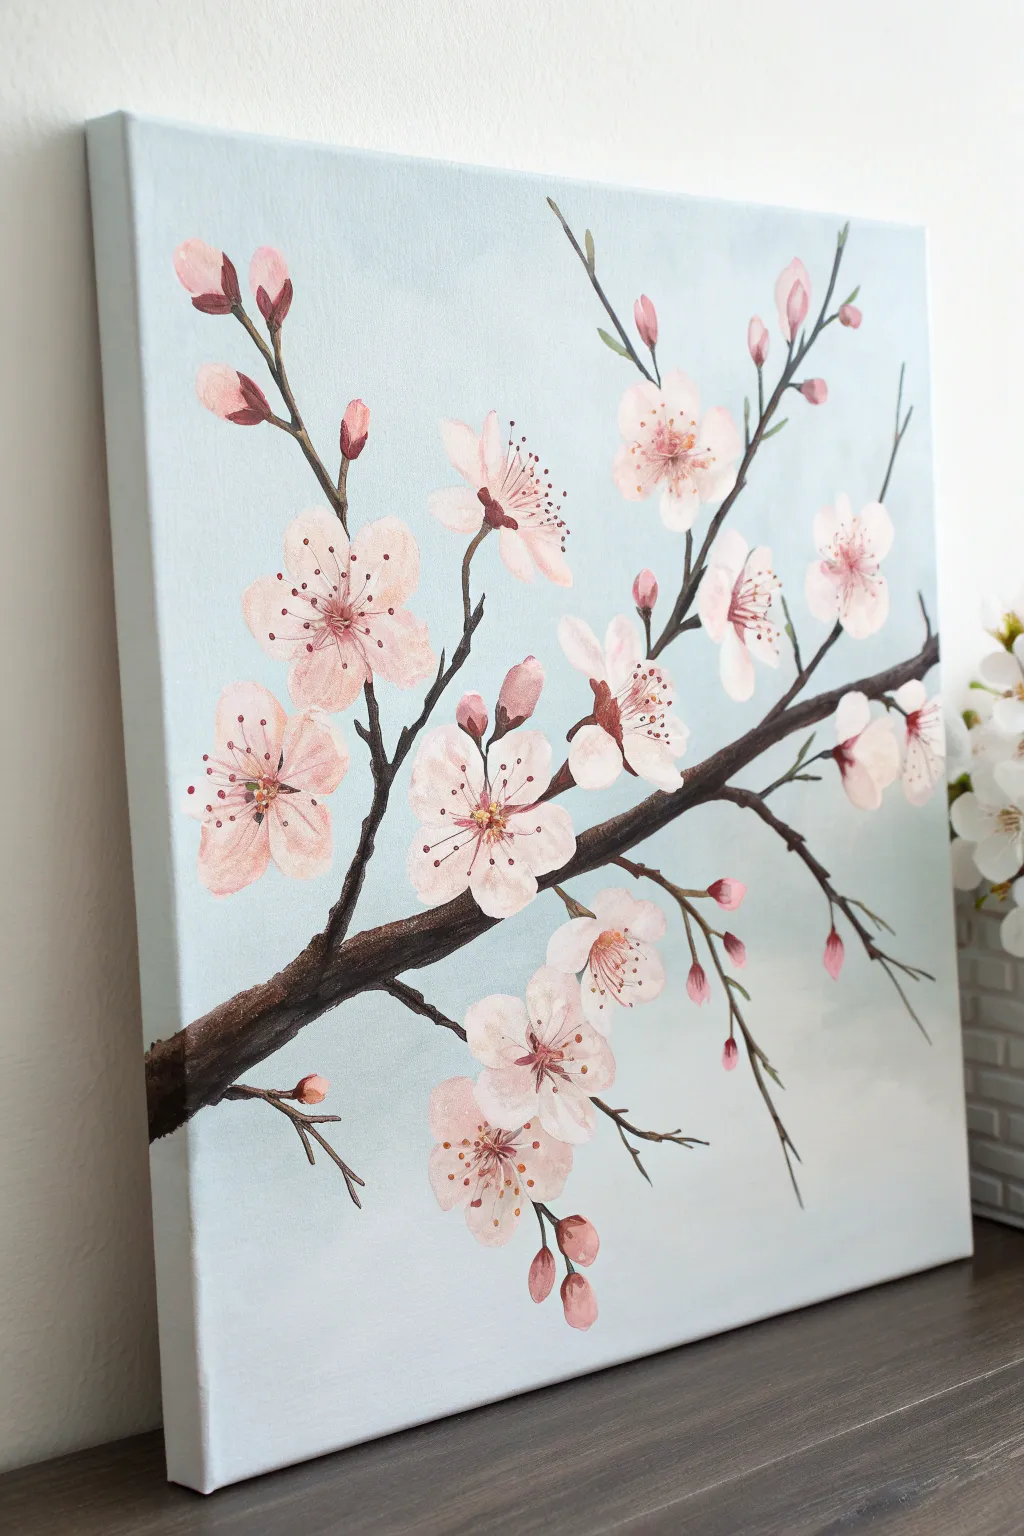
Capture the fleeting beauty of spring with this elegant acrylic painting featuring a sprawling cherry blossom branch against a soft blue sky. While some tutorials use cotton swabs, this method uses careful brushwork to create realistic, translucent petals and detailed centers for a more refined finish.
Step-by-Step
Materials
- Rectangular stretched canvas (e.g., 11×14 or 16×20 inches)
- Acrylic paints: Titanium White, Light Blue, Burnt Umber, Mars Black, Crimson Red, Yellow Ochre
- Wide flat brush (for background)
- Round brush (size 6 or 8) for petals
- Fine liner brush (size 0 or 1) for details
- Palette or paper plate
- Cup of water and paper towels
Step 1: Setting the Scene
-
Prepare the background mix:
Start by mixing a large amount of Titanium White with a very small drop of Light Blue. You want a pale, airy sky blue that looks almost white in bright light. -
Paint the sky:
Using your wide flat brush, cover the entire canvas with your pale blue mix. Use long, smooth horizontal strokes to ensure an even coat. Don’t forget to paint the edges of the canvas for a polished look. -
Create a subtle gradient:
While the paint is still wet, you can add a tiny touch more white to the top left corner and blend it downwards. This creates a soft atmospheric effect, though a flat color works beautifully too. Let this layer dry completely.
Pro Tip: Petal Translucency
To make petals look realistic, mix a tiny bit of water or glazing medium into your pale pink. This makes the paint slightly transparent, allowing the background to faintly show through.
Step 2: Structuring the Branch
-
Map out the main branch:
Mix Burnt Umber with a tiny touch of Mars Black to get a deep, dark brown. Using a medium round brush, paint a thick main branch entering from the bottom left corner, angling upward diagonally across the canvas. -
Add secondary limbs:
Extend a few thinner branches off the main limb. Make your lines slightly jagged or ‘elbowed’ rather than perfectly straight, as cherry trees have naturally gnarled growth patterns. -
Paint fine twigs:
Switch to your fine liner brush. With a slightly watered-down mixture of your dark brown, pull out very thin, wispy twigs from the ends of the larger branches. These will hold the buds and smaller flowers. -
Highlight the wood:
Mix a little White into your brown create a tan color. Lightly streak this along the top edges of the main branch to suggest sunlight hitting the bark. This adds dimension so the branch doesn’t look flat.
Step 3: Painting the Blooms
-
Mix your petal pink:
Create a soft pink using Titanium White and a very small dot of Crimson Red. You want it to be pastel but opaque enough to cover the branch where they overlap. -
Form the open flowers:
Identify spots for fully opened blooms—clusters of three or four work well. Using the tip of a size 6 round brush, press down and lift up to create five teardrop-shaped petals radiating from a center point. Leave a tiny gap in the very middle. -
Add side-facing flowers:
For flowers that aren’t facing you directly, paint only 3 or 4 petals in a fan shape. This perspective makes the branch look three-dimensional. -
Paint the buds:
At the tips of the thin twigs, paint small, oval teardrop shapes in a slightly darker pink mixture (add a tiny bit more red). These represent unblossomed buds. -
Layer the petals:
Once your first layer of pink is dry, mix an even paler pink (almost white). distinctively paint a second, slightly smaller layer over some petals to create a transparent, light-catching effect.
Level Up: Falling Petals
Paint 3-5 single petals drifting apart from the branch in the empty sky spaces. This adds movement and captures the feeling of a gentle spring breeze shaking the blooms loose.
Step 4: The Finest Details
-
Reconnect the flowers:
Use your fine liner brush and the dark brown paint to connect the base of the flowers and buds to the main branches. Add small green or brown sepals (little leaves) at the base of the buds. -
Paint the stamens:
With the liner brush and a dark pink or reddish-brown mix, paint very fine lines radiating from the center of each open flower. They should curve slightly outward like eyelashes. -
Dot the pollen:
Dip the very tip of your liner brush or a toothpick into Yellow Ochre or Gold paint. Place tiny dots at the end of each stamen line. -
Add center depth:
Place a minuscule dot of crimson or dark brown right in the very center of the open flowers to give them depth and a focal point. -
Final touches:
Step back and look at the composition. If a spot looks empty, add a floating petal or a small bud to balance the visual weight.
Hang your finished canvas where it can catch natural light to let those soft pinks truly shine


Simple Tulip Row With Pastel Background
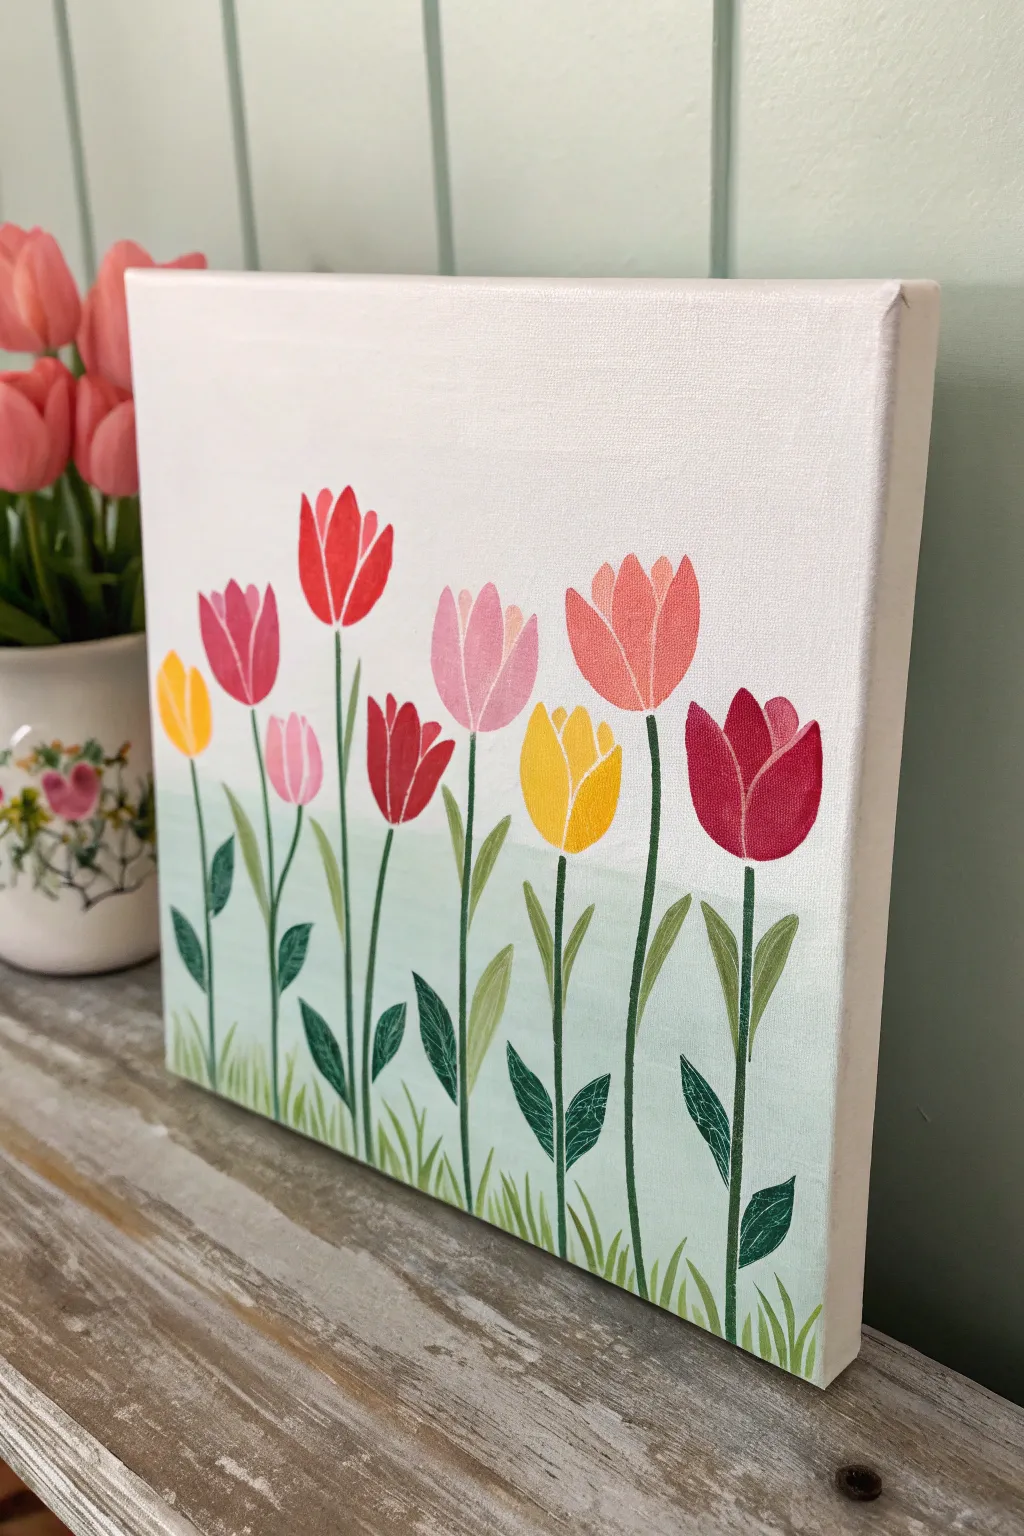
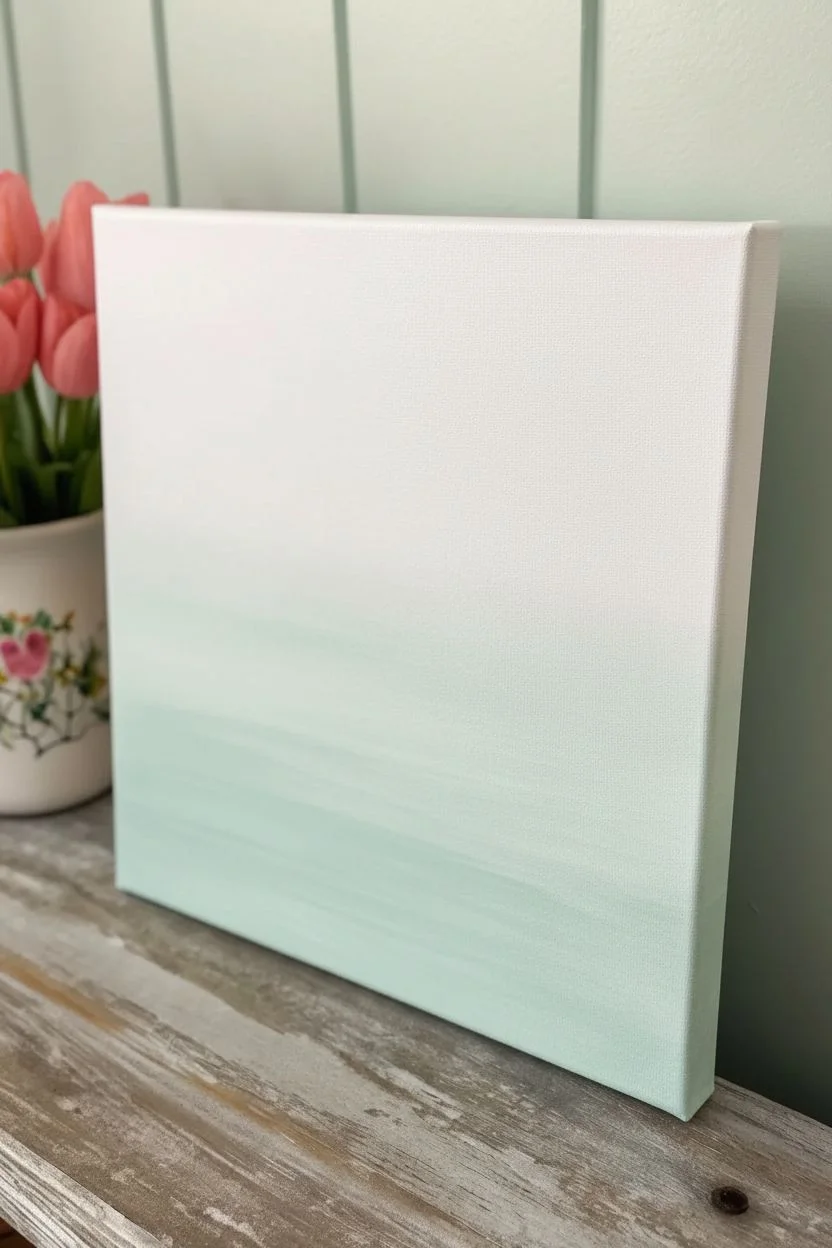
Brighten up any corner of your home with this cheerful row of standing tulips against a soft, dreamy background. The clean lines and vibrant petals make this a perfect beginner project that captures the simple joy of springtime.
How-To Guide
Materials
- Small square canvas (e.g., 8×8 or 10×10 inches)
- Acrylic paints: White, Light Blue, Deep Red, Coral/Salmon, Yellow, Pink
- Acrylic paints: Dark Green, Light/Olive Green
- Wide flat brush (for washing the background)
- Process Green/Sap Green
- Small round brush (size 2 or 4)
- Fine liner brush (size 0 or 00)
- Cup of water and paper towels
- Palette or paper plate
Step 1: Preparing the Pastel Ground
-
Lay the horizon:
Start by mixing a very pale, watery blue-green. On your palette, combine a large amount of white with a tiny dot of light blue and a speck of green. Using your wide flat brush, paint the bottom third of the canvas with horizontal strokes. -
Blend the sky:
Clean your brush thoroughly. Now paint the upper two-thirds of the canvas with pure white paint. While the bottom teal section is potentially still slightly damp, gently brush the white down to meet it, creating a soft, hazy transition line rather than a sharp horizon. -
Wrap the edges:
Don’t forget the sides of your canvas! Extend your blue-green and white tones around the edges so the artwork looks finished even without a frame. -
Allow to cure:
Let this background layer dry completely. It needs to be totally solid so the tulip colors don’t pick up the blue underneath.
Clean Lines Trick
To get those petal edges super sharp, slightly dilute your paint with a drop of water. Inky paint flows smoother than thick paint.
Step 2: Drafting the Stems
-
Mix your stem green:
Create a deep, natural green by mixing dark green with a tiny touch of red or brown to desaturate it slightly. This will keep the stems from looking neon. -
Paint the central stems:
Using your fine liner brush, paint vertical lines starting from the very bottom edge of the canvas. Vary heights slightly—some tall, some short—spacing them out across the width of the canvas. -
Thicken the lines:
Go back over your vertical lines to give them just a little bit of weight, but keep them slender and elegant.
Texture Twist
Once the paint is dry, use a white paint pen to doodle tiny patterns like dots or stripes on just one or two petals for a folk-art feel.
Step 3: Painting the Blooms
-
Plan your palette:
Squeeze out your flower colors: deep red, coral, yellow, and soft pink. You’ll want about five to seven main blooms. -
Form the center petal:
Starting with a red flower, use your round brush to paint an elongated oval shape at the top of a stem. This is the central petal facing you. -
Add side petals:
Paint two curved shapes hugging the central oval, one on the left and one on the right. They should curve inward at the top, creating that classic closed tulip cup shape. -
Create variety:
Move to the next stem and switch colors. Try a bright yellow or a soft coral next. I find it helps to rinse the brush thoroughly between colors to keep them crisp. -
Add smaller buds:
For the shorter stems, paint smaller flower heads. A simple single oval or teardrop shape works well here to suggest a bloom that hasn’t quite opened yet. -
Refine the shapes:
Once the first coat is tacky, you can add a second coat of paint to the petals if the background blue is showing through. This makes the colors pop. -
Add highlights:
Mix a tiny bit of white into your original flower colors. Paint extremely thin lines along the upper edges of the petals to define the separate shapes and add dimension.
Step 4: Leaves and Grass
-
Paint large leaves:
Load your round brush with the dark stem green. Press down firmly near the base of a stem and pull upward while lifting the brush to create a tapered point. This makes the broad tulip leaves. -
Add leaf detail:
Once the dark green leaves are dry, use a lighter olive green or mix yellow into your green. Paint fine veins or highlights on the leaves to give them texture. -
Create the grass bed:
Using your liner brush again, mix a lighter, fresher green. Paint short, quick upward strokes along the very bottom edge of the canvas. -
Layer the grass:
Overlap these grass strokes over the bottoms of the stems. Vary the direction slightly—some leaning left, some right—to make it look organic and wild.
Step back and enjoy the fresh pop of color you’ve just added to your wall


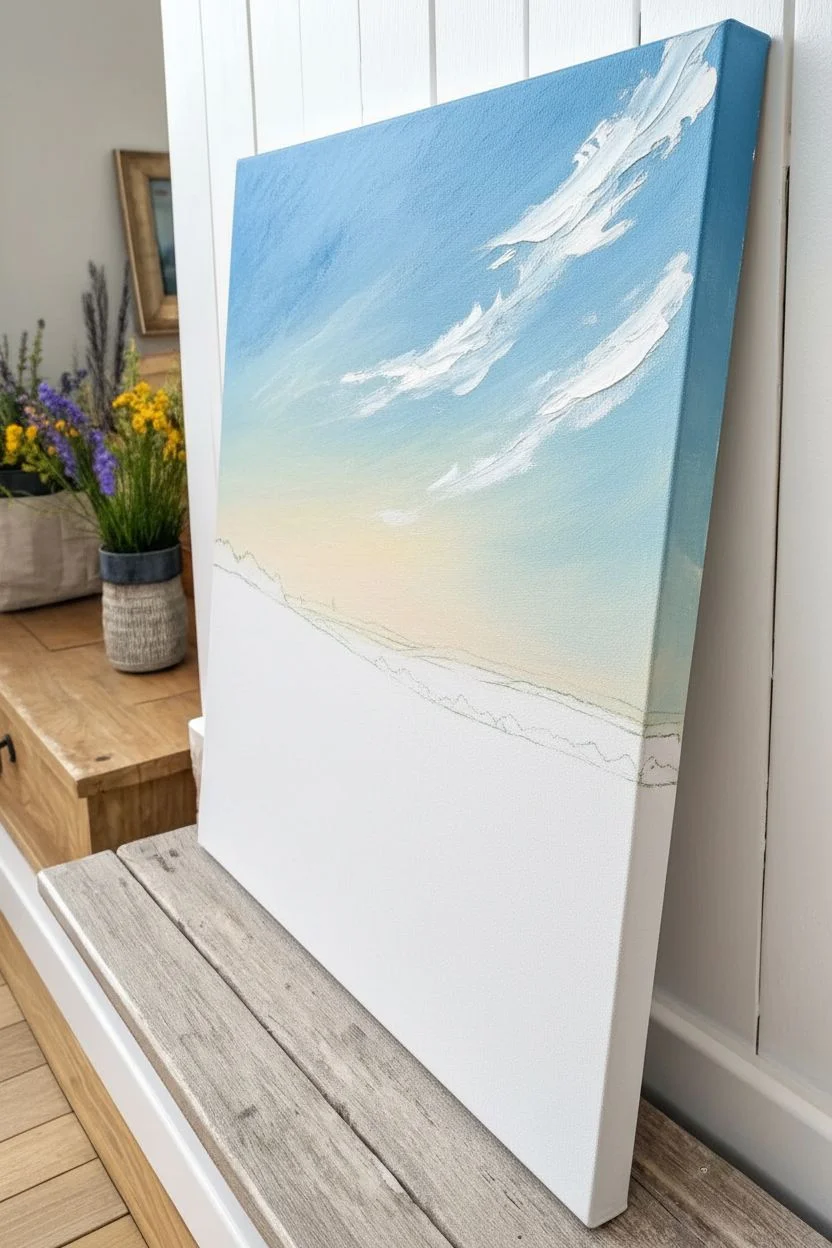
Sunny Daisies on a Sky-Blue Wash
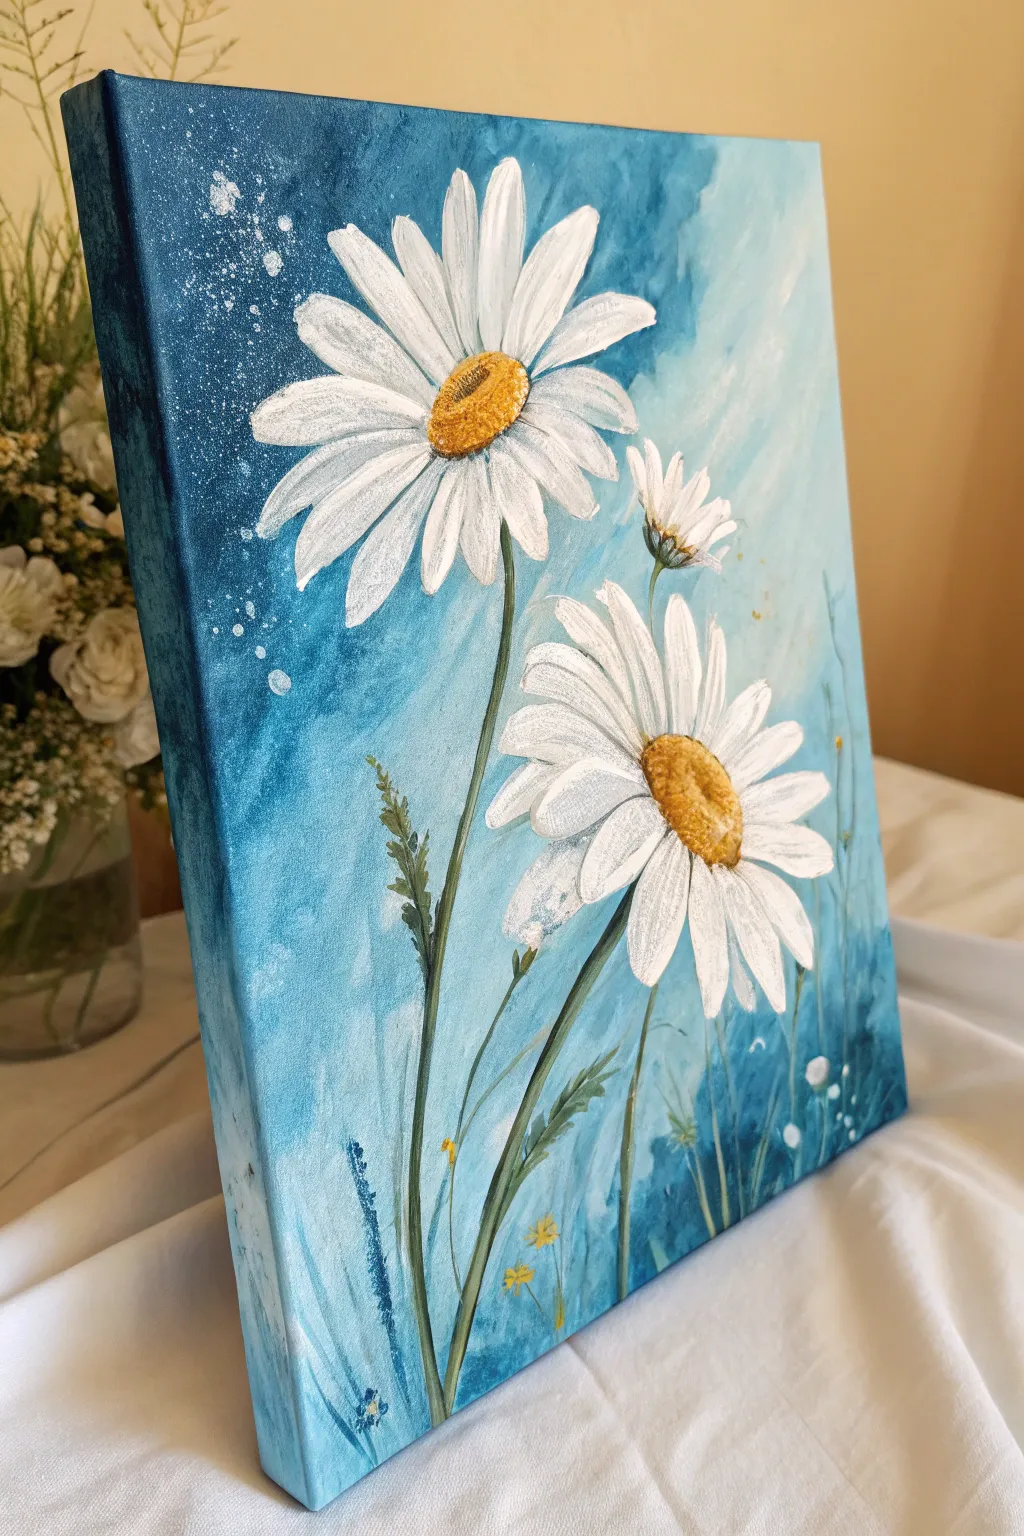
Capture the breezy joy of spring with this vibrant daisy painting that focuses on bright whites against a dreamy, textured blue background. This project teaches you how to create depth using a simple wash technique and impasto strokes for the petals.
Step-by-Step Tutorial
Materials
- Canvas (rectangle, e.g., 11×14 inches)
- Acrylic paints: Titanium White, Ultramarine Blue, Phthalo Blue, Teal, Yellow Ochre, Burnt Sienna
- Large flat brush (1 inch)
- Medium filbert brush
- Small round brush
- Old toothbrush (for splattering)
- Cup of water and paper towels
- Palette or paper plate
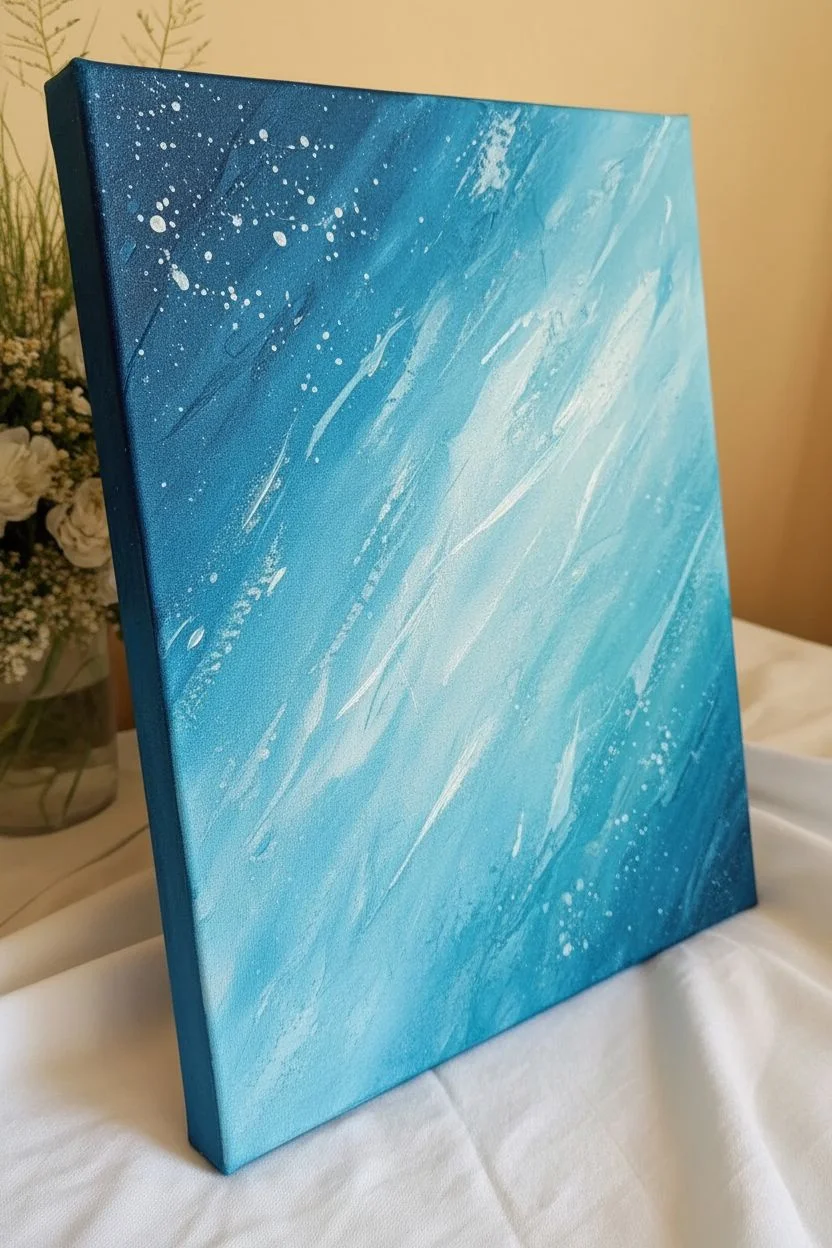
Step 1: Creating the Sky-Blue Backdrop
-
Mix the background colors:
On your palette, prepare two shades of blue. Mix Ultramarine Blue with a lot of White for a deep sky tone, and mix Teal with White for a brighter turquoise hue. Leave some pure White on the side. -
Apply the darker wash:
Using a wet large flat brush, apply the deeper blue mix starting from the top left corner. Use long, diagonal strokes that cross the canvas. -
Blend in the lighter tones:
While the first color is still damp, load your brush with the teal mix. Blend this into the middle and right sections of the canvas, letting the colors streak together rather than mixing them perfectly smooth. -
Add wispy clouds:
Dip the dirty blue brush into a tiny bit of Titanium White. Create soft, cloud-like streaks diagonally across the canvas, especially near the center and top right, to give the background a windy, atmospheric look. -
Paint the edges:
Don’t forget to wrap your dark blue paint around the sides of the canvas for a professional, finished appearance. -
Splatter texture:
Dilute a small amount of white paint with water until it’s inky. Dip an old toothbrush into it and flick the bristles with your thumb to create a spray of fine white dots over the upper left corner.
Step 2: Painting the Daisies
-
Outline placement:
Once the background is completely dry, use a small round brush with very watered-down white paint to lightly sketch the centers of your three flowers: a large one high on the left, a large one lower on the right, and a small bud tucked in the back. -
Paint the first petal layer:
Switch to a medium filbert brush. Load it with Titanium White and paint the petals radiating outward from the centers. Press down at the base of the petal and lift up as you drag out to create a tapered tip. -
Create petal transparency:
For the petals facing away from the viewer or in shadow, mix a tiny dot of blue into your white to create a cool gray. Paint a few underlying petals with this shade to add depth. -
Layer with thick white:
Reload your brush with heavy body Titanium White—don’t add water this time. Paint a second layer of petals on top, focusing on the ones closest to the viewer. The texture of the paint should be visible. -
Detail the flower centers:
Mix Yellow Ochre with a touch of White. Dab this into the round centers of the daisies using a stippling motion (tapping up and down) to create a fuzzy texture. -
Add shadow to centers:
Mix a little Burnt Sienna with the yellow. Tap this darker color onto the bottom edge of the yellow centers to give them a 3D, rounded form. -
Highlight the centers:
Add a tiny dot of pure white or very pale yellow to the top-left area of each flower center to simulate sunlight hitting the pollen.
Petal Perfect
For realistic petals, always stroke from the center outward. If your paint feels too stiff, dip just the very tip of your brush in water for smoother drag.
Step 3: Stems and Foliage
-
Mix leaf greens:
Create a natural green by mixing Yellow Ochre, a touch of Ultramarine Blue, and Burnt Sienna. Create a second, lighter green by adding more yellow and white. -
Draw the stems:
Using the small round brush and the darker green mix, paint thin, curving lines from the bottom of the canvas up to each flower head. Let the lines bend naturally like wildflowers in a breeze. -
Add leaves and grass:
Paint long, slender leaves shooting up from the bottom using the medium filbert brush turned on its side. flick the brush upward to get sharp points. -
Texture the foliage:
Go back over your greens with the lighter green mix, adding highlights to the stems and leaves where the light would catch them. -
Final touches:
Inspect the painting. If the background shows through the white petals too much, add one final thick stroke of pure white to the brightest petals for maximum pop.
Make it 3D
Mix a modeling paste into your white acrylic for the petals. This will create actual raised texture that stands off the canvas, making the flowers feel touchable.
Hang your new masterpiece in a spot that needs a permanent splash of sunshine


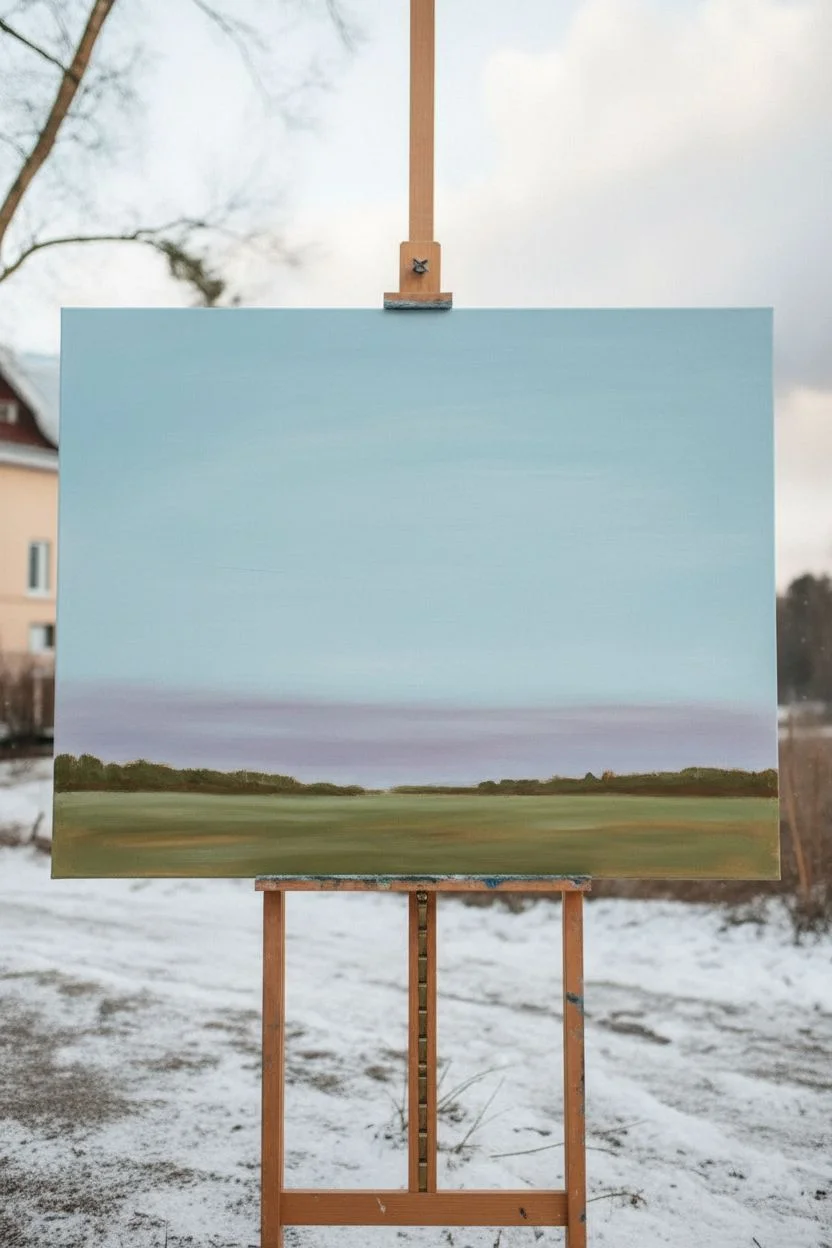
Wildflower Meadow With Easy Dot Flowers
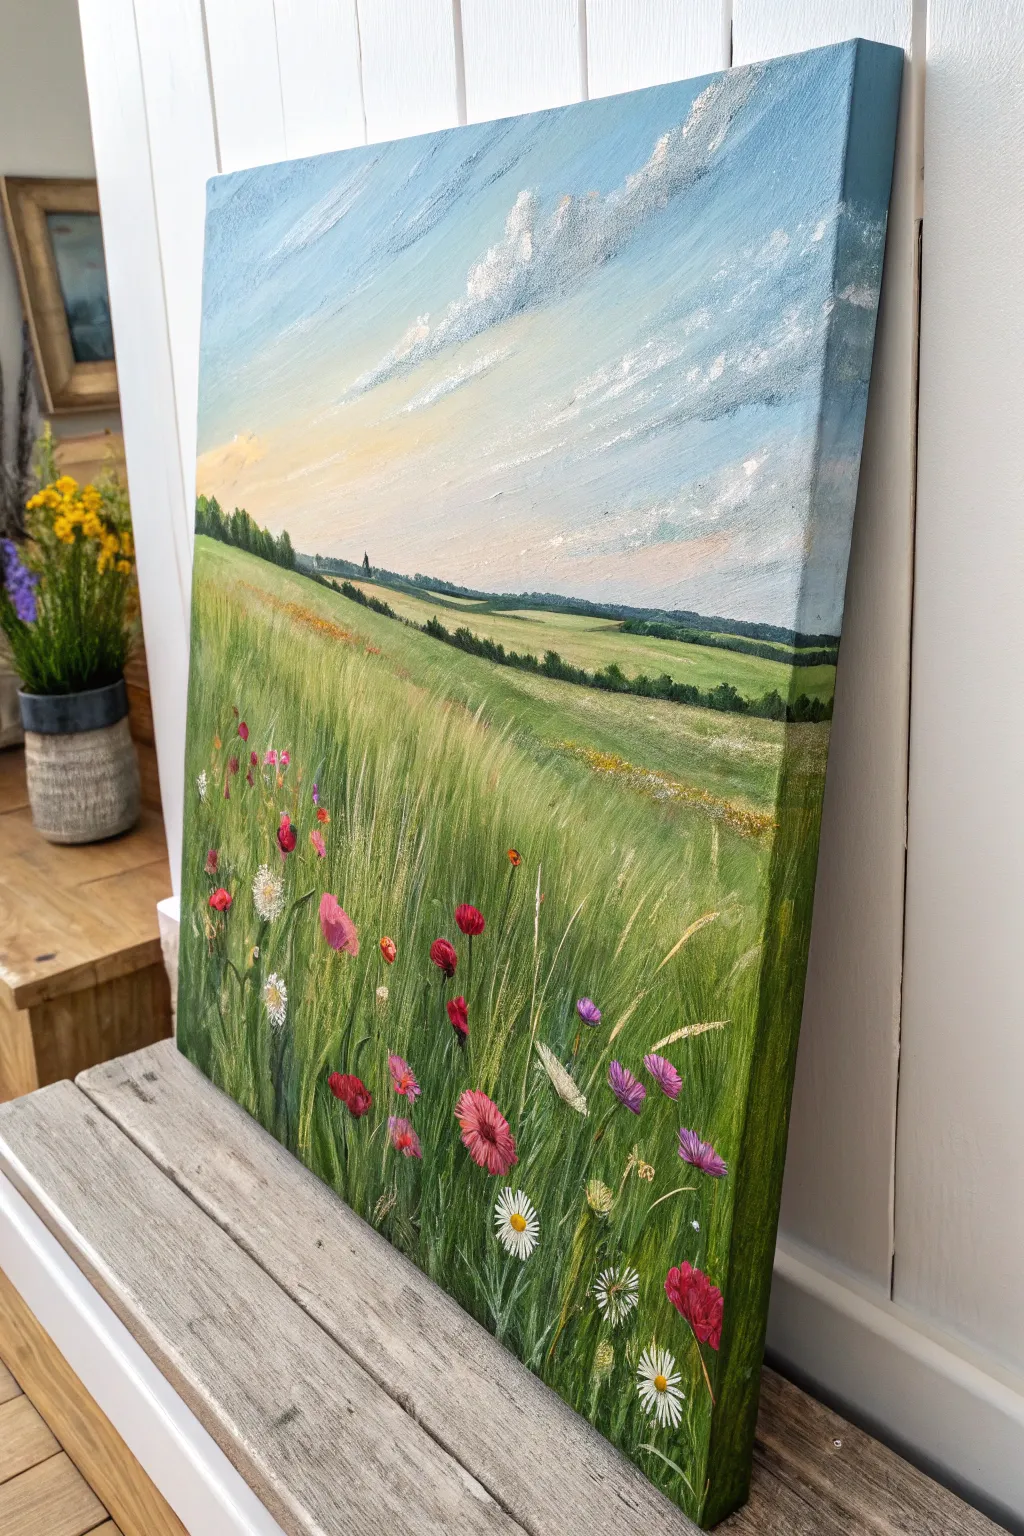
Capture the breezy energy of a spring field with this textured acrylic landscape that balances a sweeping sky with delicate floral details. By layering long brushstrokes of green with pops of pink and white, you’ll create a sense of depth that draws the viewer right into the grass.
Step-by-Step
Materials
- Stretched canvas (12×16 inch or similar)
- Acrylic paints: Titanium White, Cerulean Blue, Ultramarine Blue, Yellow Ochre, Sap Green, Hooker’s Green, Burnt Umber, Magenta, Crimson Red
- Large flat brush (1-inch width)
- Medium filbert brush
- Small round detail brush
- Fan brush (optional but helpful for grass)
- Palette knife
- Cup of water and paper towels
- Palette or paper plate
Step 1: Setting the Scene: Sky & Horizon
-
Establish the horizon line:
Mix a small amount of Sap Green with a touch of Ultramarine Blue. Using your medium brush, draw a faint horizon line about one-third of the way up from the bottom of the canvas. This doesn’t need to be perfectly straight; undulating hills look more natural. -
Paint a gradient sky:
Start at the very top of the canvas with a mix of Cerulean Blue and Titanium White. As you work your way down toward the horizon, gradually mix in more white and a tiny dot of Yellow Ochre to create a warm, pale glow near the hills. -
Add sweeping clouds:
While the sky is still slightly tacky, load a clean brush or palette knife with thick Titanium White. Create diagonal, sweeping motions across the upper right to mimic wind-blown cirrus clouds. Let the texture of the paint sit on the surface.
Muddy colors?
If your greens are turning muddy, let the first layer dry completely before adding highlights. Wet-on-wet blending is great for skies, but grass needs crisp layers.
Step 2: Building the Green Landscape
-
Block in distant fields:
For the furthest section of land just below the horizon, use a lighter, muted green (Sap Green mixed with White and Yellow Ochre). Paint horizontal strokes to suggest distance. -
Paint the middle ground:
Moving down the canvas, darken your green mix by adding Hooker’s Green. Switch to diagonal strokes that flow from left to right, matching the slope of the hill depicted in the reference. -
Create the dense foreground base:
For the bottom third of the canvas, use your darkest green combination—Hooker’s Green with a touch of Burnt Umber or Blue. Fill this area completely to act as a shadow layer for the tall grass. -
Add distant treelines:
Using the small round brush and dark green paint, dab tiny vertical shapes along the horizon line and the ridges of the hills to create the illusion of distant forests and hedgerows.
Add texture
Mix a little modeling paste into your white paint for the clouds and the foreground daisy petals. This physically raises the paint for a 3D tactile effect.
Step 3: Detailing the Grass
-
Layering the long grass:
Once the base green layer is dry, mix a mid-tone yellow-green. Using a fan brush or a filbert brush turned on its side, flick the brush upward starting from the bottom edge. Keep your wrist loose to create tapered, grass-like strokes. -
Adding highlights:
Mix a lighter shade using Yellow Ochre and White. Repeat the upward flicking motion, but use fewer strokes this time. Focusing these lighter strokes on the tips of the grass creates a sun-kissed effect. -
Varying the direction:
Don’t make all the grass stand straight up. Angle some strokes slightly left or right to make the meadow look windswept and natural.
Step 4: blooming the Wildflowers
-
Position the flower stems:
Identify where you want your main flowers to stand. Use a thin round brush with a lighter green to paint a few specific, taller stems rising above the general grass layer in the foreground. -
Paint the pink blooms:
Load your small round brush with Magenta mixed with a little White. Gently press the brush onto the canvas in the foreground to create petal shapes. For the closed buds, simply paint small, elongated teardrop shapes. -
Create the daisies:
Using pure Titanium White, paint small, spoke-like petals radiating from a center point. Vary the sizes—make the ones at the very bottom larger and the ones further back merely tiny dots. -
Add flower centers:
Once the white petals are dry, dot the centers with Yellow Ochre or a mix of Yellow and tiny bit of Orange for depth. -
Sprinkle distant color:
I like to take a bit of pink, purple, and yellow paint on an old brush and gently stipple tiny specks of color into the middle ground. This suggests a field full of flowers without needing to paint every single petal. -
Final highlights:
Add a few final distinct blades of grass using a very light green or white ink pen in the immediate foreground, overlapping some flower stems to integrate them into the scene.
Step back and admire your serene meadow painting, ready to bring a breath of fresh air to any room
BRUSH GUIDE
The Right Brush for Every Stroke
From clean lines to bold texture — master brush choice, stroke control, and essential techniques.
Explore the Full Guide
Rainbow After Rain With Soft Clouds
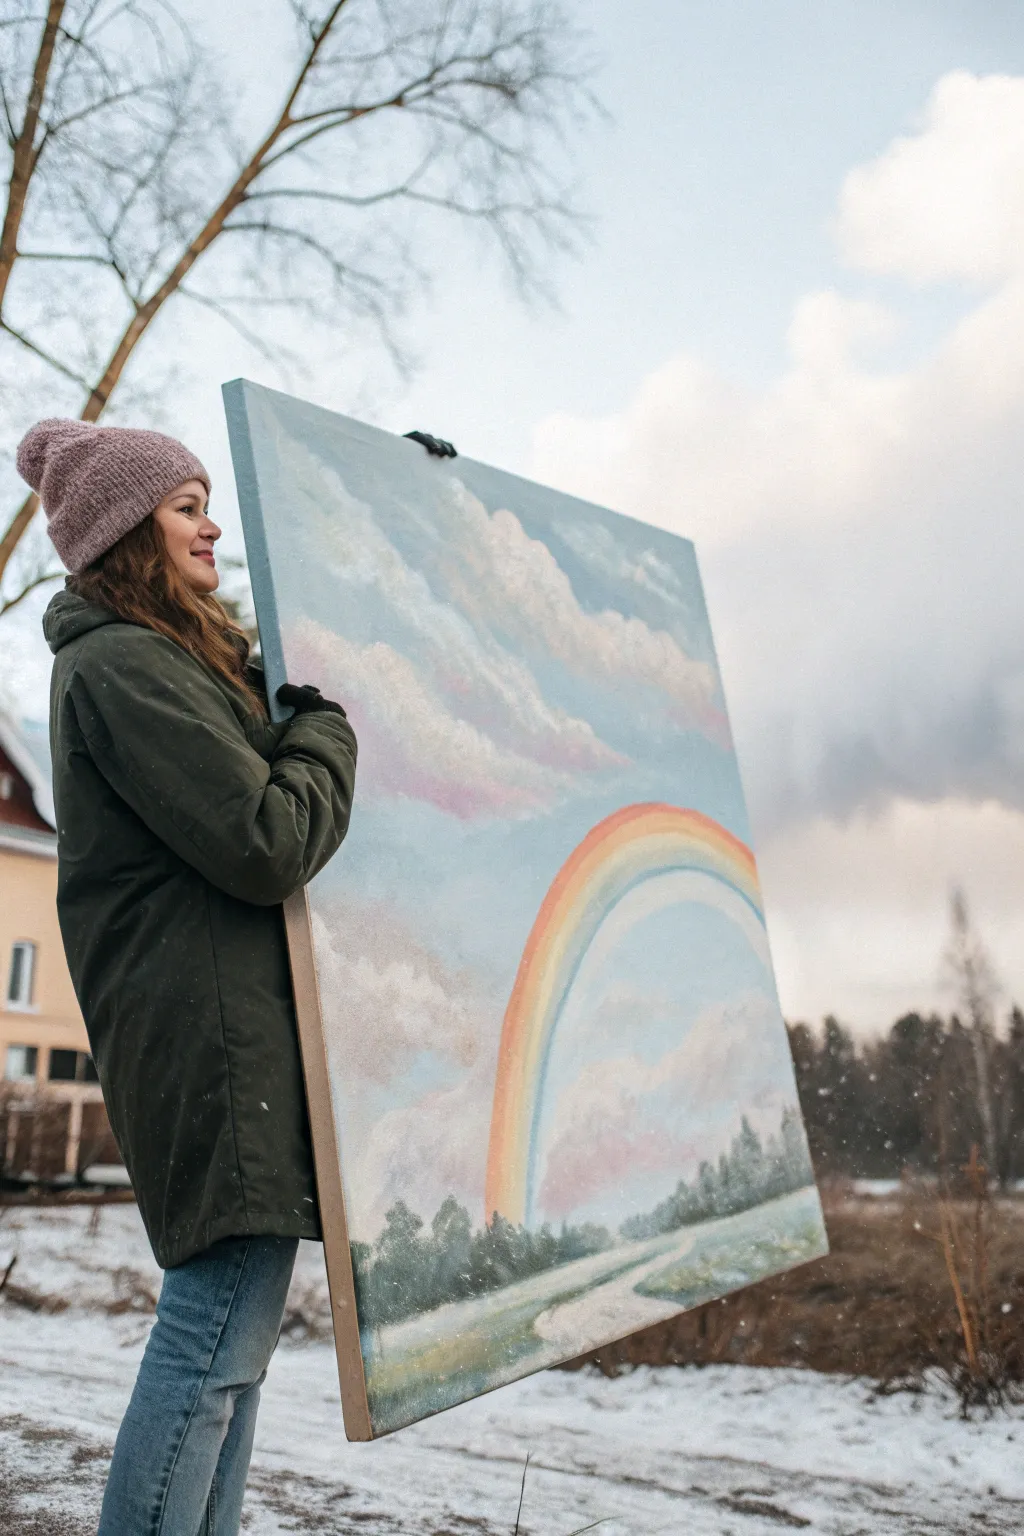
Capture the serene beauty of a breaking storm with this large-scale acrylic landscape featuring a soft, glowing rainbow. The muted pastel tones and fluffy cloud textures create a dreamy, hopeful atmosphere perfect for welcoming spring.
How-To Guide
Materials
- Large stretched canvas (24×30 inches or larger recommended)
- Acrylic paints: Titanium White, Cerulean Blue, Ultramarine Blue, Alizarin Crimson, Cadmium Yellow, Sap Green, Burnt Umber
- Large flat wash brush (2-3 inch)
- Medium filbert brush
- Small round brush for details
- Fan brush (optional for trees)
- Palette knife
- Water container and paper towels
- Easel (optional but helpful for large canvases)
Step 1: Setting the Scene
-
Prime the sky:
Begin by covering the top three-quarters of your canvas with a mix of Titanium White and a tiny touch of Cerulean Blue. The goal is a very pale, milky blue base rather than a deep sky blue. -
Add warmth:
While the blue is still slightly wet, mix a faint purple-grey using White, a speck of Alizarin Crimson, and the tiniest dot of Ultramarine. Blend this horizontally into the lower sky area to hint at distant atmospheric perspective. -
Map the horizon:
Using a mix of Sap Green and Burnt Umber, paint a low, straight horizon line about one-quarter up from the bottom of the canvas. It doesn’t need to be perfect, as trees will cover it later.
Step 2: Building the Clouds
-
Establish cloud shapes:
Load your filbert brush with Titanium White and a hint of warm pink (White + Crimson). Dab in large, diagonal cloud formations stretching from the top left corner toward the center. -
Add shadows:
Mix a soft lavender-grey using Blue, Crimson, and White. Apply this to the bottom edges of your clouds to give them volume and weight. -
Soften the edges:
Before the paint dries, use a clean, dry brush to gently swirl the edges of the clouds into the background sky. This creates that fluffy, ethereal look seen in the reference. -
Layering structure:
Add a second layer of pure Titanium White to the tops of the cloud masses where the sunlight hits them, reinforcing the diagonal movement.
Pro Tip: Atmospheric Depth
Make your rainbow paint very watery/transparent. A solid opaque rainbow looks cartoony; a translucent one that shows the clouds behind it looks realistic.
Step 3: Painting the Rainbow
-
Mix transparent colors:
To make the rainbow look realistic rather than like a sticker, mix your colors with a glazing medium or a lot of water to make them translucent. You need a pale red, orange, yellow, green, blue, and violet. -
Paint the arc:
Start with the red signaling the outer edge. Use a steady hand to sweep a wide arc starting from behind the tree line on the right side. The arc should be fairly vertical, disappearing into the clouds. -
Complete the spectrum:
Quickly lay down the subsequent colors (orange, yellow, etc.) inside the red arc while the paint is wet, allowing them to bleed slightly into each other for a soft focus effect. -
Haze the edges:
I like to take a soft, dry brush and very gently feather the edges of the rainbow so it appears to be made of light, not solid paint.
Troubleshooting: Muddy Clouds?
If your clouds turn grey or muddy, let the blue sky layer dry completely before painting white clouds on top. Wet-on-wet blending often over-mixes colors.
Step 4: Landscape Details
-
Paint background trees:
Mix a dark, cool green using Sap Green and Ultramarine Blue. Use the tip of a fan brush or a small round brush to tap in vertical tree shapes along the horizon line. -
Vary the heights:
Ensure the tree line isn’t uniform. Make some trees significantly taller, specifically on the right side and left edge, to frame the composition. -
Foreground base:
Paint the bottom section (the ground) with a mix of watered-down greens and earthy browns. Use horizontal strokes to suggest a flat field. -
Create a path:
Using a dirty white (White + a touch of Brown/Green), paint a winding shape leading from the bottom center toward the right side of the tree line. This is your dirt road or river. -
Texture the field:
Stipple lighter yellow-greens over the foreground to suggest grassy texture. Keep the strokes looser and larger near the bottom edge. -
Final highlights:
Add tiny dabs of pure white on the path to suggest reflecting light or puddles, and re-emphasize the brightest white on the top of the main cloud.
Step back and admire how the soft colors bring a sense of peace to your space
Busy Bee and Daisy Duo

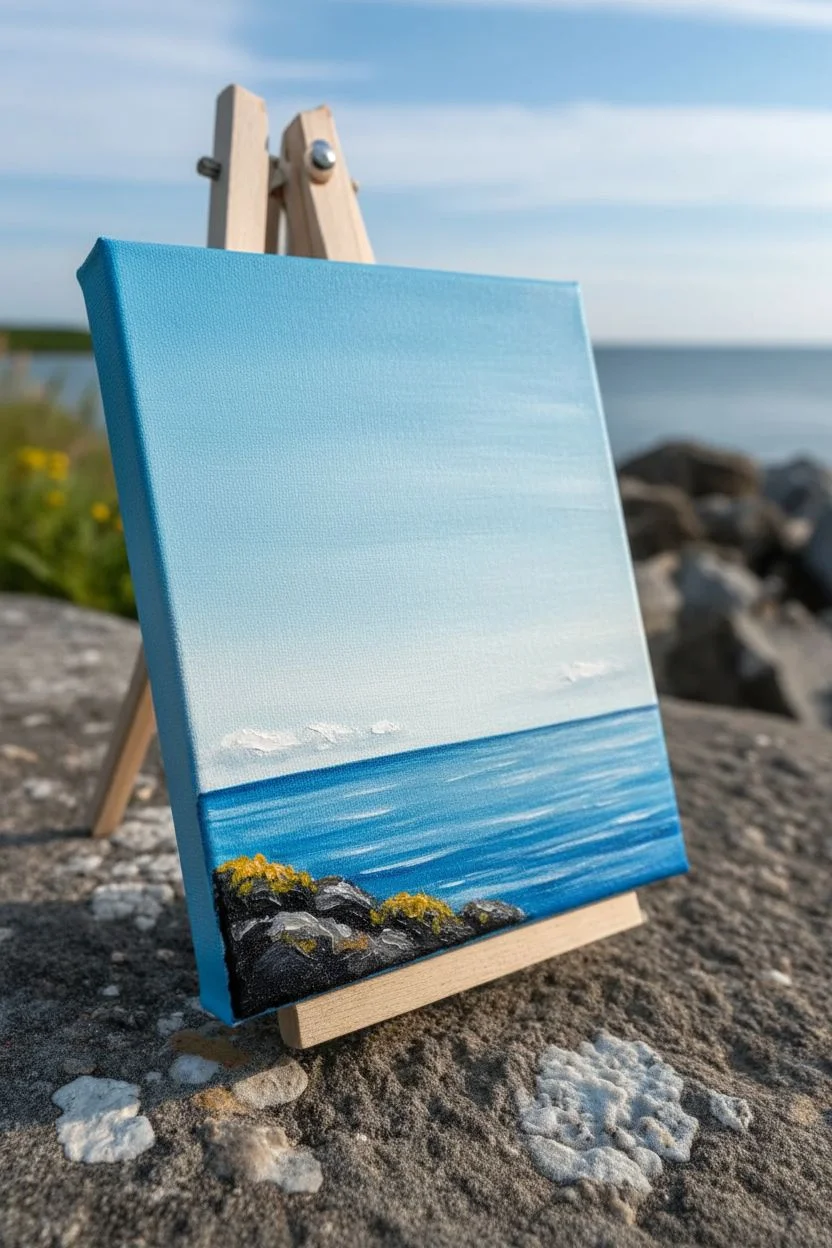
Capture the buzzing energy of spring with this stunningly realistic yet approachable painting of a bumblebee landing on a crisp white daisy. The bright blue sky background makes the white petals pop, creating a cheerful piece that brings a sunny afternoon indoors.
Detailed Instructions
Materials
- Small square canvas (e.g., 6×6 or 8×8)
- Acrylic paints: Titanium White, Primary Yellow, Yellow Ochre, Burnt Umber or Raw Sienna, Ultramarine Blue, Phthalo Blue, Lamp Black
- Flat shader brush (size 6 or 8)
- Round detail brushes (sizes 0, 1, and 3)
- Palette or paper plate
- Cup of water and paper towels
- Pencil for sketching
- Mini wooden easel for display (optional)
Step 1: Setting the Scene
-
Prime the sky:
Start by mixing Titanium White with a small amount of Ultramarine Blue and a touch of Phthalo Blue to create a light, airy sky blue. Using your flat shader brush, cover the top 3/4 of the canvas with this mix. Keep your strokes horizontal and smooth. -
Gradient effect:
While the paint is still wet, blend in a bit more white near the bottom of the sky area to create a natural horizon fade. This adds depth to your background. -
Paint the water:
For the bottom strip (the ocean), mix Phthalo Blue with a little white. Paint horizontal strokes, making them slightly darker than the sky. Add a tiny line of dark blue where the water meets the sky for the horizon line. -
Add clouds:
With a clean brush, dab tiny, faint touches of pure Titanium White near the horizon to suggest distant, fluffy clouds. Soften the edges so they don’t look like solid Cotton balls. -
Shoreline details:
In the bottom left corner, dab a mix of black and dark brown to create a small rocky outcrop. Highlight the top edges with a touch of yellow ochre to simulate moss or sunlight hitting the rocks.
Fuzzy Trouble?
If your bee looks too smooth or cartoonish, wait for the paint to dry and use a dry, stiff brush to stipple layers of fur texture. Use multiple shades of yellow/gold.
Step 2: The Daisy Centerpiece
-
Sketch the layout:
Once the background is completely dry, lightly sketch the oval center of the daisy and the direction of the petals. Don’t press too hard with the pencil. -
Base layer for petals:
Mix a very light grey using mostly white with a speck of black or blue. Paint the shape of the petals first. Daisy petals aren’t perfectly straight; give them slight curves and ruffles at the tips. -
Brightening the petals:
Load your brush with pure Titanium White and paint over the petals, leaving the light grey visible only where shadows would naturally fall (where petals overlap or tuck under the center). -
Texture the center:
For the pollen center, paint a base oval of Yellow Ochre. While still wet, stipple (dot) Primary Yellow in the center highlight area and Burnt Umber around the bottom shaded edge to create a 3D dome effect. -
Refine the stem:
I like to mix sap green (or yellow + blue) with a little white for the stem. Paint a single, confident curved line extending from the bottom of the flower head down to the water. -
Petal highlights:
Add final streaks of pure white on the tips of the petals that are catching the most ‘sunlight’ to make them look silky.
Level Up: Petal Power
Mix a tiny amount of your sky blue into the shadow color for the white petals. This reflects the sky and makes the flower look much more integrated into the environment.
Step 3: Bringing the Bee to Life
-
Bee body shape:
Using a small round brush and black paint, carefully paint the oval shape of the bee’s body resting on the upper petals. Add a smaller circle for the head. -
Fuzzy yellow stripes:
Mix a warm yellow-orange using Primary Yellow and a dot of red or orange. Using the tip of a size 0 brush, paint tiny, flicking strokes across the bee’s back to create the fuzzy yellow band. -
Texture the black:
Do the same flicking motion with black paint over the dark sections of the body. Allowing the texture to look messy helps simulate the bee’s fur. -
The wings:
Mix a very watery grey-white glaze. Paint two transparent, teardrop-shaped wings extending from the back. You should be able to see the flower petals through them. -
Wing veins:
With your thinnest brush (size 0) and watered-down black paint, draw incredibly fine lines inside the wings for the veins. -
Legs and shadows:
Paint delicate black legs gripping the petals. Add a tiny wash of grey paint on the white petal directly under the bee to ground it with a shadow. -
Final highlights:
Add a tiny dot of white to the bee’s eye and a few specks on the back to show the glossy reflection of the sun.
Place your warm spring masterpiece on its mini easel and enjoy the sunshine it brings to the room

PENCIL GUIDE
Understanding Pencil Grades from H to B
From first sketch to finished drawing — learn pencil grades, line control, and shading techniques.
Explore the Full Guide
Baby Bunny in Spring Grass
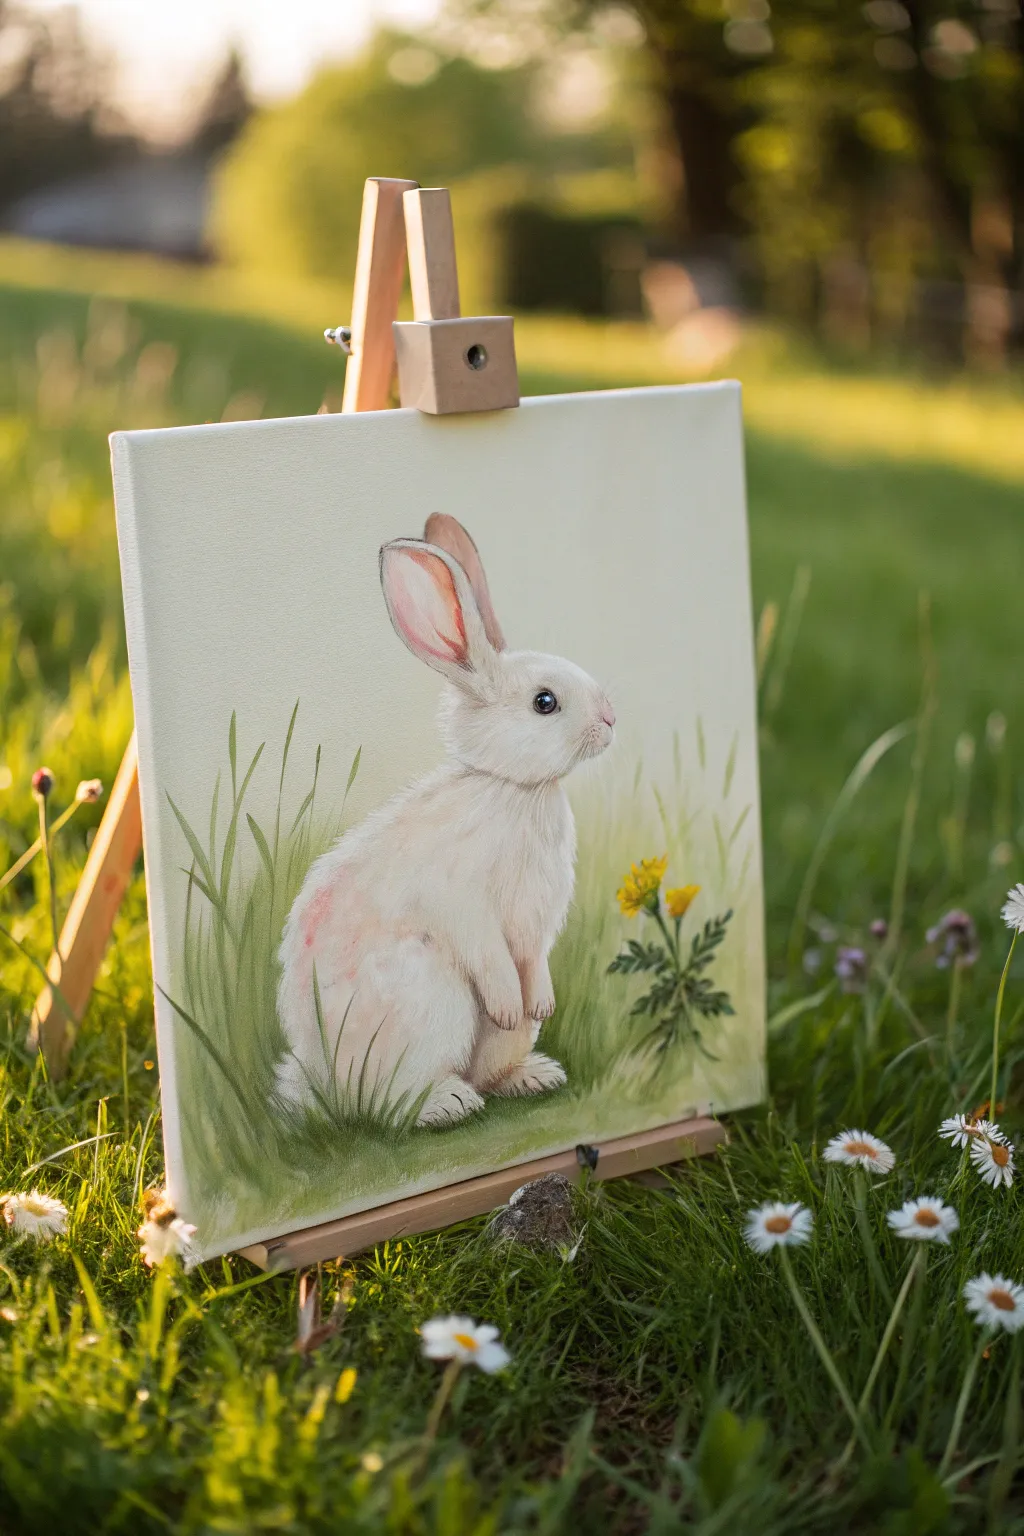
Capture the softness of a baby rabbit in this gentle spring painting. Using careful layering of acrylics, you’ll build up fluffy white fur and lush green grass against a creamy, understated background for a piece that truly celebrates the season.
Step-by-Step Tutorial
Materials
- Canvas panel or stretched canvas (11×14 or similar)
- Acrylic paints: Titanium White, Burnt Umber, Yellow Ochre, Sap Green, Olive Green, cadmium yellow, mars black
- Flat brush (1 inch) for background
- Filbert brushes (small and medium) for shapes
- Round detail brushes (sizes 0 and 2) for fur
- Palette
- Water cup and paper towels
- Pencil for sketching
Step 1: Setting the Background
-
Prepare the canvas:
Mix a very pale, creamy tint using Titanium White and a tiny dot of Yellow Ochre or Burnt Umber. You want an off-white, warm neutral tone. -
Paint the wash:
Using your large flat brush, cover the entire canvas with this creamy mix. Apply it smoothly with horizontal strokes and let it dry completely before moving forward. -
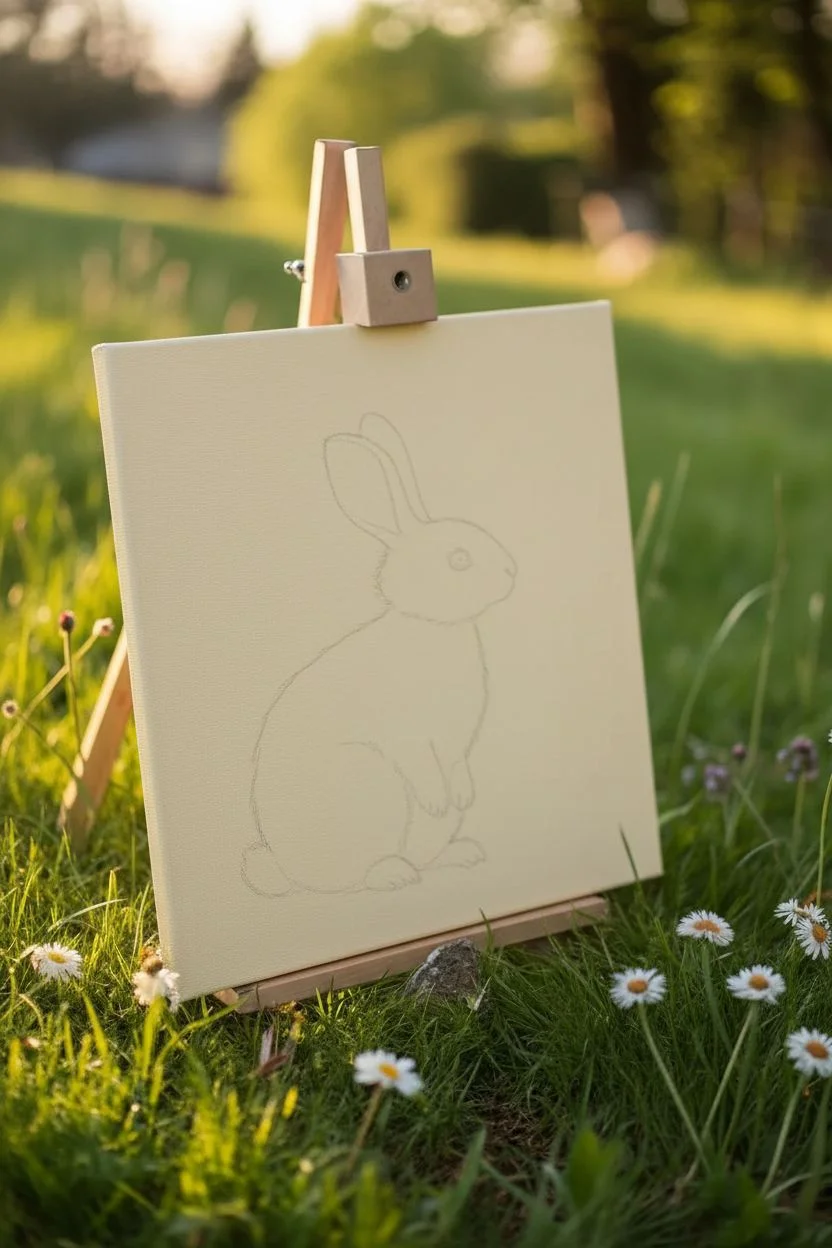
Sketch the outline:
Lightly sketch the bunny’s shape with a pencil. Focus on two main ovals: a larger one for the body and a smaller, slightly elongated one for the head. -
Add feature guides:
Mark the position of the long ears, the small paws tucked in front, and the eye placement. Keep the lines faint so they don’t show through the white paint later.
Fur Looks Flat?
If the fur lacks depth, let it dry and glaze a very watery gray-brown over shadow areas. Once dry, repaint bright white hairs on top to create 3D separation.
Step 2: Blocking and Underpainting
-
Base coat the bunny:
Fill in the bunny silhouette with pure Titanium White using a medium filbert brush. It’s okay if the edges are slightly rough; this mimics the under-fur. -
Establish shadows:
Mix a light wash of Burnt Umber and White to create a soft beige shadows. Apply this to the belly area, under the chin, and inside the fold of the back leg. -
Ear details:
Mix a soft pink using White and a tiny touch of Red or Burnt Sienna. Paint the inner part of the tall ears, blending it gently into the white fur at the edges. -
Ground the figure:
Using Sap Green thinned with a little water, paint loose, upward-sweeping strokes around the base of the bunny to establish where the grass will grow.
Add Spring Magic
Use an old toothbrush to flick tiny specks of white or pale yellow paint onto the grassy areas to simulate floating pollen or distant magical dust.
Step 3: Creating Texture
-
Layering the fur:
Switch to a small round brush. Using Titanium White, start painting short, directional strokes over the beige shadow areas to simulate fur layering. -
Building fluffiness:
continue these short strokes over the main body. I like to let the paint build slightly thick here for texture. Ensure the strokes follow the curve of the bunny’s body. -
Face details:
Use a very fine brush to refine the eye. Paint a dark circle with Mars Black, leave a tiny white dot for the reflection, and outline the eye rim very softly with brown. -
Whiskers and nose:
Mix a pale pink for the nose tip. With your thinnest liner brush and watered-down white paint, flick out quick, confident lines for the whiskers.
Step 4: The Grassy Meadow
-
Deep grass tones:
Mix Olive Green and a touch of Burnt Umber. Paint darker grass blades near the bottom of the canvas and tucked right under the bunny’s paws for depth. -
Mid-tone grass:
Using straight Sap Green, add taller, sweeping blades of grass on the left and right sides. Vary the height and angle so it looks natural, not manicured. -
Painting the dandelion:
Dab a small cluster of Cadmium Yellow mixed with Yellow Ochre to the right of the bunny. Use a stippling motion to mimic the fuzzy petals of the flower. -
Stem and leaves:
Connect the flower to the ground with a dark green stem and add a few jagged leaves at the base using your small round brush. -
Final highlights:
Mix a pale lime green (Green + White) and add a few highlighted blades of grass where the sun would hit them. Add a final bright white highlight to the bunny’s fur where the light catches the shoulder.
Now you have a charming woodland friend ready to brighten up any room.
Dandelion Wishes With Floating Seeds
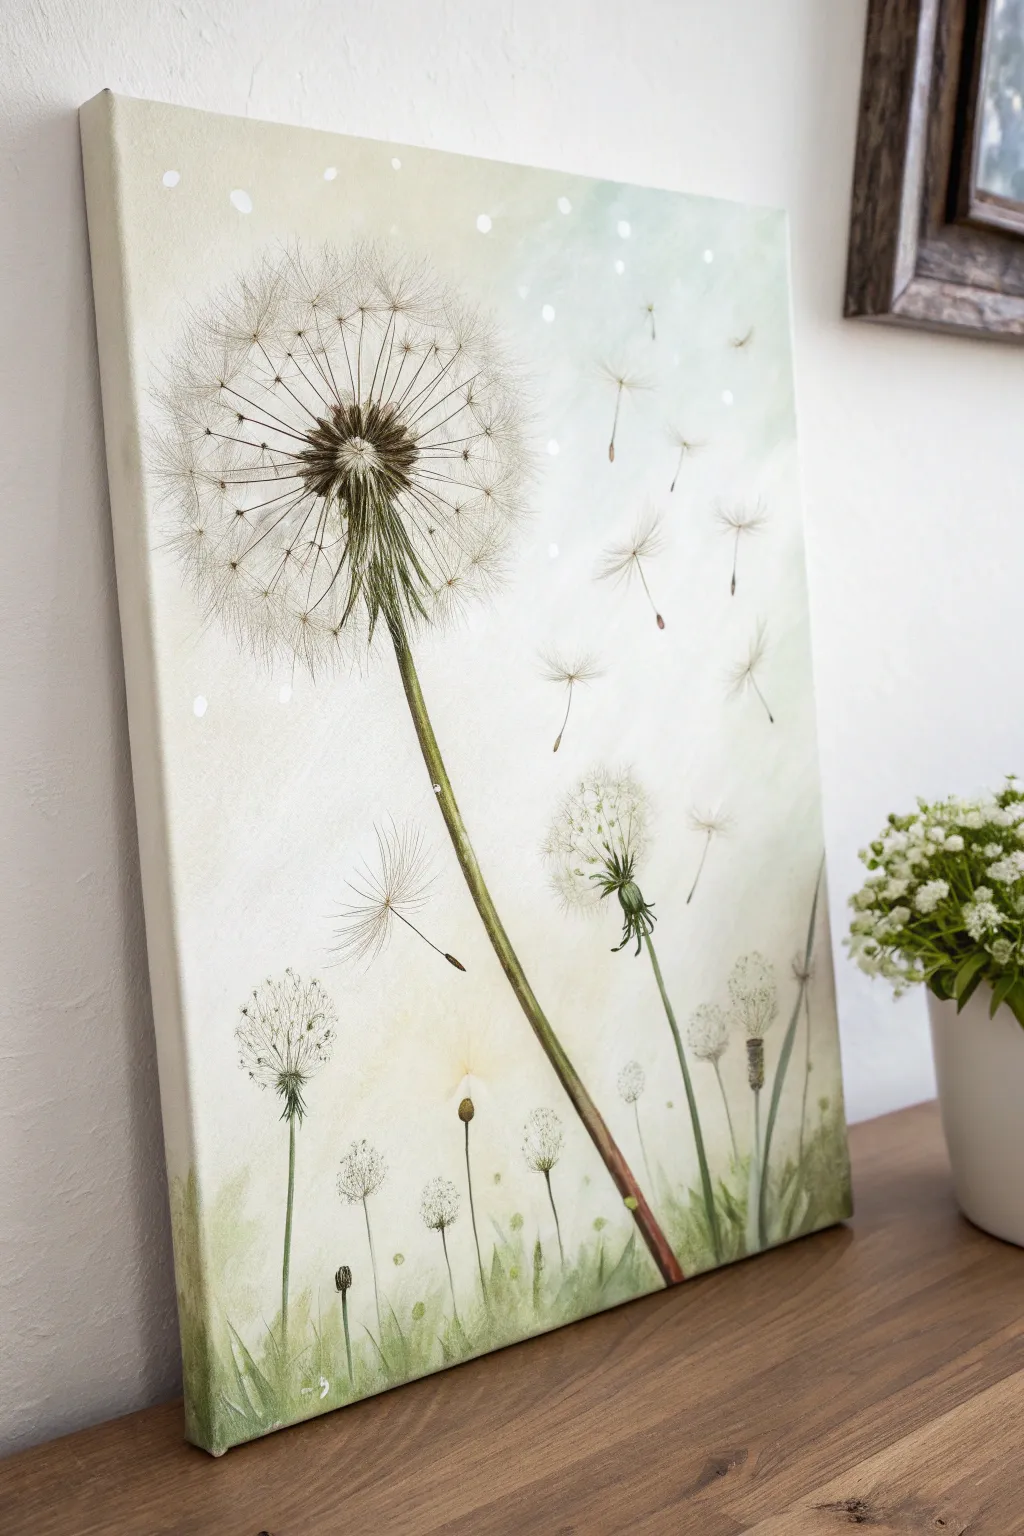
Capture the delicate beauty of a spring breeze with this ethereal dandelion painting. Using soft acrylic washes and fine detail work, you will create a serene composition of seed heads and drifting wishes against a dreamy, pale background.
Step-by-Step Tutorial
Materials
- Rectangular stretched canvas (e.g., 16×20 inches)
- Acrylic paints: Titanium White, Sap Green, Burnt Umber, Yellow Ochre, Lamp Black
- Large flat brush or sponge applicator
- Small round detail brushes (sizes 0 and 00)
- Flat shader brush (size 4 or 6)
- Fine liner brush
- Palette and water cup
- Pencil for light sketching
- Paper towels
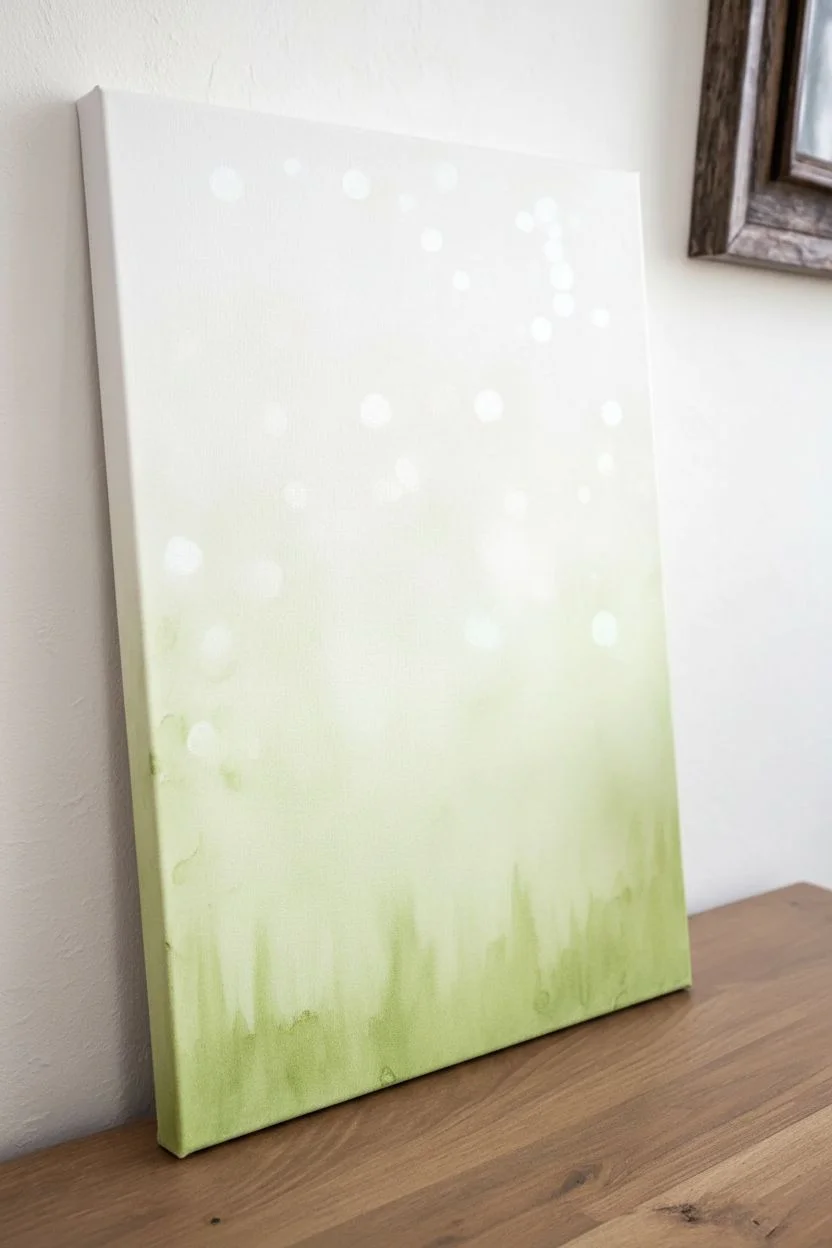
Step 1: Creating the Ethereal Background
-
Mix the base wash:
Combine a large amount of Titanium White with a tiny drop of Sap Green and a hint of Yellow Ochre. Add water to this mixture until it reaches a milky, translucent consistency. -
Apply the background:
Using a large flat brush or sponge, cover the entire canvas. Create a subtle gradient by adding slightly more green to the bottom third and fading into a near-pure white at the top corners. -
Add soft bokeh effects:
While the background is still slightly tacky, mix a very pale, watery white. Use your finger or a round sponge dabber to press faint, blurry circles into the upper sky area to mimic out-of-focus light spots. -
Paint the ground haze:
Mix a watery Sap Green wash. Using vertical strokes at the very bottom edge, create a grassy, blurred horizon line that fades upward into the pale background.
Step 2: Stem and Bud Structure
-
Sketch the layout:
Very lightly sketch the position of the main dandelion stem, leaning slightly diagonally, and position the smaller buds near the bottom. -
Paint the main stem:
Load a flat shader brush with Sap Green mixed with a touch of Burnt Umber. Paint the long, main stem with a single confident stroke. Add shadow to one side of the stem using a slightly darker green mix. -
Create the seed head center:
At the top of the main stem, paint a small, textured dark brown oval using Burnt Umber and tiny dabs of Lamp Black. This anchors the seeds. -
Paint the smaller buds:
Using the same green mix, paint the thin stems for the lower flowers. Add the closed bud shapes at the top of these stems using short, upward strokes to simulate the sepals holding the fluff. -
Add grassy details:
At the very bottom, use your liner brush with various shades of green to flick in thin, vertical blades of grass that overlap the bottom of the stems, grounding them in the scene.
Muddy Background?
If your background colors are blending into a gray mess, let the first layer dry completely before adding the next. Acrylics layer best when dry.
Step 3: Detailed Seed Work
-
Outline the main sphere:
Visualize a large circle around the main stem’s center. Paint fine, radial lines extending from the dark center outward using a liner brush and diluted brown paint. -
Add the seed parachutes:
Switch to a detailed liner brush. At the end of the radial lines, paint tiny distinct ‘V’ or star shapes using a mix of gray and brown to form the structure of the seeds. -
Fluff layer one:
Mix a semi-transparent white. Use a dry-brush technique to gently dab and sweep over the outer edge of the seed sphere, creating the illusion of soft fluff. -
Fluff layer two:
Go back in with pure, opaque Titanium White on a fine brush. Paint crisp, individual filaments on the outer edges of the main dandelion to make it look sharp and detailed. -
Detail the lower buds:
For the smaller dandelions at the bottom, use the liner brush to create circular, sparse outlines of fluff, keeping them less dense than the main flower.
Use a rigger brush
For the ultra-fine lines of the dandelion fluff and flying seeds, a ‘rigger’ or ‘script liner’ brush holds more paint and creates longer, unbroken lines.
Step 4: Floating Wishes
-
Position the flying seeds:
Decide where your wind is blowing. Paint delicate, single lines floating away from the main flower towards the right side of the canvas. -
Detail the flying pappus:
At the top of each floating line, add the tiny white tuft (the pappus) using fine, outward-flicking strokes. Keep these delicate so they look weightless. -
Add the seeds:
At the bottom of each floating white tuft, place a tiny, dark brown dot or tear-drop shape to represent the actual seed being carried away. -
Final highlights:
Add tiny dots of pure white on the sunny side of the stems and on the center of the main seed head to catch the imaginary light.
Step back and admire the gentle movement and soft light captured in your finished spring canvas


Whimsical Garden Gnome Among Blooms
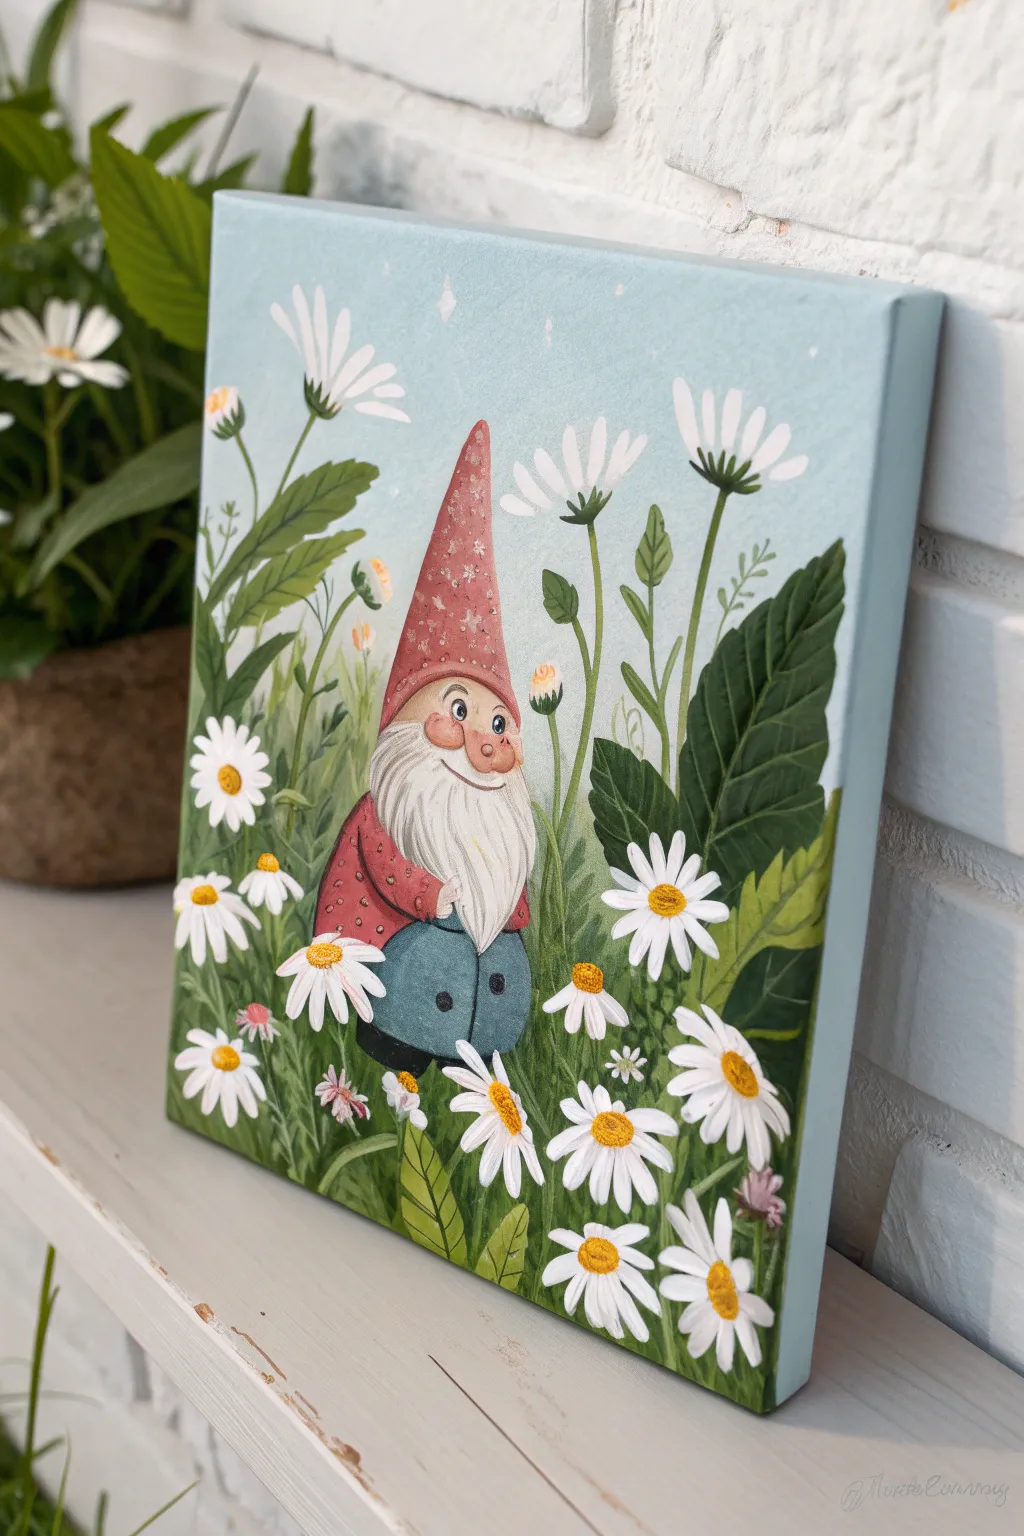
Bring a touch of storybook magic to your space with this charming painting of a friendly gnome nestled in a field of daisies. The soft pastel palette and illustrative style make this piece feel like a page torn from a beloved fairytale.
Detailed Instructions
Materials
- Square stretched canvas (approx. 10×10 or 12×12 inches)
- Acrylic paints: Titanium White, Sky Blue, Sap Green, Dark Green, Yellow Ochre, Cadmium Red, Burnt Sienna, Black
- Paintbrushes: Large flat brush (background), medium filbert (leaves), small round brush (details), liner brush (fine lines)
- Pencil and eraser
- Palette for mixing
- Cup of water and paper towels
Step 1: Setting the Scene
-
Sketch the Composition:
Begin by lightly sketching the gnome in the lower center of the canvas. Draw a tall triangle for his hat, an oval for his face, and a rounded body shape. Sketch in the large stems and daisy heads around him to establish the layout. -
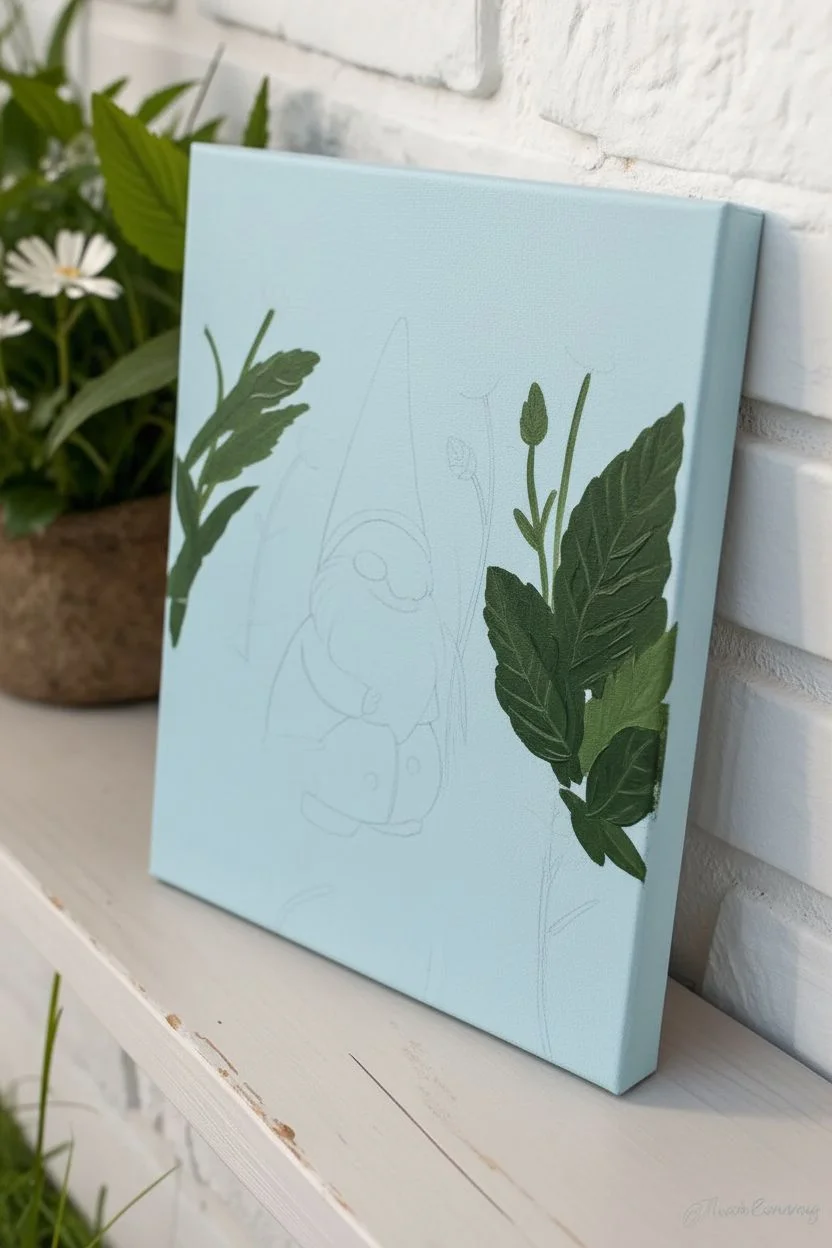
Paint the Sky:
Mix Titanium White with a very small amount of Sky Blue to create a pale, airy blue. Use a large flat brush to cover the entire background area, carefully painting around your pencil sketch of the gnome and larger flowers. Smooth out the brushstrokes for a clean finish. -
Base Leaf Layer:
Using a medium filbert brush and varying shades of Sap Green, paint the broad leaves in the background. Don’t worry about perfect details yet; just block in the shapes behind where the flowers will go.
Step 2: Painting the Gnome
-
Block in the Hat and Clothes:
Mix Cadmium Red with a touch of Burnt Sienna to get a rustic red. Paint the gnome’s pointed hat and shirt sleeves. For his pants/body, create a muted teal-blue by mixing Sky Blue with a tiny drop of Black and Green. -
Character Skin Tones:
Mix White, Yellow Ochre, and a speck of Red to create a peach skin tone. Paint the nose and the small area of the face visible above the beard. Add a slightly rosier mix to the nose and cheeks for a flushed, cheerful look. -
The White Beard:
Using a small round brush, paint the beard shape with Titanium White. I like to start at the top near the nose and pull the strokes downward to mimic the flow of hair. Apply a second coat if the first is too transparent. -
Adding Beard Texture:
Once the white base is dry, mix a very pale grey. Use a liner brush to add subtle streaks within the beard to define individual clumps of hair, giving it volume and softness. -
Facial Details:
With your finest brush or a liner, carefully paint the eyes. Use white for the sclera, blue for the iris, and black for the pupil. Add tiny white catchlights to bring him to life. Use thin brown lines for the smile and eyebrows. -
Clothing Details:
Add small black buttons to the blue outfit. Use a lighter version of the red (red mixed with white) to add tiny dots or flower patterns on the hat for texture.
Brush Control
For the crispest daisy petals, try using a flat brush turned on its chiseled edge, or a specialized ‘filbert’ brush which naturally creates rounded petal shapes when pressed down.
Step 3: The Garden of Daisies
-
Painting Stems:
Using Sap Green and a liner brush, paint thin, elegant stems reaching up towards the sky for the taller daisies. Vary the heights to create a natural, wild look. -
Painting Daisy Petals:
Load a small filbert or round brush with pure Titanium White. Press and lift the brush to create tear-drop shaped petals radiating from the center of each flower. Paint some flowers facing forward and others in profile. -
Flower Centers:
Mix Yellow Ochre with a bright yellow. Use the tip of a round brush to dab in the centers of the daisies. Stipple the paint slightly to create a fuzzy, pollen-like texture. -
Layering Foliage:
Go back in with Dark Green to add depth. Paint shadows under the large leaves and add darker grass blades at the very bottom of the canvas to ground the figure. -
Leaf Veining:
Mix a light green (Sap Green + White). Use your liner brush to draw the veins on the large, broad leaves behind the gnome for added realism.
Chalkiness Fix
If your sky looks streaky or chalky after one coat, let it dry completely and apply a second thin layer. Adding a tiny bit of water to your acrylics helps the paint flow smoother.
Step 4: Final Touches
-
Highlights and Shadows:
Add a wash of darker blue-grey under the gnome to anchor him to the ground so he isn’t floating. Add tiny highlights to the tips of the grass blades. -
Whimsical Sparkles:
Dip a toothbrush or firm brush in watered-down white paint and gently flick it over the sky area to create subtle stars or pollen dust, adding to the magical atmosphere.
Step back and admire your cheerful little garden guardian, ready to brighten up any wall


Have a question or want to share your own experience? I'd love to hear from you in the comments below!