If you’re craving easy spring window painting that looks cheerful without feeling fussy, you’re in the right place. I’m sharing beginner-friendly ideas you can paint right on glass using simple shapes, bold outlines, and classic spring motifs.
Oversized Daisy Corner Blooms
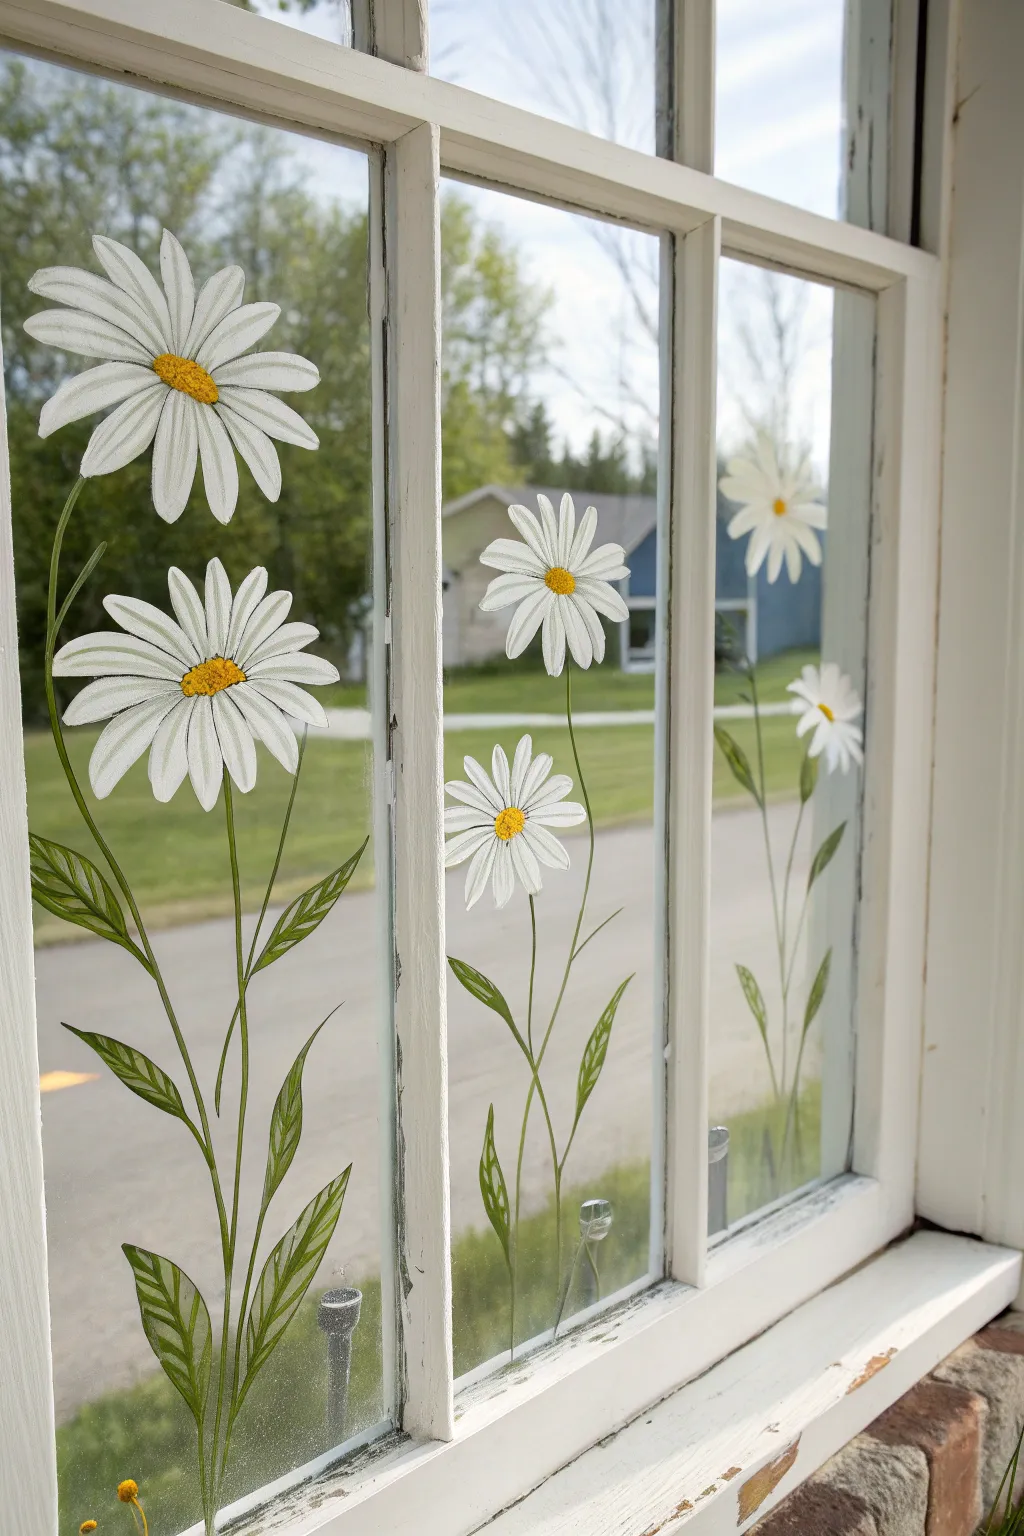
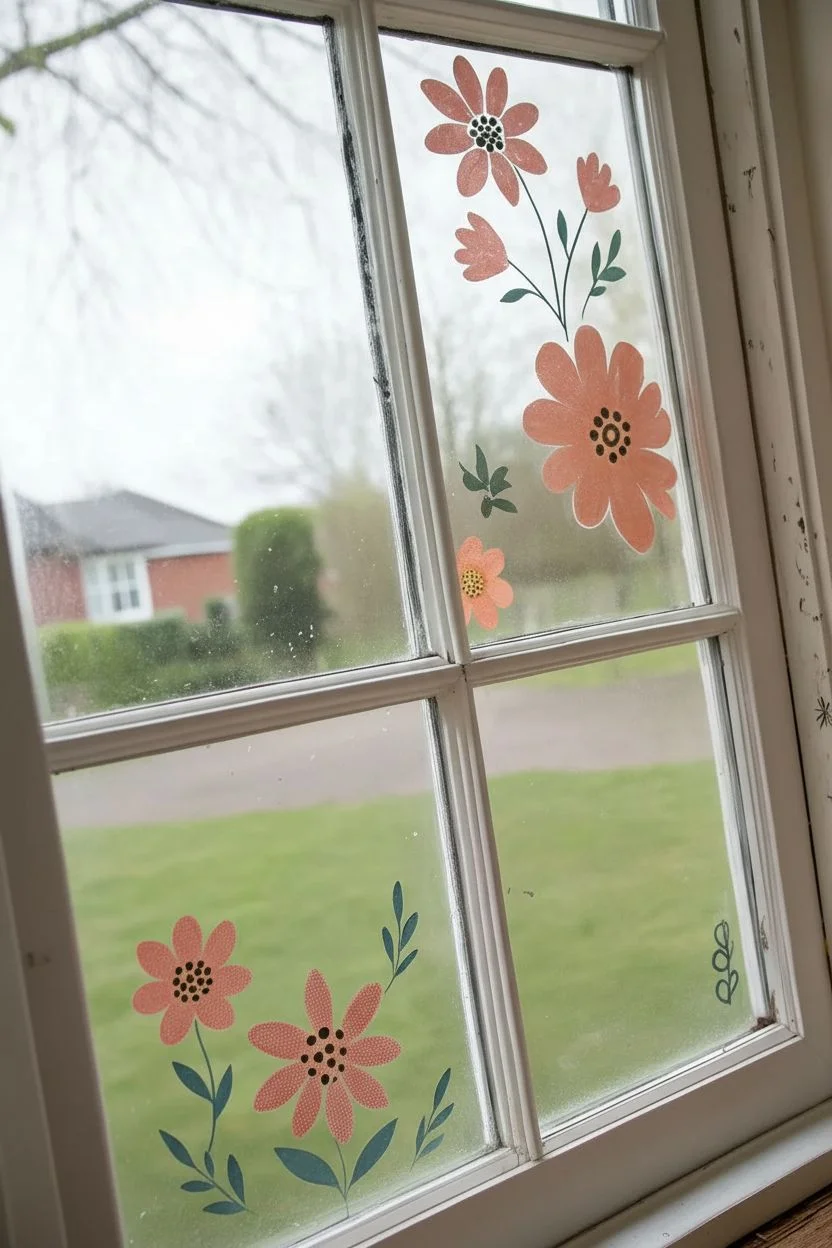
Transform your view into a permanent spring meadow with these oversized, cheerful daisies painted directly onto the window glass. This project uses simple brushstrokes to create elegant, swaying stems and bright white blooms that pop beautifully against the outdoor scenery.
Step-by-Step Tutorial
Materials
- Acrylic craft paint (White, Bright Yellow, Golden Yellow/Ochre, Olive Green, Dark Green)
- Window cleaner and paper towels
- Rubbing alcohol
- Assorted paintbrushes (Flat shader brush, small round detail brush, liner brush)
- Palette or paper plate
- Water cup
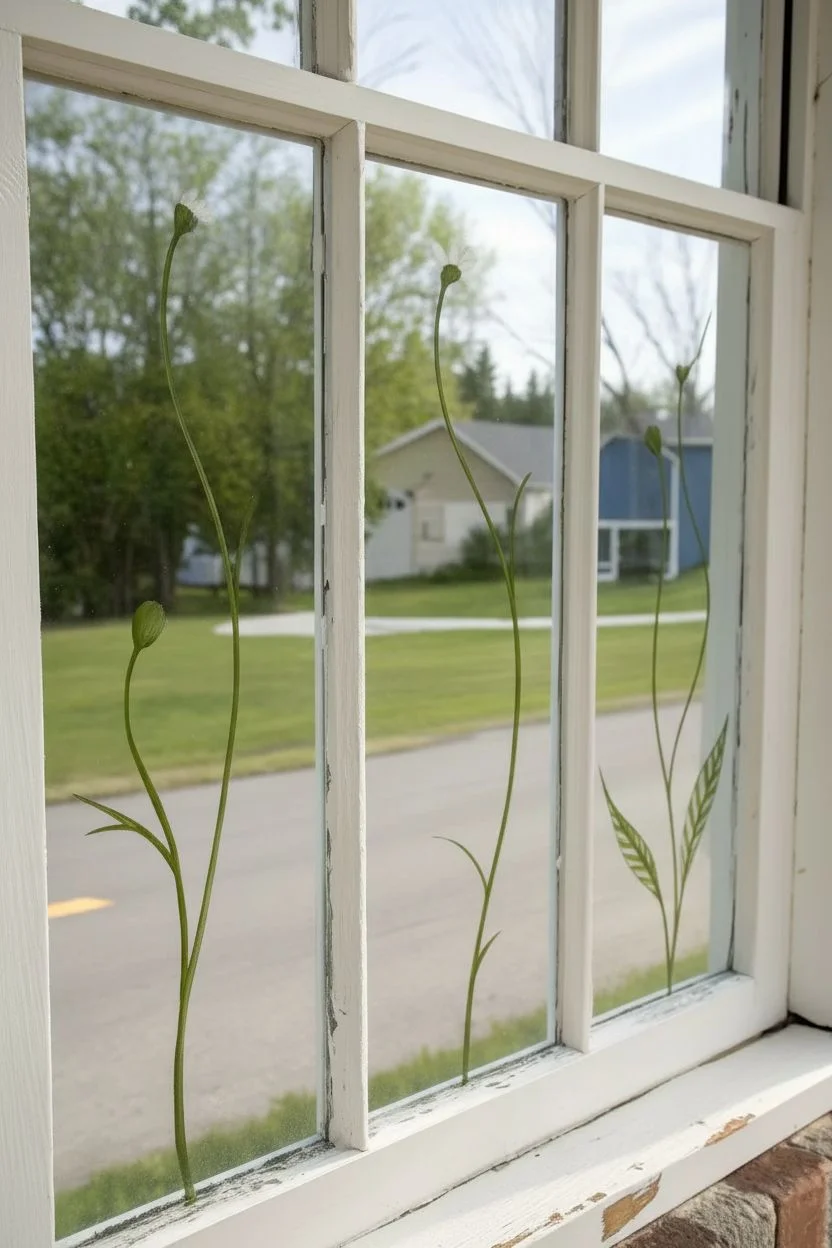
Step 1: Preparation and Stems
-
Clean the surface:
Begin by thoroughly cleaning the window pane with glass cleaner to remove dust and grime. Follow up by wiping the specific areas where you will paint with a paper towel dipped in rubbing alcohol; this removes oily residues and helps the acrylic paint adhere securely. -
Map the stems:
Mix a small amount of water into your Olive Green paint to make it flow smoothly. Using a liner brush, sketch long, slightly curved lines starting from the bottom corner of the window frame and reaching upwards. -
Vary the heights:
Create visual interest by painting your stems at different heights. I like to have the tallest stem reach about halfway up the pane, with shorter stems filling in the lower areas to simulate a natural garden cluster. -
Thicken the stems:
Go back over your initial stem lines with the liner brush to thicken them slightly near the base, tapering them as they reach the top where the flower head will sit.
Mistake Fixer
Smudged paint? Don’t wipe it while wet! Let acrylics dry completely on the glass, then use a damp cotton swab or a razor blade to cleanly scrape the mistake away without ruining the surrounding art.
Step 2: Painting the Blooms
-
Outline the petals:
Switch to a small round brush loaded with Titanium White paint. At the top of each stem, visualize a central point and paint thin outline shapes for your petals radiating outward. Aim for 12-15 long, slender petals per flower. -
Fill the petals:
Using a flat shader brush, fill inside your petal outlines with white paint. Don’t worry if the coverage isn’t perfectly opaque on the first pass; streaky texture actually adds to the organic look of flower petals. -
Stagger the flowers:
Based on your stem placement, paint your main blooms. Notice how some flowers face forward (full circles of petals) while others might tilt slightly (shorter petals on top) for a realistic perspective. -
Add a second coat:
Once the first layer of white is dry to the touch (usually 10-15 minutes), apply a second coat of white to the petals to make them bright and opaque against the light coming through the window. -
Detail the petals:
Mix a tiny drop of grey or light blue into your white paint. Use the liner brush to add very subtle, thin lines down the center of each petal, creating dimension and shadow.
Add a Visitor
Give your garden life by painting a small bumblebee or ladybug resting on one of the petals or climbing a stem. A tiny dot of red or yellow with black stripes adds instant whimsy.
Step 3: Centers and Leaves
-
Create the centers:
Load a round brush with Bright Yellow. Dab a textured, oval-shaped center into the middle of each daisy. Use a stippling motion (dabbing up and down) to mimic the pollen texture. -
Add depth to centers:
While the yellow is still wet, dip the very tip of your dirty brush into Golden Yellow or Ochre. Stipple this darker shade along the bottom edge of the yellow center to create a 3D shadow effect. -
Outline the leaves:
Return to your Olive Green paint and the liner brush. Along the stems, paint the outlines of long, lance-shaped leaves. They should curve outward and taper to a sharp point. -
Fill the leaves:
Fill in the leaf shapes with Olive Green. Use quick, sweeping strokes that follow the curve of the leaf. -
Add leaf veins:
Mix a Dark Green shade. Using your finest liner brush, paint a central vein down the middle of each leaf and add delicate diagonal veins branching out to the edges. -
Highlight the greens:
Mix a little white or yellow into your Olive Green. Add thin highlights to the top edges of the leaves and stems where the ‘sun’ would naturally hit them. -
Clean up edges:
If you made any mistakes or have jagged edges, simply wait for the paint to dry completely and gently scrape away the excess with a wooden toothpick or a razor blade held at a low angle.
Enjoy the view of your low-maintenance garden that stays in bloom regardless of the weather outside


Simple Tulip Row Along the Bottom
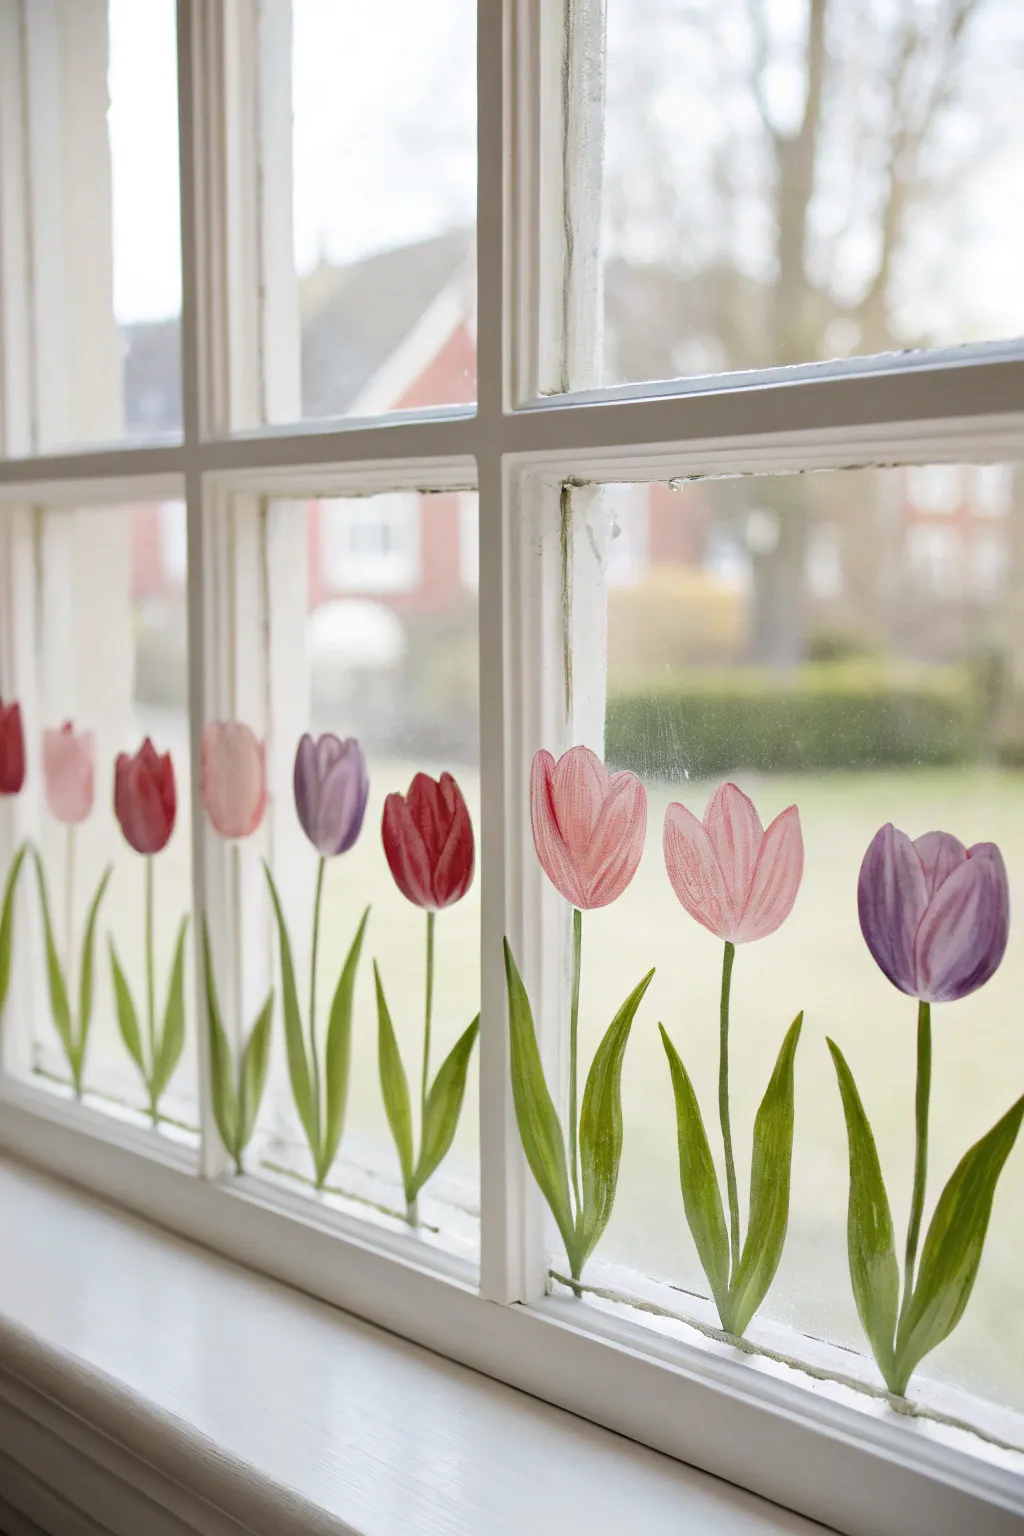
Brighten up your view with this charming row of hand-painted tulips that seem to grow right from your windowsill. Using simple brushstrokes and translucent layers, you can create a cheerful spring display that glows beautifully when the sun shines through.
Detailed Instructions
Materials
- Acrylic craft paint (pink, red, purple, white, vibrant green, olive green)
- Window cleaner and paper towels
- Rubbing alcohol
- Small flat brush (1/4 inch)
- Medium round brush (size 6 or 8)
- Fine liner brush (size 1 or 2)
- Palette or paper plate
- Cup of water
- Paper towels for blotting
Step 1: Preparation & Layout
-
Clean surface:
Begin by thoroughly cleaning the bottom window panes with glass cleaner. Follow up by wiping the glass with rubbing alcohol on a paper towel to remove any invisible oils or residue that might prevent the paint from sticking. -
Plan positions:
Visualize where each tulip will stand. For a balanced look like the example, imagine a flower head roughly every 4 to 5 inches across the width of the pane. You can make tiny dots with a dry-erase marker as guides if you want precision.
Step 2: Painting the Blooms
-
Mix base colors:
Prepare your palette with your flower colors. Mix a little white into your pinks and purples to make them opaque enough to show up against the outdoors but still light enough to glow. -
Create the pink bloom shape:
Start with a pink tulip. Using the round brush, paint an elongated ‘U’ shape for the main cup of the flower. Keep the top edges slightly uneven to mimic petals. -
Add petal definition:
While the paint is still wet, dip just the tip of your brush into a darker pink or red. Add curved strokes inside the ‘U’ shape to suggest overlapping petals. The left and right sides should curve inward toward the center. -
Paint the red tulip:
Move to the next spot and paint a red tulip. Use the same ‘U’ shape technique. For depth, mix a tiny bit of purple into your red for the shadowed areas near the bottom of the bloom. -
Paint the purple tulip:
Create a purple blossom next. I like to streak a little white directly onto the brush with the purple paint for this one, creating a lovely marbled effect as you lay down the petals. -
Repeat across the pane:
Continue painting flower heads across the row, alternating colors arbitrarily so no two identical colors are right next to each other. -
Refine the tops:
Use your smaller brush to refine the top edges of the petals. Make sure the center petal looks slightly tucked behind the two outer petals by adding a faint highlight or shadow line.
Dish Soap Trick
Mix a drop of dish soap into your acrylic paint before applying. This helps the paint stick to glass better but also makes it much easier to scrape off when the season changes.
Step 3: Stems & Leaves
-
Mix green shades:
On your palette, place your vibrant green and olive green side by side. Don’t mix them completely; you want to pick up both colors on your brush for natural variation. -
Draw the stems:
Using the liner brush or the edge of the flat brush, paint a long, slender stem from the bottom center of each flower head all the way down to the window frame. Keep the line slightly imperfect and organic. -
Start the leaves:
Switch to the medium flat brush for the leaves. Tulip leaves are long and broad. Start at the very bottom of the window frame near a stem. -
Shape the leaves:
Press the brush down firmly at the base to create width, then slowly lift pressure as you drag the brush upward and slightly curve it away from the stem. -
Create leaf tips:
Twist the brush slightly as you reach the end of the stroke to create a tapered, pointed tip. The leaf should reach about halfway up the stem height. -
Add variety:
Paint two leaves per flower, one on each side. Make one leaf slightly taller or more curved than the other to avoid a stiff, soldier-like appearance. -
Highlight the greens:
Mix a small amount of white or yellow into your green. Add a thin streak along one edge of each leaf to suggest sunlight hitting the foliage.
Add Some Dew
Once dry, use the handle end of a paintbrush dipped in white paint to add tiny dots on a few petals or leaves. It creates perfect little ‘dew drops’ for a fresh morning look.
Step 4: Final Touches
-
Clean edges:
Once the paint is dry to the touch, use a slightly damp cotton swab or the edge of a credit card to gently scrape away any paint that went outside your intended lines for a crisp finish. -
Final drying:
Let the entire artwork cure for at least an hour before touching or cleaning around the area.
Enjoy the colorful border that now frames your view of the outdoors


Hello Spring Lettering With a Floral Frame
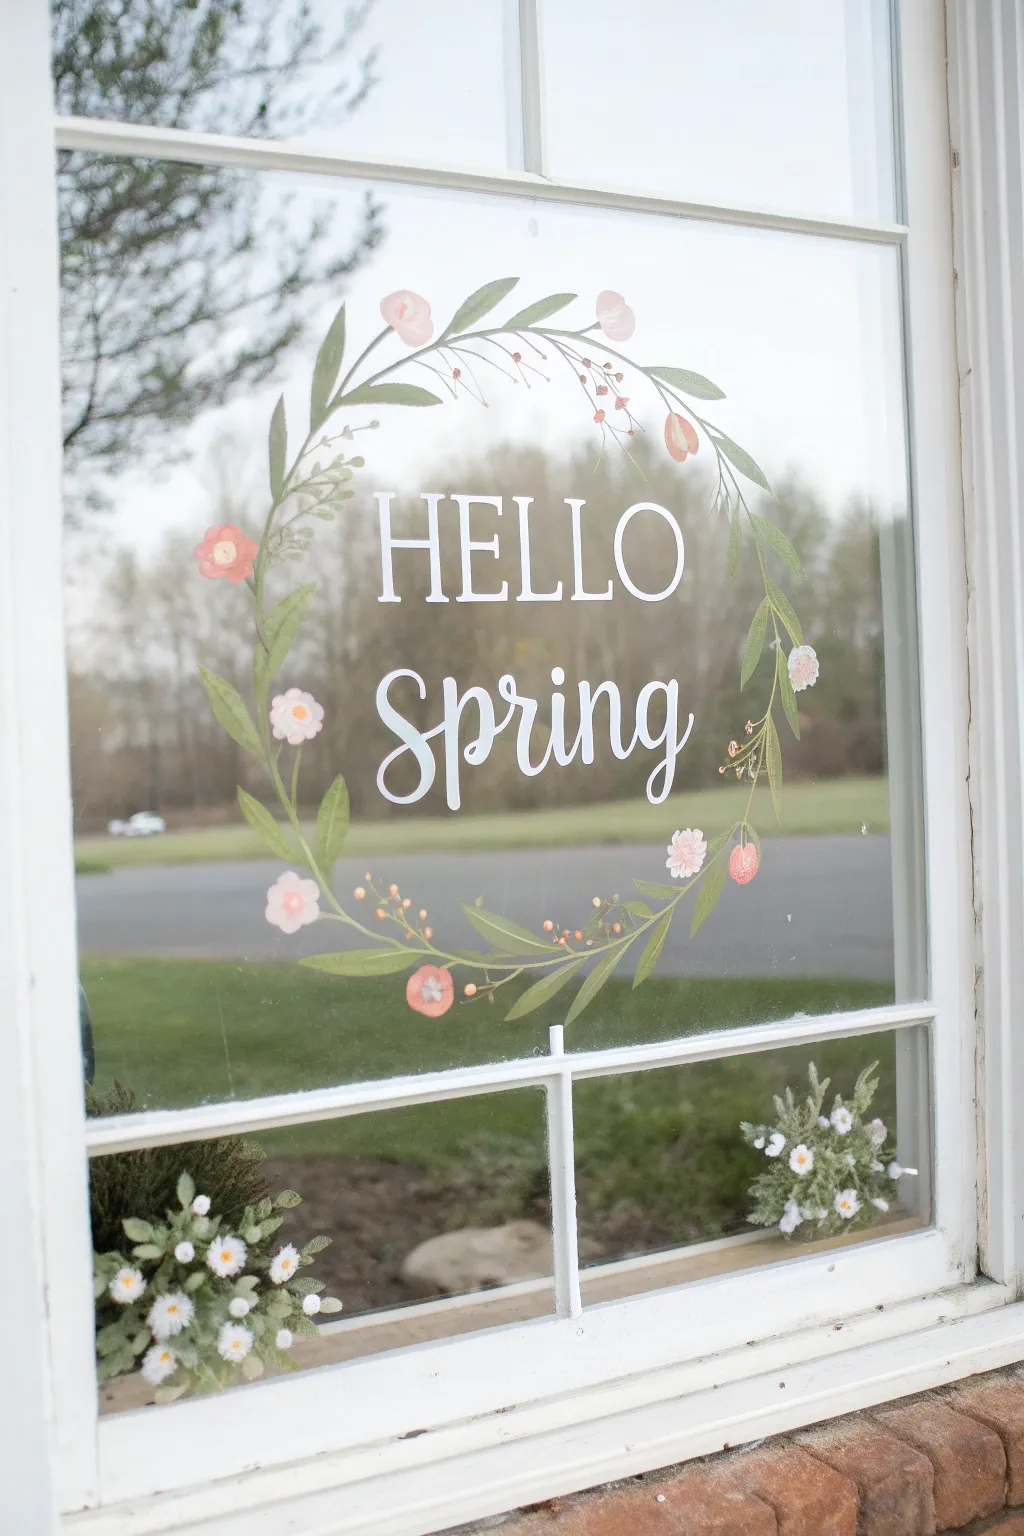
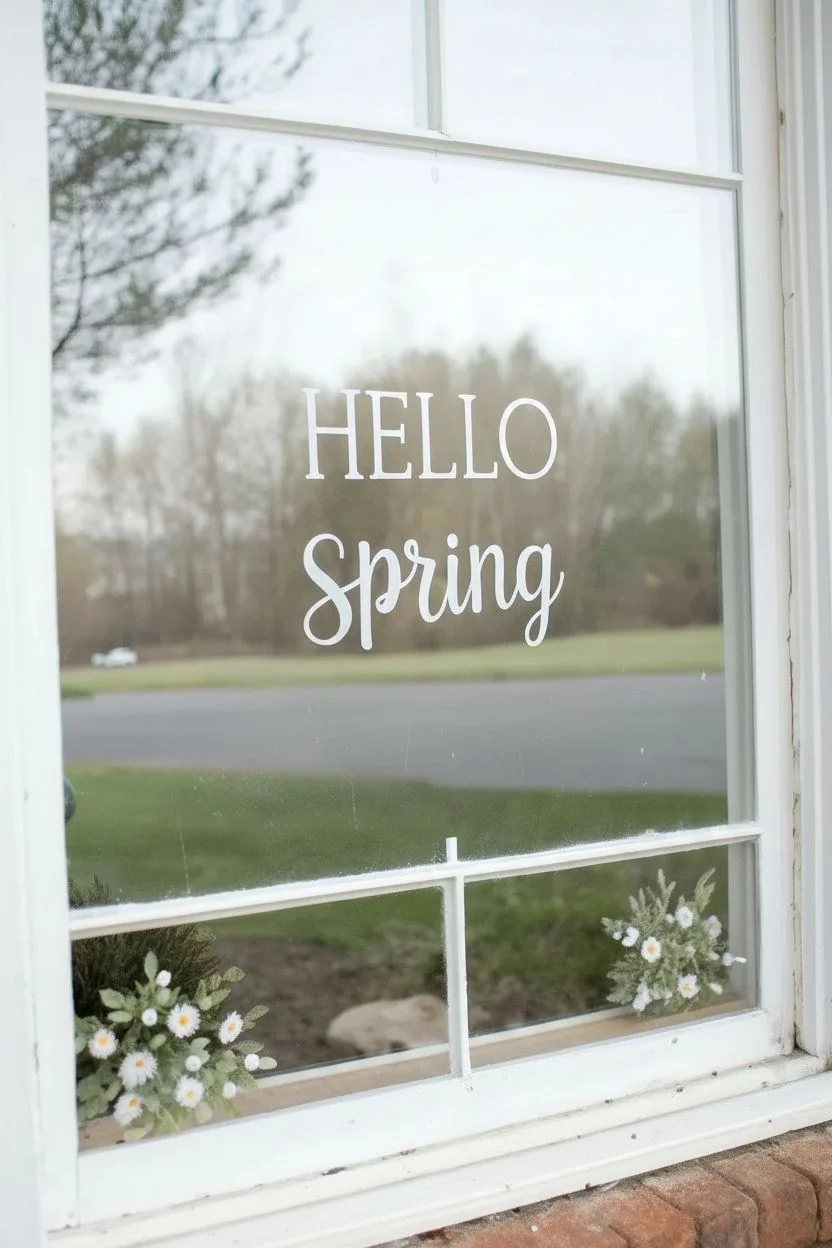
Brighten your view with this cheerful window mural featuring crisp white lettering surrounded by a delicate wreath of greenery and soft pink blooms. This project uses chalk markers or acrylic paint to create a welcoming display that celebrates the arrival of the season directly on your glass pane.
Detailed Instructions
Materials
- White liquid chalk marker (broad tip)
- White liquid chalk marker (fine tip)
- Green liquid chalk marker or acrylic paint (olive or sage tone)
- Pink liquid chalk marker or acrylic paint (light and dark shades)
- Peach/coral liquid chalk marker or acrylic paint
- Orange liquid chalk marker or acrylic paint
- Glass cleaner and lint-free cloth
- Printed template (optional)
- Painter’s tape (if using template)
- Small round paintbrush (if using acrylics)
- Cotton swabs (for cleanup)
Step 1: Preparation & Lettering
-
Clean the surface:
Begin by thoroughly cleaning the inside of your window glass with glass cleaner and a lint-free cloth. Any dust or grease will prevent the paint or marker from adhering smoothly. -
Set up your guide:
If you aren’t confident freehanding the lettering, print out the words ‘HELLO Spring’ in your desired fonts. Tape this paper to the *outside* of the window facing in so you can trace it. -
Letter the word HELLO:
Using a broad-tip white chalk marker, draw the word ‘HELLO’ in tall, serif capital letters. Keep the lines straight and even, applying steady pressure for opaque coverage. -
Letter the word Spring:
Switch to a script style for ‘Spring’ directly underneath. Use the broad marker for the downstrokes to make them thicker and a lighter touch or fine tip marker for the upstrokes to create a calligraphy effect. -
Refine the text:
Go back over your lettering to smooth out any shaky edges. I find that adding a second coat after the first one dries makes the white really pop against the outdoors.
Visibility Pro Tip
Put a piece of black construction paper on the outside of the glass while you paint. This creates high contrast so you can easily see your colors as you work.
Step 2: Painting the Wreath
-
Outline the wreath shape:
Lightly sketch a large circle around your text using a fine-tip green marker. This doesn’t need to be a perfect solid line; just faint dashes to guide where your vines will go. -
Draw the main vines:
Using your green marker or paint, draw long, sweeping curved lines following your circle guide. Let the vines overlap slightly at the bottom and thin out as they reach the top, leaving a small gap at the very peak. -
Add large leaves:
Paint elongated, pointed leaves coming off the main vines. Space them out somewhat randomly, angling them in the direction the vine is growing. -
Incorporate smaller sprigs:
Add thinner, branching stems extending from the main vine. On these, dab tiny dots or small dashes of green to represent budding foliage or different plant textures. -
Paint the main flowers:
Using pink and peach paint, add round flower shapes scattered around the wreath. Keep them simple—roughly five petals each—and vary the sizes. -
Add floral details:
Once the flower base color is tacky or dry, add a tiny dot of white or a darker pink in the center of each bloom to give them depth. -
Create distinct buds:
Paint tulip-shaped buds using the coral or darker pink shade. Place these at the ends of the thinner stems you drew earlier, making them look like they are drooping slightly. -
Add berries:
Using the orange marker or paint, place clusters of three tiny dots near the leaves and along the thinner vines to create berry accents. -
Layer in fillers:
Fill any large empty gaps with extra pale pink flowers or small white dots to balance the composition. -
Clean up edges:
Dip a cotton swab in a little water (or rubbing alcohol if the paint is stubborn) and gently wipe away any smudges or jagged lines to sharpen your artwork.
Dripping Paint?
If your liquid chalk is runny, press the nib on a paper towel first to release excess pressure. Apply thin layers, letting them dry fully before recoating.
Step back and enjoy the fresh, handmade greeting every time you look out the window


Butterflies Floating Through the Middle
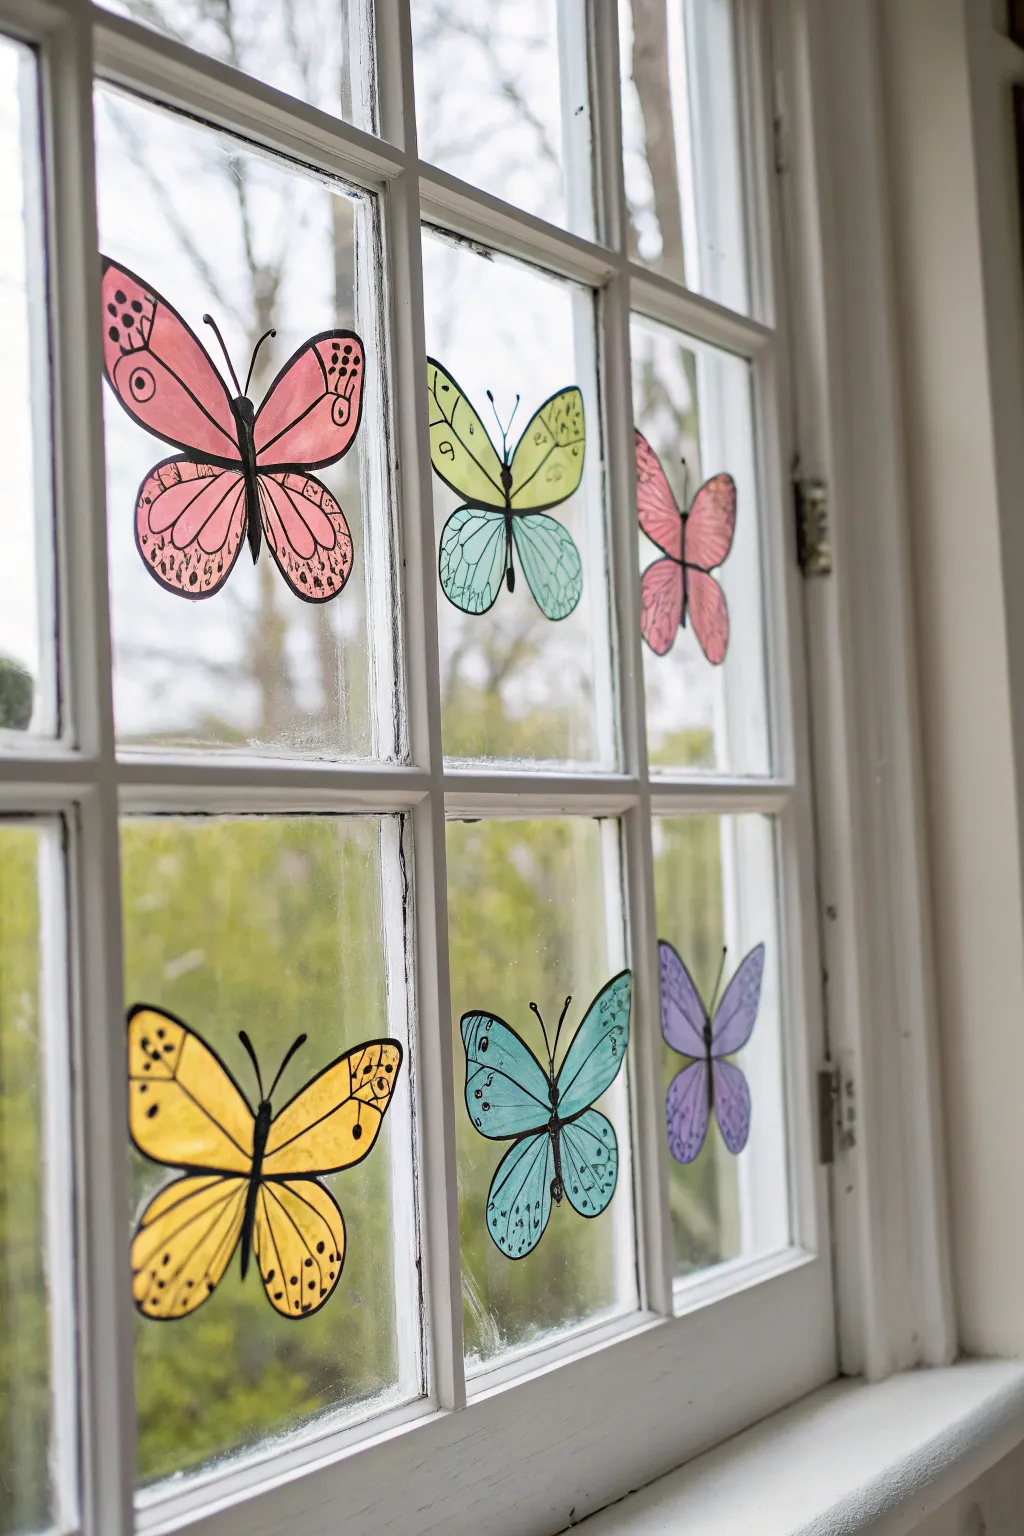
Transform your windows into a fluttering display of color with these translucent paper butterflies that mimic the look of stained glass. The light shines beautifully through the paper, casting soft, colorful shadows while adding a whimsical spring touch to your view.
How-To Guide
Materials
- Tracing paper or translucent vellum
- Black permanent marker (fine and medium tip)
- Washable markers or alcohol ink markers (various colors)
- Scissors
- Clear double-sided tape or clear glue dots
- Pencil
- A clean window surface
Step 1: Designing the Wings
-
Preparation:
Start by cleaning your window panes thoroughly to ensure the butterflies will stick well later. Then, clear a flat workspace and lay out your sheet of tracing paper or vellum. -
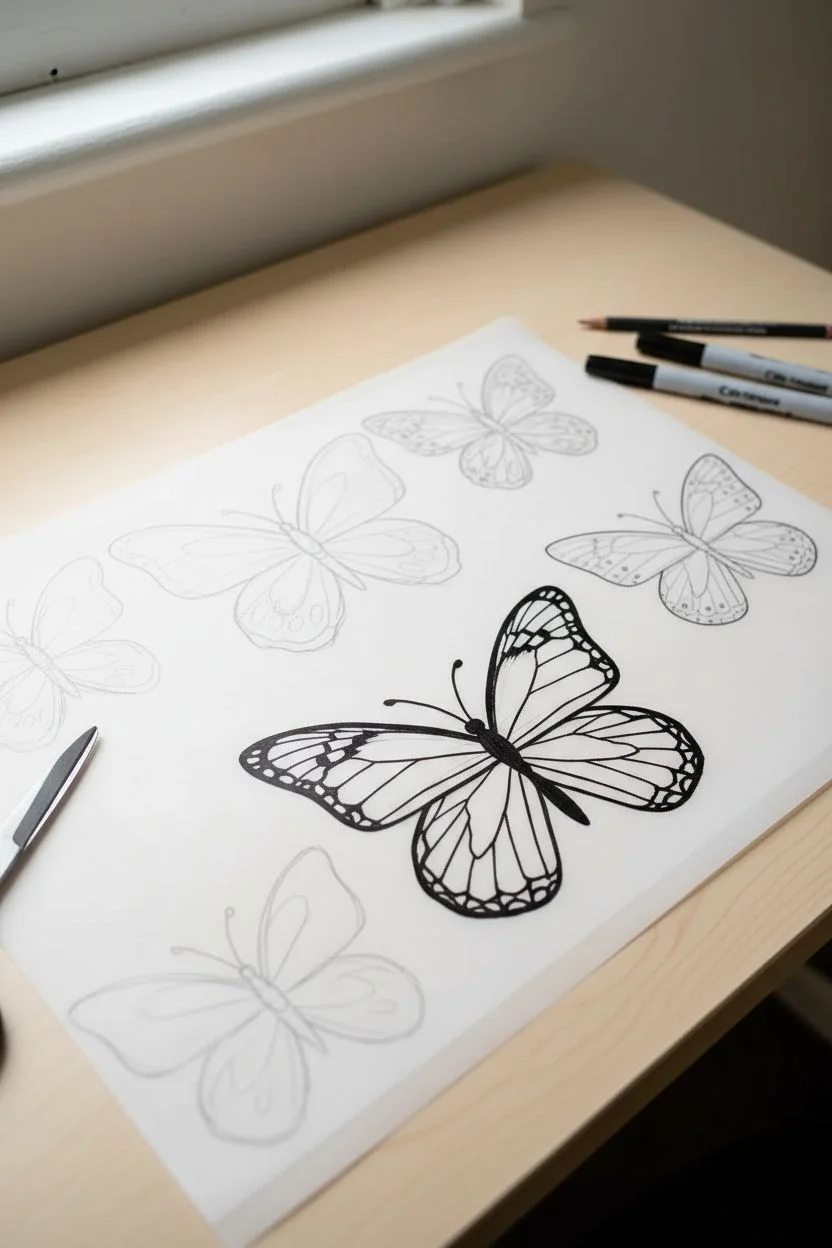
Drafting:
With a pencil, lightly sketch the outline of a butterfly directly onto the tracing paper. You can freehand this or print a template to trace if you prefer symmetry. -
Inking the Outline:
Once you are happy with the shape, go over your pencil lines with a medium-tip black permanent marker. Create a bold, continuous line for the outer wings and the central body. -
Adding Detail:
Switch to a fine-tip black marker to draw the intricate veins inside the wings. For the top wings, simple loops or dots work well; for the bottom wings, try drawing long, radiating lines to mimic natural butterfly patterns. -
Creating the Body:
Fill in the slender body and head completely with the black marker so it stands out against the translucent wings.
Keep it Crisp
If your markers are bleeding through too much, try standard printer paper rubbed with a little vegetable oil after coloring to turn it translucent instantly.
Step 2: Bringing Color to Life
-
Selecting Colors:
Choose bright, spring-appropriate colors like pink, yellow, teal, and lavender. Markers work best here because they soak into the translucent paper just enough to look like stained glass without blocking the light. -
coloring Technique:
Color in the wings, staying within your black lines. I like to color on the ‘back’ side of the tracing paper (the side without the ink) so the black lines stay crisp and don’t smear, but coloring the front works too if your ink is fully dry. -
Blending:
For a two-toned effect like the green and blue butterfly, color one section half-way, then color the rest with the second shade, overlapping them slightly in the middle to blend. -
Drying Time:
Let the marker ink dry completely for a few minutes to prevent any smudging during the cutting process.
Step 3: Installation
-
Cutting Out:
Use your scissors to carefully cut along the outer edge of the black outline. Leave no white space around the edges for the cleanest look. -
Protecting the Antennae:
Be very gentle when cutting around the delicate antennae. If they are too thin to cut out easily, you can cut them off and draw them directly onto the glass later, though keeping them attached is ideal. -
Applying Adhesive:
Apply small pieces of clear double-sided tape or a few glue dots to the back of the butterfly’s body. Avoid putting tape on the wing tips if possible, so they can curl slightly away from the glass for a 3D effect. -
Positioning:
Press the butterfly firmly onto the window pane. Arrange them in a loose, upward-floating pattern across multiple panes to create a sense of movement. -
Final Adjustments:
Step back and check your arrangement. Smooth down the center of each butterfly once more to ensure they are secure against the glass.
Add Some Sparkle
Outline the inner veins of the wings with clear glitter glue or a metallic silver pen to catch the sunlight even more during the brightest part of the day.
Enjoy the colorful glow these paper butterflies cast into your room as the sun moves across the sky
BRUSH GUIDE
The Right Brush for Every Stroke
From clean lines to bold texture — master brush choice, stroke control, and essential techniques.
Explore the Full Guide
Busy Bees and Dotted Flight Trails
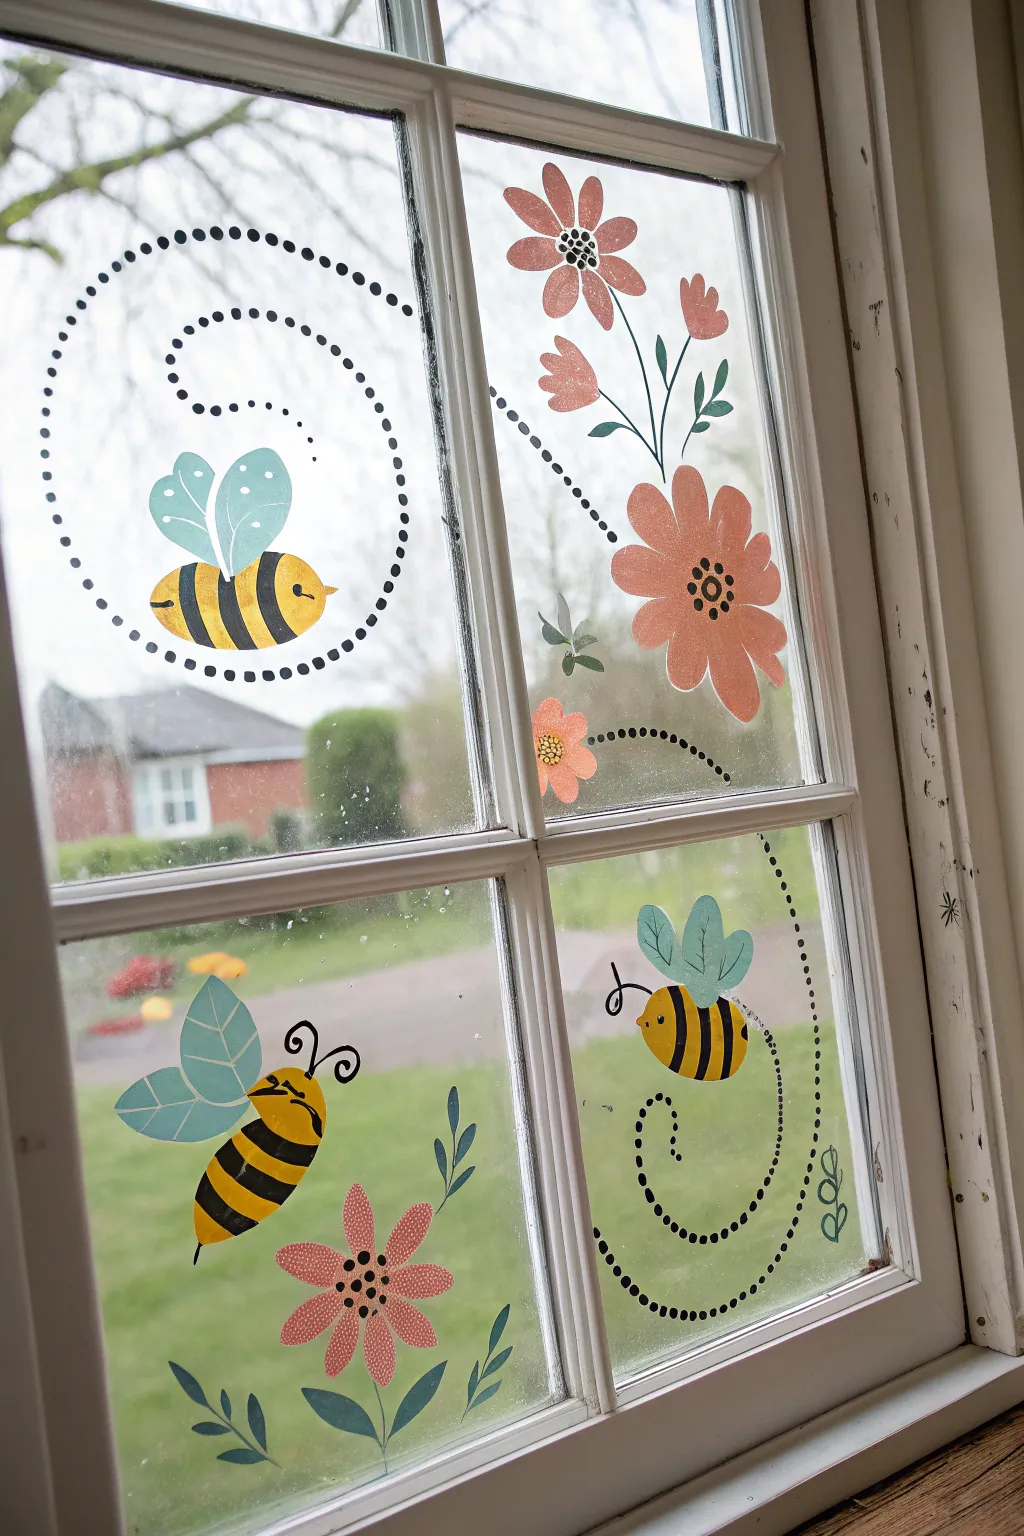
Transform a plain window pane into a lively spring scene with cheerful bees buzzing around coral-colored flowers. This project uses dotted flight trails to add dynamic movement, drawing the eye across the glass in playful loops.
Step-by-Step Guide
Materials
- Window glass paints (yellow, black, coral/pink, light blue, dark green, white)
- Small round paintbrushes (sizes 2 and 4)
- Fine-tip detail brush (size 0 or 00)
- Black glass paint marker or fine liner brush
- Paper towels
- Rubbing alcohol
- Small palette or plate
- Water cup
Step 1: Preparation & Flowers
-
Clean surface:
Begin by thoroughly cleaning the window pane with rubbing alcohol and a paper towel. This removes oils and dust, ensuring the paint adheres properly and lasts longer. -
Paint flower centers:
Starting in the upper right quadrant of the window, use a small brush to dab small, dark circles for the centers of your flowers. Space them out—one high, one lower down—to create a natural composition. -
Add petals:
Mix a coral or soft pink shade. Using a round brush, paint teardrop-shaped petals radiating outward from your centers. For the large flower, paint broad, rounded petals. For the smaller buds higher up, just paint two or three small petals pointing upwards. -
Create stems and leaves:
Load a fine linear brush with dark green paint to connect your flowers. Draw thin, curving lines downwards for stems. Add small, leaf-shapes along the stems, keeping the strokes fluid and tapered at the ends. -
Lower foliage:
In the bottom left corner, paint a second floral cluster. Create a larger, multi-petaled flower shape in coral and add some standalone leafy stems nearby in dark green to balance the design.
Uneven Dots?
If your flight trail dots look messy or uneven, try using the flat head of a nail or a Q-tip dipped in paint instead of a brush tip for perfect circles every time.
Step 2: Painting the Bees
-
Bee bodies:
Rinse your brush and switch to yellow paint. Create oval shapes for the bee bodies. Place one in the top left, one in the bottom center (facing right), and one swooping up on the right side. -
Adding stripes:
Once the yellow is dry to the touch, use black paint and a detail brush to carefully add curved vertical stripes across the bodies. The curve helps the bees look round and plump rather than flat. -
Wings base:
Mix a very diluted light blue or use a translucent glass paint. Paint two tear-drop wing shapes on the back of each bee. They should slightly overlap the body. -
Wing details:
For the bee in the top left, use white paint to dot the wings for texture. For the lower bees, use a thin line of darker blue or grey to draw a central vein through the wing leaves. -
Faces and stingers:
Using your finest brush or a black paint marker, draw tiny stingers on the rear. Add simple eyes and happy curved mouths on the yellow faces. I find a toothpick works great for these tiny details if your brush is too big. -
Curly antennae:
Give the bottom-left bee distinct, curly black antennae. Draw two lines extending from the head that loop outward into spirals.
Pro Tip: Translucency
To make the wings look truly glassy and delicate, mix a tiny drop of clear glazer or water into your light blue paint before applying it to the glass.
Step 3: Flight Trails & Details
-
Plan the trails:
Visualize the flight path of each bee. The top bee should have a large spiral behind it, while the bottom right bee has a trail spiraling upward from below. -
Dotting technique:
Dip the handle end of a paintbrush into black paint. This is the easiest way to make uniform dots. Stamp the dots along your imagined path, reloading the paint every few dots to keep them consistent. -
Top spiral:
Create a large, open spiral trail behind the top-left bee, curving upwards and outwards towards the window frame. -
Bottom spiral:
For the bee on the right, start the dotted trail near the bottom of the pane, spiral it upwards, and connect it to the bee’s stinger. -
Final flower details:
Go back to your coral flowers. Use a tiny brush with black or dark brown paint to add small dots inside the flower centers for pollen texture. -
Cleanup:
Check for any smudges or paint that went astray. A damp cotton decorated swab can easily wipe away mistakes before the paint fully cures.
Step back and enjoy how the light shines through your cheerful new garden friends
Rain Showers and a Soft Pastel Rainbow
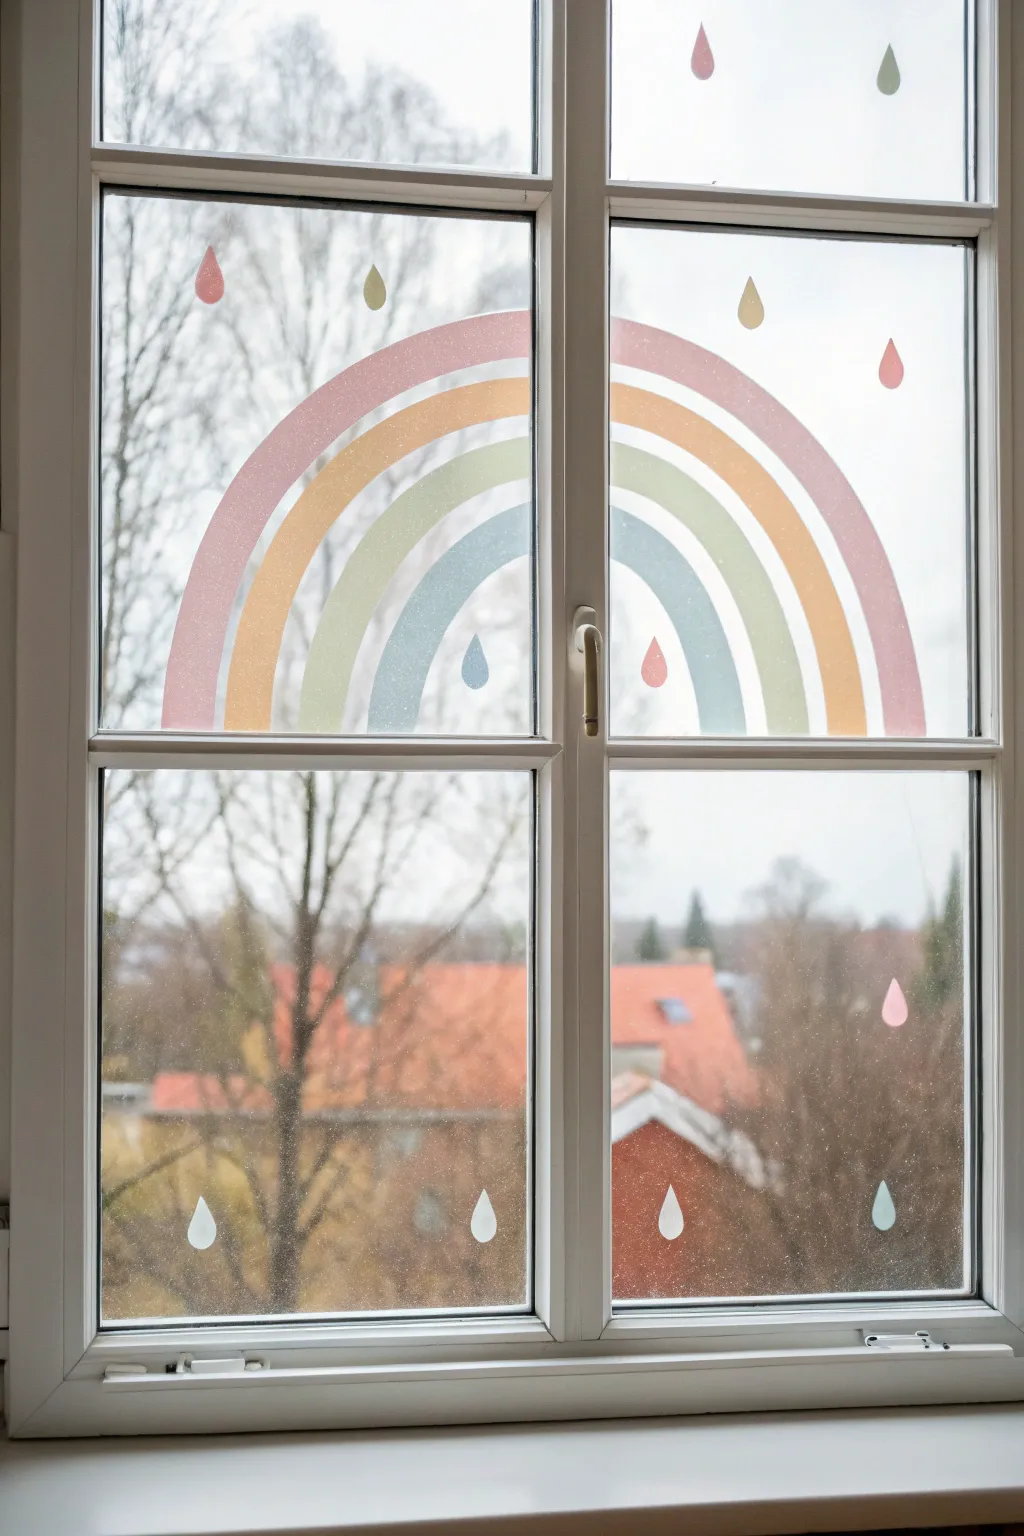
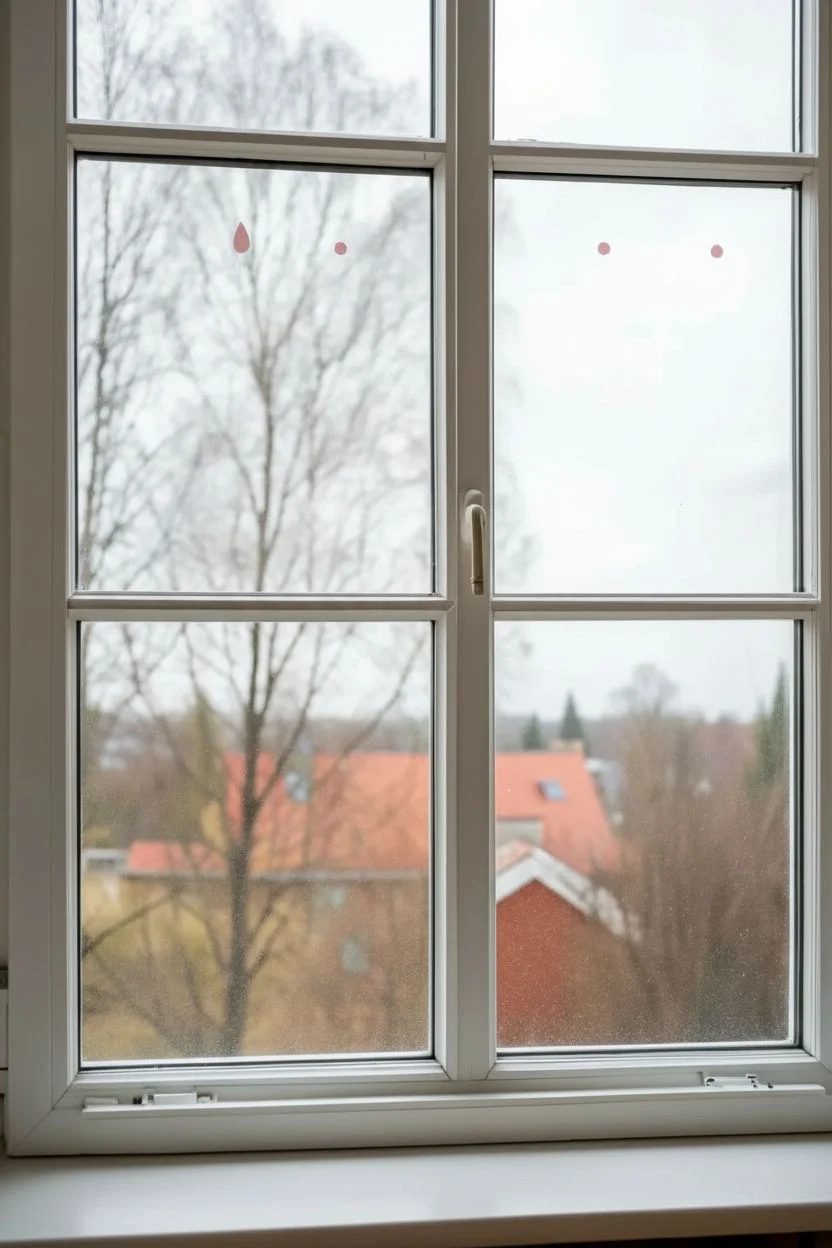
Brighten up a rainy day with this gentle, dreamy window display featuring a large, segmented rainbow arching across two panes. The soft pastel tones and simple raindrop shapes make this an approachable project that still looks professionally designed.
Step-by-Step
Materials
- Window chalk markers (liquid chalk) or tempera window paint
- Colors: Pastel pink, peach/light orange, sage green, and pastel blue
- Microfiber cloth
- Glass cleaner
- Masking tape or painter’s tape (optional)
- String and pencil (for tracing the arc)
- Cotton swabs (for cleanup)
Step 1: Preparation & Mapping
-
Clean surface:
Begin by thoroughly cleaning the window panes with glass cleaner and a microfiber cloth. Any dust or grease will prevent the paint from sticking smoothly, so ensure the glass is completely dry before starting. -
Plan the arch:
Since this rainbow spans across the window frame (mullion), visualize where the center of your rainbow would be if the frame wasn’t there. You want the highest point of the arch to be centered between the two upper panes. -
Mark reference points:
Use a small dot of the pink marker to mark the starting and ending points of the outermost arch on the glass. Measure from the window frame edge to ensure symmetry on both sides.
Wobbly Lines?
If freehanding the arch is tough, tape a piece of string to the center of the window frame’s bottom edge. Tie a pencil to the other end to swing a perfect arc as a guide.
Step 2: Painting the Rainbow
-
Start the outer band:
Using your pastel pink paint or wide-tip marker, draw the outermost curve of the rainbow. Start from the bottom left, curve up towards the frame, jump across the frame, and continue the curve down on the right pane. -
Fill the pink layer:
Thicken this line to create a band about 1-2 inches wide. I find it easiest to draw the parallel inner line first and then fill in the space between them for a solid look. -
Create the peach band:
Switch to your peach or light orange color. Leave a tiny gap of clear glass (about 2-3mm) next to the pink band, then draw your second arch following the curve of the first. -
Fill the peach layer:
Fill in this band to match the width of the pink one. Keeping the width consistent is key to the satisfying, geometric look of this design. -
Paint the green band:
Next is the sage green layer. Follow the same process, maintaining that small sliver of negative space between colors to keep the design distinct and crisp. -
Finish with blue:
Add the final, innermost arch using pastel blue. This will be the smallest curve. Fill it in carefully, ensuring the ends of all four bands line up horizontally at the bottom. -
Clean edges:
While the paint is still wet or tacky, use a damp cotton swab to clean up any wobbly edges or stray marks, sharpening the gap lines between the colors.
Step 3: Adding the Raindrops
-
Distribute upper drops:
In the white space above the rainbow, paint scattered raindrops. Use varied colors from your palette—a pink drop here, a green one there. Keep the shape simple: a rounded bottom tapering to a point. -
Inner rainbow drops:
Place two large drops directly centered underneath the blue arch—one blue and one pink—to fill the negative space under the rainbow. -
Lower pane drops:
Move to the bottom window panes. Create a scattered pattern of larger white or very pale blue raindrops. These represent the rain falling closer to the ground. -
Vary the heights:
Avoid placing the drops in straight rows. Stagger their heights to mimic natural rainfall. Step back occasionally to check the balance of the composition. -
Add top accents:
Don’t forget the very top pane sections above the main window frame if you have them, adding just one or two small drops there to draw the eye upward. -
Final opacity check:
Once the paint is fully dry, check for streaky areas. If the sun is shining through too brightly, you might want to add a second coat to the rainbow bands for a more opaque, matte finish.
Level Up: Glitter
While the paint is still wet, sprinkle a tiny pinch of biodegradable translucent glitter onto the rainbow bands. It catches the sunlight beautifully on bright mornings.
Enjoy the cozy view through your new colorful arches, bringing cheer even when the weather is gray

PENCIL GUIDE
Understanding Pencil Grades from H to B
From first sketch to finished drawing — learn pencil grades, line control, and shading techniques.
Explore the Full Guide
Whimsical Bunny in a Flower Meadow
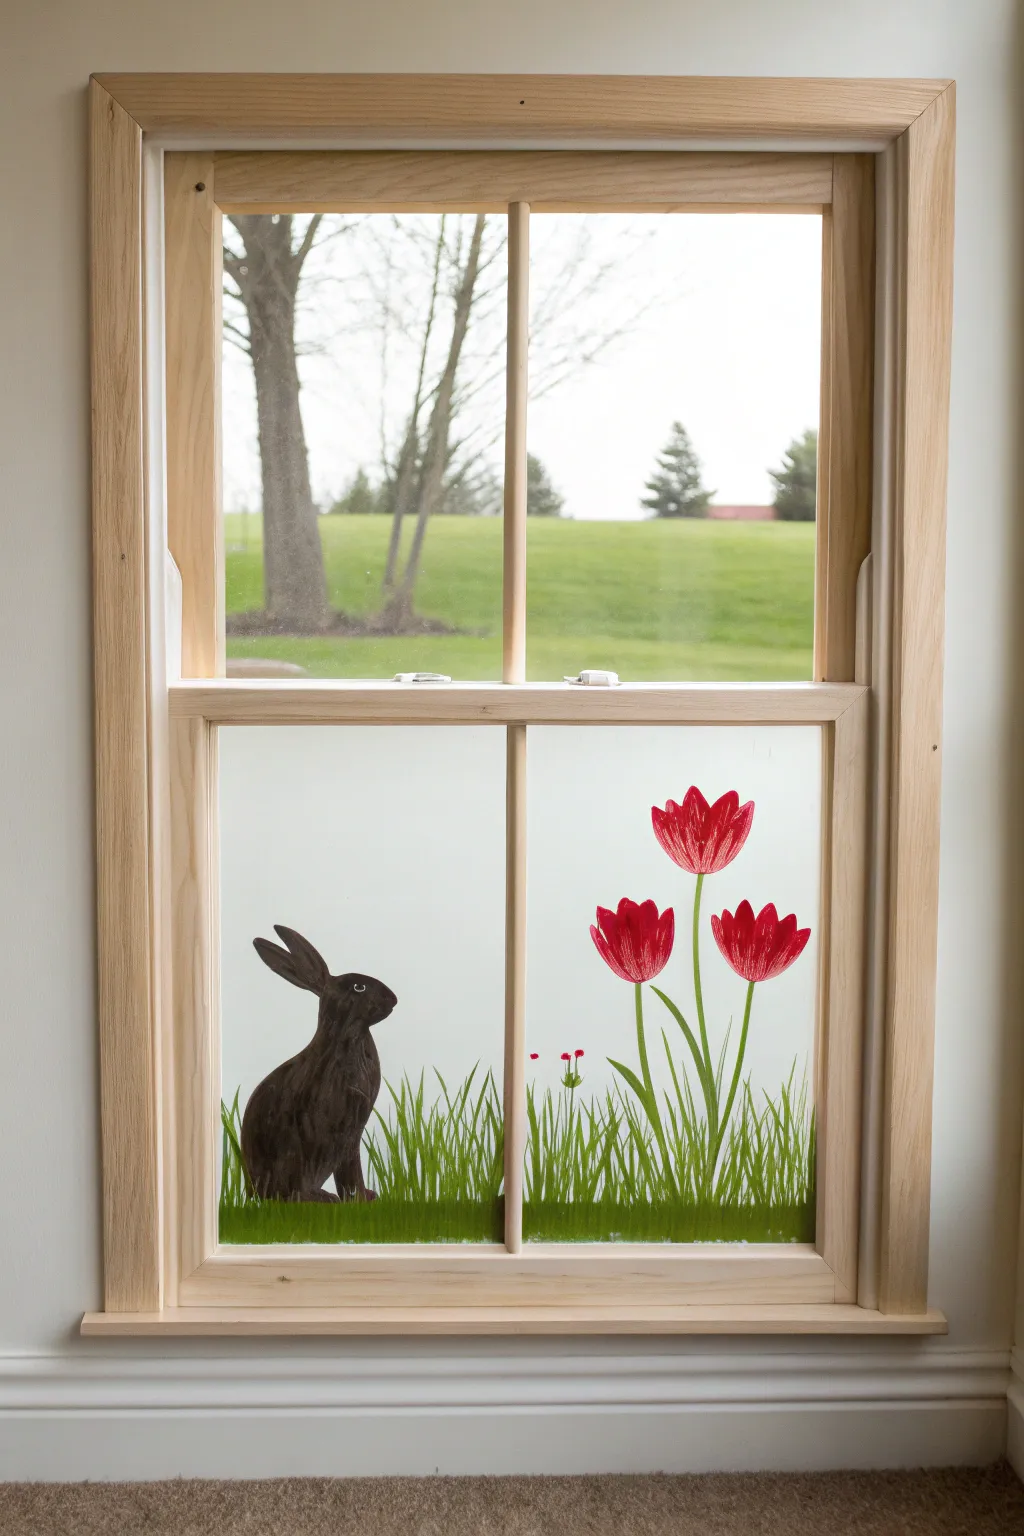
Bring the freshness of spring indoors with this charming window mural featuring a curious black rabbit amidst blooming red tulips. This project creates a delightful scene on your lower window pane, offering both privacy and a cheery seasonal view.
Step-by-Step Tutorial
Materials
- White window paint (chalk marker, acrylic craft paint, or tempera)
- Black acrylic paint
- Red acrylic paint
- Green acrylic paint (medium shade)
- Small flat brush (1/4 inch)
- Fine liner brush
- Sponge dabber or large flat brush
- Painter’s tape
- Glass cleaner and microfiber cloth
- Paper palette or plate
- Cup of water
Step 1: Preparation and Background
-
Clean and tape:
Begin by thoroughly cleaning the lower window sash with glass cleaner and a microfiber cloth to remove any dust or fingerprints. Apply painter’s tape to the wooden frame edges to protect them from stray brushstrokes. -
Create the frosted backdrop:
To make the colors pop and provide privacy, you’ll need a white background. Use a sponge dabber or large flat brush to apply an even coat of white paint across the entire lower glass pane. Dab gently for a textured, frosted look. -
Let it cure:
Allow this white base layer to dry completely. It must be dry to the touch so your colored paints sit on top rather than mixing with the white and becoming pastel.
Paint Choice
Mix a drop of dish soap into acrylic paint. It helps the paint stick to glass better but also makes it much easier to scrape off later when the season changes.
Step 2: Painting the Bunny
-
Outline the shape:
Using a small flat brush and black paint, lightly outline the bunny on the left side of the window. Start with an oval for the body and a smaller circle for the head. -
Details and ears:
Add two long ears perked up and slightly back. Slope the back downwards and define the chest area. Don’t worry about the feet yet, as they will be hidden by grass. -
Fill in the silhouette:
Fill the entire bunny shape with black paint. Use smooth strokes to give the impression of sleek fur. -
Add the eye:
Once the black paint is tacky or dry, use a tiny dot of white paint with your fine liner brush to create the eye. A small ‘C’ shape or a dot brings the rabbit to life. -
Refine the edges:
Go back over the edges of your rabbit with the liner brush to smooth out any rough spots on the silhouette.
Step 3: Painting the Tulips
-
Base stems:
On the right side of the pane, paint three long, curved stems using green paint and a liner brush. Vary their heights slightly for a natural look. -
Add leaves:
Paint long, slender leaves curving out from the base of the stems. Tulips have distinctive leaves that start low and reach upward alongside the stem. -
Paint tulip bowls:
Using red paint and a small flat brush, create the flower heads. Start with a ‘U’ shape at the top of each stem. -
Define the petals:
Paint two or three pointed petals rising from that ‘U’ shape. I like to leave tiny gaps or use a lighter touch near the top edges to mimic the texture of petals. -
Add tiny buds:
For extra detail, you can add a couple of very small red dots or tiny buds hovering low near the grass on a thin green stem.
Add Dimension
Once the red tulips are dry, add faint highlights with white or yellow paint on the petal tips to make them look like they are catching the sunlight.
Step 4: Finishing Touches
-
Paint the first grass layer:
Load your flat brush with green paint. Starting from the bottom edge of the glass, flick the brush upward to create blades of grass. -
Vary direction:
Ensure the grass blades vary in height and direction, crossing over each other slightly. Paint right over the bottom of the bunny and the base of the flower stems to ground them in the scene. -
Thicken the turf:
Go back and add a second layer of grass flicks to fill in any gaps, making the meadow look lush and dense along the bottom rail. -
Cleanup:
Once everything is fully dry, carefully peel away the painter’s tape. Use a damp cotton swab to clean up any paint that might have seeped onto the wood.
Enjoy your private garden view no matter what the weather is doing outside
Cherry Blossom Branch Reaching Across a Corner

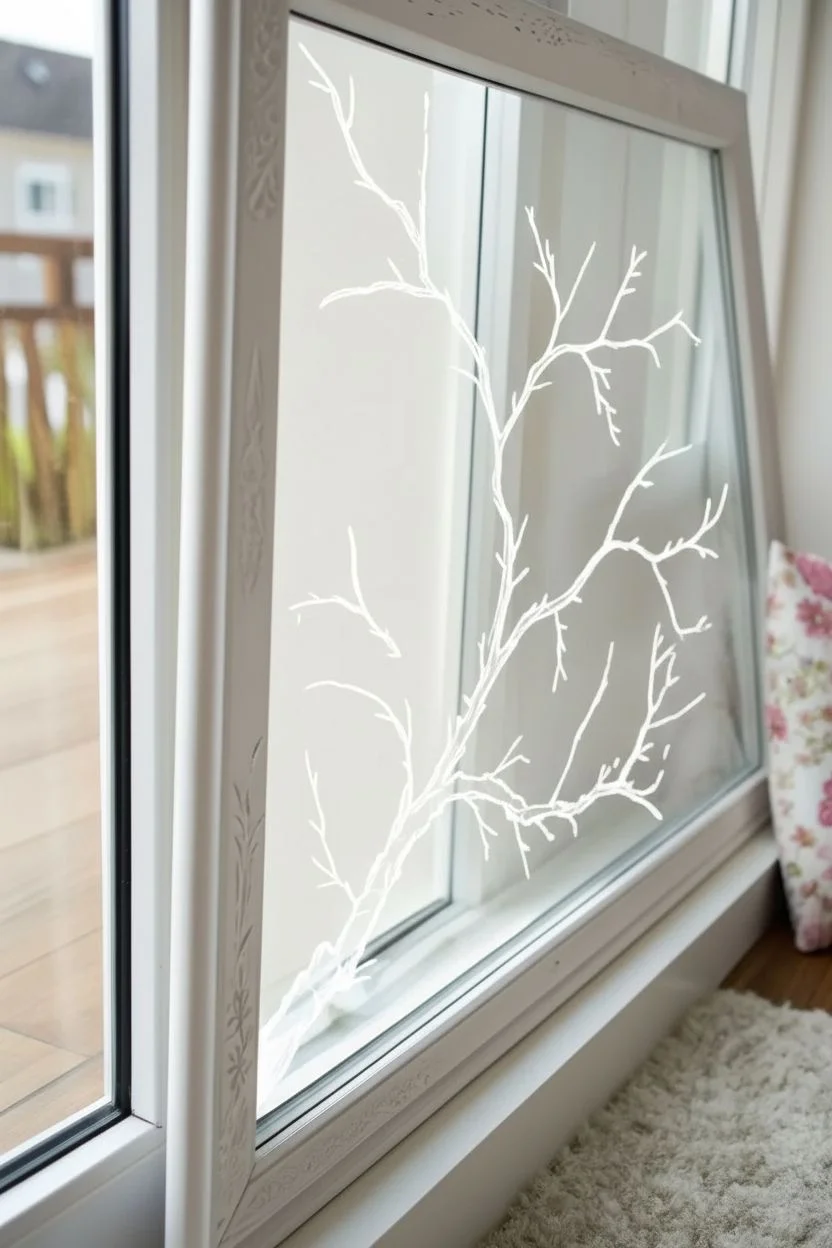
Transform a plain window corner into a romantic spring scene with this delicate cherry blossom painting. Using the natural frame of your window, this design creates the illusion of a flowering tree growing just outside, bringing soft pinks and earthy browns into your cozy space.
How-To Guide
Materials
- Acrylic craft paints (burnt umber, raw sienna, titanium white, quinacridone magenta, soft pink)
- Window cleaner and lint-free cloth
- Rubbing alcohol
- Round brushes (sizes 2, 4, and 6)
- Fine liner brush (size 0 or 00)
- Palette or paper plate
- Water cup and paper towels
- Chalk marker or dry-erase marker (optional for sketching)
Step 1: Preparation & Sketching
-
Clean the Surface:
Thoroughly clean the window pane with glass cleaner to remove dust and fingerprints. Follow up by wiping the area where you’ll be painting with rubbing alcohol on a paper towel; this removes invisible grease and ensures the paint adheres properly. -
Plan the Composition:
Visualize the branch starting from the bottom left corner. It should curve naturally upward and outward toward the center right of the pane. You want a main thick branch that tapers off into thinner twigs. -
Rough Sketch:
Use a white chalk marker or dry-erase marker to lightly sketch the main skeleton of your tree. Don’t worry about perfection here; this is just a guide that provides a roadmap for your brush. Keep the lines loose and flowing.
Paint Slipping?
If paint streaks or lifts off the glass, you’re likely brushing too hard over wet layers. Let each layer dry completely (use a hair dryer on cool) before adding details on top.
Step 2: Painting the Structure
-
Mix the Base Brown:
On your palette, mix burnt umber with a tiny touch of black to create a deep, dark brown. If the paint feels too thick, add a drop of water to improve flow, but keep it opaque. -
Paint the Main Branch:
Using a size 6 round brush, paint the thickest part of the branch originating from the corner. Apply the paint with confident strokes, allowing the width to vary slightly to mimic natural wood. -
Extend secondary Branches:
Switch to a size 4 brush. Extend smaller branches off the main trunk. Remember that tree branches usually angle upward seeking sunlight, forming ‘Y’ shapes as they split. -
Add Fine Bark Texture:
While the base coat is still slightly tacky, mix raw sienna with a little white. Use a liner brush or a nearly dry size 2 brush to streak highlights along the top edges of the branches where light would hit. -
Create Depth:
With the same liner brush, take some pure black or very dark brown and add thin, jagged lines on the underside of branches to create shadow and emphasize the rough bark texture. -
Paint the Twigs:
Use your finest liner brush (size 0) with a thinned-down dark brown to pull out delicate, spindly twigs at the ends of the branches. These should be whisper-thin and somewhat jagged.
Add Sparkle
Mix a tiny amount of iridescent medium or clear glitter glue into your lightest pink highlight color. It will catch the sunlight beautifully when the day is bright.
Step 3: Adding the Blossoms
-
Mix Blossom Shades:
Prepare three puddles of pink: a dark magenta for centers, a medium soft pink for petals, and a very pale pink (almost white) for highlights. -
Block in Main Flowers:
Identify spots for the fully open blossoms. Using a size 4 round brush loaded with medium pink, press the brush down to create five distinct petal shapes in a circle. I like to leave a tiny gap in the center. -
Paint the Petal Details:
Once the base pink is dry to the touch, take your pale pink mix. Add a small stroke inside each petal, starting from the outer edge and pulling toward the center, to give the flower dimension and cupping. -
Add Flower Centers:
Dip the tip of a size 2 brush into the dark magenta. Dab a small cluster of dots in the very center of each open flower. You can also add a tiny dot of yellow ochre or white in the middle of that cluster for pollen. -
Create Stamens:
Using the liner brush and dark magenta or thin brown, draw extremely fine lines radiating from the flower center, topping each with a tiny dot. -
Paint Closed Buds:
Scattered along the thinner twigs, paint small tear-drop shapes in darker pink. These represent the unsprouted buds. Group them in pairs or let them sit singly on the branch tips. -
Connect Buds to Stems:
Use your liner brush with the dark branch color to paint tiny green or brown stems (calyxes) that cup the bottom of each bud and connect it firmly to the wood. -
Falling Petals:
For a whimsical touch, paint two or three single petals ‘floating’ in the air away from the main branch, as if a spring breeze just blew past. -
Final Cleanup:
Check your work through the other side of the glass if possible to see missed spots. Use a damp cotton swab or a razor blade to gently scrape away any errant paint splatters or wobbly edges once everything is fully dry.
Step back and enjoy the permanent spring view you’ve created right on your window pane


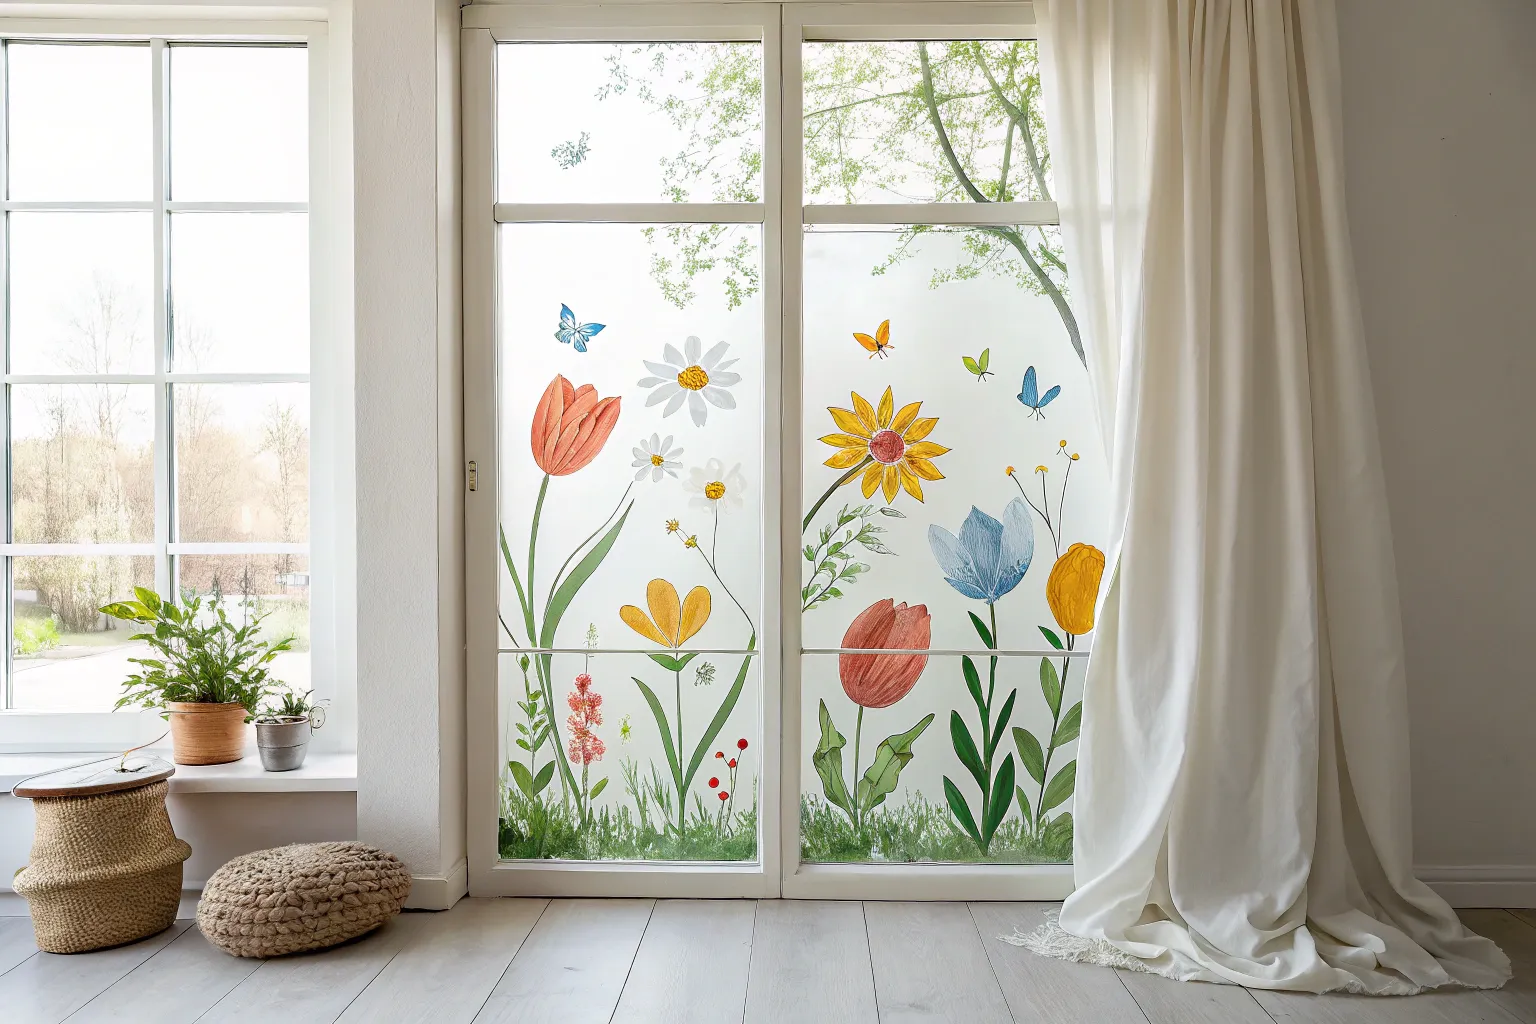
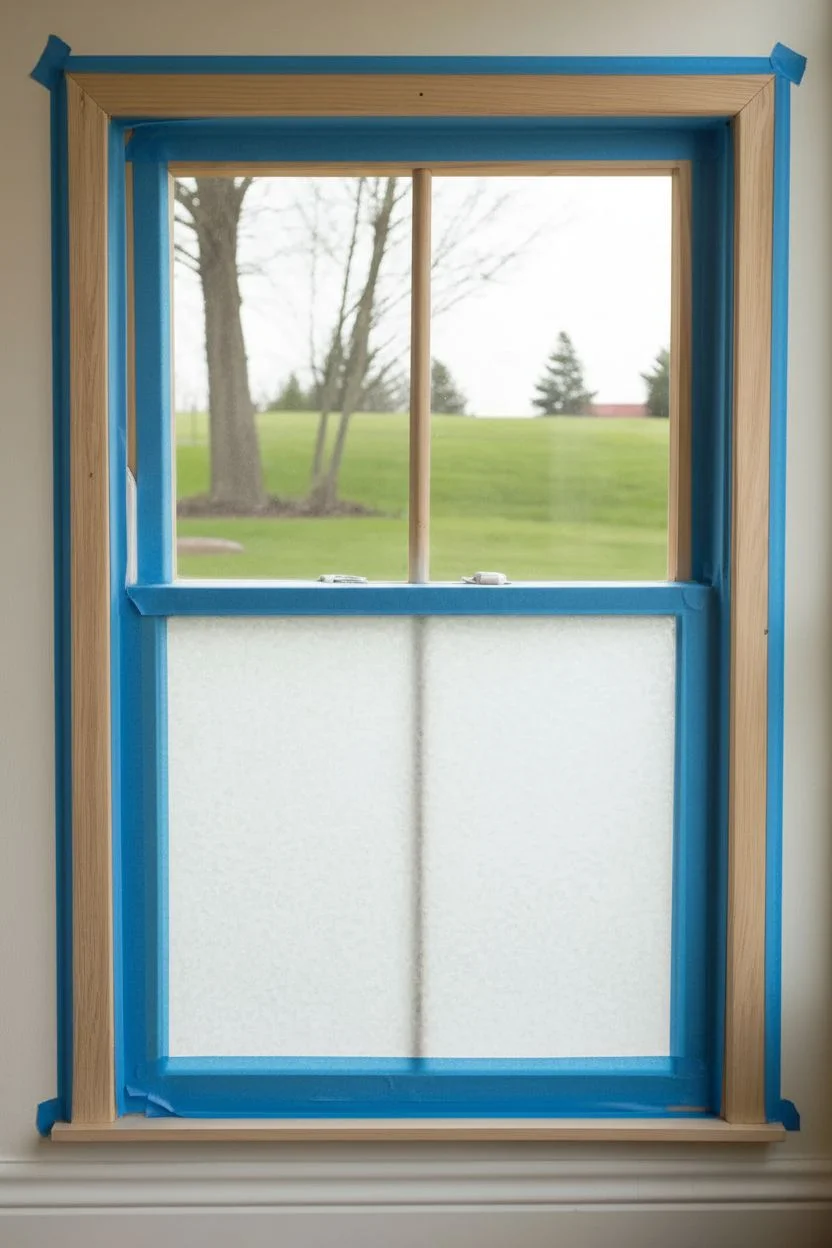
Faux Stained Glass Spring Florals
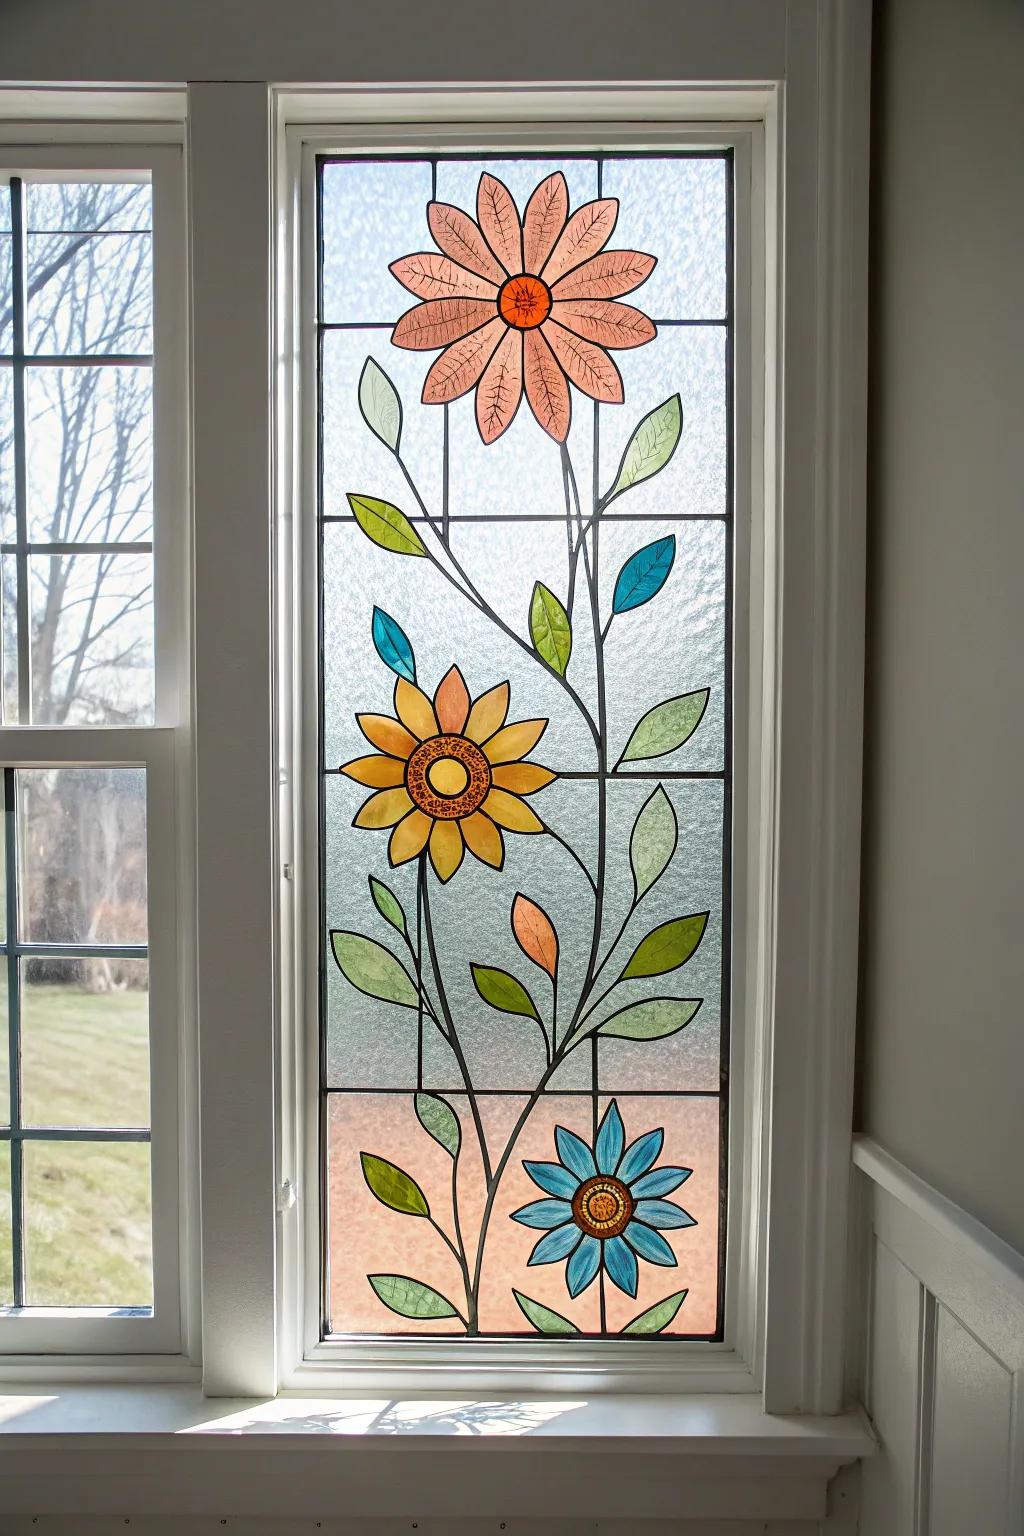
Transform a plain window pane into a glowing work of art that captures the delicate beauty of spring wildflowers. This faux stained glass technique uses gallery glass paints and liquid leading to create distinct, textured floral motifs that look stunning when the sun shines through.
Step-by-Step Tutorial
Materials
- Clean glass window pane (in frame)
- Black liquid leading
- Gallery Glass paints (Pink, Yellow, Orange, Blue, Green, Clear/Frost)
- Printed floral pattern (sized to window)
- Painter’s tape
- Toothpicks or a skewer
- Paper towels
- Glass cleaner and lint-free cloth
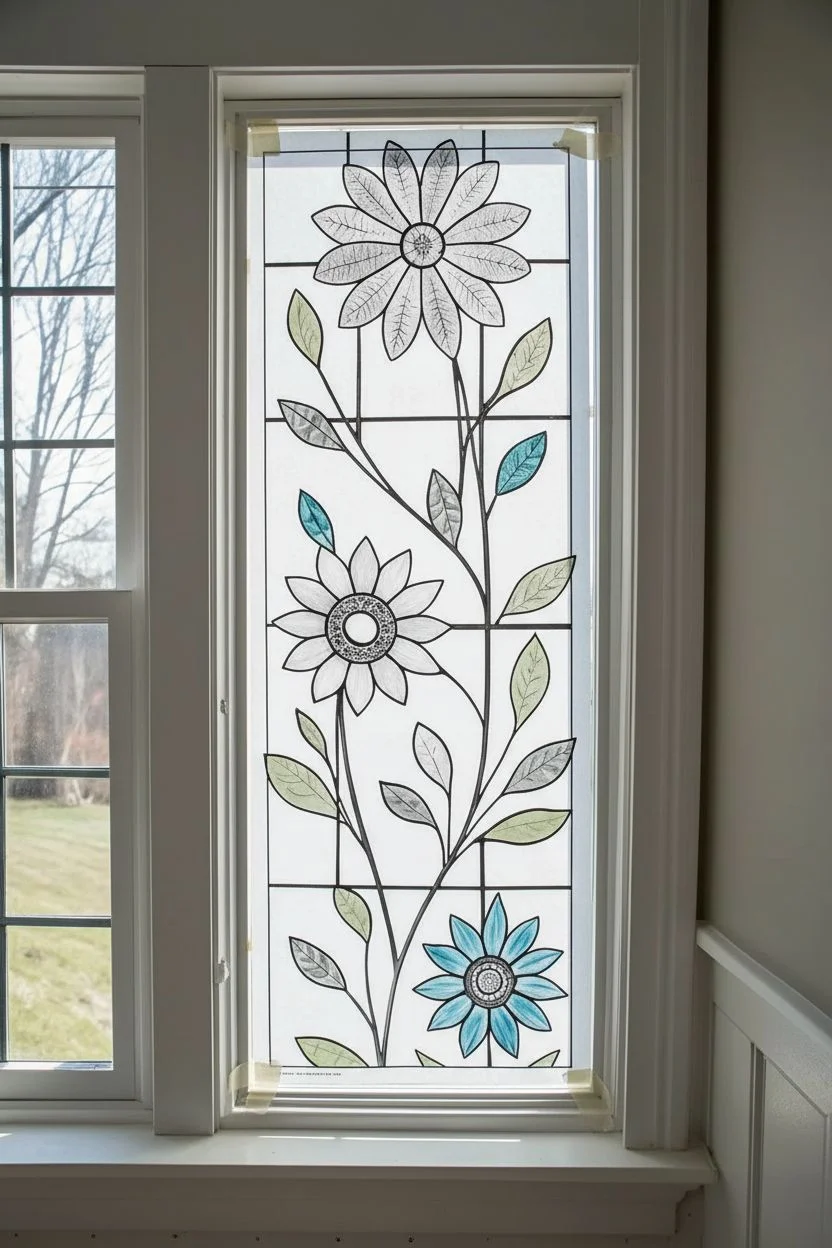
Step 1: Preparation & Mapping
-
Clean the Surface:
Begin by thoroughly cleaning the window pane with glass cleaner and a lint-free cloth to remove any dust, grease, or fingerprints. A clean surface ensures the leading and paint adhere properly. -
Ideally, Work Horizontally:
If possible, this project works best if you can remove the window sash and lay it flat on a table. If painting vertically is necessary, you will need to work in lighter coats to prevent drips. -
Position the Pattern:
Tape your printed floral pattern to the backside (exterior side) of the glass. Ensure the grid lines of the pattern align with any mullions or the frame edges for a professional look.
Fixing Gaps
If you see gaps of light between the color and the black leading after drying, just apply a small amount of fresh paint into the gap. It will fuse with the dry layer seamlessly.
Step 2: Creating the Lead Lines
-
Start the Main Grid:
Using the bottle of black liquid leading directly, trace the straight grid lines of the background first. Keep the tip slightly above the glass and let the line fall into place for a smoother finish. -
Outline the Stems:
Next, trace the long, curving main stems that run vertically through the design. Apply steady pressure to the bottle to maintain a consistent line thickness. -
Trace Flower Heads:
Carefully outline the petals of the top pink flower, middle yellow sunflower, and bottom blue daisy. Connect each petal to the central disk clearly. -
Add Leaf Details:
Fill in the outlines for all the leaves branching off the stems. Don’t worry if lines cross effectively; the leading creates separate cells for the color. -
Rectify Mistakes:
If a line goes astray, let it dry completely, then simply peel it up with a razor blade or craft knife and re-do that section. -
Dry the Leading:
Allow the leading to dry for at least 8 to 12 hours. The lines must be hard and cured before you start adding color.
Add Sparkle
For extra magic, sprinkle a tiny pinch of ultra-fine clear glitter into the wet paint of the flower centers. It catches the sunlight beautifully without looking like a craft project.
Step 3: Painting the Florals
-
Fill the Top Flower:
Start with the large pink flower at the top. Squeeze pink gallery glass paint into the petal shapes, ensuring the paint touches the leading edges to form a seal. -
Texture the Petals:
While the paint is wet, use a toothpick to swirl the paint slightly or pull it from the center outward. This adds a realistic glass-like grain to the finish. -
Paint the Sunflower:
Fill the middle flower’s petals with bright yellow paint. For the center, use a golden orange hue, and while wet, tap it with a toothpick to create a seeded look. -
Complete the Blue Daisy:
Move to the bottom flower, filling the petals with a light blue shade. I like to add a tiny drop of white near the tips and swirl it in for a variegated effect. -
Color the Leaves:
Fill the leaf shapes with various shades of green. To create depth, you can use a lighter lime green on one half of a leaf and a darker forest green on the other, swirling them where they meet. -
Add Accent Leaves:
Notice the few non-green leaves in the design (the blue and orange ones). Fill these with their respective accent colors to balance the composition. -
Pop the Bubbles:
Inspect your wet paint closely for air bubbles. Pop them instantly with a sharp toothpick so they don’t dry into the final piece.
Step 4: Background & Finishing
-
Fill the Background:
For the clear ‘frosted’ glass look, fill the remaining empty background sections with Crystal Clear or Frost gallery glass paint. Apply it generously. -
Create Texture:
Immediately heavily tap the wet clear paint with a stiff brush or the tip of the bottle to create a pebbled, textured surface that mimics privacy glass. -
Add the Bottom Panel:
For the bottom rectangular section, use a pale peach or very light terracotta color to ‘ground’ the design, applying it smoothly. -
Final Cure:
Let the window dry undisturbed for at least 24-48 hours. The paint will evolve from cloudy to transparent as it cures.
Once fully cured, reinstall your window sash and enjoy the permanent blooms brightening up your view
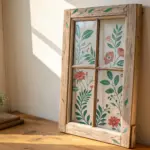
Negative Space Flower Silhouettes
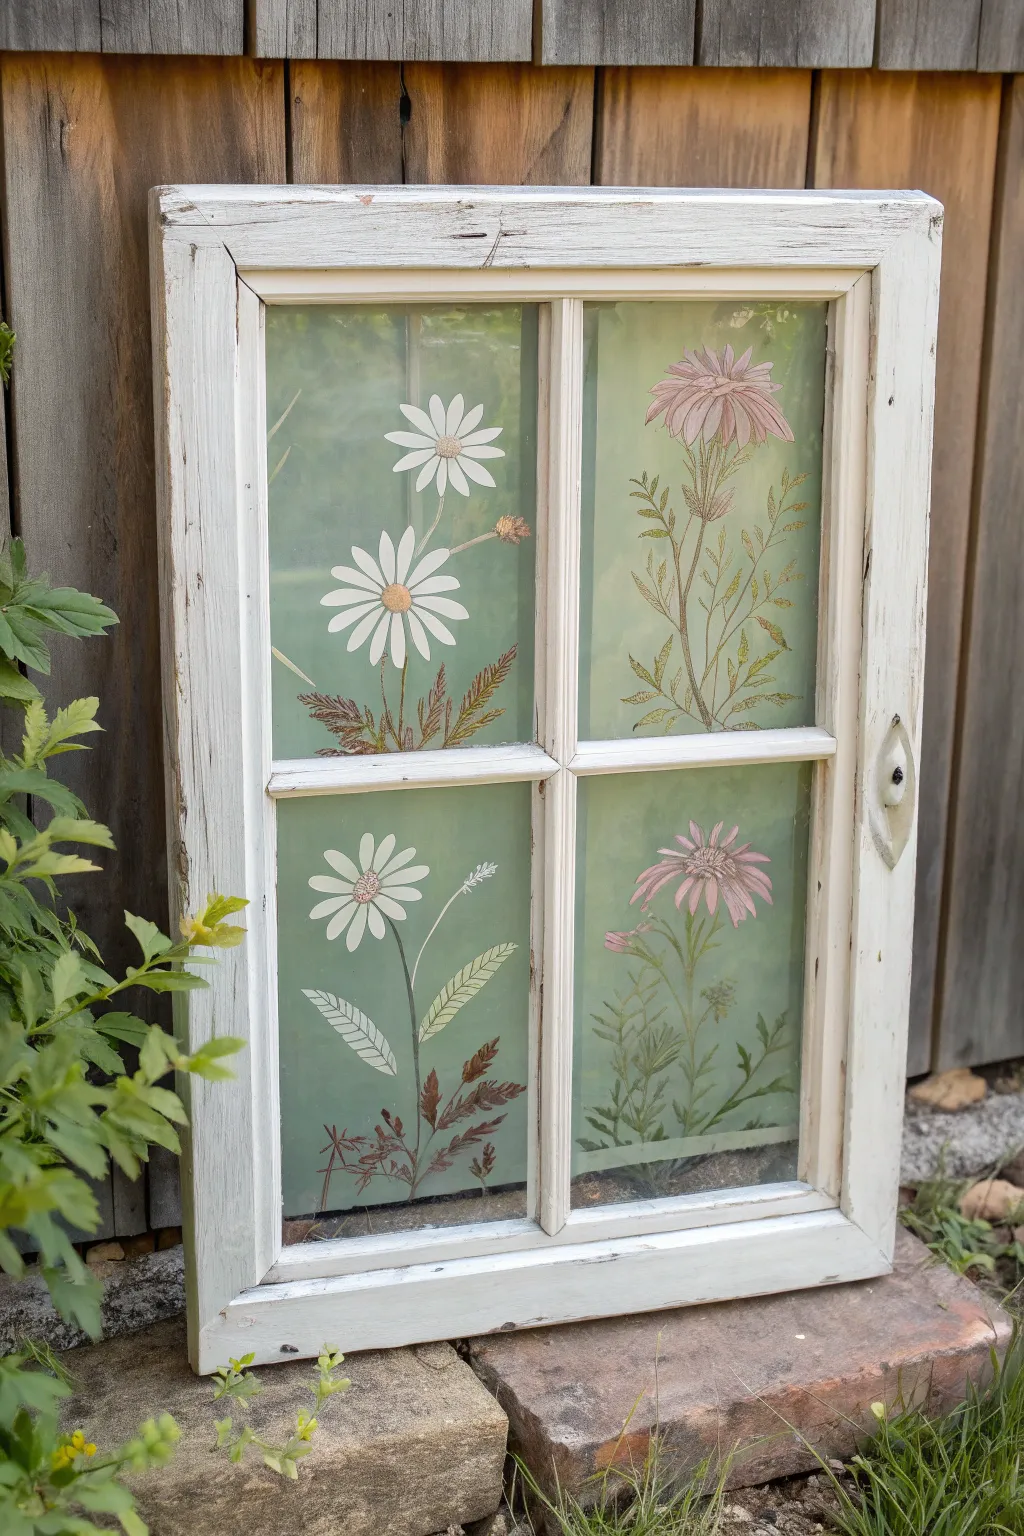
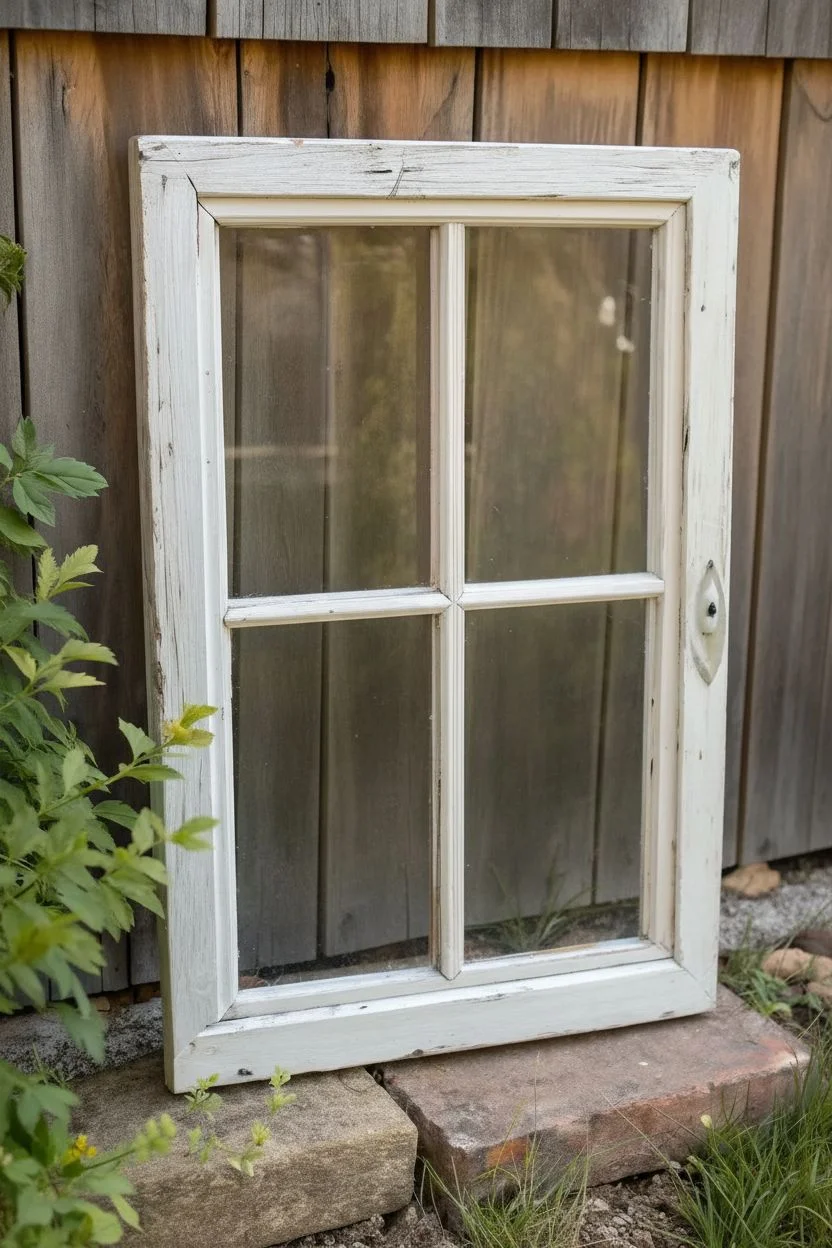
Transform an old, weathered window pane into a charming garden display with delicate floral silhouettes and soft botanical details. This project uses translucent layers and vintage-style flower illustrations to create an airy, greenhouse-inspired piece of decor.
Detailed Instructions
Materials
- Old 4-pane wooden window frame
- Glass cleaner and lint-free cloth
- Light green acrylic paint or glass paint (translucent)
- Wide flat brush or sponge applicator
- White chalk paint or acrylic paint (for flowers)
- Pink and brown acrylic paints (for details)
- Fine liner brush (size 0 or 00)
- Small round brush (size 2)
- Botanical reference images or stencils
- Clear matte sealer (optional)
Step 1: Preparation
-
Clean surface:
Begin by thoroughly cleaning both sides of the window glass. Remove any dust, grime, or old paint specks with glass cleaner and a lint-free cloth to ensure a smooth painting surface. -
Assess the frame:
If your window frame is too flaky, give it a light sanding to remove loose chips, but leave the distressed white paint for that authentic rustic character.
Step 2: Creating the Background
-
Mix the green tint:
To achieve the hazy, frosted garden look, mix a small amount of light green acrylic paint with a glazing medium or water. You want a very sheer, translucent wash, not an opaque layer. -
Apply the wash:
Using a wide flat brush or a sponge, apply the green wash to the back side of the glass. Using long, even strokes prevents streakiness. I find painting the back gives the artwork depth and protects the main design. -
Let it cure:
Allow this background layer to dry completely. It should look like a soft, sage-green fog on the glass.
Fixing Mistakes
Make a smudge? Simply use a wet Q-tip or a razor blade to gently scrape away dried acrylic paint from the glass without damaging the background wash.
Step 3: Painting the Flowers
-
Outline the daisies:
On the front side of the glass, use a small round brush and white paint to block out the basic shapes of the daisy petals. Start with the top left pane. Keep the paint somewhat thin so it mimics a pressed flower. -
Add stems and leaves:
Switch to a fine liner brush dipping into a mix of brown and green. Draw thin, wispy stems extending from the bottom of the pane up toward your white blooms. -
Paint the pink blooms:
In the right-hand panes, sketch the shape of the coneflower-style blooms using a mix of dusty pink and white. Use short, flicking brushstrokes to create the texture of individual petals. -
Detail the centers:
Once the white petals are dry, use a golden-yellow or light brown to dab in the textured centers of the daisies. A stippling motion works best here for texture. -
Layering foliage:
Add lower foliage using ferns or fern-like leaf shapes. Use a muted green-brown tone to make them look dried or vintage. Vary the opacity to create a sense of depth. -
Refine the petals:
Go back over your white and pink petals with a second, very faint coat to brighten them up if they dried too sheer, but leave some transparency. -
Add fine details:
With your finest brush, add tiny brown veins to the leaves and very delicate lines on the petals to define their shape. This fine detail is what gives it the botanical illustration look.
Level Up
Place pressed dried flowers between two pieces of glass in one of the panes for a mixed-media 3D effect that complements your painted florals.
Step 4: Finishing Touches
-
Clean edges:
Use a razor blade or damp cotton swab to clean up any paint that accidentally got onto the wooden frame or the very edges of the glass. -
Distress (Optional):
If the painting looks too crisp, you can lightly scratch a few areas with fine sandpaper once fully dry to simulate age. -
Seal result:
If you plan to keep this outdoors or in a humid area, apply a clear matte sealer over the painted areas to protect your work from moisture.
Place your finished window in a sunny spot where the light can filter through the painted leaves for a luminous effect
Tape-Resist Raindrops and Spring Sprouts
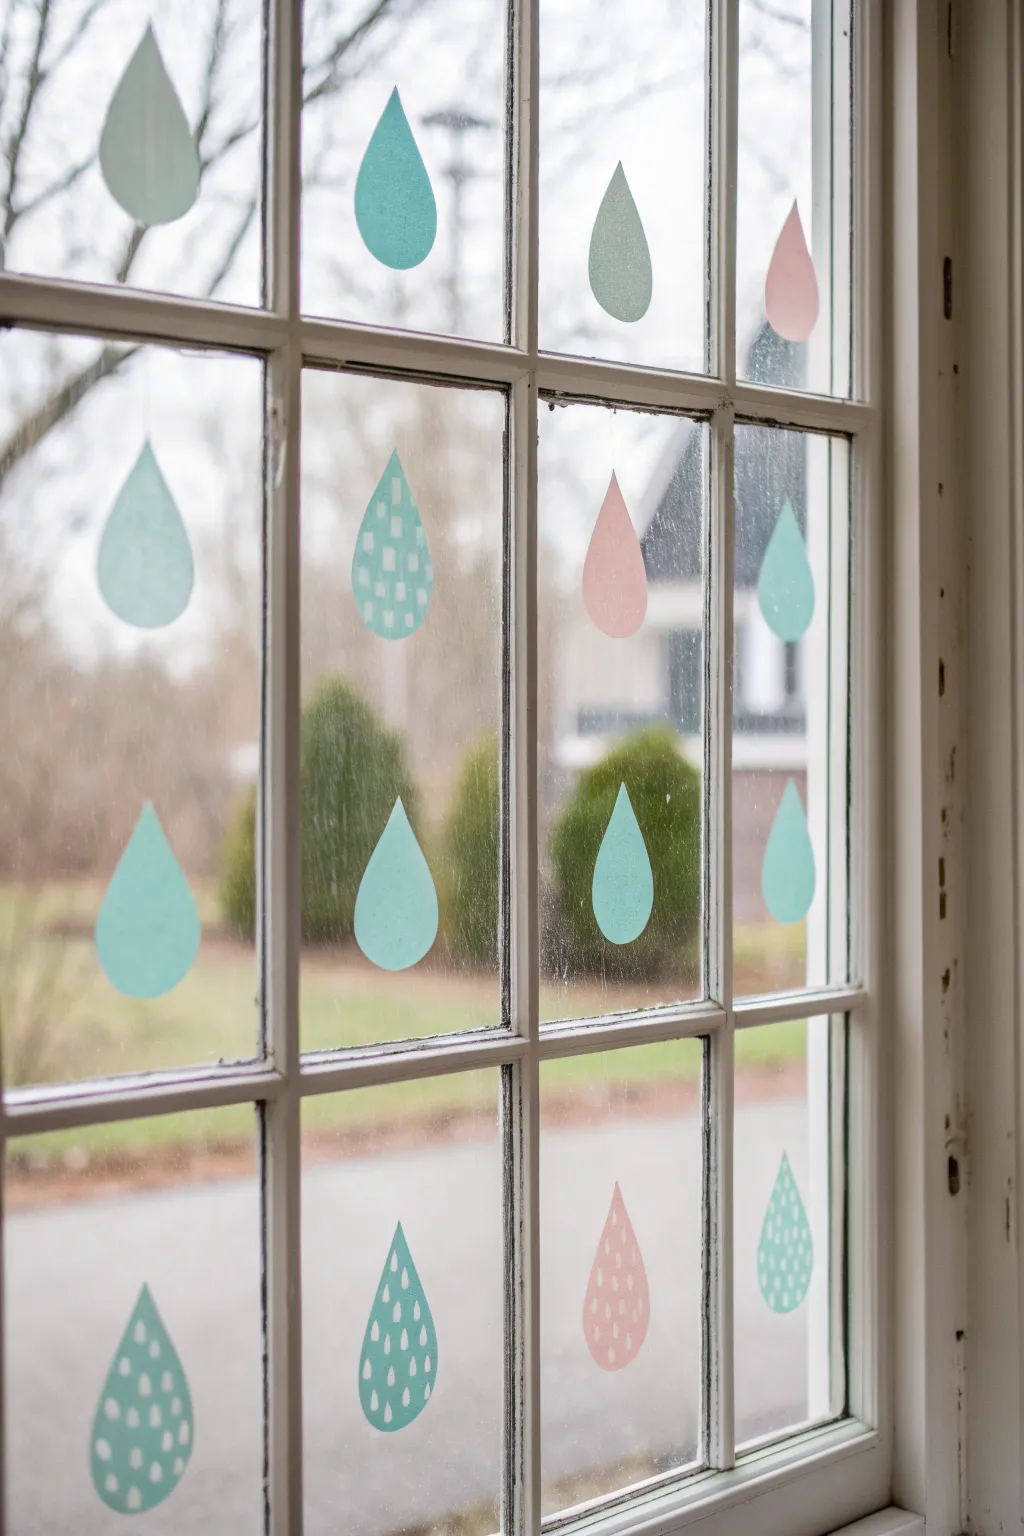
Bring the playful spirit of a spring shower indoors with this charming window display. These suspended paper raindrops create a gentle, floating illusion against the glass, featuring a mix of soft pastels and hand-drawn patterns that catch the light beautifully.
How-To Guide
Materials
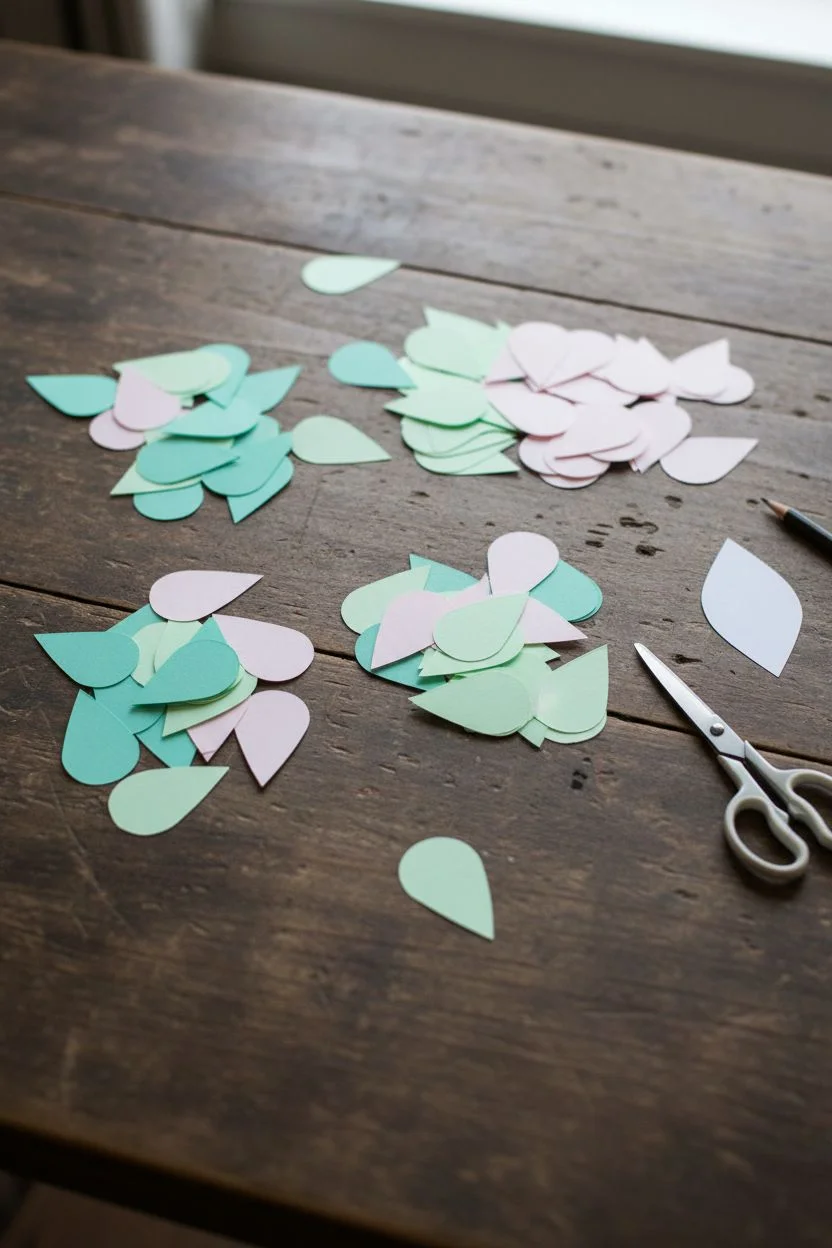
- Cardstock or scrapbook paper (teal, mint green, and pale pink)
- White gel pen or white paint marker (fine tip)
- Scissors
- Pencil
- Clear fishing line or invisible nylon thread
- Clear tape or white painter’s tape
- Ruler
- Teardrop template (optional)
Step 1: Designing the Droplets
-
Create a template:
Start by drawing a simple teardrop shape on a scrap piece of stiff paper or cardboard to use as your master template. Aim for a shape about 3 to 4 inches tall for good visibility. -
Trace the shapes:
Use your template to trace teardrop outlines onto your colored cardstock. I like to mix up the colors, tracing several onto the teal, mint, and pink papers to ensure a varied palette. -
Cut out the drops:
Carefully cut out each raindrop with sharp scissors. Try to keep the curves smooth and rounded to maintain that fluid water-drop look. -
Sort your drops:
Lay out all your cutouts on a table. Separate about half of them to remain solid colors, and set the other half aside to receive patterns.
Tape Trick
Use double-sided tape between two identical paper cutouts to sandwich the fishing line. This hides the tape completely and makes the mobile look great from outside too.
Step 2: Adding Patterns
-
Draw simple dashes:
Take a teal raindrop and use your white gel pen to draw small vertical dashes across the surface. Stagger the rows slightly to create a rain-like texture. -
Create a dot pattern:
On a different droplet, create a polka-dot effect by drawing small, varying sizes of circles. Fill in some circles completely while leaving others as open rings for visual interest. -
Mix and match:
Continue decorating a few more drops, mixing the patterns. Try a grid pattern on a mint drop or tiny ‘v’ shapes on a pink one. Leave the remaining drops solid to balance the design. -
Let the ink dry:
Set the decorated raindrops aside for a few minutes to ensure the white ink or paint allows to dry completely and won’t smudge during assembly.
Step 3: Assembling the Suspension
-
Measure the window:
Measure the height of the window pane where you plan to hang the drops. Cut lengths of clear fishing line that match this height, plus an extra 2 inches for securing. -
Layout the columns:
On a flat surface, arrange your raindrops in vertical columns as you want them to appear on the window. We recommend alternating colors (e.g., teal, pink, teal) and alternating between solid and patterned drops. -
Attach the line:
Flip the raindrops over so the back side is facing up. Lay your pre-cut fishing line down the center of the column of drops. -
Secure with tape:
Use small pieces of clear tape to secure the fishing line to the back of each raindrop. Press firmly to ensure they don’t slide down the line.
Cloud Topper
Cut a large, fluffy white cloud shape from poster board and tape it to the very top window sash. Adjust the lines so the raindrops look like they are falling directly from it.
Step 4: Installation
-
Clean the surface:
Wipe down the inside window frame and glass to ensure a clean surface for adhesion. -
Hang the first strand:
Take your first strand of raindrops and tape the top of the fishing line to the top horizontal frame of your window pane. -
Position the drops:
Step back and check the height. The drops should look suspended in mid-air within the pane. Adjust the tape at the top if necessary. -
Fill the panes:
Repeat the process for each window pane, centering one strand per vertical glass section. -
Trim excess line:
Once you are happy with the arrangement, snip off any excess fishing line hanging below the bottom raindrop or sticking out from the tape at the top.
Enjoy the cozy view of your colorful, permanent rain shower regardless of the weather outside
Sunrise Gradient With Wildflower Silhouettes
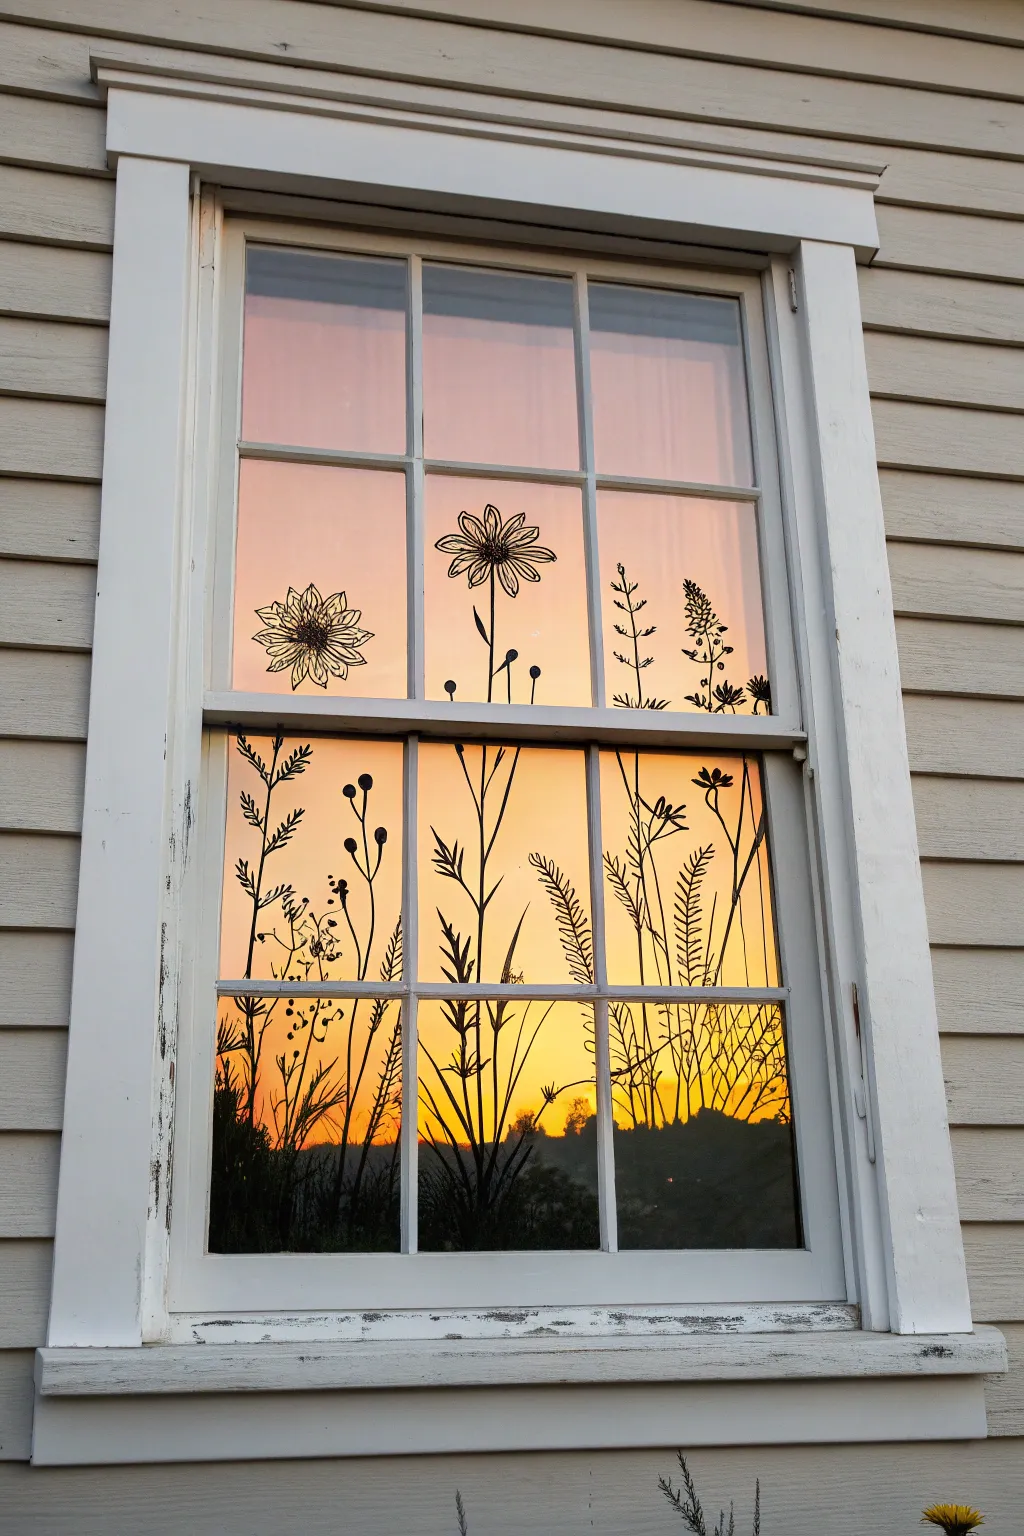
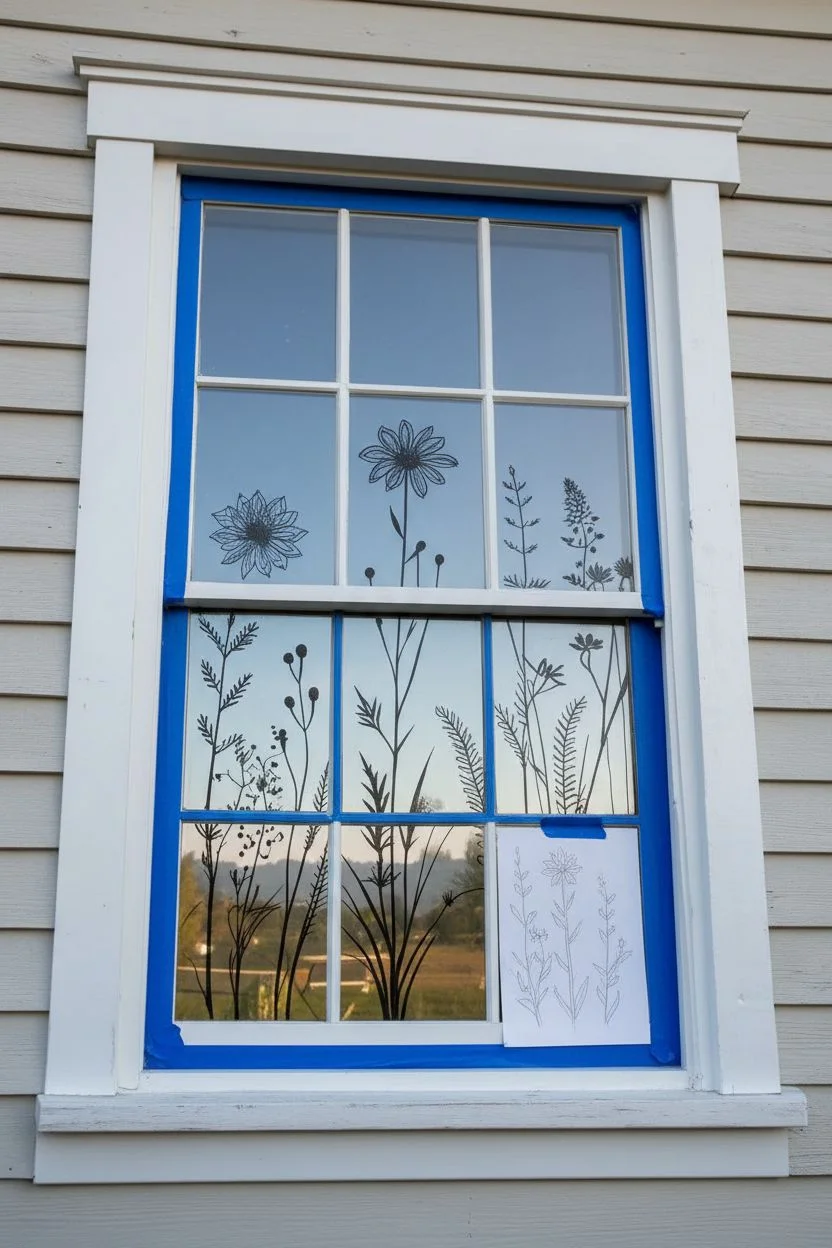
Transform an ordinary window into a breathtaking view with this stunning faux stained glass project. Using a blend of translucent paints for a sunrise gradient and sharp black outlines for wildflower silhouettes, you’ll create a glowing masterpiece that captures golden hour all day long.
Step-by-Step Tutorial
Materials
- Glass cleaner and lint-free cloth
- Gallery Glass or similar translucent window paint (pink, orange, yellow)
- Black liquid leading or black opaque glass paint
- Fine liner brush (for details)
- Sponge dabbers or cosmetic wedges
- Painters tape (optional)
- Paper towels
- Scrap paper for sketching
Step 1: Preparation & Planning
-
Clean surface:
Begin by thoroughly cleaning the window pane on the inside surface. Use glass cleaner and a lint-free cloth to remove all dust, grease, and fingerprints, as these will prevent the paint from adhering properly. -
Tape edges:
If you are worried about getting paint on the window frame, run a strip of painter’s tape along the inner edges of the sash. -
Sketch concept:
Sketch out your wildflower design on a piece of paper first. Plan where the taller stems will go (usually lower panes) and where floating blooms might sit (upper panes) to ensure a balanced composition.
Sponge Tactics
Don’t wipe or brush the background paint! Dabbing up and down creates a stippled texture that diffuses light beautifully and hides brush strokes.
Step 2: Creating the Sunset Gradient
-
Start top section:
Squeeze a small amount of pink translucent glass paint directly onto the upper third of the window pane. Using a sponge dabber, tap the paint gently to spread it out, keeping the layer thin and even. -
Blend downward:
Introduce the orange paint just below the pink while the pink is still wet. Use a clean sponge to dab the orange, slightly overlapping it with the pink section to create a soft, blurred transition. -
Add yellow warmth:
Apply yellow paint to the bottom third of the pane. Blend it upwards into the orange section using the same dabbing motion. This dabbing technique gives the glass a subtle texture that mimics real stained glass. -
Refine the blend:
If distinct lines appear between colors, use a very slightly damp clean sponge to tap over the transition zones again. Working quickly is key here before the paint starts to skin over. -
Dry completely:
Let the gradient background dry fully. This usually takes 2-4 hours depending on humidity, but follow the specific instructions on your paint bottle. The background must be solid before you paint on top.
Step 3: Painting the Silhouettes
-
Outline stems:
Using the black liquid leading bottle or a fine liner brush dipped in black glass paint, start drawing the main stems. Begin at the bottom of the window and pull long, slightly wavering lines upward to mimic natural growth. -
Add leaves:
Along the stems, paint variety in your foliage. Create some fern-like fronds with short, repetitive dashes and other leaves that are broader and more teardrop-shaped. -
Create flower heads:
For the blooms, like the coneflowers or daisies, paint the center oval first. Then, add petals radiating outward. Keep the petals simple and outlined; you don’t need to fill them in completely, allowing the sunset colors to peek through. -
Detailing work:
Switch to your finest brush for delicate details like the tiny wisps on the wheat stalks or the small seed pods. I find that bracing my pinky finger against the dry glass helps steady my hand for these intricate parts. -
Vary heights:
Ensure your flowers reach different heights across the panes. Let some stems cross over the imaginary line where the window sash divides the panes to create visual continuity. -
Ground the bottom:
At the very bottom of the window, paint a slightly denser cluster of grass or leaves. This ‘grounds’ the artwork so the flowers don’t look like they are floating in mid-air.
Season Swaps
Since this paint peels off easily when dry, try changing the silhouettes seasonally! Scrape off the flowers in autumn and paint bare branches or pine trees instead.
Step 4: Finishing Touches
-
Check density:
Step back and look at the silhouette against the light. If the black looks patchy or grey in spots, apply a second coat of black to those specific areas to ensure a crisp, solid silhouette. -
Clean up edges:
If any paint seeped under the tape or got on the frame, use a craft knife or razor blade to gently scrape it away once dry. -
Final cure:
Allow the entire project to cure for at least 24 hours. Avoid cleaning the window with harsh chemicals for the first few weeks to let the paint bond permanently.
Enjoy the warm glow of your eternal sunset every time you look out the window


Have a question or want to share your own experience? I'd love to hear from you in the comments below!