Painting on wood is one of my favorite ways to get that instantly cozy, finished look without needing fancy skills. If you’ve got a few wood slices or scrap boards and some acrylic paint or paint pens, you’re officially in business.
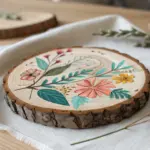
Simple Wildflower Wreath on a Wood Round
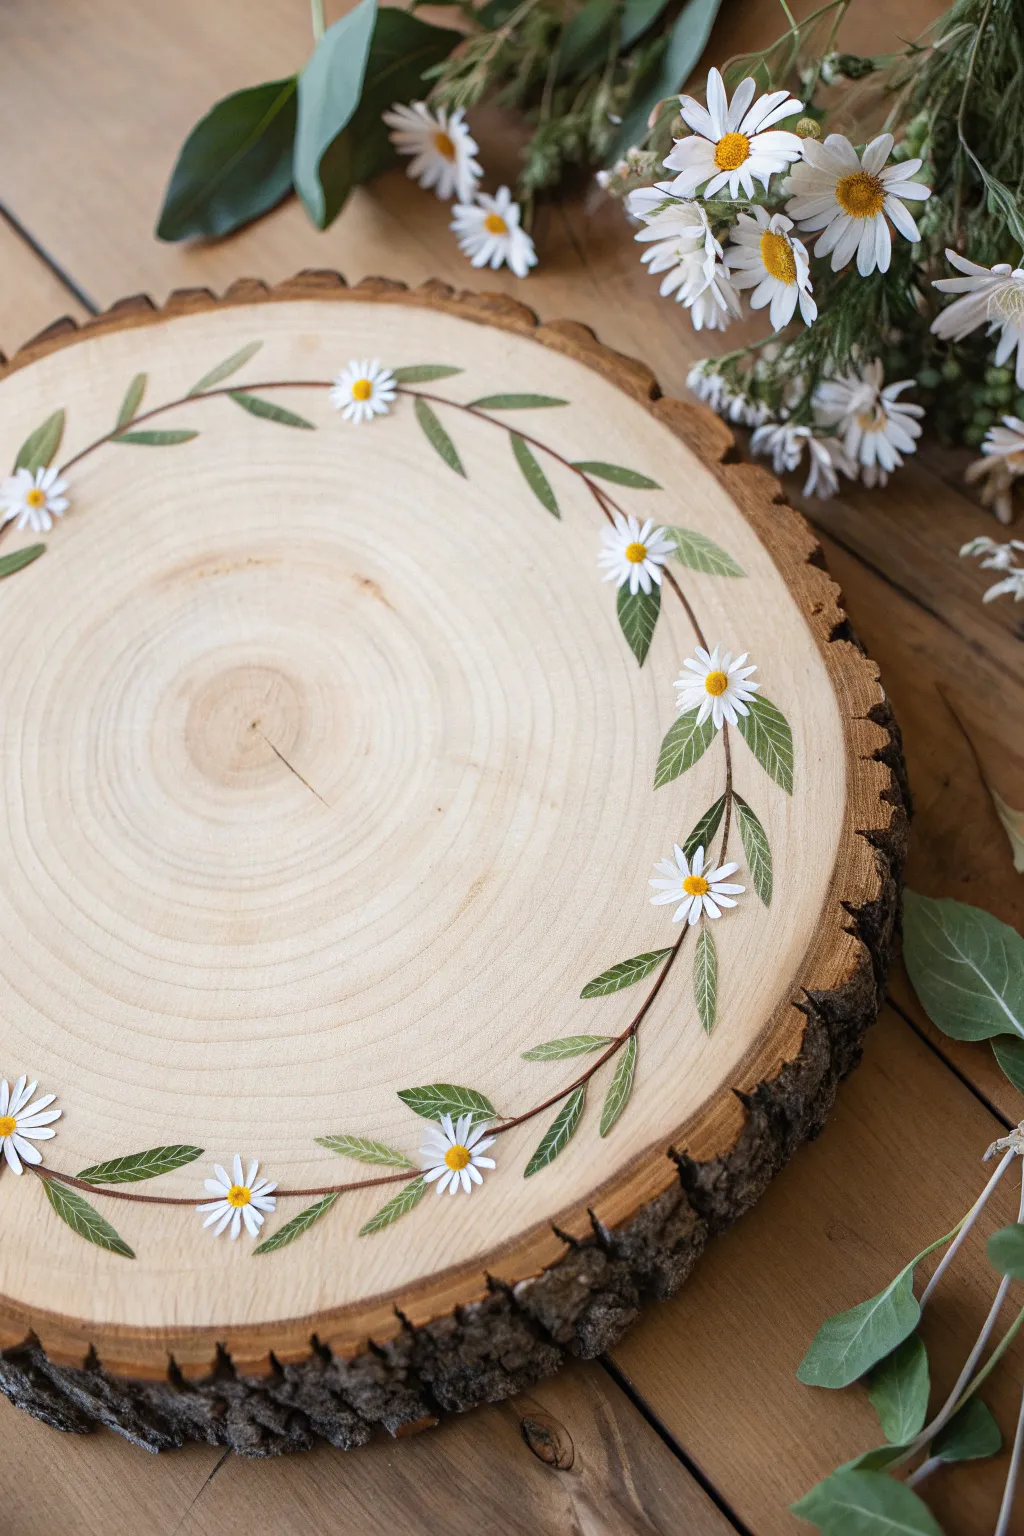
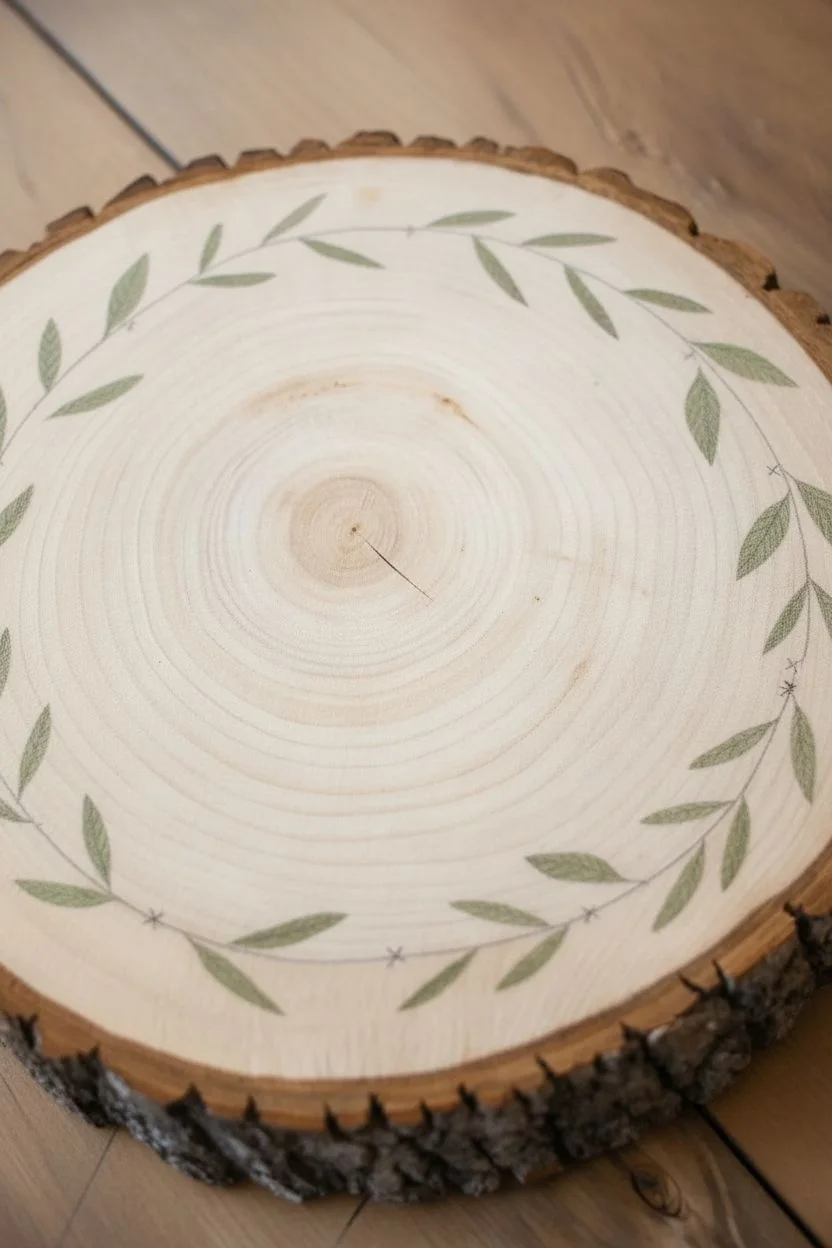
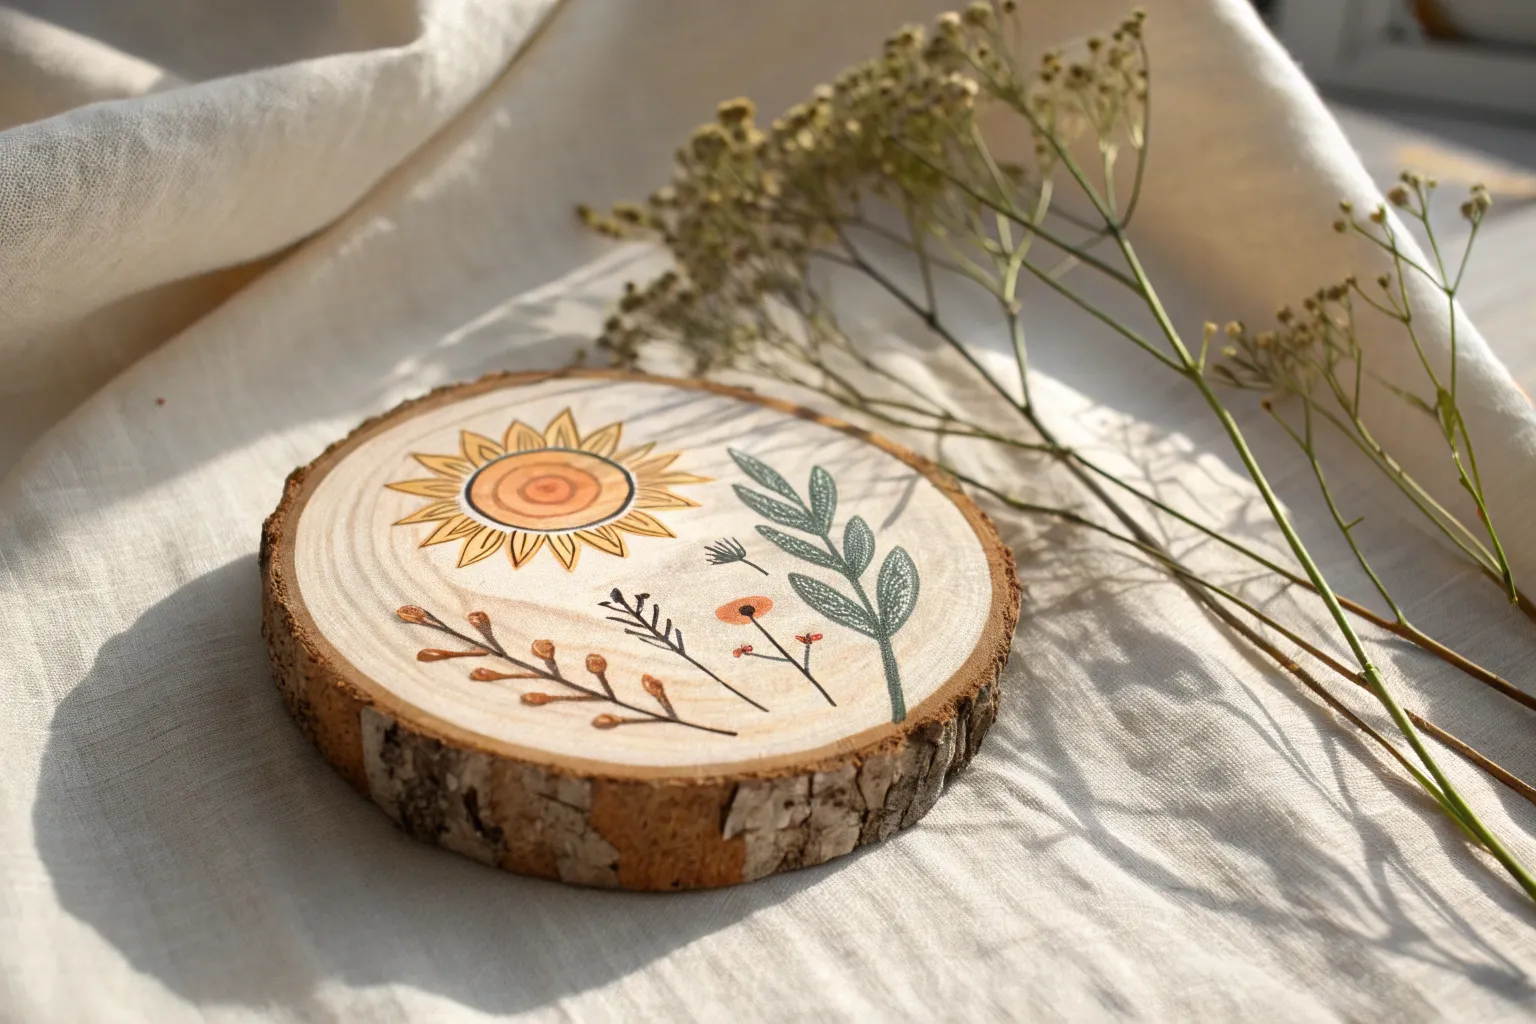
Capture the delicate beauty of a summer meadow with this charming wood slice project. By painting dainty white daisies and lush trailing vines on a rustic surface, you’ll create a piece of natural decor that feels fresh and timeless.
Step-by-Step Guide
Materials
- Large wood slice with bark edge (approx. 10-12 inches)
- Sandpaper (220 grit)
- Matte acrylic craft paints: White, Yellow, Dark Brown, Light Green, Dark Green
- Small round detail brush (size 0 or 1)
- Flat shader brush (small)
- Fine liner brush
- Pencil
- Palette or paper plate
- Paper towels and water cup
- Matte clear sealant spray
Step 1: Preparation & Mapping
-
Surface smoothing:
Begin by lightly sanding the face of your wood slice with 220-grit sandpaper. You want to knock down any rough splinters so your delicate brushstrokes glide smoothly, but keep the natural grain visible. -
Clean up dust:
Wipe the surface firmly with a dry microfiber cloth or tack cloth to remove all sanding dust. Any leftover particles will get trapped in your paint and ruin the finish. -
Sketch the vine:
Using a pencil with a very light hand, draw a large circle about 1-2 inches inward from the bark edge. The circle doesn’t need to be perfect; a little organic wobble adds character. -
Mark floral placements:
Along your pencil circle, make tiny marks where you want your daisy centers to be. Space them somewhat evenly, but leave a few wider gaps for just leaves to keep the design airy.
Uneven Petals?
If your petals look sloppy, wait for the white to dry. Use a toothpick to gently scrape away excess paint or sharpen the edges before sealing.
Step 2: Painting the Vine & Leaves
-
Mix your vine color:
Load your fine liner brush with thinned dark brown paint. Adding a tiny drop of water helps the paint flow gracefully for long lines. -
Trace the main stem:
Paint over your pencil circle with the brown liner brush. Use short strokes that connect seamlessly if you can’t do one long continuous sweep. -
Mix leaf shades:
On your palette, put out your light and dark green paints. I like to mix a tiny bit of brown into the dark green to make it look more earthy and less like plastic. -
Paint leaf shapes:
Using your small round brush, paint pairs of elongated, pointed leaves branching off the vine. Press down at the base of the leaf and lift up as you drag outward to create a sharp tip. -
Variable leaf sizes:
Make some leaves larger and fuller, and others tiny and barely budding. Varying the size creates a realistic sense of growth. -
Add dimension:
While the green is still slightly wet, dip the tip of your brush in the lighter green and streak it through the center of a few leaves to mimic light hitting the foliage.
Add a Bee Friend
Paint a tiny bumblebee hovering near one of the daisies. Use yellow and black stripes with translucent grey wings to bring the scene to life.
Step 3: Adding the Daisies
-
Paint yellow centers:
Switch to a clean small round brush. Dip into your yellow paint and dab small, slightly raised dots where you marked your flower placements. -
Let centers dry:
Wait about 10 minutes for these yellow dots to dry completely. Painting white petals over wet yellow will turn muddy. -
Paint the first petals:
Using white paint and your smallest detail brush, paint thin petals radiating outward from a yellow center. Think of them like clock hands—paint 12, 3, 6, and 9 first to keep spacing even. -
Fill in the gaps:
Fill in the spaces between your compass points with more white petals. Don’t worry if they overlap slightly; nature isn’t perfectly symmetrical. -
Shape variation:
For a few flowers, paint petals shorter on one side and longer on the other to make the flower look like it is facing sideways rather than straight up. -
Second coat:
White paint is often sheer. Once the first layer of petals is dry, go back over them with a second coat to make the white pop against the wood grain. -
Final center details:
Mix a tiny amount of orange or light brown and add meager speckles to the bottom edge of your yellow centers. This gives the flower heads a 3D effect.
Step 4: Finishing Touches
-
Connect flowers to vine:
Use your liner brush and the brown paint to add tiny stems connecting the back of the flower heads to the main vine. -
Erase pencil marks:
Once you are absolutely certain the paint is bone dry, gently erase any visible pencil guidelines. -
Seal the piece:
Take the wood slice to a well-ventilated area and spray with a matte clear sealant to protect the paint from chipping and dust over time.
Hang your rustic masterpiece on a gallery wall or use it as a stunning centerpiece for your dining table to enjoy nature’s charm indoors


Black Silhouette Pines Over a Sunset Sky
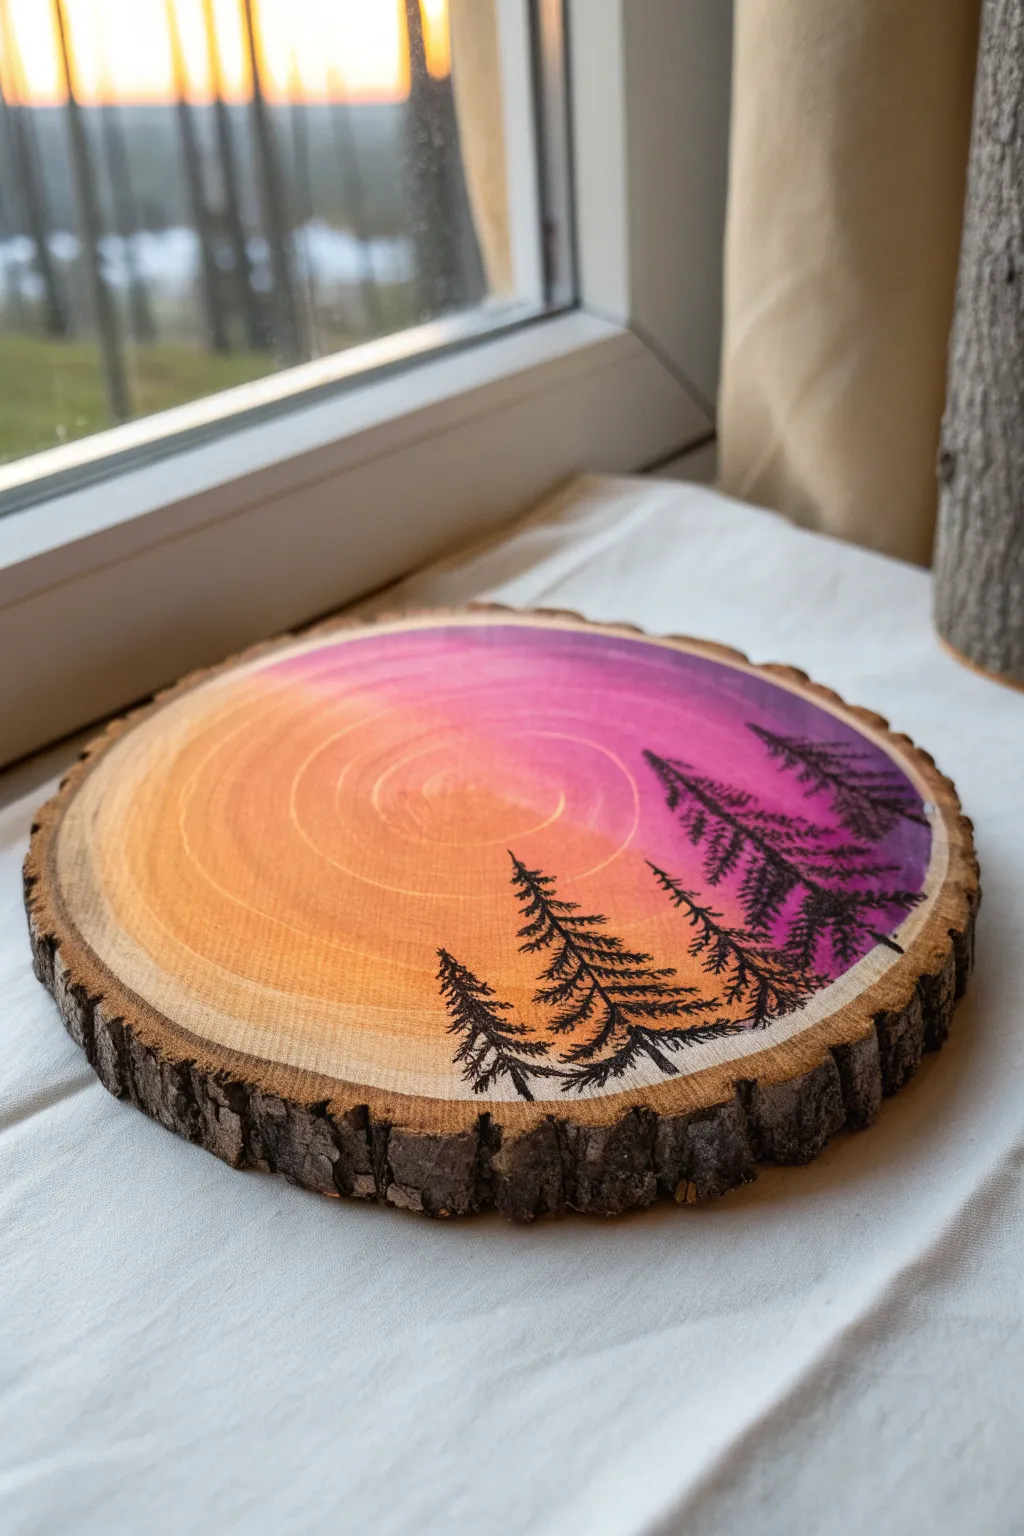
Capture the magic of twilight with this stunning wood slice art, featuring a vibrant gradient sky that blends seamlessly from warm orange to deep violet. The striking black pine silhouettes create a peaceful, rustic scene perfect for bringing a bit of the outdoors inside.
How-To Guide
Materials
- Wood slice with bark edge (approx. 6-8 inch diameter)
- Fine grit sandpaper (220-320 grit)
- Acrylic craft paints: White, Light Orange/Yellow, vibrant Orange, Magenta, Deep Purple, and Black
- Soft synthetic flat brushes (medium and large)
- Small round detail brush or liner brush (size 0 or 1)
- Cup of water and paper towels
- Matte or satin clear sealant spray (optional)
Step 1: Preparing the Canvas
-
Check surface smoothness:
Run your fingers over the face of the wood slice. Even if it came pre-sanded, give it a quick pass with 220-grit sandpaper to ensure the grain is ultra-smooth. This prevents the paint from soaking in unevenly. -
Clean the dust:
Wipe the surface thoroughly with a dry cloth or tack cloth to remove every speck of sawdust. Any remaining dust will create bumps in your sky gradient. -
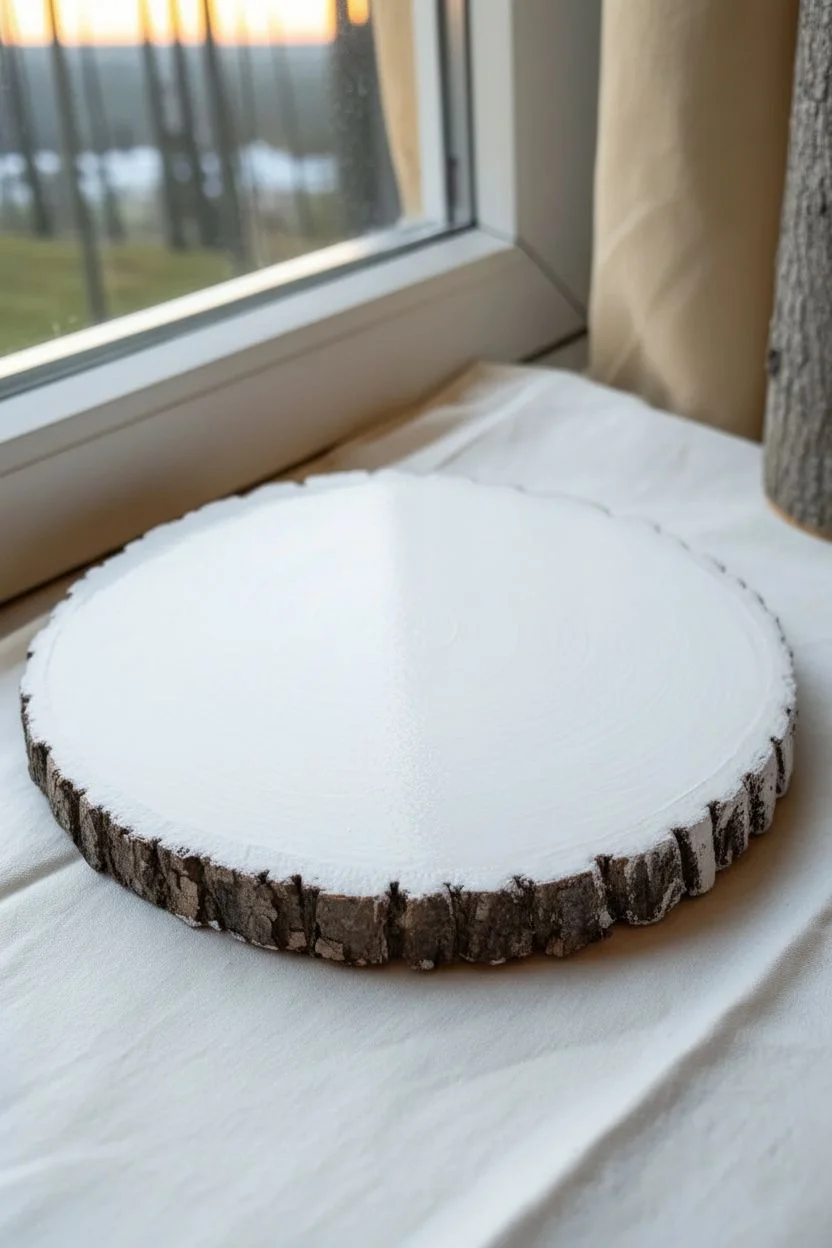
Apply a base coat:
Paint a thin, even layer of white acrylic paint over the entire face of the wood slice, stopping just before the bark. This acts as a primer and ensures your sunset colors will pop rather than sinking into the wood tones. -
Let it dry completely:
Allow the white base coat to dry fully. If the wood grain raised up and feels rough after painting, do a very light sanding and wipe clean again.
Gradient Not Blending?
If paints dry too fast to blend, mist the wood lightly with water or use a ‘slow-dry medium’ mixed into your acrylics to keep them workable longer.
Step 2: Painting the Sunset Sky
-
Mix your palette:
Squeeze out your yellow-orange, orange, magenta, and purple paints. Having them ready is crucial because acrylics dry fast and we need to blend while wet. -
Start with the lightest tone:
using a clean flat brush, paint a curved section on the left side of the wood slice using your lightest yellow-orange. This represents the last light of the sun. -
Add the mid-tones:
Without cleaning your brush fully, pick up the vibrant orange. Apply this next to the yellow, brushing back and forth where the colors meet to blur the line. -
Introduce the pinks:
Switch to magenta. Paint an arc next to the orange, blending immediately while both paints are wet. You want a soft transition, not stripes. -
Finish with deep purple:
Apply the purple to the far right edge of the slice, blending it backward into the magenta. If the transition looks harsh, I sometimes clean the brush slightly and run it lightly over the seam to smooth it out. -
Inspect the gradient:
Step back and look at your sky. If any area looks patchy, apply a second thin coat following the same color order once the first layer is touch-dry. -
Dry time:
Let the gradient background dry completely. It must be bone dry before you start the black trees, or they will bleed into the sky.
Step 3: Adding the Silhouette Trees
-
Plan tree placement:
Visualize where your trees will go. In the example, they are clustered on the right side against the darker purple sky, leaving the bright orange ‘sun’ area open. -
Paint the trunk lines:
Load your fine liner brush with black paint. Dilute it with a tiny drop of water if it feels too thick. Paint thin, vertical lines for the tree trunks. -
Create the top branches:
Start at the very top of a trunk. Use the very tip of your brush to tap tiny, downward-angled dashes. These should be very narrow at the peak. -
Widen the branches:
As you move down the trunk, make your dabbing motions slightly wider. Use a ‘z’ motion or rough tapping to simulate pine needles rather than painting perfect leaves. -
Vary density:
Leave small gaps between branches occasionally so the sunset peeks through. This makes the trees look realistic and less like solid black triangles. -
Anchor the trees:
At the bottom of the trees, tap the black paint heavily to create undersgrowth or a ground line, ensuring the trees don’t look like they are floating. -
Final touches:
Look for any spots that need a slight touch-up. If you want a more jagged look, add a few tiny stray branches sticking out the sides. -
Seal the artwork:
Once the black paint is fully cured (give it at least an hour), spray a light coat of matte or satin sealer to protect the wood and paint from moisture.
Add Starry Details
Once the sky is dry (but before painting trees), flick an old toothbrush loaded with watered-down white paint over the purple section for tiny stars.
Place your finished piece near a window to let natural light enhance those warm sunset hues


Mini Mountain Range on a Wood Round
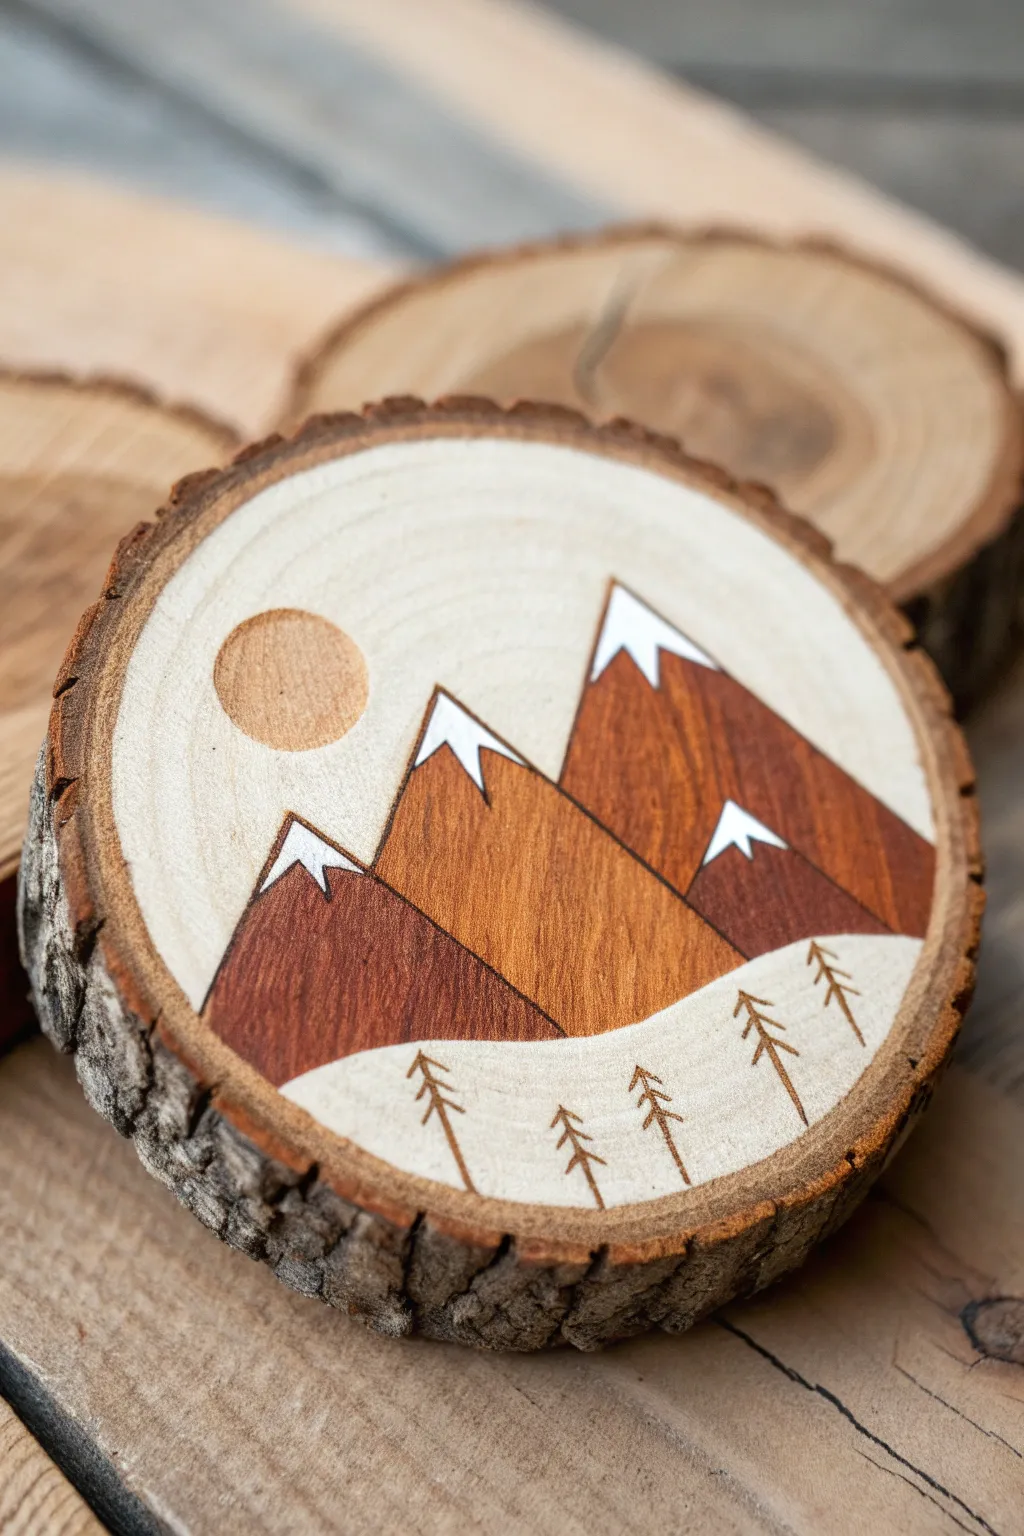
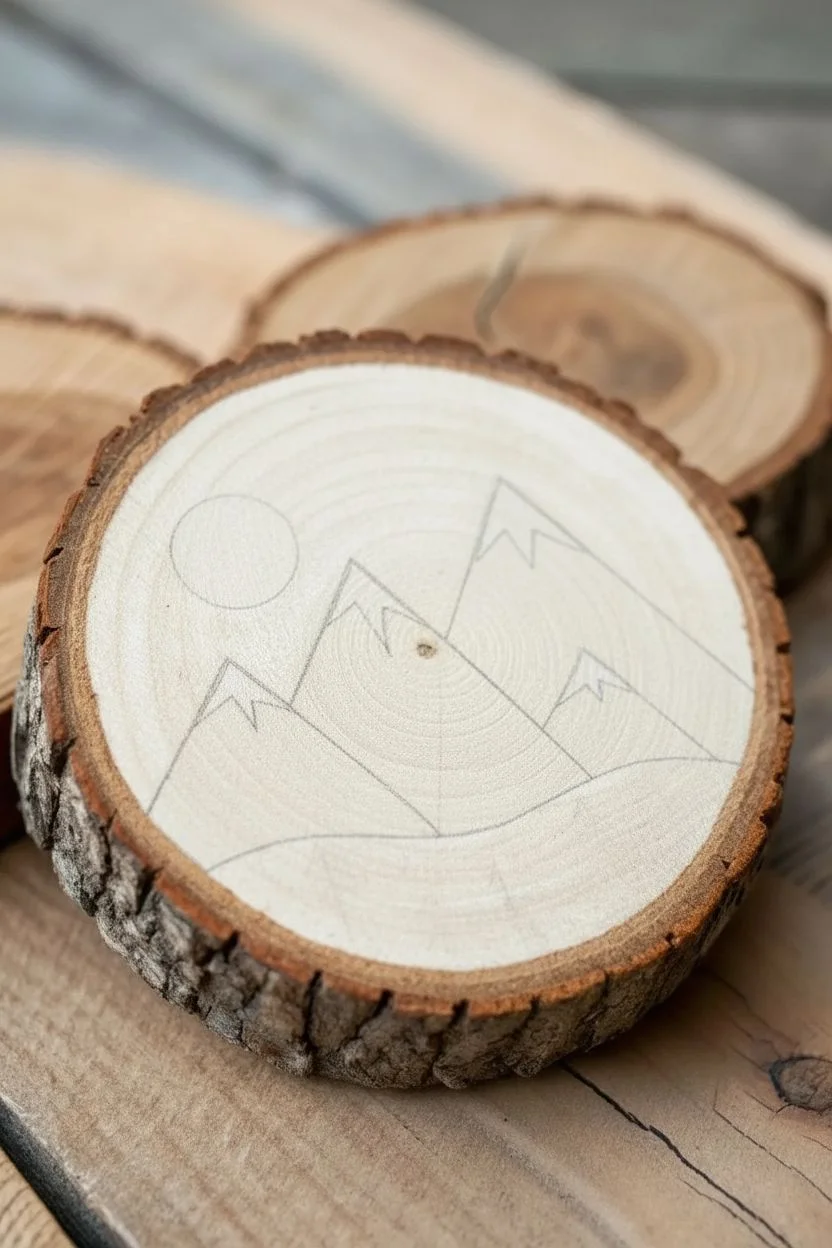
Capture the spirit of the great outdoors with this charming wood slice art featuring layered mountain peaks and delicate pine trees. Using wood stains or diluted acrylics creates warmth while letting the natural grain shine through the design.
Step-by-Step
Materials
- Wood round slice with bark edge (approx. 3-4 inches)
- Pencil and eraser
- Acrylic paints (dark brown, reddish-brown, white)
- Fine grit sandpaper (220-grit)
- Small flat paint brush
- Fine tip detail brush or brown micron pen
- Wood stain (optional, golden oak shade)
- Painters tape or masking tape
- Matte spray sealer
Step 1: Preparation & Sketching
-
Smooth the Canvas:
Begin by lightly sanding the face of your wood slice with 220-grit sandpaper. You want a very smooth surface so your paint glides easily and doesn’t bleed into textured grain lines. Wipe away all dust with a tack cloth or dry rag. -
Map Out the Sun:
Decide on the placement of your sun, positioning it slightly off-center in the upper left quadrant. Use a circular object like a coin or bottle cap to trace a perfect circle lightly with a pencil. -
Draw the Peaks:
Sketch three overlapping triangle shapes for your mountains. Create a large central peak, flanked by two slightly smaller ones in the foreground and background. Keep the bottom edge curved slightly to follow the round shape of the wood slice. -
Add Snow Lines:
Near the top of each triangle, draw jagged, irregular lines to mark where the snow caps will sit later. This guides where you will stop painting the brown tones.
Step 2: Painting the Layers
-
Mix Your Stains:
To achieve that semi-transparent look seen in the photo, you don’t want thick opaque paint. Mix a drop of water into your brown acrylic paints to turn them into a ‘wash,’ or use actual wood stain. -
Paint the Central Mountain:
Start with the middle, largest mountain. Using a flat brush, fill it in with a medium golden-brown or light oak shade. Be careful to stop right at the jagged snow line you drew earlier. -
Paint the Side Mountains:
For the mountains on the left and right, use a slightly darker, reddish-brown wash. This contrast helps separate the peaks visually. Paint carefully up to the snow lines and down to the bottom curve. -
Tint the Sun:
For the sun circle, use a very diluted wash of the golden-brown color. You want it just a shade or two darker than the raw wood background to create a subtle recessed look without being too bold. -
Let it Dry:
Allow these base layers to dry completely. Since the wood absorbs the watery paint, this should only take about 15-20 minutes.
Bleed Prevention
Does your paint bleed into the grain? Apply a thin layer of clear matte medium or Mod Podge over your pencil sketch first. This seals the wood fibers so your lines stay crisp.
Step 3: Details & Finishing
-
Add the Snow Caps:
Using a small brush and un-thinned white acrylic paint, fill in the tips of the mountains. The paint should be opaque enough to cover the wood grain completely for a crisp, bright look. -
Sharpen the Edges:
If your brown sections look a bit uneven, you can carefully outline the mountain slopes with a fine brush using the darker brown paint to make the shapes pop. -
Practice the Trees:
Before drawing on the wood, practice drawing simple stick trees on scrap paper. I prefer to draw a straight vertical line first, then add downward-slanting chevron shapes for the branches. -
Draw the Forest:
Using a fine-tip paintbrush with dark brown paint or a brown permanent art pen, add a row of five small pine trees along the bottom curve of the wood slice. -
Vary Height:
Make the trees slightly different heights and space them unevenly to keep the scene looking natural and organic rather than rigid. -
Seal the Project:
Once all paint and ink are fully cured (give it an hour just to be safe), mist the ornament with a matte clear coat. This protects the raw wood from moisture and prevents the paint from chipping.
Uneven Color Fix
If your faux-stain looks blotchy, wipe it back immediately with a damp detailing cloth. You can then re-apply a second coat once dry for smoother coverage.
Now you have a cozy piece of mountain art ready to display on a shelf or hang on the holiday tree


Polka Dot Pattern Coasters on Wood Slices
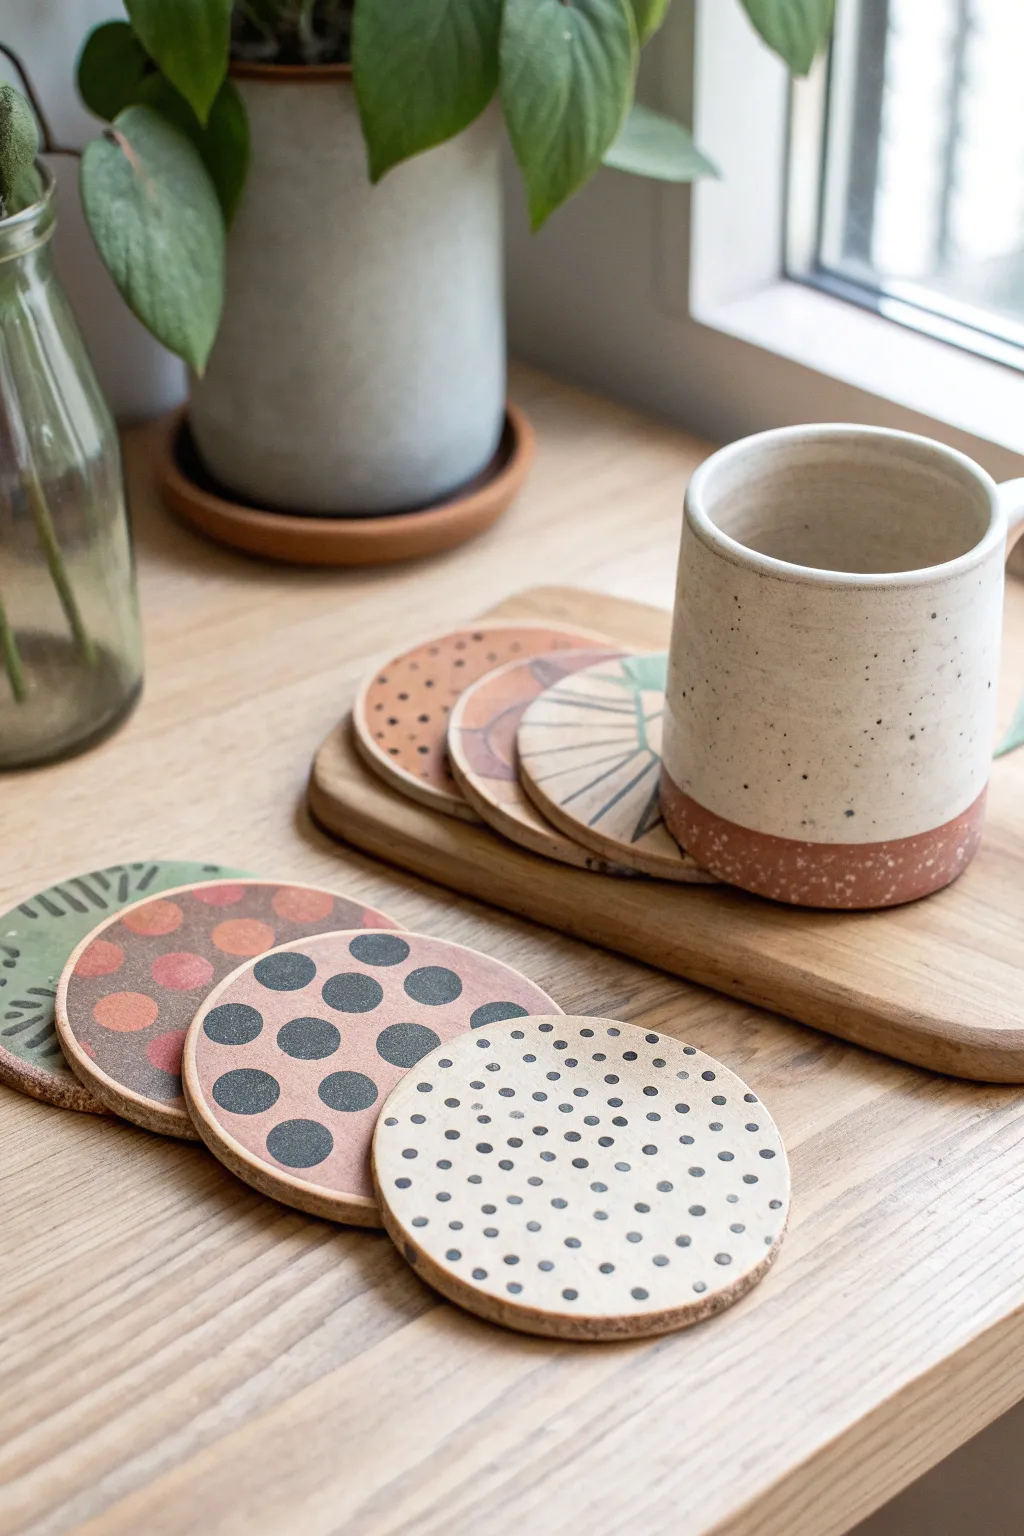
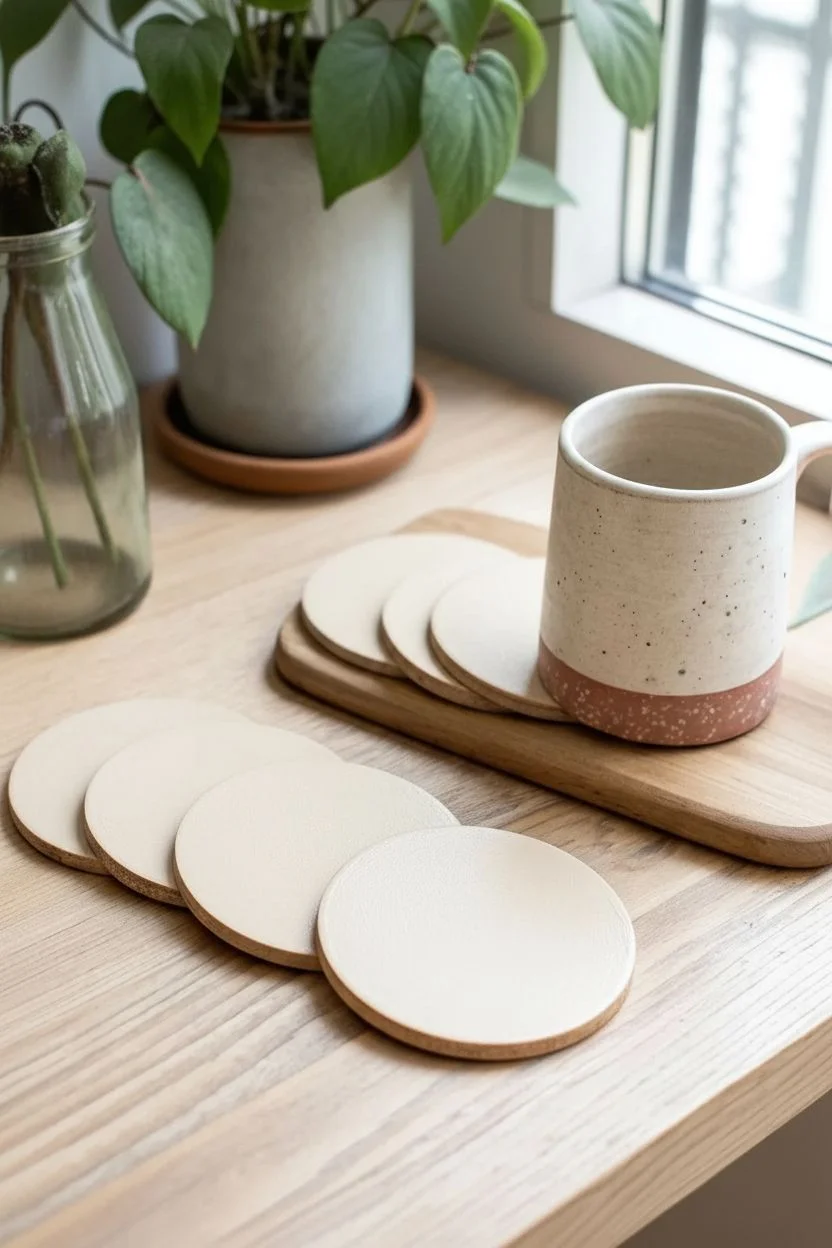
Transform plain circular wood slices or cork into trendy, functional art with simple geometric patterns. These earthy and playful coasters feature various sizes of polka dots in neutral, muted tones that add a warm, handmade touch to any coffee table.
Detailed Instructions
Materials
- Circular wood slices or thick cork rounds (approx. 4 inches diameter)
- Acrylic craft paints (creamy beige, terra cotta, charcoal grey, soft black, sage green)
- Small round paintbrushes (sizes 2 and 4)
- Foam sponge pouncers (various small sizes) (optional)
- Matte mod podge or acrylic sealer
- Fine-grit sandpaper (220 grit)
- Palette for mixing colors
- Paper towels
Step 1: Preparation and Base Coat
-
Sand the surface:
Before painting, lightly sand the surface of your wood slices or cork rounds. You want a smooth canvas free of rough fibers, which helps the paint lay flat. -
Clean dust:
Wipe away all sanding dust with a dry paper towel or a microfiber cloth. Any leftover dust will create bumpy texture in your paint. -
Apply background colors:
Choose a base color for each coaster. For the look in the photo, paint some rounds in a solid creamy beige and others in a soft terra cotta or muted pink. I find that applying two thin coats gives better coverage than one thick, gloppy coat. -
Dry completely:
Let the base coats dry thoroughly for at least 30 minutes. If the wood grain is still raised, do a very light sanding and add one final thin coat.
Use household tools
Make perfect dots without special brushes by using the flat end of a drill bit, a Q-tip, or even the eraser end of a pencil dipped in paint.
Step 2: Painting the Patterns
-
Mix dot colors:
Prepare your accent colors. For beige backgrounds, mix a charcoal grey or soft black. For terra cotta backgrounds, prepare a slightly darker shade of terra cotta or a deep grey for contrast. -
Create large dots:
For the “large dot” design, use a larger brush or a foam pouncer. Dip it into charcoal paint and press firm circles in a loose grid pattern. Don’t worry about perfect spacing; the hand-painted look adds charm. -
Create micro dots:
For the “micro dot” design on a beige background, switch to your smallest round brush (size 2). Dip just the tip into black or dark grey paint. -
Paint the micro pattern:
Lightly touch the brush to the surface to create tiny specks. Place them randomly but fairly close together to create a dense, speckled texture resembling terrazzo or stone. -
Add varied circles:
For a mixed look, create a coaster with medium-sized terra cotta circles on a grey or beige background. Hand-painting these circles rather than using a stencil gives them that organic, artisan feel. -
Paint geometric accents:
If you want the sage green variety shown, paint a section of the coaster green and add radiating charcoal lines or simple leaf shapes using a liner brush. -
Refine edges:
Check the edges of your dots. If you want a crisper look, careful touch-ups with the base color can fix any wobbly circles once the dots are dry.
Step 3: Sealing and Finishing
-
Dry time:
Allow all pattern work to cure for at least an hour. The paint must be bone dry before sealing, or you risk smearing your crisp dots. -
Apply sealer:
Brush on a thin layer of matte Mod Podge or a spray acrylic sealer. A matte finish looks more natural and earthy than gloss for this specific style. -
Seal the edges:
Make sure to coat the outer rim of the wood slice or cork to prevent moisture from drinks seeping in from the sides. -
Add second coat:
Once the first coat is dry to the touch, apply a second coat of sealer in the opposite direction (cross-hatching) to ensure full protection against heat and condensation. -
Final cure:
Let the coasters cure for 24 hours before setting any mugs on them to prevent the finish from becoming tacky.
Mix textures
Paint only half of the coaster or leave negative space showing the raw wood grain for a modern, Scandinavian-inspired partial paint look.
Your stylish new coaster set is now ready to protect your furniture with a touch of modern flair
BRUSH GUIDE
The Right Brush for Every Stroke
From clean lines to bold texture — master brush choice, stroke control, and essential techniques.
Explore the Full Guide
Leaf Imprint Painting on Wood
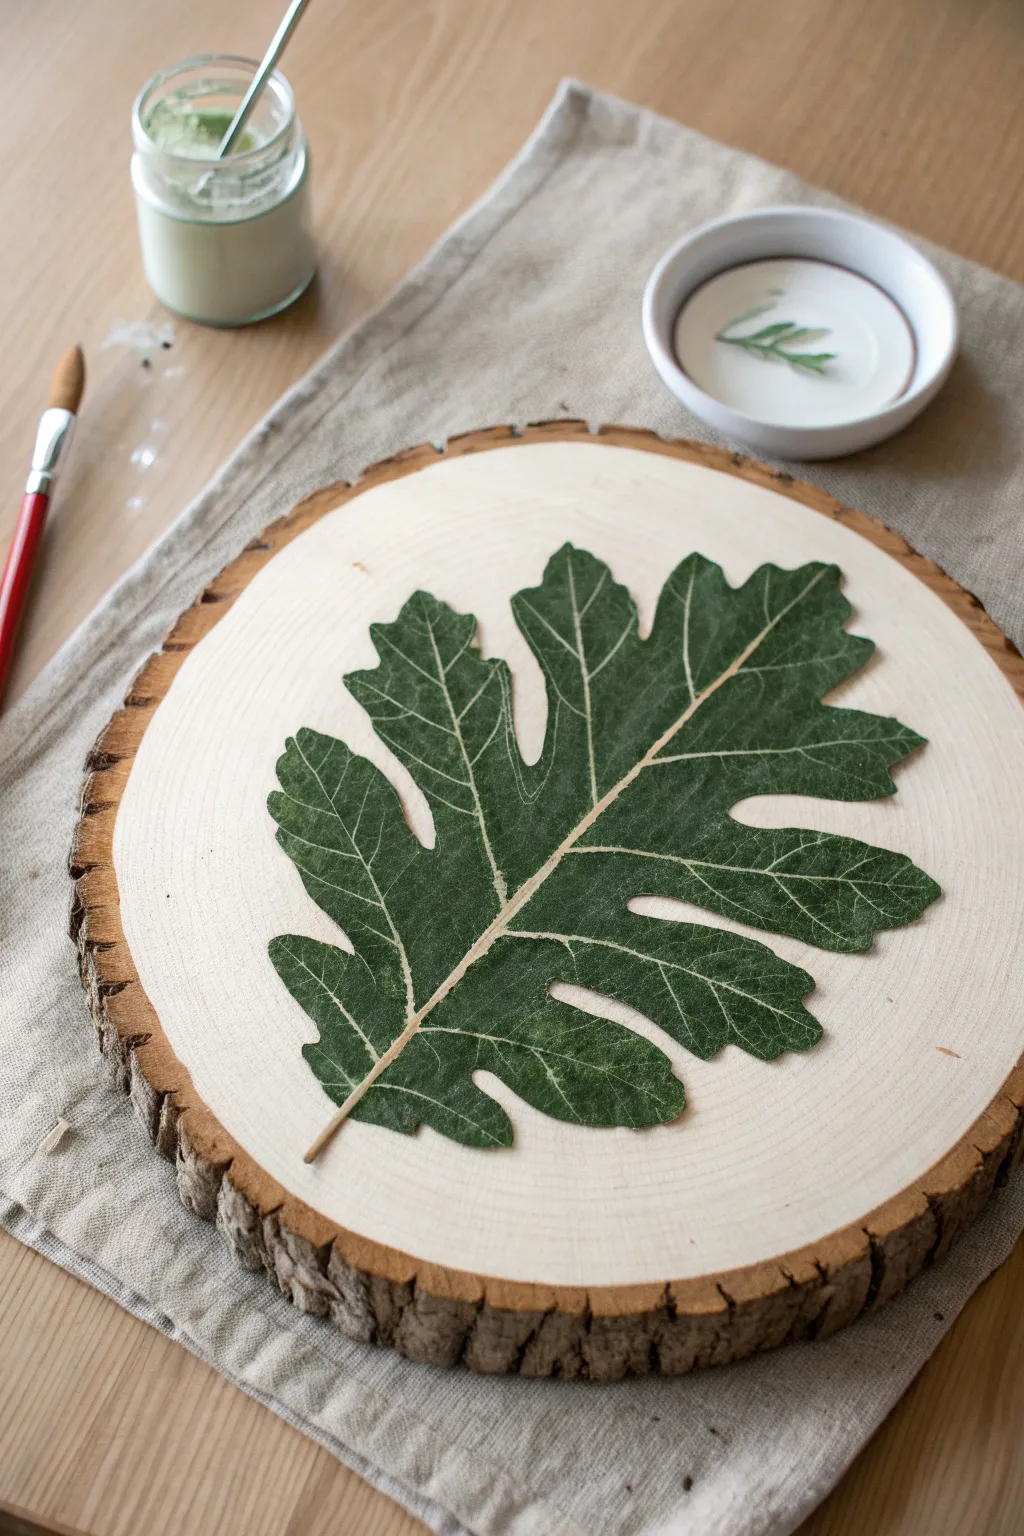
Capture the delicate details of nature with this stunningly simple leaf imprint project. By pressing a real leaf onto a smooth wood slice, you create a rustic piece of art that highlights the intricate veins and organic shape of your botanical find.
Step-by-Step Guide
Materials
- Large wood slice with bark edge (approx. 8-10 inches)
- Fresh, flexible leaf (oak or similar large leaf with deep veins)
- Matte Mod Podge or clear gel medium
- White acrylic paint (priming)
- Deep forest green acrylic paint
- Soft flat paintbrush (1 inch)
- Foam brush
- Tweezers
- Paper towels
- Rolling pin or brayer
- Sealant spray (matte finish)
Step 1: Preparation and Priming
-
Sand the surface:
Begin by sanding the top face of your wood slice until it is buttery smooth. This is crucial because any rough texture will interfere with the leaf details transferring clearly. -
Clean the wood:
Wipe away all sanding dust with a slightly damp paper towel or a tack cloth to ensure a clean bonding surface. -
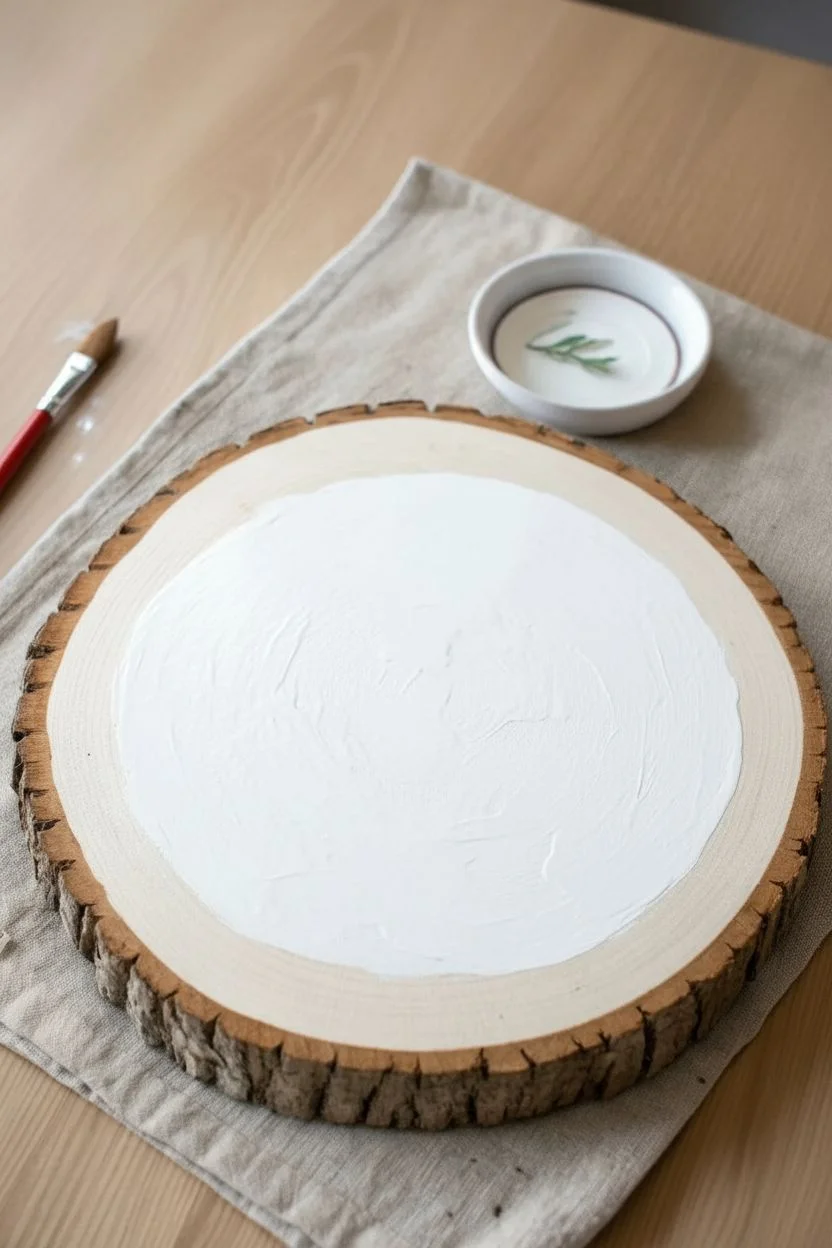
Prime the center:
Using your flat brush, paint a circle of white acrylic paint in the center of the wood slice, leaving about an inch of natural wood visible before the bark edge. This white background makes the leaf color pop. -
Let it dry:
Allow the white paint to dry completely. I usually give it about 20-30 minutes, or you can speed it up with a hair dryer on a cool setting.
Vein Definition Tip
For sharper imprints, choose leaves with thick, woody veins like oak or maple. Thin leaves like basil are too delicate and won’t emboss the texture well.
Step 2: Creating the Imprint
-
Select your leaf:
Choose a fresh leaf that is still pliable but has very prominent veins on the underside. Dry, crunchy leaves will crack during this process. -
Apply medium to the leaf:
Lay the leaf vein-side up on a scrap piece of paper. Apply a generous, even coat of matte Mod Podge or gel medium to the vein side. -
Coat the leaf surface:
Don’t skimp here—the medium acts as both the glue and the transfer agent. Ensure the stem and tips are well-coated. -
Position the leaf:
Carefully flip the leaf over and place it onto the painted white center of your wood slice. Once it touches the wood, try not to shift it. -
Press into place:
Place a plain sheet of paper over the leaf. Using a rolling pin or brayer, roll firmly over the paper to press the leaf flat against the wood. -
Burnish the details:
Remove the paper covering. Use your fingers to press down firmly along the main stem and outward to the leaf edges, ensuring total contact. -
Dry under weight:
Place a piece of parchment paper over the project and weigh it down with a heavy book for at least 1-2 hours to keep the leaf perfectly flat while the adhesive sets.
Step 3: Enhancing and Sealing
-
Assess the color:
Once dry, if the natural leaf color isn’t vibrant enough, you can enhance it. Mix a small amount of deep green paint with a glazing medium or water. -
Tint the leaf:
Gently brush this translucent green glaze over the adhered leaf. The glaze will settle into the veins and textures, highlighting the natural structure. -
Highlight the veins:
For extra realism, use a very fine detail brush with a lighter green or cream paint to carefully trace the major central vein if it got covered by the glaze. -
Clean up edges:
If any glue squeezed out excessively around the edges, use a damp Q-tip to carefully wipe it away before it fully cures. -
Final drying time:
Let the entire piece sit overnight. This ensures all moisture from the glue and paint has evaporated from the wood fibers. -
Apply top coat:
Seal your artwork with a clear matte spray sealant. Use light, even mists rather than one heavy coat to prevent pooling. -
Second coat:
After the first coat is dry to the touch, apply a second coat of sealant for durability, especially if you plan to use this as a coaster or trivet.
Level Up: Botanical Label
Use a fine-tip black marker or a small alphabet stamp set to add the scientific Latin name of the plant species at the bottom of the wood slice.
Display your botanical wood slice on a shelf or use it as a natural centerpiece for your coffee table
Sweet Little Bee on a Wood Slice
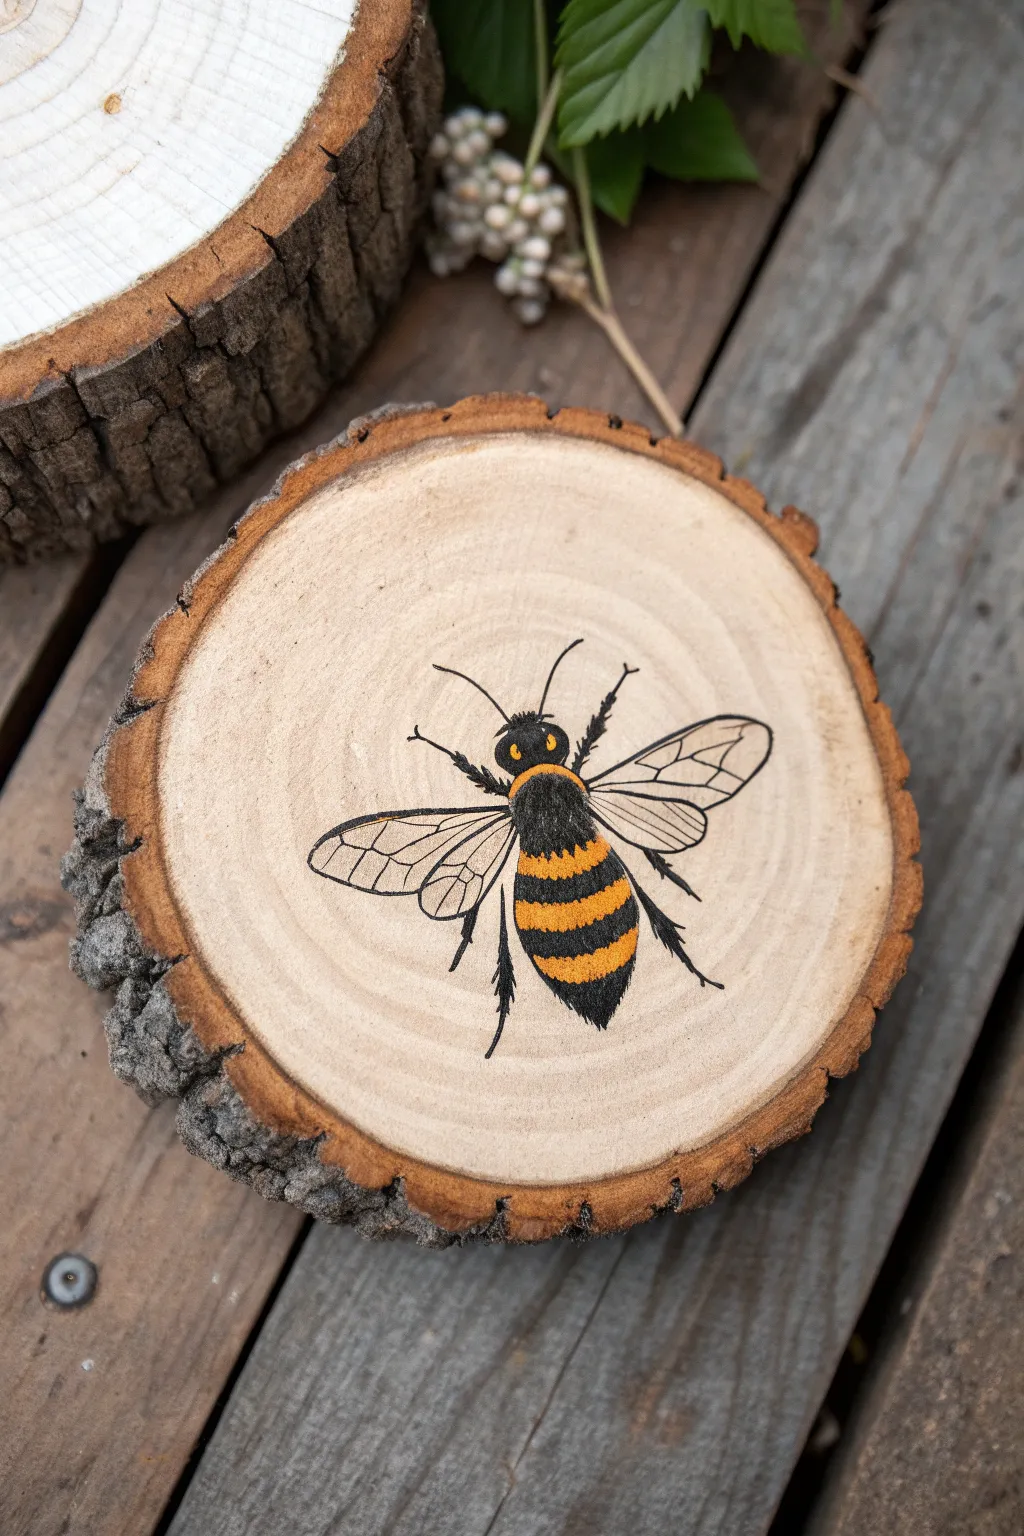
This charming project captures the fuzzy texture of a bumblebee using simple painting techniques on rustic wood. The natural rings of the wood slice create a perfect organic frame for this detailed insect study.
Step-by-Step Tutorial
Materials
- Small round wood slice (roughly 3-4 inches diameter)
- Sandpaper (fine grit, 220)
- Pencil and eraser
- Black acrylic paint or black paint pen (fine tip)
- Yellow ochre / golden yellow acrylic paint
- White acrylic paint
- Detail brushes (liner brush and small round brush)
- Matte spray sealant or clear varnish
Step 1: Preparation and Sketching
-
Prepare the surface:
Before you begin painting, ensure your wood slice is smooth. Lightly sand the surface with fine-grit sandpaper to remove any rough fibers that might catch your brush or pen, then wipe away the dust with a clean cloth. -
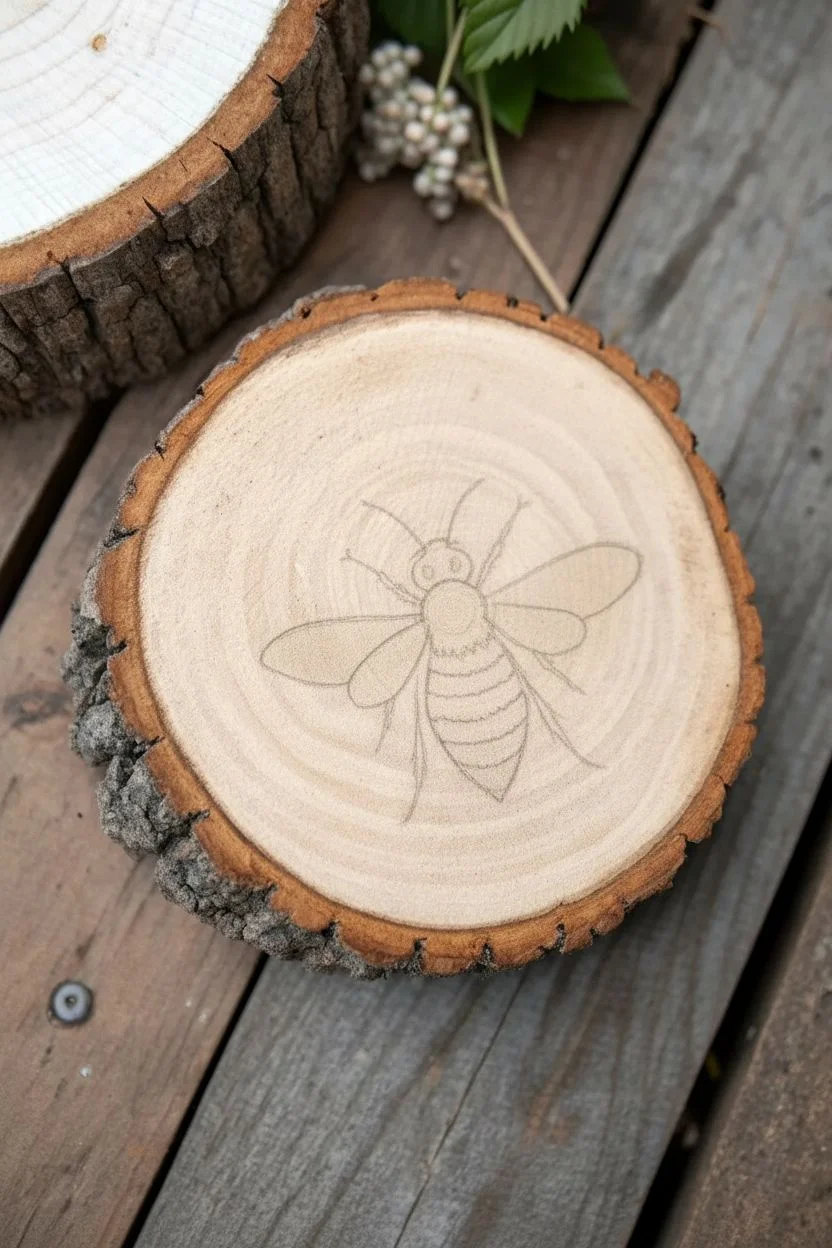
Sketch the body:
Using a light pencil, draw three distinct oval shapes in the center of the wood slice. Start with the head at the top, followed by the thorax (middle section), and finally the larger abdomen at the bottom. -
Position the wings:
Sketch two large teardrop shapes extending from the thorax on each side. These upper wings should angle slightly backward. Add smaller, narrower wing shapes just below them. -
Map the stripes:
Lightly draw curved lines across the abdomen to mark where the yellow and black stripes will alternate. This helps keep your spacing even before you commit to paint.
Step 2: Painting the Bee
-
Paint the yellow stripes:
Load a small round brush with golden yellow or yellow ochre paint. Fill in the marked stripe areas on the abdomen and add a small patch or collar of yellow just behind the head on the thorax. -
Create texture:
While the yellow is still slightly wet, I like to create a fuzzy look by stippling—tapping the brush tip gently along the edges of the yellow shapes rather than painting smooth strokes. -
Fill the black sections:
Once the yellow is dry, use black paint to fill in the head, the sections between the yellow stripes, and the tip of the abdomen. Carefully work around your yellow areas. -
Blend the fuzz:
To make the bee look realistic and soft, use a very fine brush (or a dry brush technique) to pull tiny strokes of black slightly into the yellow, and tiny strokes of yellow slightly into the black. This mimics the insect’s hair. -
Add the legs:
Using a fine liner brush or a black paint pen, draw the legs extending from the thorax. The back legs should be thickest and appear slightly hairy, while the front and middle legs can be thinner lines. -
Paint the antennae:
Draw two thin, curved lines extending from the head for the antennae. Keep the movement fluid and avoid making them perfectly straight. -
Add the eyes:
Paint or draw two small yellow circles on the sides of the black head. Once dry, add a tiny black dot in the center of each for the pupil.
Paint Pen Precision
If you struggle with brush control for the tiny wing veins, use a waterproof ultra-fine tip black marker or drafting pen instead of paint.
Step 3: Detailing the Wings
-
Outline the wings:
Using your finest brush or a black micron pen, carefully outline the wing shapes you sketched earlier. -
Draw the veins:
Fill the inside of the wings with delicate vein patterns. Draw a few main lines running the length of the wing, then connect them with smaller, geometric shapes similar to a stained glass window. -
Add transparency:
Make a very watery wash of white paint (mostly water with a drop of white). Glaze this over the wings to give them a translucent, papery appearance, but ensure your black lines remain visible. -
Highlight the body:
Add tiny, subtle highlights of white or light grey on the black parts of the legs and the very tip of the abdomen to give the bee volume.
Bleeding Lines?
If paint bleeds into the wood grain, apply a clear matte medium or sealer to the raw wood sketch area first to create a barrier before painting.
Step 4: Finishing Touches
-
Check the edges:
Look over your design and sharpen any fuzzy edges that got too messy with your black liner brush. -
Erase guidelines:
Once the paint is completely bone-dry, gently erase any visible pencil marks from your initial sketch. -
Seal the artwork:
Protect your painting by applying a coat of clear matte spray sealant. This prevents the wood from darkening too much and keeps the paint from chipping.
Display your rustic little bee on a shelf or add a magnet to the back for whimsical fridge decor

PENCIL GUIDE
Understanding Pencil Grades from H to B
From first sketch to finished drawing — learn pencil grades, line control, and shading techniques.
Explore the Full Guide
Mushrooms in a Mini Woodland Scene
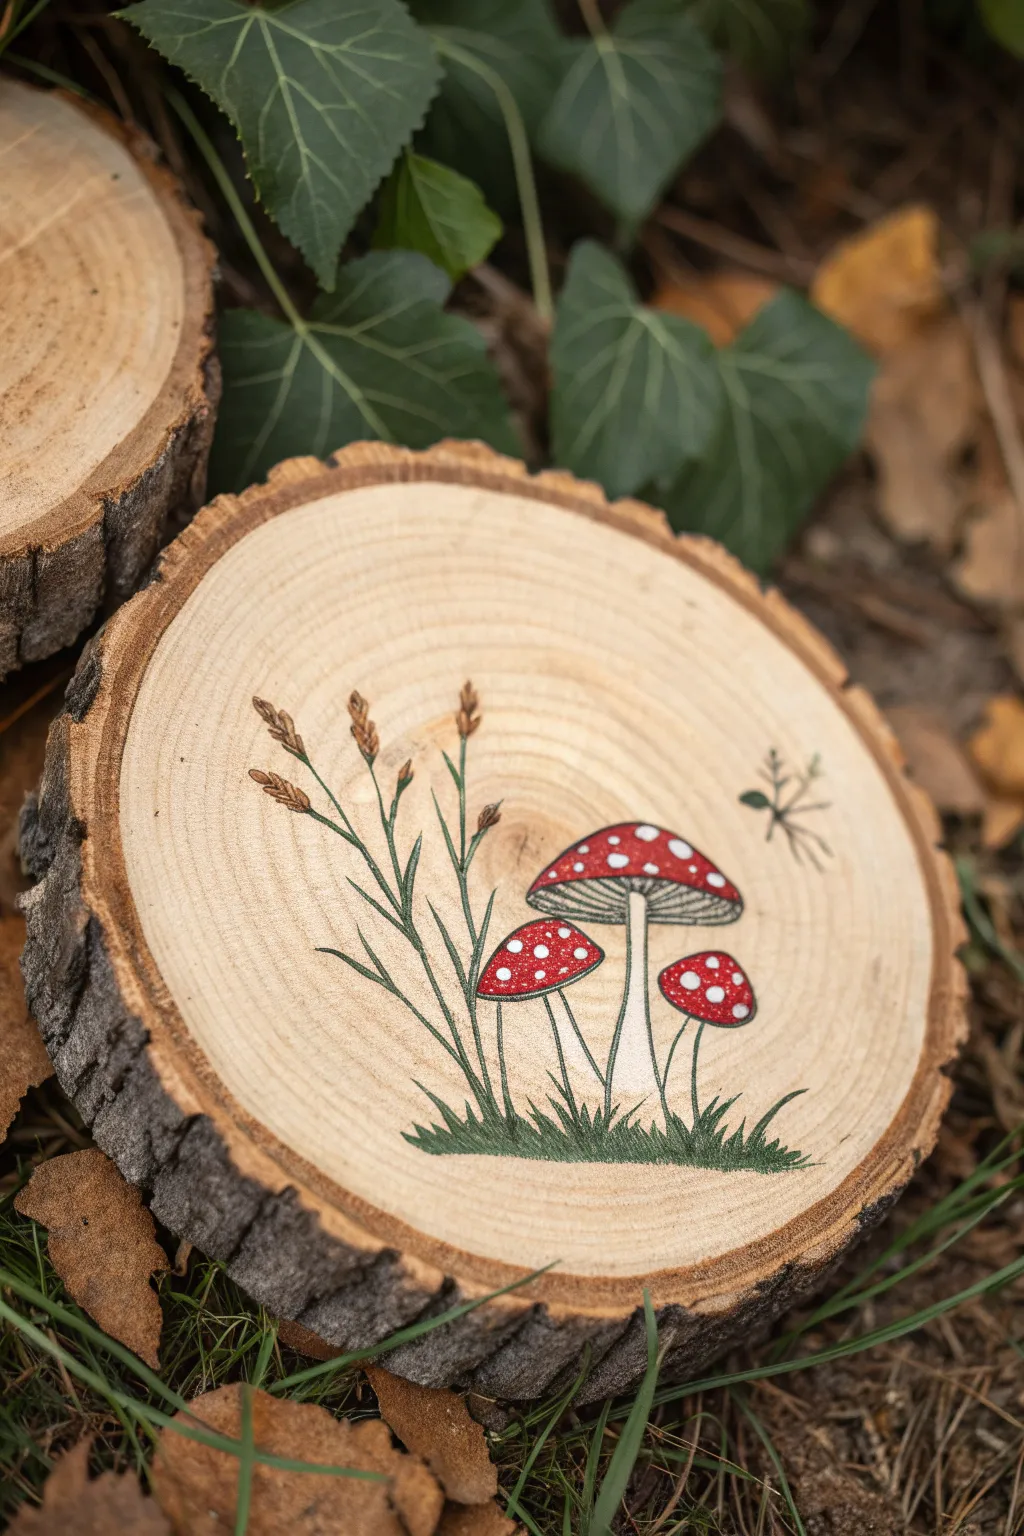
Bring a touch of the forest floor into your home with this charming wood slice art featuring classic red-capped mushrooms. The natural grain of the wood serves as the perfect rustic canvas for this whimsical, woodland-inspired illustration.
Step-by-Step
Materials
- Medium-sized wood slice (unsanded or lightly sanded)
- Sandpaper (220 grit)
- Pencil and eraser
- Fine tip black waterproof pen or ultra-fine paint marker
- Acrylic paints: Red, White, Dark Green, Light Green, Tan/Brown
- Small round brushes (sizes 0 and 2)
- Small flat brush
- Clear matte sealer/varnish
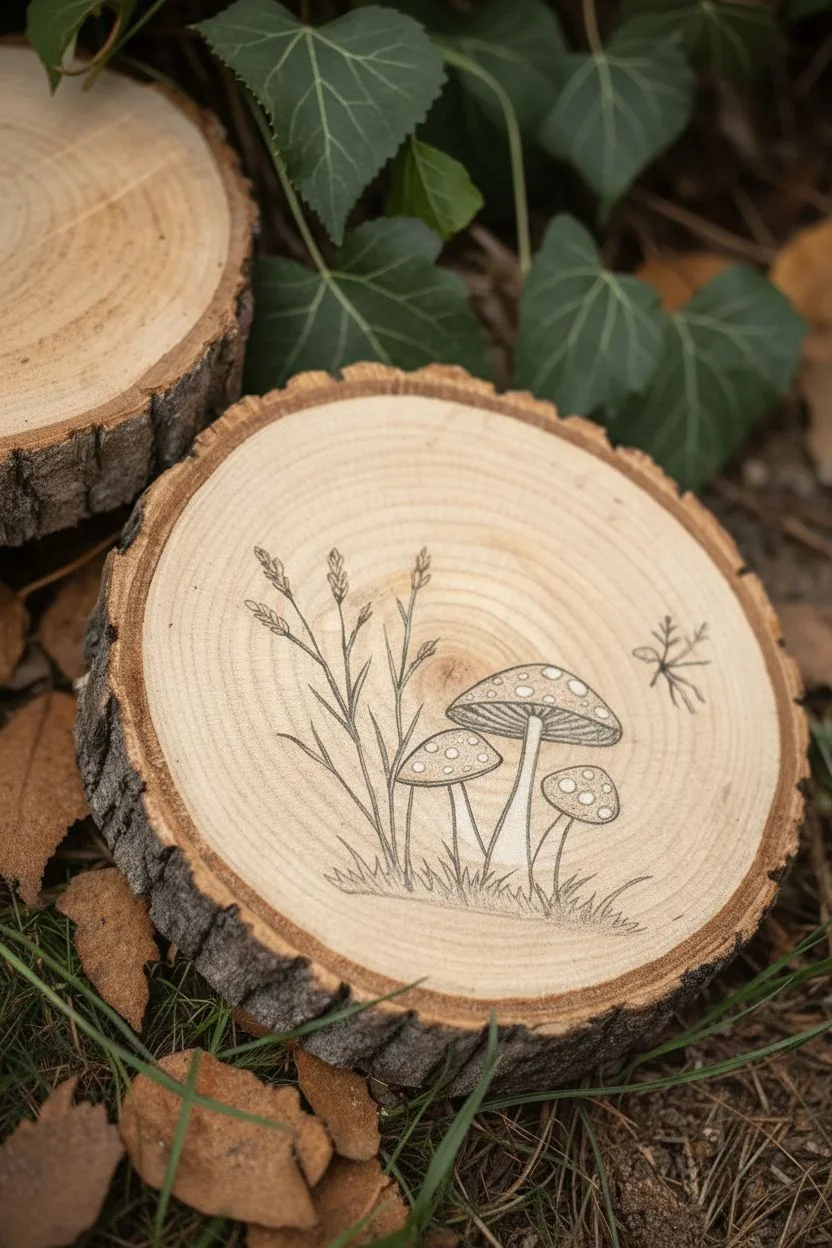
Step 1: Preparation and Sketching
-
Prepare the surface:
Begin by ensuring your wood slice is ready for paint. If the surface feels rough, gently sand it with 220-grit sandpaper until it’s smooth to the touch. Describe the dust off with a dry cloth or tack cloth. -
Sketch the mushrooms:
Using a pencil, lightly draw the outlines of the three mushrooms slightly off-center to the right. Draw a large central mushroom with a wide cap, and two smaller ones flanking it. -
Add the stalks:
Sketch the stems for each mushroom. The center stem should be thicker, while the side stems can be slightly curved and thinner. Don’t worry about the gills underneath just yet. -
Sketch the flora:
On the left side of the wood slice, draw several tall, thin stalks of wheat or grass reaching up higher than the mushrooms. Add seed heads to the tips using small oval shapes. -
Draw the ground and details:
Sketch a jagged, grassy base connecting all the elements. Finally, add a tiny flying insect or dragonfly shape floating to the right of the mushrooms.
Step 2: Inking the Outline
-
Outline the main shapes:
Using your fine tip black waterproof pen, carefully trace over your pencil lines. I prefer to start with the mushroom caps to establish the focal point. -
Detail the gills:
Under the large mushroom cap, draw fine lines radiating from the stem to the edge of the cap to create the gill texture. Add a ‘skirt’ or ring on the stem just below the cap. -
Refine the grass:
Ink the tall grass stalks on the left, using short, dashed strokes for the seed heads to give them texture. Ink the grassy ground with quick, upward flicking motions. -
Erase guidelines:
Once the ink is completely dry—give it a few minutes to be safe—gently erase all visible pencil marks so only the crisp black lines remain.
Ink Bleeding?
If your black ink bleeds when you apply paint/varnish, switch to a pigment liner or check that your pen is explicitly marked ‘waterproof’ or ‘archival’ before starting.
Step 3: Adding Color
-
Paint the caps:
Dip a size 2 brush into red acrylic paint. Carefully fill in the mushroom caps, staying within the inked lines. You may need two coats for a vibrant, opaque red. -
Add the spots:
While the red is drying, use a very small detail brush or the handle end of a brush dipped in white paint. Dot small white circles onto the red caps. Vary the sizes slightly for a natural look. -
Paint the stems:
Mix a tiny amount of tan with white to create an off-white cream color. Paint the mushroom stems, being careful not to paint over your black outline work. -
Color the grass:
Mix dark green and light green paint. Use short, upward strokes to fill in the grassy base at the bottom. The variation in color adds depth to the tufts of grass. -
Detail the stalks:
Using a thin brush and thinned-down brown paint, lightly wash color over the wheat/grass stalks on the left. It needs to be translucent enough that the black ink shows through. -
Final touches:
Add a tiny dot of green or black to the insect body if desired, or leave it as a simple outline. Check the whole piece for any spots that need a touch-up.
Paint Consistency
Thin your acrylics slightly with water. Thick globs of paint hide the wood grain, but thin washes let the natural texture show through for a rustic look.
Step 4: Sealing
-
Let it cure:
Allow the paint to dry completely. Acrylics dry fast to the touch, but giving it an hour ensures no moisture is trapped. -
Apply varnish:
Apply a thin layer of clear matte sealer over the entire face of the wood slice to protect the paint and prevent the wood from yellowing over time.
Display your woodland masterpiece on a shelf or add a hook to hang it on the wall
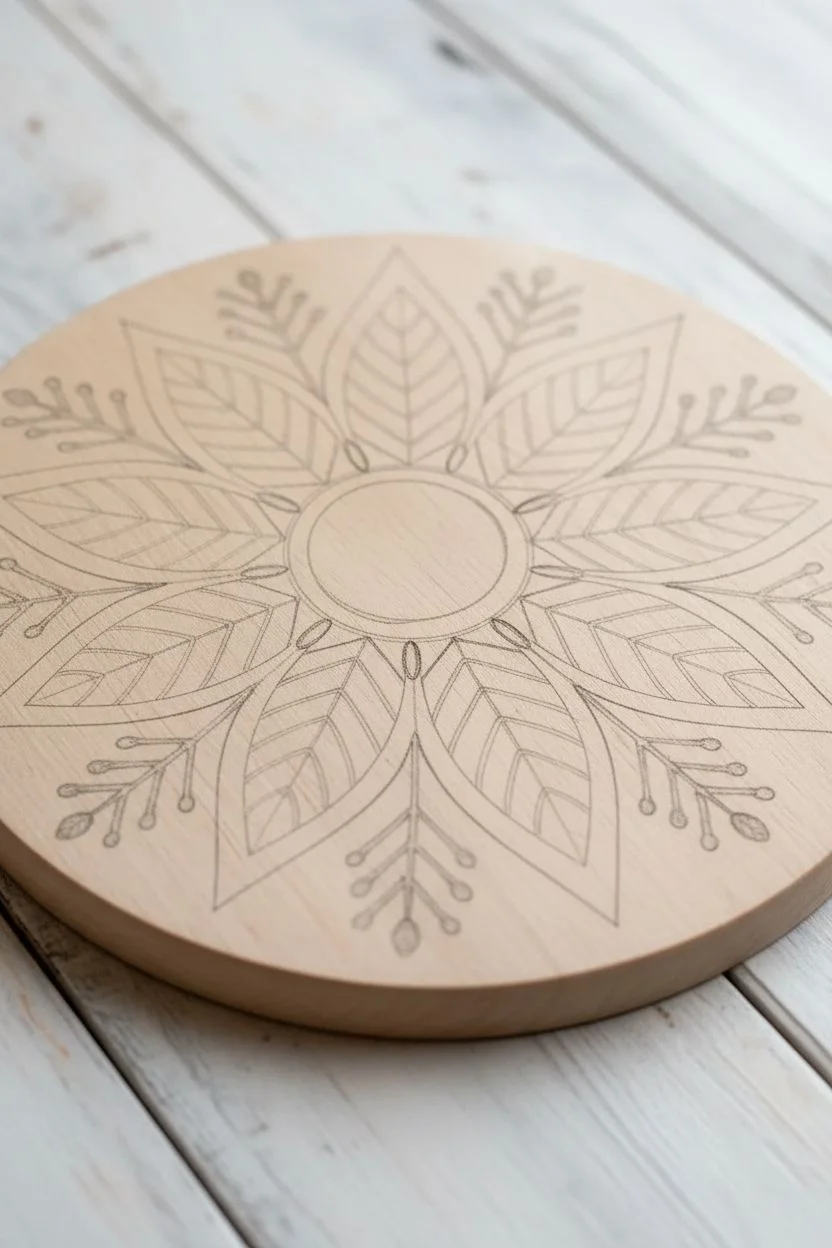
Easy Mandala Rings for Relaxing Wood Painting
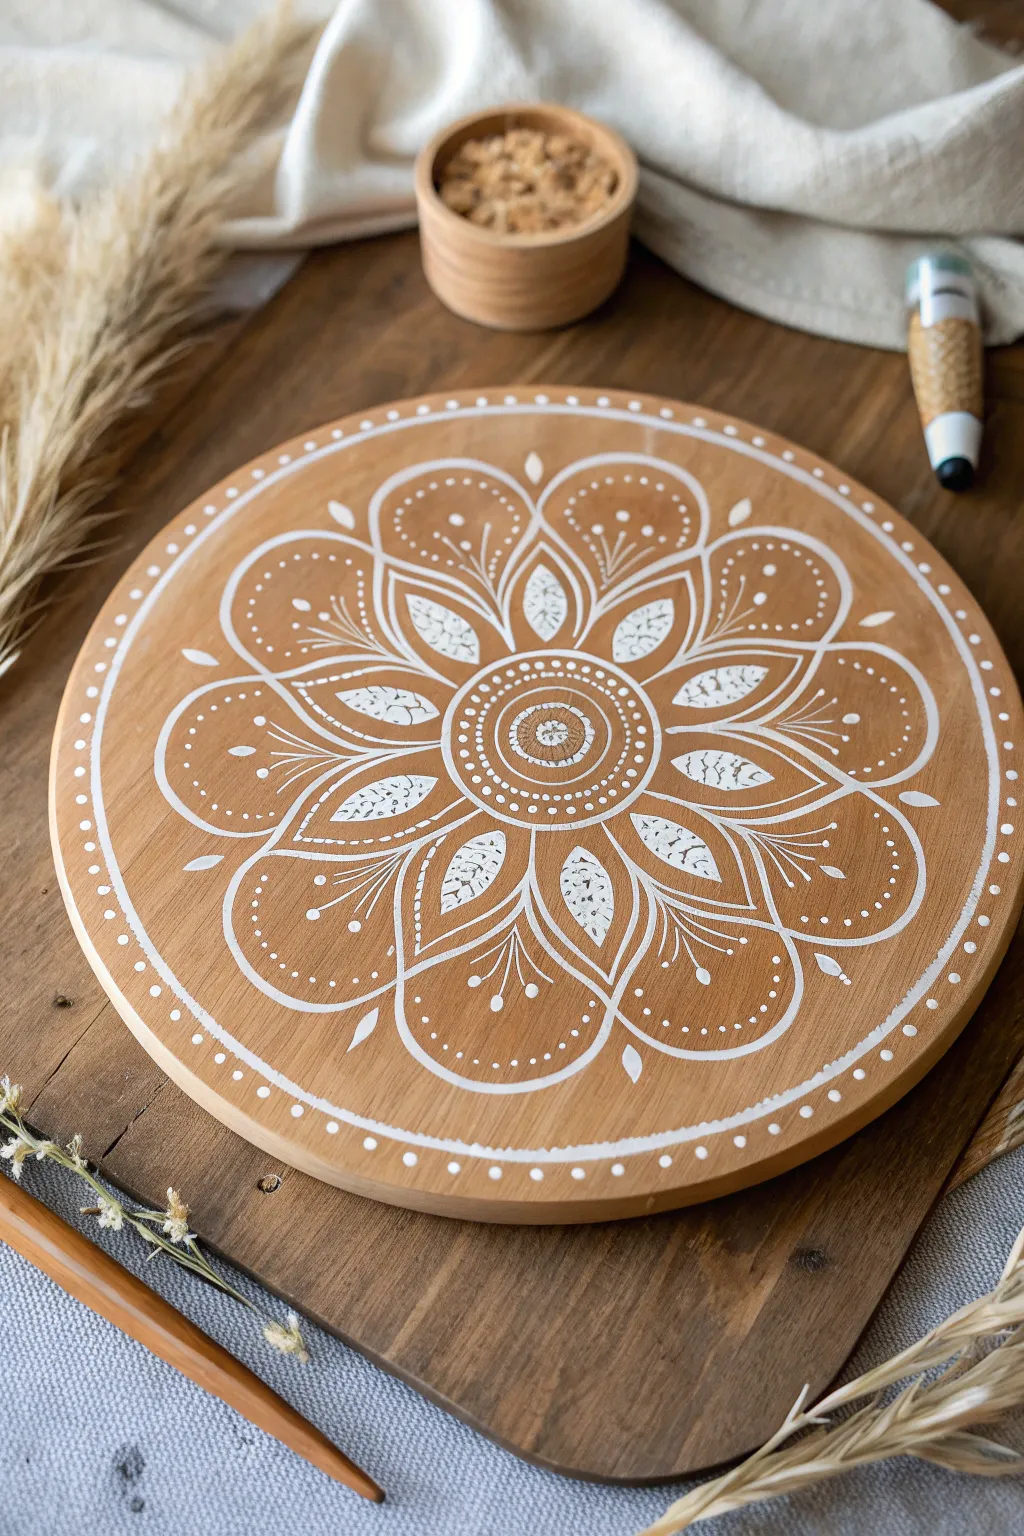
Transform a simple wooden round into a stunning piece of wall art or a trivet with this calming white-on-wood mandala design. The natural wood grain provides a warm, rustic background that makes the crisp white patterns truly pop.
Detailed Instructions
Materials
- Unfinished wooden round plaque (approx. 10-12 inches)
- White acrylic paint (high opacity) or a white paint marker
- Fine detail paintbrush (size 0 or 00) if using liquid paint
- Pencil
- Eraser
- Ruler
- Compass or circular objects for tracing
- Matte spray sealant (optional)
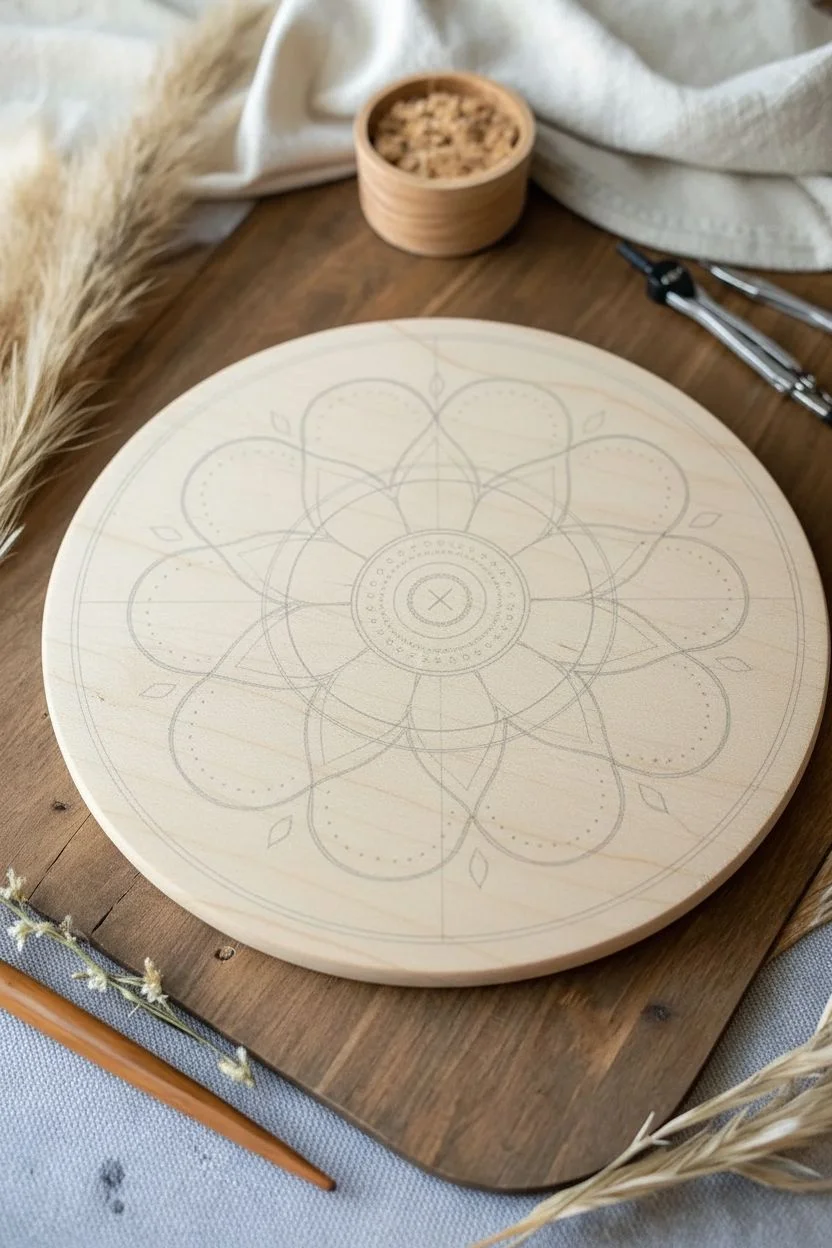
Step 1: Preparation & Mapping
-
Surface Prep:
Ensure your wooden board is clean and smooth. If it feels rough to the touch, give it a quick pass with fine-grit sandpaper and wipe away the dust. -
Find Center:
Using a ruler, lightly mark the exact center of the board with a pencil. This will be the anchor for your entire radial design. -
Primary Circles:
Use a compass to draw three concentric circles starting from the center outward. Draw a small inner circle (about 1 inch wide), a middle ring for the main petal base, and a large outer ring near the edge for the border. -
Petal Guidelines:
Divide your circle into eight equal sections using light pencil lines like a pie chart. Sketch eight large, rounded petal shapes within these sections, extending from the center area toward the outer rim.
Step 2: Painting the Core
-
Center Dot:
Start painting in the very middle. Create a small, solid white circle right on your center mark. I find using a paint marker gives me the steadiest hand for these initial shapes. -
First Ring:
Paint a ring around that center dot, leaving a small gap of exposed wood. Fill this gap with tiny dots. -
Inner Petals:
Paint eight small leaf shapes pointing outward from the center rings. Fill these leaves with a dappled or speckled texture rather than solid white to add visual interest. -
Dotted Border:
Encircle the inner petal section with two concentric rings of white dots. Keep the dots consistent in size by reloading your brush or marker frequently.
Paint Choice Pro-Tip
For ultra-crisp lines on wood grain, use an acrylic paint pen (medium tip for outlines, extra-fine for details). It prevents bleed better than a brush.
Step 3: Creating the Main Flower
-
Outline Large Petals:
Trace over your large petal pencil sketches with a solid white line. Ensure the curves are smooth and meet neatly near the center. -
Inner Contour:
Paint a second, smaller outline inside each large petal. This double-line effect creates depth and makes the design feel more intricate. -
Central Leaf Detail:
Inside every large petal, paint a central leaf shape that floats in the middle. Fill these with the same speckled or dappled texture used in the center. -
Stamen Lines:
Paint three delicate curved lines radiating from the tip of the inner leaf toward the top of the petal arch. -
Small Dots:
Add tiny white dots to the ends of those curved lines for a whimsical touch. -
Outer Petal Dots:
Follow the curve of the large petals one last time, adding a row of dots along the inner edge of the outermost line.
Level Up: Ombré Effect
Mix a tiny drop of brown or beige into your white paint for the inner circles, gradually getting brighter white as you move to the outer petals.
Step 4: Final Flourishes
-
Spacer Details:
In the energetic negative space between the large petals, paint small tear-drop or diamond shapes pointing outward. -
Rim Border:
Paint a solid white line following the circumference of the board, about half an inch from the edge. -
Rim Dots:
Finish the piece by adding evenly spaced dots just inside that outer rim line. -
Cleanup:
Let the paint dry completely. Once dry, gently erase any visible pencil guidelines. Seal with a matte spray if you plan to use this as a trivet.
Display your beautiful mandala on a shelf or wall to bring a sense of handmade calm to your space


Bold Stripes and Color Blocks on Scrap Wood

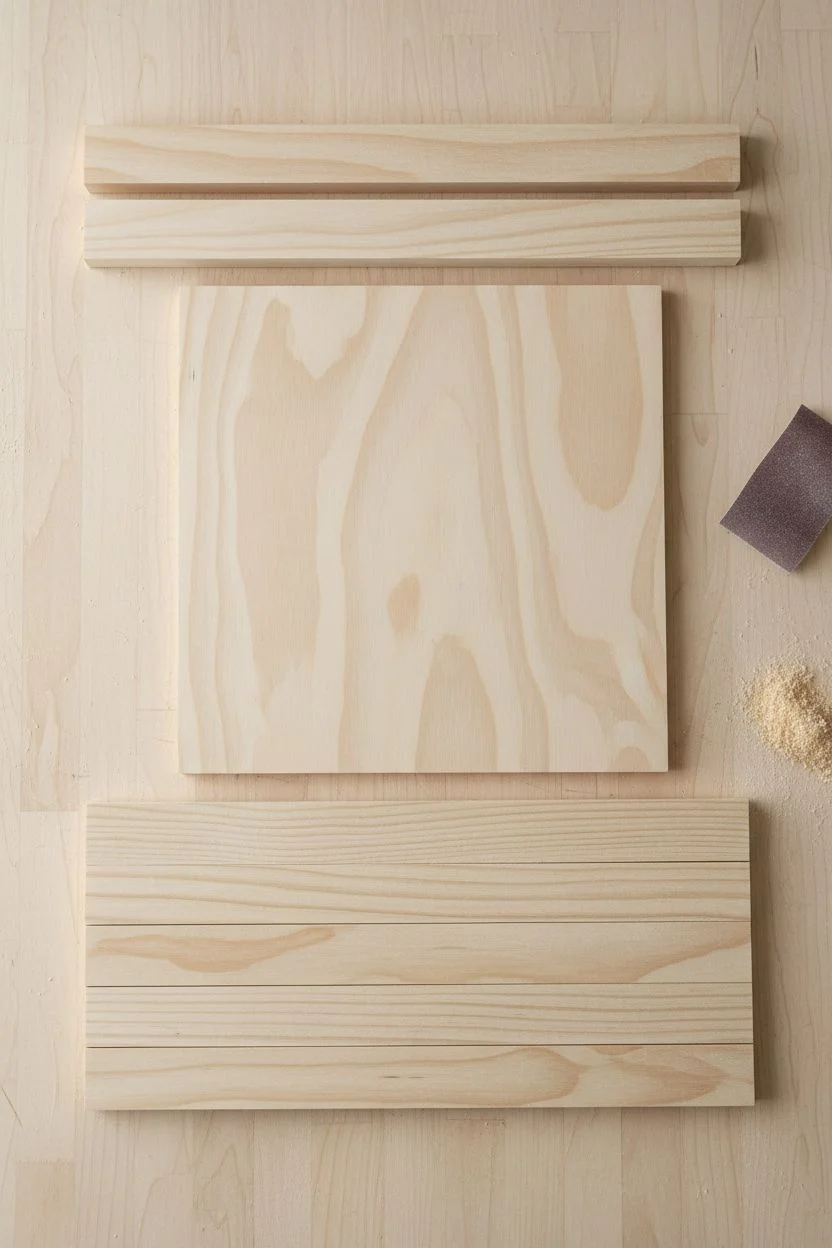
Transform leftover lumber into a stunning geometric statement piece with this simple yet impactful project. By combining stained framing with painted bold stripes, you can create a customized wall hanging that perfectly matches your home’s color palette.
Step-by-Step
Materials
- 5 flat wooden strips (scrap 1×2 or similar lath)
- 2 wooden framing pieces (slightly thicker than strips)
- Plywood backing board (cut to size)
- Wood glue
- Pin nails or brad nails
- Hammer or nail gun
- Sandpaper (medium and fine grit)
- Wood stain (dark walnut)
- Acrylic or chalk paints (Terracotta, Forest Green, Sage Green, Cream)
- Paintbrushes
- Rag for staining
- Matte polycrylic sealer (optional)
Step 1: Preparation and Cutting
-
Measure your backing:
Cut a piece of plywood or thin hardboard to your desired overall size. This will serve as the invisible base that holds everything together. -
Cut the strips:
Gather your scrap wood strips. Cut five pieces to the exact length of your backing board. Ensure they are all the same width for a symmetrical look. -
Cut the frame:
Cut two longer, thicker pieces of wood to serve as the top and bottom frame rails. These should match the total width of your assembled strip panel. -
Sand everything down:
Give all your wood pieces a thorough sanding. Start with medium grit to remove splinters, then finish with fine grit for a smooth painting surface.
Uneven Gaps?
If your scrap strips have slight bowing, clamps are essential. Clamp the strips sideways before nailing them down to force them straight and eliminate gaps.
Step 2: Adding Color
-
Plan your palette:
Lay out your five strips and decide on the color order. For this look, aim for a repetition of warm tones bookending cool and neutral tones. -
Stain the frame:
Apply a dark walnut wood stain to the top and bottom frame pieces using a clean rag. Wipe away excess after a minute to show the grain. -
Paint the first strip:
Paint the first strip on the far left with a warm Terracotta or burnt orange shade used on the far right strip as well. -
Apply deep green:
Paint the second strip a rich Forest Green. Use long, even strokes to minimize brush marks. -
Create the neutral strip:
For the middle strip, you can either paint it a cream color or leave it raw and apply a very light clear coat if the wood grain is attractive. -
Paint the sage strip:
Coat the fourth strip in a soft Sage or Mint Green which provides a nice transition between the cream and the final orange piece. -
Finish the last strip:
Paint the final strip on the far right with the same Terracotta color used in the beginning. -
Distress (Optional):
I prefer to lightly sand the edges of the painted strips once dry to let a little raw wood peek through for a rustic touch.
Step 3: Assembly
-
Glue the strips:
Apply wood glue to the back of each painted strip and press them onto the plywood backing board. -
Secure with nails:
Use pin nails or small brads at the top and bottom of each strip to firmly secure them to the backing while the glue sets. -
Attach the frame:
Apply glue to the top and bottom edges of your assembled panel. align the stained frame pieces. -
Clamp and nail frame:
Clamp the frame pieces tight against the panel. Drive nails through the frame into the ends of the strips for structural integrity. -
Seal the project:
Once fully assembled and dry, apply a matte polycrylic sealer over the entire piece to protect the paint and unify the sheen.
Water It Down
For a semi-transparent stain look on the colored pieces, mix your acrylic paint with water (1:1 ratio) to let the wood grain show through the color.
Hang your new colorful geometric art piece and enjoy the custom pop of color it brings to the room
Galaxy Background With Tiny Star Dots on Wood
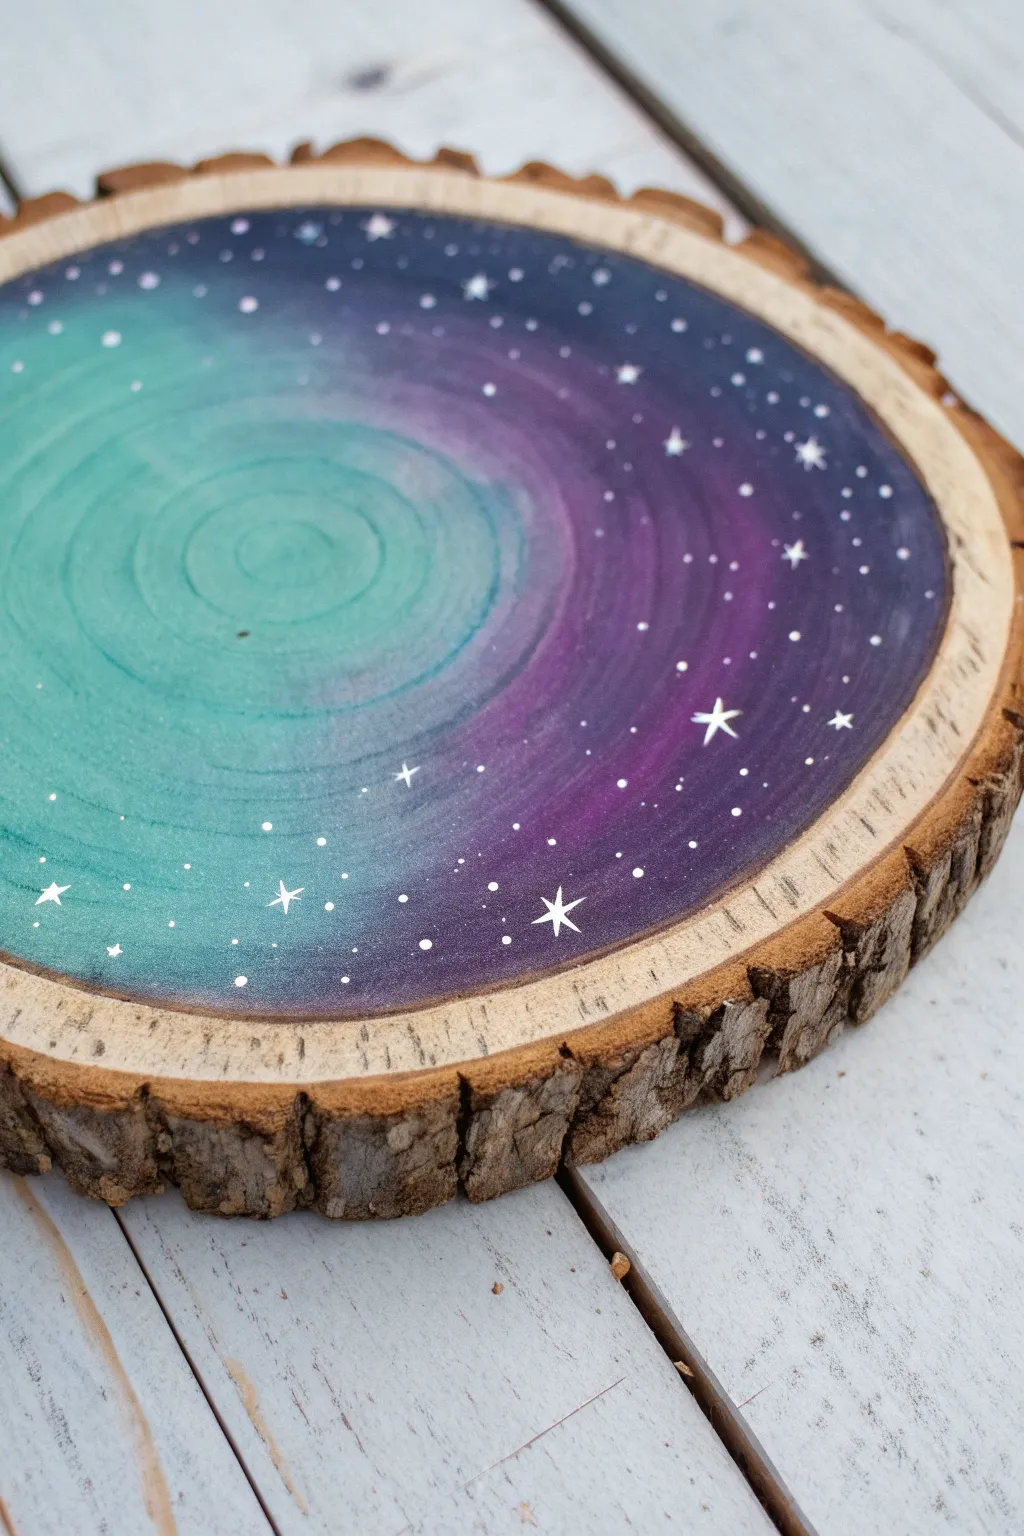
Transform a rustic slice of wood into a window to the cosmos with this stunning galaxy painting. The natural rings of the wood blend beautifully with a gradient of teal, purple, and midnight blue to create an ethereal, swirling night sky effect.
Step-by-Step Guide
Materials
- Wood slice with bark edge (approx. 5-7 inches diameter)
- Acrylic paints: Teal/Turquoise, Violet/Purple, Dark Navy Blue, Titanium White
- Flat shader brush (size 10 or 12)
- Small round detail brush (size 0 or 00)
- Water cup and paper towels
- Palette or paper plate
- Sandpaper (fine grit, optional)
- Matte or satin clear sealant spray
Step 1: Preparing the Canvas
-
Surface Check:
Begin by inspecting your wood slice. If the surface feels rough to the touch, give it a quick pass with fine-grit sandpaper to ensure your brushes glide smoothly. Wipe away any dust with a damp cloth. -
Border Consideration:
Decide how wide you want the unpainted wooden border to be. Visualizing a consistent ring of exposed wood adding about half an inch around the edge helps frame the galaxy.
Step 2: Building the Galaxy Gradient
-
Loading the Center:
Start by loading your flat brush with the teal or turquoise paint. Apply this color to the center area of the wood slice, keeping the paint relatively thin so distinct wood grain rings still peek through. -
Expanding the Teal:
Work the teal paint outward in a circular motion, covering roughly one-third of your intended painting area. Keep the edges of this circle wet. -
Introducing Purple:
Without cleaning your brush fully, pick up some violet paint. Begin blending this into the wet outer edge of the teal section. The colors should mix on the wood to create a smooth transition. -
Creating the Spiral:
Paint the purple section in a sweeping, curved motion rather than a perfect ring. You want the colors to look like a swirling nebula, so let the purple reach further in on one side. -
Deepening the Edge:
Rinse your brush and load it with dark navy blue. Apply this to the outermost edge of your design, carefully maintaining that unpainted wood border you visualized earlier. -
Blending the Dark:
Blend the navy blue inward into the purple sections. I find that using slightly damp bristles here helps smooth out any harsh lines between the violet and the deep blue. -
Checking Consistency:
Step back and look at your gradient. If the transition looks too abrupt, use a clean, slightly damp brush to lightly feather the colors together where they meet. -
Drying Time:
Allow the background gradient to dry completely. Since the paint was applied thinly to show the grain, this should only take about 15-20 minutes.
Grain Visibility Pro Tip
To keep the wood rings visible, dilute your acrylics with a mixing medium or water (approx. 2:1 paint to water ratio). It creates a semi-transparent dreamy wash.
Step 3: Adding the Stars
-
Prepping White Paint:
Put a small dot of titanium white paint on your palette. Add a tiny drop of water to thin it to an ink-like consistency, which makes painting fine lines much easier. -
Painting Major Stars:
Using your smallest detail brush, paint 5-7 large stars. Create a simple cross shape first, then gently elongate the four points to make them sharp and twinkling. -
Adding Medium Stars:
Clean your brush and pick up fresh white paint. Add slightly smaller dots scattered randomly around the distinct cross-shaped stars. -
Creating Clusters:
Group some of the small dots together. Galaxies often have dense clusters of stars, so placing three or four tiny dots close to each other adds realism. -
The Tiniest Details:
For the smallest, distant stars, you can use the very tip of the brush handle or a toothpick dipped in white paint to dot the surface delicately. -
Review and Balance:
Look at the overall distribution. Ensure you haven’t overcrowded one area while leaving another empty. Add a few more tiny specs to the dark navy edges for contrast.
Level Up: Glitter Accents
Mix a tiny amount of holographic glitter into your clear sealant or dab iridescent medium onto the larger stars for a subtle, magical shimmer when the light hits.
Step 4: Finishing Touches
-
Full Cure:
Let all the white paint dry fully. If you used slightly thicker paint for the stars to give them texture, give it an hour just to be safe. -
Sealing:
Take your project to a well-ventilated area. Apply a light coat of clear matte or satin spray sealant. This protects the wood and keeps the colors vibrant without making it too glossy.
Hang your cosmic creation on the wall or use it as a stunning coaster for your next gathering
Cute Cat Portrait on a Wood Slice
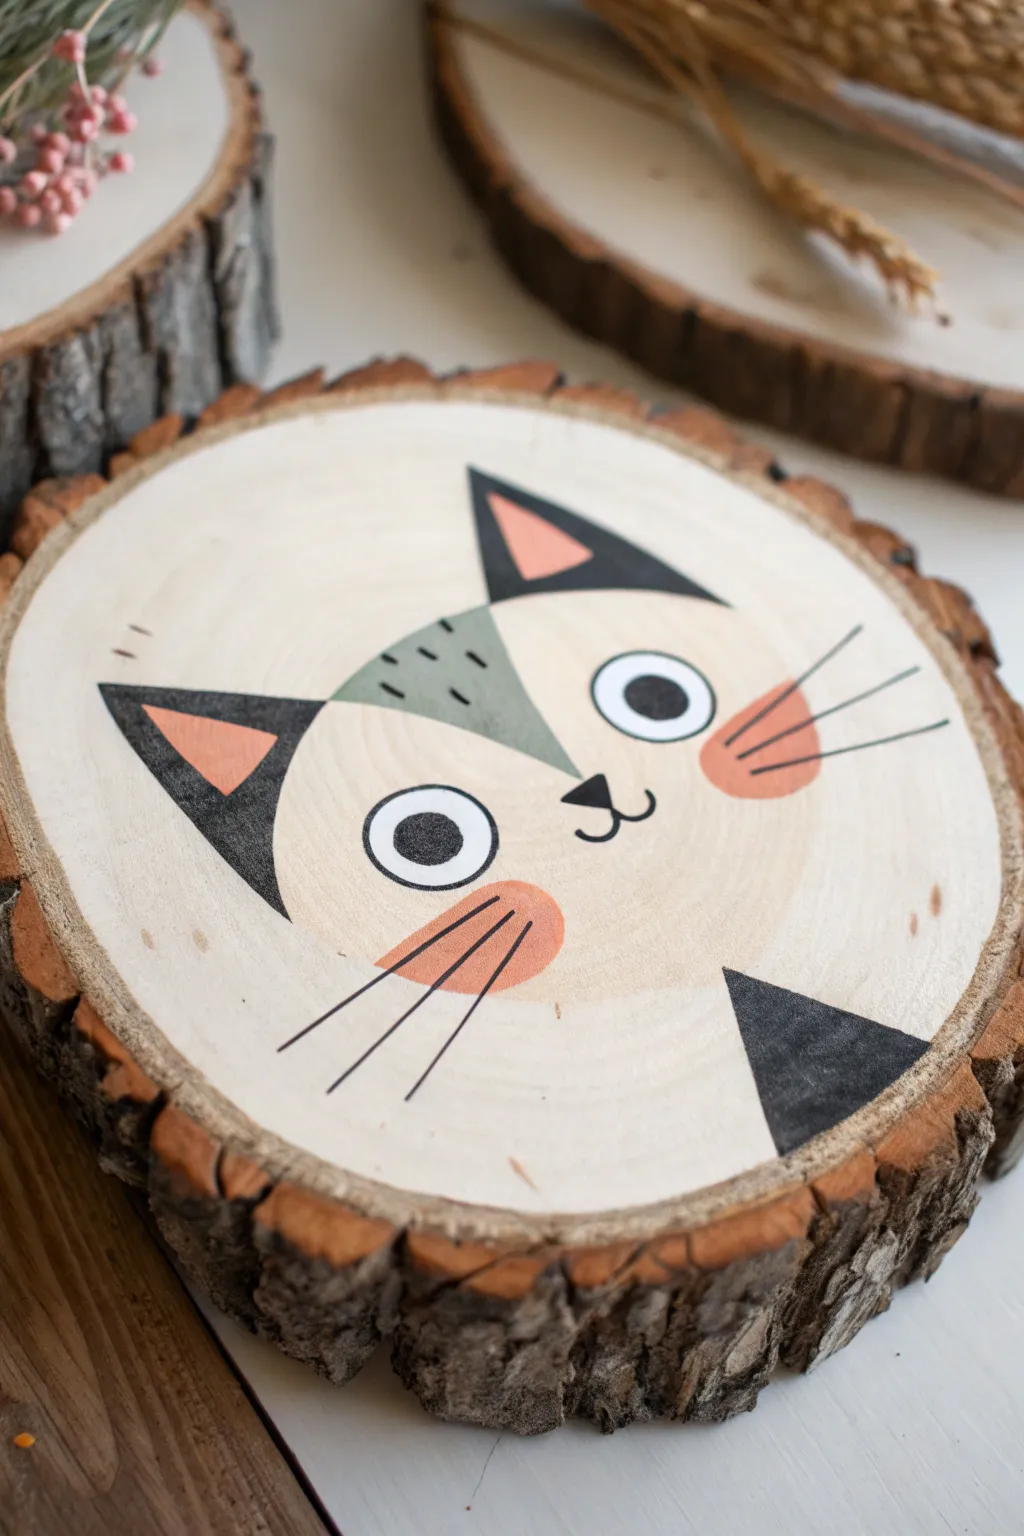
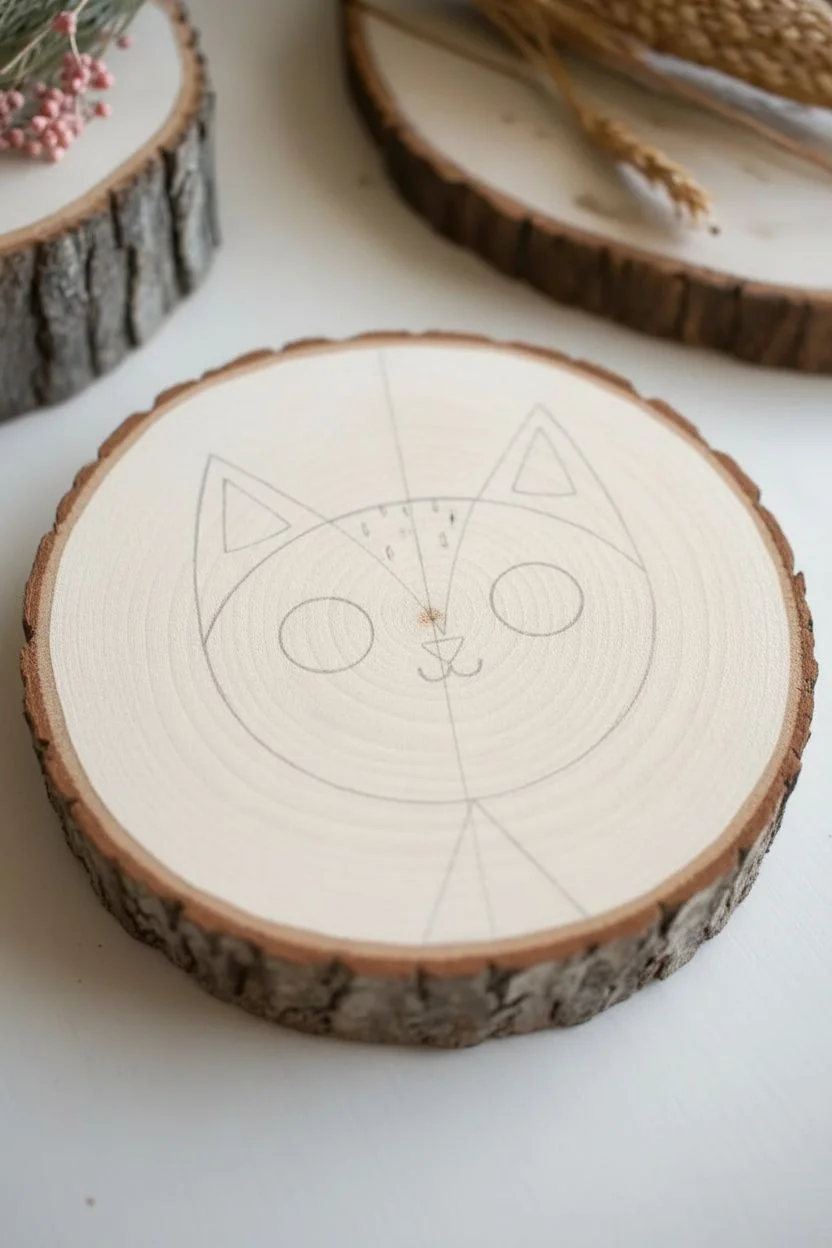
Transform a rustic slice of nature into modern decor with this charming geometric cat portrait. With its clean lines and soft, earthy palette, this project perfectly balances cozy cottage vibes with contemporary illustration style.
Step-by-Step
Materials
- Large wood slice (approx. 6-8 inches diameter)
- Fine-grit sandpaper (220 grit)
- Acrylic craft paints (cream/off-white, charcoal black, sage green, coral peach, white)
- Pencil and eraser
- Ruler
- Flat shader brushes (medium and small)
- Fine liner brush (size 0 or 00)
- Black paint marker (fine tip, optional)
- Matte spray sealant or brush-on varnish
Step 1: Preparation and Base
-
Prep the surface:
Before painting, ensure your wood slice is smooth. Sand the face of the wood gently with 220-grit sandpaper to remove any rough splinters that might snag your brush, then wipe away the dust with a dry cloth. -
Sketch the symmetry:
Using a pencil and a ruler, lightly draw a vertical line down the center of the wood slice to help with symmetry. Then, sketch a large, wide ‘U’ shape or semi-circle for the cat’s main face shape. -
Map out the features:
Sketch two large triangles for ears at the top. Add a small triangle at the bottom center for the body/neck detail. Draw a playful triangle on the forehead for the patch mark. -
Add facial details:
Lightly draw two large circles for eyes. Add a small rounded triangle nose right on your center line, anchored by a ‘3’ shape for the mouth.
Clean Lines Hack
Struggling with straight edges on the ears? Use small strips of painter’s tape or washi tape on the wood to mask off the triangles before painting.
Step 2: Painting the Design
-
Base coat the face:
Using a medium flat brush, fill in the main face area with a cream or off-white acrylic paint. You may need two thin coats for opaque coverage, letting the first dry completely before adding the second. -
Paint the grey patch:
Mix a little sage green with a touch of grey to get that muted tone. Paint the triangular patch on the forehead, carefully edging up against your pencil lines. -
Block in the black:
Switch to charcoal black paint. Fill in the main outer triangles of the ears and the triangular shape at the bottom neckline. Use a steady hand or a smaller flat brush for crisp edges. -
Fill the inner ears:
Using your coral peach color, paint the smaller inner triangles of the ears. -
Cheeky details:
Use the same coral peach color to clear oval or kidney-bean shapes on the cheeks. These should sit just outside the eye area. -
The eyes have it:
Paint the eye circles pure white. I find that doing the white parts last helps keep them looking brightest, covering any accidental slips from the cream base coat.
Step 3: Fine Details and Finishing
-
Add pupils:
Once the white eyes are bone dry, paint medium-sized black circles in the center of each eye. -
Nose and mouth:
Using your finest liner brush or a black paint pen, fill in the small nose triangle and trace the curved mouth lines below it. -
Whiskers and accents:
With the liner brush or marker, draw three thin lines radiating from each cheek patch for whiskers. Add three tiny dashes inside the green forehead patch for texture. -
Eye highlights:
Perhaps the most crucial step for cuteness: dip the non-brush end of a paintbrush into white paint and dot it onto the black pupils to create a ‘sparkle’. -
Clean up:
Check your edges. If the cream paint went outside the lines, you can gently sand it off the raw wood once dry, or paint over it if needed. -
Seal the deal:
Protect your artwork with a clear matte sealant. A spray works best to avoid smearing the fine black lines.
Make it 3D
Instead of painting the ears flat, cut small triangles from felt or leather and glue them onto the wood slice for a fun, tactile mixed-media element.
Hang your new feline friend on a gallery wall or use it as a uniquely charming coaster.
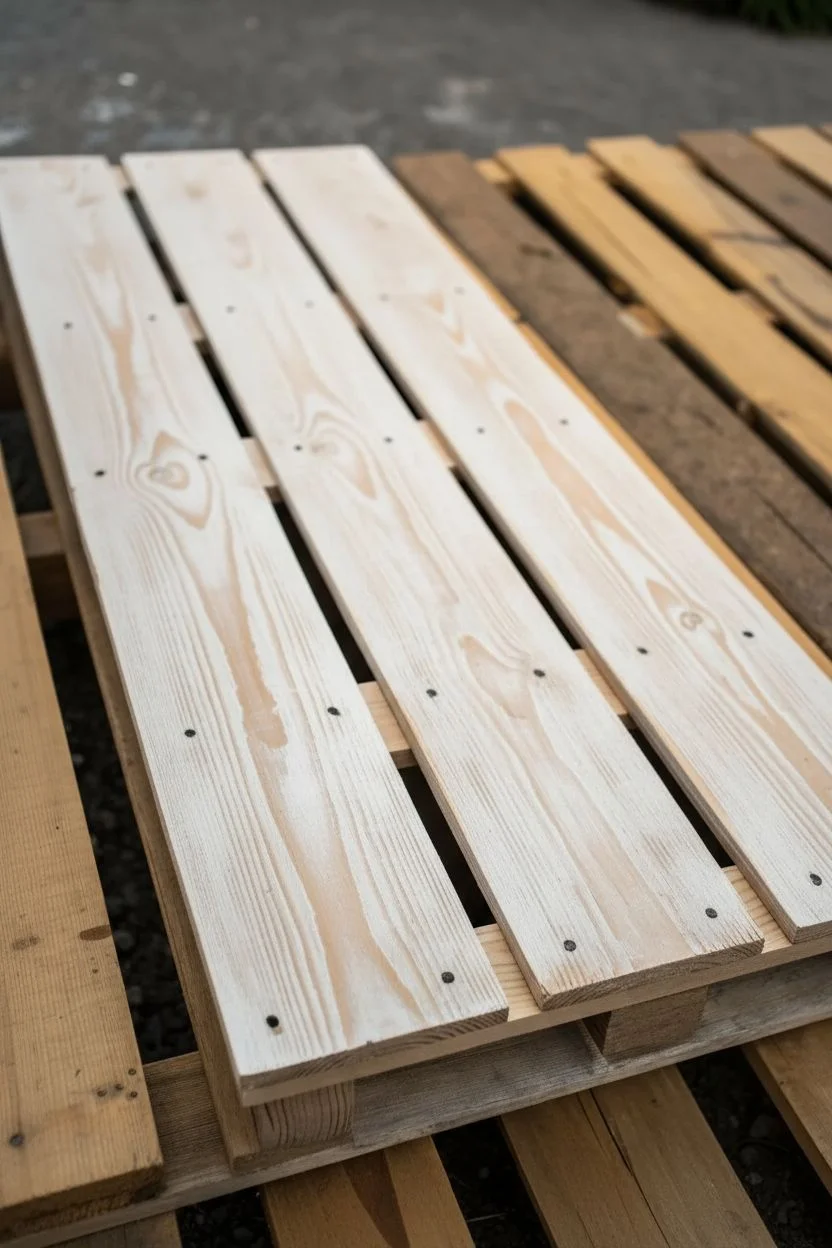
Tiny House and Fence on a Pallet-Style Board
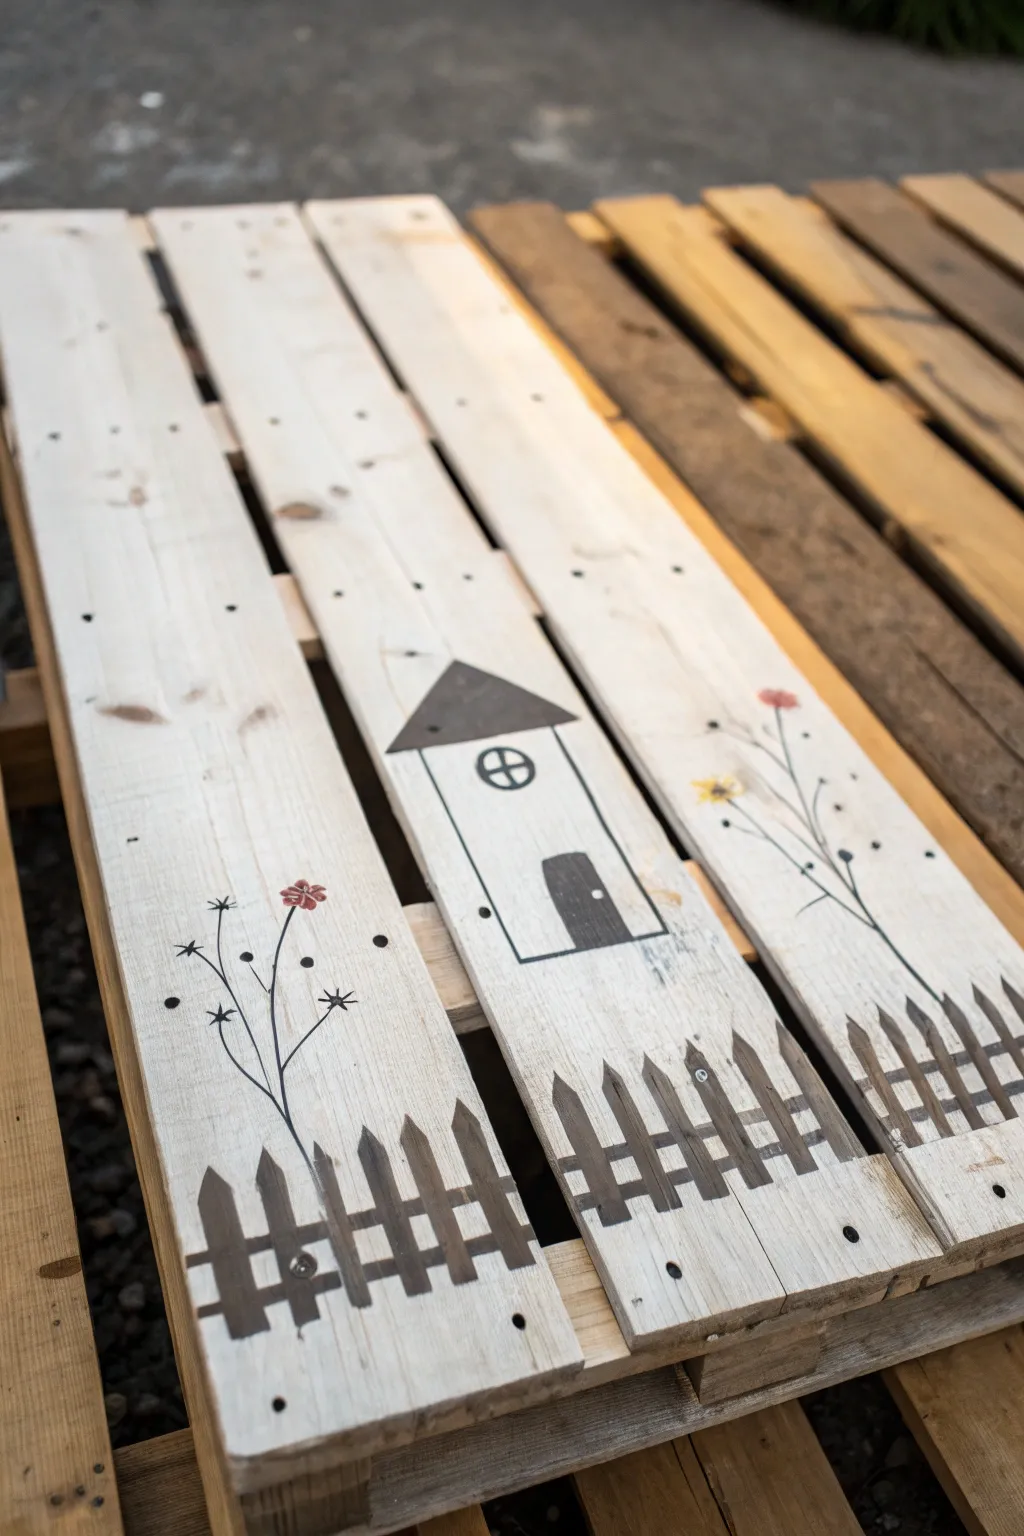
Transform rustic pallet wood into charming wall art with this simple yet evocative design. Using a minimalist color palette and easy line work, you’ll create a cozy scene featuring a tiny house and picket fence that brings a touch of countryside warmth to any space.
Step-by-Step Guide
Materials
- Reclaimed pallet wood or three unfinished wood planks (approx. 4-6 inches wide)
- Sandpaper (80 and 120 grit)
- White acrylic paint or chalk paint
- Dark brown or black acrylic paint
- Burnt orange and muted yellow craft paint
- 2-inch flat paintbrush
- Small round detail brush (size 1 or 2)
- Flat shader brush (1/4 inch)
- Pencil and eraser
- Ruler or straight edge
- Paper towels
- Matte clear coat sealer (optional)
Step 1: Preparation and Base Coat
-
Surface Prep:
Begin by thoroughly sanding your wooden planks. Start with 80-grit sandpaper to remove rough splinters, then switch to 120-grit for a smoother painting surface. Simulating the pallet look works best if you keep some natural grain visible. -
Assemble the Canvas:
If using loose planks, align three boards side-by-side. You can secure them from the back with two smaller cross-pieces and wood screws or strong wood glue to keep them stable. -
Whitewash Technique:
Dip your 2-inch flat brush into the white paint. Before applying it to the wood, wipe most of the paint off onto a paper towel. This dry-brush technique allows the wood grain to peek through. -
Apply the Base:
Brush the remaining white paint onto the wood in long, vertical strokes. Aim for semi-transparent coverage rather than a solid block of color; this rustic transparency is key to the aesthetic. -
Let it Cure:
Allow the white base coat to dry completely. Since the layer is thin, this should only take about 20-30 minutes.
Step 2: Drafting the Design
-
Marking the Fence Line:
Using a pencil and ruler, lightly draw horizontal guidelines across the bottom quarter of all three boards to mark the top and bottom of your picket fence. Don’t worry if the lines break at the gaps between boards. -
Outline the House:
On the center board, sketch a simple, tall house shape. Draw a rectangle for the body and a triangle for the roof. Place it so the bottom of the house sits just behind where the fence will be. -
Add Details:
Sketch a small arched door at the bottom right of the house rectangle and a circular window with cross-panes in the upper center. -
Floral Placement:
Lightly sketch tall, wispy stems rising from the fence line on the left and right boards. These don’t need to be perfect; just general curves to guide your brush.
Rustic Texture Tip
Don’t fill the gaps between the pallet boards with paint. Leaving these cracks dark and empty enhances the reclaimed wood illusion and adds depth.
Step 3: Painting the Scenery
-
Painting the House Outline:
Load your small round detail brush with dark brown or black paint. Carefully trace over your pencil lines for the house walls, keeping the pressure steady for an even line. -
Filling the Roof:
Switch to a slightly larger brush if needed and fill in the triangular roof with the dark paint. Create a solid shape to contrast with the airy white background. -
Window and Door:
Paint the door solid dark brown. For the window, outline the circle first, then carefully paint the cross inside. Add a tiny dot of white on the door for a handle once the dark paint is dry. -
Creating the Fence Posts:
Using the 1/4 inch flat shader brush and dark paint, create vertical strokes for the fence pickets. Space them relatively evenly, but small irregularities add charm. Make the tops pointed by angling your brush strokes. -
Connecting the Fence:
Paint two horizontal rails connecting the pickets—one near the top and one near the bottom. Don’t paint over the gaps between the main wooden boards; let the design break naturally there. -
Painting Stems:
With the detail brush and thinned dark paint (add a drop of water for better flow), paint long, thin lines for the flower stems on the outer boards. Add tiny, staggered lines for leaves. -
Adding Blooms:
Dip the tip of your detail brush into the burnt orange paint. create small, simple flowers on the left stems using just 4-5 small dabs for petals. Repeat on the right with the muted yellow for variety. -
Final Touches:
Add a few tiny black dots around the flowers to simulate pollen or seeds floating in the air. -
Sealing the Work:
Once all paint is completely dry (give it at least an hour), gently brush on a matte clear coat to protect your work, especially if this will hang in a porch area.
Seasonal Switch
Make the design adaptable by painting the flowers on the side boards different colors or changing the shapes to leaves for autumn decor.
Hang your new rustic masterpiece in an entryway or garden shed to enjoy that handcrafted farmhouse vibe every day
Ombre Wash Background With White Doodles on Wood
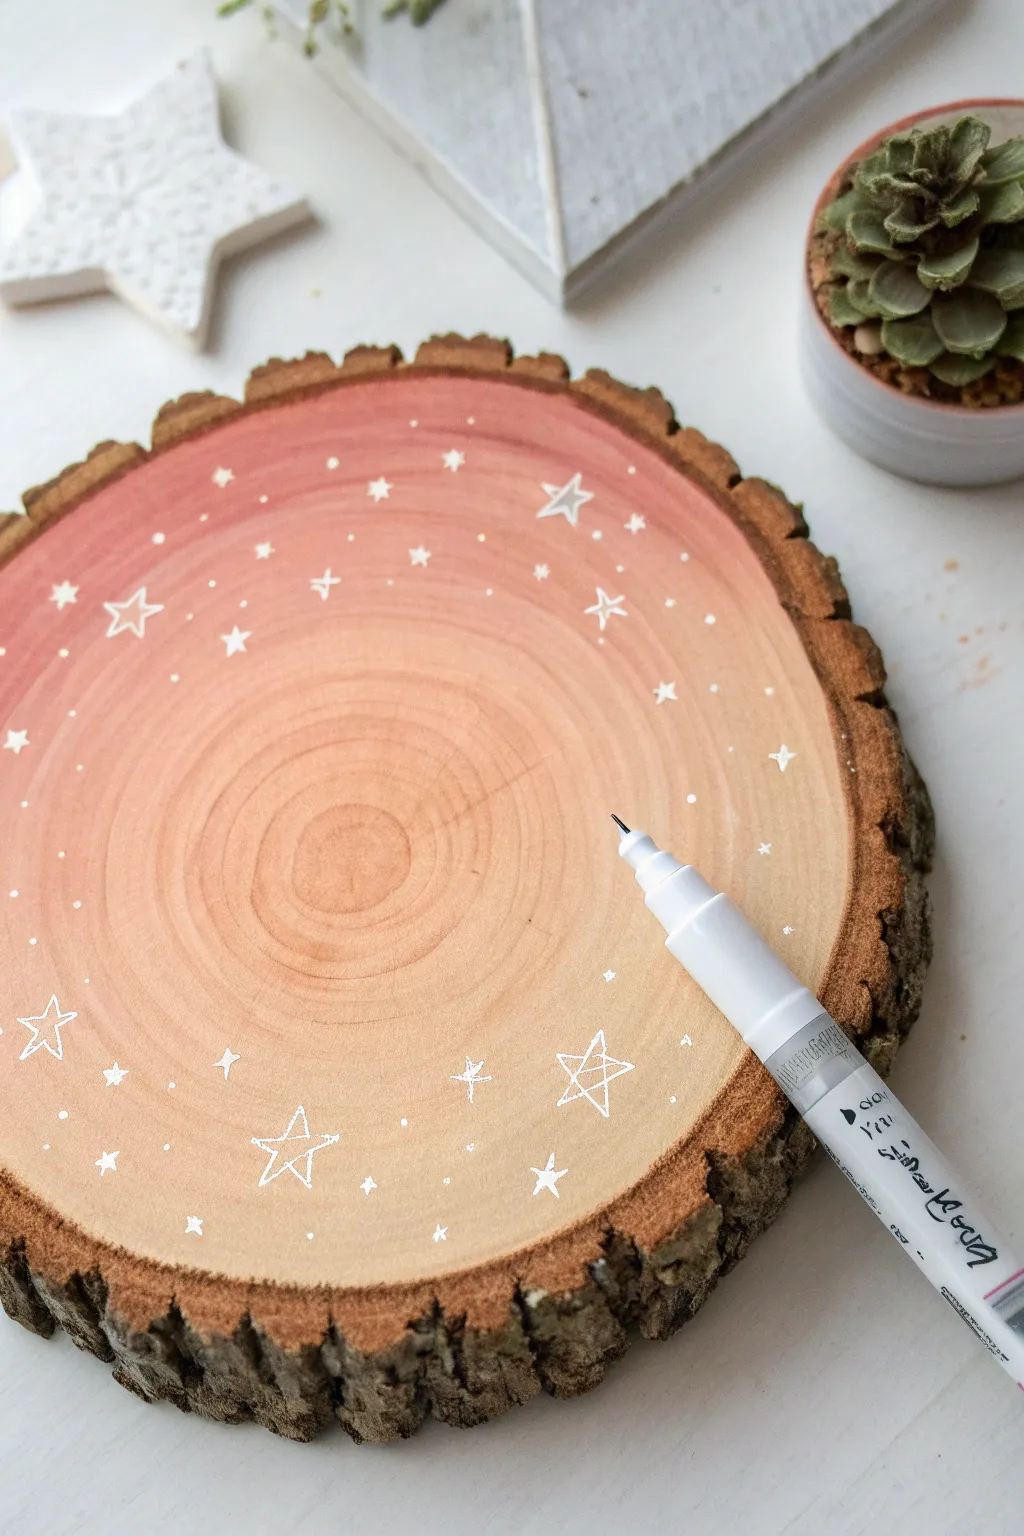
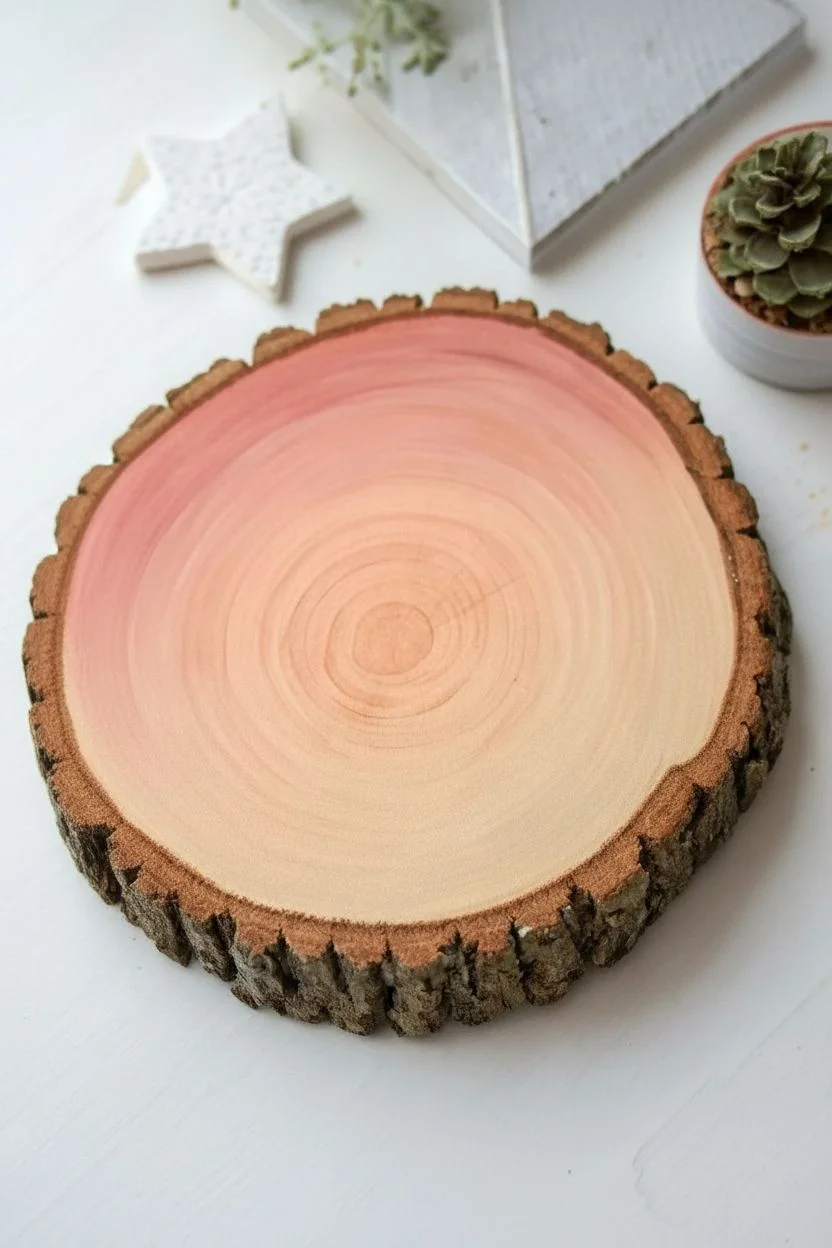
Transform a rustic wood slice into a dreamy piece of decor with a soft, sunset-inspired gradient wash. This project combines the natural grain of the wood with delicate white doodles for a look that is both whimsical and modern.
Detailed Instructions
Materials
- Medium-sized wood slice (raw bark edge)
- Acrylic paint (coral pink, light peach, white)
- Small mixing cup or palette
- Flat paintbrush
- Water cup
- Paper towel
- Fine tip white paint pen (e.g., Posca or sharpie oil-based)
Step 1: Creating the Ombre Wash
-
Prepare the wash:
Begin by creating a paint wash rather than using thick paint. Mix a small amount of water into your coral pink acrylic paint until it has a milky consistency that is translucent but still pigmented. -
Apply the first ring:
Start painting at the very outer edge of the wood slice rings, right next to the bark. Apply the watered-down coral paint in a wide band, following the circular shape of the wood. -
Dampen the brush:
Rinse your brush slightly but don’t clean it completely. Dip it into clean water and drag the inner edge of your coral paint inward towards the center of the slice. -
Blend the transition:
Continue painting inward, adding a tiny drop of peach or white to your brush if you want a lighter hue, or simply using more water to dilute the existing pigment. -
Fade to natural:
As you approach the center rings, stop adding pigment entirely. Use a damp brush to feather the paint edge so it disappears seamlessly into the natural wood color in the middle. -
Wipe away excess:
If the paint is pooling or hiding too much of the wood grain, lightly dab the area with a paper towel to lift the excess liquid. You want the rings to remain visible through the color. -
Let it dry completely:
Allow the wood to dry fully. Because we used water, the wood might take a bit longer to dry than usual; if it feels cool to the touch, it’s still damp.
Wood Grain Wisdom
Work with the grain, not against it. When applying the wash, follow the natural concentric circles exactly for the smoothest, most organic graduation.
Step 2: Doodling the Stars
-
Prime the pen:
Shake your white paint pen well and press the nib down on a scrap piece of paper to get the ink flowing smoothly before touching the wood. -
Draw the largest stars:
Start by drawing a few five-pointed open stars scattered randomly around the painted outer ring. Keep them relatively loose and hand-drawn in style rather than geometrically perfect. -
Add medium stars:
Fill in some gaps with smaller, solid white stars or simple cross-shapes to add variety to the celestial pattern. -
Create constellations:
Connect imaginary points by clustering small dots and tiny stars together. I like to focus the density of the stars on the darker, outer paint ring and have them scatter out as they move toward the unpainted center. -
Add detail dots:
Using the very tip of the pen, dot tiny specks of white ink in the empty spaces between your larger stars to create the look of distant galaxies. -
Review the balance:
Take a step back and look at your composition. Add a few more tiny dots or crosses where the design feels too empty, ensuring the pattern frames the center circle nicely. -
Let the ink cure:
Allow the white ink to dry completely to prevent smudging. If you plan to use this as a coaster, consider sealing it with a clear matte spray varnish.
Bleeding Lines?
If your paint pen ink spreads into the wood fibers, the base wash wasn’t dry enough. Let it dry longer, or apply a thin layer of clear matte medium first.
Now you have a enchanting piece of art that highlights the wood’s natural beauty
Geometric Triangles That Let the Wood Grain Shine Through
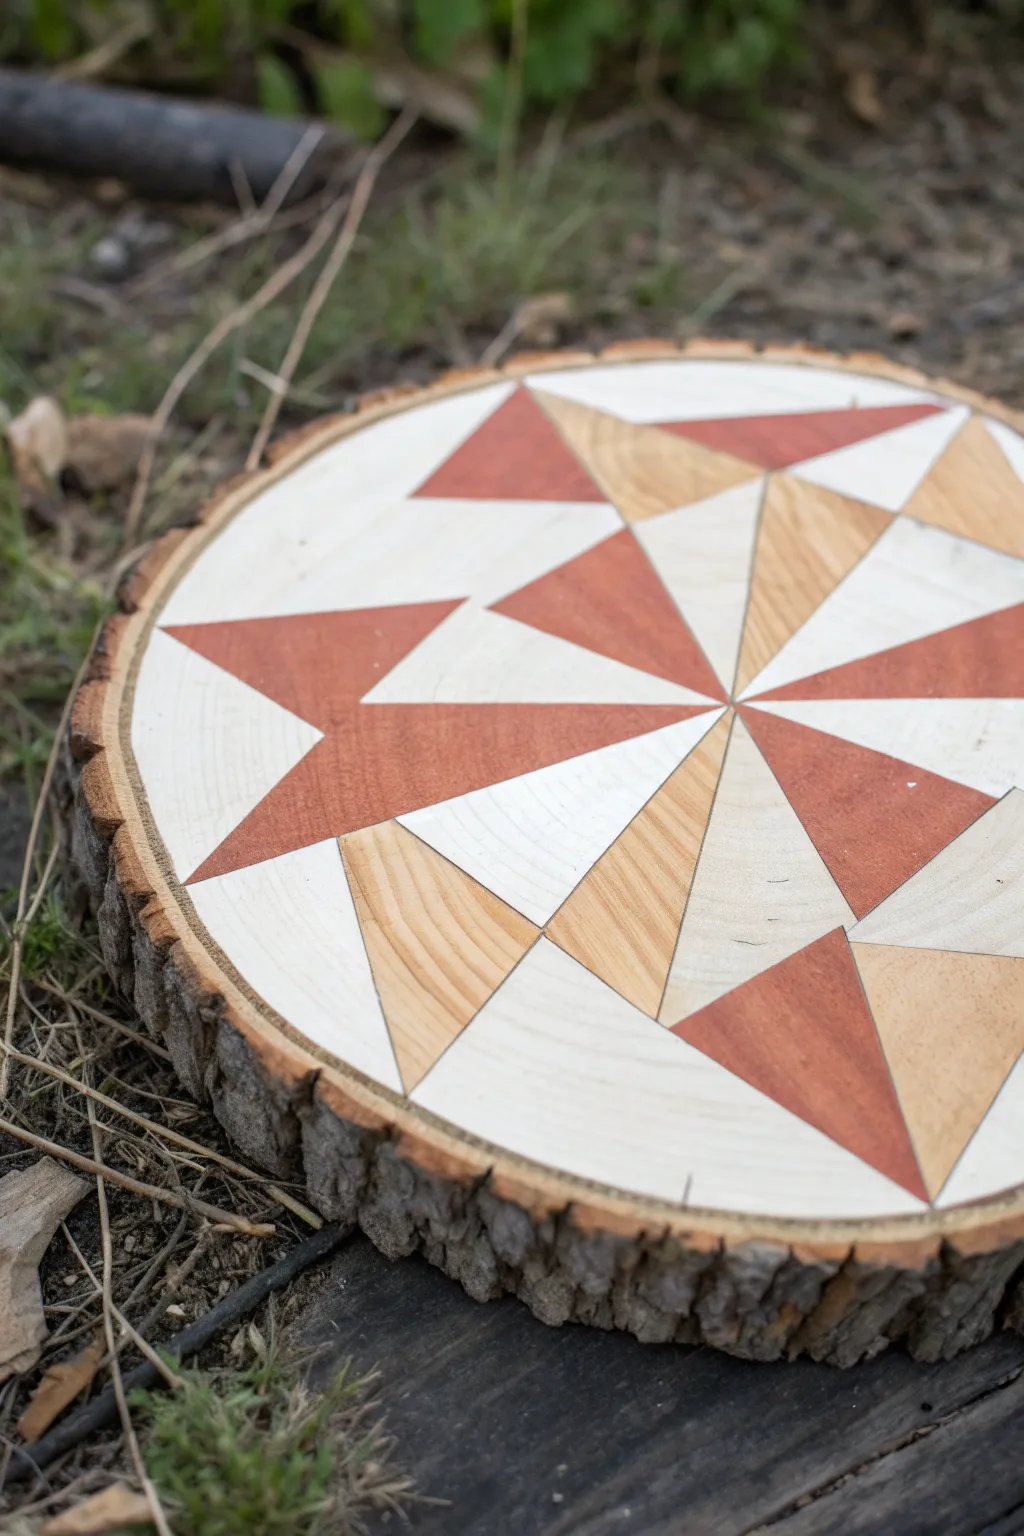
Embrace the natural beauty of wood with this rustic yet modern project that transforms a simple tree slice into a striking geometric centerpiece. By combining crisp white and warm terracotta paint with exposed wood grain, you achieve a balance of organic texture and clean design.
Detailed Instructions
Materials
- Large wood slice (with bark intact)
- Sandpaper (120 and 220 grit)
- Painter’s tape (various widths)
- Ruler or straight edge
- Pencil
- Acrylic craft paint (White)
- Acrylic craft paint (Terracotta or Russet Brown)
- Small flat angled paintbrush
- Clear matte polyurethane sealer (spray or brush-on)
- Lint-free cloth
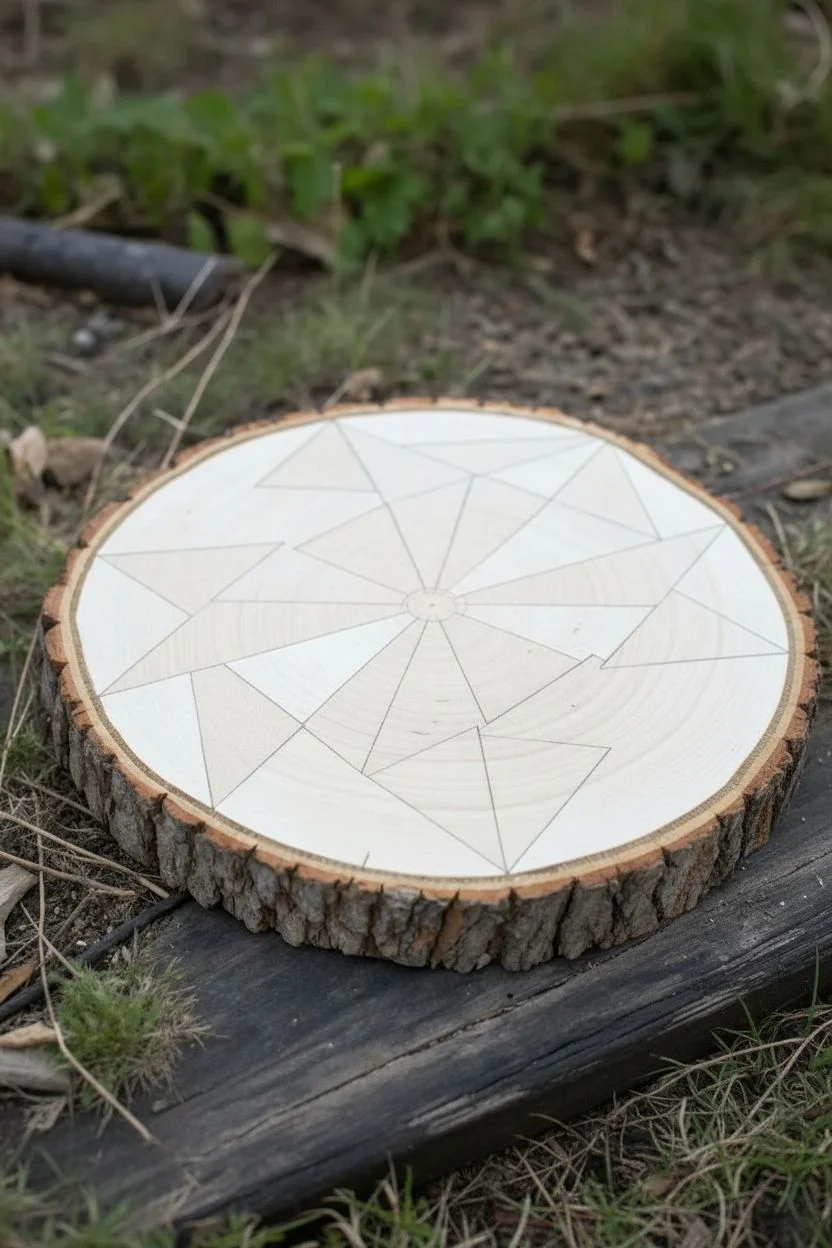
Step 1: Preparation & Planning
-
Surface Smoothing:
Begin by sanding the top face of your wood slice. Start with 120-grit sandpaper to remove rough saw marks, then switch to 220-grit for a smooth, paint-ready finish. Wipe away all dust with a lint-free cloth or tack cloth. -
Finding the Center:
Locate the approximate center of your wood slice. It doesn’t need to be mathematically perfect since the slice is organic, but make a small mark with your pencil to guide your design. -
Drafting the Design:
Using a ruler, lightly draw a series of intersecting lines through the center point to create eight equal pie-slice segments. This forms the skeleton of your geometric starburst. -
Detailed Sketching:
Within each pie slice, lightly sketch the internal triangle shapes. Looking at the reference, notice how some triangles float in the middle while others connect to the center. I find it helpful to draw the whole pattern lightly first so I don’t get lost while painting.
Seal Prior to Paint
Apply a thin layer of matte clear sealer over your tape edges before painting. This blocks the wood grain pores and ensures perfectly crisp lines.
Step 2: Painting the Pattern
-
Base Layer Strategy:
Decide which sections will remain natural wood. You can mark these with a small ‘X’ made of tape so you don’t accidentally paint them. -
Applying Tape Borders:
Tape off the straight edges of your first set of triangles. Press the edges of the tape down firmly with your fingernail or a credit card to prevent paint bleed, which is crucial on porous wood surfaces. -
The White Sections:
Load your flat brush with white acrylic paint. Apply a thin, even coat to the designated white triangles, brushing in the direction of the wood grain whenever possible. Let this dry for about 10 minutes. -
Second Coat:
If the wood grain is showing through too much for your taste, apply a second coat of white paint. Carefully peel back the tape while the paint is still slightly tacky to ensure a crisp line. -
The Terracotta Sections:
Once the white sections are fully dry (give it at least 20 minutes), tape off the boundaries for the reddish-brown triangles. Ensure your tape doesn’t pull up the fresh white paint. -
Painting Color:
Fill in these sections with your terracotta or russet brown paint. This color contrasts beautifully with the pale wood, so take your time to stay within the lines. -
Clean Up:
Remove the tape immediately after finishing the colored sections. If you notice any small bleeds or uneven edges, use a tiny detailed brush to touch them up or carefully scrape excess paint away with a craft knife.
Step 3: Finishing Touches
-
Erasing Guides:
Once all paint is completely dry, gently erase any visible pencil lines that weren’t covered by paint. Be gentle to avoid burnishing the bare wood. -
Sealing the Surface:
To protect the wood and paint, apply a clear matte polyurethane sealer. A spray sealer works best to avoid smearing the geometric lines, but a brush-on poly works if applied lightly. -
Drying:
Allow the sealer to cure according to the manufacturer’s instructions before placing anything on the surface.
Metallic Accent
Add a luxe touch by outlining the triangles with a gold paint pen or applying gold leaf to one specific set of triangles for a bit of shimmer.
Now you have a stunning, custom piece of decor that perfectly highlights the intersection of nature and design
Whimsical Color Drips on a Wood Plaque
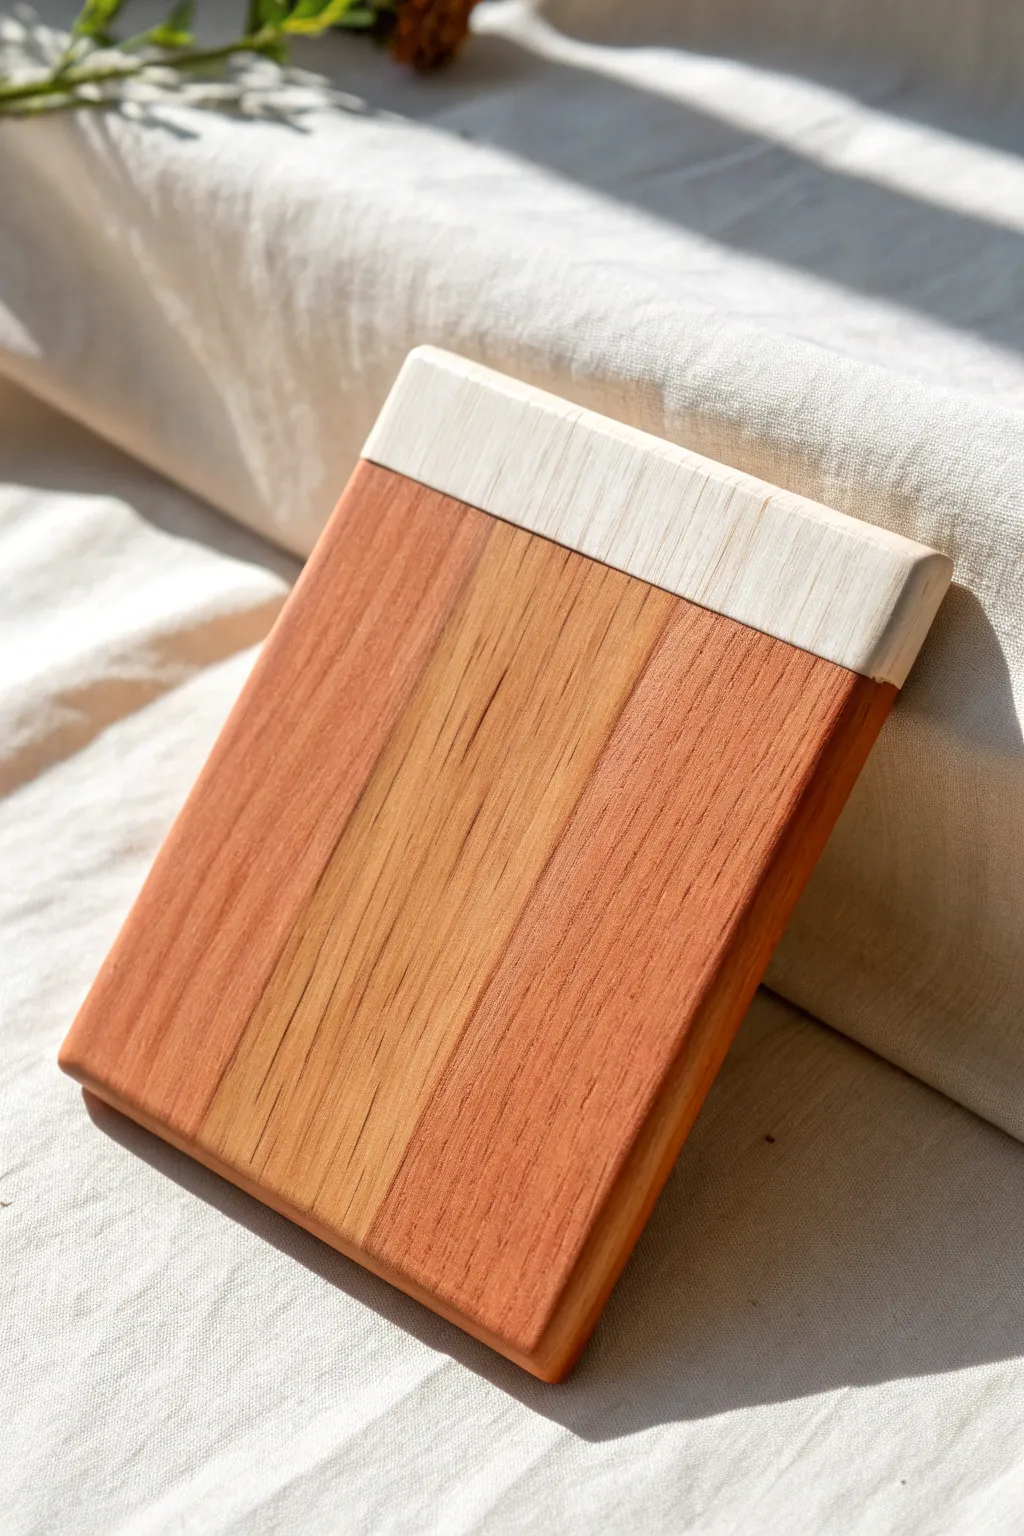
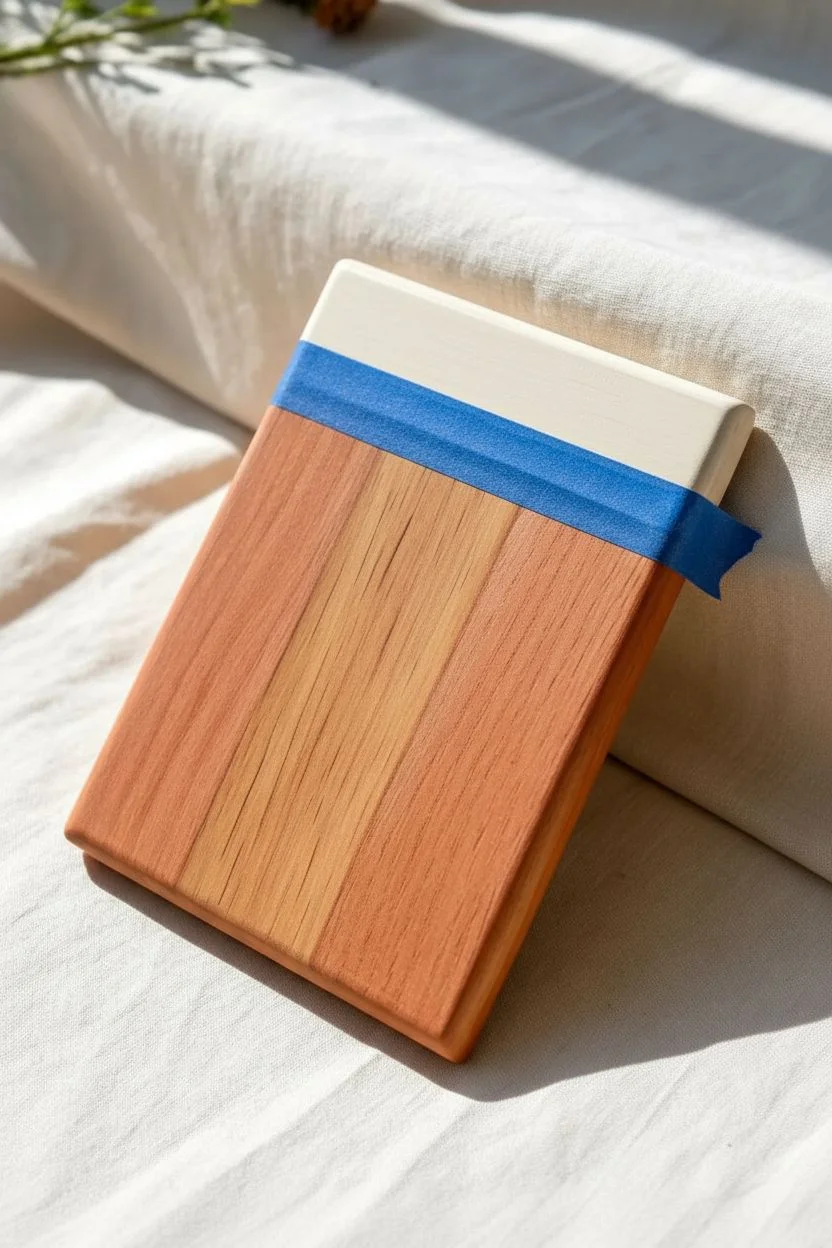
This elegant project combines the rustic warmth of natural hardwood with a modern, minimalist touch of creamy white. The distinct line created by the “dipped” effect transforms a simple wooden board into a chic object perfect for styling or light serving tasks.
Step-by-Step Guide
Materials
- Small rectangular wooden board (hardwood like cherry, maple, or walnut pre-glued panel)
- Sandpaper (120, 220, and 400 grit)
- Painter’s tape or high-quality masking tape
- Creamy white acrylic craft paint or milk paint
- Flat paintbrush (1-inch width)
- Clear polyurethane sealant or food-safe mineral oil
- Clean tack cloth or cotton rag
- Ruler
Step 1: Preparation & Sanding
-
Inspect the wood:
Begin with a small pre-glued hardwood panel or a solid block of wood. If the edges are sharp, decide if you want to soften them gently with sandpaper or keep them crisp for a modern look. -
Initial rough sanding:
Using 120-grit sandpaper, sand the entire surface of the wood. Sand with the grain, not against it, to remove any manufacturing marks or rough spots. -
Refine the finish:
Switch to 220-grit sandpaper for a second pass. This middle step is crucial for getting that professional, velvety texture that feels good in the hand. -
Clean the surface:
Wipe away all sanding dust thoroughly using a tack cloth or a slightly damp rag. Any lingering dust will ruin the crisp line we are aiming for.
Bleeding Line Fix
Step resulted in a fuzzy line? No worries. Carefully re-apply tape slightly above the error and use a very sharp craft knife to gently scrape away the excess bleeding paint.
Step 2: Creating the Dipped Effect
-
Measure the block:
Decide on the proportions for your color block. A good rule of thumb is to paint the top 1/4 to 1/3 of the board. Measure down from the top edge and make tiny tick marks with a pencil. -
Apply the tape:
Place a strip of painter’s tape across the board, aligning the bottom edge of the tape with your pencil marks. Wrap the tape tightly around the sides and back to ensure a continuous line. -
Seal the tape edge:
Press the edge of the tape down firmly with your fingernail or a credit card. I like to do this twice to guarantee no paint seeps underneath. -
First coat application:
Dip your flat brush into the creamy white paint. Apply a thin, even layer to the exposed top section of the wood. Brush away from the tape edge initially to prevent pushing paint under it. -
Paint the edges:
Don’t forget the top edge and side edges of the painted section. These need to be fully covered for the illusion that the wood was literally dipped in paint. -
Dry and repeat:
Let the first coat dry completely according to the paint bottle instructions. Apply a second coat to ensure the wood grain is mostly hidden and the color is opaque. -
Optional third coat:
If your paint is thin or the wood is very dark, a third coat might be necessary for that solid, blocked-out look.
Step 3: Finishing Touches
-
Remove the tape:
While the final coat is still slightly tacky (not completely bone dry), carefully peel back the painter’s tape at a 45-degree angle. This helps prevent the paint from chipping at the line. -
Create a smooth transition:
Once the paint is fully cured, take a piece of very fine 400-grit sandpaper. extremely gently pass it over the painted area and the transition line to knock down any raised ridges. -
Seal the painted area:
Apply a clear satin polyurethane or acrylic sealer specifically over the painted white section to protect it from scratches and chipping. -
Oil the natural wood:
For the unpainted wood section, rub in a generous amount of food-safe mineral oil or wood butter. This will darken the grain and make the contrast with the white paint pop beautifully. -
Final buffing:
After the oil has soaked in for about 20 minutes, buff the entire piece with a clean, dry lint-free cloth to remove excess oil and give it a slight sheen.
Embrace Texture
Instead of solid paint, mix a teaspoon of baking soda into your acrylic paint. This creates a ceramic-like texture that makes the wood look like it’s capped in stone or pottery.
Place your finished board on a coffee table or shelf to add an instant touch of modern warmth to your space
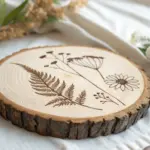
Burned-Edge Look With Painted Center Motif on Wood
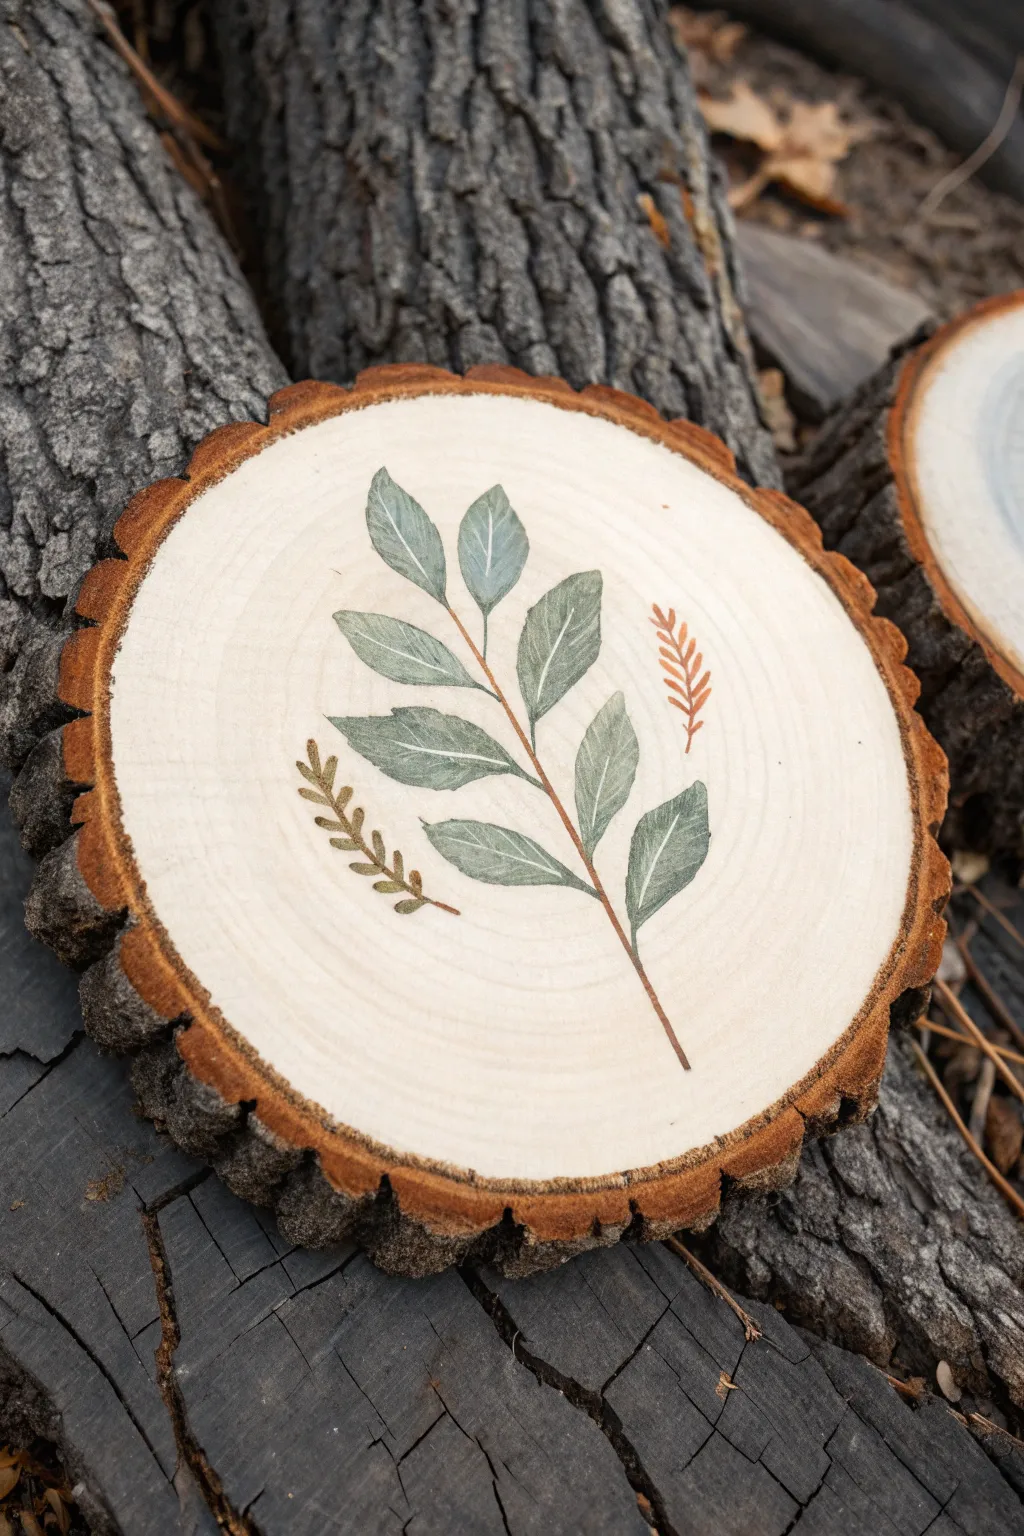
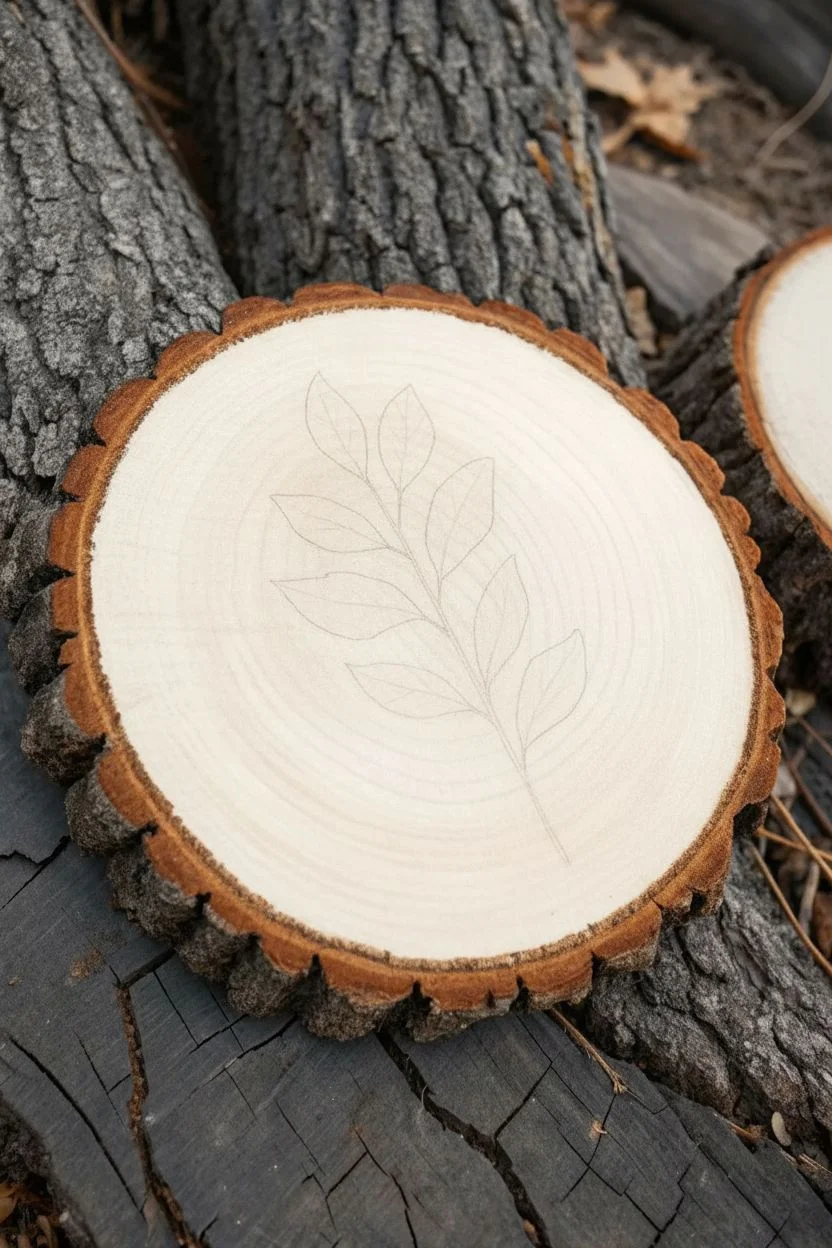
Embrace the rustic charm of nature with this simple yet elegant wood slice painting featuring a delicate leafy branch. The combination of the raw bark edge and the soft, slightly translucent paint application creates a beautifully organic piece perfect for farmhouse decor or handmade gifts.
Step-by-Step Tutorial
Materials
- Medium-sized wood slice (approx. 4-6 inches) with bark intact
- Fine-grit sandpaper (220-grit)
- Acrylic paints (Sage Green, Forest Green, White, Burnt Umber, Burnt Sienna, Yellow Ochre)
- Textile medium or water (to thin paints for a watercolor effect)
- Small round brush (size 2 or 4)
- Fine liner brush (size 0 or 00)
- Pencil
- Carbon paper (optional)
- Paper towel
- Clear matte sealer spray or varnish
Step 1: Preparation & Sketching
-
Smooth the Surface:
Before you begin painting, ensure your wood slice is smooth. Lightly sand the face of the wood with 220-grit sandpaper to remove any rough fibers that might catch your brush. Wipe away the dust with a dry cloth or paper towel. -
Positioning the Design:
Decide on the placement of your main branch. It should run diagonally across the slice for a dynamic composition. Visualize a central stem with 6-8 main leaves growing outward. -
Light Sketching:
Using a pencil, very lightly sketch the central stem and the outlines of the leaves. Keep your lines faint so they won’t show through the paint later; erased lines can sometimes smudge on raw wood.
Step 2: Painting the Main Foliage
-
Mixing the Base Green:
On your palette, mix Sage Green with a tiny touch of White to create a soft, muted leafy tone. I like to thin this mixture slightly with water or a textile medium to achieve a semi-transparent, watercolor-like consistency that lets some wood grain show through. -
Painting the Leaves:
Using your small round brush, fill in the leaf shapes with your diluted green mix. Start from the base of the leaf and pull the brush toward the tip to create a natural taper. It’s okay if the color isn’t perfectly uniform; variations add depth. -
Adding Dimension:
While the leaves are still slightly damp, mix a darker version of your green using a bit of Forest Green. Touch this darker shade to the base of a few leaves to create a subtle shadow gradient. -
Painting the Stem:
Switch to your fine liner brush. Mix Burnt Umber with a tiny bit of water to get an inky consistency. Carefully paint the thin central stem, connecting all your leaves. Extend the stem slightly off the bottom for a grounded look. -
Drying Time:
Allow the green leaves and stem to dry completely. Since the paint is thin, this should only take about 10-15 minutes.
Paint Bleeding?
If paint bleeds into the wood grain, your mixture is too watery. Let it dry, sand lightly, and reapply using less water or by mixing paint with clear gesso instead.
Step 3: Adding Details & Accents
-
Creating Leaf Veins:
Mix a very pale green shade, almost white. Using your finest liner brush, paint a central vein down the middle of each dried green leaf. -
Secondary Veins:
Add tiny, delicate side veins branching off the central vein on the larger leaves. Keep these lines extremely thin and subtle. -
Painting the Accent Sprigs:
To add variety, paint two smaller botanical accents. For the fern-like sprig on the right, mix Burnt Sienna with a touch of White to get a rust-orange color. Paint a small curved stem with tiny dashes for leaves. -
The Second Accent:
For the sprig on the left, use a mix of Yellow Ochre and Sage Green for an earthy olive tone. Paint a small stem with tiny, teardrop-shaped leaves extending from it. -
Refining Edges:
Look over your work. If any leaf edges look too ragged, use your round brush with slightly thicker green paint to smooth them out gently.
Pro Tip: Practice Run
Test your thinned paint consistency on the back of the wood slice first. The wood’s thirstiness varies, so this helps you gauge how much water to add.
Step 4: Finishing Touches
-
Burnished Edge Effect:
To enhance the ‘burned edge’ look mentioned in the inspiration, take a small amount of Burnt Umber paint on a dry brush. Wipe most of the paint off on a paper towel. -
Applying the Tint:
Gently dry-brush the very outer rim of the wood face, right where the bark meets the smooth wood. This deepens the natural darkness of the edge and frames your painting. -
Final Inspection:
Check for any stray pencil marks. If visible, gently erase them, being careful not to rub the painted areas. -
Sealing the Artwork:
Once the paint is fully cured (give it at least an hour), protect your work. Spray the entire face of the wood slice with a clear matte sealer. This prevents moisture from warping the wood or damaging the paint over time.
Hang your finished piece as a mini wall gallery or use it as a stunning rustic coaster
Mixed-Media Texture on Wood Using Dry Brush and Dot Details
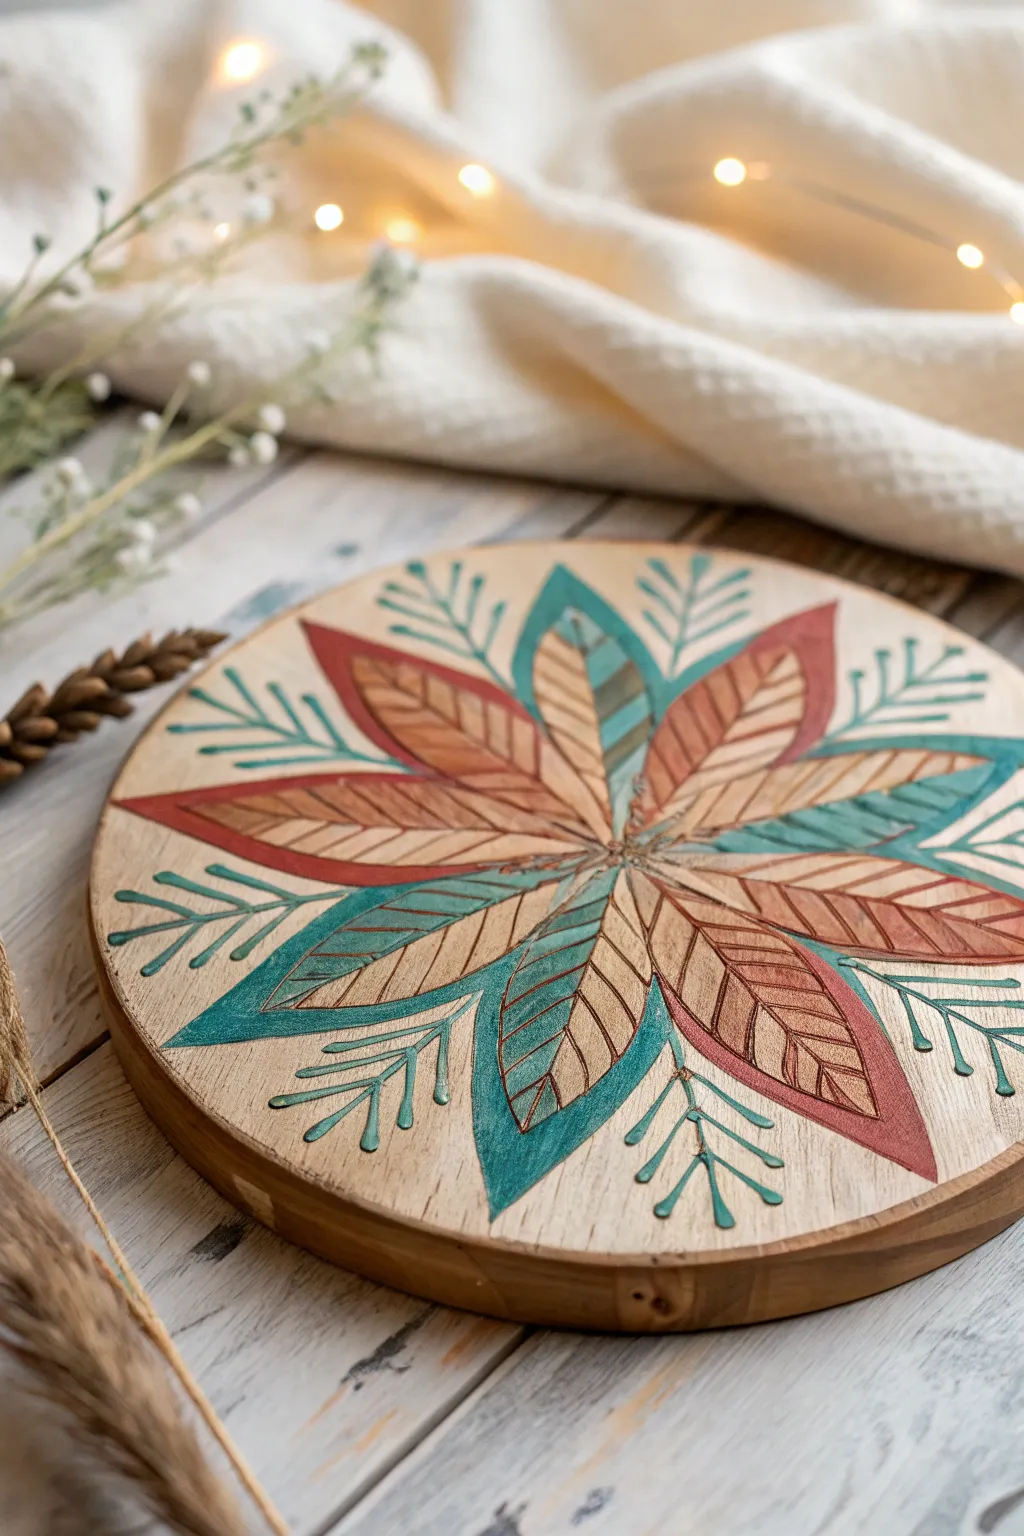
This rustic yet elegant project transforms a simple wooden round into a stunning piece of wall art or a decorative tray. Featuring a radiating leaf pattern with a mix of earthy reds, teals, and natural wood tones, it uses clever masking and detailing to create a polished, textured look.
Step-by-Step
Materials
- Round wooden plaque or charger (approx. 10-12 inches)
- Acrylic paints (Teal, Metallic Copper/Red-Bronze, Deep Red)
- Paintbrushes (flat brush, fine liner brush)
- Pencil and eraser
- Ruler and compass (or round object for tracing)
- Painter’s tape or masking fluid (optional)
- Fine-grit sandpaper (220 grit)
- Clear matte or satin varnish
- Carbon transfer paper (optional)
Step 1: Preparation and Layout
-
Sand the surface:
Begin by sanding your wooden round with fine-grit sandpaper to ensure a smooth painting surface. Wipe away all dust with a tack cloth or slightly damp rag. -
Mark the center:
Find the exact center of your wooden circle. Use a ruler to measure across the diameter in two directions; where they intersect is your center point. -
Draw guide circles:
Using a compass or by lightly tracing a smaller bowl, draw two light concentric circles. The inner one will define the leaf tips near the center, and the outer one will mark where the expansive leaves end. -
Sketch the primary petals:
Divide your circle into eight equal sections. Sketch a large, pointed leaf shape in each section, extending from the center out to your guide lines. Keep your pencil pressure light so lines are easy to erase later. -
Add secondary leaf shapes:
Between each large leaf, draw a slightly narrower, recessed leaf shape or a simple dividing line to create a layered effect. This gives the mandala depth. -
Sketch the outer sprigs:
In the negative space between the tips of the main leaves, sketch simple botanical sprigs. Draw a central stem with three or four small leaves branching off on each side.
Step 2: Painting the Base Colors
-
Paint the teal leaves:
Select four alternating large leaves to be your teal set. Using a flat brush, carefully fill them in. I like to keep the paint somewhat translucent here so the wood grain shows through slightly. -
Apply the warm tones:
For the remaining four large leaves, mix a deep red with a touch of metallic copper. Paint these leaves, allowing the brush strokes to follow the curve of the leaf for added texture. -
Detail the inner layers:
Paint the smaller, recessed leaf shapes (the secondary layer) in a contrasting lighter wood tone or a very watered-down version of your copper paint to distinguish them from the main petals. -
Paint the outer sprigs:
Switch to your fine liner brush. Dip it in the teal paint and carefully trace the botanical sprigs on the outer edge. Use a ‘press and lift’ motion to create the tear-drop shape of the small leaves. -
Dry thoroughly:
Allow all paint layers to dry completely. If you want more opacity, add a second coat now, but the rustic charm often benefits from a single, slightly uneven layer.
Uneven Edges?
If your leaf outlines look shaky, skip the brush. Use an ultra-fine tip permanent marker or black paint pen for crisp outlines, then seal lightly to prevent bleeding.
Step 3: Adding Definition and Texture
-
Create the central veins:
Once dry, use a sharp pencil or a very fine brush with dark brown paint to draw a straight line down the center of each large leaf. -
Add angled veins:
Draw or paint diagonal veins branching from the center line to the leaf edges. Keep these lines consistently spaced—about a centimeter apart—to maintain the geometric mandala feel. -
Outline the leaves:
Use a liner brush with a dark brown or dark grey paint to outline each large leaf. This step sharpens the design and separates the colors from the raw wood background. -
Highlight the center:
In the very center where all leaves meet, add small dots or a tiny starburst shape using the metallic copper paint to create a focal point. -
Distress (optional):
For a varied texture, you can lightly sand over the painted leaves with very fine sandpaper. This reveals a bit more wood grain and creates a vintage, worn look.
Add Dimension
Mix a tiny amount of texture paste or baking soda into your teal paint for the outer sprigs. This makes them physically raised, adding tactile interest.
Step 4: Finishing Touches
-
Clean up lines:
Check your outer sprigs and outlines. If any lines look shaky, use a clean damp brush to gently correct them or touch up with the background color (if you painted a background) or simply sand away mistakes. -
Seal the wood:
Protect your artwork by applying a coat of clear matte or satin varnish over the entire face of the wood round. This brings out the richness of the wood grain and protects the paint.
Hang your finished mandala in an entryway or use it as a centerpiece to bring a warm, artistic touch to your home


Have a question or want to share your own experience? I'd love to hear from you in the comments below!