If you’ve been itching to play with epoxy resin, these ideas will give you that glossy, glass-like magic without feeling overwhelming. I’m sharing my favorite projects and effects I reach for when I want big visual impact from simple pours, embeds, and swirls.
Geode-Style Epoxy Resin Coasters With Metallic Edges
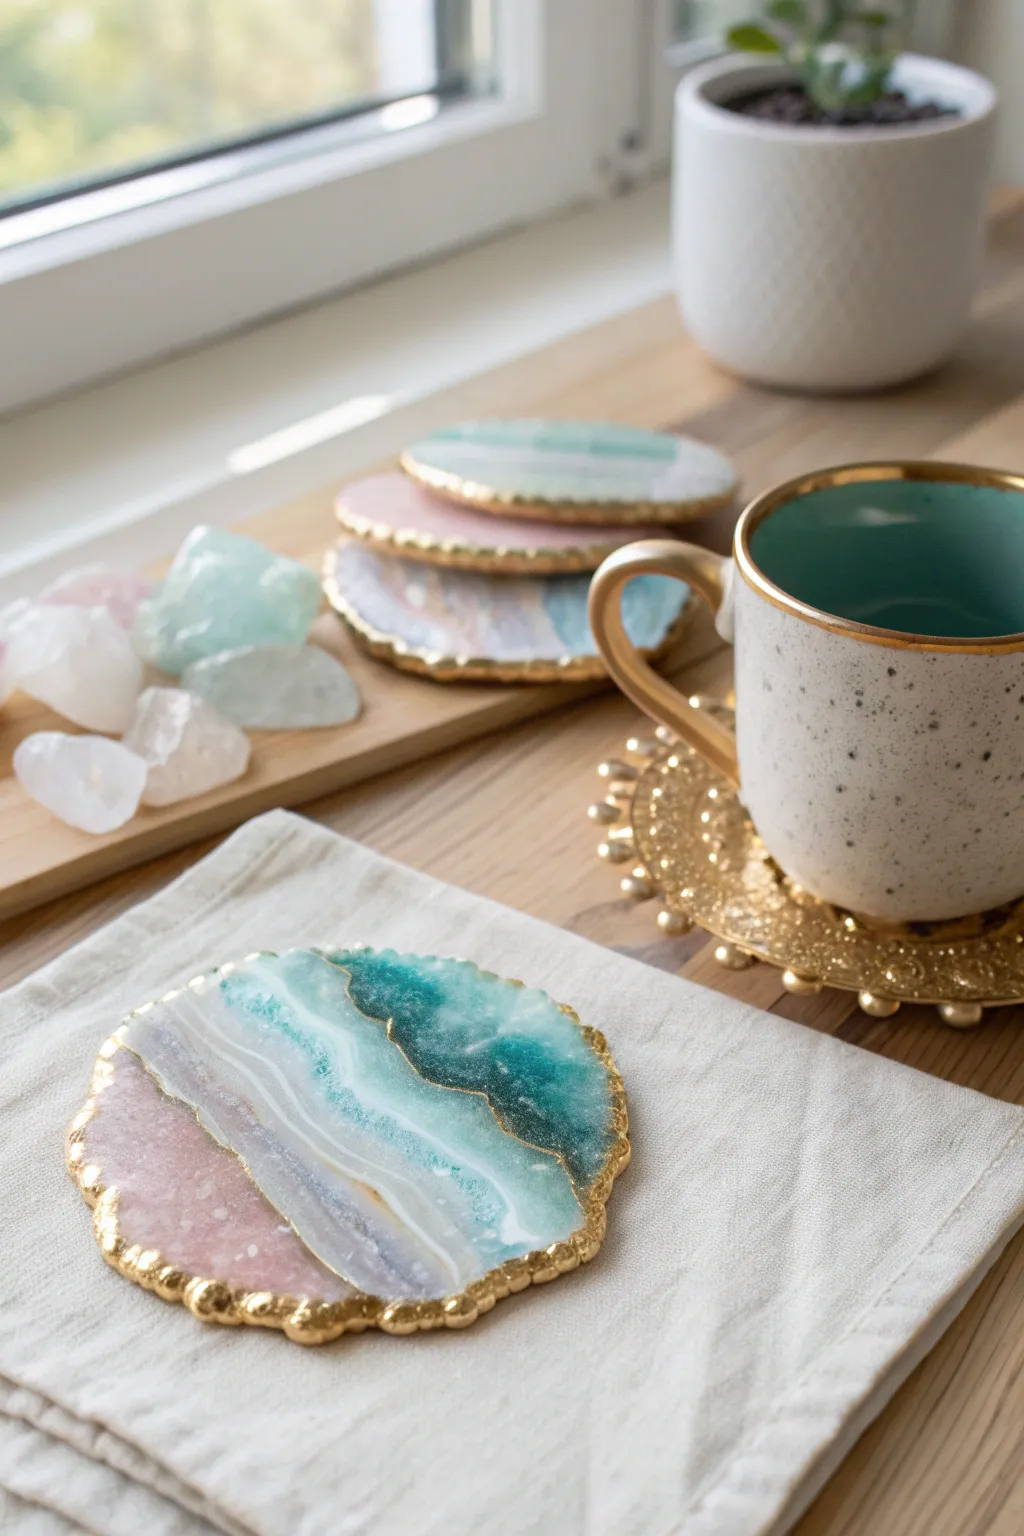
These stunning coasters mimic the natural beauty of agate with swirling layers of teal, white, and translucent minerals. Finished with a textured metallic gold rim, they bring a touch of geological elegance to any coffee table.
Detailed Instructions
Materials
- Epoxy casting resin (2-part kit)
- Silicone geode coaster molds (irregular edge shapes)
- Mica powders: Blue/Teal, White, Pink/Rose Gold
- White alcohol ink (for cloud effects)
- Clear crushed glass or large glitter chunks (for the centers)
- Liquid gold leaf or metallic gold paint pen
- Mixing cups and wooden stir sticks
- Heat gun or torch
- Toothpicks
- Nitrile gloves
Step 1: Preparing the Base
-
Safety First:
Before starting, ensure you are in a well-ventilated area and put on your nitrile gloves to protect your skin from the resin. -
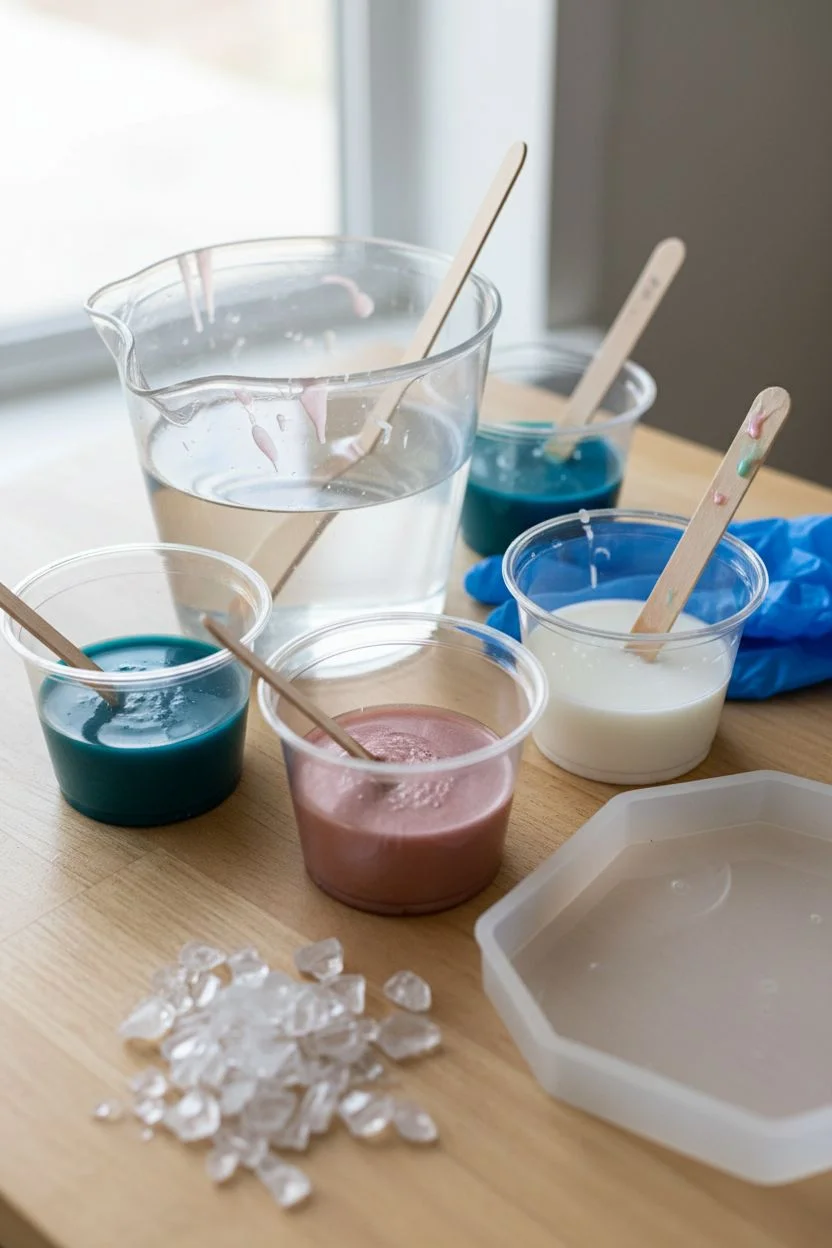
Mix the Resin:
Measure equal parts of resin and hardener into a mixing cup. Stir slowly but thoroughly for at least 3 minutes, scraping the sides and bottom to avoid sticky soft spots. -
Divide the Batch:
Pour smaller amounts of the mixed resin into separate cups. You will need one cup for clear, one for white, one for teal/blue, and a small one for a touch of pink. -
Add Colorants:
Mix mica powders into their respective cups. Keep one cup perfectly clear. For the white, you can use either mica powder or a few drops of white pigment paste to get an opaque look.
Sticky Surfaces?
If your resin is still tacky after 48 hours, the ratio was likely off or it wasn’t mixed enough. Unfortunately, you usually can’t fix this; pour a fresh layer.
Step 2: Creating the Geode Design
-
Place the Core:
Take your crushed glass or clear glitter chunks and arrange a small pile in the center or slightly off-center of the silicone mold. Pour a little clear resin over the stones to lock them in. -
Pour the First Ring:
Pour a ring of the clear or very light translucent resin around the crushed glass center. This negative space creates depth like a real geode. -
Layer the Colors:
Pour a distinct band of the teal resin next, following the irregular shape of the mold. Don’t worry if the lines aren’t perfect; organic is better. -
Add the White Ribbon:
Pour a thin line of the white resin next to the teal. Using a toothpick, gently swirl the white into the teal just slightly to soften the harsh line. -
Fill the Edges:
Fill the remaining outer edge of the mold with the soft pink or a lighter variation of the teal resin. Ensure the resin reaches every nook of the mold wall. -
Remove Bubbles:
Pass a heat gun or torch quickly over the surface of the wet resin to pop any air bubbles that have risen to the top. -
Create Depth:
For that hazy, cloudy effect, drop one or two drops of white alcohol ink into the clear sections. It will naturally sink and create wispy tendrils. -
Cure:
Cover the molds with a box or dust cover and let them cure undisturbed for 24-48 hours, depending on your resin brand instructions.
Step 3: Finishing Touches
-
Demold:
Once hardened, gently peel the silicone mold away from the resin coaster. The edges will naturally be uneven, which is perfect for this style. -
Smooth Sharp Edges:
Run your finger along the rim. If there are any sharp resin burrs, gently sand them down with fine-grit sandpaper and wipe clean. -
Apply Gold Base:
Using a small brush, apply liquid gold leaf along the textured edge of the coaster. I find that dabbing rather than stroking helps get the paint into the uneven crevices. -
Extend the Rim:
Allow the gold paint to creep slightly onto the top surface of the coaster, mimicking the natural mineral crust found on agate slices. -
Seal (Optional):
If you want the gold edge to be extra durable, apply a very thin layer of clear resin or a clear gloss varnish over just the painted rim.
Gazing into the Abyss
Add depth by doing two pours. embed the glass in a clear layer first, let it cure, then add the colored layers behind it.
Place your warm mug on your new creation and enjoy the functional art you’ve made


Ocean Wave Epoxy Resin Art on Wood Panels
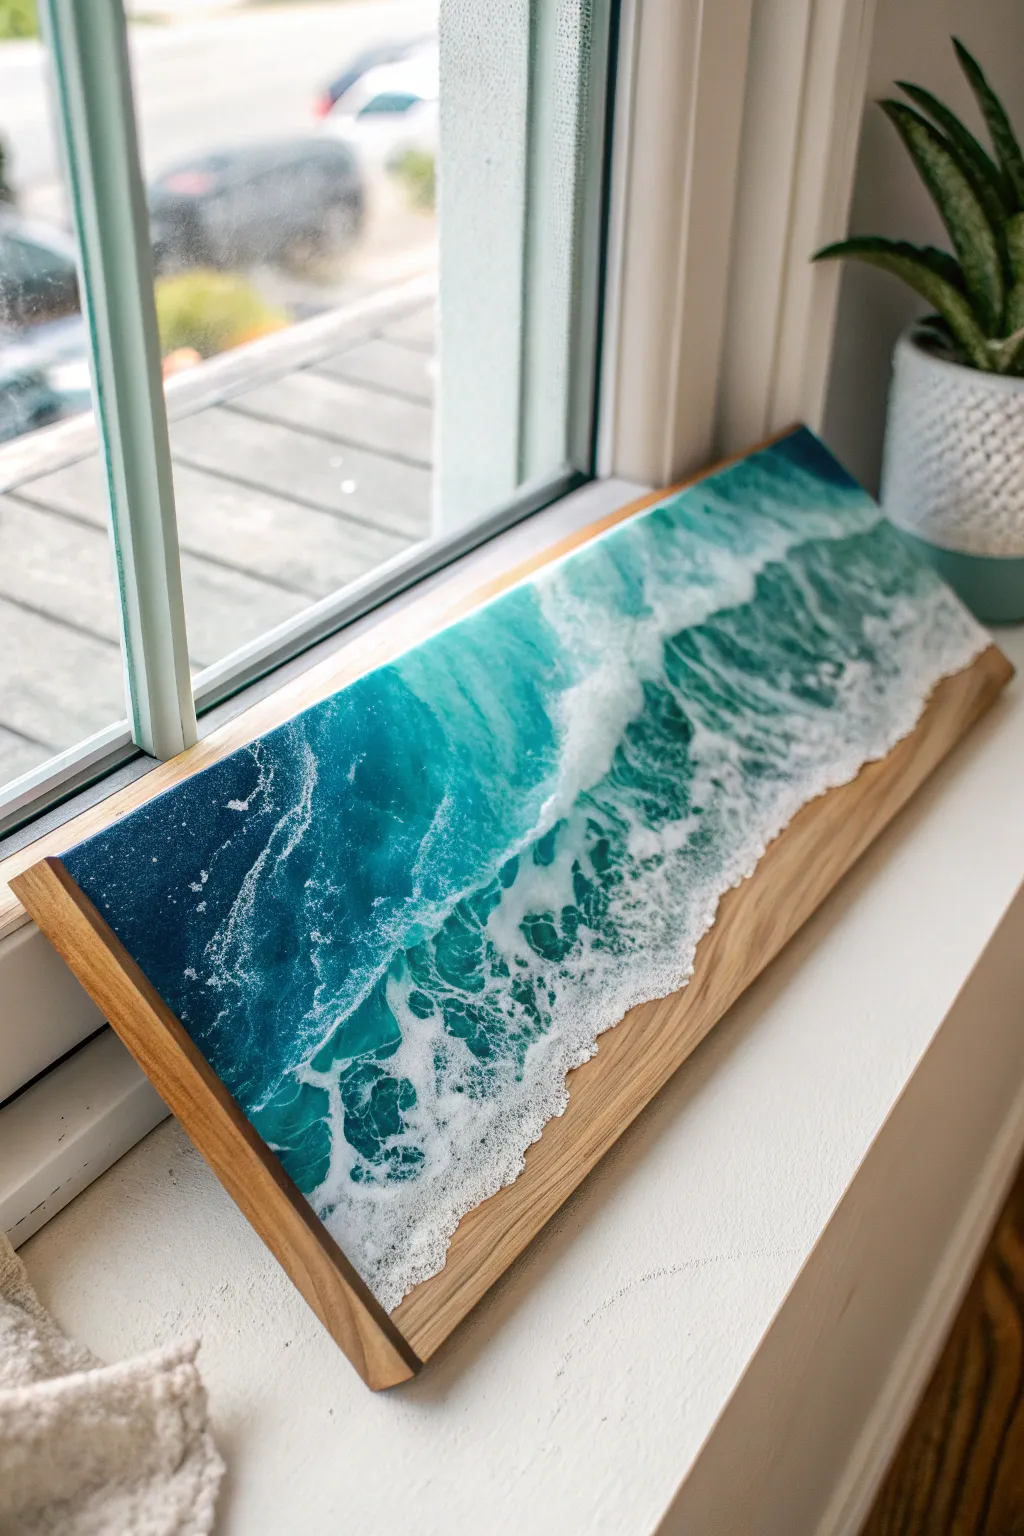
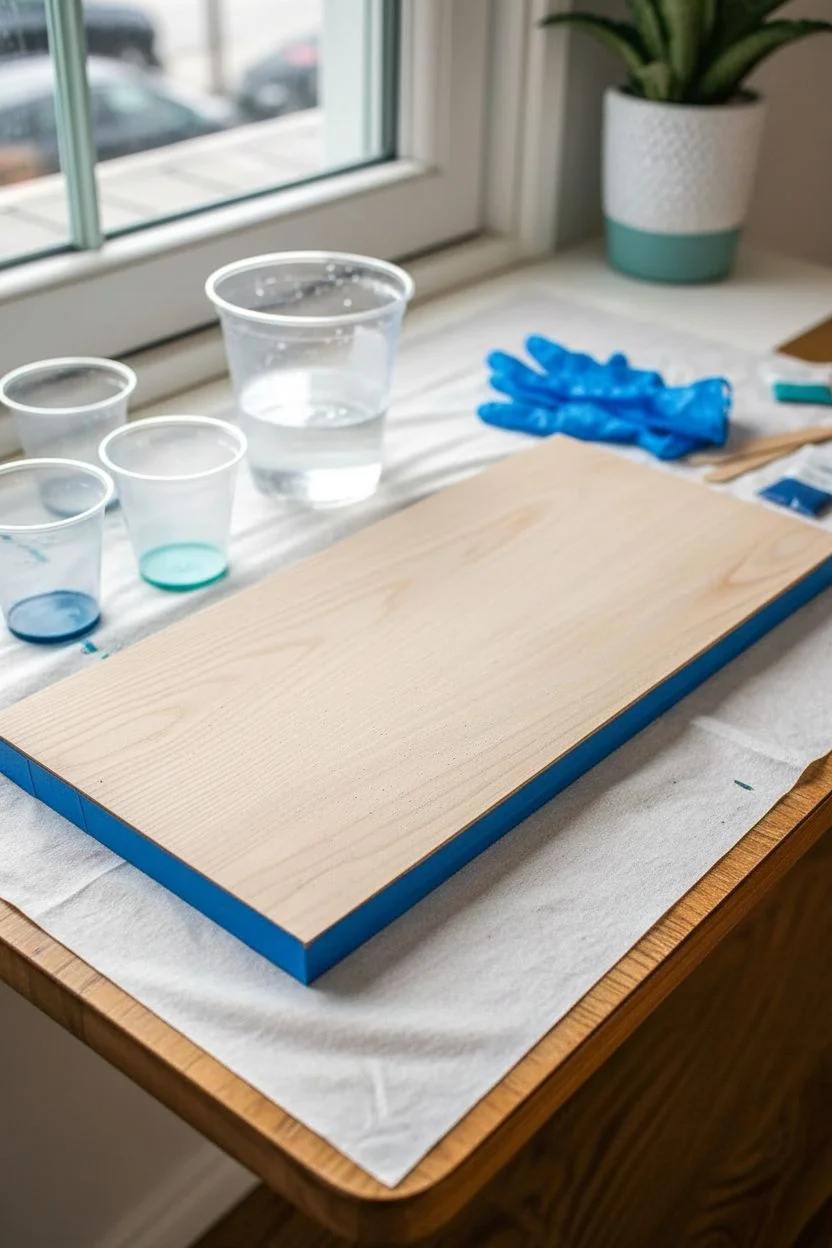
Capture the raw power and beauty of the ocean with this stunning resin art piece on a natural wood panel. By layering deep blues, vibrant turquoises, and frothy white cells, you’ll create a realistic seascape that brings a breath of fresh salt air into your home decor.
Step-by-Step
Materials
- Rectangular wood panel (oak or maple recommended)
- Painter’s tape
- Art resin (two-part epoxy)
- Mica powder pigments (Deep Blue, Teal, White)
- White epoxy pigment paste
- Heat gun or embossing tool
- Butane torch
- Plastic cups and stir sticks
- Nitrile gloves
- Drop cloth or silicone mat
- Sandpaper (220 grit)
Step 1: Preparation and Mixing
-
Prepare the workspace:
Set up in a well-ventilated, dust-free area. Cover your work surface with a drop cloth or silicone mat to catch drips. Ensure your table is perfectly level, as resin will flow to the lowest point. -
Prep the wood panel:
Lightly sand the surface of your wood panel with 220-grit sandpaper to help the resin adhere. Wipe away all dust with a tack cloth or damp towel and let it dry completely. -
Mask the edges:
Apply painter’s tape tightly to the underside edges of the wood board. This creates a barrier that catches drips and makes cleanup much easier once the resin cures. -
Mix the resin:
In a large cup, measure equal parts of resin and hardener carefully. Stir slowly for at least 3 minutes, scraping the sides and bottom to ensure a thorough mix without introducing too many bubbles.
Step 2: Applying the Ocean Colors
-
Divide the resin:
Pour the mixed clear resin into four smaller cups. Leave one cup clear for the negative space or top coating. -
Tint the resin:
Mix your pigments into the remaining three cups: deep blue for the deep ocean, teal for the shallow water, and white pigment paste for the waves. Mix thoroughly until the color is opaque. -
Pour the deep blue:
Start by pouring a band of the deep blue resin along the top third of the wood panel. This represents the deepest part of the ocean furthest from the shore. -
Pour the teal:
Pour a band of teal resin next to the blue, slightly overlapping the edges. Leave the bottom third of the wood bare to represent the sandy beach. -
Blend the gradient:
Use a gloved finger or a stir stick to gently blend the line where the blue and teal meet. You want a seamless transition, not a hard line.
Pro Tip: Lacing Magic
For better sea foam cells, use a dedicated opaque white pigment paste rather than powder. Paste is heavier and sinks slightly, creating superior lacing effects.
Step 3: Creating the Wave Effect
-
Apply clear resin:
Pour a thin line of clear resin right where the teal resin meets the bare wood. This helps the white wave glide smoothly. -
Lay the white line:
Pour a thin line of the white pigmented resin directly onto the clear strip you just applied. Don’t make it too thick, or the wave will look heavy. -
Blow the waves:
Using your heat gun on a low setting, push the white resin back over the teal and blue sections. Hold the gun at a 45-degree angle and move quickly to create wispy, foamy patterns. -
Create cells:
Quickly pass a butane torch over the white foam areas. The heat will pop bubbles and help create those desirable lacing or cell effects that mimic sea foam. -
Add a second wave (Optional):
If you want more depth, repeat the process by adding a second, smaller line of white further back in the teal section and blowing it out gently. -
Clean the edges:
Check the sides of the panel. Use a gloved finger to smooth out any drips and ensure the sides are covered evenly if you want a wrapped look.
Troubleshooting: Overheating
Don’t hold the heat gun in one spot too long or the resin will scorch and stick to the wood. Keep the gun moving constantly for a fluid, natural look.
Step 4: Curing and Finishing
-
Cover and cure:
Place a large box or cover over your artwork to protect it from dust. Let it cure undisturbed for 24 hours. -
Remove tape:
Once the resin is hard to the touch but still slightly flexible (usually around the 24-hour mark), peel off the painter’s tape from the back. -
Final cure:
Allow the piece to sit for another 48–72 hours to reach its full hardness before handling or hanging.
Display your finished ocean panel near a window to let the natural light illuminate the depths of your resin waves


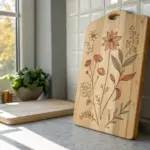
Pressed Flower Epoxy Resin Coasters for Botanical Vibes
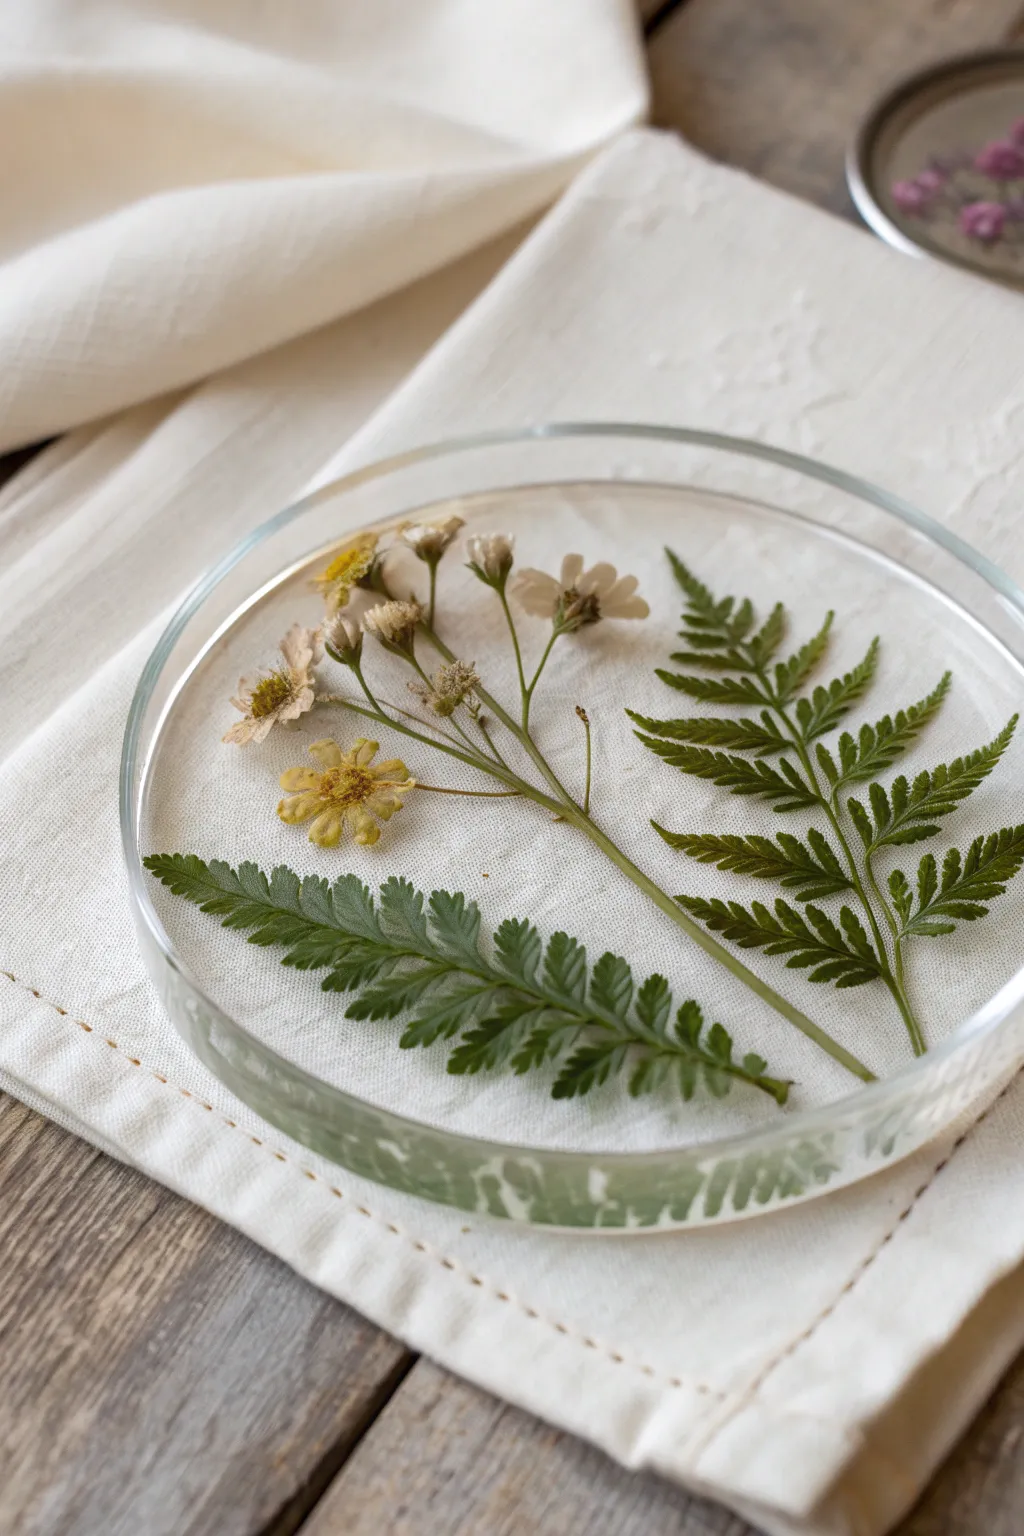
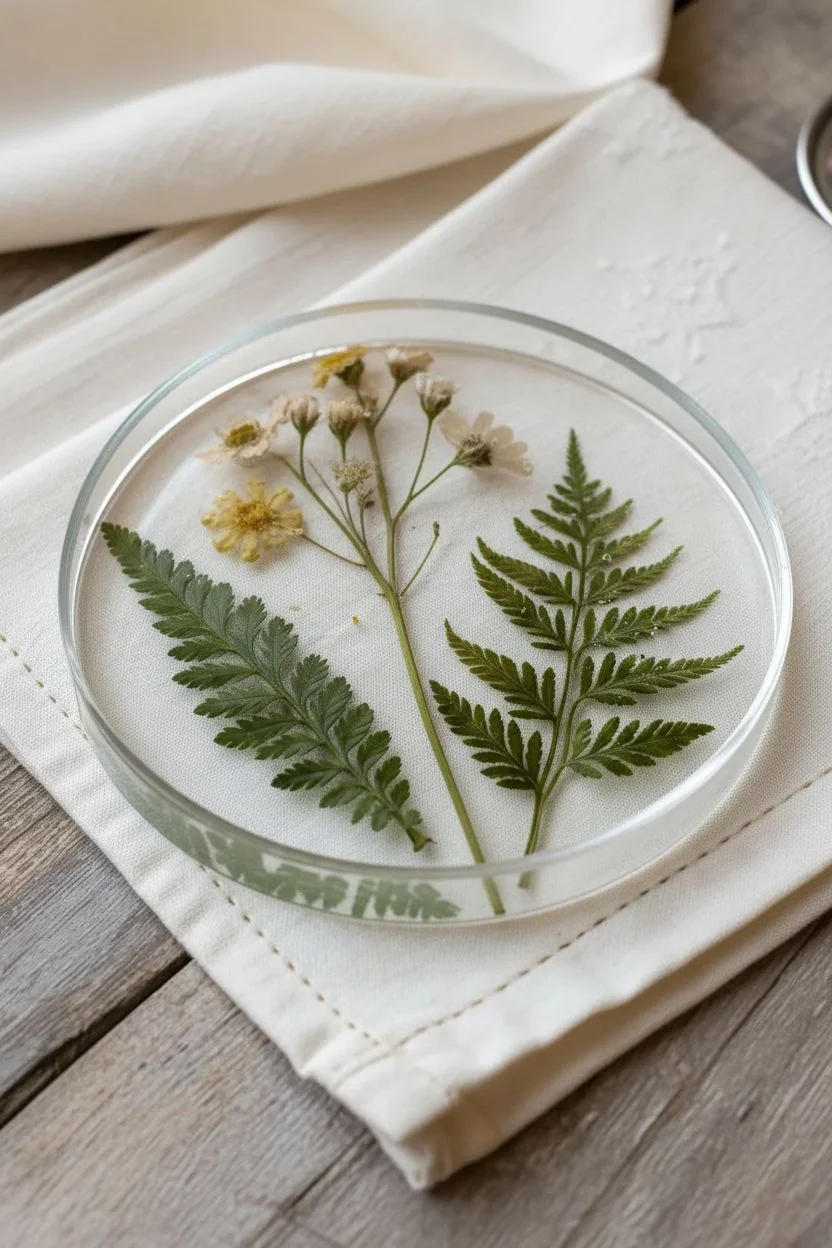
Capture the delicate beauty of nature in a durable, functional piece of art with these transparent botanical coasters. By suspending dried ferns and wildflowers in high-gloss epoxy, you create an elegant floating effect that brings a touch of the outdoors to your coffee table.
Step-by-Step Tutorial
Materials
- High-quality clear casting epoxy resin (part A and part B)
- Silicone coaster mold (smooth, round with a slight rim)
- Dried pressed flowers (chamomile or small daisies)
- Dried pressed fern fronds
- Tweezers
- Mixing cups and stir sticks
- Heat gun or torch
- Nitrile gloves and respirator mask
- Dust cover (cardboard box or plastic container)
Step 1: Preparation and First Pour
-
Prepare your workspace:
Set up in a dust-free, well-ventilated area. Lay down a silicone mat or wax paper to protect your surface and ensure your pressed botanicals are completely dry and moisture-free to prevent rotting inside the resin. -
Clean the mold:
Inspect your silicone coaster mold carefully. Use a piece of masking tape to lift off any stray dust particles or lint, as clear resin shows every tiny imperfection. -
Mix the base layer resin:
Measure a small amount of resin and hardener according to manufacturer instructions (usually 1:1 by volume). Stir slowly for 3-5 minutes, scraping the sides and bottom to ensure a thorough mix without introducing too many bubbles. -
Pour the base layer:
Pour a very thin layer (about 2-3mm) of mixed resin into the bottom of the mold. This acts as the ‘glue’ for your flowers and prevents them from touching the bottom surface. -
Remove bubbles:
Let the resin sit for a minute, then gently pass a heat gun or torch over the surface to pop any air bubbles that rise to the top.
Seal Your Blooms
If using very fragile flowers, seal them with a spray sealer or dipping them in diluted PVA glue first. This prevents the resin from soaking in and turning petals translucent.
Step 2: Arranging the Botanicals
-
Plan your layout:
Before placing anything in the wet resin, lay out your design on a piece of paper first. For the look in the photo, place a central floral stem flanked by two fern fronds. -
Place the flowers:
Using tweezers, gently pick up your main floral stem. Place it face-down into the wet resin (since the bottom of the mold will become the top of the coaster). -
Add the greenery:
Carefully position the fern leaves on either side of the flower stem, also face-down. Ensure the leaves don’t overlap awkwardly and create undesired thickness. -
Press gently:
Lightly press the botanicals down with your tweezers to ensure they are fully in contact with the resin and trapped air bubbles are released from underneath the petals. -
Let it cure slightly:
Cover the mold with a dust cover and let this base layer cure until it is tacky or ‘gummy’ (usually 4-6 hours). This prevents the flowers from floating up when you pour the final layer.
Step 3: Final Pour and Finishing
-
Mix the top coat:
Mix a second, larger batch of clear resin. I like to let this batch sit in the cup for just minute or two after mixing to let large bubbles rise and pop before pouring. -
Pour the second layer:
Slowly pour the resin over your tacky base layer and flowers until the mold is filled to the brim. Pouring slowly helps avoid disturbing delicate petals. -
Check for trapped air:
Look closely around the fern leaves and flower centers. If you see trapped air bubbles sticking to the plants, use a toothpick to gently nudge them to the surface. -
Final bubble removal:
Pass your heat gun quickly over the surface one last time. Be careful not to overheat the resin or the silicone mold. -
Full cure:
Cover the project again to protect against dust. Allow firmly to cure for at least 24-48 hours, or whatever time is recommended by your specific resin brand. -
Demold:
Once fully hardened, gently peel the silicone mold away from the resin coaster. Start at the edges and work your way around until it pops free. -
Examine edges:
If the edges feel sharp or raised where the meniscus formed, sand them lightly with fine-grit wet sandpaper (like 400 grit) or use a deburring tool. -
Add feet (optional):
Stick small clear silicone bumper pads to the bottom of the coaster to prevent slipping and protect your table surfaces.
Gilded Edges
Once fully cured and demolded, use a liquid gold leaf pen or gold acrylic paint to color the very edge of the coaster for a sophisticated, bounded look.
Enjoy your beautiful, everlasting garden captured in crystal clear resin


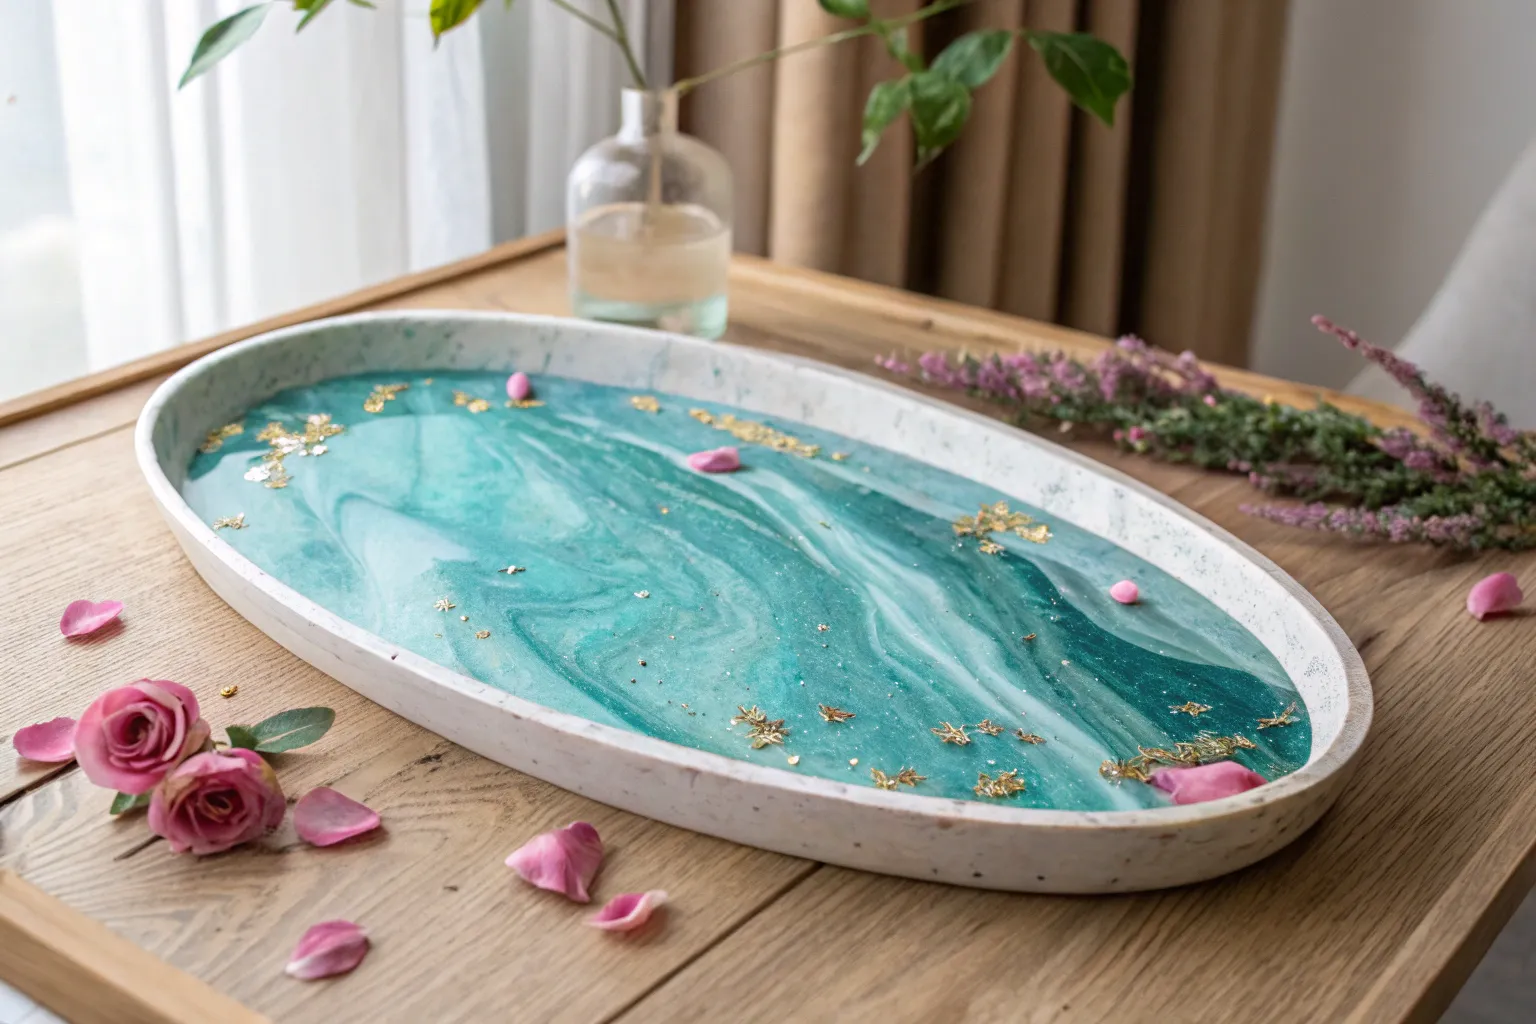
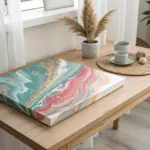
Marble-Swirl Epoxy Resin Serving Tray
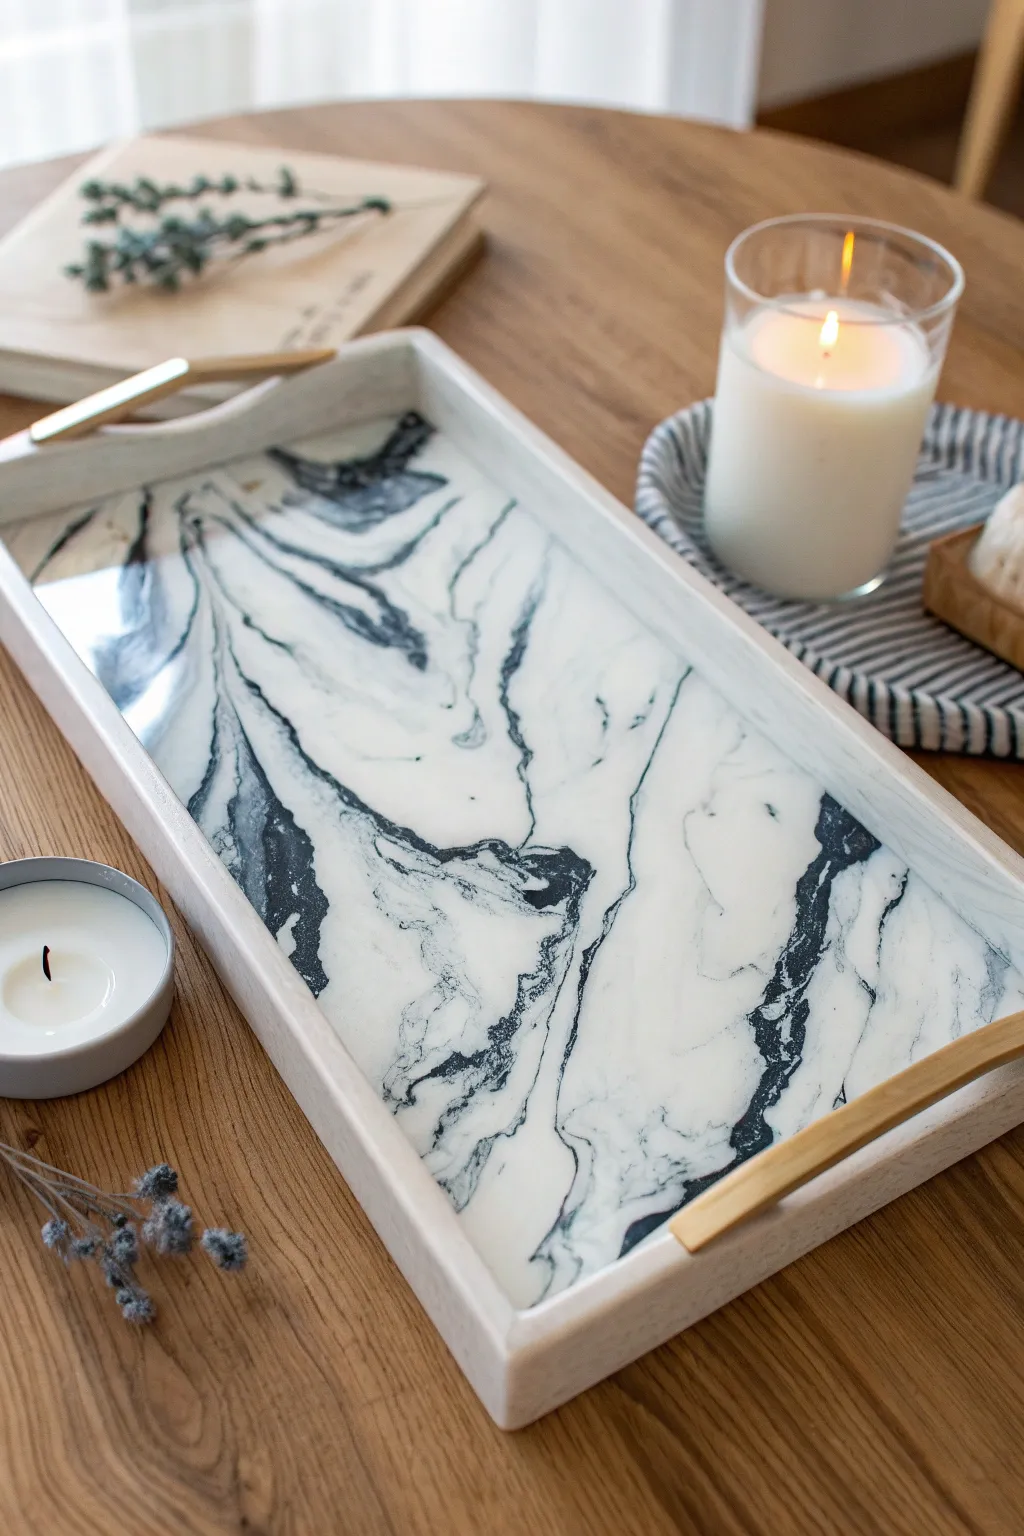
Elevate your home decor with this sleek serving tray that mimics the luxurious look of Carrara marble. The high-gloss finish and fluid black veins create a sophisticated centerpiece perfect for holding candles or serving drinks.
How-To Guide
Materials
- Rectangular wooden tray with raised sides (unfinished or painted white)
- White acrylic paint (if tray is unfinished)
- Painter’s tape
- Clear epoxy resin kit (PART A and PART B)
- White resin pigment paste (opaque)
- Black resin pigment or alcohol ink
- Gold drawer pulls or handles (2)
- Drill with appropriate bit size
- Mixing cups and stir sticks
- Heat gun or culinary torch
- Level working surface
- Gloves and protective eyewear
- Plastic drop cloth
Step 1: Tray Preparation
-
Prep the surface:
Begin by sanding your wooden tray lightly if it feels rough. Wipe away any dust with a damp cloth or tack cloth to ensure a smooth base. -
Paint the base coat:
Apply a solid coat of white acrylic paint to the entire tray, including the inside bottom where the resin will sit. This ensures the wood grain doesn’t show through the white resin later. -
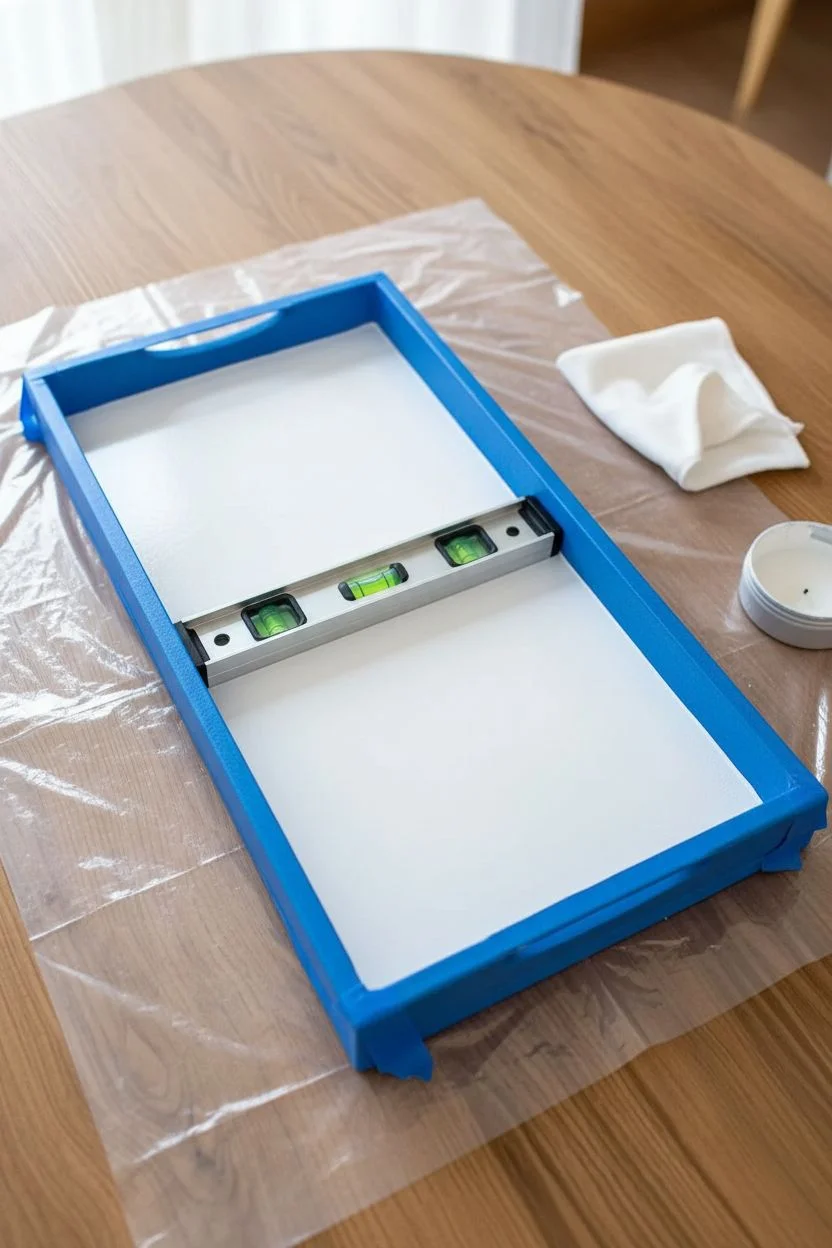
Tape the edges:
Once the paint is fully dry, carefully run painter’s tape along the inside vertical walls of the tray. This protects the sides from resin splashes and creates a clean meniscus line. -
Level the tray:
Place your tray on a plastic drop cloth and use a spirit level to check it’s perfectly flat. Adjust with shims if necessary; an unlevel tray leads to pooling resin.
Natural Flow
Don’t overmix the black and white on the tray. Marble has distinct separation, so stop moving the resin while there is still stark contrast.
Step 2: Mixing and Pouring
-
Measure the resin:
Calculate the volume needed for the bottom of your tray (length x width x desired depth). Measure equal parts of Resin A and Hardener B into a mixing cup. -
Mix thoroughly:
Stir the mixture slowly but steadily for at least 3-5 minutes, scraping the sides and bottom. Pouring into a second clean cup and mixing again is a great habit to ensure a perfect cure. -
Tint the base:
Reserve a very small amount (about 5-10%) of clear resin in a separate cup for the veins. Tint the larger remaining batch with opaque white pigment paste until you have a solid, milky color. -
Prepare the accent color:
Take your small reserved cup of clear resin and add a drop or two of black pigment. Mix well until you have a deep, consistent jet black. -
Pour the white base:
Pour the white resin into the tray, spreading it with a spreader tool or gloved finger until it covers the entire bottom surface evenly.
Metallic Veining
Mix metallic gold powder into a tiny bit of clear resin and drizzle it alongside the black veins for an ultra-glamorous finish.
Step 3: Creating the Marble Effect
-
Add the veins:
Dip a stir stick into the black resin and drizzle thin, wandering lines across the wet white surface. Think of lightning bolts or river tributaries—keep it random and organic. -
Manipulate the pattern:
Use a heat gun on a low setting to gently blow the black lines. This will fan out the pigment and create that smoky, blurred marble effect. -
Define the details:
For sharper lines, drag a toothpick through the thicker black areas to pull delicate wisps of color into the white field. -
Remove bubbles:
Pass your heat gun or torch quickly over the entire surface to pop any rising air bubbles. Don’t linger in one spot to avoid scorching. -
Let it cure:
Cover the tray with a clean box to prevent dust from landing in the wet resin. Let it cure undisturbed for 24-48 hours.
Step 4: Finishing Touches
-
Remove tape:
When the resin is set but perhaps slightly flexible (around the 12-hour mark depending on your brand), carefully peel away the painter’s tape. -
Mark handle positions:
Once fully hard, measure and mark the center points on the short outer sides of the tray for your handles. -
Drill holes:
Drill through the marked spots. Placing a piece of scrap wood firmly against the inside wall while drilling helps prevent the wood from splintering as the bit exits. -
Attach hardware:
Screw the gold handles into place securely. A dab of superglue on the screw threads can keep them tight permanently.
Enjoy styling your stunning new tray on a coffee table or ottoman to catch the light
BRUSH GUIDE
The Right Brush for Every Stroke
From clean lines to bold texture — master brush choice, stroke control, and essential techniques.
Explore the Full Guide
Epoxy Resin Ring Dish for Sink-Side Storage
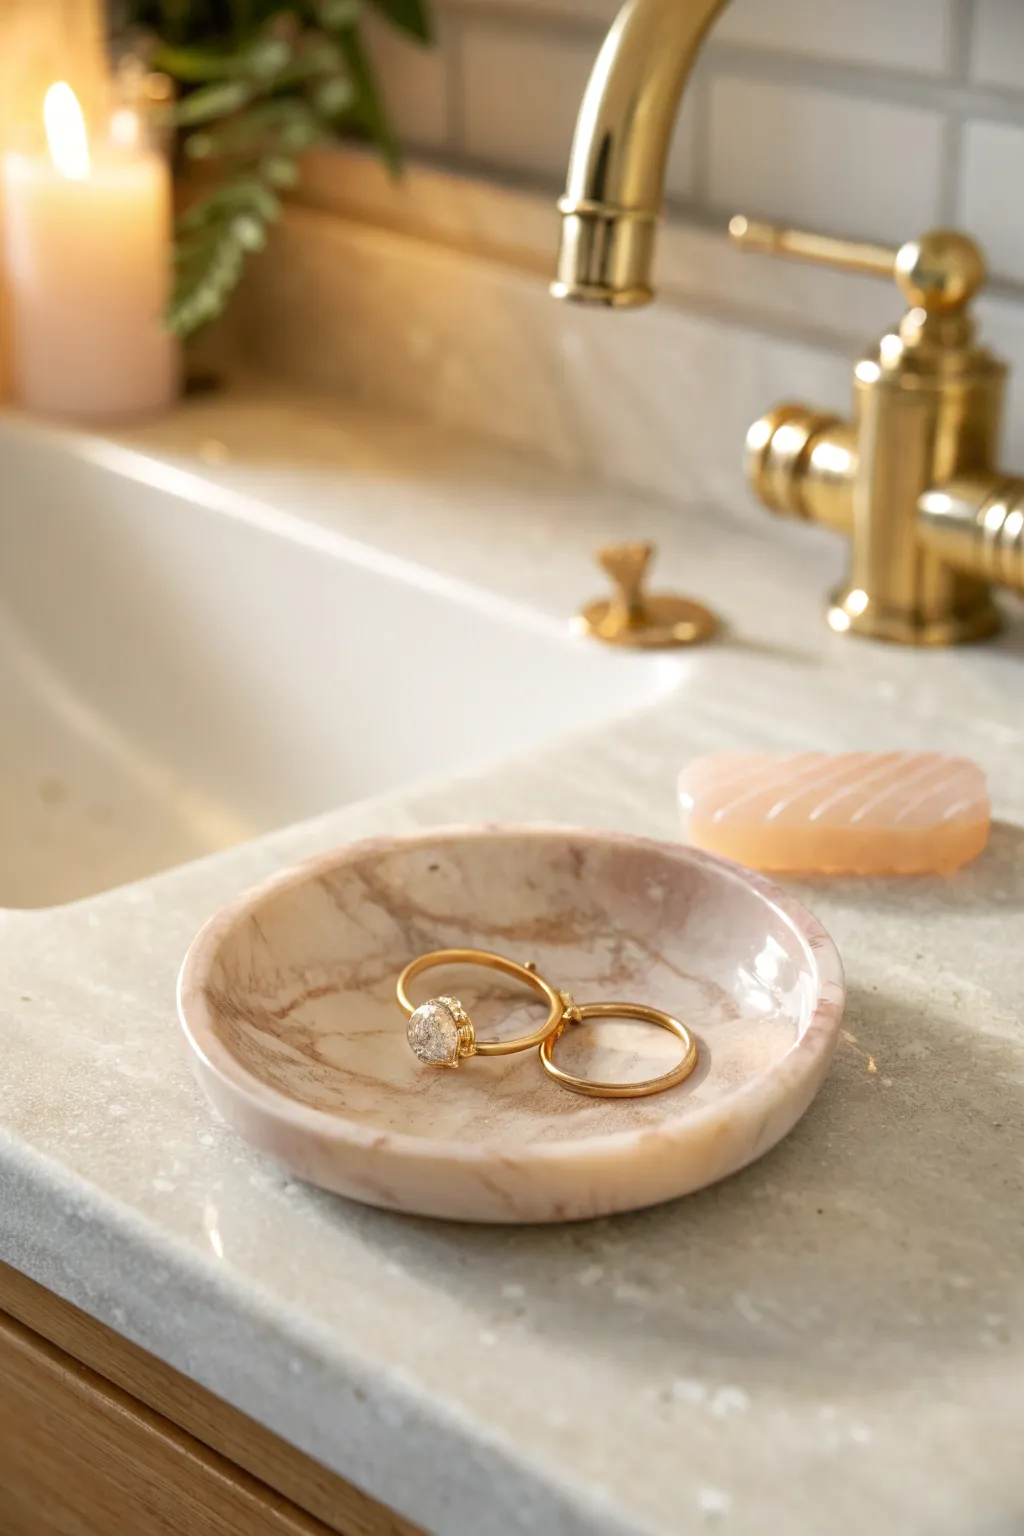
Mimic the luxurious look of natural stone with this elegant epoxy resin ring dish. Using a simple swirling technique, you can create realistic pink and grey marble veining that adds a sophisticated touch to your bathroom vanity.
Step-by-Step Guide
Materials
- Two-part casting resin (1:1 ratio)
- Round silicone mold (coaster or small dish style)
- White opacity pigment or alcohol ink
- Soft pink mica powder or alcohol ink
- Brown or dark grey alcohol ink
- Gold alcohol ink (optional for gilded veins)
- Mixing cups and wooden stir sticks
- Toothpicks or fine detail tool
- Heat gun or torch
- Disposable gloves and work surface protection
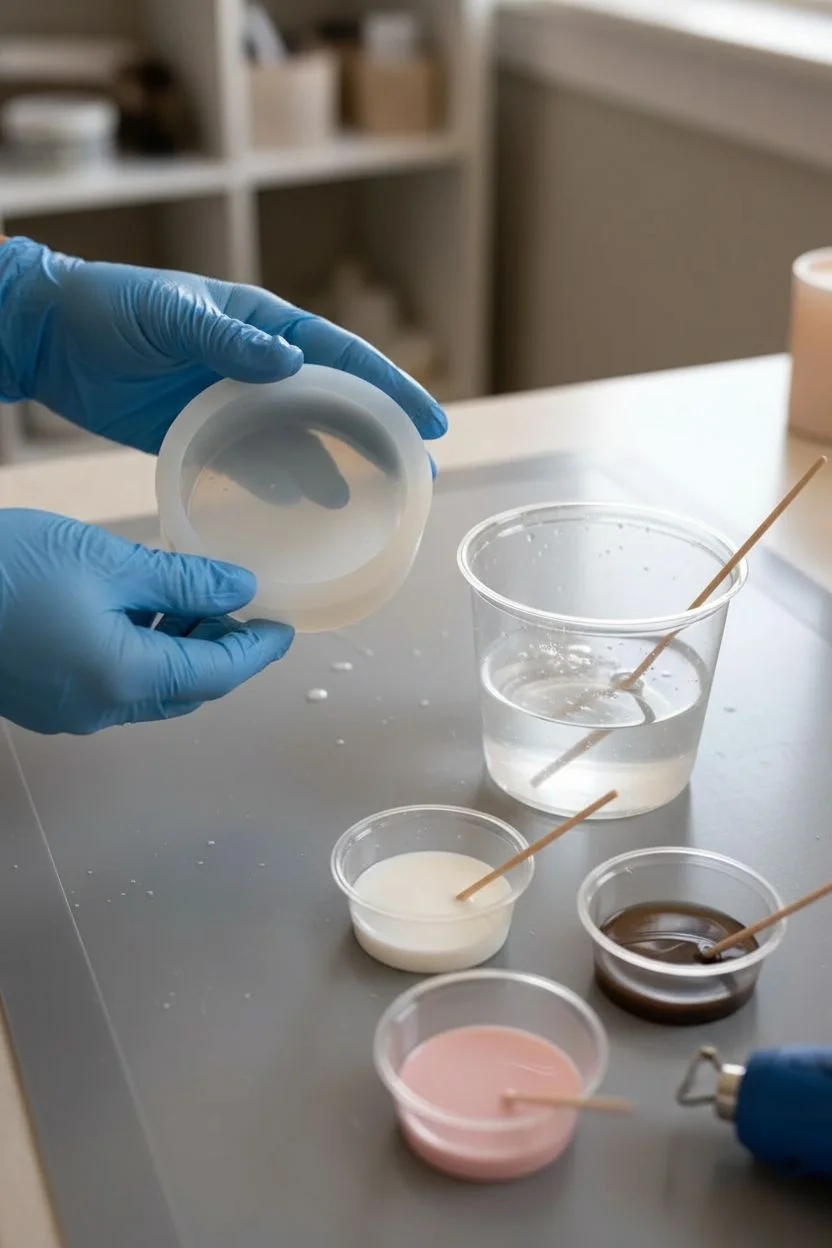
Step 1: Preparation & Mixing
-
Workspace Setup:
Prepare a level, dust-free work area covered with a silicone mat or plastic sheet. Put on your gloves to protect your hands from sticky resin. -
Measure Resin:
Pour equal parts of resin (Part A) and hardener (Part B) into a measuring cup. You won’t need much—about 2-3 ounces total should suffice for a single small dish, depending on your mold size. -
Thorough Mixing:
Stir the mixture slowly and consistently for at least 3 minutes. Scrape the sides and bottom of the cup to ensure both parts are fully integrated, otherwise, you might end up with sticky spots that never cure. -
Rest Period:
Let the mixed resin sit for about 2-3 minutes. This allows some of the larger air bubbles created during stirring to rise to the surface and pop on their own.
Step 2: Creating the Marble Effect
-
Base Color Creation:
Pour the majority of your clear resin into a larger cup and tint it with a white opaque pigment. You want a milky, almost solid white look, but slightly translucent is okay for depth. -
Accent Colors:
Divide the remaining small amount of resin into two tiny cups. Tint one with soft pink mica powder for that subtle blush tone and the other with a drop of brown or dark grey ink for the veins. -
Pouring the Base:
Pour the white base resin into your silicone mold until it is almost full. I like to leave just a millimeter of space at the top to prevent overflow during the swirling process. -
Adding Pink Depth:
Drizzle a few thin lines of the pink resin mixture randomly across the surface. Don’t overthink this pattern; natural stone is delightfully imperfect. -
Creating Veins:
Dip a toothpick into your brown or grey resin mix and drag thin lines through the wet white base. Follow the general direction of your pink drizzles to create a cohesive ‘grain’ direction. -
Swirling Technique:
Using a clean toothpick or a fine detail tool, gently swirl the colors together. The goal isn’t to mix them into a new color, but to blur the hard edges so they look like natural stone sediment layers. -
Heat Application:
Quickly pass a heat gun or torch over the surface. This serves two purposes: it pops surface micro-bubbles and slightly liquifies the resin, encouraging the colors to bleed and soften further.
Natural Stone Look
For ultra-realism, don’t just swirl; drag the toothpick in jagged, jittery motions to mimic the random fractures found in real marble veining.
Step 3: Curing & Finishing
-
Final Check:
Inspect the surface one last time for stray dust particles or stubborn bubbles. Pick them out carefully with a toothpick if needed. -
Curing Time:
Cover the mold with a box to prevent dust from settling on it. Allow the resin to cure undisturbed for 24 hours, or according to your specific brand’s instructions. -
Demolding:
Once fully hard, gently peel the silicone mold away from the resin. Start at the edges and work your way around until the dish pops out freely. -
Edge Sanding:
If the bottom edge (which was the top of the pour) feels sharp, lightly sand it with fine-grit wet sandpaper to smooth it out. -
Final Polish:
Wipe the dish clean with a damp cloth to remove sanding dust. If the finish looks dull after sanding, you can apply a tiny amount of polishing compound or a thin topcoat of resin for extra shine.
Gilded Edge Upgrade
Once cured and demolded, use a gold leaf paint pen to trace the rim of the dish for a chic, high-end finish that matches gold faucets.
Place your new faux-stone dish by the sink and enjoy a stylish spot to keep your rings safe
Epoxy Resin Tea Light Holders With Translucent Layers
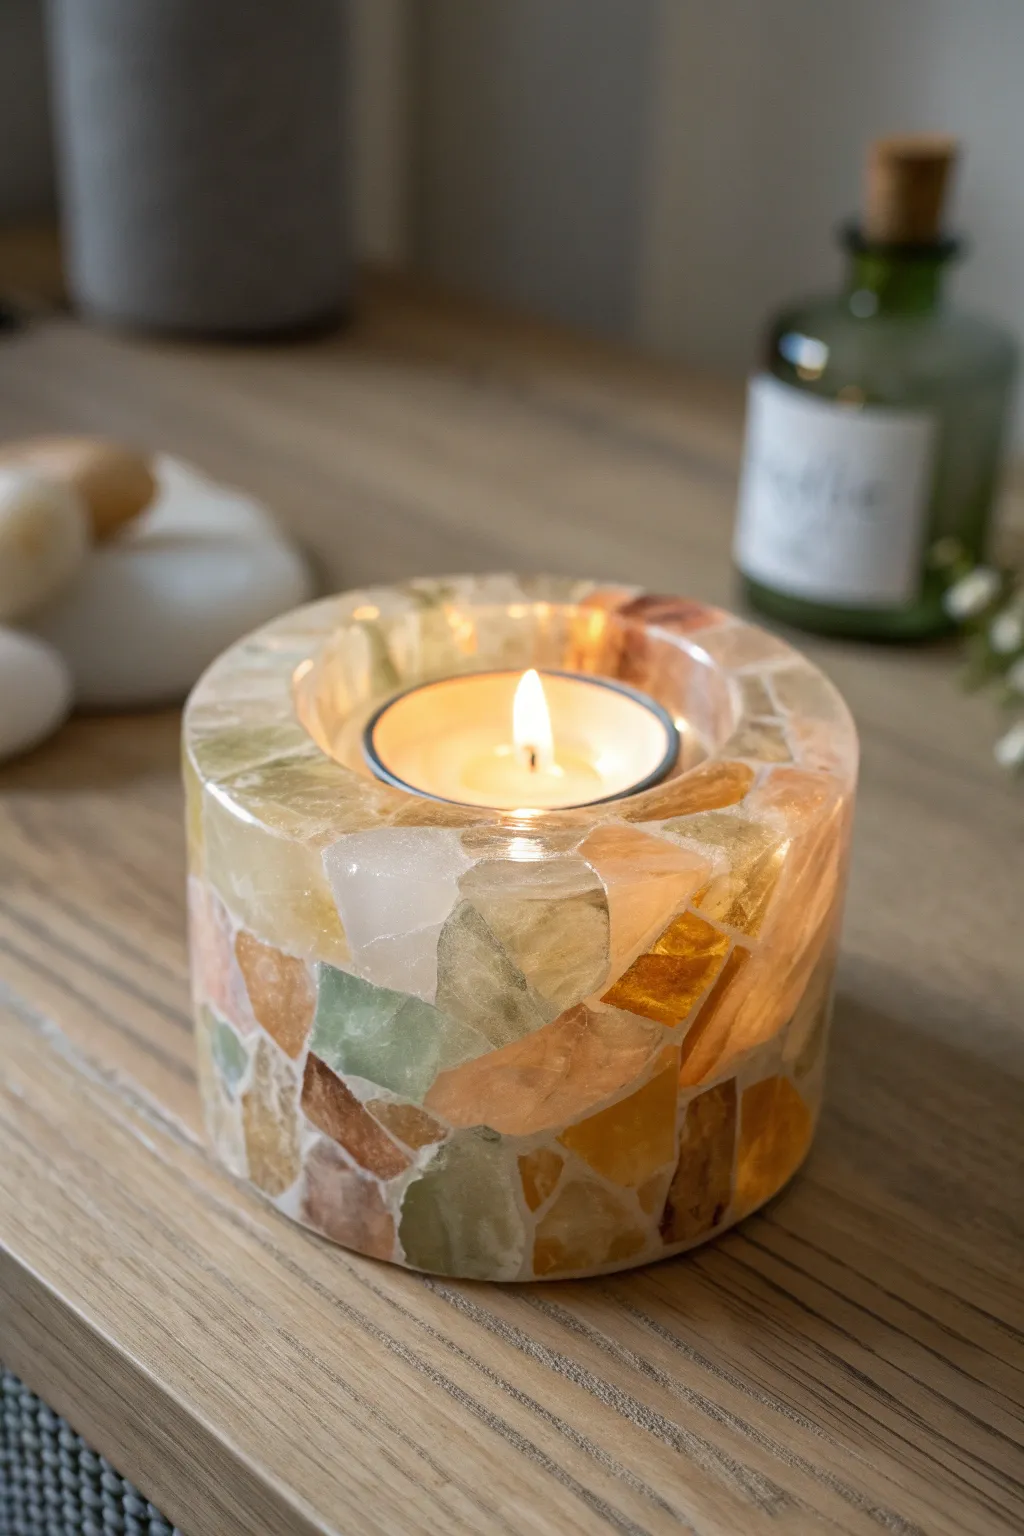
Bring a touch of organic warmth to your home with this stunning resin tea light holder. By embedding varying shades of translucent agate-style stones into a cloudy resin base, you create a beautiful glowing effect when a candle is lit inside.
Detailed Instructions
Materials
- Cylindrical silicone tea light mold (with center cutout)
- Epoxy resin (casting resin preferred)
- Hardener
- Translucent stone chips or faux agate pieces (amber, green, white, pale yellow)
- White alcohol ink or white pigment paste
- Mixing cups and stir sticks
- Gloves and protective eyewear
- Sandpaper (grits 120 to 1000)
- Polishing compound and cloth
- Heat gun or lighter
Step 1: Preparation & Stone Sorting
-
Select your stones:
Begin by sorting through your stone chips or faux agate pieces. For this specific look, you want a harmonious blend of muted earth tones—milky whites, soft ambers, mossy greens, and honey yellows. -
Clean the inclusions:
Wash and thoroughly dry your stones if they are dusty. Any debris left on them will float in the resin and ruin the translucent effect. -
Prepare the mold:
Ensure your silicone mold is clean and lint-free. If you are using a two-part mold versus a solid ring mold, make sure the seams are tight. -
Dry fit the stones:
I like to loosely place a few stones in the bottom of the mold just to see how the colors interact before committing with resin.
Stone Selection Tip
For maximum glow, test your stones with a flashlight beforehand. Opaque rocks block the light, while quartz and agate allow the flame to shine through beautifully.
Step 2: The First Pour (Placement)
-
Mix the resin:
Measure and mix your epoxy resin and hardener according to the manufacturer’s ratio. Stir slowly for 3-5 minutes to minimize bubbles. -
Tint the mixture:
Add a very tiny drop of white alcohol ink to the resin. You don’t want it opaque white; just slightly milky or ‘foggy’ to diffuse the light between the stones. -
Pour the base layer:
Pour a thin layer of resin (about 1/4 inch) into the bottom of the mold. -
Arrange the first stones:
Using tweezers or a gloved hand, place your largest flat stones against the outer wall of the mold. The resin will act as a glue to hold them against the silicone. -
Pop bubbles:
Run a heat gun quickly over the surface to pop any bubbles trapped under the stones.
Cloudy Resin?
If your resin looks cloudy after sanding, you haven’t sanded high enough. Keep going to 2000+ grit or apply a thin topcoat of fresh resin to restore clarity.
Step 3: Building the Walls
-
Fill the gaps:
Continue stacking stones up the sides of the mold walls. Try to interlock them like a puzzle so there aren’t huge gaps of plain resin. -
Fill with resin:
Slowly pour more of your milky resin mixture into the mold, filling the spaces between the stones. Pause occasionally to let the resin settle into deep crevasses. -
Monitor for floating:
If your stones start to float away from the wall, verify they are packed tightly enough. You can let the resin get slightly tacky before adding the final top stones to keep them in place. -
Top off:
Fill the mold to the brim. The resin will likely shrink slightly as it cures, so a little dome on top is helpful. -
Final bubble check:
Wait 10 minutes and check for micro-bubbles rising from the rough stone surfaces. Zap them with your heat gun one last time. -
Cure:
Cover the mold to protect it from dust and let it cure fully for 24-48 hours.
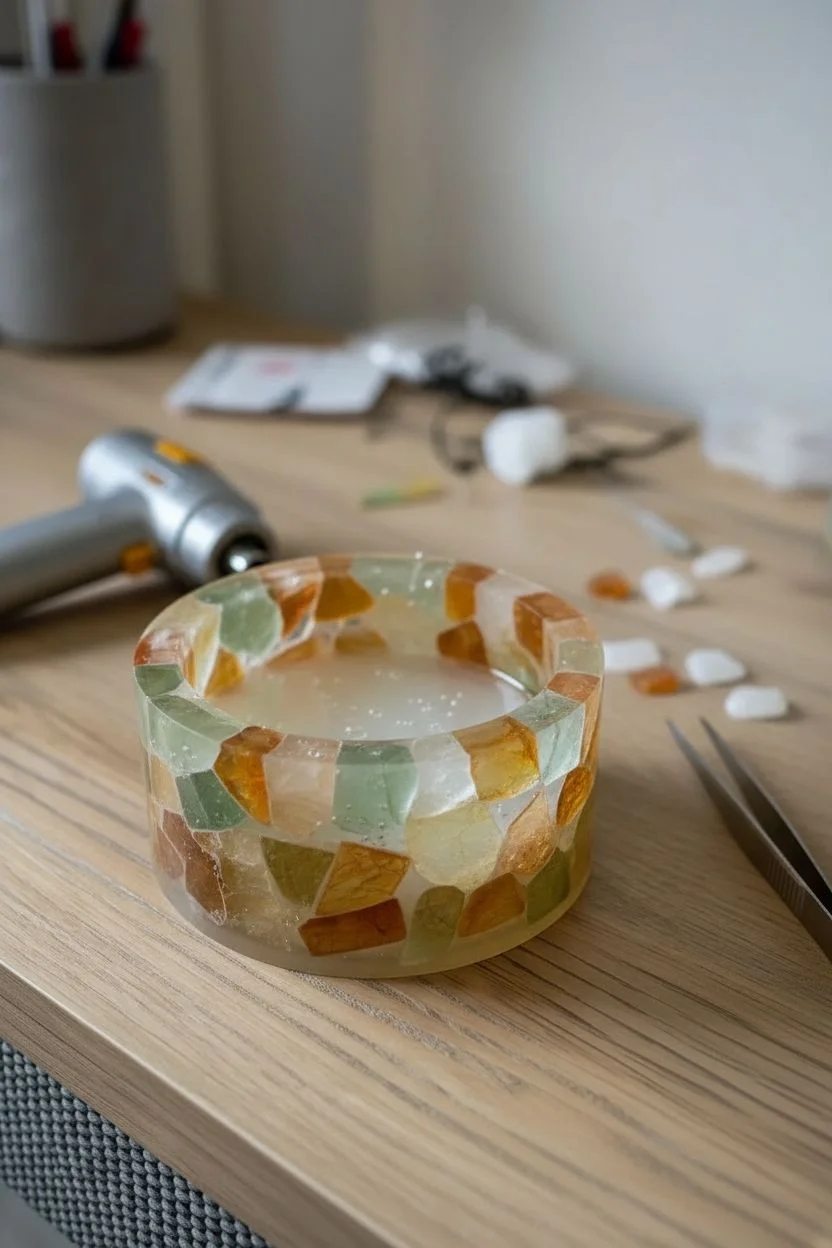
Step 4: Demolding & Finishing
-
Release the piece:
Gently peel back the silicone mold. The surface might look a bit dull or have resin covering the stone faces—this is normal. -
Sand the exterior:
To reveal the true beauty of the stones, wet sand the outside of the cylinder. Start with 120 grit to grind down excess resin until the stone surfaces are exposed and flush with the resin. -
Refine the finish:
Work your way up through the grits (220, 400, 600, 1000). The surface should become smoother and more transparent with each step. -
Polish:
Apply a polishing compound with a soft cloth or a buffing wheel to bring back a glass-like shine. -
Final check:
Wipe the holder clean. Insert a tea light and test the fit.
Now you have a serene, glowing centerpiece ready to create a cozy atmosphere

PENCIL GUIDE
Understanding Pencil Grades from H to B
From first sketch to finished drawing — learn pencil grades, line control, and shading techniques.
Explore the Full Guide
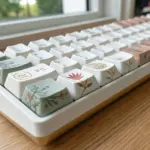
Epoxy Resin Bookmarks With Layered Color Bands
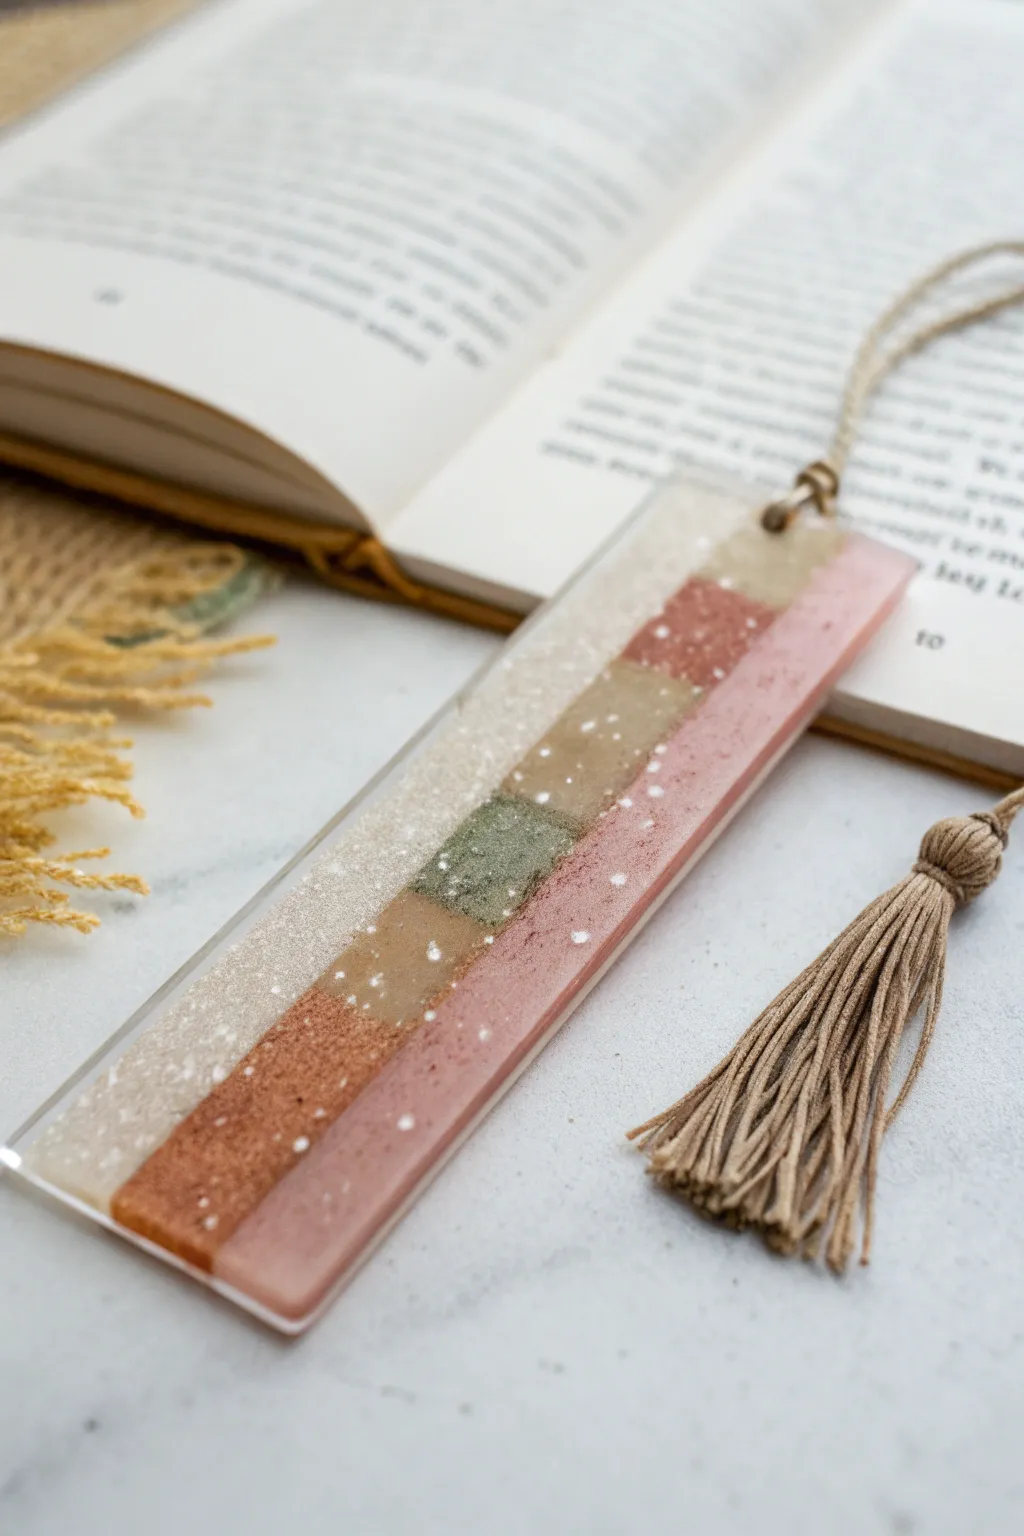
Capture the calm of a cozy reading corner with these elegant bookmarks featuring diagonal bands of muted, earthy tones. The soft transition of cream, terracotta, and olive hues, dusted with gentle speckles, creates a sophisticated accessory for any book lover.
How-To Guide
Materials
- Rectangular silicone bookmark mold
- Two-part casting epoxy resin
- Mica powders or opaque resin pigments (cream, terracotta, olive green, dusty rose, tan)
- White alcohol ink or fine white glitter (for speckles)
- Mixing cups (small silicone or plastic cups)
- Wooden stir sticks
- Heat gun or lighter
- Jute twine or cord
- Scissors
Step 1: Color Preparation
-
Mix Your Base Resin:
Measure and mix your two-part epoxy resin according to the manufacturer’s specific instructions. Ensure you stir slowly for at least 3-5 minutes to avoid introducing too many air bubbles. -
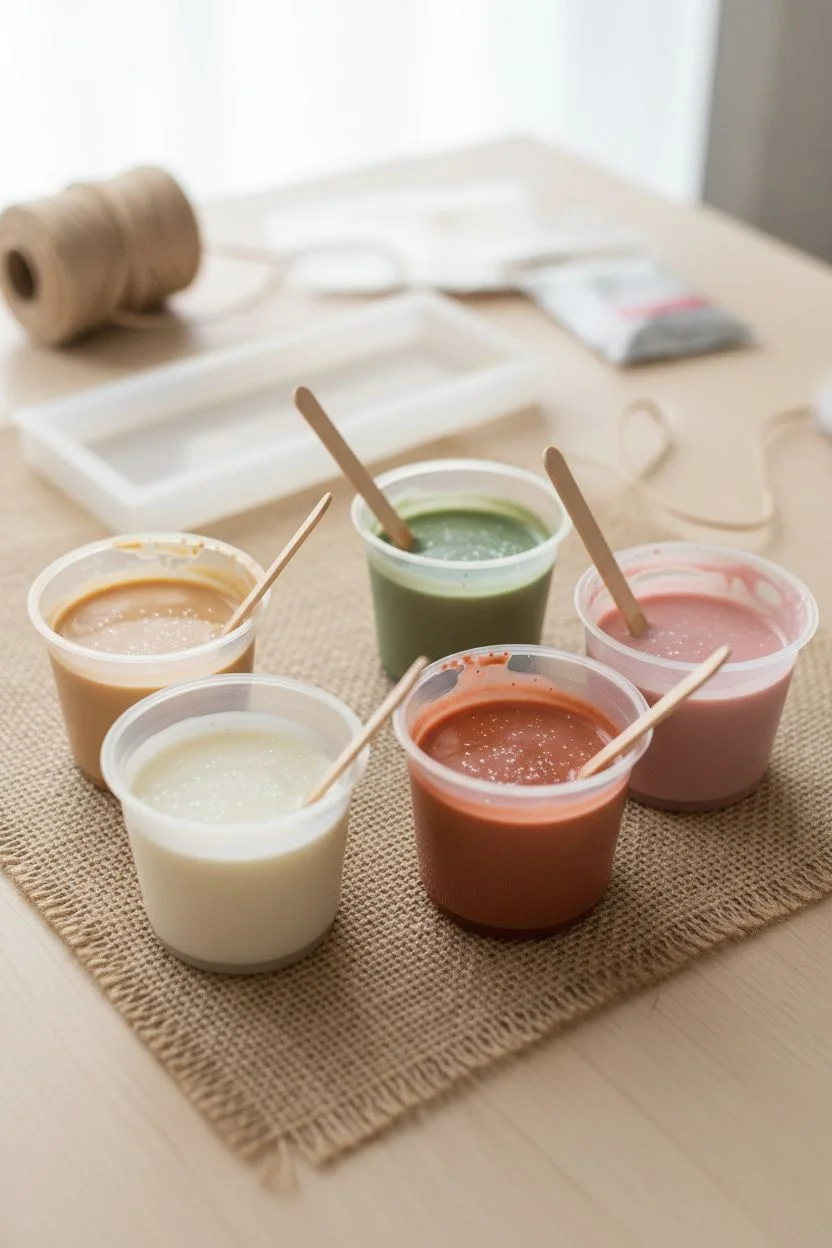
Divide the Batch:
Separate your clear resin into five small cups. You won’t need equal amounts for every color, but distinct portions are necessary for the striped effect. -
Create the Palette:
Mix your pigments into the separate cups. Aim for a palette of cream, tan, olive green, terracotta, and soft pink. Stir until the color is completely opaque and uniform. -
Add Texture:
Sprinkle a pinch of fine white glitter or a drop of white alcohol ink into each colored cup. Stir gently; this creates the subtle speckled stone effect seen in the finished piece.
Uneven Lines?
If your colors are running together too much, let the mixed resin sit in the cups for 10-15 minutes to thicken slightly before pouring. This helps distinct bands hold their shape.
Step 2: Pouring the Layers
-
Prop the Mold:
This is the crucial trick: slightly tilt your silicone mold by placing a stir stick under one long edge. This helps the resin settle into diagonal lines naturally, though we will largely be pouring in controlled strips. -
Pour the First Strip:
Start at the top corner with your cream-colored resin. Pour a small diagonal strip. The resin is viscous, so it should hold its shape somewhat without running everywhere immediately. -
Add Adjacent Bands:
Working quickly while the resin is wet, pour the next color (tan) right next to the cream. Let the edges touch and merge slightly, but don’t stir them together. -
Continue the Pattern:
Follow with the terracotta, olive green, and dusty pink mixtures. Pour them in diagonal bands moving down the length of the bookmark mold. -
Pop Bubbles:
Pass a heat gun or lighter quickly over the surface to pop any surface bubbles. Be fast so you don’t overheat the resin or the mold. -
Let it Settle:
Allow the colored layer to cure for about 4-6 hours until it is tacky or soft-cured. It doesn’t need to be rock hard, just stable enough to not bleed.
Clean Pour Tip
Use mixing cups with a pinched spout or use a popsicle stick to guide the resin flow. This gives you much better control over the diagonal lines than free-pouring from a round cup.
Step 3: Finishing Touches
-
Clear Coat (Optional):
If your colored layer didn’t fill the mold to the top, mix a small batch of clear resin. Pour it over the cured colored layer to create a smooth, domed finish that encapsulates the design. -
Full Cure:
Let the bookmark cure completely undisturbed for 24 hours. Cover it with a box to prevent dust from settling on the sticky surface. -
Demold:
Gently peel the silicone mold away from the cured resin. The edges might be sharp, so handle with care. -
Sand Edges:
If there are any sharp or uneven edges, use fine-grit wet sandpaper to smooth them down. Wipe away any dust with a damp cloth. -
Make the Tassel:
Cut several lengths of jute twine (about 8 inches long). Fold them in half and loop them through the hole at the top of the bookmark. -
Secure the Knot:
Take another short piece of twine and wrap it tightly around the neck of your tassel loop to create the ‘head’ of the tassel. Tie it off securely and trim the ends of the tassel so they are even.
Now you have a durable, artful placeholder ready to mark the spot in your next great adventure
Photo-Window Epoxy Resin Coasters for Tiny Memories
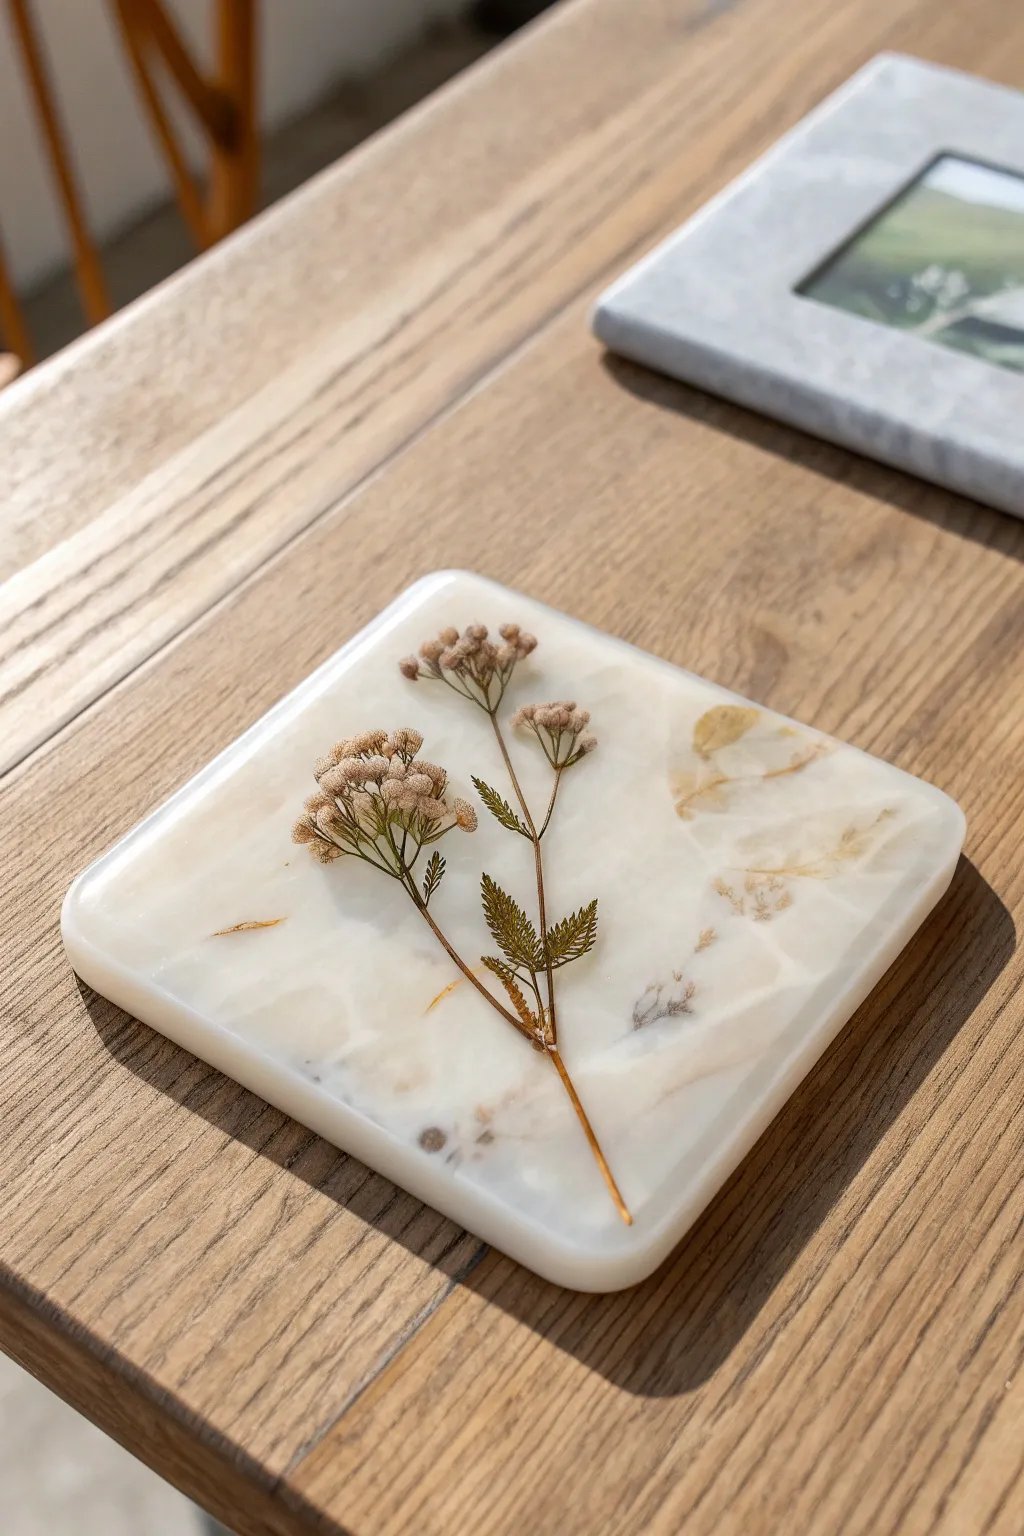
Create the delicate, translucent look of polished onyx stone using epoxy resin and gentle white pigments. These sophisticated coasters encapsulate preserved botanicals in a milky, swirled suspension that mimics natural mineral veining.
Step-by-Step
Materials
- High-quality casting resin (1:1 ratio used here)
- Square silicone coaster mold with rounded edges
- White epoxy pigment paste (opaque)
- White alcohol ink (translucent)
- Pearl mica powder (optional for extra shimmer)
- Dried botanicals (Yarrow or Baby’s Breath)
- Tweezers
- Heat gun or torch
- Mixing cups and stir sticks
- Gloves and protective mat
Step 1: Preparation & First Layer
-
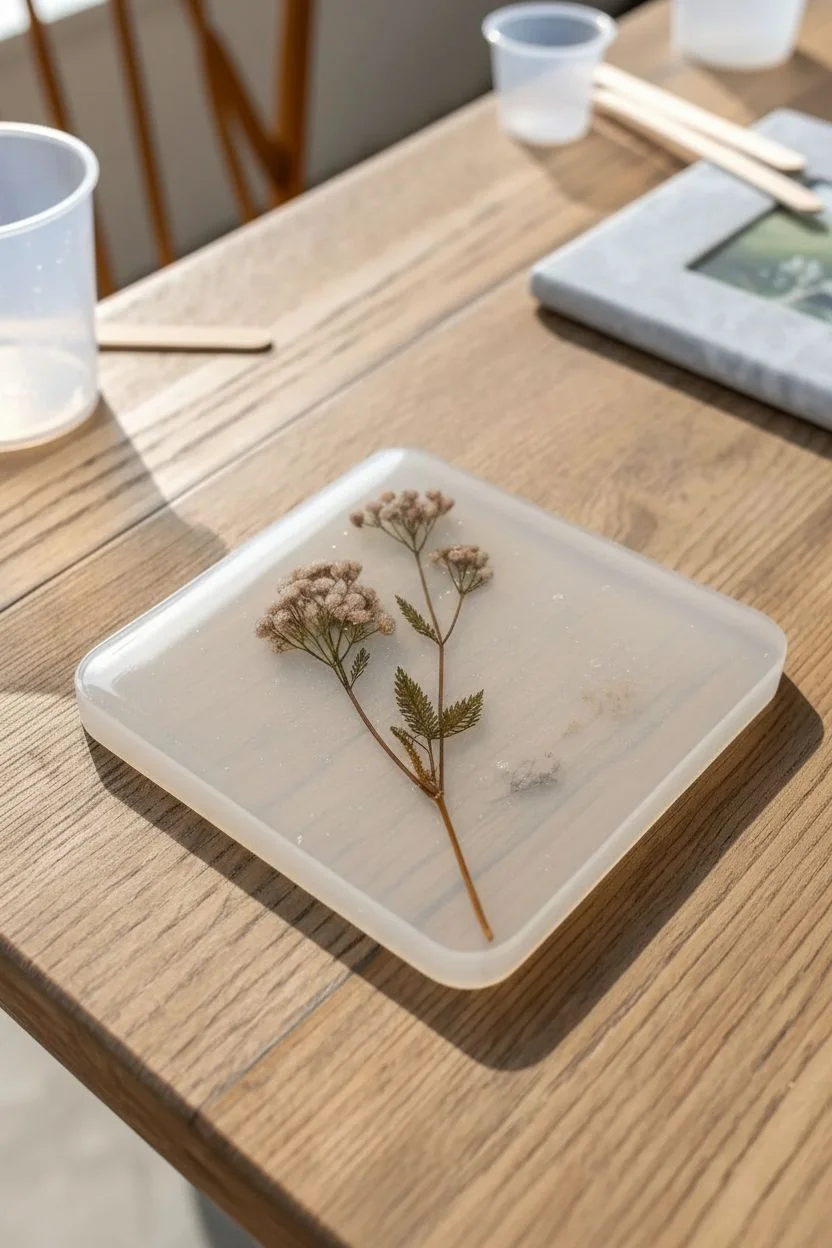
Prepare your botanicals:
Ensure your botanical stems are completely dried and flattened slightly if they are bulky. Test the layout by placing them dry into the empty mold to ensure they fit without touching the edges. -
Mix the base resin:
Measure and mix a small batch of clear resin according to your manufacturer’s instructions. You only need enough to cover the bottom of the mold by about 2-3mm. -
Pour the clear layer:
Pour the clear resin into the mold. Use a heat gun or torch to quickly pop any bubbles that rise to the surface. -
Place the flowers:
Using tweezers, carefully lower the dried botanical stem into the wet resin. Press it down gently so it is fully submerged and doesn’t float. Let this layer cure until tacky (usually 4-6 hours).
Depth Perception
Pouring the clear layer first is crucial. It creates visual distance between the flower and the white swirls, making the plant look like it’s trapped deep inside the stone.
Step 2: Creating the Onyx Effect
-
Mix the main resin batch:
Prepare a larger volume of resin sufficient to fill the rest of the mold. Split this main batch into two separate cups. -
Tint cup one:
In the first cup, add a tiny drop of white alcohol ink. You want a very translucent, milky appearance, not opaque white. -
Tint cup two:
In the second cup, add a small amount of white pigment paste and a pinch of pearl mica powder. This will be your denser, more solid white. -
Let it thicken:
I like to let the resin sit for about 10-15 minutes at this stage. Allowing it to thicken continually helps the colors stay distinct rather than blending into a uniform grey. -
Pour the translucent base:
Pour the translucent alcohol ink mixture into the mold first, filling it most of the way but leaving room for the swirls. -
Add the opaque accents:
Drizzle ribbons of the thicker, opaque white mixture into the clear resin. Focus on creating organic, wandering lines rather than geometric patterns. -
Swirl the patterns:
Take a clean stir stick or toothpick and gently drag it through the resin to marble the two whites together. Don’t overmix; you want to maintain streaks of clarity. -
Final bubble removal:
Pass your heat gun over the surface one last time to remove surface bubbles and help the white resin bloom slightly.
Step 3: Finishing Touches
-
Full cure:
Cover the mold with a box to prevent dust from settling and allow it to cure fully for 24-48 hours. -
Demold carefully:
Gently peel back the silicone mold to release the coaster. The edges should be smooth, but check for any sharp resin lips. -
Inspect the clarity:
Hold the coaster up to the light to admire the depth difference between the translucent and opaque sections. -
Sand edges (if needed):
If there is a rough edge from the mold fill line, gently sand it with high-grit wet sandpaper (1000+) to smooth it out. -
Add cork backing:
To protect table surfaces, stick small clear silicone bumpers or a shaped cork pad to the underside of your new faux-stone creation.
Golden Veins
Mix a tiny amount of gold mica powder with resin and drizzle thin lines during the swirl phase to mimic quartz gold inclusions found in real stone.
Enjoy styling your coffee table with these elegant, nature-inspired pieces that will last for years


Epoxy Resin Paperweights as Mini “Time Capsules”
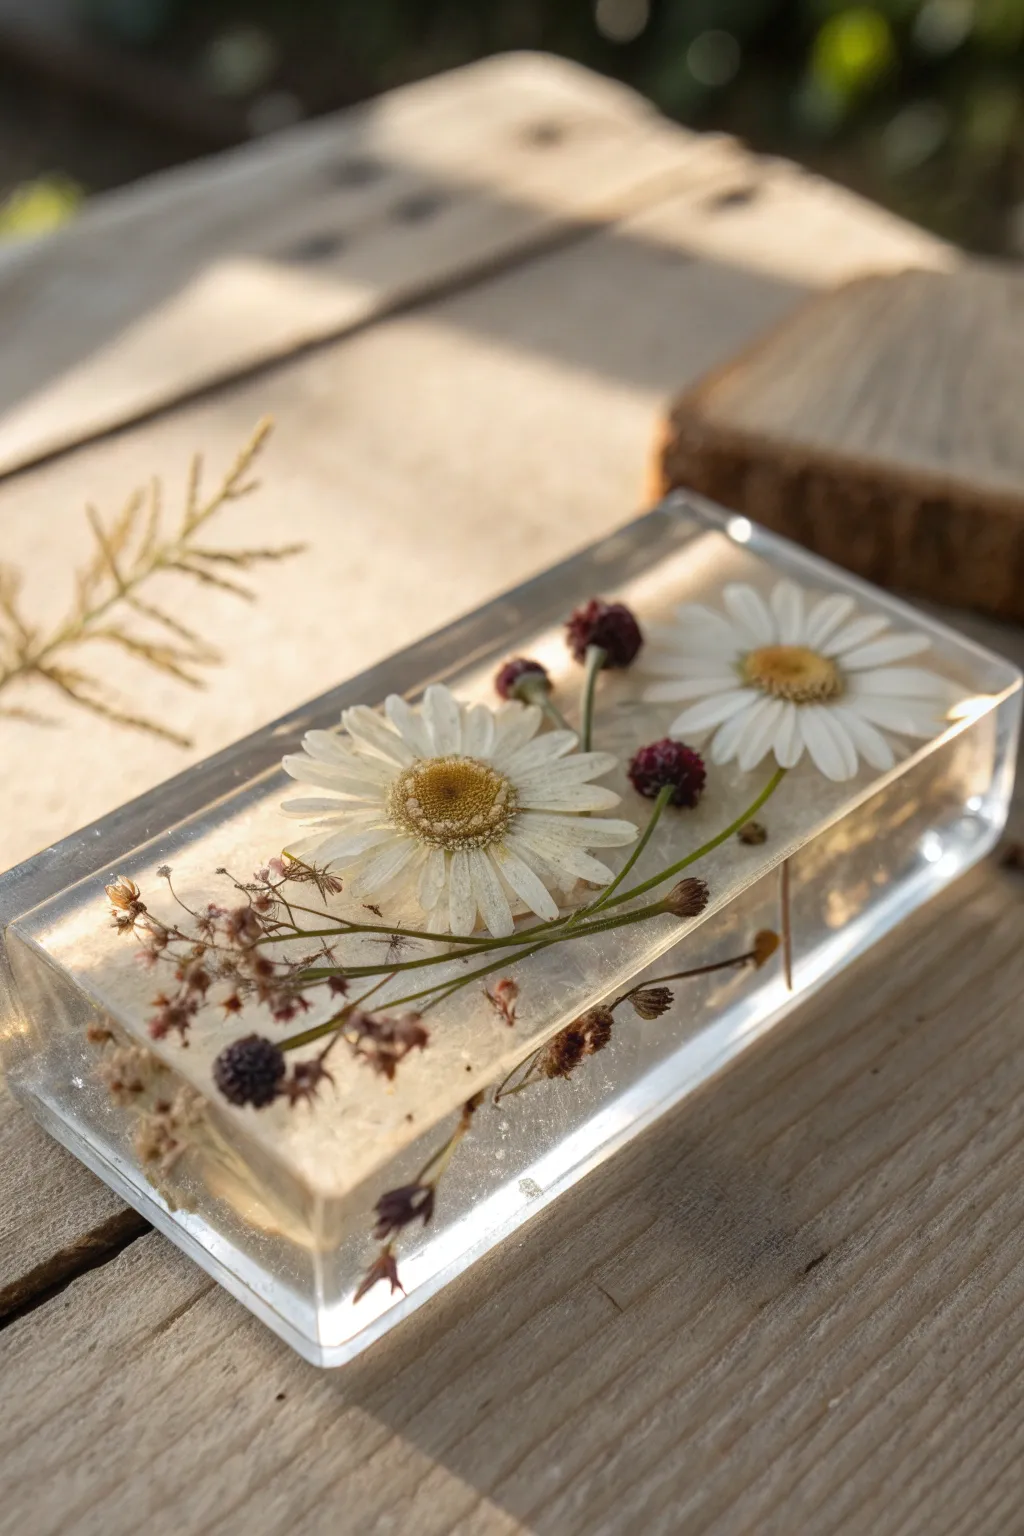
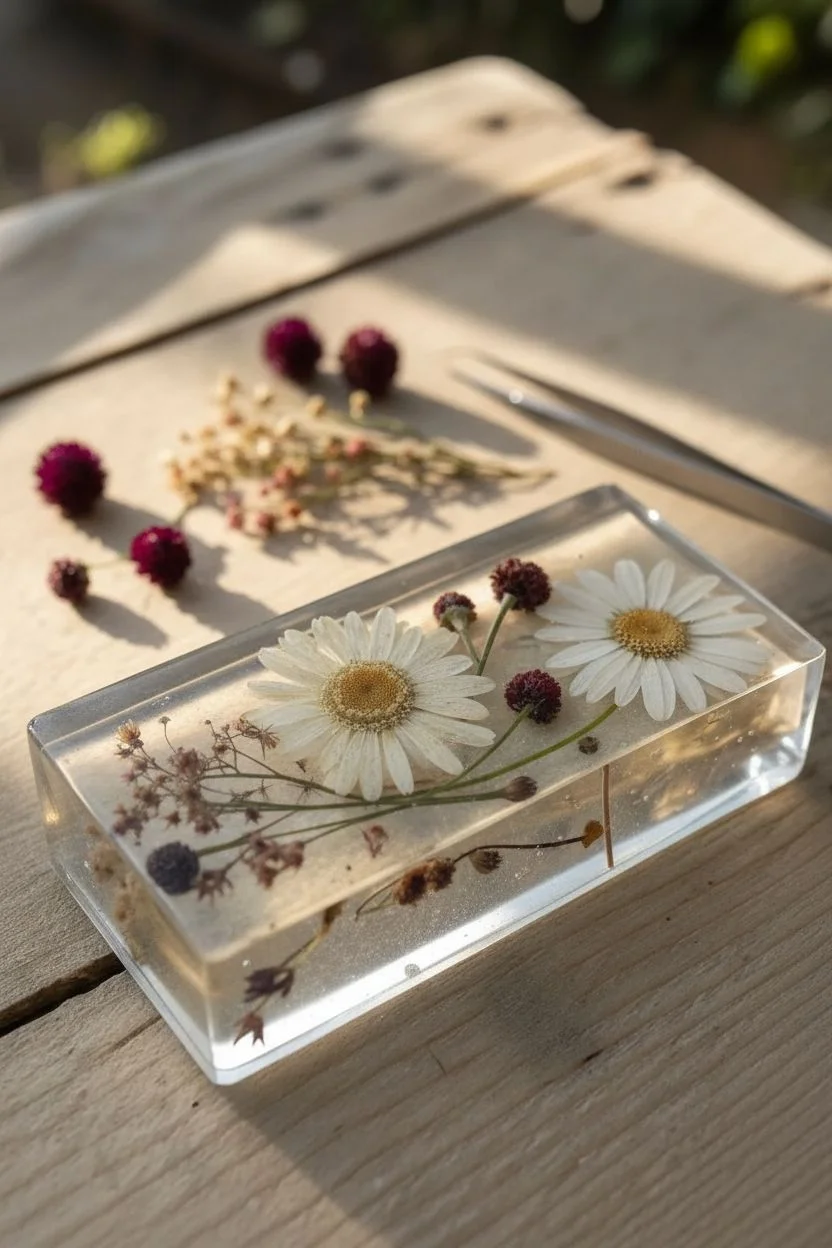
Capture the fleeting beauty of a summer meadow in this crystal-clear epoxy paperweight. By encapsulating delicate daisies and wild sprigs in a rectangular mold, you create a permanent, three-dimensional snapshot of nature that glows beautifully when it catches the light.
Detailed Instructions
Materials
- Rectangular silicone mold (approx. 4x2x1 inches)
- Deep-pour or casting epoxy resin (Part A and Part B)
- Dried pressed white daisies or feverfew flowers
- Dried small burgundy globe amaranth or clover heads
- Dried delicate filler foliage (baby’s breath or dried grasses)
- Mixing cups and stir sticks
- Tweezers
- Heat gun or lighter
- Personal protective equipment (gloves, respirator mask)
- Sandpaper (various grits from 400 to 2000) and polishing compound (optional)
Step 1: Preparation and First Layer
-
Safety check:
Before starting, ensure you are working in a well-ventilated area and wearing your nitrile gloves and respirator. Resin crafts require safety first. -
Prepare your botanicals:
Select your dried flowers. Ensure they are 100% moisture-free; any moisture will rot inside the resin or turn brown. Arrange them on a table next to your mold to plan your composition before you pour. -
Mix the first batch:
Measure a small amount of resin (about 1/4 of total mold volume) following manufacturer ratios strictly. Stir slowly for 3-5 minutes to minimize bubbles. -
Pour the base layer:
Pour this initial thin layer into the bottom of your rectangular mold. This acts as the ‘face’ of your paperweight. -
Pop bubbles:
Let the resin sit for a few minutes so bubbles rise, then quickly pass a heat gun or lighter over the surface to pop them.
Floating Flowers?
If your flowers drift upward, you poured too much resin at once. Pour in thin layers, letting each layer get sticky (gel stage) before adding the next.
Step 2: Arranging the Flora
-
Place primary flowers:
Using tweezers, gently place your two main white daisy heads face down into the wet resin. Remember, the bottom of the mold is the top of the finished piece. -
Add accent blooms:
Tuck the small burgundy globe amaranth heads around the daisies. Position them at slightly different depths if the resin is thick enough to support them, or let them rest near the face. -
Incorporate foliage:
Slide the delicate sprigs of dried greenery and tiny filler flowers underneath and around the main blooms. I find that overlapping stems slightly creates a more natural, gathered look. -
Check positioning:
Look at the mold from the side to ensure nothing is touching the very edges, which could create holes in your final surface. -
Let it tack:
Allow this layer to cure until it reaches a ‘tacky’ gel state (usually 2-4 hours). This prevents the flowers from floating up when you pour the rest.
Step 3: Encapsulation and Finish
-
Mix the second batch:
Prepare enough resin to fill the remainder of the mold. Stir carefully to avoid whipping air into the mixture. -
The final pour:
Slowly pour the resin over your tacked floral arrangement. Pour down the side of the mold or over a stick to reduce turbulence and bubbles. -
Check for trapped air:
Flowers love to trap air bubbles underneath their petals. Use a toothpick to gently prod the flowers or wiggle them slightly to release any hidden air pockets. -
Surface finish:
Do one final pass with your heat gun to remove surface bubbles. Cover the mold with a box to protect it from dust. -
Curing time:
Leave the mold undisturbed for the full cure time recommended by your specific resin brand, usually 24 to 72 hours. -
Demolding:
Once fully rock-hard, gently pull the silicone sides away and pop your paperweight out. -
Edge cleanup:
If there is a sharp lip on the back edge, use fine-grit sandpaper to smooth it down. If the front is cloudy, you may need to polish it, but a good silicone mold usually leaves a shiny finish.
Pro Tip: Silica Gel
Don’t use fresh flowers! Dry them in silica gel sand for 3-5 days first. This preserves the 3D shape and vibrant colors much better than book pressing.
Place your finished block on a windowsill to watch the sunlight illuminate the delicate botanical world you’ve preserved
Epoxy Resin Hair Clips With Foil Flake Sparkle
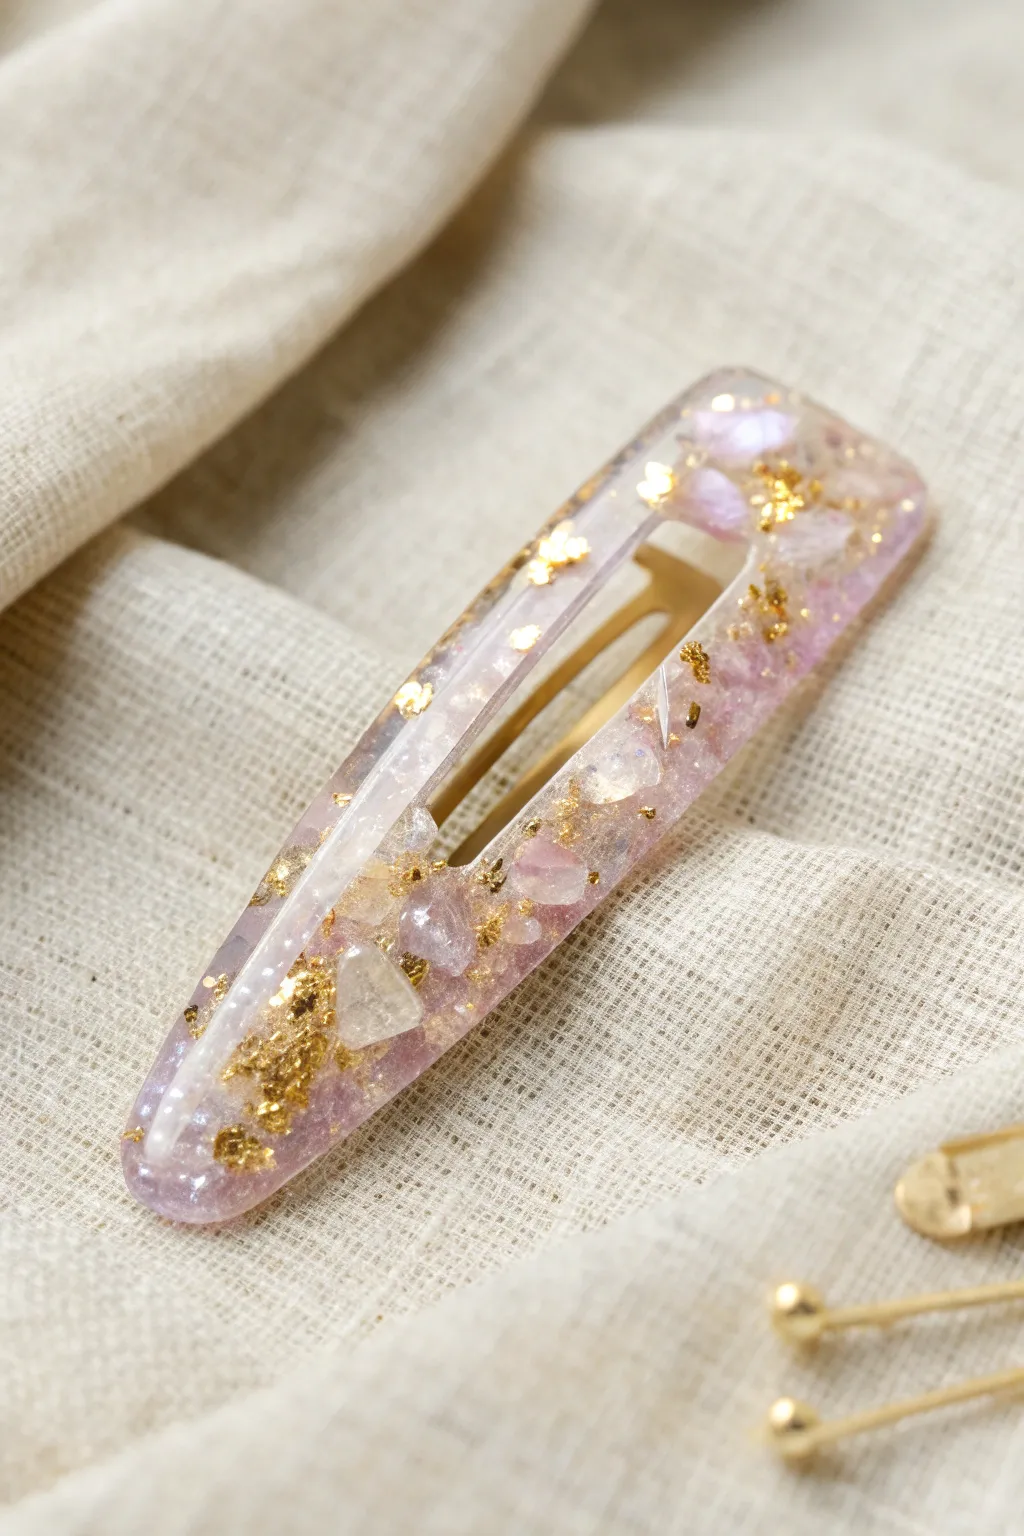
Elevate your accessory game with these ethereal hair clips, featuring the delicate interplay of crushed amethyst stones and shimmering gold foil suspended in crystal-clear resin. This project captures a luxurious, organic look that makes a simple functional item feel like a piece of jewelry.
Step-by-Step
Materials
- Epoxy resin (two-part, casting resin recommended)
- Hair clip silicone mold (rectangular/teardrop shape)
- Gold alligator hair clip hardware (to match mold size)
- Crushed amethyst chips or purple faux crystal gravel
- Gold foil flakes
- Mixing cups and stir sticks
- E6000 glue or UV resin (for attaching clip)
- Gloves and respirator mask
- Tweezers or toothpick
- Fine grit sandpaper (optional)
Step 1: Preparing the Components
-
Safety First:
Before opening your bottles, ensure you are in a well-ventilated area and put on your nitrile gloves and respirator mask for safety. -
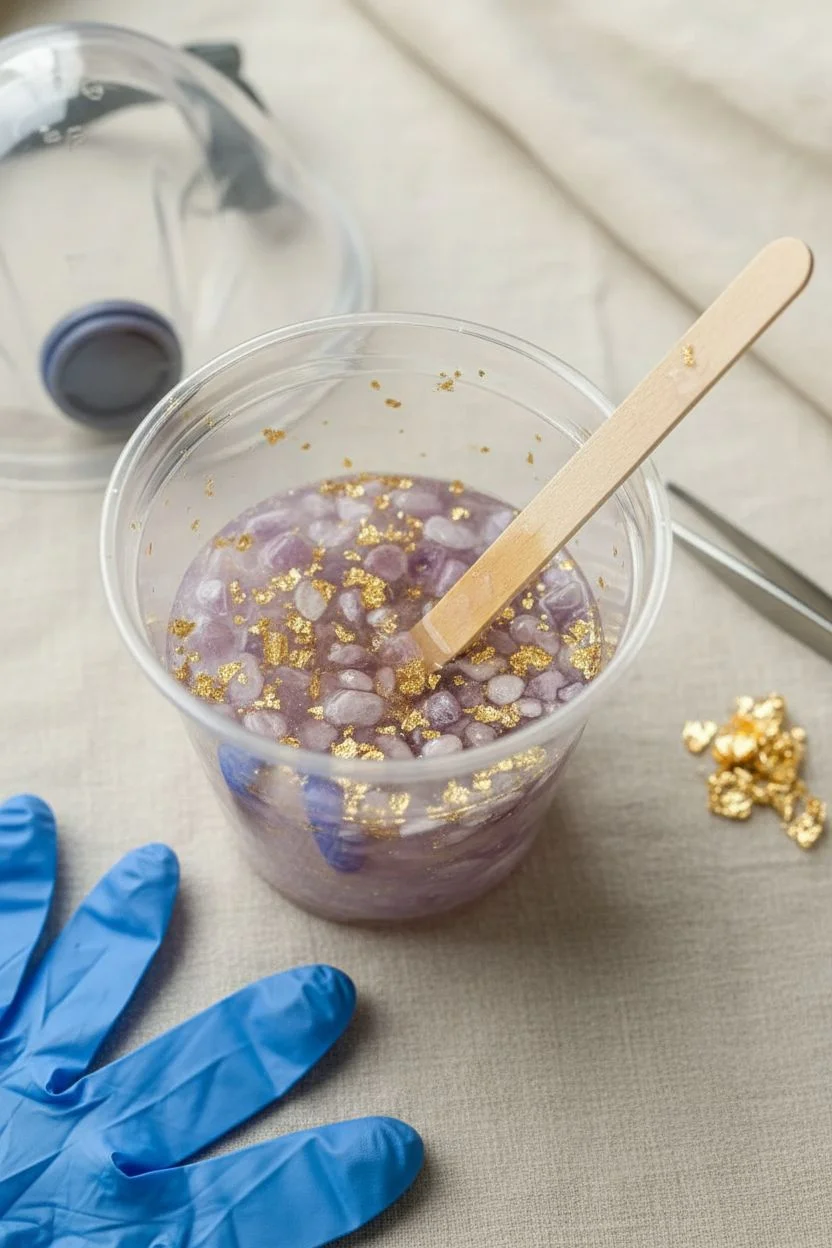
Mix the Resin:
Measure equal parts of resin (Side A) and hardener (Side B) into a mixing cup. Stir slowly but thoroughly for about 3 to 5 minutes, scraping the sides and bottom to ensure a complete chemical blend. -
Degas the Mixture:
Let the mixed resin sit for about 5 minutes to allow any large air bubbles created during stirring to rise to the surface and pop. -
Prepare the Foil:
While the resin rests, use tweezers to tear your gold foil sheet into small, irregular flakes. You want a mix of tiny specks and slightly larger statement pieces.
Stone Suspension Trick
If your stones seek sinking to the bottom face, wait until the resin becomes thick and tacky (gel phase) before adding them. This suspends them in the middle of the clip.
Step 2: Casting the Design
-
Initial Pour:
Pour a very thin base layer of clear resin into your silicone mold. This acts as a ‘glue’ layer to hold your heavy stones in place so they don’t break the surface tension immediately. -
Place the Amethyst:
Using tweezers, carefully place the crushed amethyst chips into the mold. I like to scatter them somewhat randomly but ensure they are distributed from end to end for visual balance. -
Add the Sparkle:
Dip a toothpick into the resin, pick up your gold foil flakes, and push them into the mold between the stones. Submerge them slightly so they float rather than sink to the very bottom. -
Fill the Mold:
Slowly pour the remaining clear resin over the stones and foil until the mold is filled to the brim. Pour slowly to avoid trapping new air pockets around the jagged edges of the stones. -
Pop Bubbles:
Wait a few minutes for bubbles to surface, then pass a heat gun or lighter quickly over the surface to pop them. -
Cure:
Place the mold on a level surface and cover it to protect from dust. Allow it to cure fully according to your resin brand’s instructions, usually 24 to 48 hours.
Step 3: Assembly and Finishing
-
Demold:
Once fully hardened, gently peel back the silicone mold to release your resin piece. -
Check Edges:
Inspect the edges for any sharp resin flashing. If you find any, gently sand them down with fine-grit sandpaper or a nail file until smooth. -
Prep the Hardware:
Take your gold alligator clip and roughen the flat top surface slightly with sandpaper; this creates a better texture for the glue to grip. -
Apply Adhesive:
Apply a thin, even strip of E6000 glue or a strong jewelry adhesive to the flat surface of the metal clip. -
Attach the Resin:
Press the resin piece firmly onto the metal clip. Ensure it is centered and aligned perfectly. -
Final Cure:
Clamp the pieces together lightly or let them sit undisturbed for at least 24 hours to ensure the glue reaches maximum strength before wearing.
Adding Soft Color
Mix a tiny drop of translucent purple alcohol ink or mica powder into the resin before pouring for a hazy, dreamlike lavender background behind the stones.
Now you have a stunning, geology-inspired accessory ready to catch the sunlight in your hair
Epoxy Resin Fridge Magnets in Mini Abstract Shapes
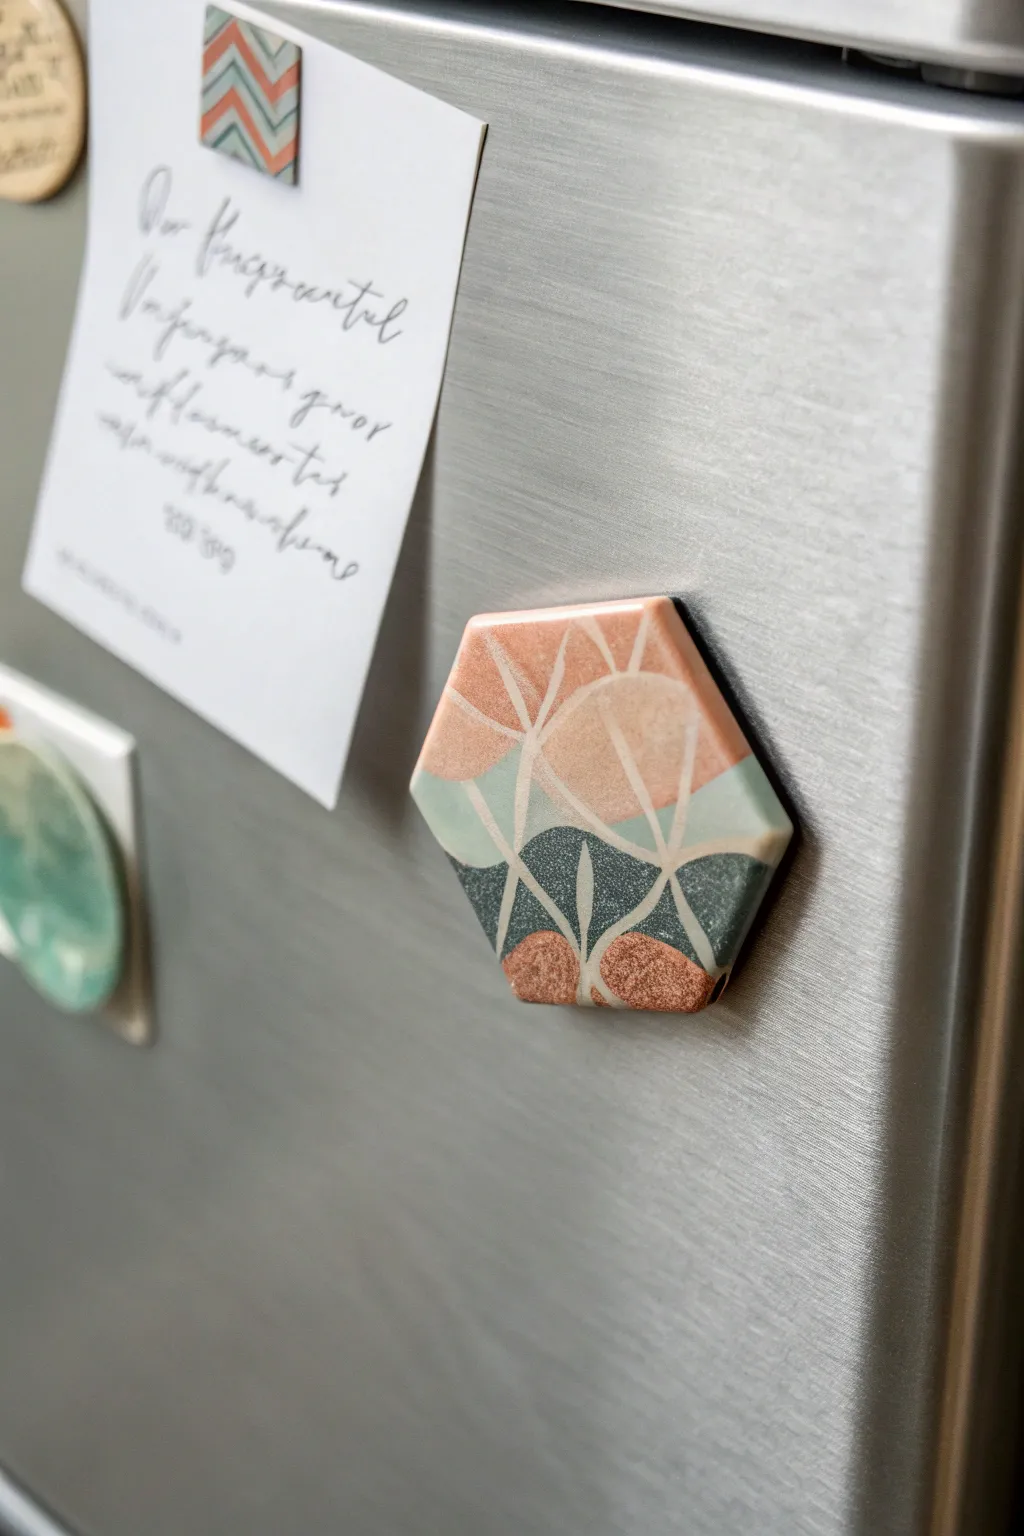
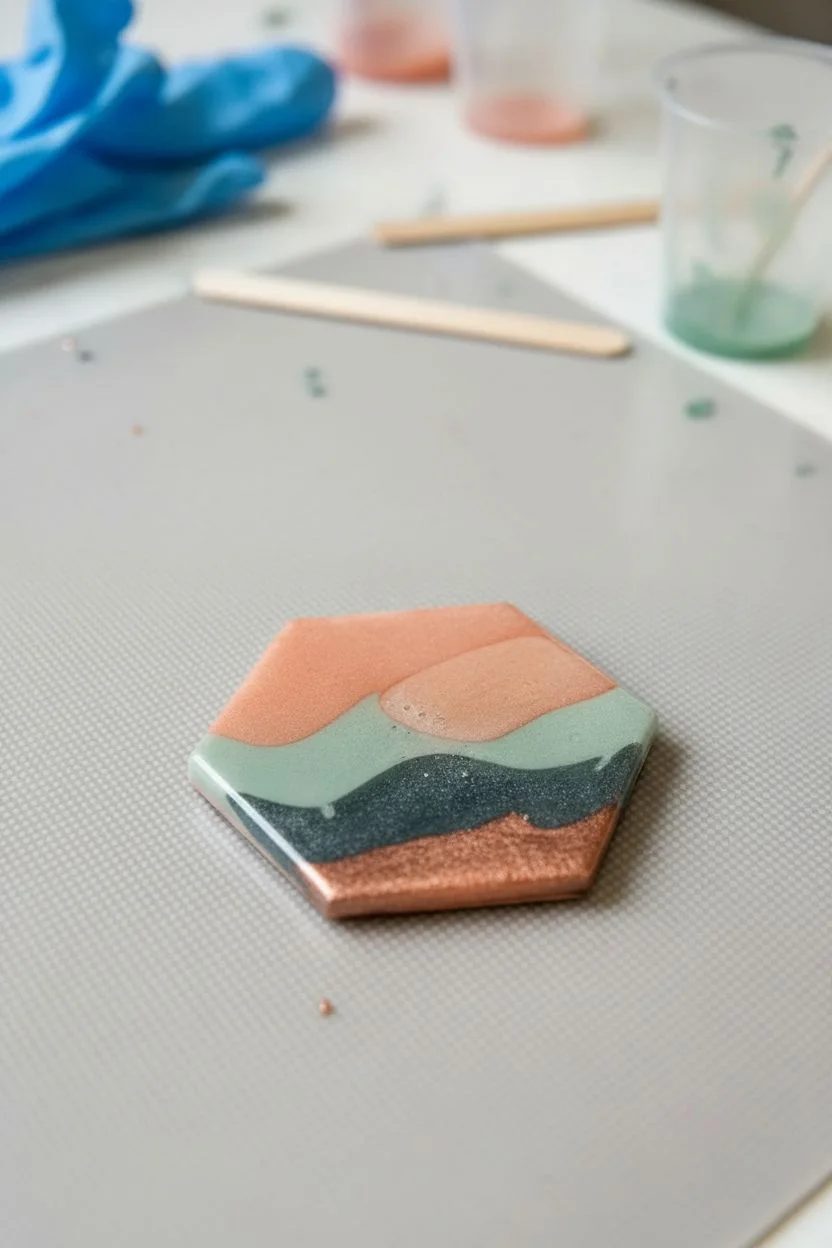
These stylish hexagonal magnets blend soft pastels with deep slate tones in an abstract geometric design, all sealed under a glossy layer of epoxy resin. The thin white lines creating the distinctive pattern add a refined, artistic touch perfect for modernizing your fridge display.
Step-by-Step
Materials
- Hexagon silicone mold (small/medium size)
- Epoxy resin (two-part kit)
- Hardener
- Resin pigments or acrylic paints (Peach/Coral, Mint/Sage Green, Dark Slate Blue, Copper)
- White acrylic paint or a white extra-fine paint pen
- Mixing cups and stir sticks
- Small magnets (neodymium or ceramic)
- Strong adhesive (E6000 or super glue)
- Heat gun or lighter
- Fine-grit sandpaper (optional)
- Latex or nitrile gloves
Step 1: Creating the Base Layer
-
Prepare your workspace:
Set up in a well-ventilated area and cover your surface with parchment paper or a silicone mat. Put on your gloves to protect your skin from the resin. -
Mix the resin:
Measure equal parts of resin and hardener into a mixing cup. Stir slowly for at least 3-5 minutes, scraping the sides and bottom thoroughly to ensure a complete chemical reaction. -
Divide and color:
Separate the mixed resin into four smaller cups. Tint each cup with your chosen pigments: a soft peach, a muted mint green, a dark slate blue, and a metallic copper. -
Pour the abstract pattern:
Pour small puddles of the different colored resins into the hexagon mold simultaneously. Try to keep the peach at the top, mint in the middle, and slate/copper at the bottom, but allow them to touch naturally. -
Pop bubbles:
Quickly pass a heat gun or lighter over the surface of the wet resin to burst any air bubbles that have risen to the top. -
Initial cure:
Cover the mold to prevent dust from settling on it and let it cure fully according to your resin brand’s instructions, typically 24-48 hours.
Sticky Situation?
If your resin is still tacky after 48 hours, the mixing ratio likely wasn’t exact or you didn’t stir enough. Unfortunately, you can’t fix it; you’ll need to re-pour.
Step 2: Adding the Line Work
-
Demold the piece:
Once fully hard, gently pop the hexagon out of the silicone mold. If there are any sharp edges, smooth them lightly with fine-grit sandpaper. -
Draw the design:
Using a white extra-fine paint pen, draw thin lines over the cured resin surface. Create roughly organic shapes that mimic botanical stems or cracked earth, separating the color zones. -
Add detail lines:
Fill in the larger shapes with additional straight or slightly curved white lines to create the geometric texture seen in the reference photo. -
Let paint dry:
Allow the white paint lines to dry completely. If you apply the top coat too soon, you risk smearing the crisp white lines.
Step 3: Domed Finish & Assembly
-
Mix a clear coat:
Mix a small batch of clear, uncolored epoxy resin. Let it sit for a few minutes so it thickens slightly; I find this helps it stay on the surface without dripping over the sides. -
Apply the dome:
Carefully pour a small amount of clear resin onto the center of the painted hexagon. Use a clean stir stick to gently push the liquid to the very edges. -
Surface tension is key:
Do not let the resin flow over the edge. Rely on surface tension to create a smooth, curved ‘dome’ effect on top of the artwork. -
Final cure:
Cover the piece again and let this clear top layer cure for another 24 hours until hard and glass-like. -
Attach the magnet:
Flip the finished piece over. Apply a dab of E6000 or strong glue to the back center. -
Secure and wait:
Press your magnet into the glue and let the adhesive set for the recommended time before placing it on your fridge.
Clean Lines
If you lack a steady hand for the paint pen, use thin strips of lining tape (washi tape) on the cured base, paint over it, and peel it off for perfect geometric separations.
Now you have a piece of functional modern art to brighten up your kitchen
Epoxy Resin Drawer Knobs for Instant Furniture Glow-Up
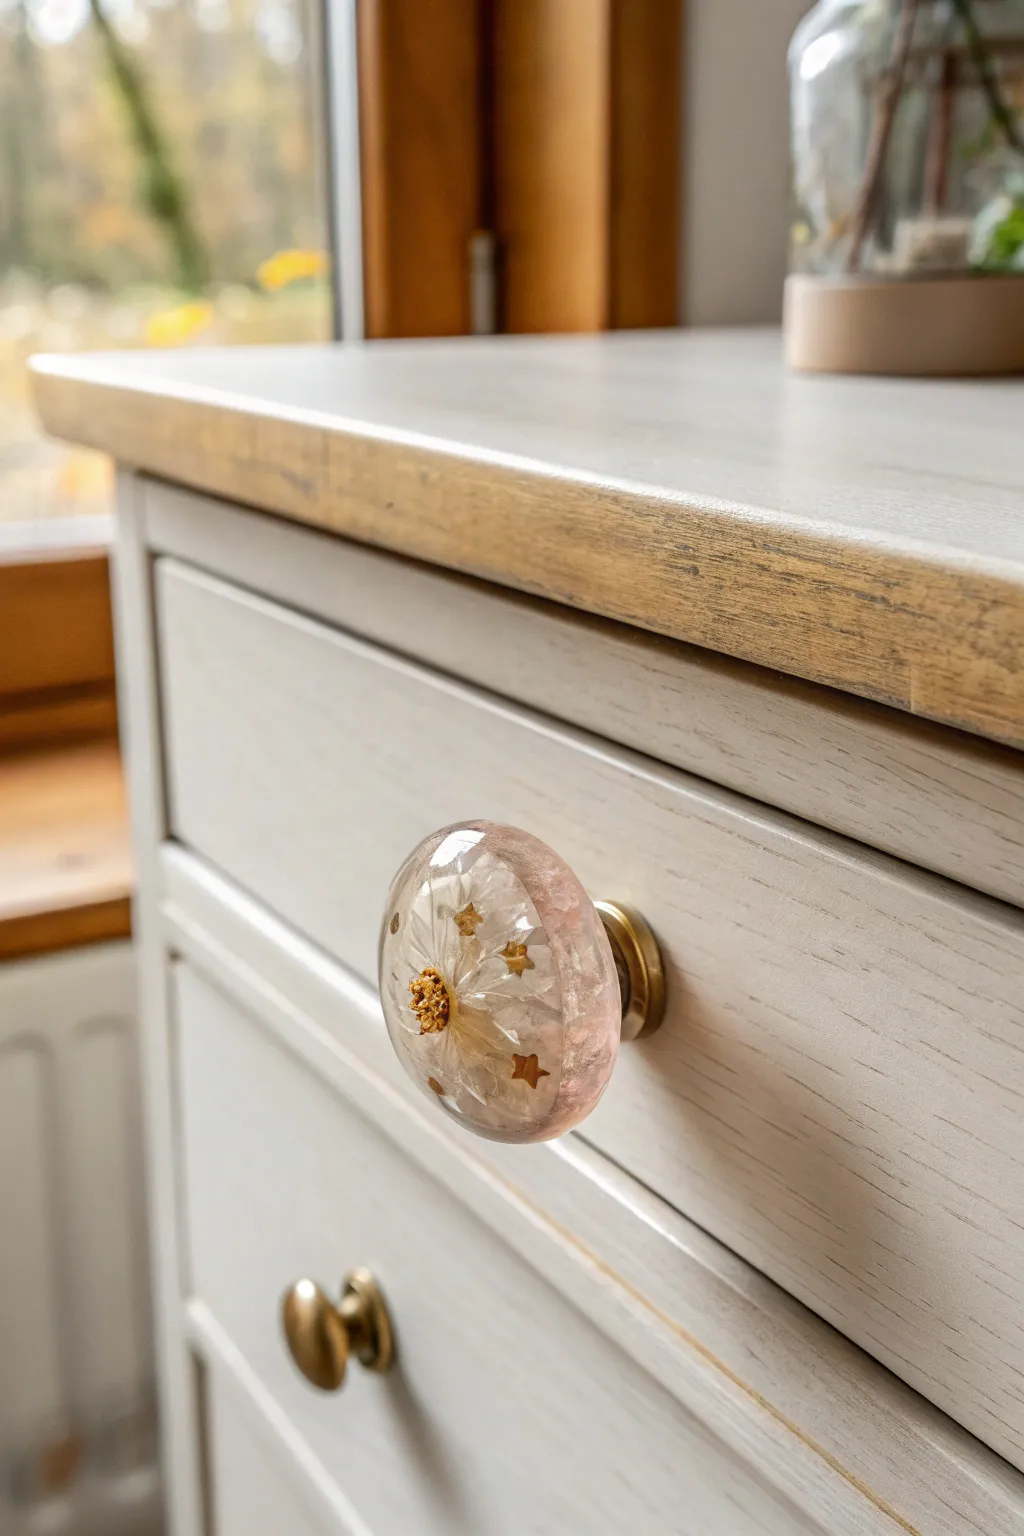
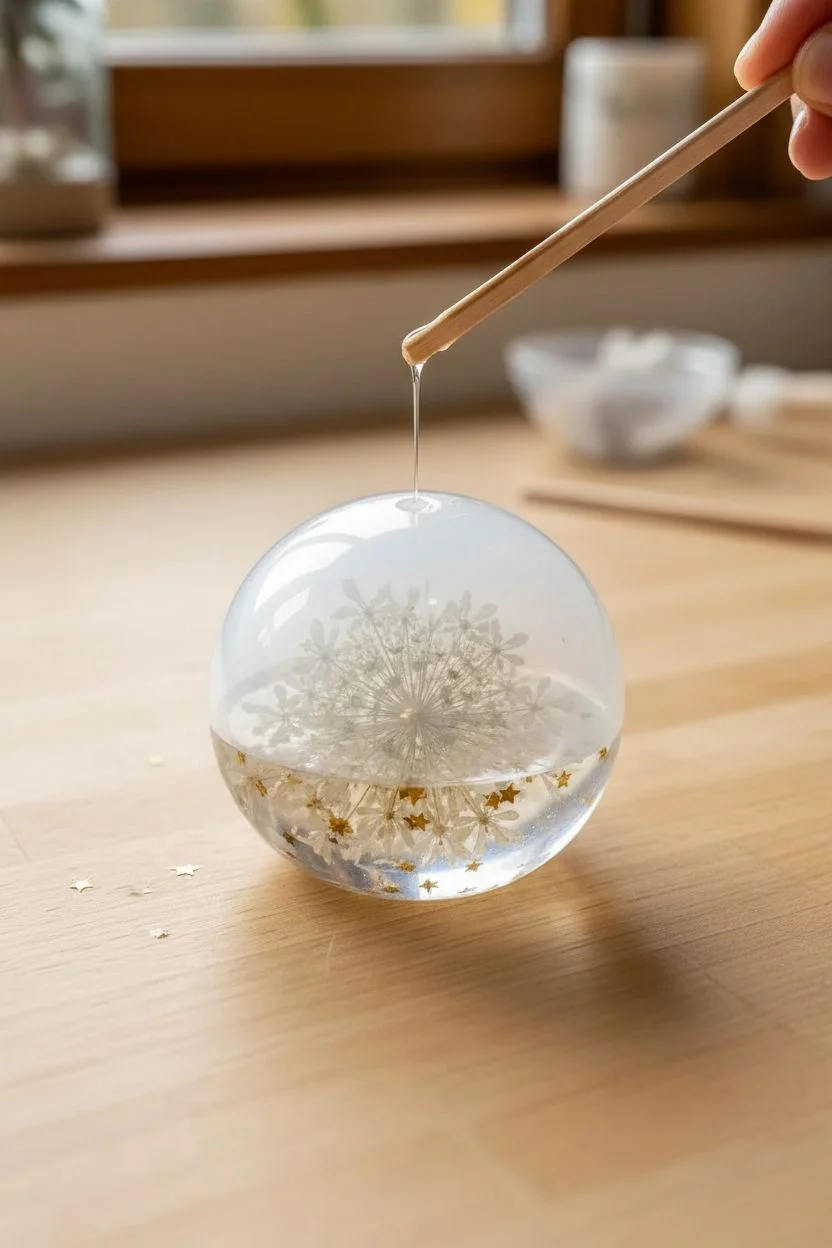
Transform ordinary furniture into a whimsical statement pieces with these enchanting drawer knobs suspended in time. By encapsulating delicate dried blooms and glittering stars within clear epoxy, you create functional hardware that feels like a tiny, frozen garden.
Step-by-Step Tutorial
Materials
- High-gloss casting epoxy resin (2-part system)
- Silicone knob molds (round/sphere shape)
- Dried white flowers (Queen Anne’s lace or baby’s breath)
- Small gold star confetti
- Threaded brass knob bases/inserts
- Glue for jewelry/metal (E6000)
- Mixing cups and stir sticks
- Tweezers
- Heat gun or lighter
- Gloves and respirator mask
- Sandpaper (fine grit)
Step 1: Preparation and First Pour
-
Selecting the molds:
Choose a silicone mold specifically designed for drawer knobs; these often come with a built-in screw mechanism, but for this specific look, we are using a plain sphere mold and will attach the hardware later to ensure clarity. -
Prepping flowers:
Ensure your white flowers are completely dry. Moisture is the enemy of resin and will cause the petals to rot or turn transparent. Trim the stem so only the flower head remains, sized slightly smaller than your mold. -
Mixing part A and B:
Measure equal parts of your casting resin and hardener by volume. Mix slowly for at least 3-5 minutes, scraping the sides and bottom of the cup thoroughly to avoid sticky spots later. -
Base layer:
Pour a very small amount of mixed resin into the bottom of the mold, filling it just about 1/4 of the way. This creates the ‘front’ face of the knob. -
Removing bubbles:
Let the resin sit for a few minutes to allow bubbles to rise. Gently pass a heat gun or lighter over the surface to pop any remaining air pockets.
Flower Float Prevention
Work in layers! If you pour all at once, lightweight dried flowers will float to the top. A tacky base layer acts like glue to hold the bloom perfectly centered.
Step 2: Embedding the Elements
-
Placing the stars:
Dip your tweezers into the resin, pick up your gold star confetti, and place them into the base layer. Since this is the front, ensure the ‘good side’ of the confetti is facing down into the mold. -
Positioning the bloom:
The resin needs to be slightly tacky before adding the flower so it doesn’t float to the top. Wait until the resin has thickened just a bit (usually 20-40 minutes depending on your brand), then gently press the flower face-down into the mold. -
Sealing the flower:
I like to drip a tiny bit of fresh resin over the back of the flower at this stage. This helps wet the petals and prevents huge air bubbles from getting trapped under the bloom during the main pour. -
Curing the first layer:
Allow this initial layer to cure for several hours until it is hard enough to support the next pour without the flower drifting out of place.
Cloudy Resin Correction
If your knob looks foggy after demolding, the mold surface may have been dull. You can fix this by brushing on a thin topcoat of fresh resin to restore the shine.
Step 3: Filling and Finishing
-
Second mix:
Mix a second batch of clear resin. If you want that subtle hint of blush pink seen in the photo, add a microscopic drop of alcohol ink—literally the tip of a toothpick’s worth—into the mixture. -
Final pour:
Fill the rest of the mold to the brim. Pour slowly in a thin stream to minimize bubbles. If the flower tries to float, push it back down with a toothpick until the resin thickens. -
Full cure:
Cover the mold with a box to prevent dust from settling on the sticky surface. Let it cure fully for 24 to 48 hours according to your resin’s instructions. -
Demolding:
Once rock hard, gently peel back the silicone mold to reveal your resin sphere. The flower should be beautifully suspended in the center. -
Sanding the back:
The flat back of the knob (where you poured) might have a sharp edge. Place a sheet of fine-grit sandpaper on a flat surface and rub the back of the knob against it in a circular motion until smooth. -
Attaching hardware:
Apply a strong jewelry adhesive like E6000 to the flat face of your brass knob base. Press it firmly against the flat sanded back of the resin piece. -
Installing:
Wait 24 hours for the glue to fully set before screwing your new custom knob into your drawer or cabinet door.
Now you have a set of bespoke hardware that adds a touch of botanical elegance to any room.
Inky-Swirl Epoxy Resin Dice Sets for Game Night
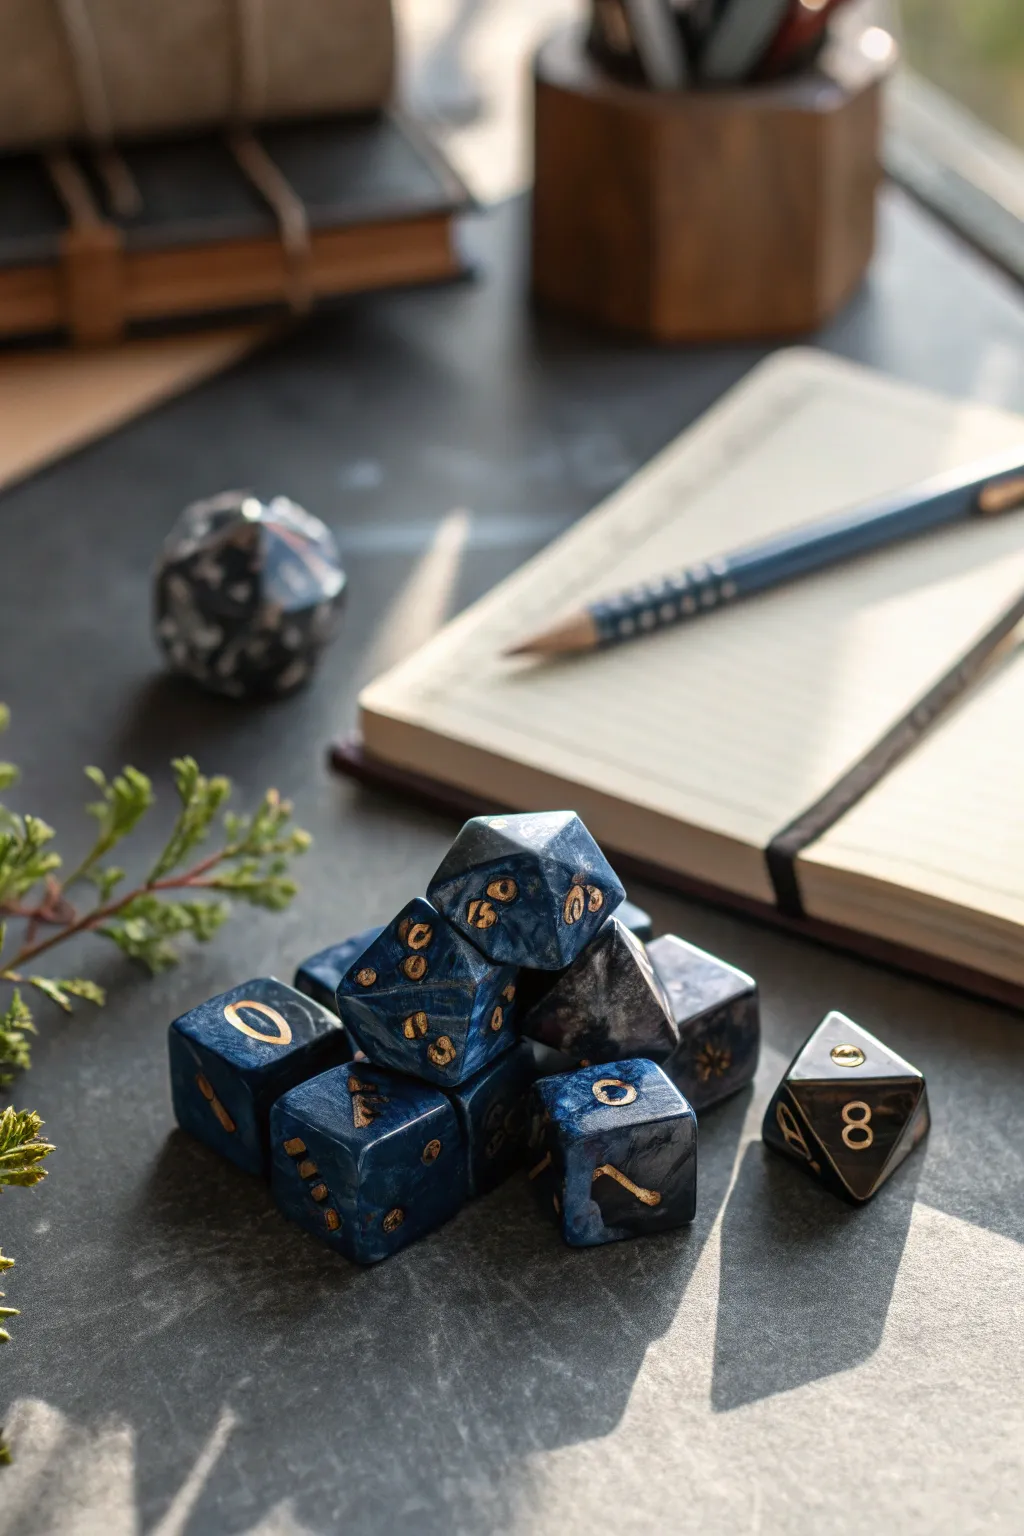
Summon the magic of tabletop gaming with these mesmerizing, deep blue and black swirled dice. This project combines translucent resin with intense ink drops to create a smoky, mystical depth perfect for your next campaign.
Step-by-Step Guide
Materials
- Polyhedral dice silicone molds (7-piece set)
- Two-part epoxy resin (high clarity, low viscosity)
- Alcohol inks (deep navy blue, black, white sinker)
- Mica powder (pearl or dark silver for subtle shimmer)
- Gold acrylic paint or model paint
- Fine-tip paintbrush or toothpick
- Mixing cups and stir sticks
- Gloves and respirator mask
- Heat gun or lighter
- Polishing papers (Zona papers recommended)
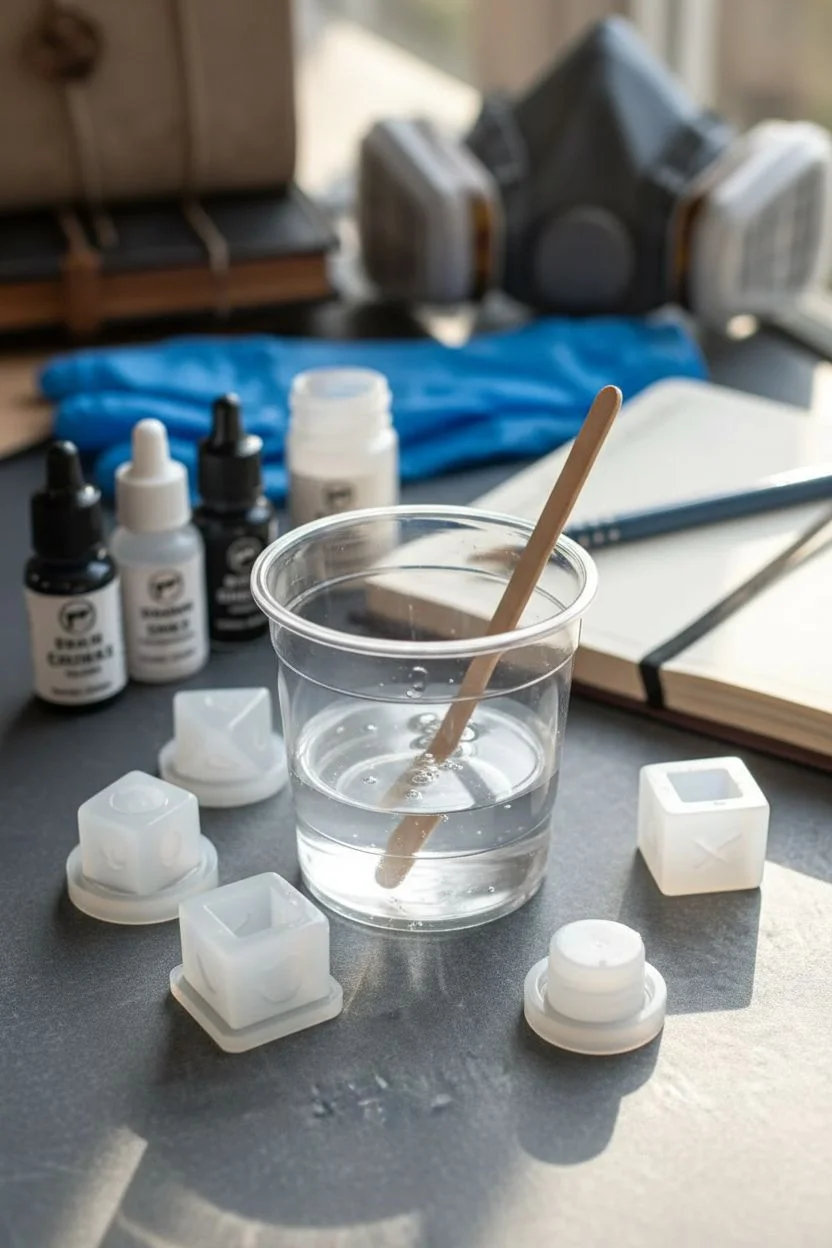
Step 1: Preparation and Mixing
-
Safety First:
Before summoning any chemical reactions, ensure your workspace is covered and well-ventilated. Don your gloves and respirator mask. -
Mold Prep:
Clean your silicone molds thoroughly with tape or a gentle wash to remove any dust. Ensure they are completely dry before proceeding. -
Measure Resin:
Measure out equal parts of resin and hardener (or according to your brand’s ratio) into a mixing cup. You won’t need a huge amount for one set of dice, typically around 30-40ml. -
Stir Slowly:
Mix the resin slowly for 3-5 minutes, scraping the sides and bottom. The goal is to minimize bubbles, so keep that stirring stick submerged. -
Rest Phase:
I like to let the mixed resin sit for about 5 minutes to allow large air bubbles to rise to the surface before pouring.
Master the Petri Effect
The ‘white sinker’ ink is heavy. Use it sparingly! One drop is often enough to drag the blue and black down creating those cool tendrils without clouding the whole die.
Step 2: Pouring and Inking
-
Fill the Molds:
Pour clear mixed resin into each die mold, filling them about halfway. Do not overfill yet. -
Add Base Color:
Drop one single drop of deep navy alcohol ink into the resin in each mold. -
Create the Swirl:
Now, add a tiny drop of black ink. Follow it immediately with a drop of white sinker ink to help push the colors down. -
Top Off:
Fill the rest of the mold with clear resin until it creates a slightly domed meniscus at the top opening. -
Cap It:
Carefully place the lids on the molds. You want a little excess resin to squish out (called ‘flashing’) to ensure there are no voids inside. -
Cure Time:
Place the molds in a pressure pot if you have one (set to 40psi) to crush bubbles. If not, cover them to prevent dust and let them cure for a full 24-48 hours.
Step 3: Finishing Touches
-
Demold:
Once fully hard, gently peel back the silicone and pop your dice out. They will likely have rough edges where the lid met the base. -
Trim Flashing:
Use flush cutters or a hobby knife to carefully trim away the thin excess resin around the ‘1’ face or cap area. -
Sanding:
Wet sand the face that had the lid (usually the high number) using polishing papers. Start with a coarse grit and work your way up to the finest grit for a glass-like shine. -
Clean Up:
Wash the sanded dice with water and dry them completely. -
Inking the Numbers:
Dip a fine brush in gold acrylic paint and fill in the engraved numbers. Don’t worry about being messy; let the paint cover the groove. -
Wipe Excess:
Before the paint dries completely, wipe the face of the die with a paper towel or your thumb. The paint will stay in the number but wipe off the smooth face.
Sticky Dice Syndrome?
If your dice feel flexible after 48 hours, the ratio was likely off or not mixed well enough. Unfortunately, sticky resin doesn’t fix itself; you may need to re-pour.
Roll for initiative with your stunning new handmade set and watch your party marvel at the depths of color.
Wood-and-Epoxy Resin “River” Pendants From Scrap Wood
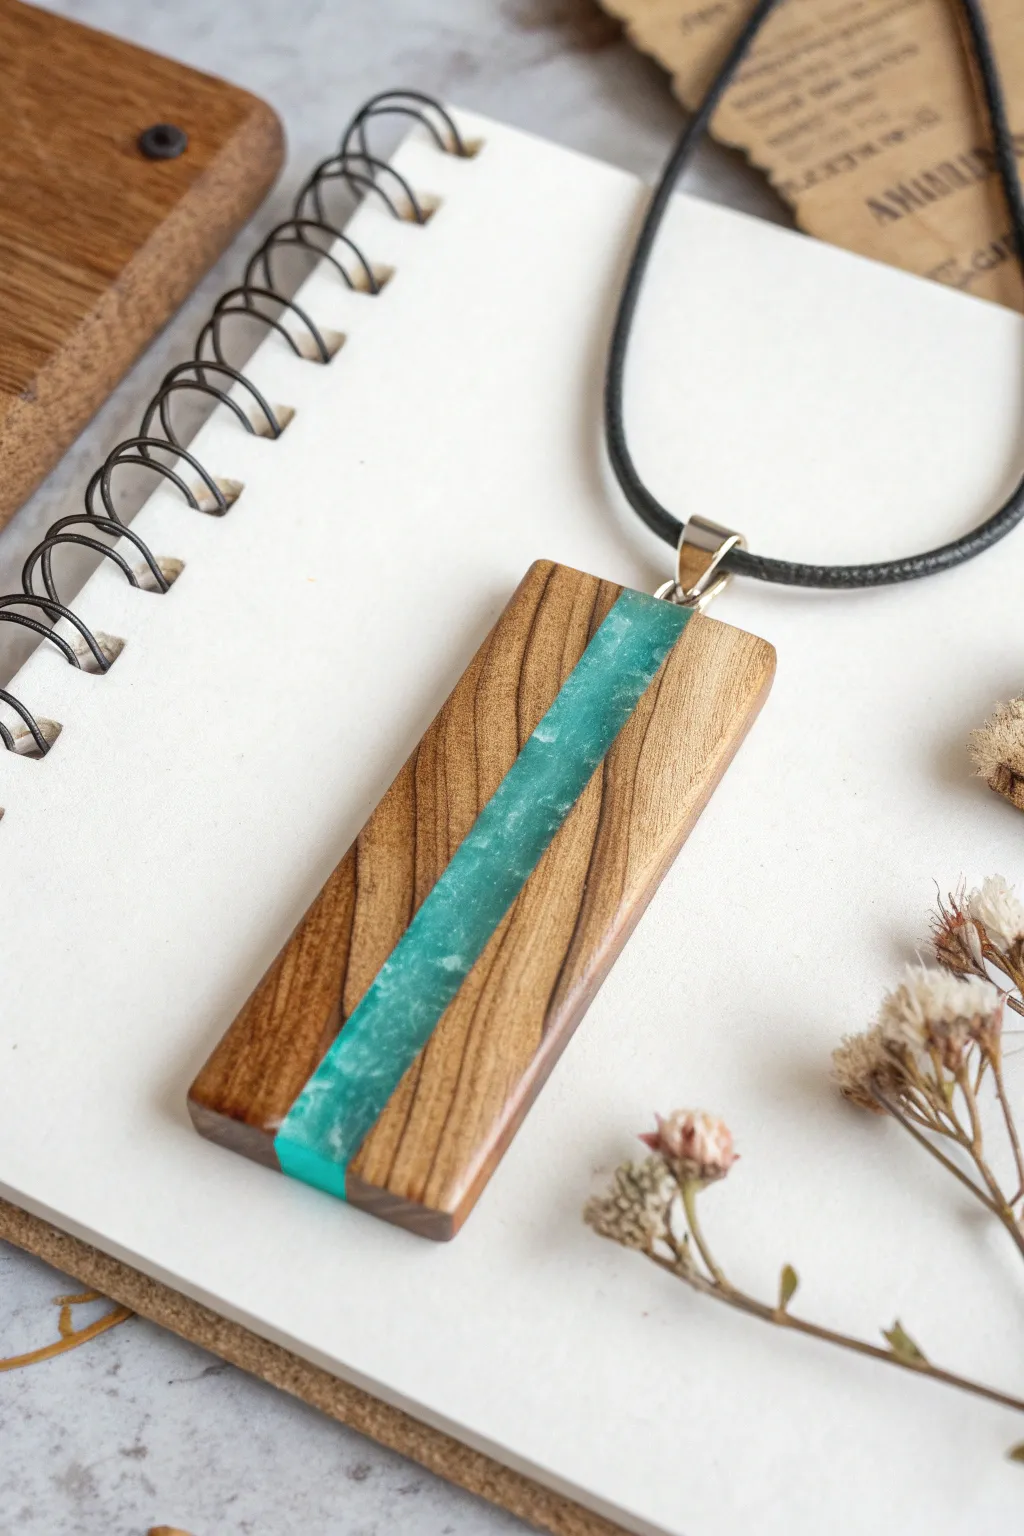
Transform small scraps of hardwood and clear resin into a stunning, minimalist piece of wearable art. This rectangular pendant features a striking band of translucent turquoise epoxy that mimics a flowing river cutting through natural wood grain.
Step-by-Step Tutorial
Materials
- Two small strips of hardwood (e.g., walnut or olive wood), approx. 1×3 inches
- Two-part epoxy resin (casting resin)
- Turquoise mica powder or alcohol ink
- Tyvek tape or a silicone mold box
- Hot glue gun
- Sandpaper (grits 80 through 2000)
- Polishing compound and microfiber cloth
- Drill with small bit
- Pendant bail and jump ring
- Leather jewelry cord
- Wood finish (Danish oil or mineral oil)
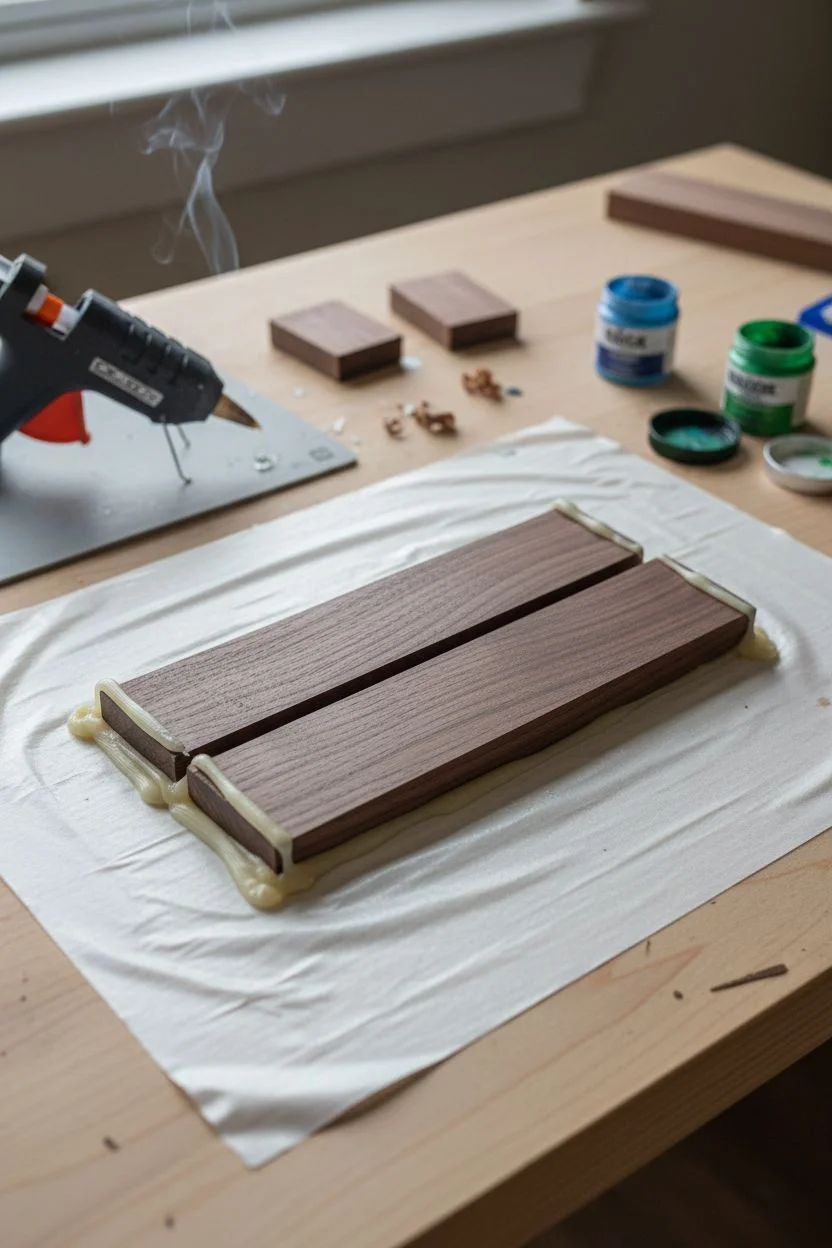
Step 1: Preparing the Mold
-
Select your wood:
Choose two small pieces of hardwood that have interesting grain patterns. The pieces should be roughly the same length and thickness, with at least one straight edge on each. -
Create a base:
Cover a flat surface or a small piece of scrap board with Tyvek tape. This tape is crucial because epoxy won’t stick to it. -
Position the wood:
Place your two wood pieces on the taped surface, leaving a gap of about 1/4 to 1/3 inch between them. This gap will become your resin ‘river’. -
Seal the mold:
Using a hot glue gun, run a line of glue along the outside edges of the wood to seal them to the base. Create dams on the open ends of the gap to prevent the resin from leaking out. -
Verify the seal:
Double-check your glue dams. A small leak can drain your river, so I always add a second layer of hot glue just to be safe.
Step 2: Pouring the River
-
Mix the resin:
Measure and mix your two-part epoxy resin according to the manufacturer’s instructions. Stir slowly to minimize air bubbles. -
Add color:
Gradually mix in a tiny amount of turquoise mica powder or alcohol ink. You want a translucent look like the photo, so add pigment sparingly until you reach a watery blue-green shade. -
Pour the channel:
Carefully pour the tinted resin into the gap between the wood pieces. Fill it slightly higher than the wood surface to account for shrinkage or settling. -
Remove bubbles:
Wait about 5 minutes for bubbles to rise, then gently pass a heat gun or lighter over the surface to pop them. -
Cure:
Allow the piece to cure fully in a dust-free area. This usually takes 24 to 48 hours depending on your specific resin brand.
Live Edge Look
Don’t cut the inner wood edges straight. Break them slightly or use the natural wavy grain edge to give the river a more organic, flowing appearance.
Step 3: Shaping and Finishing
-
Demold the blank:
Once hard, remove the hot glue and peel the piece off the tape. You now have a rough rectangular block. -
Flatten the surface:
Sand the front and back faces flat using 80-grit sandpaper until the resin is flush with the wood. A belt sander works great here, but hand sanding works too. -
Cut to shape:
Trim the edges to create a perfect rectangle. You can use a small handsaw or scroll saw for this. -
Dry sanding:
Ideally, work your way through 120, 220, and 400 grit sandpaper. Ensure you remove all scratches from the previous grit before moving on. -
Wet sanding:
Switch to wet sanding for the higher grits (600 up to 2000). Keep the paper wet to prevent the resin from heating up and clouding. -
Polish to shine:
Apply a plastic polishing compound to a cloth and buff the resin stripe vigorously until it becomes crystal clear. -
Oil the wood:
Rub a generous amount of Danish oil or mineral oil over the entire piece. This protects the wood and makes the grain pop. -
Install hardware:
Drill a small hole into the center of the top edge. Insert a screw-eye hue or glue in a pendant bail. -
Final assembly:
Thread your leather cord through the bail to complete the necklace.
Add Sparkle
For a magical touch, mix a pinch of glow-in-the-dark powder or ultrafine holographic glitter into the resin before pouring.
Now you have a serene, nature-inspired accessory that carries the calming flow of a river wherever you go
Faux Sea Glass Epoxy Resin Window Hanging That Catches Light
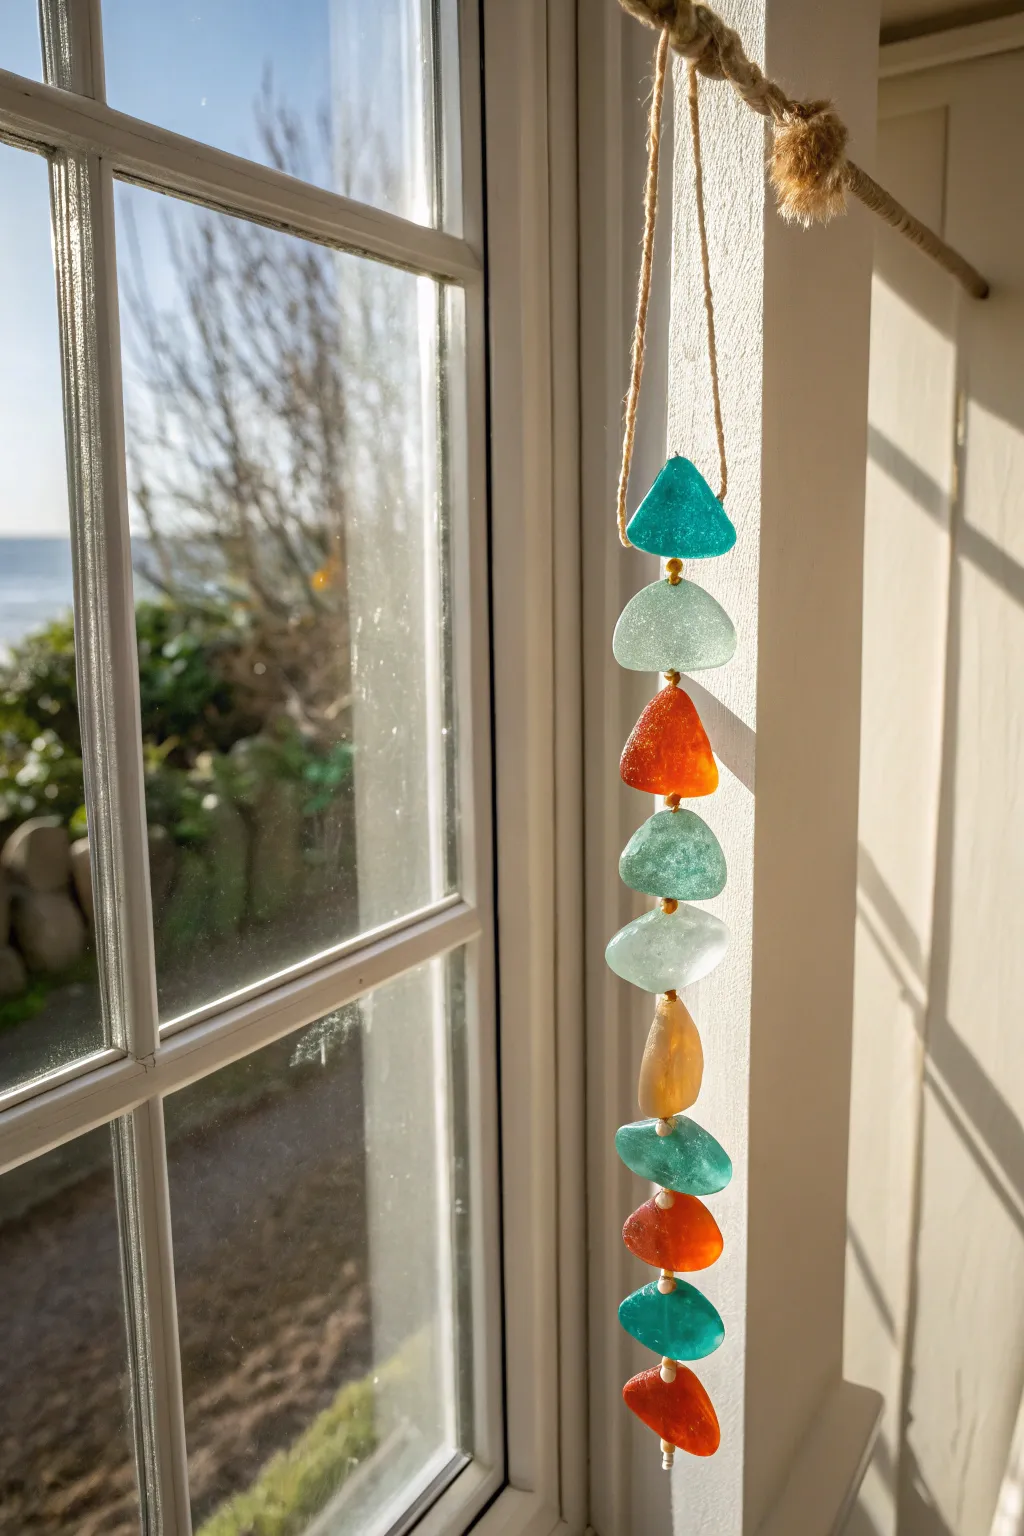
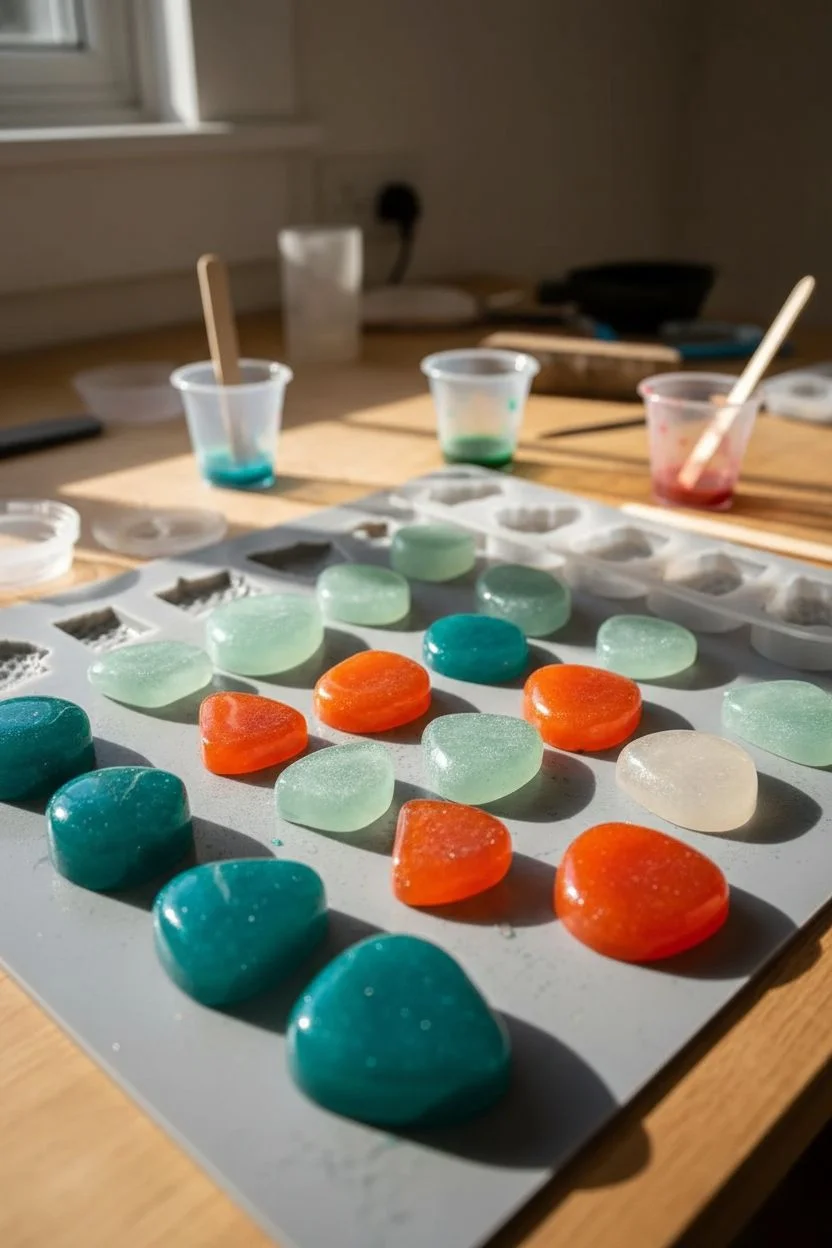
Transform ordinary epoxy resin into frosty, glowing shards of faux sea glass that dangle elegantly in your window. This project captures the weathered beauty of beach treasures, bringing a permanent pop of coastal color to any room that gets good sunlight.
Step-by-Step Tutorial
Materials
- Clear casting epoxy resin (AB mix)
- Silicone gem or irregular stone molds
- Alcohol inks (teal, orange, white, seafoam green)
- Fine sandpaper (220 to 400 grit) or matte finish spray
- Small hand drill or Dremel with a fine bit
- Natural jute twine or hemp cord
- Small gold or wooden spacer beads
- Mixing cups and stir sticks
- Protective gloves and respirator mask
Step 1: Casting the “Glass”
-
Prepare the resin:
Mix your epoxy resin according to the manufacturer’s package instructions. Ensure you stir slowly and scrape the sides of the cup to minimize air bubbles, which is crucial for a glass-like finish. -
Tint the resin:
Divide the mixed resin into separate small cups. Add just a drop or two of alcohol ink to each cup to achieve translucent colors like deep teal, vibrant orange, and pale seafoam. I like to leave one batch very pale or clear for good contrast. -
Add the frosty effect:
To mimic sea glass, add a tiny drop of white alcohol ink to each color cup. This creates a slight opacity that diffuses light beautifully rather than letting it pass straight through. -
Pour into molds:
Pour your tinted resin into the stone-shaped silicone molds. Don’t worry if the tops aren’t perfectly flat; irregular shapes look more organic and authentic. -
Cure completely:
Let the resin cure fully for 24-48 hours. The pieces need to be rock-hard before you attempt to drill into them.
Frosty Texture Trick
Instead of sandpaper, tumble the cured resin pieces in a rock tumbler with ceramic media and grit for 12 hours to get a truly authentic finish.
Step 2: Weathering and Finishing
-
Demold the gems:
Pop the cured resin pieces out of the molds. At this stage, they will likely be shiny, looking more like hard candy than sea glass. -
Sand for texture:
To get that frosty, tumbled look, wet sand the surface of each resin piece using fine-grit sandpaper. Rub in circular motions until the glossy shine turns into a satin matte finish. -
Alternative matte finish:
If sanding tedious small pieces feels overwhelming, you can spray them with a coat of matte varnish. Just ensure it’s a light, even coat to prevent drips. -
Clean the pieces:
Wash the sanded resin stones with mild soap and water to remove any sanding dust or residue, then dry them completely.
Step 3: Assembly
-
Drill holes:
Using a small hand drill or Dremel, carefully drill a vertical hole through the center of each resin piece. Go slowly to avoid cracking the resin or overheating the bit. -
Prepare the twine:
Cut a long length of jute twine, about double the length you want the final hanging to be. Fold it in half to create a loop at the top for hanging. -
Tie the top knot:
Tie a secure knot about an inch or two below the loop to start your strand. -
Thread the first piece:
Thread both ends of the twine through the top resin stone (the teal triangle in the image). Slide it down to the knot. -
Add a spacer:
Thread a small gold or wooden bead onto the twine immediately after the resin stone. This acts as a spacer and adds a nice metallic detail. -
Secure the section:
Tie a knot underneath the spacer bead to hold the first assembly in place. -
Repeat the pattern:
Continue adding resin stones in your desired color order (alternating warm and cool tones works well), separating each with a spacer bead and securing with knots if you want gaps between them. -
Finish the strand:
Once all your faux sea glass pieces are attached, tie a final double knot at the bottom. Trim any excess twine for a rustic look.
Driftwood Topper
Drill a piece of found driftwood and thread your twine through it at the top, creating a horizontal bar to hang multiple strands from.
Hang your new creation in a bright window and watch how the sun illuminates the frosted colors throughout the day
“Petri Bloom” Epoxy Resin Panels With Drop-and-Spread Ink
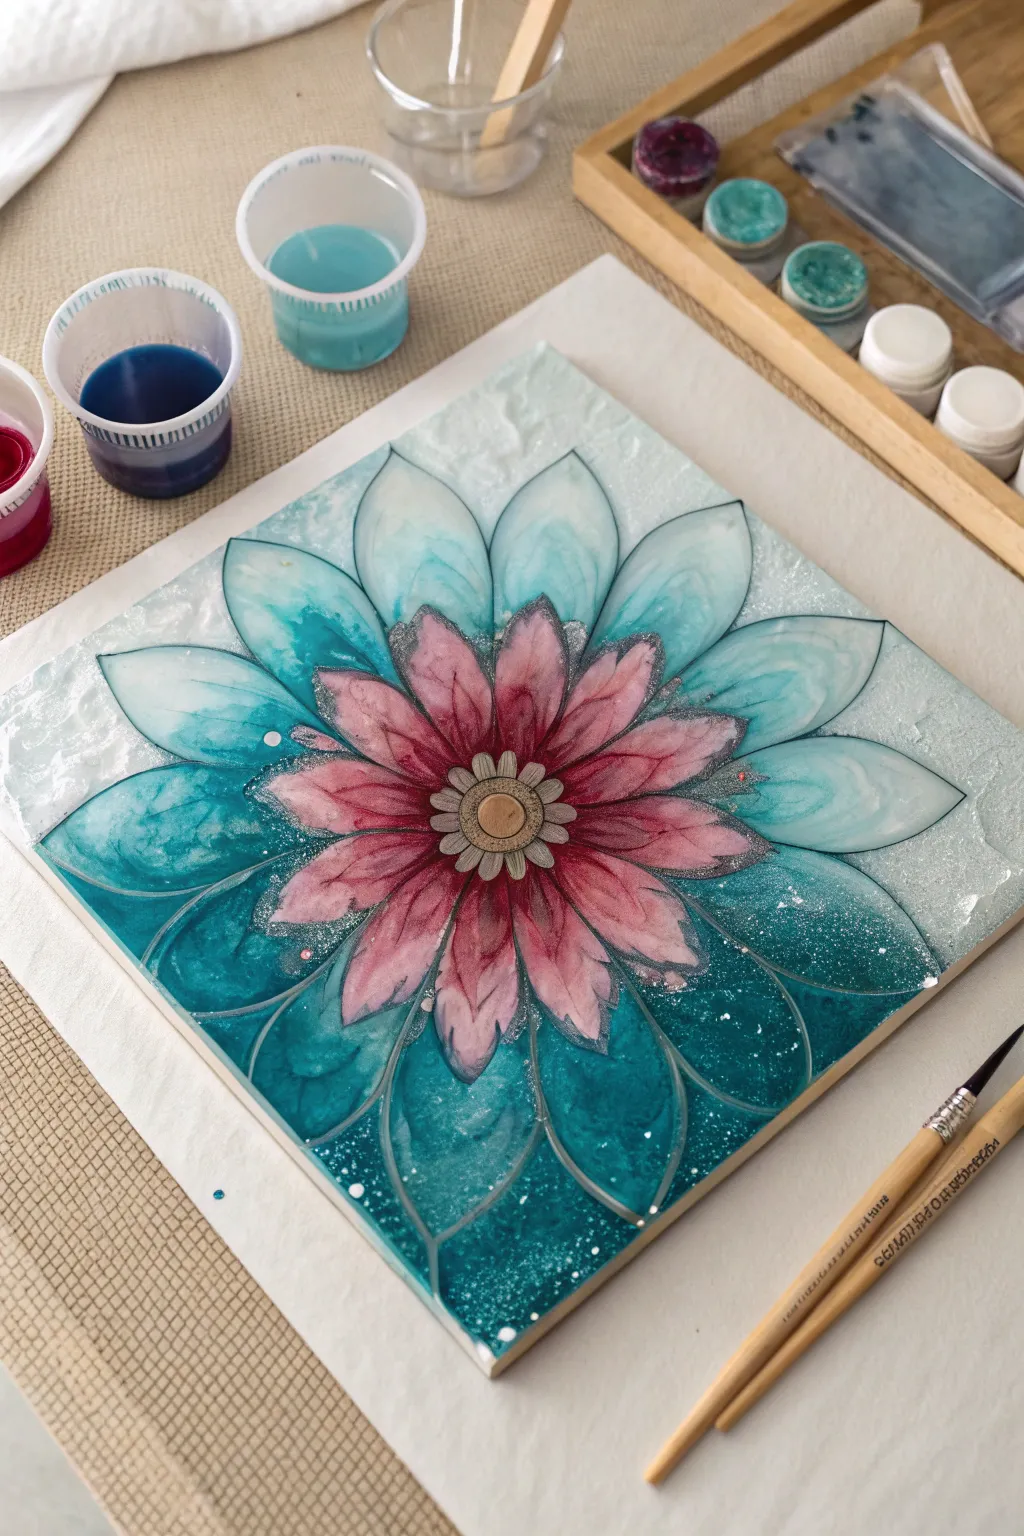
This mesmerizing floral panel combines the fluid beauty of alcohol inks with the structure of resin art. By creating distinct petal zones and layering vibrant pinks and teals, you can achieve a stunning, translucent bloom that looks almost like stained glass.
Step-by-Step
Materials
- Square wood panel or canvas (approx. 10×10 or 12×12 inches)
- White acrylic gesso
- Clear epoxy resin (casting or coating resin)
- Alcohol inks (Teal/Turquoise, Magenta/Pink, White sinker ink)
- Relief outliner or 3D paint (Silver or Black)
- Glitter or mica powder (Silver/Holographic)
- Mixing cups and stir sticks
- Heat gun or torch
- Small detail brushes
- Gloves and protective mat
Step 1: Preparation and Structured Outline
-
Prime the Surface:
Begin by coating your wooden panel with a layer of white gesso. This provides a bright background that will make the translucent resin colors pop. Let it dry completely. -
Draft the Design:
Using a pencil, lightly sketch a large, centered flower. Draw a small central circle for the stigma, a ring of smaller inner petals, and then large, sweeping outer petals that reach the edges of the panel. -
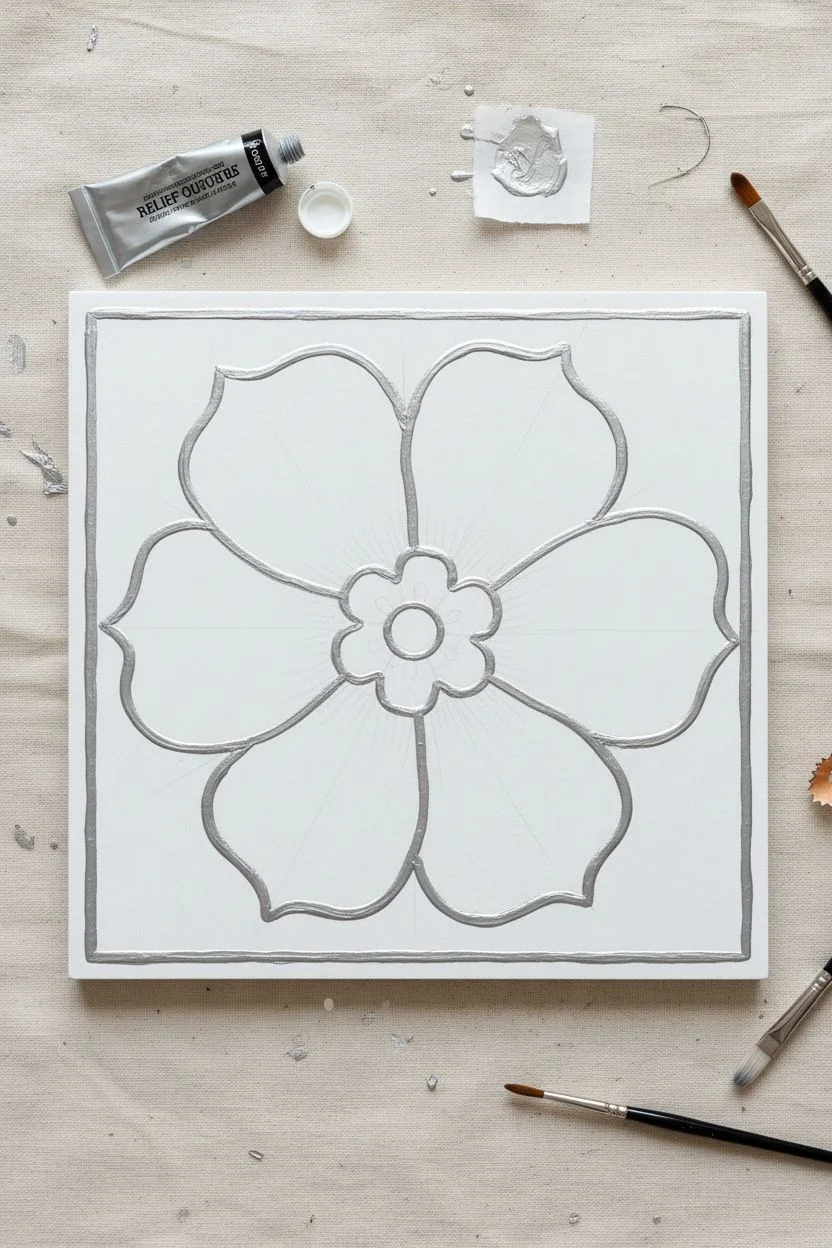
Create the Barriers:
Trace over your pencil lines using a relief outliner or 3D paint. This step is crucial because it creates physical dams that will hold different resin colors in place. Ensure the lines are unbroken so the liquid resin doesn’t leak between petals. -
Dry the Outlines:
Allow the relief outliner to cure fully according to the manufacturer’s instructions, usually for several hours or overnight. It must be solid before you pour resin.
Don’t Rush the Dams
Make sure your relief outliner lines are completely dry and gap-free before pouring. Even a pinhole leak can cause colors to bleed together.
Step 2: Resin Mixing and The Pink Center
-
Mix the Resin:
Mix a batch of clear epoxy resin, ensuring you follow the 1:1 ratio strictly. Stir slowly to minimize air bubbles. -
Preparing the Pink Tint:
Pour a small amount of resin into a separate cup and tint it with a drop of magenta alcohol ink. You want it translucent, not opaque. -
Pouring the Inner Petals:
Carefully pour or pipette the pink resin into the inner petal sections created by your outline. Do not overfill; the resin should be level with the barrier lines. -
Adding Depth:
While the pink resin is wet, drop a tiny amount of darker pink ink near the center of the flower and let it spread outward naturally. -
The Floral Center:
Fill the very center circle with a small amount of clear resin mixed with gold or beige mica powder for a textured stigma effect.
Step 3: Teal Outer Petals and Background
-
Mixing the Teal Resin:
In another cup, mix resin with teal or turquoise alcohol ink. Again, keep this mixture somewhat transparent to allow the white background to shine through. -
Filling the Outer Petals:
Pour the teal mixture into the large outer petal shapes. Use a toothpick or small stir stick to guide the resin into the sharp corners of the outline. -
Creating the Petri Effect:
Immediately after pouring the teal, drop single drops of white ‘sinker’ alcohol ink into the center of the teal sections. This pushes the color down and creates the bloom texture seen in the photo. -
Background Texture:
Mix a final cup of clear resin with fine silver glitter or crushed glass. Pour this into the negative space corners around the flower petals. -
Pop Bubbles:
Pass a heat gun or torch quickly over the surface to pop any air bubbles rising to the top. Keep the heat moving to avoid scorching the resin. -
Curing:
Cover the piece with a dust cover (like a cardboard box) and let it cure for 24 hours.
Luminous Layers
For a deeper 3D look, paint shadows with acrylics on the gesso base before pouring the resin. The tinted resin will act like a colored lens over the shading
Step 4: Final Details
-
Detailing the Veins:
Once the resin is hard, use a very fine brush or a metallic paint marker to accentuate the veins inside the petals, drawing fine lines over the hardened resin for added dimension. -
Top Coat (Optional):
If surface is uneven due to the outliner, pour a final thin layer of crystal clear resin over the entire piece to encase the texture and create a glass-like finish.
Display upright on a shelf or mount it on a wall to catch the light beautifully


Have a question or want to share your own experience? I'd love to hear from you in the comments below!