There’s something extra satisfying about turning a simple stone into a tiny piece of autumn you can hold in your hand. If you’re craving cozy color palettes, cute seasonal motifs, and a few playful twists, these fall rock painting ideas will keep your brush busy.
Jack-o’-Lantern Face Variety Set
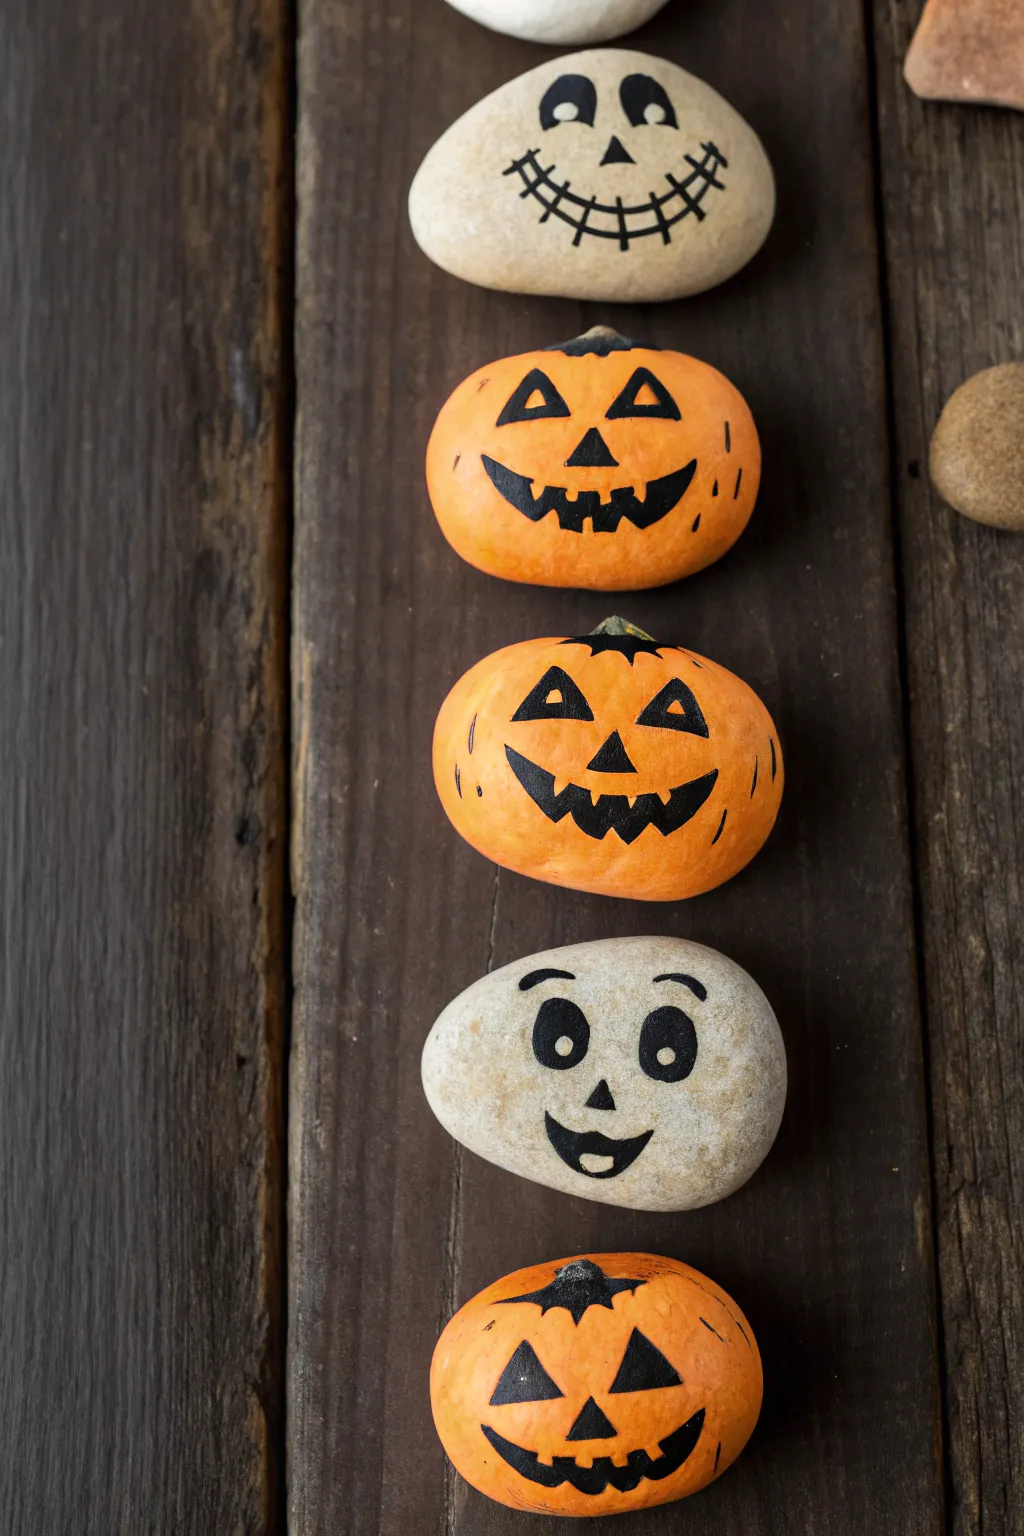
Transform ordinary smooth stones into a charming lineup of Halloween characters with this simple painting project. By alternating between bright orange pumpkins and pale, friendly ghosts, you can create a playful variety set perfect for autumn decor.
How-To Guide
Materials
- Smooth, flat river rocks (oval or round shapes preferable)
- Acrylic paint (Bright Orange, Warm White or Cream)
- Black paint marker (fine and medium tip) or fine paint brush
- Flat paintbrush (medium size)
- Pencil for sketching
- Clear sealant spray (matte or gloss)
- Water cup and paper towels
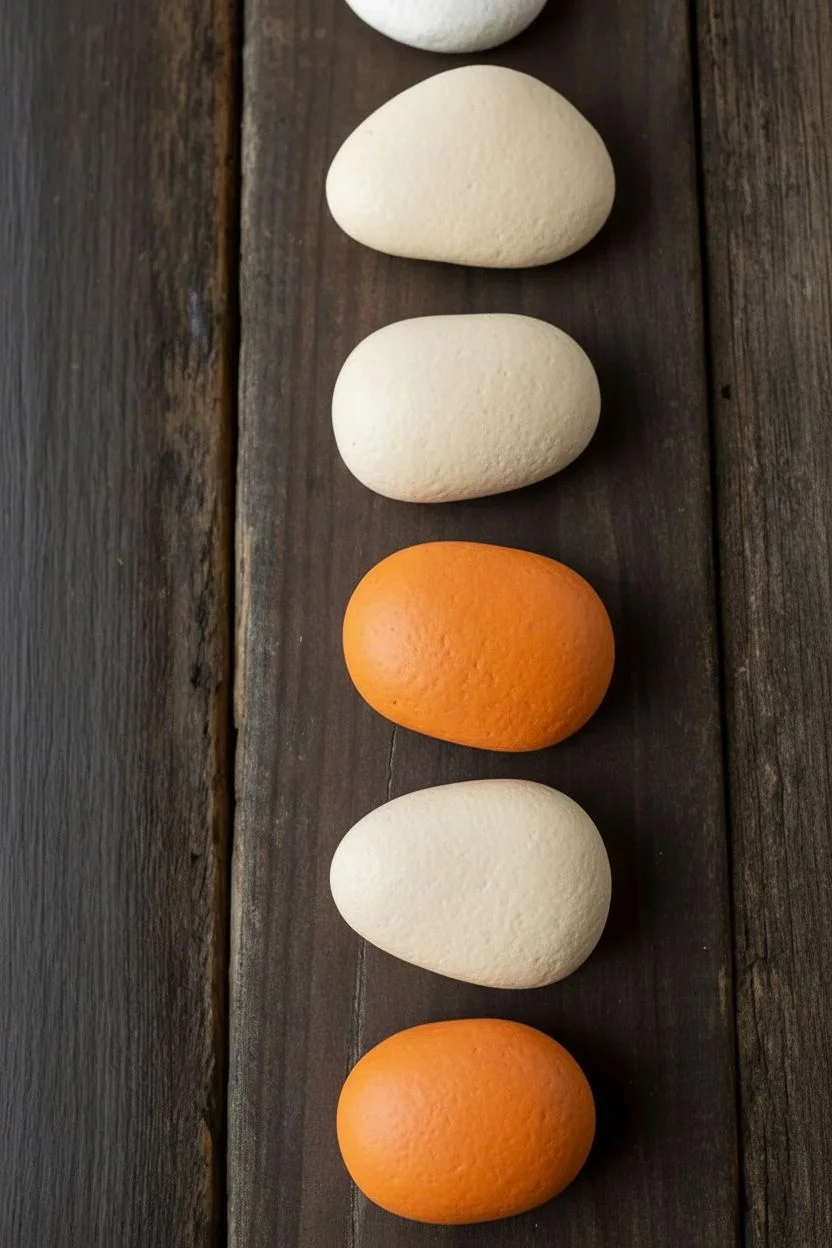
Step 1: Base Coat Application
-
Clean the canvas:
Begin by washing your stones thoroughly with soap and water to remove any dirt or oils. Let them dry completely before starting to ensure the paint adheres properly. -
Sort your shapes:
Examine your stones and decide which ones naturally look more pumpkin-like (rounder, wider) and which suit a ghost or skull shape (taller, narrower). -
Apply the first layer:
Paint the pumpkin stones with a bright orange acrylic paint. For the ghost stones, use a warm white or cream color. Don’t worry about full opacity yet; a thin, even coat is best to start. -
Layer for vibrancy:
Allow the first coat to dry fully, which usually takes about 15-20 minutes. Apply a second or third coat until the color is solid and the natural rock color no longer shows through. -
Check the edges:
Make sure to paint slightly around the sides of the rock so the design looks complete from an angle, though painting the underside isn’t necessary for display pieces.
Pro Tip: Marker Prep
Store your paint markers horizontally before use. Shake vigorously and test the flow on a scrap paper before touching the rock to prevent sudden ink blobs.
Step 2: Designing the Pumpkin Faces
-
Sketch the features:
Once the orange paint is bone-dry, lightly sketch your jack-o’-lantern faces with a pencil. I find it helpful to vary the expressions—make some spooky and others happy. -
Draw the eyes:
Use a medium-tip black paint marker to fill in the classic triangle eyes. Outline the triangle first, then fill the center to keep the edges sharp. -
Add the nose:
Place a smaller triangle for the nose just below the eyes. Precise placement here helps center the face. -
Create the mouth:
Draw the classic toothy grin. Start with a curved line for the bottom of the mouth, add the top curve, and then draw the square notches for teeth before filling it in solid black. -
Detailing texture:
For extra dimension, use a very fine black marker or pen to add thin, sketchy curved lines on the orange surface to mimic pumpkin ribs. -
Top it off:
If your rock has a natural point at the top, paint a small jagged shape or dark spot to represent the pumpkin stem remains.
Level Up: Mix & Match
Try painting the ghostly rocks with glow-in-the-dark acrylic paint as a top coat. They will look normal in daylight but reveal a spooky glow at night.
Step 3: Creating the Ghostly Expressions
-
Plan the ghost faces:
On your dry white rocks, pencil in large, expressive eyes and mouths. These designs work best with rounded features rather than the sharp angles of the pumpkins. -
Paint the heavy outlines:
For the skeleton-style rock, draw large teardrop shapes for eyes and a stitched mouth smile. The ‘stitched’ look is achieved by drawing a curved line and crossing it with short vertical hash marks. -
Add friendly features:
For the friendly ghost variation, draw two large oval eyes with pupils. Leave a small white dot inside the black pupil (or paint it back in white later) to give the eyes a ‘sparkle’ of life. -
Fill the features:
Fill in the rest of the mouth and nose shapes with your black paint marker. Ensure the ink flows smoothly to avoid streaky black areas. -
Seal the deal:
Allow all ink and paint to cure for at least 24 hours. Finish by spraying a clear acrylic sealant over the rocks to protect them from chipping and to make the colors pop.
Now you have a whole patch of durable, delightful characters ready to greet guests on your porch or windowsill


Maple Leaf Gradient Rocks
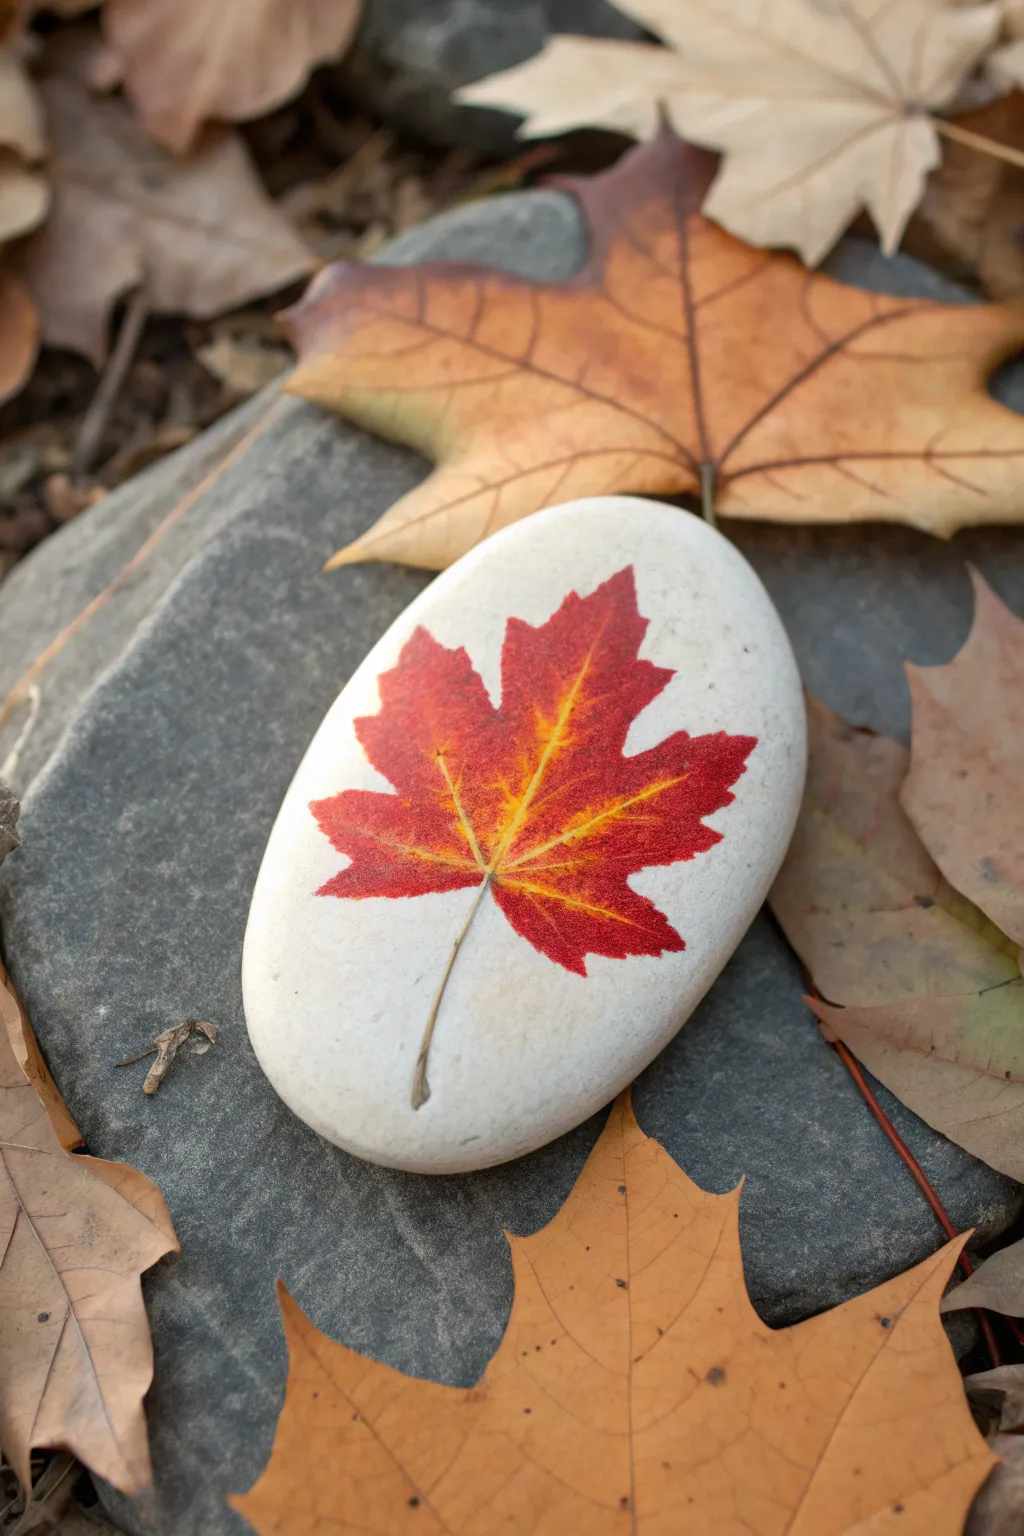
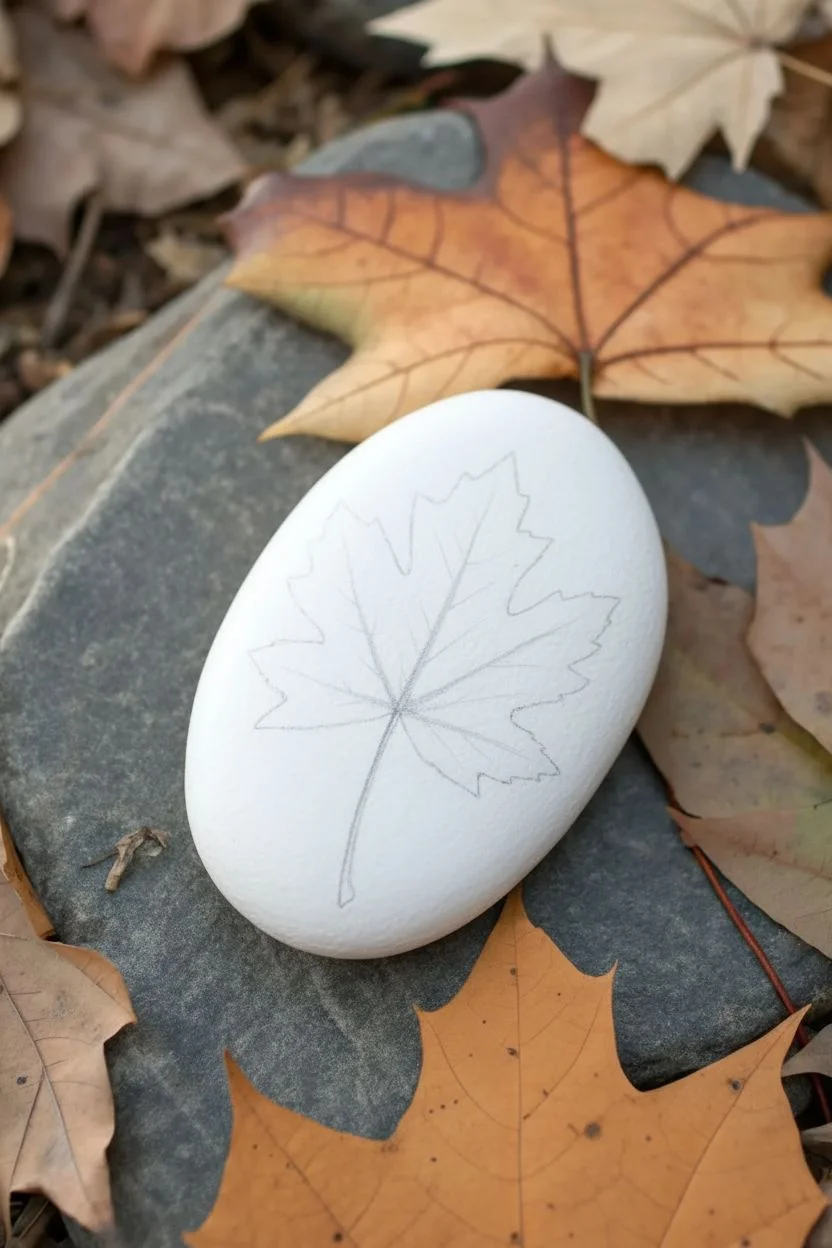
Capture the fiery transformation of autumn foliage with this striking gradient maple leaf design. By blending vibrant reds into golden yellow centers, you can create a realistic, glowing leaf that pops beautifully against a smooth white stone.
Step-by-Step
Materials
- Smooth, flat river rock (rounded oval shape)
- White acrylic paint (or gesso)
- Acrylic paints: Deep red, crimson red, bright orange, cadmium yellow
- Fine liner brush (size 00 or 0)
- Small flat shader brush (size 2 or 4)
- Graphite transfer paper (optional)
- Pencil
- Matte or satin varnish sealer
- Miniature fan brush (optional for blending)
Step 1: Preparation and Base Coat
-
Clean the surface:
Begin by scrubbing your rock with warm soapy water to remove any dirt or oils. Let it dry completely in the sun or with a hair dryer. -
Apply the foundation:
Paint the entire top surface of the rock with a solid coat of white acrylic paint. Since we want a clean background, apply two or three thin layers rather than one thick one to avoid brush strokes. -
Let it cure:
Ensure the white base is bone dry before proceeding. I find that waiting an extra hour here prevents the red paint from accidentally lifting the white base later.
Smooth Blending Trick
Use a tiny drop of “slow drying medium” or retarder in your acrylics. This keeps the paint wet longer, allowing you to create a seamless, butter-soft gradient between the yellow and red zones.
Step 2: Drafting the Design
-
Sketch the outline:
Lightly draw a classic five-point maple leaf shape onto the center of the rock using a pencil. If freehand drawing feels daunting, you can print a small leaf silhouette and trace it using graphite transfer paper. -
Define the veins:
Draw the central vein structure lightly. Start with a main vertical line from the stem to the top tip, then branch out four diagonal lines leading to the other main lobes.
Step 3: Painting the Gradient
-
Start with yellow:
Using your small flat brush, paint the very center of the leaf where the veins meet with cadmium yellow. Extend this yellow color slightly outward into the veins. -
Introduce orange:
While the yellow is still slightly wet, pick up your bright orange paint. Blend it into the outer edges of the yellow section, moving outward toward the middle of the leaf lobes. -
Apply crimson red:
Paint the majority of the leaf body with crimson red, blending it carefully into the orange area. The transition should be soft, moving from yellow center to orange mid-section to red. -
Deepen the edges:
Use the deep red hue for the very tips and jagged edges of the leaf. This darker shade creates a beautiful contrast against the white background. -
Refine the edges:
Switch to your fine liner brush. Carefully go over the jagged perimeter of the leaf with your deep red to ensure the points are sharp and crisp. -
Dry the base layer:
Allow this colorful gradient layer to dry completely. The paint needs to be set before adding the fine details on top.
Fixing Wobbly Lines
If your vein lines get too thick, don’t wipe them off. Wait for them to dry, then use the background red color to paint ‘in’ alongside the vein, thinning the line back down.
Step 4: Detailed Veining
-
Mix a vein color:
Create a lighter color for the veins by mixing a tiny amount of yellow paint with white. You want a pale, creamy yellow that will stand out against the red. -
Paint main veins:
Using your finest liner brush (size 00), paint thin lines over your original pencil marks for the main veins. Start from the base and flick the brush upward for a tapered look. -
Add secondary veins:
Paint delicate, branching veins coming off the main arteries. Keep these lines whisper-thin and slightly irregular for a natural appearance. -
Feather the veins:
If the veins look too stark, create a wash by watering down a tiny bit of red paint and glazing it over parts of the veins to push them ‘into’ the leaf texture.
Step 5: Finishing Touches
-
Paint the stem:
Draw a thin, brownish-grey line extending from the bottom of the leaf. I like to add a tiny shadow on one side of the stem to give it roundness. -
Clean up errors:
If any red paint went outside the lines, use a clean brush with white paint to touch up the background, sharpening the leaf’s silhouette. -
Seal the artwork:
Once fully cured (wait at least 24 hours), apply a coat of matte or satin varnish. A glossy finish works too, but matte looks more like a natural stone texture.
Place this permanently preserved piece of autumn on your desk or garden path to enjoy the colors of fall year-round


Oak and Birch Leaf Study Rocks
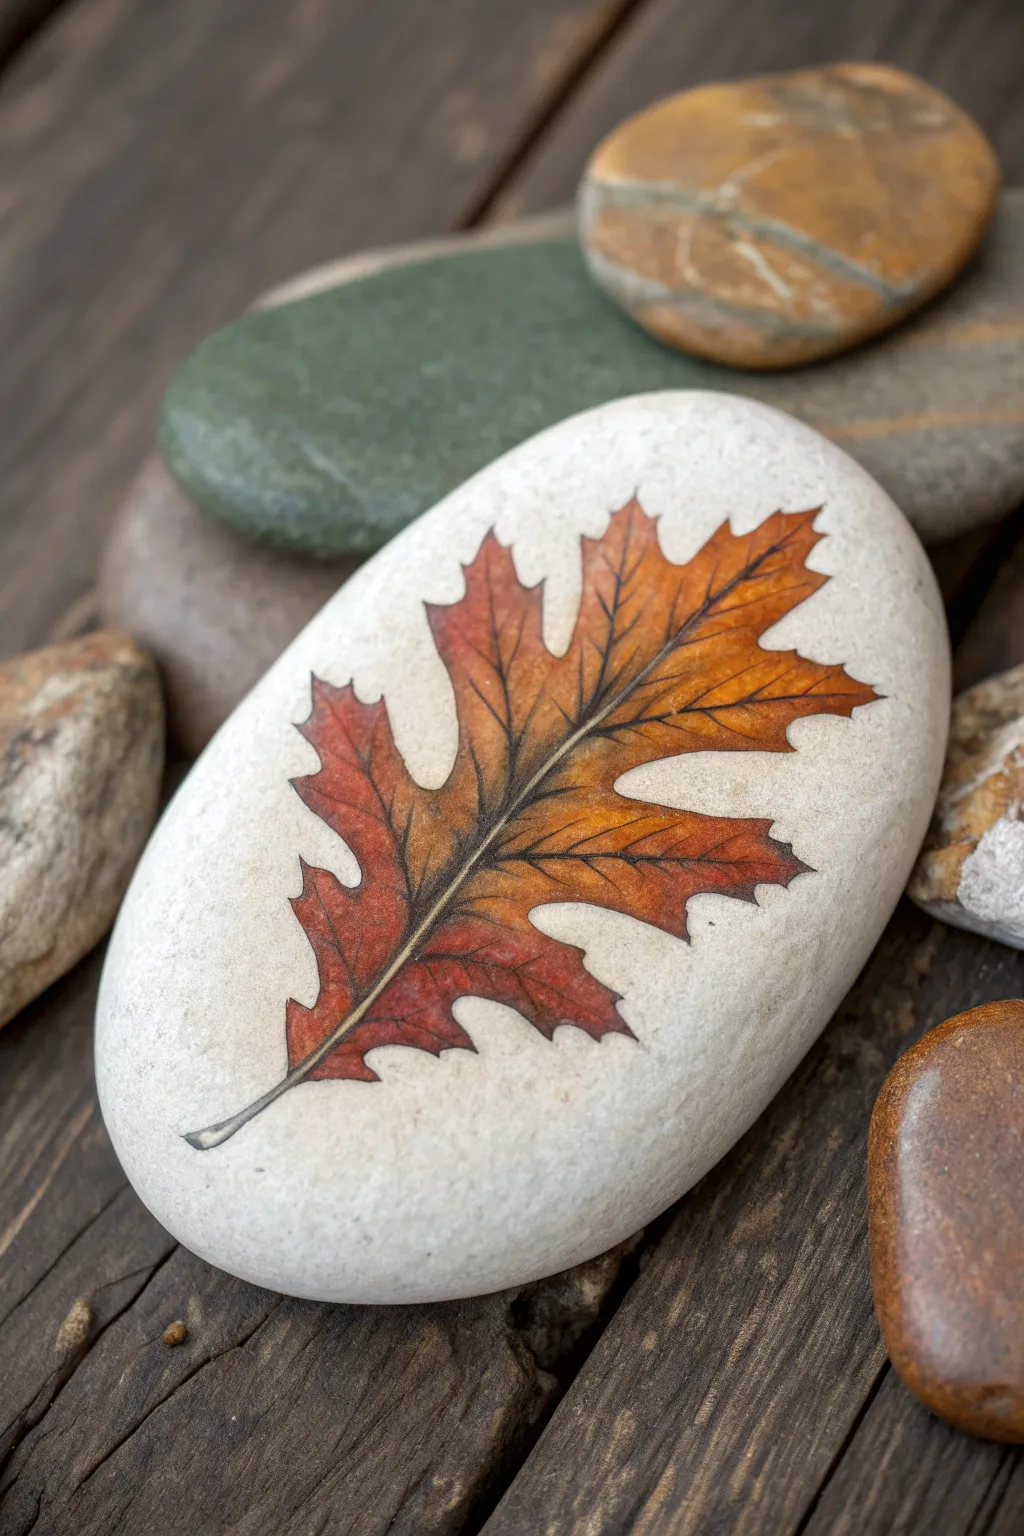
Capture the delicate beauty of autumn with this realistic oak leaf study painted on a smooth river rock. The sharp, fine lines and warm gradient of rusts and oranges create a stunning contrast against the natural white stone surface.
Step-by-Step Guide
Materials
- Smooth, flat white or light-colored river rock
- Pencil (HB or H for light lines)
- Acrylic paints (Titanium White, Burnt Sienna, Yellow Ochre, Burnt Umber, Mars Black, Cadmium Orange)
- Fine liner brush (size 00 or 000)
- Small round brush (size 1 or 2)
- Matte varnish or sealant
- Palette for mixing
- Water cup and paper towels
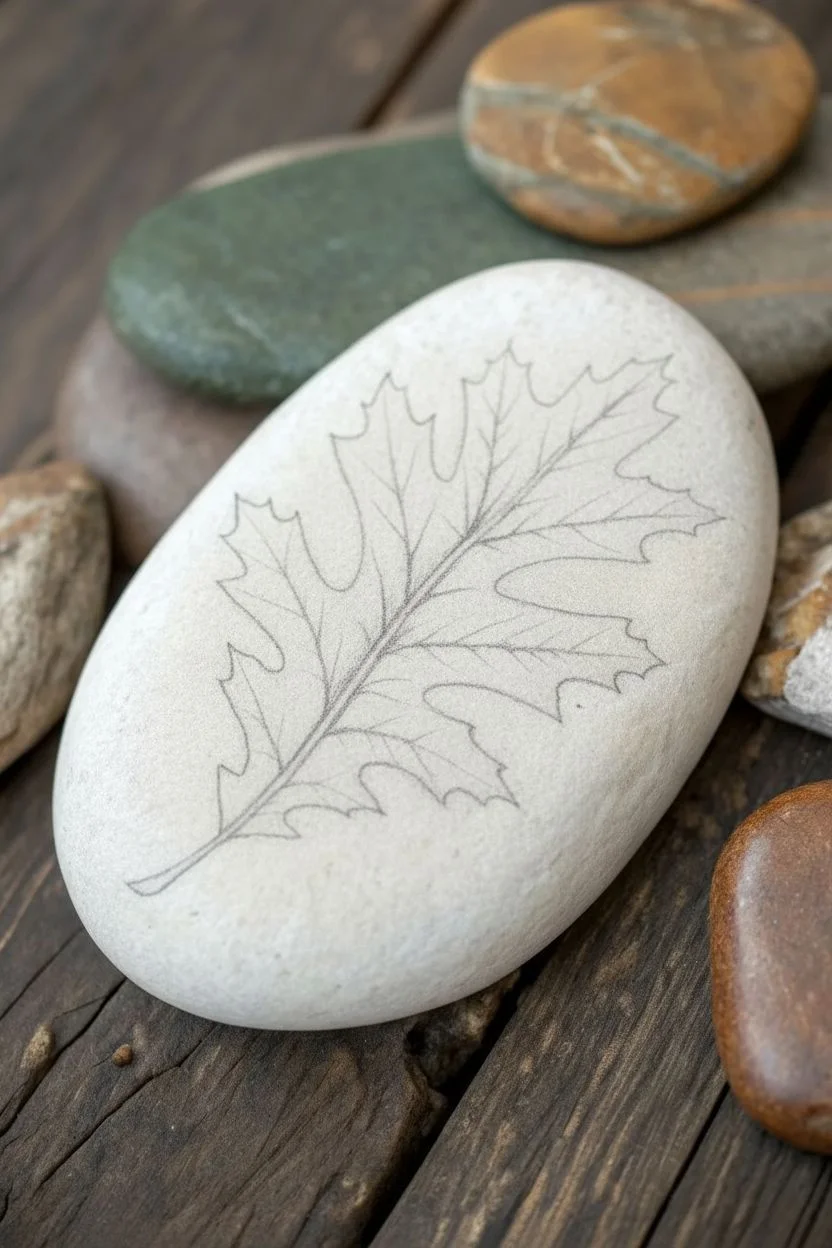
Step 1: Sketching the Shape
-
Rock Preparation:
Begin by washing your stone with warm soapy water to remove any dirt or oils that might repel paint. Let it dry completely in the sun or with a hairdryer before starting. -
Central Vein:
Using a light pencil, draw a gentle, slightly curved line down the center of the rock. This will serve as the spine of your oak leaf and help guide the symmetry. -
Leaf Outline:
Sketch the lobes of the oak leaf. Start near the stem and work your way up, drawing 3-4 rounded lobes on each side. Remember, oak leaves are rarely perfect, so slight asymmetry looks more natural. -
Refining the Edge:
Go back over your outline and add sharp little points at the tips of the lobes and smooth out the rounded dips (sinuses) between them. Keep the pencil pressure light so it can be easily covered.
Step 2: base Coloring
-
Mixing the Base Tone:
On your palette, mix a warm, light orange by combining Yellow Ochre with a tiny touch of Burnt Sienna. Thin it slightly with water so it flows like ink. -
Initial Wash:
Fill in the entire leaf shape with this light orange wash. It doesn’t need to be opaque; a semi-transparent layer allows the stone’s texture to peek through slightly. -
Creating Gradients:
While the first layer is still slightly tacky, mix a darker rust color using Burnt Sienna and a drop of Cadmium Orange. -
Adding Warmth:
Paint this darker rust color onto the left side of the leaf and the tips of the lobes on the right side. Use a damp brush to gently blend the transition where the rust meets the lighter base color. -
Deepening Shadows:
Mix a small amount of Burnt Umber with your rust color. Apply this to the very bottom of the leaf near the stem and in the crevices between the lobes to create depth.
Steady Hands
Rest your wrist on the table or a separate block of wood to stabilize your hand while painting the fine veins. This prevents shakes and ensures crisp lines.
Step 3: Detailing and Veins
-
Painting the Main Vein:
Switch to your finest liner brush (00 or 000). Mix a dark, brownish-black using Burnt Umber and a tiny speck of Mars Black. Carefully paint the central vein from the stem to the tip. -
Adding Side Veins:
Using the same dark mixture, paint thin veins branching out from the center line into each lobe. Keep your hand steady and lift the brush at the end of the stroke for a tapered look. -
Micro-Veins:
For extreme realism, water down your dark paint significantly. Draw tiny, almost invisible webbing veins branching off the secondary veins. These should be whisper-thin. -
The Stem:
Paint the stem at the bottom. Start with the dark brown mix, but add a tiny highlight of white on one side to make it look cylindrical rather than flat.
Autumn Texture
Before sealing, flick a stiff toothbrush dipped in watered-down brown paint over the leaf. This creates tiny speckles that mimic natural imperfections.
Step 4: Final Touches
-
Highlighting:
Mix a pale creamy color (White + Yellow Ochre). Lightly dry-brush this onto the highest points of the leaf surface, usually in the center of the lobes, to simulate bowing. -
Review and Correct:
Step back and look at your rock. If any edges look too fuzzy, use a clean brush with a tiny bit of white paint (or the color of your rock) to tidy up the perimeter. -
Sealing:
Allow the paint to cure for at least 24 hours. Apply a layer of matte varnish to protect the artwork without adding an artificial glossy shine.
Place your finished stone on a wooden tray or nestle it among others for a beautiful seasonal display


Hello Fall Hand-Lettered Message Rocks
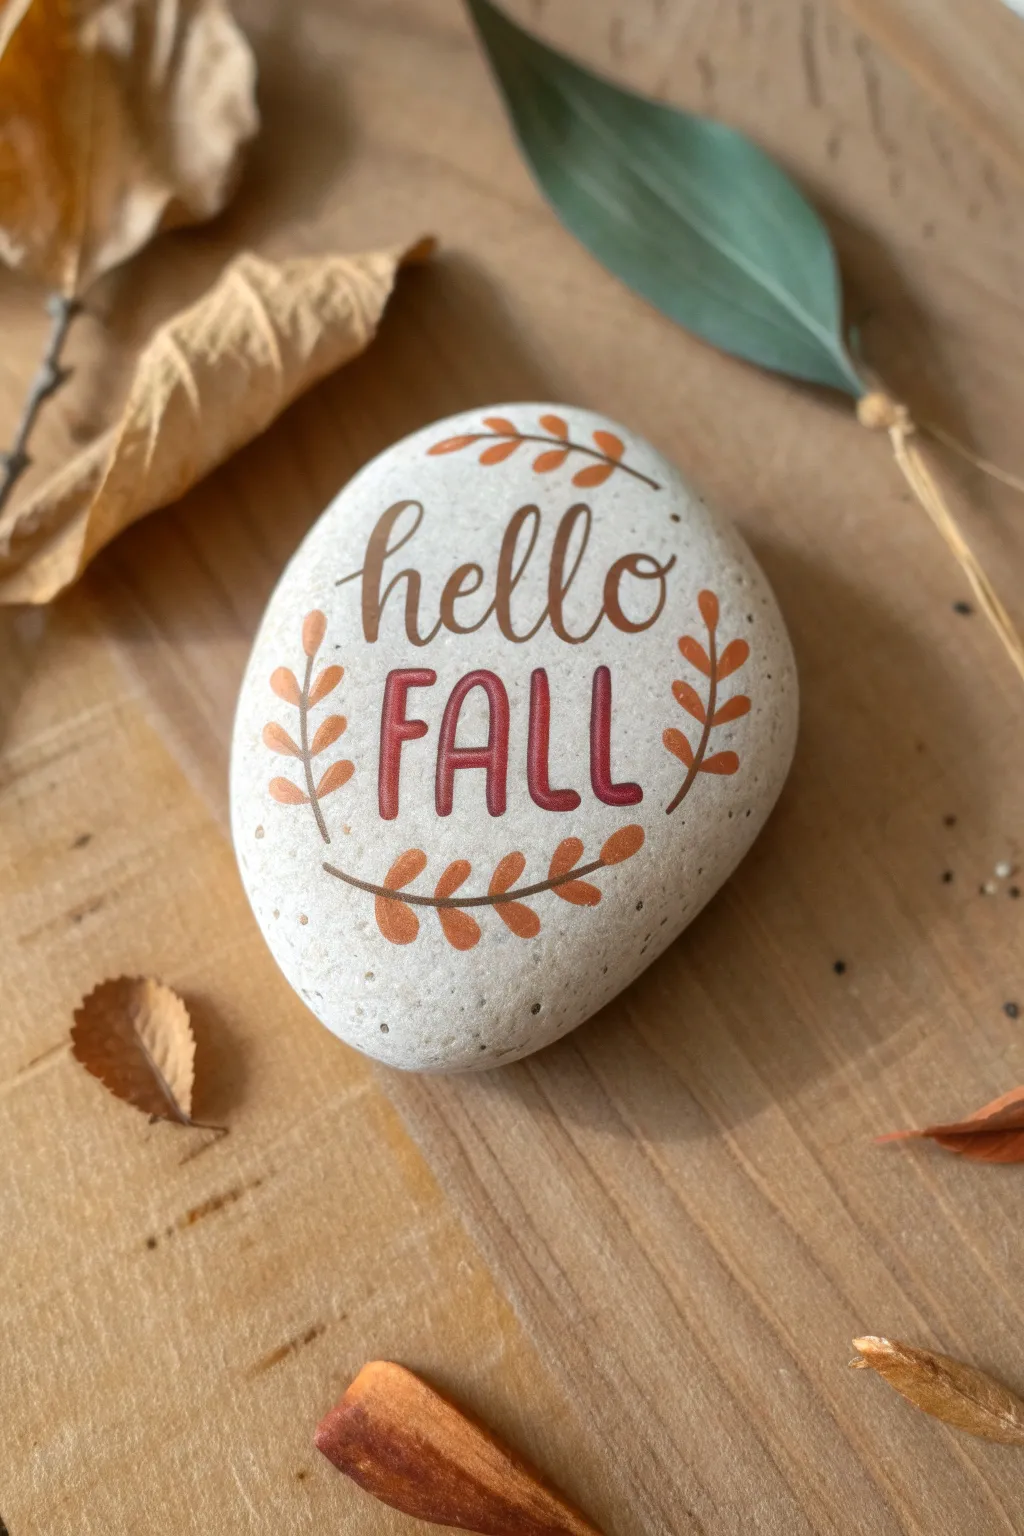
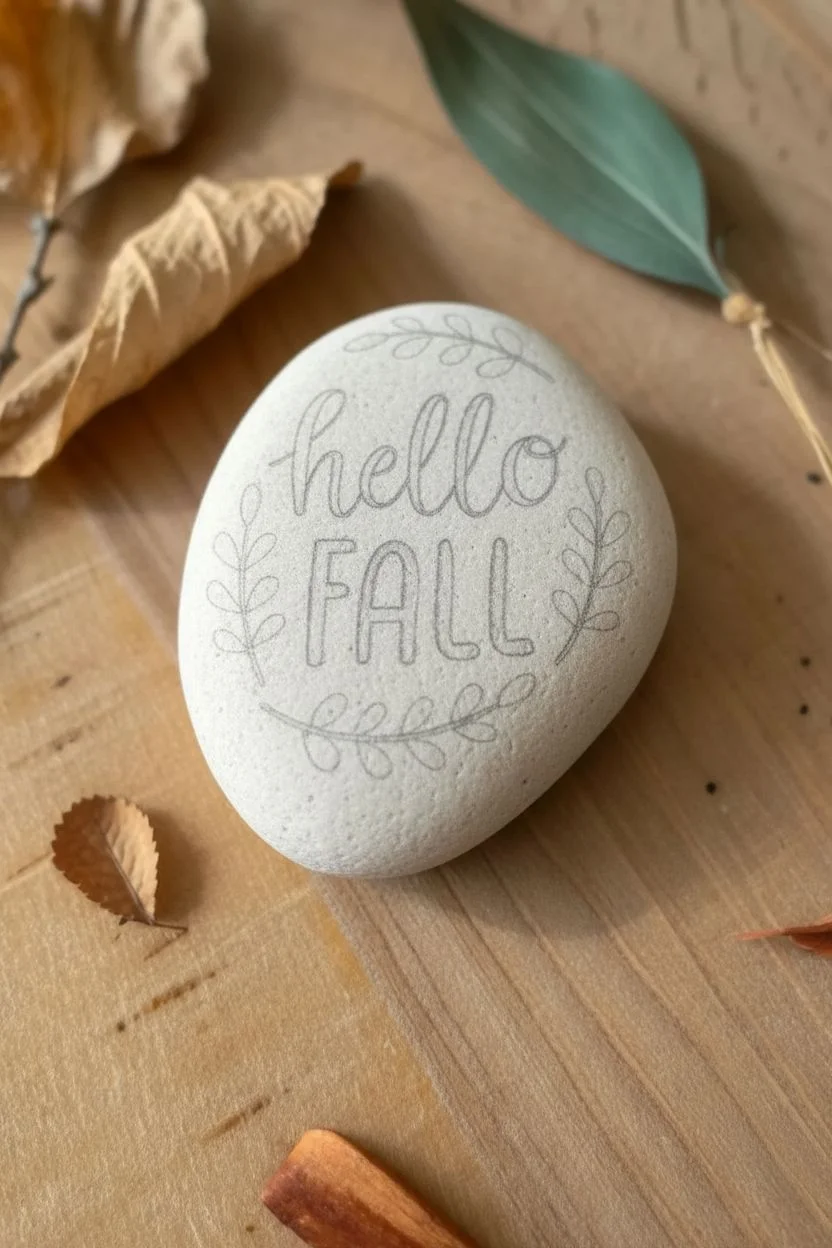
Embrace the changing seasons with this delightfully simple rock painting project. The smooth stone features elegant hand-lettering framed by whimsical leaf sprigs, creating a perfect piece of rustic autumn decor.
Detailed Instructions
Materials
- Smooth, flat river rock (white or light beige)
- Pencil and eraser
- Brown fine-point paint pen (or acrylic paint and liner brush)
- Burgundy or deep red fine-point paint pen
- Orange fine-point paint pen
- Clear matte sealant spray
Step 1: Preparation & Planning
-
Select and Clean the Stone:
Find a smooth, light-colored stone with a relatively flat surface. Wash it thoroughly with soap and water to remove any dirt or oils, then let it dry completely. -
Draft the Design:
Using a pencil, lightly sketch your design onto the stone. Start by positioning the word ‘hello’ in the upper center. -
Sketch the Lower Text:
Draft the word ‘FALL’ directly underneath ‘hello’ using simple block letters. Ensure the spacing looks balanced between the two words. -
Add Decorative Elements:
Lightly draw curved lines for the four branches: one at the top, one at the bottom, and one on each side, framing the text.
Steady Hand Tip
To keep shaky hands steady, anchor your pinky finger on a dry part of the rock or the table surface while drawing fine lines.
Step 2: Lettering the Message
-
Letter ‘hello’:
Shake your brown paint pen well to mix the pigment. Keep the strokes fluid and replicate the cursive style by connecting the letters smoothly. -
Refine the Script:
Go back over the downstrokes of the ‘hello’ letters to slight thicken them, giving it a faux-calligraphy look. -
Letter ‘FALL’:
Switch to your burgundy or deep red paint pen. Carefully trace your block letters for ‘FALL’, keeping the lines clean and even. -
Thicken the Block Letters:
Make the vertical lines of ‘FALL’ slightly bolder than the horizontal ones for better visual weight. -
Dry Check:
Pause for a few minutes to let the lettering dry completely before starting on the framing vines so you don’t smudge your work.
Oh No, A Smudge!
If you make a mistake, don’t panic. Use a damp Q-tip to quickly wipe away wet paint pen, or scratch dry paint off carefully with a toothpick.
Step 3: Adding Flora Details
-
Draw the Stems:
Using the brown paint pen again, trace over your pencil lines for the main stems of the decorative branches. -
Add Top Leaves:
With the orange paint pen, add small, simple oval leaves to the top branch. Attach them directly to the brown steam. -
Add Bottom Leaves:
Repeat the process for the bottom branch, ensuring the leaves point outward in the direction of the stem’s curve. -
Complete Side Branches:
Finish by adding orange leaves to the left and right vertical branches. I find it helpful to rotate the rock as I work to keep my hand steady. -
Clean Up:
Once the paint is 100% dry, gently erase any visible pencil marks that weren’t covered by paint. -
Seal the Project:
Finish by spraying the rock with a clear matte sealant. This protects the paint from chipping and gives it a finished, professional look.
Now you have a charming piece of seasonal art ready to display on your desk or tucked into a bookshelf
BRUSH GUIDE
The Right Brush for Every Stroke
From clean lines to bold texture — master brush choice, stroke control, and essential techniques.
Explore the Full Guide
Thankful and Give Thanks Typography Rocks
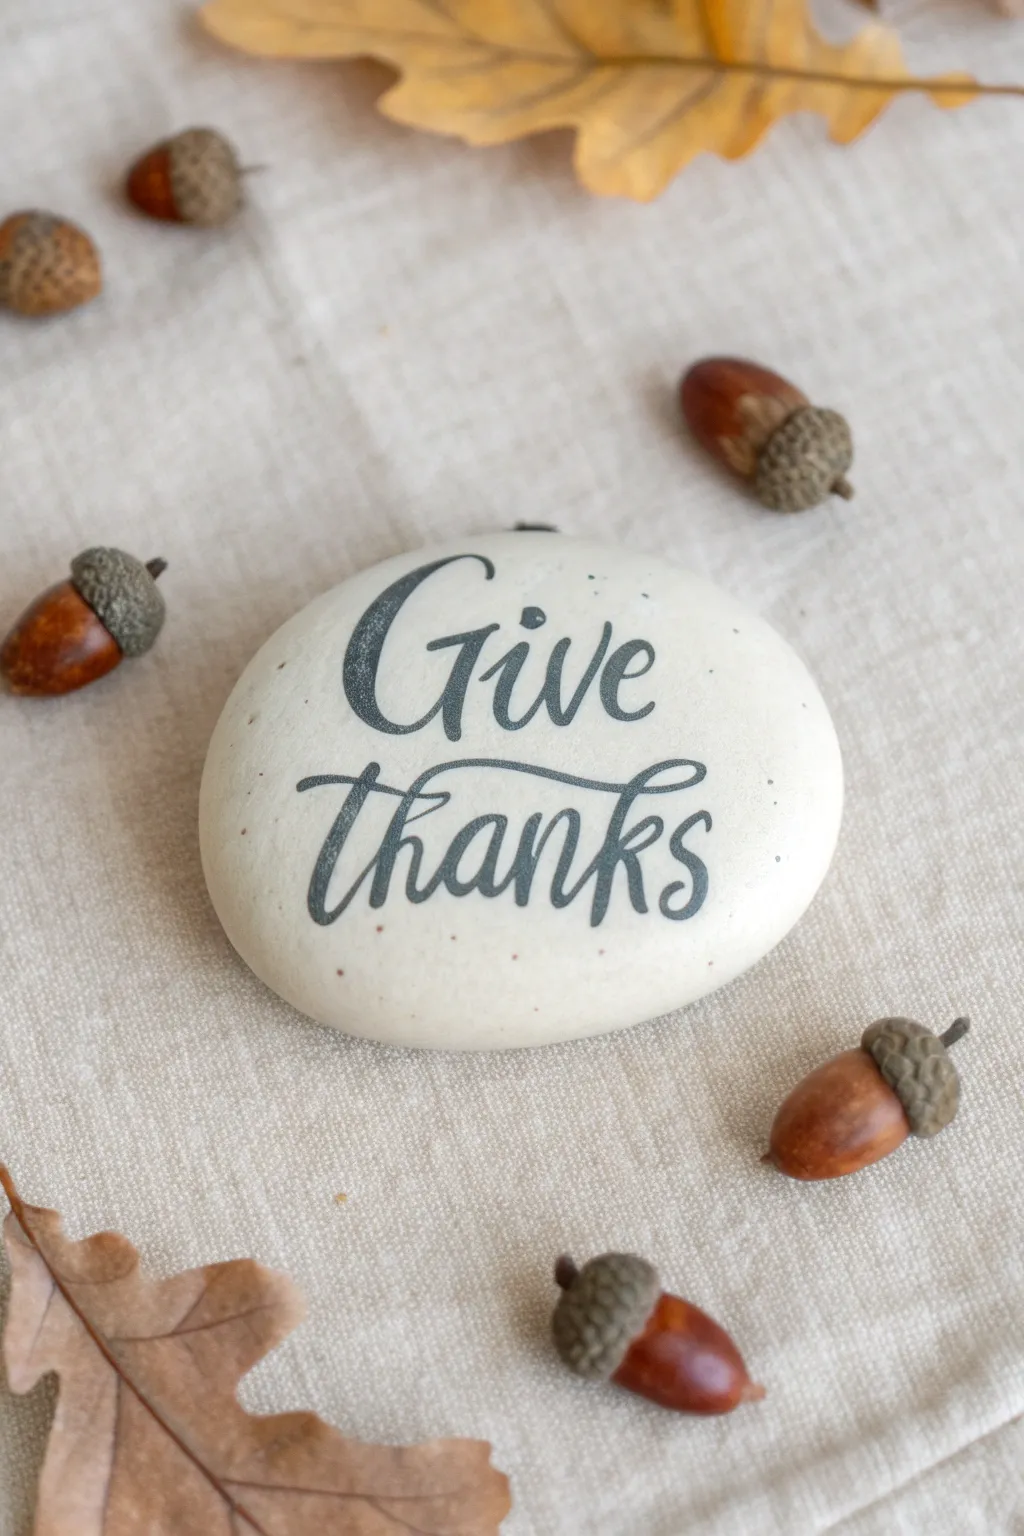
Embrace the spirit of gratitude with this minimalist typography rock that mimics the look of high-end ceramic decor. The creamy base and charcoal lettering create a sophisticated, muted palette perfect for a Thanksgiving centerpiece or a thoughtful hostess gift.
Step-by-Step
Materials
- Smooth, round river rock (approx. 3-4 inches wide)
- Cream or off-white acrylic paint (matte finish)
- Dark charcoal grey or soft black acrylic paint
- Fine grit sandpaper (optional)
- Pencil
- Fine liner brush (size 0 or 00)
- Old toothbrush or stiff bristle brush
- Matte spray sealer or varnish
- Paper plate or palette
- Cup of water
- Paper towel
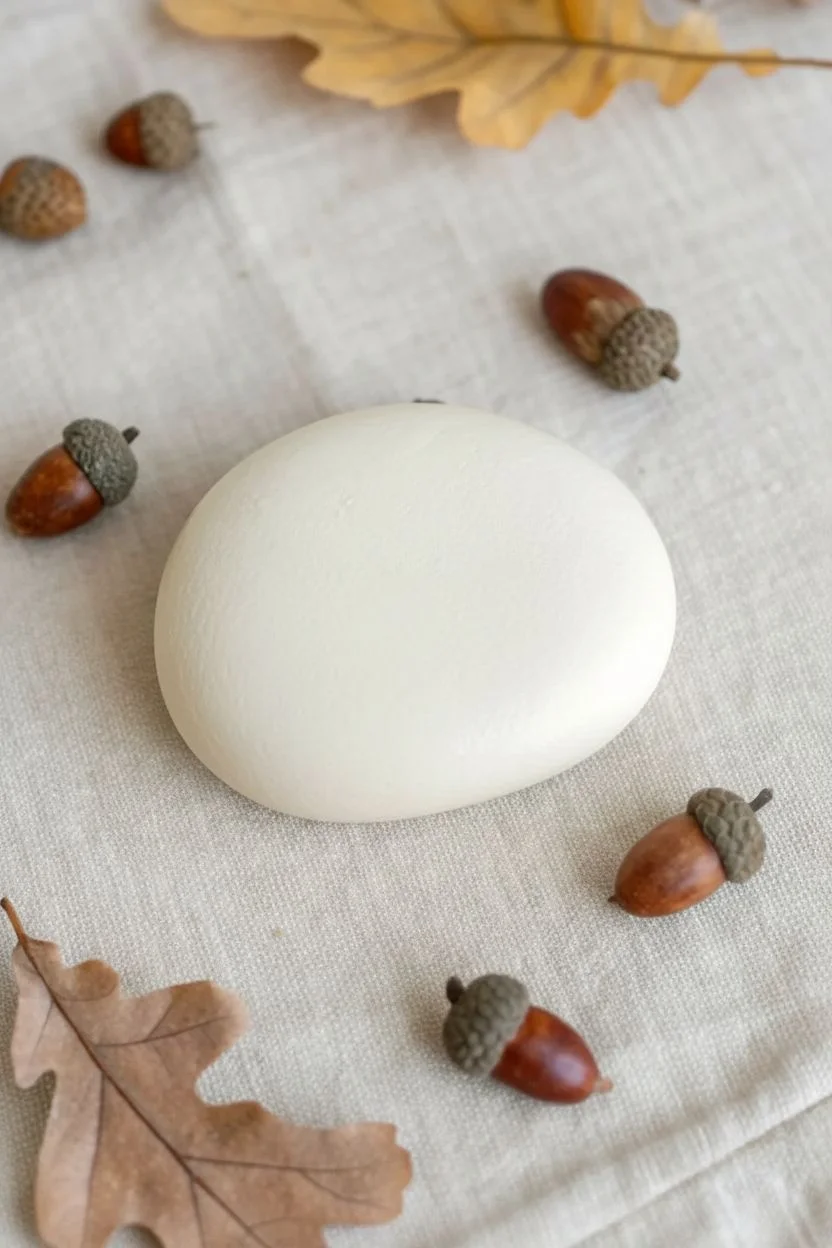
Step 1: Preparation and Base Coat
-
Clean the surface:
Begin by washing your rock with warm, soapy water to remove any dirt or oils. Scrub it gently and let it dry completely in the sun or with a hair dryer. -
Smooth the texture:
If your rock has rough patches, lightly sand the surface with fine-grit sandpaper. This creates a smoother canvas for your lettering later on. -
Mix your base color:
Pour a generous amount of cream or off-white acrylic paint onto your palette. If the color feels too stark, add a tiny pin-prick of brown to warm it up. -
Apply the first layer:
Coat the entire top surface of the rock with the cream paint using a wider brush. Don’t worry about full opacity yet; thin, even layers are better than one thick, gloopy one. -
Build opacity:
Allow the first coat to dry fully. Apply a second—and possibly a third—coat until you have a solid, opaque cream surface with no original stone showing through.
Steady Hands Tip
Rest your painting hand on a stable surface or use your pinky finger as a pivot point against the table while doing the detailed lettering.
Step 2: Creating the Speckled Effect
-
Prepare the splatter paint:
Mix a small amount of your dark charcoal paint with a few drops of water until it reaches an ink-like consistency. It needs to be fluid enough to fly off bristles. -
Load the tool:
Dip an old toothbrush or a stiff bristle brush into the thinned paint. Tap off the excess so it isn’t dripping. -
Apply the speckles:
Hold the brush about 6 inches above the dry cream rock. Run your thumb across the bristles to flick tiny distinct specks onto the surface. I suggest practicing on a scrap piece of paper first to gauge the spray. -
Dry thoroughly:
Let these tiny speckles dry completely before moving on to the lettering phase to avoid smudging them.
Step 3: Lettering
-
Draft the layout:
Use a pencil to very lightly sketch the words ‘Give Thanks’ onto the rock. Center ‘Give’ slightly higher and nestle ‘Thanks’ underneath it. -
Refine the script:
Draw the letters in a cursive style. Pay attention to the connecting strokes and the flourishes on the ‘G’ and ‘k’. -
Outline the text:
Using your fine liner brush and the un-thinned charcoal paint, carefully trace over your pencil lines. Keep your hand steady and use only the very tip of the brush. -
Thicken the downstrokes:
To achieve the calligraphy look, go back and thicken every stroke where your pen would naturally move downward. This creates faux-calligraphy weight variation. -
Sharpen the edges:
Clean up any wobbles by carefully smoothing the outer edges of your letters with the liner brush, ensuring the ends of the letters taper off elegantly. -
Connect the flourish:
Extend the crossbar of the ‘T’ in ‘Thanks’ so it curves gracefully over the rest of the word, mimicking the style in the photo.
Golden Touch
For a glamorous twist, use metallic gold paint for the speckles or trace a thin shadow line next to the letters in gold for subtle shimmer.
Step 4: Finishing Touches
-
Erase guidelines:
Once the paint is absolutely bone dry (give it at least an hour), very gently erase any visible pencil marks. -
Seal the artwork:
Take your matte spray sealer and apply a light, even coat over the rock. A matte finish is crucial here to maintain that natural, ceramic stone appearance. -
Final cure:
Let the sealer cure according to the manufacturer’s instructions, usually 24 hours, before handling or displaying.
Place your finished stone on a linen napkin or among fall leaves to enjoy a beautiful reminder of gratitude
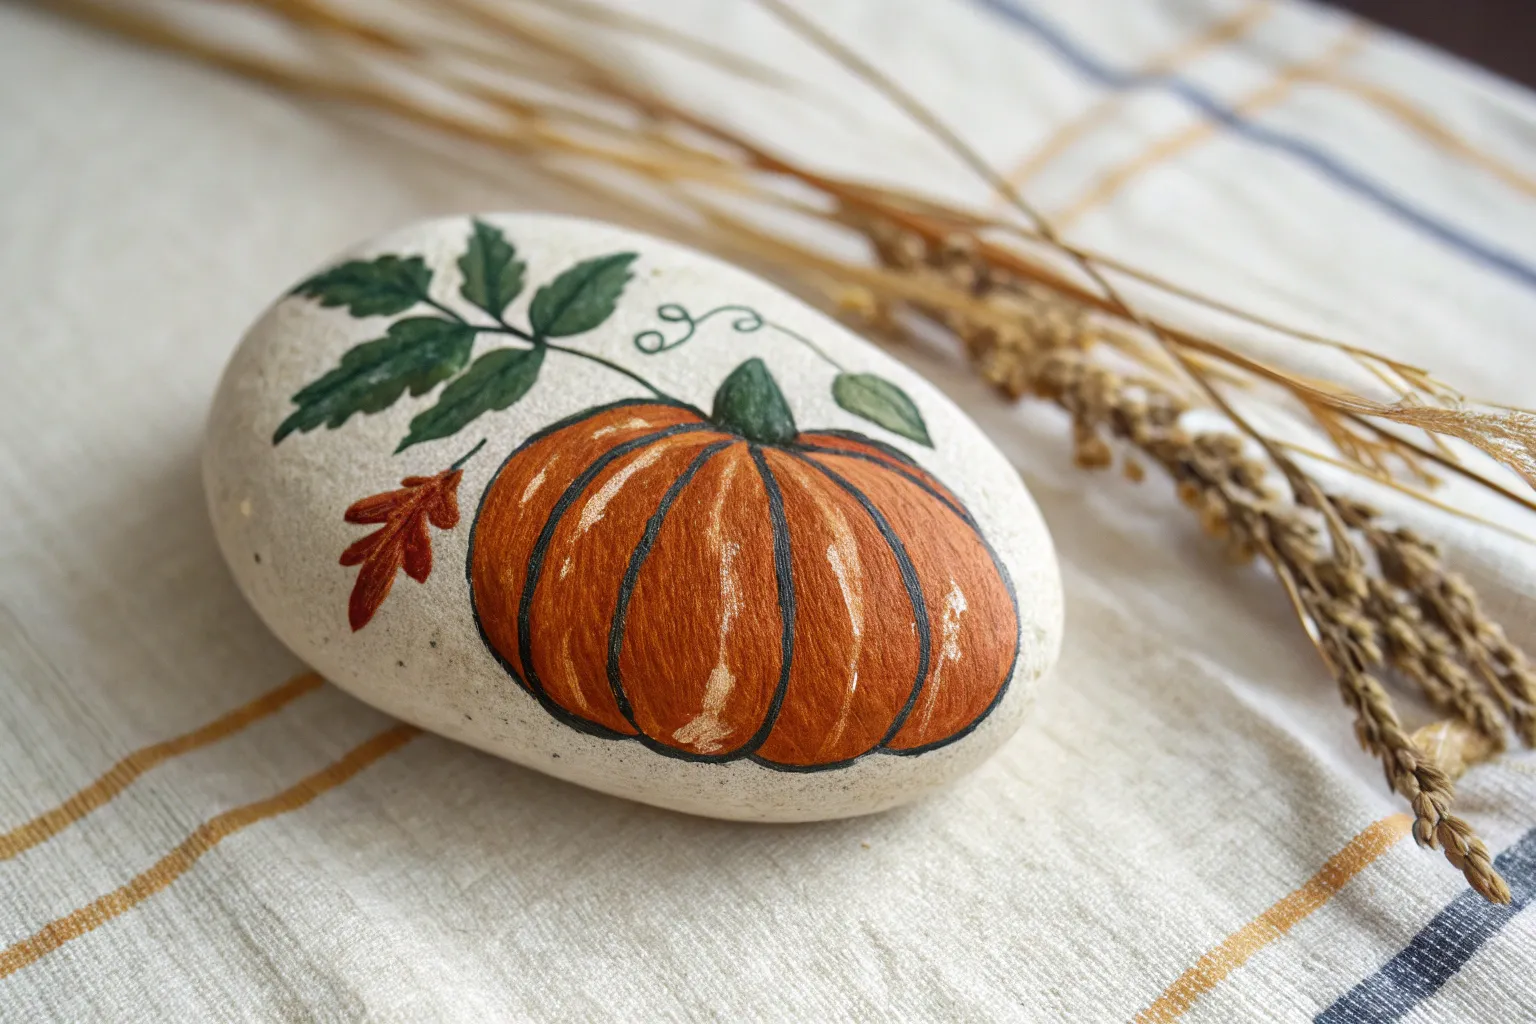
Heirloom Pumpkin Color Palette Rocks
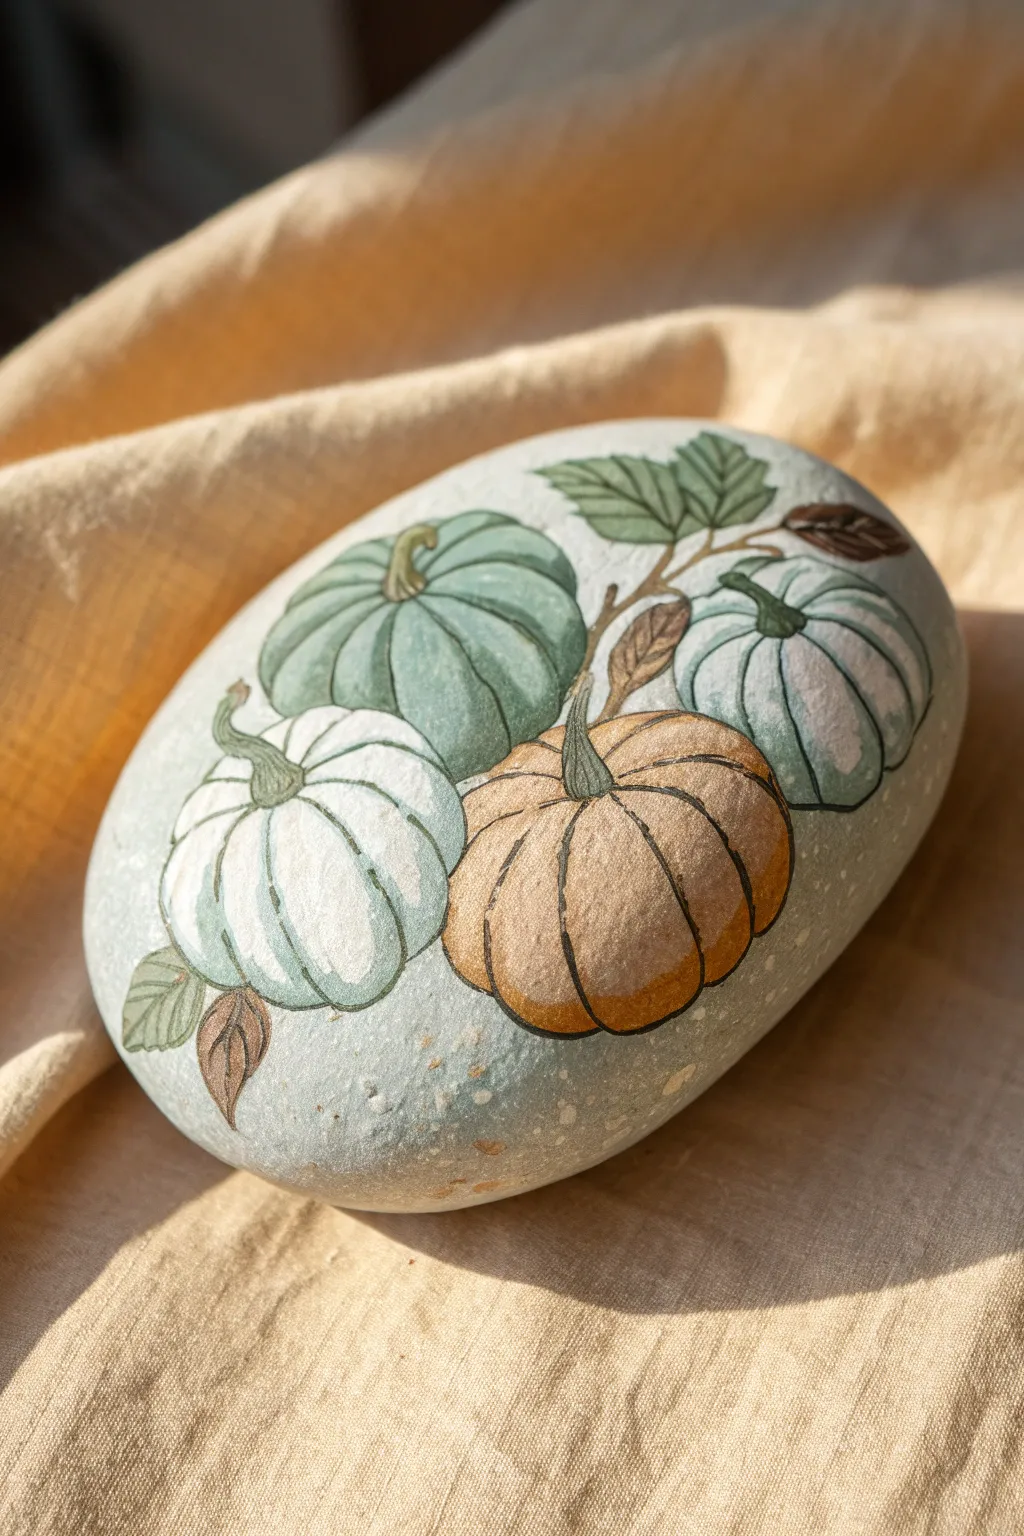
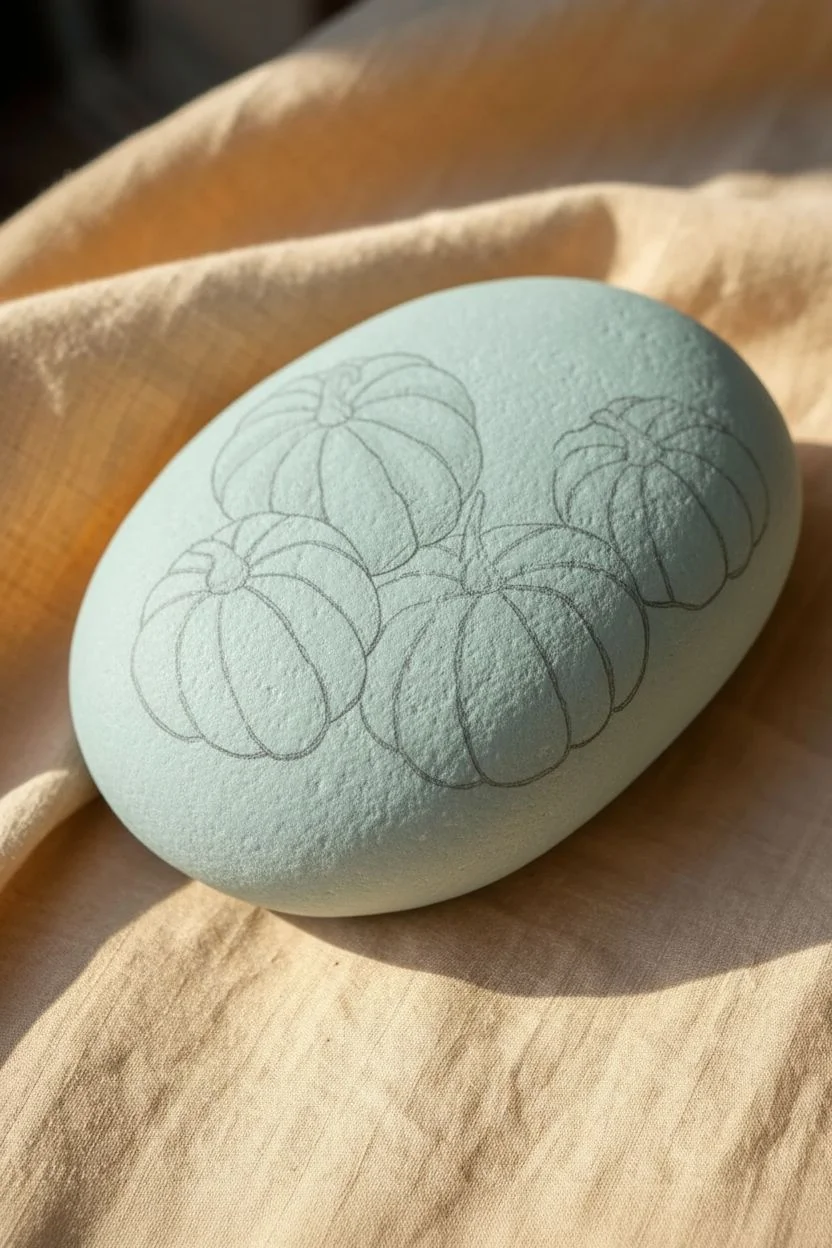
Capture the elegant, muted tones of fall with this sophisticated painted stone featuring a cluster of heirloom pumpkins. The soft sage greens, milky whites, and warm ochres create a cozy, vintage-inspired design that elevates regular rock painting into small-scale art.
Step-by-Step Guide
Materials
- Large, smooth oval river rock (cleaned and dried)
- Acrylic paints: Sage green, titanium white, burnt sienna, raw sienna, muted teal/blue-grey, dark brown
- Fine grit sandpaper (optional)
- Pencil for sketching
- Round synthetic brushes (sizes 2 and 4)
- Fine liner brush (size 0 or 00) or black fine-tip acrylic paint pen
- Matte finish sealer or varnish
- Water cup and palette
Step 1: Preparation & Base shapes
-
Prep the surface:
Begin with a clean, dry rock. If your stone has rough patches, lightly sand them with fine-grit sandpaper to create a smoother canvas for your brushwork. -
Paint the background:
Mix a very pale wash of teal and white acrylic paint. Cover the entire face of the rock with this soft, cloudy base color to unify the design. -
Sketch the composition:
Once the base is completely dry, lightly sketch four pumpkin ovals using a pencil. Place one large oval in the back left, one in the back right, and layer two smaller ones in the foreground. -
Outline the segments:
Within each oval, lightly sketch the curved vertical lines that define the pumpkin’s ribs and segments. Don’t worry about being perfect; natural pumpkins are irregular.
Smoother Linework
If using a brush for outlines, thin your black paint with a drop of water until it has an ink-like consistency. This helps the paint flow smoothly without dragging.
Step 2: Blocking in Colors
-
Paint the white pumpkin:
Start with the front-left pumpkin. Paint it with a creamy off-white, mixing titanium white with a tiny dot of brown to warm it up. -
Paint the orange pumpkin:
For the front-right pumpkin, use a muted ochre or raw sienna rather than bright orange. If your orange is too vibrant, tone it down with a touch of brown. -
Paint the sage pumpkin:
Fill in the large back-left pumpkin with a solid coat of sage green. If you need to mix this, combine green, white, and a little grey. -
Paint the blue-grey pumpkin:
Color the final pumpkin on the right with a pale blue-grey shade. I find two thin coats often look smoother than one thick glob.
Step 3: Adding Depth & Details
-
Add rib shading:
Using a slightly darker version of each pumpkin’s base color, gently paint along the curved segment lines you sketched earlier to create volume. -
Highlight the curves:
Mix a lighter tint of each color (add more white) and paint the center of each segment to make the pumpkins look plump and round. -
Paint the stems:
Using a size 2 brush and brownish-green paint, add the twisting stems to the top of each pumpkin, making sure they curve naturally. -
Add leaves and vines:
Paint a few broad leaves using a medium green, and add delicate twisting vines in brown that connect the group.
Vintage Patina
Before sealing, lightly dry-brush a tiny amount of metallic gold or bronze on the pumpkin tops for a subtle, elegant shimmer.
Step 4: Fine Linework & Finishing
-
Outline the pumpkins:
This is the most crucial step for the illustrative look. Using your 00 brush or a fine-tip paint pen, carefully outline each pumpkin segment with very thin black or dark brown lines. -
Detail the stems:
Add fine vertical lines to the stems to give them a woody texture. -
Leaf detailing:
Draw the veins inside the green leaves and outline the brown withered leaves for a crisp finish. -
Splatter texture:
Load a toothbrush or stiff brush with watered-down white or cream paint and gently flick tiny speckles over the rock for a rustic, weathered effect. -
Seal the artwork:
Allow the rock to dry fully, preferably overnight. Apply a coat of matte varnish to protect the paint without adding unnatural shine.
Display this beautiful stone as part of a table centerpiece or gift it as a seasonal paperweight

PENCIL GUIDE
Understanding Pencil Grades from H to B
From first sketch to finished drawing — learn pencil grades, line control, and shading techniques.
Explore the Full Guide
Cozy Plaid Pattern Fall Rocks
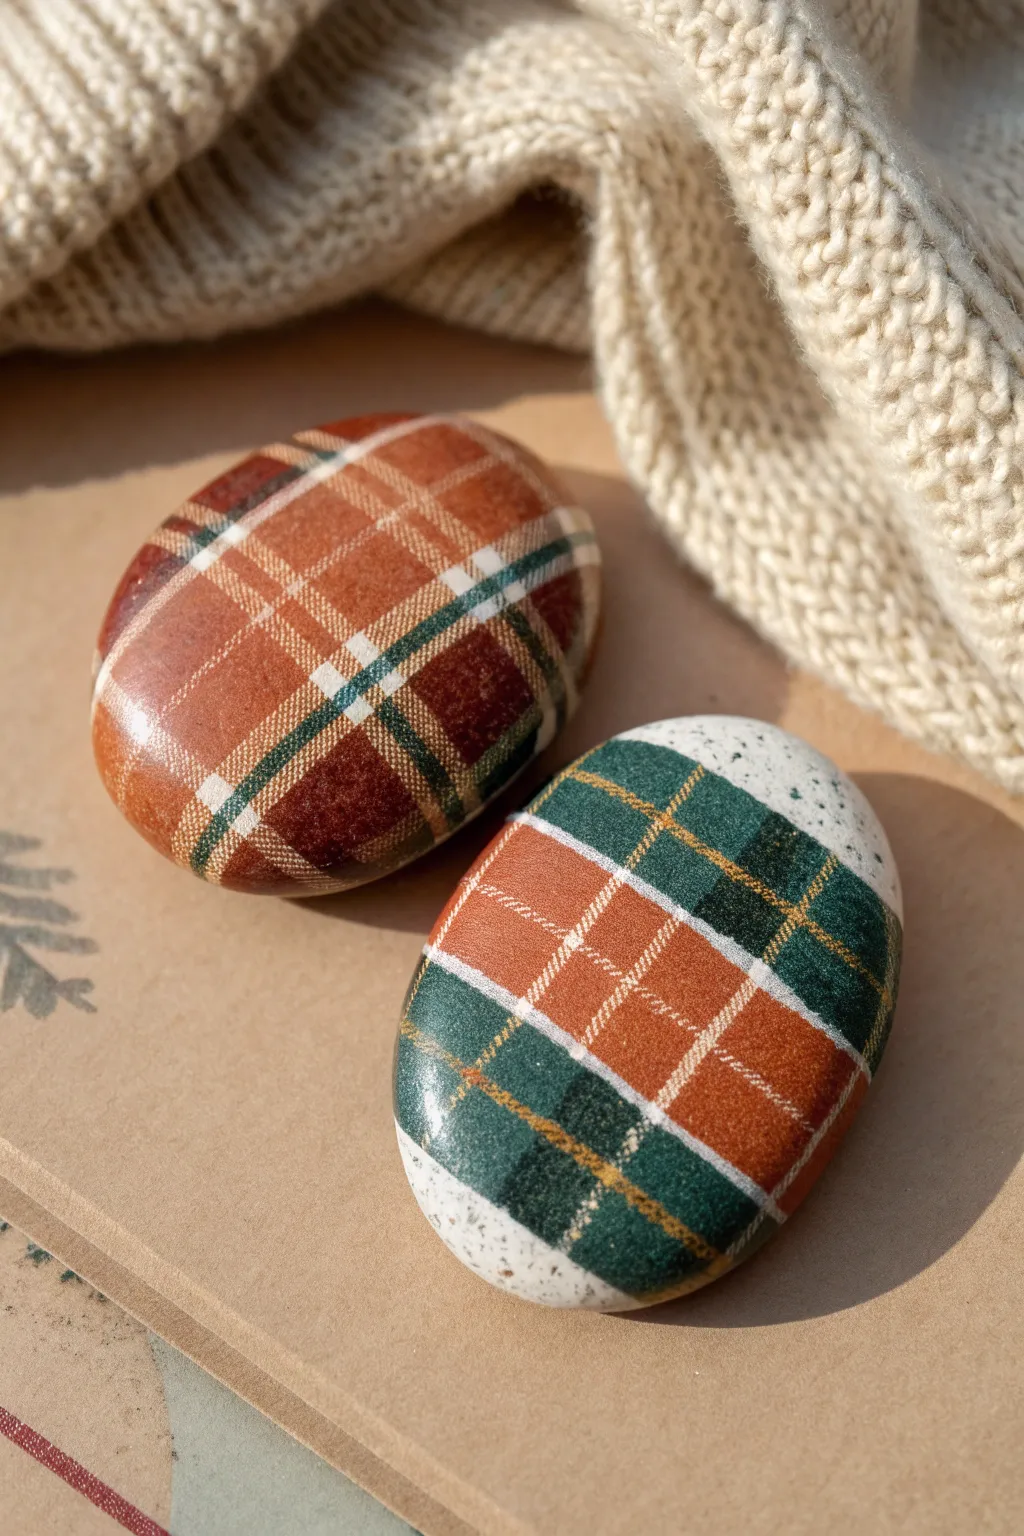
Cozy up your home decor with these warm, textured-look plaid rocks that capture the essence of a favorite flannel shirt. Using a clever layering technique, you can transform simple river stones into sophisticated autumnal accents that look surprisingly realistic.
How-To Guide
Materials
- Smooth oval river rocks
- Gesso or white primer (optional but recommended)
- Acrylic paints: Burnt sienna or terracotta, hunter green, cream/off-white, and gold metallic
- Flat shader brushes (medium width)
- Liner brush (very fine point)
- Washi tape or low-tack masking tape (various widths)
- Matte finish sealant spray
- Paper plate or palette
- Cup of water
Step 1: Preparation & Base Coat
-
Clean the surface:
Begin by scrubbing your rocks with warm soapy water to remove any dirt or oils that might prevent the paint from sticking. Let them dry completely in the sun or with a hairdryer. -
Apply a primer:
For the brightest colors, brush on a thin layer of white gesso or primer. While you can paint directly on the stone, this step helps the subsequent earth tones pop. -
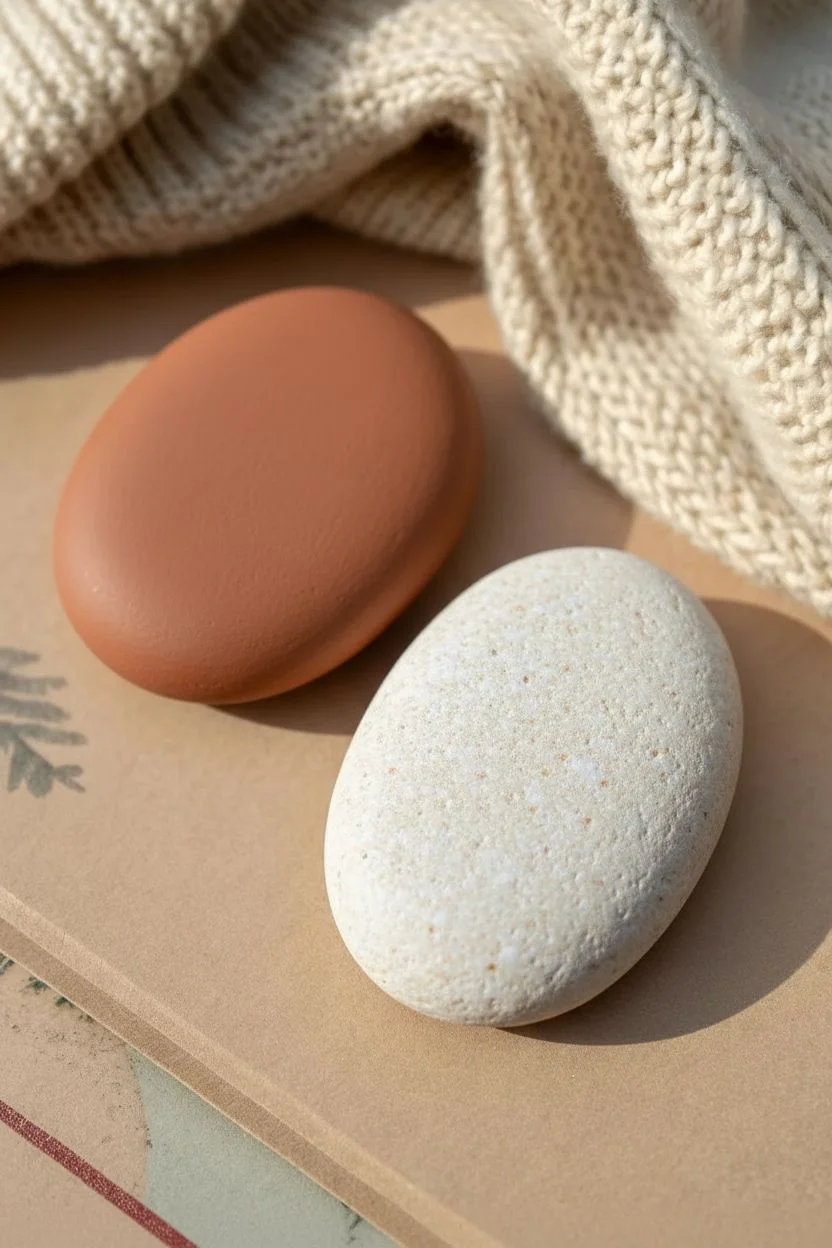
Paint the first rock base:
For the rust-colored rock, paint the entire surface with a warm burnt sienna or terracotta shade. You may need two coats for full opacity, allowing the first to try to the touch. -
Paint the second rock base:
For the contrasting rock, paint a background of creamy off-white. I like to sponge this layer on slightly for a speckled, natural stone effect, but a solid coat works beautifully too.
Step 2: Creating the Grid
-
Wait for complete dryness:
It is absolutely crucial that your base coats are bone dry before proceeding. Use a hairdryer on a cool setting if you’re impatient to start the pattern. -
Create vertical stripes (Rock 1):
On the terracotta rock, use your medium flat brush to paint wide, translucent vertical stripes using the hunter green paint. The key is to dilute the paint slightly so the base color shows through, creating that woven fabric look. -
Paint horizontal stripes (Rock 1):
Paint horizontal stripes of equal width across the vertical ones using the same diluted green paint. Where the lines cross, the color will naturally be darker, mimicking the overlap of threads. -
Block out color (Rock 2):
For the white rock, we will use a color-blocking technique. Use wide low-tack tape to mask off a large cross section. Paint the exposed areas with hunter green and a rusted orange, leaving some areas of the white base visible.
Straight Line Secret
Struggling with straight lines? Use thin strips of washi tape as guides. Press edges down firmly to prevent paint bleed.
Step 3: Adding the Weave Details
-
Add thin white lines:
Switch to your fine liner brush. On the terracotta rock, paint thin, consistent cream lines directly through the center of the dark green checks you created. -
Create secondary lines:
Paint thinner sets of parallel cream lines in the terracotta spaces between the green stripes. This variation in line thickness makes the plaid look authentic. -
Detail the second rock:
On the green and orange rock, use the liner brush to add a grid of very thin white lines. Let them run over the color blocks to visually tie the different sections together. -
Add metallic accents:
Dip the very tip of your liner brush into metallic gold paint. Add sparse, delicate lines running parallel to the white grid on both rocks for a touch of elegance.
Paint Too Thick?
If your ‘woven’ layers look too solid, mix in a drop of glazing medium or water. You want the bottom layers to peek through slightly.
Step 4: Finishing Touches
-
Simulate fabric texture:
To make the rocks look like wool, take a barely-damp brush with a tiny amount of white paint and lightly dry-brush the surface in a cross-hatch motion. This softens hard lines. -
Correct mistakes:
If any lines went astray, use a clean damp brush to quickly wipe them away, or touch up neighboring colors with the base shade once dry. -
Let it cure:
Allow the rocks to sit undisturbed for at least an hour. The layers of paint need to bond completely before sealing. -
Seal the artwork:
Spray the rocks with a matte finish sealant. Avoid glossy sprays, as the matte finish reinforces the soft, fabric-like appearance of the plaid pattern.
Place your finished plaid rocks in a shallow wooden bowl or on a mantle for an instant touch of autumn warmth
Sunflower and Mum Bloom Rocks

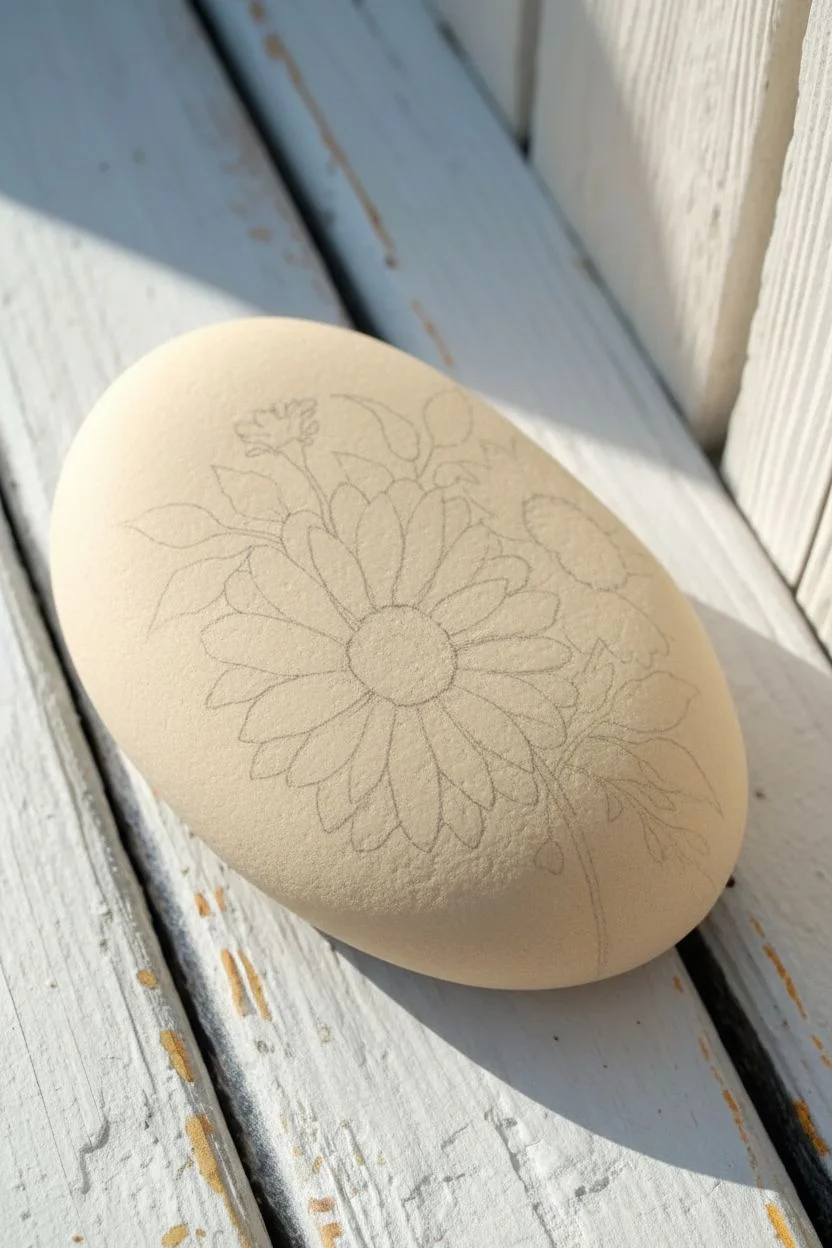
Capture the warmth of autumn with this delicately detailed painted rock, featuring a trio of vibrant blooms against a smooth, natural stone canvas. This project uses fine brushwork to create a vintage botanical illustration style that turns a simple garden find into a piece of art.
Step-by-Step Guide
Materials
- Smooth, oval-shaped river rock (cleaned and dried)
- Acrylic paints (Titanium White, Golden Yellow, Burnt Sienna, Deep Maroon, Sap Green, Dark Green, Black)
- Small flat brush
- Fine liner brush (size 00 or 000)
- Small round brush (size 1 or 2)
- Pencil for sketching
- Matte or satin varnish sealer
- Palette and water cup
Step 1: Base and Sketching
-
Prime the Surface:
Even if your rock is naturally light, apply a thin coat of Titanium White mixed with a tiny drop of yellow or beige across the top surface. This creates a uniform, warm off-white canvas that makes the flower colors pop without looking too stark. -
Lightly Sketch the Composition:
Once the base is fully dry, use a pencil to lightly map out your flowers. Draw a large oval in the center for the main bloom, a smaller circle on the right for the mum, and a small shape at the top left for the bud. Keep lines faint so they don’t show through the paint.
Step 2: Painting the Main Bloom
-
Base Leaf Color:
Before tackling petals, block in the main stems and leaf shapes with a mid-tone Sap Green using your small round brush. It’s often easier to layer petals *over* the stem connections rather than trying to paint stems around them later. -
Main Flower Petals:
For the large central flower, mix Golden Yellow with a touch of Titanium White. Paint the long, slender petals working from the outside edge toward the center. Don’t worry if they overlap; this adds dimension. -
Adding Depth:
While the yellow is still slightly tacky, mix a little Burnt Sienna into your yellow. Paint delicate streaks from the center of the flower moving outward about halfway up each petal to create shadow and depth. -
The Center Cone:
Dab a dark brown (mix Burnt Sienna and a dot of Black) into the center of the main flower. Use a stippling motion with the tip of your brush to create a textured, fuzzy look.
Brush Maintenance Pro-Tip
For those ultra-fine lines on the leaves, slightly wet your liner brush before picking up paint. This thins the acrylic just enough to flow like ink for crisp, unbroken strokes.
Step 3: Secondary Blooms
-
Painting the Mum:
Move to the right-side flower. Use Deep Maroon paint to form the petals. These should be slightly shorter and more clustered than the main sunflower. -
Mum Highlights:
Mix a tiny bit of white into your maroon paint and sweep it across the tips of the petals to catch the ‘light.’ -
The Upper Bud:
For the top-left bud, use a bright orange (mix Golden Yellow and a drop of red). Paint the petals flared upward, looking like an opening cone. -
Bud Greenery:
Using your fine liner brush and Dark Green, paint the jagged sepals (the little green leaves) at the very base of this upper orange bud, blending them into the stem.
Level Up: Vintage Patina
After painting, lightly sponge a very watered-down brown wash around the rock’s edges. This creates an ‘aged paper’ look that mimics an old botanical book plate.
Step 4: Fine Details and Finishing
-
Leaf Veining:
Returning to your leaves, use the liner brush and a diluted Dark Green or Black-Green mix to paint very thin central veins and side veins on each leaf. -
Shading the Leaves:
If herbs or leaves look too flat, I like to glaze a thin wash of dark green over the bottom half of each leaf to create a shadow where it connects to the stem. -
Refining the Center:
Go back to the central flower’s dark center. Add tiny dots of pure Yellow and White around the outer rim of the dark cone to represent pollen and catch the light. -
Tiny Bud Details:
Don’t forget the tiny reddish bud near the bottom right. Use the maroon paint to make a small, closed teardrop shape hanging from a drooping stem. -
Crisp Edges:
Check your petal edges. If any look messy, use your liner brush with the background color (that off-white mix) to carefully ‘caste’ the edges and clean up the silhouette. -
Sealing:
Allow the rock to dry completely—ideally overnight. Finish with a matte or satin spray varnish to protect your artwork from scratches and weather without making it overly glossy.
Place your finished stone on a windowsill or garden path to enjoy those autumn vibes all year round


Fox, Owl, and Hedgehog Woodland Rocks
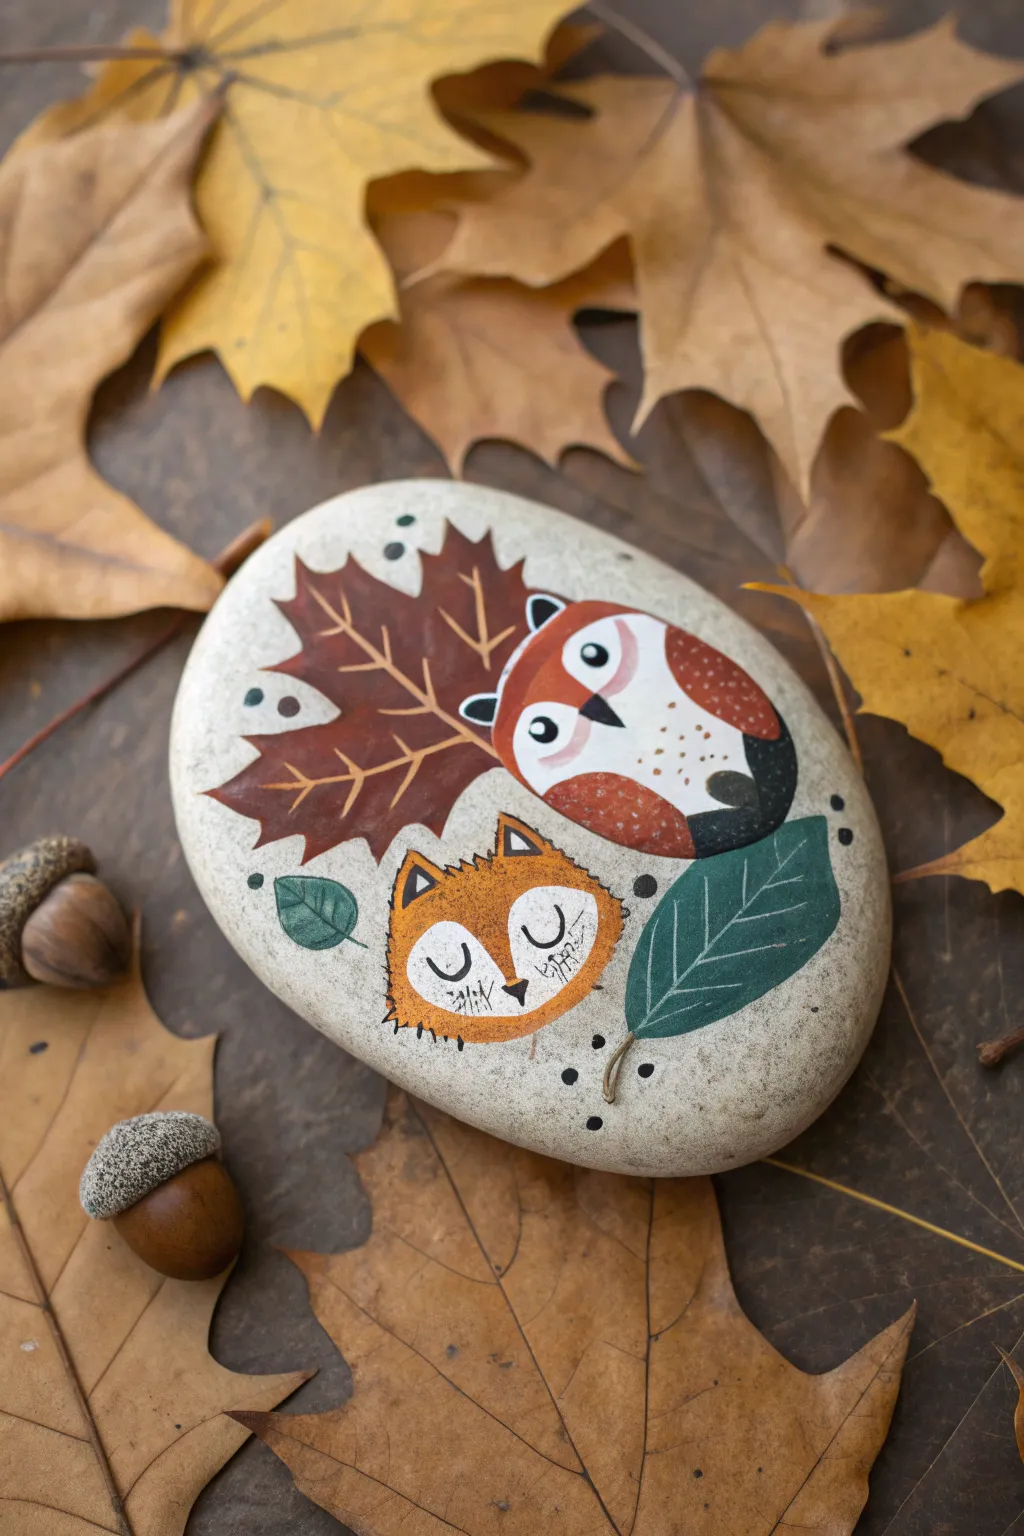
This cozy rock painting features a sleeping fox and a curious owl tucked into autumn leaves. With its soft, muted colors and simple woodland shapes, it’s a perfect project to welcome the fall season.
How-To Guide
Materials
- Large, smooth river rock (flat surface is best)
- Acrylic paints: white, burnt orange, golden yellow, dark brown, olive green, cream
- Fine point brushes (0 and 00 sizes)
- Medium flat brush
- Pencil for sketching
- Black fine-liner paint pen or permanent marker
- Matte finish sealer/varnish
- Water cup and palette
Step 1: Base and Sketching
-
Clean the Stone:
Begin by washing your stone with warm soapy water to remove any dirt or oils. Let it dry completely before starting. -
Paint the Background:
Since the stone in the image is naturally light, you might not need a base coat. However, if your rock is dark, paint a large oval shape with a cream-colored mix to create a neutral canvas for your animals. -
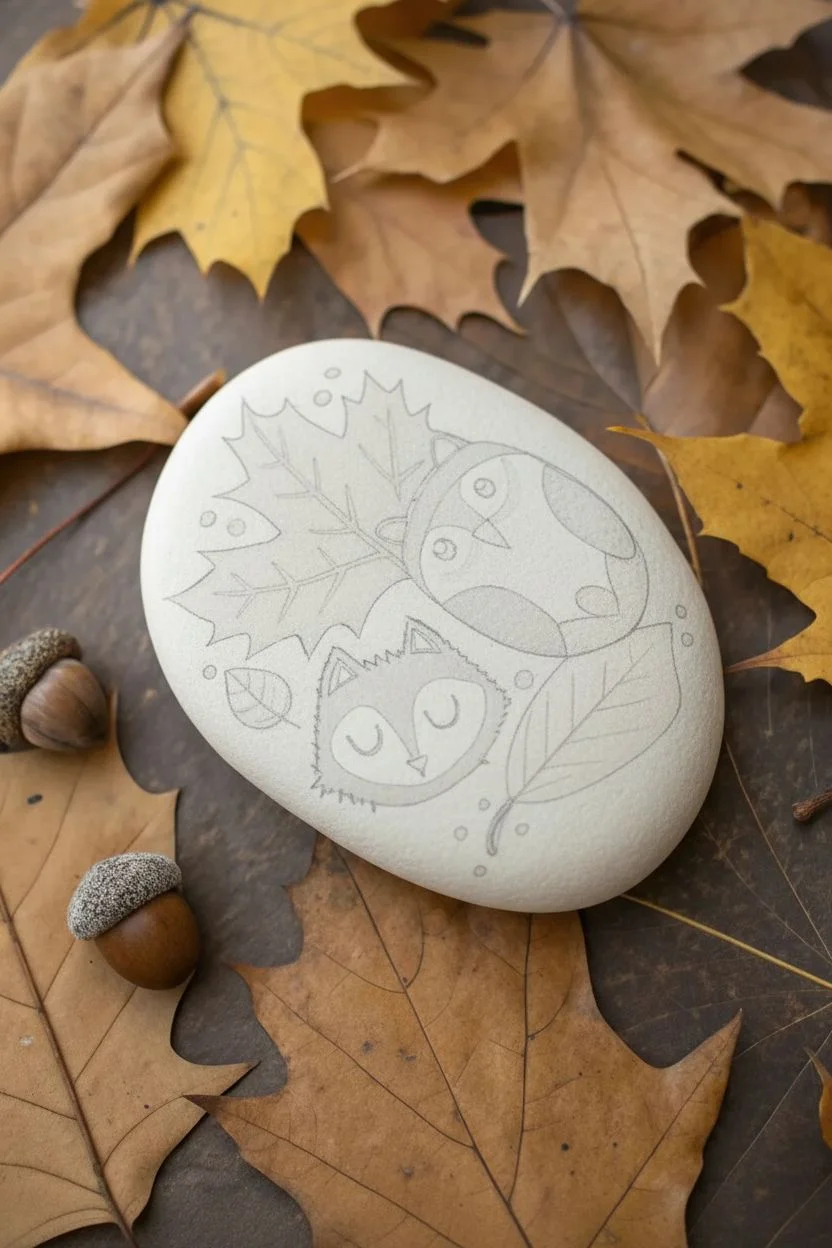
Sketch the Layout:
Lightly sketch your design with a pencil. Draw a large maple leaf shape in the top left, an oval for the owl tucked on the right, and a smaller, rounded triangle shape below the leaf for the fox’s head.
Brush Control Trick
For super fine outlines like the fox fur, thin your black paint with a tiny drop of water until it has an ink-like consistency.
Step 2: Painting the Owl
-
Owl Body Base:
Fill in the owl’s body shape. Use burnt orange for the outer wings and top of the head. Leave the belly and face area unpainted or fill it with white. -
Face and Belly:
Paint the heart-shaped face area and the round belly with white paint. You might need two layers to make it opaque against the stone. -
Adding Details:
Once the orange is dry, use a dark brown to add the wingtips. Use the tip of your smallest brush or a dotting tool to add small brown dots to the white belly for texture. -
Owl Eyes:
Paint two black circles for eyes inside the white face area. Once dry, add a tiny white dot in each for a reflection.
Step 3: Painting the Fox
-
Fox Head Base:
Mix a golden-orange hue by combining your burnt orange with a touch of yellow. Paint the main shape of the fox’s head with this color. -
Fox Face Mask:
Using white paint, block in the heart-shaped area of the fox’s face, extending from the forehead down to the muzzle. -
Ears and Fur:
Use a very fine brush to pull small strokes of orange paint outward from the edges of the head to mimic fur texture. Add triangles for the ears.
Add Some Sparkle
Mix a tiny amount of gold metallic paint into your orange hues or add gold dots around the leaves to make the rock shimmer in sunlight.
Step 4: Leaves and Branches
-
Maple Leaf Base:
Paint the large maple leaf in deeply saturated brownish-red or burgundy. I find that thinning the paint slightly helps it flow into the stone’s texture. -
Green Leaf:
Paint the large elongated leaf on the bottom right in a muted olive green. Add a smaller green leaf near the fox’s left ear. -
Veins and Stems:
Using a liner brush and cream or light tan paint, carefully draw the veins onto the red maple leaf and the green leaves. -
Leaf Stalks:
Paint tiny brown stems connecting the leaves, making them look like falling autumn foliage.
Step 5: Fine Lining and Details
-
Fox Features:
Using your black paint pen or liner brush, draw two closed ‘U’ shapes for the sleeping fox’s eyes. Add a small black triangle for the nose. -
Outline Work:
Very delicately outline the fox’s head with broken, wispy black lines to emphasize the fur texture. Outline the owl’s body and eyes for definition. -
Decorative Dots:
Add clusters of small dots—some black, some dark green—around the animals and leaves to fill the empty space and frame the composition. -
Sealing:
Allow the entire rock to cure for 24 hours. Finish with a matte spray varnish to protect your woodland scene without adding too much unnatural shine.
Now you have a charming piece of autumn decor that can double as a paperweight or garden accent
Bare Tree Silhouette With Falling Leaf Dots
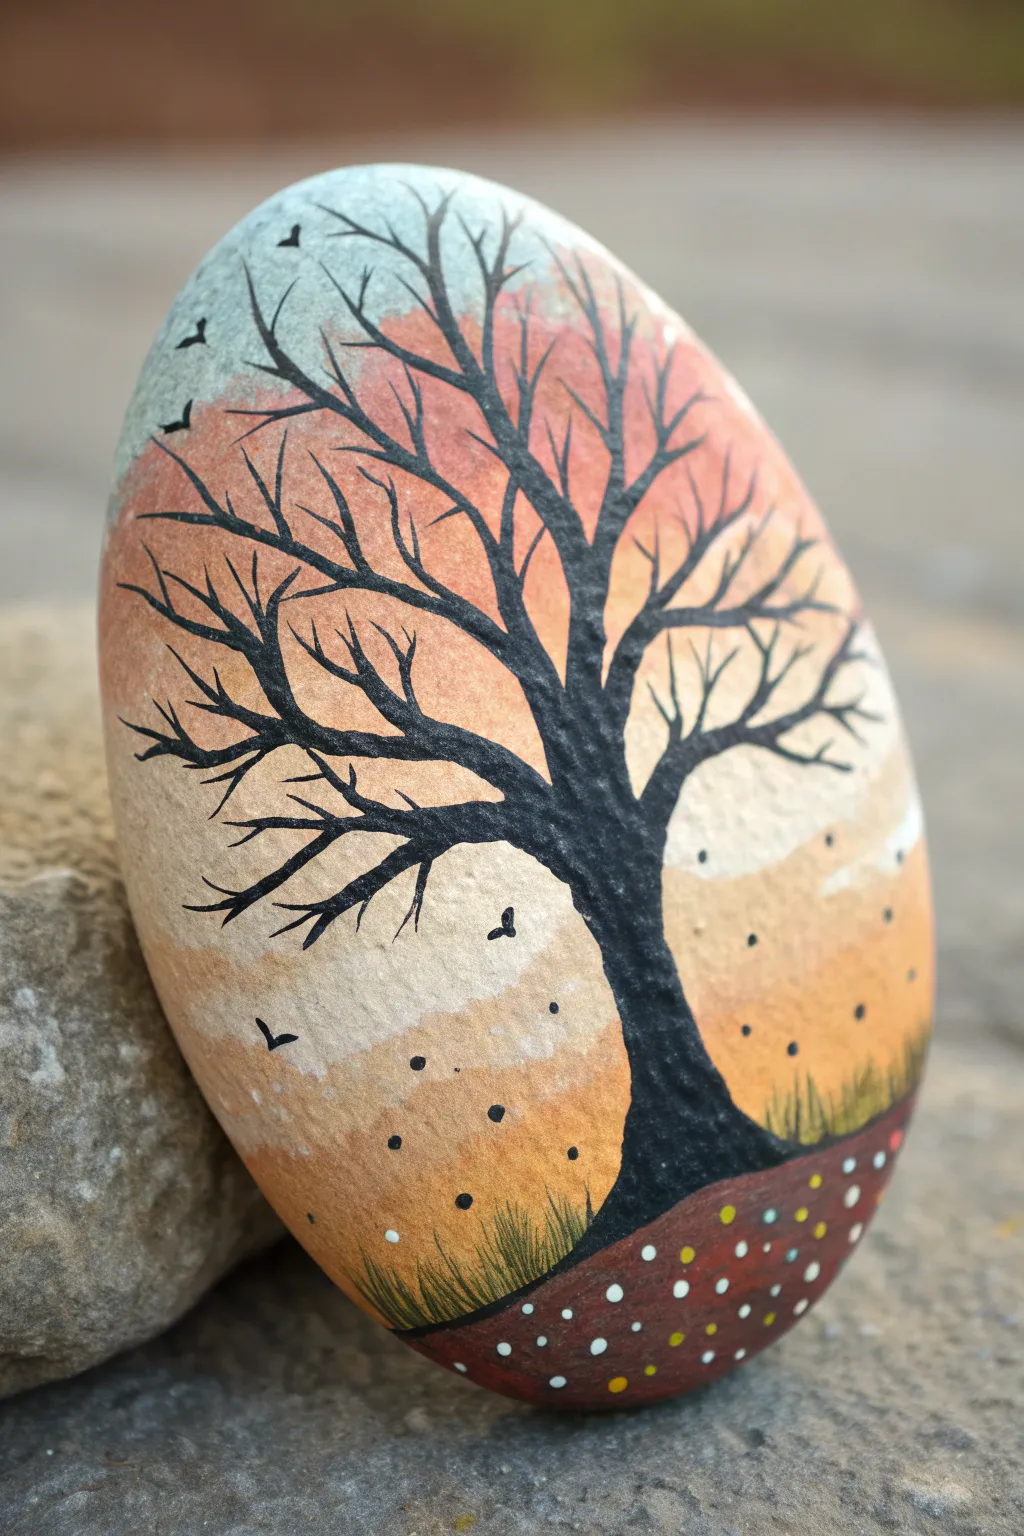
This elegant rock painting captures the serene beauty of autumn’s end with a striking black tree silhouette against a soft, gradient sky. The design features a gentle Ombre effect, transitioning from dusk blue to warm peach, ground by falling leaves represented as delicate dots.
Detailed Instructions
Materials
- Smooth, oval river rock (about 3-4 inches tall)
- Acrylic paints: light blue, peach, cream, yellow ochre, dark brown, black, white, and burgundy
- Sponges or foam pouncers for blending
- Fine liner brush (size 00 or 000)
- Small round brush (size 1 or 2)
- Dotting tool or toothpick
- Acrylic spray sealer or varnish
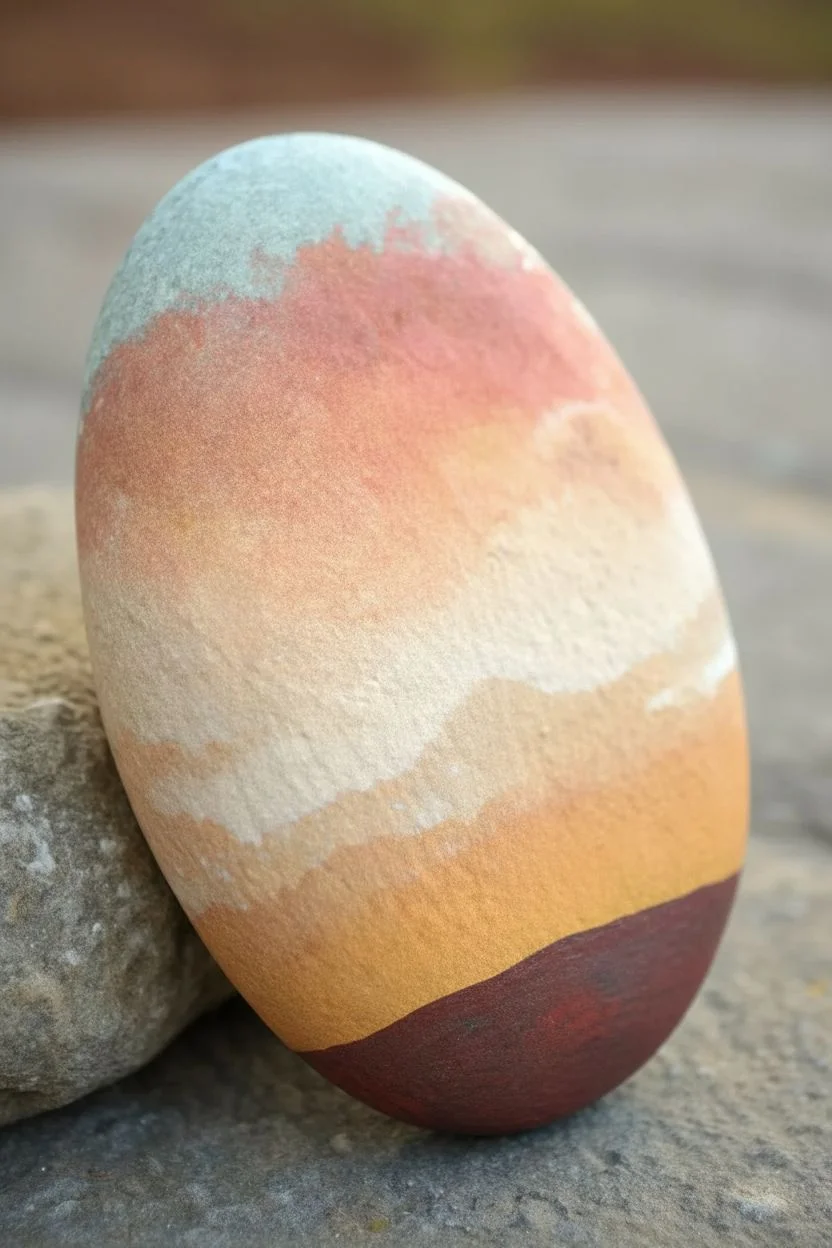
Step 1: Preparing the Gradient Background
-
Clean the canvas:
Start by washing your rock with soap and water to remove any dirt or oils. Let it dry completely before painting. -
Mix your palette:
Prepare your sky colors on a palette: light blue, a soft peach or salmon pink, a creamy off-white, and a yellow ochre for the horizon line. -
Apply the top layer:
Using a sponge or wide flat brush, apply the light blue paint to the very top curve of the rock. Don’t worry about a straight line; a natural curve looks best. -
Blend in the peach:
While the blue is still slightly wet, sponge the peach color right below it, tapping gently where they meet to create a seamless, hazy transition between the sky and the sunset hues. -
Lighten the horizon:
Continue down the rock with the creamy off-white paint. Blend this into the bottom edge of the peach section to brighten the middle of the stone. -
Add the ground haze:
Sponge a layer of yellow ochre near the bottom third of the rock, blending it softly upwards into the cream color to suggest a dusty, autumnal atmosphere. -
Create the heavy earth:
Paint the very bottom section of the rock with a solid dark burgundy or chocolate brown to create the immediate foreground where the tree will stand. Create a curved horizon line.
Paint Flow Tip
If your black paint drags when painting thin branches, add a tiny drop of water or flow medium to make it inky. It should glide like liquid eyeliner.
Step 2: Painting the Tree Silhouette
-
Draft the trunk:
Once the background is bone dry, load a small round brush with black acrylic paint. Start from the dark ground area and paint a thick trunk that tapers as it moves upward, leaning slightly to the right for a natural look. -
Extend main branches:
Switch to your fine liner brush. Pull 3-4 main branches extending from the top of the trunk, reaching toward the upper edges of the rock. Keep your hand loose to avoid stiff lines. -
Add secondary twigs:
From each main branch, paint smaller, thinner twigs branching outward. I find that rolling the brush slightly as you lift it off the rock helps create very fine, tapered tips. -
Fill the canopy:
Continue adding tiny twig details until the canopy looks full but bare. Ensure the lines cross over each other occasionally to add depth to the silhouette. -
Paint falling birds:
Using the very tip of your liner brush, add a few tiny ‘V’ shapes in the distance on the left side to represent birds flying in the background. -
Detail the grass:
With the liner brush and a mix of black and dark green (or just black), flick short, quick upward strokes along the horizon line where the trunk meets the ground to resemble tall grass.
Fixing Smudges
Accidentally made a branch too thick? Wait for it to dry completely, then use the background paint color to carefully ‘erase’ or thin out the line.
Step 3: Adding Falling Leaf Details
-
Mix ground dots:
Prepare small puddles of white, yellow, and perhaps a touch of orange paint. -
Dot the foreground:
Using a dotting tool or the end of a toothpick, place scattered dots of varying sizes on the dark burgundy ground area. These represent fallen leaves resting on the earth. -
Add falling specks:
Add just a few tiny black or dark brown dots floating in the air around the lower branches to suggest leaves or debris caught in a breeze. -
Seal the artwork:
Allow the paint to cure for at least 24 hours. Finish by spraying the rock with a clear acrylic sealer to protect your painting from chipping and fading.
Display this serene piece on a desk or windowsill to enjoy a calm autumn moment all year round
Harvest Basket Cornucopia Rocks
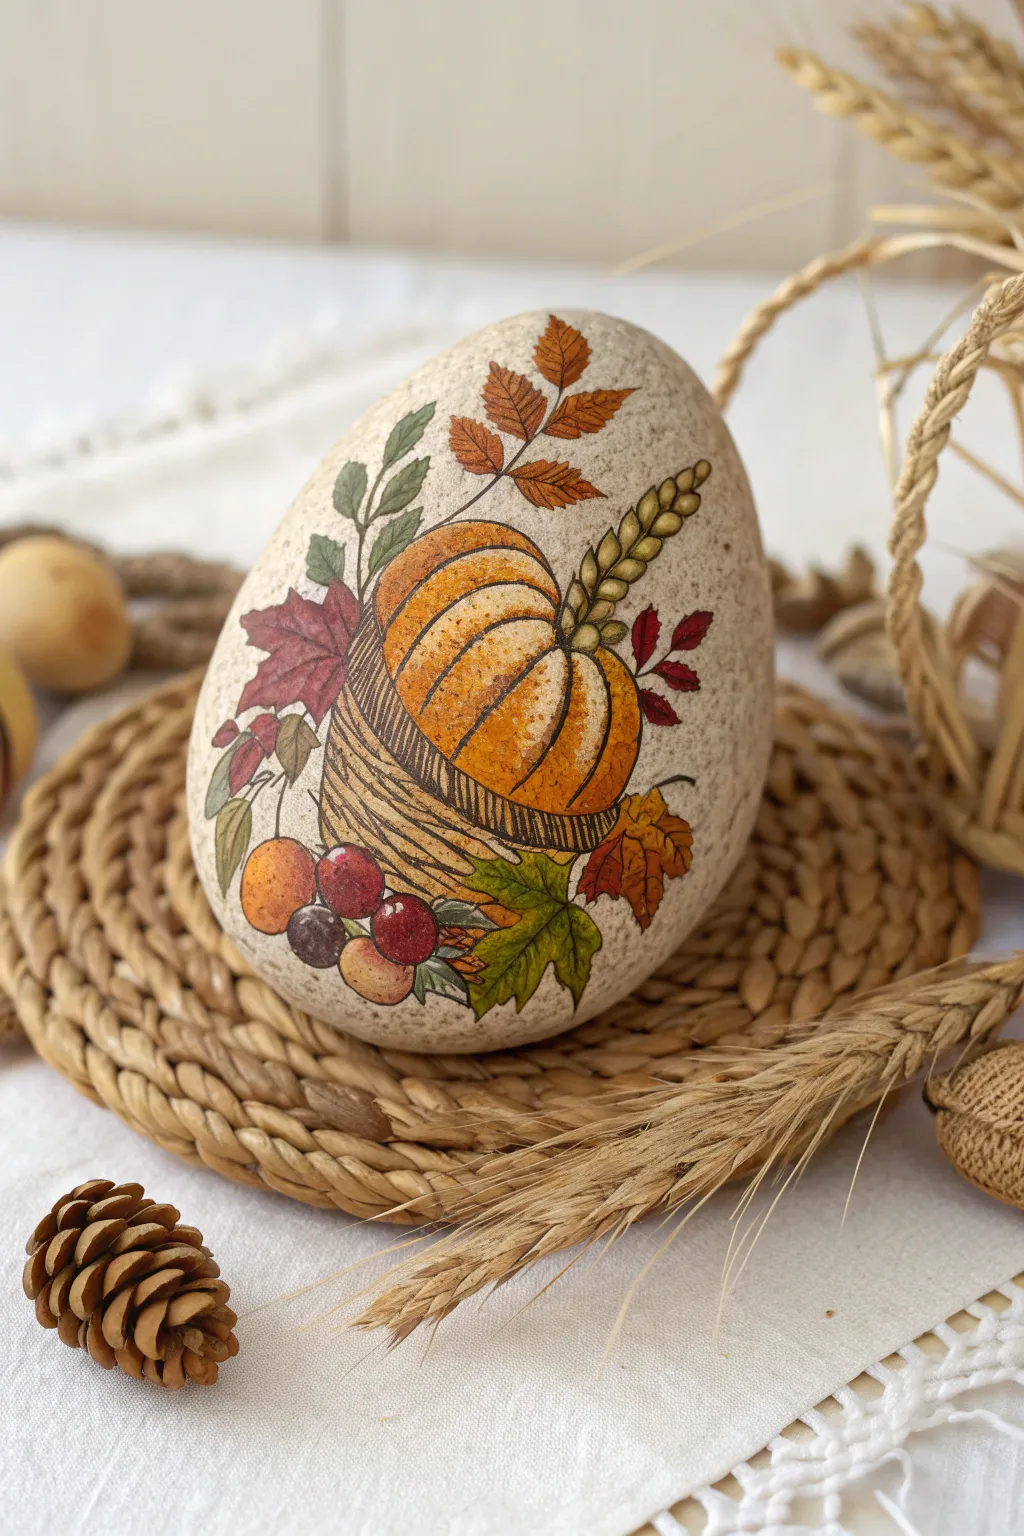
Capture the essence of the harvest season on a smooth, egg-shaped stone with this detailed cornucopia design. The textured background and fine line work give this painted rock a classic, illustrative quality perfect for fall decor.
How-To Guide
Materials
- Smooth, egg-shaped river rock
- Gesso or white acrylic primer
- Acrylic paints (Cream/Off-white, Burnt Sienna, Orange, Golden Yellow, Olive Green, Deep Red, Purple)
- Fine grit sandpaper
- Micron pens or ultra-fine black paint markers (0.1mm and 0.3mm)
- Small flat brush
- Detail liner brushes (000 size)
- Old toothbrush (for splattering)
- Matte spray varnish
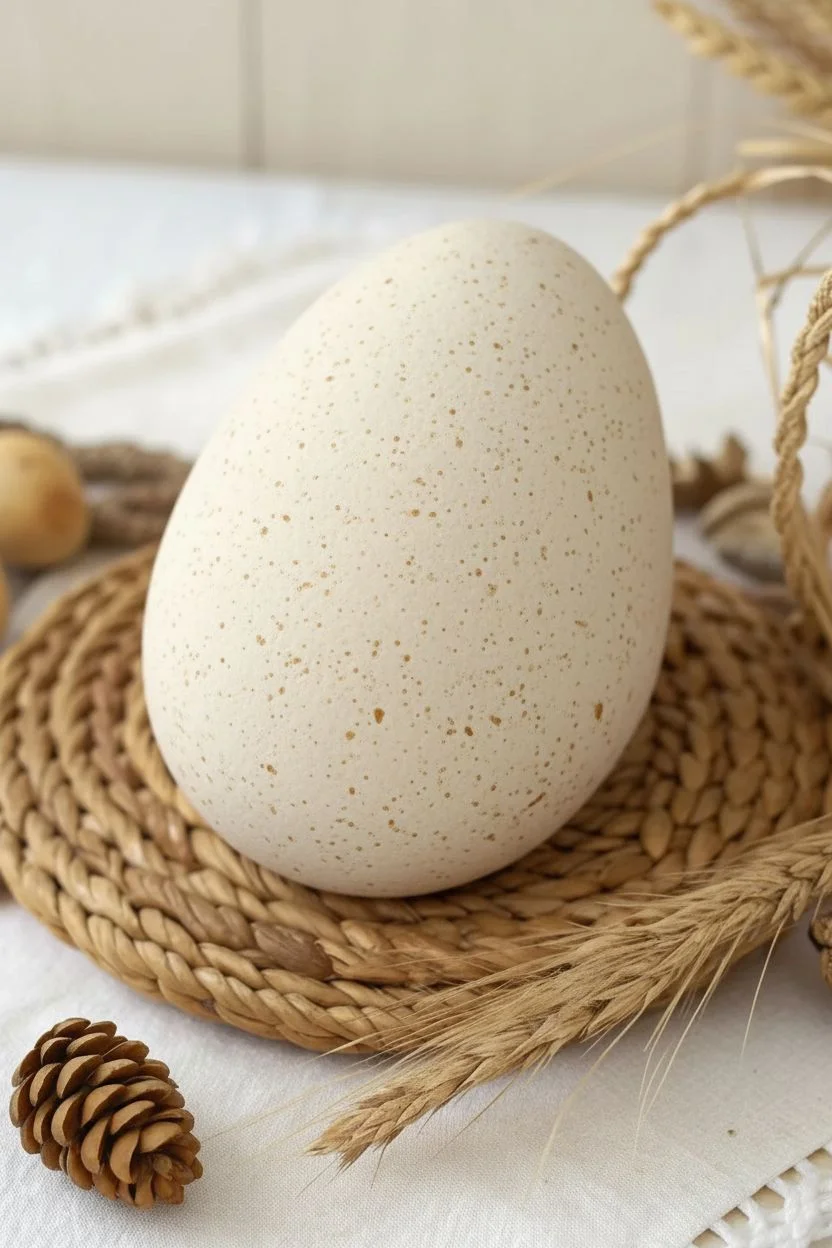
Step 1: Preparation & Base
-
Clean and Prep:
Begin by scrubbing your rock with soapy water to remove any dirt or oils. Let it dry completely. -
Prime the Surface:
Apply a coat of white gesso to the entire rock. Once dry, lightly sand it with fine-grit sandpaper to create a velvety smooth surface for your pens. -
Base Color Application:
Mix a warm Cream or Off-white acrylic paint. Coat the entire rock. You may need two coats for full opacity; let each layer dry fully. -
Add Texture:
Dip an old toothbrush into slightly watered-down brown paint. Run your thumb across the bristles to flick tiny speckles onto the rock. This creates that natural, eggshell-like speckled texture.
Step 2: Sketching & Outlining
-
Sketch the Composition:
Using a pencil, lightly sketch a tilted basket shape near the bottom center. Add a large pumpkin resting inside it, spilling out towards the right. -
Add Detail Elements:
Sketch a few round fruits (plums or apples) at the bottom left opening of the basket. Draw a stalk of wheat rising up behind the pumpkin. -
Leaf Placement:
Fill the surrounding negative space with various leaf shapes—a maple leaf on the left, oak leaves at the top, and smaller filler leaves. -
Initial Inking:
Take your 0.1mm black pen. Carefully trace your pencil lines. For the basket, use curved hatch marks to simulate the woven wicker texture.
Don’t Smudge!
Water-based paint markers can reactivate ink. Always use spray sealer for the first coat over ink drawings, never a brush-on varnish.
Step 3: Painting & Shading
-
Wash Technique:
Water down your acrylics significantly to create a glazing or watercolor effect. Paint the pumpkin with a sheer wash of Golden Yellow. -
Layering Pumpkin Tones:
While the yellow is dry, add a wash of Orange to the shadowed areas and creases of the pumpkin segments to build dimension. -
Coloring the Basket:
Paint the basket area with a wash of watered-down Burnt Sienna. Let the white background show through slightly to keep it looking rustic. -
Fruits and Berries:
Fill in the round fruits at the base using washes of Deep Red, Purple, and a soft Orange for variety. I like to leave a tiny spot of unpainted white on each fruit for a highlight. -
Greenery:
Paint the leaves using Olive Green. Vary the intensity by adding a touch of yellow for the wheat stalk and brown for the dried oak leaves at the top. -
Deepening Shadows:
Once the color washes are dry, go back with slightly thicker surrounding colors (like dark brown or deep red) to add contrast in the deepest crevices.
Metallic Accent
Use a gold gel pen or metallic gold paint to trace just the wheat stalk and the basket rim for a subtle, elegant shimmer.
Step 4: Finishing Touches
-
Define the Details:
Switch to your 0.3mm pen. Re-trace the main outlines to make them pop. Add veins to the leaves and small stippling dots on the pumpkin skin for texture. -
Hatching Shadows:
Use the finer 0.1mm pen to add cross-hatching shading on the shadowed side of the basket and under the eaves of the pumpkin. -
Seal the Work:
Allow the ink to dry for at least 24 hours to prevent smearing. Finish with a matte spray varnish to protect your harvest scene without adding unnatural shine.
Display this charming piece in a small nest or wooden bowl to bring a touch of Thanksgiving warmth to your home
Whimsical Turkey With Patterned Tail Feathers
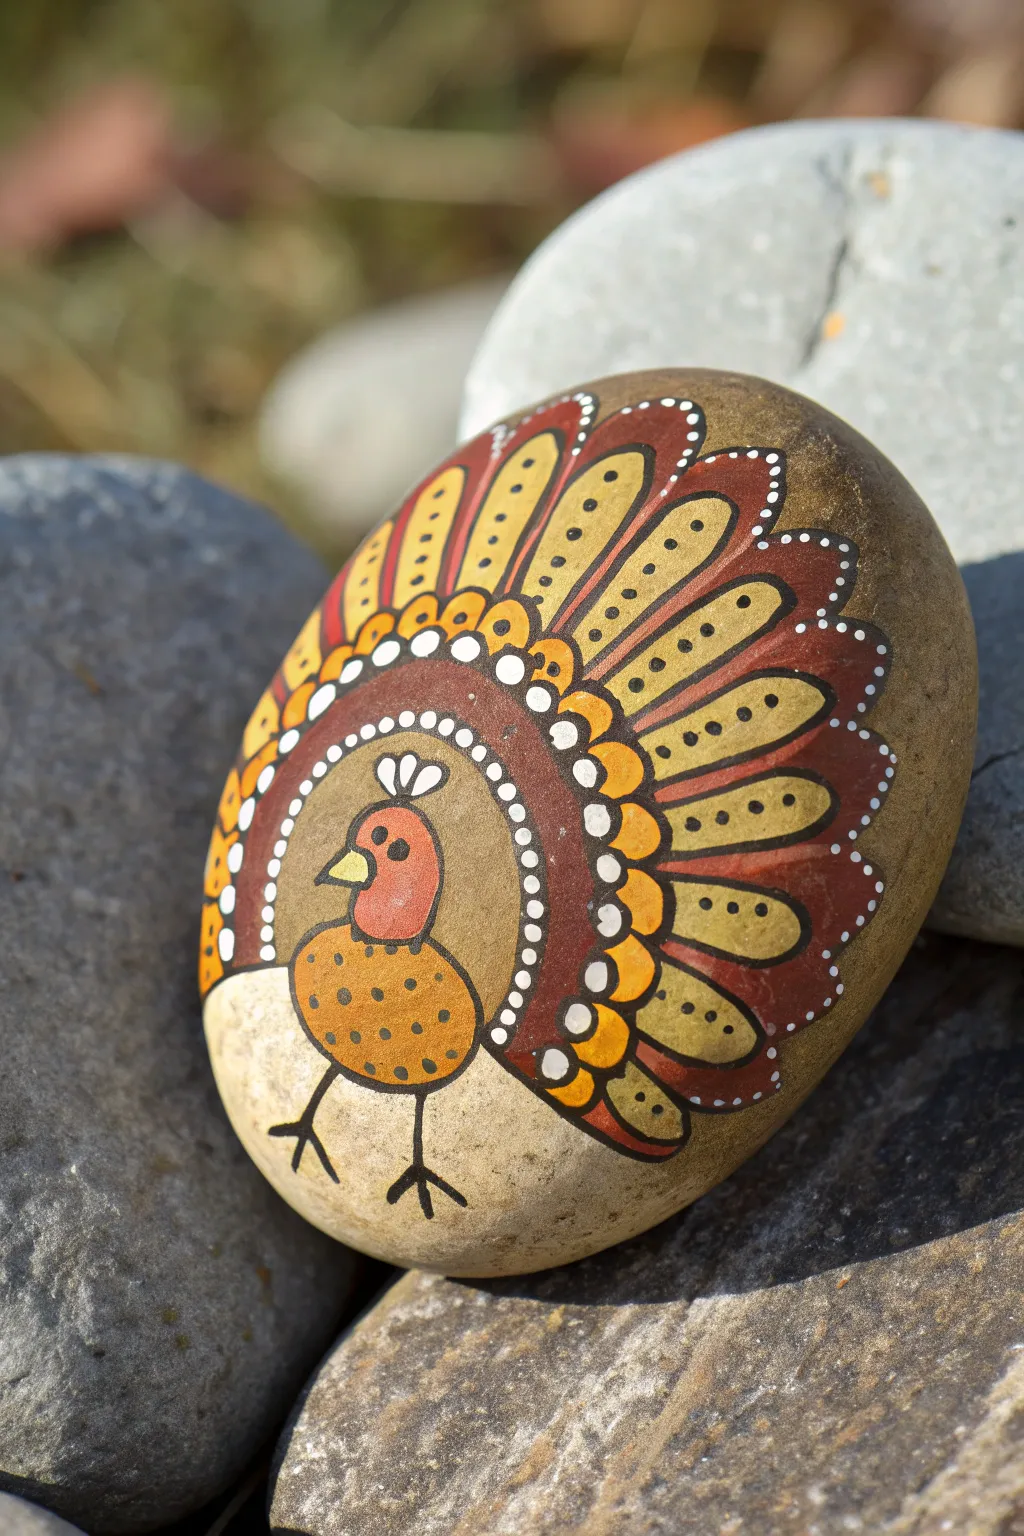
Embrace the spirit of autumn with this festive turkey design that swaps traditional realism for folk art charm. The intricate-looking tail feathers are surprisingly easy to achieve using simple layering and dotting techniques, making this a perfect addition to your fall decor.
Detailed Instructions
Materials
- Smooth, oval-shaped river rock
- Acrylic paints (dark brown, rust red, golden yellow, creamy beige, white, black)
- Fine liner detail brush (size 0 or 00)
- Small round brush (size 2)
- Dotting tool or toothpick
- Pencil for sketching
- Clear matte or satin varnish spray
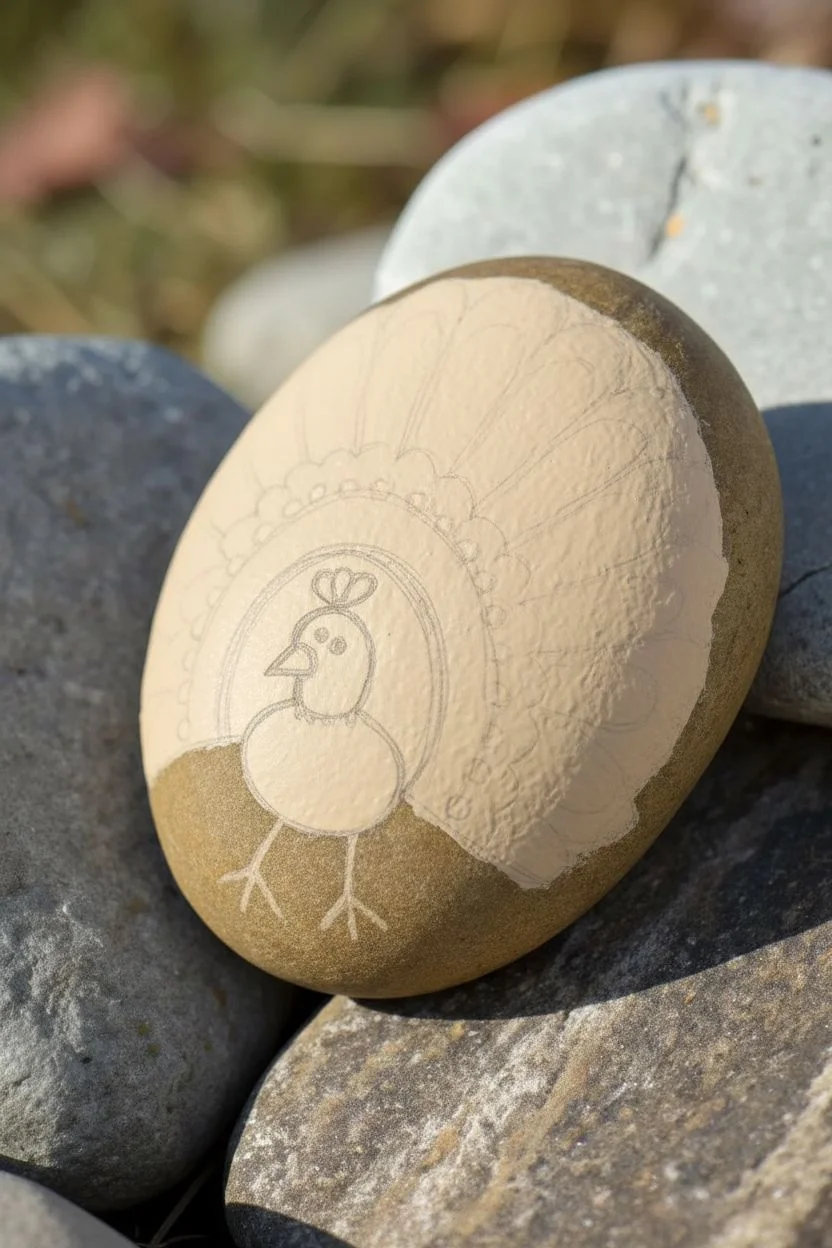
Step 1: Base and Sketch
-
Prepare the canvas:
Begin by washing your stone thoroughly with soap and water to remove any dirt or oils. Let it dry completely before starting. Since we want the natural stone color to serve as the background for the lower half, clean lines are essential. -
Sketch the outline:
Lightly sketch your turkey design with a pencil. Draw a large arch for the top feather boundary, a central circle for the body, and a smaller oval on top for the head. Don’t worry about the tiny details yet; just get the main shapes centered. -
Paint the background arch:
Using your round brush and the creamy beige paint, fill in the large semi-circle area behind where the turkey’s head and body will be. This solid light background will make the bird pop against the stone.
Consistency Is Key
When creating the white border dots, reload your tool with paint after every 2-3 dots. This ensures they stay the same size and roundness all the way around the arch.
Step 2: Blocking in Color
-
Paint the body and head:
Fill in the lower circular body shape with golden yellow paint. For the head, create a smaller oval on top using the rust red or orange paint. Let these shapes dry so the distinct colors don’t bleed into each other. -
Add the main feather fan:
Paint a thick, dark brown border arching over the creamy beige background you created earlier. This band separates the inner body area from the outer tail feathers. I like to make this band fairly wide to accommodate dots later. -
Create the outer feathers:
Along the top edge of the stone, outside your brown band, paint elongated teardrop shapes fanning outward. Alternate between rust red and golden yellow for a vibrant look. Ensure the tips of the ‘feathers’ curve slightly with the shape of the rock. -
Paint the inner feather layer:
Inside the outer ring of feathers (on top of the creamy beige area), paint a smaller tier of yellow teardrop shapes pointing inward toward the head. These should be shorter than the outer feathers.
Step 3: Detailed Dot Work
-
Add the beak and wattle:
Using your finest brush, paint a small yellow triangle for the beak and add a tiny white crest or wattle detail on top of the head. -
Outline the bird:
Take your black paint and a very fine liner brush to outline the head, the beak, and the golden body circle. Add two stick legs with simple three-toed feet at the bottom. -
Define the feathers:
Use the black liner brush to carefully outline every individual feather shape in the tail fan. Separating the colors with black lines gives it that crisp, illustrative style. -
The white dot border:
Dip your dotting tool or a toothpick into white paint. Create a row of evenly spaced dots along the inner edge of the dark brown arch. This high-contrast dotted line is key to the folk art aesthetic. -
Detail the outer feathers:
Add a series of smaller white dots along the very outer perimeter of the red feathers to frame the design against the raw stone. -
Inner feather decorative dots:
On the yellow feathers, place tiny black dots running down the center of each shape to mimic quills or patterns. -
Body texture:
Give the turkey’s golden body some texture by adding small, scattered black dots across the yellow area.
Shaky Lines?
If your black outlines look wobbly, thin your black acrylic with a tiny drop of water. Ink-like consistency flows much smoother from a liner brush than thick paint.
Step 4: Finishing Touches
-
The eye:
Paint a solid black circle for the eye on the rust-colored face. Once dry, add a minuscule spec of white for a highlight to bring the character to life. -
Final scallop details:
For extra dimension, paint small semi-circles (scallops) in orange or yellow at the base of the dark brown arch, bridging the gap between the brown band and the feather tips. -
Seal the artwork:
Allow the paint to cure fully, preferably overnight. Finish by spraying a clear matte or satin varnish over the rock to protect your detailed work from chipping.
Now you have a charming handcrafted turkey perfect for brightening up a Thanksgiving table setting
Mandala-Style Autumn Heart Rocks
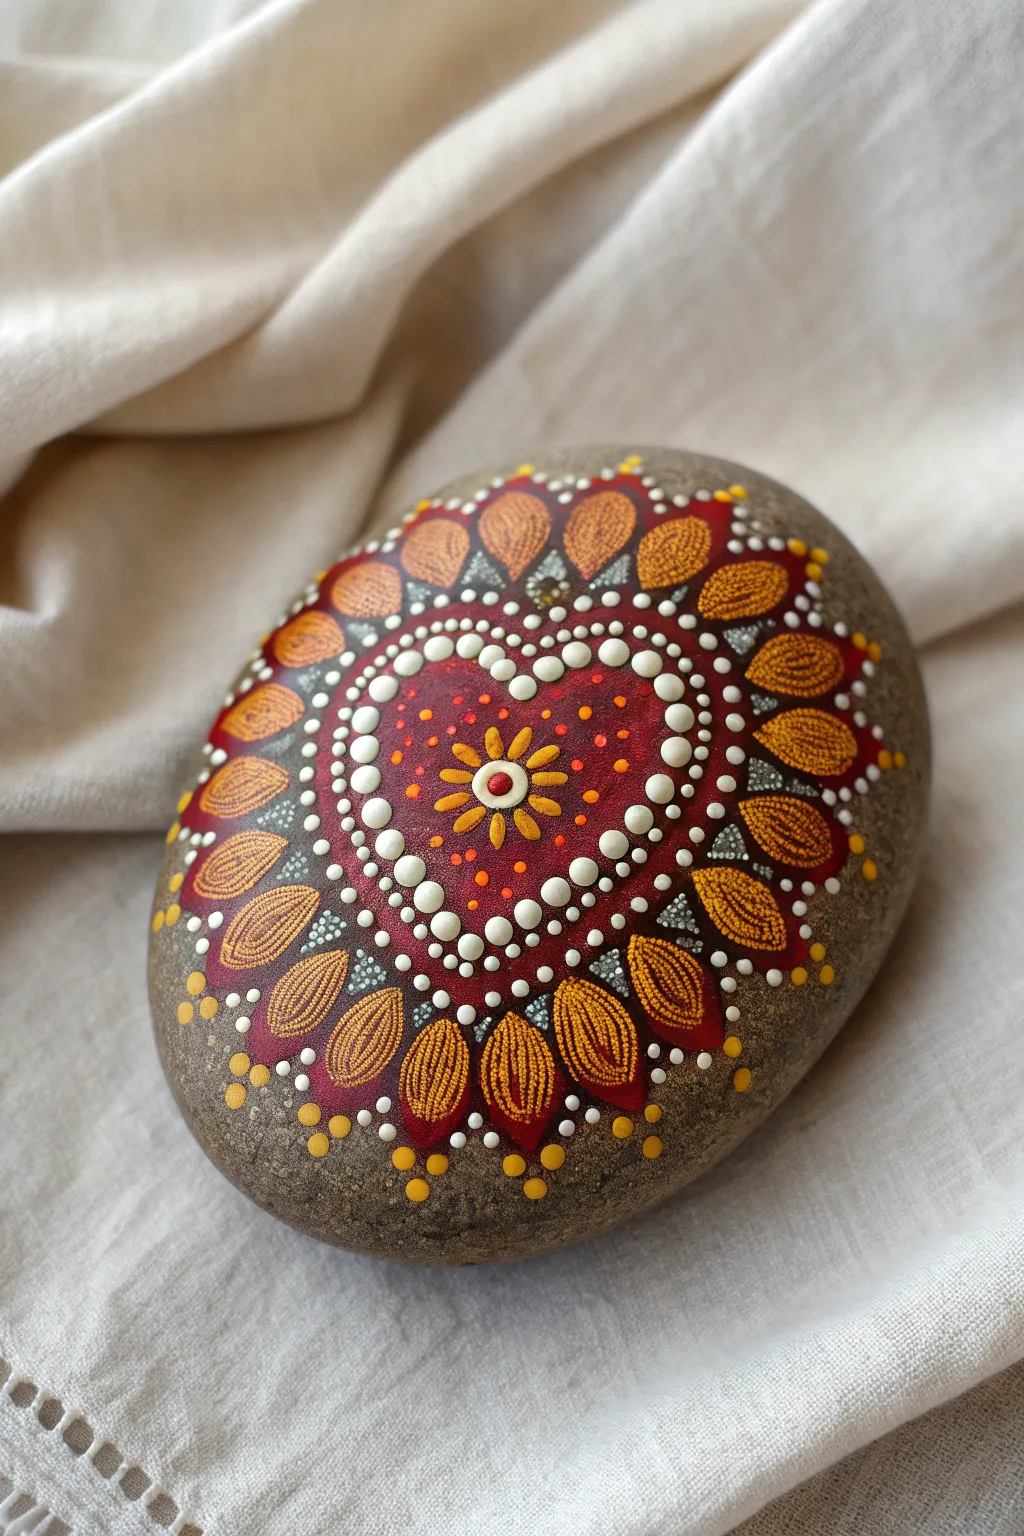
Embrace the cozy warmth of fall with this intricate mandala-style rock painting, featuring a glowing heart center surrounded by fiery petal motifs. This design combines the soothing repetition of dot painting with rich harvest colors like deep maroon, burnt orange, and bright gold.
Detailed Instructions
Materials
- Smooth, oval-shaped river rock (cleaned and dried)
- Acrylic paints: Deep maroon/burgundy, burnt orange, bright yellow-gold, white, and metallic silver (optional)
- Dotting tools (various sizes, from fine stylus to larger ball ends)
- Fine detail paintbrush (size 0 or 00)
- Pencil (optional for sketching)
- Acrylic varnish or sealant (glossy or matte)
Step 1: Base Design & Heart Center
-
Clean and Prep:
Begin by washing your stone with soap and water to remove any dirt or oils. Let it dry completely. The natural gray of the stone serves as our background, so no base coat is needed. -
Outline the Heart:
Using a pencil or a very faint chalk line, lightly sketch a large, symmetrical heart shape in the center of the rock. This will guide your main focal point. -
Fill the Heart Background:
Load your paintbrush with deep maroon paint. Carefully fill in the heart shape you sketched. You might need two coats to get an opaque, rich color. Allow this layer to dry fully before moving on. -
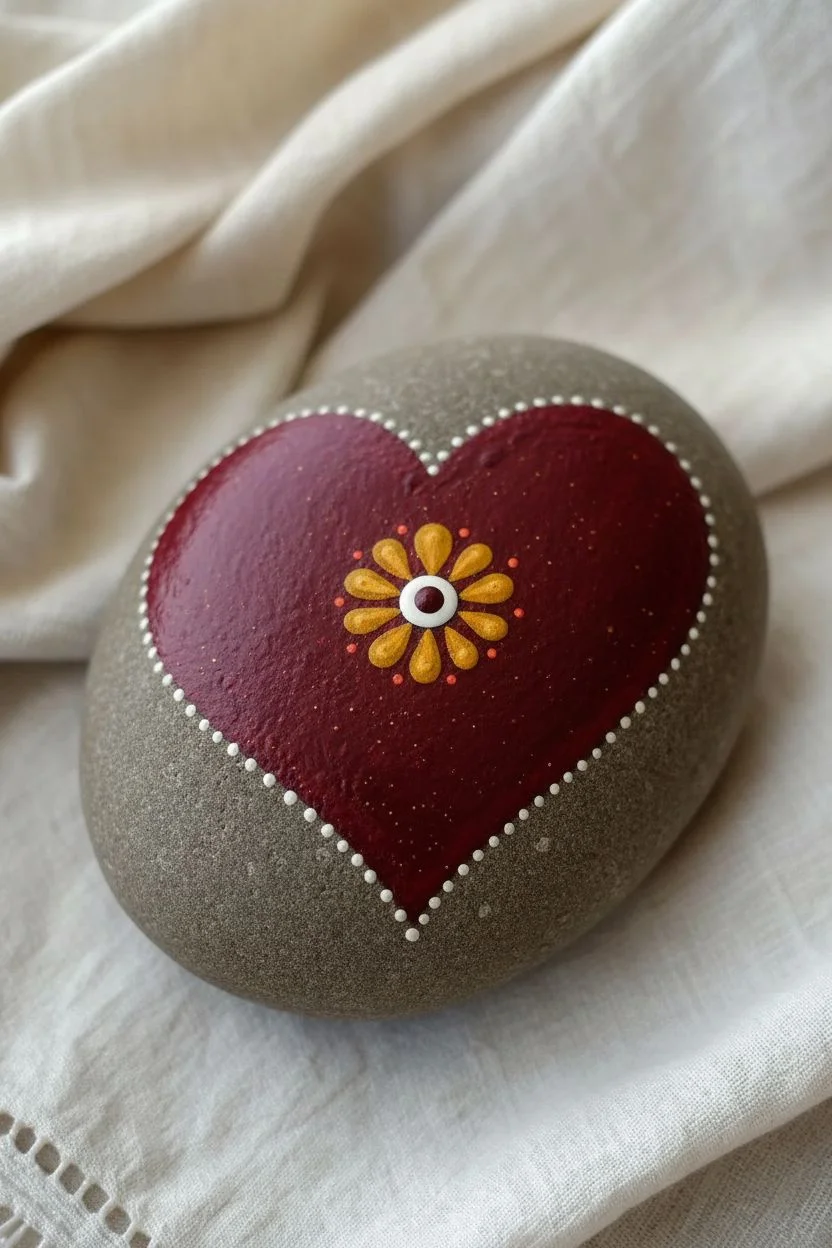
Create the Floral Center:
Inside the maroon heart, use a medium dotting tool to place a single white dot in the very center. Then, dip a slightly smaller tool in maroon again to place a tiny dot inside that white one for a ‘bullseye’ effect. -
Add Inner Petals:
Around the central dot, use a small brush or a fine stylus to paint eight small, teardrop-shaped petals in bright yellow-gold. They should radiate outward like a tiny sun. -
Stipple Texture:
To add depth to the maroon heart, take your finest dotting tool and dip it in light orange or gold paint. Add tiny, scattered speckles across the maroon surface, keeping them sparse near the center and slightly denser near the edges.
Step 2: Mandala Framework
-
The Dotted Border:
Using a medium-sized dotting tool and white paint, create a border of evenly spaced dots tracing the entire outline of the heart. Try to keep the spacing consistent. -
Second Dot row:
Create a second row of dots just inside the white border using a smaller tool. Use a very pale pink or a slightly smaller white dot to create a delicate double-rim effect. -
Base Petal Layer:
surrounding the heart, paint large, substantial petal shapes radiating outward. Use the deep maroon paint again. The base of each petal should point toward the heart. Let these dry completely. -
Orange Overlay:
Once the maroon petals are dry, paint a slightly smaller petal shape inside each maroon one using burnt orange. This leaves a dark red border visible around each orange center.
Perfect Paint Consistency
For crisp dots that don’t flatten out, your paint should be like heavy cream. If it forms peaks, it’s too thick; if it runs, it’s too thin.
Step 3: Intricate Details
-
Detailed Veining:
This is where the design comes to life. Using your finest brush or a needle tool with light yellow or gold paint, draw tiny, parallel lines inside each orange petal section. These look like delicate leaf veins or embroidery stitches. -
Outer Flourishes:
Between the tips of the large petals, add small triangular strokes or tiny dots in silver or grey paint to fill the negative space and add a metallic shimmer. -
Edge Dots:
Finish the design by adding a trail of graduated yellow dots extending from the tip of each petal out toward the edge of the rock. Start with a larger dot near the petal tip and let them get tinier as they move away. -
Clean Up:
Check for any unwanted smudges or uneven dots. You can gently scrape off dry mistakes with a toothpick or cover them with a tiny dab of paint that matches the stone’s color. -
Seal the Rock:
I always wait at least 24 hours before sealing. Apply a coat of glossy varnish to protect your intricate work and make the colors pop against the grey stone.
Uneven Dot Spacing?
Don’t panic! Fill awkward gaps with tiny ‘filler’ dots in a contrasting size or color. It looks intentional and adds texture.
Place your finished mandala stone on a sunny windowsill or use it as a festive paperweight to enjoy those warm autumn vibes all season


Have a question or want to share your own experience? I'd love to hear from you in the comments below!