Family drawings hit different because you’re not just drawing people—you’re drawing connection. These ideas are meant to feel doable and sentimental, whether you’re sketching a quick moment or building a keepsake-worthy family portrait.
Classic Family Portrait From a Favorite Photo
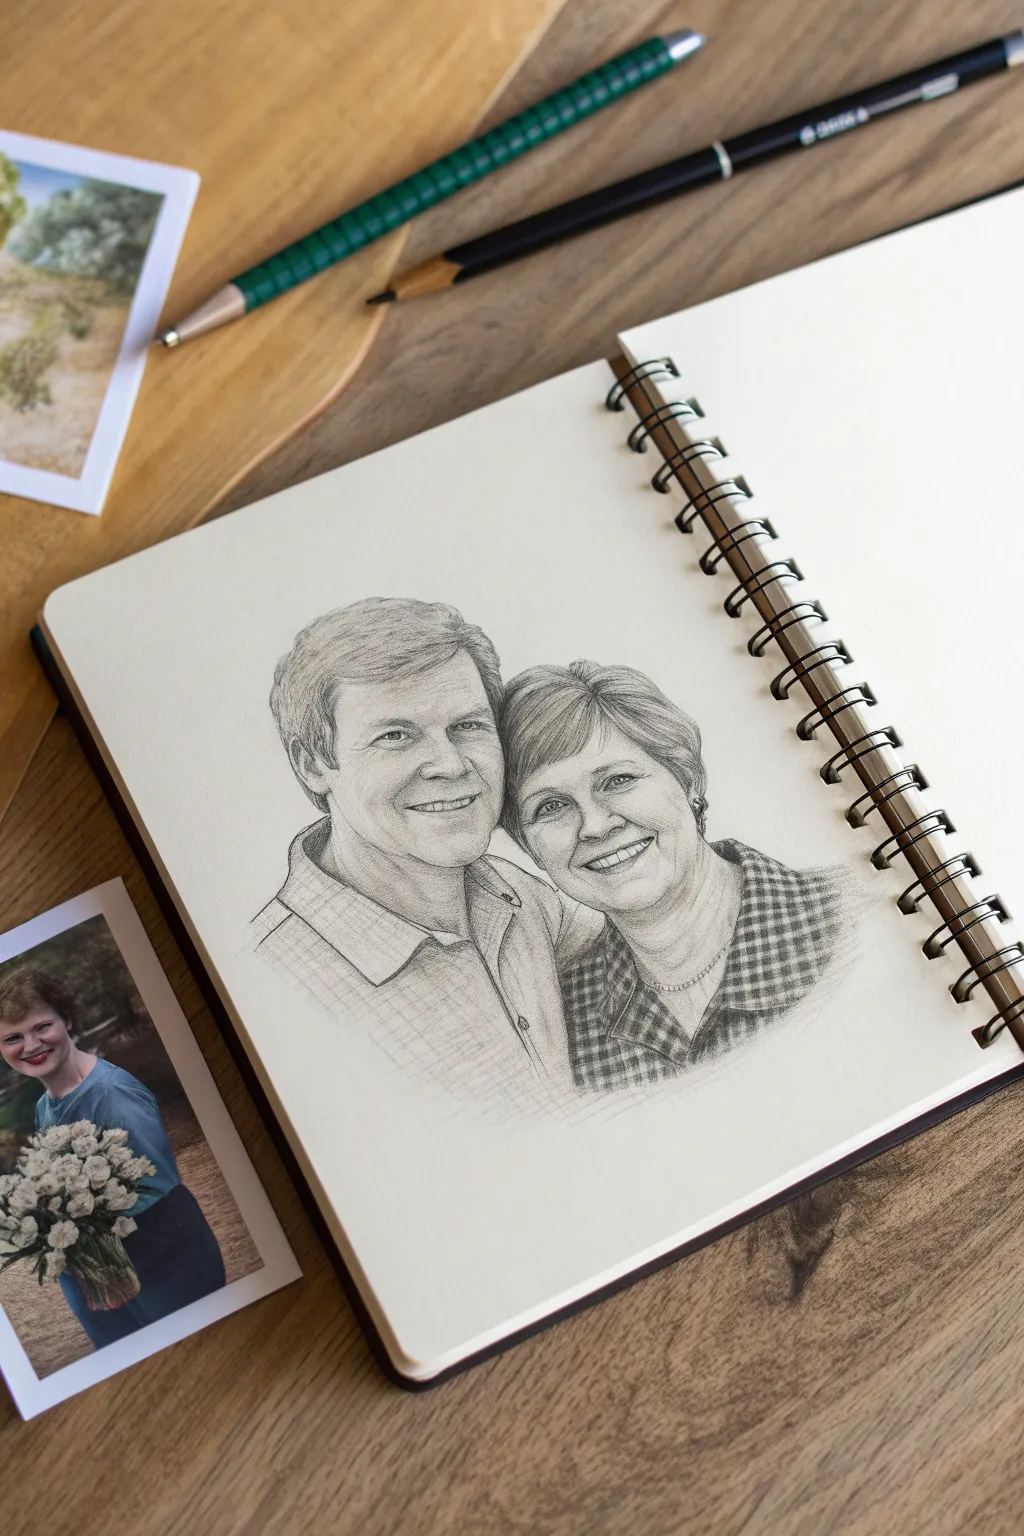
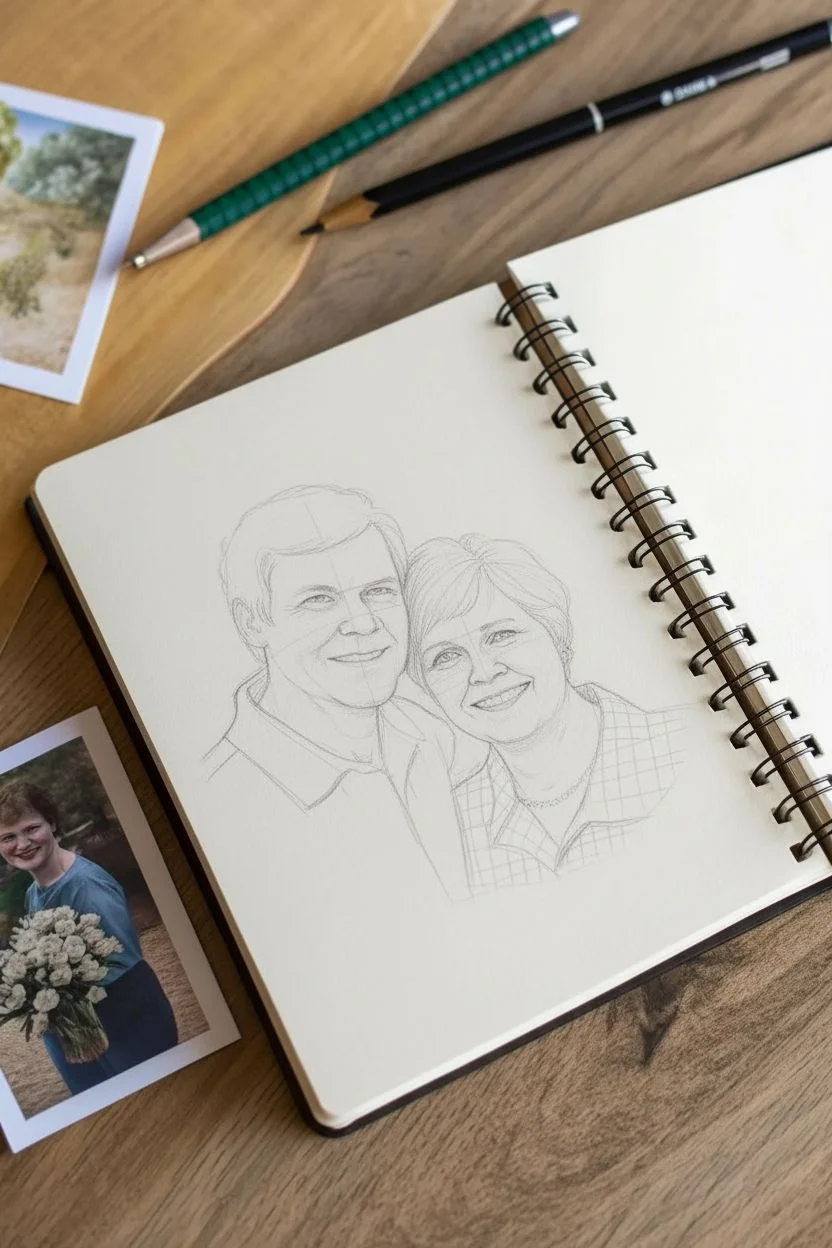
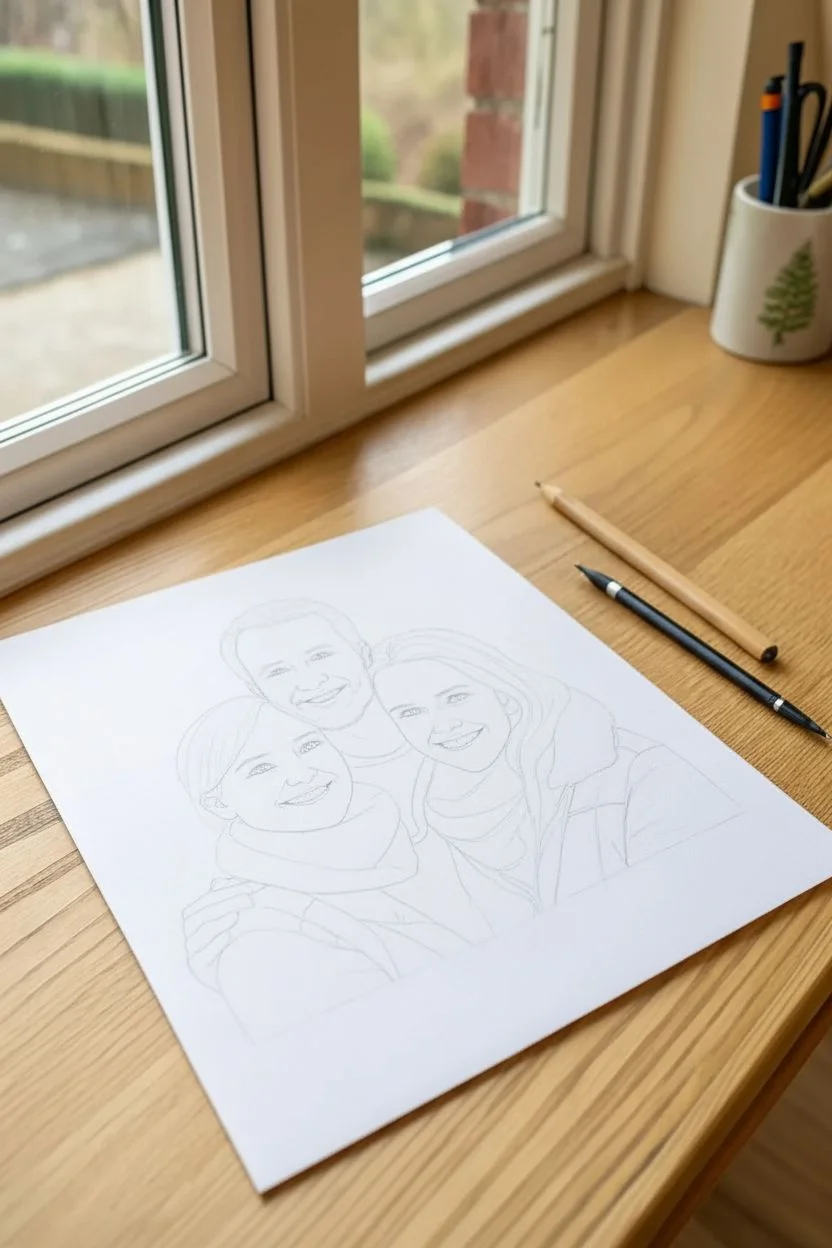
Capture the warmth and connection of a couple with this classic realistic pencil drawing technique. Using delicate shading and careful proportions, you’ll transform a cherished photograph into a timeless graphite illustration in your sketchbook.
Step-by-Step Guide
Materials
- Spiral-bound sketchbook (medium tooth paper)
- Graphite pencils (ranging from 2H to 6B)
- Kneaded eraser
- Precision eraser or eraser stick
- Blending stump or tortillon
- Reference photo of a couple
- Ruler
- Pencil sharpener
Step 1: Planning and Outlining
-
Analyze your reference:
Begin by studying your reference photo closely. Identify the basic geometric shapes that make up the heads and shoulders. Look for the relationship between the two figures—where do they overlap? The woman’s head leans slightly toward the man’s shoulder. -
Lightly block in shapes:
Using a 2H pencil and very light pressure, sketch oval shapes for the heads. Draw a center line down each face to determine the angle of rotation. Mark horizontal guidelines for the eyes, nose, and mouth. -
Refine the facial features:
Sketch the specific contours of the eyes, noses, and lips on your guidelines. Pay close attention to the spacing between the eyes and the width of the noses. The man’s smile lines and the woman’s cheek contours are crucial for likeness. -
Draft the hair and clothing:
Outline the general volume of the hair rather than individual strands. Sketch the collars and shoulders, noting that the woman’s checkered shirt has a specific pattern structure you’ll need to follow later. -
Clean up the line work:
Before shading, double-check your proportions. If something looks off, fix it now. Gently lift any heavy construction lines with a kneaded eraser until only a faint guide remains.
Smudge Control
Is your hand smearing your work? Place a clean sheet of scrap paper under your drawing hand. This acts as a shield, protecting your shading from oils and friction while you work.
Step 2: Shading the Faces
-
Start with the eyes:
Switch to an HB or B pencil. deeply darken the pupils and the upper lash line. Leave tiny white specks of paper bare for the catchlights in the eyes to bring them to life. -
Establish facial structure:
Use a B pencil to lightly shade the shadows around the nose, eye sockets, and under the chin. Keep your strokes directional, following the curve of the skin. -
Blend for smooth skin:
Gently smudge your graphite shading with a blending stump to create soft skin tones. I find using a circular motion works best here to avoid streaks. Lift highlights on the nose bridge and cheeks with the kneaded eraser. -
Deepen the contrast:
Use a 2B or 4B pencil to reinforce the darkest areas: the corners of the mouth, the nostrils, and the deep shadows under the jawline. This pop of contrast adds dimension.
Mix Media Magic
Try adding a subtle wash of watercolor to just the clothing or the background. A pale blue behind the figures or color on the shirt can make the monochrome faces pop.
Step 3: Hair and Clothing Details
-
Texture the hair:
For the man’s hair, use long, sweeping strokes with an HB pencil to suggest flow. For the woman’s shorter style, use shorter, layered strokes. Don’t outline every hair; focus on the clumps and shadows. -
Render the man’s shirt:
Use a light, cross-hatching technique to shade the man’s button-down shirt. Keep it lighter than the woman’s clothing to create separation between the two figures. -
Map the checkered pattern:
Draw the grid for the woman’s plaid shirt. Ensure the lines curve around her shoulder and chest form, rather than staying flat, to show volume. -
Fill the darker fabric:
Use a 4B pencil to darken specific squares in the plaid pattern. Vary the pressure to show where the fabric folds or sits in shadow. -
Blend the fabrics:
Lightly blend the clothing with your stump to integrate the pencil strokes into the paper grain. This softens the look and makes the fabric feel woven.
Step 4: Final Touches
-
Evaluate the values:
Step back and squint at your drawing. Does the woman’s dark shirt balance the man’s lighter shirt? If the drawing looks too gray, add more 6B graphite to the deepest shadows. -
Refine edges:
Use your precision eraser to clean up the outside edges of the drawing. A crisp vignette or fade-out at the bottom creates a professional, finished portrait look. -
Seal the drawing:
Since graphite can smudge easily in a sketchbook, you may want to place a sheet of wax paper between the pages or use a fixative spray once finished.
Now you have a touching, handcrafted memory preserved in your sketchbook


Rear-View Family Hug (No Faces Required)
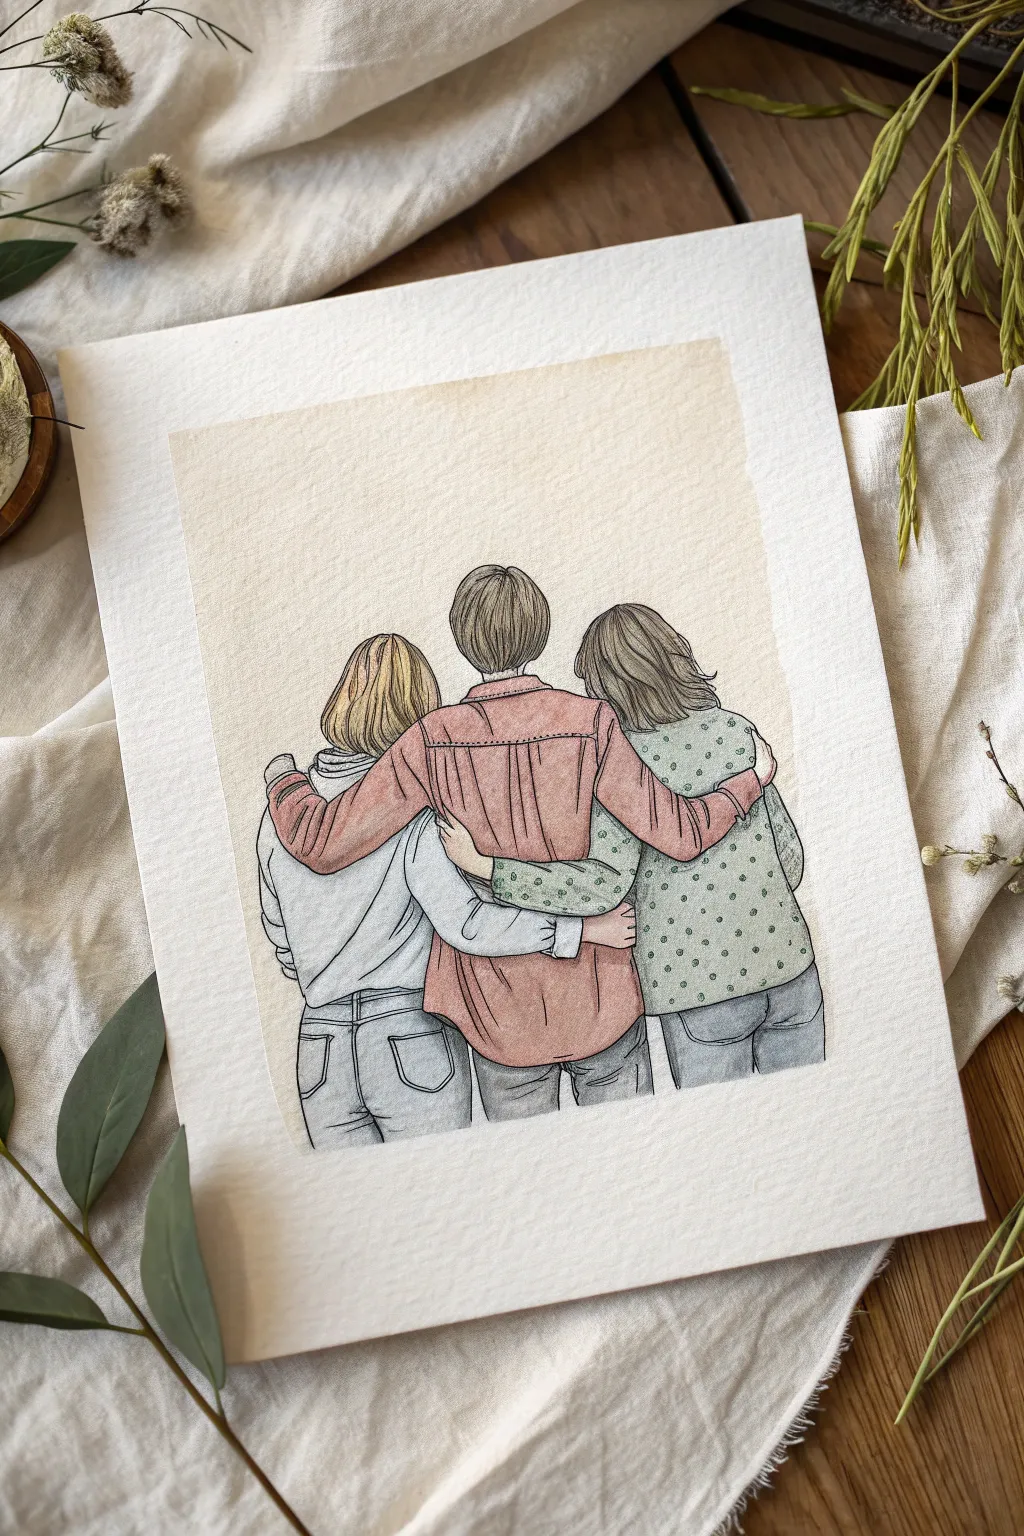
This heartwarming illustration captures a tender moment between three figures seen from behind, eliminating the pressure of drawing facial features while still conveying deep connection. Using simple line work combined with soft watercolor or marker shading, you’ll create a timeless keepsake that celebrates togetherness.
Detailed Instructions
Materials
- Cold press watercolor paper (A4 or similar size)
- Pencil (HB or 2H)
- Eraser (kneaded preferred)
- Fine liner pens (black, waterproof, sizes 0.1 and 0.3)
- Watercolors or alcohol markers (muted tones)
- Paintbrushes (small round size 2 and 4)
- Paper towel
- Water cup (if using paints)
- Masking tape (optional)
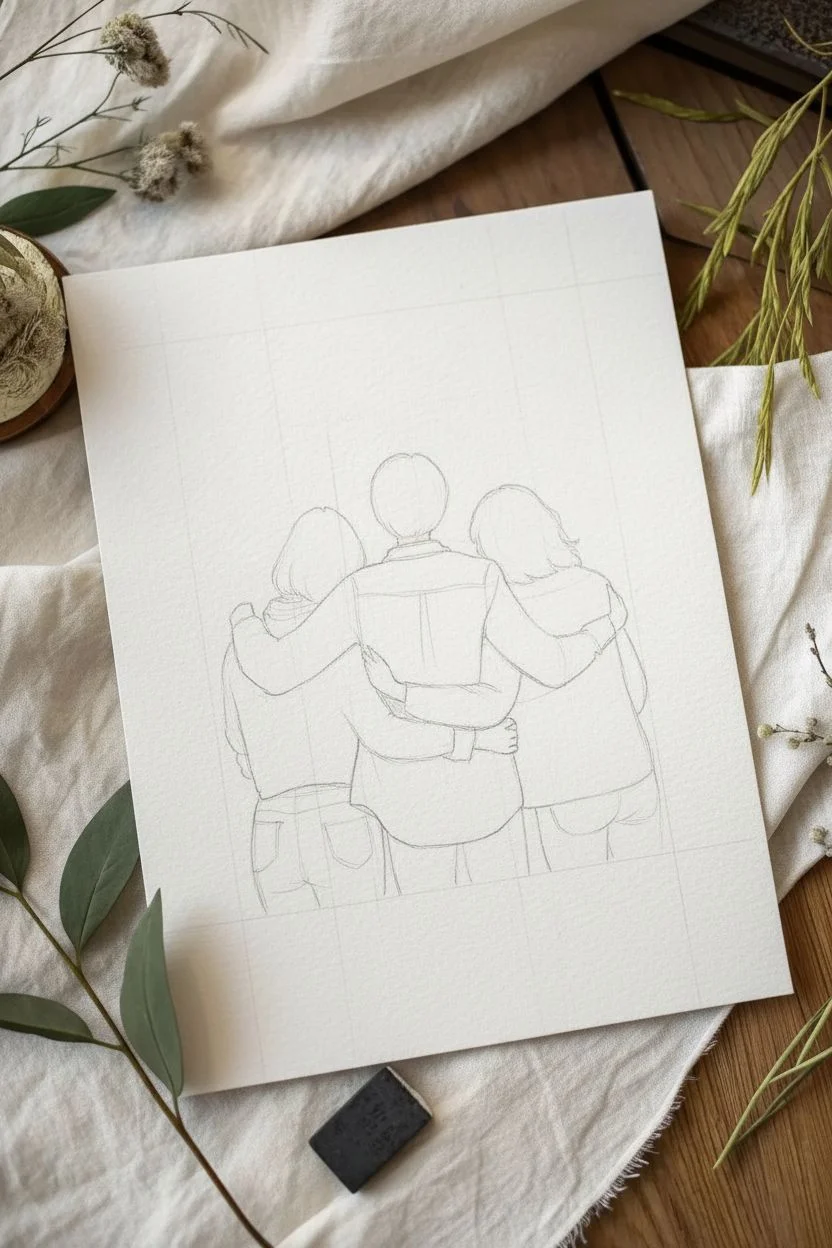
Step 1: Planning and Sketching
-
Establish the composition:
Start by lightly marking the center of your paper to position the middle figure. Draw three vertical lines to represent the spines of your three subjects, ensuring the central figure is slightly taller if depicting an adult or older sibling. -
Block in the shoulders:
Sketch gentle ovals for the heads and sloping lines for the shoulders. For the hugging pose, the shoulders of the outer figures should lean slightly inward toward the center figure. -
Draft the clothing shapes:
Draw loose outlines for the torsos. The middle figure wears a collared shirt, so sketch a rectangular shape. The left figure receives a looser hoodie shape, and the right figure gets a softer blouse outline. -
Position the arms:
Sketch the arms of the middle figure reaching out to embrace the others. The hands should rest naturally on the outer shoulders or upper arms. Then, sketch the inner arms of the left and right figures wrapping around the central waist. -
Refine the hair:
Add hairstyles to the ovals. For the left figure, draw a bob cut; use a short cut for the center; and sketch shoulder-length wavy hair for the figure on the right. Keep the pencil strokes light so they are easy to adjust.
Ink Smearing?
If your black outlines bleed when you paint, your pen isn’t wateproof. Switch to a Micron or Pigma pen, or paint the color first and add the ink lines on top once dry.
Step 2: Inking the Lines
-
Outline the main figures:
Using your 0.3 fine liner, trace over the main pencil lines of the clothing and bodies. Use confident, slightly broken lines to give the drawing a hand-illustrated feel rather than a rigid diagram look. -
Detail the clothing:
Switch to a 0.1 fine liner for smaller details. Add the collar, buttons, and stitching on the central shirt. Draw the hood folds on the left and the small polka dot pattern on the right figure’s shirt. -
Texture the hair:
With the 0.1 pen, draw individual strands within the hair shapes. Follow the direction of hair growth—downwards from the crown—using quick, flicking strokes to create volume and movement. -
Add fabric folds:
Draw crease lines where arms bend and where shirts tuck into pants. These small lines at the elbows and waist hem add crucial realism to the posture. -
Erase pencil guides:
Wait until the ink is completely dry to avoid smudging. Then, gently erase all underlying pencil sketches with your kneaded eraser.
Step 3: Adding Color and Tone
-
Base coat for the shirt:
Mix a diluted terracotta or dusty rose watercolor. Paint the central shirt, carefully working around the arms of the other figures. I like to keep this wash quite wet to avoid hard edges forming too quickly. -
Color the side figures:
I prefer a very pale cool grey for the left hoodie to keep it neutral. For the right blouse, use a pale sage green wash. Let the base layers dry before adding more saturation if needed. -
Paint the denim:
Use a diluted indigo or payne’s grey for the jeans. Apply a lighter wash first, then drop in darker pigment near the pockets and seams while the paint is still damp to create a denim texture. -
Add hair color:
Paint the hair using yellow ochre for the blonde figure and varied browns for the others. Leave tiny slivers of white paper unpainted near the crown of the heads to act as natural highlights. -
Shadows and depth:
Once the first layers are bone dry, mix a slightly darker version of each color. Apply this to the underside of the arms, beneath the hair, and in deep fabric folds to give the figures volume. -
Final touches:
If you are using markers, you might go over the polka dots on the right shirt with a slightly darker green tip now. For watercolor, use a fine brush to dab these details in last.
Make It Personal
Customize the clothing patterns to match real outfits your family owns. Adding a specific logo, plaid pattern, or favorite color makes this a truly unique gift.
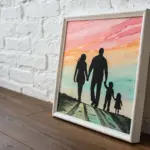
Frame your beautiful illustration in a simple wood frame to complement the warm, handmade aesthetic


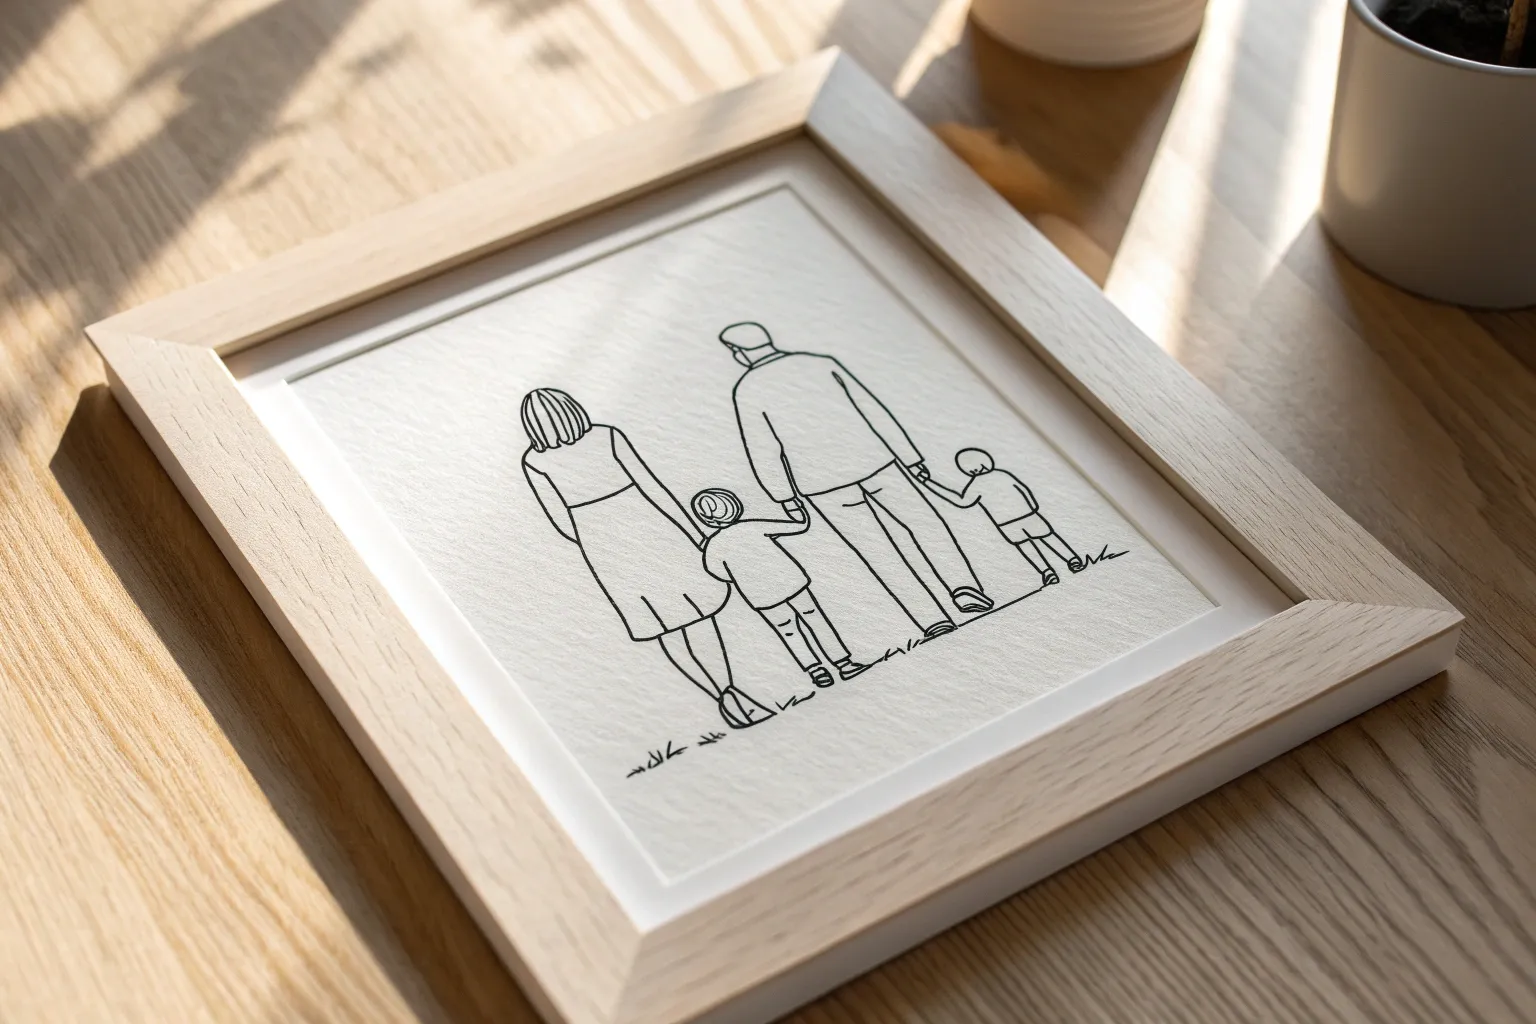
Simple Hand-Holding Lineup With Height Differences
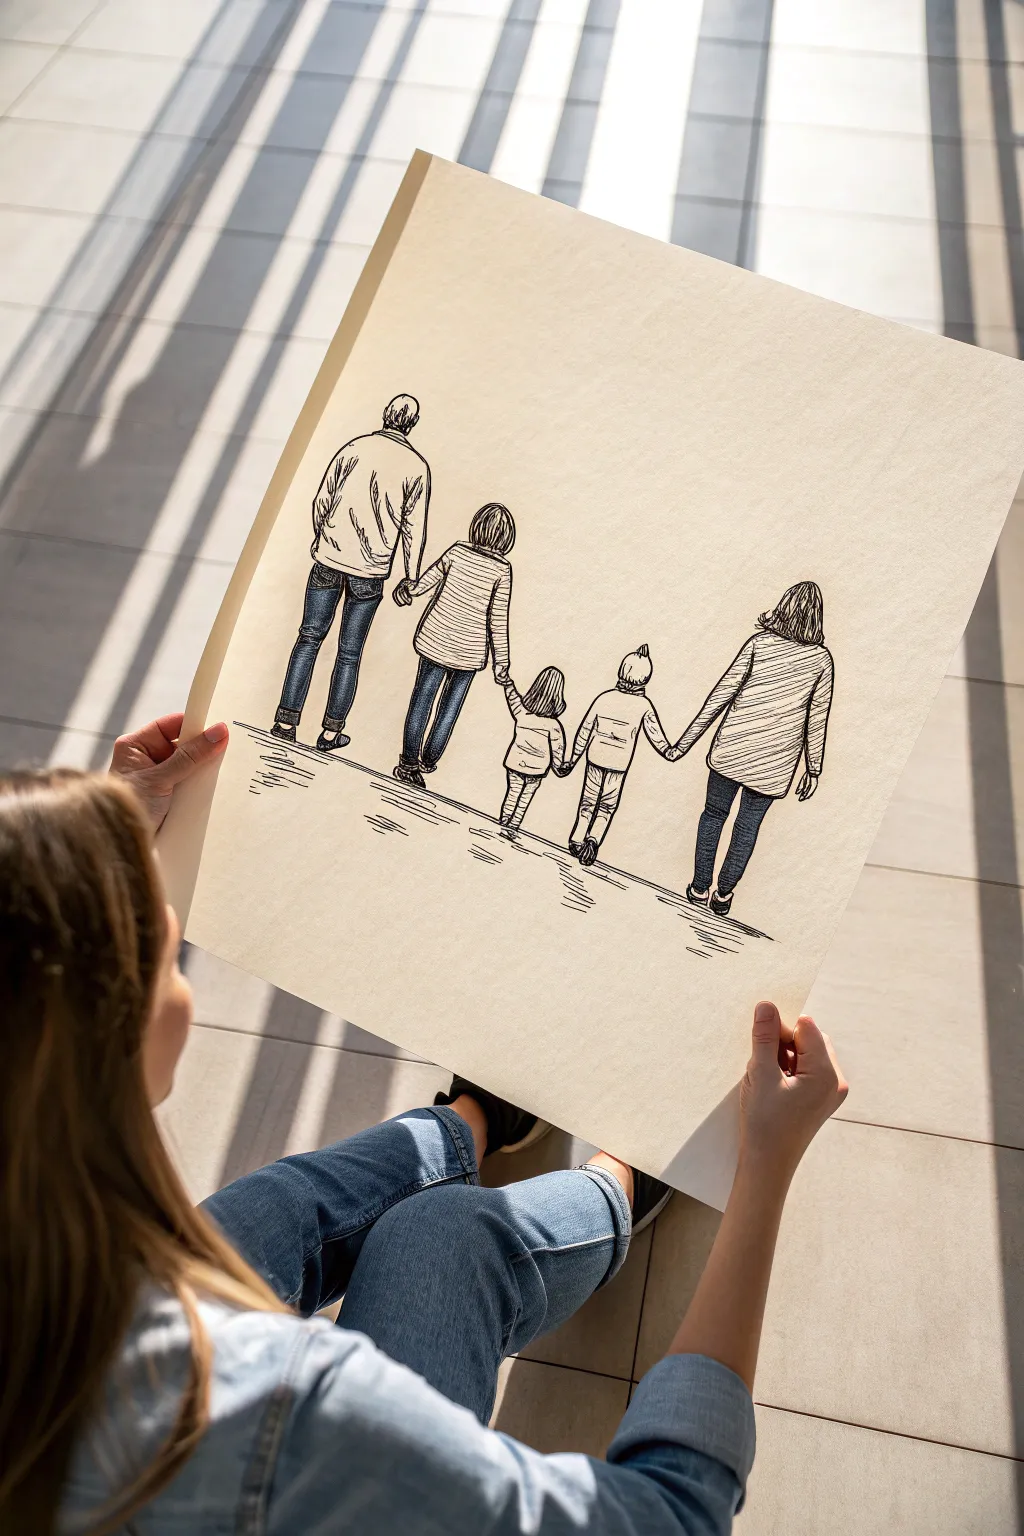

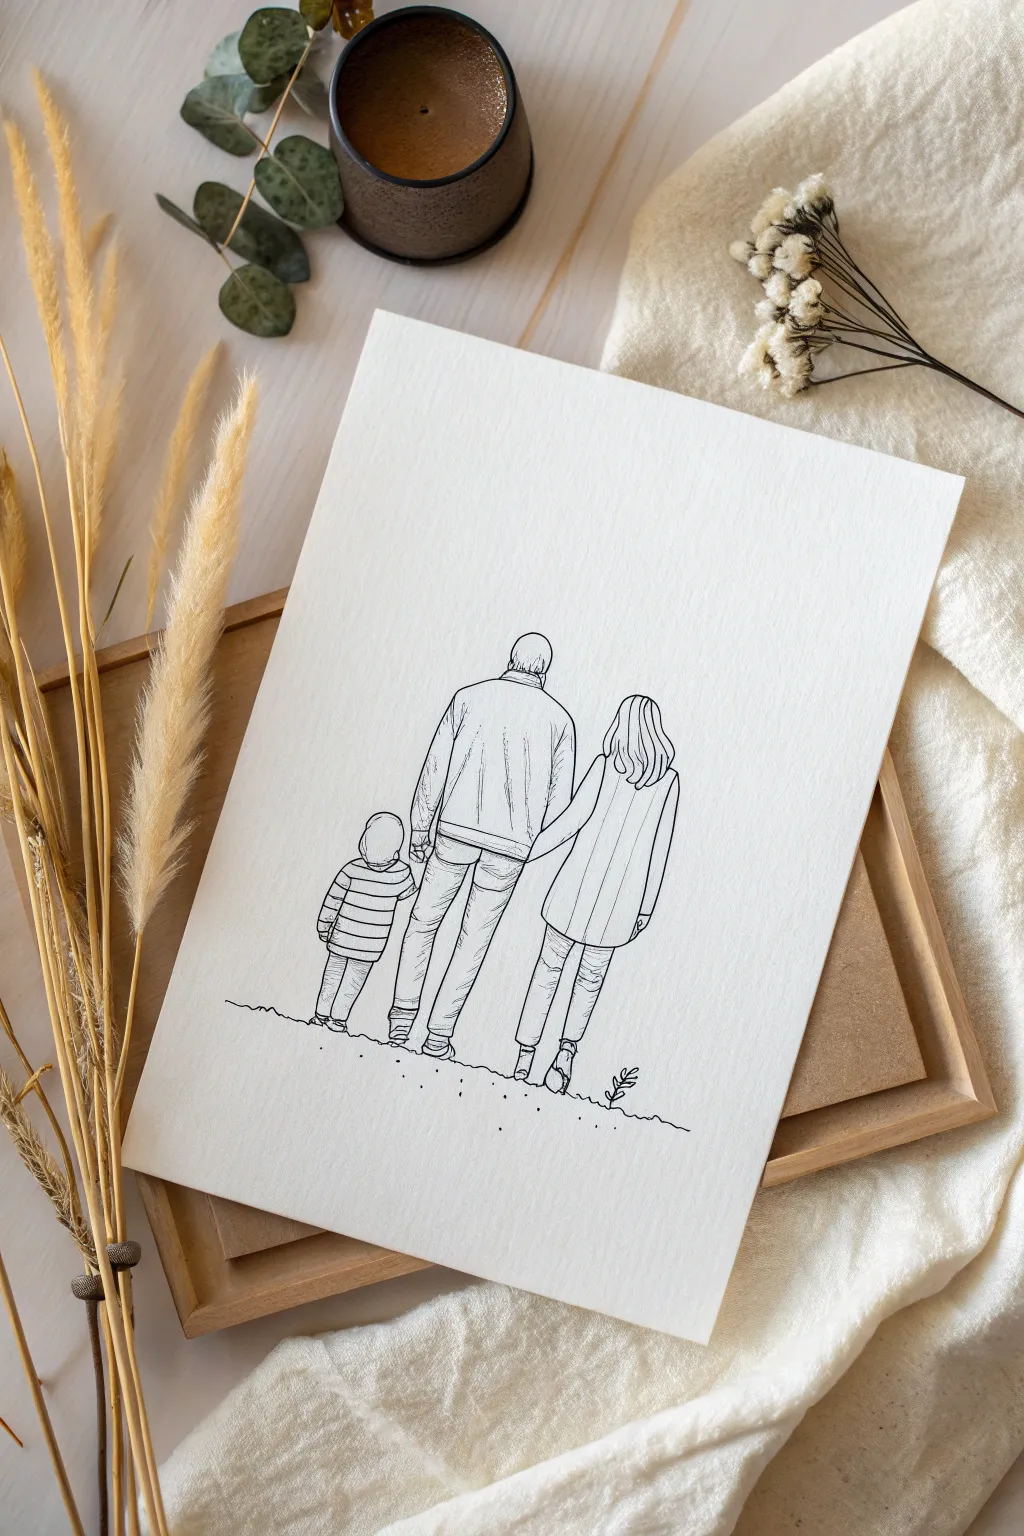
This heartwarming sketch captures a family walking away hand-in-hand, focusing on the charm of their postures and height differences rather than complex facial features. Using simple fine-liners, you’ll create a stylized, textural illustration on large-format paper that feels both personal and timeless.
Step-by-Step
Materials
- Large sheet of cream or off-white drawing paper (A2 or 18×24 inches)
- Pencil (HB or 2B) for sketching
- Kneaded eraser
- Fine-liner pens (black, sizes 0.1, 0.3, and 0.5mm)
- Blue colored pencil or alcohol marker (denim shade)
- Ruler
Step 1: Planning the Composition
-
Determine the scale:
Since fine details aren’t the focus, size matters. Lay out your large sheet of cream paper on a flat surface. Imagine where the ground line will be—keep it relatively low to leave plenty of ‘white space’ or ‘sky’ above the figures for an airy feel. -
Roughly block in shapes:
Using your pencil lightly, draw five ovals for heads to establish the height hierarchy. Start with the tallest parent on the left, move down to the children in the middle, and place the second parent on the right. -
Connect the bodies:
Sketch simple geometric shapes for the torsos and legs beneath the heads. Since they are walking away, don’t worry about faces; focus on the slope of the shoulders and the stride of the legs. -
Link the hands:
Draw faint connecting lines between the figures where their hands will meet. Adjust the arm angles so the hand-holding looks natural—parents’ arms will reach down while the smallest child’s arms will reach up high.
Ink Smearing?
If your hand smudges the ink, place a scrap piece of paper under your drawing hand as a shield while you work, or work from left to right.
Step 2: Refining the Sketch
-
Detail the clothing:
Go back over your blocky shapes and add the flow of clothing. Sketch hoodies, sweaters, or jackets. Add creases at the elbows, waist, and behind the knees to suggest movement. -
Define hair and shoes:
Add hairstyles to the back of the heads. This is the main identifier for each person, so capture the length and texture (straight, wavy, bun) accurately. Sketch simple shoe shapes at the base of the legs. -
Finalize the pencil lines:
Review the entire lineup. Erase any distracting construction lines and ensure the proportions look correct before moving to ink. The pencil lines should be visible but faint enough to erase later.
Step 3: Inking the Outlines
-
Start with the main contours:
Take your 0.5mm fine-liner. I prefer starting with the clothing outlines first. Use confident, slightly broken strokes rather than one continuous rigid line to give the drawing a sketchy, organic feel. -
Ink the hair:
Switch to a 0.3mm pen for the hair. Use sweeping strokes that follow the direction of hair growth. For darker hair, group lines closer together; for lighter hair, leave more paper showing. -
Outline the hands:
Use the fine 0.1mm pen for the joined hands. These are small details, so keep the shapes simple—you don’t need to draw every individual finger perfectly, just the clasped shape.
Pro Tip: Fabric Weight
Make parents’ clothes drape heavily with fewer, longer folds. Give kids’ clothes bunchier, sharper wrinkles to show they are active and smaller.
Step 4: Adding Texture and Tone
-
Hatch the tops:
Using the 0.1mm pen, add horizontal hatching lines across the sweaters and shirts. This creates a fabric texture. Vary the spacing—tighter lines for shadows under the arms and looser lines on the back. -
Color the denim:
Take your blue colored pencil or marker. Fill in the jeans on all figures. If using pencil, vary your pressure to create highlights on the thighs and calves. If using marker, do one even coat first. -
Add ink texture to denim:
Once the blue base is on, use the 0.3mm black pen to add vertical hatching lines over the blue legs. This simulates the weave of denim fabric and unifies the style with the rest of the drawing. -
Ground the figures:
Use quick, sketchy horizontal lines underneath the feet to create a shadow and ground plane. This prevents the family from looking like they are floating in mid-air. -
Erase and clean up:
Wait at least 15 minutes for the ink to fully dry. Gently run your kneaded eraser over the entire drawing to lift the original pencil sketches.
Hang this charming lineup in a hallway or living space to celebrate your family bond with simple artistic flair


Walking Away Together Down a Path
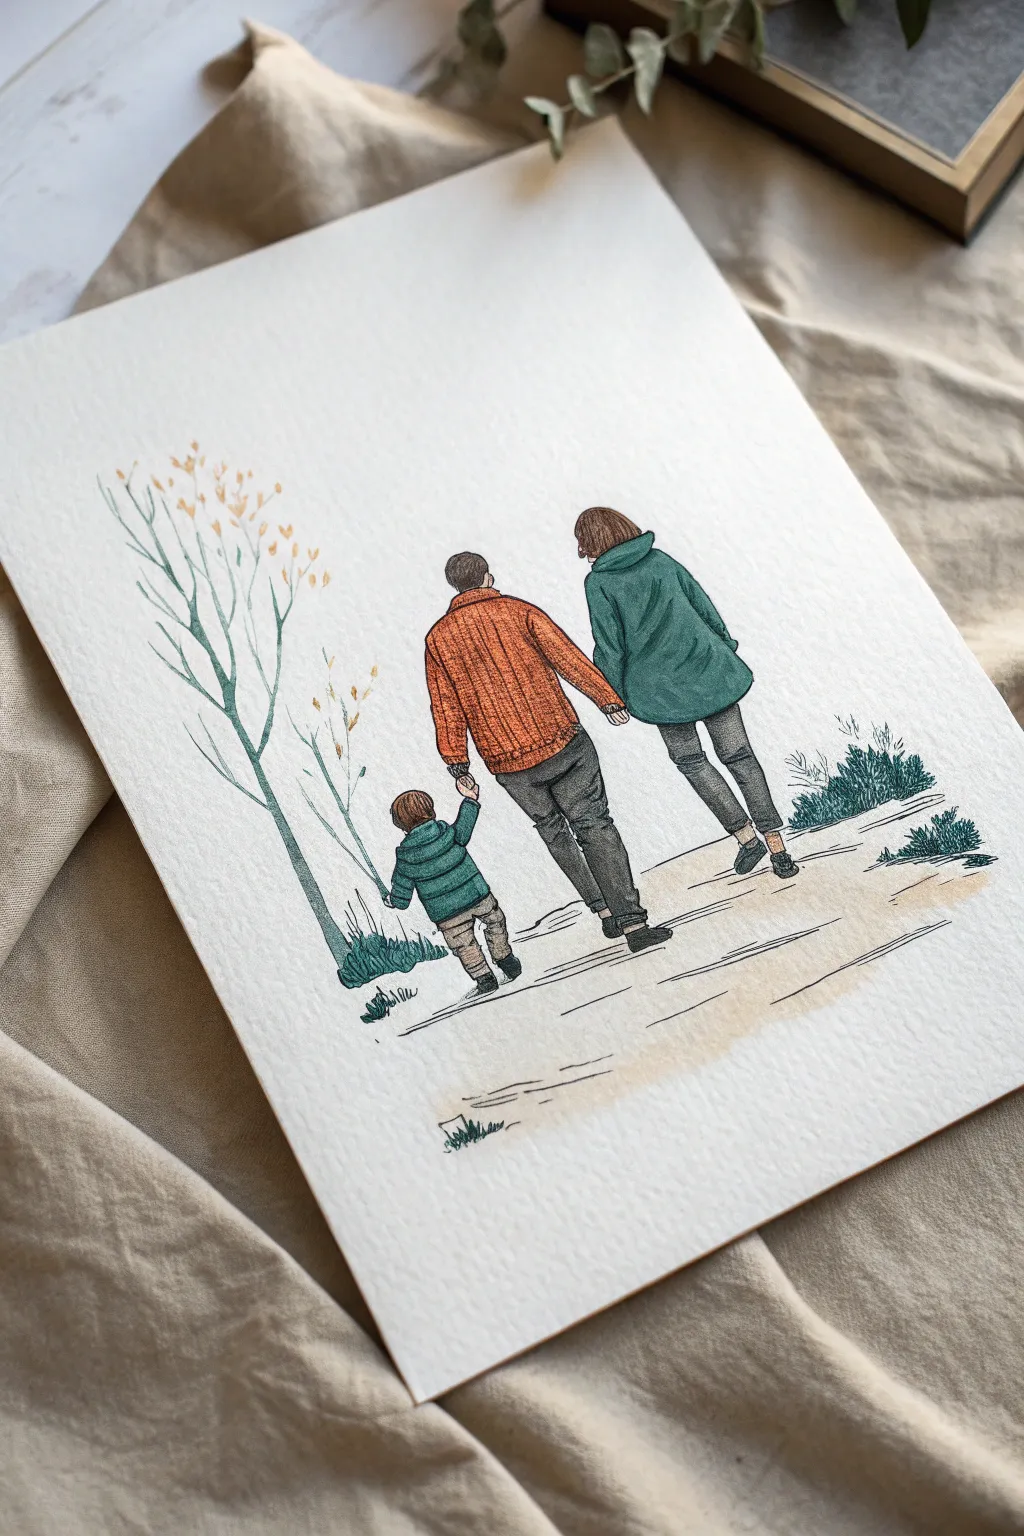
Capture a tender family moment with this delicate watercolor and ink illustration featuring a father, mother, and child walking hand-in-hand. The style combines clean ink outlines with soft, textured color fills for a warm and nostalgic finish.
How-To Guide
Materials
- Heavyweight cold-press watercolor paper (300 gsm)
- Fine liner pens (sizes 0.1, 0.3, and 0.5 – waterproof/archival ink)
- Watercolor paints (Burnt Sienna, Sap Green, Deep Green, Indigo, Yellow Ochre, Burnt Umber)
- Round watercolor brushes (size 2 and 4)
- Pencil (HB or 2H)
- Kneaded eraser
- Paper towel
- Water jar
Step 1: Planning and Sketching
-
Analyze the composition:
Visualize the placement of your three figures. The father is central, the mother is to his right, and the child holds his left hand. Position the grouped figures slightly off-center to the right to leave room for the tree on the left. -
Establish the horizon:
Lightly draw a gentle diagonal line across the bottom third of the paper to suggest the path they are walking on. This anchors the figures so they aren’t floating. -
Construct the figures:
Using your pencil, draft the basic shapes of the bodies. Since they are walking away, focus on the posture: slightly slumped shoulders and the angles of the legs in motion. Keep the child’s head aligned near the father’s wait or hip level. -
Draft the clothing details:
Refine your sketch by adding clothing folds. Sketch the father’s cable-knit sweater texture, the mother’s hooded coat, and the child’s puffy jacket. Add the cuffed pants and shoes for each figure. -
Sketch the tree element:
On the left side, lightly draw a tall, thin tree trunk that branches out delicately. The branches should reach up towards the top left corner, framing the scene without overwhelming the family.
Fabric Texture Tip
For the knit sweater, lift pigment with a dry brush while the paint is damp precisely on the “ribs” of the drawing. This reveals the paper’s white tooth.
Step 2: Inking the Outlines
-
Outline the figures:
Switch to your 0.3 fineliner. Carefully trace the main contours of the family. Use broken or slightly wavy lines for the clothing to suggest fabric texture rather than rigid straight lines. -
Add texture to the father’s sweater:
With a thinner 0.1 pen, draw vertical, wavy lines down the back of the father’s sweater to mimic a heavy knit pattern. Keep these lines somewhat loose. -
Detail the hair:
Use the 0.1 pen to draw short, directional strokes for the hair. Follow the natural growth pattern—downward for the father and child, and slightly waved for the mother’s bob. -
Ink the tree and path:
Use a shaky, organic hand to ink the tree trunk and branches. Add small tufts of grass near the tree base and along the path’s edge using quick, upward flicks. -
Erase pencil marks:
Once the ink is completely dry—give it a few minutes—gently use the kneaded eraser to lift all visible graphite lines.
Step 3: Watercolor Application
-
Paint the father’s sweater:
Mix a warm Burnt Sienna. Apply a wash to the father’s sweater. I like to blot a few spots with a paper towel while it’s wet to create highlights on the shoulders. -
Color the mother’s coat:
Use a deep teal or mix Deep Green with a touch of Indigo. Paint her coat, allowing the color to pool slightly at the bottom hem for natural shading. -
Paint the child’s outfit:
Use a lighter Sap Green for the child’s jacket to distinguish it from the mother’s coat. Use a diluted brown or beige for the pants. -
Add details to pants and shoes:
Paint the adults’ pants in a dark grey or charcoal (pay attention to drying times so colors don’t bleed into the coats). Fill in the shoes with black or dark brown. -
Paint the tree and foliage:
Use a very watery grey-green for the tree trunk. For the tree leaves, dab small spots of Yellow Ochre and muted orange. Paint the grass tufts with deep green. -
Create the path:
Mix a very dilute wash of Yellow Ochre and brown. Paint broad, horizontal strokes across the ground, fading out toward the edges to create a vignetted look.
Make it Personal
Customize the hair colors and clothing styles to match your own family photos. You can even add a family pet walking alongside the child.
Step 4: Final Touches
-
Deepen shadows:
Once the first layer is dry, mix slightly darker versions of your clothing colors. Add these to the creases of elbows, knees, and under the hems of the coats to add volume. -
Enhance textures:
Use your 0.1 pen again to add extra hatching over the dried paint, particularly in the darkest shadow areas of the trousers and the tree bark. -
Ground the figures:
Add a few horizontal lines of ink under the feet to show contact with the ground, and paint a faint shadow under each person stretching slightly to the left.
Now you have a timeless keepsake that captures the quiet beauty of a family walk

PENCIL GUIDE
Understanding Pencil Grades from H to B
From first sketch to finished drawing — learn pencil grades, line control, and shading techniques.
Explore the Full Guide
Faceless Pencil Shading Portrait (Hair and Clothes Focus)
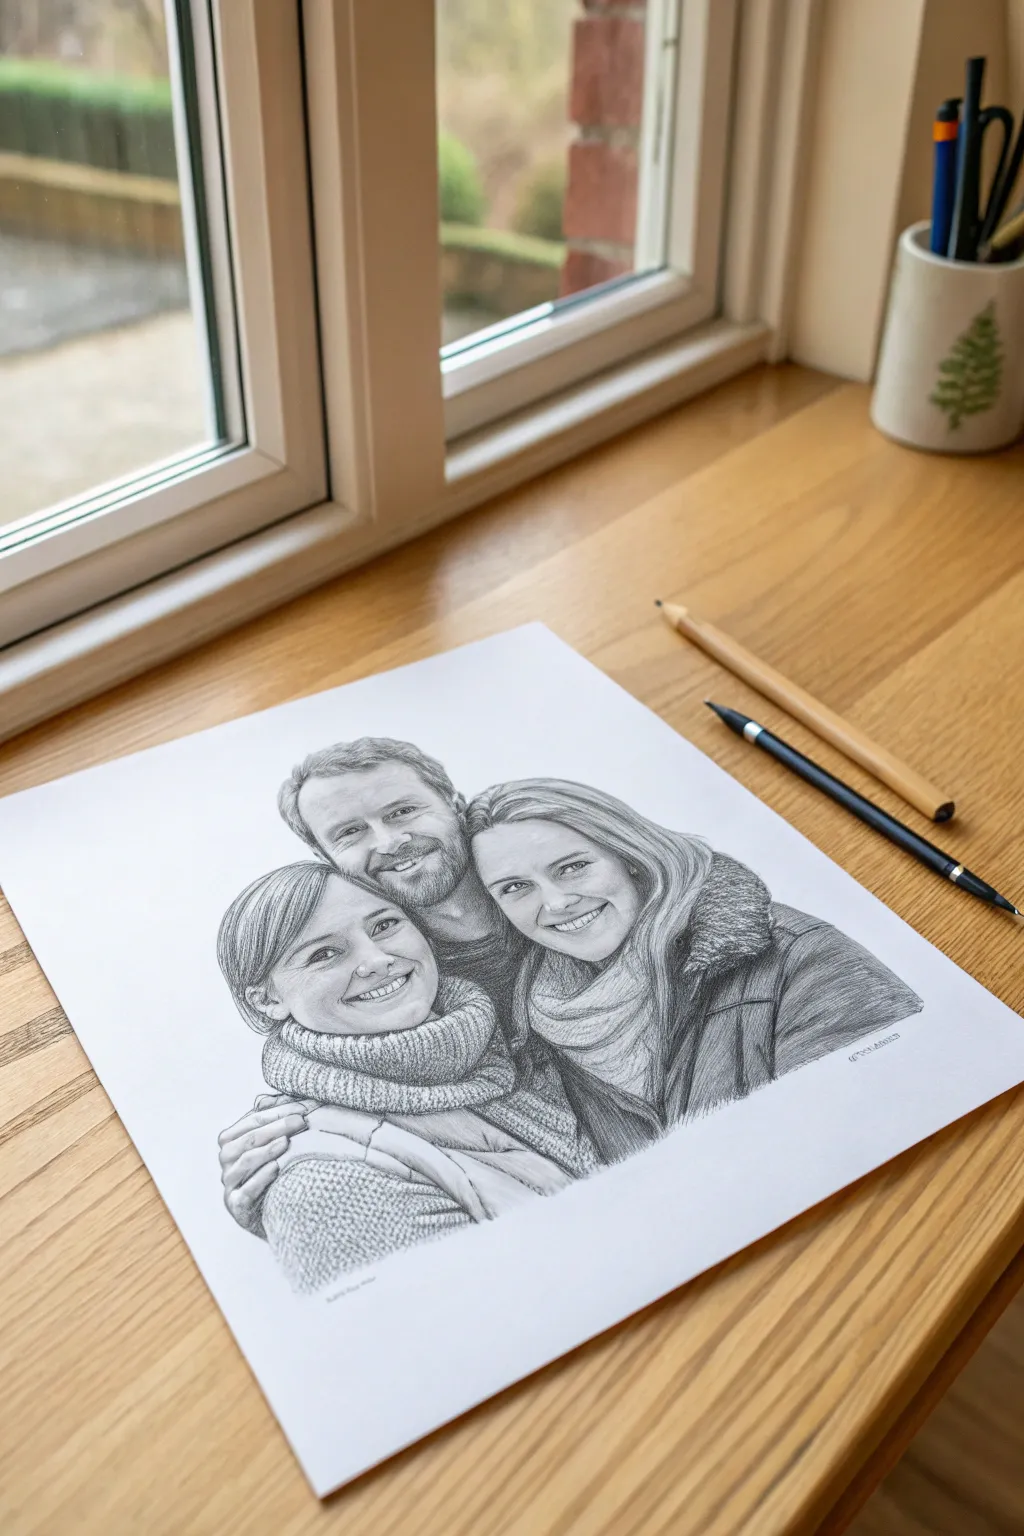
Capture the warmth of family bonds with this highly detailed graphite pencil drawing. By focusing on intricate textures like knitted scarves and flowing hair, you can create a lifelike and cherished keepsake.
How-To Guide
Materials
- High-quality drawing paper (smooth or Bristol board, A4 or A3)
- Set of graphite pencils (HB, 2B, 4B, 6B, 8B)
- Mechanical pencil (0.5mm, HB or 2B)
- Kneaded eraser and stick eraser
- Blending stumps (tortillons)
- Tissue or soft brush for sweeping debris
- Reference photo of the family
Step 1: Planning and Outline
-
Select your reference:
Choose a high-resolution photo where the lighting is clear. A photo with distinct shadows and highlights will make the shading process much easier. -
Map out the composition:
Lightly sketch the basic shapes of the heads and shoulders using an HB pencil. Ensure the relative sizes are correct; usually, adult heads are roughly oval shapes. -
Refine facial features:
Mark the eye lines, nose placement, and mouth centers. Double-check the distances between these features, as accuracy here is crucial for likeness. -
Finalize the line art:
Clean up your sketch with a mechanical pencil for precision, outlining the eyes, eyelids, nostrils, and lips. Keep these lines faint so they disappear later.
Step 2: Shading the Faces
-
Start with the eyes:
Using a sharp 4B or 6B pencil, fill in the pupils, leaving small white circles for catchlights. Shade the iris with radial lines, darker at the top. -
Establish skin tones:
Lightly layer graphite with a 2B pencil over the shadowed areas of the face (cheekbones, under the chin, eye sockets). Use a blending stump to smooth this into a soft skin texture. -
Define the nose and mouth:
Deepen the shadows around the nostrils and the corners of the mouth. Avoid hard outlines; instead, use shading to suggest the edges of the nose. -
Add facial hair textures:
For the male subject, use short, directional strokes with a mechanical pencil to simulate stubble or a beard. Layer these over a base tone of grey shading.
Smudge Prevention
Place a clean sheet of paper under your drawing hand. This acts as a shield, preventing oils from your skin and friction from smearing your hard work while you shade.
Step 3: Hair and Clothing Textures
-
Block in hair value:
Identify the darkest areas of the hair and fill them in with a 6B or 8B pencil. Leave the highlighted areas white or very light grey for now. -
Draw hair strands:
I prefer using a mechanical pencil here to draw long, flowing strokes in the direction of hair growth. Taper the lines at the ends for a natural look. -
Create the knitted scarf texture:
Draw small, interlocking ‘V’ or ‘U’ shapes to mimic the knit pattern. Shade inside the loops to create depth, making the fabric look thick and cozy. -
Shade the coats:
Use broad strokes with a 4B pencil for smoother fabrics like jackets. Pay attention to folds and creases where the fabric bunches up near the arms. -
Add fur collar details:
If there is a fur trim, use short, jagged strokes that radiate outward. Keep the tips lighter and the roots darker to create fluffiness.
Level Up: Backgrounds
Instead of leaving it white, lightly shade a soft, out-of-focus background known as ‘bokeh.’ Use a dirty blending stump to create vague circles without distinct edges.
Step 4: Final Touches
-
Deepen contrast:
Step back and assess the drawing. Use your darkest 8B pencil to reinforce the deepest shadows in the hair, clothes folds, and pupils to make the image pop. -
Lift highlights:
Use a stick eraser (or a sharp edge of your kneaded eraser) to lift out bright highlights on the nose tip, lower lip, and shiny hair strands. -
Clean the background:
Erase any smudges around the subjects to keep the white space pristine. A clean background focuses all attention on the detailed portrait.
Once you’ve sprayed a fixative to protect the graphite, your detailed family portrait is ready to be framed and displayed
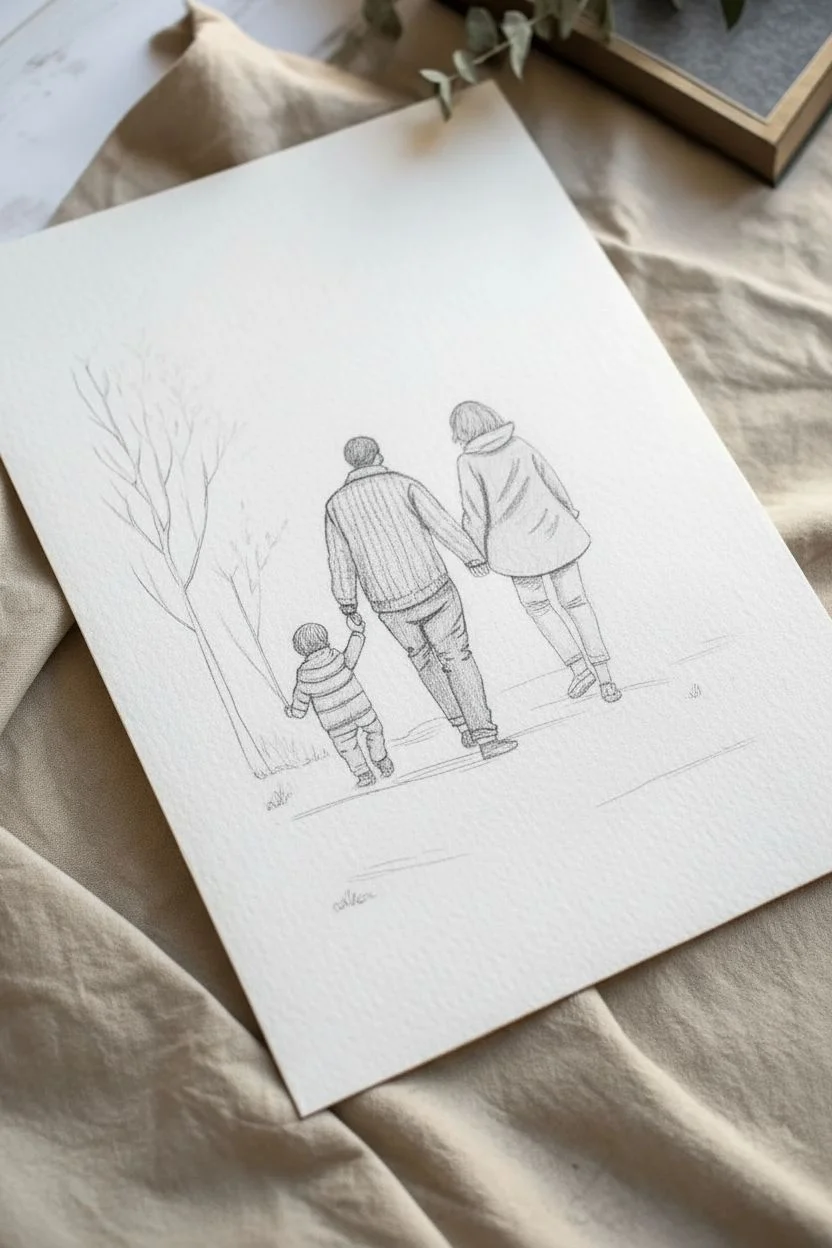
Minimalist Continuous-Line Family Drawing

Capture the essence of family connection with this delicate, minimalist line drawing that emphasizes posture and togetherness over facial details. Using a fine-tip pen on textured paper creates a timeless, heirloom-quality piece perfect for framing or gifting.
Step-by-Step Tutorial
Materials
- High-quality cold press watercolor paper or textured sketch paper (heavyweight, approx. 300gsm)
- Fine liner pens (sizes 0.1mm, 0.3mm, and 0.5mm) in archival plain black ink
- HB graphite pencil
- Kneaded eraser
- Ruler
- Reference photo of a family walking away
- Light box or bright window (optional for tracing)
Step 1: Preparation & Sketching
-
Select your reference:
Choose a photo where the subjects are walking away from the camera. This angle simplifies the drawing process by removing the need for complex facial features, focusing instead on body language and clothing drapes. -
Prepare the paper:
Cut your textured paper to the desired size. A standard A4 or 8×10 inch size works well. Tape the corners down lightly to your work surface to prevent shifting while you draw. -
Map out proportions:
Using your HB pencil with very light pressure, mark the top of the heads and the bottom of the feet. This ensures your figures will fit comfortably on the page without running off the edge. -
Outline the central figure:
Start sketching the central figure (usually the tallest, often the father) lightly. Focus on simple geometric shapes first—an oval for the head and a rectangle for the torso—before refining the slope of the shoulders. -
Add the connecting figures:
Sketch the mother and child figures next. Pay close attention to the connection points, specifically where their hands meet. The holding of hands is the emotional center of this piece, so take your time getting the spacing right. -
Refine the clothing:
Go back over your rough shapes and add the details of the clothing. Draw the curve of the jacket hems, the stripes on the child’s shirt, and the natural folds in the pants legs. Keep these pencil lines faint. -
Ground the subjects:
Sketch a very subtle, uneven horizon line near their feet. Add a few tiny vertical dashes to suggest grass or terrain, just like in the example image.
Fixing Wobbly Lines
If a line goes astray or looks shaky, don’t try to erase it. Instead, thicken the line slightly in that specific area to hide the wobble, making it look like a deliberate shadow on the figure’s clothing.
Step 2: Inking the Drawing
-
Test your pens:
Before touching the final paper, test your fine liners on a scrap piece of the same texture. You want to ensure the ink flows smoothly without bleeding into the paper grain. -
Begin the main outlines:
Using a 0.5mm pen, start inking the primary outlines of the figures. Use a confident, steady hand. If your line wobbles slightly, embrace it; the texture adds to the hand-drawn charm. -
Detail the clothing folds:
Switch to a thinner 0.3mm pen for inner details like the creases in the sleeves, the back seam of the jackets, and the pockets. These lines should be slightly lighter than the outer silhouette. -
Draw the hair:
Use the 0.1mm pen for the hair. Instead of drawing every strand, use sweeping, broken lines to suggest the direction and volume of the hair. For the father’s short hair, use small stippling or short vertical dashes. -
Add texture to the child’s shirt:
Carefully ink the horizontal stripes on the child’s shirt. I find it helpful to break the lines slightly rather than drawing a perfect ruler-straight line, as this mimics the movement of fabric. -
Inking the ground:
Use your finest 0.1mm pen to create the squiggly, organic line for the ground. Add the tiny tuft of a plant on the right side for a bit of scale and balance.
Step 3: Finishing Touches
-
Let the ink cure:
Allow the ink to dry completely. Archival ink dries fast, but on textured paper, it can pool in tiny divots. Wait at least 15-20 minutes to be safe. -
Erase the pencil guide:
Gently dab—don’t scrub—with the kneaded eraser to lift the graphite sketch. scrubbing can damage the paper’s tooth or fade the black ink slightly. -
Assess and refine:
Stand back and look at the drawing. If any lines look too thin or disconnected, carefully reinforce them with the 0.1mm pen. Add a few extra dots or dashes to the ground for texture if needed. -
Sign and frame:
Sign your name very small near the bottom right or left corner. Place the finished artwork in a simple wooden frame or mount it on a clipboard for a casual look.
Add Watercolor Accents
For a pop of subtle color, add a loose wash of watercolor over just the clothing. Keep the colors desaturated (sage green, dusty blue, terracotta) and let the paint spill slightly outside the lines.
This simple yet poignant artwork captures a beautiful moment in time that you can cherish forever
BRUSH GUIDE
The Right Brush for Every Stroke
From clean lines to bold texture — master brush choice, stroke control, and essential techniques.
Explore the Full Guide
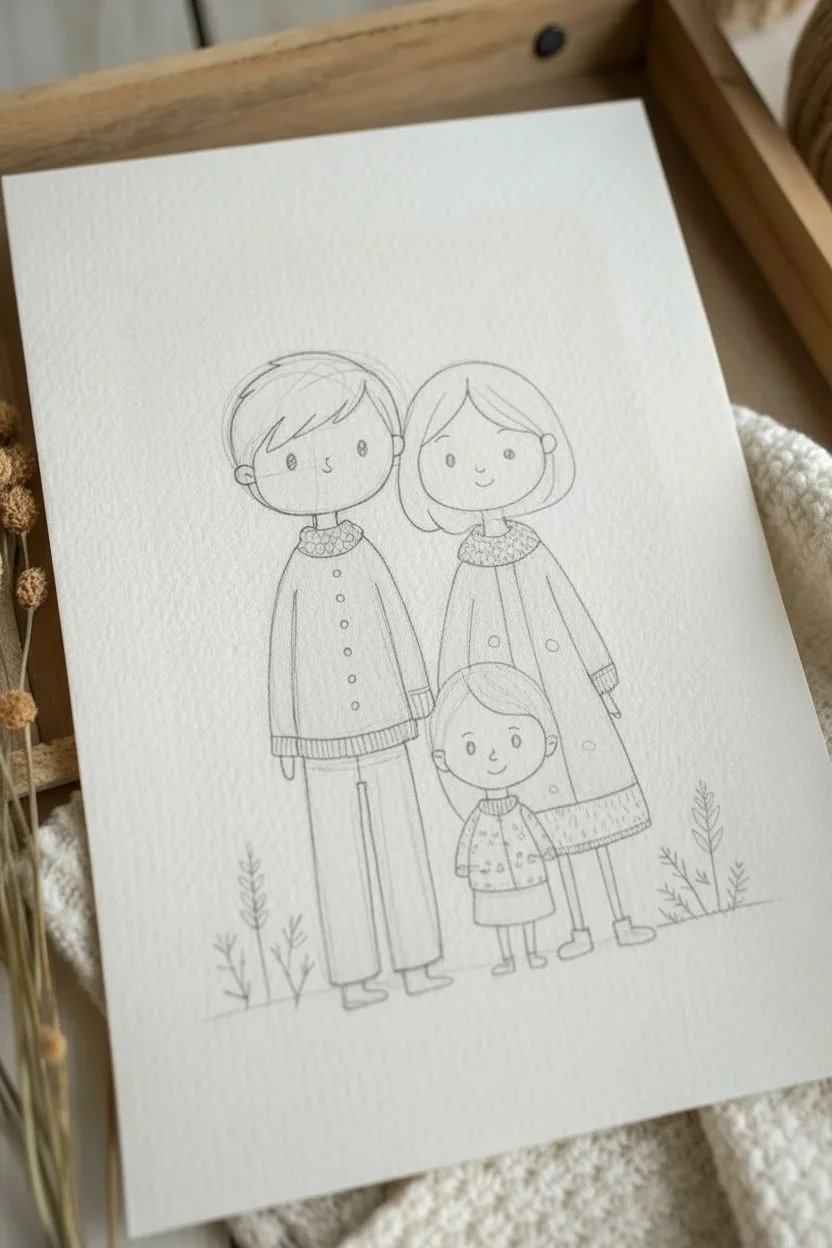
Cartoon-Style Family With Big Expressions

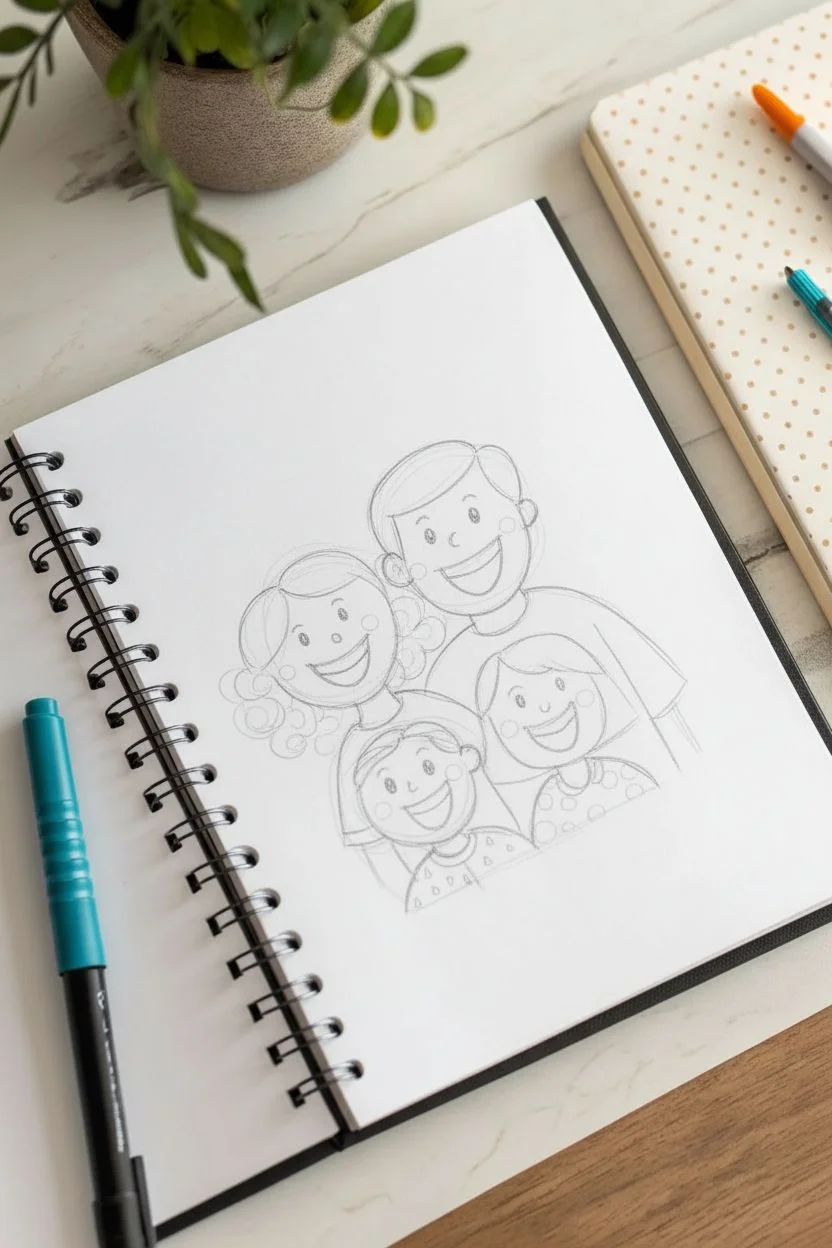
Capture the joy of togetherness with this delightful cartoon-style family portrait, featuring bold ink lines and playful pops of color. This project uses a simplified, expressive style that focuses on big smiles and clean shapes, making it perfect for artists of all skill levels.
How-To Guide
Materials
- Spiral-bound mixed media or sketch paper
- Fine-liner pen (black, waterproof, approx. 0.5mm)
- Thicker marker pen (black, approx. 1.0mm)
- Alcohol or water-based markers (Teal/Aqua, Light Pink, Salmon/Red)
- Pencil (HB or 2B)
- Eraser
Step 1: Planning and Sketching
-
Map out the composition:
Start by lightly sketching four circles in pencil to represent the heads. Place the two larger circles (parents) in the back row, slightly overlapping. Position the two smaller circles (children) in front, nested comfortably below the parents’ heads. -
Refine the face shapes:
Define the jawlines. For the dad (back right), use a squarer, U-shaped jaw. For the mom (back left) and daughter (front right), keep the faces rounder. The little boy (front center) should have a smaller, slightly rounded-square shape. -
Draft the facial features:
Lightly sketch the features. The key here is the ‘Big Expressions’ theme. Draw wide, U-shaped smiles for everyone. Add simple, small circles for eyes, ensuring they are wide-set for a friendly look. -
Add hair outlines:
Sketch the hair shapes. Give the dad a side part, the mom curly pigtails, the daughter a bob cut, and the son short, swept hair. Keep the lines loose and bouncy. -
Sketch the bodies:
Draw simple curved lines to suggest shoulders and torsos. The bodies should be compact, serving mostly to support the heads and add a splash of color later.
Step 2: Inking the Outlines
-
Ink the faces:
Using your fine-liner, carefully trace over your pencil lines for the face shapes and ears. Don’t worry about perfection; small wobbles add character. -
Detail the expressions:
Ink the eyes and eyebrows. Fill in the pupils solid black. For the mouths, outline the lips and draw a line across the center to show teeth, or curve the bottom lip for an open laugh. -
Ink the hair:
Go over the hair outlines. For the mom’s curls, use looping, spiral motions to create texture. For straight hair, use smooth, continuous strokes. -
Thicken key lines:
Grab your thicker marker (1.0mm). Retrace the main outer contours of the hair and the shoulders. This line weight variation helps pop the characters off the page. -
Add clothing details:
Ink the necklines of the shirts. Add simple patterns like polka dots on the daughter’s dress or small triangles on the son’s shirt. -
Erase pencil marks:
Wait a moment for the ink to fully set, then gently erase all visible pencil sketches to leave a clean black-and-white base.
Ink Smearing?
If your black ink bleeds when you add marker color, ensure your outlines are waterproof pens (like microns). Let the black ink dry for at least 30 minutes before coloring.
Step 3: Adding Color Accents
-
Color the cheeks:
Taking a pink marker, draw simple, small circles high on the cheeks of each character. This gives them that classic rosy, happy cartoon look. -
Fill the son’s shirt:
Use a salmon or light red marker to color the little boy’s shirt. I like to leave small gap of white space near the edges for a casual, sketched feel. -
Color the mom’s shirt:
Use the teal or aqua marker to fill in the mom’s shirt. Be careful to color around the boy’s head where he overlaps her. -
Dot the daughter’s dress:
Using the same teal marker, fill in the large polka dots on the daughter’s outfit, leaving the background of the fabric white. -
Final touches:
Check for any white spots that need filling or lines that need reconnecting. Add a tiny bit of shading under the chins with the fine-liner if you want extra depth.
Customize It
Personalize the drawing by changing the hairstyles or adding glasses to match your own family members. You can try adding a family pet peeking out from the bottom corner too.
Now you have a charming, personalized family portrait ready to be framed or gifted.
Cute Chibi Family in Matching Outfits
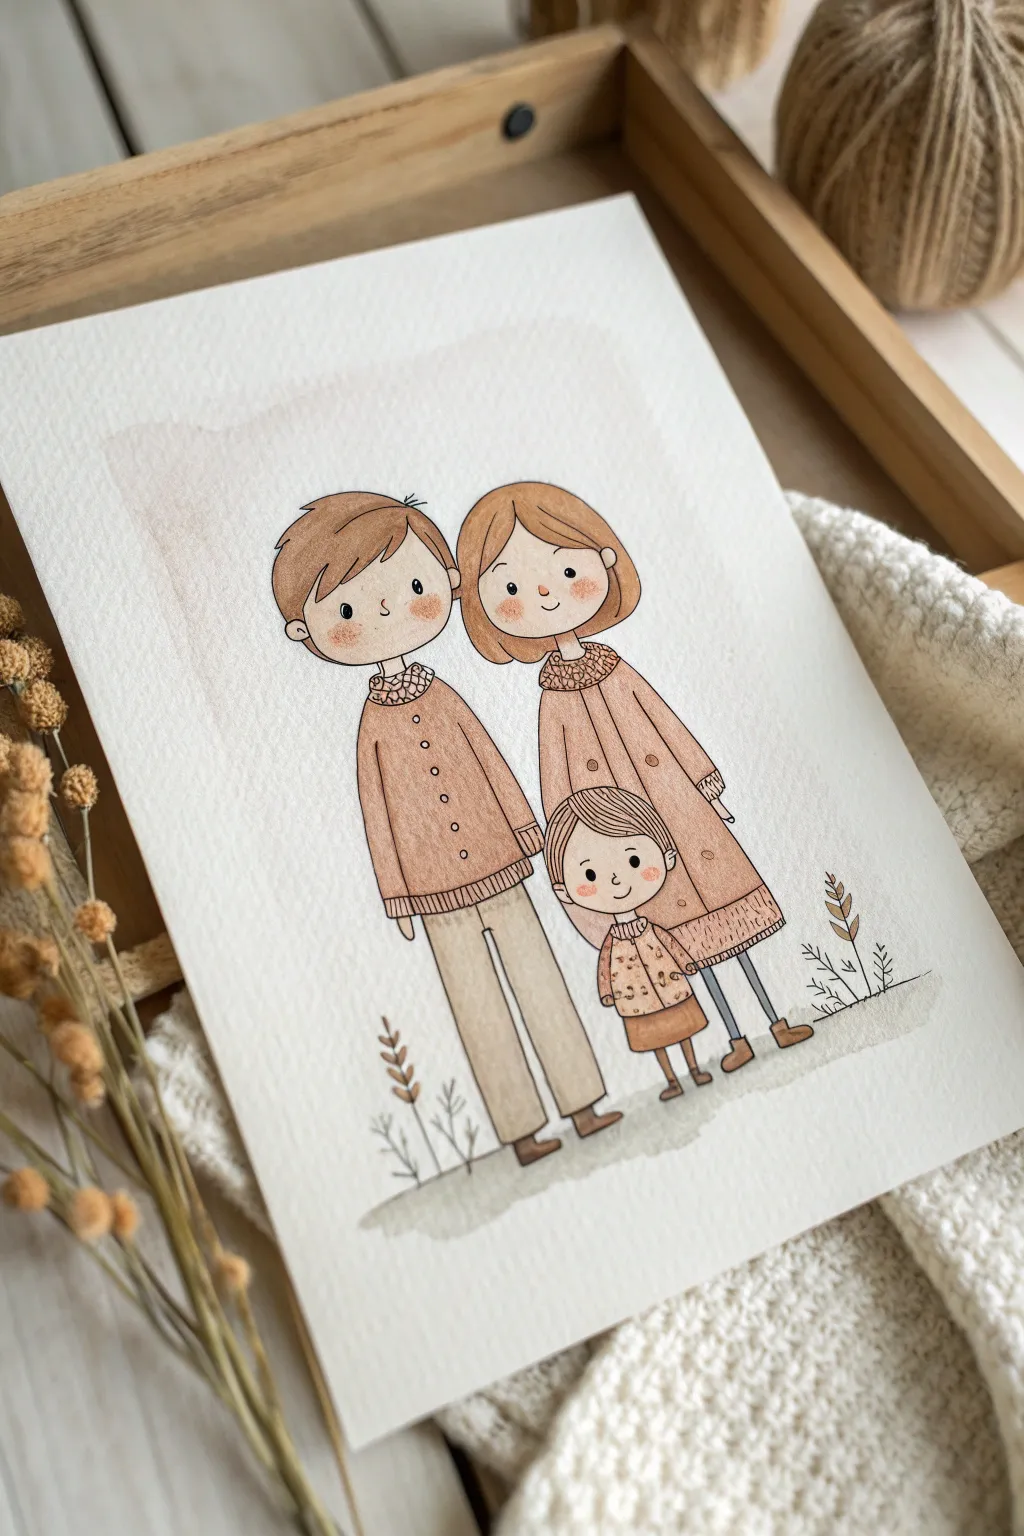
Capture the warmth of family bonds with this adorable chibi-style illustration featuring matching earth-toned outfits. The combination of gentle watercolor washes and crisp ink outlines creates a heartwarming keepsake perfect for nursery walls or greeting cards.
Detailed Instructions
Materials
- Cold press watercolor paper (300 gsm)
- Pencil and eraser
- Waterproof fine liner pens (0.1mm and 0.3mm, dark brown or black)
- Watercolor paints (shades of ochre, brown, beige, dusty pink)
- Round watercolor brushes (size 2 and 4)
- Clean water and paper towel
Step 1: Drafting the Family
-
Position the figures:
Start by lightly sketching three overlapping circles for the heads. Place the dad on the left, the mom next to him slightly lower, and the child centered in front of them. -
Define the faces:
Draw the hairstyles first to shape the heads. Give the dad short, swept hair and the mom a soft bob. Keep the facial features minimal: wide-set dots for eyes, tiny curved noses, and small smiles. -
Sketch the bodies:
Draw the outfits using simple, slightly rounded shapes. Sketch a sweater and trousers for the dad, a long coat or dress for the mom, and a matching patterned sweater for the child. Keep the hands tucked away or very simple. -
Add cozy details:
Lightly pencil in texture details like chunky knit collars, ribbed cuffs, and buttons down the front of the dad’s cardigan and mom’s coat.
Fixing Smudged Ink
If your ink smudges when erasing or painting, you likely didn’t use waterproof pens. Switch to pigment liners (like Micron) and wait at least 15 minutes before erasing pencil lines.
Step 2: Inking the Outline
-
Outline main shapes:
Using a 0.3mm waterproof pen, carefully trace over your pencil lines for the hair, clothes, and face outlines. I find using a dark brown ink instead of black makes the finished piece feel softer. -
Refine the details:
Switch to a thinner 0.1mm pen for delicate details like the facial features, the knit patterns on the collars, and the small plants at their feet. -
Erase pencil marks:
Wait until the ink is completely dry to avoid smudging, then gently erase all visible pencil sketches to leave a clean drawing ready for paint.
Texture Pop
Use white gouache or a white gel pen to add tiny dots to the eyes or patterns on the sweaters after the watercolor is dry. It makes the characters look more lively.
Step 3: Painting with Watercolors
-
Skin tones:
Mix a very diluted beige or pale peach color. Apply a light wash to the faces, leaving the paper white for the eyes if you didn’t ink them yet, or just painting around the inked features. -
Rosy cheeks:
While the face wash is still slightly damp, dab a tiny amount of diluted pink or reddish-orange onto the cheeks to create a soft, diffused blush effect. -
Hair color:
Paint the hair using light brown shades. You can leave small white spaces near the top of the heads to suggest highlights and shine. -
Dad’s outfit:
Use a warm brown or ochre for the dad’s cardigan. Paint the trousers in a neutral beige. Keep the wash fairly flat, but allow some pigment to pool at the bottom of the sweater for shadow. -
Mom’s outfit:
Paint the mom’s coat in a dusty pink or light terracotta shade. Let this layer dry, then darken the area under the collar and near the buttons for subtle dimension. -
Child’s outfit:
Use a slightly darker variation of the mom’s coat color or a patterned mix. Paint the skirt or pants in a coordinating earth tone.
Step 4: Finishing Touches
-
Grounding the scene:
Mix a watery grey-green and paint a loose, organic shape at their feet to simulate the ground, painting over the base of the plant stems. -
Background wash:
For a subtle backdrop, paint a very faint, large rectangle or wash behind the heads using a highly diluted warm grey or beige, letting it fade out irregularly. -
Enhance textures:
Once the paint is fully dry, use your fine liner or a colored pencil to add tiny textures, like speckles on the child’s sweater or lines on the ribbed cuffs. -
Final blush:
If the cheeks dried too light, go back in with a colored pencil to add stronger rosy circles for that signature cute look.
Frame your painting in a simple wooden frame to complement those beautiful earthy tones


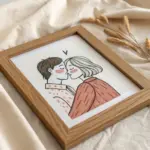
Family Portrait With a Heart-Shaped Composition
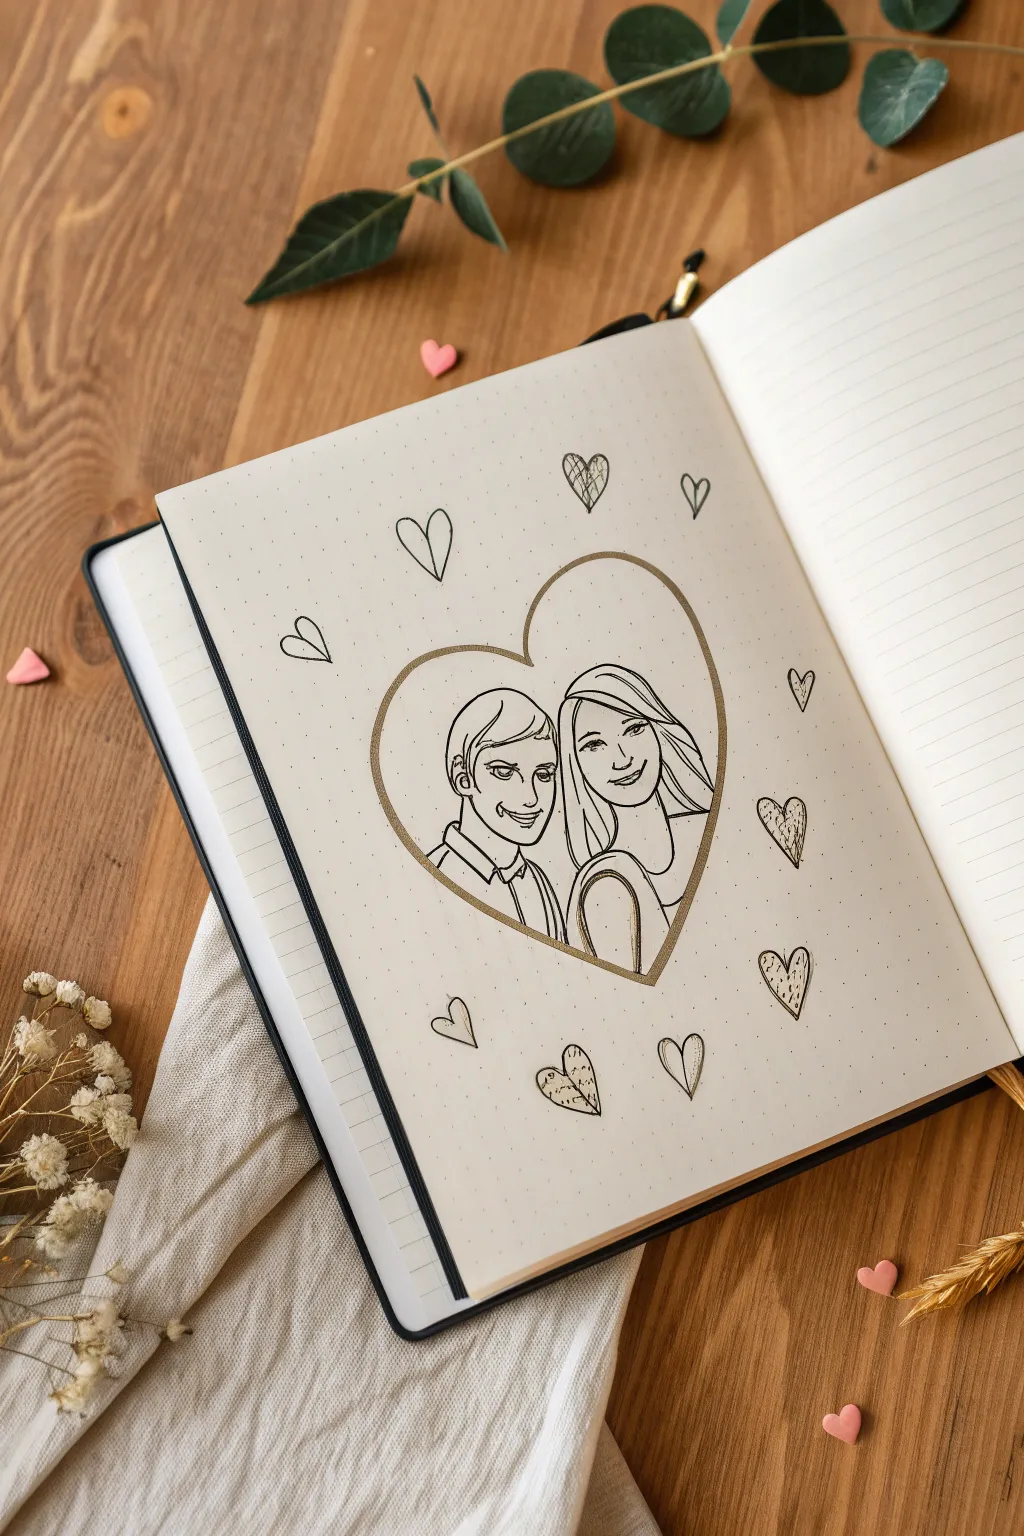
Capture a special connection with this charming line art portrait framed within a simple heart silhouette. Using a dotted notebook as your canvas, this project combines minimalist sketching with sweet decorative elements for a personalized keepsake.
Step-by-Step
Materials
- Dotted grid journal or notebook
- Pencil (HB or H for sketching)
- Fine liner pen (black, approx. 0.3mm)
- Standard black pen or gel pen (0.5mm)
- Gold or bronze metallic marker (fine tip)
- Eraser
- Reference photo of couple
Step 1: Setting the Composition
-
Center layout:
Begin by finding the visual center of your notebook page. Since you are using a dot grid, count the dots to ensure your main heart will be perfectly positioned. -
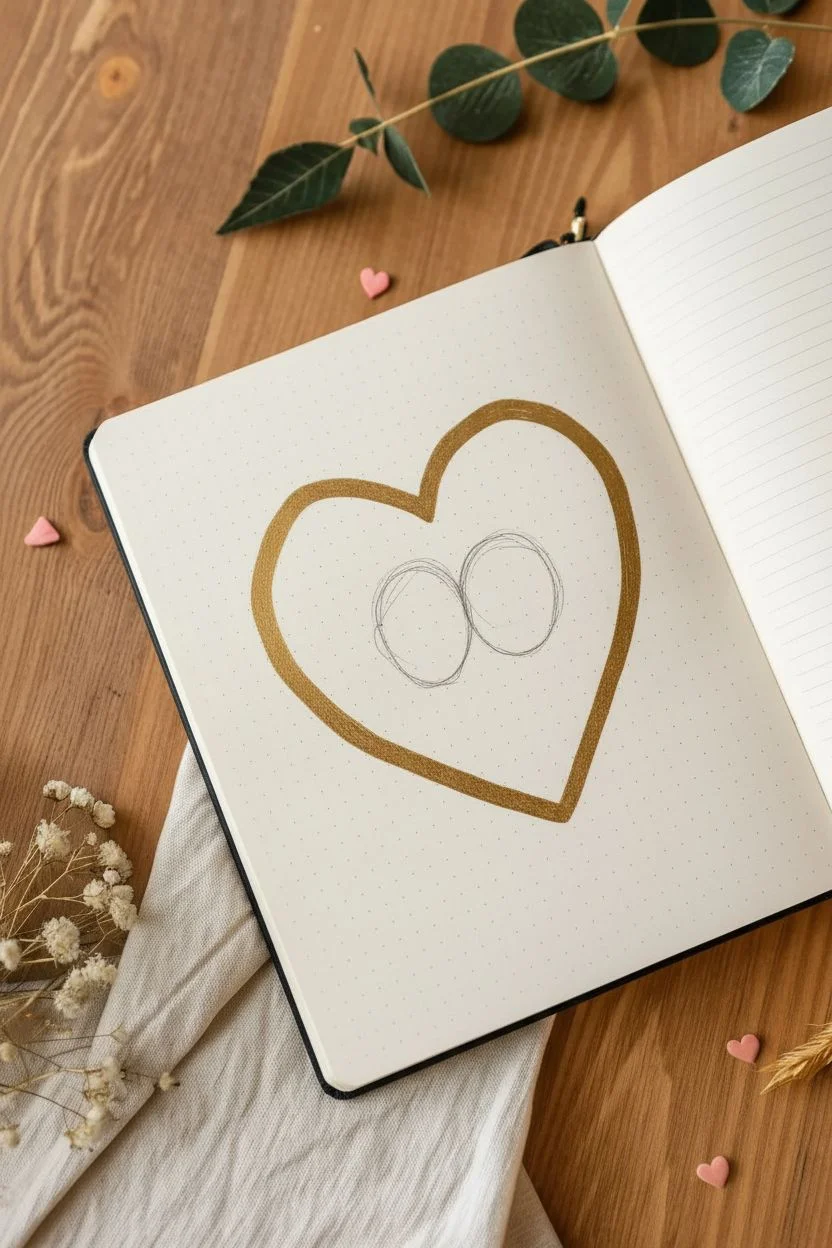
Outline the main heart:
Using your pencil, lightly sketch a large, wide heart shape in the center. Aim to make it fill about half the page, leaving ample negative space around the edges for the smaller hearts later. -
Rough figure placement:
Inside the heart, sketch two simple oval shapes for the heads. Position them close together, slightly overlapping or touching to show intimacy. The figures should take up the bottom two-thirds of the heart. -
Refine the heart border:
Once satisfied with the size, go over your pencil heart outline with the metallic gold or bronze marker. Make this line slightly thicker than a standard pen stroke to give it a frame-like quality.
Smudged Ink?
If you accidentally smudge wet ink, turn it into a stylistic choice by adding small hatched shadows over the smudge, or cover it with a tiny solid black heart.
Step 2: Sketching the Couple
-
Define the faces:
Working very lightly with your pencil, sketch the facial features. For this style, keep eyes, noses, and mouths somewhat simplified and cartoon-like rather than hyper-realistic. -
Add hair details:
Draw the hair outlines. Notice how the woman’s hair in the example flows down, while the man’s is shorter and cropped. Let the hair lines extend all the way down to where the figures meet the bottom of the heart frame. -
Shoulders and clothing:
Sketch the necklines and shoulders. Keep the clothing details minimal—just a collar for the man and a simple neckline for the woman creates a clean look.
Pro Tip: Hair Highlights
Leave small gaps in your ink lines at the ‘crown’ of the head or curve of the hair. These breaks in the line art act as natural highlights for a shiny look.
Step 3: Inking the Portrait
-
Trace facial features:
Switch to your fine liner (0.3mm). Carefully trace over your pencil lines for the eyes, nose, and mouth. I like to use a very light touch here so the expressions don’t look too heavy. -
Ink the hair:
Use fluid, confident strokes to ink the hair. Add a few internal lines within the hair shapes to suggest strands and volume, but don’t overdo it. -
Outline the bodies:
Trace the clothing and shoulder lines. Where the figures touch the bottom of the gold heart frame, stop your pen line exactly at the gold border so they appear contained within it. -
Erase pencil marks:
Wait at least five minutes to ensure the ink is completely bone dry. Then, gently erase all visible graphite lines from the portrait area.
Step 4: Adding Decorative Elements
-
Scattered hearts placement:
With your pencil, lightly draw about 8-10 smaller hearts floating around the central frame. Vary their angles slightly so they look like they are fluttering. -
Inking the small hearts:
Go over these small heart outlines with your standard black pen (0.5mm). The slight line weight variation helps distinguish them from the finer facial features. -
Adding texture:
Select 3 or 4 of the small hearts to fill with texture. Scribble loosely inside one, use small dashes in another, or stippling in a third. Leave the remaining hearts empty for balance.
Step 5: Final Touches
-
Reinforce the frame:
If your gold marker line looks a bit faint against the black ink, carefully add a second layer to the main heart outline to make it pop. -
Final cleanup:
Do one last pass with your eraser to remove any remaining guide marks or stray pencil sketches around the scattered hearts.
Now you have a sweet, personalized journal page capturing a lovely moment in time
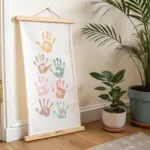
Parents Encircling Kids in a Protective Pose
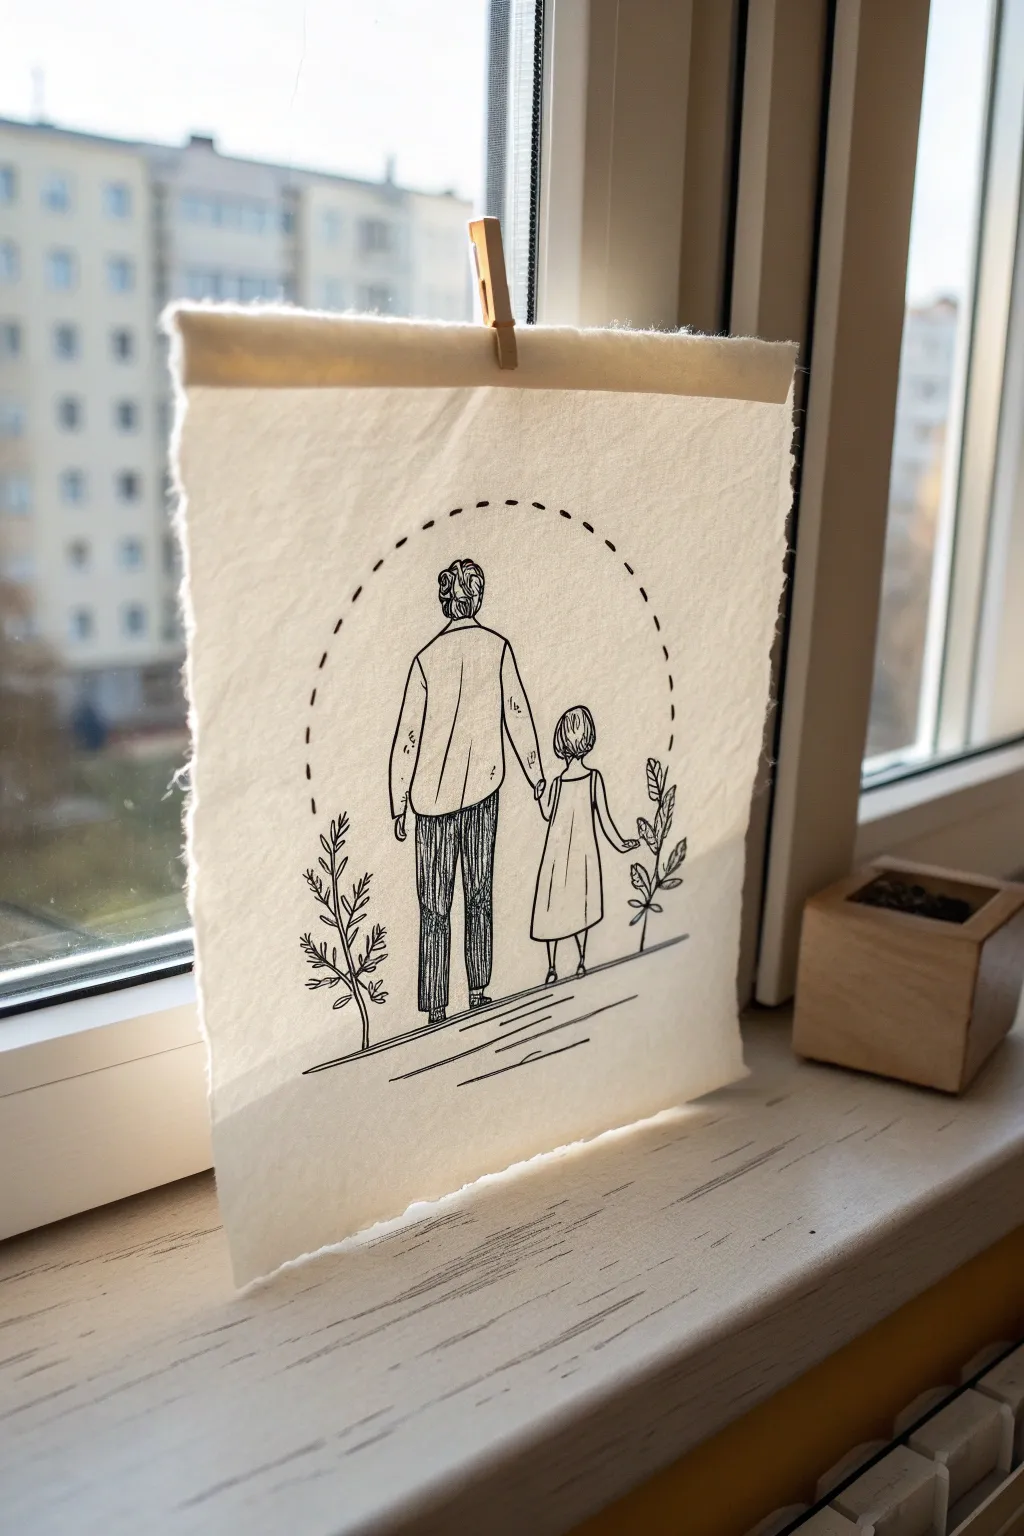
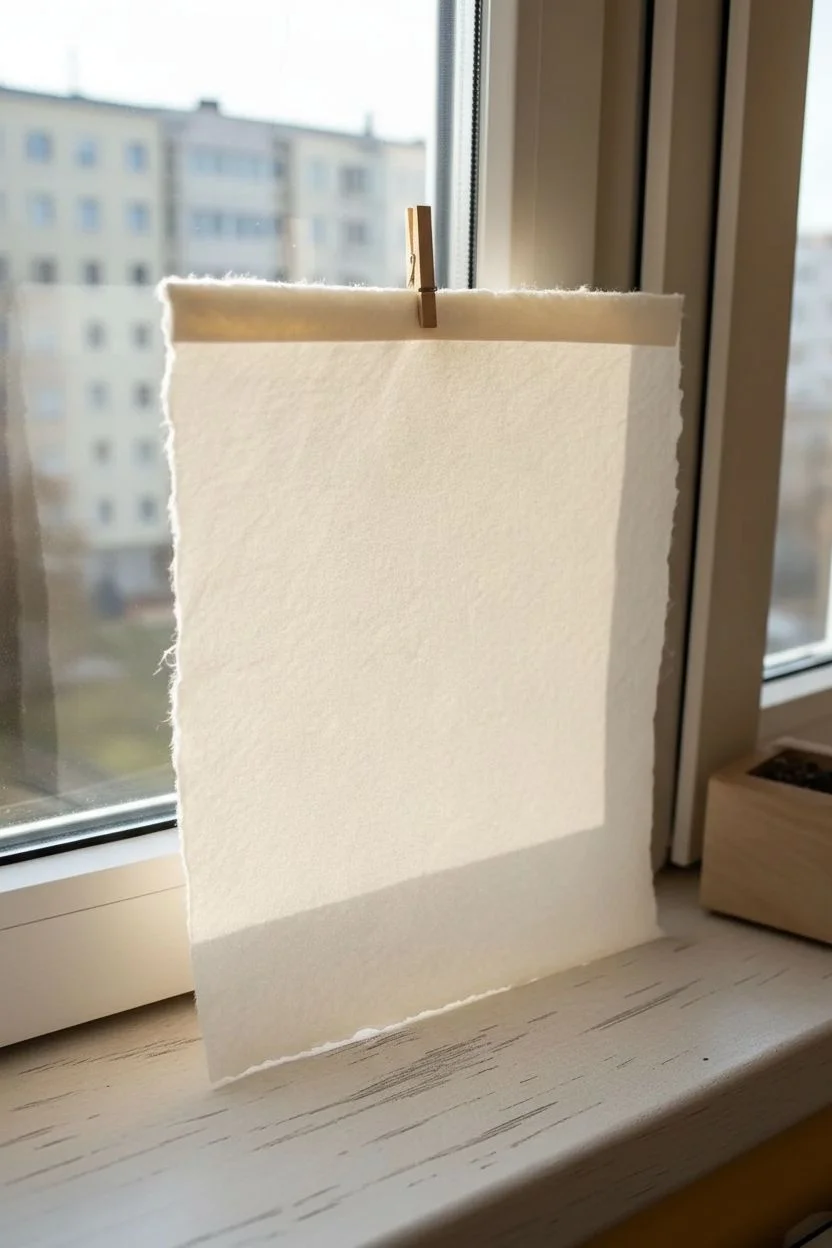
Capture a tender moment of connection with this minimalist line art piece, drawn directly onto textured fabric or heavy handmade paper. The raw, torn edges and simple clothespin mount give it a charming, rustic aesthetic perfect for window sills or small wall spaces.
Step-by-Step Tutorial
Materials
- Heavyweight textured paper or starched unbleached cotton fabric
- Fine-point black permanent marker (0.3mm or 0.5mm)
- Pencil (HB or H for light lines)
- Eraser
- Ruler
- Wooden clothespin
- String or thin wire for hanging (if not clipping directly to a fixture)
- Window light or a lightbox (optional, for tracing)
Step 1: Preparing the Canvas
-
Select your base:
Choose a thick, creamy paper with visible grain or a piece of stiff, light-colored cotton fabric. The texture is key to the final look. -
Create the rough edges:
Cut your material into a rectangle, approximately 5×7 inches. To achieve the deckled look shown in the image, tear the paper against a ruler’s edge slowly rather than cutting it with scissors. -
Fold the top:
Make a neat fold about 0.5 inches down from the top edge. This creates the channel where the string passes through or simply adds weight for the clip to grip securely.
Use a Lightbox
Not confident drawing freehand? Print the design first, tape it behind your paper on a sunny window, and trace the lines directly.
Step 2: Sketching the Figures
-
Draft the central axis:
Using a pencil very lightly, draw a vertical line down the center of your page to help position the two figures evenly. -
Outline the father’s shape:
To the left of the center line, sketch the taller figure. Start with the head, move down to a relaxed shirt shape, and draw straight, simple legs for the trousers. -
Outline the daughter’s shape:
To the right, sketch the smaller figure. Give her a simple A-line dress that ends just below the knees, and position her arm so it reaches up towards the father’s hand. -
Connect the hands:
Draw their hands clasped together. Don’t worry about anatomical perfection; a simple suggestion of interlocking fingers works perfectly for this style. -
Add hairstyle details:
Sketch short, wavy hair for the father and a bob cut for the daughter. Keep the lines loose to suggest movement. -
Ground the scene:
Below their feet, draw two or three horizontal lines of varying lengths to represent the ground or a path.
Make it Personal
Customize the hairstyle and clothing details to match specific family members, or add a third small figure for another sibling.
Step 3: Adding the Frame & Elements
-
Draft the arch:
Use a compass or trace a round object to pencil a light arch over the figures. It should start at hip-height on one side and end at the same height on the other. -
Sketch the foliage:
At the base of the arch on the left, draw a simple plant with small leaves growing upward. Repeat this on the right side with a slightly different leaf pattern for variety.
Step 4: Inking the Design
-
Establish the outline:
Take your fine-point black marker. Trace over your pencil lines for the figures, using steady, confident strokes. I like to start with the heads to establish the focal point. -
Detail the clothing:
Add vertical lines on the father’s trousers to suggest texture or corduroy. Add small creases on the shirt and the back of the dress. -
Inking the arch:
Instead of a solid line, ink the arch as a series of small, evenly spaced dashes. This keeps the frame feeling light and airy. -
Ink the plants and ground:
Go over the plant sketches and the ground lines. Keep the plant stems thin and delicate. -
Erase guidelines:
Wait at least 5-10 minutes to ensure the ink is completely dry. Gently erase all visible pencil marks, being careful not to crumple the paper edges.
Step 5: Final Assembly
-
Attach the clip:
Take a simple wooden clothespin and clip it to the center of the top fold you created earlier. -
Display your art:
If hanging, thread a piece of twine through the clip’s metal spring. Otherwise, balance the clip on a thin ledge or window frame as shown to let light filter through the paper.
Now you have a delicate, hand-drawn keepsake that perfectly captures a quiet moment of family bonding
Family in a Candid Kitchen Moment
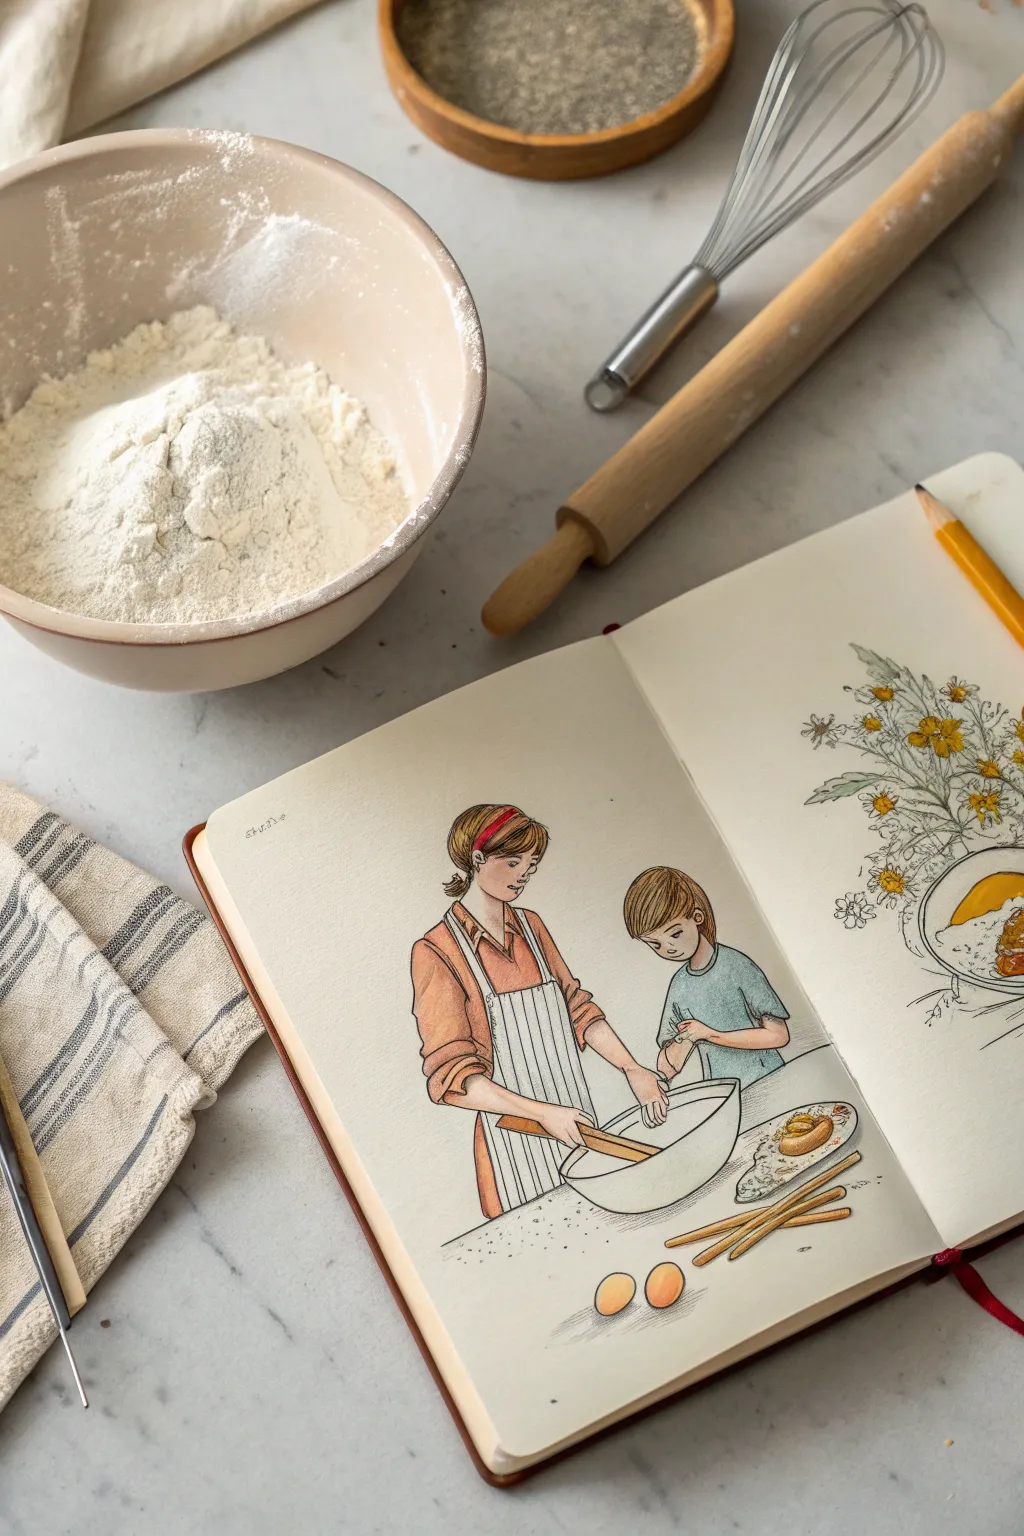
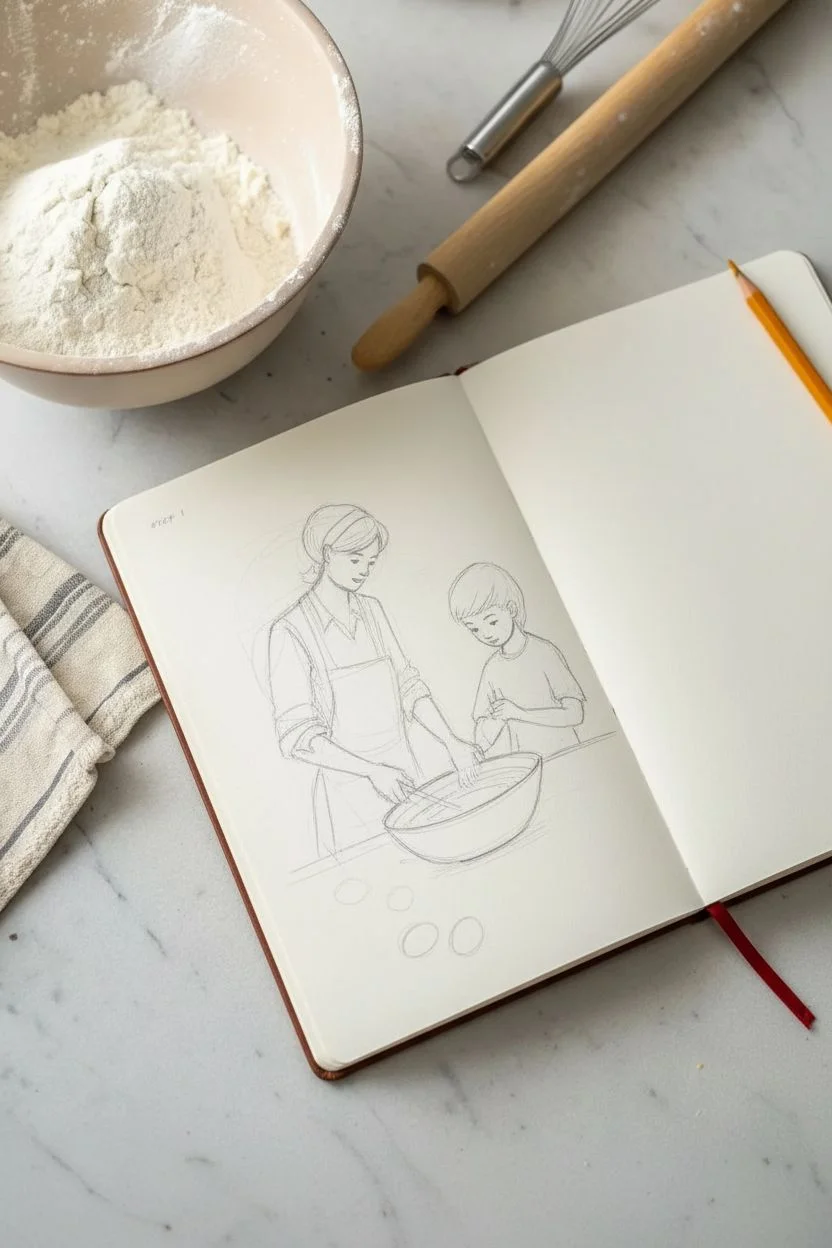
Capture the warmth of a shared family memory with this delicate mixed-media sketch. Using a combination of fine-liners and colored pencils creates a soft, illustrative quality that perfectly suits this tender moment of connection over a mixing bowl.
Step-by-Step Guide
Materials
- Heavyweight sketchbook paper (mixed media or hot press)
- H or HB graphite pencil for sketching
- Kneaded eraser
- Fine-point pigment liner (0.1mm and 0.3mm, black or sepia)
- Artist-grade colored pencils (terra cotta, dusty blue, cream, warm grey)
- Pencil sharpener
- Reference photo of family baking (optional)
Step 1: Drafting the Composition
-
Establish the figures:
Begin with loose, light gesture lines using your HB pencil. Map out the taller figure first, slightly angled to the left, and place the smaller child figure on the right side. -
Define the action:
Draw the large mixing bowl as a central anchor point between them. Position the woman’s hands gripping a spoon handle within the bowl, and the child’s hands resting near or on the rim. -
Refine the anatomy:
Flesh out the basic shapes into recognizable forms. Pay special attention to the tilt of their heads; they should both be looking down at the bowl to create a unified focal point. -
Add kitchen details:
Sketch the counter line horizontally behind them. Add a few scattered ingredients near the bowl for context, like eggs or a dusting of flour. -
Finalize pencil lines:
Before inking, refine the facial features and clothing folds. Make sure the apron straps and sleeves look natural and relaxed.
Step 2: Inking the Outlines
-
Outline the main figures:
Using a 0.3mm pigment liner, trace over your refined pencil lines for the characters’ bodies. Use broken or thinner lines where the light would hit, like the tops of shoulders. -
Detail the faces:
Switch to a delicate 0.1mm pen for facial features. Keep the eyes simple and the noses subtle to maintain that soft illustrative style seen in the example. -
Ink the accessories:
Go over the bowl, spoon, and apron details. I like to keep the lines loose and slightly sketchy here rather than perfectly rigid geometric shapes. -
Add background elements:
If you are including the flower vase or side elements shown on the opposite page, ink them lightly now, but keep the focus on the central baking scene. -
Clean up the sketch:
Wait for the ink to dry completely to avoid smudging. Gently erase all underlying graphite pencil marks with a kneaded eraser.
Keep it Light
Don’t press hard with colored pencils. The charm of this style is the paper texture showing through, making it look airy and nostalgic rather than heavy.
Step 3: Applying Color
-
Base layer for skin:
Lightly shade the skin areas with a creamy peach or beige colored pencil. Keep the pressure very light to allow the paper grain to show through slightly. -
Coloring the clothing:
Use a terra cotta or muted orange for the mother’s blouse. Apply the color in the direction of the fabric folds. For the child’s shirt, use a soft dusty blue. -
Shading the apron:
Leave the apron mostly white, but use a warm grey to create shadows in the folds and under the arms to give it dimension. -
Adding hair details:
Layer brown and ochre tones for the hair. Use sharp strokes that follow the hair’s natural growth pattern, leaving small white gaps for highlights. -
Defining the bowl:
Shade the outside of the bowl with very light grey, concentrating on the bottom curve to suggest weight and roundness. -
Props and accessories:
Color the wooden spoon and any eggs on the counter with warm brown and yellow ochre tones.
Date It
Add the date and a small handwritten note about what recipe you were baking in the corner. It turns the drawing into a true journal entry.
Step 4: Finishing Touches
-
Deepen the shadows:
Go back in with slightly darker versions of your base colors (e.g., a rusty brown over the orange shirt squares) to deepen the shading where arms overlap the body. -
Add a ground shadow:
Use a cool grey pencil to sketch a loose, scribbled shadow beneath the bowl and any counter items to ground them. -
Texture the surface:
Add tiny stippling dots with your 0.1mm pen around the bowl area to represent spilled flour or crumbs on the counter.
Now you have a charming illustrated memory preserved in your sketchbook to look back on.
Family Road Trip Scene From Inside the Car
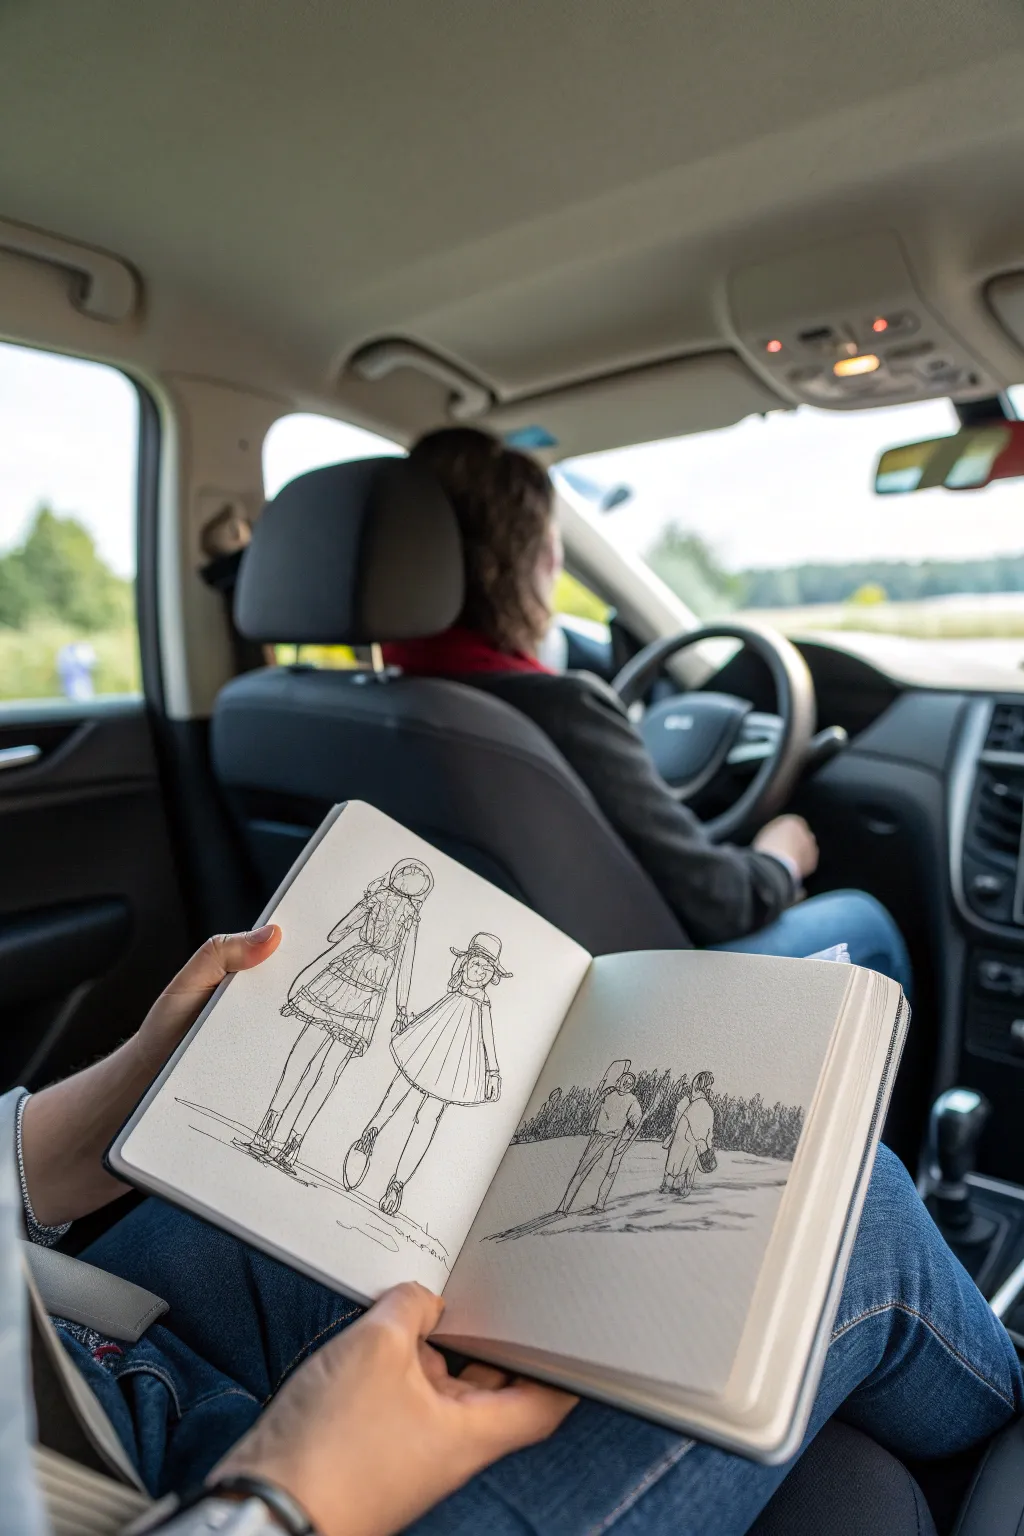
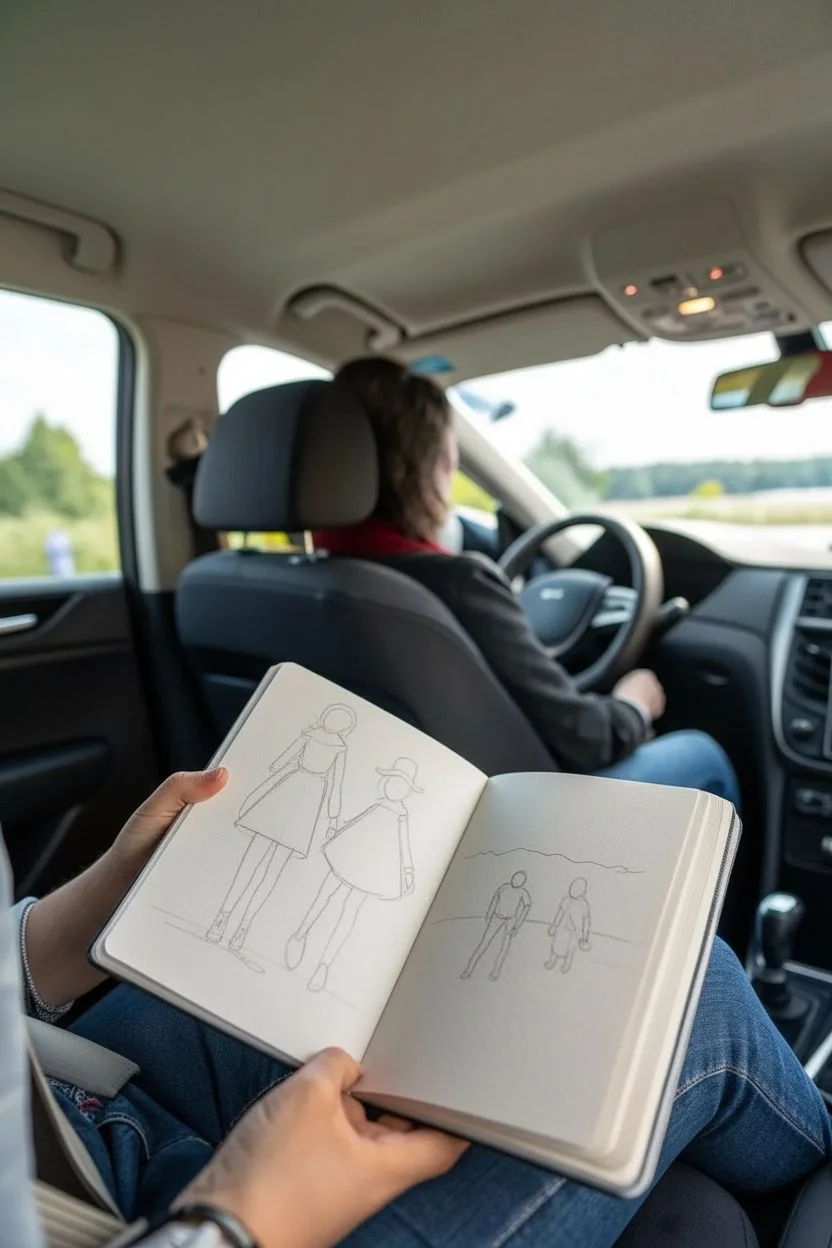
Capture the fleeting memories of a family journey with this dual-page sketchbook spread, featuring clean line art on one side and a scenic vignette on the other. This project captures the essence of travel by juxtaposing detailed character studies with looser environmental sketches, perfect for passing time in the passenger seat.
How-To Guide
Materials
- Hardcover sketchbook (approx. A5 or 5×8 size)
- Fine liner pens (0.1mm, 0.3mm, and 0.5mm)
- HB or 2B graphite pencil
- Kneaded eraser
- Ruler (optional)
- Blending stump (tortillon)
Step 1: Planning the Composition
-
Establish the horizon lines:
Begin by opening your sketchbook to a fresh spread. On the right page, lightly sketch a horizon line about one-third of the way up from the bottom using your HB pencil. This will ground your landscape scene. -
Block in figure placement:
On the left page, sketch two tall, vertical ovals to represent where the two main standing figures will go. They should take up most of the page height. On the right page, draw two smaller, stick-figure gestures in the foreground of your landscape area. -
Refining the poses:
Flesh out the shapes on the left page. Draw the outline of two figures holding hands or standing close. One should be slightly taller. Sketch loose trapezoid shapes for their coats or dresses.
Road Warrior Tip
Drawing in a moving car? Brace your drawing hand against the sketchbook page with your pinky finger to stabilize your pen against bumps.
Step 2: Left Page: The Fashion Study
-
Detailing the outfits:
Focus on the left page figures. Add details like collars, buttons, and the hem of the dresses. Give the taller figure a hood or hat, and the smaller figure a wide-brimmed hat. -
Adding leg definition:
Sketch the legs extending from the hemlines. Use simple lines to suggest stockings or leggings, and draw the shoes—boots for the taller figure and smaller flats or shoes for the child. -
Inking the main lines:
Switch to your 0.3mm fine liner. Carefully go over your pencil lines for the clothing outlines. Use confident, single strokes rather than feathery lines for a clean look. -
Adding texture:
Use the 0.1mm pen to add texture to the clothes. Draw faint vertical lines on the dresses to suggest pleats or fabric folds. Add small hatching marks on the hats for shadow. -
Grounding the figures:
Draw a very simple, broken horizontal line at their feet to show they are standing on ground, rather than floating in space.
Step 3: Right Page: The Landscape Walk
-
Sketching the background vegetation:
Move to the right page. Above your horizon line, sketch a dense row of trees or bushes. Keep these shapes loose and organic, focusing on the silhouette rather than individual leaves. -
Defining the walking figures:
Refine the two smaller figures walking away from the viewer. Draw them as if they are mid-stride, perhaps carrying bags or hiking gear. Their backs should be to you. -
Inking the landscape:
Use the 0.5mm pen for the foreground figures to make them pop. Then, switch to the 0.05mm or 0.1mm pen for the background trees. Use a scribbling motion to create the density of the forest line without drawing every branch. -
Creating depth with hatching:
Add horizontal hatching lines on the ground area to suggest a snowy field or flat grass. Keep the lines closer together near the horizon and further apart as they get closer to the bottom edge. -
Adding shadows:
Draw diagonal hatch marks extending from the feet of the walking figures to cast long shadows, simulating late afternoon light.
Wobbly Lines?
If a pothole ruins a straight line, turn it into a texture! Add more wiggly lines around it to transform the mistake into organic fabric folds or grass.
Step 4: Finishing Touches
-
Erase pencil guides:
Once the ink is completely dry (give it a few minutes to be safe), gently run your kneaded eraser over the entire spread to lift the graphite guidelines. -
Enhance contrast:
Look at your drawing as a whole. I like to darken the darkest areas—like the shoes or deep folds in the coats—with the 0.5mm pen to add final weight to the image. -
Soft shading (optional):
If you want a softer look, take your pencil again and very lightly shade the sides of the dresses or the tree line, then smudge it slightly with a blending stump or your finger.
Enjoy the satisfaction of seeing your family memories preserved in ink as the miles roll by
Family Portrait With Pets as Full Family Members
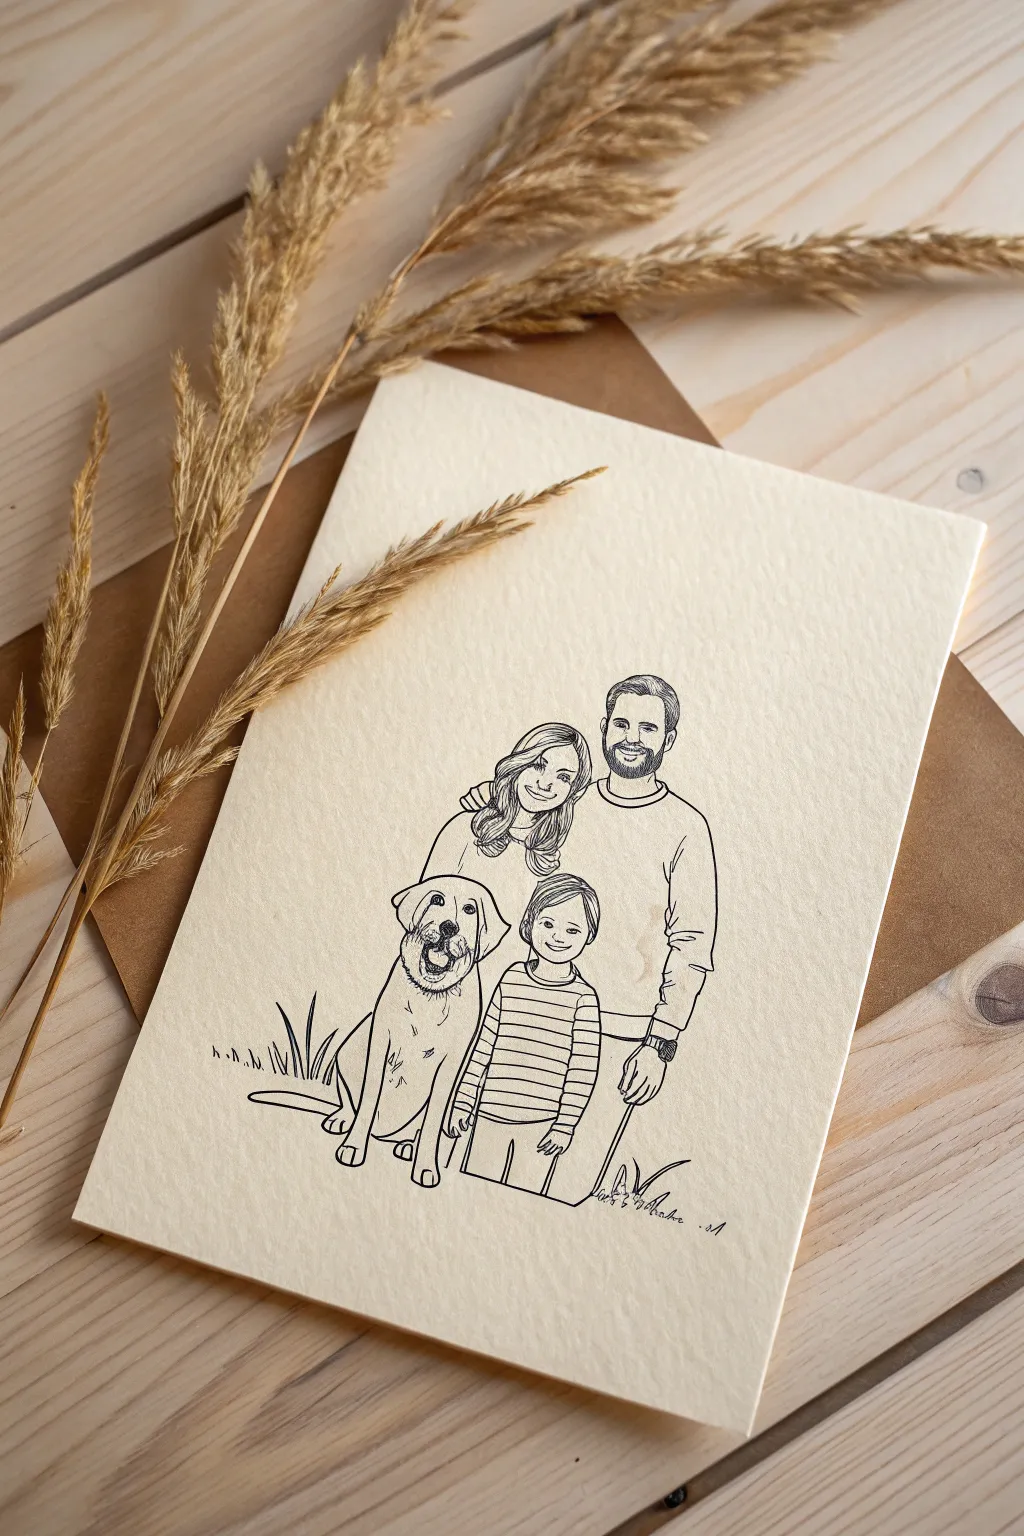
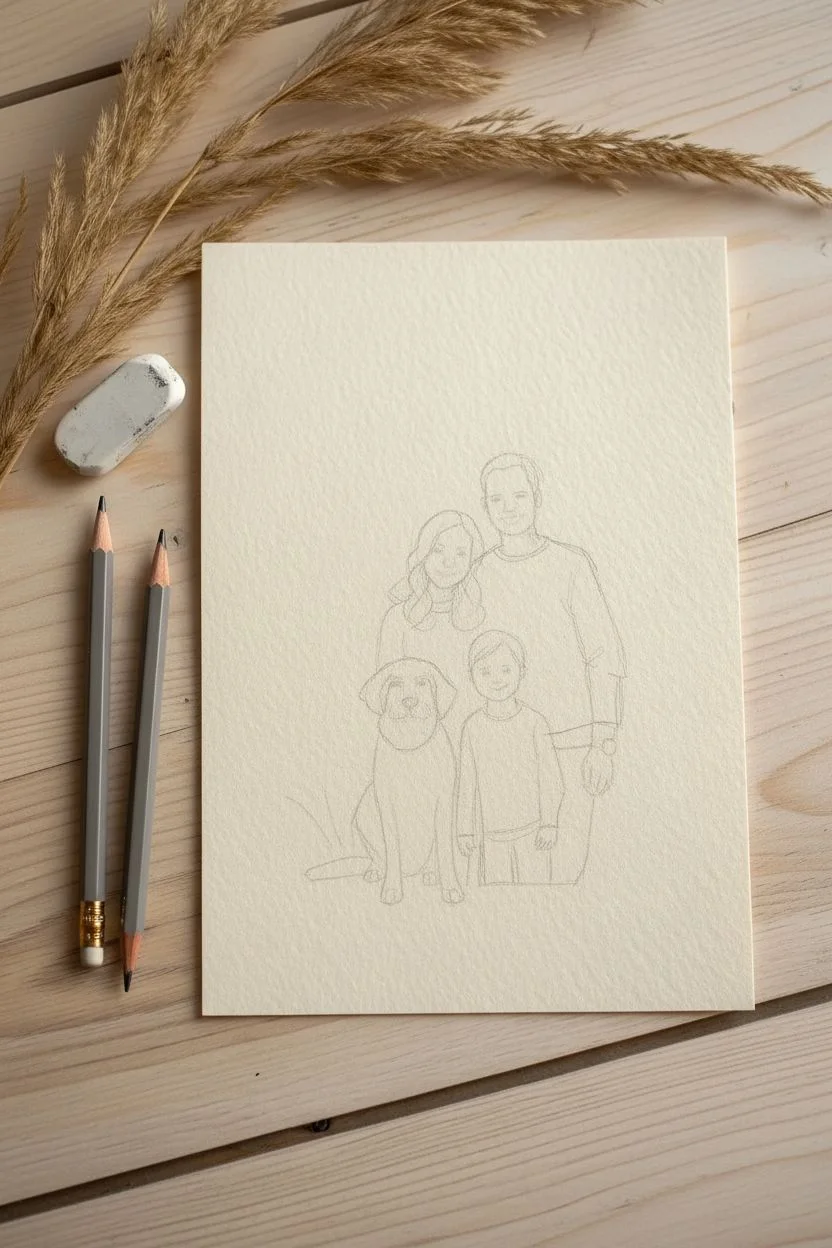
Capture the unique bond of your family and furry friends with this elegant, minimalist line drawing. Using fine ink pens on high-quality textured paper creates a timeless keepsake that emphasizes connection through simple, confident strokes.
Step-by-Step Tutorial
Materials
- Heavyweight cream or off-white textured watercolor paper (300gsm)
- Pencil (HB or 2H for sketching)
- Kneaded eraser
- Fine liner pens (sizes 0.1, 0.3, and 0.5)
- Reference photo of your family and pet
- Tracing paper (optional)
- Ruler (optional for shirt patterns)
Step 1: Preparation and Composition
-
Select your reference:
Choose a clear photo where family members are close together. If you don’t have a perfect group shot, find individual photos of family members and the pet at similar angles to combine them. -
Rough layout sketching:
Lightly sketch the basic shapes on your paper using an HB pencil. Focus on ovals for heads and simple blocks for torsos to establish the pyramid composition seen in the example, with the tallest person in the back. -
Positioning the pet:
Place the dog prominently in the foreground, sitting next to the child. Treat the pet as a central figure, ensuring their head size is proportional to the human subjects.
Smudge Alert
If you are right-handed, ink from left to right (and vice versa) to avoid dragging your hand through wet ink. Place a spare paper scrap under your hand.
Step 2: Detailed Penciling
-
Refining facial features:
Work into your rough shapes to define eyes, noses, and smiles. Keep the details simple—this style relies on capturing the *essence* rather than photorealism. Avoid heavy shading. -
Drawing the hair:
Outline the general shape of the hairstyles first. Add main directional flow lines for the hair but don’t draw every single strand. For the mother’s hair, focus on the waves resting on the shoulders. -
Clothing outlines:
Sketch the clothing contours. Give the father a simple sweater, the mother a soft top, and the child a striped shirt. Add slight wrinkles at the elbows and waist to suggest fabric movement. -
The dog’s texture:
Outline the dog’s floppy ears and snout. Instead of a solid outline for the fur, use short, broken pencil strokes around the neck and chest to suggest fluffiness.
Step 3: Inking the Drawing
-
Start with the main contours:
Switch to your 0.5 fine liner. Trace the major outlines of the bodies and heads. Use confident, continuous lines where possible to maintain that clean, illustrative look. -
Inking faces:
Change to a finer 0.1 pen for facial features. Eyes and mouths require delicate touches; a thick line here can age a face or change an expression drastically. -
Hair details:
Using a 0.3 pen, add the internal hair lines. Follow the direction of hair growth. For the beard, use short, dense hatching strokes. -
Defining the clothes:
Ink the clothing outlines with the 0.5 pen. For the child’s striped shirt, I prefer doing the horizontal lines freehand rather than with a ruler to keep the drawing feeling organic and warm. -
Inking the pet:
Use the 0.3 pen for the dog. Use broken, jagged lines for the fur texture, especially around the ruff of the neck and the paws. -
Adding ground elements:
Ground your subjects by drawing a few simple blades of grass near the dog’s paws and the child’s feet using quick, upward flicks of the 0.3 pen.
Artist’s Secret
Don’t connect every line. Leaving small gaps in hair, fur, or clothing folds lets the eye ‘complete’ the image, making the drawing feel lighter and more professional.
Step 4: Finishing Touches
-
Erase pencil marks:
Wait at least 15 minutes to ensure the ink is completely dry. Gently rub the entire drawing with a kneaded eraser to lift the graphite without damaging the paper surface. -
Check line weights:
Look over the drawing. If the main silhouette feels too faint, carefully go over the outermost lines again with the 0.5 pen to make the family pop against the paper. -
Sign your work:
Add your signature or the date and family name in small, cursive script at the bottom right corner for a personalized finish.
Frame your new artwork or gift it in a sturdy envelope as a heartfelt present to loved ones
Exaggerated Family Caricature With Signature Features
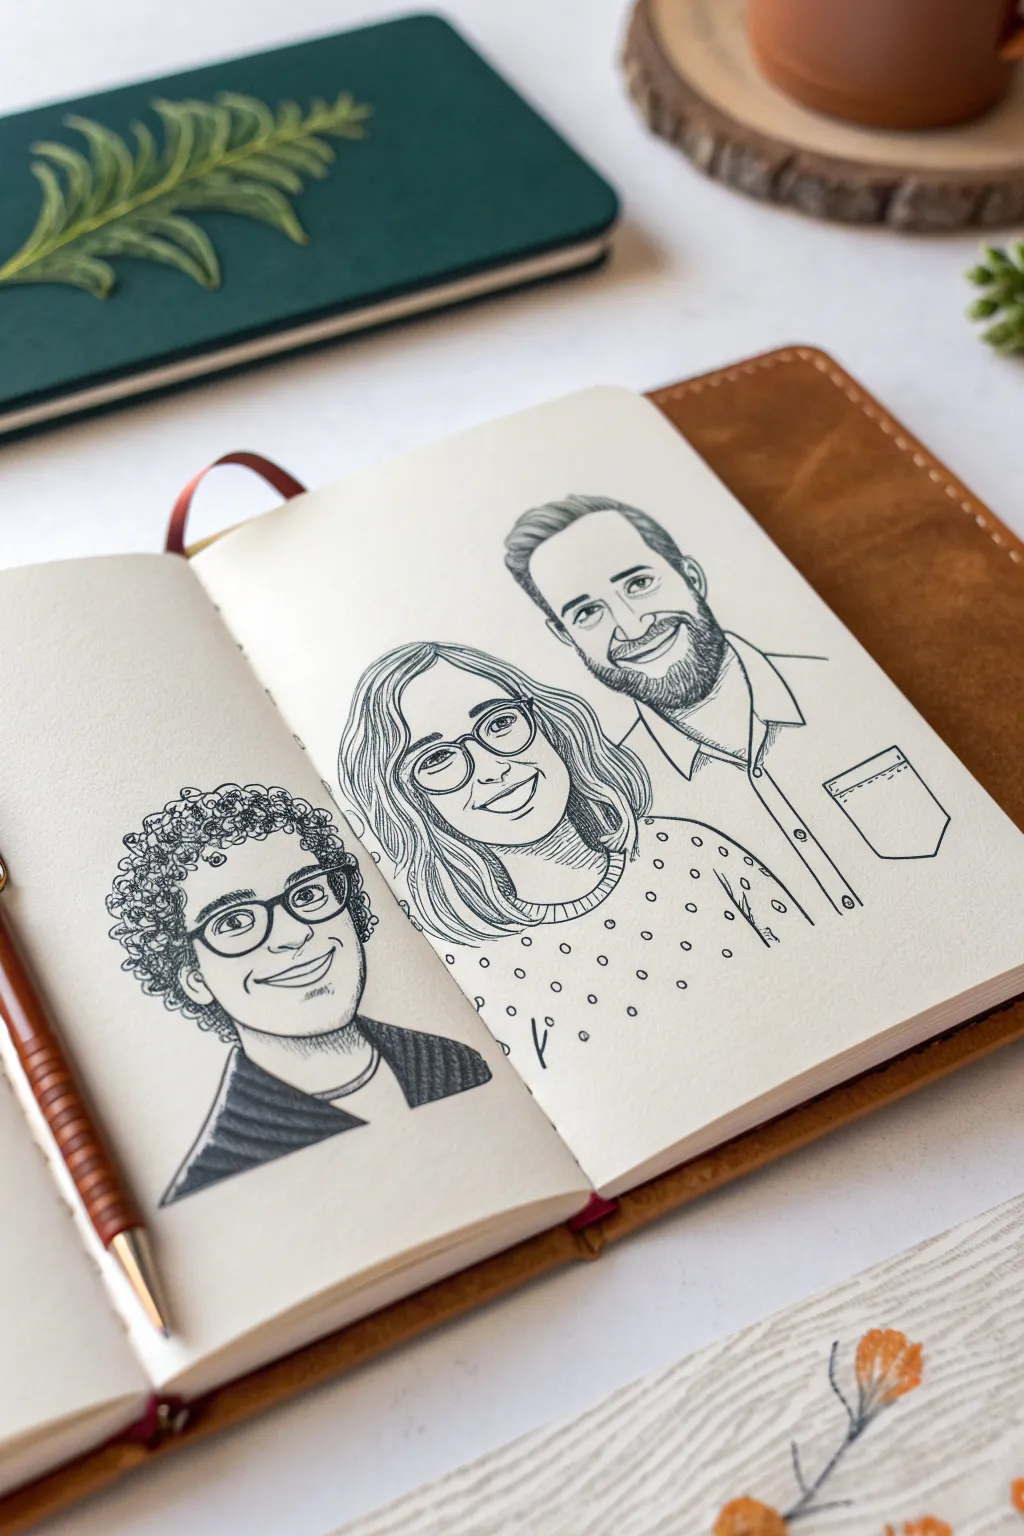
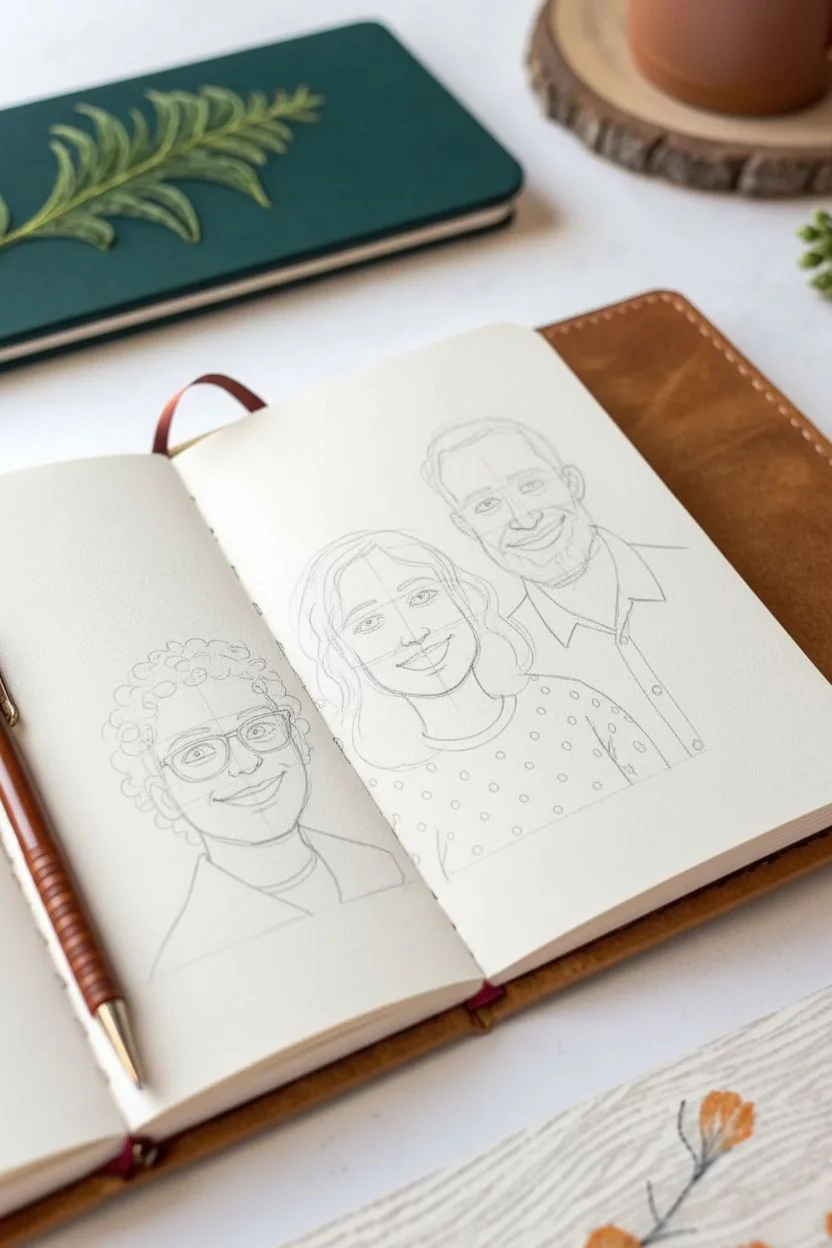
Capture the distinct personalities of your loved ones with this clean, illustrative ink drawing style that balances realism with charming exaggeration. This project focuses on clear line work, simplified clothing patterns, and capturing signature facial features in a cohesive sketchbook spread.
How-To Guide
Materials
- Smooth bristol or mixed-media sketchbook paper
- HB or H graphite pencil
- Kneaded eraser
- Fine liner pens (sizes 005, 01, 03, and 05)
- Reference photos of family members
Step 1: Planning and Sketching
-
Establish the layout:
Open your sketchbook to a fresh spread. Lightly mark the center of the pages to decide placement. For a group of three, place one person on the left page (lower third) and the couple on the right page to create a balanced, asymmetrical composition. -
Basic head shapes:
Using your HB pencil, lightly sketch oval shapes for the heads. Keep distinct shapes in mind: use a rounder oval for softer faces and a more squared-off jawline for bearded or angular faces. Don’t press hard; these lines will be erased later. -
Map facial guidelines:
Draw vertical lines down the center of each oval to determine the direction the person is facing. Add horizontal lines for the eyes, nose, and mouth placement. Slightly exaggerate the eye size for that friendly, illustrative look seen in the example. -
Refine features:
Sketch the specific features. Focus on ‘signature’ elements like glasses, curly hair, or a beard. For glasses, draw the frames slightly larger than life to frame the eyes. For the beard, outline the overall mass shape rather than individual hairs. -
Shoulders and clothing:
Block in the neck and shoulders. Keep the clothing simple—collared shirts or sweaters work best. Sketch outlines for potential patterns, like the polka dots on the woman’s sweater, but keep them faint.
Step 2: Inking the Outlines
-
Start with the eyes:
Switch to an 01 fine liner. Carefully ink the upper lash line first, making it slightly thicker. Add the pupil and iris, leaving a small white circle for a catchlight to bring them to life. -
Feature outlines:
Ink the nose and mouth. Use broken lines for the nose bridge to keep it subtle. For the mouth, focus on the corners and the center line; avoid outlining the entire lip shape unless wearing lipstick, as this can look heavy. -
Inking glasses:
If a subject has glasses, use an 03 pen to give the frames weight and solidity. Draw the frames carefully over the eyes you’ve already inked. Don’t worry if the line isn’t perfectly machine-straight; the hand-drawn wobble adds charm. -
Hair contours:
Outline the main mass of the hair with an 03 or 05 pen. For curly hair, use a series of bumpy, scalloped lines. For straight hair, use long, smooth strokes. Don’t fill it in yet. -
Clothing lines:
Ink the clothing outlines with confident strokes. Add details like collars, buttons, and pocket seams. Use a slightly thicker pen (05) for the outer silhouette of the shoulders to separate the figures from the background.
Smudged Ink?
If you accidentally smudge wet ink, don’t scrub it. wait for it to dry, then turn the smudge into a texture element (like a shadow or pattern) using stippling dots to camouflage the mistake.
Step 3: Shading and Texturing
-
Detailing the hair:
Switch to your finest pen (005). Add individual hair strands inside the main shapes you outlined. Follow the direction of growth. For the curly hair, use small tight loops; for the beard, short downward dashes. -
Skin shading:
Add minimal shading to the face to avoid aging the subjects. Use tiny stippling dots or very light hatching under the chin, under the nose, and inside the ears. -
Clothing patterns:
Ink the patterns on the clothes. For the polka dots, draw small circles. Don’t fill them in solid; keep them as open circles for a lighter feel. Add subtle wrinkle lines near the armpits and elbows. -
Heavy blacks:
Locate areas that need high contrast, like the dark shirt on the left figure. Use an 05 or brush pen to fill this area with dense, cross-hatching or solid black, leaving thin white gaps to suggest fabric texture. -
Final clean up:
Wait at least 15 minutes for the ink to cure completey. Take your kneaded eraser and gently dab and roll it over the drawing to lift all graphite guidelines without smudging the ink.
Variation Tip
To differentiate hair colors without color, use line density. Ink blond hair with sparse lines and lots of white space; ink dark hair with dense, closely packed lines.
Now you have a timeless, hand-drawn keepsake that celebrates your family’s unique characters
Family Tree Drawing With Portrait Leaves
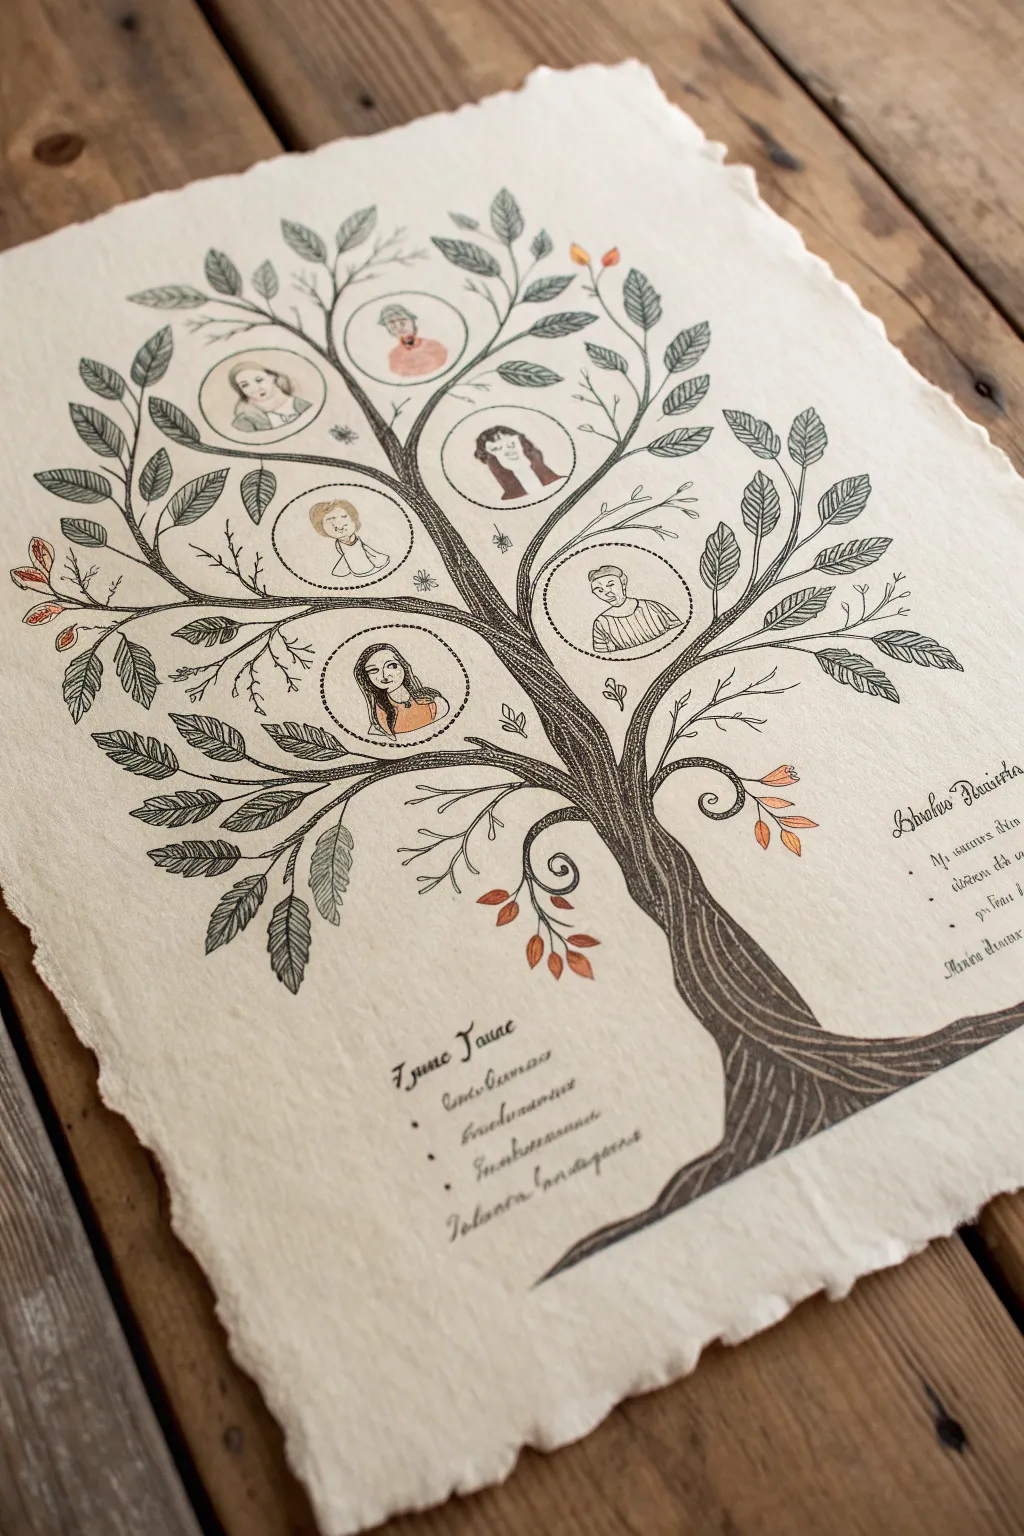
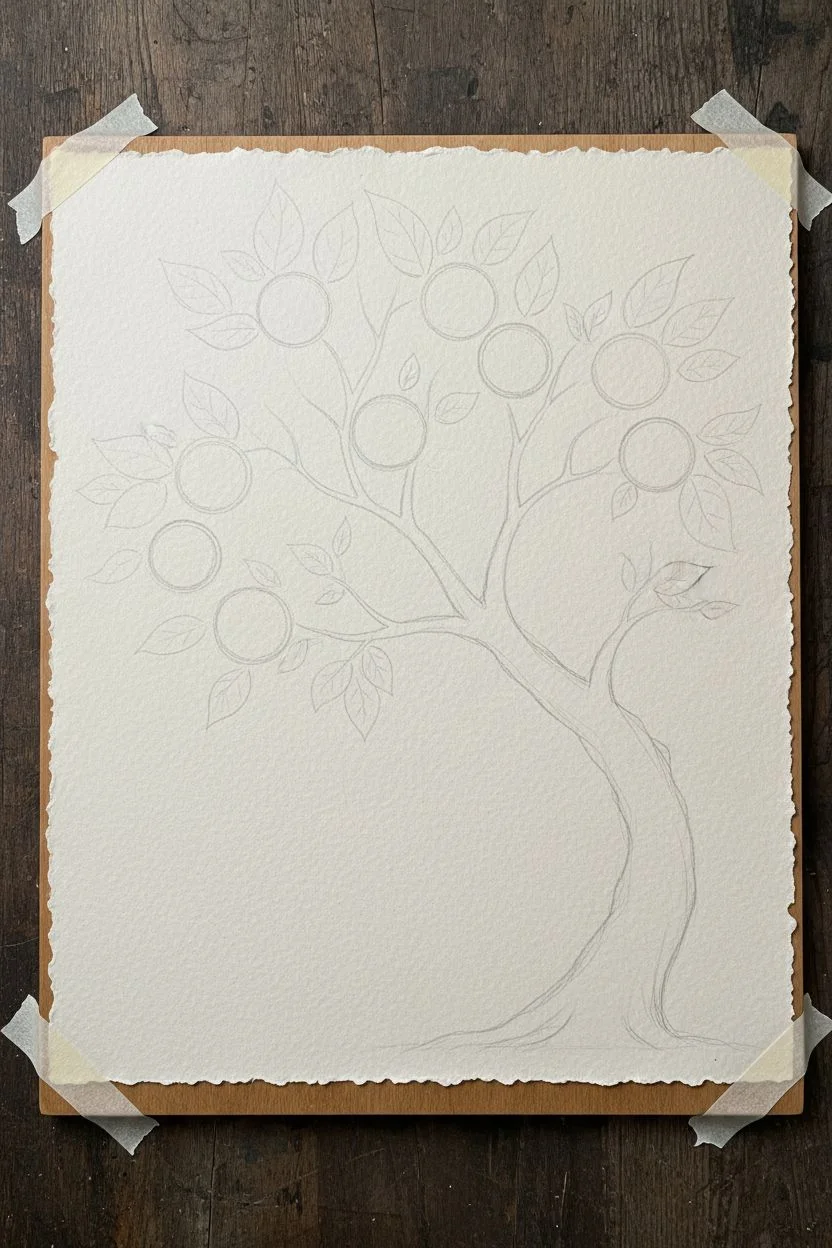
This charming project combines botanical illustration with miniature portraiture to create a truly unique family record on textured paper. The result is a vintage-inspired heirloom piece featuring delicate line work and watercolor washes that celebrates your lineage in an artistic way.
Step-by-Step
Materials
- Heavyweight handmade or deckle-edge watercolor paper (cream or oat colored)
- Fine liner pens (sizes 0.05, 0.1, and 0.3, black or sepia)
- Watercolor paints (earthy greens, browns, and skin tones)
- Small round watercolor brushes (sizes 0, 2, and 4)
- Graphite pencil (HB or 2H)
- Kneadable eraser
- Reference photos of family members
Step 1: Planning and Sketching
-
Paper Selection:
Begin by selecting a high-quality sheet of handmade paper. The rough texture and uneven ‘deckle’ edges are crucial for achieving the antique look shown in the example. Tape the corners down lightly to a board to prevent shifting. -
Drafting the Trunk:
Using your HB pencil, lightly sketch a sweeping curve for the tree trunk starting from the bottom right corner. Let the trunk taper as it reaches upward, splitting into two or three main arterial branches. -
Positioning Portraits:
Instead of drawing leaves immediately, lightly draw circles where you want your family portraits to sit. Arrange them hierarchically if desired, or scatter them organically among the upper branches. These should be roughly coin-sized. -
Adding Branch Details:
Connect your penciled circles to the main trunk with thinner, winding branches. Sketch in the surrounding foliage, mixing large singular leaves with clusters of smaller ones to fill the negative space without overcrowding the composition.
Step 2: Inking the Structure
-
Outlining the Tree:
Switch to a 0.1 or 0.3 fine liner pen. Trace your trunk lines, using long, somewhat shaky strokes to simulate bark texture. Avoid perfectly straight lines; organic wobbles add character. -
Bark Texture:
Fill the interior of the trunk with flowing, vertical contour lines that follow the shape of the tree. I like to let these lines converge and separate to suggest knots and twisted wood. -
Leaf Veins:
Ink the outlines of your leaves. For the interior detail, vary your approach: use simple central veins for some, cross-hatching for others, and leave a few blank for a visual break. -
Portrait Frames:
Carefully ink the circles for the portraits. You can use a dotted line or a solid thin line to create a subtle ‘frame’ effect. Erase all pencil marks once the ink is fully dry.
Ink Bleeding Issues?
Handmade paper is thirsty! If your ink feather, switch to a waterproof pigment liner and test it on a scrap piece first. Do not pause your pen on the paper.
Step 3: Miniature Portraiture
-
Simple Faces:
Using your finest 0.05 pen, draw the portraits inside the circles. Keep features simple and stylized—dots for eyes and simple curves for noses—rather than attempting photorealism at this tiny scale. -
Hair and Clothing:
Add distinguishing characteristics like hairstyles, glasses, or favorite clothing necklines. These small details are what make the tiny drawings recognizable as specific family members. -
Adding Color:
With a size 0 brush, apply very watered-down watercolor washes to the portraits. Use faint skin tones and soft colors for clothing. The goal is a tint, not opaque coverage.
Pro Tip: Tracing Aid
If you aren’t confident drawing faces freehand, print your family photos at tiny size, rub graphite on the back, and trace them directly into the circles.
Step 4: Final Touches
-
Painting Foliage:
Mix a desaturated sage green and a darker forest green. Paint the leaves loosely, staying mostly within the lines but allowing some overflow for an illustrative feel. -
Autumn Accents:
To add warmth, paint a few selected leaves or berries in burnt orange or ochre. This breaks up the green monotony and adds visual interest. -
Lettering:
In the bottom open spaces, use a calligraphy nip or your boldest fine liner to write names or a family title. Use a slightly ornamental script to match the vintage aesthetic. -
Textural Detail:
Once the paint is dry, you can go back in with your pen to add tiny stippling dots or extra hatching in the darkest shadowed areas of the tree trunk for depth. -
Review and Erase:
Do a final pass with your kneadable eraser to pick up any remaining graphite ghost lines, leaving a crisp, clean illustration.
Now you have a timeless piece of family history that looks like it came straight from a storybook
Collaborative Family Drawing Game Portrait (Pass-the-Paper)
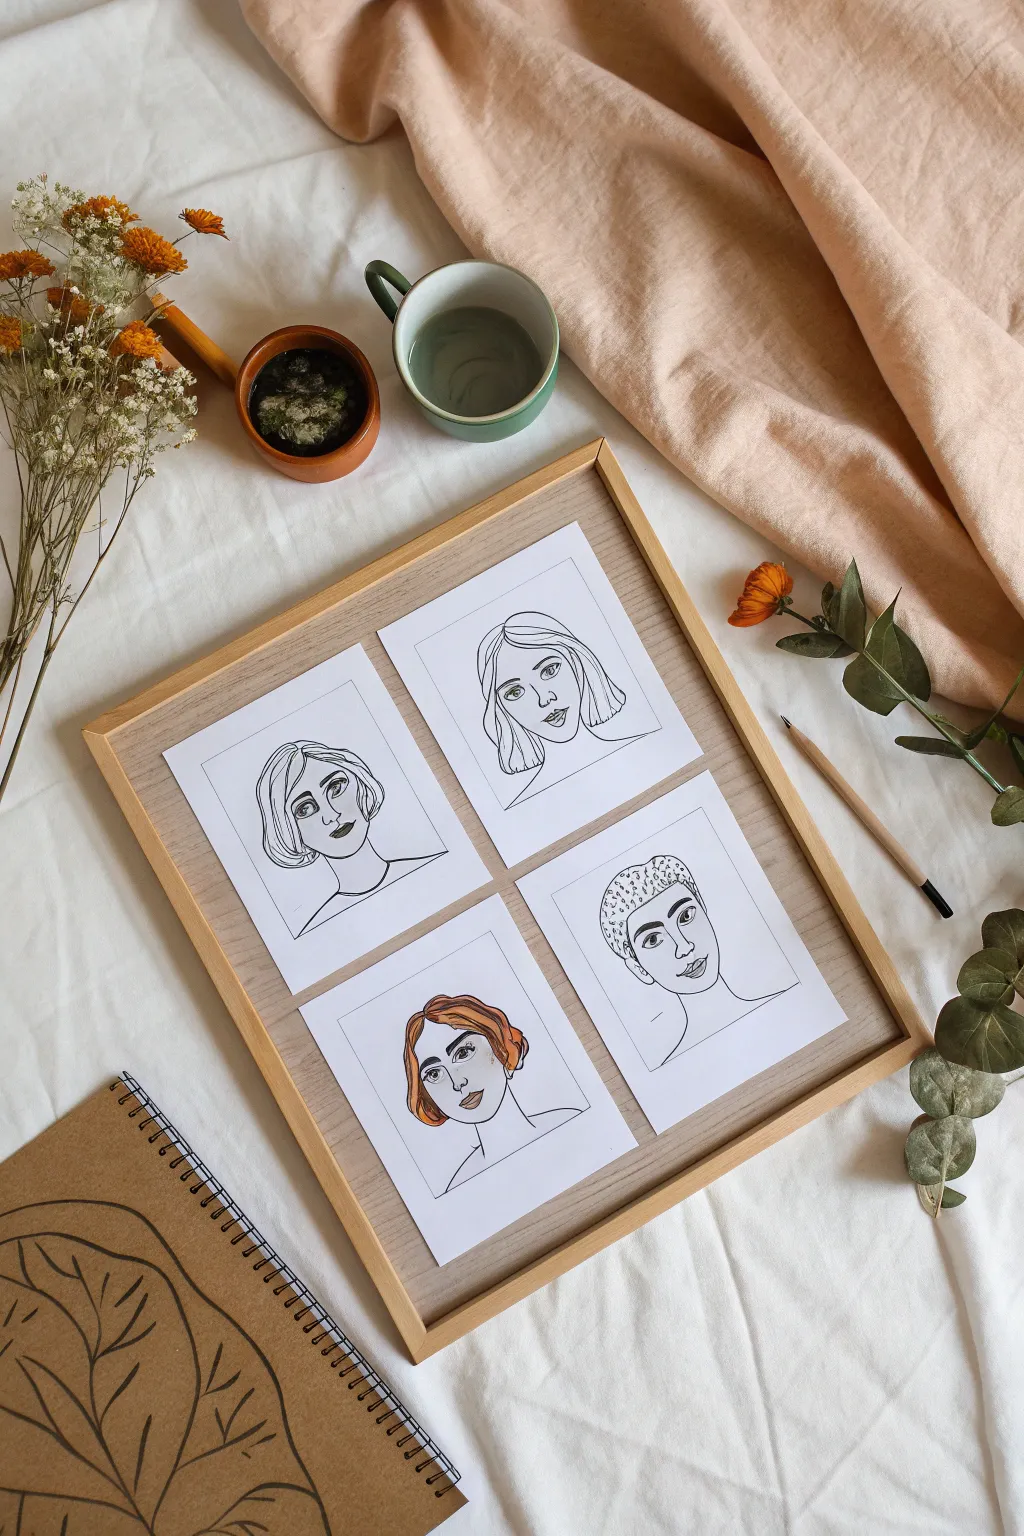
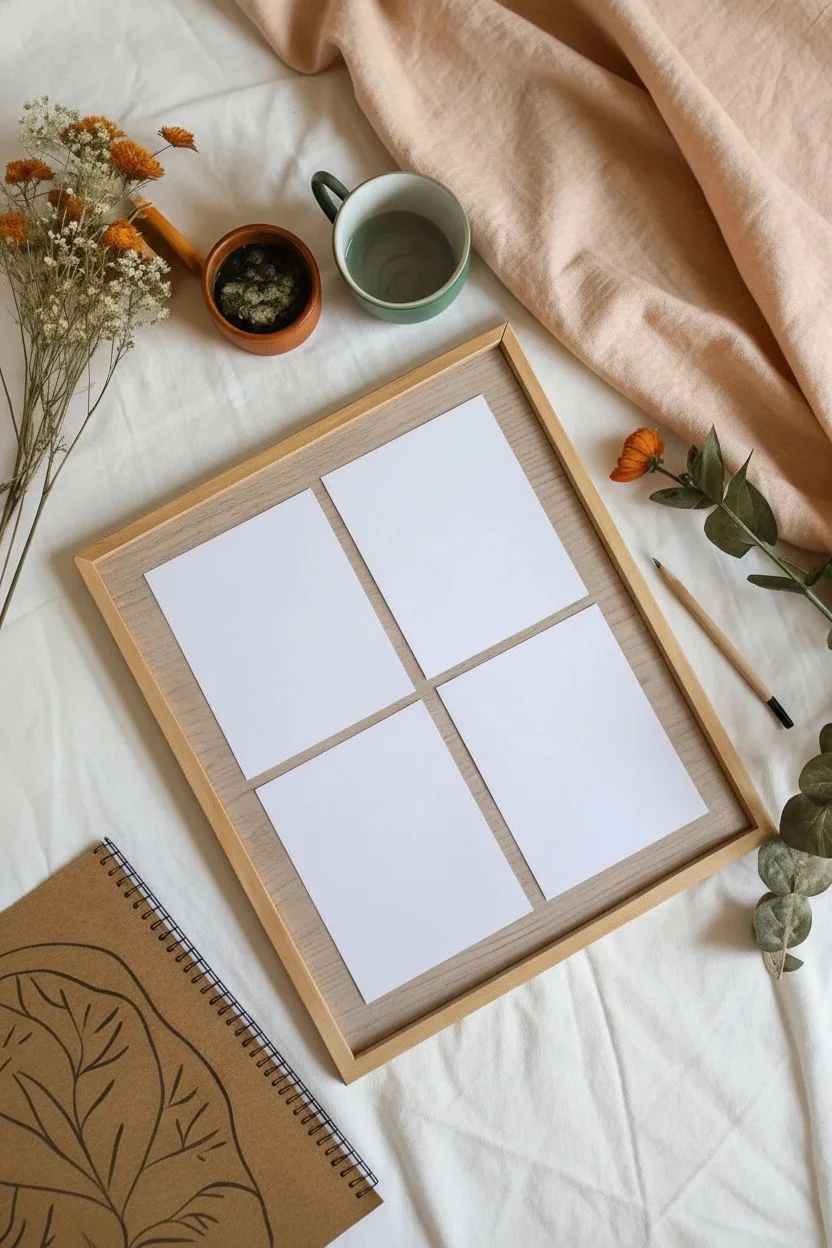
Create a unified gallery of minimalist portraits that celebrates imperfect lines and collaborative creativity. This project results in a stunning framed quartet of line drawings, perfect for capturing the essence of family members or friends in a modern, illustrative style.
Step-by-Step Tutorial
Materials
- Four sheets of heavyweight drawing paper or mixed media paper (square cut)
- Fine-point black drawing pen (e.g., Micron 05 or 08)
- Light wooden frame (approx. 12×12 inches or similar)
- Mounting board or backing paper (natural beige/kraft tone)
- Orange or terracotta watercolor paint
- Small round paintbrush (size 4 or 6)
- Double-sided tape or acid-free glue dots
- Pencil (HB) and eraser for initial sketches
Step 1: Preparation & Composition
-
Paper sizing:
Begin by cutting your heavyweight white paper into four equal squares. Size them so they will fit comfortably inside your wooden frame with about an inch of spacing between them. -
Preparing the mount:
Take your backing board—a subtle beige or wood-grain texture works beautifully here to mimic the reference—and lay the four squares down to test the spacing. Don’t glue them yet; just visualize the final grid. -
Choosing subjects:
Decide who each square will represent. You can have family members draw each other, or pass the papers around for a true collaborative game where one person draws the eyes, another the nose, and so on.
Step 2: Drafting the Portraits
-
Loose pencil sketching:
Using an HB pencil, lightly map out the general shape of the faces. Keep the style continuous and fluid; focus on the main contours of the hair, jawline, and neck. -
Feature placement:
Sketch the facial features simply. The goal isn’t photorealism but an artistic abstraction. Large, expressive eyes and defined lips work well for this aesthetic. -
Refining the lines:
Go back over your pencil lines to simplify them. Erase unnecessary clutter so you have a confident path for your ink work later.
Ink Smearing?
If your pen smears when erasing pencil lines, switch to a pigment-based liner (like a Micron) and wait longer before erasing.
Step 3: Inking & Accent Color
-
Tracing with ink:
Take your black fine-point pen and carefully trace over your pencil lines. Use a steady hand but don’t worry about wobbles—they add character to the line art style. -
Varying line weight:
I find that adding a tiny bit of extra thickness to the jawlines or the curve of the hair helps the portraits pop off the page. -
Letting ink set:
Allow the black ink to dry completely for at least 15 minutes before erasing any visible pencil marks to avoid smudging. -
Adding the color pop:
Select one portrait to highlight. Mix a watery wash of terracotta or orange watercolor. Apply it loosely to the hair area, staying somewhat within the lines but allowing for a painterly feel. -
Drying time:
Let the painted square dry flat. If the paper buckles slightly, place it under a heavy book once it is fully dry to flatten it out. -
Texture details:
For variety, consider adding texture to another portrait, like the stippled ‘dots’ on the hair cap of the bottom-right figure in the reference image.
Make it bolder
Try painting a solid background color on just one square, or use different monochromatic watercolors for each person’s hair.
Step 4: Final Assembly
-
Positioning on the board:
Place your backing board on a flat surface. Arrange your four finished drawings in a 2×2 grid, ensuring the margins are equal on all sides. -
Adhering the art:
Apply double-sided tape or glue dots to the back corners of each drawing. Press them firmly onto the backing board. -
Framing:
Clean the glass of your wooden frame to remove dust or fingerprints. Place the mounted artwork inside and secure the back clips. -
Display:
Your collaborative portrait series is now ready to hang or lean against a wall for a modern, artistic touch to your home decor.
Enjoy displaying this unique piece that captures your family’s artistic spirit in a sophisticated way


Have a question or want to share your own experience? I'd love to hear from you in the comments below!