A family portrait is one of those gifts that instantly turns into a keepsake—something that stays on the wall long after the occasion is over. Here are my favorite family portrait gift ideas, starting with the classics and moving into the artsy, unexpected options I love making in the studio.
Watercolor Family Portrait From a Favorite Photo
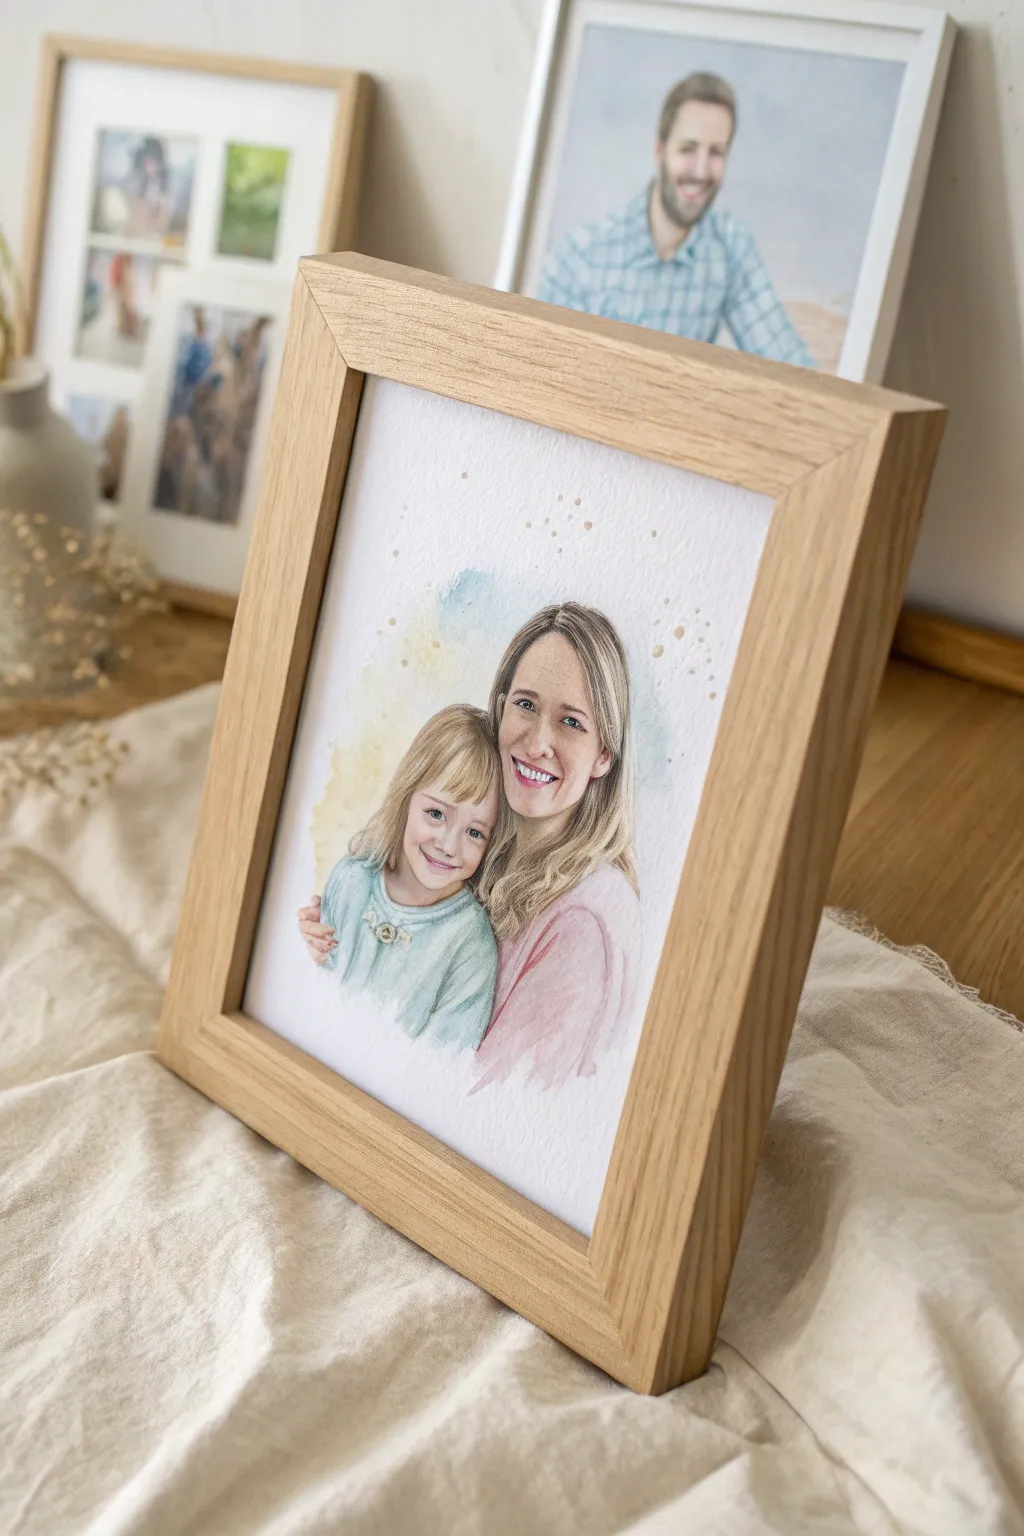
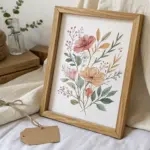
Transform a beloved family photo into a delicate, heirloom-quality watercolor painting that captures affection with soft washes and fine details. This project uses traditional watercolor techniques to create a light, airy portrait framed in natural wood, perfect for preserving a special moment.
Step-by-Step Guide
Materials
- High-quality hot press watercolor paper (300 gsm)
- HB pencil and kneadable eraser
- Watercolor paints (skin tones: Yellow Ochre, Alizarin Crimson, Burnt Sienna; others: Cobalt Blue, Sap Green)
- Round watercolor brushes (Size 2, 4, 8) and a detail liner brush
- Masking fluid (optional)
- Two jars of water
- Paper towels
- Natural wood frame (square crop)
- Reference photo
Step 1: Preparation and Sketching
-
Prepare your workspace:
Tape your watercolor paper down to a board using artist tape to prevent buckling when the paper gets wet. Ensure you have good lighting and your reference photo is printed or displayed clearly nearby for easy viewing. -
Lightly sketch the outline:
Using an HB pencil, carefully sketch the main contours of the subjects. Focus on the placement of features like eyes, nose, and mouth, but keep your lines extremely faint so they don’t show through the final sheer paint layers. -
Refine the features:
Go back in and define the shapes of the hair and clothing folds. Don’t shade with the pencil; just map out where the shadows will eventually be painted. -
Mask highlights (optional):
If you struggle to preserve white space, use a small amount of masking fluid on the brightest catchlights in the eyes or the shine on the teeth. Let this dry completely before touching it with a wet brush.
Muddy colors?
If skin tones look dirty, you likely over-mixed the paint on the paper. Let layers dry completely before glazing a new color over top to keep them transparent.
Step 2: Painting the Skin Tones
-
Mix your base skin tone:
Create a watery wash using Yellow Ochre and a tiny touch of Alizarin Crimson. Test the color on a scrap piece of paper first to ensure it’s not too saturated; watercolor dries lighter, but it’s safer to start very pale. -
Apply the first wash:
Using a size 8 brush, apply the base skin wash to the faces, avoiding the eyes and teeth. Work wet-on-dry for control, keeping the edges of the face soft but distinct. -
Add warmth and shadows:
While the first layer is still slightly damp, drop in a mix of Burnt Sienna or a slightly darker red-orange into the cheeks, nose tip, and shadow areas (like under the chin) to create volume without harsh lines. -
Deepen the shadows:
Once the first layers are dry, mix a cooler shadow tone (add a tiny bit of blue to your skin mix) and paint the deeper recesses around the eye sockets and neck. Soften any hard edges with a clean, damp brush.
Pro Tip: Soften Edges
To get that dreamy look, run a clean, damp brush along the edge of fresh paint strokes. This ‘feathers’ the color into the white paper seamlessly.
Step 3: Hair and Clothing
-
Block in hair color:
For the blonde hair shown, use a very diluted wash of Yellow Ochre or Raw Sienna. Paint in the direction of hair growth, leaving white gaps for highlights where the light hits the hair. -
Add texture to the hair:
Switch to a size 4 brush and a darker brown mix (add Burnt Umber). Paint individual strands focused near the roots and widely in the shadow areas, leaving the main body of the hair lighter to suggest volume. -
Paint the clothing:
Mix a soft teal for the child’s shirt and a muted rose for the adult’s top. Apply these washes loosely. I like to let the color fade out at the bottom edges to give that unfinished, artistic vignette look. -
Add clothing folds:
While the clothing wash is drying, use a slightly more concentrated version of the same color to paint the folds and wrinkles, softening the edges to keep the fabric looking soft.
Step 4: Details and Background
-
Refine facial features:
Using your smallest detail brush (size 0 or 2), carefully paint the irises, verify the pupil placement, and define the lash line. Use a reddish-brown for the lips, keeping the application sheer. -
Add the background splashes:
Mix a very watery yellow and teal. Load your brush and gently splatter or dab these colors around the heads in a halo effect. Let the colors bleed into each other on the paper for an ethereal feel. -
Add gold speckles (optional):
For a bit of magic, tap a wet brush against your finger to flick tiny droplets of gold or dark yellow paint around the upper background area. -
Erase and sign:
Once the painting is bone dry—wait at least an hour—gently erase any visible pencil marks with the kneadable eraser. Remove any masking fluid if used. -
Frame the artwork:
Place the finished piece behind a mat if desired, or float mount it, and secure it inside a simple natural oak frame to match the organic feel of the watercolor.
Hang your new masterpiece in a well-lit spot to enjoy the gentle warmth it brings to the room


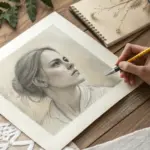
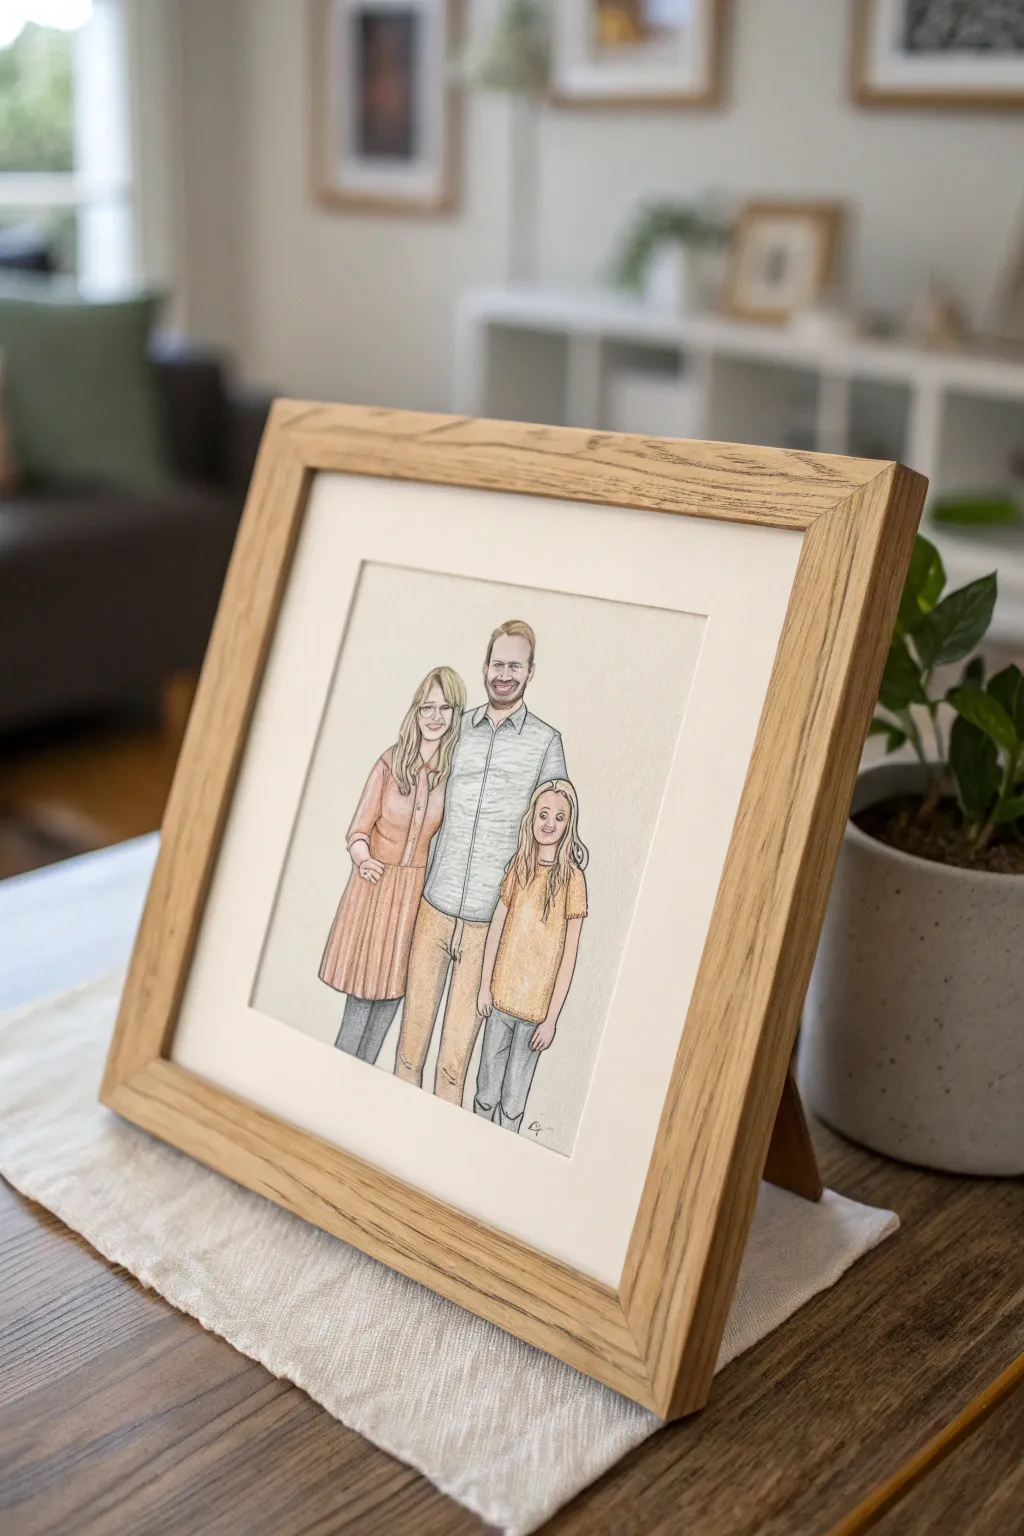
Classic Pencil Family Portrait Sketch
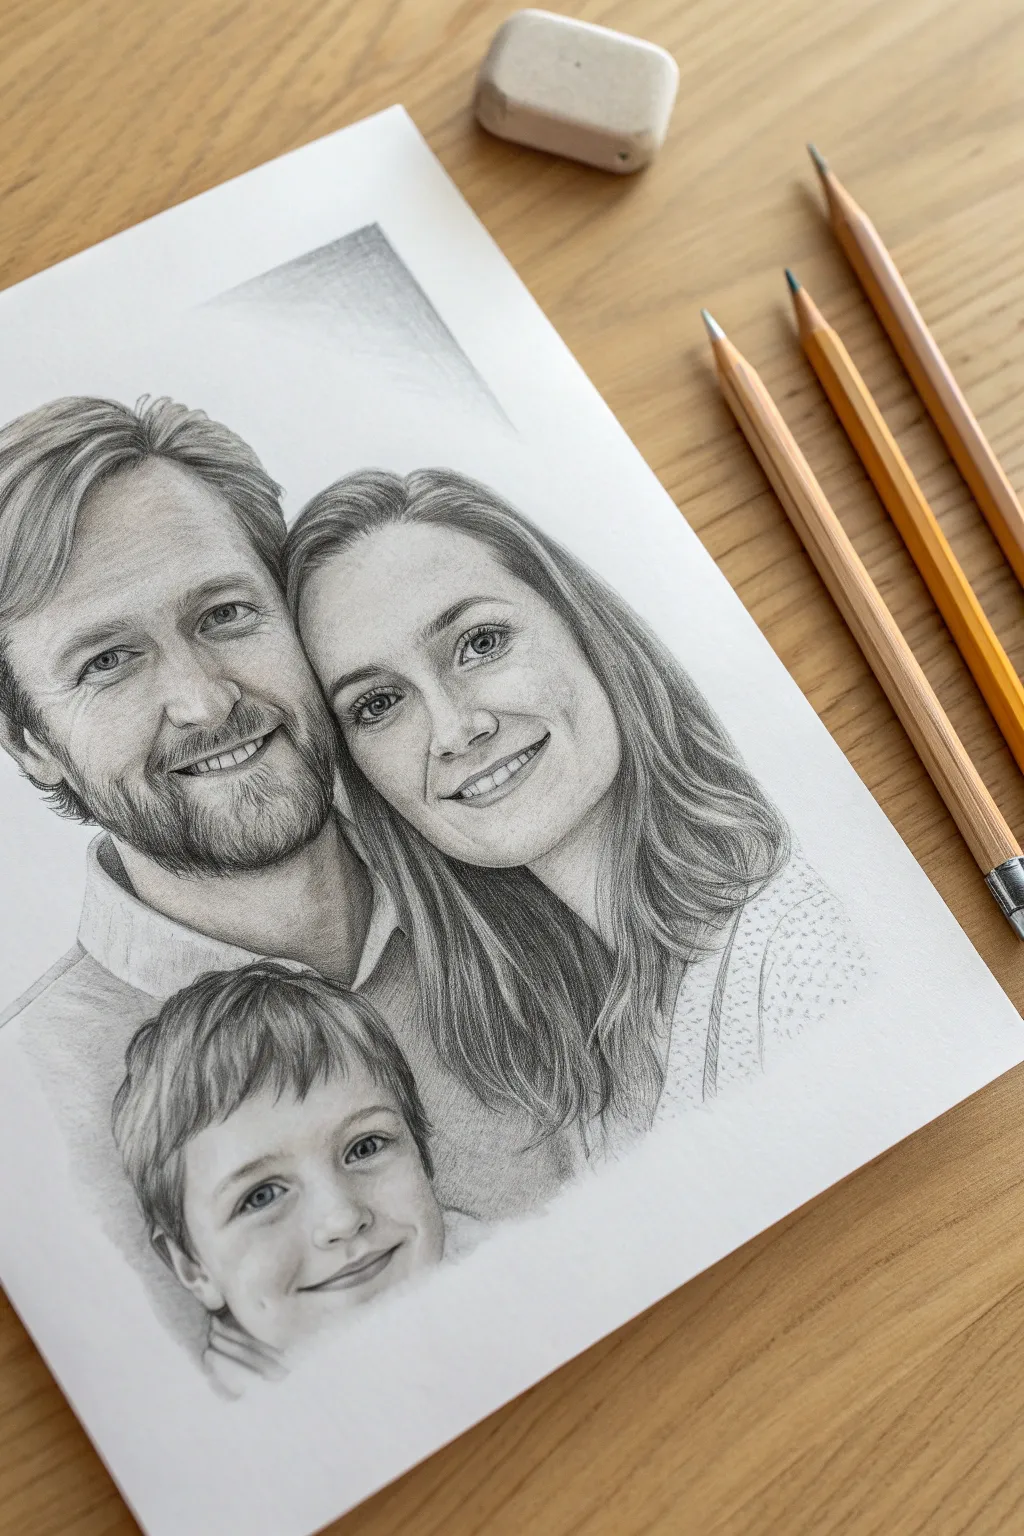
Capture the warmth and connection of family with this classic pencil portrait technique. Using graduated shading and precise line work, this project transforms a simple reference photo into a sophisticated, highly detailed black and white illustration perfect for framing.
Detailed Instructions
Materials
- High-quality hot press watercolor paper or smooth Bristol board (A4 or A3)
- Graphite pencils (HB, 2B, 4B, 6B)
- Mechanical pencil (0.5mm HB) for fine details
- Kneaded eraser
- White vinyl eraser
- Paper blending stump or tortillon
- Reference photo of the family
- Drawing board and masking tape
Step 1: Laying the Foundations
-
Prepare your workspace:
Tape your paper securely to a drawing board to prevent shifting. Ensure you have good lighting, preferably from the left if you are right-handed, to avoid casting shadows on your work area. -
Analyze the reference:
Study your reference photo carefully. Look for the triangle composition formed by the three heads—the parents usually sit slightly higher than the child, anchoring the image. -
Initial block-in:
Using an HB pencil with a very light hand, sketch the basic oval shapes for the heads. Do not press hard; these lines need to be erasable. Establish the eye lines, nose lines, and center lines for the faces to ensure correct proportions. -
Refining the features:
Lightly sketch the recognizable features. Focus on the placement of the eyes, the width of the noses, and the curve of the mouths. Don’t worry about shading yet; just get the ‘map’ of the faces accurate.
Step 2: Developing the Portrait
-
Start with the eyes:
Begin detailing the eyes on the father’s face first. Use a mechanical pencil for the pupils and iris outlines. The eyes are the soul of the portrait, so accurate placement here is crucial. -
Shading the skin tones:
Switch to a 2B pencil. Apply a base layer of shading to the face, avoiding the brightest highlights on the forehead and nose. I find using light, circular motions helps create a smoother skin texture than back-and-forth hatching. -
Softening the transitions:
Use a paper blending stump to gently smudge the graphite you just laid down. This pushes the graphite into the paper tooth, creating that soft, realistic skin tone characteristic of classic portraits. -
Building facial structure:
Deepen the shadows around the eye sockets, under the nose, and beneath the bottom lip using a 4B pencil. Establish the beard texture on the father with short, directional strokes, layering lighter strokes over darker base values. -
Detailing the mother’s face:
Move to the mother’s portrait. Keep her skin smoothness in mind; use softer transitions and less heavy hatching than on the male subject. Pay special attention to the smile lines—keep them subtle to avoid aging the subject. -
Drawing the hair:
For the mother’s long hair, use long, flowing strokes with a 4B or 6B pencil. Follow the direction of growth. Leave strips of white paper untouched to represent the shine where the light hits the hair. -
Adding the child:
Sketch the child’s features at the bottom. Children have softer features and larger irises relative to their eyes. Keep the shading very light and minimal to maintain a youthful appearance.
Protect Your Palm
Place a scrap piece of clean paper under your drawing hand. This prevents skin oils from staining the paper and stops your hand from smudging your hard work.
Step 3: Finishing Touches
-
Clothing contours:
Lightly sketch the collars and shoulders. You don’t need to detail every thread; suggestions of folds and shadows using a 2B pencil are sufficient to ground the heads. -
Adding texture to clothes:
If there’s a pattern, like the subtle dots on the mother’s top, add them now with dots of the mechanical pencil. Keep the clothing lighter than the faces so it doesn’t distract. -
Deepening the blacks:
Take your 6B pencil and revisit the darkest areas: the pupils, the deep shadows in the hair, and the corners of the mouths. This pushes the contrast and makes the drawing ‘pop’ off the page. -
lifting highlights:
Take your kneaded eraser and mold it into a fine point. Dab—don’t rub—areas where you want bright highlights, like the reflection in the eyes, the tip of the nose, and the shine on the teeth. -
Define the edges:
Clean up the perimeter of the drawing. You can choose to leave a soft, vignetted edge that fades into the white paper, or crisp up the outer contours of the hair and shoulders. -
Final protectant:
Once fully satisfied, gently brush away any eraser crumbs. It is wise to spray a fixative over the drawing (outdoors) to prevent the graphite from smudging over time.
Vignette Style
Fade the shoulders and bottom of the drawing into the white paper gradually. This ‘floating’ look focuses attention on the faces and gives the piece a professional, airy feel.
This beautiful handmade tribute captures a moment in time that can be cherished for generations to come


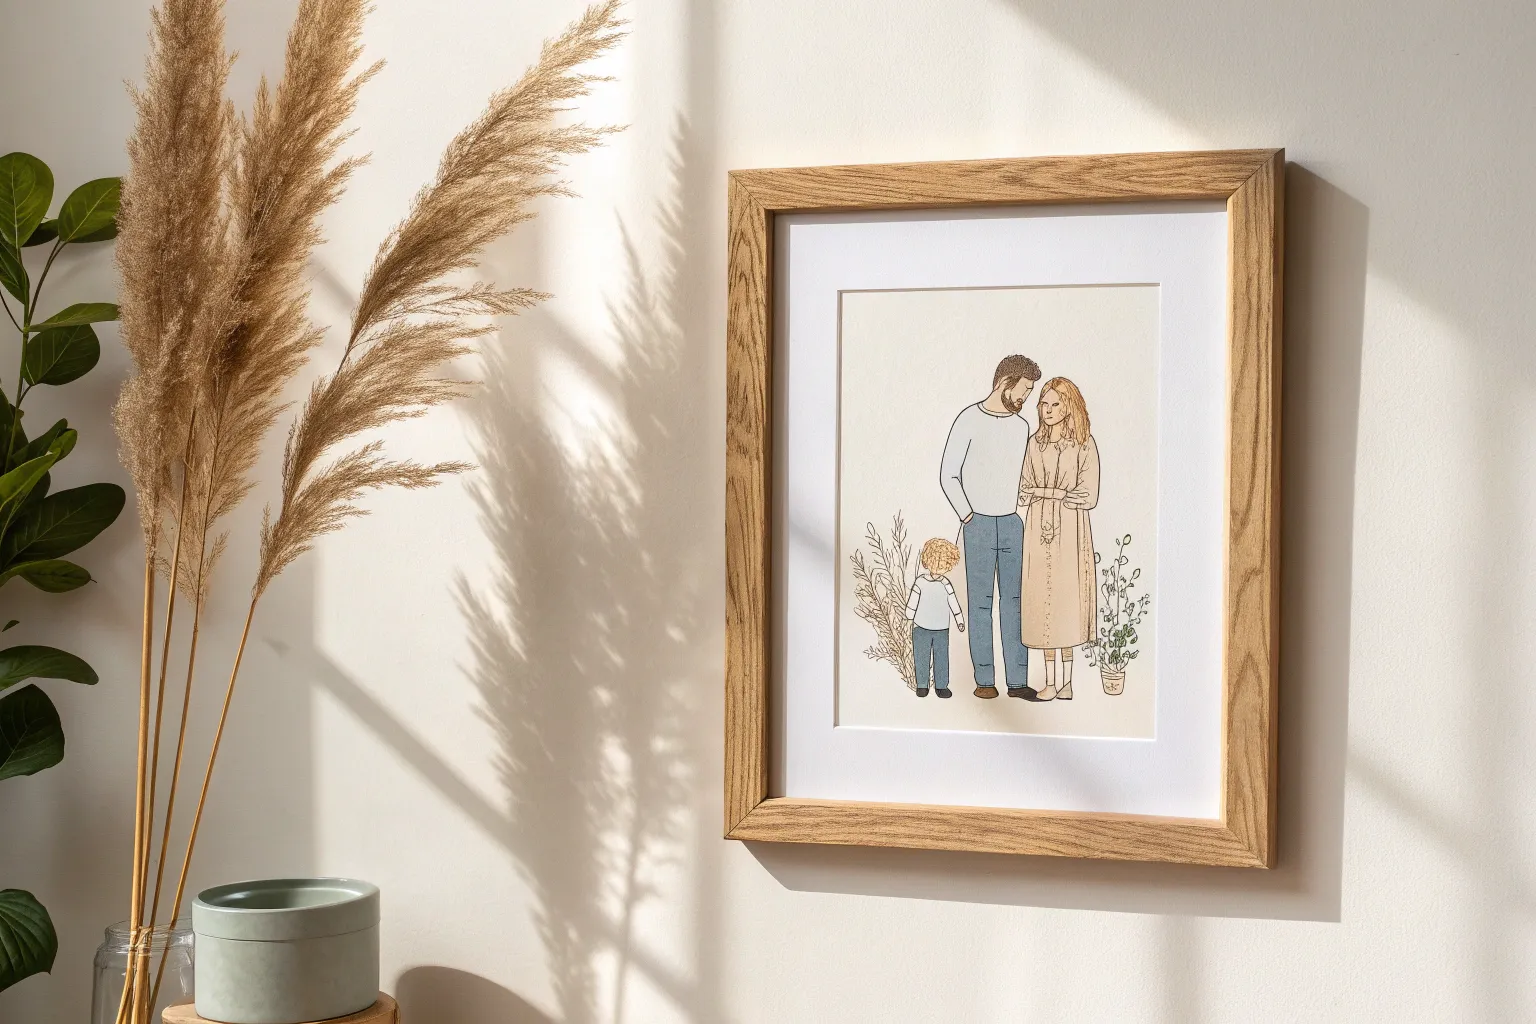
Minimal Line Art Family Portrait
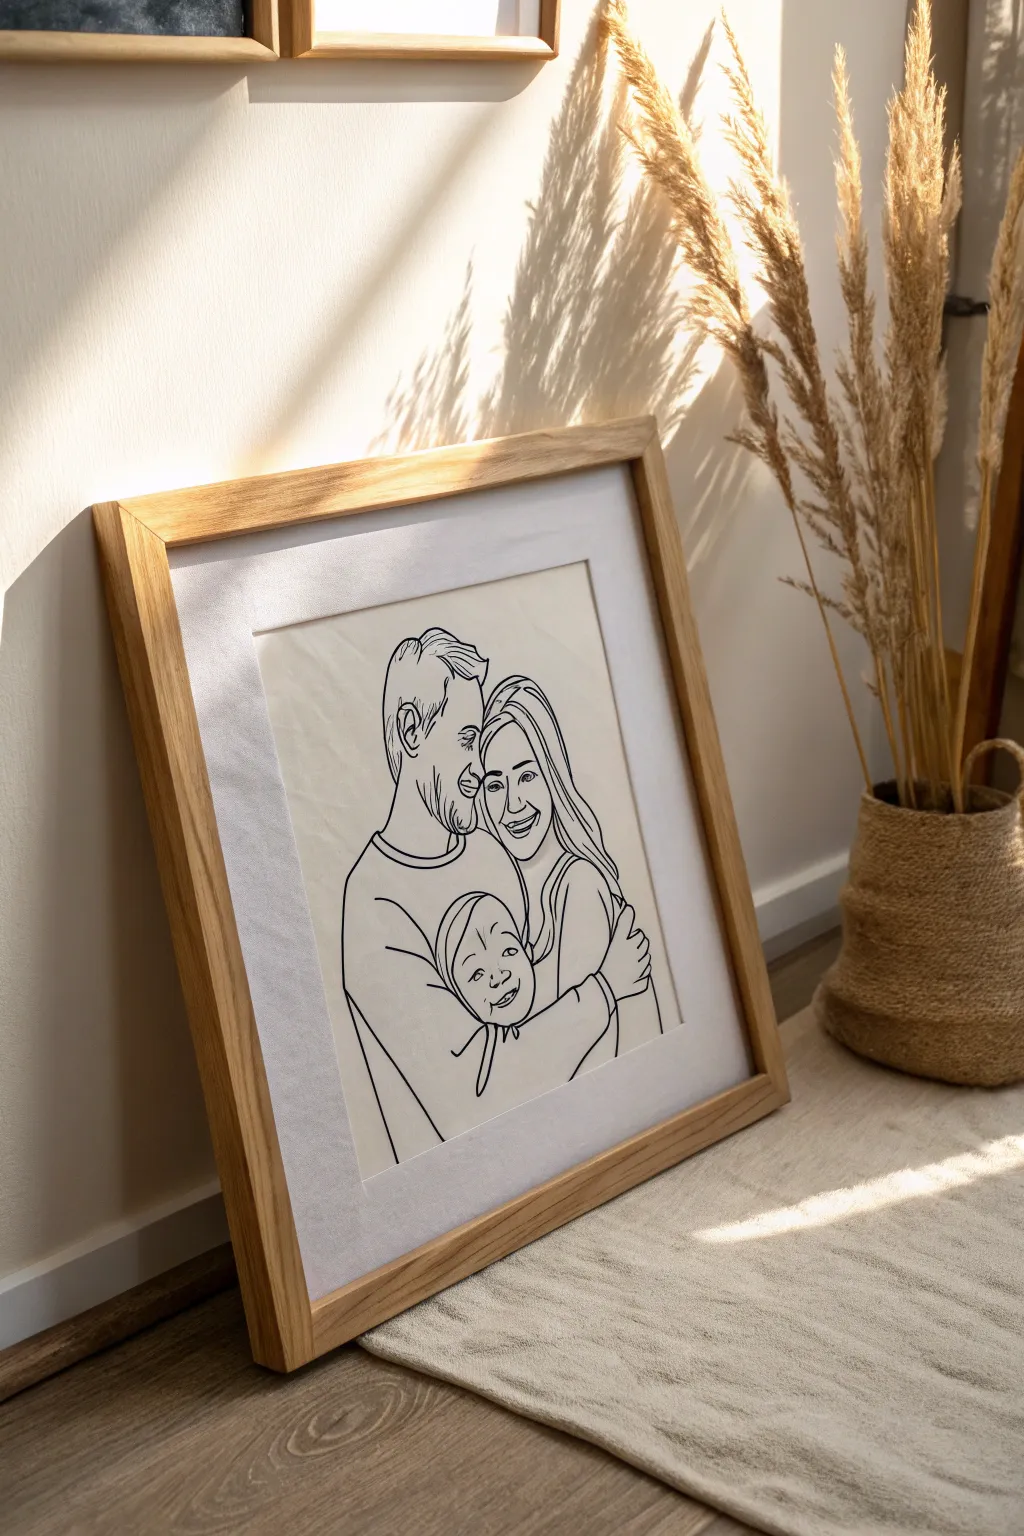
Capture the essence of family bonds with this elegant, minimalist line drawing project. By tracing over a cherished photo and simplifying the details, you create a sophisticated piece of art that looks professionally designed.
Step-by-Step
Materials
- High-quality reference photo
- Tracing paper or light box
- Heavyweight drawing paper (smooth bristol or hot press watercolor paper)
- Pencil (HB or 2H)
- Eraser (kneaded)
- Fine liner pens (0.1mm, 0.3mm, 0.5mm) in black archival ink
- Masking tape
- Wooden frame with mat board
Step 1: Preparation & Composition
-
Select the perfect photo:
Choose a clear family photo where faces are visible and distinguishable. Close-up shots focusing on interaction, like a hug, work best for this intimate style. -
Prepare the reference:
Turn your photo into a black and white image on your computer or phone. Increase the contrast significantly; this helps you see exactly which major lines define the faces and bodies. -
Print the reference:
Print your high-contrast image at the exact size you want your final drawing to be. If you don’t have a printer, you can display it on a tablet at full brightness, locking the screen interaction. -
Secure your layers:
Tape your printed photo down to a flat surface. Layer your final drawing paper over it. If your paper is too thick to see through, use a light box underneath or tape both sheets to a sunny window.
Confident Strokes Tip
Draw lines by moving your whole arm from the shoulder, not just your wrist. This creates smoother, more continuous curves essential for the sleek minimal look.
Step 2: Drafting the Lines
-
Begin the primary pencil sketch:
Using a light hand and your HB pencil, begin tracing the most prominent outlines. Ignore small details like eyelashes, individual teeth, or fabric patterns. -
Simplify facial features:
Focus on the ‘islands’ of the face: the eyes, nose line, and mouth shape. Don’t close every shape; leaving small gaps in the lines adds to that airy, minimalist aesthetic. -
Outline the hair:
Instead of drawing individual strands, look for the overall shape or ‘helmet’ of the hair. Draw long, sweeping curves to suggest volume and direction. -
Connect the figures:
Trace the shoulders and arms where the family members touch. Merging the lines where two people meet emphasizes connection and unity. -
Review the sketch:
Remove the underlying photo and look at your pencil drawing alone. Use your kneaded eraser to lighten the lines until they are barely visible guides.
Step 3: Inking & Finishing
-
Thicken main contours:
Start with your 0.5mm pen. Trace the outermost silhouettes of the figures (shoulders, outer hair lines, and heavy clothing folds) to establish a strong visual anchor. -
Detail the faces:
Switch to the 0.3mm pen for facial features. Use deliberate, confident strokes. I like to start with the eyes, as getting the expression right anchors the rest of the drawing. -
Refine subtle details:
Use your finest 0.1mm pen for delicate areas like the baby’s features, smile lines, and finer hair strands. Keep these lines very light and broken. -
Check line weight balance:
Step back and assess your drawing. If an area feels too empty, add a simple crease line in the clothing or a hair curve, but remember that less is often more. -
Erase pencil marks:
Allow the ink to dry completely—give it at least 15-20 minutes to prevent smearing. Gently erase all remaining pencil guidelines with the kneaded eraser. -
Mount artwork:
Center your artwork on the back of the mat board. Use artist tape to secure just the top edge of the paper to the mat, allowing the paper to hang freely and avoiding buckling. -
Final assembly:
Clean the glass of your wooden frame thoroughly on both sides. Place the matted artwork inside, secure the back, and check for any trapped dust before hanging.
Wobbly Lines?
If a line looks shaky, don’t try to redraw over it immediately. Instead, thicken the line slightly in that spot to smooth out the irregularity intentionally.
This custom piece is now ready to bring a touch of warm, modern elegance to any room


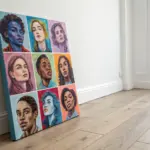
Bold Acrylic Family Portrait on Canvas
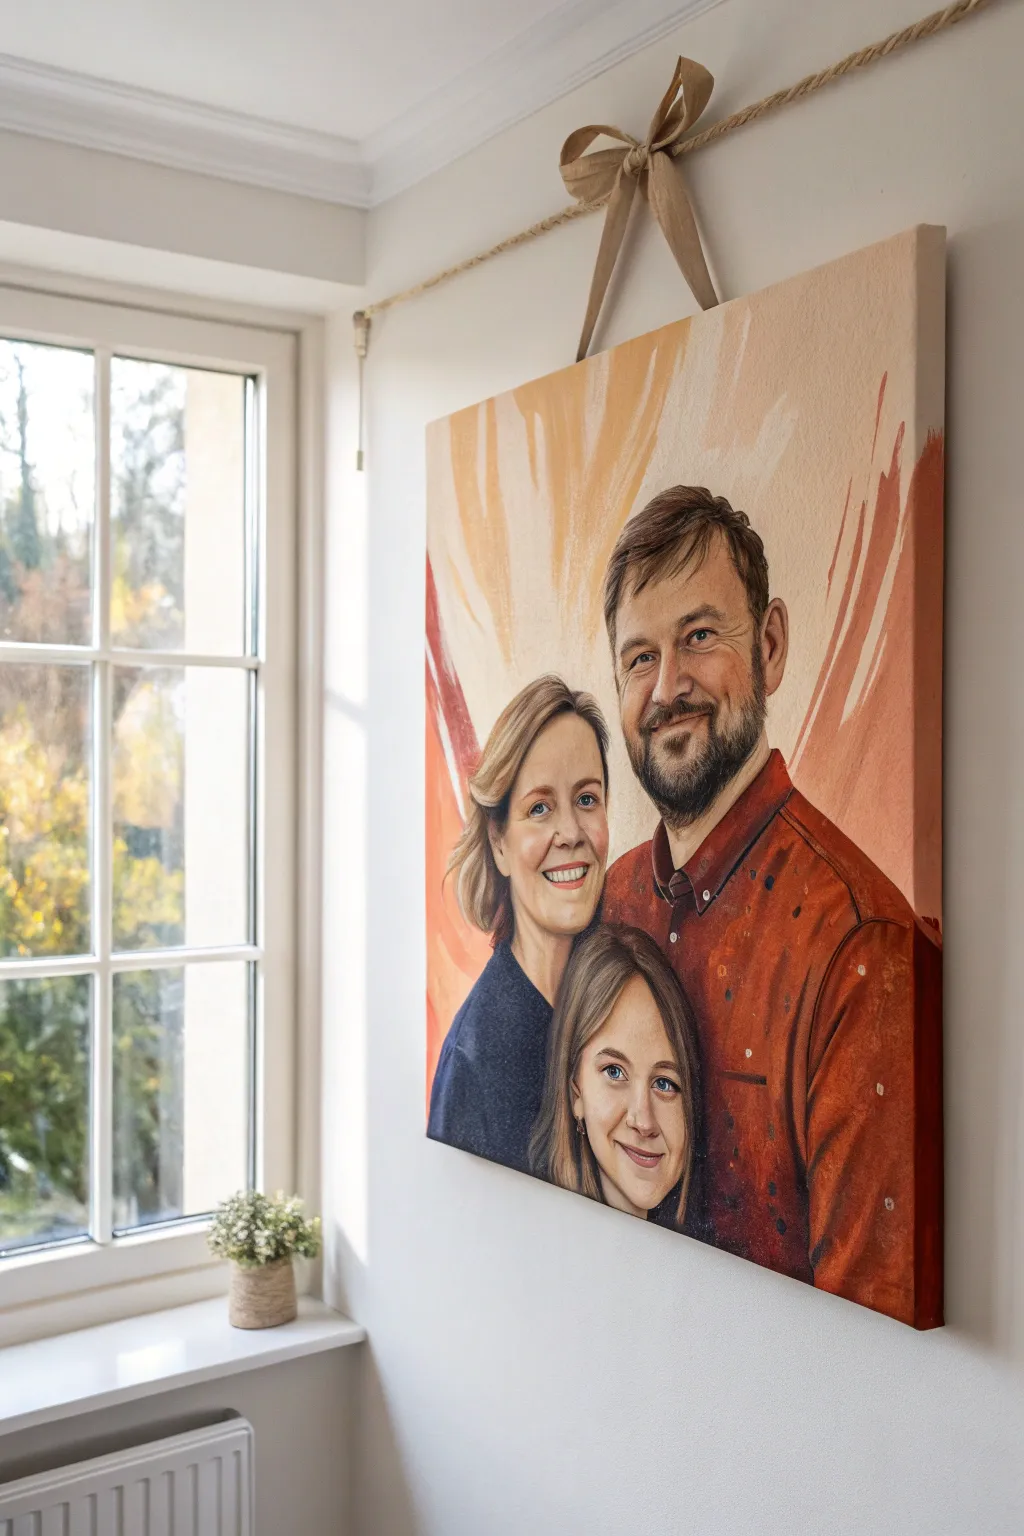
Capture the warmth of your loved ones with this vibrant acrylic portrait that blends realistic facial features with an abstract, sun-draped background. The resulting canvas feels both modern and timeless, making it a striking centerpiece for any hallway or living room.
Detailed Instructions
Materials
- High-quality stretched canvas (at least 16×20 inches)
- Acrylic paints (Titanium White, Burnt Sienna, Yellow Ochre, Cadmium Red, Ultramarine Blue, Burnt Umber, Flesh Tint)
- Reference photo of the family
- Pencils and eraser (HB and 2B)
- Variety of brushes: large flat brush (2 inch), medium filbert, fine liner brushes
- Acrylic fluid medium or flow improver
- Palette and palette knife
- Easel or flat working surface
- Natural jute twine and ribbon (for hanging)
- Staple gun or heavy-duty glue
Step 1: Preparation and Sketching
-
Surface Prep:
Begin by applying a thin wash of Burnt Sienna diluted with water over the entire canvas to kill the stark white. This warm undertone will help glow through the later layers. -
Grid or Projection:
Once the wash is dry, transfer your reference photo to the canvas. You can use a grid method for accuracy or a projector if you have one, using an HB pencil to lightly outline the figures. -
Refining Features:
Strengthen the key lines of the faces—eyes, nose, and mouth placement—using a slightly darker pencil or a dilute paint mix. Ensuring the likeness is accurate at this stage is crucial before opaque paint goes down.
Pro Tip: Eye Placement
Double-check the eyes before detailing. The space between eyes is usually the width of one eye. If they are too close or far, the likeness will fail.
Step 2: Blocking and Skin Tones
-
Mixing Skin Base:
Create a mid-tone flesh color using White, Yellow Ochre, and a touch of Cadmium Red. Mix a large enough batch to cover all three faces as a base layer. -
Shadow Mapping:
Mix a darker shadow tone by adding Burnt Umber and a tiny bit of Ultramarine Blue to your skin base. Apply this to the shadowed sides of the faces, under the chins, and around the eye sockets. -
Highlight Mapping:
Add more White to your base mix and block in the forehead, bridge of the nose, and cheekbones. Don’t worry about blending perfectly yet; just get the values in the right places. -
Blocking Clothing:
Paint the father’s shirt with a deep rust red (Cadmium Red + Burnt Sienna), the mother’s top in a dark navy (Ultramarine + Black), and leave the daughter’s area for later detail. Keep these layers fairly flat for now.
Step 3: Designing the Background
-
Mixing Sun Rays:
Prepare three gradients of warm colors: a pale cream, a soft peach, and a deeper terracotta orange. These will form the abstract sun rays behind the figures. -
Dynamic Strokes:
Using the large 2-inch flat brush, paint sweeping, upward strokes starting from behind the figures and reaching toward the top edge. Keep the strokes loose and energetic rather than perfectly straight. -
Layering Contrast:
Add a few bolder, darker orange strokes on the right side to balance the composition, allowing some of the brush texture to remain visible for an artistic feel.
Level Up: Impasto Effect
Mix gel medium into your background paint colors. It thickens the paint, allowing you to create visible, raised brushstrokes for a textured, painterly look.
Step 4: Detailed Rendering
-
Blending Faces:
Use a dry filbert brush to softly blend the transitions between your skin highlights, mid-tones, and shadows. I find using a tiny amount of flow improver here helps create that smooth, realistic skin texture. -
Facial Details:
Switch to your fine liner brush. Darken the pupils, define the lash lines, and carefully paint the lips. Use Burnt Umber rather than black for facial features to keep the look natural. -
Hair Texture:
Paint the hair in layers, starting with the darkest mass tone. Then, flick lighter distinct strokes over the top to suggest individual strands and highlights where the light hits. -
Clothing Texture:
Add depth to the father’s shirt by dabbing darker red-browns for folds and lighter orange-reds for highlights. For the mother’s sweater, use a dry-brush technique with a slightly lighter blue to suggest fabric texture. -
Father’s Beard:
Use a stippling motion or very short dashes with a liner brush to create the texture of the beard, layering dark browns with lighter grey-browns.
Step 5: Final Touches and Hanging
-
Eye Highlights:
The most important step for life-like portraits: place a tiny dot of pure Titanium White in the eyes to create the ‘catchlight’ reflection. -
Edges and Varnish:
Paint the sides of the canvas a neutral cream or continue the background colors around the edge. Once fully dry (wait 24-48 hours), apply a satin varnish to protect the work and unify the sheen. -
Attaching the Ribbon:
Cut a length of thick burlap or grosgrain ribbon. Tie it into a rustic bow. -
Securing the Hanger:
Attach two lengths of jute twine to the back of the canvas frame using a staple gun. Tie the ribbon bow to the top center of the twine for that decorative, hanging-frame aesthetic seen in the photo.
Hang your masterpiece where the natural light hits it to emphasize those warm, sunny tones you carefully layered.
BRUSH GUIDE
The Right Brush for Every Stroke
From clean lines to bold texture — master brush choice, stroke control, and essential techniques.
Explore the Full Guide
Back-View Family Portrait With Arms Linked
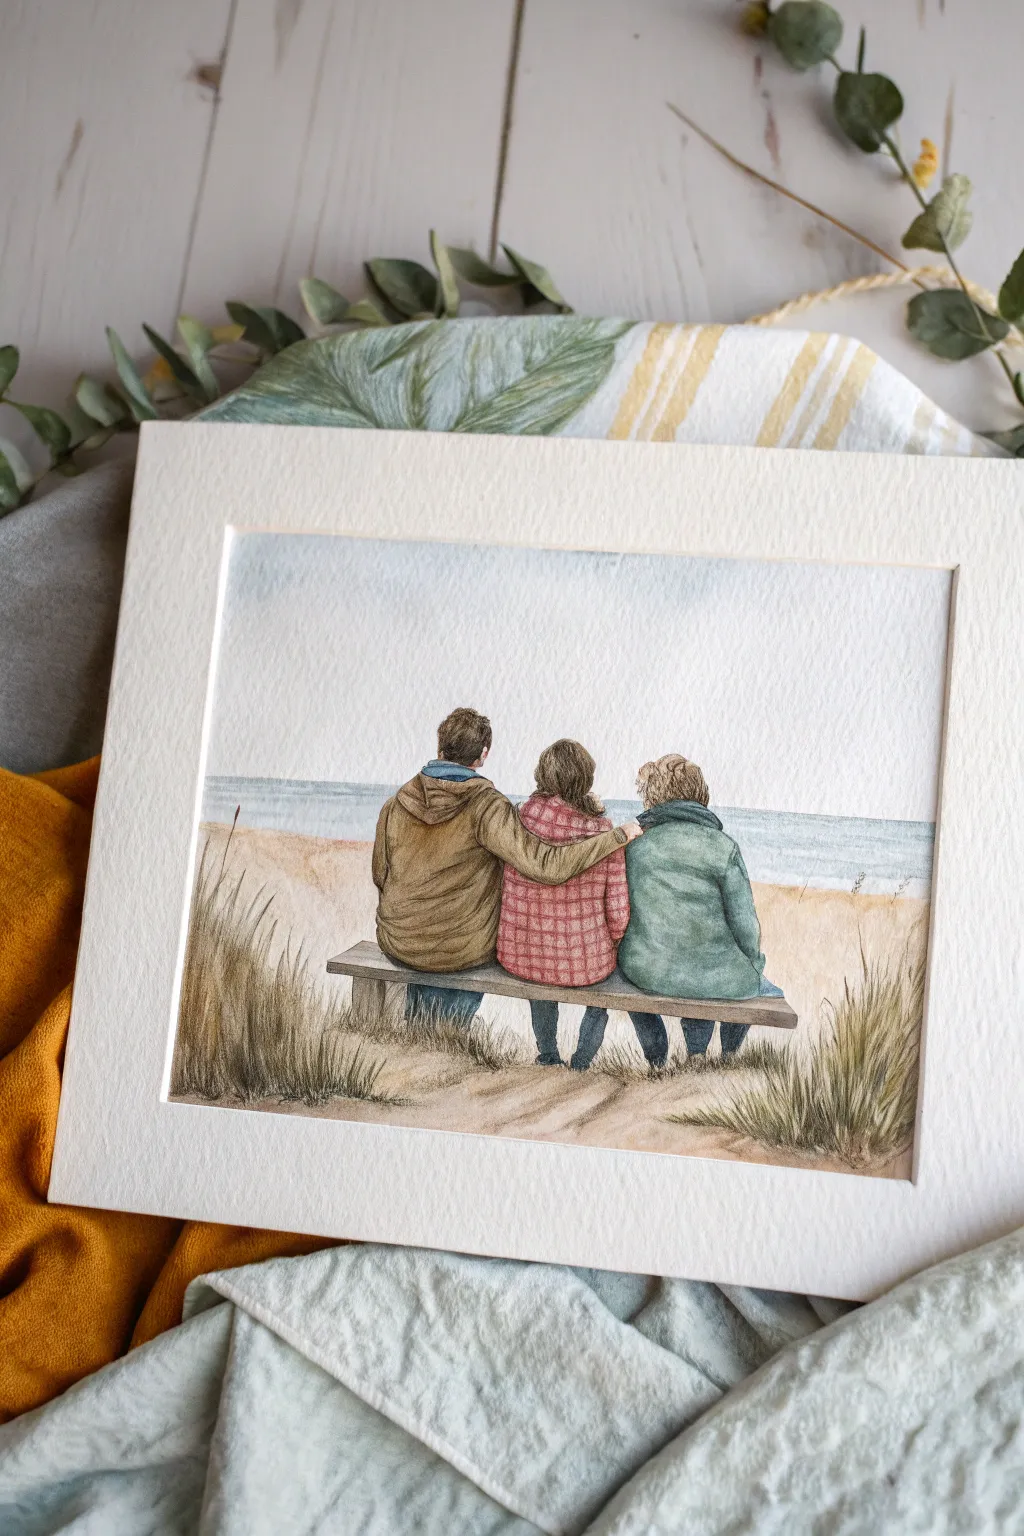
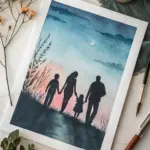
Capture the poignant beauty of family bonds with this delicate mixed-media portrait, featuring three figures gazing out at a tranquil sea. Using a blend of watercolor washes for atmosphere and fine liner or colored pencil for texture, you’ll create a keepsake that feels both timeless and deeply personal.
Step-by-Step
Materials
- Cold-press watercolor paper (300 gsm)
- Watercolor paint set (Earth tones: Burnt Sienna, Yellow Ochre; Blues: Cerulean, Ultramarine; Reds: Alizarin Crimson)
- Round watercolor brushes (Size 4, 8, and a 0 for details)
- Pencil (HB) and kneaded eraser
- Fine liner pens (sepia or dark brown) or sharp colored pencils
- Masking tape
- Jar of water and paper towels
- Reference photo of your subjects from behind
Step 1: Sketching and Preparation
-
Prepare the paper:
Begin by taping down the edges of your watercolor paper to a board with masking tape. This creates a clean white border and prevents the paper from buckling when wet. -
Establish the horizon:
Lightly draw a straight horizontal line across the paper, positioning it about one-third of the way up from the bottom to separate the sea from the sky. -
Outline the figures:
Sketch the three figures sitting on a bench. Focus on their posture and size relationships rather than clothing details at this stage. Place the bench legs so they sit firmly in the sand area. -
Add clothing details:
Refine the sketch by drawing the folds of the jackets and shirts. Pay attention to how the fabric bunches at the elbows and waist, particularly where the arm is draped across the neighbor’s shoulders. -
Sketch the foreground:
Indicate the grassy dunes in the foreground using quick, upward flicks of the pencil to suggest movement and direction.
Step 2: Painting the Landscape
-
Wash the sky:
Wet the sky area with clean water first. Drop in a very diluted wash of pale blue, keeping it uneven to suggest soft cloud cover. Let this dry completely before moving on. -
Paint the ocean:
Mix a slightly stronger blue-grey for the water. Paint horizontal strokes, leaving tiny slivers of white paper sparkling through to represent waves catching the light. -
Create the sand:
Mix Yellow Ochre with a touch of Burnt Sienna and plenty of water. Apply this wash to the beach area, darkening the tone slightly right under the bench for a subtle shadow.
Uneven Washes
If your large sky wash dries with hard lines (an outcome called ‘blooming’), gently scrub the edge with a damp, clean brush to soften it back into the background.
Step 3: Painting the Figures
-
Base layers for clothing:
Apply the first layer of color to the clothing. Use a mustard brown for the left figure, a soft red for the checked shirt, and a teal green for the right figure. Keep these washes fairly flat initially. -
Deepen the shadows:
Once the base layers are dry, mix darker versions of your clothing colors. Paint into the folds and creases you sketched earlier to give the figures volume and weight. -
Paint the hair:
Using a small number 4 brush, paint the hair using directional strokes that follow the hair’s natural growth pattern. I usually leave tiny gaps of white paper to suggest highlights. -
Detail the pattern:
For the middle figure’s flannel shirt, use a fine brush or a sharpened colored pencil to carefully draw the grid pattern over the dried red wash. Follow the curvature of the back to make it look realistic. -
Paint the bench:
Use a weathered grey-brown mix for the wooden bench. Paint horizontal wood grain textures and darken the legs where they meet the sand.
Add Personal Texture
Use colored pencils over dried watercolor to add texture to a wool coat or the wood grain on the bench. It adds a lovely mixed-media depth.
Step 4: Finishing Touches
-
Add dune grass:
Using a partially dry brush or fine liner, flick swift, upward strokes of olive green and brown in the foreground to create the tufts of dune grass. -
Refine edges:
Take your fine liner pen or a sharp colored pencil and very gently outline key areas like the shoulders and hair to crisp up the image. -
Final assessment:
Step back and check the contrast. If the painting feels too pale, add a final glaze of shadow under the bench and in the deepest folds of the clothing. -
The reveal:
Ensure the paper is bone dry, then carefully peel away the masking tape at a 45-degree angle to reveal your crisp, professional border.
Frame your finished piece in a simple wood frame to complement the organic tones of the beach scene
One Family Portrait Merged From Multiple Photos
Transform separate snapshots into a cohesive and heartwarming family heirloom using distinct ink lines and gentle watercolor washes. This project captures the essence of your loved ones in a stylized, illustrative format that feels both modern and timeless.
Detailed Instructions
Materials
- High-quality watercolor paper (cold press, 300lb)
- Pencil (HB or H)
- Kneaded eraser
- Fine liner pens (waterproof, sizes 01 and 03)
- Watercolor paints (pan set or tubes)
- Round watercolor brushes (sizes 4 and 8)
- Reference photos of family members
- Light tablet or bright window (optional for tracing)
- Masking tape
- Paper towels and water cup
- Square wooden frame with mount
Step 1: Planning and Composition
-
Gather and select references:
Collect clear photos of each family member you wish to include. Since you are merging multiple photos, try to find images where the lighting is somewhat consistent, or decide on a single light source to emulate during the drawing phase. -
Create a digital or mental collage:
If you are comfortable with digital tools, crop the figures and arrange them side-by-side on a computer to check the scale and height differences. Alternatively, create a rough pencil thumbnail sketch on scratch paper to decide who stands where. -
Prep the paper:
Cut your watercolor paper to the size of your frame’s mat opening. Secure the paper to a rigid board using masking tape around the edges to prevent buckling when wet.
Pro Tip: Unifying the Look
To make disparate photos look consistent, pick a limited color palette (3-4 colors) and mix them into every shade you use. This ties the group together visually.
Step 2: Sketching the Figures
-
Draft the basic shapes:
Using an HB pencil, lightly block in the general shapes of the bodies. Focus on the height relationships—ensure the child’s head reaches the correct point on the parents’ torso. -
Refine the heights and poses:
Adjust the positioning so the figures look like they are standing together naturally. You might need to slightly alter an arm position from the original photo so it tucks behind a spouse or rests on a child’s shoulder. -
Detail the faces:
Lightly sketch the facial features. Keep the likeness simple; this style relies on capturing the ‘essence’ rather than hyper-realism. Pay attention to signature elements like glasses, beards, or specific hairstyles. -
Add clothing details:
Sketch the outlines of the clothing, adding folds where elbows bend or shirts tuck in. Keep the lines loose and relaxed. -
Lighten the pencil lines:
Once you are happy with the composition, roll a kneaded eraser over the entire drawing to lift up the graphite until only faint ghost lines remain as a guide.
Troubleshooting: Inconsistent Scale
If heads look distinct sizes, measure the ‘head height’ of the tallest person. An average adult is about 7.5 heads tall. Use this ratio to sanity-check the other figures.
Step 3: Inking the Outline
-
Outline main contours:
Using a size 03 waterproof fine liner, trace the primary outlines of the bodies and hair. Use a broken, sketchy line rather than a solid hard wire to keep the illustration feeling organic. -
Detail the faces:
Switch to a finer 01 pen for facial features. Eyes and mouths require a delicate touch; less is often more here to avoid aging the subjects or making them look cartoonish. -
Add texture and shadow:
Use small hatching / diagonal lines to indicate shadows under the chin, in clothing folds, or on the legs. I prefer to keep this minimal to maintain the airy look of the piece. -
Erase pencil marks:
Allow the ink to dry completely (wait at least 15 minutes to be safe), then gently erase all remaining pencil marks.
Step 4: Watercolor Application
-
Mix skin tones:
Prepare a watery wash for skin tones using a mix of ochre, a touch of red, and plenty of water. Test the color on a scrap piece of paper first to ensure it isn’t too saturated. -
Paint skin areas:
Use a size 4 brush to gently fill in the faces and hands. Don’t worry about staying perfectly in the lines; a little bleed adds charm. -
Color the clothing:
Choose a soft, harmonious color palette for the outfits—muted pinks, blues, and warm yellows work well together. Apply the paint in light washes, leaving small white highlights on shoulders or knees to suggest volume. -
Add hair color:
Paint the hair in layers. Start with a very light wash of the base color (blonde or brown), let it dry slightly, and then add deeper strokes for contrast. -
Deepen shadows:
Once the first layers are dry, mix slightly darker versions of your clothing and skin colors. Paint these into the shadowed areas you hatched with ink earlier to add dimension.
Step 5: Final Assembly
-
Final drying and flattening:
Let the painting dry completely overnight. If the paper has buckled slightly, place it under a heavy book for a few hours. -
Mount and frame:
Center the artwork behind the mat of your wooden frame. Secure it with acid-free tape on the back of the artwork, clean the glass, and assemble the frame.
Hang your custom portrait in a bright spot where the delicate lines and colors can be admired daily

PENCIL GUIDE
Understanding Pencil Grades from H to B
From first sketch to finished drawing — learn pencil grades, line control, and shading techniques.
Explore the Full Guide
Extended Family Portrait for Grandparents
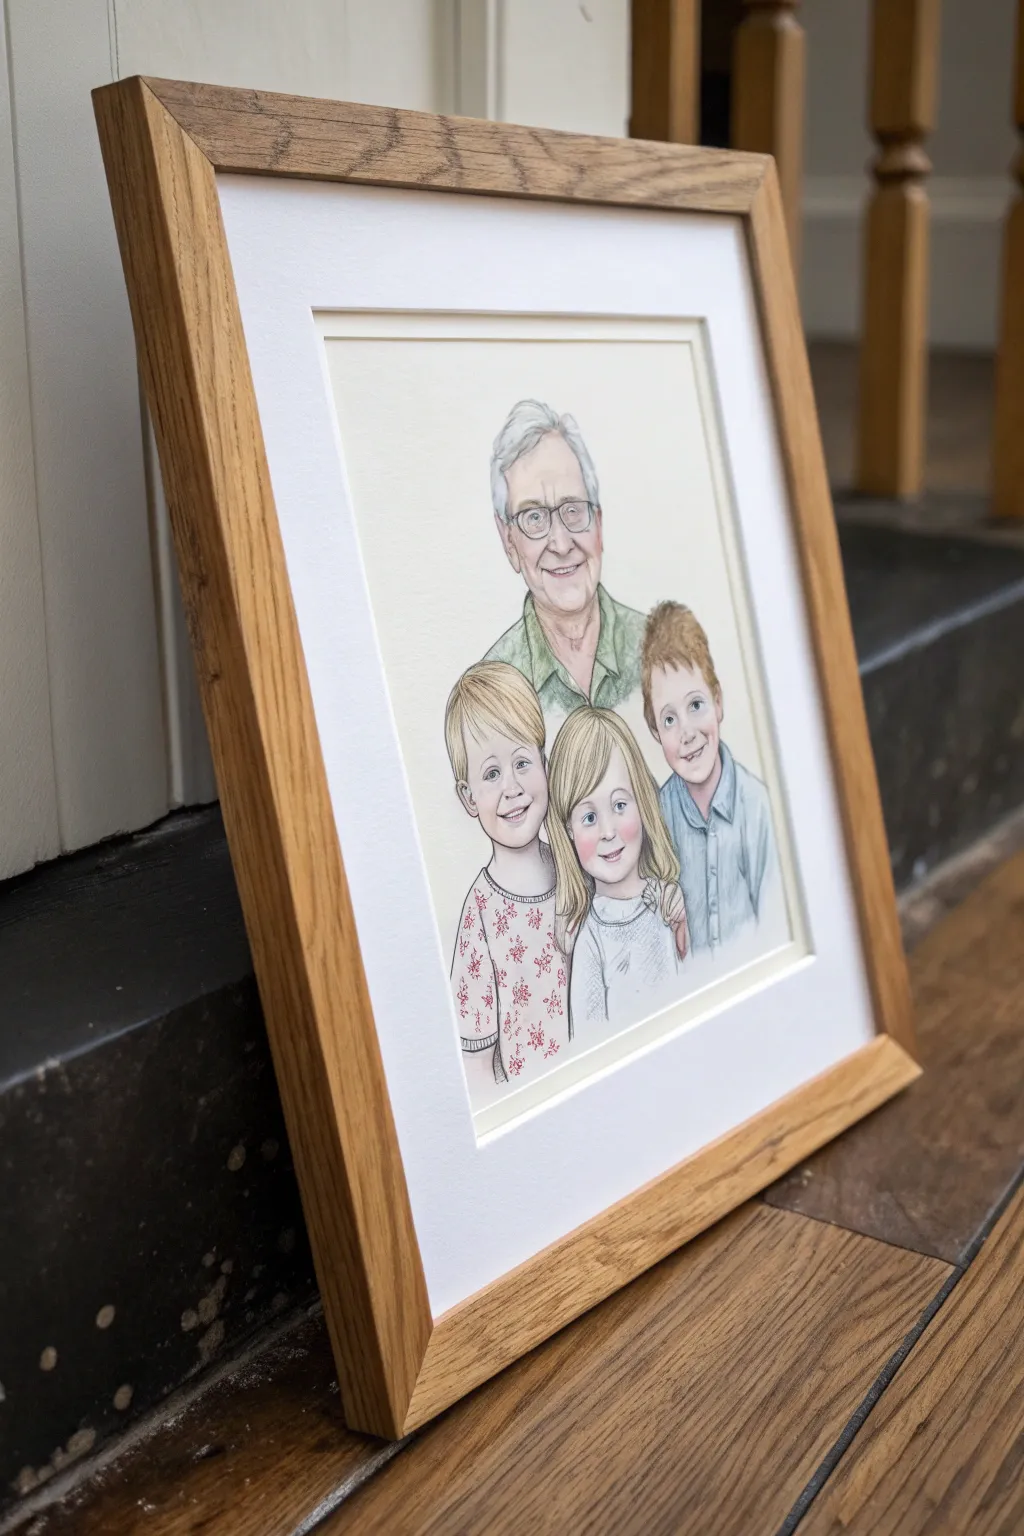
Capture the bond between generations with this tender mixed-media portrait, combining precise graphite line work with soft color washes. The result is a timeless, illustrative heirloom that balances realistic likeness with a gentle, artistic touch.
Step-by-Step Guide
Materials
- High-quality cotton watercolor paper (hot press for smoothness)
- Graphite pencils (HB, 2B, 4B)
- Kneadable eraser
- Watercolor paints or watercolor pencils
- Small round brushes (size 0, 2, 4)
- Fine liner pen (light grey or sepia, optional)
- Reference photo of family members
- Masking tape
- Drawing board
- Light oak frame with white mount
Step 1: Preparation and Sketching
-
Prepare your surface:
Tape your hot press watercolor paper to a drawing board using masking tape. This prevents the paper from buckling when you add the light washes of color later. -
Analyze the composition:
Arrange the composition from your reference photos. Place the older figure (Grandpa) centrally at the top, forming the peak of a triangular composition, with the three children clustered naturally below him. -
Draft the basic shapes:
Using an HB pencil with a very light hand, map out the head shapes and shoulder lines. Focus on the relative sizes of the heads to distinguish the age difference between the adult and the children. -
Refine facial features:
Lightly sketch the eyes, nose, and mouth for each figure. Pay close attention to the eye placement lines; getting the likeness right at this stage is crucial before any color is added. -
Detail the hair and clothing:
Draw the outlines of hair locks and clothing folds. Don’t shade yet, just establish clear boundaries for where your colors will eventually go. -
Clean up the line work:
Once satisfied with the likenesses, gently lift any heavy graphite marks with your kneadable eraser so only faint guidelines remain. I find this helps keep the final piece looking fresh and not muddy.
Fixing Muddy Skin
If facial tones look muddy, stop immediately. Let it dry 100%, then gently lift pigment with a clean, damp brush or eraser before reapplying fresh color.
Step 2: Adding Color
-
Mix skin tones:
Create a watery wash of skin tone using Burnt Sienna and a touch of Yellow Ochre. It should be very pale—watercolor dries lighter, but it’s safer to start barely there. -
Apply initial skin wash:
Paint the face areas, leaving the whites of the eyes and teeth strictly white. Let the paint pool slightly in shadow areas like under the chin or eye sockets for subtle depth. -
Add facial warmth:
While the first layer is dry, mix a slightly pinker tone (add a tiny bit of Alizarin Crimson) for the cheeks, nose tips, and lips. Apply this gently to give the children a healthy glow. -
Hair base layers:
Wash in the base colors for the hair—pale yellow for the blonde child, a reddish-brown for the redhead, and grey-white tones for the grandfather. Keep strokes directional to follow the hair growth. -
Clothing washes:
Apply distinct colors to the shirts. Use a soft sage green for the grandfather, light blue for the boys, and leave the girl’s jumper white or very light grey for now. -
Pattern details:
For the child on the left, use a fine brush to dab small red floral patterns onto the shirt once the base wash is completely bone dry.
Step 3: Defining & Refining
-
Reinforce with pencil:
Once the paint is fully dry, take a sharpened 2B pencil or a sepia fine liner and re-draw the defining lines. Outline the eyes, define the glasses frames, and sharpen the jawlines. -
Add texture to hair:
Use sharp pencil strokes to draw individual strands of hair over the watercolor base. This mixed-media technique adds volume and realism that paint alone often misses. -
Deepen shadows:
Use a 4B pencil to gently shade the deepest areas—inside the pupils, the corners of the mouth, and the folds of the clothing—to make the figures pop. -
Highlight the eyes:
If you accidentally painted over the eye reflections, add a tiny dot of white gouache or gel pen to the pupil. This ‘catchlight’ brings the portraits to life instantly. -
Final assessment:
Step back and check the balance. If the skin looks too pale, add a very light glaze of color. If lines are too harsh, soften them with the kneadable eraser. -
Framing:
Mount the finished artwork behind a white mat with a generous border. Place it into a light oak frame to complement the soft, natural tones of the drawing.
Add a Personal Touch
include a subtle background element relevant to the grandparents, like a faint outline of their garden or home, to ground the figures in a specific memory.
This gentle portrait will serve as a beautiful reminder of family connection for years to come
Family Portrait With Pets Included
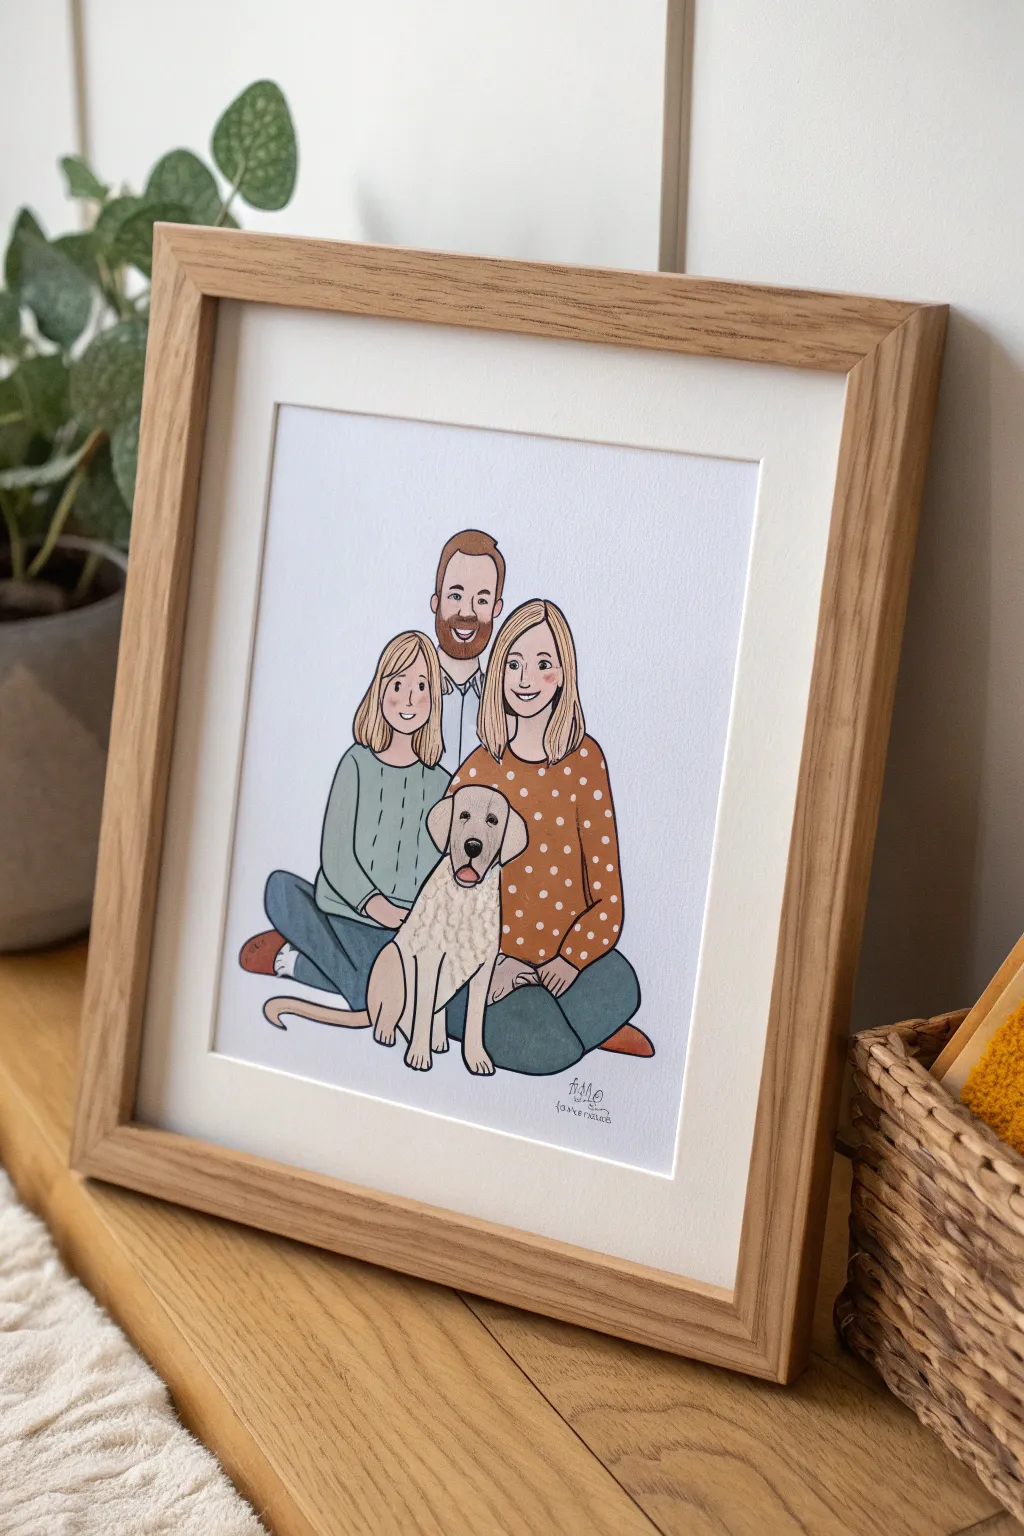
Capture the unique charm of your family and furry friends with this delightful illustrative portrait style. Combining crisp ink outlines with soft, flat coloring creates a modern, storybook aesthetic that looks professional yet handmade.
Step-by-Step Tutorial
Materials
- Heavyweight mixed-media paper or hot-press watercolor paper (smooth texture)
- Pencil (HB) and quality eraser
- Fine liner pens (black, waterproof, sizes 01 and 05)
- Alcohol markers or watercolor paints
- Reference photo of the family
- Light box or transfer paper (optional)
- Picture frame (square format recommended)
Step 1: Sketching the Composition
-
Prepare your reference:
Choose a clear photo where everyone is close together. If needed, create a quick digital collage to group the family members and the pet into a tight, cozy triangular composition, similar to the example. -
Block in basic shapes:
Lightly sketch outlines using simple geometric shapes. Use circles for heads and gentle ovals for torsos. Don’t worry about details yet; just focus on getting the relative sizes right, ensuring the pet sits comfortably at the center or base. -
Refine facial features:
Draw the facial features lightly. For this style, keep eyes as simple dots or small almonds, and use simple lines for noses and smiles. The goal is a likeness through hair and face shape rather than photorealism. -
Add clothing and hair details:
Sketch the hairstyles and clothing outlines. Keep clothing drapes simple. This is the time to decide on patterns, like the polka dots on the mother’s sweater or the texture of the sweater on the daughter. -
Define the pet:
Pay special attention to the pet’s ears and pose. Ensure the dog looks seated and relaxed, perhaps slightly overlapping the legs of the family members to show connection.
Step 2: Inking the Lines
-
Trace with fine liner:
Using your 01 waterproof pen, carefully trace over your pencil lines. I prefer to start with the faces to ensure the expressions stay clean and open. -
Vary line weight:
Switch to a slightly thicker 05 pen for the major outer contours of the figures and the dog. This subtle difference helps separate the subjects from the background and gives the drawing a ‘sticker-like’ pop. -
Add texture marks:
Use the thinnest pen to add small texture details, like the ribbing on a collar, individual hairs on the dog’s chest, or the folds in the jeans. -
Erase pencil guides:
Wait at least 15 minutes for the ink to fully cure to prevent smudging. Once dry, gently erase all underlying graphite sketches until the paper is brilliant white again.
Fixing Smudges
If you smudge ink, don’t panic. Use a white gel pen or opaque white gouache to carefully paint over the mistake. Once dry, you can redraw the line on top.
Step 3: Adding Color
-
Select your palette:
Choose a limited color palette to keep the artwork cohesive. Pick muted, earthy tones like sage green, rust orange, and denim blue, rather than neon brights. -
Fill skin tones:
Apply the skin tone first. If using markers, work quickly to avoid streakiness. If using watercolor, use a very watery wash for a pale, even complexion. -
Color the hair:
Fill in hair shapes with solid blocks of color. Leave tiny narrow strips of white paper near the crown or part line to simulate shine and volume. -
Paint the clothing:
Fill in the solid clothing colors. For the polka dot sweater, carefully color around the white circles if using markers, or use white gouache/gel pen on top afterwards. -
Color the pet:
For the dog, use a warm cream or tan. Add a slightly darker shade under the ears and chin to create separation and depth without shading the whole figure. -
Deepen the denim:
Color the jeans a muted blue-grey. You can go over areas where legs overlap a second time to create a simple shadow effect. -
Add finishing touches:
Add small blush circles to the cheeks with a light pink. Sign your name or add the family name in a quirky, handwritten font near the bottom.
Level Up: Pattern Play
Make the portrait pop by scanning your line art and coloring it digitally. You can drop in real patterns or floral clipart onto the shirts for a modern collage look.
Place your finished illustration in a simple wooden frame to complete this heartwarming gift


Cozy Home-Setting Family Portrait Scene
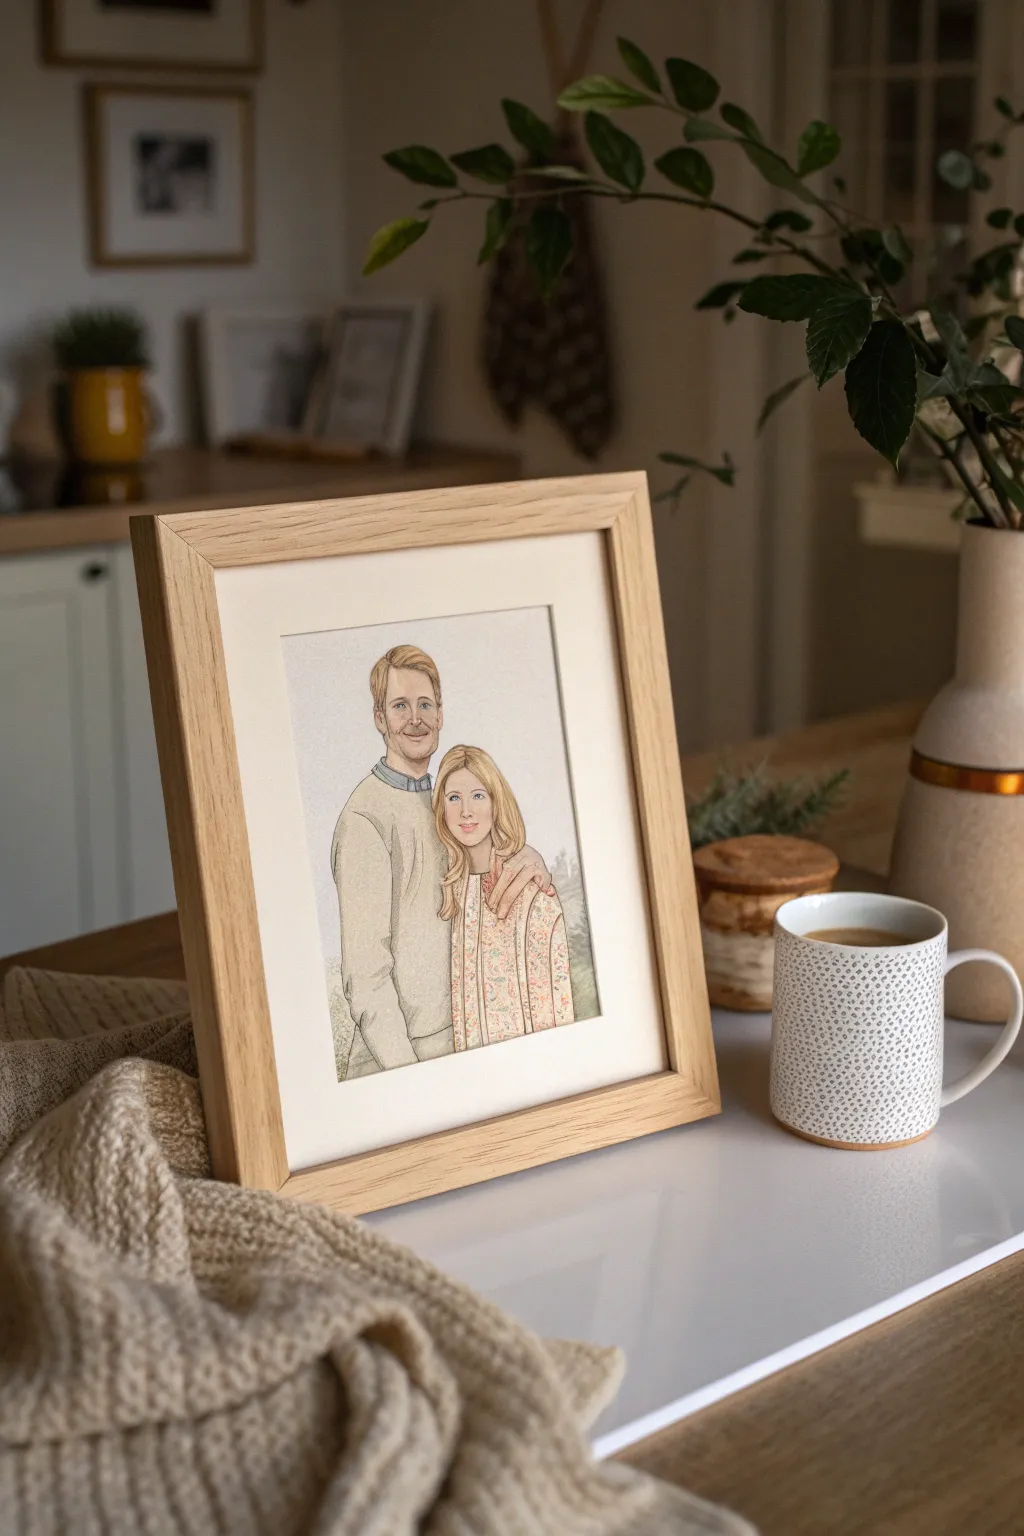
Capture a special relationship with this delicate, illustrative portrait style that combines fine ink lines with soft watercolor washes. The result is a timeless, heartwarming piece that feels both personal and professionally crafted, perfect for displaying in a cozy, light-filled corner of the home.
How-To Guide
Materials
- Hot press watercolor paper (smooth finish)
- Pencil (HB or H)
- Kneaded eraser
- Fine liner pens (waterproof, archival black, 0.1mm and 0.3mm)
- Watercolor paints (pans or tubes)
- Round brushes (sizes 2, 4, and 6)
- Mixing palette
- Two jars of water
- Paper towels
- Light oak wooden frame with white mat
Step 1: Planning and Sketching
-
Select your reference:
Choose a photo where the subjects are well-lit and standing close together. The poses should be natural and affectionate, similar to the arm-around-shoulder pose in the example. -
Rough layout:
Lightly mark the top and bottom boundaries of your figures on the paper to ensure they fit well within the eventual mat opening. -
Gesture drawing:
Using your pencil, sketch the basic shapes of the heads and torsos. Focus on the tilt of the heads and the connection between the figures rather than details at this stage. -
Refine the features:
Carefully draw the facial features. Keep your pencil pressure very light so any mistakes can be lifted easily with the kneaded eraser without damaging the paper surface. -
Clothing and hair details:
Sketch the outlines of the hair and clothing folds. For the floral pattern on the woman’s dress, just indicate the flow of the fabric; don’t draw every flower yet.
Ink Confidence
Don’t choke up on the pen. Hold it further back for looser, more expressive lines. If a line goes astray, thicken it slightly to make it look intentional.
Step 2: Inking the Outline
-
Begin the ink work:
Using the 0.1mm waterproof pen, start tracing your pencil lines. Use broken, slightly sketchy lines for hair and fabric to keep the drawing feeling organic and not stiff. -
Define the faces:
Switch to your finest pen tip for the eyes, nose, and mouth. Less is more here; hint at the features rather than outlining them heavily, which can make portraits look aged or harsh. -
Add line weight:
I like to use the 0.3mm pen to thicken purely the outer silhouette of the couple and the deepest shadow areas, creating a subtle separation from the background. -
Erase pencil marks:
Wait at least 15 minutes for the ink to fully cure, then gently erase all visible pencil lines with the kneaded eraser.
Step 3: Adding Color
-
Mix skin tones:
Create a pale wash using Yellow Ochre and a touch of Alizarin Crimson. Test the color on a scrap piece of paper first to ensure it isn’t too saturated. -
Apply skin base:
Paint the face and hands with the pale wash. While it’s still damp, drop slightly more pigmented color onto the cheeks and warm areas like the nose. -
Hair base layers:
Paint the hair in sections. For the blonde tones shown, use a dilute wash of Yellow Ochre or Raw Sienna, leaving white paper showing for the brightest highlights. -
Clothing washes:
Apply a soft beige or grey wash to the man’s sweater. While wet, add a slightly darker grey to the underarm and side to suggest volume. -
Painting the floral pattern:
For the woman’s dress, use a very small brush (size 2). Dot in small clusters of pink and orange. Don’t worry about being precise; the impression of flowers is more effective than perfect petals. -
Deepening shadows:
Once the initial layers are bone dry, mix a cool violet-grey. Glaze this transparently over the neck, under the hair, and in deep fabric folds to create dimension. -
Background hint:
Mix a very watery, desaturated green. loosely paint a nebulous shape behind the lower half of the figures to suggest a grassy setting without painting a full landscape.
Add Texture
Use a dry brush technique on the man’s sweater to mimic the texture of wool. Lightly drag a brush with very little paint across the dry paper grain.
Step 4: Finishing and Framing
-
Final ink touches:
After the paint is completely dry, you may want to re-state a few ink lines that got lost under the paint, particularly in the eyes or the clothing pattern. -
Mounting:
Center your artwork behind a clean white mat. Use acid-free artistic tape to secure the paper to the back of the mat board. -
Framing:
Place the matted artwork into the light oak frame. Ensure the glass is clean on the inside before sealing the back.
Place your framed masterpiece on a side table or mantel to add a warm, personal touch to your room.
Black-and-White Family Portrait With One Color Accent
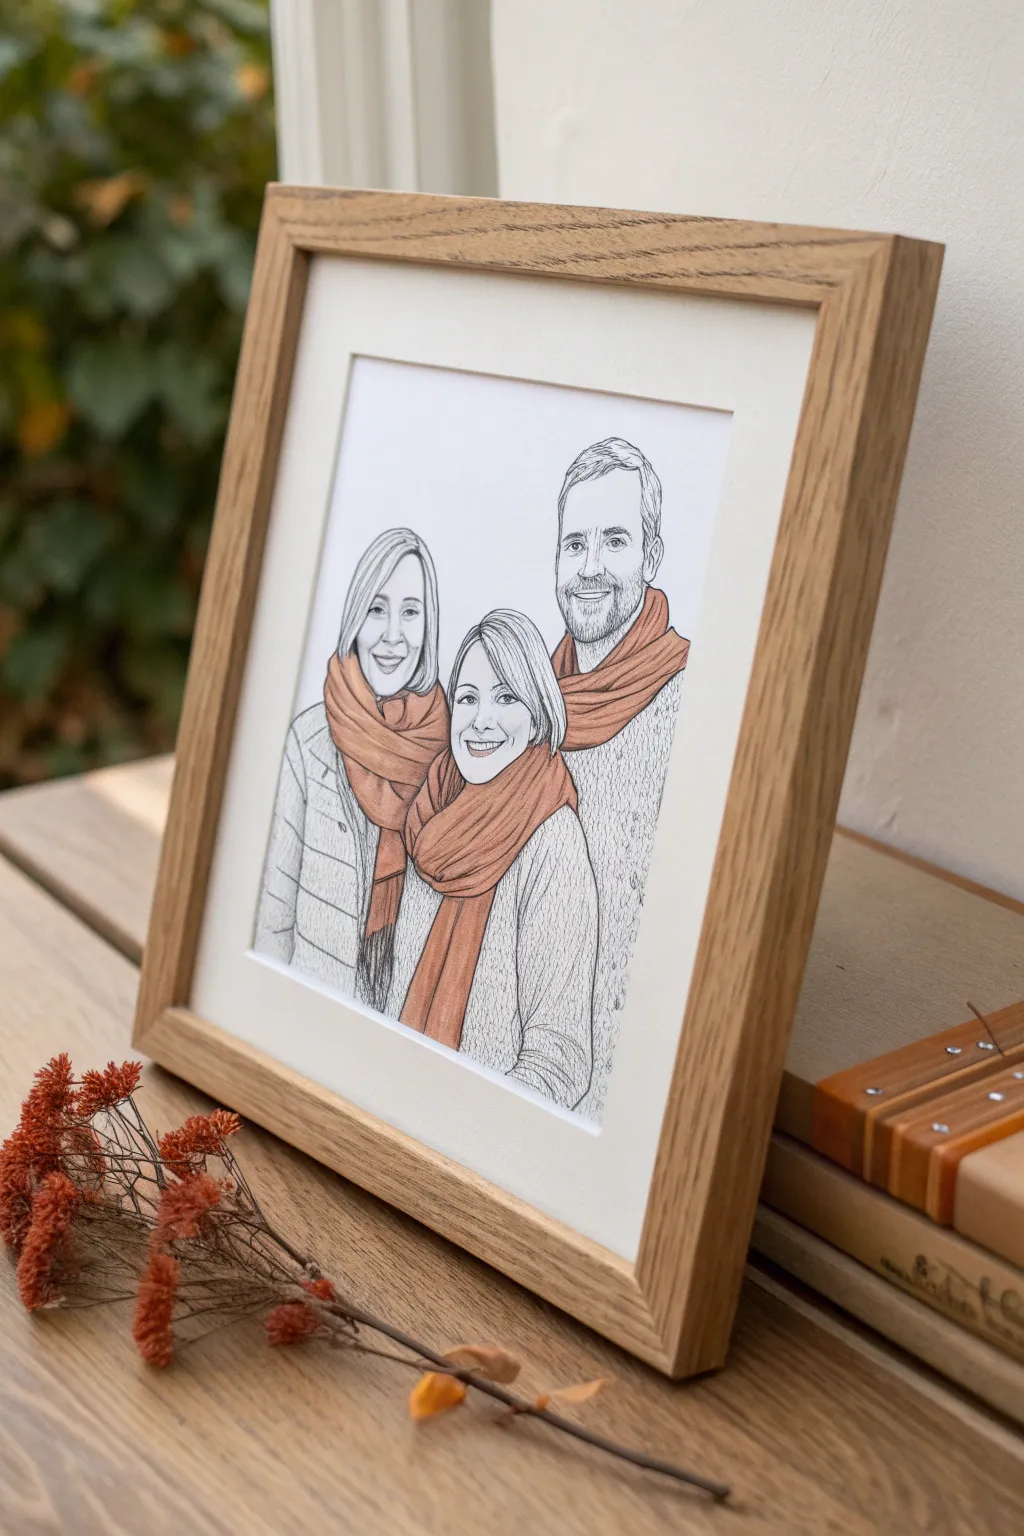
Capture your family’s likeness in a modern, minimalist style that blends classic line drawing with a striking pop of color. This approachable project turns a favorite photo into a custom illustration where soft terracotta accents bring warmth to crisp black ink.
Step-by-Step
Materials
- High-quality reference photo of your family
- Heavyweight smooth Bristol board or hot-press watercolor paper
- HB or 2H graphite pencil for sketching
- Fine liner pens (sizes 0.1, 0.3, and 0.5)
- Black pigment ink pen or brush pen
- Colored pencils or alcohol markers (terracotta/rust shade)
- Kneadable eraser
- Tracing paper (optional but recommended)
- Light tablet or bright window (for tracing)
Step 1: Preparation & Sketching
-
Photo Selection:
Choose a reference photo where faces are clearly visible, shadows aren’t too harsh, and everyone is wearing something distinct like a scarf or textured sweater. -
Create the Outline:
Tape your reference photo behind your drawing paper using a light tablet or a bright window. If you aren’t comfortable tracing directly, do a preliminary sketch on tracing paper first to refine the composition. -
Light Pencil Sketch:
Using your HB or 2H pencil, lightly map out the main contours of the faces, hair, and clothing. Keep these lines whisper-thin as guidelines since you want the ink to be the star. -
Plan the Accent:
Decide which element will carry the color. In this project, the scarves unite the subjects, so outline these shapes clearly but leave their interiors blank for now.
Pro Tip: Texture Trick
Don’t draw every stitch on a sweater. Suggest the texture with squiggly lines near the edges and shadows, leaving the highlighted center areas mostly white.
Step 2: Inking the Details
-
Facial Features:
Switch to your 0.1 fine liner for the most delicate work: the eyes, nose, and mouth. Use broken lines for smile lines or wrinkles to prevent the faces from looking aged or heavy. -
Define the Hair:
Use the 0.3 pen to outline the hair shapes. Instead of drawing every strand, focus on the overall volume and key directional flow of the hair, adding a few internal lines for texture. -
Clothing Texture:
For items like the quilted jacket or knit sweater, use tiny hatching or stippling with the 0.1 pen. Creating texture without solid lines keeps the drawing feeling light and airy. -
Stronger Outlines:
Take the 0.5 pen to reinforce the outer silhouette of the figures. This slightly bolder line weight helps separate the subjects from the negative white space around them. -
Erase Pencil Guidelines:
Wait at least 15 minutes for the ink to fully set to avoid smearing. Gently roll a kneadable eraser over the entire drawing to lift the graphite sketch.
Step 3: Adding the Color Accent
-
Base Color Layer:
Using your terracotta colored pencil or marker, fill in the chosen accent areas (the scarves). Apply a light, even layer first to establish the base tone. -
Building Shadows:
Go back over the folds and shadowed areas of the scarves with a second layer of the same color. If using pencil, increase your pressure slightly to deepen the saturation. -
Define the Folds:
Once the color is consistent, carefully use your 0.3 pen to add the linear folds and creases on top of the color. This integrates the colored sections with the rest of the black-and-white ink style. -
Final Touches:
Review the drawing from a distance. If the colored areas feel too flat, add very subtle hatching with the 0.1 pen over the darkest colored shadows to add dimensions. -
Matting and Framing:
Cut a mount board to fit your frame. Position the drawing so there is ample white space around the figures, centering the composition vertically but perhaps leaving slightly more space at the bottom for visual balance.
Troubleshooting: Smudged Ink?
If you accidentally smear wet ink, don’t wipe it! Let it dry completely, then carefully scrape the smudge away gently with an X-Acto knife or cover with white gouache.
Now you have a timeless, personalized artwork ready to be framed in natural oak for a perfect gift presentation
Family Portrait With Names and a Special Date
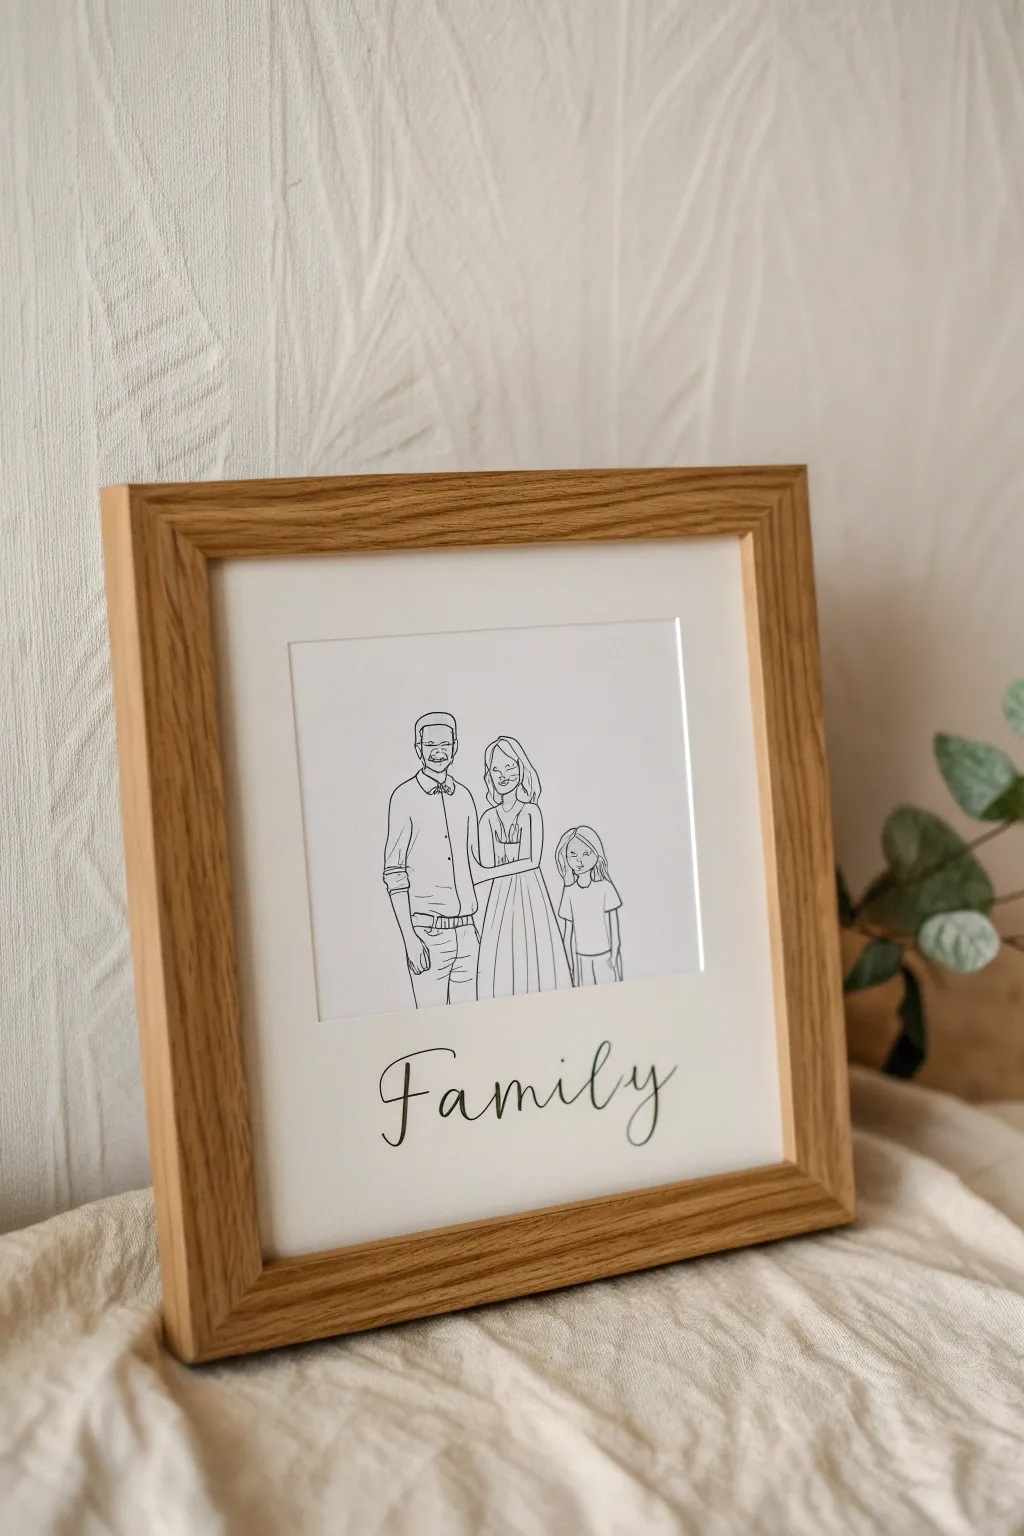
Capture the essence of togetherness with this elegant and modern minimalist line drawing. This project transforms a favorite family photo into a sophisticated piece of continuously flowing art that looks beautiful in any home decor setting.
How-To Guide
Materials
- High-quality white cardstock or heavy drawing paper (A4 or 8×10 size)
- Pencil (HB or H)
- Eraser
- Fine liner pens (0.3mm and 0.5mm, black, waterproof/archival)
- Light box or bright window (for tracing)
- Reference photo of your family
- Ruler
- Light oak wooden frame with mat capability
- Masking tape or painter’s tape
- Computer and printer (optional, for drafting)
Step 1: Drafting the Design
-
Select your reference photo:
Choose a clear, full-body or waist-up photo of the family where everyone is standing close together. The pose doesn’t need to be perfect since you will be simplifying it significantly. -
Simplify the image digitally (optional):
If you are comfortable with technology, lower the opacity of your photo in a program like Canva or Photoshop and digitally trace the main outlines. Print this draft to use as your base guide. -
Prepare the tracing setup:
If working manually, tape your reference photo (or your digital draft printout) to a light box or a sunny window. securely tape your high-quality cardstock directly over it so it doesn’t shift. -
Trace the primary contours:
Using a light pencil touch, trace the major outlines of the figures. Focus on the shoulders, arms, and clothing drapes. Ignore small details like buttons, patterns, or intricate hair strands. -
Define facial features:
For this minimalist style, keep faces very simple. Mark light guides for the jawline, hair, and maybe simple lines for eyes and smiles, but avoid heavy shading or detailed noses.
Jittery Lines?
If your hand shakes while inking, try drawing faster. Slow movement often causes more wobbles. Practice confident ‘ghost’ strokes in the air before touching the paper.
Step 2: Inking the Artwork
-
Begin the final line work:
Switch to your 0.5mm fine liner. Start from the top (usually the heads) and work your way down to avoid smudging the ink with your hand as you draw. -
Create continuous flow:
Try to use long, confident strokes rather than short, scratchy ones. The charm of this style lies in the smooth, almost unbroken lines that connect the family members. -
Detail the clothing:
Add just a few lines to suggest folds in the fabric—like the crease of a sleeve or the drape of a dress—to give the figures volume without clutter. -
Add hair texture:
Use the finer 0.3mm pen for hair. Draw flowing clumps of hair rather than individual strands, keeping the aesthetic clean and graphic. -
Refine the hands:
Hands can be tricky; simplify them into basic interlocking shapes if they are holding onto each other, focusing on the gesture of connection. -
Inking the text:
Below the figures, pencil in the word ‘Family’ or a surname in a loose, cursive script. Once happy with the spacing, trace over it carefully with the 0.5mm pen to ensure the lettering stands out. -
Let it dry completely:
Wait at least 15 to 20 minutes to ensure the ink is totally set. Archival ink dries fast, but better safe than creating a smear at the finish line.
Step 3: Finishing and Framing
-
Erase pencil guides:
Gently glide your eraser over the entire drawing to remove the graphite marks. Hold the paper taut with your other hand to prevent it from crinkling. -
Inspect for gaps:
Look closely at your lines. If there are any unintended gaps or weak spots in the ink, carefully connect them now for a polished look. -
Prepare the frame:
Clean the glass of your light oak frame on both sides to remove dust and fingerprints. -
Mount the artwork:
Center your artwork behind the mat board (if using one) or directly against the backing. Use a small piece of masking tape on the back to hold it in place. -
Final assembly:
Place the glass, mat, and artwork into the frame and secure the backing clips. Your personalized family heirloom is ready for display.
Pro Tip: Line Weight
Use a thicker pen (0.8mm) for the outermost silhouette of the group and a thinner pen (0.3mm) for interior details like clothing folds. This depth adds professional polish.
Hang this charming piece in a hallway or living room to add a personal, artistic touch to your family space
Storybook-Style Family Portrait Illustration
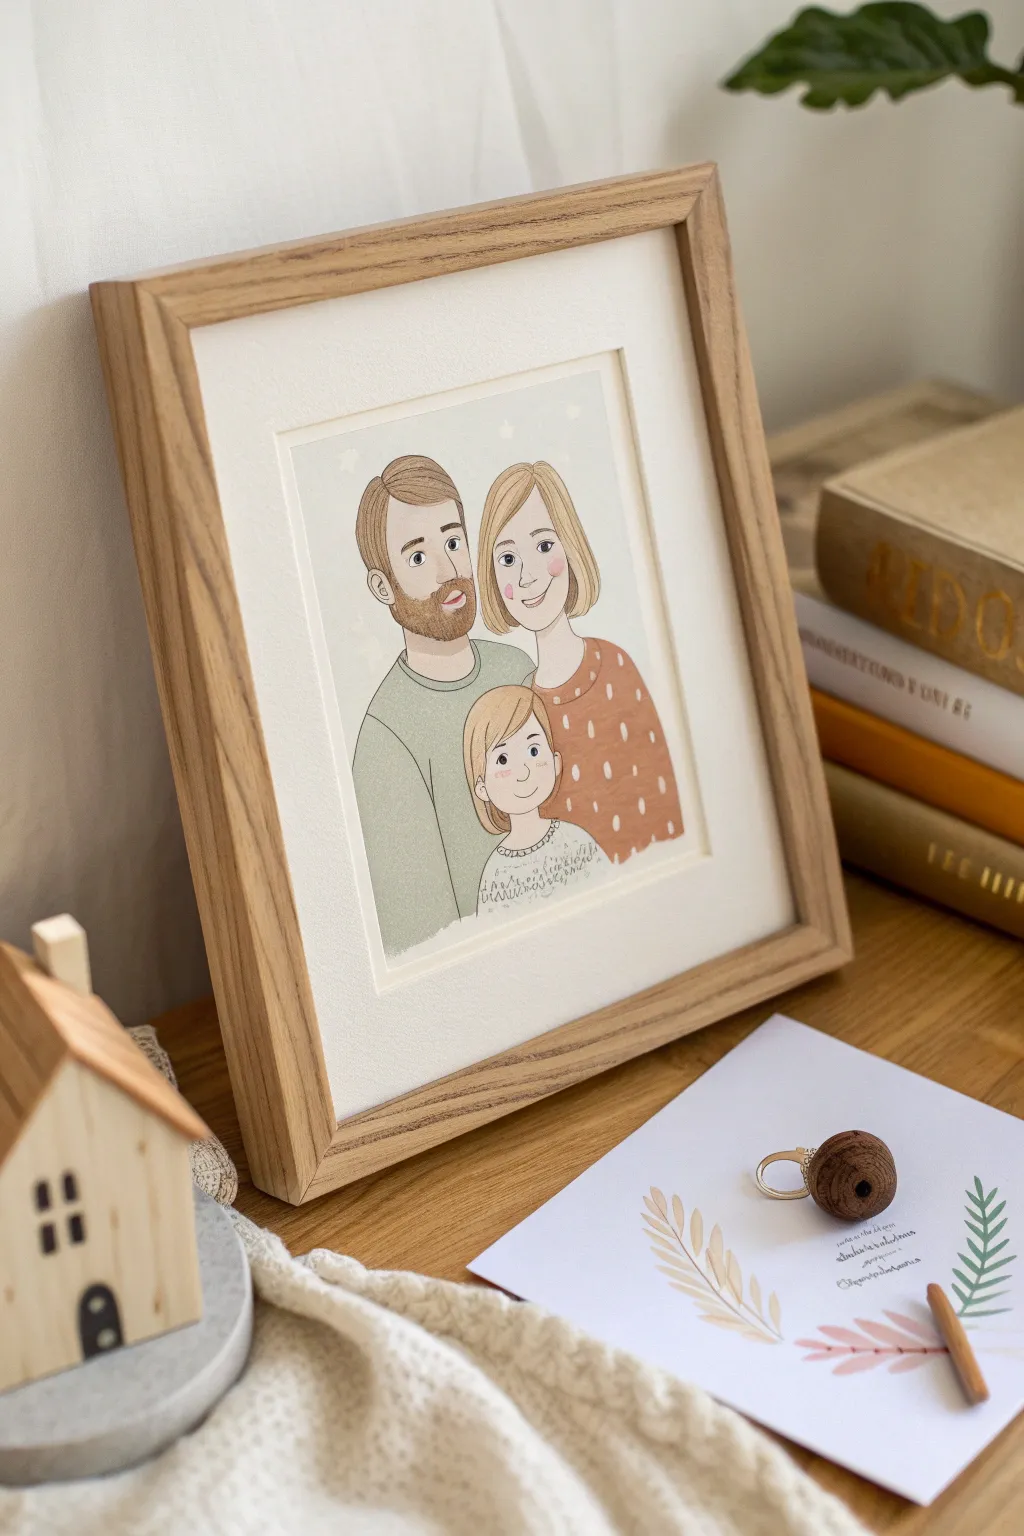
Capture your family’s likeness in this charming, storybook-inspired illustration style. Soft colors, simple lines, and gentle textures come together to create a heartwarming keepsake that feels like it stepped right out of a children’s book.
Detailed Instructions
Materials
- High-quality watercolor paper or bristol board (smooth finish)
- Pencils (HB for sketching)
- Fine liner pens (brown or sepyia, 0.1mm and 0.3mm)
- Watercolor paints or gouache (muted palette: sage green, terracotta, beige)
- Small round paintbrushes (sizes 0, 2, and 4)
- Kneaded eraser
- Light wooden frame with matting
Step 1: Drafting the Composition
-
Gather reference photos:
Start by selecting a few clear photos of the family members you intend to draw. You don’t need a single group photo; individual headshots work well as long as you can see hairstyles and facial features clearly. -
Map out basic shapes:
Lightly sketch ovals on your paper to represent the heads. Position the parents in the back and the child in the front center to create a balanced triangular composition. -
Refine facial features:
Draw simple guidelines for the eyes, nose, and mouth. In this style, eyes are often simple dots or small almonds, giving that sweet, innocent look. -
Add hairstyles:
Sketch the hair shapes broadly, focusing on the overall silhouette rather than individual strands. Keep the lines smooth and simplified. -
Sketch the clothing:
Draw the shoulders and upper torsos. Since the child is in front, their clothing will overlap the parents’. Keep necklines simple—crew necks work perfectly for this casual aesthetic.
Pro Tip: Eye Placement
Place eyes slightly wider apart than realistic proportions standardly dictate. This small adjustment instantly creates that cute, youthful ‘storybook’ character aesthetic.
Step 2: Inking and Cleaning
-
Choose your ink color:
Instead of harsh black, I prefer using a sepia or dark brown fine liner. This maintains the soft, vintage storybook feel of the illustration. -
Outline the main forms:
Carefully trace over your pencil lines with the 0.3mm pen for the major outlines of the faces, hair, and clothing. -
Add delicate details:
Switch to a thinner 0.1mm pen for finer details like the eyes, eyebrows, and the pattern on the child’s shirt. -
Texture the beard:
For facial hair, use short, repetitive hatching lines rather than coloring it in solid. This adds texture without overwhelming the face. -
Erase pencil marks:
Wait until the ink is completely dry to avoid smudging, then gently lift all graphite lines with a kneaded eraser.
Step 3: Adding Color and Texture
-
Mix skin tones:
Prepare a watery wash of beige or light peach gouache. Test the color on a scrap piece of paper first to ensure it isn’t too saturated. -
Paint the faces:
Apply the skin tone wash evenly. Keep the paint thin so the paper texture shows through slightly, enhancing the hand-drawn look. -
Color the hair:
Mix flat colors for the hair—sandy blonde and light brown. Apply these in blocks, leaving tiny gaps near the outlines if you want a more loose, artistic feel. -
Paint clothing blocks:
Use muted, earthy tones for the clothes. Sage green for the father and a warm terracotta for the mother create a lovely natural contrast. -
Add blush:
Once the skin paint is dry, dab a tiny amount of diluted pink paint or pastel dust on the cheeks for a rosy glow. -
Detail the patterns:
Use white gouache or a white gel pen to add the simple dash pattern on the mother’s sweater and the intricate script-like pattern on the child’s top.
Troubleshooting: Shaky Lines?
If your ink lines are jittery, try drawing faster. Slow hand movements often cause more wobble. Confident, quick strokes result in smoother curves.
Step 4: Final Touches and Framing
-
Brighten eyes and lips:
Add tiny white highlights to the eyes to bring them to life. A touch of soft pink on the lips adds dimension without looking like makeup. -
Add subtle background:
Lightly paint faint star shapes or soft clouds in the background using a very pale yellow or grey wash, just to break up the white space. -
Sign and date:
Add your signature and the date subtly at the bottom. It marks the moment in time for the family. -
Mount and frame:
Place the finished illustration behind a cream-colored mat and secure it in a light oak frame to complement the warm tones of the artwork.
Hang this custom portrait in a hallway or living room to add a personal, artistic touch to your home
Build-Your-Own Character Family Portrait
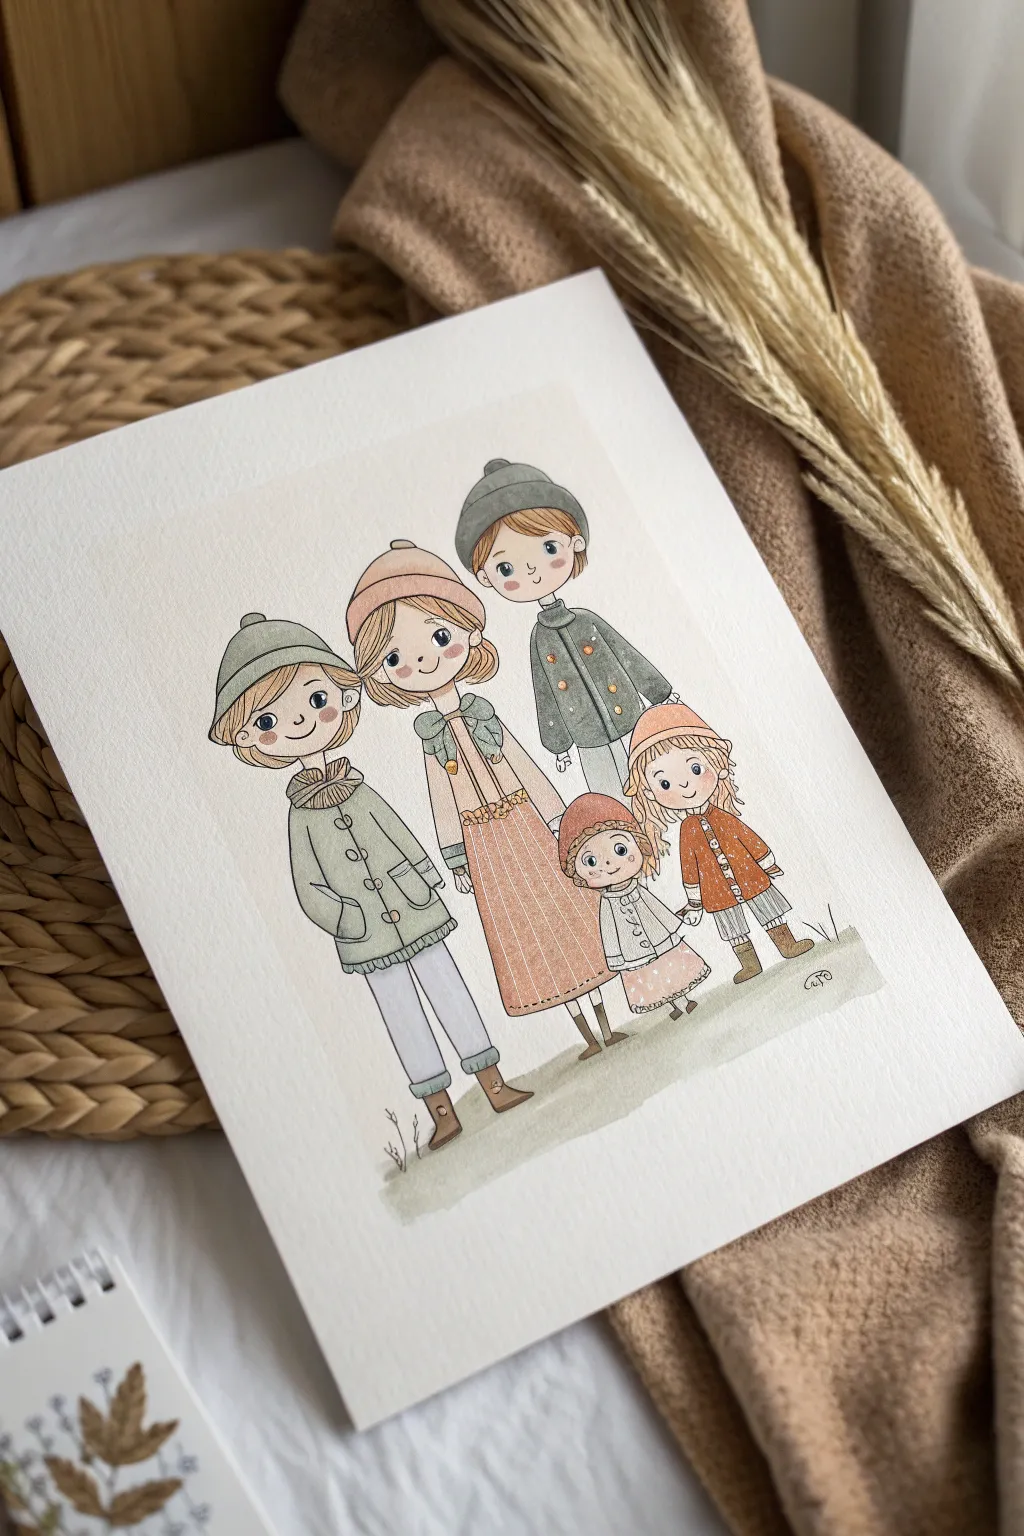
Capture the charm of your family with this whimsical, illustrative portrait style that pairs delicate ink lines with soft watercolor washes. The finished piece features adorable, doll-like characters dressed in cozy, cohesive outfits, perfect for a heartwarming keepsake.
How-To Guide
Materials
- Cold press watercolor paper (300 gsm)
- HB pencil and kneaded eraser
- Waterproof fine liner pens (0.1, 0.3, and 0.5mm, brown or sepia ink)
- Watercolor paints (pan or tube set)
- Round watercolor brushes (sizes 2, 4, and 6)
- White gel pen or gouache
- Paper towels
- Two jars of water
Step 1: Drafting the Whimsical Characters
-
Establish the composition:
Begin by lightly marking the horizontal ground line near the bottom third of the paper. Arrange the family members from left to right, varying their heights to keep the composition dynamic. -
Sketch the basic shapes:
Use your HB pencil to draw large circles for the heads and smaller, elongated rectangles for the bodies. Keep the proportions stylized—heads should be slightly oversized compared to the bodies for that cute, illustrative look. -
Design the outfits:
Sketch winter clothing on each figure. Think oversized coats with large buttons, beanies with pompoms, and scarves. Keep the lines simple and rounded to match the gentle aesthetic. -
Add facial features:
Place the eyes wide apart on the lower half of the face to enhance the youthful appearance. Draw small, simple curved lines for noses and smiles.
Step 2: Inking the Outlines
-
Trace main lines:
Using a 0.3mm brown or sepia waterproof pen, carefully trace over your pencil lines. The brown ink gives a softer, warmer feel than standard black. -
Add texture details:
Switch to a finer 0.1mm pen to add details like stitching on pockets, ribbing on the beanies, and strands of hair. I like to use broken lines for knit textures to keep them looking soft. -
Erase pencil marks:
Wait until the ink is completely dry—give it a good 10 minutes to be safe—then gently erase all underlying pencil sketches with a kneaded eraser to avoid damaging the paper surface.
Palette Harmony
Stick to 3-4 main colors (like sage, rust, and cream) and mix them slightly into every other color you use. This unifies the piece instantly.
Step 3: applying Watercolor Washes
-
Mix skin tones:
Dilute a mix of yellow ochre and a touch of burnt sienna with plenty of water. Apply a very light wash to the faces and hands, leaving small white spaces if you want highlighted areas. -
Paint the rosy cheeks:
While the skin tone is still slightly damp (but not soaking), drop a small amount of diluted crimson or pink onto the cheek areas. Let it bloom naturally for a soft blush effect. -
Color the first layer of clothing:
Choose a cohesive palette of sage green, muted terracotta, and warm grey. Paint the coats and dresses using a size 4 brush. Work in sections that don’t touch to prevent colors from bleeding into each other. -
Paint hair and accessories:
Fill in the hair using warm browns and chestnut hues. Paint the hats and scarves, trying to balance the colors across the group so no single color dominates one side of the portrait. -
Add patterns:
Once the first layers are bone dry, use a size 2 brush with slightly more concentrated paint to add polka dots to the dress or stripes to the scarves. -
Shadowing:
Mix a diluted purple-grey color. Glaze this transparently under the chins, inside the hoods, and along the sides of the coats to give the flat illustrations a little pop of dimension. -
Ground the figures:
Mix a very watery sap green and gray. Paint a loose, organic strip of grass beneath their feet to ground them, rather than having them float in white space.
Seasonal Switch
Customize the outfits for the season! Swap beanies for sun hats and coats for t-shirts to make a summer version of your family portrait.
Step 4: Final Touches
-
Deepen the eyes:
Use your smallest brush or a dark blue/black pen to fill in the pupils, leaving a tiny speck of white paper for the catchlight if possible. -
Add highlights:
Use a white gel pen or a dot of white gouache to add highlights to the buttons, the tops of the hats, and the tips of the shoes. -
Reinforce textures:
If the watercolor washed out any ink lines, go back over crucial outlines like the jacket edges or hair strands with your 0.5mm pen to crispy them up.
Frame your lovely little family portrait in a simple wood frame to let the soft colors shine
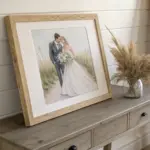
Memorial Family Portrait With a Gentle Tribute
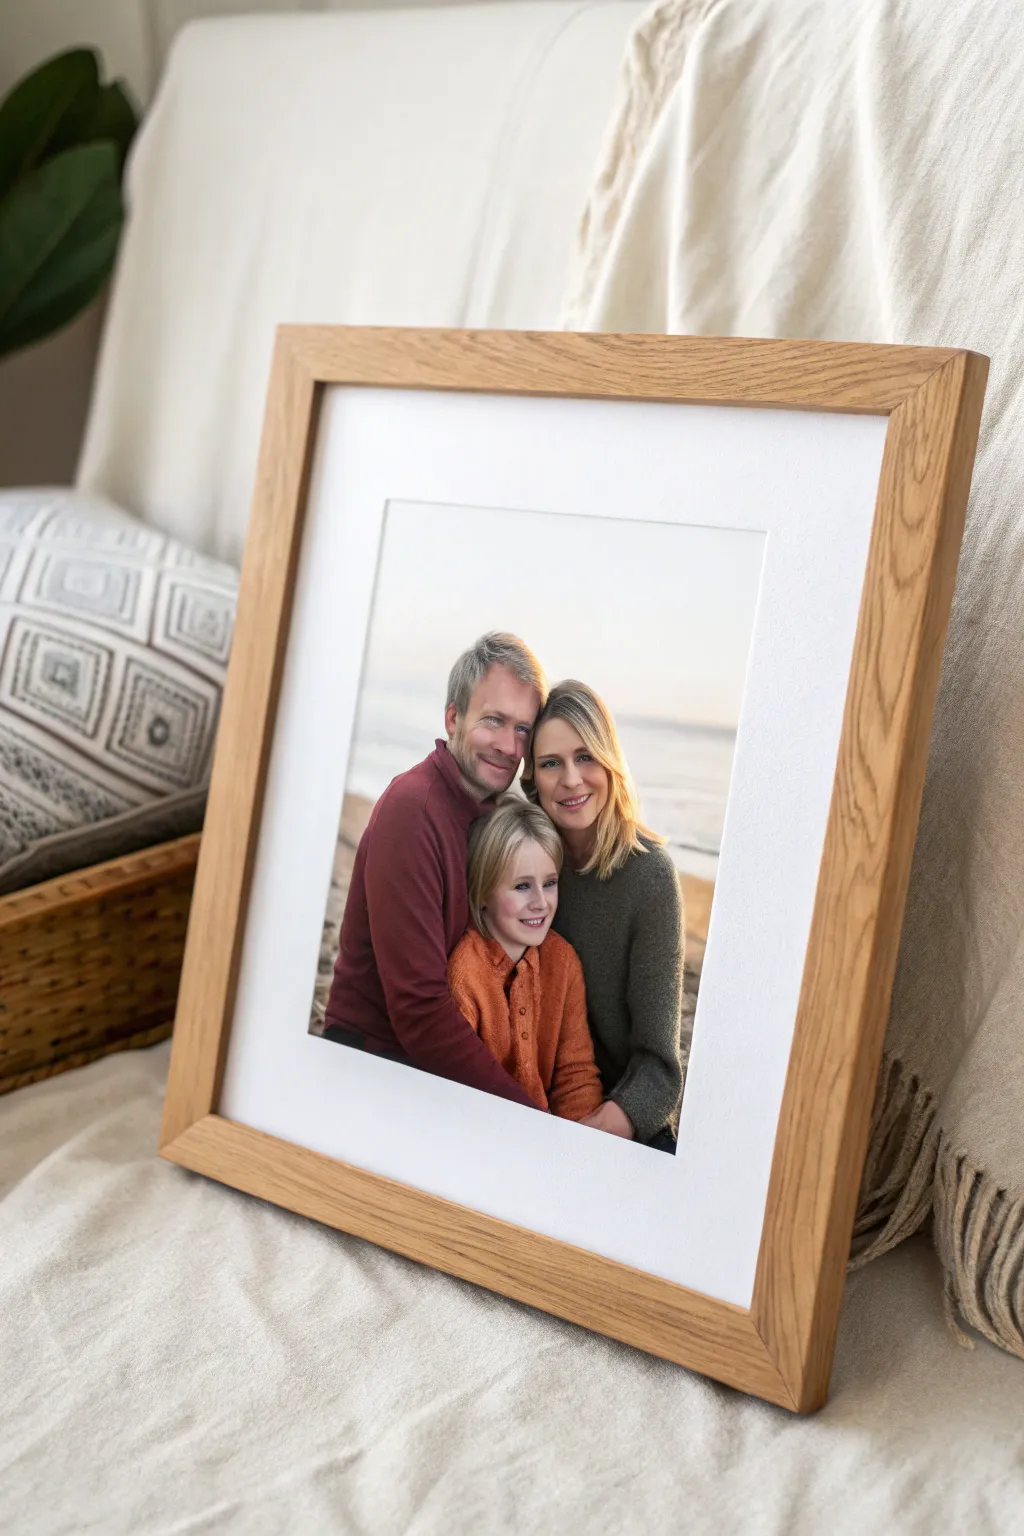
Capture the warmth of a cherished family memory with this professionally matted and framed photograph project. The result is a clean, gallery-style piece that draws the eye straight to the emotional center of the image, perfect for gifting or displaying on a mantel.
Detailed Instructions
Materials
- High-resolution digital family photo
- Archival inkjet printer (or professional print service)
- Luster or semi-gloss photo paper (8×10 or larger)
- Solid wood frame (oak finish recommended)
- Acid-free white mat with beveled opening
- U-V protective glass or acrylic glazing
- Mat cutter (if cutting custom mats)
- Mounting tape or photo corners
- Microfiber cloth
- Point driver or framing points
- Kraft paper (for dust cover backing)
- Double-sided tape
Step 1: Preparing the Image
-
Select the photo:
Choose a touching family portrait with soft, natural lighting. For this project, a beach setting with warm sunset tones works beautifully to create a serene atmosphere. -
Edit for warmth:
Using photo editing software, slightly increase the vibrancy and warmth to enhance the skin tones and the golden hour lighting, ensuring the colors pop against the white mat. -
Crop and size:
Crop your image to a square or rectangular format that fits your mat opening. Leave a 1/4-inch bleed on all sides to make mounting easier later. -
Print the photograph:
Print the image on high-quality luster or semi-gloss paper. These finishes reduce glare while maintaining deep color saturation, which is ideal for portraits behind glass.
Step 2: cutting the Mat
-
Measure the mat board:
If you are cutting your own mat, measure the outer dimensions to fit snugly inside your wooden frame. A wide border (2-3 inches creates a luxurious gallery look. -
Mark the opening:
Mark the window opening on the back of the mat board. For a professional touch, I like to weight the bottom margin slightly, making it just a bit wider than the top and sides. -
Cut the bevel:
Use a specialized mat cutter to slice the window opening at a 45-degree angle. This reveals the crisp white core of the mat board, adding depth to the presentation.
Fixing Buckled Prints
If your photo ripples under the mat, it’s likely taped too tightly. Remove bottom tape; only hang photos from the top edge to let gravity keep them flat.
Step 3: Mounting and Assembly
-
Clean the glass:
Thoroughly clean both sides of your frame’s glass with a microfiber cloth to remove fingerprints and dust. Any speck left inside will be visible forever. -
Position the photo:
Place the photo face up on a clean surface and position the mat board over it. Adjust until the composition looks perfectly centered within the window. -
Secure the print:
Using archival mounting tape, create a ‘T-hinge’ at the top edge of the photo on the back of the mat. This allows the photo to expand and contract with humidity changes without buckling. -
Stack the layers:
Place the glass into the frame first, followed by the mat and photo assembly, and finally the backing board. -
Secure the backing:
Use a point driver to insert flexible or rigid framing points into the inside edge of the wooden frame, holding the entire sandwich tightly against the glass.
Elevated Matting
Use a double mat—a thin inner accent color and a wide white outer mat—to add depth and draw out specific colors from your family portrait.
Step 4: Finishing Touches
-
Apply dust cover:
Run a strip of double-sided tape along the back edge of the frame. Lay a sheet of kraft paper over it, pressing down firmly, and trim the excess paper with a craft knife. -
Mist the paper:
Lightly mist the kraft paper with water. As it dries, it will drum tighten, creating a professional seal that keeps dust and insects out. -
Attach hanging hardware:
Install D-rings and wire or a sawtooth hanger about one-third of the way d own the frame back for secure wall mounting.
Now you have a beautifully preserved memory ready to bring warmth to any room on the quietest of afternoons


Have a question or want to share your own experience? I'd love to hear from you in the comments below!