
Turning a utilitarian appliance into a centerpiece is one of my favorite ways to add unexpected personality to a creative space. Whether you are looking up at a spinning color wheel or repurposing old parts for wall decor, there is so much potential hidden in these simple shapes.
The Classic Matte White Refresh
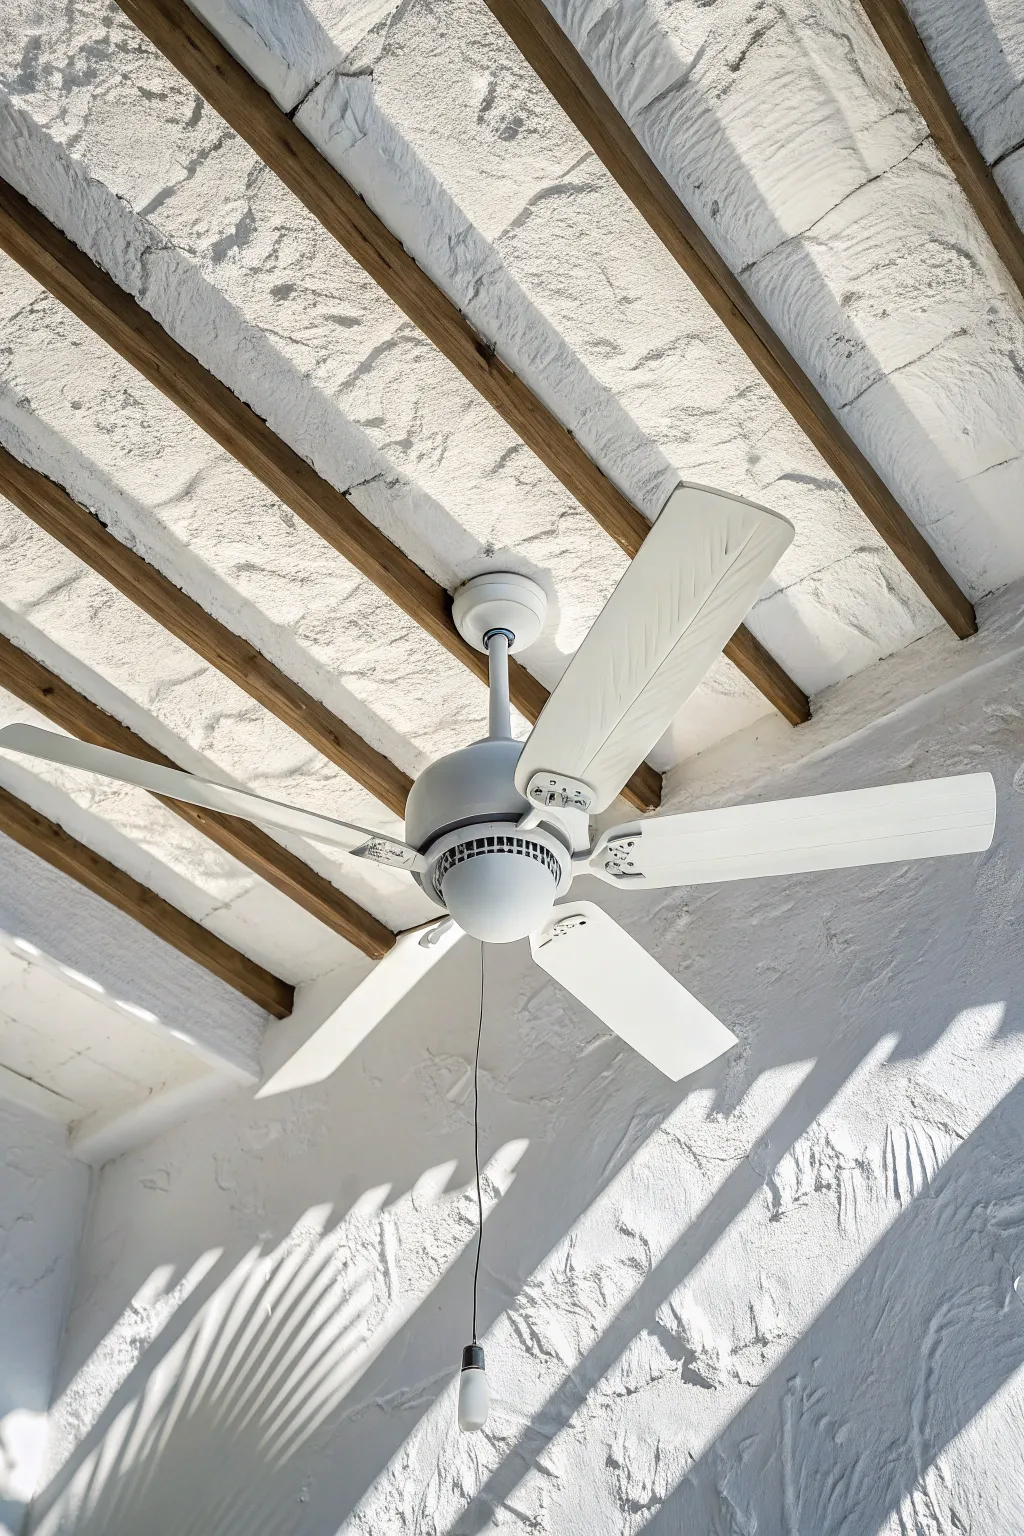
Breathe new life into a dated ceiling fan with a crisp coat of matte white paint. This project creates a seamless, built-in look against white ceilings, instantly modernizing your space without the cost of a replacement.
Step-by-Step Guide
Materials
- Screwdriver set
- Degreaser or TSP substitute
- 220-grit sandpaper
- Tack cloth
- Painter’s tape
- Drop cloth
- Bonding primer (spray)
- Matte white spray enamel
- Cardboard blocks or cups
Step 1: Preparation & Disassembly
-
Safety check:
Turn off the electricity to the room at the circuit breaker to ensure total safety before you begin working on the fixture. -
Initial dusting:
Use a step ladder to reach the fan and thoroughly dust the top of the blades and motor housing to prevent years of dirt from falling on you during removal. -
Remove blades:
Unscrew the blade brackets (the metal arms) from the motor housing first, then lower them down. -
Separate parts:
Detach the wooden blades from the metal brackets once they are safely on your work surface so you can paint them individually. -
Housing removal:
If comfortable with wiring, remove the motor housing cover; otherwise, mask off the ceiling and internal motor vents extensively with painter’s tape and plastic.
Pro Tip: Balance Basics
Number the blades and their corresponding spots on the motor with tape before removal. Reinstalling them in their original positions helps maintain the fan’s factory balance and reduces wobbling.
Step 2: Surface Prep
-
Deep cleaning:
Clean every piece you intend to paint with a degreaser or TSP substitute to remove invisible oils and accumulated household grime that repels paint. -
Scuff sanding:
Lightly sand the blades, brackets, and housing with 220-grit sandpaper; you don’t need to strip the old finish entirely, just dull the shine to create ‘tooth’. -
Dust removal:
Wipe away all sanding residue using a tack cloth or a lint-free rag dampened with isopropyl alcohol to ensure a perfectly smooth base. -
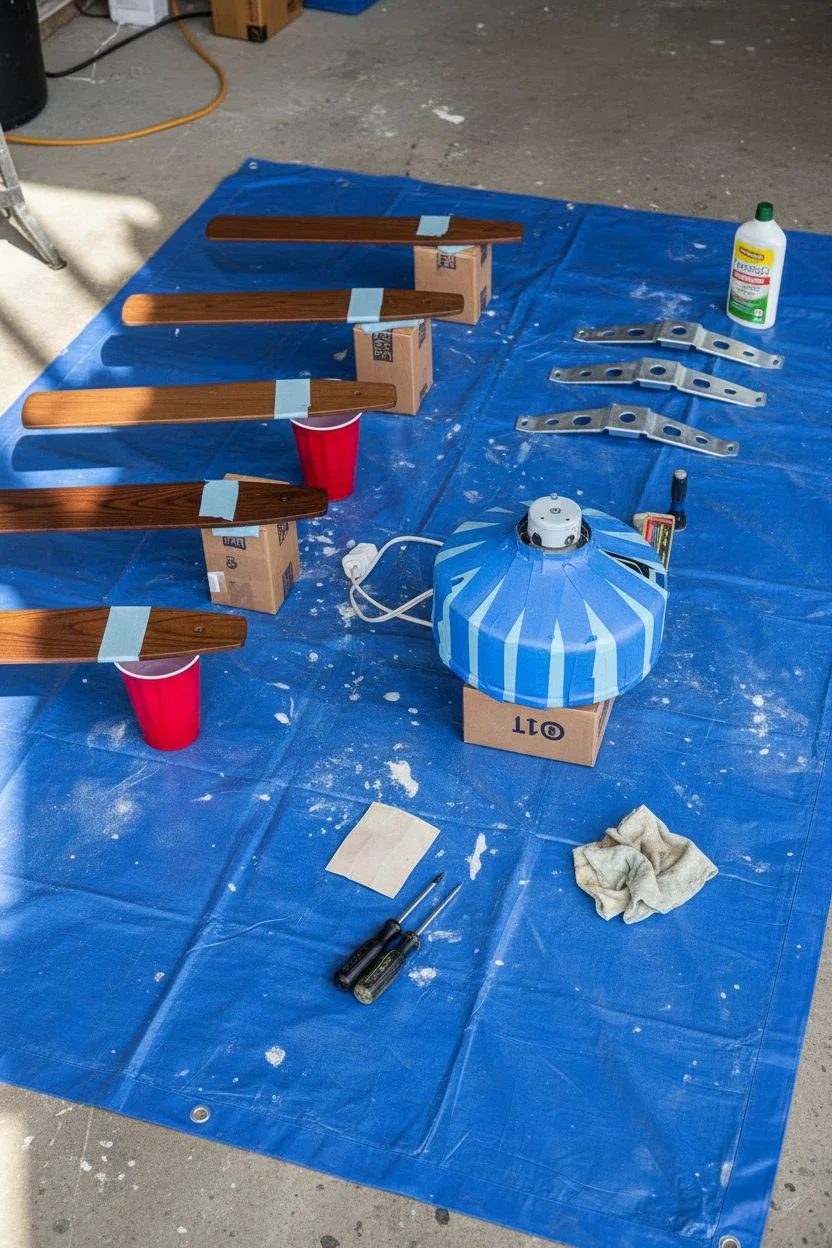
Workstation setup:
Move to a well-ventilated area and prop the blades up on small cardboard boxes or plastic cups so the edges are elevated off the drop cloth.
Troubleshooting: Drips
If you spray too heavily and get drips, let the paint dry completely—don’t wipe wet paint! Sand the drip flat with fine grit paper, wipe clean, and mist a final light coat to blend it.
Step 3: Priming & Painting
-
Prime the surface:
Apply a light, even coat of high-quality bonding primer to all surfaces, holding the can about 8-10 inches away. -
Seal both sides:
Whenever I tackle a project like this, I take the time to prime and paint both sides of the blades to seal them against humidity, preventing warping. -
Mix the paint:
Shake your can of matte white spray enamel for at least one minute to mix the matting agents thoroughly, which is crucial for that flat, non-reflective finish. -
First coat:
Spray the first coat of white paint using long, sweeping strokes that start and end off the object to avoid pooling at the turn. -
Second layer:
Let the first coat become tacky or dry to touch (check your specific can’s label) before applying a second coat for solid opacity. -
Bracket attention:
Ensure the blade brackets receive the same number of coats so the finish matches perfectly against the white motor. -
Final inspection:
Inspect the finish for any missed spots, specifically checking the thin edges of the blades where the dark original wood tone loves to peek through.
Step 4: Reassembly
-
Curing time:
Allow all parts to cure for at least 24 hours in a dry area; this ensures the paint hardens effectively against dust and centrifugal force. -
Reattach hardware:
Screw the blades back onto the brackets, then mount the bracket assembly back onto the motor housing securely. -
Test run:
Turn the power back on and run the fan on low speed to check for balance and smooth operation.
Enjoy the cool breeze from your refreshed, gallery-worthy ceiling fixture.


Spinning Rainbow Spectrum Gradient
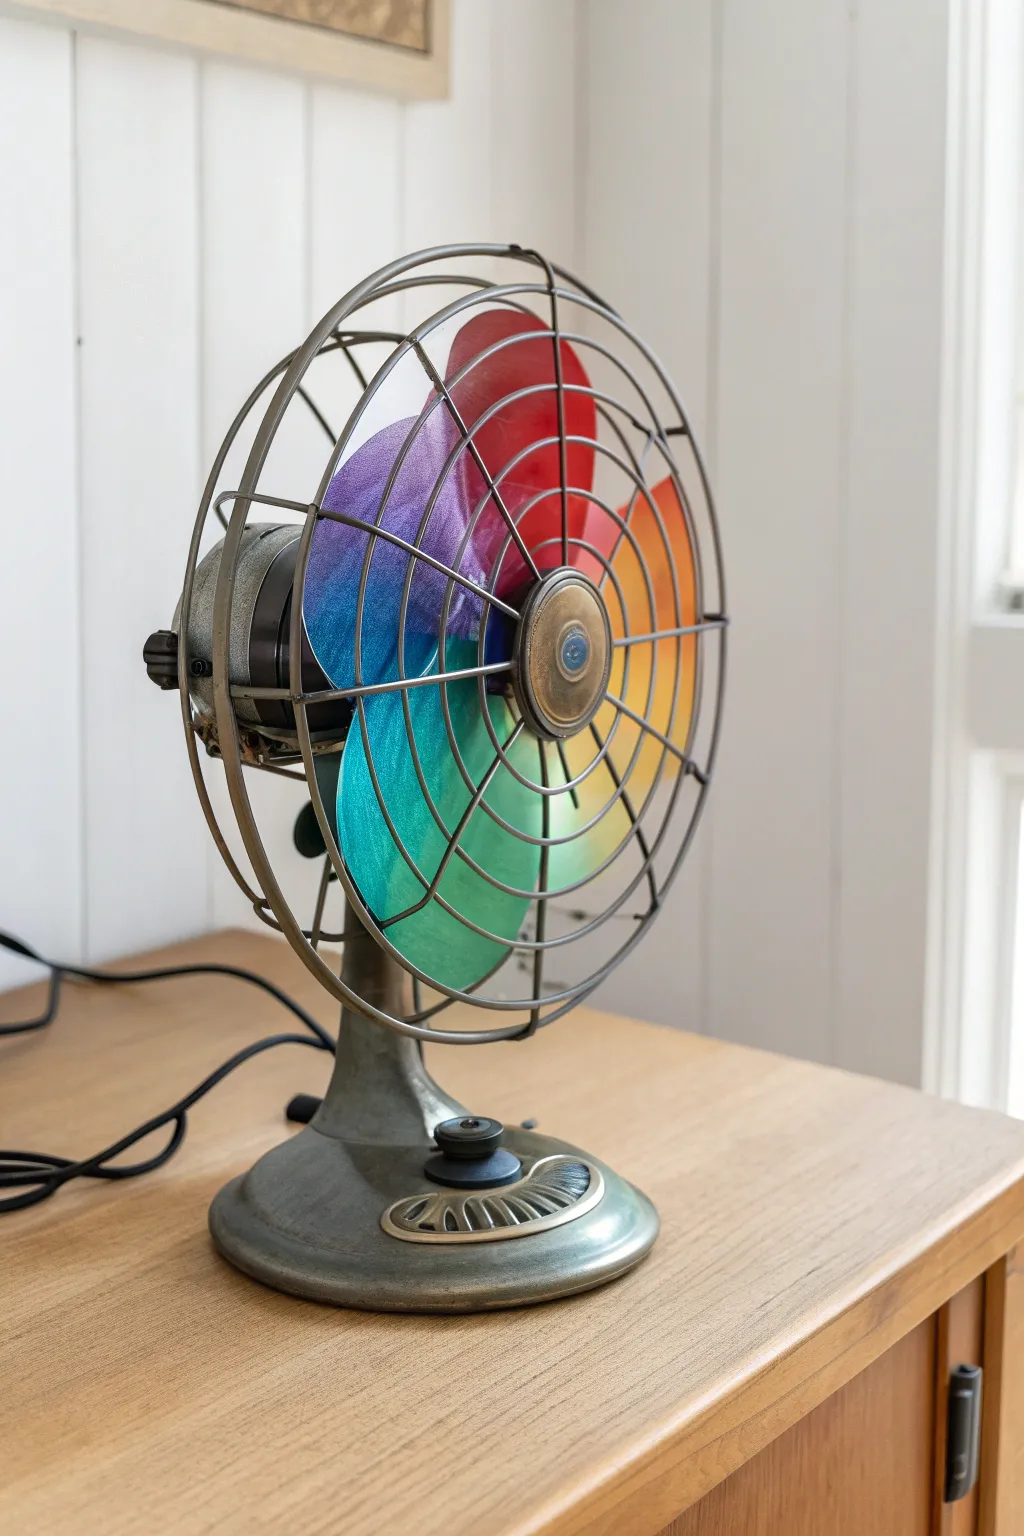
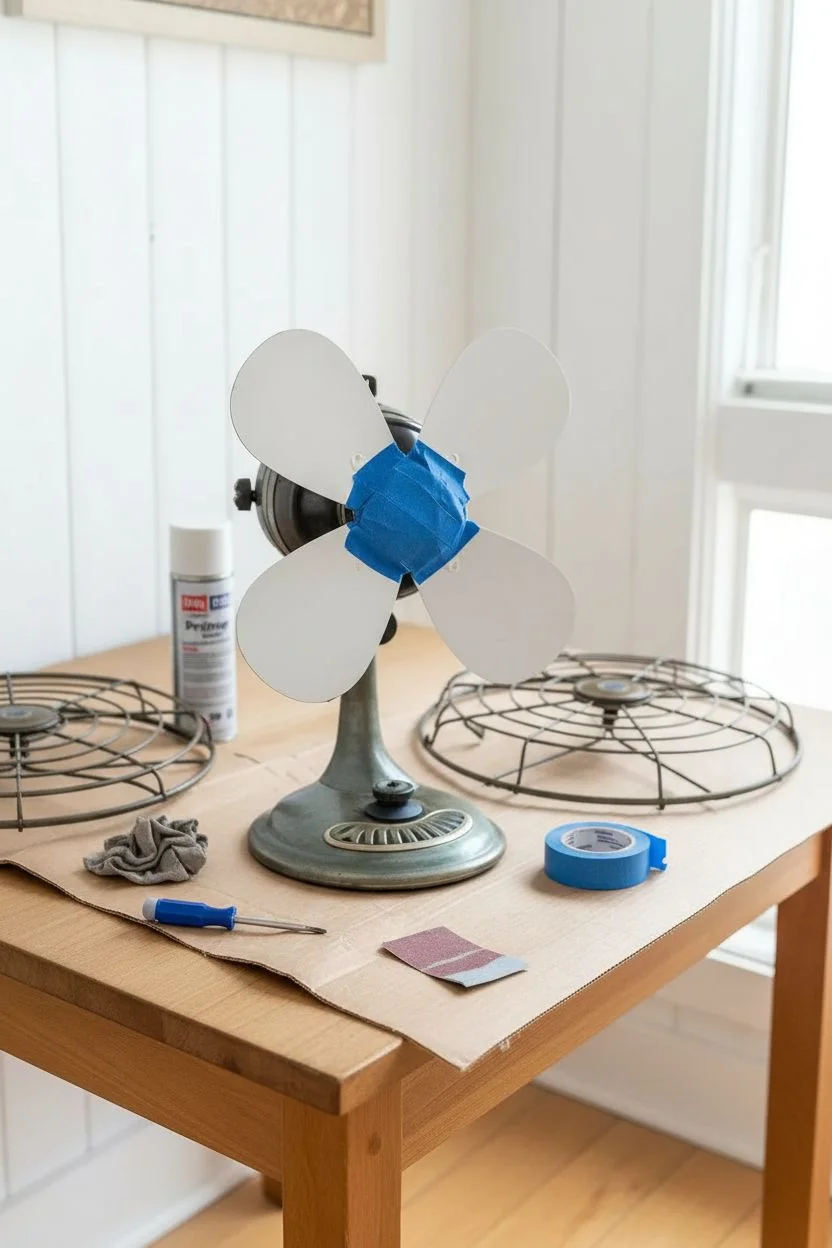
Turn a utilitarian vintage appliance into a mesmerizing piece of kinetic art with this spectrum makeover. While static, the blades display a vibrant color wheel, but once in motion, they blend into a stunning visual white-light effect.
Detailed Instructions
Materials
- Vintage metal table fan
- Small screwdriver set
- Degreasing cleaner (TSP substitute)
- Fine-grit sandpaper (400-600 grit)
- Painter’s tape
- Self-etching primer (White)
- Spray paints (Red, Yellow, Blue, Green, Purple, Pink)
- Clear gloss enamel sealant
- Cardboard scraps
Step 1: Disassembly and Prep
-
Safety check:
Ensure the fan is completely unplugged and placed on a sturdy, covered workspace. -
Remove the front cage:
Locate the clips or small screws holding the front wire cage in place and carefully remove it to expose the blades. -
Detach the blade assembly:
Look for a small set screw on the side of the central hub or a reverse-threaded cap on the front; loosen it to slide the blade unit off the motor shaft. -
Degrease thoroughly:
Vintage fans often have years of oily buildup, so scrub the metal blades with a strong degreaser and let them dry completely. -
Sand for adhesion:
Lightly scuff the entire surface of the blades with fine-grit sandpaper to give the paint something to grip onto. -
Mask the hub:
Use painter’s tape to completely cover the central brass or steel hub mechanism, wrapping it tightly so paint only lands on the blade fins.
Step 2: Creating the Spectrum
-
Prime the surface:
Apply two thin coats of white self-etching primer to the blades; the white base is essential for making the rainbow colors pop. -
Plan your wheel:
Visualize the four blades as a color wheel: Blade 1 is Yellow/Green, Blade 2 is Blue/Purple, Blade 3 is Red/Pink, Blade 4 is Orange/Yellow. -
Start with Yellow:
Spray the first blade bright yellow, allowing the color to overspray slightly onto the left side of the adjacent blade for blending. -
Shield and spray Green:
Use a piece of cardboard to shield the completed yellow center, then spray green on the transition between the yellow blade and the next one. -
Apply the Blue tones:
Move to the next blade, spraying a rich blue that fades into the green edge you just created. -
Fade into Purple:
On the trailing edge of the blue blade, introduce purple, keeping the can about 8 inches away for a soft, dusty transition. -
Add the Red/Pink blade:
Coat the third blade in vibrant red or dark pink, blending the starting edge into the purple section. -
Complete the loop with Orange:
On the final blade, spray orange, blending it into the red on one side and the original yellow on the other to close the loop. -
Check transitions:
I like to stand back and do tiny ‘dusting’ sprays from a distance to soften any harsh lines between colors.
Drip Disaster?
If you get a paint run, don’t wipe it wet! Let it dry completely for 24 hours, sand the drip flat with 600-grit paper, and apply a light mist coat of color to blend it back in.
Step 3: Protection and Reassembly
-
Seal the deal:
Once the colors are dry to the touch, apply three light coats of clear gloss enamel to protect the finish from dust and friction. -
Remove masking:
Carefully peel away the painter’s tape from the center hub to reveal the original metallic hardware. -
Reattach blade assembly:
Slide the painted fan blades back onto the motor shaft and tighten the set screw firmly. -
Test the spin:
Manually spin the blades with your hand to ensure they don’t wobble and to preview the color blending effect. -
Secure the cage:
Reattach the front wire cage using the clips or screws you saved earlier.
Add Some Sparkle
To replicate the shimmering look in the photo, apply a layer of translucent holographic glitter spray or ‘metallic effect’ clear coat before your final gloss sealing layer.
Plug in your revived retro fan and enjoy the cooling breeze of your personal rainbow.


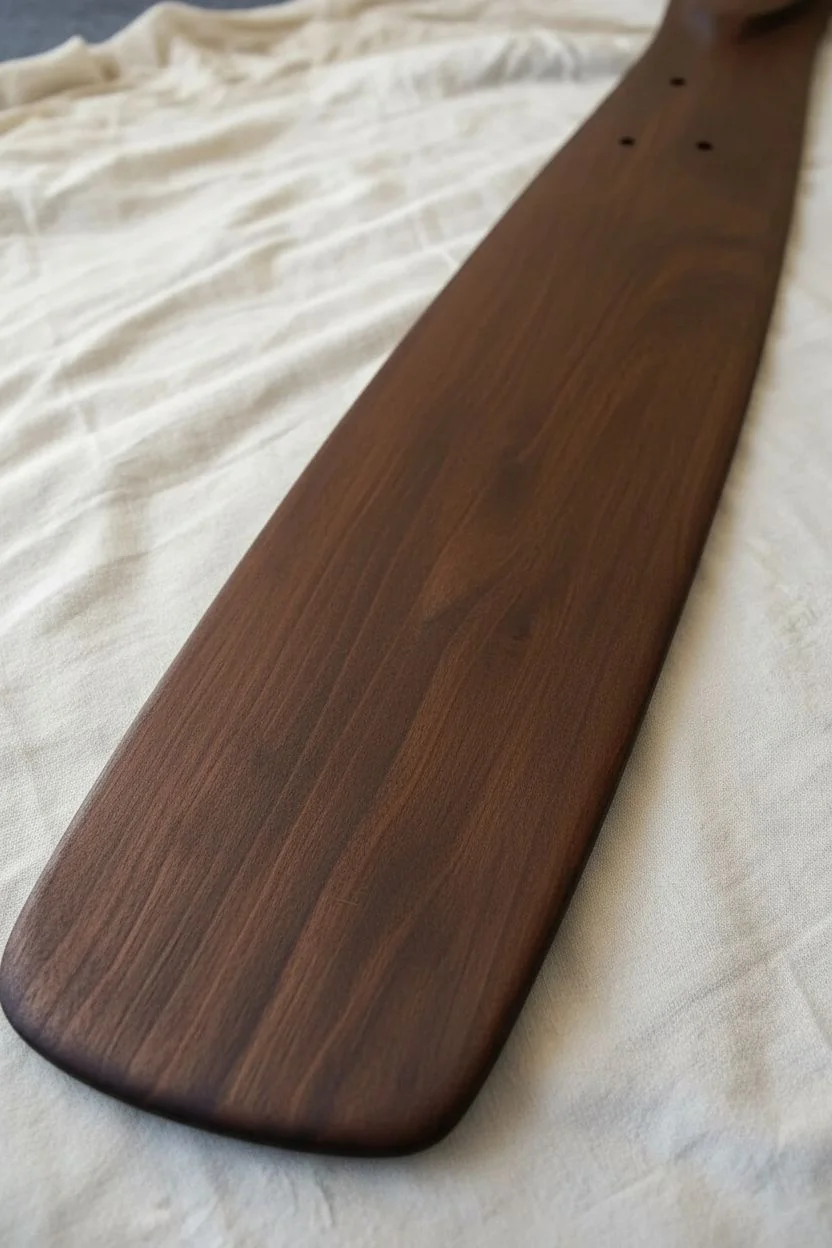
Minimalist Gold Dipped Tips
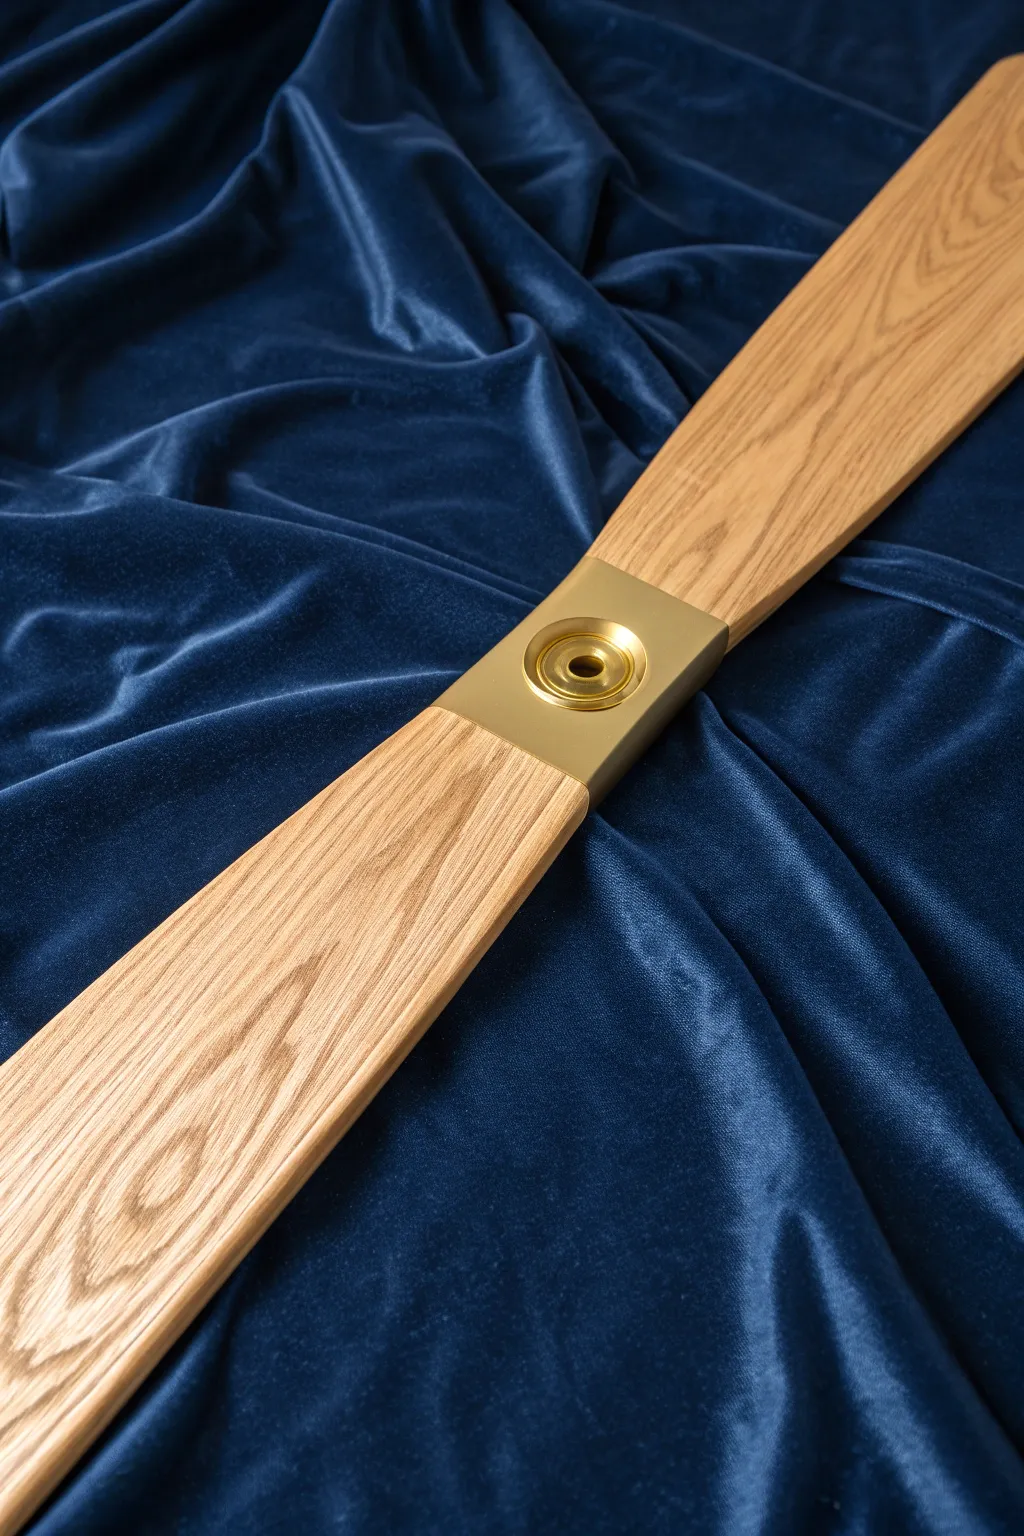
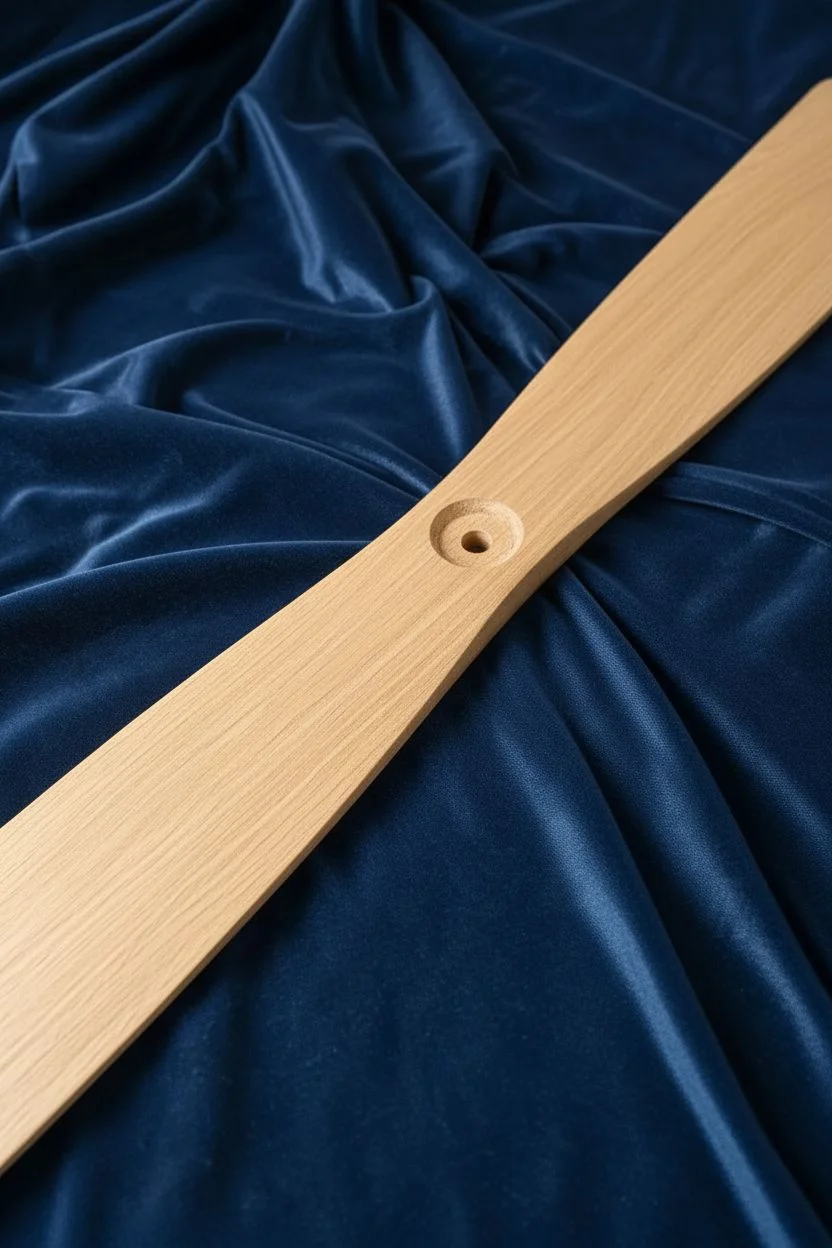
Transform standard ceiling fan blades into sophisticated decor elements with this sleek, dual-tone update. By combining the raw beauty of natural wood grain with a striking block of metallic gold, you create a high-contrast look that mimics expensive designer fixtures.
Step-by-Step Tutorial
Materials
- wooden fan blades
- sandpaper (80, 150, and 220 grit)
- high-quality painter’s tape
- tack cloth or microfiber rag
- spray primer (suitable for wood)
- metallic gold or brass spray paint
- clear matte polyurethane spray
- plastic drop cloth or masking paper
- screwdriver
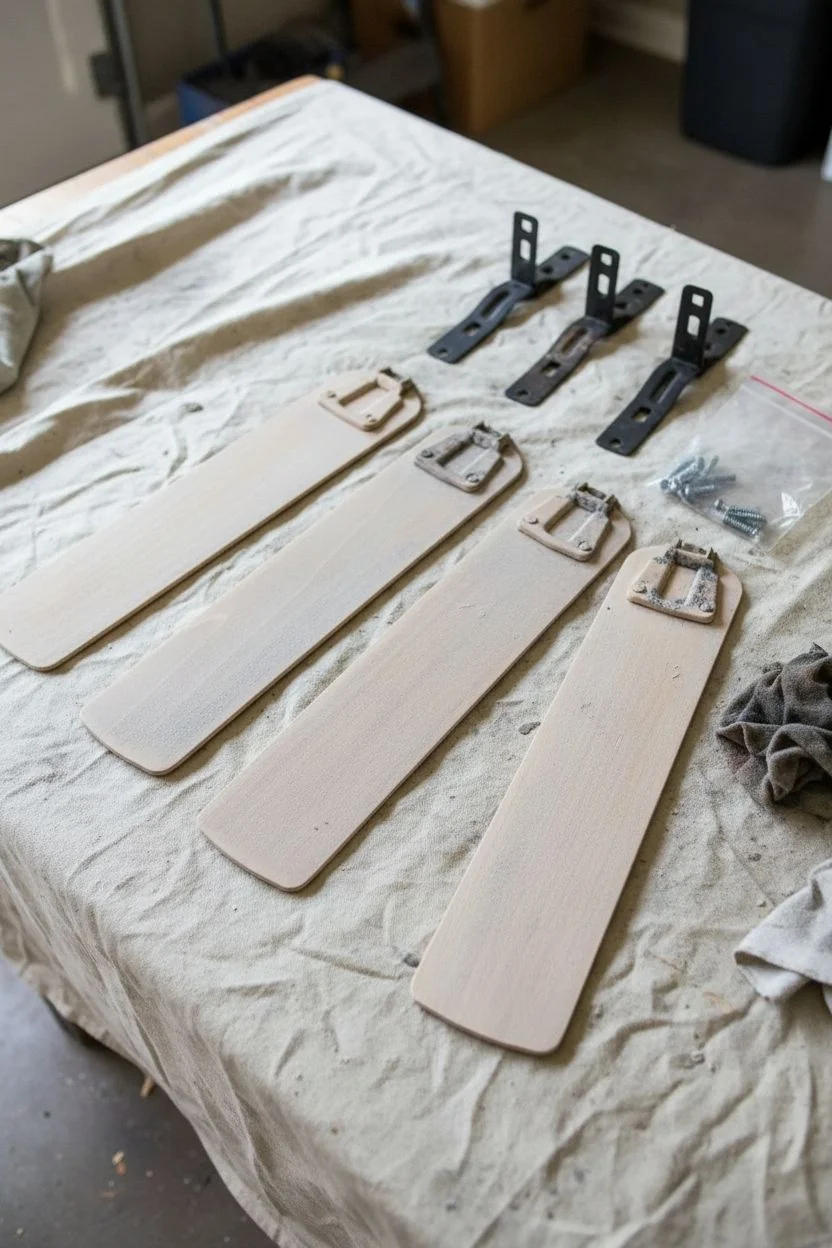
Step 1: Preparation & Sanding
-
Remove hardware:
Turn off the fan power, then unscrew the blades from the motor housing and remove any metal brackets attached to the wood. -
Clean the surface:
Wipe down each blade with a damp cloth to remove the layer of dust and grime that accumulates on ceiling fans. -
Strip the old finish:
Using 80-grit sandpaper, sanding with the grain to remove existing varnish, paint, or stain until you reveal the bare wood underneath. -
Smooth the grain:
Switch to 150-grit sandpaper to smooth out the scratches from the coarser paper. -
Final polish:
Finish scuffing with 220-grit sandpaper; the wood should feel silky smooth to the touch. -
Remove dust:
Thoroughly wipe the blades with a tack cloth to ensure absolutely no sawdust remains in the pores.
Clean Lines Only
If paint bled under the tape, wait for it to fully dry. Then, gently scrape the excess paint away using an X-Acto knife or a razor blade held at a low angle.
Step 2: Masking & Painting
-
Measure the accent:
Decide how large your gold section will be; measuring about 4 to 6 inches from the mounting end (where the holes are) usually creates a balanced look. -
Apply tape:
Place a strip of painter’s tape straight across the blade at your measured mark, wrapping it around the edges to the back. -
Seal the edge:
I always run a credit card firmly over the edge of the tape where paint will meet wood to prevent any bleeding. -
Protect the wood:
Wrap the rest of the blade (the long section you want to remain wood) in masking paper or plastic, taping it securely to your initial tape line. -
Prime the base:
Spray a light coat of primer on the exposed mounting end to ensure the metallic paint adheres evenly to the wood grain. -
Apply gold base:
Once the primer is dry, shake your metallic gold spray paint vigorously and apply a thin, even coat using sweeping motions. -
Second coat:
Let the first coat set for about 15 minutes, then apply a second coat for full opacity and a rich brassy tone. -
Reveal the line:
Carefully peel off the painter’s tape while the paint is still slightly tacky, pulling away from the wet paint at a 45-degree angle.
Adding Texture
For an industrial look, stick small brass upholstery tacks or decorative washers around the screw holes before reinstalling to mimic riveted metal plates.
Step 3: Sealing & Assembly
-
Protect the wood:
Once the gold is fully cured (usually 24 hours), verify the raw wood section is clean. -
Clear coat:
Mist the entire blade with a clear matte polyurethane spray to seal the raw wood and protect the gold finish without adding unnatural shine. -
Paint hardware (optional):
For a seamless look, spray the screw heads or washers gold to match the new blade tip. -
Reinstall:
Screw the blades back onto the fan motor, ensuring they are tightened securely.
Enjoy the gentle breeze from your stylish, custom-crafted centerpiece.


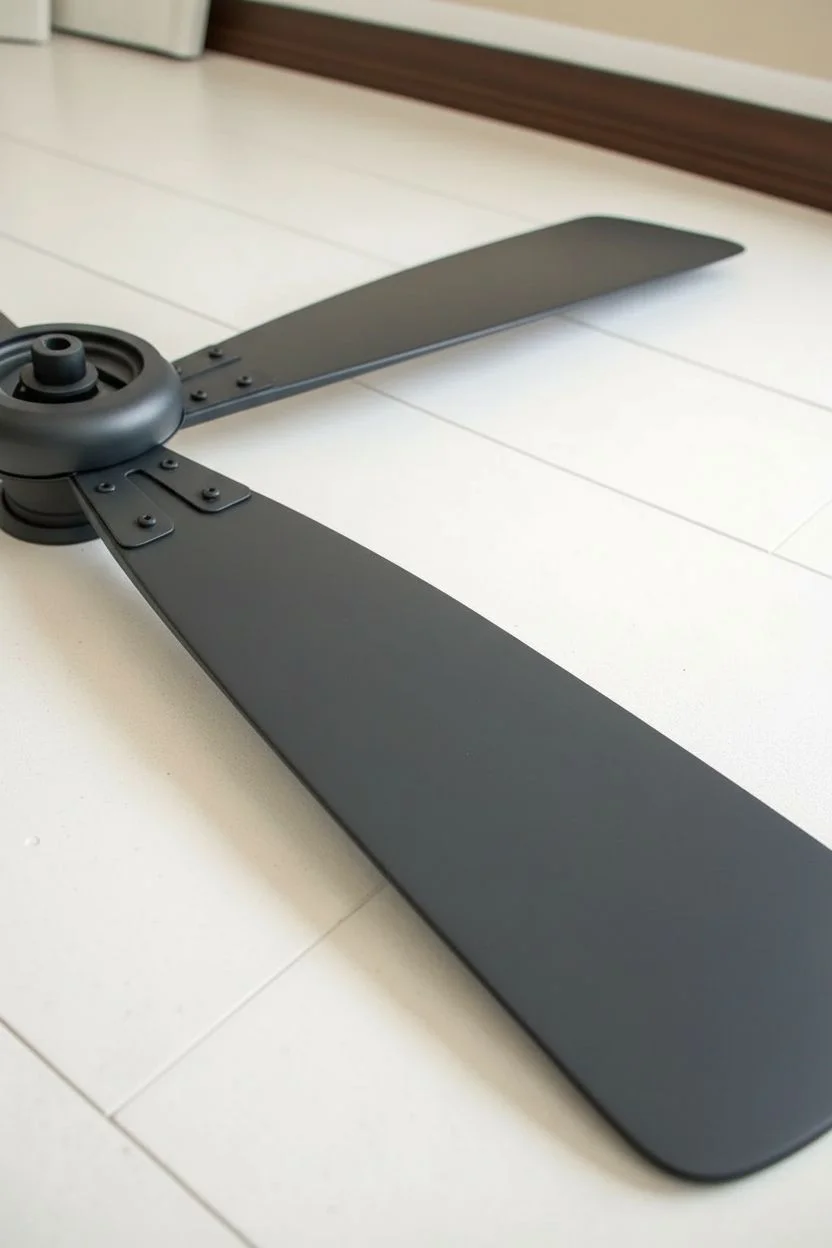
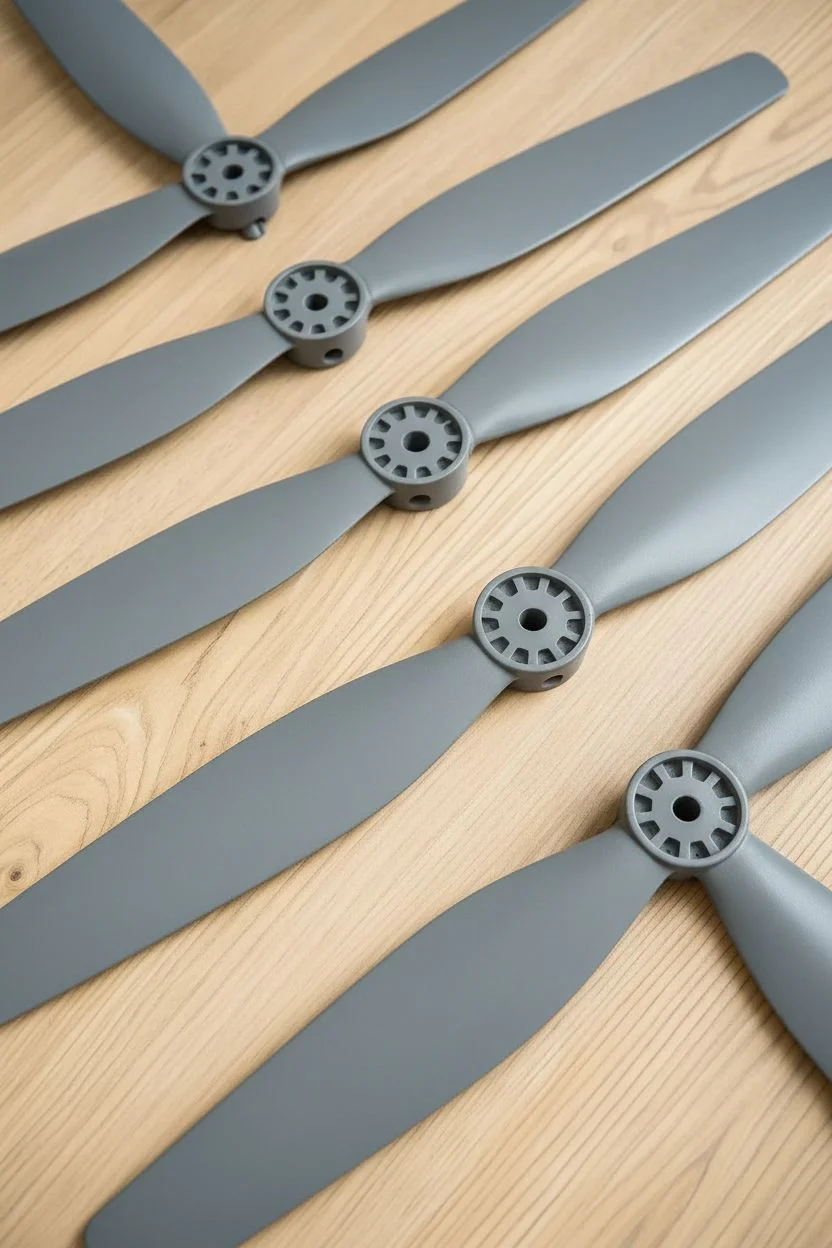
Modern Geometric Chevron Patterns
Transform a standard ceiling fan into a modern statement piece with this high-contrast chevron update. This project uses precise taping and bold charcoal paint to create a dynamic pattern that looks mesmerizing when in motion.
How-To Guide
Materials
- Ceiling fan blades (removed from unit)
- Degreaser cleaner (TSP)
- Sandpaper (220-grit)
- White enamel or chalk paint (base)
- Charcoal grey acrylic or chalk paint (accent)
- Painter’s tape (1-inch width)
- Ruler and pencil
- Flat paintbrush (2-inch)
- Small detail brush
- Clear polycrylic sealer
Step 1: Preparation & Base Coat
-
Remove and clean:
Take the blades off the fan motor and scrub them thoroughly with a degreaser to remove years of dust and oily buildup. -
Light sanding:
Scuff sand the existing finish with 220-grit sandpaper to help the new paint adhere, then wipe away all sanding dust with a tack cloth. -
Apply base color:
Paint the entire surface of each blade with your white base color. Use long, smooth strokes to minimize brush marks. -
Dry and repeat:
Allow the first coat to dry completely, then apply a second coat of white to ensure opaque, solid coverage. -
Full cure:
Let the base coat cure for at least 24 hours. This is crucial so the tape doesn’t peel up your fresh white paint later.
Bleed Breakthrough
If paint bled under the tape, don’t panic. Wait for it to fully dry, then use a tiny artist’s brush and your white base paint to carefully ‘erase’ the jagged edges and straighten the line.
Step 2: Taping the Pattern
-
Mark the center:
Using a ruler, lightly draw a pencil line running vertically down the exact center of the blade from root to tip. -
Mark intervals:
Mark a dot on the center line every 3 to 4 inches, depending on how specific you want your chevron density to be. -
Layout the tape:
Cut strips of painter’s tape. Place two strips meeting at a point on your marked center line to form a ‘V’ shape. -
Check symmetry:
Ensure the angle feels right; usually, a 45-degree angle looks best. Repeat this process down the length of the blade. -
Extend the pattern:
Place parallel strips of tape below your first ‘V’s, using the tape’s own width as a spacer if desired, or measuring equal gaps. -
Seal the edges:
Press the tape edges down firmly with a credit card. I like to then brush a very thin layer of the *white* base paint over the tape edges to seal them.
Color Pop
For a unique twist, incorporate a third color. Add a thin pinstripe of metallic gold or copper parallel to the grey chervons using a paint pen after the main paint has dried.
Step 3: Painting & Finishing
-
Apply accent color:
Using your flat brush, fill in the exposed areas with the charcoal grey paint. Brush away from the tape edge initially to prevent seepage. -
Second coat:
Once the first grey coat is dry to the touch, apply a second coat for deep, rich color saturation. -
The reveal:
Carefully peel off the painter’s tape while the second coat is still slightly damp. Pull the tape away at a 45-degree angle for the crispest lines. -
Touch ups:
Inspect your lines. Use a small detail brush and the appropriate color to fix any minor bleeds or uneven spots. -
Clear coat:
Apply a layer of clear polycrylic sealer over the entire blade. This protects the finish from dust and makes future cleaning easier. -
Reinstallation:
Allow the sealer to cure fully according to the can instructions before screwing the blades back onto your fan motor.
Enjoy the cool breeze and the mesmerizing new pattern spinning above you.
BRUSH GUIDE
The Right Brush for Every Stroke
From clean lines to bold texture — master brush choice, stroke control, and essential techniques.
Explore the Full Guide
Dreamy Cloud Scape Camouflage
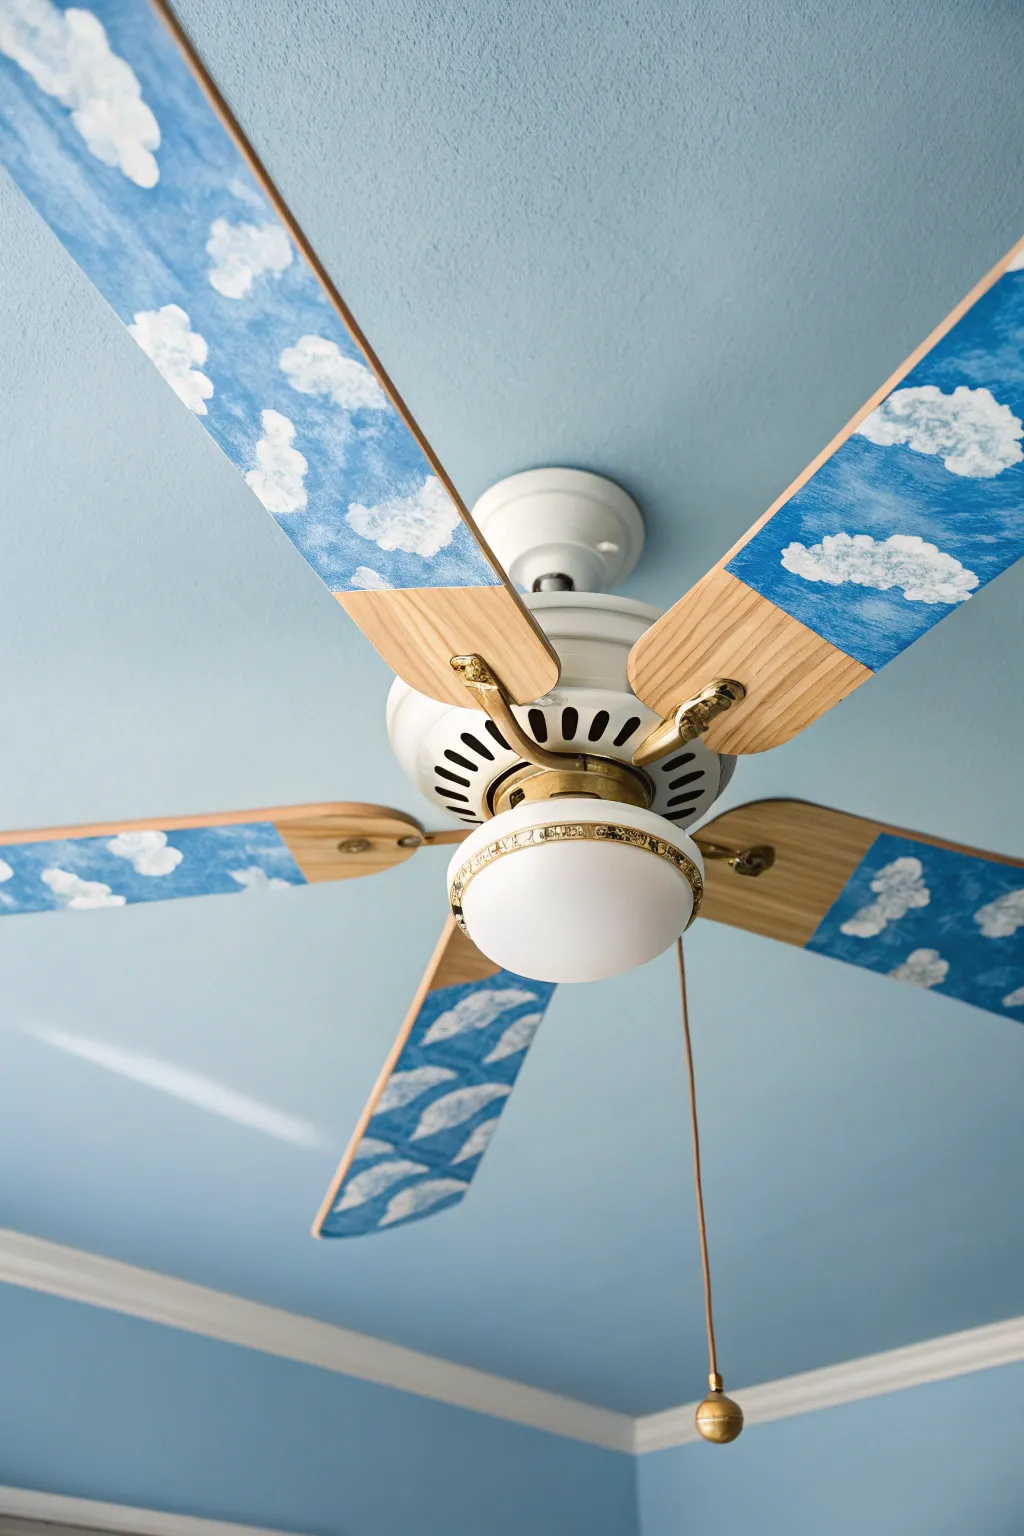
Transform a standard ceiling fan into a whimsical extension of the sky with this dreamy paint project. By leaving a geometric touch of natural wood at the base, you create a modern artwork that blends seamlessly with a blue ceiling.
Detailed Instructions
Materials
- Ceiling fan blades (removed from unit)
- Screwdriver
- Degreaser or TSP substitute
- Fine-grit sandpaper (220 grit)
- Painter’s tape
- Acrylic craft paint (Sky Blue, Titanium White)
- Wide flat brush or foam brush
- Natural sea sponge or round stencil brush
- Paper plate or palette
- Clear spray sealer (Satin or Matte finish)
Step 1: Prep and Prime
-
Detach the blades:
Turn off the power to the fan, then carefully unscrew each blade from the mounting brackets using your screwdriver. Keep the screws in a ziplock bag so they don’t get lost. -
Deep clean surfaces:
Kitchen and bedroom fans collect invisible grease and dust. Scrub each blade thoroughly with a degreaser or mild soap water and let them dry completely, or the paint won’t stick. -
Light scuffing:
Gently rub the surface of the blades with 220-grit sandpaper. You aren’t trying to strip the old finish, just creating a toothy texture for the new paint to grab onto. -
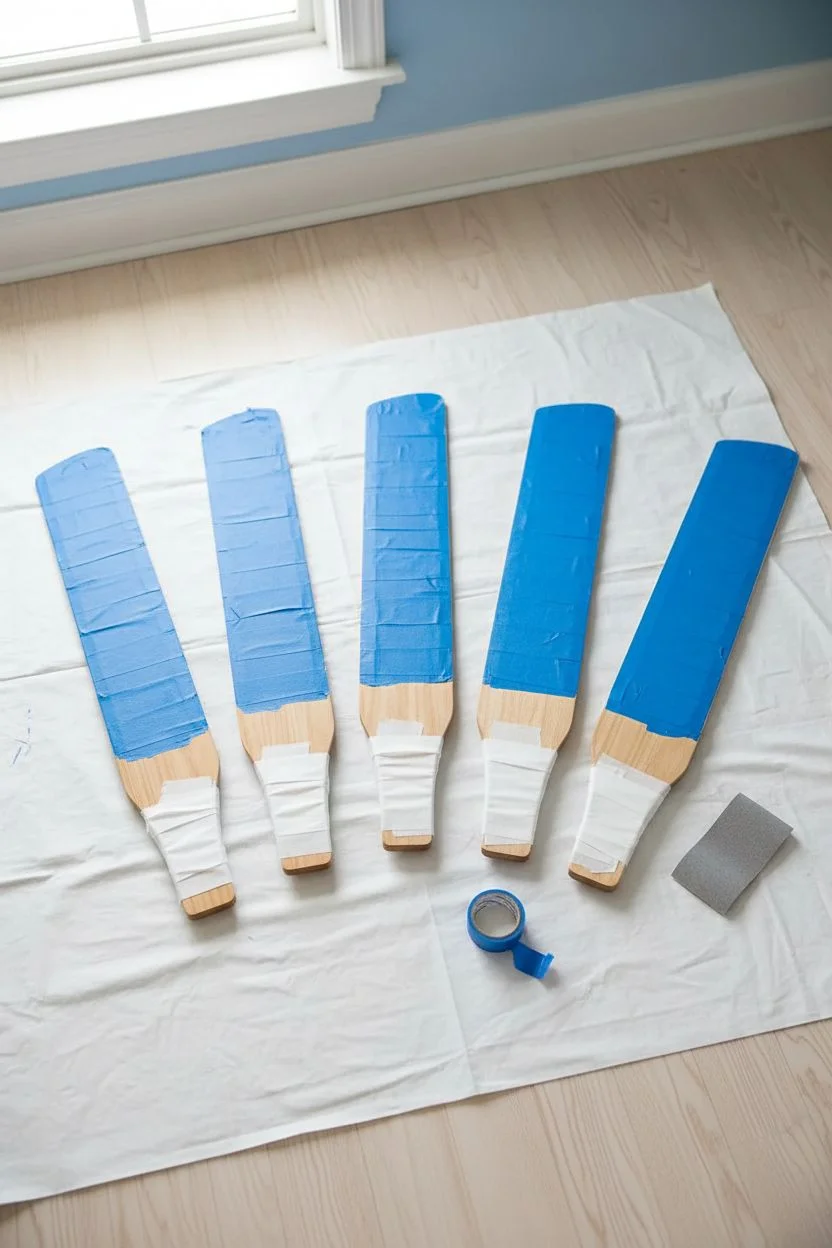
Tape the horizon line:
Decide how much natural wood you want exposed near the bracket; about 3 to 4 inches is standard. Measure this distance on every blade and apply a strip of painter’s tape across the width, pressing the edges down firmly. -
Protect the wood:
Wrap the rest of the bottom section (the area you just taped off) with paper or extra tape to ensure no stray splashes land on the wood finish.
Step 2: Painting the Sky
-
Apply the blue base:
Using a wide flat brush or foam brush, apply your Sky Blue acrylic paint to the upper section of the blade. Paint in long, even strokes moving away from the tape line toward the tip. -
Check the edges:
Pay special attention to the sides of the blades. You want the blue to wrap around the edges so the wood color doesn’t peek through when looking up from the floor. -
Second coat coverage:
Allow the first coat to dry to the touch, usually about 20 minutes. Apply a second coat to ensure a solid, opaque blue field without streaking.
Bleeding Lines?
If blue paint bled under the tape onto the wood grain, gently scrape it away with the edge of a credit card or a wooden toothpick while the paint is semi-dry but still tacky.
Step 3: Creating the Clouds
-
Prepare your palette:
Pour a dollop of Titanium White paint onto a paper plate. Dampen your sea sponge or stencil brush slightly and squeeze out excess water, then dip it lightly into the white paint. -
Off-load excess paint:
I always blot the sponge on a clean part of the plate before touching the blade. You want a ‘dry’ texture, not a wet glob, to create that airy, fluffy look. -
Dab the shapes:
Using a gentle up-and-down pouncing motion, dab irregular cloud shapes onto the blue background. Focus on the tips and middle sections, leaving some blue space for balance. -
Soften the edges:
As the paint runs out on your sponge, work around the perimeter of your white shapes. This creates a misty, translucent fade where the cloud meets the sky. -
Highlight the centers:
Reload your sponge with a bit more fresh white paint and dab just the centers of the cloud formations. This builds dimension, making the clouds look puffy and dense in the middle.
Night Mode
Mix a small amount of glow-in-the-dark medium into your final layer of white cloud paint. The fan will look normal by day, but create a subtle glowing starlit effect when the lights go out.
Step 4: Sealing and Assembly
-
Remove the tape:
Carefully peel back the painter’s tape. Pull it away from the paint line at a 45-degree angle to ensure a crisp, sharp edge between the sky and the wood. -
Apply topcoat:
Take the blades outside or to a ventilated area. Spray 1-2 thin coats of clear acrylic sealer over the entire painted surface. This prevents dust from sticking to the acrylic and makes cleaning easier later. -
Cure and rehang:
Let the blades cure for at least 24 hours so the paint hardens fully. Reattach them to the brackets and mount them back onto the fan motor housing.
Flip the switch and enjoy the breeze coming from your own personal patch of blue sky
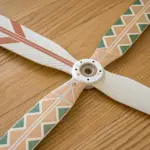
Playful Polka Dot Motion Blur
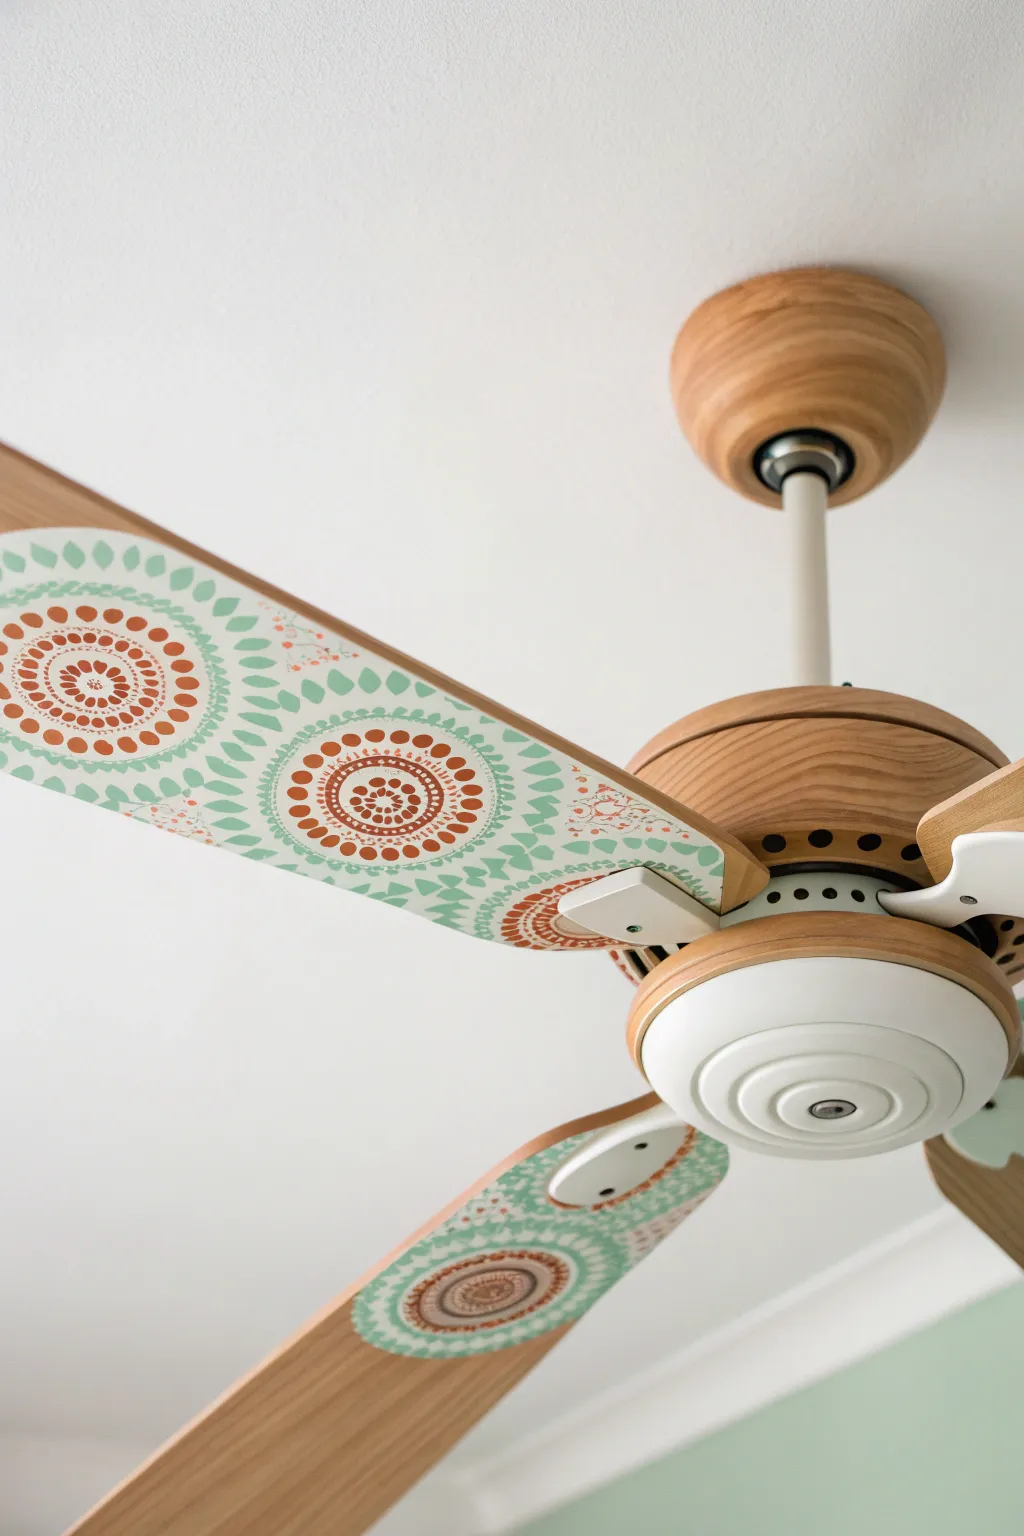
Transform a standard wooden ceiling fan into a spinning work of art with this breezy, bohemian update. By applying a mandala-inspired stencil pattern in fresh mint and terracotta tones, you’ll create a mesmerizing motion blur effect when the fan is in use.
How-To Guide
Materials
- Ceiling fan with wooden blades
- Screwdriver
- Mild degreaser or soapy water
- Fine-grit sandpaper (220-grit)
- Painter’s tape
- Large mandala or circular geometric stencil
- Acrylic craft paint (Mint Green)
- Acrylic craft paint (Terracotta/Rust Orange)
- Foam pouncers or stencil brushes
- Small detail paintbrush
- Clear matte spray sealer (polycrylic)
Step 1: Preparation & Safety
-
Safety check:
Ensure the fan is turned off completely at the wall switch or breaker box before beginning. -
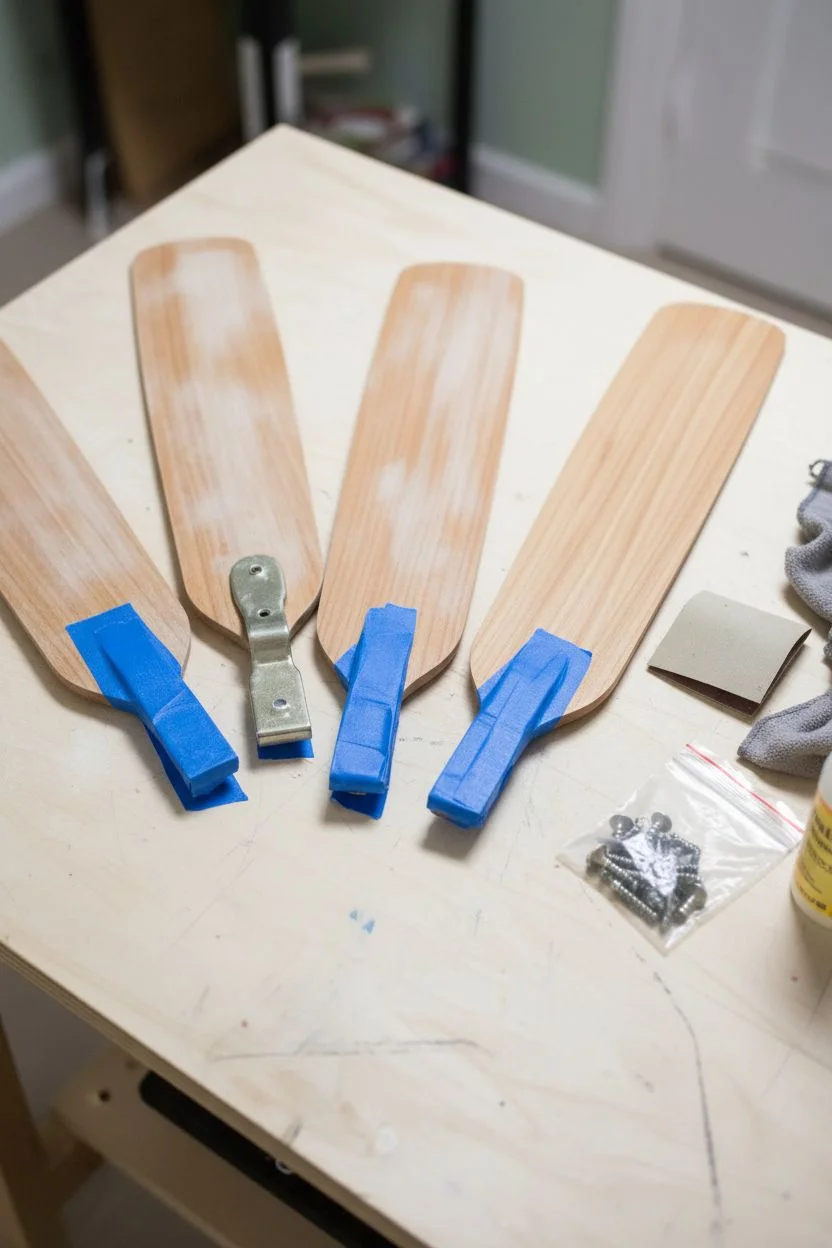
Remove the blades:
Use your screwdriver to carefully detach each fan blade from the motor housing bracket. -
Organize hardware:
Place all screws and washers in a ziplock bag or small bowl so nothing gets lost during the painting process. -
Clean the surface:
Wipe down each blade thoroughly with a degreaser to remove years of dust and oily buildup, which prevents paint adhesion. -
Light sanding:
Gently scuff the surface of the blades with 220-grit sandpaper to give the wood some ‘tooth’ for the paint. -
Protect the attachment points:
Wrap painter’s tape around the base of the blade where it connects to the metal arm to keep that area clean.
Pro Tip: Crisp Edges
To prevent paint bleeding under the stencil, use the ‘dry brush’ method. Your sponge should have so little paint that it looks faded when you first touch the wood.
Step 2: Stenciling the Design
-
Plan the placement:
Position your mandala stencil so the center of the design aligns with the width of the blade. -
Secure the stencil:
Use painter’s tape to firmly hold the stencil in place on the first blade; any shifting will ruin the crisp lines. -
Load the mint color:
Dip a foam pouncer into the Mint Green paint, then dab off almost all the excess onto a paper towel until the sponge feels nearly dry. -
Apply the primary color:
Gently dab the mint paint over the outer rings and larger geometric sections of the stencil using a strictly up-and-down motion. -
Switch to terracotta:
Using a smaller, fresh pouncer, apply the Terracotta paint to the inner circular details and accent dots within the stencil pattern. -
Lift and reveal:
Immediately peel the stencil straight up while the paint is still wet to prevent the edges from drying to the plastic. -
Repeat consistency:
Move to the next blade, measuring carefully to ensure the pattern starts at the exact same distance from the tip on every blade. -
Hand-painted details:
I like to use a small detail brush to touch up any bridges left by the stencil or to add tiny freehand dots for extra texture.
Step 3: Finishing Touches
-
Drying time:
Allow the blades to dry completely for at least 24 hours in a well-ventilated area. -
Seal the work:
Apply two light coats of clear matte spray sealer to protect the design from dust and future cleaning. -
Reassembly:
Once the sealer is fully cured, screw the blades back onto the brackets and reattach them to the fan motor.
Level Up: Metallic Pop
Add a third dimension by using metallic gold paint for the tiniest center dots. When the fan spins, this creates a shimmering golden ring light effect.
Flip the switch and enjoy the calming, kaleidoscope effect of your custom-painted fan.

PENCIL GUIDE
Understanding Pencil Grades from H to B
From first sketch to finished drawing — learn pencil grades, line control, and shading techniques.
Explore the Full Guide
Rustic Distressed Wood Faux Finish
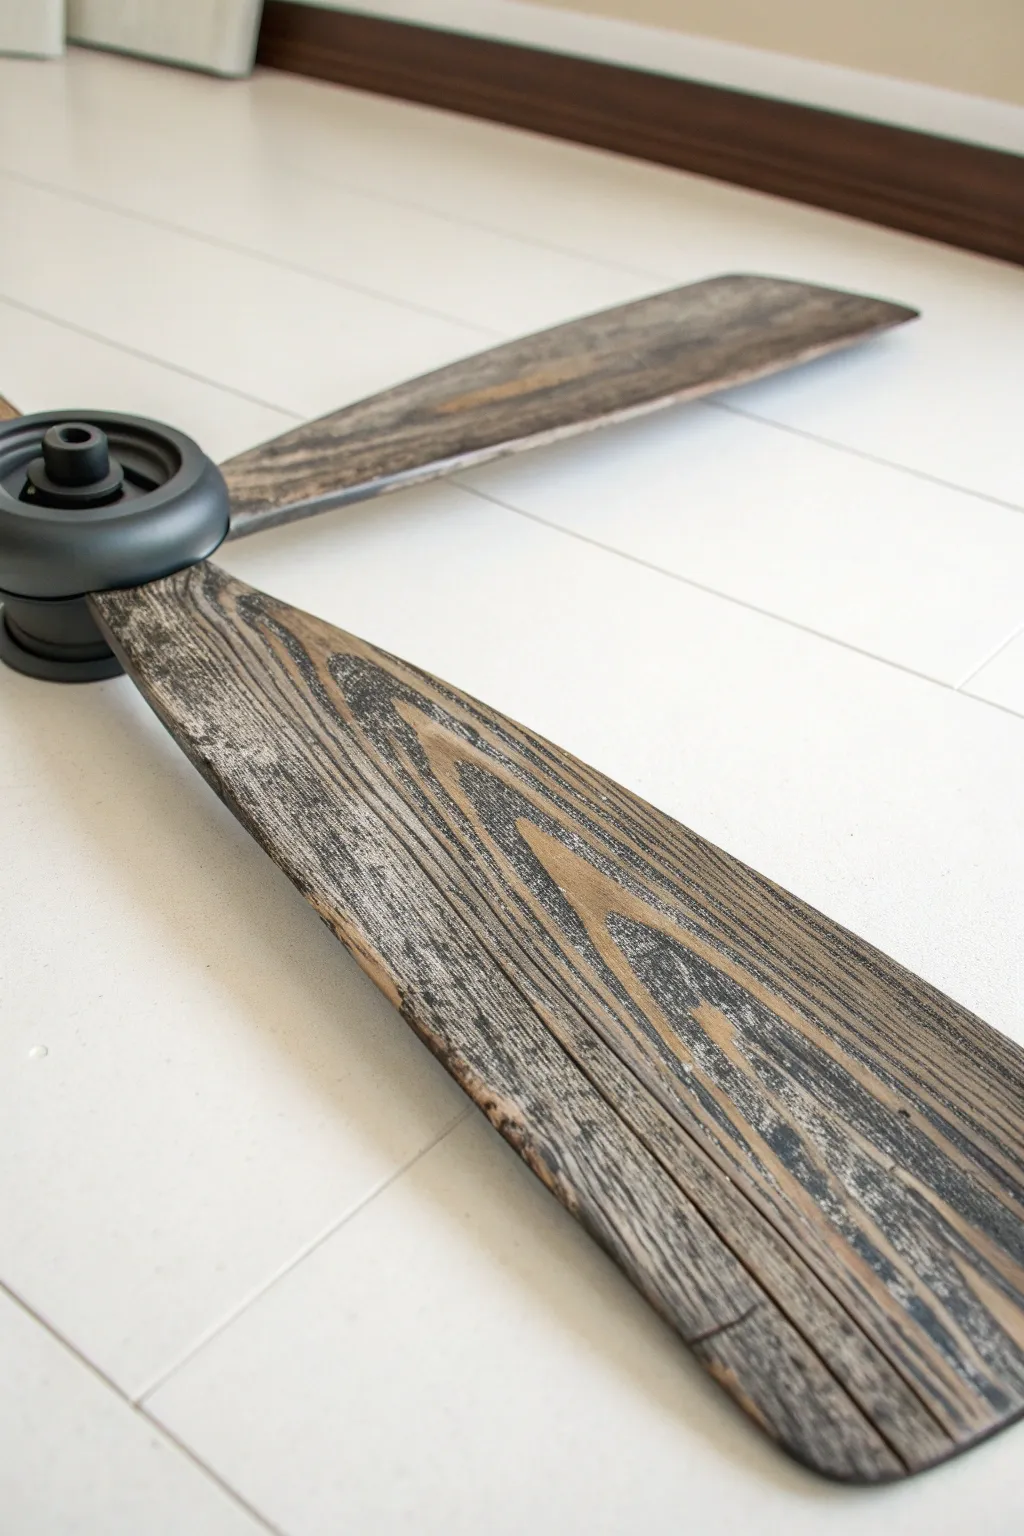
Transform standard, glossy fan blades into rustic statement pieces that look like reclaimed timber. This technique uses simple layering and dry-brushing to mimic the deep grain and weathered patina of old barn wood.
Step-by-Step Guide
Materials
- Ceiling fan blades (demounted)
- Sanding block (120-grit)
- Primer spray paint (matte dark grey or black)
- Acrylic craft paints (Black, Espresso Brown, Driftwood Grey, Warm White)
- Cheap chip brushes (2-inch, stiff bristles)
- Paper towels
- Matte clear finishing spray
- Matte black spray paint (for hardware)
Step 1: Preparation & Base Coat
-
Remove and clean:
Take the fan blades off the motor housing and remove any metal brackets. Wipe the blades down thoroughly with a damp cloth to remove years of dust and grease buildup. -
Scuff sanding:
Lightly sand the entire surface of both sides of the blades using 120-grit sandpaper. You don’t need to strip the original finish, just dull the shine so the new paint adheres. -
Prime the blades:
Spray the blades with a dark grey or black primer. This dark base is crucial because it will act as the deep ‘shadows’ and cracks in your faux wood grain. -
Paint the hardware:
While the blades dry, take the metal blade brackets and the motor housing cover (if removable) and spray them with matte black paint to match the rustic industrial look. -
Dry time:
Allow the primer and hardware to cure completely according to the can instructions before moving to the artistic phase.
Troubleshooting: Muddy Colors
If your wood grain looks like grey sludge, you aren’t letting layers dry. The base layers must be 100% dry before dry-brushing the top coats, otherwise colors blend instead of layering.
Step 2: Creating the Faux Grain
-
Prepare the brown layer:
Pour some Espresso Brown acrylic paint onto a paper plate. Do not water it down; you want the paint relatively thick to hold texture. -
Apply the brown streaks:
Dip just the tips of your chip brush into the brown paint. Use long, unidirectional strokes from the base of the blade to the tip. Leave gaps so the black primer peeks through. -
Enhance texture:
I prefer to wiggle the brush very slightly as I drag it to create organic imperfections found in real wood. -
Let it set:
Allow this brown layer to become touch-dry. Acrylics dry fast, so this usually takes about 15-20 minutes. -
Prepare the grey wash:
Mix your Driftwood Grey paint with a tiny drop of the Warm White to lighten it. Dab your fresh brush into the paint, then wipe almost all of it off onto a paper towel. -
Dry brush the weathering:
Using the ‘dry brush’ technique, drag the brush lightly over the brown layer. The grey should catch on the ridges of your brush strokes, creating that sun-bleached look. -
Add highlights:
Focus the grey and white paint more heavily on the edges of the blades where natural weathering would occur. -
Deepen the grain:
If you lose too much contrast, take a small artist brush with black paint and manually draw in a few ‘knots’ or deep cracks, then feather them out.
Step 3: Finishing & Assembly
-
Distress (Optional):
Once fully dry, lightly run your sandpaper over the blades one last time. This knocks back any high ridges and blends the grey into the brown for a smoother finish. -
Seal the work:
Spray the blades with two light coats of matte clear sealer. This protects your handiwork from dust and makes future cleaning easier. -
Reattach brackets:
Screw the freshly painted black metal brackets back onto the blades. -
Final assembly:
Mount the blades back onto the fan motor carefully to avoid scratching the new finish.
Pro Tip: The Brush Matters
Use the cheapest, coarsest chip brushes you can find. Soft brushes smooth the paint too much; coarse bristles naturally separate to create the distinct ridges needed for realistic faux grain.
Enjoy the cozy, farmhouse vibe your upgraded fan brings to the room.
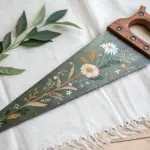
Elegant Floral Vine Trails
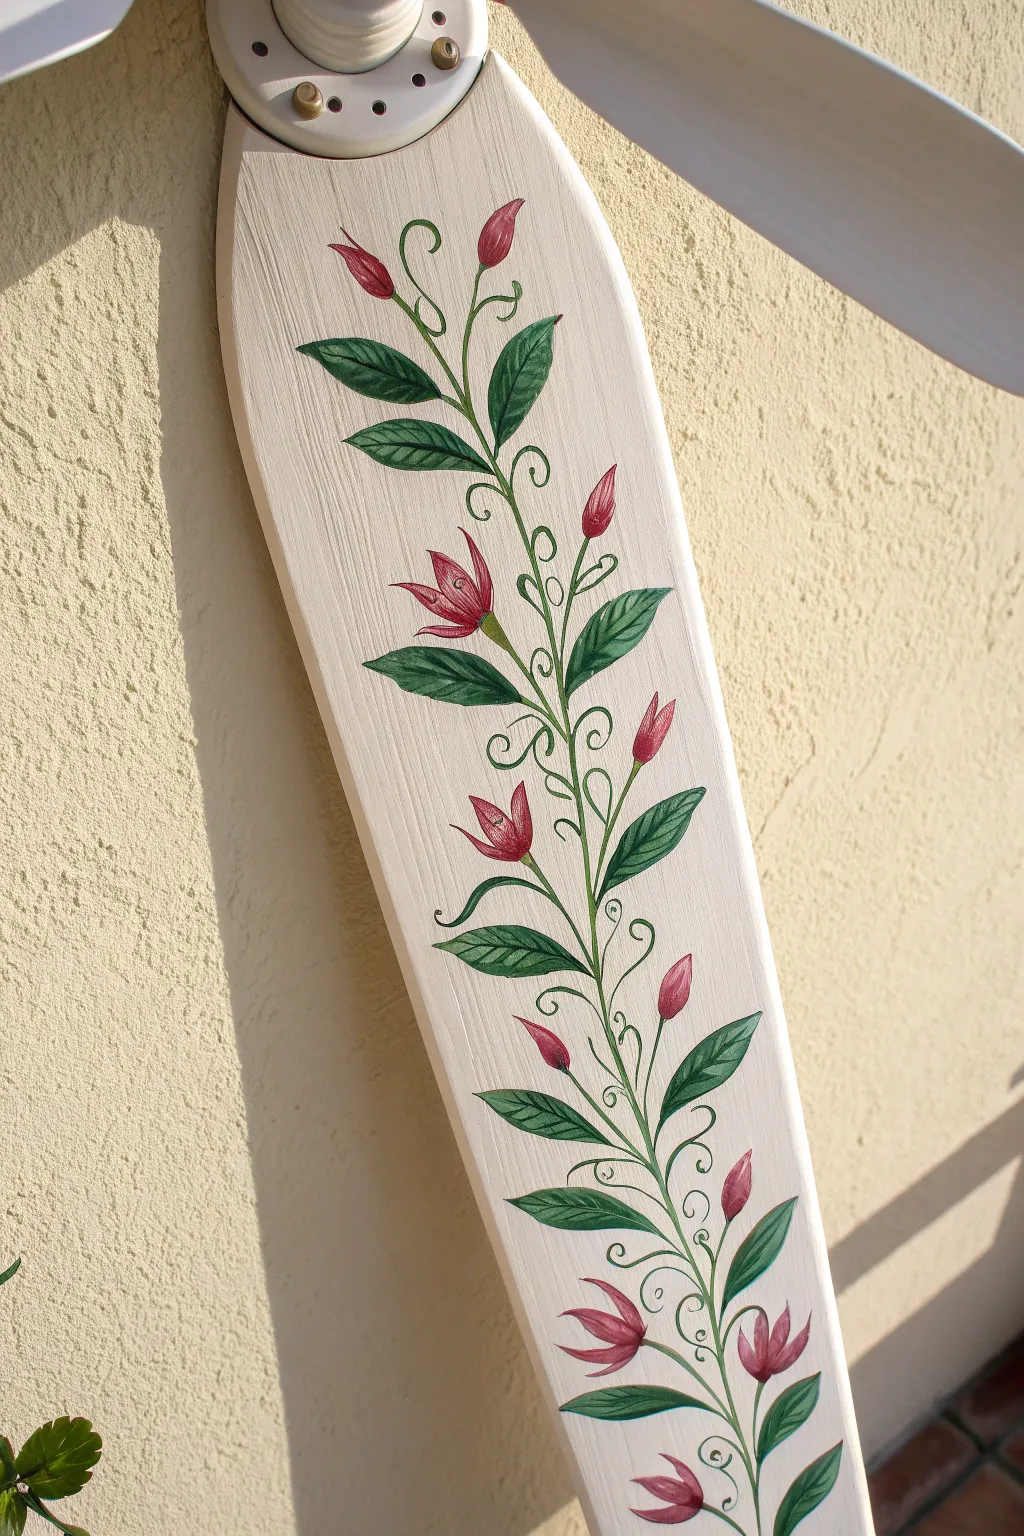
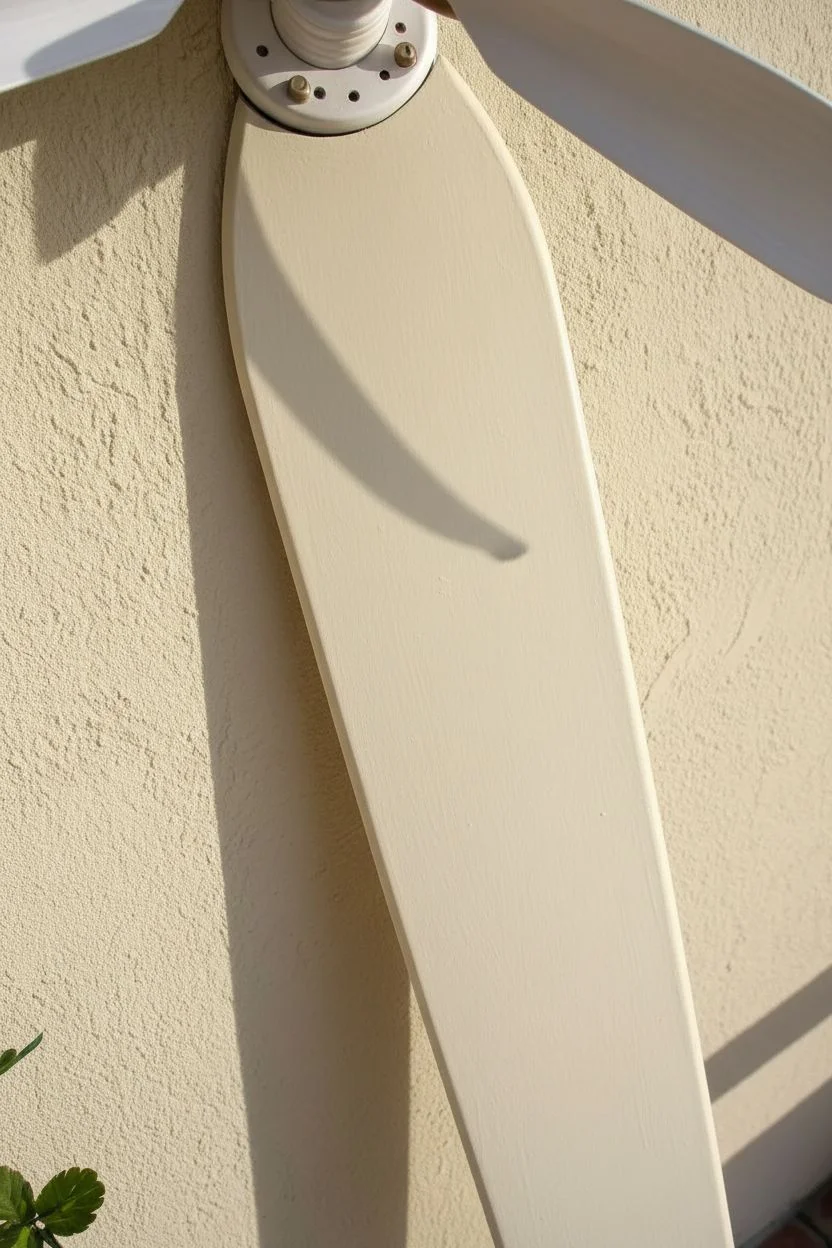
Transform a plain wooden fan blade into a charming piece of folk art with this elegant floral vine design. This project focuses on classic decorative painting techniques to create depth in the leaves and movement in the scrolls.
How-To Guide
Materials
- Wooden fan blade
- Sandpaper (180 grit)
- Tack cloth or damp rag
- Acrylic primer
- Acrylic craft paints (Cream/Off-White, Sap Green, Dark Hunter Green, Burgundy, Titanium White)
- Flat brush (1-inch) for base trim
- Round brush (#4 or #6)
- Fine liner brush (#0 or #00)
- Palette or paper plate
- Clear matte acrylic sealer spray
Step 1: Surface Preparation
-
Clean the surface:
Remove the blade from the fan hardware and wipe it down thoroughly to remove any dust or grease buildup. -
Sand the finish:
Scuff sand the entire front surface of the blade with 180-grit sandpaper to help the new paint adhere, then wipe away dust with a tack cloth. -
Apply primer:
Brush on a smooth coat of acrylic primer to ensure an even surface and let it dry completely. -
Paint the background:
Apply two to three coats of Cream acrylic paint using the flat brush, allowing roughly 20 minutes of drying time between each layer until opaque.
Mastering the Scroll
For the fine curly vines, dilute your paint with water until it feels like ink. This allows the paint to flow smoothly off the liner brush for long, unbroken curves without skipping.
Step 2: Leaf and Stem Structure
-
Sketch the path:
Using a pencil very lightly, draw a gentle ‘S’ curve running vertically down the center of the blade to serve as your main vine guide. -
Mix stem color:
On your palette, thin a mixture of Sap Green and a tiny touch of Hunter Green with water until it reaches an inky consistency. -
Paint the main stem:
Using the liner brush and your inky mixture, trace over your pencil line with a single, confident stroke. -
Block in leaf shapes:
Load the #4 round brush with Sap Green and paint simple pointed oval leaf shapes alternating sides along the main stem. -
Shade the leaves:
While the green is still slightly tacky, pick up a small amount of Dark Hunter Green on one side of your brush and sweep it along the bottom edge of each leaf for shadow. -
Add leaf detail:
Switch back to the fine liner brush and the dark green paint to draw a thin central vein down the middle of each leaf.
Step 3: Flowers and Accents
-
Paint the buds:
Using the round brush loaded with Burgundy, paint small teardrop shapes near the top of the vine to represent closed buds. -
Create open blooms:
For the lower flowers, paint three flared strokes—one center and two sides—to create a tulip-like shape. -
Highlight the petals:
I like to mix a little Titanium White into the Burgundy to create a soft pink, then add small strokes to the tips of the petals for dimension. -
Attach the flowers:
Use your liner brush and the green mix to paint small calyxes (the green cup at the base of the flower) and connect them to the main stem. -
Add decorative scrolls:
With very watery light green paint and the liner brush, add whimsical curly tendrils coming off the main stem to fill empty spaces.
Stabilizing Your Hand
If your hand shakes during fine detail work, extend your pinky finger and rest it on a dry section of the blade. This creates a pivot point and keeps your hand steady while painting.
Step 4: Sealing and Finishing
-
Erase guidelines:
Once the paint is absolutely bone dry, gently erase any visible pencil marks from your initial sketch. -
Cure the paint:
Allow the finished painting to sit for at least 24 hours to ensure all layers are fully cured. -
Apply topcoat:
Take the blade to a well-ventilated area and spray a light, even coat of clear matte acrylic sealer to protect your artwork.
Hang your new floral artwork piece on the wall or reattach it to a fan for a stunning vintage accent.


Cosmic Galaxy Night Sky Theme
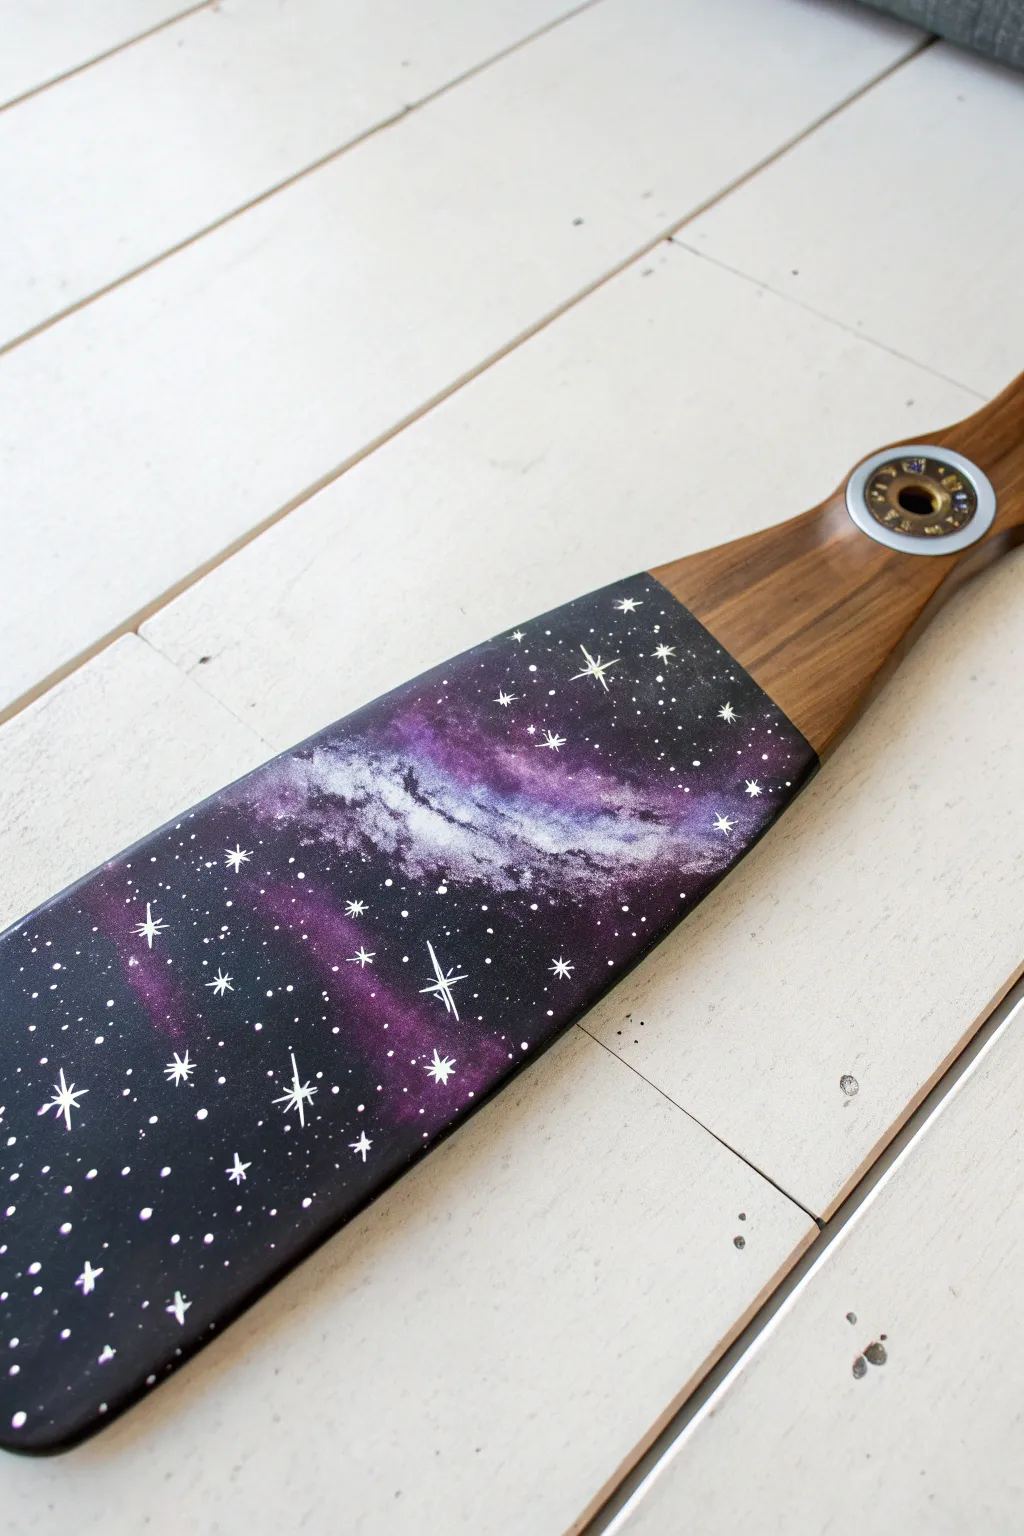
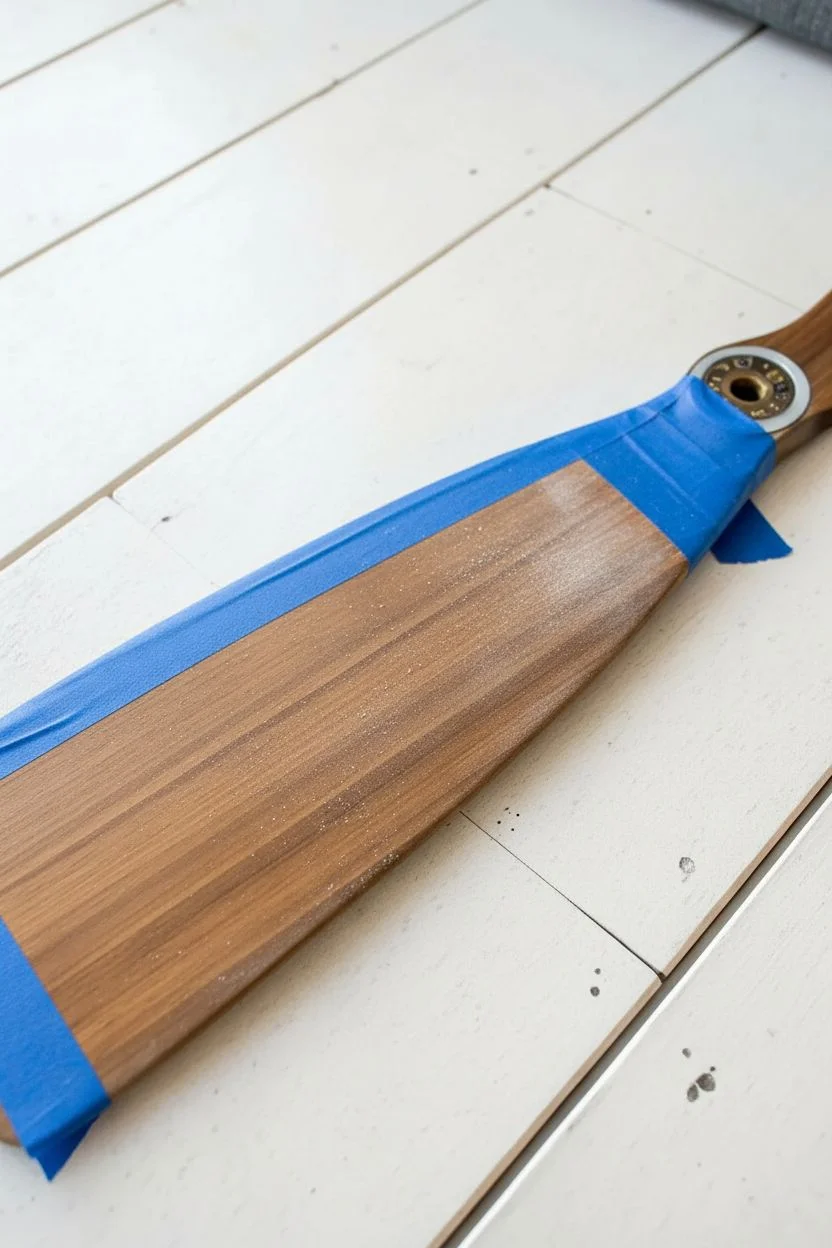
Transform a vintage wooden propeller or a standard ceiling fan blade into a stunning window to the cosmos. This project balances the natural warmth of wood with a high-contrast, mystical galaxy painting technique.
Step-by-Step
Materials
- Wooden propeller or fan blade
- Painter’s tape
- Fine-grit sandpaper (220 grit)
- Black acrylic paint (base)
- Acrylic paints (violet, indigo, magenta, titanium white)
- Makeup sponges or sea sponge
- Old toothbrush or stiff bristle brush
- Fine liner brush (size 0 or 00)
- Clear acrylic sealer (satin or gloss)
Step 1: Preparation
-
Clean surface:
Wipe down the fan blade or propeller with a damp cloth to remove any dust, grease, or grime. Let it dry completely. -
Tape the boundary:
Decide where you want the galaxy to end and the natural wood to begin. Wrap painter’s tape around the handle or base, pressing the edges down firmly to prevent paint bleed. -
Light sanding:
Gently scuff the area you plan to paint with fine-grit sandpaper. This helps the acrylics adhere better to the finished wood surface. -
Dust off:
Wipe away the sanding dust with a microfiber cloth or tack cloth so your base coat creates a smooth finish.
Sponge Technique Tip
Always offload your paint onto a scrap paper towel before touching the blade. Start with very little paint—you can always add more layers, but it’s hard to fix a heavy blob.
Step 2: Painting the Galaxy
-
Apply base coat:
Paint the blade uniform black from the tip down to the tape line. Use long, smooth strokes. -
Second coat:
Allow the first layer to dry, then add a second coat of black if the wood grain is still showing through. Let this dry fully. -
Start the nebula:
Dip a small corner of a makeup sponge into dark purple or indigo paint. Dab it onto a paper towel first to remove excess—you want a dry texture. -
Create flow:
Sponge the dark purple onto the black background in a diagonal, drifting pattern to mimic the flow of the Milky Way. -
add brightness:
Using a fresh part of the sponge, pick up a lighter magenta or violet. Dab this sparingly over the center of your dark purple areas to build depth. -
Highlight the cloud:
Mix a tiny drop of white into your purple to create a pastel lavender. Sponge this very lightly into the center of the nebula cloud for a glowing effect. -
Blend edges:
I like to use a clean, dry sponge to softly dab the edges of the painted clouds, ensuring they fade naturally into the black background rather than stopping abruptly. -
White mist:
Add faint wisps of pure white using a very dry sponge, dragging it slightly to create a ‘gas cloud’ texture across the darkest purple sections.
Level Up: Glow Effects
Mix glow-in-the-dark medium with your white paint for the stars. During the day it looks like crisp white paint, but at night, a hidden galaxy emerges.
Step 3: Stars & Details
-
Prepare splatter paint:
Dilute a small amount of white acrylic paint with water until it reaches an ink-like consistency. -
Create star field:
Dip an old toothbrush into the thinned white paint. Run your thumb across the bristles to flick a fine spray of dots over the black and purple areas. -
Control the density:
Aim for a random distribution; some areas can be dense with stars, while others should remain mostly black. -
Paint major stars:
Using your fine liner brush, paint a few larger white dots manually to represent brighter nearby stars. -
Add sparkles:
Turn a few of the larger dots into four-point stars. Paint a thin vertical line through the dot, then a horizontal line crossing it. -
Detail the sparkles:
For the biggest sparkles, add tiny diagonal lines between the main cross points to create an eight-point starburst. -
Remove tape:
Carefully peel off the painter’s tape. Pull it away from the painted edge at a 45-degree angle to get a crisp line. -
Seal the work:
Once the paint is completely cured (wait at least a few hours), apply a clear acrylic sealer over the entire blade to protect your artwork.
Hang your cosmic propeller proudly and enjoy the view of deep space right from your room
Bright Sunflower Petal Design
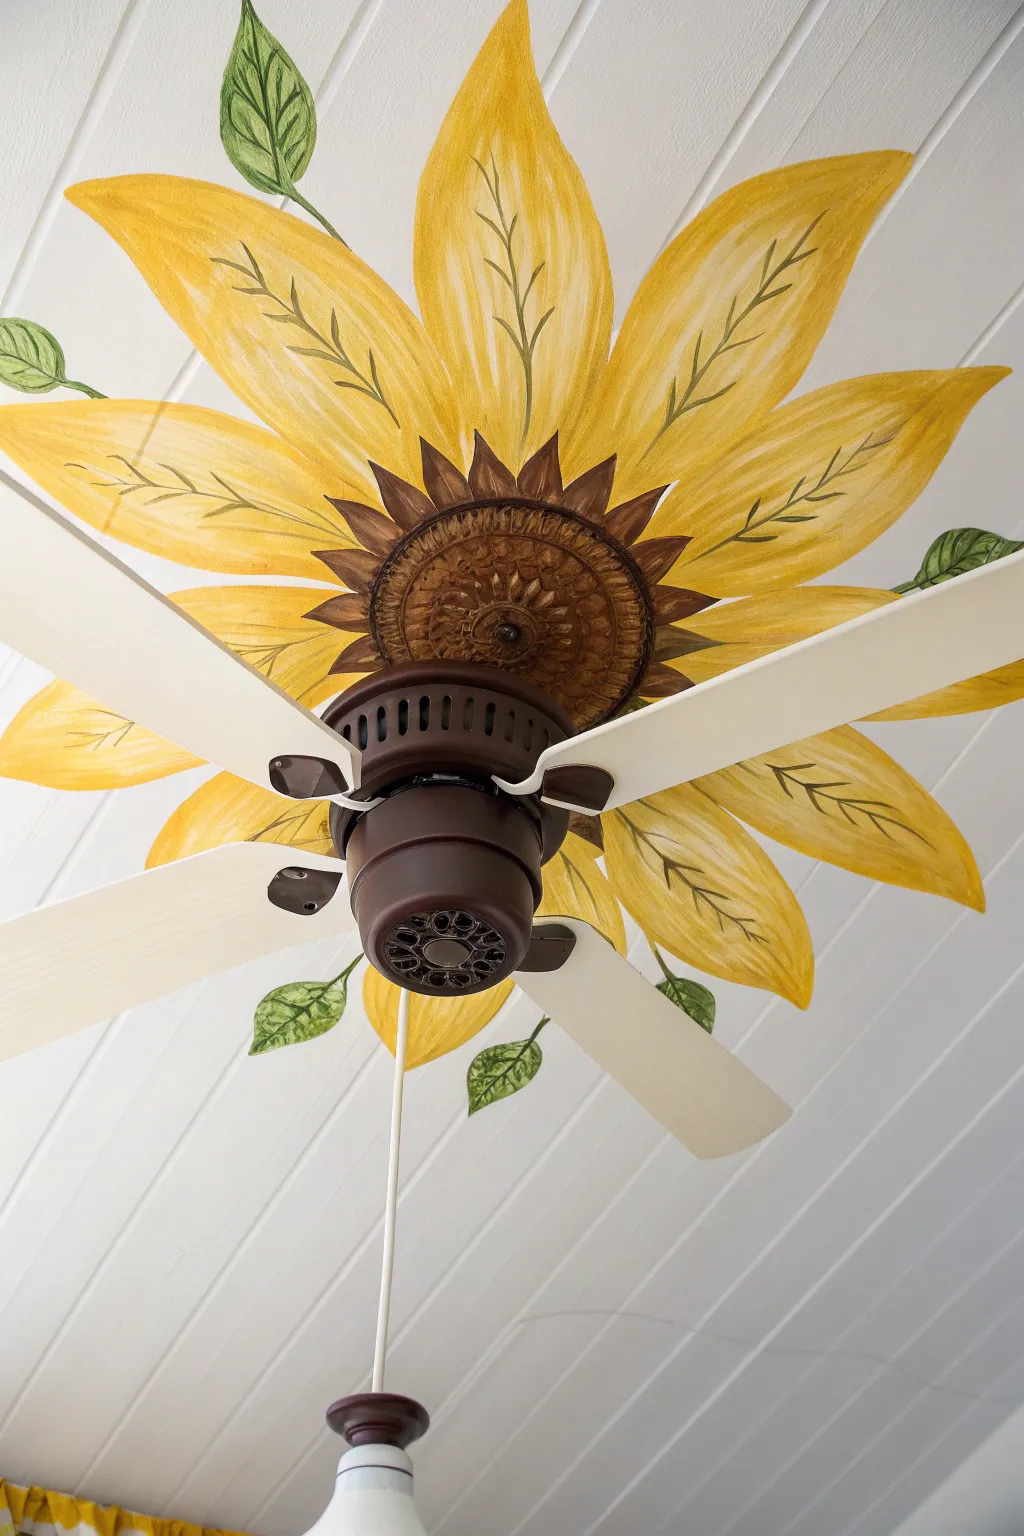
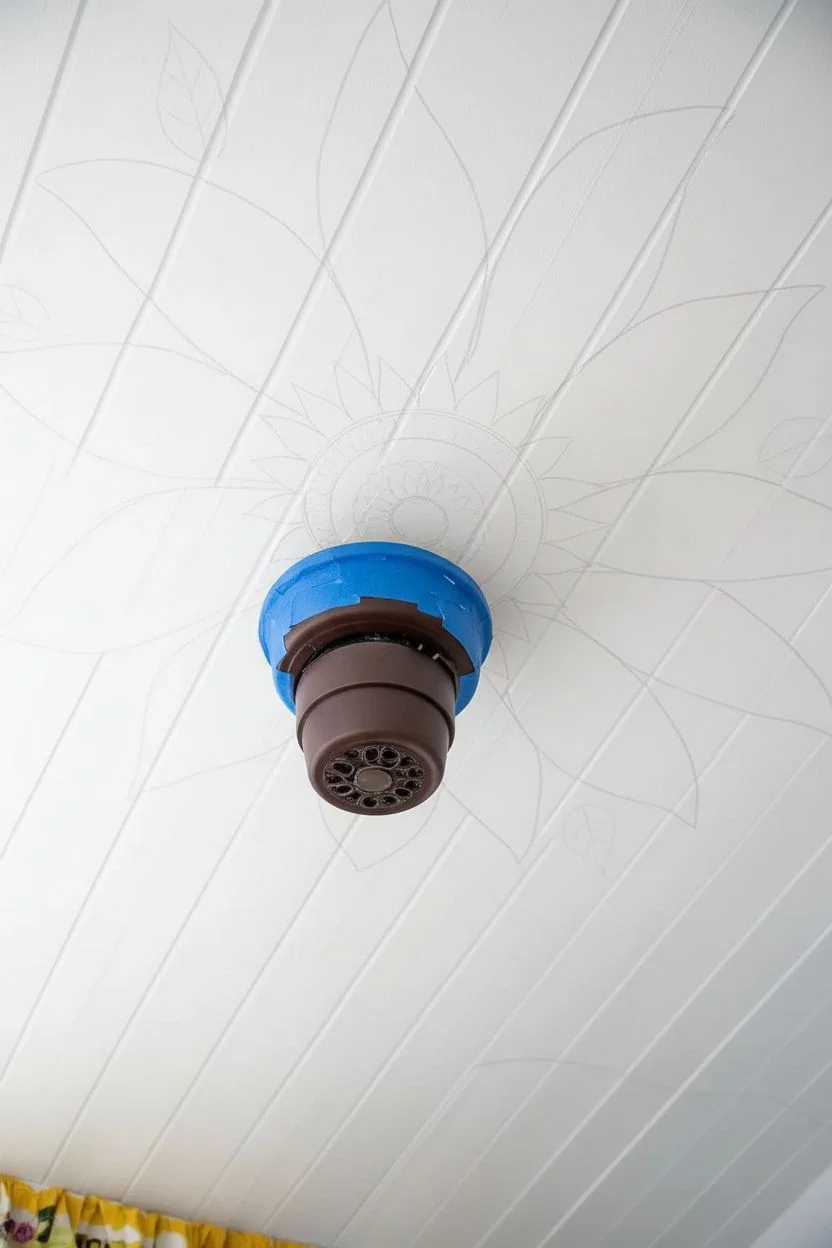
Transform a plain ceiling fan into a blooming masterpiece by painting a sunflower mural directly onto the ceiling surface. This project utilizes the fan’s existing centerpiece as the flower’s heart, extending golden petals outward to brighten any room.
Detailed Instructions
Materials
- Heavy body acrylic paints (Golden Yellow, Pale Yellow, Burnt Umber, Sap Green)
- Angled sash brush (1-inch)
- Round detail brush (size 4 or 6)
- Pencil
- Painter’s tape
- Stepladder
- Screwdriver
- Clean rag and mild degreaser
Step 1: Preparation and Sketching
-
Safety check:
Turn off the electricity to the ceiling fan at the breaker box before starting any work to ensure total safety. -
Clear the canvas:
Use a screwdriver to carefully remove the fan blades from their brackets. This is crucial for giving you room to paint the ceiling without obstruction. -
Clean the surface:
Wipe down the ceiling area around the fan motor with a rag and mild degreaser to remove dust so the paint adheres properly. -
Tape the hardware:
Apply painter’s tape around the edge of the fan motor housing or medallion to protect the metal finish from stray brushstrokes. -
Sketch the petals:
Lightly sketch large, elongated tear-drop shaped petals radiating from the center using a pencil. Aim for about 10-12 large petals. -
Add leaf placements:
Sketch the tips of green leaves peeking out from behind the yellow petals, placing them randomly near the outer edges for a natural look.
Drip Prevention
Keep paint thick! Watery paint drips on your face when working overhead. Use heavy body acrylics and load the brush sparingly to prevent gravity from making a mess.
Step 2: Painting the Blooms
-
Base coat the petals:
Using the angled brush, fill in the petals with a mix of Golden Yellow and a touch of white. I like to paint in long, sweeping strokes from the center outward to mimic petal texture. -
Create depth:
While the yellow is still slightly wet, streak in pure Golden Yellow along the edges and Pale Yellow down the center of each petal to add dimension. -
Paint the center starburst:
Mix Burnt Umber with a tiny drop of water. Paint sharp, triangular spikes radiating from the fan base onto the bottom of each petal to create depths where the petal meets the center. -
Detail the veins:
Switch to your round detail brush and thin down some Burnt Umber or dark green. Paint a thin central vein line down the middle of each petal. -
Add feathering:
Along the central vein line, paint tiny, feathery ‘V’ shapes or smaller veins branching out. This gives the folk-art style shown in the reference.
Step 3: Leaves and Final Touches
-
Fill in the greenery:
Paint the sketched leaf tips using Sap Green. Use the very tip of your brush to get sharp points on the leaves. -
Texture the leaves:
Mix a little yellow into your green and add highlight strokes to one side of each leaf to suggest light source and curvature. -
Leaf veining:
Use the dark Burnt Umber mix again to paint a central vein and small branching veins on the green leaves, similar to the method used on the petals. -
Clean up edges:
If you went outside the lines, use a small brush with your ceiling color (usually white) to sharpen the outer tips of the petals and leaves. -
Remove tape:
Carefully peel away the painter’s tape from the fan housing once the paint is tacky but not fully cured to avoid peeling off the paint skin. -
Reassemble:
Once the ceiling is completely dry (wait at least 4 hours), screw the fan blades back into place and turn the power back on.
Texture Match
If you have a decorative medallion, paint the inner ‘spikes’ to align with the grooves of the medallion for a seamless transition from 3D wood to 2D paint.
Now you have a permanent burst of sunshine overhead that warms the room even on the cloudy days.
Interactive Chalkboard Paint Surface
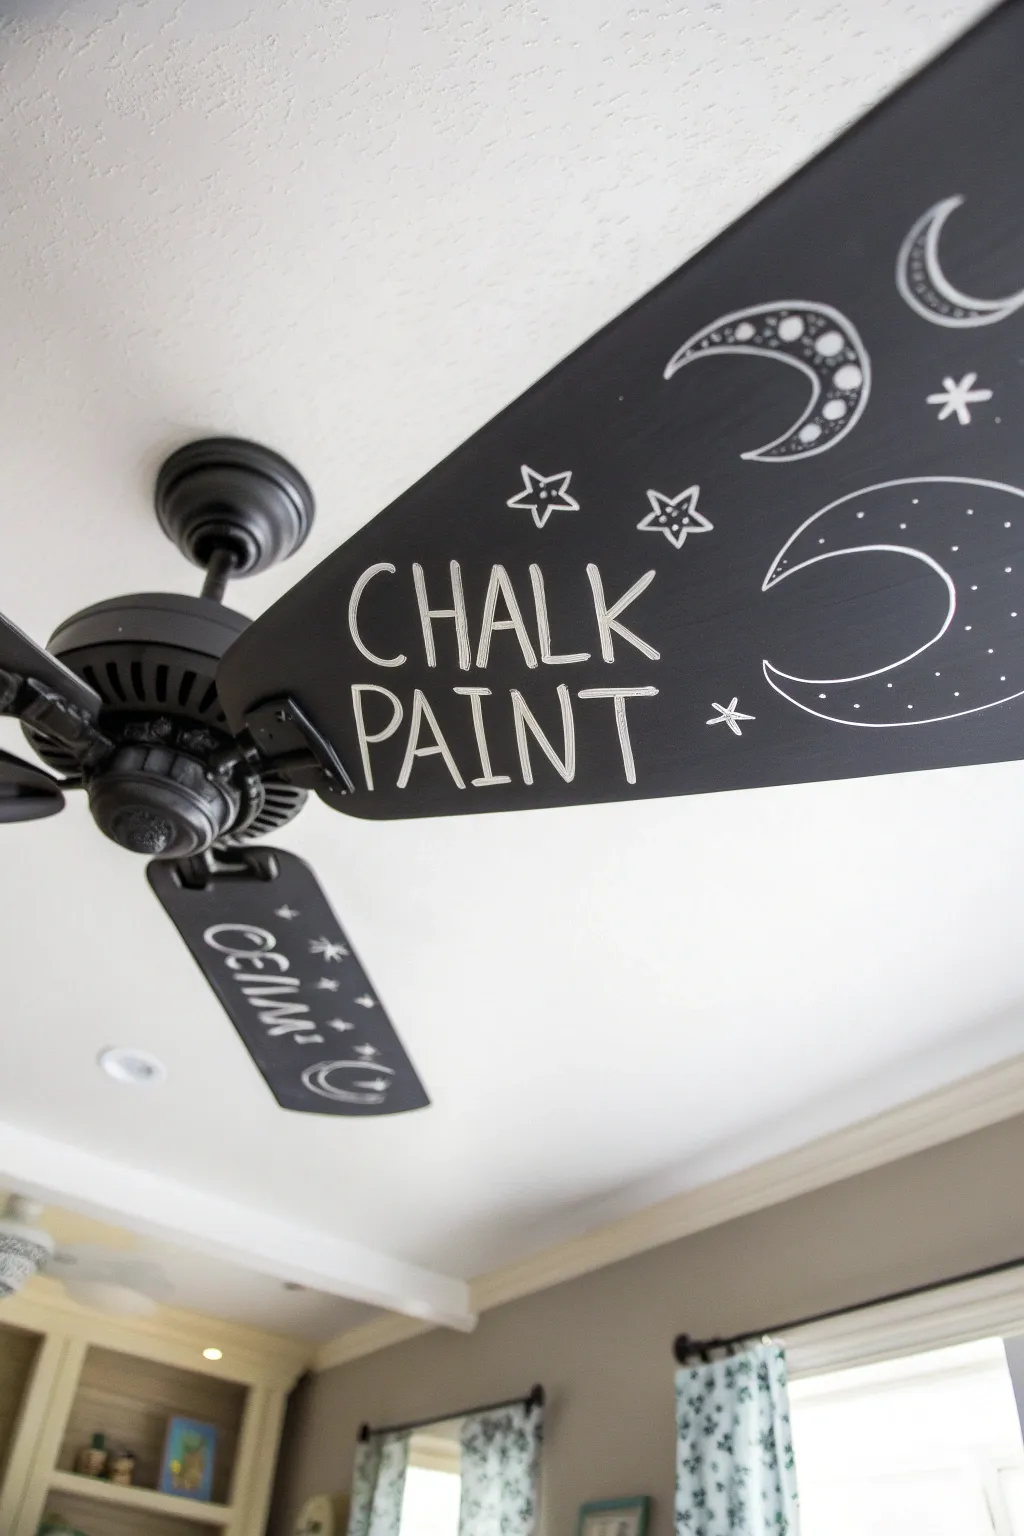
Transform a boring ceiling fan into a creative canvas with this interactive chalkboard finish. The matte black surface provides a modern industrial look, while the hand-drawn celestial designs add a touch of dreamy personality to any room.
How-To Guide
Materials
- Ceiling fan (blades and brackets)
- Screwdriver
- Degreasing cleaner (like TSP) and rags
- Sandpaper (150 and 220 grit)
- Tack cloth
- Spray primer (gray or black)
- Chalkboard spray paint or brush-on chalkboard paint
- Matte black spray paint (for metal hardware)
- White liquid chalk markers
- Traditional white chalk stick
- Drop cloth or cardboard
Step 1: Disassembly and Preparation
-
Safety check and removal:
Turn off the electricity to the fan at the breaker box. Using a screwdriver, carefully remove the fan blades from the motor housing. -
Separate hardware:
Unscrew the metal brackets from the actual wood or particleboard blades. Keep all screws in a labeled baggie so they don’t get lost. -
Deep clean surfaces:
Fan blades collect hidden grease and dust. Scrub the blades thoroughly with a degreasing cleaner and a rag to ensure the paint adheres properly. -
Establish a surface tooth:
Sand firmly with 150-grit sandpaper to remove the old glossy finish. You don’t need to strip it to bare wood, just scuff it up until it looks dull. -
Remove debris:
Wipe away all sanding dust using a damp rag followed by a tack cloth to ensure a perfectly smooth painting surface.
Seasoning is Secret
Don’t skip rubbing the surface with side-chalk (Step 12)! If you skip this, your first drawing will leave a permanent ‘ghost’ image even after erasing.
Step 2: Priming and Painting
-
Prime the blades:
Lay the blades on a drop cloth. Apply a light coat of primer to prevent the wood grain or original color from bleeding through. -
Paint the hardware:
While the primer dries on the blades, spray painting the metal brackets with standard matte black paint ensures they match the chalkboard finish seamlessly. -
Apply chalkboard base:
Once the primer is dry, apply the first coat of chalkboard paint. I prefer using spray paint for fan blades to avoid brush strokes, keeping the can 10 inches away. -
Sand between coats:
After the first coat is dry to the touch, lightly sand with fine 220-grit sandpaper to knock down any bumps. -
Finish the coating:
Apply a second and third thin coat of chalkboard paint, allowing proper drying time between each layer as specified on your paint can. -
Allow to cure:
This is crucial: let the blades dry for at least 24 hours (or up to 3 days if humid) to let the paint harden completely before drawing.
Step 3: Design and Assembly
-
Season the chalkboard:
Before drawing art, take a piece of traditional chalk turned on its side and rub it over the entire painted surface. Wipe it off with a dry cloth. -
Draft the text:
Using a liquid chalk marker, print the words ‘CHALK PAINT’ in bold, casual capital letters across the center of the main blade. -
Add celestial motifs:
Draw large crescent moon shapes on the tips of the blades. Fill the negative space of the moons with small dots or circles for texture. -
Fill the background:
Scatter hand-drawn five-point stars and asterisks around the text and moons to complete the night-sky theme. -
Detail the secondary blades:
On the other blades, add variations like the word ‘CEILING’ or different moon phases so the fan creates a pattern when spinning. -
Reattach hardware:
Screw the freshly painted metal brackets back onto the wooden blades, being careful not to scratch the new finish. -
Final installation:
Mount the blade assemblies back onto the motor housing and secure them tightly.
Blade Balance Check
If the fan wobbles after reinstalling, tape a small coin to the top (unseen) side of the wobbly blade to act as a counterweight and restore balance.
Enjoy the cool breeze and the new playful, artistic focal point in your room
Intricate Stencil Mandala Art
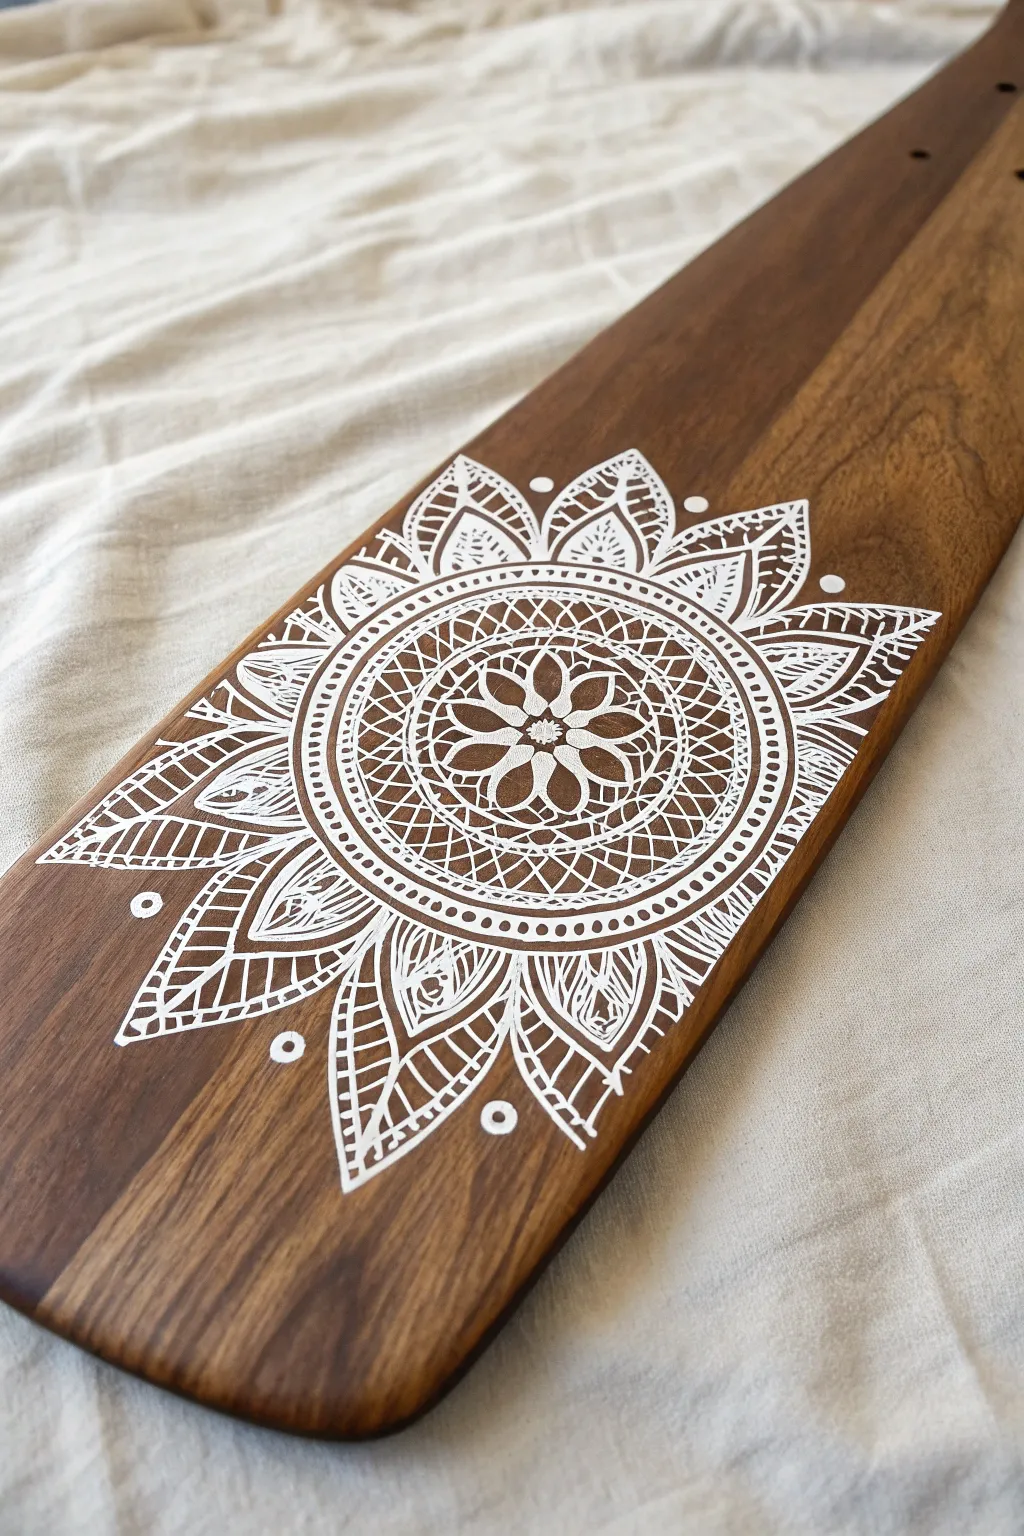
Repurpose an old ceiling fan blade into a stunning piece of boho wall decor with this high-contrast stenciling project. The intricate white geometric patterns stand out beautifully against rich, dark-stained wood for a sophisticated finish.
Step-by-Step Tutorial
Materials
- Wooden fan blade
- Sandpaper (120 and 220 grit)
- Dark wood stain (e.g., Dark Walnut or Espresso)
- Lint-free staining rags
- Large intricate mandala stencil
- Repositionable spray adhesive
- Painter’s tape
- White acrylic paint or chalk paint
- Makeup sponge or stencil brush
- Small liner brush
- Clear matte sealant spray
Step 1: Preparation & Base
-
Clean the slate:
Remove any metal brackets or hardware from the fan blade. Wipe it down with a damp cloth to remove years of dust or grime. -
Sand the surface:
Use 120-grit sandpaper to remove the old factory finish. You need to get down to the raw wood so the new stain absorbs evenly. -
Smooth it out:
Switch to 220-grit sandpaper for a final pass. This makes the surface ultra-smooth, which is crucial for preventing paint bleed later. -
Apply the stain:
Using a lint-free rag, rub the dark wood stain into the grain. Work in long strokes from end to end. -
Wipe and dry:
After letting the stain sit for a few minutes, wipe away any excess. Allow this to dry completely—usually overnight—to prevent the stencil adhesive from pulling up the color.
Clean Lines Hack
Before applying white paint, dab a thin layer of clear matte medium (Mod Podge) over the stencil first. This seals the edges so any bleed is invisible clear coat, keeping your white lines crisp.
Step 2: Stenciling the Design
-
Prep the stencil:
Spray the back of your mandala stencil with a light coat of repositionable spray adhesive. Let it get tacky for about 60 seconds. -
Position carefully:
Center the stencil on the widest part of the blade. Press it down firmly, paying special attention to the fine interior bridges of the design. -
Secure edges:
Use painter’s tape on the outer edges of the stencil to ensure it doesn’t shift while you work. -
Load the sponge:
Dip your makeup sponge or stencil brush into the white paint. Here I always dab the sponge on a paper towel until it’s almost dry—too much paint causes bleeding. -
Apply the first layer:
Lightly pounce (dab up and down) over the stencil. Do not drag or brush the sponge. The first coat should look faint. -
Build intensity:
Apply a second and possibly third coat using the same dry dabbing motion until you achieve a solid, bright white opacity. -
The reveal:
While the paint is still slightly tacky but mostly dry, peel the stencil straight up and off the wood to reveal the design.
Level Up: Gallery Wall
Create a vertical centerpiece by painting three blades with complementary mandala sections. Hang them one above the other with small gaps to create a large, deconstructed artwork effect.
Step 3: Details & Finish
-
Fill the gaps:
Stencils often leave small gaps (bridges) to hold the plastic together. Use a fine liner brush and white paint to maintain the continuity of lines where appropriate. -
Add hand-painted accents:
To match the image perfectly, add solid white dots between the petal shapes or at the tips of the design using the back end of your paintbrush. -
Clean up edges:
If any paint seeped under the stencil, use a damp toothpick or a fine sanding block to gently scrape it away once dry. -
Let it cure:
Allow the white paint to dry fully for at least 2 hours. -
Seal the art:
Spray the entire blade with a matte clear coat. This protects the wood and keeps the white paint from chipping over time.
Hang your new upcycled masterpiece vertically and enjoy the custom bohemian vibe you created
Moody Ombré Monochrome Fade
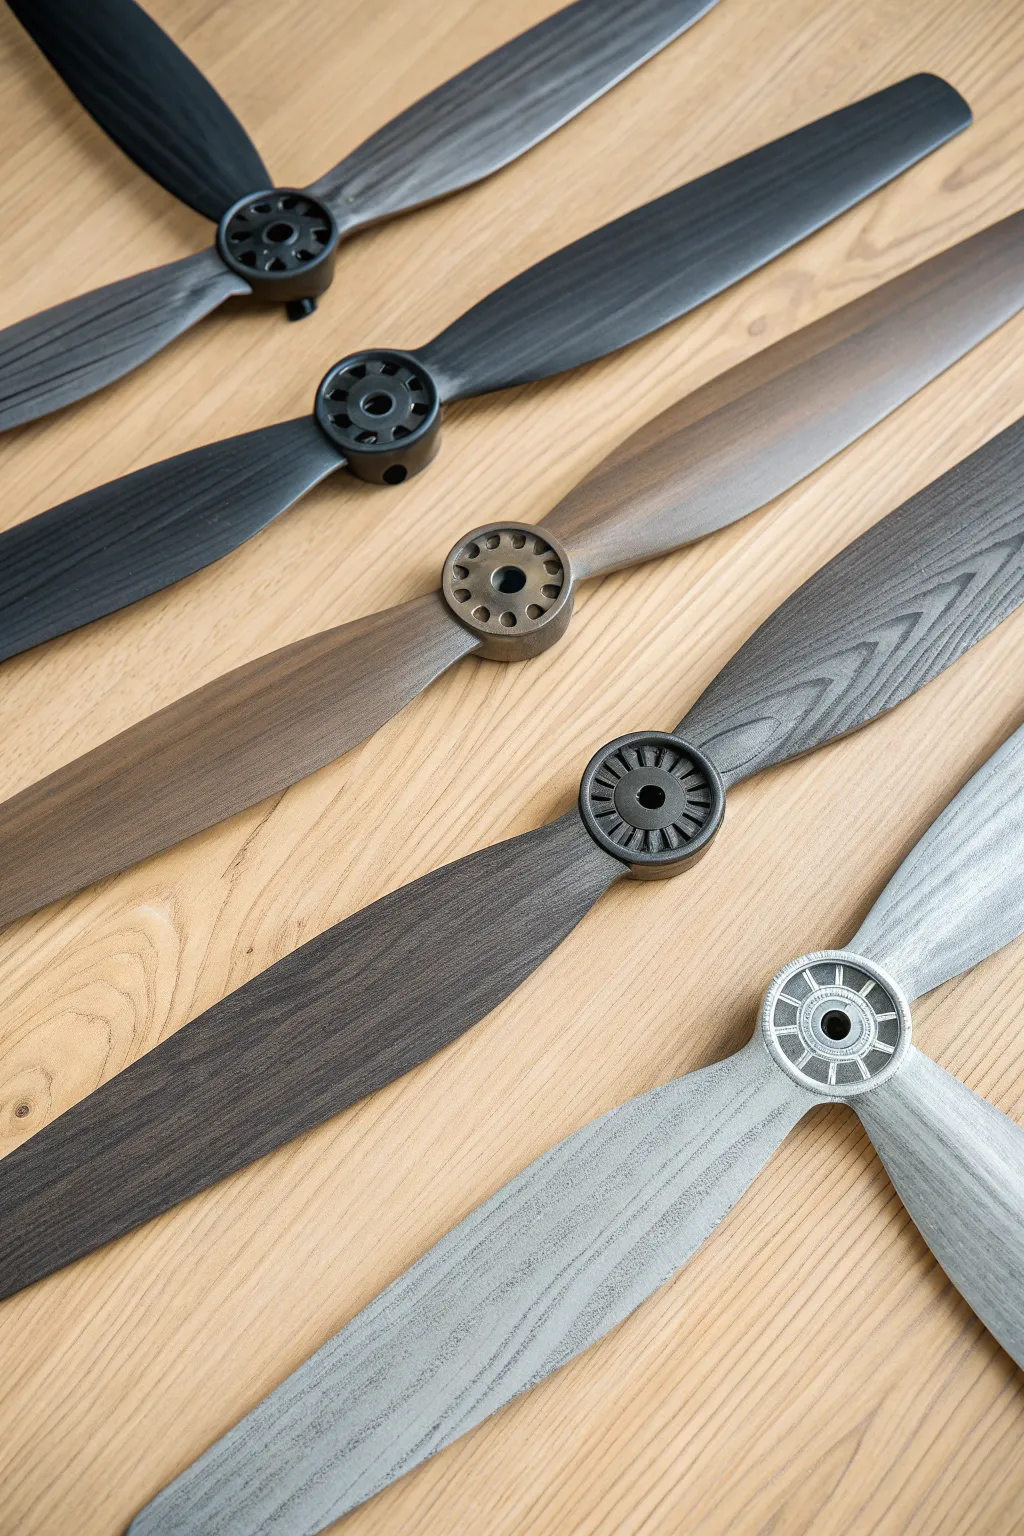
Transform ordinary laminate fan blades into a sophisticated architectural statement with this graduated faux-wood technique. By layering paints and glazes, you will create a stunning transition from deep charcoal to weathered driftwood that adds modern texture to any ceiling fan.
Step-by-Step Tutorial
Materials
- Ceiling fan blades (removed from unit)
- Sanding block (120 and 220 grit)
- Degreasing cleaner
- Spray primer (grey or white)
- Acrylic paints (Black, Burnt Umber, Slate Grey, Warm White)
- Glaze medium
- Inexpensive chip brushes (2-inch width)
- Soft synthetic brush
- Matte clear polyurethane spray
- Drop cloth
Step 1: Preparation
-
Remove and organize:
Take the blades off your ceiling fan using a screwdriver. Keep the screws and metal irons (the brackets) grouped with their specific blades if you plan to paint the hardware to match. -
Clean thoroughly:
Wipe down every surface of the blades with a degreasing cleaner to remove years of dust, kitchen grease, or furniture polish. Paint won’t stick to oily surfaces. -
Scuff sanding:
Use 120-grit sandpaper to scuff the original finish. You don’t need to strip it completely, just roughen it up so the primer bites. -
Prime the surface:
Apply a thin, even coat of spray primer. I prefer using a grey primer for this project as it helps transition between the dark and light tones more easily than white.
Uneven Grain Lines?
If your wood grain looks too streaky or artificial, lightly drag a clean, dry brush perpendicular to the grain while the glaze is wet to blur the lines.
Step 2: Establishing the Ombré Base
-
Plan your gradient:
Arrange your blades in a line. You will be painting them in a sequence: Charcoal, Espresso, Grey-Brown, and Whitewash. -
Base coat: The Darkest Blade:
Paint the first blade entirely with flat black acrylic paint. This is your anchor color. -
Base coat: The Medium Blade:
Mix black with Burnt Umber to create a deep espresso color. Apply this as the base for the second blade. -
Base coat: The Grey Blade:
Mix Slate Grey with a touch of Burnt Umber for a warm driftwood tone. Coat the third blade fully. -
Base coat: The Lightest Blade:
Mix Warm White with a drop of Slate Grey. This should look like pale birch wood. Paint the final blade. -
Let it cure:
Allow all base coats to dry completely for at least two hours before attempting the grain technique.
Step 3: Faux Wood Graining
-
Mix the graining glaze:
Mix 1 part black/brown paint (match it slightly darker than your blade’s base color) with 4 parts glaze medium. Ideally, the glaze should be translucent. -
Apply the glaze:
Working on one blade at a time, brush the glaze mixture over the entire length of the blade using a soft brush. -
Create the texture:
Immediately take a dry, coarse chip brush. Drag it through the wet glaze from top to bottom in one long, continuous motion without stopping. -
Add wood variations:
To create the ‘cathedral’ grain arches seen in the photo, gently wiggle the brush handle while dragging, or rock the bristles slightly. Keep the motion fluid. -
Soften the look:
If the brush lines look too harsh, very lightly drag a clean, dry feathering brush over the wet glaze to blur the harsh stripes into a natural grain. -
Repeat for the gradient:
Repeat the graining process on the other blades. Remember to adjust your glaze color: use black glaze for the dark blades, and a medium-grey glaze for the lighter blades.
Cheap Brushes Work Best
Don’t use expensive brushes for the graining step! The stiff, irregular bristles of a cheap chip brush create the most realistic organic wood texture.
Step 4: Finishing Hardware
-
Paint the brackets:
For a cohesive look, paint the metal blade irons (hubs). Paint the iron for the black blade black, the brown blade bronze, and so on, matching the base tones. -
Dry brush metal detail:
Once the metal paint dries, dry-brush a tiny amount of silver metallic paint on the edges of the lighter brackets to impart a machined, industrial look. -
Seal the project:
Once all paint is bone dry (wait overnight), spray two light coats of matte polyurethane over the blades and brackets to protect against dust and rotation speed. -
Reassembly:
Reattach the irons to the blades, then mount them back onto the motor housing, ensuring the gradient order is preserved if desired.
Now you have a custom, gallery-worthy ceiling fixture that turns a functional appliance into a work of art.
Abstract Spilled Paint Technique
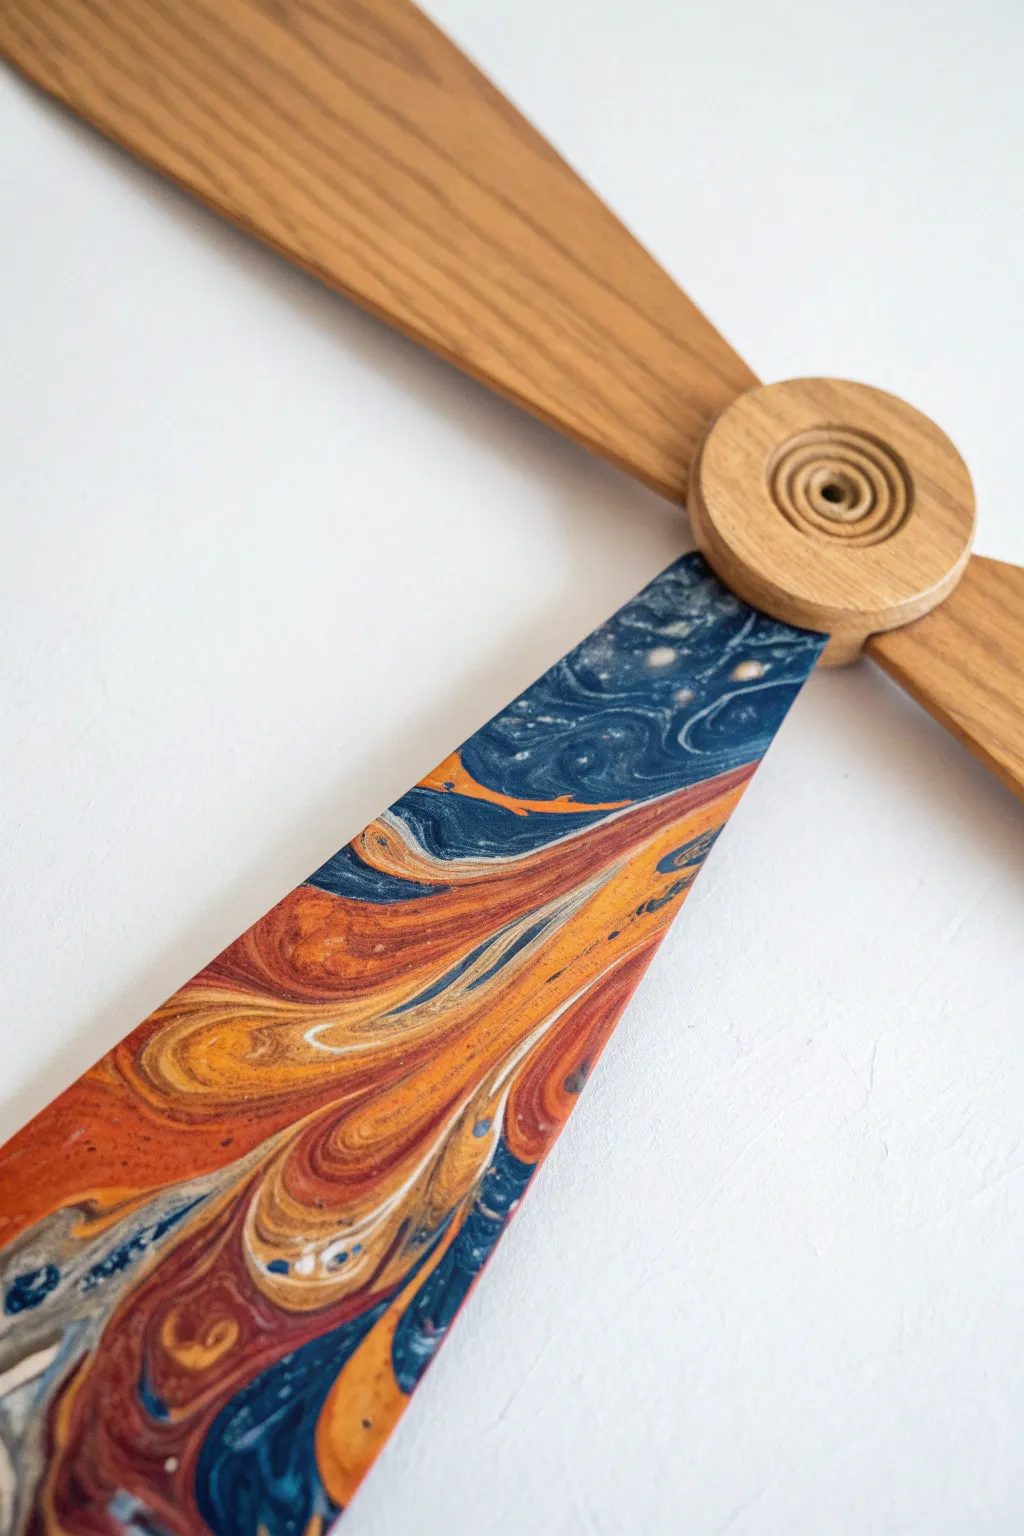
Transform a standard ceiling fan into a piece of spinning modern art by combining natural wood tones with a mesmerizing spilled-paint effect. This project uses the hydro-dipping technique to create organic, swirling patterns in navy, rust, and cream that look incredibly complex but are surprisingly easy to achieve.
Step-by-Step Guide
Materials
- Wooden fan blades
- Sandpaper (220 grit)
- Painter’s tape
- White spray primer (matte)
- Spray paints (Navy Blue, Burnt Orange, Rust Red, Cream/White)
- Large plastic storage bin (deep enough to submerge half the blade)
- Water
- Stir stick or skewer
- Rubber gloves
- Respirator mask
- Clear protective topcoat (spray)
Step 1: Preparation & Priming
-
Clean surface:
Thoroughly clean the fan blade with a degreaser to remove any dust or oily residue that might built up over time. -
Sand for adhesion:
Lightly scuff the entire surface of the blade with 220-grit sandpaper to give it some ‘tooth,’ then wipe away the dust with a tack cloth. -
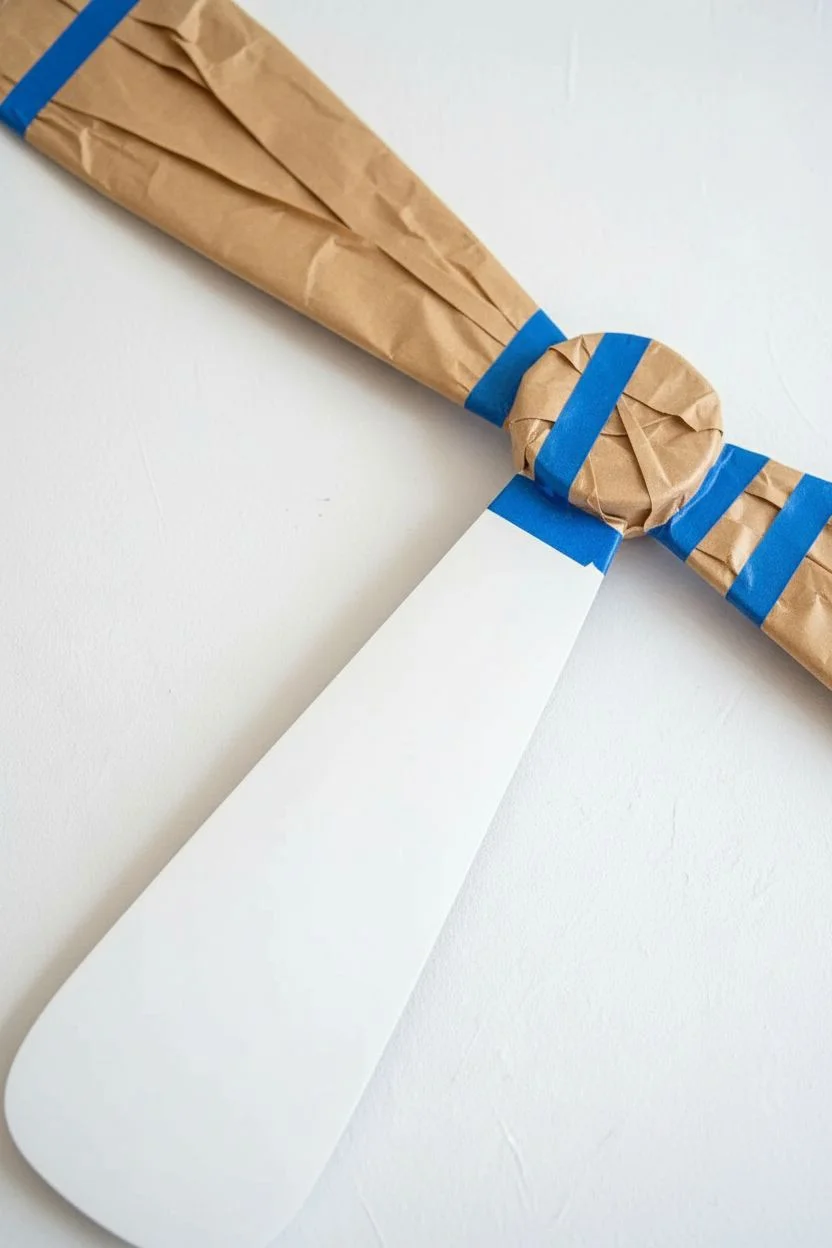
Mask the wood:
Decide where you want the paint to stop and the natural wood to begin. Place a strip of painter’s tape across the blade to create a sharp, straight line. -
Protect the handle:
Wrap the entire upper section of the blade (the part meant to remain wood) in paper and tape to protect it from stray spray. -
Apply primer:
Spray the lower exposed section of the blade with white primer. I prefer doing lighter coats to avoid drips; this white base acts as a canvas to make the dipped colors pop. -
Let it cure:
Allow the primer to dry completely according to the can’s instructions before moving to the dipping phase.
Step 2: The Hydro-Dip
-
Prepare the water:
Fill your large plastic bin about 3/4 full with water. Place the bin in a well-ventilated area, preferably outside. -
Base layer spray:
Shake your spray cans vigorously. Start by spraying your darkest color (Navy) directly onto the center of the water surface for about 3-5 seconds. -
Layering colors:
Immediately spray the next color (Burnt Orange) into the center of the blue ring. Continue alternating between Rust, Cream, and your base colors to create concentric rings floating on the water. -
Create the swirl:
Gently drag a stir stick or skewer through the floating paint rings to manipulate the design. Don’t overmix, simply create a few marble-like swirls. -
Dip the blade:
Wearing rubber gloves, hold the blade by the masked handle. Slowly sustain a 45-degree angle and lower the primed section into the water, letting the paint wrap around the wood. -
Clear the surface:
While the blade is still submerged, blow air onto the water surface or use a piece of cardboard to push aside the remaining floating paint. This prevents a double-layer of mess when you pull the object out. -
Remove and drip:
Lift the blade out of the water. Start shaking it gently to remove excess water droplets, but be careful not to touch the wet paint.
Water Temperature Matters
Use water that is lukewarm (around 70-80°F). Cold water can cause the spray paint to seize up and clump instantly, while warm water keeps the film fluid for a smoother transfer.
Step 3: Finishing Touches
-
Dry time:
Prop the blade up vertically and allow it to dry completely. This usually takes 24 hours to ensure all moisture has evaporated from the wood. -
Reveal the line:
Carefully peel back the painter’s tape to reveal the crisp line between the chaotic swirled paint and the calm natural wood. -
Seal the deal:
Apply two light coats of clear spray sealer over the entire blade (including the wood section) to unify the sheen and protect the finish. -
Final inspection:
Check the edges for any roughness and lightly sand if necessary before reinstalling your new functional art piece.
Metallic Accent Level-Up
For a glamorous touch, add quick bursts of metallic gold or copper spray paint into your water rings. These metallic flecks will separate differently, creating stunning shimmering veins.
Once reattached, flip the switch and watch your stationary masterpiece transform into a blur of beautiful color.


Have a question or want to share your own experience? I'd love to hear from you in the comments below!