When you’re drawing a father-daughter moment, you’re really drawing connection—those small gestures that feel safe, steady, and full of love. I pulled together these ideas like we’re hanging out in the studio, so you can pick a scene that fits your story and your skill level.
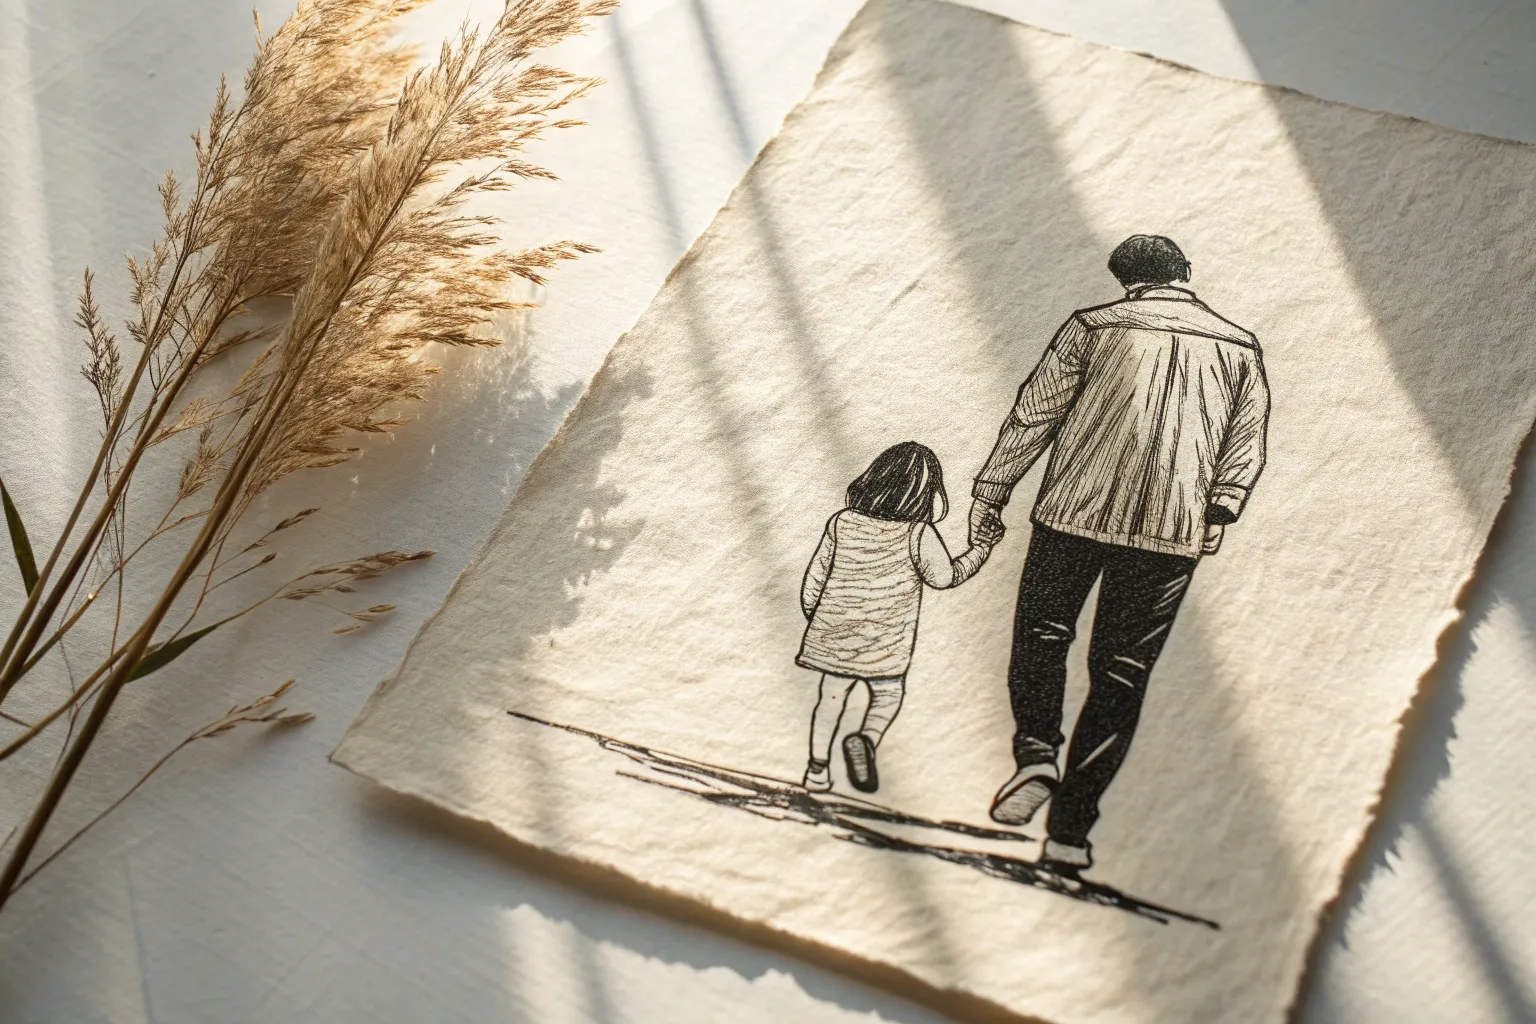
Classic Hand-Holding Walk
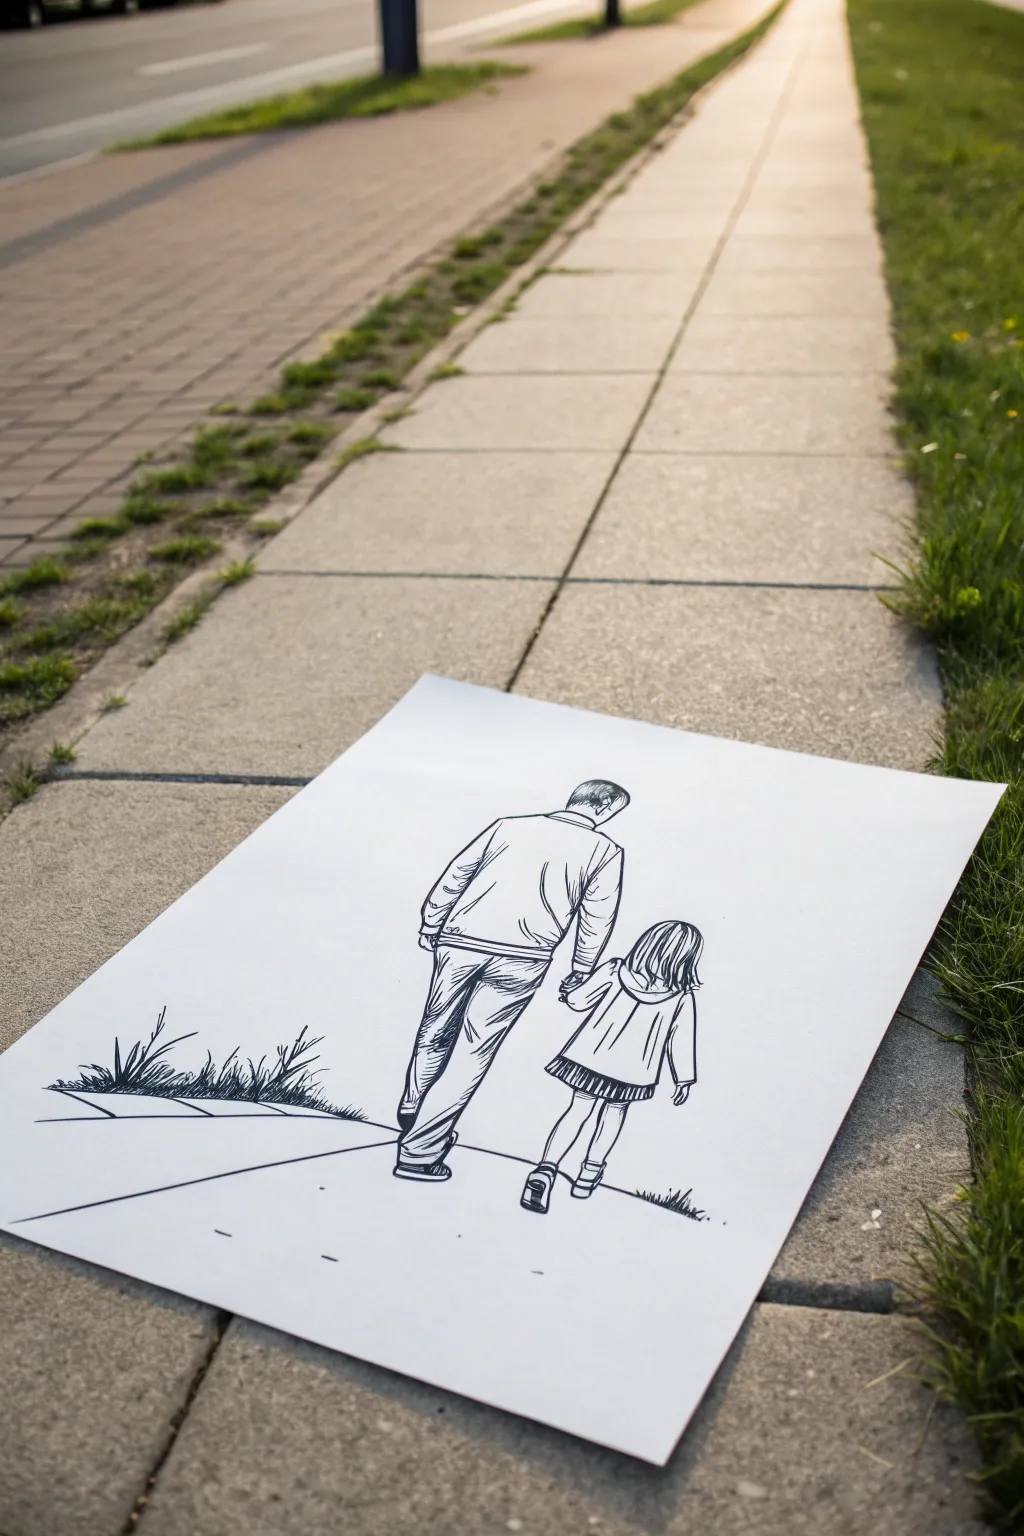
Capture a heartwarming moment of connection with this clean, sketchy ink drawing of a father and daughter taking a stroll. The artwork features crisp linework and simple cross-hatching to create depth, making it a perfect project for refining your figure drawing skills.
Step-by-Step
Materials
- High-quality white drawing paper (A3 or A4 recommended)
- HB graphite pencil
- Fine liner pens (0.3mm and 0.5mm, black)
- Thicker marker or brush pen (black) for shadows
- Kneaded eraser
- Ruler
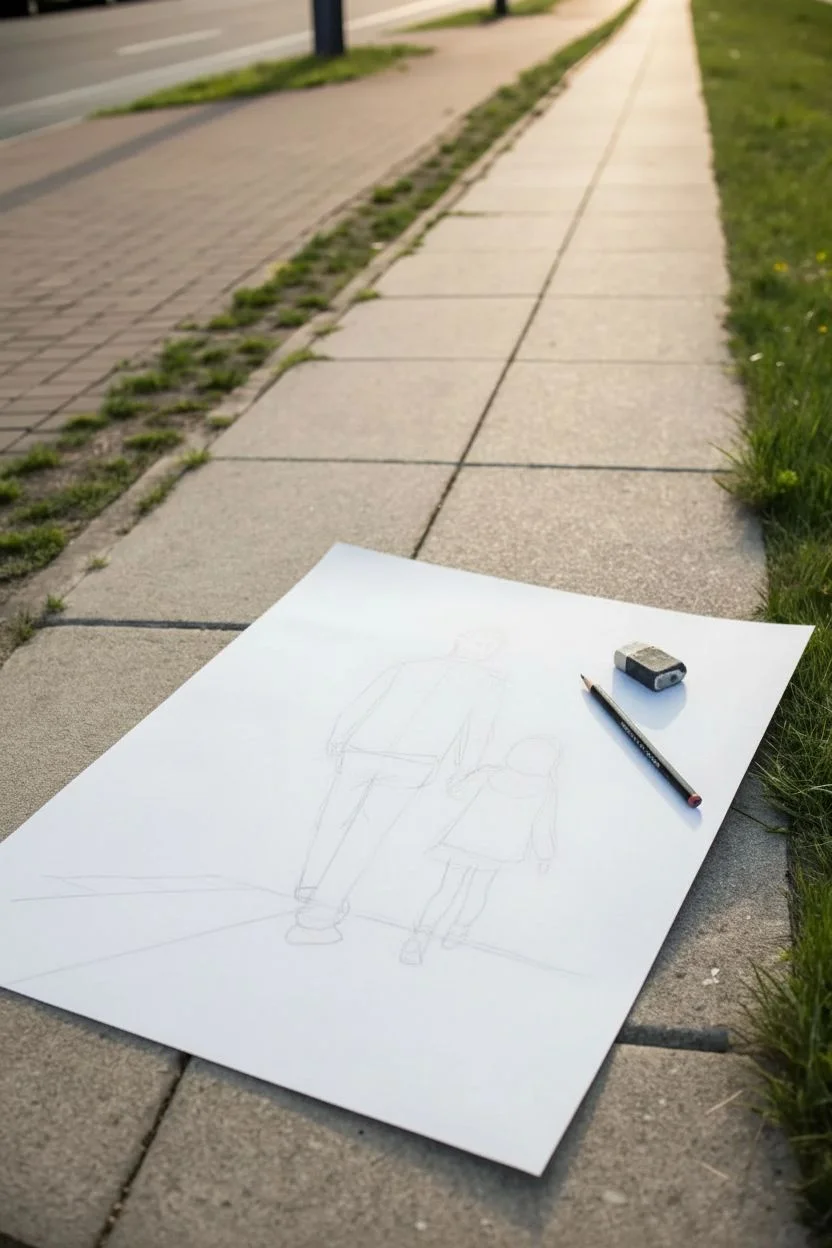
Step 1: Setting the Scene Guidelines
-
Establish the horizon:
Begin by lightly drawing a horizon line across the lower third of your paper using your HB pencil and a ruler. This grounds your figures. -
Draft the pathway:
Sketch diagonal perspective lines converging slightly towards the top right to imply a sidewalk or path, giving the drawing a sense of direction. -
Block in the father’s form:
Lightly sketch a tall, rectangular shape for the father’s torso and two vertical cylinders for legs, slightly bending the left leg to show a walking motion. -
Position the daughter:
To the right of the father, sketch a much smaller form. Her head should roughly align with the father’s elbow level to emphasize the height difference. -
Connect the hands:
Draw faint lines connecting the father’s right arm and drawing the daughter’s left arm reaching up, ensuring the connection point looks natural and relaxed.
Step 2: Refining the Figures
-
Detail the father’s clothing:
Sketch the outline of a casual jacket or sweater on the father. Add folds around the waist and elbows where the fabric would naturally bunch up. -
Define the trousers:
Draw the father’s trousers, emphasizing the creases behind the knees and near the shoes to suggest movement and fabric weight. -
Sketch the daughter’s outfit:
Outline a cute A-line coat or dress for the daughter. Make the hem flare out slightly to suggest a gentle swaying motion as she walks. -
Add hair details:
Sketch the back of their heads. Give the father short texturing and draw long, flowing lines for the daughter’s hair, letting it rest on her shoulders. -
Finalize footwear:
Draw simple shoe shapes. The father’s left heel should be slightly lifted to capture the mid-stride action, while the daughter’s feet are closer together.
Uneven Ink Flow?
If your lines look shaky or bleed, switch to a smoother Bristol paper. Rough paper catches the nib, causing unsteady strokes.
Step 3: Inking and Texturing
-
Outline main figures:
Switch to your 0.5mm fineliner. Go over the main contours of both figures with confident, mostly continuous strokes to lock in the shapes. -
Add clothing folds:
Use the finer 0.3mm pen to add wrinkles and folds. I find that broken, quick lines work best here to keep the fabric looking soft rather than rigid. -
Apply hatching for denim:
On the father’s pants, use parallel diagonal hatching lines to create shadow and texture, particularly on the left leg and under the jacket hem. -
Texture the dress:
Add vertical lines on the daughter’s dress and the pleated skirt underneath to show the fabric’s flow and pattern. -
Inking the hair:
Use long, sweeping strokes for the daughter’s hair, leaving some white space for highlights. Use shorter, denser strokes for the father’s hair. -
Ground the scene:
Draw sketchy, grassy tufts along the left edge of the sidewalk using quick, upward flicks of your pen. -
Final touches:
Thicken the lines at the bottom of the shoes and add a small cast shadow underneath them to firmly plant the figures on the ground. -
Clean up:
Wait at least 10 minutes for the ink to fully cure, then gently erase all your initial pencil guidelines with the kneaded eraser.
Mastering The Stride
To make the walk look real, ensure the heel of the front foot touches the ground while the toe of the back foot pushes off.
Now you have a timeless keepsake drawing that perfectly captures the simple joy of a family walk together


Warm Father-Daughter Hug
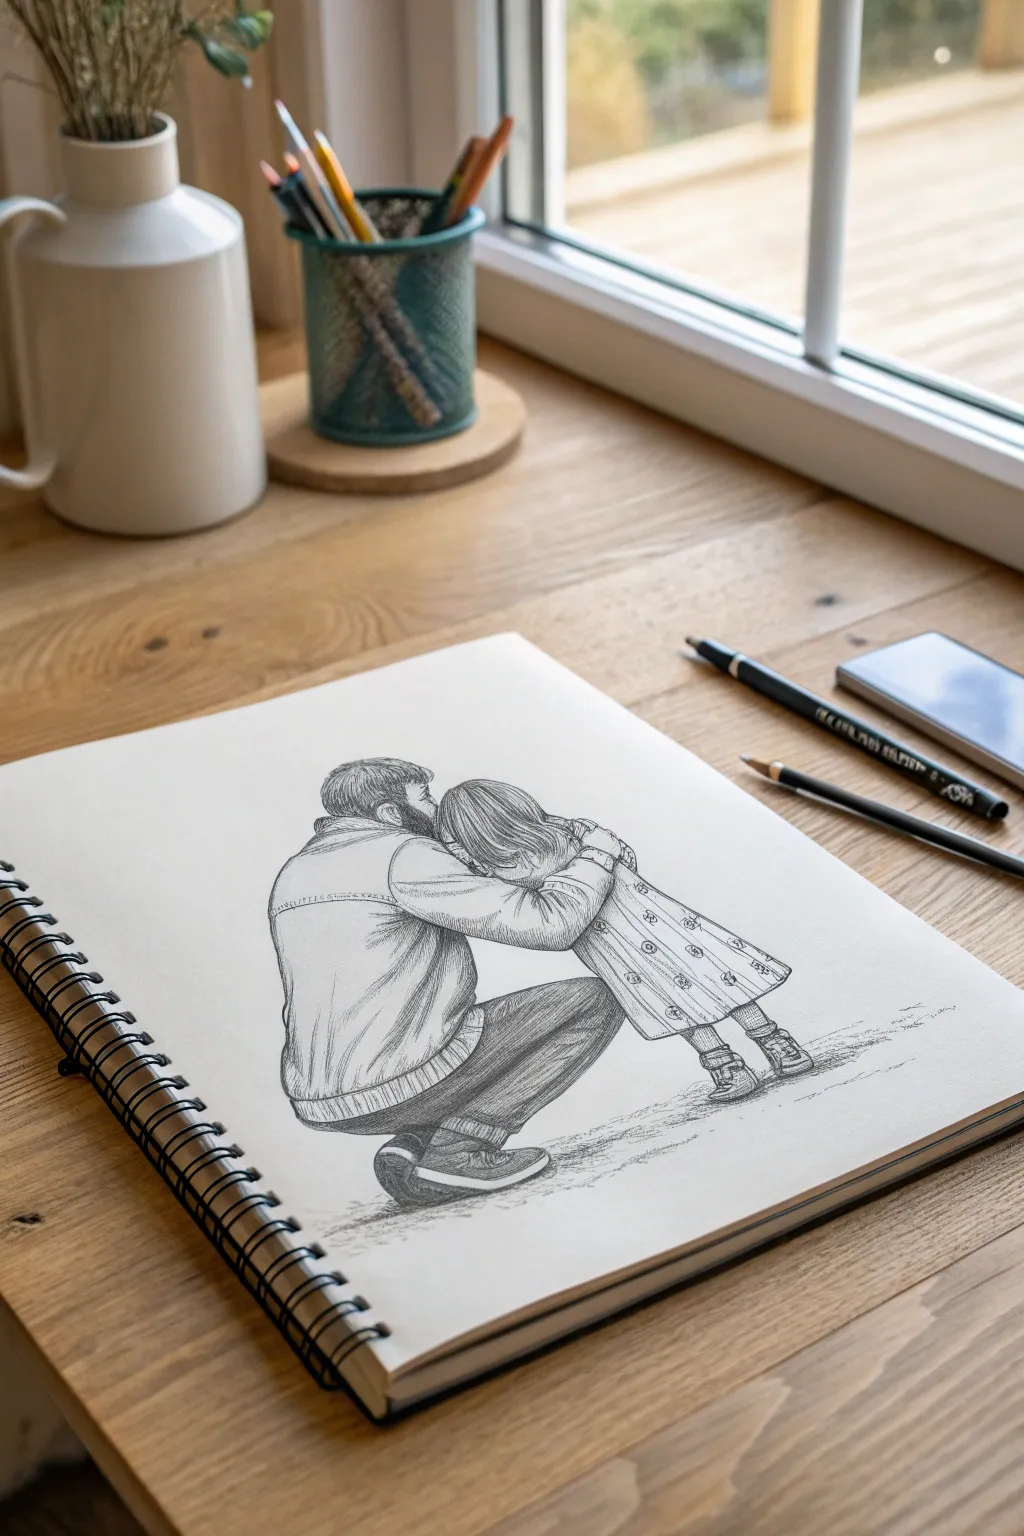

Capture a tender moment of connection with this touching pencil sketch of a father kneeling to hug his young daughter. The drawing features detailed fabric textures and a focus on emotive body language, rendered in soft graphite technique.
How-To Guide
Materials
- High-quality sketchbook paper (heavyweight, slightly textured)
- Set of graphite pencils (HB, 2B, 4B, 6B)
- Kneadable eraser
- Precision mechanical pencil (0.5mm)
- Blending stump or tortillon
- Pencil sharpener
Step 1: Planning and Proportions
-
Establish the ground line:
Begin by lightly sketching a faint, uneven horizontal line near the bottom third of your page to represent the ground. This anchors the figures so they don’t look like they are floating. -
Block in the father’s posture:
Using an HB pencil with very light pressure, draw a large oval shape for the father’s torso, leaning forward. Add a circle for his head tucked down, and sketch the basic angular shapes of his bent legs. -
Position the daughter:
Draw the daughter’s form standing directly in front of the father. Her head should be nestled against his shoulder. Use a simple triangular shape to map out her dress flaring outwards. -
Refine the embrace:
Sketch the father’s arms wrapping around the child’s back. Pay attention to the angle of the elbows and where the hands disappear into the hug. Simultaneously, mark where her small arms reach up around his neck.
Fixing Stiffness
If the hug looks stiff, soften the angles at the elbows and knees. Use curved hatching lines on the clothing rather than straight ones to imply a rounded, organic body shape underneath.
Step 2: Defining the Figures
-
Outline the father’s clothing:
Switching to your mechanical pencil for precision, define the collar of his jacket and the shoulder seam. Draw the horizontal band across the back of the jacket. -
Detail the daughter’s dress:
Outline the hem of the dress, giving it a slight wave to show movement. Add the faint outlines of her legs and small shoes peeking out from underneath. -
Add hair texture:
For the father, use short, controlled strokes to create the texture of hair and a beard. For the daughter, draw long, flowing lines cascading down her back to represent long hair. -
Define the shoes:
Draw the father’s sneaker with distinct sole lines and laces. Then, detail the daughter’s shoes, adding little socks and straps.
Adding Warmth
Level up by using a sepia or sanguine colored pencil for the final shading layer instead of graphite. This subtle color shift mimics vintage sketches and enhances the emotional warmth.
Step 3: Shading and Texture
-
Shade the trousers:
Using a 4B pencil, fill in the father’s trousers with dark, directional strokes. Follow the curve of the leg to create volume. Leave the top of the thigh slightly lighter to suggest a highlight. -
Texture the jacket:
Use vertical hatching lines on the back of the jacket to suggest a ribbed or heavy fabric. Keep the strokes looser here than on the trousers. -
Create the dress pattern:
Draw small, scattered flower shapes or circles across the daughter’s dress. Keep them light and delicate. Add vertical fold lines to show the fabric draping. -
Deepen the shadows related to the hug:
I find it helpful to really darken the areas where the two figures meet—under his arm and between their bodies—to create depth and separation. -
Detail the hem ribbing:
Add vertical tick marks along the bottom edge of the father’s jacket to mimic an elasticated waistband.
Step 4: Final Touches
-
Refine the hair:
Go back in with a 6B pencil to add the darkest strands in the hair for both figures, creating contrast against the white paper. -
Ground the figures:
Add scribble-style shading horizontally beneath their feet to create a cast shadow. This confirms weight and contact with the ground. -
Clean up highlights:
Use your kneadable eraser to lift off any smudges and clarify the brightest points on the shoulders and the daughter’s hair.
Take a moment to admire the emotion captured in the simple lines of your finished drawing


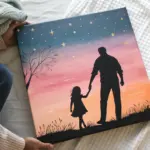
Silhouette Under an Umbrella
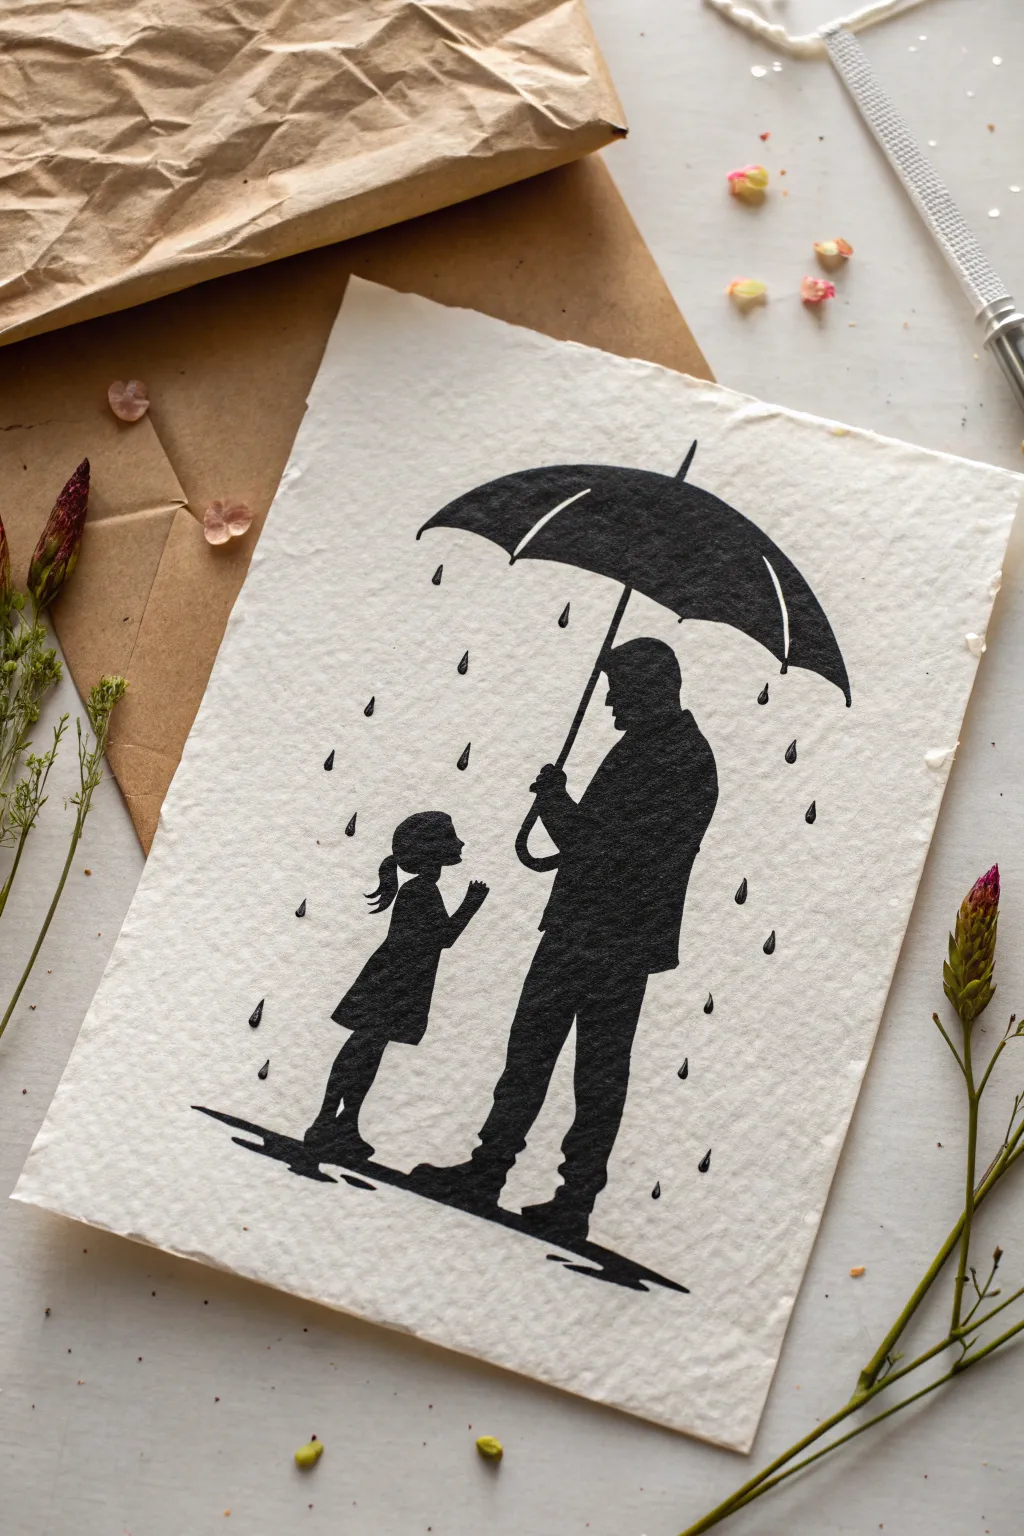
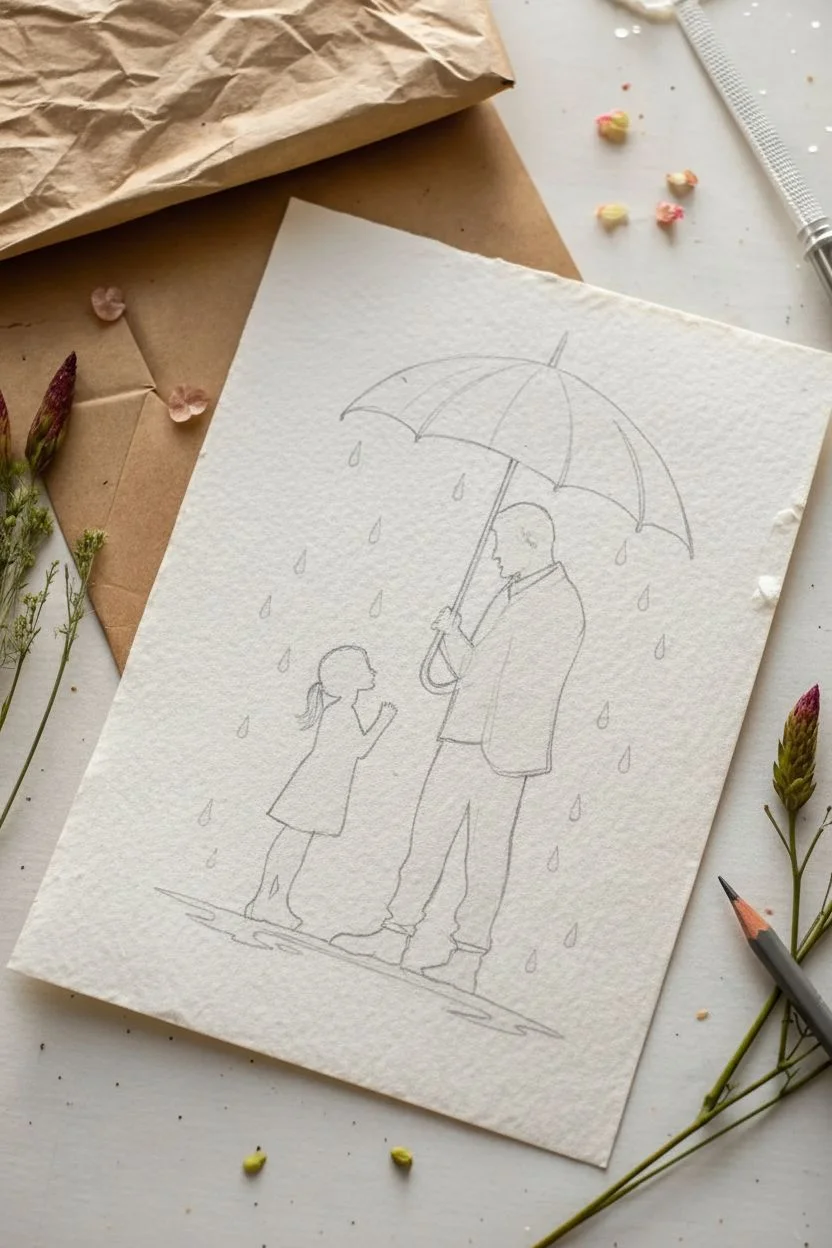
Capture a heartwarming moment of protection and love with this high-contrast silhouette artwork. Using textured handmade paper and rich black ink, you’ll create a striking visual that evokes the cozy feeling of walking together in the rain.
Detailed Instructions
Materials
- Sheet of textured handmade paper (deckle edge preferred)
- Pencil (HB or H)
- Eraser
- Black archival ink pen (fine tip, e.g., 0.1mm)
- Black archival ink pen (broad tip or brush pen)
- Black acrylic paint or India ink (optional, for large fills)
- Small round paintbrush (if using paint)
- Reference image or sketchbook
Step 1: Sketching the Outline
-
Prepare the paper:
Place your sheet of textured handmade paper on a flat, clean surface. The irregular surface can be tricky, so tape the corners down lightly if it tends to curl. -
Outline the figures:
Lightly sketch the basic shapes of the father and daughter using your HB pencil. Keep the pressure very light so you don’t groove the paper or make marks that are hard to erase later. -
Position the umbrella:
Sketch the large arc of the umbrella over the father’s head. Angle the handle so it connects naturally with his hand position. -
Refine the silhouettes:
Go back over your rough shapes to define specific details like the girl’s ponytail, the hem of her dress, and the collar of the father’s jacket. Remember, since this is a silhouette, you only need the outer contour—no internal facial features are needed. -
Add the rain elements:
Mark light positions for the falling raindrops and the small puddles at their feet. Spacing them irregularly looks more natural.
Step 2: Inking the Silhouette
-
Trace the contours:
Using your fine-tip pen (0.1mm), carefully trace the pencil outlines. The textured paper might make the pen skip slightly, so move slowly to ensure a solid line. -
Detail the umbrella ribs:
Draw the curved white lines on the umbrella first. It’s actually easier to draw these ‘negative space’ lines now so you don’t accidentally color over them later. -
Fill the large areas:
Switch to your broad tip pen or a small brush with black ink. Begin filling in the bodies of the figures. I find it safest to work from the center outwards toward your outline. -
Solidify the black:
Handmade paper is absorbent. You may need a second layer of ink or paint to get that deep, opaque black coverage, especially on the father’s coat. -
Refine the edges:
Switch back to the fine pen to sharpen any fuzzy edges caused by the paper’s texture, particularly around the girl’s fingers and hair.
Textured Paper Tip
Handmade paper can bleed. Before starting, test your pen on a scrap piece or the back corner. If it bleeds, spray the paper with a matte fixative first to seal the surface.
Step 3: Adding Atmosphere
-
Create the raindrops:
Draw the falling rain using a teardrop shape—pointed at the top, rounded at the bottom. Fill them in completely black. -
Anchor the figures:
Ink the puddles at their feet. Use horizontal, slightly jagged strokes to mimic the look of water splashing on the ground. -
Add splash details:
Don’t forget the tiny dots or small dashes near the feet to represent water splashing up from the impact of walking. -
Final check:
Look over the entire piece for any white spots within the black areas. Dab them with your pen. -
Erase pencil marks:
Wait until the ink is completely dry—give it extra time due to the absorbency of the paper. Gently erase any visible pencil lines.
Add a Pop of Color
Make the artwork pop by leaving the umbrella or the girl’s dress unpainted, or paint just that one element in a bright red or yellow watercolor for a focal point.
Now you have a timeless piece of art that beautifully freezes a precious moment in time


Piggyback Ride Laughs
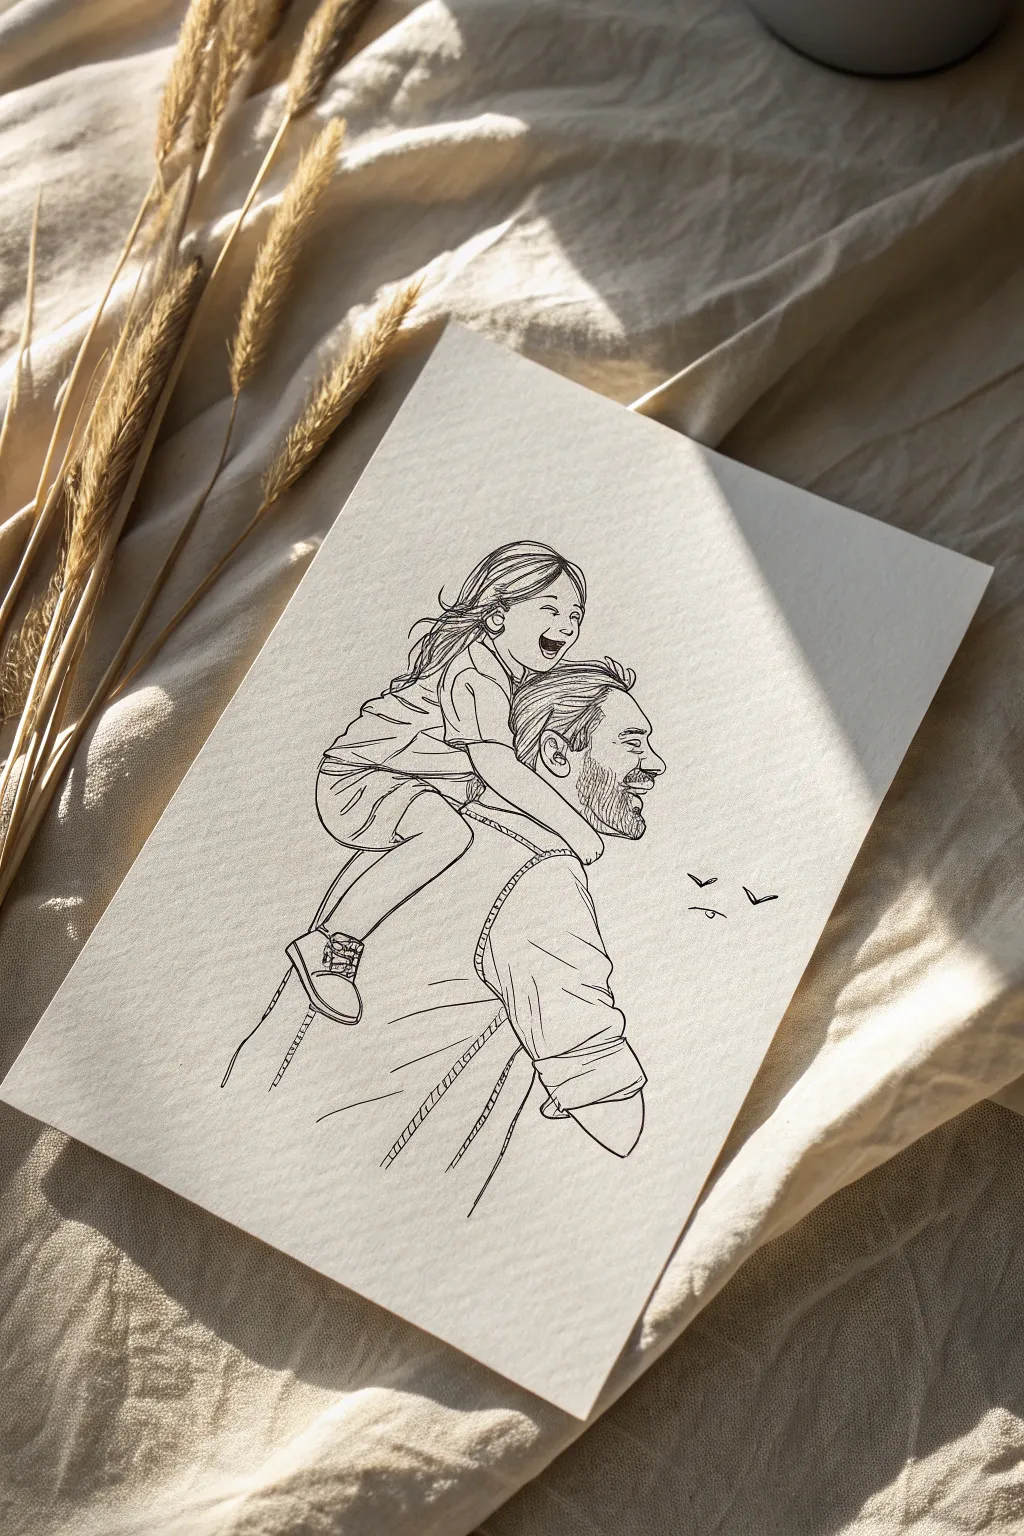
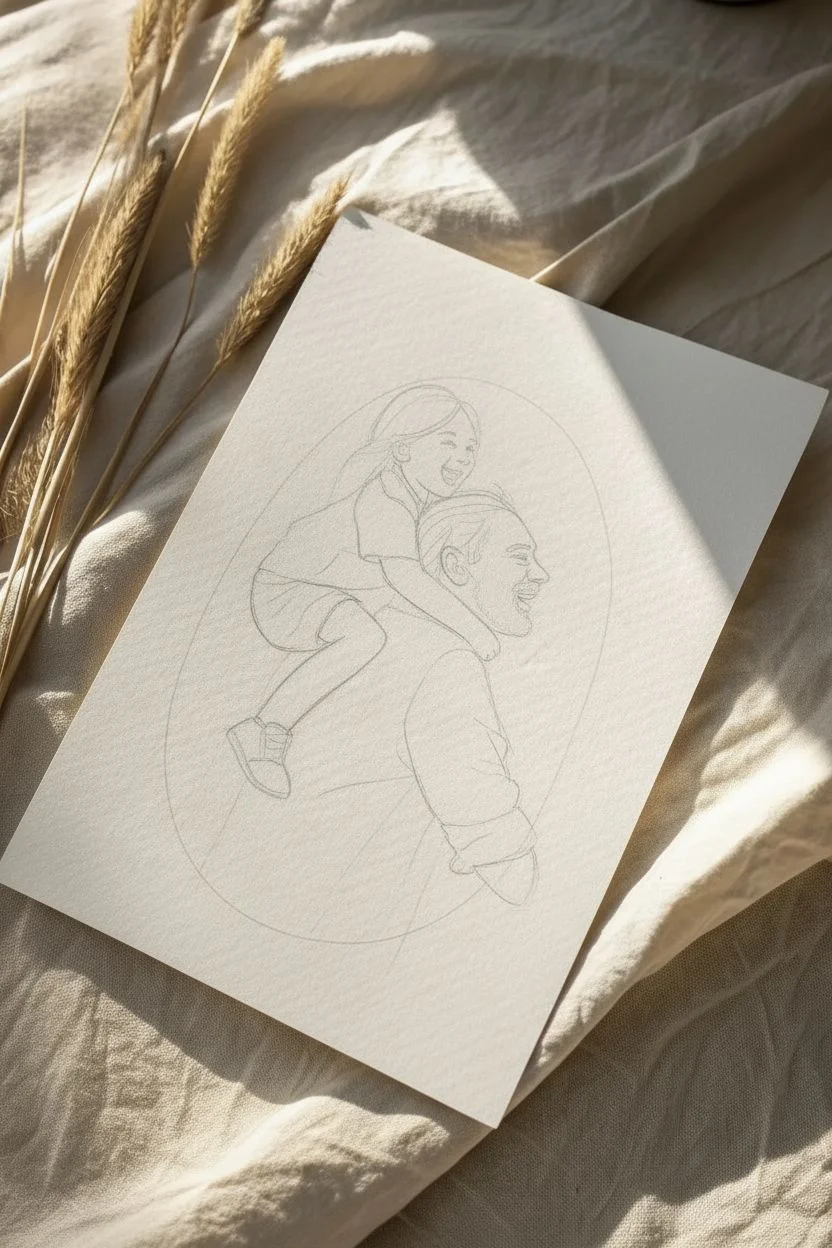
Capture a heartwarming moment of pure joy with this linear illustration style that focuses on emotion and movement. The crisp black lines against textured paper create a modern, minimalist look perfect for a lasting keepsake.
How-To Guide
Materials
- Heavyweight textured drawing paper (cream or off-white)
- HB pencil for sketching
- Kneaded eraser
- Fine liner pens (sizes 0.1, 0.3, and 0.5)
- Ruler (optional)
- Reference photo of a piggyback ride
Step 1: Planning the Composition
-
Establish the shapes:
Begin lightly with your HB pencil. Sketch a large oval for the father’s torso and a smaller circle above it for his head. Don’t press hard; we want these lines to disappear later. -
Position the child:
Draw the daughter’s basic form sitting on the father’s shoulders. Use a smaller oval for her body, leaning slightly forward, and a circle for her head that overlaps slightly with the top of the father’s head. -
Map the limbs:
Sketch stick-figure lines to determine where the arms and legs go. The father’s arm should reach back to support the child’s leg, and the child’s arms should wrap comfortably around the father’s neck. -
Refine the pose:
Flesh out the stick figures into tubular shapes. Pay attention to the angle of the father’s back—it should have a slight forward lean to suggest the weight of the child.
Step 2: Sketching the Details
-
Define the profiles:
carefully sketch the side profiles of both faces. Since they are laughing, tilt the chins up slightly and open the mouths. The connection between their expressions is the heart of this piece. -
Add hair volume:
Draw the outline of the hair. For the daughter, let the hair flow backwards to suggest movement. For the father, keep it shorter but textured. -
Clothing folds:
Sketch the clothes, focusing on where fabric bunches. Important areas are the father’s shoulder where the child sits, his elbow bend, and the child’s shorts. -
Detailing the hands:
Refine the father’s hand gripping the child’s leg. You don’t need every knuckle perfectly defined, just the general shape of the grip.
Master the Laugh lines
When drawing laughing faces, crinkle the eyes! Add tiny crows-feet lines at the outer corners of their eyes. This small detail instantly makes the joy feel genuine.
Step 3: Inking the Drawing
-
Outline the main figures:
Switch to your 0.3 fine liner. Trace over your pencil lines for the main outlines of the bodies and heads. Keep your hand steady but fluid to avoid shaky lines. -
Facial features:
Change to the delicate 0.1 pen for the faces. I find this prevents the features from looking too heavy. Carefully ink the eyes, noses, and smiling mouths. -
Hair texture:
Using the 0.1 pen, add flowing lines inside the hair shapes. Do not fill it in completely; use long, sweeping strokes to suggest strands and direction. -
Clothing details:
Use the 0.5 pen for the bottom edges of the clothing to give them weight. Then, switch back to the 0.1 pen to add small crease lines at the elbows and waist. -
The beard stubble:
Create the father’s beard texture using short, vertical hatching lines with the 0.1 pen. Keep the strokes dense on the jawline and lighter on the cheek. -
Adding the birds:
To the right of the figures, draw three simple ‘V’ shapes in varying sizes with the 0.1 pen to represent birds in the distance.
Ink Smearing?
If your hand drags ink across the paper, place a clean scrap sheet of paper under your drawing hand. This acts as a barrier, protecting your fresh lines from smudging.
Step 4: Finishing Touches
-
Clean up:
Wait at least 15 minutes for the ink to fully cure. Then, gently erase all underlying pencil sketch lines with the kneaded eraser. -
Assess line weight:
Look at your drawing from a distance. If the outer contour feels too thin, go over the perimeter one last time with the 0.5 pen to make the subject pop off the page.
Frame this drawing in a simple wood frame to let the joyful expressions really shine
BRUSH GUIDE
The Right Brush for Every Stroke
From clean lines to bold texture — master brush choice, stroke control, and essential techniques.
Explore the Full Guide
Bedtime Story Snuggle Scene
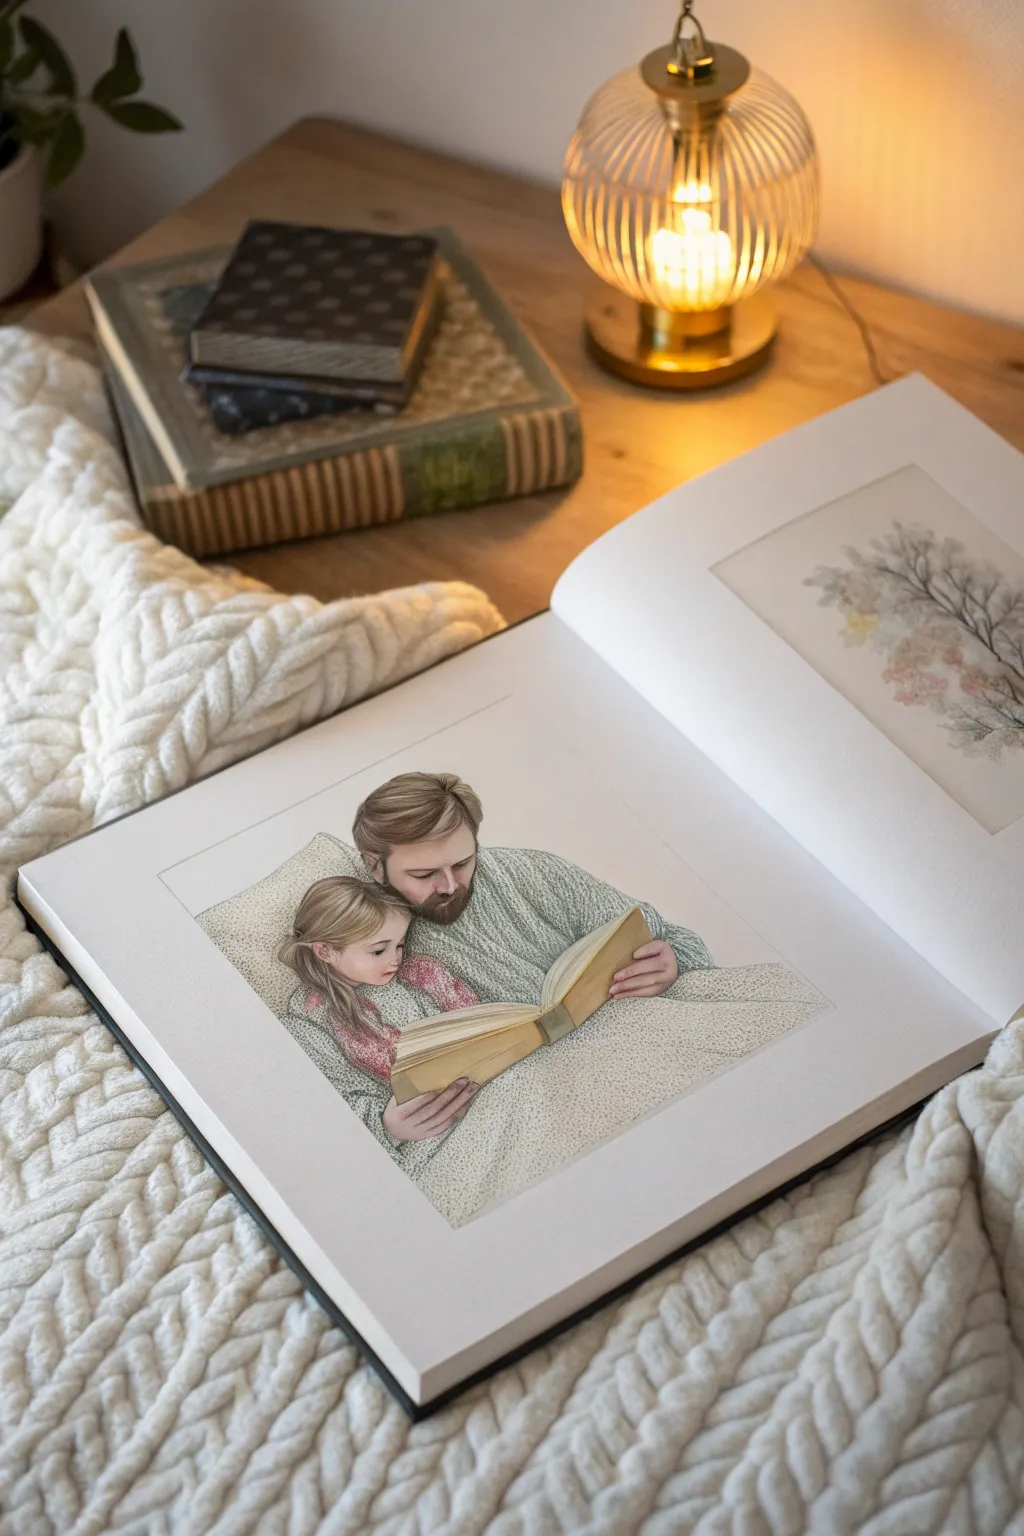
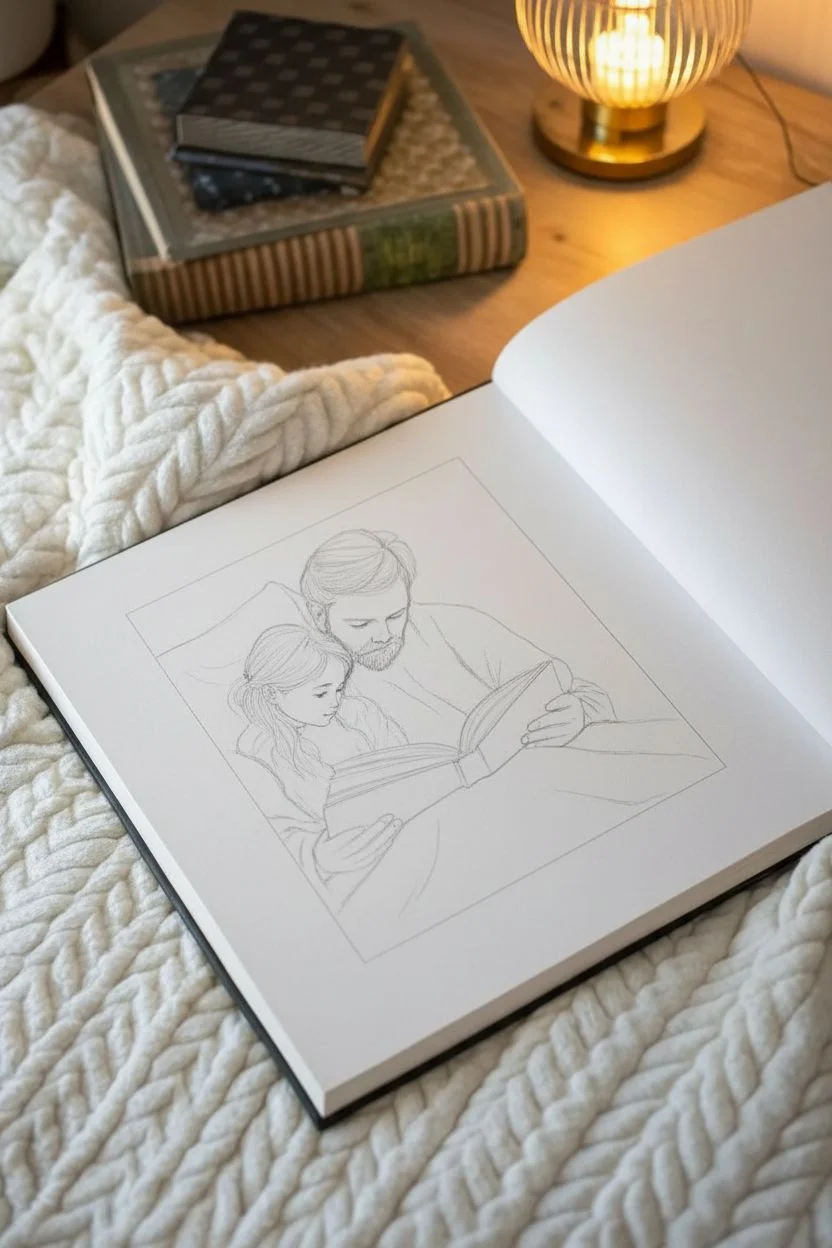
Capture the tender quiet of a bedtime routine with this gentle mixed-media illustration. Using a combination of soft graphite lines and muted color washes, you’ll create a cozy scene perfect for a custom storybook or a framed nursery gift.
Step-by-Step Guide
Materials
- Heavyweight drawing paper or hot-press watercolor paper (at least 140lb)
- H and HB graphite pencils
- Kneaded eraser
- Watercolor set (specifically earthy tones: ochre, burnt sienna, sepia)
- Colored pencils (prismacolor or polychromos recommended)
- Small round brushes (size 0 and 2)
- White gel pen or gouache for highlights
- Ruler
Step 1: Sketching the Composition
-
Define the Frame:
Start by using your ruler to draw a crisp, rectangular border on your page. This frame helps center the intimate moment and gives the drawing a finished, book-illustration feel right from the start. -
Block in Basic Shapes:
With an H pencil, lightly sketch two overlapping ovals to represent the heads of the father and daughter. Position them close together to emphasize their connection. Add a large, slanted rectangular shape below them for the open book they are holding. -
Refine the Facial Features:
Switch to an HB pencil for slightly clearer lines. Draw the father looking down at the book and the daughter looking sideways at the pages. Keep the features delicate; you don’t need intense detail, just the suggestion of eyes, noses, and the father’s beard. -
Draft the Bedding:
Sketch the large, encompassing shape of the duvet relative to their bodies. Draw the pillow behind the father’s head. Use soft, curving lines to suggest wrinkles and folds in the fabric where their arms rest. -
Clean Up Lines:
Use your kneaded eraser to gently lift away the initial construction ovals and any stray markings, leaving only your clean, final contours ready for color.
Too Much Water?
If your paper starts buckling, you’ve used too much water for the weight of the sheet. Let it dry completely, place it under a heavy book overnight to flatten, then switch to colored pencils.
Step 2: Adding Washes and Texture
-
Apply Skin Tones:
Mix a very watery wash of burnt sienna and a touch of ochre. Paint this carefully onto the faces and hands. Keep it transparent; you want the paper’s white to shine through for luminosity. -
Paint the Hair:
For the father, use a diluted sepia wash. For the daughter, use a mix of yellow ochre and a tiny bit of brown. Apply the paint in the direction of hair growth, leaving small gaps for highlights. -
Base Color for Clothing:
Paint the father’s sweater with a pale sage or grey-green wash. For the child’s pajamas, use a soft rose or muted pink. Don’t worry about texture yet; just establish the flat local color. -
The Golden Book:
Mix a warm yellow-gold color for the book cover and pages. Painting the pages slightly lighter than the cover helps differentiate the parts of the object. -
Knit Texture – Father:
Once the watercolor is completely dry, take a grey-green colored pencil. Draw tiny, repeating ‘v’ shapes or small hatching lines across his sweater to simulate a chunky knit texture. I find varying the pressure here adds nice depth. -
Fabric Texture – Daughter:
Using a darker pink or red colored pencil, add small stippling dots or a subtle floral pattern to the child’s sleeves. This contrasts nicely with the father’s textured sweater. -
Defining the Bedding:
Use a light grey colored pencil to shade the folds of the duvet and pillow. Instead of solid lines, use small, random stippling dots to give the blanket a soft, fabric-like appearance rather than a hard outline.
Step 3: Final Details and Depth
-
Deepen the Shadows:
Use a dark brown colored pencil to carefully outline the jawline, the hands holding the book, and the separation between the two figures. This creates the necessary separation so they don’t look merged. -
Enhance Hair Strands:
Sharpen a dark brown pencil to a fine point. Draw individual hair strands over the dried watercolor base, focusing on the parted areas and the ends of the hair. -
Book Details:
Use a pencil to draw fine lines on the book pages to represent text blocks. Shade the center crease of the book to show that it is open. -
Final Highlights:
Using a white gel pen or a tiny dot of white gouache, add a spec of light to the eyes (if visible) and the very tip of the book pages to make the scene pop.
Soft Sweater Trick
To make the father’s sweater look extra fuzzy, lightly smudge your colored pencil cross-hatching with a cotton swab or blending stump. It softens the harsh pencil strokes instantly.
Now you have a heartwarming illustration that perfectly captures the quiet bond of story time
Dancing in the Living Room
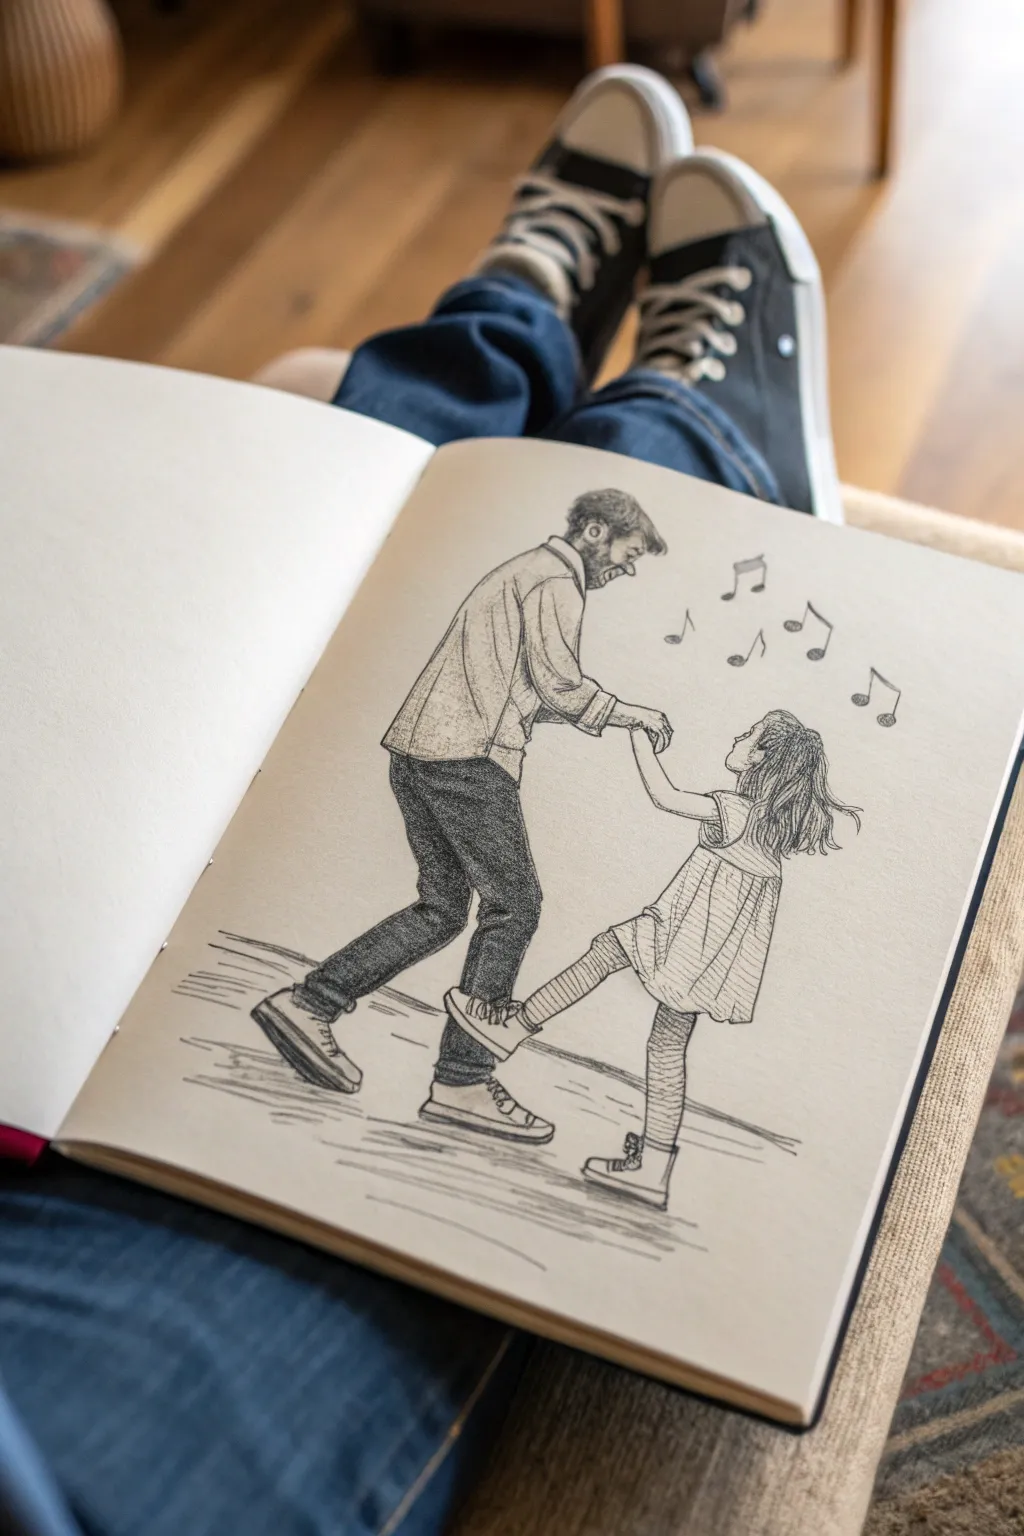
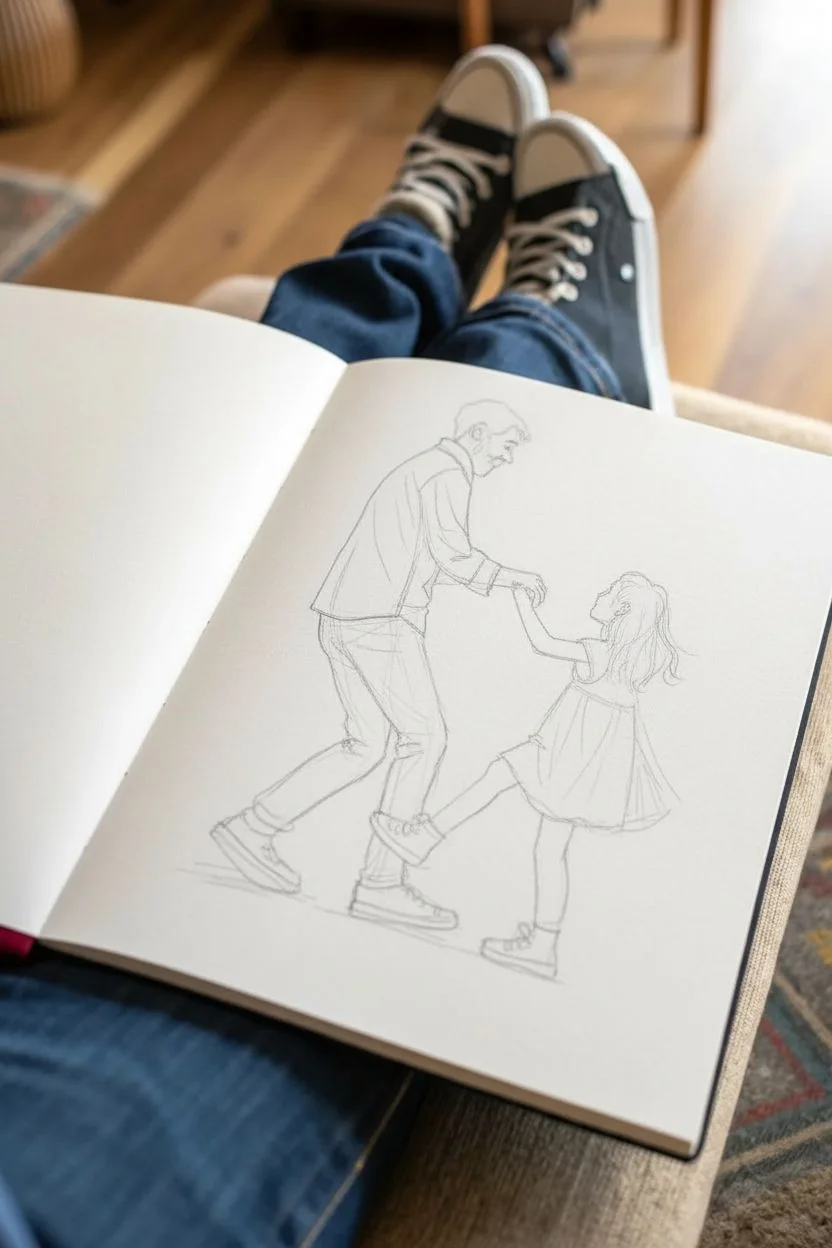
Capture a heartwarming moment of connection with this lively ink illustration of a father and daughter dancing. Using precise line work and careful hatching, you’ll create a drawing full of movement, texture, and musical charm.
Step-by-Step Guide
Materials
- Smooth heavyweight sketchbook paper
- HB graphite pencil
- Kneaded eraser
- Fine liner pens (0.1mm, 0.3mm, 0.5mm black)
- Ruler (optional for ground lines)
Step 1: Planning the Pose
-
Establish the figures:
Begin with a light HB pencil sketch to map out the basic stick figures. Place the father on the left, leaning slightly forward, and the daughter on the right, looking up at him. -
Refine the anatomy:
Flesh out the shapes. The father’s legs should be bent in mid-step, with his left foot forward and right heel lifting. Sketch the daughter’s leg kicked up playfully behind her to emphasize the dancing motion. -
Connect the hands:
Draw their joined hands as the focal point. Ensure his arm extends down while hers reaches up, creating a V-shape connection between them. -
Add clothing details:
Sketch the outlines of the clothes. Give the father a button-down shirt with rolled sleeves and jeans. For the girl, draw a simple sleeveless dress with a flared skirt and leggings underneath.
Keep it Loose
Don’t connect every single line perfectly. Leaving small gaps in the outlines, especially around the hair and clothing folds, keeps the drawing feeling airy and lively rather than stiff.
Step 2: Inking the Outlines
-
Trace main contours:
Switch to a 0.3mm fine liner pen. Go over your pencil lines, using confident, continuous strokes for the outer edges of the clothing and limbs. -
Detail the faces:
Use a delicate 0.1mm pen for the facial features. For the father, outline a beard and profile. For the daughter, keep the profile soft and add flowy hair lines that suggest movement. -
Draw the shoes:
Ink the father’s sneakers and the girl’s high-top shoes. Pay attention to the soles and laces, as these ground the figures. -
Clean up:
Once the ink is completely dry, gently erase all underlying pencil marks with your kneaded eraser to leave a clean slate for shading.
Step 3: Shading and Texture
-
Texture the jeans:
Using the 0.3mm pen, fill the father’s jeans with dense stippling or tight, erratic scribbles. This darkens the legs significantly, contrasting with his lighter shirt. -
Shade the shirt:
Apply light, parallel hatching lines on the father’s shirt to indicate folds and shadows, particularly under the arm and along the side. -
Pattern the dress and leggings:
Draw vertical lines down the girl’s skirt to show the fabric folds. Use horizontal hatching on her legs to simulate the texture of striped or knit leggings. -
Add hair texture:
With the 0.1mm pen, draw individual strands for the girl’s hair and short, scumbled strokes for the father’s beard and hair.
Watercolor Wash
Once the ink is fully waterproof and dry, add a splash of color. A light wash of blue for the jeans or a soft yellow glow around the music notes can make the sketch pop.
Step 4: Atmosphere and Final Touches
-
Ground the figures:
Sketch swift, horizontal lines beneath their feet to represent the floor. I find that varying the length of these lines creates a more natural, sketchy look than a solid horizon line. -
Add movement:
Draw a few small ‘action lines’ near the feet to emphasize the steps and the kick. -
Include music notes:
Draw several eighth and quarter notes floating in the air between and above their heads to visualize the rhythm. -
Final darkening:
Take a 0.5mm pen and selectively thicken lines on the shadowed side of the figures (usually the back and bottom edges) to add weight and depth to the illustration.
Now you have a timeless keepsake that perfectly captures the joy of an impromptu living room dance

PENCIL GUIDE
Understanding Pencil Grades from H to B
From first sketch to finished drawing — learn pencil grades, line control, and shading techniques.
Explore the Full Guide
Father-Daughter Bike Ride Sketch
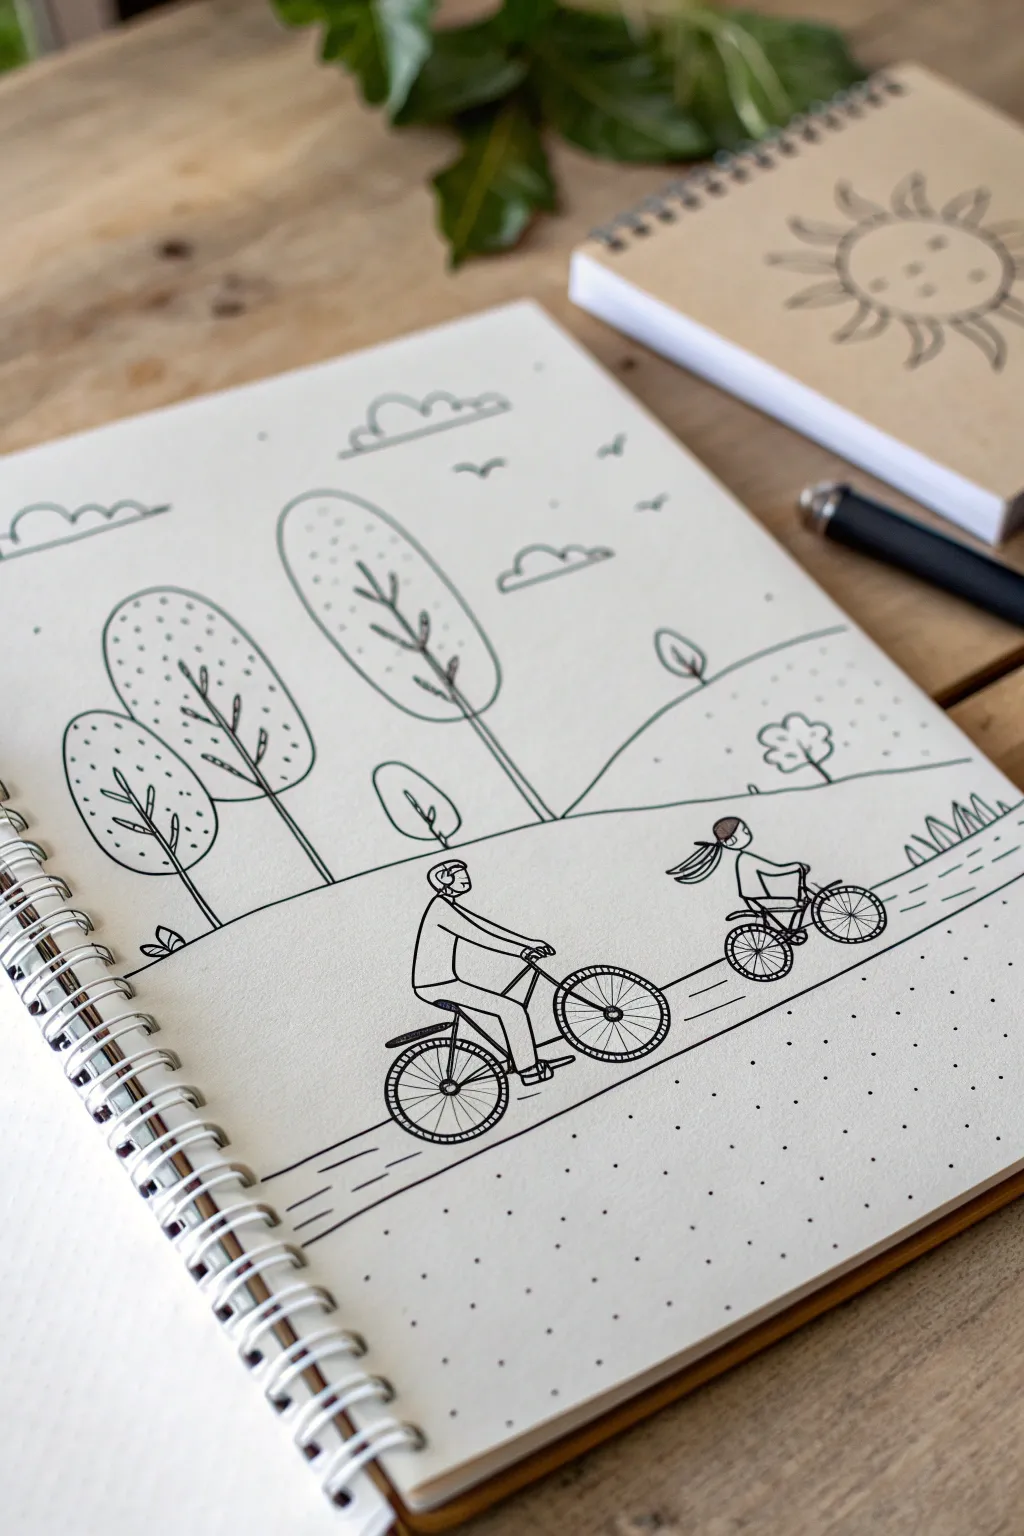
Capture a breezy afternoon ride with this minimalist line drawing technique. Using simple geometric shapes and confident pen strokes, you’ll create a charming scene of a father and daughter cycling through a stylized park landscape.
Step-by-Step Guide
Materials
- A5 spiral-bound sketchbook (dot grid or plain paper)
- Black fine-liner pen (0.3mm or 0.5mm)
- Pencil (HB for sketching)
- Eraser
- Ruler (optional)
Step 1: Setting the Scene
-
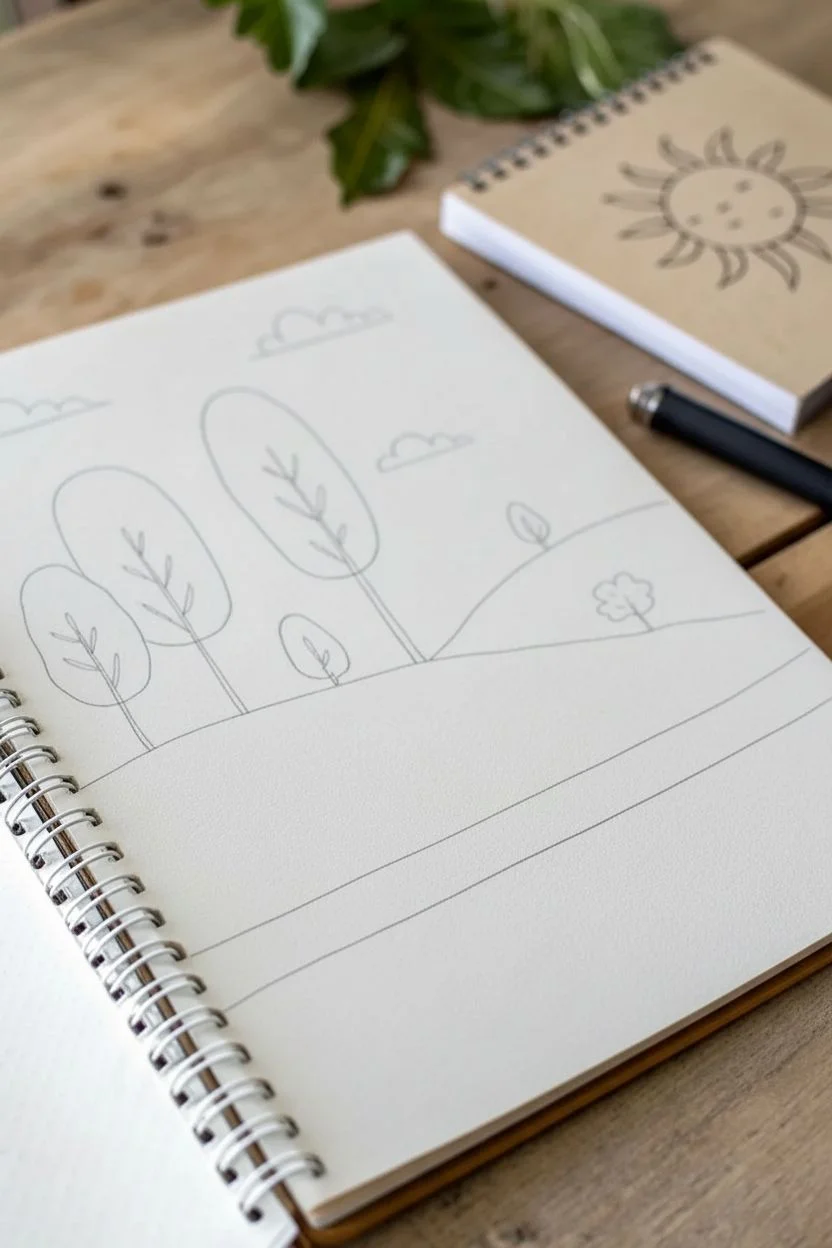
Establish the horizon:
Begin by drawing a long, horizontal line across the lower third of your page. This will be the main path. Add a second, slightly curved line above it to create the grassy hill in the background. -
Draft the background trees:
On the left side, sketch three oval shapes of varying sizes for the tree canopies. Make the largest one tall and thin, and the two smaller ones more round. Add thin, vertical lines for trunks. -
Add distant details:
Draw a smaller, simpler tree shape on the far right hill. Sketch a few flat-bottomed cloud shapes floating in the sky area.
Wobbly Wheels?
If freehand circles are tough, use a circle template or a compass. Even tracing a coin works perfect for getting those bike wheels round.
Step 2: Drawing the Cyclists
-
Position the figures:
Lightly sketch the placement of the two cyclists. Place the father figure on the left and the daughter slightly ahead on the right to show perspective. -
Sketch the wheels:
Draw two circles for the father’s bike and two slightly smaller ones for the daughter’s bike. If circles are tricky, you can trace a coin or small bottle cap. -
Build the bike frames:
Connect the wheels with simple triangular lines to form the bike frames. Keep the design geometric and understated rather than perfectly realistic. -
Draw the riders:
Sketch the father with a simple torso leaning forward and legs bent at the pedal. Give him a helmet. For the daughter, draw a smaller figure with hair flowing back to suggest movement.
Step 3: Inking and Refining
-
Outline the trees:
Switch to your black fine-liner. Trace over your pencil lines for the trees. I like to keep the lines crisp but not perfectly straight to add organic character. -
Texture the foliage:
Fill the tree canopies with simple patterns. Use small dashes or stippling dots inside the oval shapes to suggest leaves without drawing individual ones. -
Ink the bikes:
Carefully trace the wheels. Add spokes by drawing lines from the center of the wheel to the tire. Trace the frames and handlebars with steady strokes. -
Defined the characters:
Ink the riders. Focus on the flow of the girl’s angular hair and the connection of their hands to the handlebars. Keep facial features minimal or entirely absent for a clean style. -
Enhance the background:
Trace the horizon lines. For the grass, add small jagged lines or tufts near the path edges to break up the long straight lines. -
Final nature touches:
Ink the clouds and add small V-shapes in the sky for birds. Add sparse dots in the sky area to create texture or suggest a light breeze.
Make It Yours
Try adding a splash of watercolor to just the trees or the cyclists’ clothes for a lovely pop of contrast against the monochrome lines.
Step 4: Finishing Up
-
Erase pencil guides:
Wait a few moments to ensure the ink is completely dry. Gently erase all underlying pencil sketches to reveal the clean black lines. -
Add movement lines:
Draw a few short, horizontal dash lines on the path behind the wheels. This helps ground the bicycles and gives the illusion of forward motion.
Now you have a sweet, timeless illustration celebrating a shared moment on the road
Swing Push at the Playground
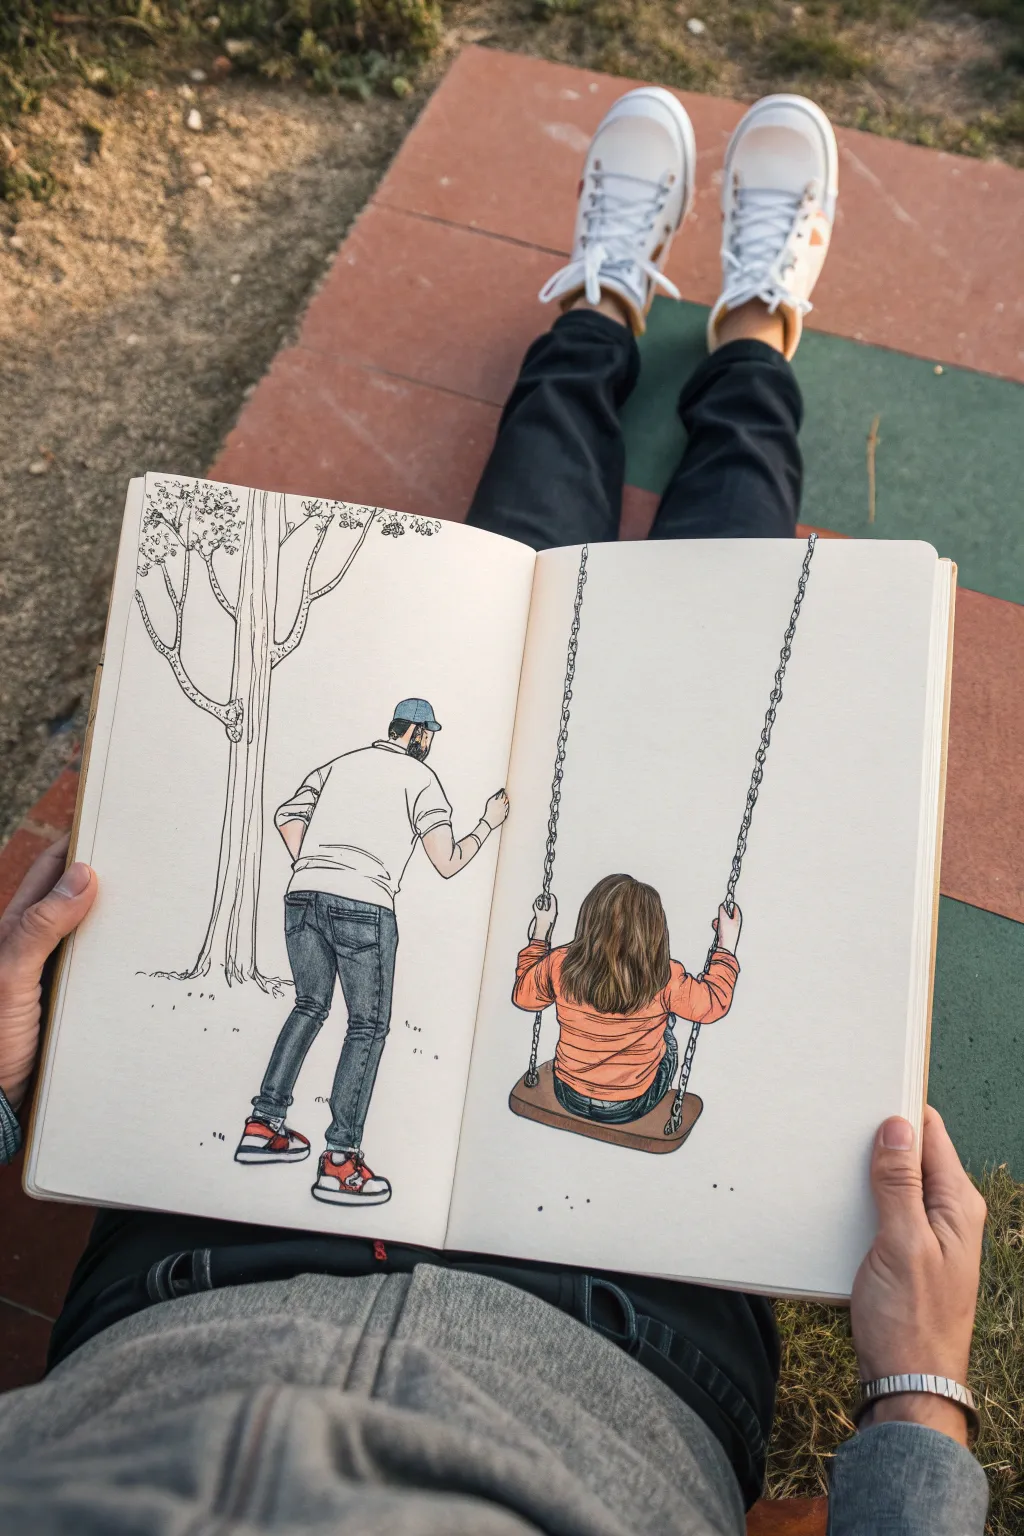
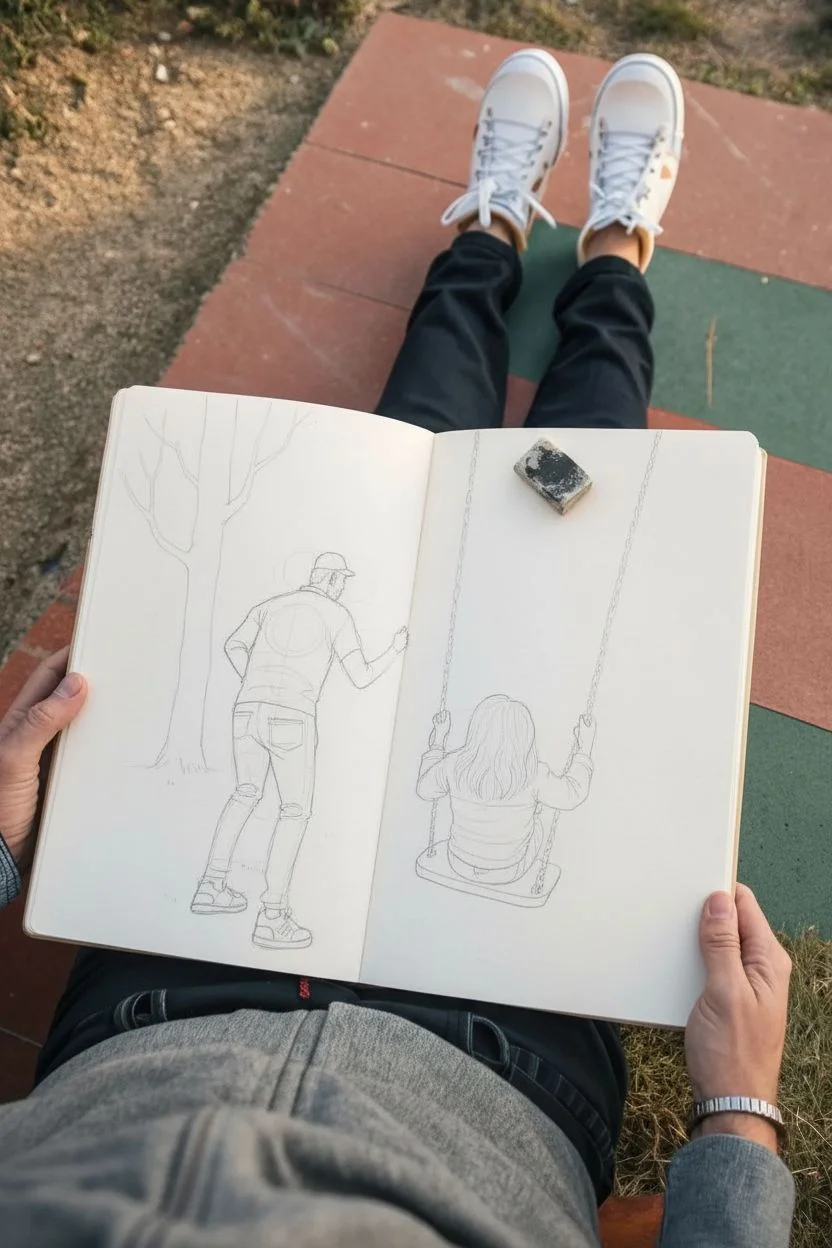
Capture a sweet moment of connection with this clever sketchbook spread that utilizes the book’s spine as part of the composition. This ink-and-marker illustration spans two pages to create a dynamic scene of a father pushing his daughter on a swing.
Step-by-Step
Materials
- A5 or A4 sketchbook (smooth paper preferred)
- Pencil (HB or 2B)
- Kneaded eraser
- Fine liner pens (sizes 0.1, 0.3, and 0.5)
- Alcohol-based markers (colors: cool grey, burnt orange, denim blue, skin tones, white)
- Ruler (optional)
Step 1: Planning and Sketching
-
Establish the composition:
Open your sketchbook so it lays flat. Visualize the fold in the center as the invisible space between the pusher and the swinger. The key to this drawing is ensuring the swing chains align across the gap. -
Rough placement circles:
Lightly sketch a circle on the left page for the father’s head and torso, positioning him slightly left of center. On the right page, sketch the rough shape of the girl sitting, keeping her relatively low on the page to allow room for the long swing chains. -
Connect the chains:
Using a ruler or a steady hand, draw two very light guide lines for the swing chains. They need to start high on the right page, angle slightly, and technically ‘connect’ to the father’s hands on the left page, though the spine breaks the line. -
Refining the father figure:
Flesh out the father’s form. Sketch his back turned to the viewer, one arm extended forward as if pushing. Add details like the cap, the rolled-up sleeves of his t-shirt, and his jeans. His stance should look active, with legs spread for balance. -
Refining the daughter figure:
Detail the girl on the swing. Has her back to us as well, showing long hair cascading down. Sketch her hands gripping the chains and her legs dangling. I find it helpful to draw the wooden seat’s perspective carefully so it looks like it’s swinging forward. -
Adding the background tree:
On the far left, sketch a simplified tree trunk and a few branches reaching over the father’s head. Keep this minimal; it frames the scene without cluttering it.
Pro Tip: Chain Alignment
Use a ruler to lightly draw the chain path across BOTH open pages before drawing the spiral binding gap. This ensures the angle remains perfect even when the image is split.
Step 2: Inking the Outline
-
Outline the figures:
Switch to your 0.3 fine liner. Carefully go over your pencil lines for the characters’ clothing and bodies. Use confident, continuous strokes for clothing folds to make them look natural. -
Detailing the swing chains:
This requires patience. Draw small, interlocking oval links along your guide lines. Darken the side of each link slightly to give them metallic volume. Ensure the chain stops at the girl’s hands and the father’s pushing hand. -
Tree texture:
Use a 0.1 fine liner for the tree. Create vertical, jagged lines for bark texture and loose, scribbly shapes for the leaves at the top. The tree should feel sketchier than the figures. -
Erase pencil lines:
Once the ink is completely dry—wait at least five minutes to prevent smudging—take your kneaded eraser and gently remove all the graphite sketch marks.
Step 3: Coloring and Shading
-
Coloring the father’s clothes:
Use a denim blue marker for the father’s jeans. Apply one layer, then go back over the shadowed areas (like the creases behind the knees) to deepen the color. Leave the t-shirt white, or add very subtle light grey shading at the folds. -
Coloring the daughter’s outfit:
Select a bright burnt orange marker for the girl’s sweater. This pop of color draws the eye. Shade the undersides of her arms and the folds in her back. Use the denim blue for her jeans as well. -
Skin tones and hair:
Apply a skin tone marker to the father’s arms and the girl’s hands. For the girl’s hair, use a light brown or dirty blonde marker, adding darker streaks for depth. Don’t forget to color the father’s shoes and cap. -
Adding ground shadows:
Using a cool grey marker, draw loose, scribbly shadows on the ground beneath the father’s feet and under the swing. This grounds the figures so they don’t look like they are floating in space. -
Final highlights:
If you have a white gel pen, add tiny highlights to the swing chains or the top of the girl’s hair to simulate sunlight.
Level Up: Seasonal Vibes
Add falling leaves in orange and yellow around the figures to create an autumn atmosphere, or draw scant snowflakes and add a hat to the girl for a winter scene.
Now you have a heartwarming, interactive spread that tells a story every time you open your sketchbook


Tiny Hand in Big Hand Close-Up
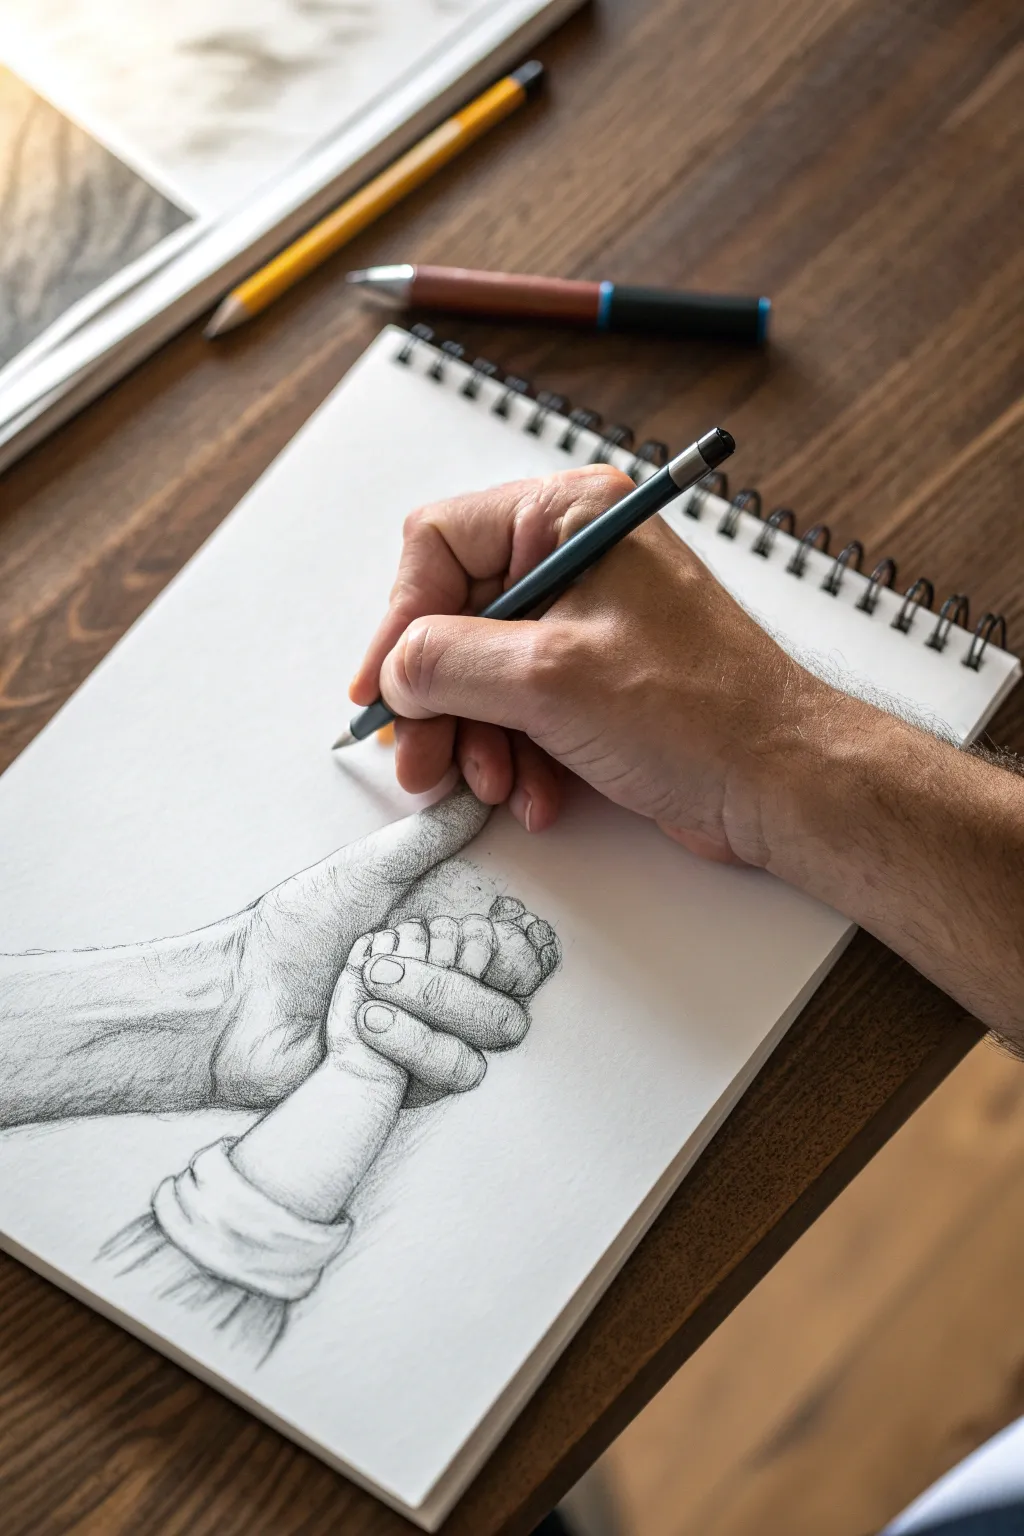
Capture the tender connection between generations with this realistic graphite study of an infant’s hand grasping an adult’s thumb. This project focuses on detailed shading and texture to bring the warmth and fragility of the moment to life on paper.
Step-by-Step Guide
Materials
- High-quality sketchbook paper (heavyweight, slight tooth)
- Graphite pencils (H, HB, 2B, 4B, 6B)
- Mechanical pencil (0.5mm HB) for fine details
- Kneaded eraser
- Blending stump or tortillon
- Reference photo of hands (optional but helpful)
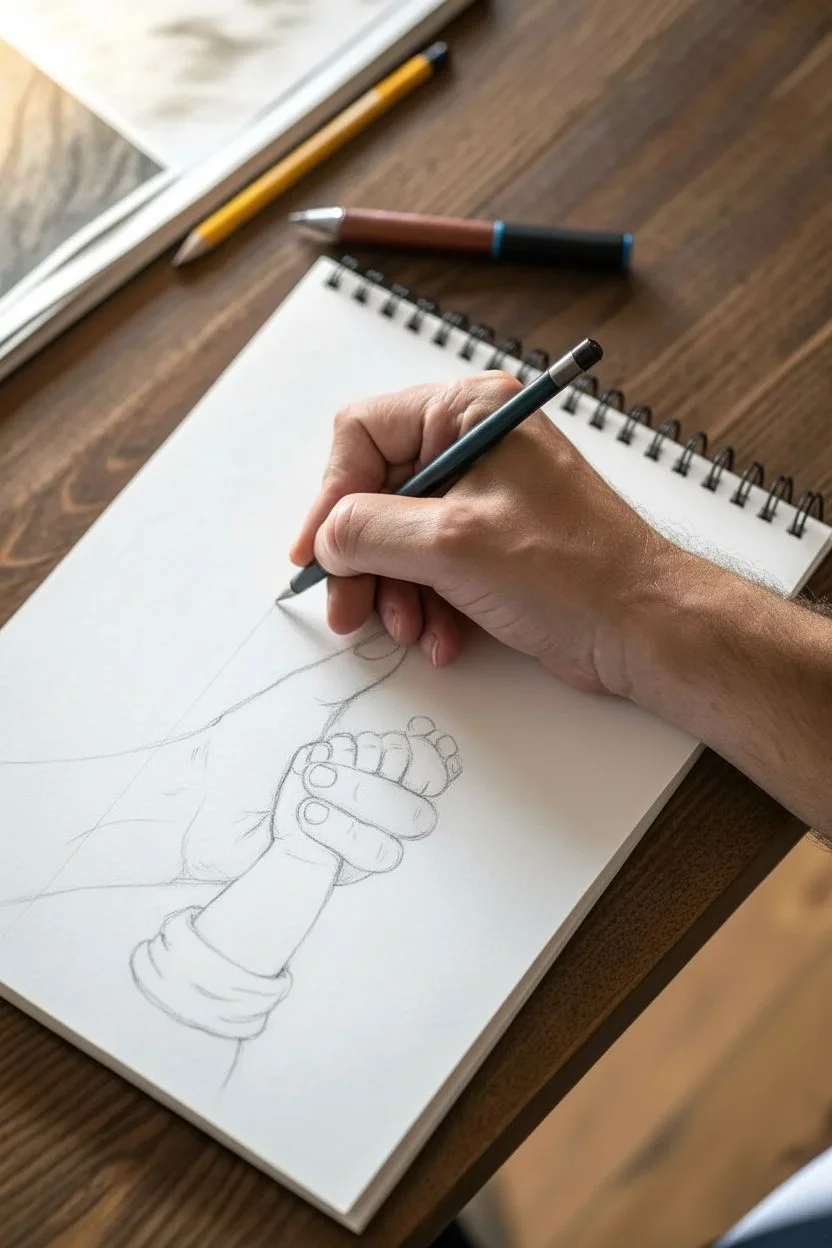
Step 1: Laying the Proportions
-
Map the composition:
Begin lightly with an H pencil, sketching a diagonal line across the lower left quadrant of the page. This will serve as the axis for the adult’s thumb. -
Outline the adult hand:
Sketch the basic cylindrical shape of the thumb extending upward, and the broader curve of the wrist and palm base below it. Keep lines faint so they can be erased easily. -
Position the tiny hand:
Draw the infant’s wrist intersecting the lower part of the adult thumb. Use simple oval shapes to represent the palm and knuckles of the baby. -
Sketch the fingers:
Add four small, curved sausage shapes wrapping around the adult thumb to represent the baby’s fingers. Pay attention to how the index and middle fingers curve more tightly than the pinky. -
Refine the outlines:
Switch to an HB pencil to firm up the contours. Define the creases in the baby’s wrist and the fingernails on the tiny hand. Add the rolled cuff of the baby’s sleeve near the bottom.
Muddy Shading Rescue
If shading looks too grey or smeared, dab—don’t rub—with a kneaded eraser to lift graphite. Sharpen pencils frequently to restore crisp texture.
Step 2: Shading and Texture
-
Establish the light source:
Decide on your light direction—in this example, light comes from the upper right. Use a 2B pencil to lightly shade the left side of the adult’s wrist and the underside of the baby’s fingers. -
Shade the adult skin:
Using a 2B pencil, create texture on the adult hand. Use directional hatching that follows the curve of the skin, emphasizing the rougher texture and fine hairs on the back of the hand. -
Render the baby’s skin:
Switch to a smoother shading technique for the infant’s skin. I find that using small circular motions helps avoid harsh lines here. Keep the tones lighter overall to suggest softness. -
Deepen the shadows:
Take a 4B pencil to darken the areas where the hands touch. Specifically, darken the crevices between the baby’s fingers and the shadow cast by the baby’s hand onto the adult thumb. -
Add thumb details:
Draw the creases of the adult thumb knuckle using a sharp 2B or mechanical pencil. Add subtle shading on the thumb pad where the baby’s fingers are pressing into the skin. -
Texture the sleeve:
Sketch the folds of the baby’s sleeve fabric with broad strokes. Use the eraser to lift out highlights on the ridges of the folds to make the fabric look three-dimensional.
Step 3: Refining Details
-
Focus on fingernails:
Draw the tiny fingernails on the baby’s hand. Keep the outlines delicate, adding a tiny glint of white (unshaded paper) to make them look shiny. -
Blend tones:
Use a blending stump to soften the shading on the baby’s arm and fingers, creating that smooth, chubby look. Be careful not to over-blend the adult hand; you want to keep some texture there. -
Enhance contrast:
With a 6B pencil, go over the darkest shadows one last time—under the wrist and deep in the finger gaps—to make the drawing pop off the page. -
Add arm hair texture:
Using a sharp mechanical pencil, add quick, short strokes to the adult’s wrist area to simulate hair. Follow the natural growth direction. -
Examine the wrist creases:
Sharpen your dark pencil and emphasize the deep creases on the baby’s wrist, often called ‘bracelets’. These should be soft shadows, not harsh black lines. -
Final clean up:
Use the kneaded eraser to lift any graphite smudges from the surrounding white paper, ensuring high contrast between the drawing and the background.
Add a Personal Touch
For a meaningful detail, try drawing a specific bracelet, watch, or hospital ID band on one of the wrists to anchor the memory in time.
Now you have a timeless keepsake that perfectly captures the bond of early fatherhood
Shoulder Ride at a Fair
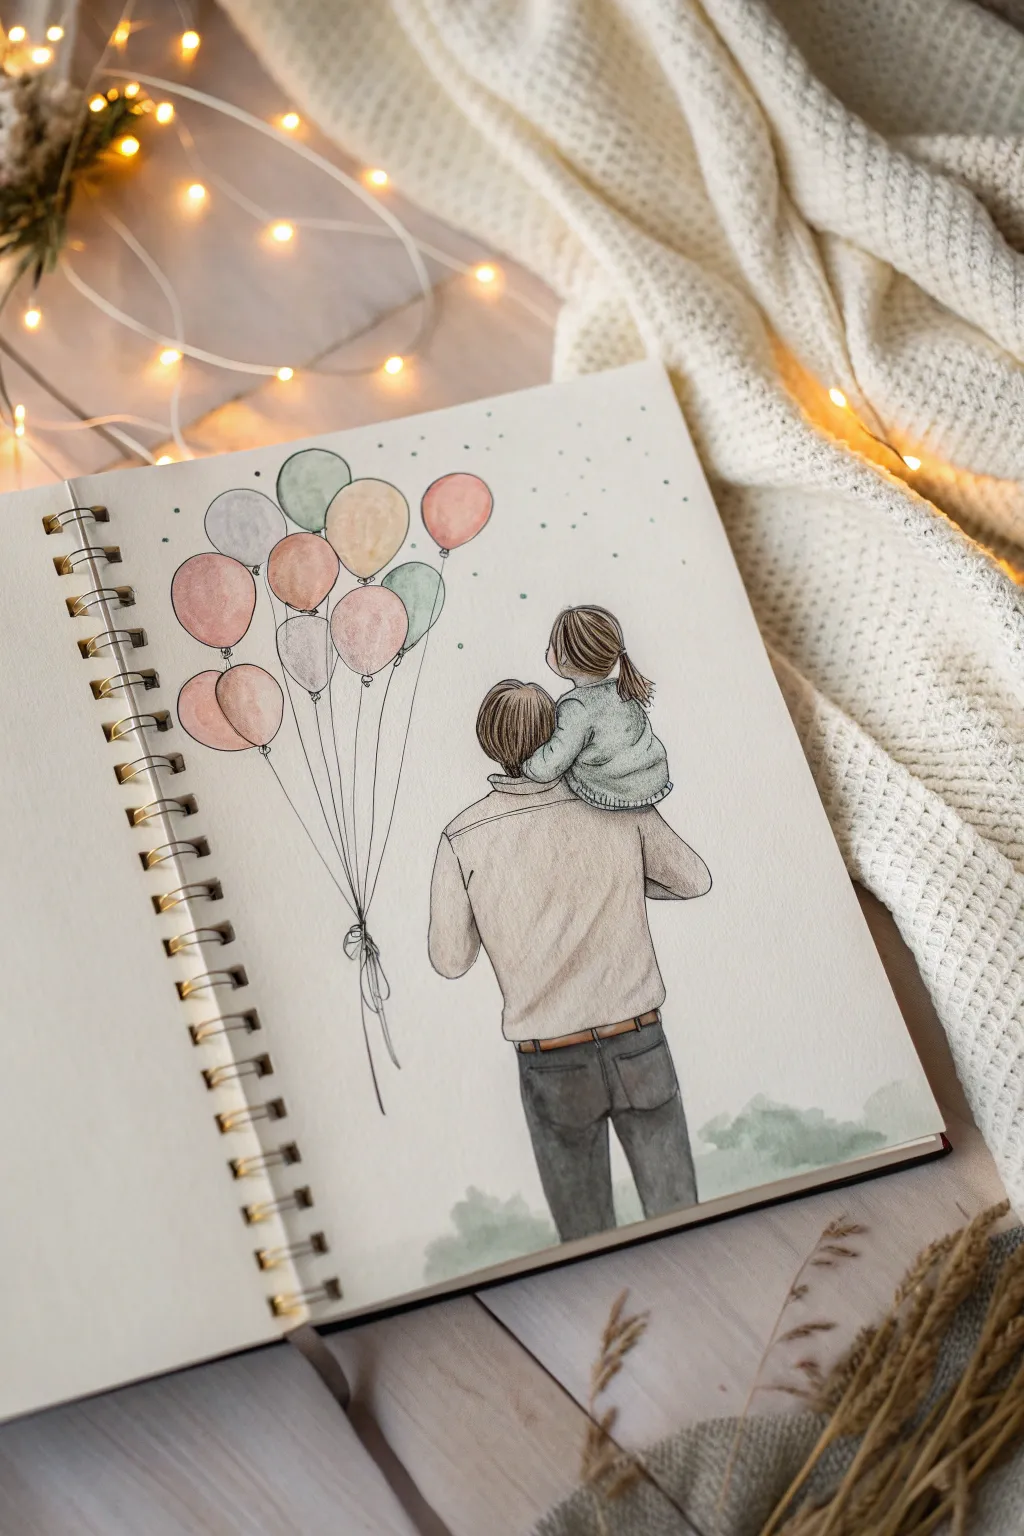
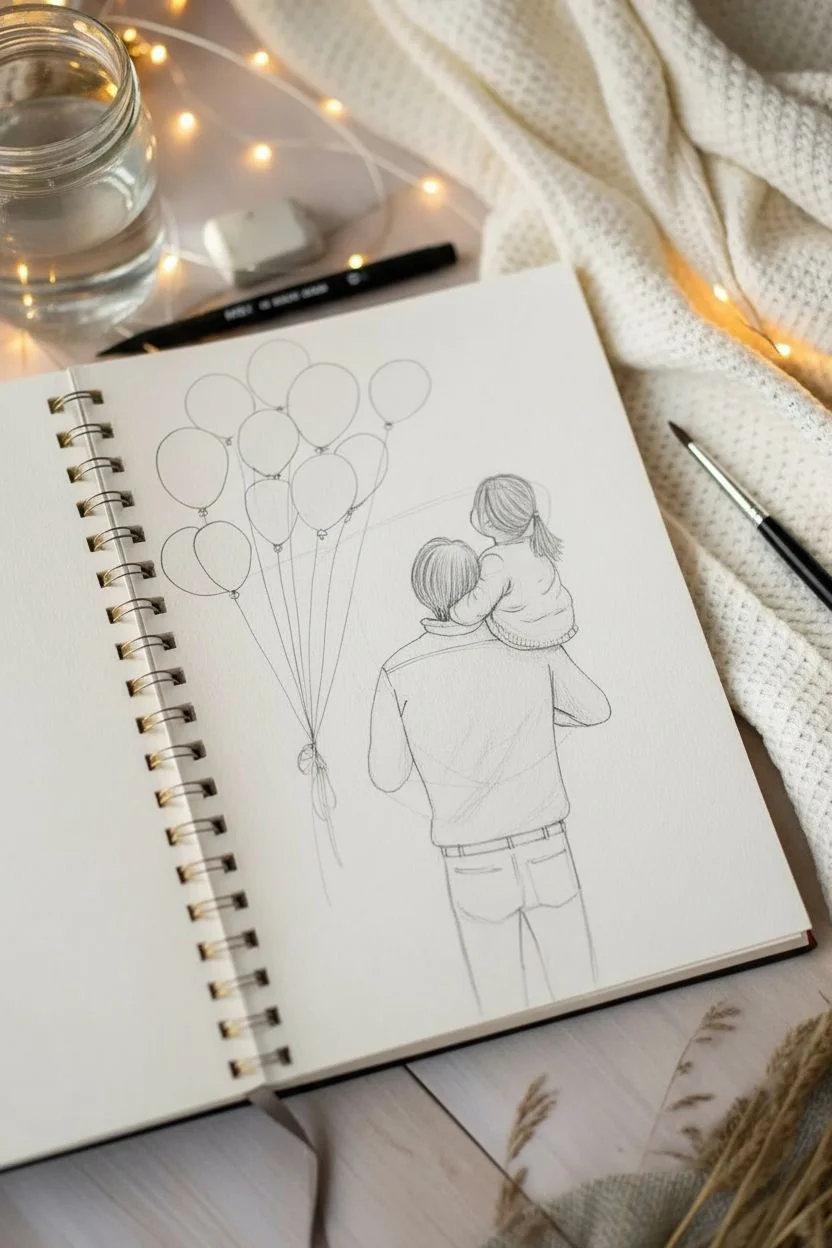
Capture a sweet moment of connection with this delicate watercolor and ink illustration of a father carrying his daughter. The soft pastel palette and loose sketching style give the piece a dreamy, nostalgic memory-book feel.
Step-by-Step Tutorial
Materials
- Spiral-bound sketchpad (heavyweight mix-media or watercolor paper)
- Pencil (HB or H for light sketching)
- Fine liner pen (black, 0.1mm and 0.3mm)
- Watercolor paints (pan or tube)
- Small round watercolor brushes (size 2 and 4)
- Jar of water
- Paper towel
- Kneaded eraser
Step 1: Sketching the Figures
-
Establish the pose:
Start by lightly sketching the basic shapes of the father’s back. Draw a broad oval for his torso and two rectangles for legs. On top of his shoulders, sketch a smaller, slightly slumped shape for the daughter’s torso. -
Refine the heads:
Draw the father’s head slightly tilted down. Add the daughter’s head looking up and away. Sketch hair shapes loosely—short and textured for him, a ponytail for her. -
Outline clothing folds:
Add details to their clothing. Give the father a collared shirt with natural creases at the armpits and waist. Draw the daughter in a chunky sweater or coat, indicating the fabric’s weight where it rests on his shoulders. -
Position the balloons:
To the left of the figures, lightly draw a cluster of about ten oval shapes for the balloons. Vary their heights and sizes slightly to make the bunch look natural. -
Connect the strings:
Draw faint, slightly curved lines from the bottom of each balloon converging at the father’s left hand (which is hidden/low). Bunch the strings together at a single point and add a loose bow sketch.
Step 2: Inking the Lines
-
Outline the figures:
Using a 0.3mm fine liner, go over your pencil sketch. Use broken, sketchy lines rather than solid continuous ones to maintain a hand-drawn, artistic vibe. Focus on the hair strands and clothing wrinkles. -
Ink the balloons:
Switch to a finer 0.1mm pen for the balloons. Outline them carefully but keep the lines delicate. Draw the strings with quick, confident strokes so they don’t look shaky. -
Erase pencil marks:
Once the ink is completely dry (give it a few minutes to be safe), gently use a kneaded eraser to lift away all the graphite guidelines.
Ink Confidence
Don’t press hard with the pen. Let the nib glide. Gaps in the lines are okay; they let the watercolor breathe and keep the drawing looking spontaneous.
Step 3: Watercolor Application
-
Paint the skin and hair:
Mix a very watery beige or peach tone for the visible skin on their necks and ears. For the hair, use a diluted brown, layering a darker stroke near the roots and part lines for depth. -
Color the clothing:
I prefer painting the father’s shirt in a warm, neutral grey or beige, keeping it very light. Paint the daughter’s sweater a soft sage green or pale blue. Let the water pool slightly at the edges for a classic watercolor look. -
Add darker tones:
Use a darker grey or diluted black for the father’s trousers. Apply the paint unevenly to suggest denim texture and shadows. -
Fill the balloons:
Choose a muted pastel palette—dusty pinks, sage greens, and soft yellows. Paint each balloon, leaving a tiny white unpainted spot near the top right of each one to represent a highlight. -
Ground the image:
Mix a very watery green-grey wash. Making loose, irregular strokes, dab in some abstract ‘ground’ around the father’s legs so the figures don’t feel like they are floating in white space. -
Confetti details:
Using the tip of your smallest brush or a colored marker, add tiny dots of green surrounding the balloons and figures to create a magical, festive atmosphere.
Make it Personal
Change the hair color or style to match the real-life subjects. You strictly personalize the balloon colors to match a specific event theme or favorite colors.
Now you have a timeless keepsake that perfectly captures childhood wonder in soft pastel tones
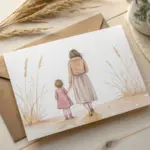
Simple One-Line Father-Daughter Outline
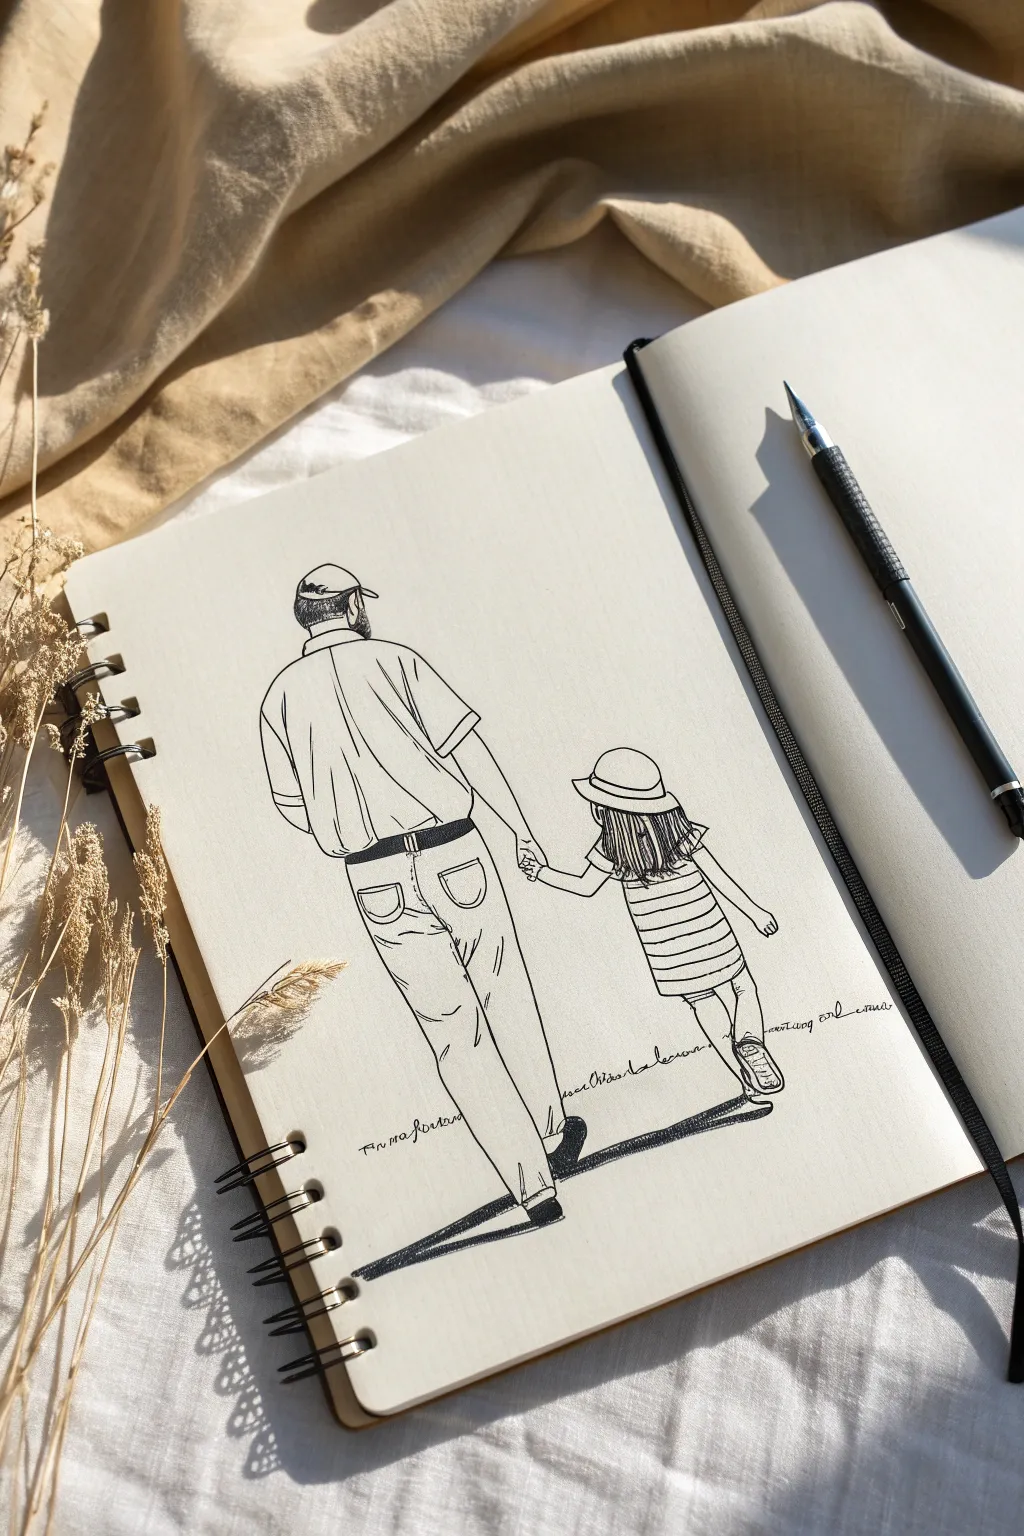
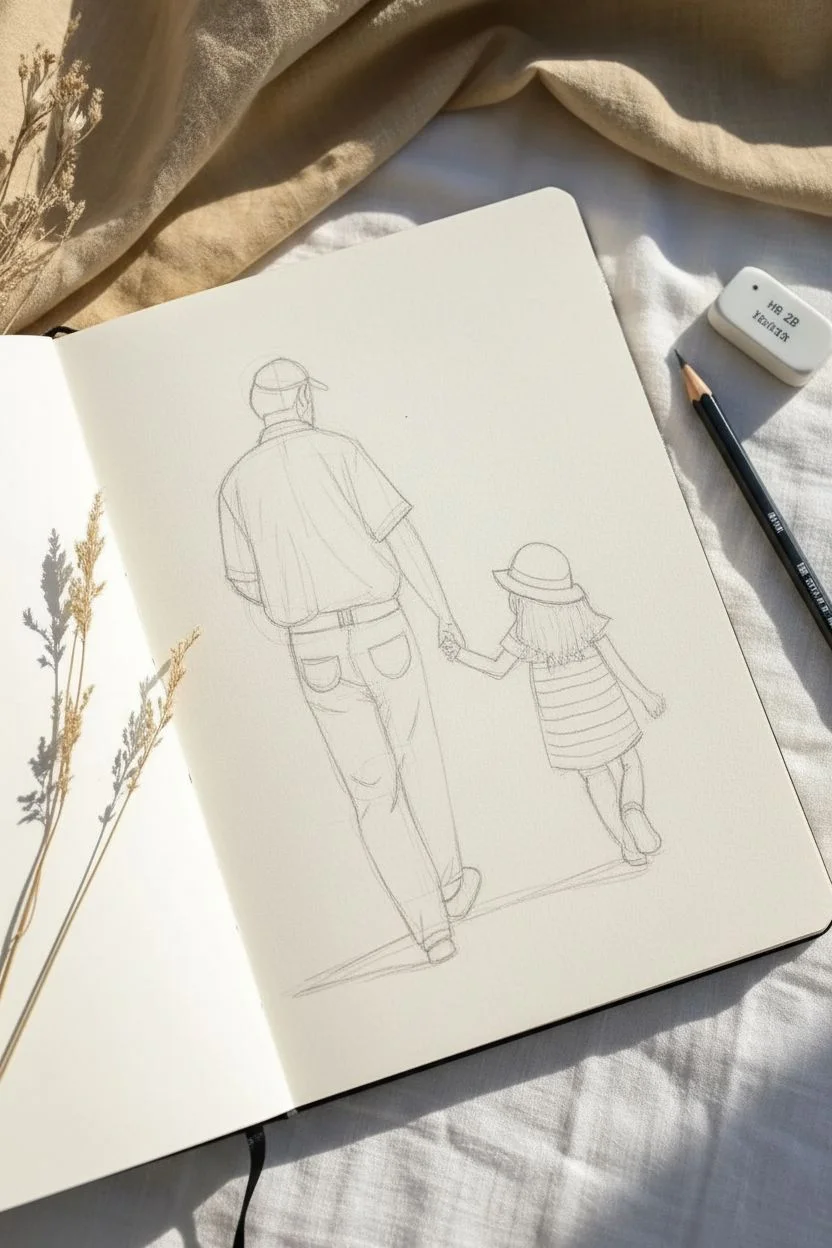
Capture a heartwarming moment of connection with this father-daughter line drawing, featuring clean outlines and subtle hatching details. This approach focuses on capturing the casual posture and bond between the figures using simple ink strokes on cream paper.
Step-by-Step
Materials
- Spiral-bound sketchbook (cream or off-white paper preferred)
- HB or 2B pencil for sketching
- Kneadable eraser
- Fine liner pen (0.3mm or 0.5mm, black)
- Thicker marker or brush pen (optional, for shadows)
Step 1: Pencil Under-Drawing
-
Establish the Heights:
Begin by lightly marking the top of the father’s head and the top of the daughter’s hat. The daughter should reach roughly to the father’s elbow level to get the proportions right. -
Outline the Father’s Head:
Sketch a simple oval for the head, adding the curved brim of a baseball cap facing slightly to the right. Indicate the back of the neck and a hint of a beard. -
Draft the Father’s Torso:
Draw the shoulders sloping largely downward. Create the shape of his shirt, making it loose and untucked, with a short sleeve ending mid-bicep. -
Add Legs and Stride:
Draw the father’s trousers. The left leg should be straight, bearing weight, while the right leg bends slightly backward as if he is pushing off to walk. Use relaxed lines for wrinkles near the knees. -
Sketch the Daughter’s Hat and Hair:
To the right, draw a rounded hat shape with a wide brim. Let her hair flow down from under the hat, hitting just past her shoulders. -
Draw the Daughter’s Dress:
Outline a simple A-line dress or top. Create horizontal guides across it to mark where the stripes will go later. Add her small legs beneath, capturing a mid-step motion. -
Connect the Hands:
This is crucial: draw the father’s arm extending down and the daughter’s arm reaching up. Sketch their hands interlocking gently.
Uneven Stripes?
If the girl’s dress stripes look wonky, don’t worry. Wavy lines actually add movement and charm to the fabric, making it look deeper and more realistic.
Step 2: Inking the Details
-
Define the Father’s Clothes:
Using your fine liner, go over the pencil lines of the father’s shirt. Add vertical fold lines down the back of the shirt to suggest fabric drape. -
Detail the Belt and Pants:
Ink the belt loops and the belt itself darker than the rest. Outline the back pockets of the jeans, adding small arcs for stitching detail. -
Ink the Daughter’s Outfit:
Carefully trace the daughter’s hat and hair. When inking her dress, fill in the horizontal stripes, leaving white space between them for a patterned look. -
Refine the Connection:
Trace the joined hands carefully. You don’t need to draw every finger; a simplified shape often communicates the grip better than a detailed anatomical drawing. -
Add Textural Hatching:
I find that adding small, parallel hatch marks on the father’s hair and beard gives great texture. Do the same for the daughter’s hair to show flow. -
Ground the Figures:
Draw a long, horizontal shadow stretching to the right from their feet. Use heavy, solid black strokes here to firmly plant the figures on the ground.
Pro Tip: Shadow Anchor
Make the cast shadow the darkest, thickest part of your entire drawing. This high contrast instantly makes the delicate line work pop off the page.
Step 3: Final Touches
-
Add Handwritten Context:
Lightly sketch a wavy, horizontal line of cursive text just above the shadow line. This artistic element acts as a creative horizon line. -
Erase Pencil Marks:
Wait until the ink is completely dry to avoid smudging. Gently rub the kneadable eraser over the entire drawing to lift the initial graphite guide lines. -
Assess Contrast:
Look for areas that need more weight. You might want to thicken the line on the shadowed side of the father’s pants or under the daughter’s dress hem.
Now you have a timeless keepsake that perfectly illustrates the guidance of fatherhood
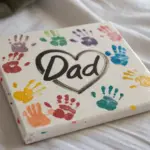
Father and Daughter Inside a Heart Outline
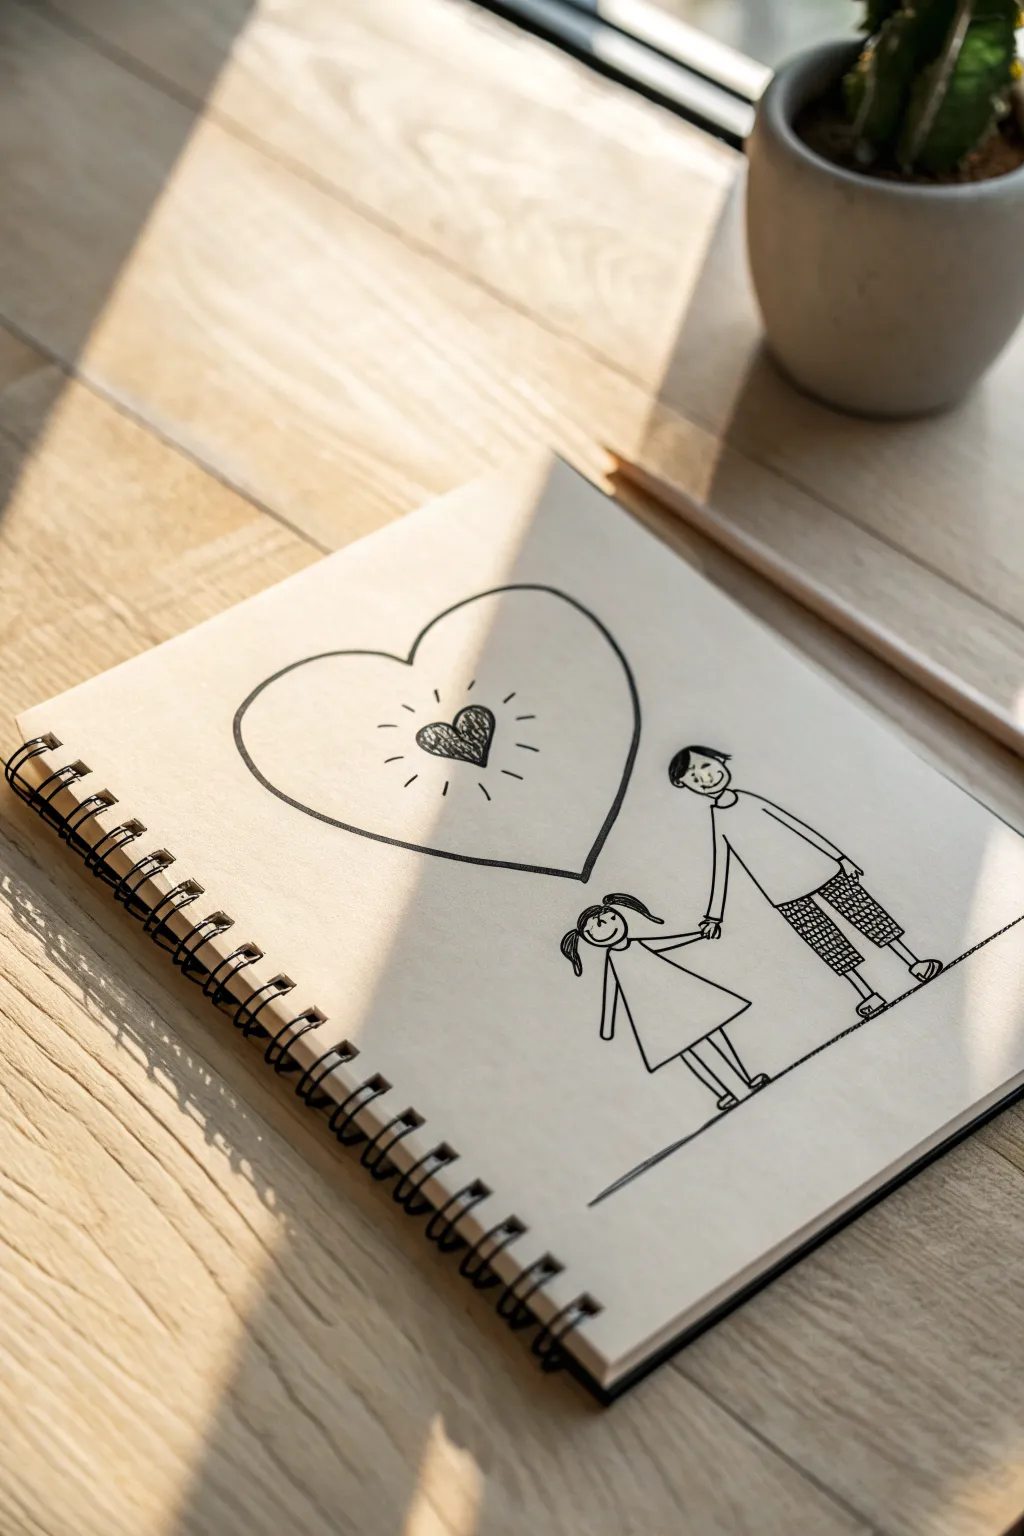
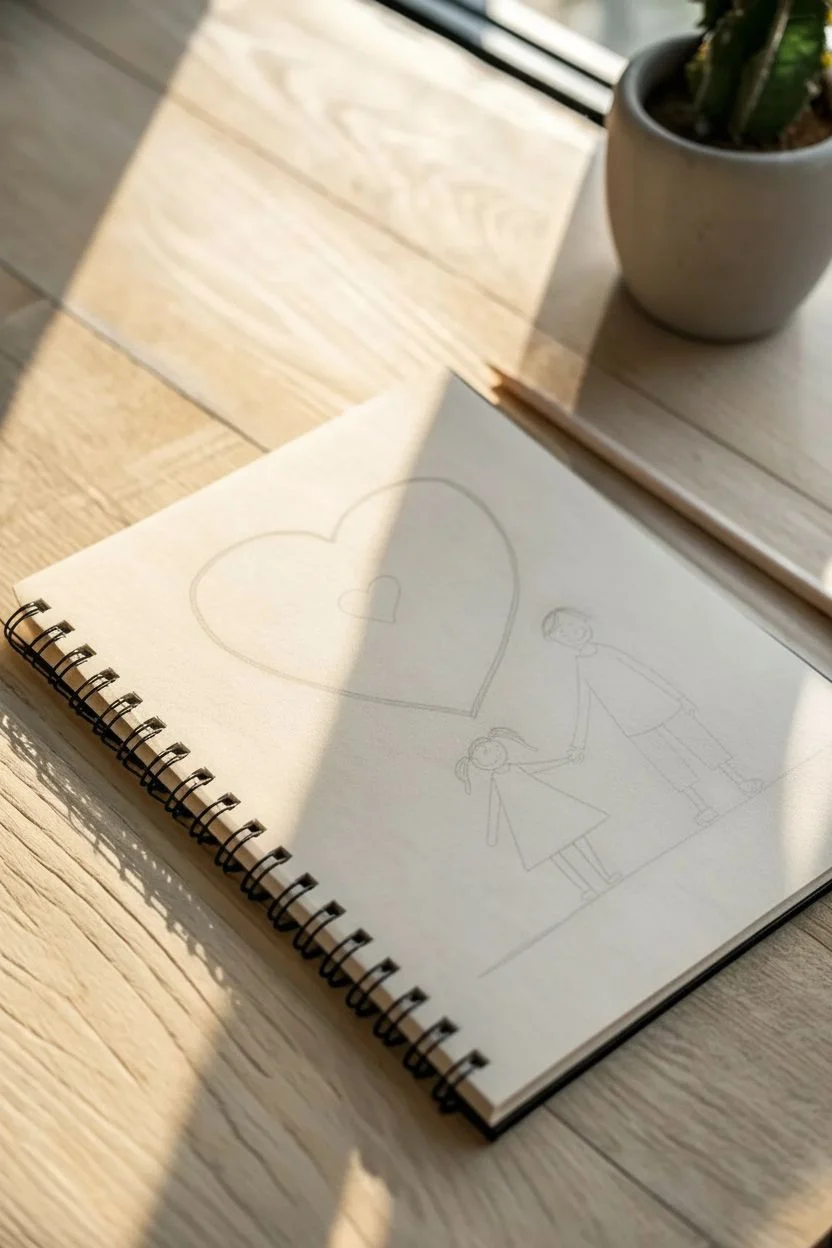
This heartwarming sketch captures the bond between father and daughter with simple, expressive lines and a glowing motif. The clean black ink on textured paper creates a charming, minimalist aesthetic perfect for greeting cards or sketchbook memories.
Step-by-Step Guide
Materials
- Spiral-bound sketchbook (heavyweight cream or off-white paper)
- Black fineliner pen (0.5mm or 0.8mm for main lines)
- Thinner black fineliner (0.1mm or 0.3mm for details)
- Pencil (HB or 2B for initial sketching)
- Soft eraser
- Ruler (optional)
- Warm sunlight or good lighting source
Step 1: Setting the Scene
-
Initial Outline:
Begin by lightly sketching the large heart shape in the upper center of the page with your pencil. Make it wide and generous, occupying about a third of the page height. -
Positioning the Figures:
Below the heart to the right, sketch simple stick-figure guidelines for the father and daughter. The father should be taller on the right, and the daughter shorter on the left. -
Ground Line:
Draw a faint horizontal line beneath their feet to ground the drawing, ensuring they aren’t floating in space.
Step 2: Drawing the Glowing Heart
-
Inking the Large Heart:
Switch to your thicker fineliner (0.5mm/0.8mm). Carefully trace over your pencil line for the large outer heart. Try to do each curve in one smooth, confident stroke rather than short scratches. -
The Inner Heart:
Inside the large heart, slightly off-center to the left, draw a smaller heart shape. -
Adding Texture:
Fill this smaller heart with tight scribbles or cross-hatching to make it dark and textured. This contrast draws the eye immediately. -
Radiating Light:
Using the thinner pen, draw short dash-like lines radiating outward from the scribbled heart. Keep them evenly spaced to simulate a glowing effect.
Uneven Heart Shape?
If your large heart looks lopsided, don’t worry! Simplicity is key here. Just thicken the line on the thinner side to balance the visual weight without redesigning the whole shape.
Step 3: Sketching the Characters
-
Father’s Head:
Draw an oval for the father’s head. Add simple curved lines for hair parted on the side, dot eyes, and a wide, gentle smile. -
Father’s Body:
Sketch a rectangular shape for his torso. Add long, slender sleeves for his arms. -
Patterned Pants:
Draw the legs of his trousers. To add visual interest similar to the photo, fill the pants with a cross-hatch or plaid pattern using the thinner pen. -
Daughter’s Face:
Draw a circle for the daughter’s head. Give her pigtails by drawing curved lines extending from the sides of her head. -
Daughter’s Dress:
Create a simple triangle shape for her dress. Add stick legs beneath the hemline. -
Connecting Hands:
Draw their arms extending toward each other. Where the hands meet, simple interlocking loops or a small circle can suggest holding hands without needing complex anatomy. -
Final Details:
Add small semi-circles for shoes on both characters. Trace the ground line with a single solid stroke. -
Refining Lines:
Go over the character outlines with your thicker pen to make them stand out against the paper.
Make it Personal
Customize the clothing details! Add stripes to the girl’s dress or a specific hat to the dad to match the real-life subjects you are drawing.
Step 4: Finishing Touches
-
Erasing:
Once the ink is completely dry—I usually wait at least five minutes to be safe—gently erase all underlying pencil marks. -
Reviewing:
Check for any lines that need thickening. Sometimes going over the bottom of the letters or shoes adds a nice visual weight.
Now you have a sweet, permanent reminder of a special bond captured on paper


Have a question or want to share your own experience? I'd love to hear from you in the comments below!