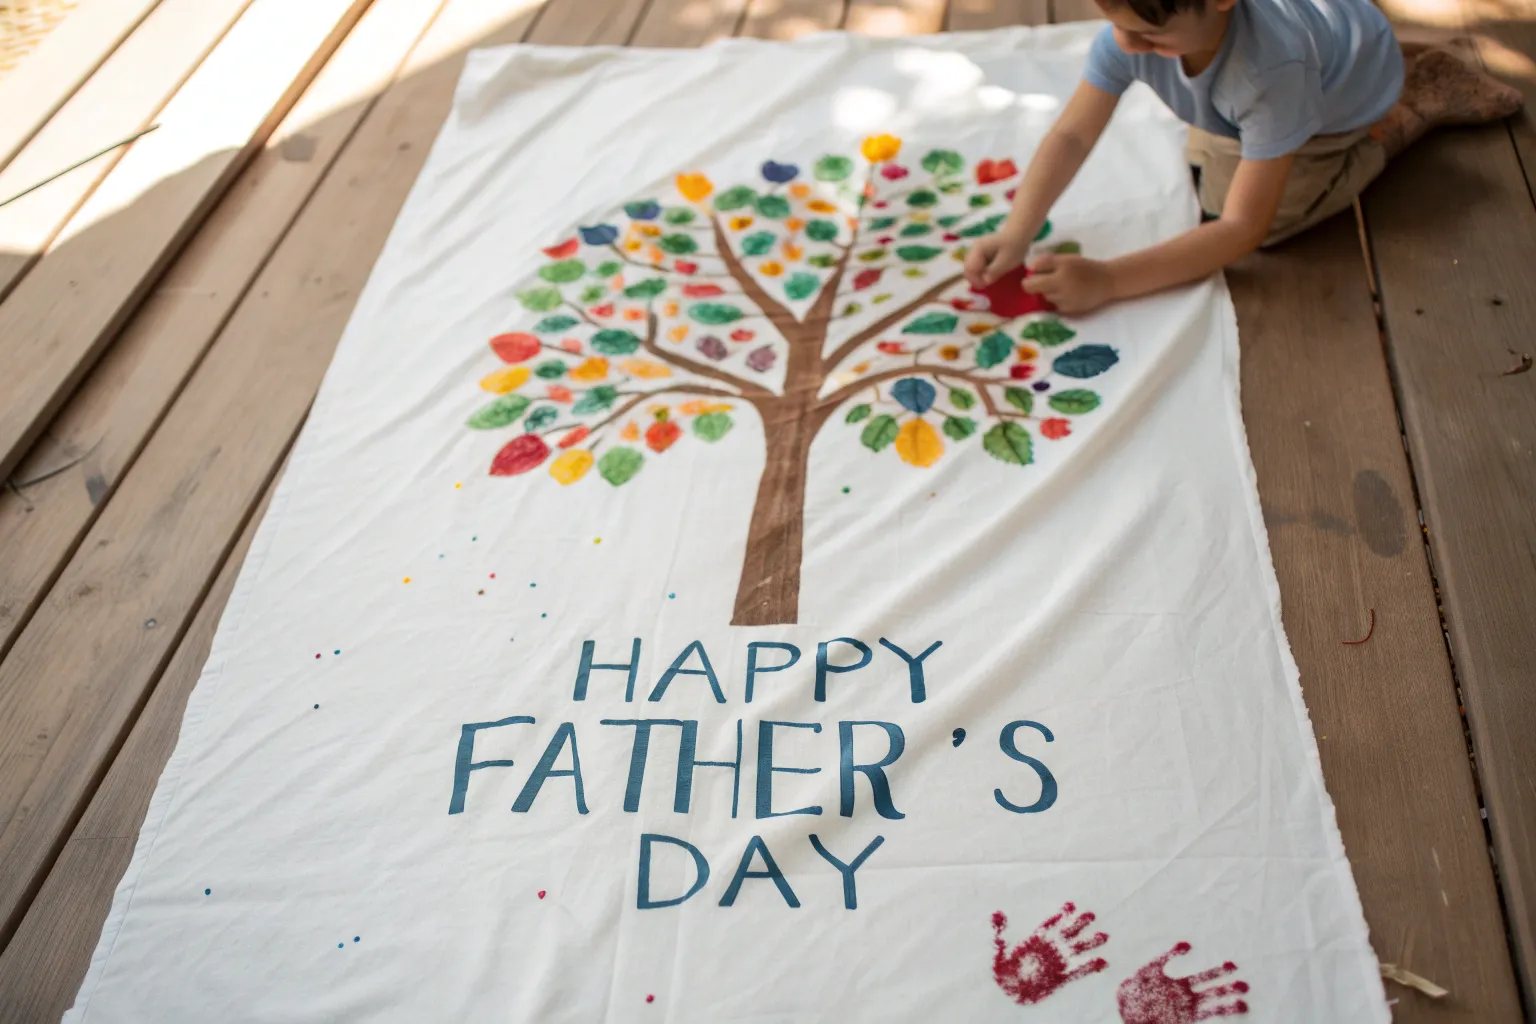
Father’s Day finger painting is my favorite kind of art-making: simple, sweet, and packed with personality. These ideas keep the process easy for little hands while turning every print and smudge into a gift-worthy keepsake for Dad.
Fingerprint “Dad” Letter Art
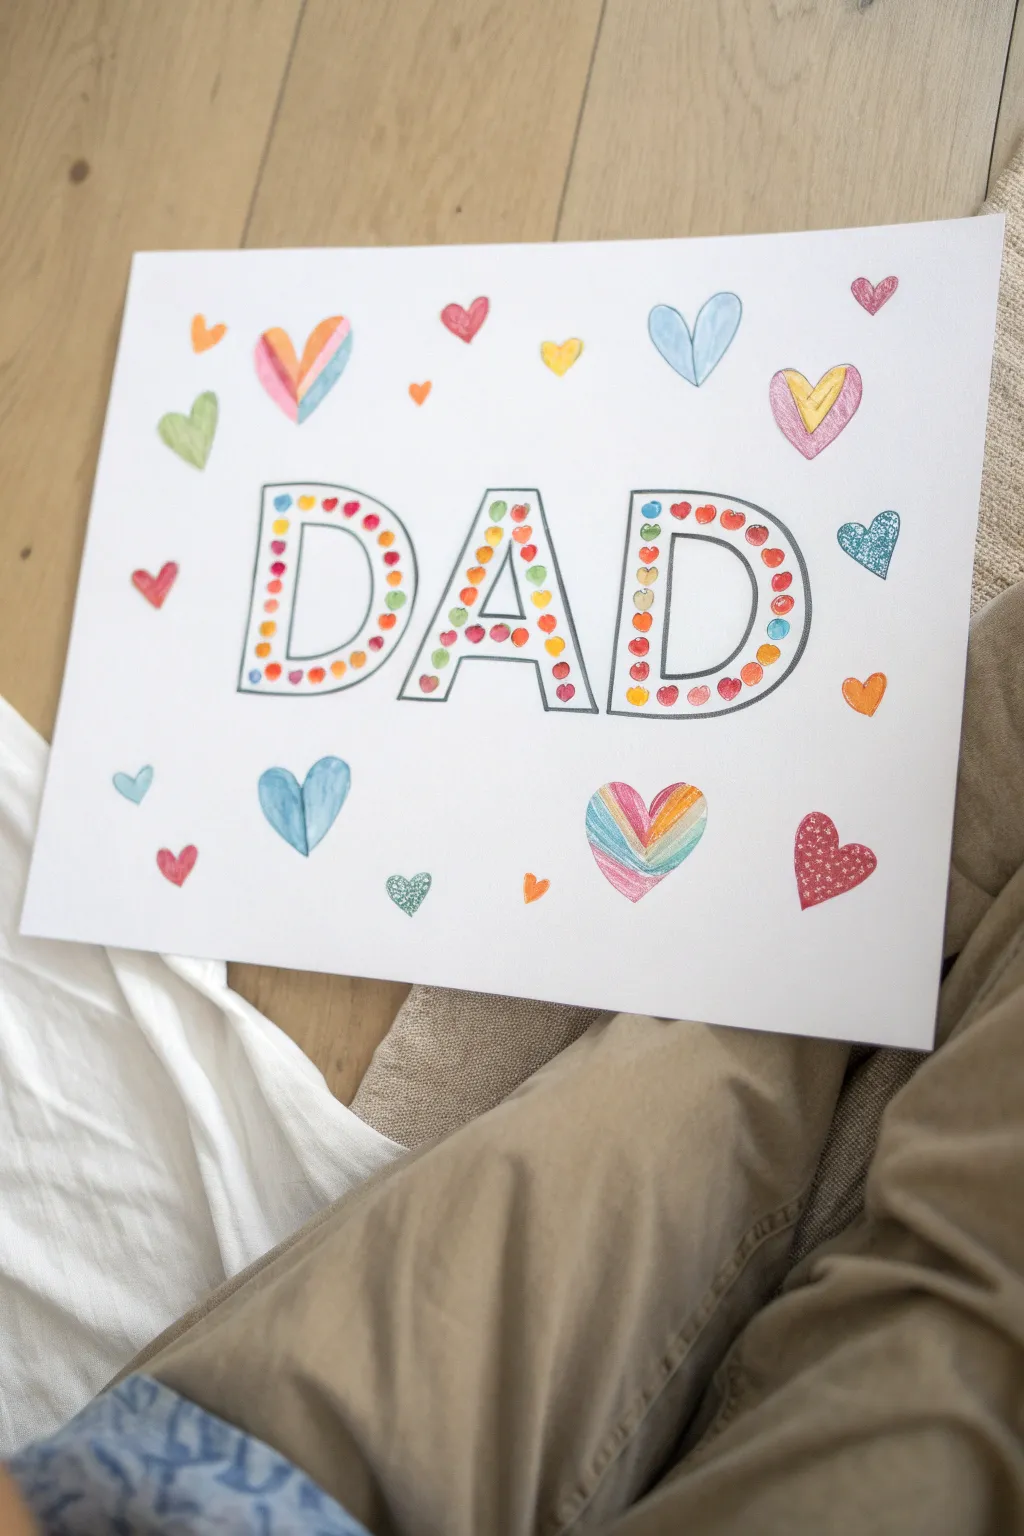
This bright and heartfelt poster features the word “DAD” filled with colorful fingerprints, surrounded by a whimsical collection of hand-drawn hearts. It’s a wonderful way to combine precision drawing with the messy fun of finger painting for a keepsake he’ll cherish.
Detailed Instructions
Materials
- Large sheet of white cardstock or heavy drawing paper (11×17 or A3 is ideal)
- Black ink pen or fine-tip marker
- Pencil and eraser
- Colored pencils or crayons (bright rainbow colors)
- Washable craft paints or ink pads (red, orange, yellow, green, blue)
- Ruler
Step 1: Drafting the Letters
-
Plan your layout:
Lay your large paper on a flat surface. Using a pencil and ruler, lightly mark a horizontal center line to help keep your letters straight. -
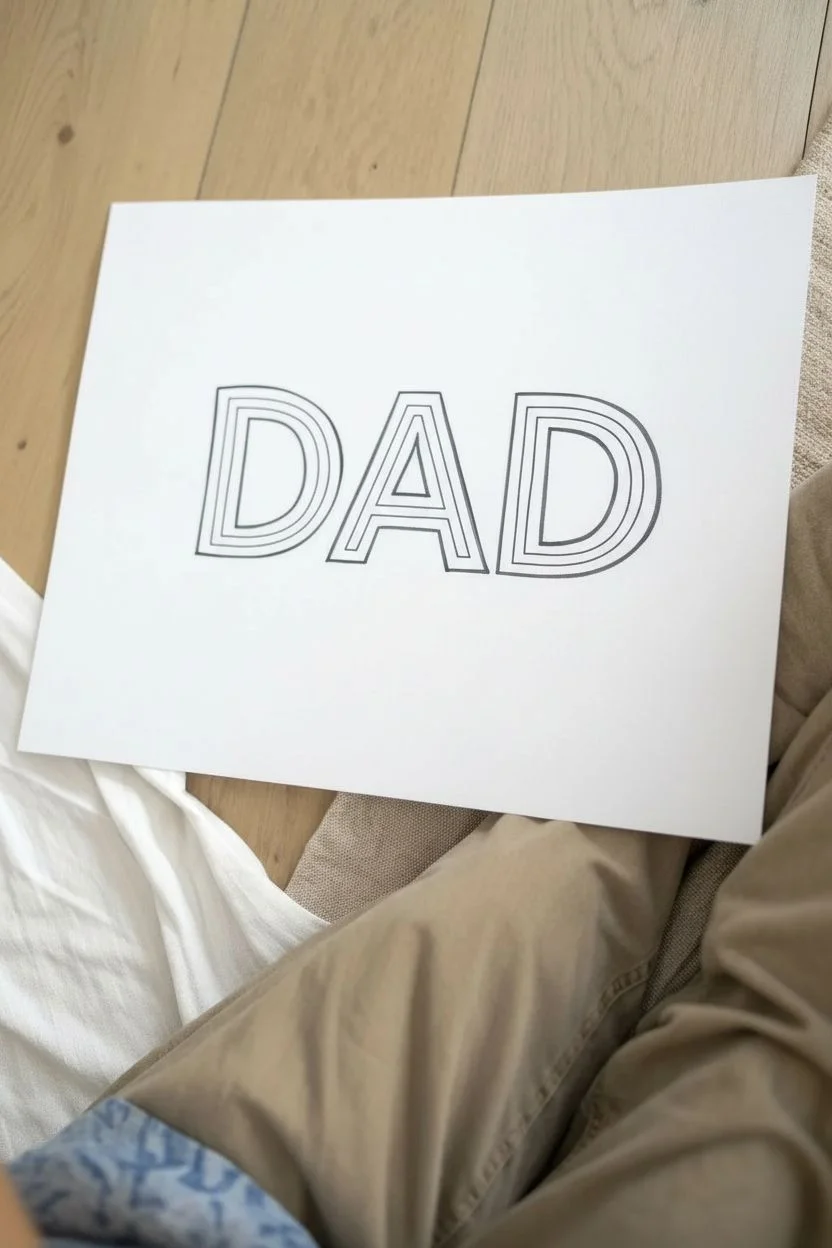
Outline the letters:
Lightly sketch the word “DAD” in large, block bubble letters. Aim for the letters to be about 4-5 inches tall so there is plenty of room inside for the fingerprints. -
Create the border:
Draw a second line inside each letter, leaving a gap of about half an inch between the outer edge and this inner opening. This creates the ‘hollow’ path we will fill later. -
Ink the outlines:
Once you are happy with the size and spacing, trace over your pencil lines with a black ink pen or fine-tip marker. I like to use a ruler for the straight edges of the ‘A’ and ‘D’ to keep them crisp. -
Erase guidelines:
Wait a moment for the ink to dry completely, then gently erase all remaining pencil sketch marks to leave a clean black-and-white outline.
Little Finger Tip
Use your child’s pinky finger for the prints inside the letters. The smaller size fits the narrow letter channels better than a thumb or index finger.
Step 2: Adding the Fingerprints
-
Prepare your paints:
Squeeze small amounts of red, orange, yellow, green, and blue washable paint onto a palette or paper plate. If using ink pads, open them all up now. -
Start with the first D:
Dip a fingertip (index or pinky works best for detail) into your first color. Press it gently inside the channel of the first letter ‘D’. -
Create a pattern:
Continue adding fingerprints, switching colors frequently to create a confetti-like effect. Try to keep the prints inside the lines, but don’t worry if they overlap slightly. -
Fill the A:
Move on to the letter ‘A’, following the same colorful process. Ensure you follow the shape of the letter, going up, down, and across the bridge. -
Finish the last D:
Complete the word by filling the final ‘D’. If the paint feels too thick, blot your finger on a scrap paper once before touching the artwork. -
Let it dry:
Set the paper aside for 10-15 minutes to ensure the paint or ink is fully dry before you start drawing around it.
Step 3: Decorating with Hearts
-
Sketch surrounding hearts:
Using your pencil again, lightly sketch hearts of various sizes and orientations scattered around the word “DAD”. Make sure to vary the angles so they look playful. -
Outline the hearts:
Trace over these heart sketches with your black pen or fine-tip marker once you are satisfied with their placement. -
Color: Striped hearts:
Select a few larger hearts to fill with stripes. Using colored pencils, draw diagonal bands of rainbow colors inside them. -
Color: Solid hearts:
Color several smaller hearts in solid, single colors like pastel blue, bright red, or soft pink. -
Color: Patterned hearts:
Get creative with the remaining hearts by adding tiny polka dots or scribble textures inside them for visual interest. -
Add tiny fillers:
Look for any large empty white spaces and draw very tiny solid hearts (like the orange and yellow ones shown) to balance the composition. -
Final check:
Give the entire artwork a final look over. Erase any stray pencil marks and clean up any smudges if necessary.
Smudge Alert
If you accidentally smudge paint outside the lines, wait for it to dry, then turn the smudge into a new heart or doodle to cover the mistake.
This vibrant piece is now ready to be framed or hung on the fridge to brighten Dad’s day


Handprint “Best Dad” Trophy
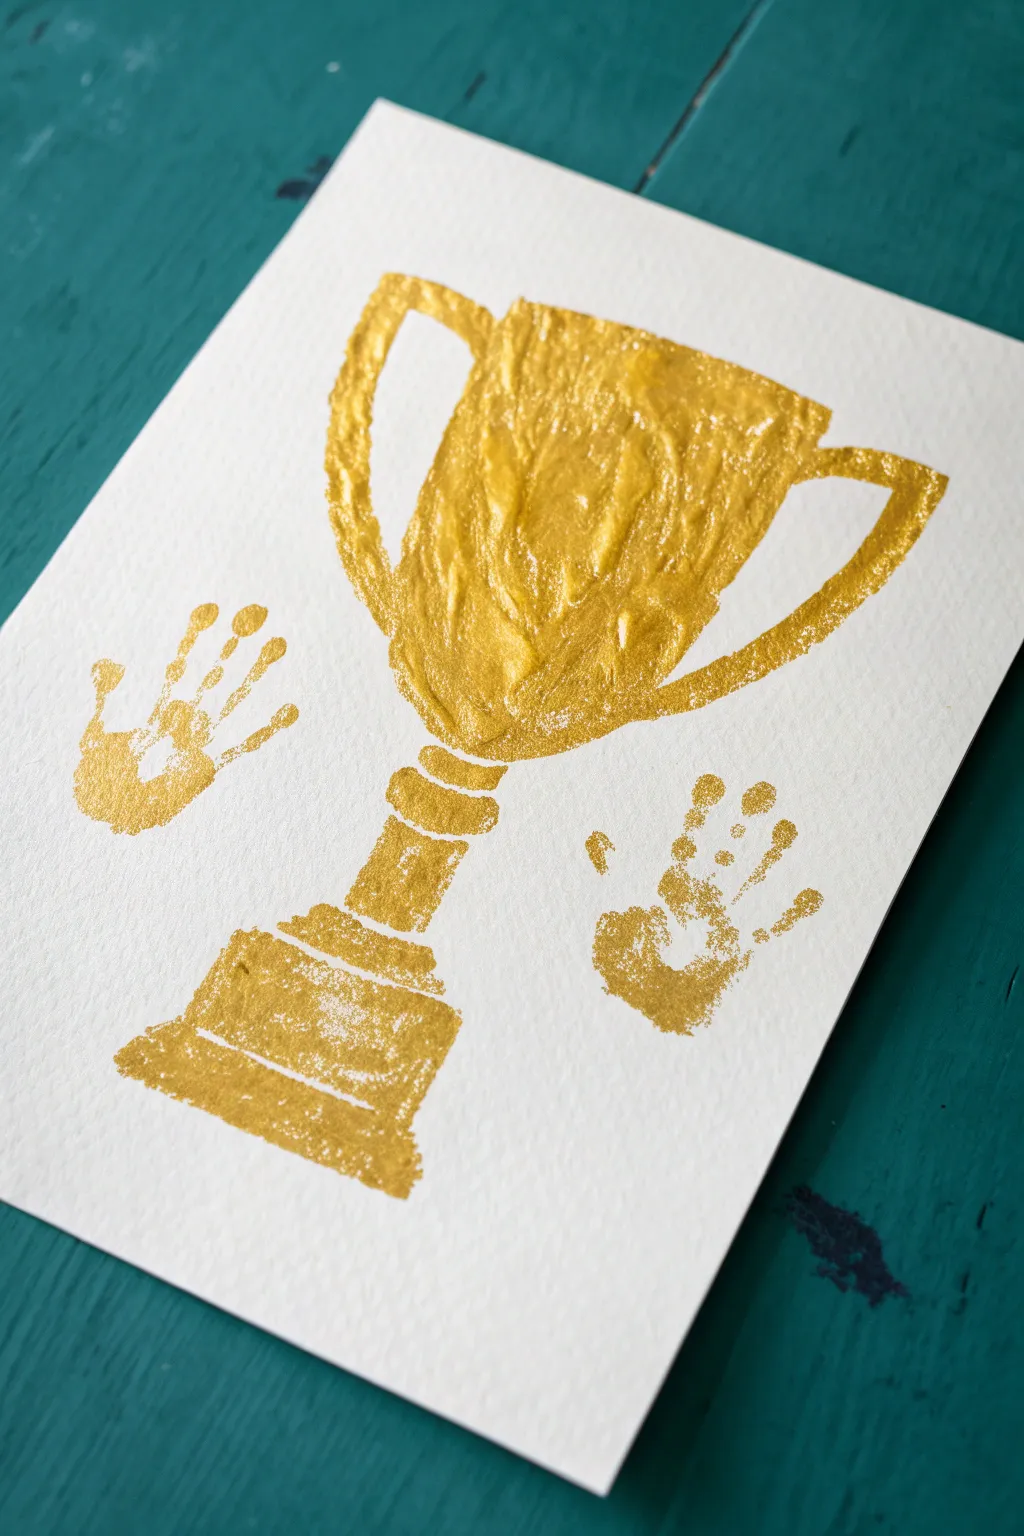
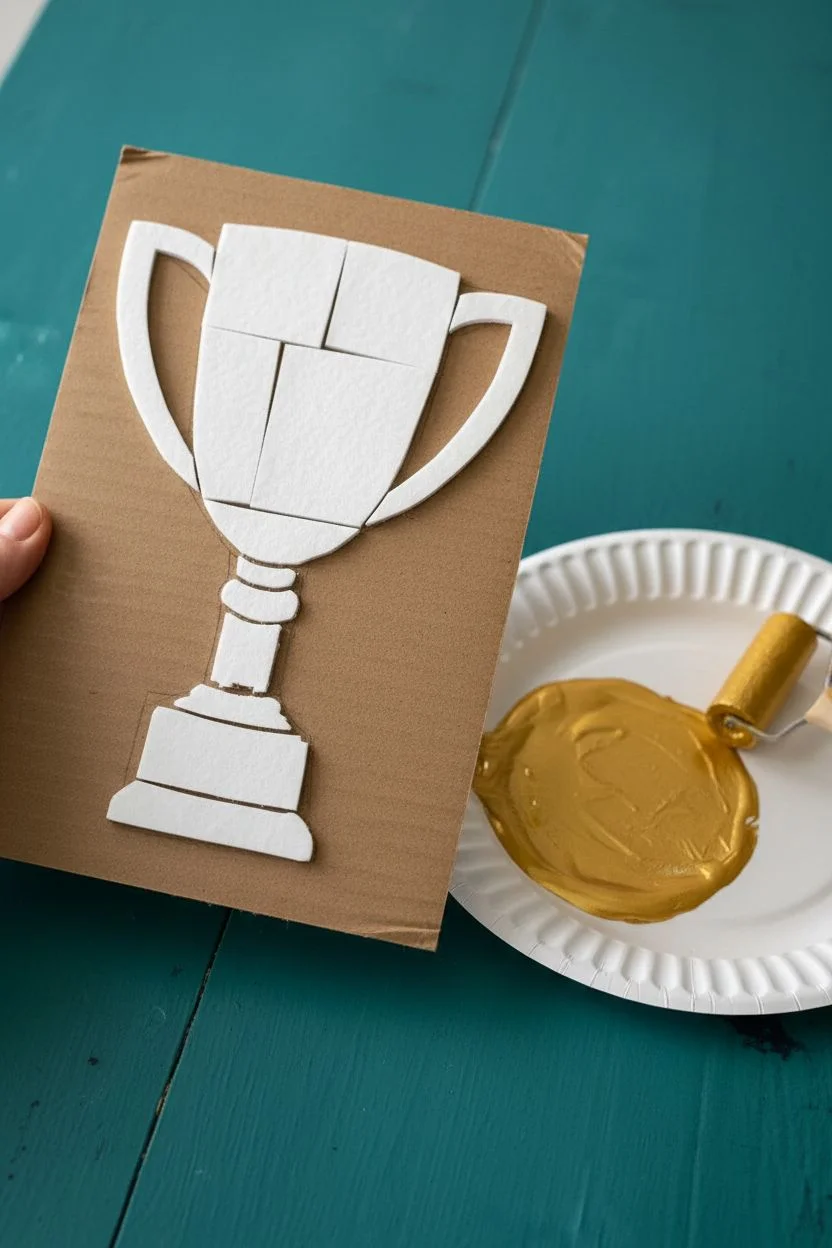
Celebrate the champion in your life with this striking gold trophy art project that captures little hands forever. The textured, metallic finish gives it a classic linocut look, making it a sophisticated yet sentimental Father’s Day keepsake.
Step-by-Step Tutorial
Materials
- Heavyweight white textured cardstock or watercolor paper
- Gold metallic acrylic paint
- Adhesive craft foam sheet
- Small roller (brayer) or foam paintbrush
- Piece of cardboard or stiff backing board
- Scissors
- Pencil
- Paper plate or palette
- Protective table covering
Step 1: Creating the Trophy Stamp
-
Sketch the trophy shape:
Begin by drawing a simple trophy silhouette on the backing of your adhesive foam sheet. Include the cup, two handles, a stem, and a tiered base. -
Simplify the details:
Keep the drawn lines bold. You want a shape that is easy to cut out and will print clearly, so avoid tiny, intricate details. -
Cut out the foam pieces:
Carefully cut along your pencil lines with scissors. If your trophy has separate sections (like the cup detached from the base), that is actually better for creating the spaced-out look. -
Assemble the stamp:
Peel the backing off the adhesive foam pieces and stick them onto your piece of cardboard. Arrange them to form the complete trophy shape. -
Check spacing:
Ensure there is a tiny gap between the cup and the stem, or the stem and the base, just like in the photo. This negative space adds to the authentic printmaking look.
Step 2: Printing the Trophy
-
Prepare the gold paint:
Squeeze a generous amount of metallic gold acrylic paint onto a paper plate or palette. -
Load the roller:
Roll your brayer (or dip your foam brush) into the paint until it is evenly coated but not dripping. -
Apply paint to the stamp:
Roll or dab the paint over your foam trophy stamp. Aim for a thick, textured layer of paint rather than a smooth, thin one to achieve that rich finish. -
Position the paper:
Place your high-quality white paper on a flat surface. Position the stamp face down in the center of the paper. -
Press and print:
Press down firmly and evenly over the entire back of the cardboard. Be careful not to wiggle the stamp to avoid smudging the edges. -
Reveal the image:
Lift the stamp straight up to reveal your golden trophy. The foam texture will leave a wonderful, slightly stippled effect.
Pro Tip: Texture Magic
Don’t smooth the paint too much. The uneven texture reflects light better, making the gold sparkle more than a flat layer would.
Step 3: Adding the Handprints
-
Prepare little hands:
Make sure your child’s hands are clean and dry before starting this step. It’s helpful to have wipes nearby just in case. -
Apply paint to palms:
Use a foam brush to paint a layer of the same gold metallic paint onto the child’s palm and fingers. I find tickling their hand a little helps relax stiff fingers. -
Position the first print:
Guide one hand to the left of the trophy cup. The fingers should point slightly outward and upward, framing the trophy. -
Press for the print:
Press the hand down firmly, ensuring the palm and each fingertip makes contact with the paper. -
Lift carefully:
Lift the hand straight up to keep the print crisp. Repeat the process with the other hand on the right side of the trophy. -
Let it dry completely:
Set the artwork aside in a safe place. Metallic paints can sometimes take a little longer to dry fully, especially where the paint is thick.
Level Up: Personalized Prize
Once dry, use a black fine-tip marker to write ‘World’s Best Dad’ or the year directly onto the center of the trophy cup.
Now you have a shimmering award fit for a king to present on Father’s Day


“I Love You This Much” Handprint Hug
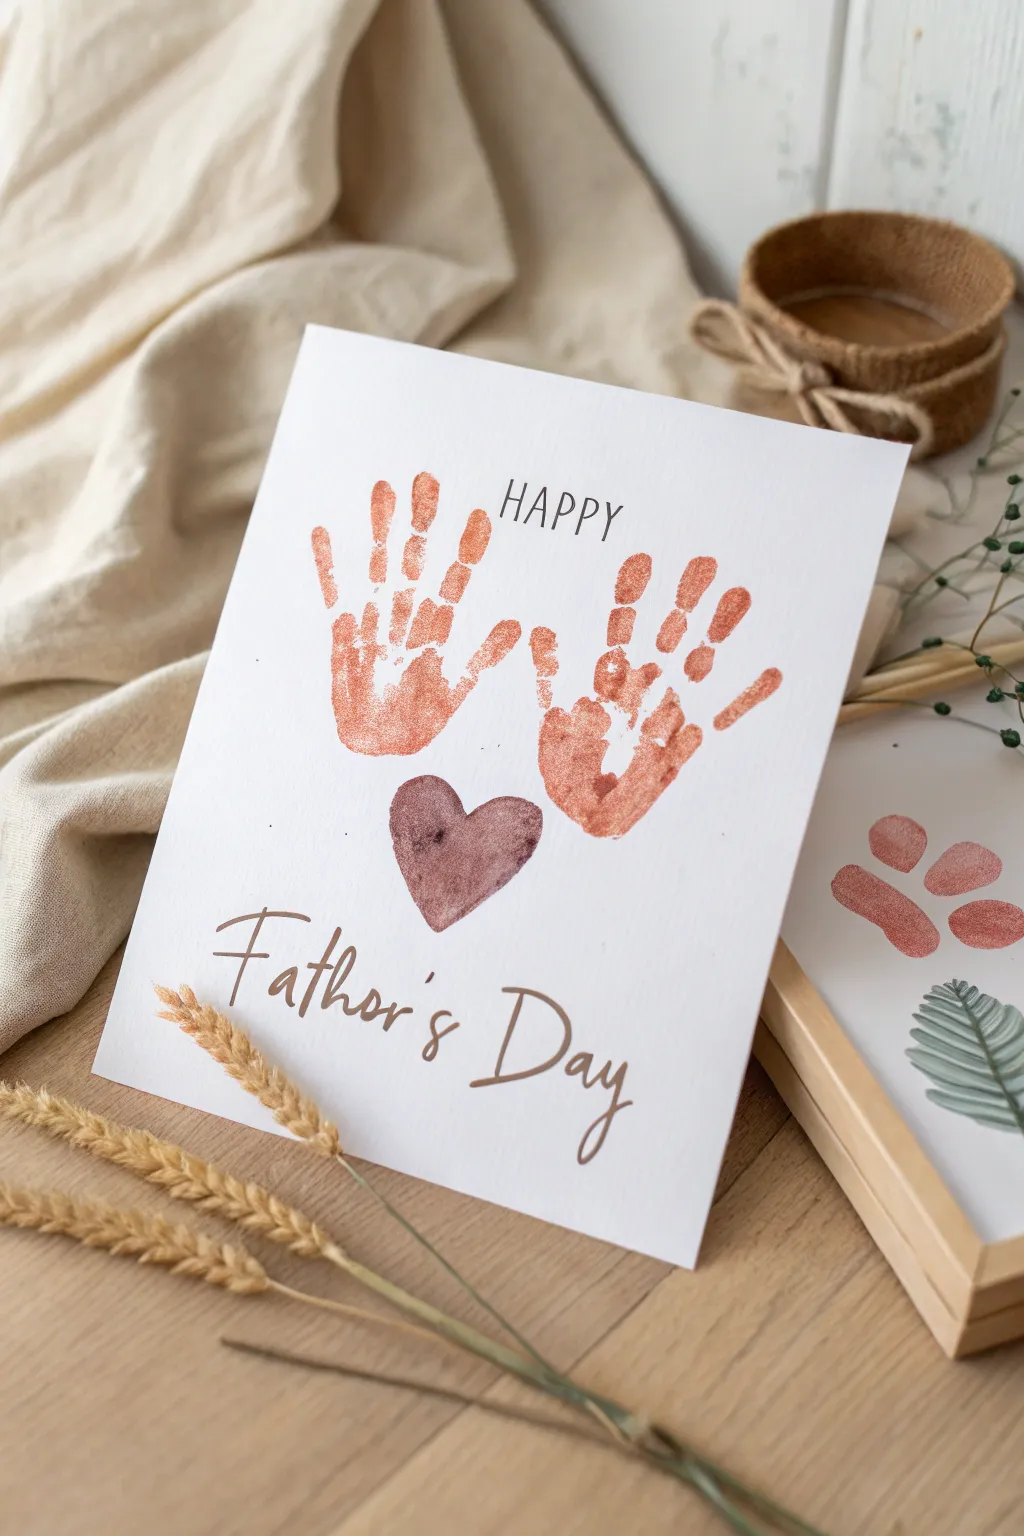
Capture the perfect memory with this elegant take on a classic handprint craft. Using shimmering metallic paint and crisp cardstock, this project transforms simple prints into a sophisticated Father’s Day greeting.
Step-by-Step
Materials
- Heavyweight white cardstock (A4 or 8×10 to fold)
- Metallic acrylic paint (copper or bronze)
- Dark brown or maroon acrylic paint
- Medium paintbrush (flat)
- Fine liner brush or black marker
- Paper towels or wet wipes
- Scrap paper for testing
- Small painting dish or palette
Step 1: Preparation & First Prints
-
Prepare your workspace:
Lay down a protective covering on your table. Squeeze a generous amount of the metallic copper paint onto your palette. It helps to have wipes nearby for quick cleanups. -
Position the card:
Fold your cardstock if you are making a folding card, or lay it flat if doing an art print. Orient it vertically (portrait style). -
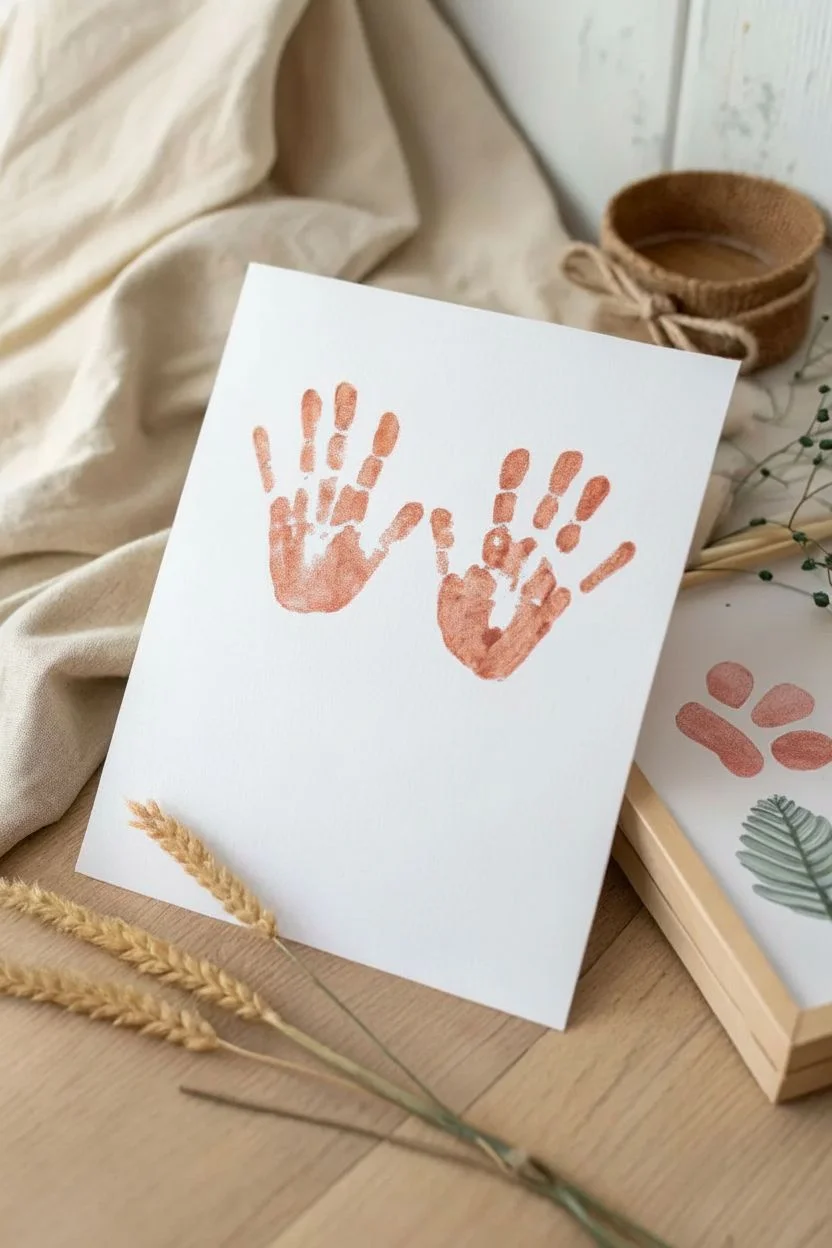
Apply paint to the first hand:
Using the flat paintbrush, coat the child’s left hand with the metallic copper paint. Ensure an even layer—not too thick to squish, but not too dry. -
Create the left print:
Guide the hand to the upper left quadrant of the paper. Press firmly on the palm and each finger to ensure good contact, then lift straight up to avoid smearing. -
Print the right hand:
Repeat the painting process with the child’s right hand. Position this print to the right of the first one, leaving a small gap between the thumbs, slightly angled outward. -
Initial dry time:
Allow the handprints to dry completely. Metallic acrylics can sometimes take a little longer to set than matte paints, so give it about 15-20 minutes.
Smudge Rescue
If a handprint smudges, turn it into art! Use a damp Q-tip to shape the smudge into a heart or abstract shape, or wait for it to dry and paint a small heart over the error.
Step 2: Adding the Heart
-
Mix your heart color:
Prepare your dark brown or maroon paint. You want a matte, earthy tone to contrast with the shiny handprints. -
Paint the heart shape:
Using a small-to-medium brush, paint a classic heart shape directly below the space between the two handprints. It should act as a visual anchor for the composition. -
Texturing the heart:
I like to dab the paint slightly rather than using long smooth strokes here; this creates a subtle watercolor-like texture that matches the organic feel of the handprints. -
Second drying phase:
Let the heart dry completely before moving on to the text to prevent any hand smudging.
Pro Tip: Better Prints
For the sharpest prints, apply paint with a sponge brush rather than a bristle brush. It creates a more even texture and prevents slippery globs of paint.
Step 3: Lettering & Details
-
Draft the text layout:
Lightly visualize or pencil in where your text will go. ‘HAPPY’ sits centered above the hands, and ‘Father’s Day’ flows below the heart. -
Write the top text:
Use a fine liner brush with black paint, or a high-quality black marker. Write ‘HAPPY’ in simple, thin capital letters centered above the gap between the middle fingers. -
Begin the bottom script:
Below the heart, switch to a looser, handwritten script style. Start painting the word ‘Father’s’ on the left side, letting the letters flow naturally. -
Complete the phrase:
Finish with ‘Day’ on the right side. Try to keep the baseline relatively even, though a slight upward slant adds charm. -
Refine the lines:
Check your lettering for any thin spots. If you used paint, go over the downstrokes again to thicken them slightly for a faux-calligraphy look. -
Final inspection:
Check for any stray paint specks. If you find small smudges, you can often gently scratch them off heavy cardstock with a craft knife once fully dry.
Now you have a timeless, metallic keepsake that captures a moment in time beautifully


“Love Bug” Fingerprint Caterpillar
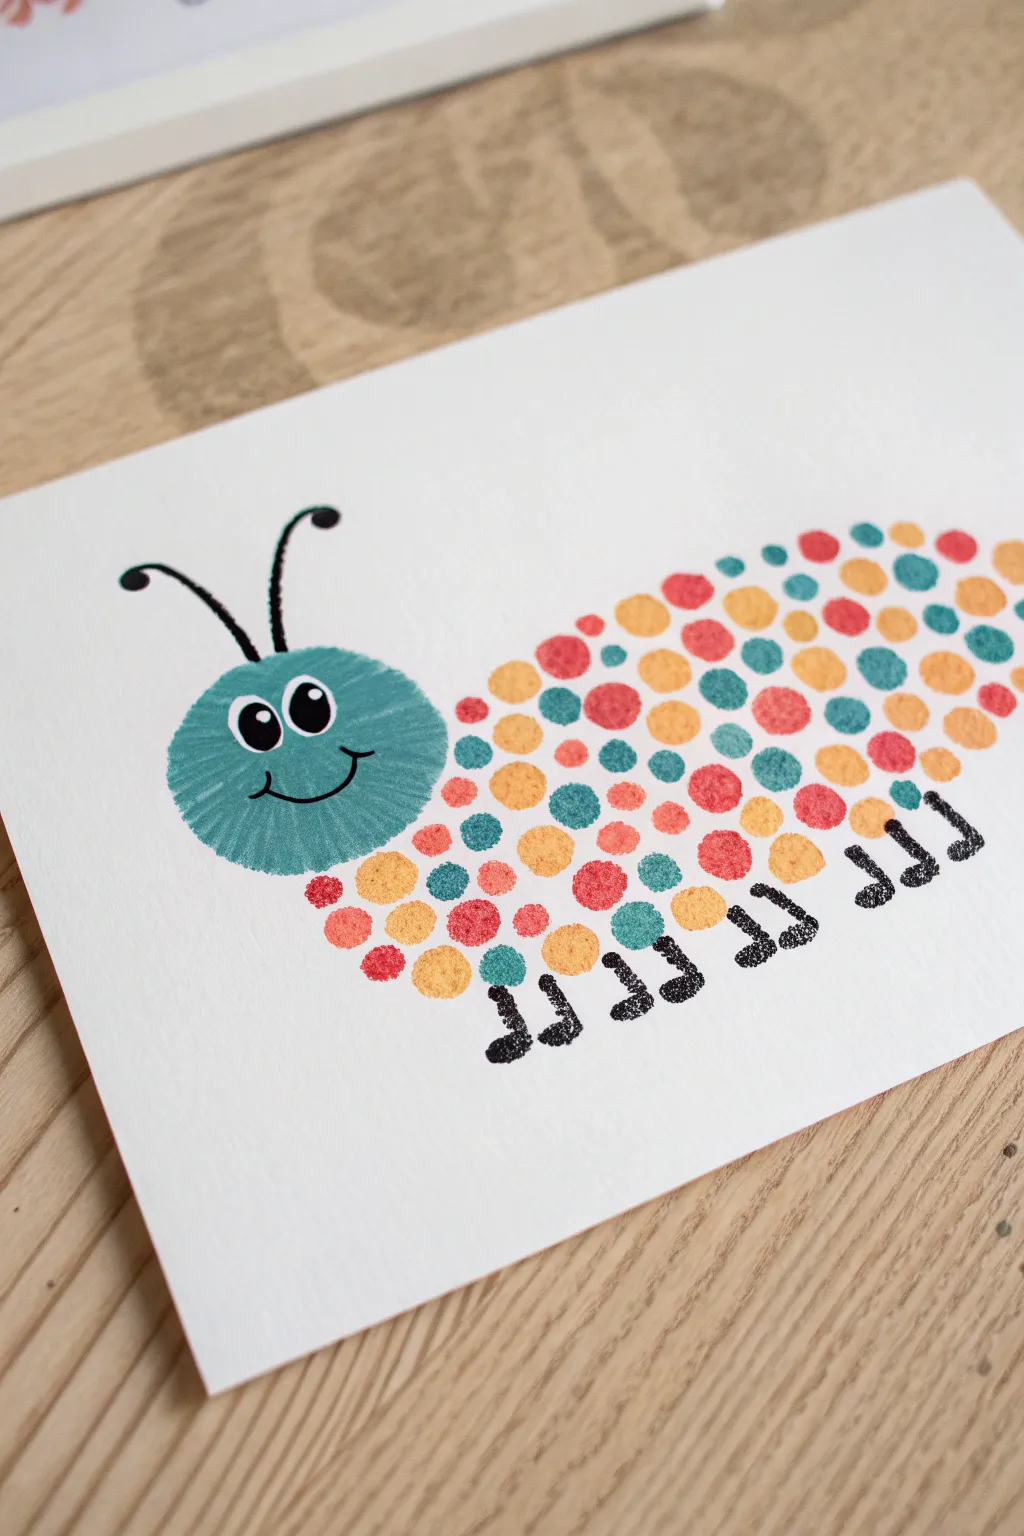
This colorful caterpillar is built dot-by-dot, creating a textured and vibrant little creature that crawls right across the page. With its sweet expression and marching legs, it’s a perfect keepsake for Dad that capture’s a child’s unique fingerprint.
Step-by-Step Tutorial
Materials
- Heavy white cardstock or watercolor paper
- Kids’ non-toxic washable stamp pads (teal, orange, pink/red, yellow)
- Black fine-tip marker or felt-tip pen
- Googly eyes (optional) or white paint marker
- Damp cloth or baby wipes for fingers
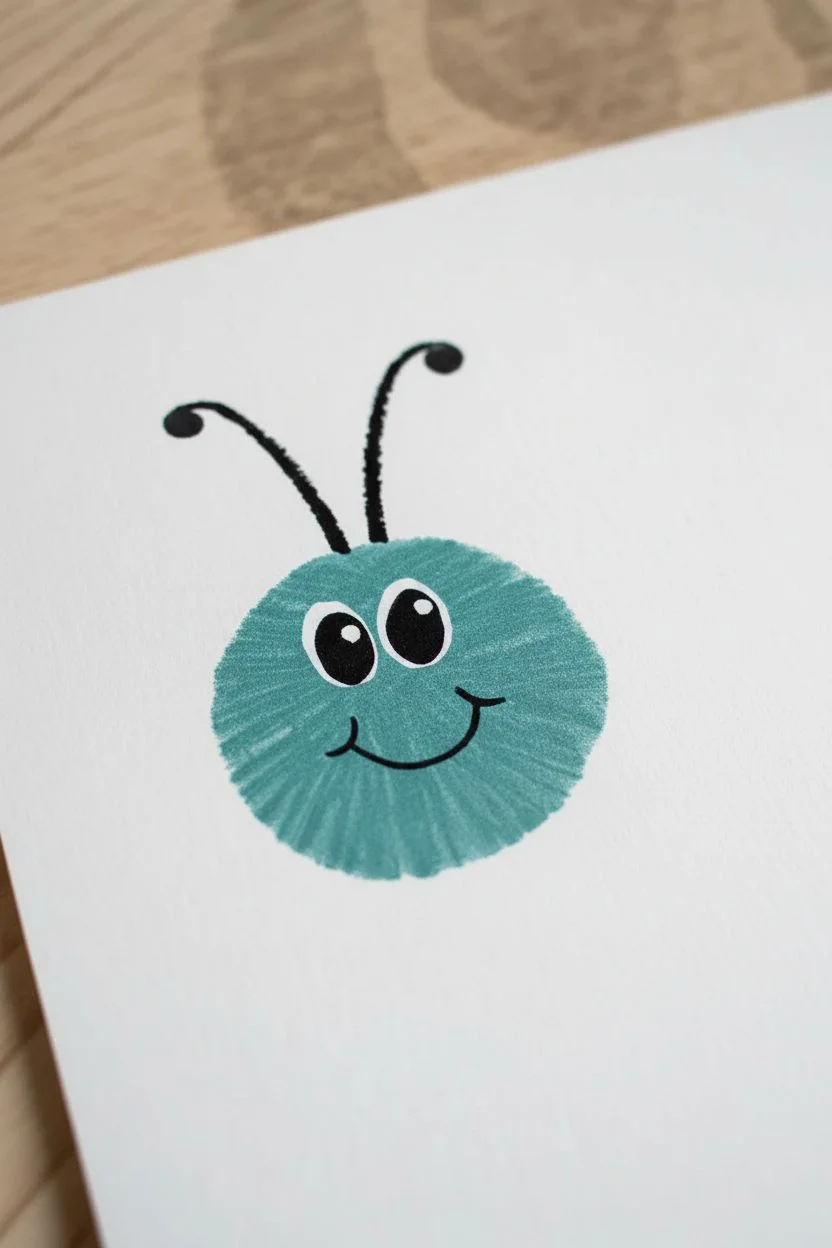
Step 1: Creating the Caterpillar’s Head
-
Prepare the head color:
Start by selecting a teal or blue-green stamp pad for the caterpillar’s face. If you have a larger thumb, this will work best, but you can also press multiple overlapping fingerprints to create a larger circle. -
Stamp the face shape:
Press your thumb firmly onto the ink pad and then stamp a large, solid circle on the left side of your paper. If the ink looks too light, you can stamp it a second time in the same spot to build up that rich teal color. -
Add eye details:
Once the teal ink is completely dry, use a black marker to draw two large, oval eyes near the top of the circle. Leave a small white highlight in each pupil, or use a tiny dot of white paint later to make them shine. -
Draw the smile:
Just below the eyes, use your black marker to draw a wide, U-shaped smile. Add small ‘cheek’ lines at the ends of the smile for an extra friendly expression. -
Add antennae:
Draw two long, curved lines extending upward from the top of the teal head. Finish each antenna with a small, filled-in black circle at the tip.
Step 2: Building the Body
-
Select body colors:
Choose three contrasting ink pad colors for the body segments, such as orange, pinkish-red, and a lighter teal. Having these open and ready helps keep a good rhythm. -
Start the first row:
Using your index finger, press into the orange ink and stamp a dot right next to the bottom of the caterpillar’s head. Continue stamping a row of dots along the bottom, alternating colors randomly as you go. -
Clean fingers frequently:
Between color changes, give your finger a quick wipe with a damp cloth. This keeps your yellow and orange pads from getting muddy with darker ink colors. -
Form the body arch:
Create the main body shape by stamping a large, elongated hump. Start stamping rows above your bottom line, stacking the fingerprints close together so they touch slightly. -
Fill in the shape:
Continue filling in the body with random colored fingerprints. I find it helpful to vary the pressure slightly; lighter touches make smaller background dots, while firm presses cover more space. -
Taper the tail:
As you move toward the right side of the paper, gradually stamp fewer dots per vertical column so the body curves down to a rounded end point.
Stamp Pad Success
If your stamp pads are dry, lightly spritz them with water a few minutes before starting. This reactivates the ink and gives richer, fuller fingerprints.
Step 3: Adding the Legs
-
Let the ink set:
Pause for a moment to ensure all your colorful body prints are dry to the touch so you don’t smudge them while drawing. -
Draw the front legs:
Using your black marker, draw two little L-shaped feet under the first few body segments near the head. Make the lines thick and bold. -
Add marching legs:
Continue adding pairs of L-shaped legs along the bottom of the body. You don’t need a leg for every single dot; spacing them out every few fingerprints makes it look like he is walking effectively. -
Detail the feet:
At the bottom of each L-shape, scribble a tiny bit back and forth to create a thicker ‘shoe’ look for the caterpillar’s feet. -
Final check:
Look over your artwork for any sparse areas in the body. If you see a big white gap, you can carefully add one last small fingerprint to fill the space.
Make It Personal
Hide a secret message! Write ‘I Love You’ or ‘Dad’ in tiny letters inside a few of the lighter-colored fingerprints for a hidden surprise he has to hunt for.
Now you have a charming little love bug ready to march its way into someone’s heart
BRUSH GUIDE
The Right Brush for Every Stroke
From clean lines to bold texture — master brush choice, stroke control, and essential techniques.
Explore the Full Guide
Handprint Family Tree Keepsake
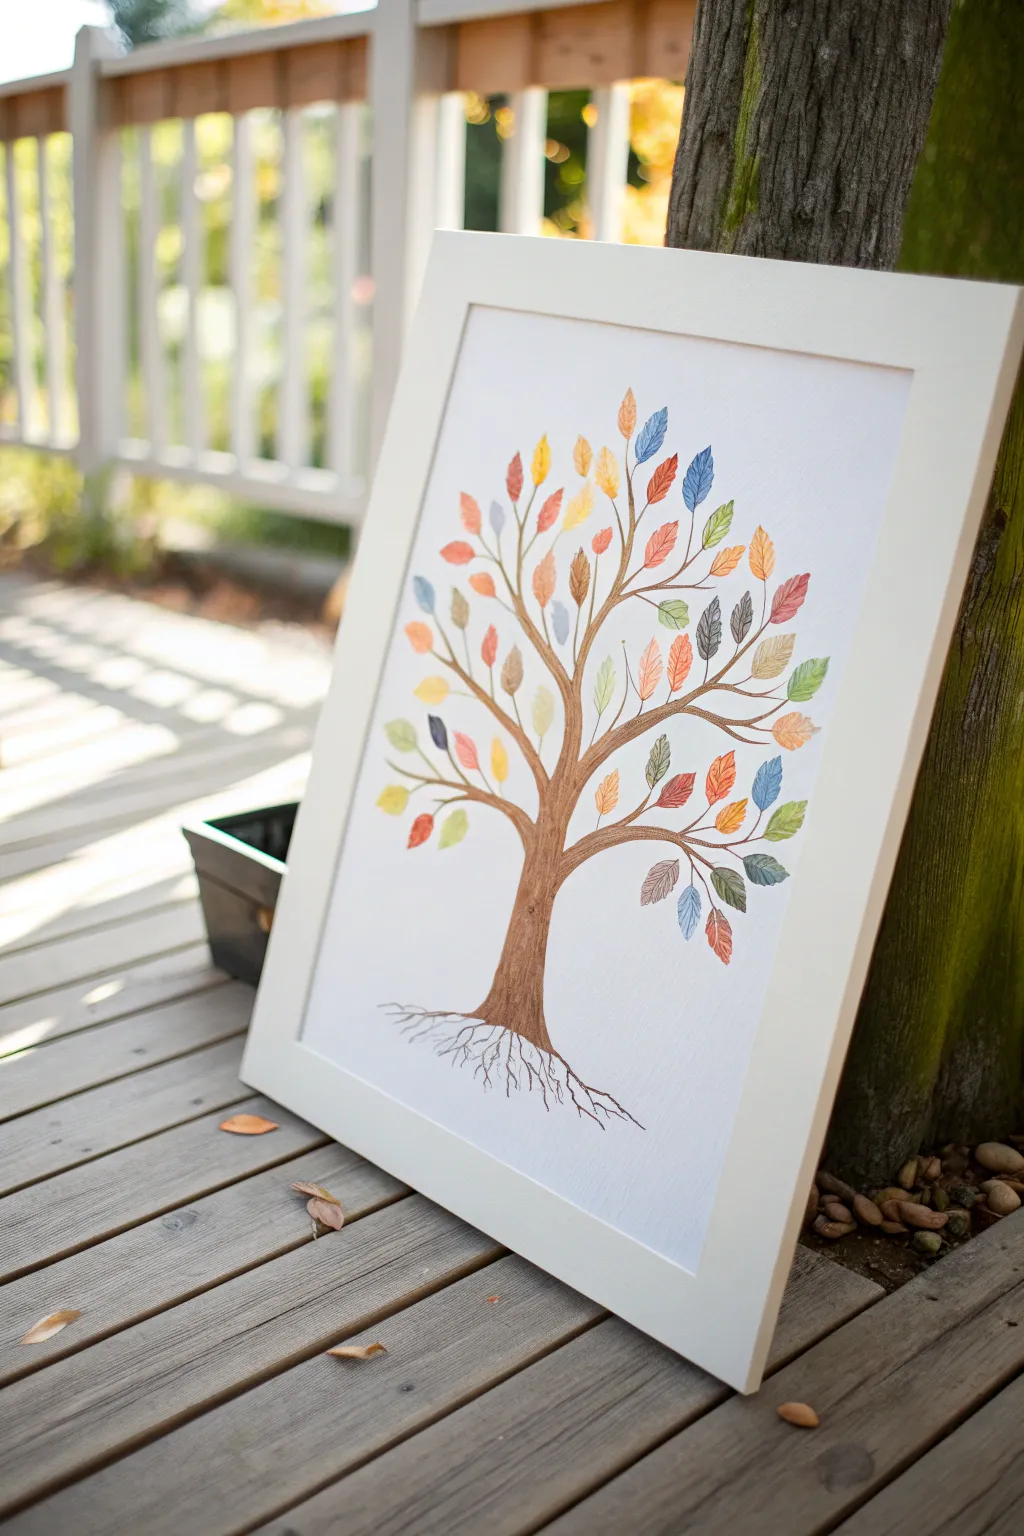
This elegant keepsake replaces the traditional messy handprints with delicate, colorful leaf impressions creating a sophisticated piece of art suitable for any room. The project features a beautifully detailed trunk with exposed roots, adorned with a spectrum of soft, translucent leaves that represent each family member.
How-To Guide
Materials
- Heavyweight watercolor paper (140lb/300gsm)
- White picture frame (sized to your paper, e.g., 11×14 or 16×20)
- Watercolor paints (tube or pan set)
- Round watercolor brush (size 6 or 8)
- Fine liner brush (size 0 or 1)
- Brown watercolor paint (Burnt Umber or Sepia)
- Pencil and kneaded eraser
- Paper towels
- Small cup of water
- Optional: Real leaves for observation
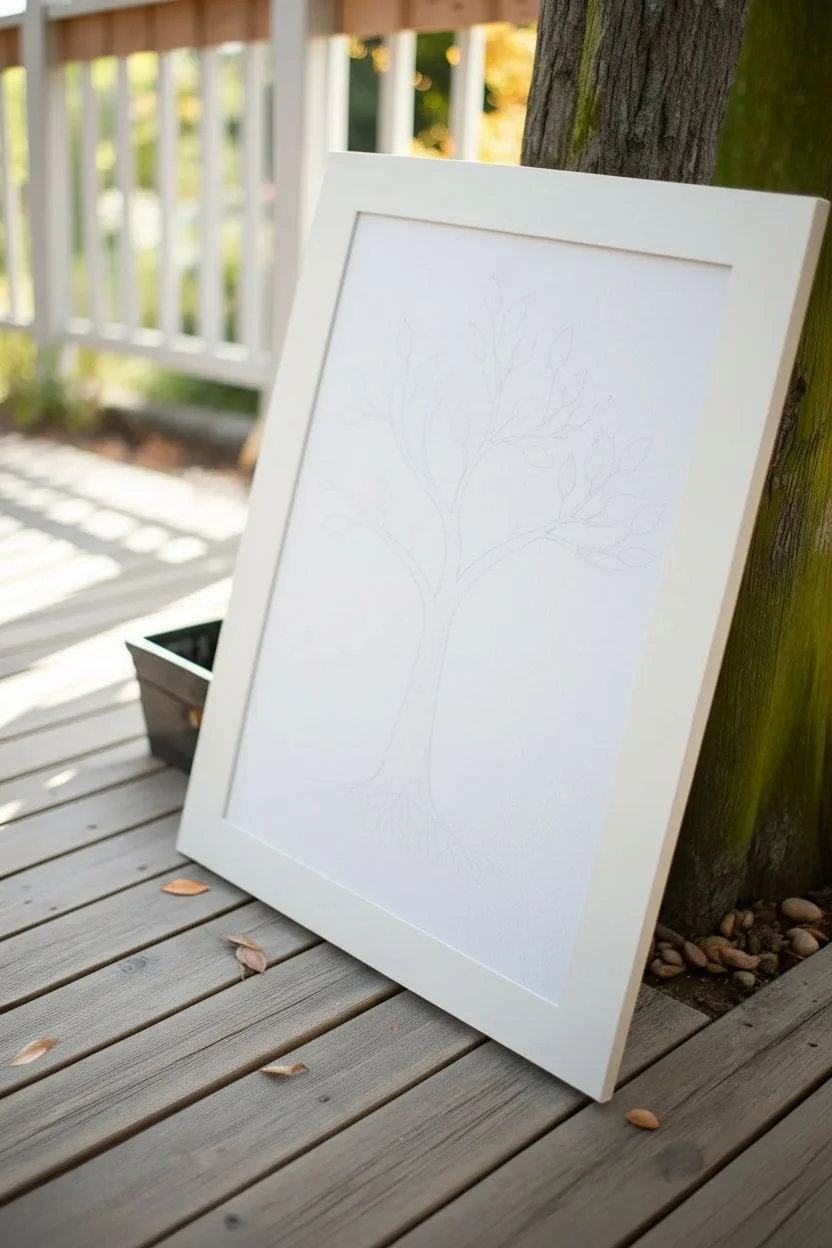
Step 1: Sketching the Foundation
-
Plan your composition:
Lightly visualize where the tree will sit on the paper using a pencil. Aim to center the trunk, leaving about two inches at the bottom for the roots and plenty of open space at the top for the canopy. -
Draft the trunk:
Sketch the main trunk using very faint pencil lines. Start wider at the base and gently taper upward. Don’t worry about being perfectly straight; a slight curve adds organic character. -
Add main branches:
Draw three to four main branches extending from the top of the trunk. Let them reach out in different directions to create a balanced skeleton for your leaves. -
Detail the roots:
At the base of the trunk, sketch exposed roots that spread outward into the ground. Keep these lines squiggly and varied in length to mimic natural root systems.
Bleeding Colors?
If leaf colors are running into each other, you’re working too fast. Let each leaf dry for 2-3 minutes before painting a neighbor, or use a hair dryer on low for quick drying intervals.
Step 2: Painting the Wood
-
Mix your brown wash:
Create a watery mix of brown paint. You want a transparency that allows the white paper to show through slightly, giving it a luminous quality. -
Paint the trunk base:
Using your size 6 brush, fill in the trunk area with vertical strokes. I prefer to lift the brush at the end of the stroke to create natural wood grain texture. -
Follow the branches:
Continue the brown wash up into the main branches, tapering your strokes as the wood gets thinner. Switch to the fine liner brush for the very tips of the branches. -
Define the roots:
Use the fine liner brush dipped in slightly darker, less watered-down brown paint to trace the root lines you sketched. Let the lines fade out as they move away from the tree. -
Add texture and shadow:
While the trunk is barely damp, add thin lines of darker brown along one side of the trunk and under the main branches to suggest shadow and bark texture. Let the wood layer dry completely.
Step 3: Adding the Foliage
-
Prepare your palette:
Mix several puddles of distinct colors: ochre, earthy orange, rust red, dusty blue, sage green, and soft brown. Keep them watery for that translucent watercolor look. -
Establish leaf placement:
Using a pencil very lightly, mark where you want your leaves to go. Instead of random scattering, attach them to the ends of your painted branches or draw tiny stems where they will float. -
Paint the first leaf:
Load your round brush with one color (e.g., orange). Press the belly of the brush down onto the paper and lift up to a point. This single stroke creates a perfect almond leaf shape. -
Vary the colors:
Clean your brush thoroughly and pick a contrasting color like blue. Paint the next leaf nearby. Alternating warm and cool tones creates visual interest across the canopy. -
Connect with stems:
Once a leaf is painted, use your fine liner brush with a tiny bit of brown paint to draw a thin stem connecting the leaf back to a branch. This grounds the floating shapes. -
Add leaf veins:
Wait for the colorful leaf shapes to dry completely. Then, using a fine liner brush and a slightly darker version of the leaf’s color (or a neutral grey), paint a central vein and tiny diagonals. -
Fill the canopy:
Continue adding leaves, working from the center outward. Ensure you have a mix of all your chosen colors distributed evenly, rather than clumped together. -
Check the balance:
Step back and look at your tree. If one side looks heavy, add a few small, lighter-colored leaves on the opposite side to balance the composition.
Pro Tip: Color Harmony
To keep the palette cohesive, mix a tiny dot of your brown trunk color into every single leaf color. This ‘mothers’ the colors, ensuring they all look like they belong on the same tree.
Step 4: Final Touches
-
Erase pencil marks:
Once you are absolutely certain the entire painting is bone dry, gently use the kneaded eraser to lift any visible pencil lines from your initial sketch. -
Add ground details:
Use your fine liner to add tiny, scratchy horizontal lines near the roots to suggest the ground plane, anchoring the tree so it doesn’t look like it’s floating. -
Frame your work:
Place the artwork into your white frame. Using a white frame helps the colors pop and maintains the clean, modern aesthetic of the piece.
Hang this beautiful stylized family tree in a well-lit spot to enjoy the translucent, stained-glass effect of the watercolor leaves.
“You’re the Best Pop” Fingerprint Popcorn
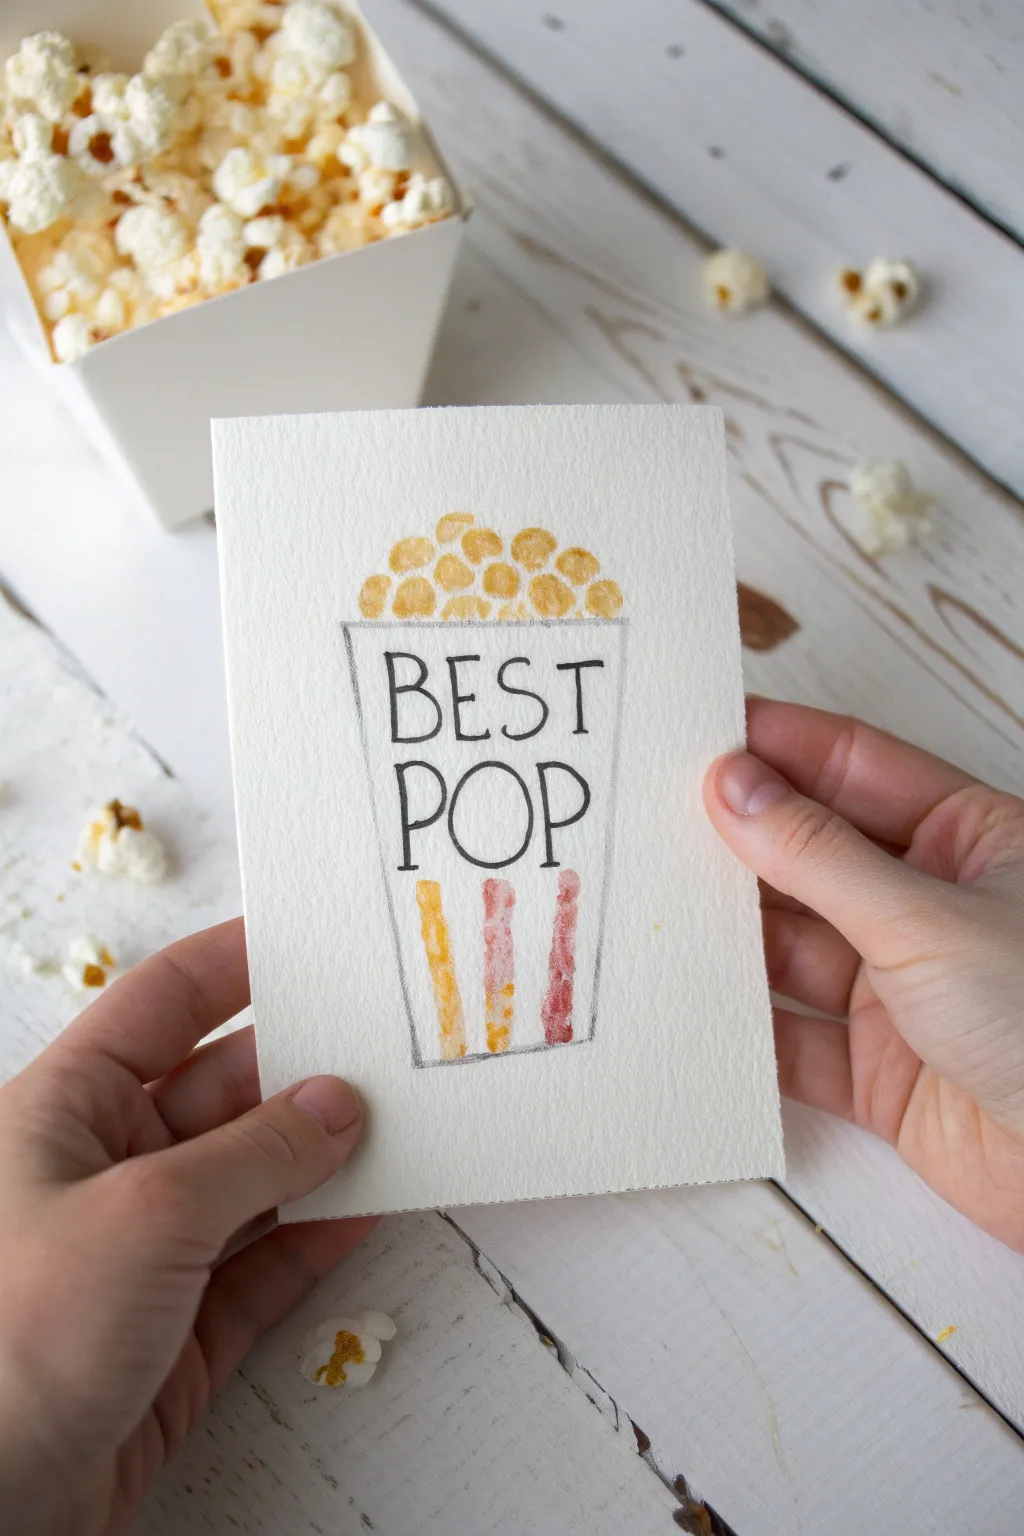
This clever handmade card turns simple thumbprints into buttery popcorn kernels for a “punny” Father’s Day greeting. The textured look of the paint on heavy paper adds a lovely, tactile quality that makes the message stand out.
Step-by-Step Tutorial
Materials
- Heavyweight watercolor paper or cardstock (folded)
- Yellow acrylic or poster paint (warm, buttery shade)
- Red acrylic or poster paint
- Fine liner pen (black)
- Pencil
- Ruler
- Palette or small plate
- Paper towels
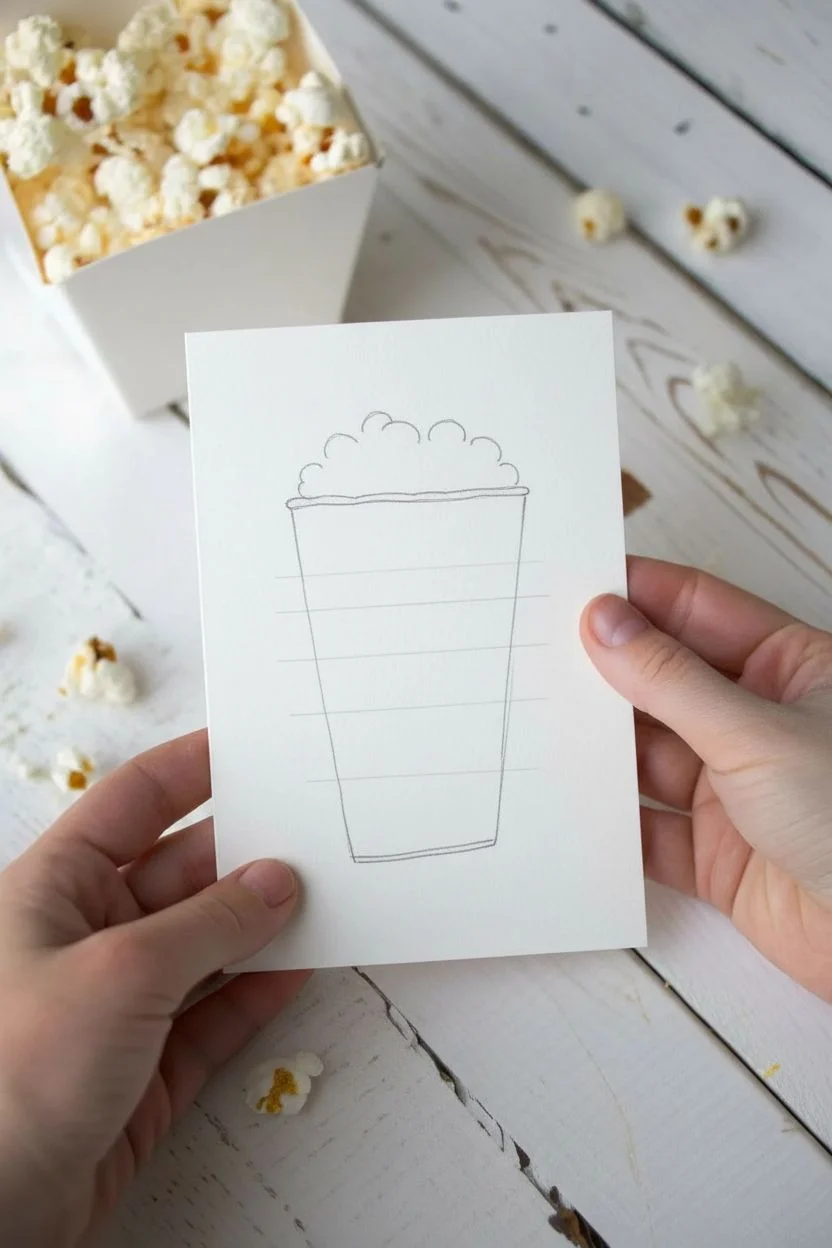
Step 1: Drawing the Outline
-
Fold the foundation:
Begin by folding your heavyweight watercolor paper in half to create a sturdy card base. -
Sketch the bucket shape:
Using a pencil and ruler, lightly sketch a trapezoid shape centered on the front of the card. The top line should be wider than the bottom line to mimic a classic popcorn container. -
Define the rim:
Draw a slightly curved line across the top of your trapezoid to create the open rim of the bucket. -
Ink the outline:
Trace over your pencil lines with a fine black liner pen to finalize the bucket shape. -
Add text guide lines:
Lightly sketch horizontal guide lines with a pencil inside the bucket where you want your text to sit.
Smudged Prints?
If your fingerprints look like blobs, you have too much paint on your finger. Dab it once on a paper towel before pressing onto the card stock for clearer texture.
Step 2: Creating the Popcorn
-
Prepare yellow paint:
Squeeze a small amount of yellow paint onto your palette. You want a nice, warm buttery shade. -
Test prints:
Practice stamping your index finger on a scrap piece of paper to get the right amount of paint—you want texture, but not a glob. -
Stamp the kernels:
Press your painted fingertip onto the paper just above the bucket’s rim. Cluster the prints together, overlapping slightly, to create a mounded pile of popcorn. -
Clean up:
Wipe your finger clean thoroughly with a paper towel before moving to the next color.
Step 3: Adding the Bucket Stripes
-
Prepare stripe colors:
Put a dab of red paint and a fresh dab of yellow paint on your palette. -
Stamp the first stripe:
Dip your pinky finger or the side of your index finger into the orange-yellow paint. Press it vertically inside the bucket outline to create a thick, textured stripe. -
Add red stripes:
Using a clean finger, dip into the red paint and stamp vertical stripes next to the yellow one. Leave a gaps between stripes for a classic striped bucket look. -
Dry completely:
Let the paint dry fully. I usually give this about 10-15 minutes just to be safe so nothing smears.
Texture Trick
Use textured watercolor paper (cold press). The rough surface catches the paint unevenly, making the fingerprints look even more like fluffy popcorn kernels.
Step 4: Finishing Touches
-
Letter the text:
Using your black fine liner, carefully write “BEST” in the top half of the bucket and “POP” in the bottom half. -
Add style to letters:
Go over the letters a second time to thicken the lines slightly, giving them a bold, hand-lettered appearance. -
Erase guides:
Once the ink is totally dry, gently erase any remaining pencil marks from your initial sketch. -
Final check:
Check for any gaps in your popcorn pile and add a tiny extra fingerprint if the mound needs more volume.
Now you have a charming, personalized card ready to make Dad smile


Have a question or want to share your own experience? I'd love to hear from you in the comments below!