
Faux painting is my favorite kind of visual magic—just paint, a few simple tools, and suddenly a plain wall looks like stone, fabric, or aged plaster. Here are faux painting ideas I’d totally pull out in my own studio when you want big impact without changing the structure of the space.
Color Washing for Soft Old-World Depth
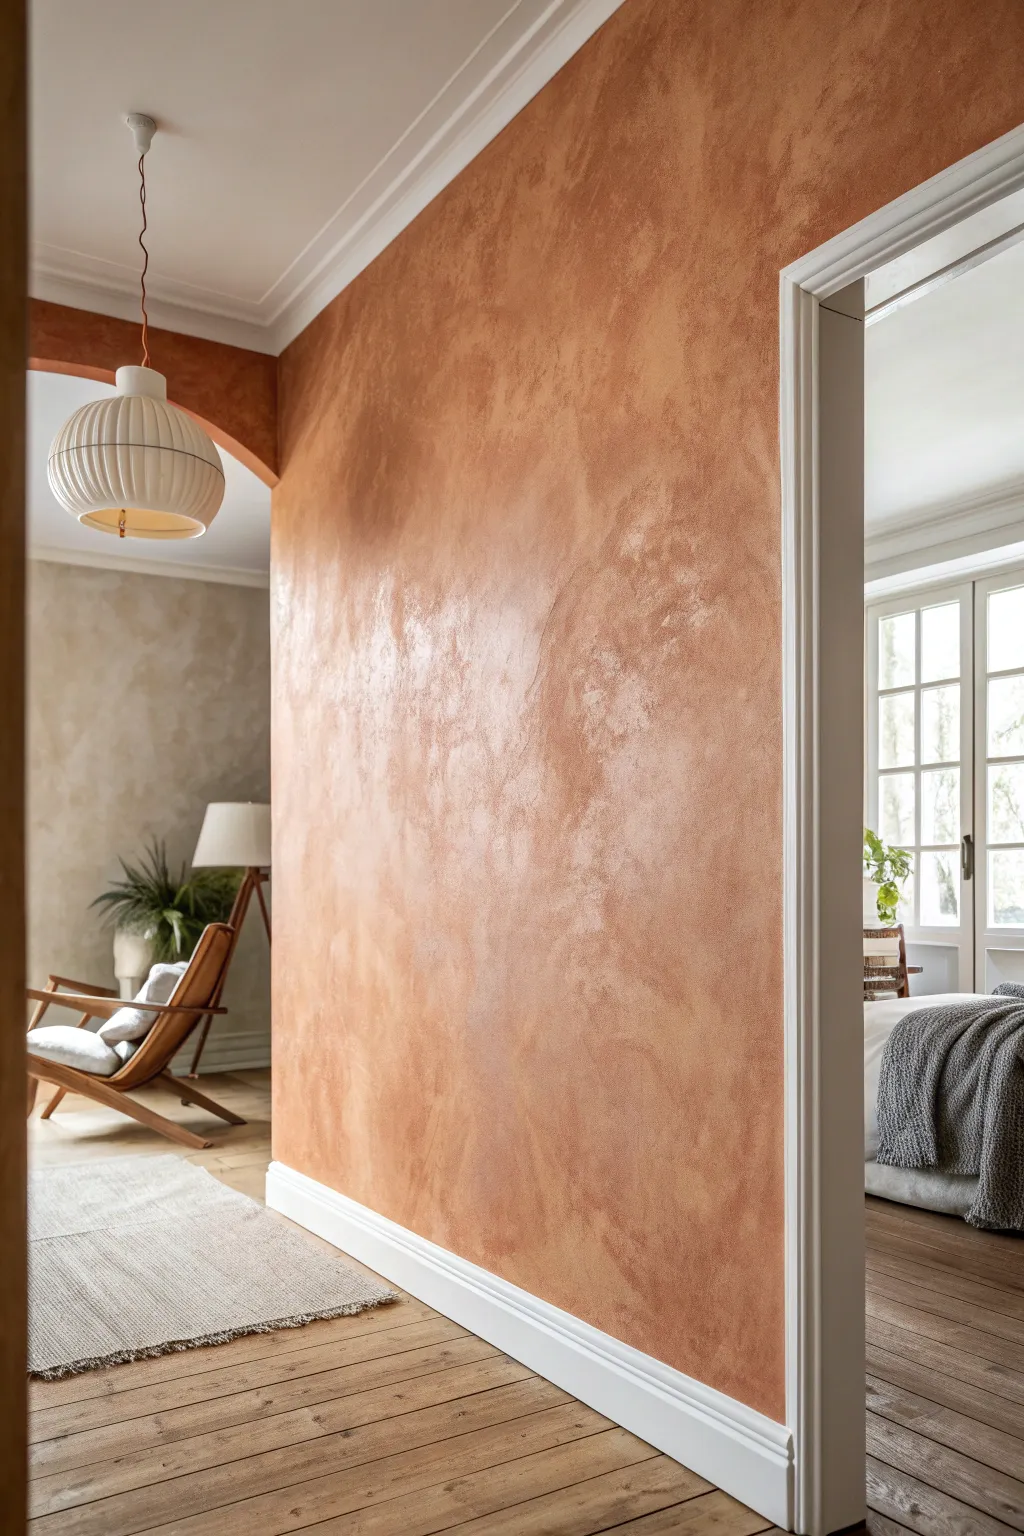
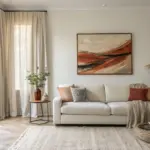
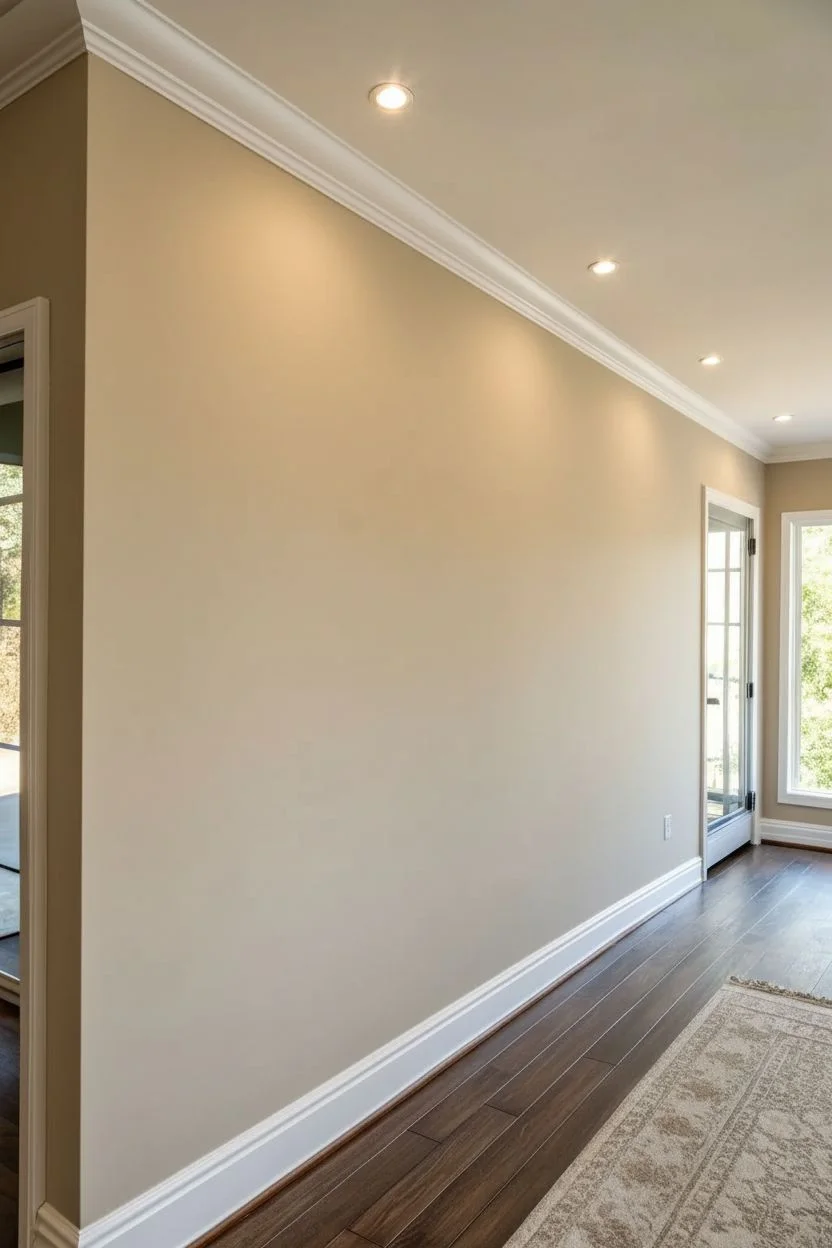
Bring the warmth of a Mediterranean villa into your home with this soft, textured color washing technique. By layering a translucent terracotta glaze over a lighter base, you achieve a cloudy, mottled finish that mimics the depth of aged plaster without the heavy texture.
Detailed Instructions
Materials
- High-quality eggshell wall paint (pale cream or off-white base)
- Latex glaze medium (clear)
- Latex paint (terracotta or rusty orange accent color)
- Wide painter’s tape
- Drop cloths
- Large bucket for mixing
- Stir sticks
- Sea sponge or wool sponge (natural is best)
- Soft-bristled brush (4-inch width)
- Clean, lint-free cotton rags (cheesecloth works well)
- Medium grit sandpaper
- Trisodium Phosphate (TSP) substitute for cleaning
Step 1: Wall Preparation
-
Clean the Surface:
Begin by thoroughly washing your walls with a TSP substitute and water mixture to remove any grease or oils, ensuring the glaze will adhere properly. -
Protect and Tape:
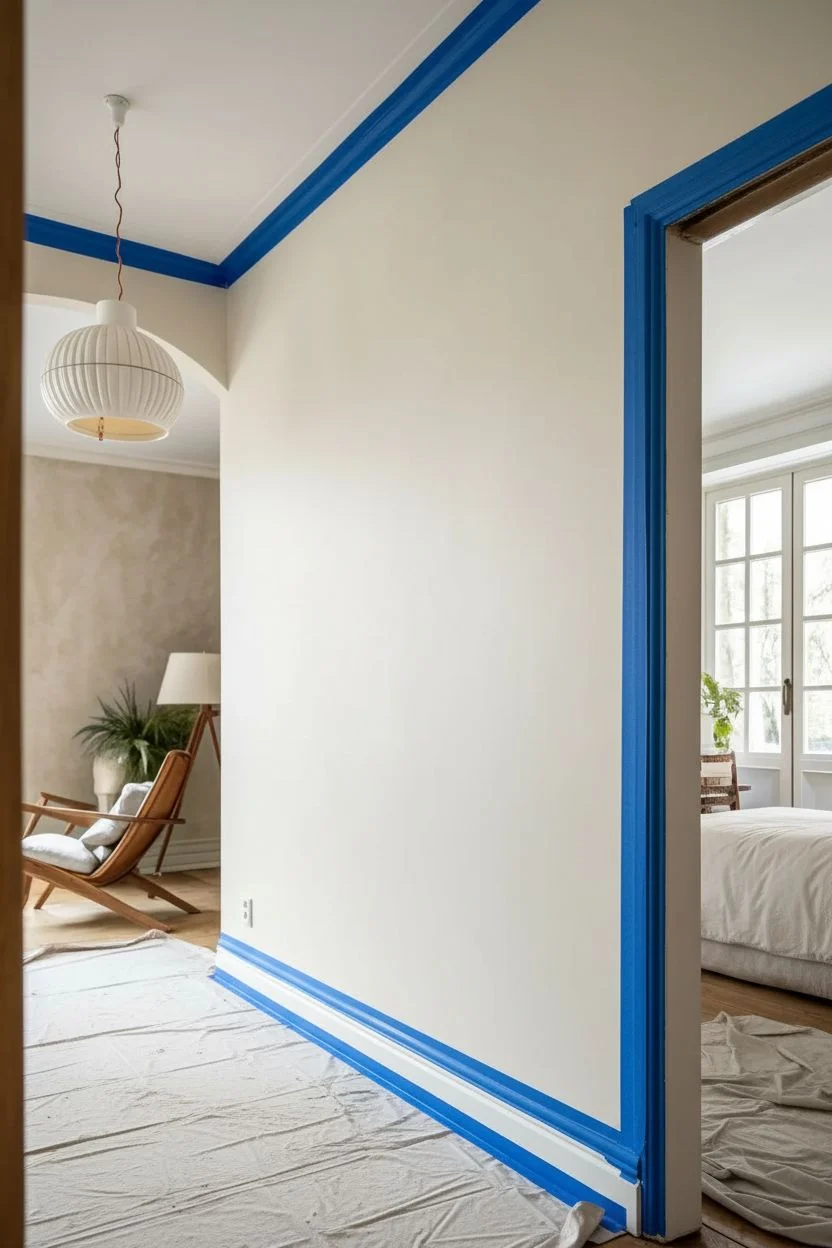
Apply wide painter’s tape along the ceiling line, baseboards like the crisp white molding shown here, and door frames to keep the glaze off your trim. Lay down drop cloths to protect your flooring from drips. -
Apply Base Coat:
Roll on two coats of your pale cream or off-white eggshell paint. Allow the first coat to dry completely before applying the second, creating a solid, uniform canvas for your color wash. -
Dry Time:
Let the base coat cure for at least 24 hours. This is crucial because if the base is soft, the glazing process might lift the paint.
Keep the Edge Wet
Never stop in the middle of a wall. Always finish a full wall corner-to-corner in one session to avoid hard, visible drying lines in your glaze.
Step 2: Mixing the Glaze
-
Create the Mix:
In your bucket, combine one part latex glaze medium, one part terracotta paint, and one part water. The water helps extend the drying time, giving you more flexibility. -
Test the Translucency:
Brush a small amount of the mixture onto a piece of scrap cardboard or a hidden wall patch. You want a semi-transparent look; if it’s too opaque, add more glaze and water in equal parts.
Step 3: Applying the Wash
-
Dampen the Applicator:
Take your clean cotton rag or wool sponge and dip it into water, wringing it out thoroughly until it is just barely damp. This prevents the cloth from soaking up too much glaze initially. -
Initial Application:
Dip the rag/sponge into your terracotta glaze mixture and blot off the excess. Apply the glaze to the wall starting in a top corner, using loose, random circular motions. -
Work in Sections:
Focus on a 3-foot by 3-foot section at a time. The goal is to keep a ‘wet edge’ so you don’t end up with visible lap lines where dried sections meet wet ones. -
Softening the Texture:
While the glaze is still wet, take a clean, dry brush or a fresh dry rag and gently sweep over the applied area in a cross-hatch or swirling pattern (‘X’ motions work well). -
Blurring the Edges:
Pay special attention to the edges of your current section. Feather the glaze out thinly so that when you move to the next section, they blend seamlessly. -
Varying Density:
Allow some areas to be slightly darker and others lighter, letting the cream base peek through. I prefer to step back every few feet to ensure the ‘cloudiness’ looks organic and balanced. -
Tackling Corners:
Use a smaller brush to dab glaze into corners and along the tape line, then immediately soften it with your dry rag to match the texture of the main wall.
Add Metallic Shimmer
Mix a tiny amount of pearl or bronze metallic paint into your final glaze layer. It adds a subtle glow that catches the light beautifully.
Step 4: Refining and Layering
-
Assess the Finish:
Once the first layer is dry (about 4 hours), evaluate the depth. The wall in the photo has significant depth, which likely requires a second, lighter pass. -
Second Layer (Optional):
If you want more richness, repeat the process with a slightly more diluted glaze mixture. Apply this second coat very sparingly to build up that old-world complexity. -
Remove Tape:
Carefully peel away the painter’s tape while the final coat is still slightly tacky to prevent peeling dry paint chips. -
Final Touch-ups:
Inspect the wall for any harsh lines or drips. If you find a spot that looks too heavy, lightly sand it with fine-grit sandpaper to distress it back to the desired look.
Enjoy the timeless, sun-baked atmosphere your new walls bring to the space


Strié Dragging to Mimic Linen Panels
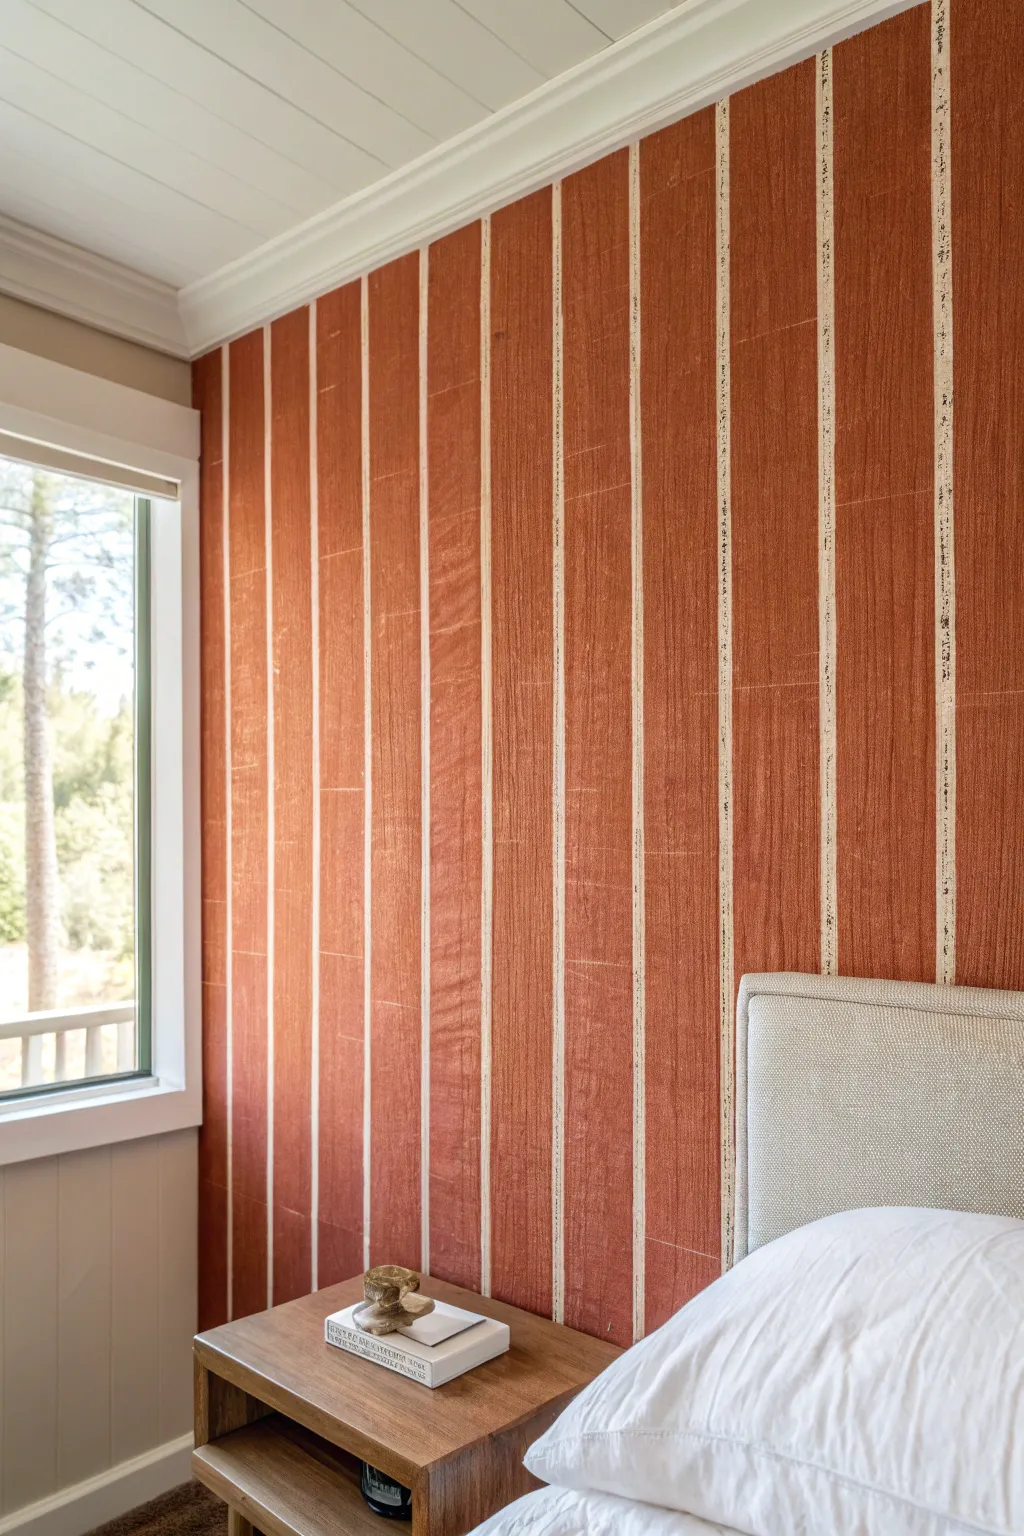
Transform plain drywall into a sophisticated, textured surface that mimics the warmth of heavy linen panels without the expense of real fabric. This faux finish uses a dragging technique called strié to create soft, vertical and horizontal weave lines for a realistic textile appearance.
Detailed Instructions
Materials
- Base coat paint (satin or eggshell finish, terra cotta/rust color)
- Glaze medium
- Tintable latex paint (slightly darker shade than base)
- Painter’s tape (0.25 inch or 0.5 inch width)
- Large dragging brush or specialized strié brush
- Steel wool or stiff bristle brush
- Levels and pencil
- Paint tray and liners
- Rags or lint-free cloths
Step 1: Preparation and Masking
-
Clean and prime:
Begin with a clean, dry wall. Any existing texture should be sanded down lightly, as dragging works best on smooth surfaces. Apply a primer if making a drastic color change. -
Apply the base color:
Roll on two coats of your chosen base color—here, a rich, earthy terra cotta works beautifully. Allow the paint to dry completely, preferably overnight, to ensure the tape won’t peel it up later. -
Measure vertical panels:
Decide on the width of your ‘fabric panels.’ A standard width of 12-18 inches looks realistic. Use a level and a pencil to lightly mark vertical guidelines across the entire wall. -
Tape the separation lines:
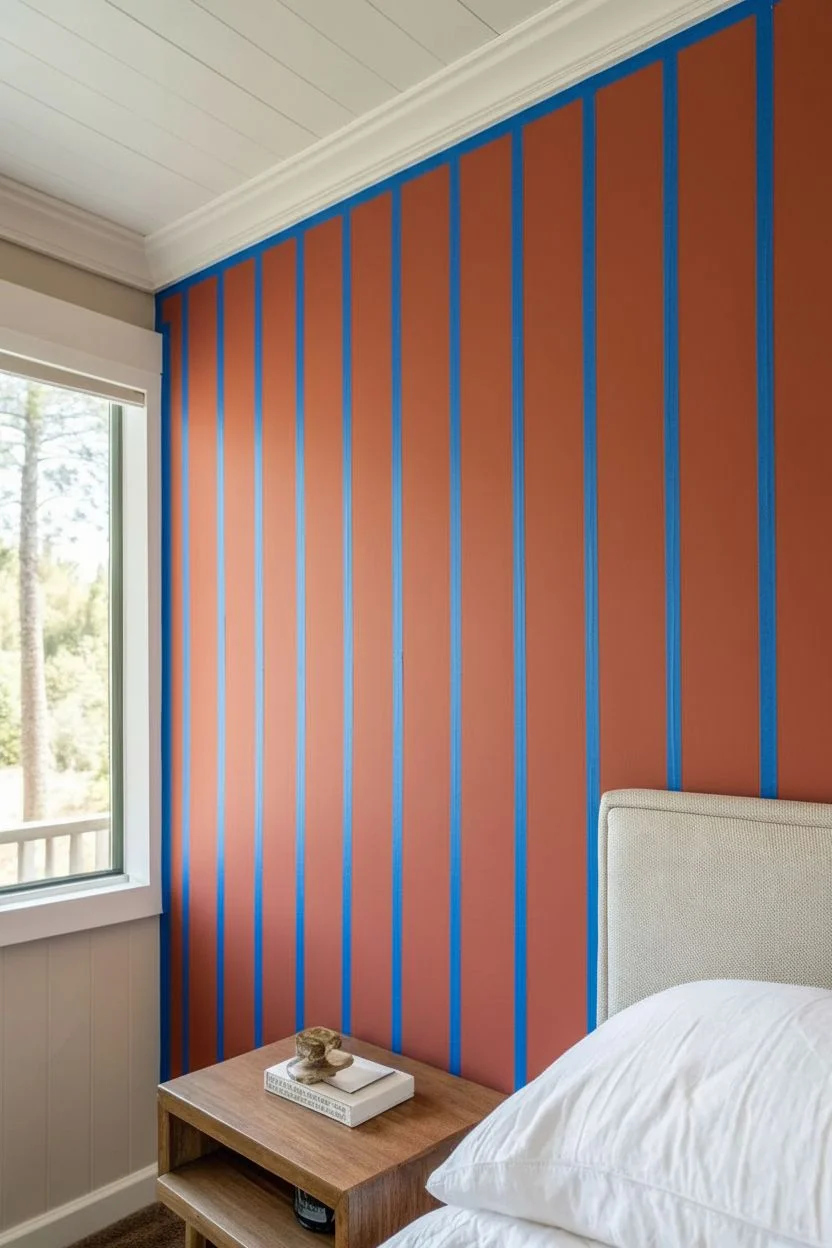
Apply your thin painter’s tape (0.25 or 0.5 inch) directly over your pencil marks. These taped lines will remain the original base color and act as the ‘seams’ or spacing between your faux fabric panels. -
Seal the tape edges:
To prevent glaze from bleeding under the tape, lightly brush a small amount of the base coat color over the tape edges. This creates a crisp, professional line once the tape is removed.
Step 2: Creating the Weave Texture
-
Mix the glaze:
Mix one part of your darker paint color with four parts glaze medium. The mixture should be translucent and workable for an extended period. -
Work in sections:
Do not glaze the entire wall at once. Focus on one vertical ‘panel’ between the tape lines at a time so the glaze doesn’t dry before you can texture it. -
Apply the glaze:
Brush or roll the glaze mixture onto the first panel section. You want full coverage, but avoid applying it so thickly that it drips. -
Vertical dragging:
Immediately take your dragging brush. Starting at the very top, pull the brush straight down through the wet glaze in a single, continuous motion to the bottom. Wipe the brush on a rag after each pass. -
Refine the vertical lines:
If your line wavers, simply re-brush the glaze smooth and drag again. Repeat this across the width of the panel until the vertical striations are uniform. -
Simulate horizontal threads:
To create the cross-weave look of linen, take a pad of steel wool or a dry stiff-bristle brush. Very lightly drag it horizontally across the wet glaze. Use a gentle touch; you want faint cross-hatches, not heavy lines. -
Vary the pressure:
I find that varying hand pressure slightly during the horizontal pass creates a more organic, natural fabric look rather than a perfect geometric grid. -
Move to the next panel:
Repeat the glazing and dragging process on the next panel. Work swiftly to maintain a wet edge if you aren’t using tape, but since we have taped breaks, you can take your time between sections. -
Add subtle imperfections:
Real linen has slubs and irregularities. Occasionally wiggle the brush slightly or press a bit harder in random spots to mimic these natural flaws in simulated fabric. -
Remove the tape:
This is the most satisfying part. carefully peel away the vertical strips of painter’s tape while the glaze is still slightly tacky or just after it dries. Pull the tape at a 45-degree angle away from the painted edge. -
Touch up:
Inspect your lines. If any glaze bled under the tape despite your sealing step, use a small artist’s brush and the original base color to tidy up the ‘seams’ between panels.
Glaze Drying Too Fast?
If the glaze sets before you drag it, mix a small amount of water or a specialized paint conditioner into your batch to extend the ‘open time’ and workability.
Level Up: Horizontal Seams
For ultra-realism, add horizontal tape lines randomly staggered at different heights to mimic where bolts of fabric were stitched together.
Step back and admire how a simple dragging technique has added incredible depth and textile warmth to your room


Faux Plaster Trowel Marks for Mediterranean Texture
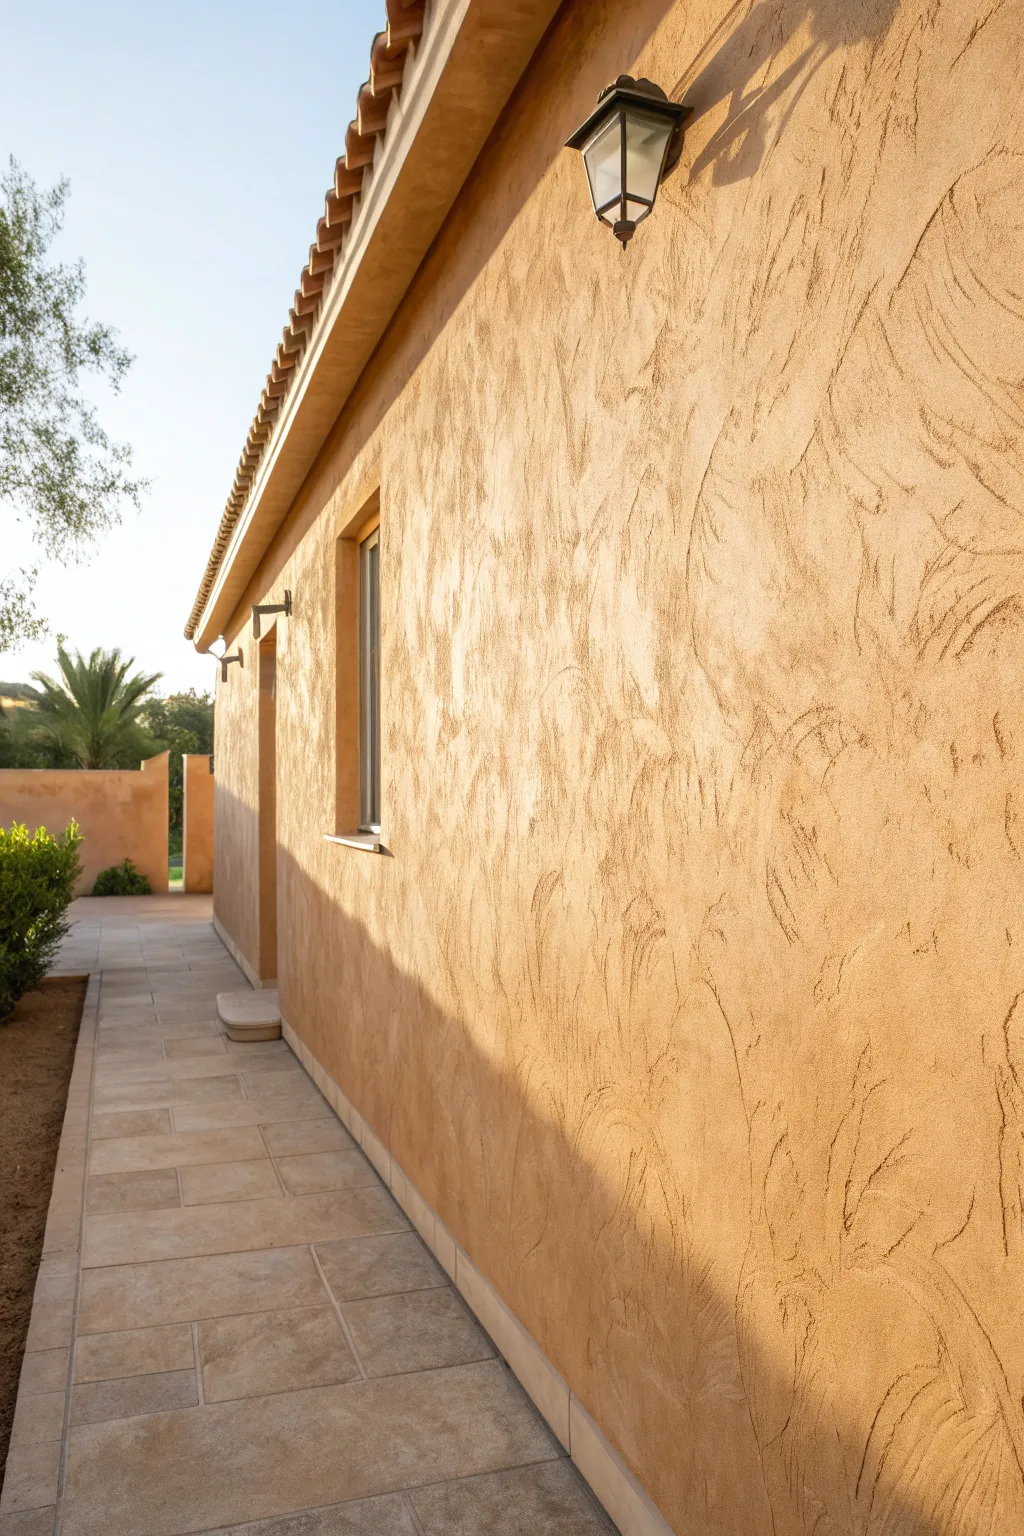
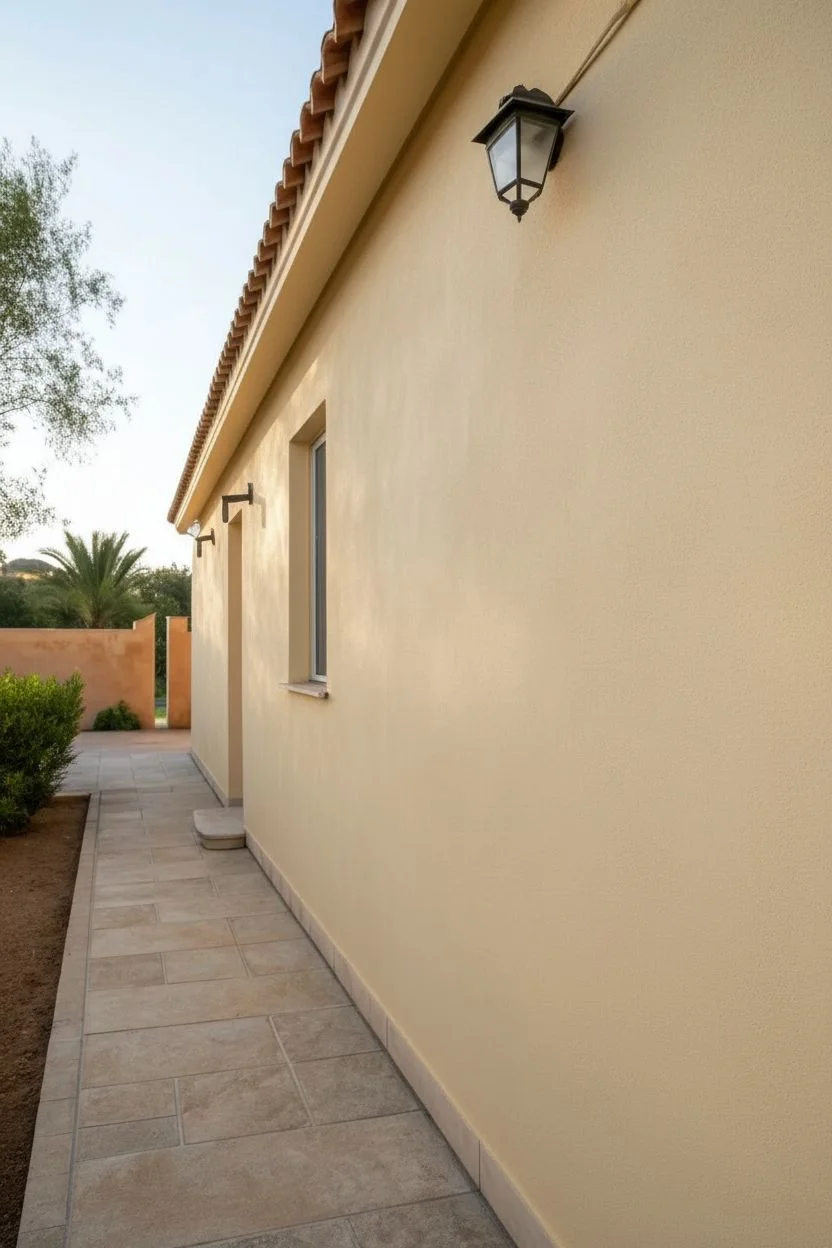
Transform a flat surface into the warm, inviting exterior of a Tuscan villa using this specialized faux finish technique. With sweeping trowel marks and a rich, golden hue, you can replicate the look of aged plaster that has been baked by the sun for decades.
Step-by-Step Guide
Materials
- Joint compound or texture medium
- Tintable glaze (or latex paint thinned with glaze medium)
- Latex satin paint (base coat in warm cream/beige)
- Latex satin paint (top coat in golden ochre/terracotta)
- Wide drywall trowel or Venetian plaster trowel
- Paint roller and tray
- Painter’s tape
- Drop cloths
- Sanding sponge (medium grit)
- Large sponge or rag
Step 1: Preparation and Base
-
Protect the area:
Begin by thoroughly cleaning the wall surface to ensure adhesion. Tape off baseboards, adjacent walls, and ceiling edges with painter’s tape, and spread drop cloths to catch plaster drips. -
Prime the surface:
Apply a high-quality primer if you are working on bare drywall or a drastically different color. Let this dry completely before moving on. -
Apply the base color:
Roll on your base coat of satin latex paint in a neutral, warm cream or beige tone. This color will be subtle but might peek through the thinner areas of your texture. -
Dry time:
Allow the base coat to dry for at least 4 to 6 hours, or according to the manufacturer’s instructions, ensuring a solid foundation.
Arc Angles
Keep your trowel motion loose and fast. The ‘fan’ shapes visible in the image come from pivoting your wrist rather than moving your whole arm in a straight line.
Step 2: Creating the Texture
-
Mix your medium:
Prepare your joint compound. If it’s too stiff, add a tiny amount of water to achieve a consistency similar to creamy peanut butter—spreadable but not runny. -
Load the trowel:
Scoop a generous amount of compound onto the edge of your drywall trowel or Venetian plaster trowel. -
Apply the first sweep:
Place the trowel against the wall at a shallow angle (about 30 degrees) and drag it in a wide, sweeping arc. Vary the direction of your arcs—up, down, and sideways. -
Create the heavy ridges:
Don’t aim for smoothness. The goal is to leave distinct ‘ridges’ where the compound is thicker at the edge of the stroke, creating the physical shadows seen in the reference image. -
Overlap randomly:
Continue these sweeping motions, overlapping the previous strokes significantly. I like to leave some areas slightly flatter and others with heavy buildup to mimic uneven, hand-applied masonry. -
Work in sections:
Tackle the wall in manageable 3×3 foot sections to keep a ‘wet edge’ and prevent the compound from setting up before you can blend the adjacent area. -
Let it cure:
This thick texture needs substantial drying time. Allow the wall to cure for 24 hours until the compound is completely hard and white.
Cracking Compound?
If the thickest ridges crack while drying, don’t panic. These hairline cracks actually add to the authentic, aged stucco aesthetic you are trying to achieve.
Step 3: Color and Dimension
-
Light sanding:
Gently run a medium-grit sanding sponge over the dried wall to knock down any dangerously sharp peaks, but keep the overall rough texture intact. -
Mix the glaze:
Mix your golden ochre paint with a glazing liquid in a 1:4 ratio (one part paint to four parts glaze). This transparency is crucial for depth. -
Apply the glaze:
Using a large brush or thick roller, apply the tinted glaze over the textured surface, working it into all the crevices and low points. -
Wipe back:
While the glaze is still wet, use a damp sponge or lint-free rag to wipe the surface gently. This removes the color from the high points of the texture while leaving dark pools of color in the deep ridges. -
Add variation:
For a more aged look, blot some areas more heavily than others to create natural-looking sun-faded patches versus darker, shadowed areas. -
Final cure:
Allow the glaze coat to dry completely for another 24 hours. -
Seal (Optional):
If this wall is in a high-traffic area, apply a clear matte water-based polyurethane sealer to protect those beautiful textured ridges from chipping.
Step back and admire the play of light and shadow on your newly created Mediterranean masterpiece


Metallic Glaze for Light-Catching Glamour
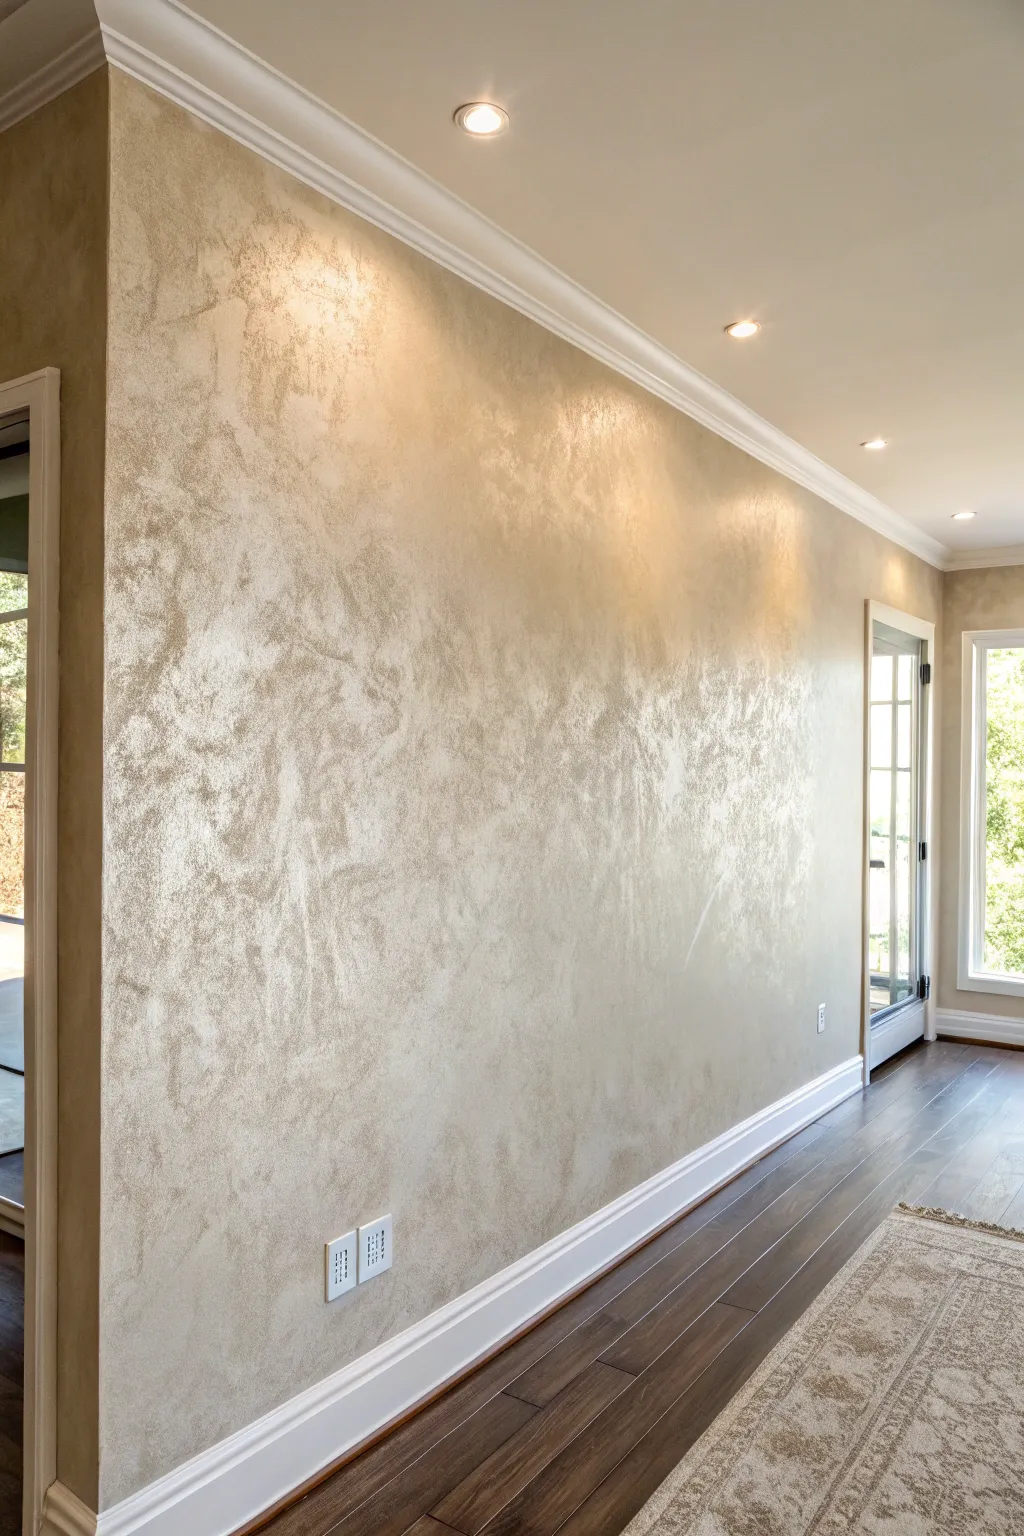
Transform a plain wall into a luminous focal point with this sophisticated metallic glaze technique. The subtle texture mimics the look of high-end Venetian plaster but is achieved with simple layers of glaze and paint to catch the light beautifully.
Step-by-Step Guide
Materials
- Interior satin latex paint (warm beige/champagne base)
- Metallic glaze (champagne or pearl gold)
- Extender or glaze medium
- Painter’s tape
- Drop cloths
- Paint rollers (medium nap)
- Paint tray and liners
- Sea sponge or wool sponge pad
- Lint-free rags
- 3-inch paintbrush
- Sandpaper (220-grit)
Step 1: Preparation and Base Coat
-
Protect the space:
Begin by laying down drop cloths on the floor and taping off trim, ceiling lines, and adjacent walls. Metallic glazes can be messy, so thorough taping is crucial. -
Prep the surface:
Lightly sand very rough patches if necessary, then wipe the wall down with a damp cloth to remove dust. A clean surface ensures the glaze adheres evenly. -
Apply base color:
Roll on a coat of your warm beige latex paint. This base color should be slightly darker or similar in tone to your metallic glaze to add depth. -
Dry and recoat:
Let the first coat dry completely according to manufacturer instructions. Apply a second coat if the coverage looks uneven, and let this dry fully—preferably overnight.
Fixing Lap Lines
If you see distinct lines where sections dried, lightly mist the area with water and dab with a sponge to reactivate and blend the glaze edges.
Step 2: Mixing the Glaze
-
Prepare the mixture:
In a bucket or tray, mix your metallic paint with a clear glazing liquid. A common ratio is 1 part paint to 4 parts glaze, but check your product label. -
Test the translucency:
I usually test a small amount on a piece of cardboard first. You want the mixture to be translucent enough to let the base coat peek through but metallic enough to shimmer.
Stippling Brush Hack
For a softer, less ‘spongy’ texture, use a large, dry stippling brush to pounce over the wet glaze. It creates a finer, misty metallic haze.
Step 3: Applying the Metallic Texture
-
Work in sections:
Plan to work in irregular 3×3 foot sections. This prevents the glaze from drying before you can manipulate it. -
Apply the glaze:
Use a sponge roller or a brush to apply the metallic glaze mixture onto the first section of the wall. Don’t worry about perfect coverage; randomness is good here. -
Create the texture:
While the glaze is wet, take a dampened sea sponge or balled-up lint-free rag. Press and twist it gently against the wet glaze to lift some off and redistribute the metallic pigment. -
Soften the edges:
Feather out the edges of your working section with a dry brush or clean rag so you don’t end up with harsh lap lines when you move to the next area. -
Continue the pattern:
Move to the next adjacent section, overlapping the wet edges slightly with the previous area to blend them seamlessly. -
Vary your motion:
Rotate your wrist constantly while sponging. This avoids creating a recognizable stamp pattern and keeps the texture looking organic and cloud-like. -
Check for heavy spots:
Step back occasionally to view the wall from a distance. If you see a spot that is too heavy with glaze, dab it lightly with a clean cloth to lift excess material. -
Let it cure:
Allow the glaze layer to dry completely. This usually takes longer than standard paint, so give it at least 24 hours.
Step 4: Finishing Touches
-
Inspect the sheen:
Once dry, check how the light hits the wall. If you want more shimmer, you can repeat the glazing process with a lighter touch for a second layer. -
Remove tape:
Carefully score the edge of the painter’s tape with a utility knife before pulling it off to prevent peeling any dried glaze. -
Clean up trim:
If any glaze seeped onto the baseboards, wipe it up immediately or touch up with trim paint for a crisp, professional edge.
Enjoy the sophisticated glow your new wall brings to the room every time the lights turn on
BRUSH GUIDE
The Right Brush for Every Stroke
From clean lines to bold texture — master brush choice, stroke control, and essential techniques.
Explore the Full Guide
Tone-on-Tone Stripes Using Finish Changes
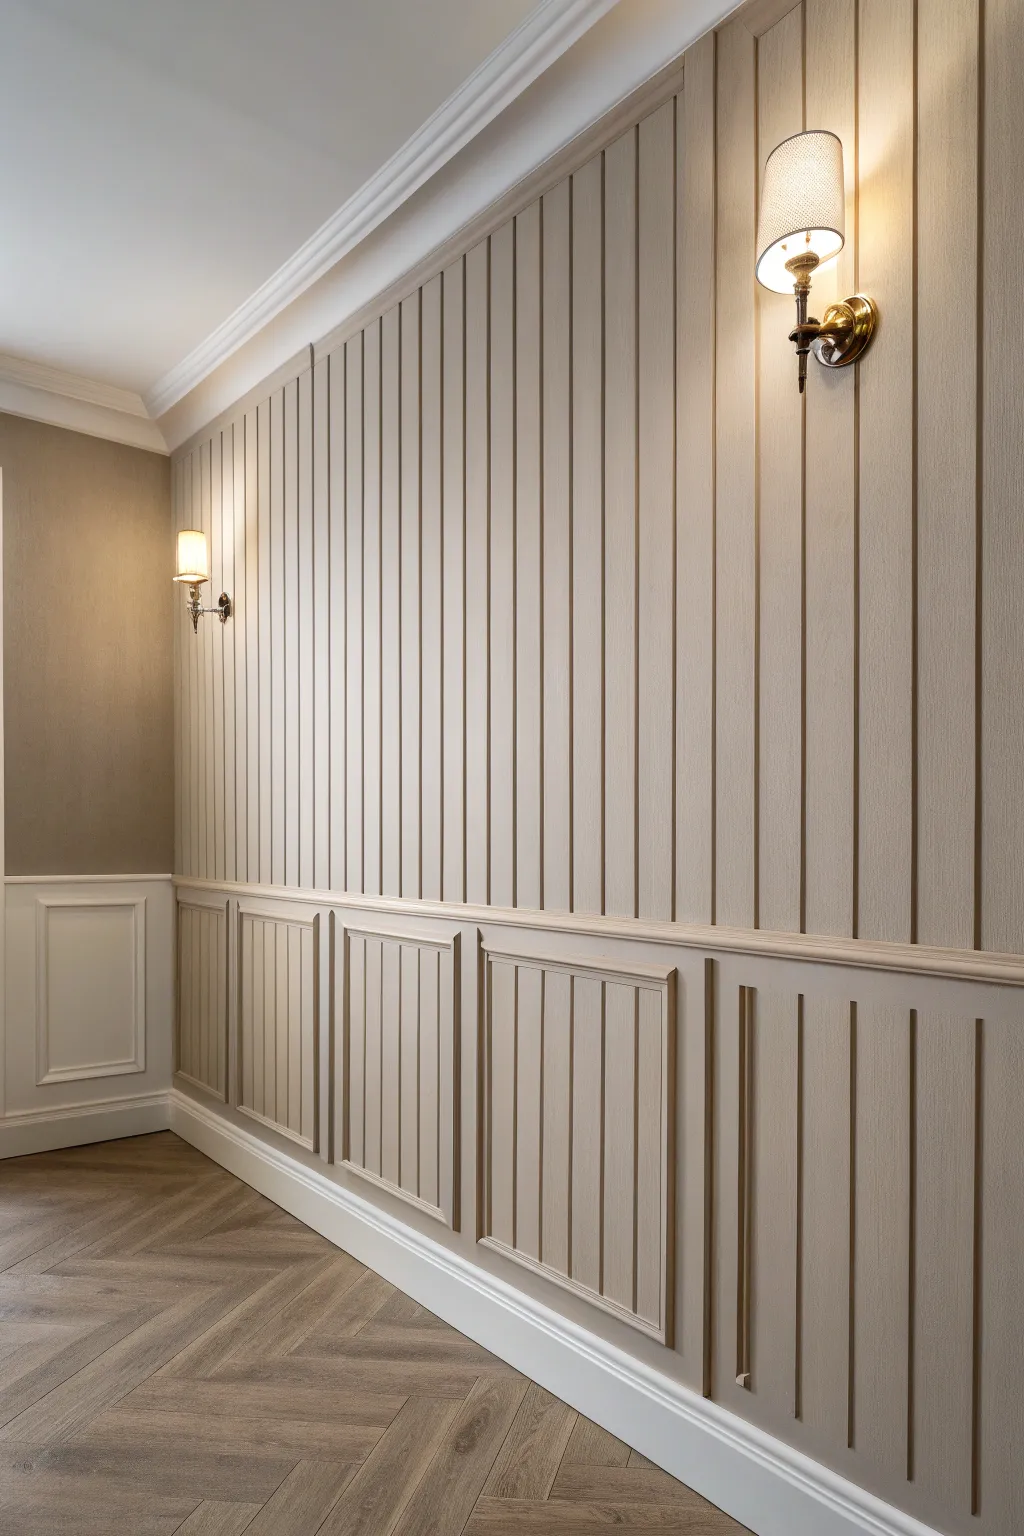
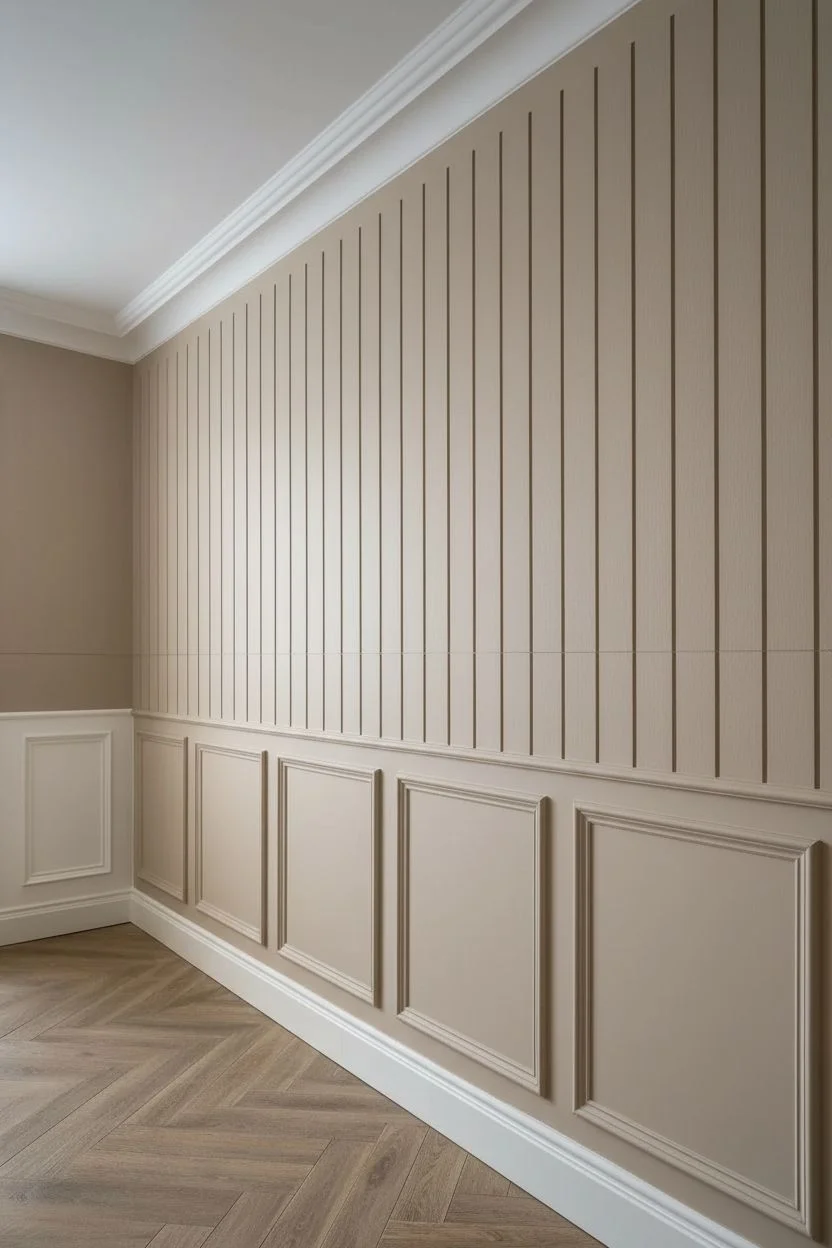
Achieve the sophisticated look of custom wainscoting and beadboard without installing a single piece of lumber. This technique uses clever shading, taping, and finish variances to create convincing three-dimensional architectural details on a flat wall.
Detailed Instructions
Materials
- Warm beige satin latex paint (base color)
- Warm beige semi-gloss latex paint (same color as base)
- Darker taupe glazing medium or acrylic paint (for shadows)
- Lighter cream acrylic paint (for highlights)
- Painter’s tape (various widths: 1-inch, 1/4-inch)
- Level and measuring tape
- Pencil
- 4-inch foam roller
- Small angled sash brush
- Artist’s liner brush (size 1)
- Straight edge or ruler
- Drop cloth
Step 1: Base Coat and Layout
-
Prepare the Surface:
Begin by cleaning your wall thoroughly to ensure good adhesion, then roll on two solid coats of your warm beige satin paint. Allow this base to cure for at least 24 hours so your tape won’t peel it up later. -
Mark the Chair Rail:
Measure about 32 to 36 inches up from the floor to establish the height of your wainscoting. Use a level to draw a light horizontal pencil line across the entire wall to represent the top of the chair rail. -
Grid the Lower Panels:
Below your chair rail line, measure and mark out rectangles to simulate the recessed panels. Leave about 3-4 inches of space between each box and above/below to acting as the ‘stiles’ and ‘rails’ of the woodwork. -
Mark the Upper Vertical Planks:
Above the chair rail line, use your level to mark vertical lines every 3 to 4 inches apart. These will become the seams of your faux beadboard or shiplap.
Light Source Logic
Decide where light enters the room (e.g., a window). Shadows must always be on the side opposite the light source, and highlights facing it, or the illusion fails.
Step 2: Creating the Shadow & Highlight Lines
-
Tape the Upper Verticals:
Place strips of painter’s tape along your vertical pencil lines on the upper wall. I prefer to place the tape just to the right of the line for consistency. -
Paint the Shadow Lines:
Mix a small amount of darker taupe glaze. Using a small brush, dry-brush a very thin, faint line along the left edge of the tape. This creates the shadow inside the groove of the plank. -
Paint the Highlight Lines:
Once the shadow is dry, carefully remove the tape. Now, using a straight edge and your artist’s liner brush, paint a very thin cream highlight line immediately to the right of where the tape was. This simulates the light catching the edge of the board. -
Outline the Lower Panels:
Move to the lower wainscoting section. Use painter’s tape to mask off the outside edges of your drawn rectangles. -
Create Depth on Panels:
Paint the top and left inside edges of the rectangles with your shadow glaze to suggest a recessed corner. Paint the bottom and right inside edges with the highlight color. -
Add Inner Detail Lines:
to Mimic the routed edge of real trim, add a second, smaller rectangular outline inside the main one using the same shadow/highlight technique, keeping the lines crisp and parallel.
Step 3: Adding the Faux Texture
-
Tape for Vertical Texture:
In the image, the wainscoting panels (the lower boxes) have vertical slats inside them. Mark vertical lines inside your painted rectangles, spacing them 2 inches apart. -
Apply Shadows to Slats:
Using your straight edge as a guide, hand-paint thin vertical shadow lines along these marks with your liner brush and the dark glaze opacity kept low. -
Apply Highlights to Slats:
Follow immediately with a thin highlight line right next to each shadow line. The contrast between these two thin strokes creates the optical illusion of a groove.
Add Wood Grain
Before the final sheen coat, use a wood-graining rocker tool with a translucent glaze over the panel interiors to add a realistic timber texture.
Step 4: Final Finish Glazing
-
Simulate Sheen Difference:
This is the secret to the look. Tape off the ‘stiles and rails’ (the flat spaces between your panels). Paint the interior of the paneled sections with the semi-gloss version of your base beige color. -
Drying and Tape Removal:
Ideally, remove the tape while the semi-gloss paint is still slightly tacky to avoid pulling up ragged edges. Let the paint dry completely. -
Refine the Chair Rail:
To finish the transition, paint a thicker horizontal line (about 2 inches) at your chair rail mark. Add a dark shadow line underneath it and a bright highlight on the top edge to make it pop off the wall. -
Clean Up Edges:
Step back and check your work. Use a tiny brush with the base wall color to touch up any areas where your hand might have slipped or lines became too thick.
Now you have a stately, classical architectural feature that adds incredible depth to your room using only paint.
Faux Velvet Ombre for a Bold, Artsy Accent Wall
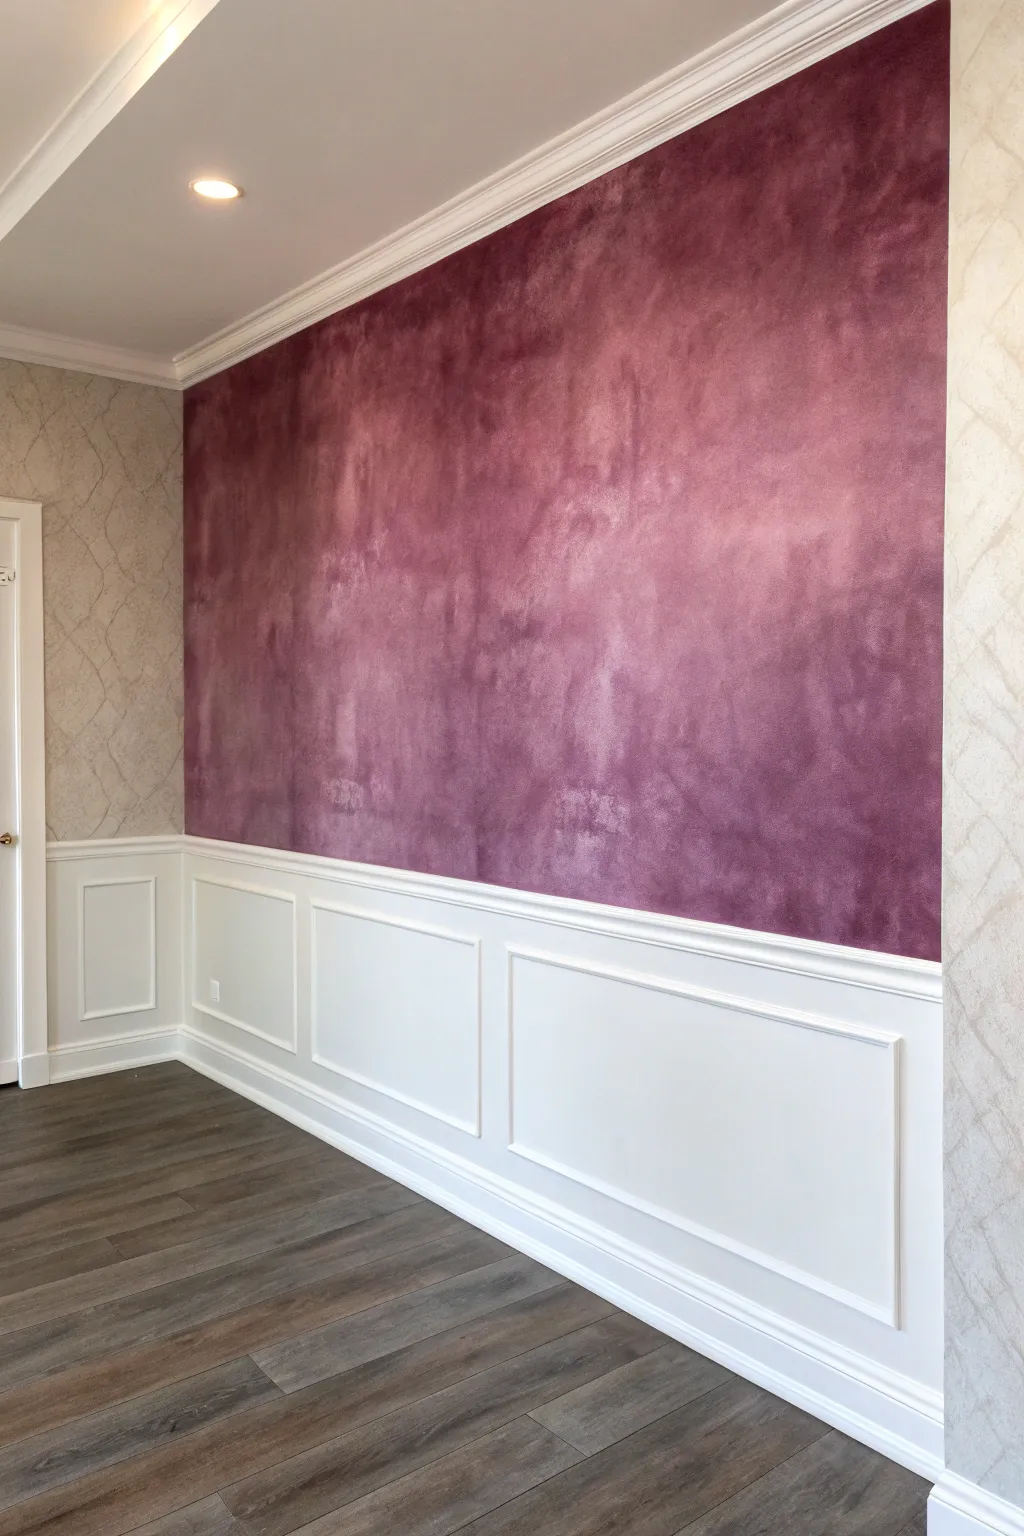
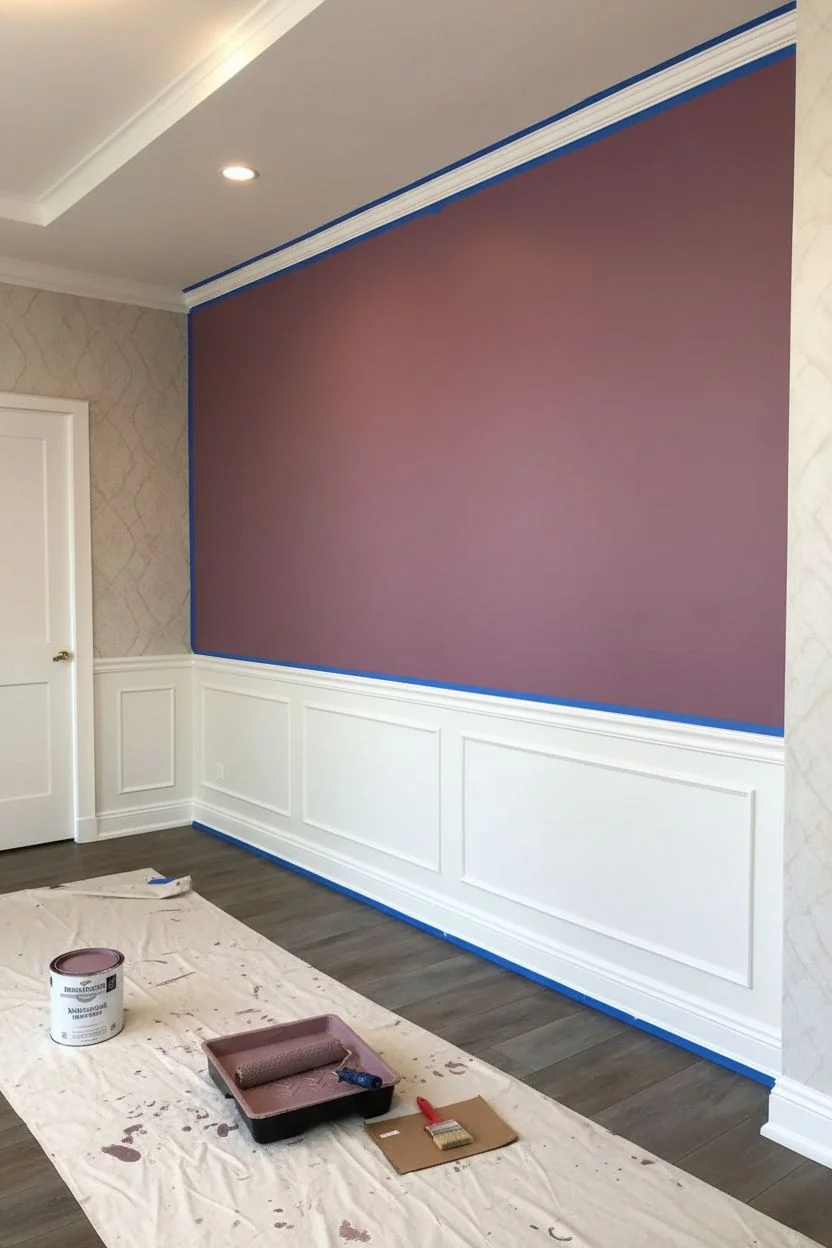
Transform a plain wall into a dramatic focal point with this faux velvet ombre effect that mimics the plush, soft texture of real fabric. The rich, mottled layers of deep plum and violet create depth and movement, bringing a sophisticated and artsy vibe to your space.
Detailed Instructions
Materials
- Interior painter’s tape
- Drop cloths
- White primer (if wall needs prep)
- Base coat paint (satin or eggshell latex, in a mid-tone mauve/purple)
- Darker glaze coat (deep plum or burgundy latex paint)
- Clear acrylic glazing medium
- Lint-free cotton rags or cheesecloth
- Sea sponge (natural)
- Paint tray and liners
- 2-inch angled sash brush
- Roller frame and cover
- Mixing bucket or container
- Stir sticks
Step 1: Preparation & Base Coat
-
Isolate the area:
Begin by taping off all adjacent surfaces with painter’s tape, specifically the ceiling line, the wainscoting or chair rail below, and the side walls. Press the tape edges down firmly to prevent bleed-through. -
Protect the floor:
Lay down drop cloths to protect your flooring, especially since the glazing process can get a bit drippy compared to standard rolling. -
Prime if necessary:
If painting over a dark color or raw drywall, apply a coat of white primer first. Let this dry completely before moving on. -
Cut in the base color:
Using your angled sash brush and the mid-tone mauve base paint, cut in around the perimeter of the wall section, getting right into the corners and along the tape lines. -
Roll the base coat:
While the cut-in edges are still wet, use a roller to apply the base coat to the entire wall area. Aim for solid, opaque coverage. -
Apply a second coat:
Once dry to the touch (check your paint can for specific times), apply a second coat of the base color to ensure a perfectly even foundation. Allow this to dry for at least 24 hours so it fully cures before glazing.
Natural Texture Pro Tip
Rotate your wrist constantly while sponging and ragging. Using the same hand position creates a repetitive ‘stamp’ pattern that ruins the organic look.
Step 2: Mixing & Applying Glaze
-
Prepare the glaze mixture:
In a mixing bucket, combine your darker plum paint with the clear glazing medium. A standard ratio is 1 part paint to 4 parts glaze, but checking a small test patch on cardboard is always wise. -
Dampen your sponge:
Take a natural sea sponge and dampen it slightly with water, squeezing out any excess. It should be soft and pliable, not soaking wet. -
Apply glaze in sections:
Work in small, irregular sections of about 3×3 feet at a time. Dip the sponge into the glaze mixture and dab it onto the wall in a random, cloudy pattern. -
Soften with rags:
Immediately after sponging on the glaze, take a crumpled, damp lint-free rag and blot the wet glaze. This softens the sponge marks and creates that cloudy, velvet-like texture. -
Blend the edges:
Keep the edges of your working section wet and irregular. Never stop a section with a hard, straight line, or you’ll see a seam when you start the next patch. -
Create depth with layers:
For areas where you want a deeper shadow (like the ‘folds’ of velvet), lightly dab a bit more glaze and blot less aggressively. I usually like to step back every few feet to check the overall balance. -
Repeat until covered:
Continue this sponge-on, rag-off process across the entire wall, blending each new section into the wet edge of the previous one.
Step 3: Finishing Touches
-
Review and touch up:
Look for any areas that seem too uniform or bare. You can lightly dab a little more glaze into these spots with a mostly dry sponge to blend them in. -
Remove tape carefully:
While the glaze is still slightly tacky (or fully dry, depending on your preference), carefully peel away the painter’s tape at a 45-degree angle to ensure a crisp line. -
Clean up wainscoting:
If any glaze seeped onto the white wainscoting below, wipe it immediately with a damp detailing cloth before it sets.
Level Up: Metallic Sheen
Mix a small amount of pearlized or metallic mixing medium into your glaze. This adds a subtle shimmer that catches the light like true velvet nap.
Enjoy the rich, tactile atmosphere your new velvet-finish wall brings to the room


Have a question or want to share your own experience? I'd love to hear from you in the comments below!