When I’m planning finger painting with 2-year-olds, I keep it simple: big motions, bright colors, and no pressure to “make” anything perfect. These ideas are all about toddler process art—quick to set up, easy to clean, and genuinely fun for those busy little hands.
One-Finger Dot Party for 2-Year-Olds
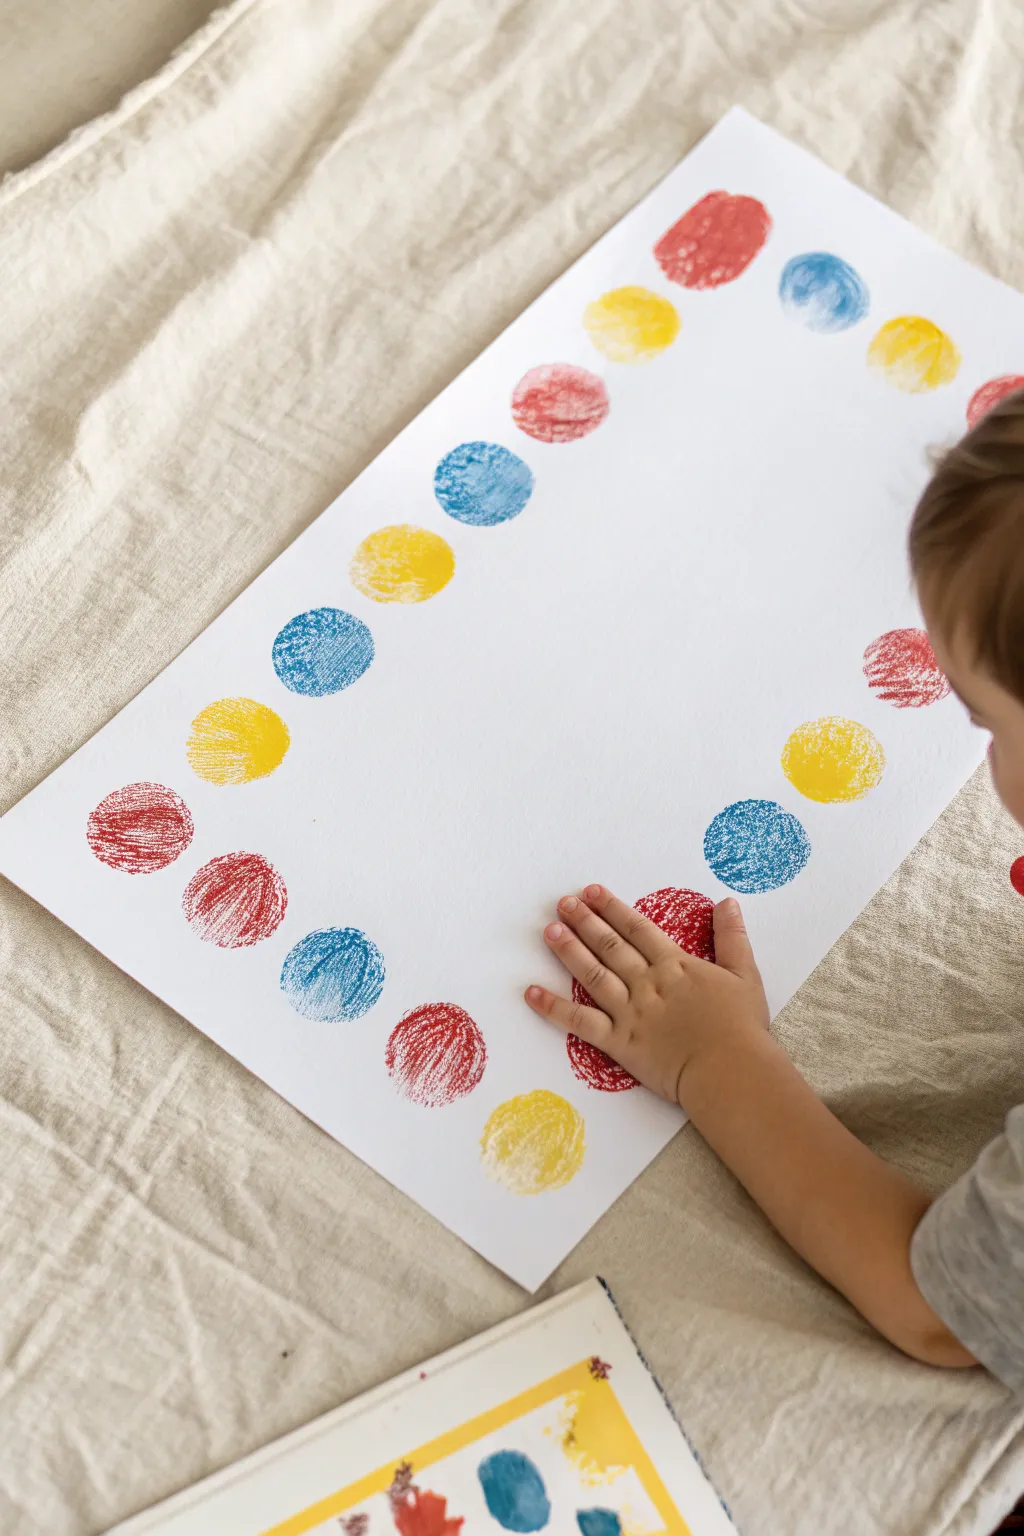
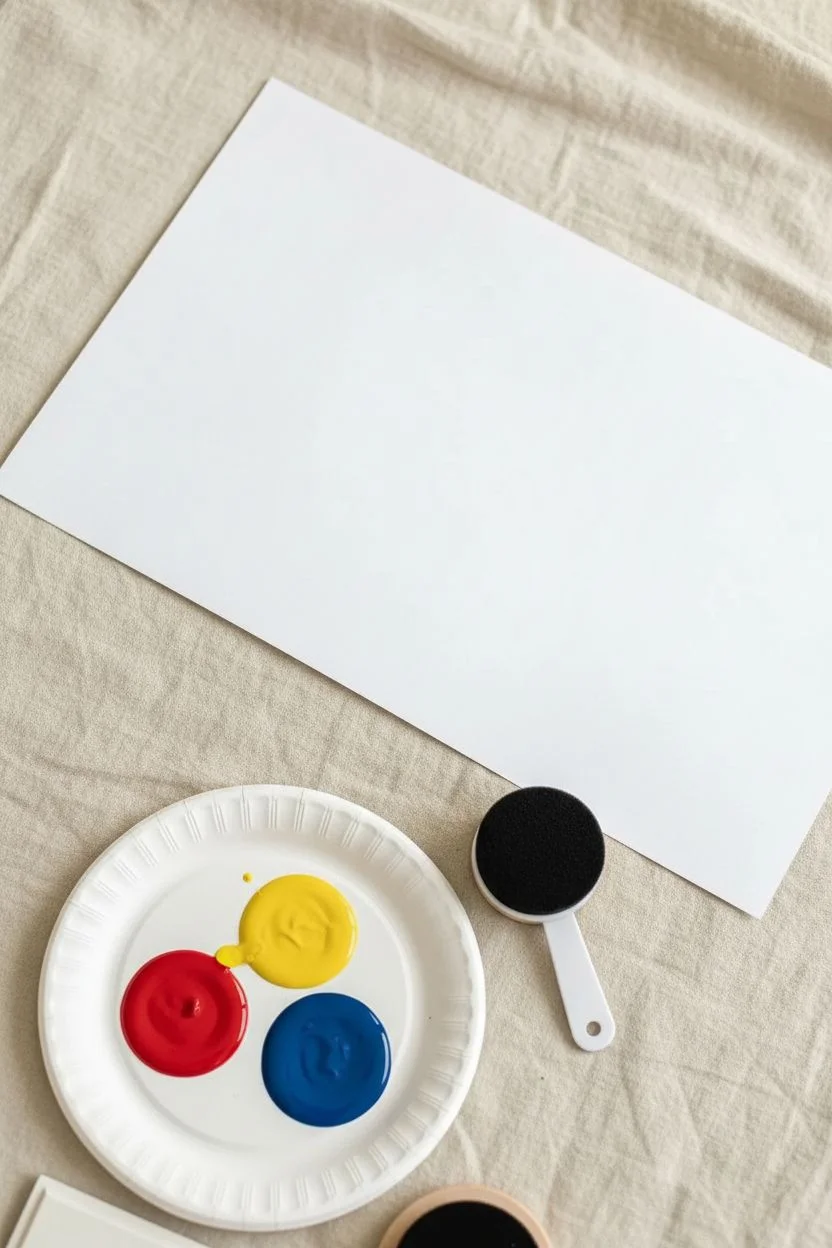
Create a fun visual game and art piece all in one with this simple dot border activity. The brightly colored circles form a frame around a blank center, inviting little ones to practice color recognition and motor control.
How-To Guide
Materials
- Large sheet of white paper (A3 or 11×17 inch recommended)
- Red washable paint or ink pad
- Yellow washable paint or ink pad
- Blue washable paint or ink pad
- Sponge daubers or large round stamps
- Paper plate or palette for paint
- Baby wipes for quick cleanup
Step 1: Setting the Stage
-
Prepare the workspace:
Lay down a drop cloth or old sheet to protect your surface, as finger painting can get expressive. Place the large sheet of white paper flat in the center of the workspace. -
Set up the colors:
Squeeze a dollop of red, blue, and yellow washable paint onto a paper plate. Ensure the puddles are wide enough for a sponge dauber to fit, but not too deep to avoid globs. -
Choose your tool:
Select a round sponge dauber or a large circular stamp. If you don’t have these, a cut potato or the bottom of a small paper cup works perfectly to create consistent circles.
Stamp Master Tip
Twist the sponge dauber slightly as you lift it off the paper. This helps release the suction and leaves a crisper, fuller circle with fewer missing patches.
Step 2: Creating the Border
-
Start the corner:
Begin at the top left corner of the paper. Press your dauber firmly into the red paint, tapping off any excess nearby. -
Stamp the first dot:
Stamp a solid red circle about an inch inward from the corner edges. Lift the tool straight up to keep the edges clean. -
Add a yellow dot:
Clean the dauber or switch to a fresh one. Load it with yellow paint and stamp a circle next to the red one, leaving a small gap of white space between them. -
Complete the sequence:
Ink up with blue paint and stamp the third dot in the line. This establishes your primary color pattern: red, yellow, blue. -
Continue the top edge:
Repeat the red-yellow-blue sequence across the top edge of the paper until you reach the right corner. Adjust the spacing slightly as you approach the end so the pattern fits neatly. -
Turn the corner:
Start moving down the right side of the paper. Continue the pattern from where you left off; for example, if you ended on blue, start the downward line with red. -
Stamp the side edges:
Work your way down both the left and right vertical sides of the paper, adhering to the color sequence. Try to keep the dots aligned with each other vertically for a tidy look. -
Close the bottom:
Finish the border by connecting the bottom edge with a final row of stamped dots. I like to step back here to make sure the spacing looks balanced across the bottom.
Step 3: Finishing and Drying
-
Let it dry completely:
Allow the paint to dry fully. Since the dots might have a thicker texture, give this at least 30 minutes to ensure they don’t smudge. -
Clean up immediately:
Wash the daubers or stamps right away with warm soapy water to prevent the paint from hardening in the sponge fibers. -
Inspect the texture:
Once dry, run a finger lightly over the dots. The texture should feel slightly raised and ‘chalky’ if using tempera, which is great for sensory exploration.
Game Time
Turn the artwork into a game! Once dry, call out a color and have your toddler race to touch a matching dot. It’s great for listening skills.
Now you have a colorful, handmade game board ready for interactive play.
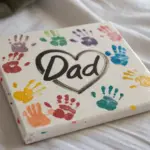
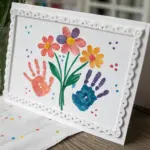
Handprint Sunshine Art for 2-Year-Olds

Brighten up any room with this radiant handprint sunshine that captures the warmth of summer. Using simple finger painting techniques, your little one transforms their hand into glowing rays and a cheerful, golden center.
Detailed Instructions
Materials
- Heavyweight white paper or cardstock
- Yellow washable tempera paint
- Orange washable tempera paint
- Paintbrushes (medium size)
- Paper plate or paint palette
- Baby wipes or damp paper towels (for quick cleanup)
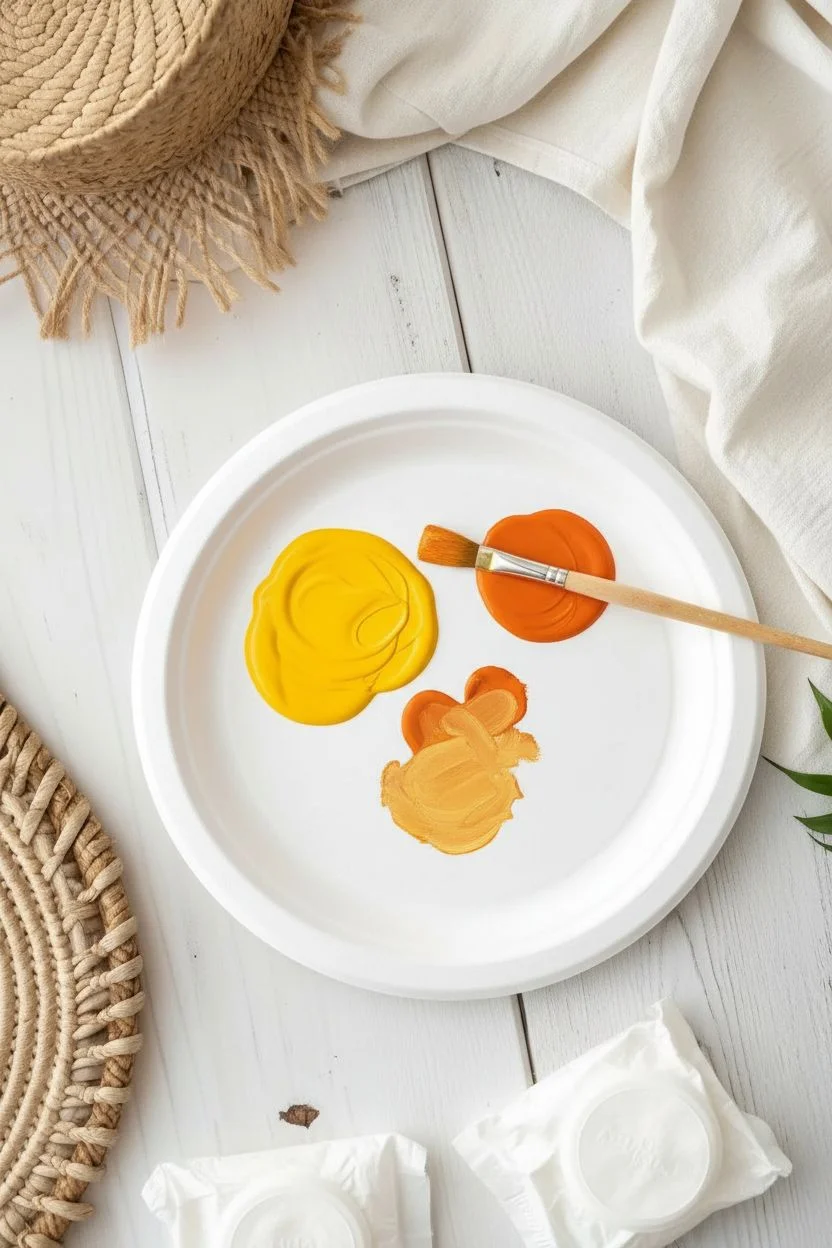
Step 1: Preparing the Colors
-
Set up your palette:
Squeeze a generous dollop of yellow paint onto your paper plate. -
Add the orange:
Place a smaller amount of orange paint next to the yellow, keeping them slightly separate for now. -
Mix a sun-kissed shade:
Use a brush to mix a little bit of orange into a portion of the yellow to create a warm, golden yellow-orange hybrid color.
Double-Dip for Depth
Don’t rinse the brush between yellow and orange. Letting the colors streak together on the hand creates a beautiful, fiery depth.
Step 2: Painting the Hand
-
Paint the palm:
Using a paintbrush, cover your child’s entire palm with a thick layer of bright yellow paint. Make sure not to let the paint dry too quickly before printing. -
Paint the fingers:
Paint the fingers with orange paint. For a more textured look, you can dab a little yellow on top of the orange while it’s still wet. -
Review coverage:
Check that the entire hand is well-coated. If you see dry spots, add a fresh dab of paint right before pressing down.
Step 3: Creating the Sun
-
Position the hand:
Guide your child’s hand over the center of the paper. Orient it so the fingers point upwards and slightly fanned out. -
Press firmly:
Press the hand down firmly onto the paper. Gently push on each finger and the center of the palm to ensure a good transfer. -
Lift carefully:
Hold the paper down with one hand and lift the child’s hand straight up to avoid smearing the print. -
Clean up quickly:
Wipe the painted hand immediately with a baby wipe or damp towel to keep things tidy before moving to the next step.
Smudged Print?
If the hand slides and smudges, turn the smear into a cloud or a second sun ray, or simply paint over it later with white for a quick fix.
Step 4: Adding Details
-
Paint the center swirl:
Dip a finger into the yellow paint and press it into the center of the palm print. -
Create a spiral:
Swirl the finger in a circular motion outward to create a bright, distinct spiral inside the sun’s body. -
Prepare for rays:
Dip a clean finger or a small brush into the yellow paint again. -
Add extra rays:
Draw simple straight lines radiating outward from the bottom and right side of the palm print to complete the circle of rays. -
Thicken the lines:
Go over the painted rays one more time if needed to match the thickness of the printed fingers. -
Let it dry:
I like to set this aside in a safe, flat spot for at least an hour to let the thicker paint blobs dry completely.
Hang this cheerful masterpiece in a sunny spot to remind you of warm days all year round


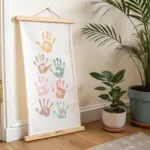
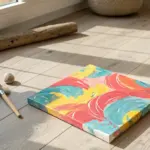
Handprint Rainbow Keepsake for 2-Year-Olds
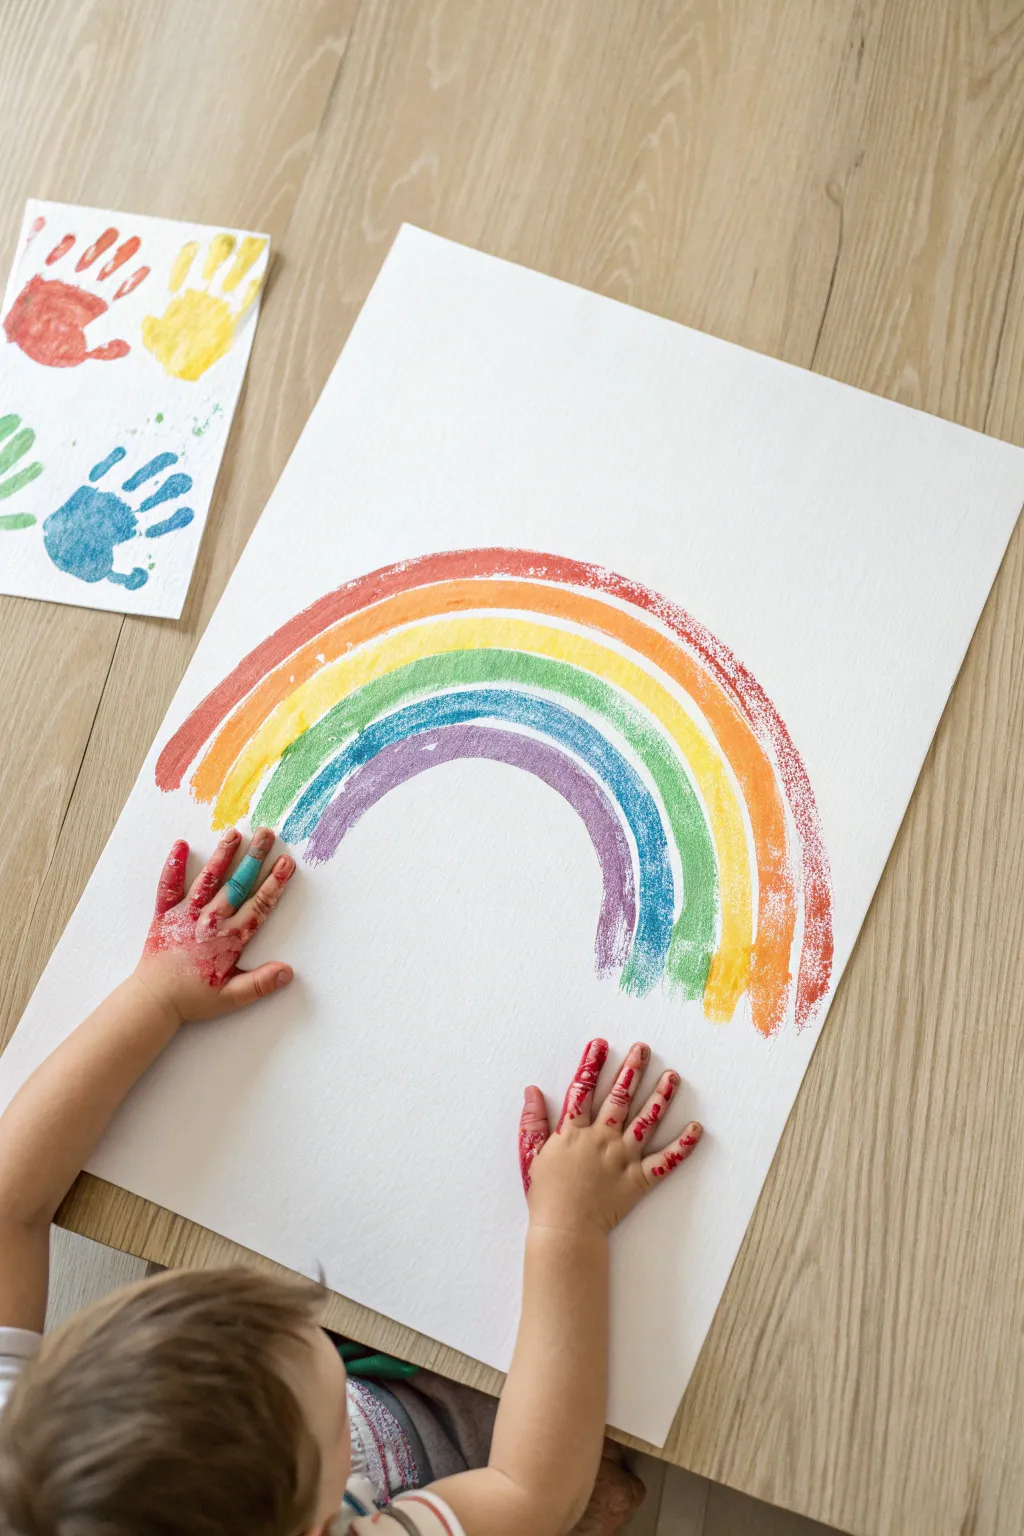
Create a vibrant, large-scale rainbow that captures the energy of your toddler’s movements. This simple yet striking project uses broad, sweeping motions to produce a beautiful arch of colors perfect for playroom walls.
Step-by-Step Tutorial
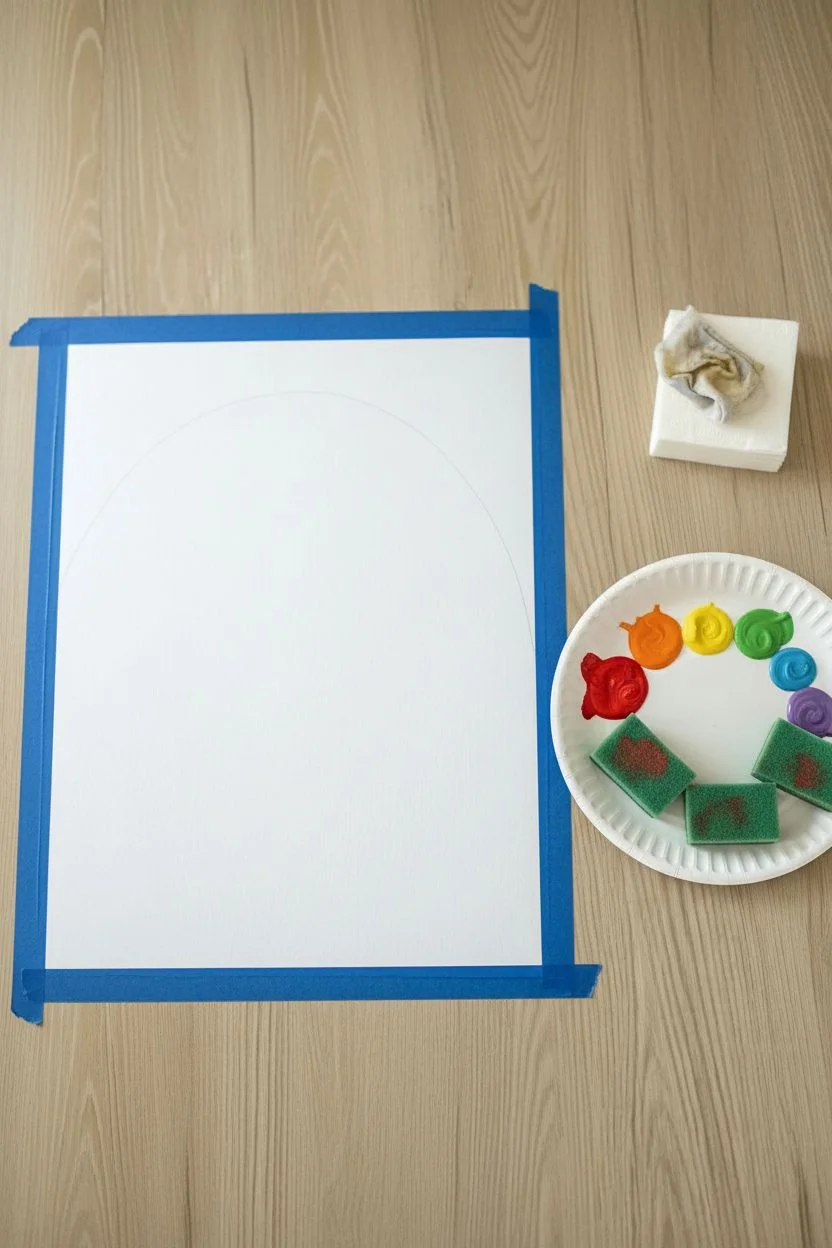
Materials
- Large sheet of heavyweight white paper or poster board (A2 size or larger)
- Washable tempera or finger paints (red, orange, yellow, green, blue, purple)
- Wide foam brushes or kitchen sponges cut into strips
- Painter’s tape or masking tape
- Paper plate or palette for paints
- Wipes or damp cloth for quick clean-ups
Step 1: Preparation
-
Secure the workspace:
Clear a large section of a table or the floor. Since toddlers can be enthusiastic, tape the corners of your large white paper down to the surface so it doesn’t slide around during the big swipes. -
Prepare the palette:
Squeeze generous dollops of each rainbow color onto a paper plate or palette. Keep them separated to avoid muddying the colors before you start. -
Ready the sponges:
If you don’t have wide foam brushes, cut a kitchen sponge into rectangular strips, one for each color. These broad tools are easier for little hands to control than thin bristles.
Step 2: Painting the Rainbow
-
Map the arch:
Before involving your toddler, you might want to lightly sketch a very faint pencil line for the top red arch just to guide the shape, though freehanding adds charm. -
Start with red:
Dip the first sponge or foam brush into the red paint. Ensure the bottom face of the sponge is fully coated but not dripping. -
Create the first swipe:
Guide your toddler’s hand to create the largest, outermost arch. Start from the bottom left and sweep up and over to the bottom right in one continuous motion if possible. -
Move to orange:
Switch to a fresh tool and the orange paint. Place this stroke immediately underneath the red one, following the same curve. It’s okay if the edges touch or blend slightly; it creates a nice texture. -
Continue the spectrum:
Repeat the process for yellow, green, blue, and purple. As you move inward to the smaller arches, the curves will need to be tighter. -
managing the spacing:
Try to keep the gaps between colors minimal. If a gap appears, you can always go back over it, but the rough, dry-brush look shown in the image is part of the aesthetic.
Uneven Arches?
If the arches look wobbly or uneven, don’t correct them! The imperfections show your child’s natural range of motion and make it a true keepsake.
Step 3: Finishing Touches
-
Add handprints (Optional):
While the paint is wet or after cleaning up the tools, you can have your child stamp a handprint in a contrasting color near the rainbow, or on a separate practice sheet like in the photo. -
Let it dry:
Remove the tape carefully only after the paint has fully dried to prevent tearing the paper edges. -
Display:
Find a spot on the wall to hang this cheerful masterpiece once it is completely dry to the touch.
Texture Tip
Use a slightly dry sponge (less paint) to get that textured, crayon-like effect seen in the photo. Too much paint makes it look solid and flat.
Now you have a colorful, oversized keepsake that brightens up the room and freezes a moment of your toddler’s artistic stage in time
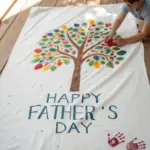


Handprint Elephant Art for 2-Year-Olds

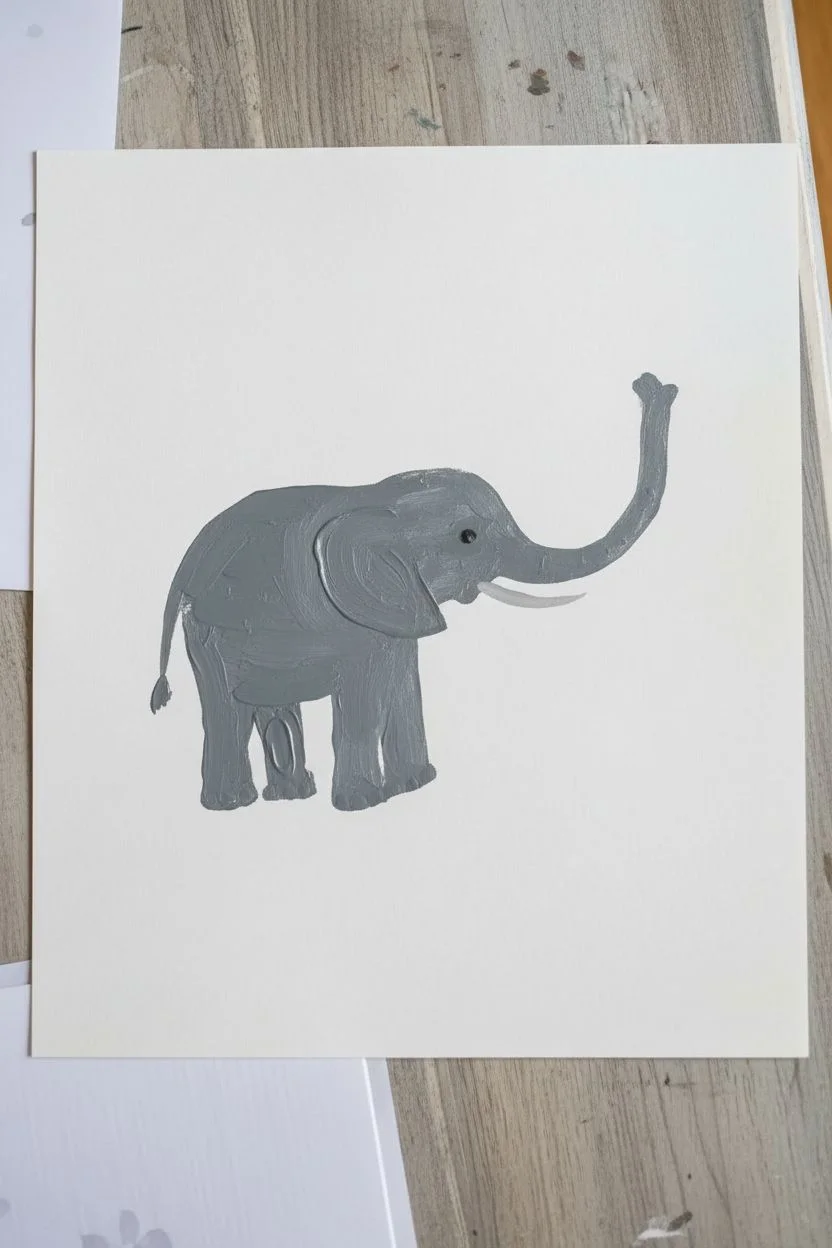
Transform a simple gray handprint into a playful splash of water coming from an elephant’s trunk. This project combines a cute illustration with a sensory painting activity perfect for little hands.
How-To Guide
Materials
- Heavyweight white paper or cardstock
- Gray tempera or poster paint
- Thick black marker or black paint pen
- Paintbrush (medium size)
- Small sponge or foam brush (optional)
- Protective table cover
- Baby wipes or damp cloth (essential for clean-up!)
Step 1: Painting the Elephant Body
-
Outline the Shape:
Start near the bottom left of your paper. With gray paint and a brush, outline the main body of the elephant. Think of a large, rounded rectangle shape for the body and sturdy legs. -
Fill in the Body:
Fill the outlined shape with gray paint. Use smooth strokes to create a solid color. It doesn’t have to be perfect; textured brush strokes add character. -
Add the Head and Trunk:
Extend the paint shape upwards to create the head. Curve a trunk upwards towards the center of the page. This upward curve is crucial as it will connect to the handprint later. -
Let it Dry:
Allow the gray paint of the elephant’s body to dry completely. This prevents smudging when you add the details later. I usually wait about 15-20 minutes for tempera paint.
Clean Prints Pro-Tip
For the sharpest handprint, practice on a scrap paper first. Gently pressing down on each of your child’s knuckles ensures the fingers print fully.
Step 2: Creating the Handprint Spray
-
Prepare the Hand:
While the body dries, get your toddler’s hand ready. Using a sponge or large brush, coat the palm and fingers of one hand with a generous layer of the same gray paint. -
Check Paint Covering:
Ensure the paint is wet but not dripping. If it’s too thick, the print might smudge; too thin, and it won’t show up clearly. -
Position the Hand:
Guide your child’s hand to the area directly above the painted trunk. Orient the hand so the fingers point upward and slightly outward, mimicking a spray of water. -
Press and Lift:
Firmly press the palm and each finger down onto the paper. Lift the hand straight up quickly to get a clean print without dragging. Clean that messy hand immediately with a wipe. -
Add Droplets (Optional):
If you want extra ‘splash’ effects, dip a fingertip in gray paint and add a few small dot prints around the main handprint.
Step 3: Adding Details
-
Outline the Ear:
Once the gray body is dry, use a thick black marker or paint pen to draw a large, floppy ear shape on the side of the head. -
Define the Ear Flap:
Add a few curved lines inside the ear outline to suggest the fold and texture of the elephant’s skin. -
Draw the Eye:
Place a solid black dot near the base of the trunk for the eye. You can add a tiny white dot inside it later for a sparkle if you wish. -
Detail the Trunk:
Draw small, curved hatch marks horizontally along the trunk to give it a wrinkled texture. -
Draw the Mouth and Tusks:
Add a small curved line for a smile under the trunk. Use white paint or a white gel pen to draw a small tusk curving upward. -
Finish the Feet:
At the bottom of the legs, draw small semi-circles with the black marker to represent the elephant’s toenails. -
Add a Tail:
Draw a thin line extending from the back of the elephant for a tail, finishing it with a little tuft of hair at the end.
Level Up: Blue Splash
Instead of gray for the handprint, use light blue paint. This makes the ‘spray’ look like real water and adds a nice pop of color to the artwork.
Hang this adorable keepsake on the fridge to remember just how small those hands once were
BRUSH GUIDE
The Right Brush for Every Stroke
From clean lines to bold texture — master brush choice, stroke control, and essential techniques.
Explore the Full Guide
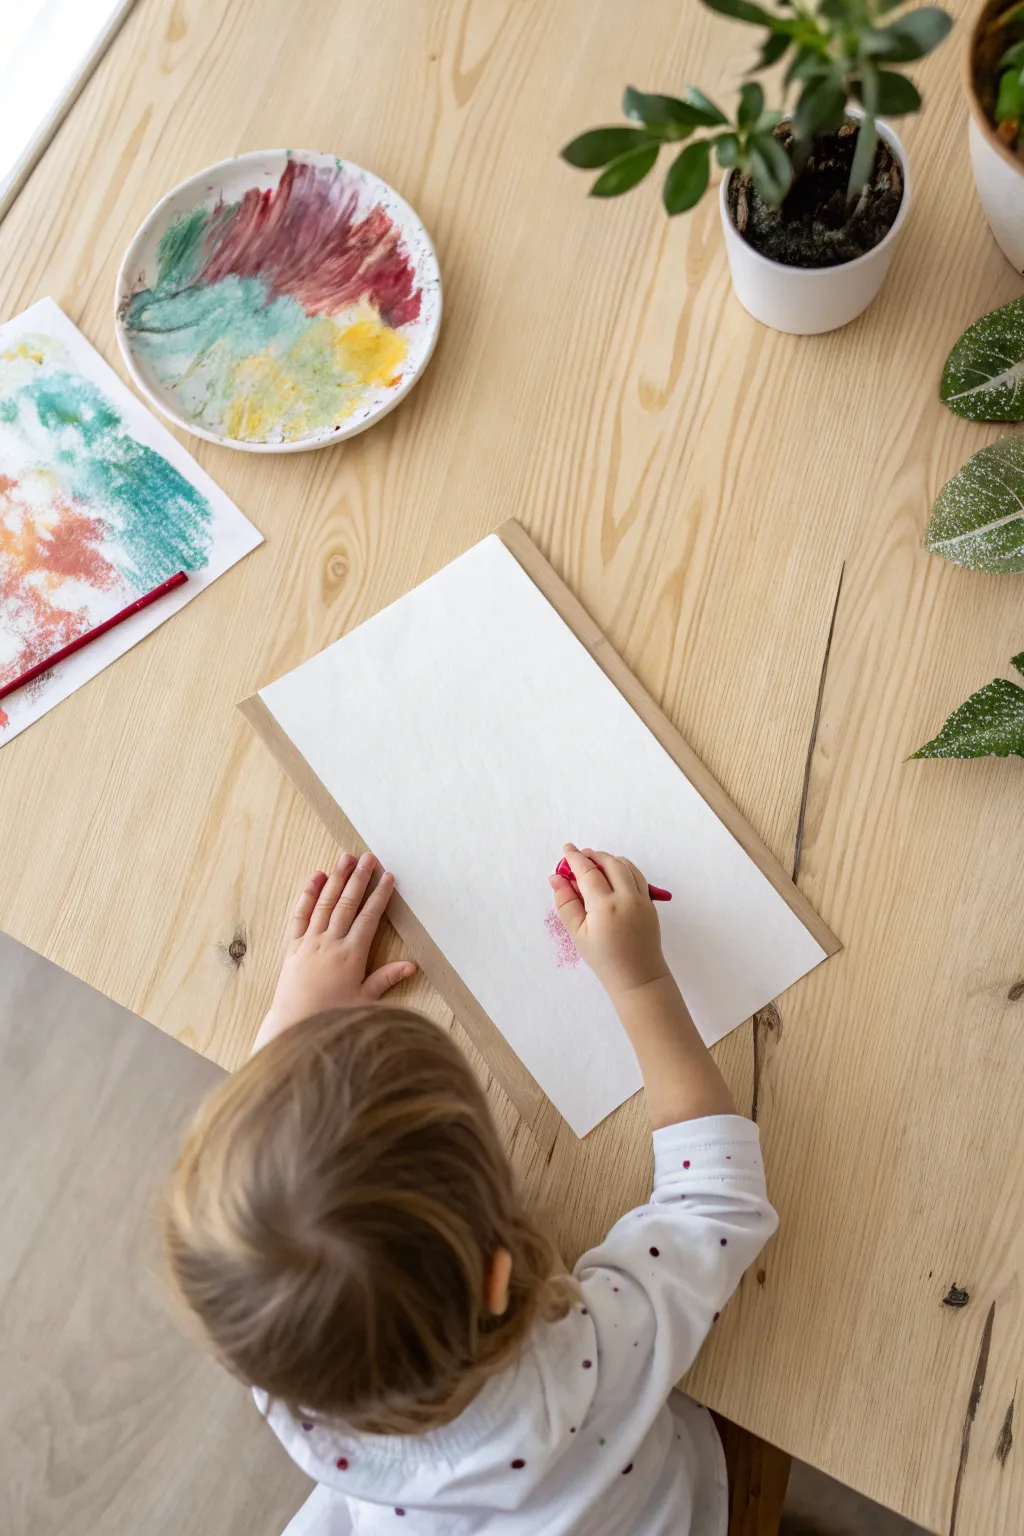
Print-Pull Finger Painting for 2-Year-Olds

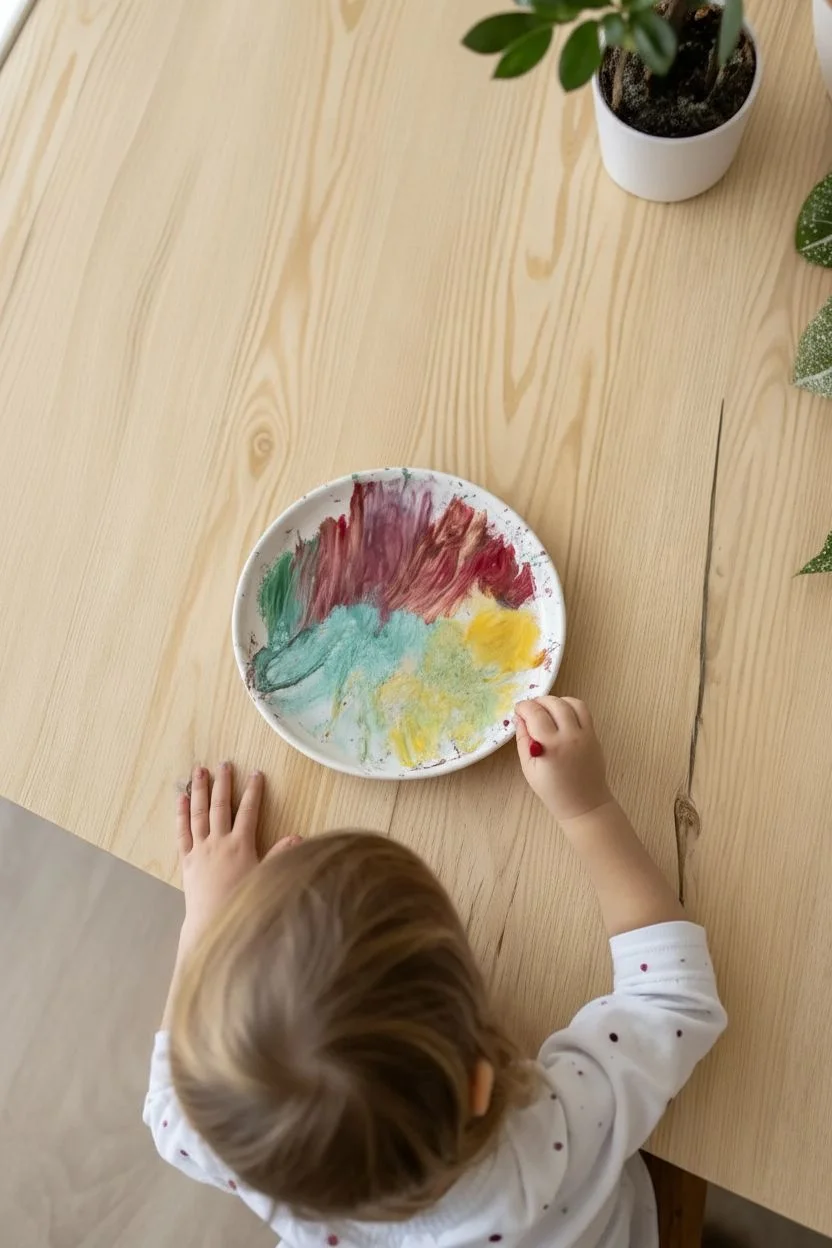
This engaging technique bridges the gap between drawing and finger painting, creating soft, textured prints that capture the energy of toddler art. It turns simple scribbles into surprising, watercolor-like abstract pieces with minimal mess compared to traditional finger painting.
Step-by-Step Guide
Materials
- Small ceramic or plastic plate (white works best to see colors)
- Washable finger paints or tempera paints (red, yellow, green, teal)
- Heavyweight drawing paper or mixed media paper
- Kraft paper or cardboard sheet (for a work surface backing)
- Red wax crayon or oil pastel
- Pencil (optional, for tracing)
Step 1: Preparing the Paint Plate
-
Plate selection:
Choose a small, flat plate to serve as your ‘printing plate.’ A white ceramic dessert plate works beautifully because it’s sturdy and shows true colors. -
Apply base colors:
Squeeze small, pea-sized blobs of washable paint directly onto the plate. Use a variety of colors—in this project, we are using deep reds, golden yellows, and teal greens. -
Finger mix:
Encourage your toddler to use their fingers to gently spread and swirl the paint around the plate. The goal isn’t to mix a muddy brown, but to create zones of color that touch and blend slightly at the edges. -
Check consistency:
Ensure the paint layer is relatively thin and even. If it’s too thick, the paper will just slide around; if it’s too thin, it won’t transfer. A tacky, creamy consistency is perfect.
Clean Edges Trick
Tape the paper to the table surface on one side only (like a hinge) before placing it over the paint. This prevents the paper from sliding while your toddler draws.
Step 2: The Draw-Transfer Process
-
Prepare the workspace:
Set up a piece of cardboard or kraft paper on the table. This acts as a defined workspace and protects the table, giving the paper a bit of cushion. -
Position the paper:
Take a fresh sheet of white drawing paper. Gently place it face-down directly onto the painted plate. Do not press down with your hand yet. -
Secure the stack:
Carefully move the paper—with the plate still underneath it—to the cardboard workspace, or simply bring the cardboard over to the plate. The paper is now hiding the paint. -
Select a drawing tool:
Hand your child a red wax crayon or oil pastel. A chunky crayon is easier for little hands to grip firmly. -
Draw on the back:
Ask the child to draw on the blank side of the paper while it is resting on top of the wet paint. They can scribble, draw shapes, or make dots. -
Pressure application:
Explain that they need to press hard. Where they press with the crayon, the paper will pick up the paint from the plate underneath. I find that oil pastels work great here because they encourage firmer pressure. -
Add sensory interaction:
Let them use their fingers to lightly rub areas of the paper as well for softer, cloud-like transfers of color alongside the sharp crayon lines.
Step 3: The Reveal
-
Peel back:
Once the drawing is done, help your toddler grab one corner of the paper. -
The pull:
Slowly peel the paper off the plate. This is the magic moment—the ‘print’ will be revealed on the side that was touching the paint. -
Observe the texture:
Notice how the paint has a unique, fuzzy texture where the crayon lines were drawn. The rest of the paper might have light smudges, adding an artistic background effect. -
Dry flat:
Lay the finished print face up on a flat surface to dry. Since the paint layer is thin, it should dry relatively quickly. -
Repeat:
The plate usually still has enough paint for a second ‘ghost’ print. Place a new sheet of paper on top and repeat the drawing process to see a lighter version.
Level Up: Texture Tools
Instead of just crayons, use the back of a paintbrush, a toy car wheel, or a blunt stick to draw on the back of the paper for different line thicknesses and textures.
You can display these beautiful monoprints in a frame once dry, showcasing the unique collaborative effort between paint and crayon


Have a question or want to share your own experience? I'd love to hear from you in the comments below!