Toddlers don’t need fancy tools to make something adorable—they just need paint, paper, and permission to get a little messy. Here are my go-to finger painting ideas for toddlers that turn tiny prints and happy smudges into recognizable, frame-worthy art.
Handprint Sunshine With Finger-Rays

Bring a little bit of summer inside with this cheerful finger painting project that pairs a classic handprint with a bright, beaming sun. The vibrant yellow paint pops beautifully against crisp white paper, creating a keepsake that captures the warmth of small hands.
Step-by-Step
Materials
- White cardstock or heavy construction paper
- Non-toxic yellow finger paint
- Paper plate or shallow paint palette
- Paintbrush (optional, for applying paint to hand)
- Baby wipes or damp paper towels for cleanup
- Painter’s tape (optional)
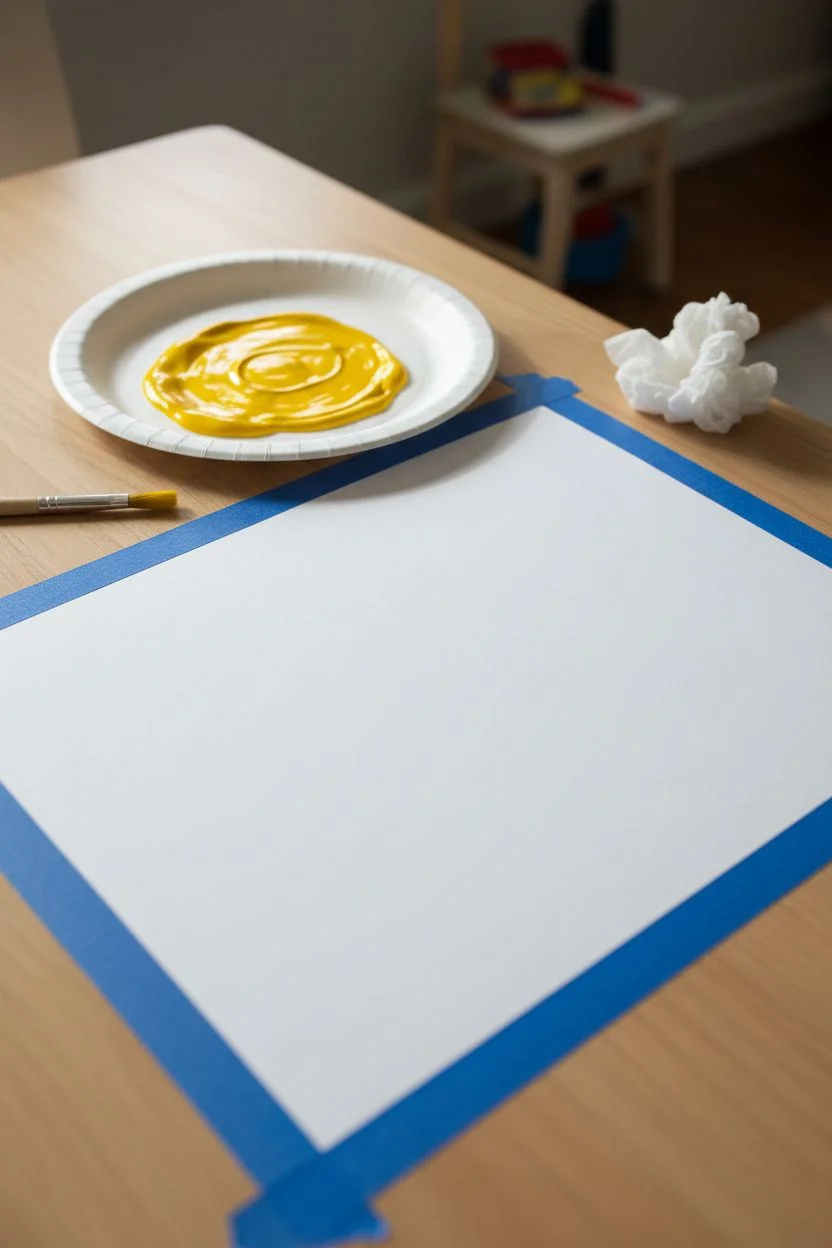
Step 1: Preparation
-
Set the workspace:
Clear a flat surface and perhaps tape the corners of your white cardstock down to prevent it from sliding around while your toddler works. -
Prepare the paint:
Squeeze a generous amount of yellow finger paint onto a paper plate. You want a puddle large enough to fit a toddler’s hand or wide enough to easily dip a brush into.
Step 2: The Handprint
-
Coat the hand:
Either dip the child’s hand directly into the yellow paint or use a paintbrush to coat their palm and fingers evenly. -
Check for coverage:
Ensure the thumb and all four fingers have a solid layer of paint, but try to avoid globs that might smudge excessively. -
Position the hand:
Guide the hand towards the lower center of the paper. Orient the hand so the fingers point slightly outward to the left, rather than straight up. -
Press down:
Firmly press the palm down first, followed by each finger. Gently massage over the top of the hand to ensure good contact with the paper. -
Lift carefully:
Hold the paper down with one hand and swiftly lift the painted hand straight up to get a crisp impression. Wipe the hand clean immediately with baby wipes.
Clean Print Tip
For the sharpest handprint, practice on a scrap piece of paper first. This helps determine exactly how much paint is ‘too much’ before committing to the final cardstock.
Step 3: Painting the Sun
-
Dip a finger:
Have the child dip their index finger into the yellow paint. I find that using just the tip gives better control for drawing lines. -
Draw the circle:
Above the handprint and slightly to the right, guide them to draw a rough circle. It doesn’t need to be perfect; a wobbly circle adds character. -
Fill the sun (optional):
Leave the center of the sun open like a ring, or smear a little paint inside to give it a solid core, depending on preference. -
Start the rays:
Dip the finger again if needed. Start drawing short lines radiating outward from the sun circle. -
Space the rays:
Create rays all around the circle. Vary the lengths slightly—some short, some longer—to mimic the shimmering look of light. -
Connect the elements:
You can position a few rays so they seem to reach down toward the handprint, visually connecting the two yellow elements. -
Add texture:
If the paint seems too thin in spots, dab a little extra onto the sun or rays to build up a nice, bright texture.
Make It Sparkle
While the yellow paint is still wet, lightly sprinkle fine iridescent or gold glitter over the sun and rays to give the artwork a magical, shimmering finish.
Step 4: Final Touches
-
Check balance:
Look at the composition. If the sun feels lonely, add a few extra stray dots or small dashes of yellow around it for artistic flair. -
Dry properly:
Carefully move the paper to a safe, flat drying area. Thick finger paint can take a few hours to dry completely. -
Flatten the paper:
Once fully dry, if the paper has curled from the moisture, place it under a heavy book for a day to flatten it out again.
Now you have a captured moment of sunshine to brighten up any wall or refrigerator door


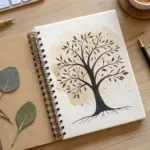
Handprint Tree With Fingerprint Leaves
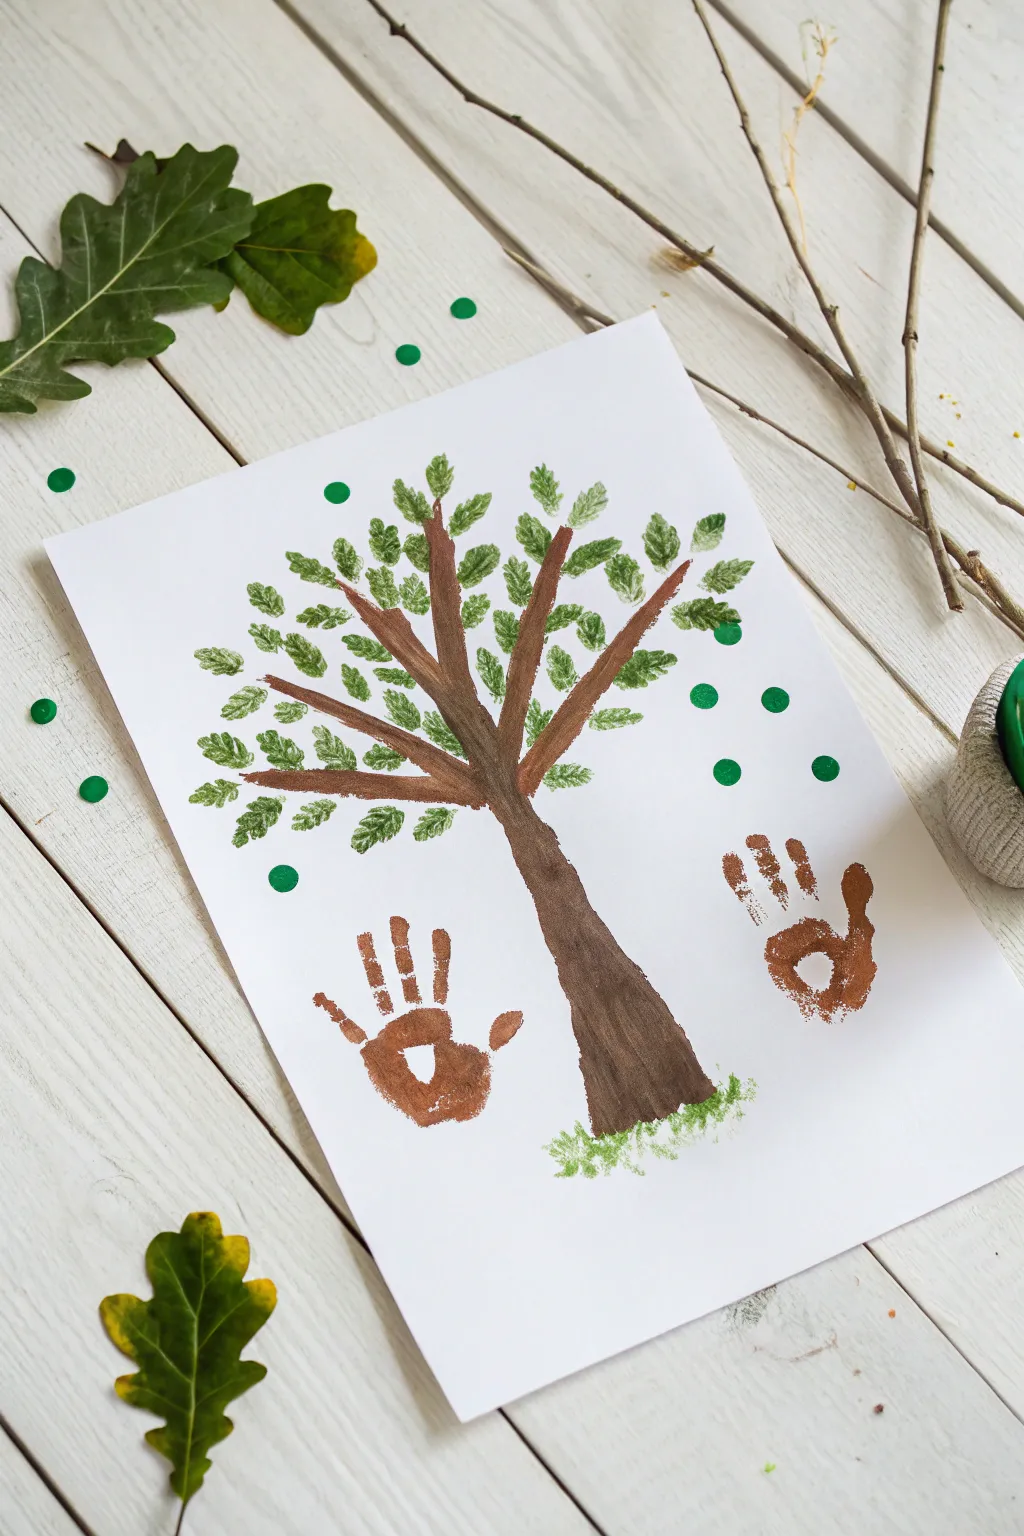
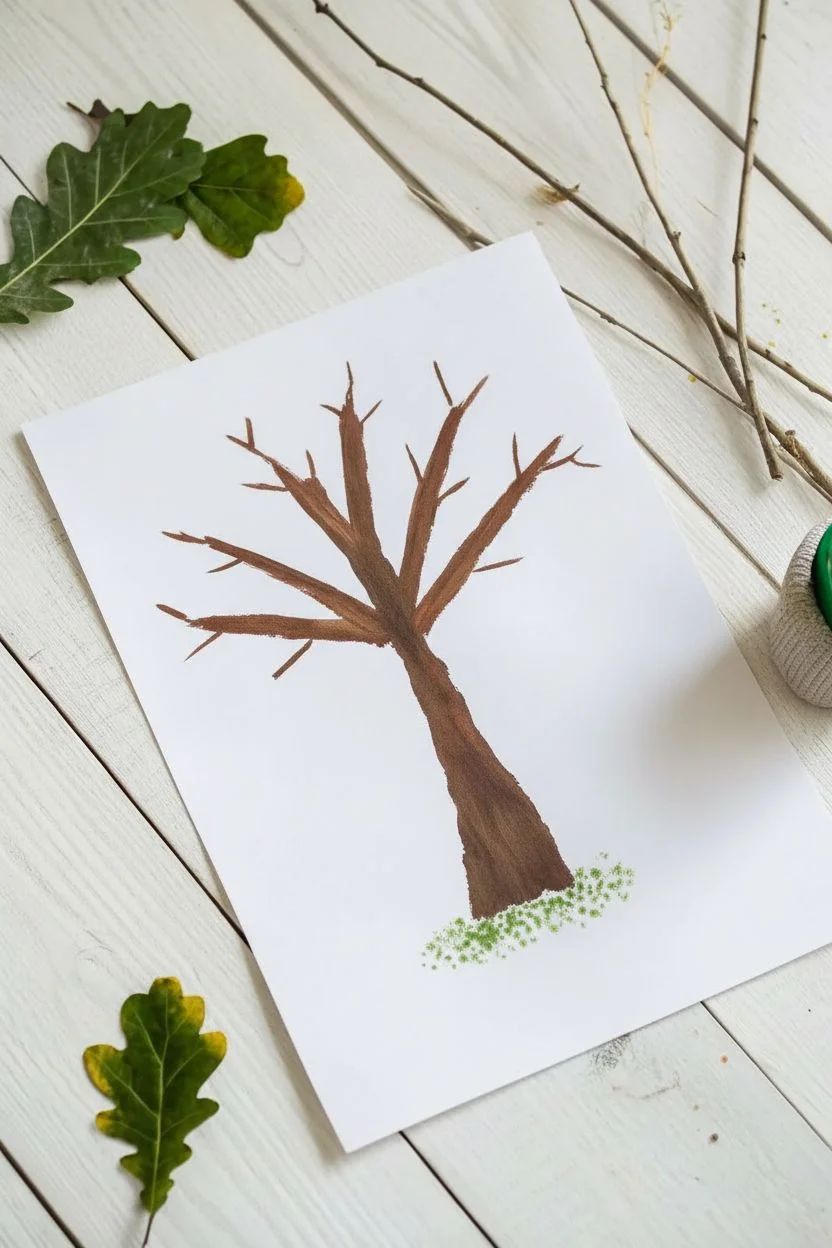
This charming nature-inspired craft combines a hand-painted trunk with delicate fingerprint leaves to create a sturdy oak tree. Two little brown handprints frame the scene, making it a wonderful keepsake that captures the size of your little one’s hands.
Step-by-Step Guide
Materials
- White cardstock or heavy-weight construction paper
- Brown tempera or acrylic paint
- Green tempera or acrylic paint
- Small paintbrush (for the trunk details)
- Small sponge or foam brush (optional)
- Green paper confetti or small green dot stickers (optional decoration)
- Palette or paper plate for mixing
Step 1: Painting the Tree Structure
-
Outline the trunk:
Start by dipping a small paintbrush into brown paint. About 2 inches from the bottom edge of your paper, paint a vertical line upward for the trunk, widening it slightly at the base to create roots. -
Fill in the trunk:
Paint the trunk solid brown, using smooth vertical strokes. Make the texture look natural by slightly varying the pressure on your brush. -
Add main branches:
From the top of the trunk, paint three or four main branches extending outwards and upwards. Think of a ‘Y’ shape branching out to fill the center of the page. -
Create smaller twigs:
Extending from your main branches, paint thinner, shorter lines for twigs. These will serve as the anchor points for your leaves later. -
Paint the grass base:
Clean your brush and switch to green paint. Using a stippling motion (dabbing up and down), add a small patch of grass right at the base of the trunk to ground your tree. -
Let the structure dry:
Set the paper aside for about 10-15 minutes. It’s important that the brown branches are mostly dry before adding green leaves so the colors don’t muddy.
Clean Prints
For the clearest handprints, have a damp wipe ready immediately. Also, gently press each of your child’s knuckles down individually once their hand is on the paper to ensure a full print.
Step 2: Adding the Foliage
-
Prepare the green paint:
Squeeze a blob of green paint onto your palette. Consider mixing a tiny bit of yellow in if you want a lighter, fresh leaf color. -
Dip the finger:
Have your child dip their index finger into the green paint. You want a decent coating, but not so much that it trips. -
Stamp the first leaves:
Press the painted finger firmly onto the ends of the painted twigs. Lift straight up to get a clear oval print. -
Fill out the canopy:
Continue stamping fingerprints all around the branches. I like to group them in clusters of two or three to mimic how oak leaves grow. -
Add floating leaves:
Stamp a few green fingerprints detached from the tree branches, as if they are blowing in the wind or falling down. -
Create texture:
If the child tries to slide their finger, that’s okay—a little smear actually makes the leaves look like they have texture.
Step 3: Personalizing the Keepsake
-
Coat the hands:
Using a sponge brush or a large paintbrush, cover the palm and fingers of your child’s hand with brown paint. -
Position the left print:
Guide the hand to the bottom left empty space on the paper. Press down firmly, ensuring the palm makes contact, then lift straight up. -
Position the right print:
Re-apply paint if necessary and repeat the process on the bottom right side of the paper. -
Add the confetti dots:
If you have green paper confetti or dot stickers, scatter 5-10 of them randomly around the white space of the paper to look like falling magical spores or distant leaves. -
Final dry time:
Let the entire project sit flat to dry completely, which usually takes about one hour.
Make it Seasonal
Switch the green fingerprint leaves for orange, red, and yellow paints to instantly transform this into an autumn scene, or use pink fingerprints for a spring cherry blossom tree.
Once dry, you can sign and date the bottom to remember exactly how small those hands were at this age
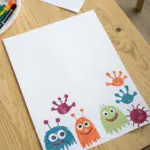
Fingerprint Caterpillar Parade
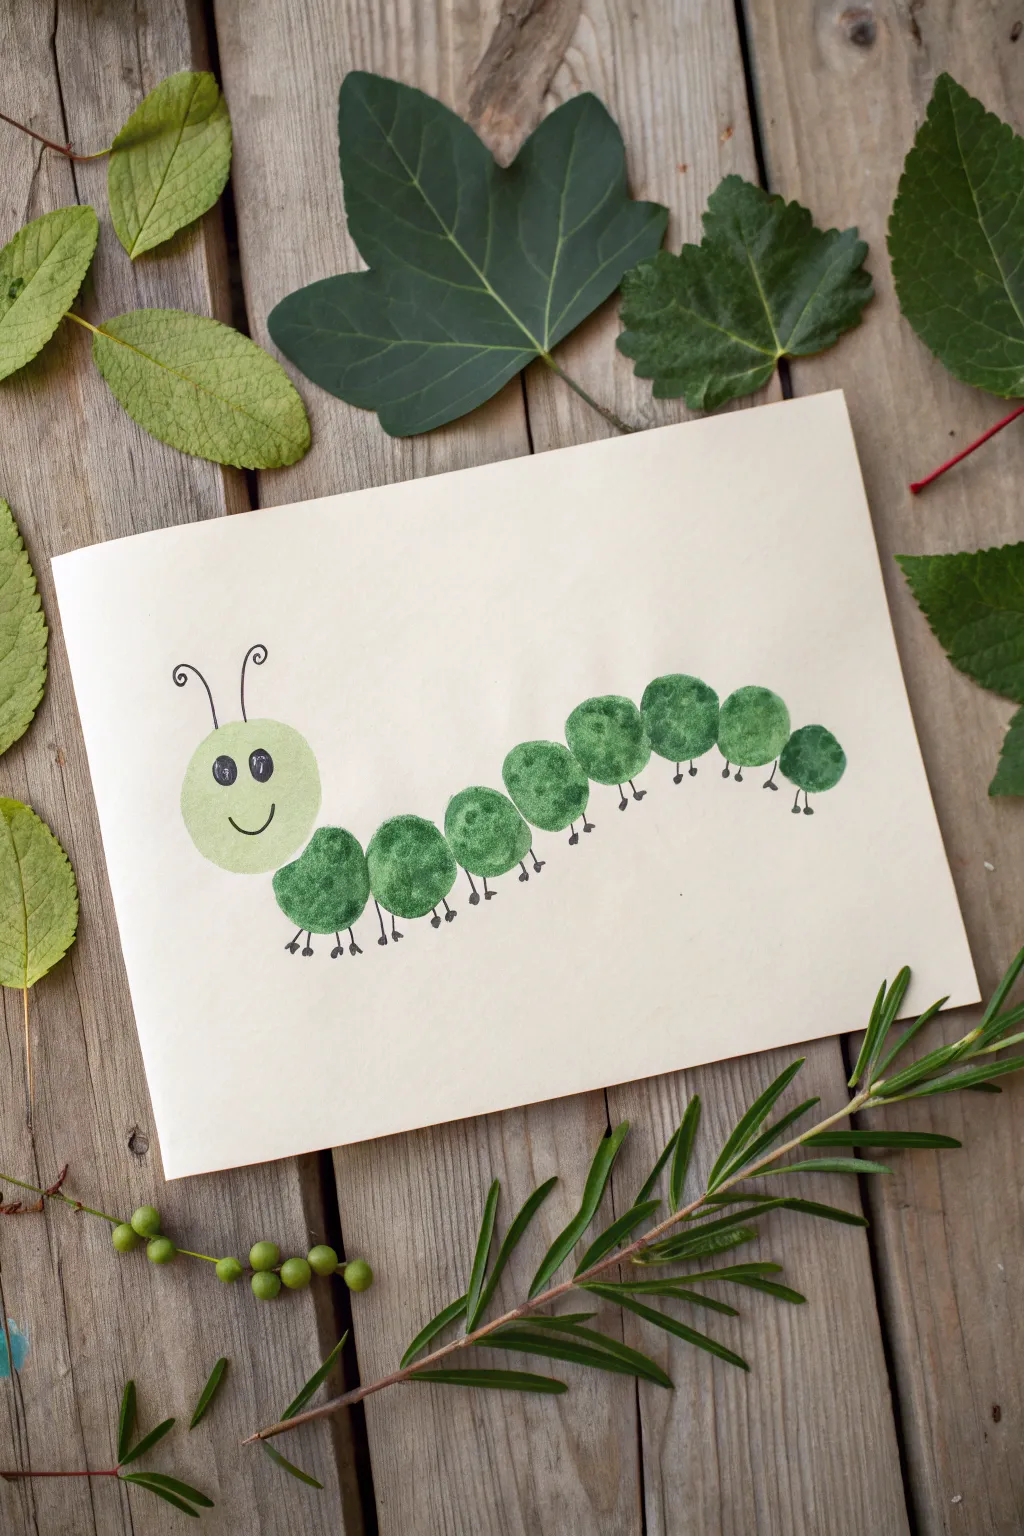
Transform little fingertips into a charming garden creature with this delightful and simple project. The result is a vibrant green caterpillar inching its way across the page, complete with a friendly smile and wiggly antennae.
Step-by-Step Tutorial
Materials
- Heavyweight white cardstock or art paper
- Green washable paint (two shades: light and dark)
- Black fine-point marker or pen
- Paper plate or palette
- Damp cloth or wipes for cleanup
- Flat work surface
Step 1: Setting the Scene
-
Prepare the workspace:
Lay down your cardstock on a flat surface. Since we are working with paint, ensure the area is clear of other items. -
Ready the palette:
Squeeze a dollop of the darker green paint onto your paper plate. If you have a lighter green, add a small amount nearby, but don’t mix them completely yet.
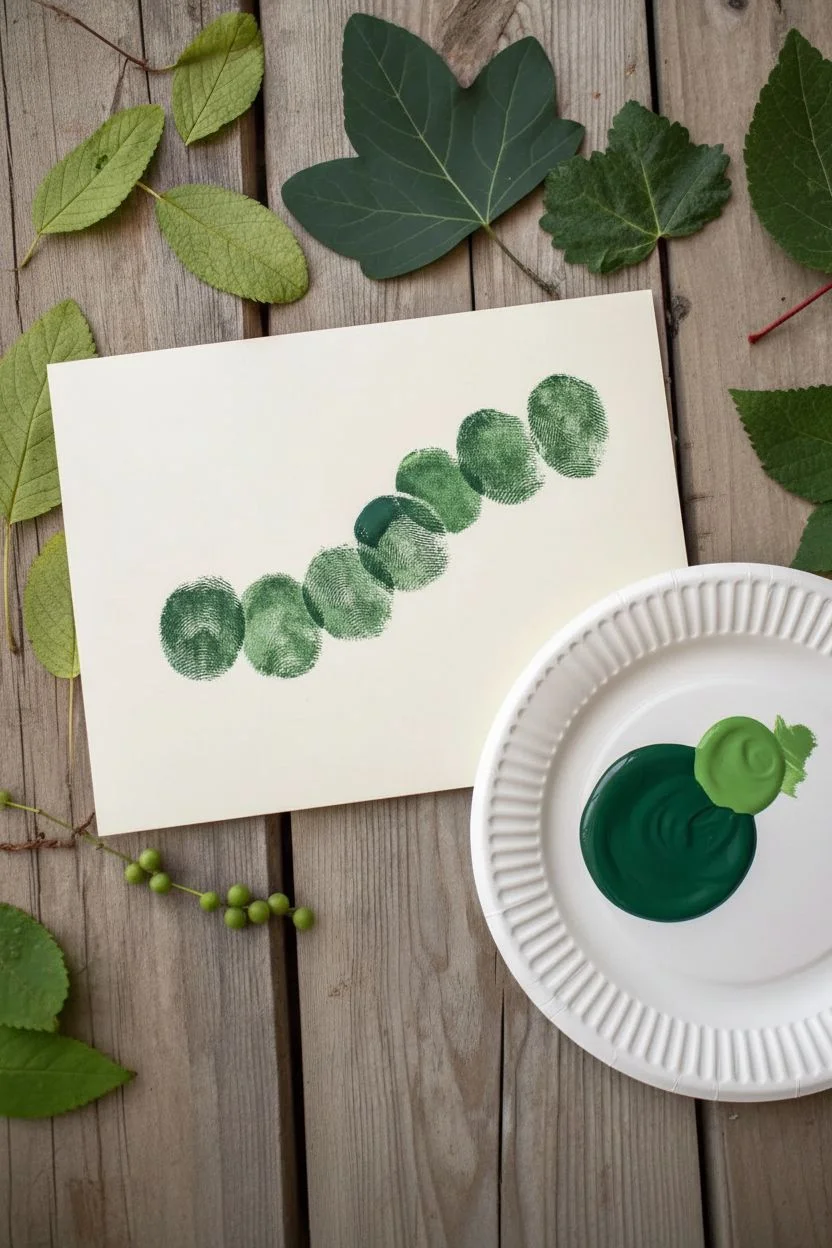
Stamp Master
To get that mottled texture shown in the photo, blot your painted finger once on a scrap paper before stamping the final project. It reveals more paper grain.
Step 2: Creating the Body
-
Ink the finger:
Guide your toddler to press their index finger or thumb firmly into the darker green paint. Make sure the pad of the finger is evenly coated but not dripping. -
Start the tail:
Press the painted finger onto the paper towards the right side to start the caterpillar’s tail. A firm press followed by a straight lift helps keep the circle shape clean. -
Build the curves:
Continue adding fingerprints, moving towards the left. Each new print should slightly overlap the previous one so the body segments connect seamlessly. -
Create movement:
Instead of a straight line, arc the fingerprints up and down slightly to mimic tall inching movement. I like to make a gentle wave shape for a natural look. -
Vary the color:
For added texture, occasionally dip the finger into the lighter green or mix a tiny bit on the plate before stamping. This creates depth in the caterpillar’s body segments. -
Finish the body:
Continue until you have a chain of about 8 to 10 green circles, stopping just before you want the head to be. -
Clean up quickly:
Wipe off the finger used for the dark green paint thoroughly with a damp cloth before moving to the next step.
Garden Party
Don’t stop at one! Use different colors like red or yellow to create a whole family of caterpillars, or add fingerprint leaves around them.
Step 3: Adding the Head
-
Prepare the head color:
For the head, use a distinct, lighter shade of green. If you don’t have a separate tube, mix white paint with your green, or spread the existing green very thinly. -
Stamp the head:
Coat a clean thumb (which makes a larger print than an index finger) in the light green paint. -
Attach the head:
Press the thumb print at the very front (left side) of your caterpillar chain. It should slightly overlap the first body segment to look connected. -
Let it dry:
This is the hardest part for little ones—wait for the paint to dry completely. The marker ink will bleed if the paint is even slightly wet.
Step 4: Drawing the Details
-
Draw the eyes:
Once dry, use the black fine-point marker to draw two oval eyes inside the light green head circle. -
Fill the pupils:
Color in the pupils, leaving a tiny speck of white space if possible to give the eyes a sparkle. -
Add a smile:
Draw a simple, upward-curved line beneath the eyes for a happy mouth. -
Create antennae:
Sketch two long, curving lines rising from the top of the head. Add a small spiral or curl at the very tip of each antenna for a whimsical touch. -
Add the legs:
Under each dark green body segment (skip the head), draw two small lines extending downward. -
Give it feet:
At the bottom of each leg line, add a tiny horizontal dash or dot to represent little feet gripping the ‘ground’. -
Final check:
Look over the drawing to ensure all legs are attached and the ink is dry before displaying.
Now you have a cute keepsake that captures a moment in time with your toddler’s tiny prints


Handprint Elephant With Fingerprint Details
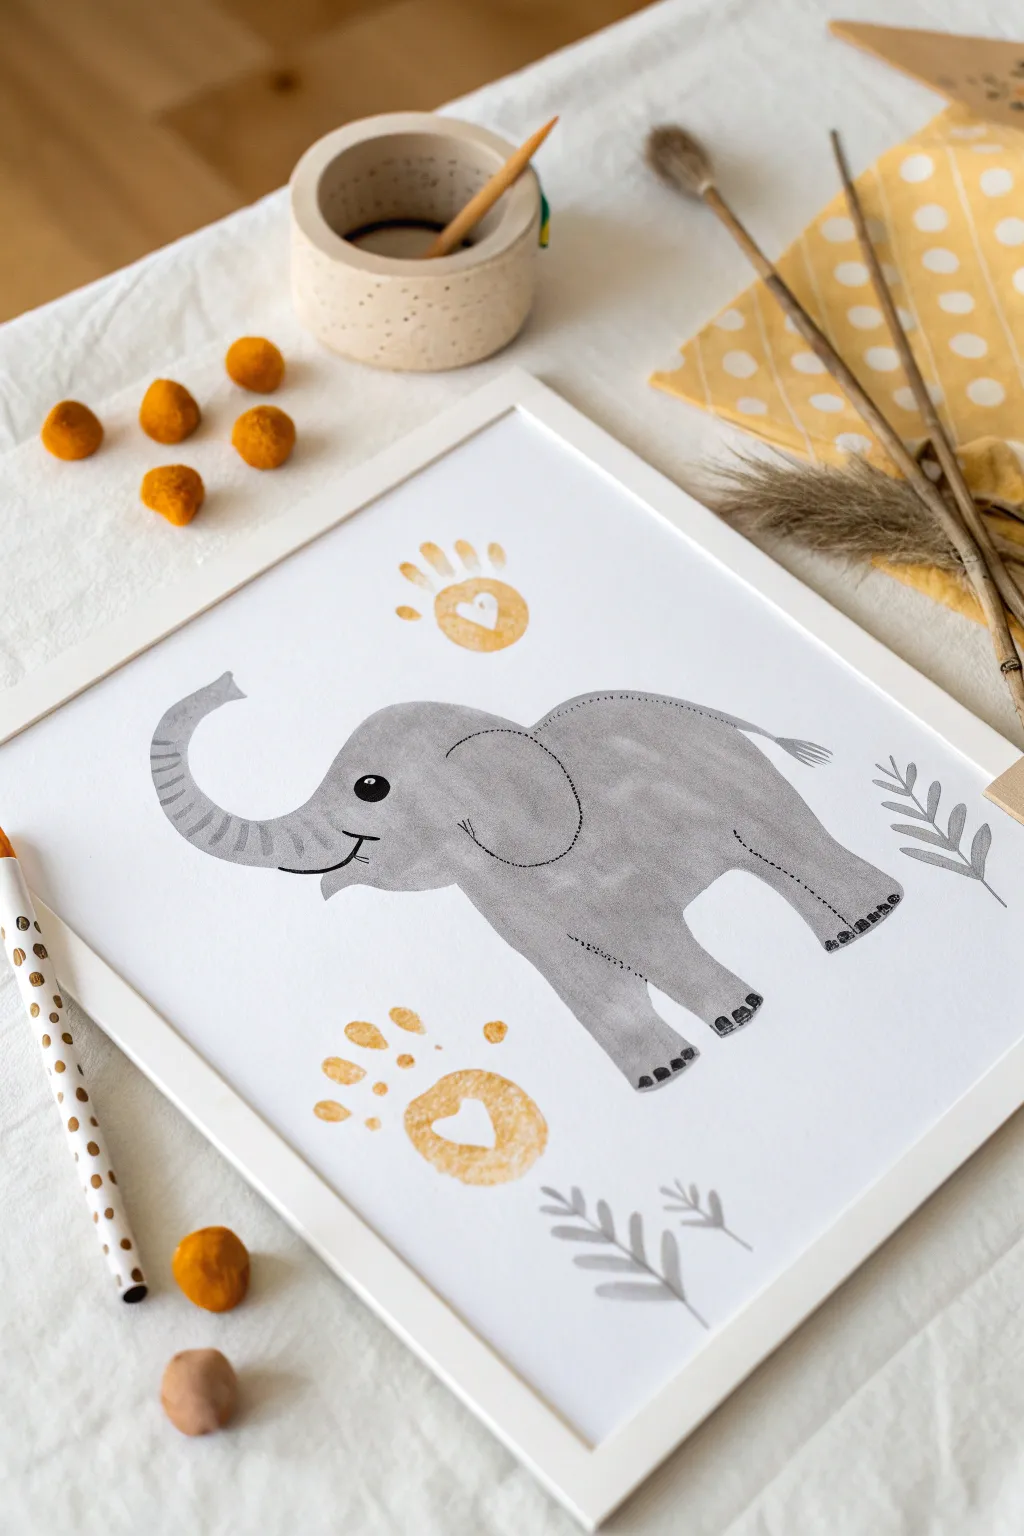
This adorable project transforms a simple grey shape into a playful elephant, accented with sunny yellow handprints that act as decorative suns or flowers. It is a wonderful keepsake piece that combines structured painting with organic printmaking techniques.
How-To Guide
Materials
- White cardstock or heavy watercolor paper
- Grey watercolor or diluted acrylic paint
- Yellow finger paint or non-toxic acrylic
- Fine-tip black marker or ink pen
- Medium round paintbrush
- Small detail paintbrush
- Picture frame (white)
- Pencil for light sketching
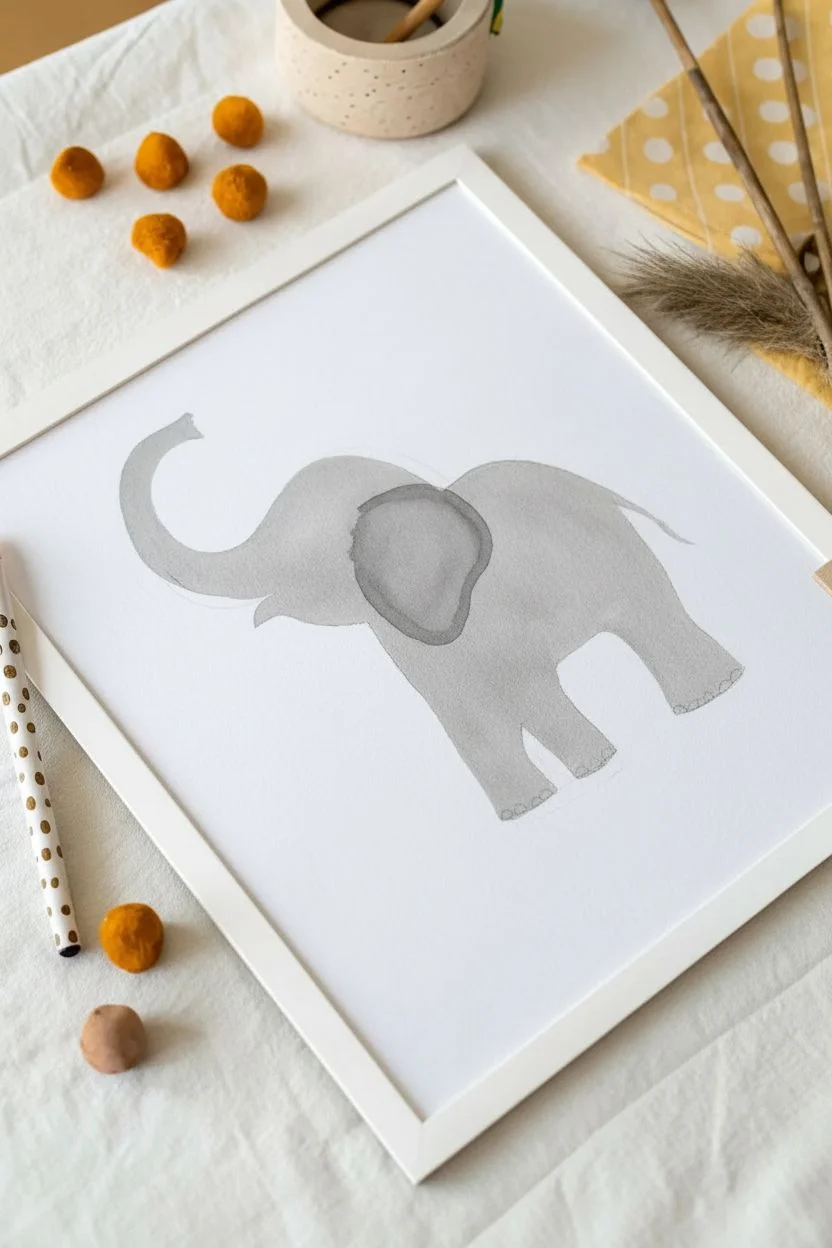
Step 1: Painting the Elephant Base
-
Sketch the outline:
Begin by very lightly sketching the elephant’s shape in the center of your paper. Draw a large oval for the body, a rounded shape for the head, and a long, curving trunk reaching upwards. -
Add the legs:
Sketch two thick legs extending from the bottom of the oval body. Keep the sketch faint so it won’t show through the paint later. -
Prepare the grey wash:
Mix your grey paint with a little water to achieve a semi-transparent, watercolor-like consistency. You want the texture of the paper to show through slightly. -
Fill in the shape:
Using your medium round brush, carefully fill in the elephant sketch with the grey wash. Work relatively quickly so the paint dries evenly without harsh lines. -
Create the ear:
While the body paint is still slightly damp, paint a large, floppy ear shape on the head using a slightly more concentrated grey to make it stand out against the head. -
Detail the trunk:
Ensure the trunk’s curve is smooth and tapers slightly at the end. Let the main grey body dry completely before moving to the next phase.
Fixing Smudges
If the yellow handprint smudges, turn it into a deliberate abstract flower by adding a green stem with your marker.
Step 2: Adding the Handprints
-
Prepare the yellow paint:
Squeeze a small amount of yellow finger paint onto a palette or paper plate. Ensure it’s thick enough to leave a good texture. -
Print the top sun:
Coat a toddler’s hand (or just the palm and fingers) in yellow paint. Press it firmly onto the paper above the elephant’s back. The palm creates a sun-like circle, and the fingers radiate outward. -
Print the bottom accent:
Repeat the process to add a second handprint near the bottom left corner, below the elephant’s trunk. Wash hands immediately after printing. -
Add heart details:
Once the yellow paint is slightly tacky or dry, use a clean finger or a brush handle to wipe away or lift a small heart shape from the center of each yellow palm print.
Add Pop
Use gold metallic paint instead of yellow for the handprints to make the artwork shimmer and look extra elegant.
Step 3: Line Art & Finishing Touches
-
Outline the ear:
Using a fine-tip black marker, draw a dashed line along the bottom curve of the ear to define its shape against the body. -
Draw the eye:
Place a solid black circle on the head for the eye, leaving a tiny white dot in the center for a highlight. -
Add the smile:
Draw a small, curved line for the mouth just under the trunk base to give the elephant a happy expression. -
Define the trunk texture:
Add short, curved dashed lines along the underside of the trunk to suggest wrinkles and texture. -
Detail the legs and tail:
Draw small semi-circles at the bottom of the feet for toes. Then, sketch a thin tail with a tuft of hair at the end on the elephant’s rear. -
Paint decorative leaves:
Mix a very light, watered-down grey. Paint simple fern-like leaf sprigs on the right side and bottom center of the paper to balance the composition. -
Frame the artwork:
Allow the entire piece to dry for several hours. Once fully dry, place it into a clean white frame to display.
Hang this sweet creation in a nursery or play area for a gentle touch of handmade art
BRUSH GUIDE
The Right Brush for Every Stroke
From clean lines to bold texture — master brush choice, stroke control, and essential techniques.
Explore the Full Guide
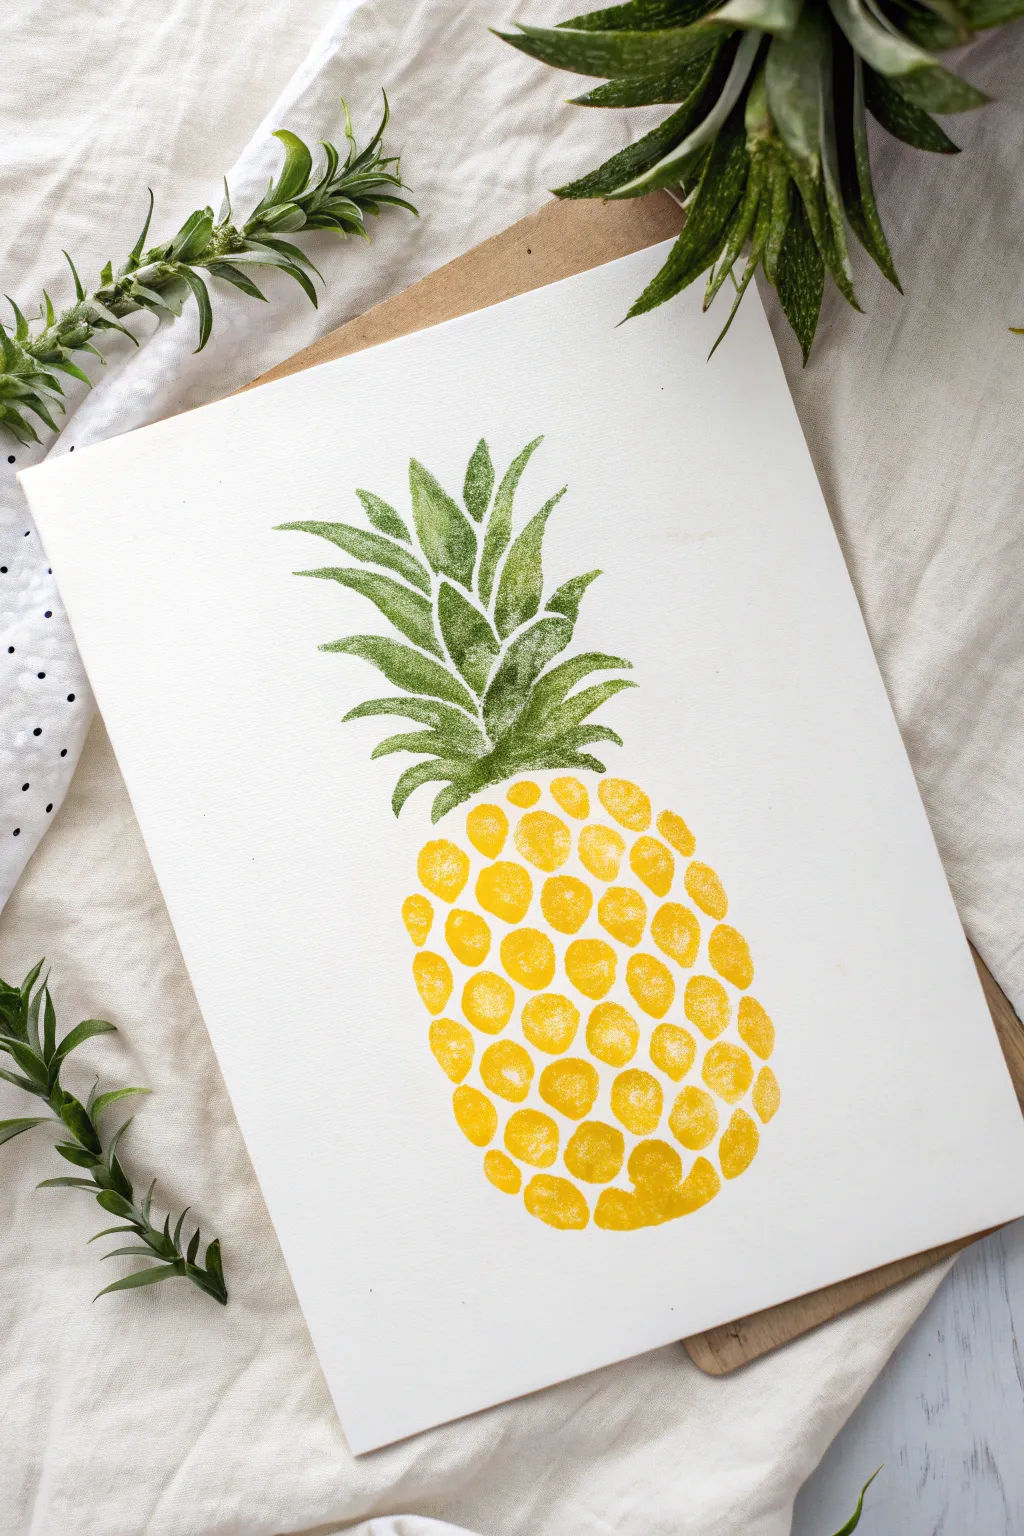
Pineapple Made From Fingerprint Scales

Bring a slice of summer into your home with this vibrant pineapple art piece created entirely from fingerprints. The textured look of the thumbprints perfectly mimics the rough skin of a real pineapple, resulting in a cheerful and modern piece of decor.
Detailed Instructions
Materials
- White cardstock or heavy canvas paper
- Yellow acrylic or washabale tempera paint
- Green acrylic or washable tempera paint
- Paper plate or painting palette
- Paper towels or wet wipes
- Pencil (optional)
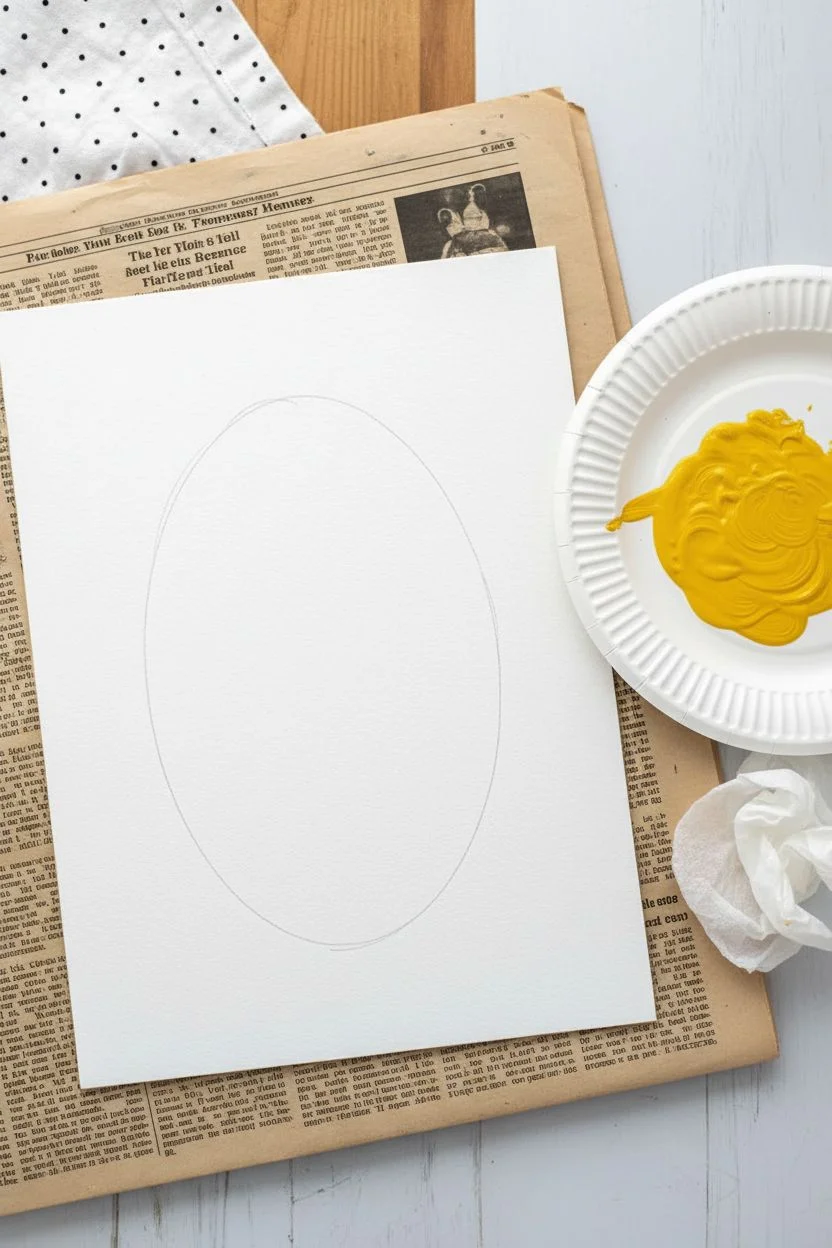
Step 1: Preparation
-
Set the Stage:
Protect your work surface with newspaper or a plastic tablecloth, as finger painting can get a little messy. -
Prepare Colors:
Squeeze a generous amount of yellow paint onto your paper plate. You want a puddle large enough to press a thumb into without hitting the plate’s edges. -
Outline (Optional):
If you are worried about the shape, use a pencil to very lightly sketch an oval shape for the pineapple body on your paper. Keep the lines faint so they won’t show through the yellow paint.
Clean Edges Pro-Tip
For crisper edges on your ‘scales’, practice pressing straight down and lifting straight up. Sliding the finger creates smears instead of defined ovals.
Step 2: Creating the Body
-
First Impressions:
Dip your thumb (or your child’s thumb) into the yellow paint. I like to blot it once lightly on a spare piece of paper to remove globs of excess paint. -
Start at the Bottom:
Press the thumb firmly onto the bottom center of your paper or within your penciled oval. This creates the first scale. -
Build the Base:
Continue adding yellow thumbprints along the bottom row, spacing them slightly apart but close enough to look cohesive. -
Row by Row:
Work your way upward, row by row. Try to offset the prints slightly from the row below, similar to how bricks are laid, to get that natural pineapple pattern. -
Shape the Curve:
As you move up the sides, angle your thumb slightly inward to create the rounded, tapered shape of the fruit. -
Filling In:
Continue until you have formed a complete oval shape with the yellow prints. Reload your thumb with paint frequently to keep the color bright and consistent. -
Let it Dry:
Allow the yellow body to dry completely before starting the green top. This prevents the colors from smudging together into a muddy brown.
Step 3: Adding the Crown
-
Switch Colors:
Clean your hands thoroughly with wet wipes or soap and water. Pour a small amount of green paint onto a clean section of your palette. -
Use a Smaller Finger:
For the pointy leaves, switch to using your index finger or pinky finger, depending on the size of the leaves you want. -
Start the Leaves:
Dip your finger in green paint and press it at the very top of the yellow oval. Drag your finger slightly upward as you lift it to create a tapered, pointy tip. -
Layering Up:
Add more green prints, moving upward and outward. Make the central leaves the tallest and most vertical. -
Curving Out:
Add leaves to the sides that curve outward, just like the spiky crown of a real pineapple. -
Volume and Texture:
Overlap some of the green prints to give the crown fullness. Don’t worry if the green slightly touches the top of the yellow section; it adds to the organic look. -
Final Touches:
Step back and check the shape. If the crown looks too thin, add one or two more green swipes to fill in any gaps.
Troubleshooting Blobs
If you accidentally apply too much paint and get a thick glob, lightly dab it with the corner of a paper towel to absorb the excess while it is still wet.
Once the paint is fully dry, you will have a delightful tropical print ready to frame or display on the fridge


Have a question or want to share your own experience? I'd love to hear from you in the comments below!