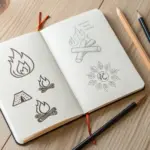
If you’re craving juicy contrast in your sketchbook, fire and ice is one of the most satisfying pairings to draw. You get to play with opposing color families, textures, and moods—all while making your subject feel extra dramatic.
Split-Face Fire and Ice Lion
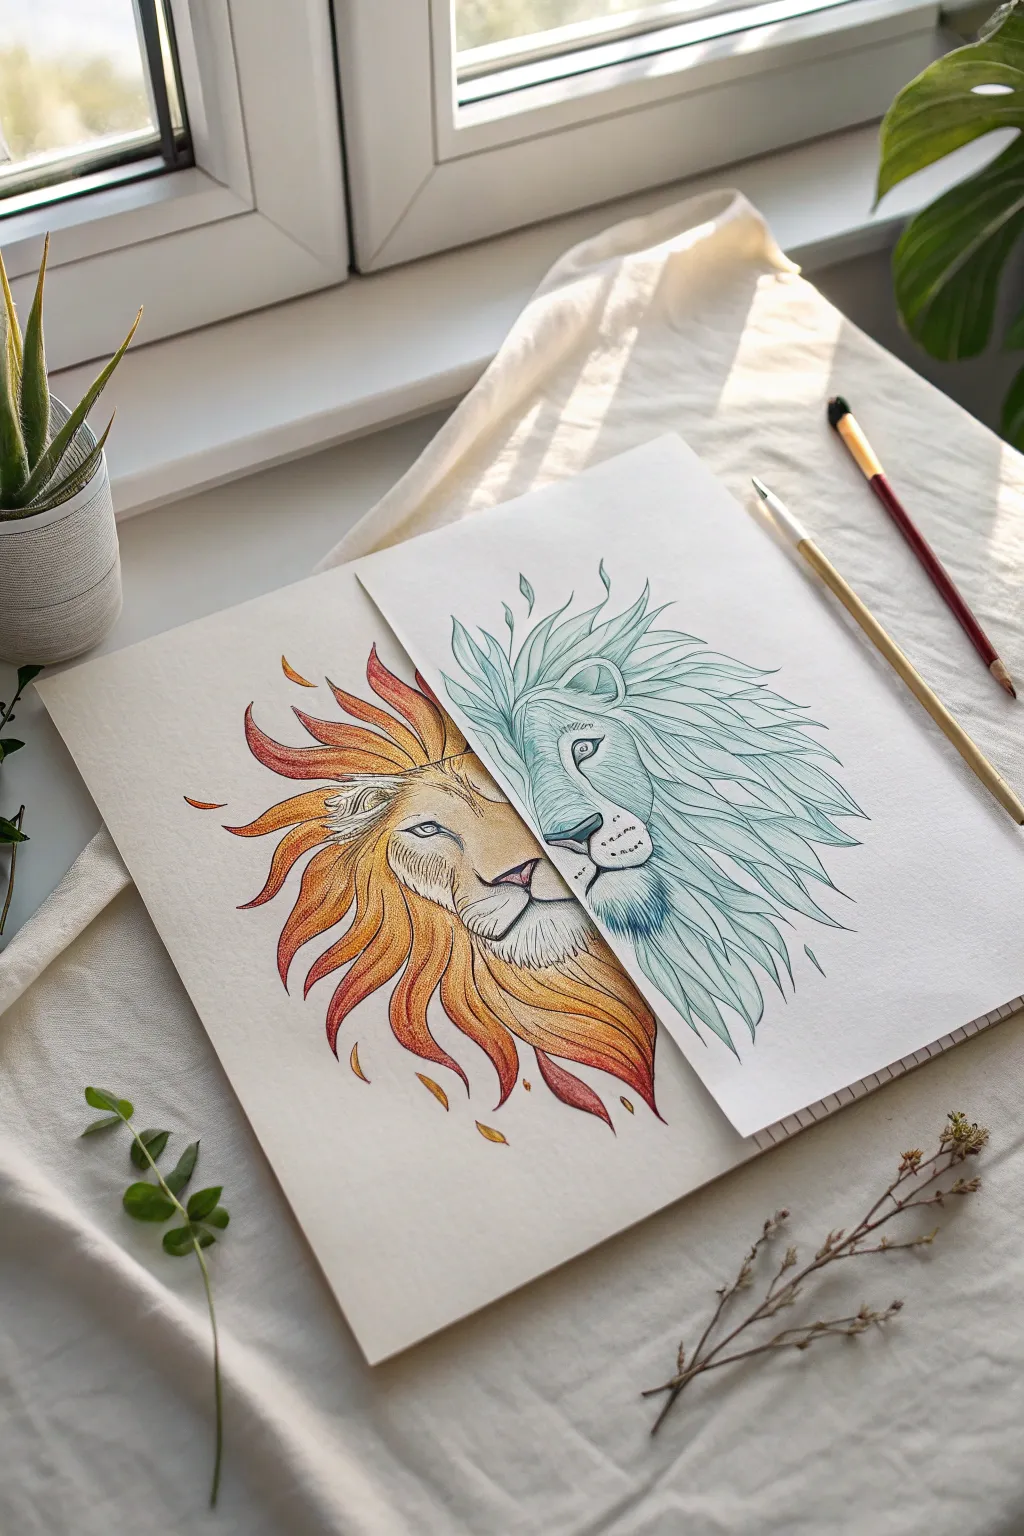
Capture the raw power of nature with this striking split-face lion illustration, merging the warmth of flames with the cool serenity of frost. By utilizing two separate sheets of paper, you create a dimensional, layered effect that perfectly divides the two elemental personalities.
How-To Guide
Materials
- Heavyweight drawing paper or mixed media paper (2 sheets)
- Graphite pencil (HB or 2B)
- Eraser
- Colored pencils (wax or oil-based)
- Colors: Deep reds, oranges, golden yellows, teals, ice blues, mint greens
- Fine liner pens (optional for outlining)
- Paper clips or masking tape
Step 1: Planning and Sketching
-
Prepare the papers:
Start by aligning your two sheets of paper. Place the top sheet so it covers exactly half of the bottom sheet horizontally. Use a small amount of masking tape or paper clips to hold them temporarily in place so they don’t shift while drawing the base sketch. -
Establish the centerline:
Lightly draw a vertical line right along the edge of the top paper where it meets the bottom paper. This is your axis of symmetry for the lion’s face. -
Sketch the basic facial structure:
With an HB pencil, sketch the outline of the lion’s head across both papers as if they were one surface. Mark the positions for the eyes, nose bridge, and muzzle opacity ensures the features align perfectly later. -
Refine the features:
Detail the eyes and nose. Notice how the lion’s expression is stoic; keep the eyes level. Draw the nose slightly wider than a domestic cat’s, emphasizing the broad bridge. -
Flow the mane lines:
Sketch the mane with long, flowing strokes. For the left (fire) side, curve the lines upward and outward like flickering flames. For the right (ice) side, keep the lines smoother and more windswept, suggesting cold air currents.
Mismatched Features?
If the eyes look uneven after separating the pages, align the papers against a window. The backlighting acts as a lightbox, letting you trace the exact position from one side to the other.
Step 2: Coloring the Fire Side (Bottom Sheet)
-
Separate the sheets:
Remove the top sheet and set it aside. You will now focus entirely on the bottom sheet which contains the left half of the face. -
Base layer of warmth:
Start by laying down a light layer of golden yellow over the entire mane area and the lighter parts of the face. Use the side of your pencil lead for soft, even coverage. -
Define the contours:
Switch to an orange pencil to begin shading the shadows around the eye socket, the side of the nose, and the depths of the mane. This establishes the volume of the face. -
Intensify the flames:
Use a deep red to color the tips of the mane tufts and the deepest shadows between the strands. Press harder here to build saturation. -
Add detail strokes:
With a sharp orange or rust-colored pencil, draw fine lines following the direction of the fur growth on the face. I find that quick, short strokes work best for the short hair on the muzzle. -
Highlight and refine:
Leave the paper white or use a white pencil for the brightest highlights on the nose bridge and under the eye. Add floating ’ember’ shapes detached from the mane for a magical touch.
Step 3: Coloring the Ice Side (Top Sheet)
-
Cool foundations:
Take the top sheet. Begin with a very pale blue or mint green base layer. Keep this extremely light, as the ‘ice’ side relies heavily on the white of the paper for its frosty look. -
Shade with teal:
Use a teal or turquoise pencil to shade the eye socket, the side of the muzzle, and the underside of the mane clumps. Keep your hand light to maintain a translucent, icy feeling. -
Deepen the contrast:
Select a darker slate blue for the pupils, the nostrils, and the deepest crevices of the mane. This contrast is crucial to prevent the drawing from looking washed out. -
Graphic line work:
Unlike the fire side which is blended, use sharper, clearer lines for the ice mane. Outline individual strands with a medium-pressure teal to give them a crystallized appearance. -
Final assembly:
Place the top sheet back over the bottom sheet, aligning the nose and forehead seamlessly. Use a small piece of double-sided tape or adhesive on the back of the top sheet to secure it permanently in place. -
Touch-ups:
Check the transition line. If the pencil lines don’t meet perfectly at the paper edge, extend them slightly on either side until the split face looks unified despite the contrasting themes.
Pro Tip: Texture Contrast
Make the ‘Fire’ shading soft and blended using circular strokes. Keep the ‘Ice’ shading linear and distinct with sharp strokes. This textural difference enhances the elemental duality.
Now you have a dynamic piece of art that perfectly balances the fierce heat of fire with the cool calm of ice.


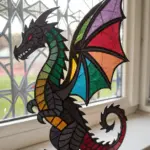
Fire and Ice Yin-Yang Symbol
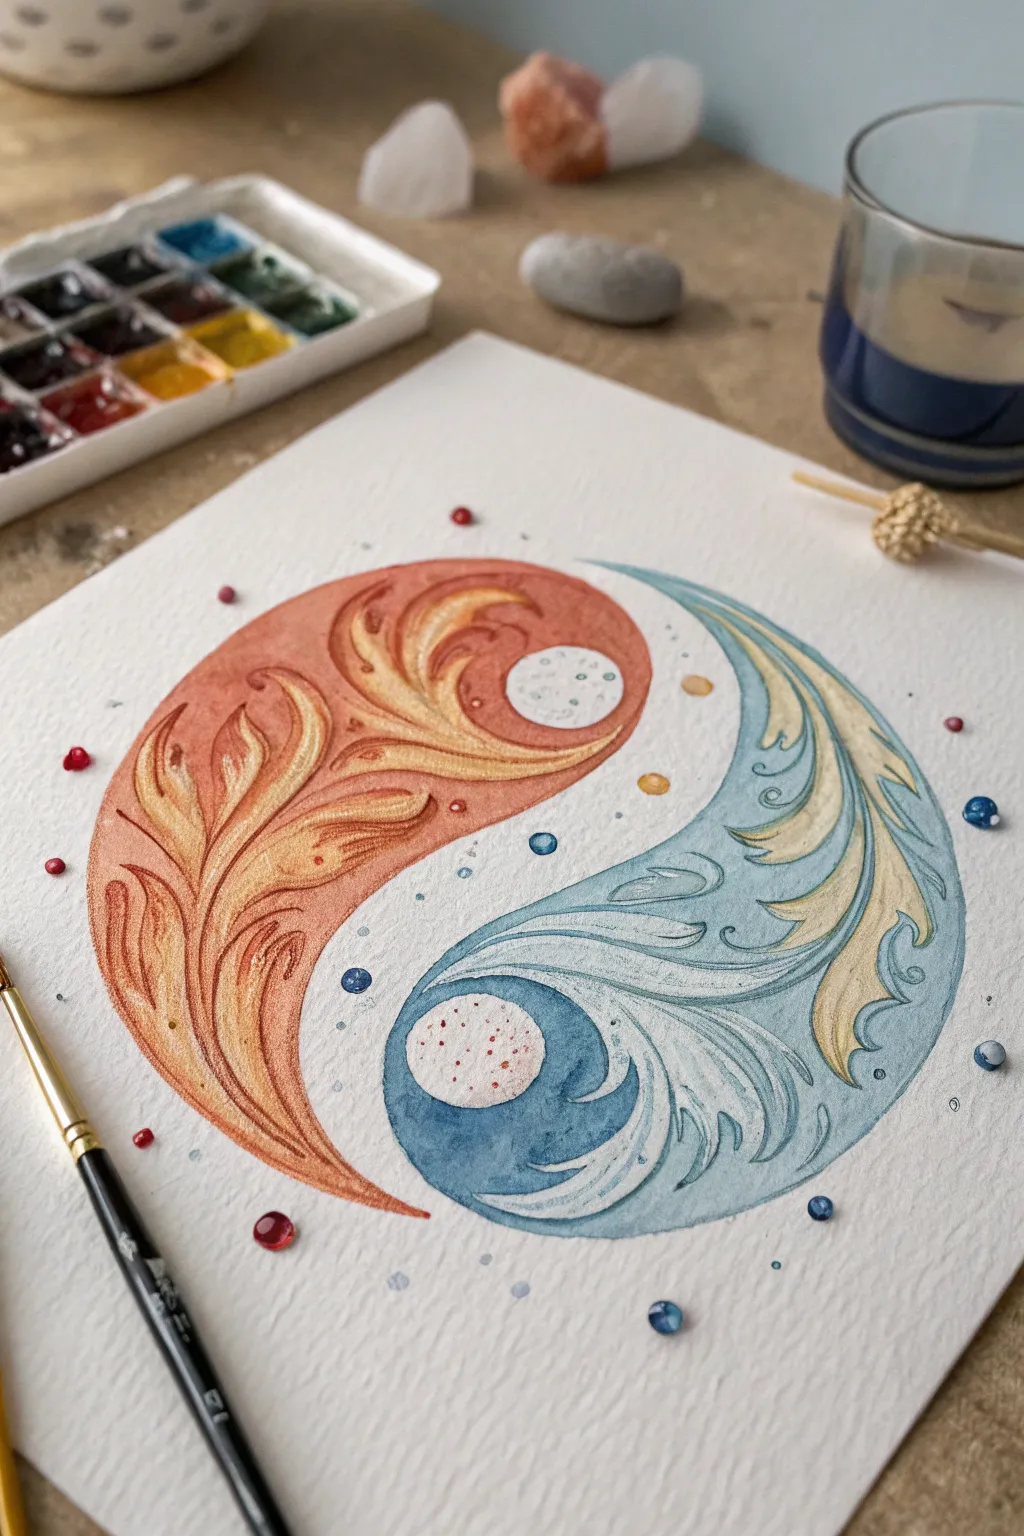
This elegant project reimagines the classic Yin-Yang symbol through the opposing forces of fire and ice, rendered in textured watercolor. The warm amber and cool azure tones swirl together with intricate leaf-like details, creating a balanced composition that feels both organic and mystical.
Detailed Instructions
Materials
- Cold press watercolor paper (300 gsm or heavier)
- Watercolor paints (warm orange/rust, golden yellow, cool cyan/blue, dark indigo, white gouache)
- Pencil (HB) and eraser
- Compass or circular object for tracing
- Round watercolor brushes (sizes 2, 4, and 0 for details)
- Small rhinestones or flattened glass beads (red and blue)
- Paper towels and water cup
Step 1: Sketching the Framework
-
Draw the main circle:
Start by using a compass or tracing a round object to draw a perfect circle in the center of your paper. Keep your pencil pressure light so the lines don’t show through the paint later. -
Define the S-curve:
Lightly sketch the signature ‘S’ curve down the middle of the circle to separate the two halves. Instead of a simple line, give it a slight fluidity, as if the elements are flowing into each other. -
Add inner details:
Sketch the inner circles for the ‘eyes’ of the Yin-Yang. Then, draft the flowing, leaf-like shapes inside each half. The fire side should have sharp, upward-curving tendrils, while the ice side can have smoother, wave-like foliate patterns.
Bleeding Lines?
If your fire and ice colors are bleeding into each other at the center line, ensure one side is essentially bone-dry before you start painting the neighbor. Use a hairdryer to speed this up.
Step 2: Painting the Fire Element
-
Base wash:
Wet the ‘fire’ half of the symbol with clean water, avoiding the inner eye circle. Drop in a diluted wash of warm orange or rust color, letting it bloom naturally on the paper. -
Deepen the tones:
While the paper is still damp, add concentrated rust or reddish-brown paint to the outer edges and the crevices of your leaf sketches to create depth. -
Highlighting with gold:
Lift out some pigment from the center of the leaf shapes using a thirsty brush, or add a touch of golden yellow to the raised areas to simulate glowing embers. -
Define the texture:
Once the base layer is dry, use a size 2 brush to paint the specific outlines of the fire tendrils. Use a darker rust shade to separate the shapes, creating a carved, relief-like effect. -
The cool eye:
Paint the small inner circle on the fire side. This represents the ‘seed’ of the opposite element, so use a very pale, diluted wash of blue or leave it mostly white with faint detailing.
Metallic Magic
For a truly mystical finish, trace the very outer rim of the circle and the major internal veins with a metallic gold or silver watercolor paint to make the design shimmer.
Step 3: Painting the Ice Element
-
Cool base wash:
Move to the ‘ice’ half. Wet the area and apply a wash of cool cyan or light blue. I find tilting the paper slightly helps the pigment settle beautifully into the textured grain of the paper. -
Add icy shadows:
Introduce a darker indigo or cerulean blue into the curves and corners of the wave patterns while the wash is damp, building contrast against the lighter areas. -
Enhance the flow:
Similar to the fire side, lift pigment from the center of the wave shapes to create highlights. If you want a more magical look, mix a tiny bit of white gouache with your pale blue for opaque frost effects. -
Detailing the waves:
Let the base dry completely. Using your smallest brush (size 0), outline the intricate swirls and leaf veins with a concentrated dark blue mix to sharpen the design. -
The warm eye:
Paint the inner circle on the ice side. Keep this circle pale but use warm speckles of rust or orange to mirror the fire element.
Step 4: Final Flourishes
-
Refine edges:
Go around the main outer circle with a very steady hand and a small brush to crisp up the boundary where the paint meets the white paper. -
Add texture to the eyes:
Use the tip of your brush to stipple tiny dots inside both inner circles—blue dots on the warm eye, and orange dots on the cool eye—to emphasize the interconnectivity. -
Atmospheric splatters:
Load a brush with watery paint and gently tap it against another brush handle to flick tiny droplets around the main design. Use blue on the ice side and red/orange on the fire side. -
Place the gems:
Once the painting is 100% dry, arrange your small glass beads or rhinestones around the artwork. You can adhere them with a dab of craft glue for a permanent mixed-media piece or leave them loose for photography.
Step back and admire the balance of warm and cool tones in your finished elemental artwork


Reaching Hands: Flame and Frost
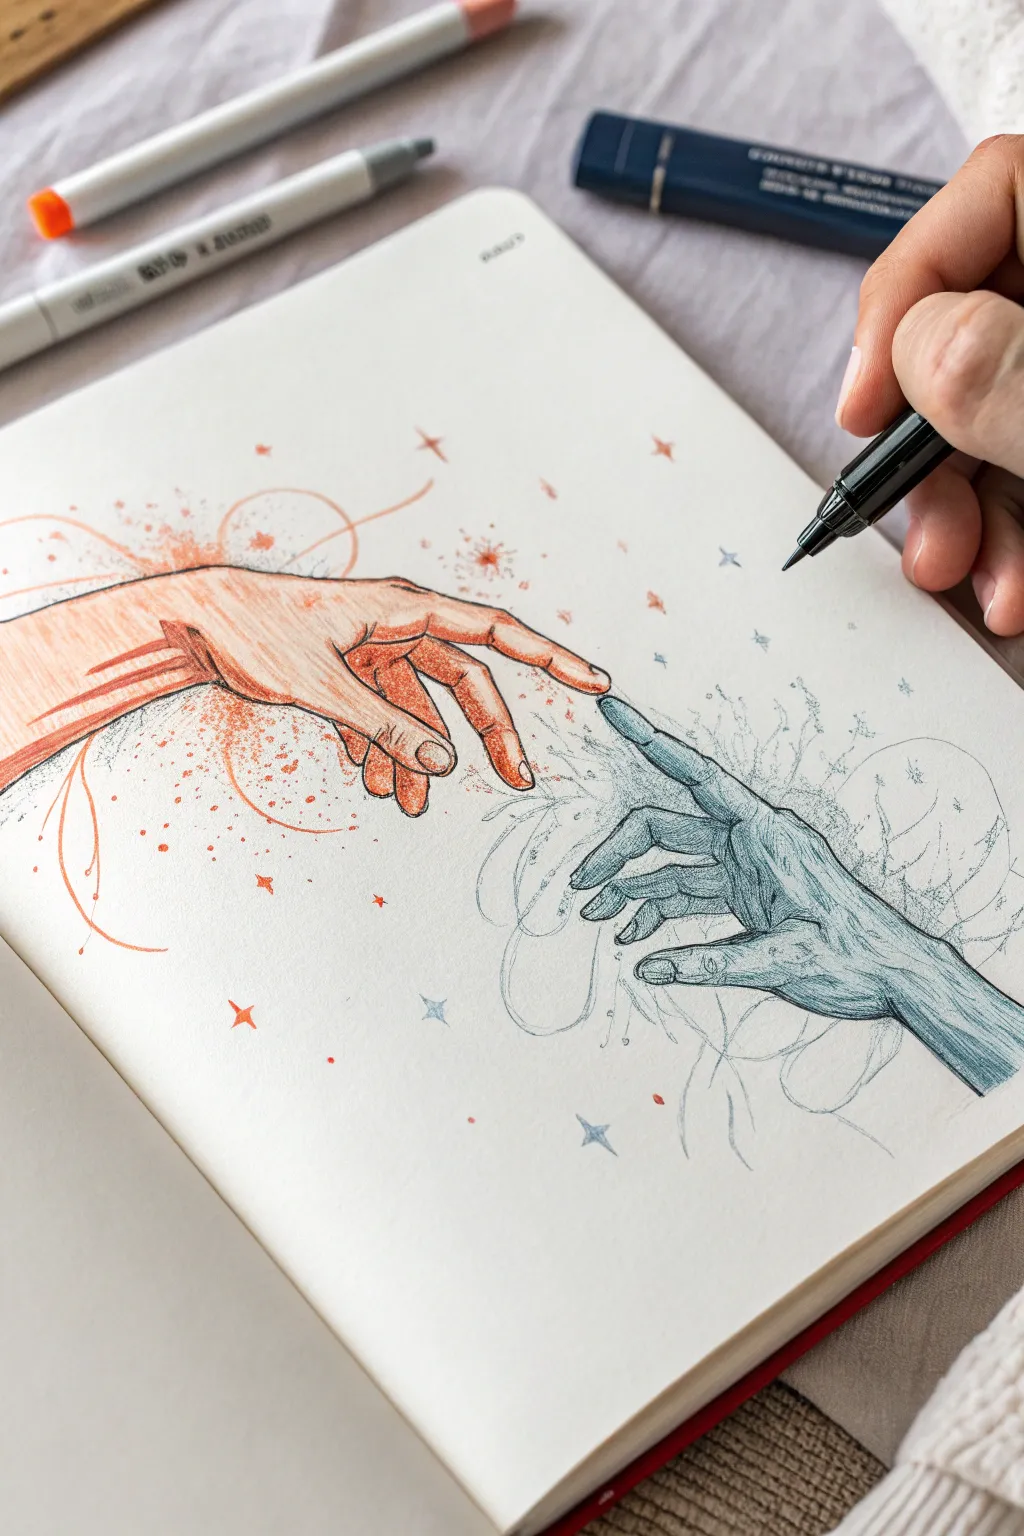
Recreate the iconic ‘Creation of Adam’ pose with a fiery and frosty twist in this dynamic sketchbook spread. This tutorial guides you through sketching anatomically realistic hands and infusing them with the chaotic energy of fire and the crystalline structure of ice.
Step-by-Step Tutorial
Materials
- Sketchbook with smooth, heavy paper (bristol or mixed media)
- H or HB pencil for initial sketching
- Kneaded eraser
- Fine-liner pens (0.1, 0.3, and 0.5 sizes) in black
- Colored pencils (Oranges: light, medium, rusty red)
- Colored pencils (Blues: icy pale, teal, deep navy)
- White gel pen for highlights
- optional: blending stump
Step 1: Conceptual Framework
-
Map the Composition:
Begin by lightly marking the center point of your page. You want a diagonal flow, with the ‘Fire’ hand entering from the upper left and the ‘Ice’ hand reaching up from the lower right. Leave a small gap of about an inch between the index fingers to create tension. -
Block in Basic Shapes:
Instead of drawing fingers immediately, sketch the palms as rectangular blocks. The left ‘Fire’ palm should face slightly downward, while the right ‘Ice’ palm faces upward. Add lines to indicate wrist direction. -
Structure the Fingers:
Draw cylindrical guidelines for the fingers. The index fingers should be the focal point, extending towards each other. Keep the other fingers relaxed and slightly curved. Pay attention to the knuckles; the fire hand looks best with a slightly more strained, active pose, while the ice hand can look a bit stiffer.
Reference Is Key
Take a photo of your own hands in these positions to use as a reference. It’s much easier to understand the foreshortening of the fingers when looking at a real 3D model.
Step 2: The Fire Hand (Left)
-
Refine the Outline:
Using your pencil, contour the left hand to give it skin and muscle definition. Focus on the tendon lines along the back of the hand leading to the fingers. -
Add Base Warmth:
Take a light orange colored pencil and lay down a soft base layer over the entire hand. Keep your strokes directional, following the curve of the fingers to suggest roundness. -
Deepen the Shadows:
Using a rusty red pencil, shade the underside of the fingers, the palm creases, and the areas between the tendons. This creates volume and drama. -
Cross-Hatching Details:
Switch to a red or brown fine-liner or a very sharp colored pencil. Add hatching lines along the shadowed areas to mimic the texture of an engraving or vintage illustration. -
Explosive Energy:
Draw swirling, loose lines emanating from the wrist and forearm. Add stippling (dots) concentrated around the wrist and fading outward to look like sparks or embers drifting away.
Cosmic Background
Use watercolor to wash a faint purple and black galaxy background behind the hands to make them look like celestial bodies creating a universe.
Step 3: The Ice Hand (Right)
-
Angular Contours:
Refine the right hand’s outline. Unlike the smooth muscle of the fire hand, make these lines slightly more jagged and angular to suggest a frozen, crystalline nature. -
Cool Base Layer:
Apply a pale icy blue pencil layer. Leave the tops of the knuckles and finger joints nearly white to represent frost reflecting light. -
Frosty Shadows:
Use a teal or deep blue pencil to shade the recesses. I like to keep these shadows sharp and distinct rather than blending them smoothly, enhancing the ‘shattered ice’ look. -
Veins and Cracks:
With a fine blue pen or sharp pencil, draw vein lines that branch out like frost patterns on a window. Let these texture lines extend beyond the skin of the wrist. -
Atmospheric Chill:
Sketch faint, swirling lines around the wrist that differ from the fire hand; think smooth, cold vapor rather than erratic sparks. Add small four-pointed star shapes nearby to represent glinting snowflakes.
Step 4: Final Touches
-
Enhance the Gap:
The space between the fingers is crucial. Ensure there is no heavy shading right at the fingertips, keeping the focus on the potential touch. -
Ink Definition:
Use a 0.3mm black pen to selectively outline both hands. Don’t outline everything evenly—thicken the lines on the shadowed sides and leave the light-hitting sides broken or very thin. -
Scattered Elements:
Add a few more red dots/sparks drifting toward the ice hand, and a few blue sparkles drifting toward the fire hand to show the elements interacting. -
Highlighting:
Finally, use a white gel pen to add bright specular highlights on the knuckles and fingernails to make the drawing pop off the page.
Step back and admire the stark contrast between the warm and cool tones you have created on the page


Fire Bird vs Ice Bird Face-Off
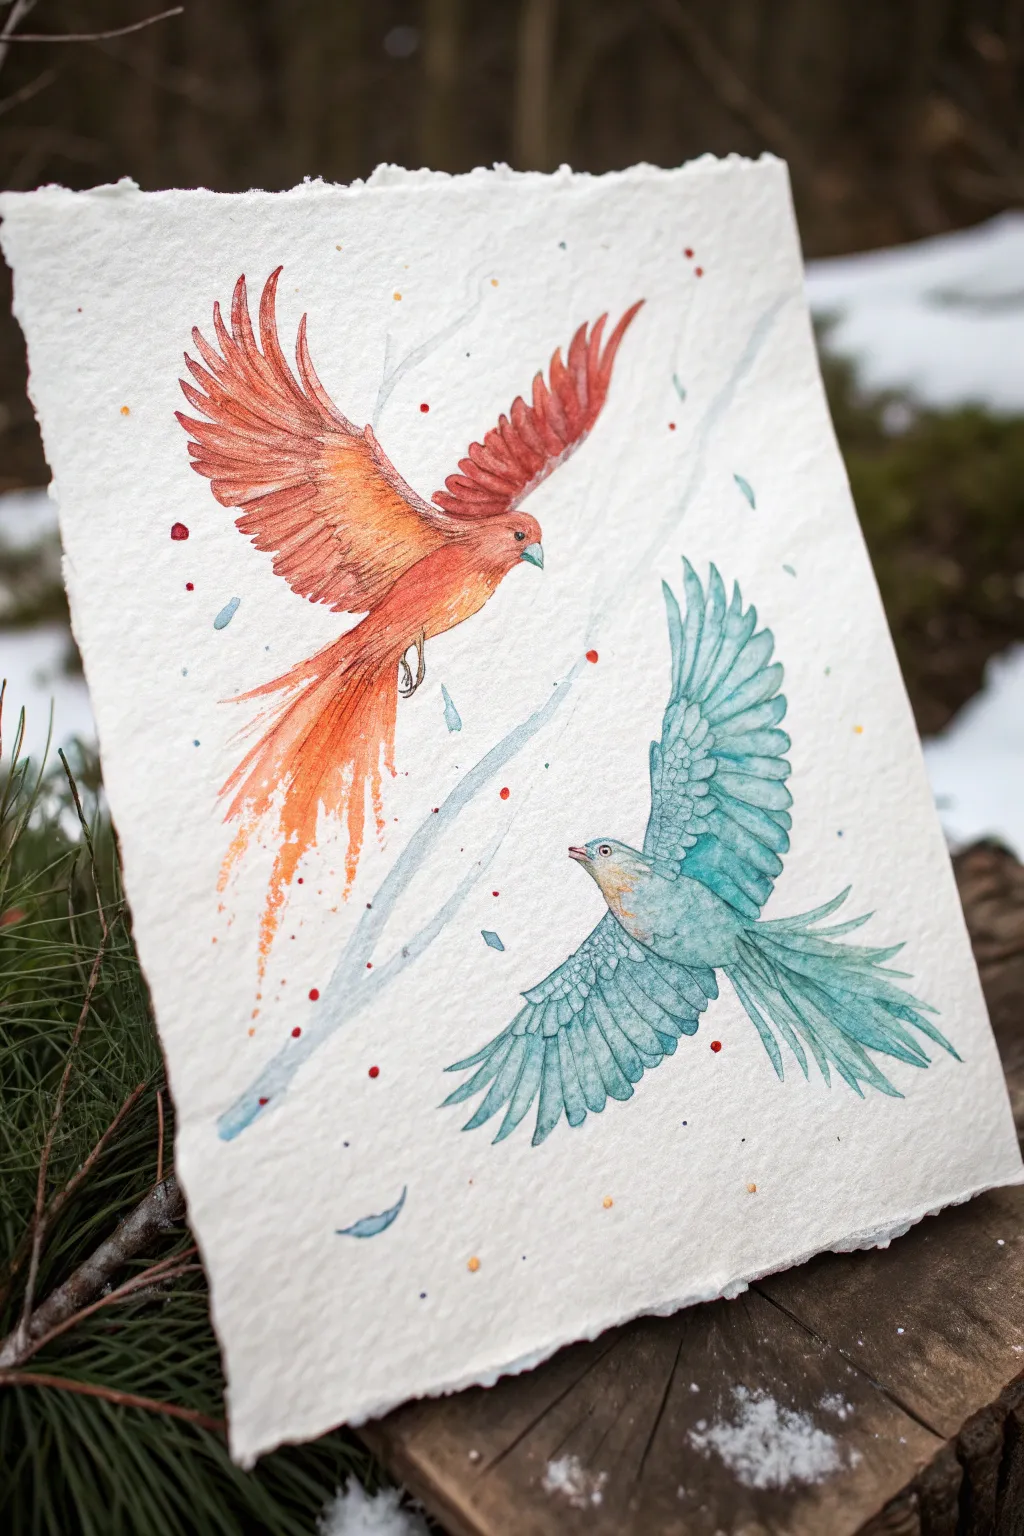
Capture the dynamic energy of opposing elements with this striking watercolor illustration featuring two circling birds. Using vibrant warm and cool tones on beautifully textured paper creates a sense of movement and harmony.
Detailed Instructions
Materials
- Cold press watercolor paper (rough texture preferred, 300gsm)
- Watercolor paints (Cadmium Red, Orange, Cerulean Blue, Turquoise, Phthalo Blue)
- Fine liner pens (0.1mm and 0.3mm, waterproof black or sepia)
- Round watercolor brushes (Size 4 and Size 0 for details)
- Pencil (HB) and kneaded eraser
- White gel pen or gouache (optional)
- Masking tape
Step 1: Planning composition
-
Establish the flow:
Begin by lightly sketching a loose circle or ‘S’ curve in the center of your textured paper. This invisible line will guide the flight path of your two birds to ensure they look like they are dancing around each other. -
Sketch the fire bird:
On the upper left of your curve, sketch the outline of the fire bird. Draw the wings fully extended upward and the tail feathers sweeping down, creating a strong diagonal line. Keep the pencil pressure extremely light. -
Sketch the ice bird:
Position the ice bird on the lower right, mirroring the first one but inverted. Its head should be turning slightly upward to face the fire bird, creating a connection between the two subjects.
Muddy colors?
Ensure each bird is fully dry before painting the background or the other bird. If the red and blue wet paint touch, they will turn brown instantly.
Step 2: Painting the Fire Bird
-
Base wash:
Wet the fire bird’s body area with clean water. Drop in a dilute wash of yellow-orange, letting it bloom naturally on the rough paper surface. -
Adding intensity:
While the paper is still damp, charge your brush with vibrant Cadmium Red and touch it to the tips of the wings and the head. Let the pigment bleed backward into the lighter orange body. -
Creating texture:
For the tail feathers, use a drier brush with concentrated orange paint. Flick the brush outward quickly to create a feathery, slightly rough edge that mimics flames. -
Splatter effect:
Load a small brush with watery red paint and gently tap it over the fire bird to create small droplets. This adds to the ‘spark’ effect of the fire element.
Step 3: Painting the Ice Bird
-
Cool foundations:
Mix a watery pale blue wash. Apply this to the lower bird, keeping the belly area very light, almost white, to represent the highlight of frosty feathers. -
Deepening the blues:
introduce Phthalo Blue or Turquoise to the edges of the wings and the long tail feathers. I like to drop clear water into these drying edges occasionally to create ‘cauliflower blooms’ that look like frost patterns. -
Ice crystals:
Paint sharp, angular strokes for the tail feathers using a size 0 brush, implying shards of ice rather than soft plumage.
Torn Paper Look
For that rustic deckled edge, fold your paper repeatedly along the desired line, wet the crease with water, and slowly tear it by hand.
Step 4: Defining with Ink
-
Feather details:
Once the paint is bone dry, take your 0.1mm fine liner. Outline the individual overlapping feathers on the wings. Use broken, sketchy lines rather than solid outlines to maintain movement. -
Facial features:
Carefully ink the beaks and eyes. Leave a tiny white spec in the eyes for a life-like glint. Use stippling (small dots) around the eyes to transition from beak to feathers. -
Softening edges:
On the fire bird’s tail, avoid outlining completely. Instead, use the pen to add small internal lines that suggest direction, letting the watercolor edge remain loose and organic.
Step 5: Atmosphere and Finish
-
Connecting the energy:
Paint a very faint, watery swoosh of pale blue or gray between the birds to emphasize the circular movement of wind connecting them. -
Magic dust:
Add small confetti-like dots of contrasting colors around the birds—blue specks near the red bird and orange specks near the blue bird—to show the elements interacting. -
Final highlights:
If needed, use a white gel pen to accentuate the wing tips or add a crisp edge to the beaks.
Step back and admire how the warm and cool tones vibrate against each other in your finished piece

PENCIL GUIDE
Understanding Pencil Grades from H to B
From first sketch to finished drawing — learn pencil grades, line control, and shading techniques.
Explore the Full Guide
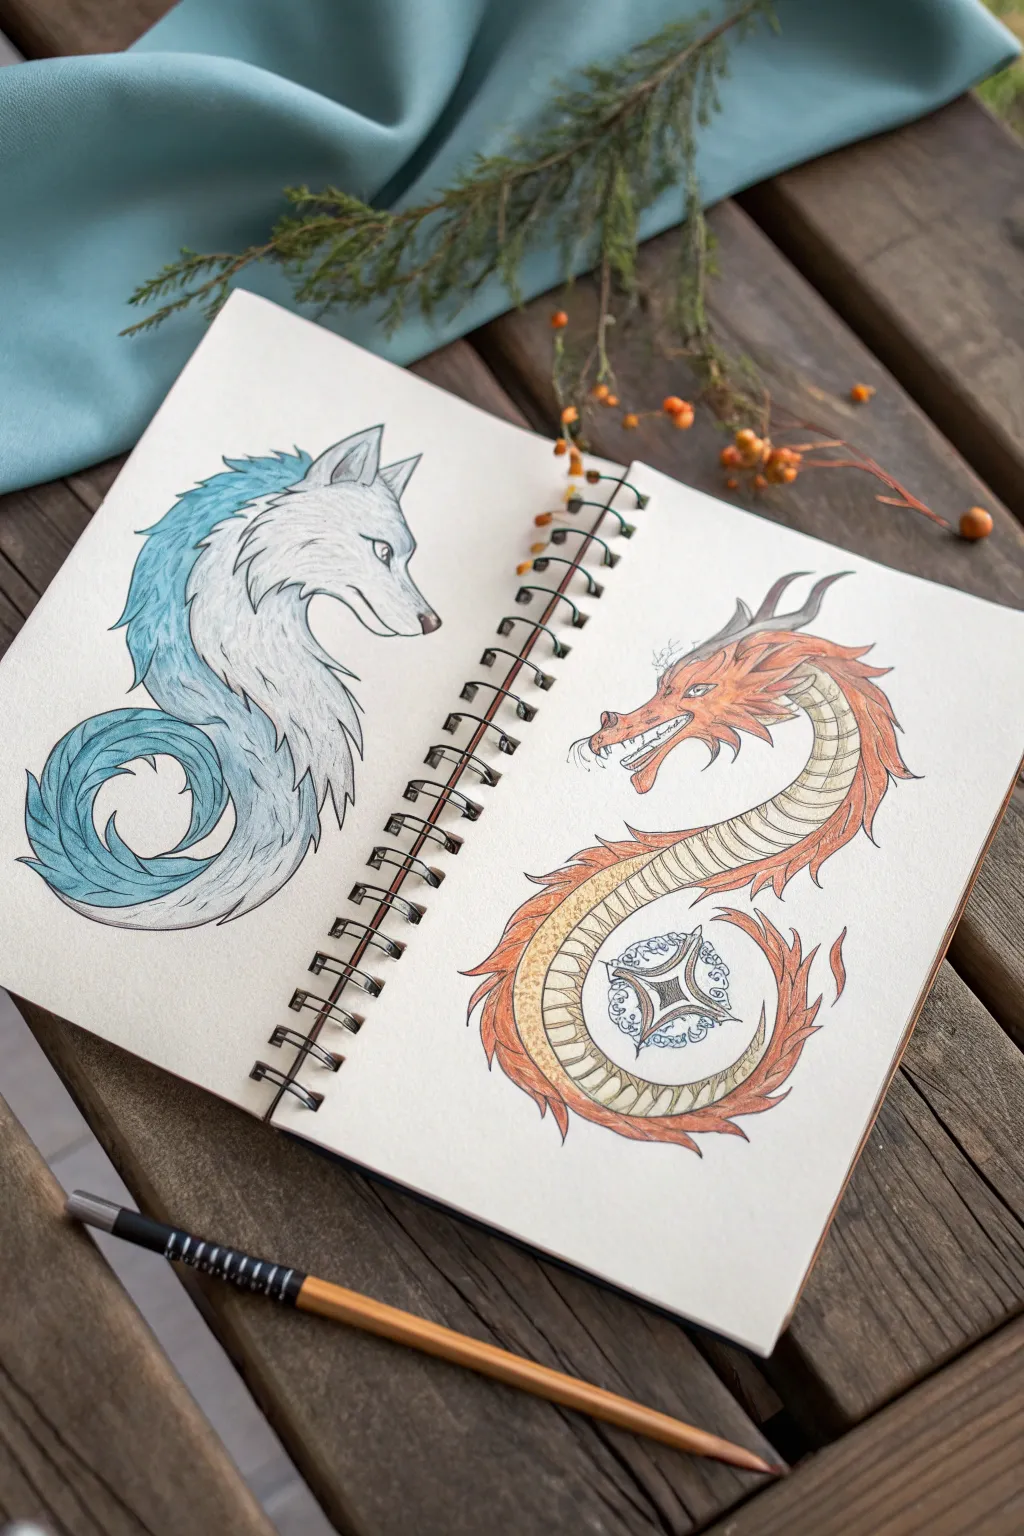
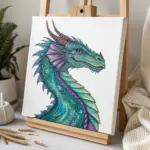
Wolf and Dragon Elemental Duo

Follow the ancient dance of opposites with this dual-page sketchbook spread featuring an ethereal ice wolf and a fierce fire dragon. Both mythical creatures curl into elegant S-shapes, facing one another to create a beautiful symmetry of cool blues and warm reds.
How-To Guide
Materials
- Wire-bound sketchbook (heavyweight paper)
- Graphite pencil (HB or 2B)
- Fine liner pens (preferably 0.1mm and 0.3mm)
- Colored pencils (Cool palette: light blue, teal, white, grey)
- Colored pencils (Warm palette: orange, red, yellow, brown/gold)
- Clean eraser
- Pencil sharpener
Step 1: Structural Sketching
-
Establish the composition:
Open your sketchbook to a fresh two-page spread. Visualize a large ‘S’ curve on the left page for the wolf and a mirrored ‘S’ curve on the right for the dragon. These curves will serve as the spine for each creature. -
Block in the wolf’s head:
On the left page, near the top of your S-curve, sketch a sleek, triangular shape for the wolf’s head. Add pointed ears and a long snout pointing toward the right page. -
Outline the wolf’s body:
Connect the head to the S-curve, sketching a fluffy, flowing mane that tapers down into a curled tail. Keep the lines loose to represent fur. -
Block in the dragon’s head:
On the right page, opposite the wolf, sketch the dragon’s head. Use more angular blocks for the jaw and snout. Add two horns sweeping backward. -
Define the dragon’s body:
Draw the serpentine body following the mirrored S-curve. Unlike the wolf, this body should be a consistent tube shape. At the bottom loop, sketch a circular emblem or orb that the tail curls around.
Step 2: Refining Details
-
Detail the wolf’s face:
Lightly draw the wolf’s eye, nose tip, and inner ear details. Use jagged, short strokes along the neck and back to suggest thick, icy fur texture. -
Detail the dragon’s face:
Add the dragon’s eye, nostril, and teeth. Draw flowing whiskers near the snout and refine the horns to look sharp and segmented. -
Add scales and plating:
For the dragon’s underbelly, draw horizontal lines all the way down the neck to the tail to create ventral plates. Along the spine, add jagged spikes or tufts of mane. -
Design the dragon’s orb:
Inside the dragon’s tail loop, refine the circular emblem. Sketch a four-pointed star shape in the center surrounded by decorative swirls.
Fur vs. Scales
For the wolf, lift your pencil at the end of strokes for tapered fur. For the dragon, use continuous pressure for hard scales.
Step 3: Inking
-
Outline the wolf:
Using a 0.1mm fine liner, carefully ink the wolf. Use broken, flickering lines for the fur to keep it looking soft. I find lighter pressure here helps maintain the airy feel of the ice element. -
Outline the dragon:
Switch to a slightly firmer hand or a 0.3mm pen for the dragon’s scales and horns. Ink the belly plates with clean, continuous curves. -
Internal textures:
Add very fine hatching inside the dragon’s horns and the wolf’s ears for shadow depth. Once the ink is totally dry, gently erase the pencil guidelines.
Level Up: Metallic Pop
Use a gold gel pen for the dragon’s eyes and the center star, and a silver gel pen for the wolf’s eyes for magical glimmer.
Step 4: Coloring the Elements
-
Base layer for the wolf:
Lightly shade the wolf’s mane with a pale teal or sky blue. Leave the face and chest mostly white, using the paper’s color as a highlight. -
Deepen the ice tones:
Layer a darker blue along the spine and the inner curve of the tail. Use feathering strokes that follow the direction of the fur to blend into the white areas. -
Base layer for the dragon:
Apply a base of pale yellow or cream to the dragon’s belly plates and a light orange to the upper body scales. -
Intensify the fire colors:
Layer distinct reds and deep oranges on the dragon’s mane, horns, and spine. Press harder near the edges of scales to create volume and roundness. -
Final touches:
Add a soft grey shadow under the creatures if desired to ground them. Use a white pencil to burnish and blend the transition areas on the wolf to make the fur look smooth.
Close your sketchbook knowing you’ve captured the perfect balance between two powerful elements


Have a question or want to share your own experience? I'd love to hear from you in the comments below!