Whenever I’m stuck, I draw fish—they’re basically the perfect mix of simple shapes and gorgeous details. Here are fish drawing ideas that start super classic and ease you into more playful, “how did you even think of that?” directions.
Simple Fish Doodles in Profile
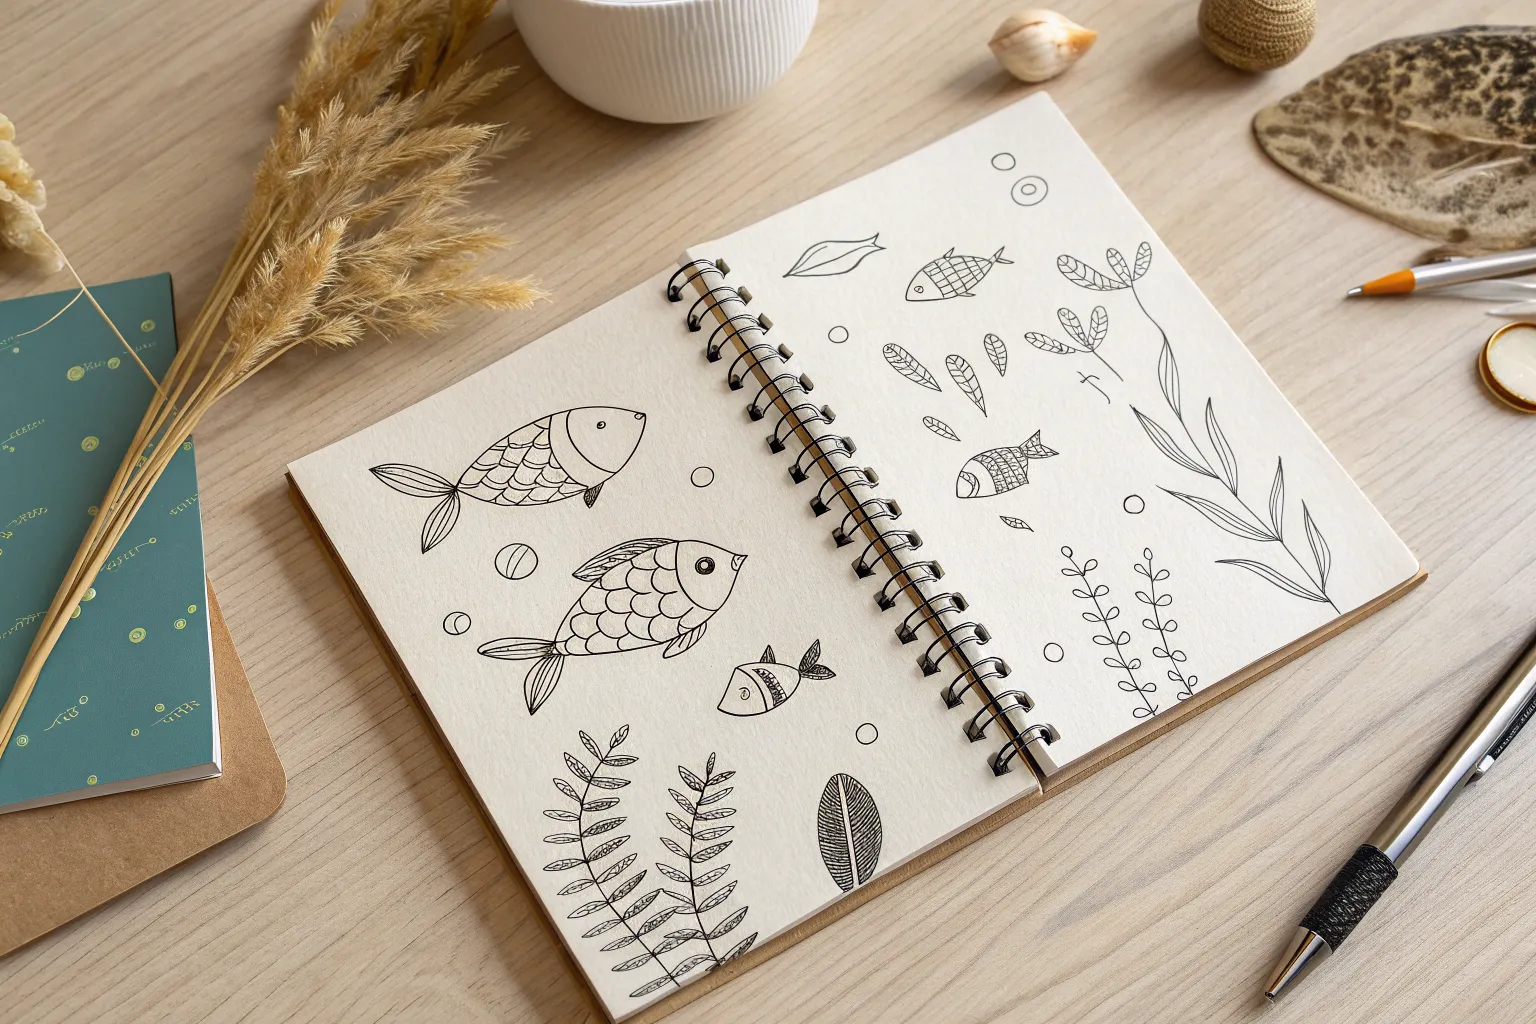
Create a charming set of stylized fish doodles using simple shapes and repetitive patterns. This minimal ink drawing focuses on line weight and decorative filling to bring three unique fish characters to life on your sketchbook page.
Step-by-Step
Materials
- Sketchbook or drawing paper (smooth texture preferred)
- Black fineliner pen (0.5mm or 0.8mm)
- Pencil (HB or 2B for sketching)
- Eraser
Step 1: Planning the Composition
-
Lightly sketch outlines:
Begin with a pencil to lightly sketch three horizontal almond or teardrop shapes stacked vertically on the left page. These will serve as the main bodies for your three fish. -
Add tails described:
Attach a triangular tail fin to the narrower end of each almond shape. Create variety by making the top tail classic, the middle one slightly longer, and the bottom one sharp and angular. -
Draft the faces:
Draw curved vertical lines near the rounded front of each fish to separate the head from the body. Add small circles for eyes.
Ink Smearing?
If your eraser is dragging ink across the page, your pen hasn’t set. Test the dryness by lightly tapping a heavy ink area with a clean finger before erasing.
Step 2: Drawing the Top Fish (Scallop Pattern)
-
Outline in ink:
Trace over your pencil sketch for the top fish with your black pen, keeping the line smooth and continuous. -
Add the dorsal fin:
Draw a small, three-leaf clover shape on the top back of the fish for a decorative fin. -
Ink the eye:
Draw the eye circle and add a tiny dot in the center for the pupil. -
Create scallop scales:
Starting just behind the head line, draw columns of ‘U’ shapes or scallops. Stack them neatly all the way to the tail. -
Detail the tail:
Fill the tail triangle with tiny stippling dots for texture.
Make it Pop
Use a white gel pen to add tiny highlights on the black filled areas of the bottom fish or to add patterns over the dark pupils.
Step 3: Drawing the Middle Fish (Stripe Pattern)
-
Trace the silhouette:
Ink the outline of the middle fish. Give this one a distinct look by adding a small triangular fin on the underside. -
Draw the eye:
Ink the eye circle, but this time fill in a larger black pupil, leaving a tiny white glint. -
Stripe the body:
Fill the main body section with slightly curved vertical stripes. Try to keep the spacing consistent between lines. -
Texture the fins:
Inside the tail and the small bottom fin, add dense stippling (tiny dots) to create a shaded effect that contrasts with the striped body.
Step 4: Drawing the Bottom Fish (Leaf Pattern)
-
Ink the outline:
Go over your final pencil sketch with ink. Add a spiky, three-pronged dorsal fin on top and two small fins on the bottom belly. -
Add facial details:
Ink the head line and a simple dot eye inside a circle. -
Draw the spine:
Draw a horizontal line straight through the center of the body, stopping before the tail. -
Add leaf patterns:
Draw angled ovals branching off the center spine line, making them look like stylized leaves or large seeds. -
Final shading:
Color in one half of each ‘leaf’ shape black for a bold, graphic look. Finish by stippling the tail fin.
Step 5: Finishing Touches
-
Erase guidelines:
Wait at least five minutes for the ink to fully dry, then gently erase all visible pencil marks. -
Add bubbles:
Draw tiny circles floating above the fish to suggest they are underwater. -
Bonus doodles:
If you are feeling creative, sketch smaller versions of these fish on the adjacent page in a vertical swimming direction, as shown in the inspiration photo.
Now you have a school of uniquely patterned fish swimming across your page

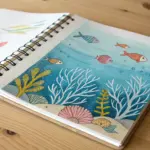

School of Fish Mini Sketches
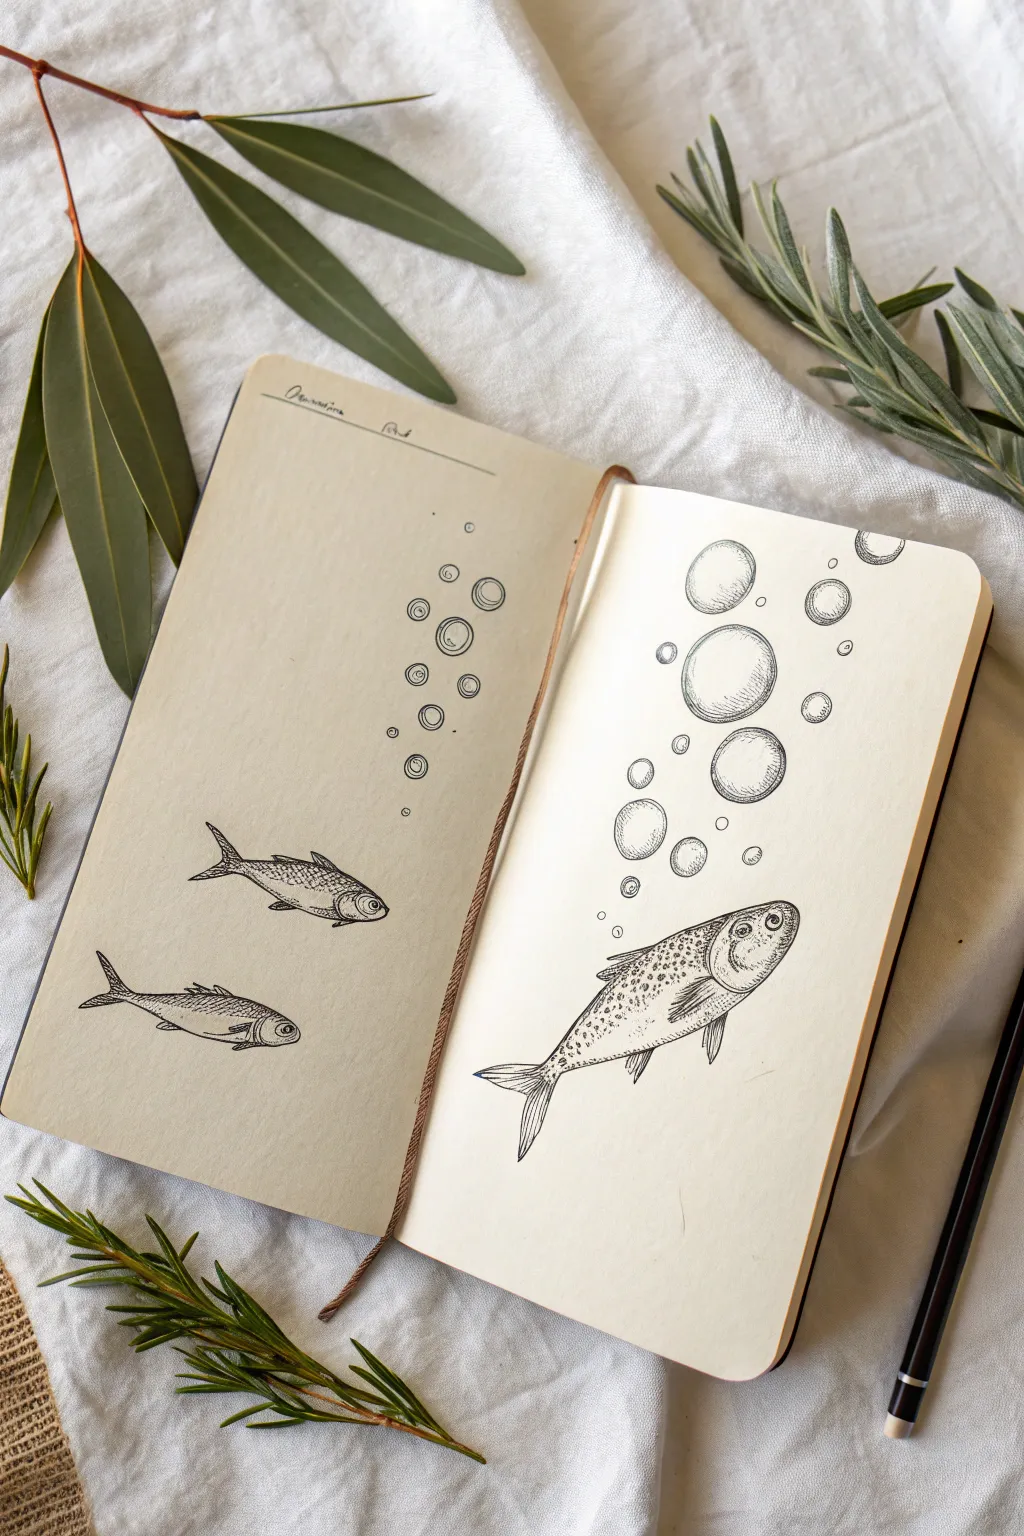
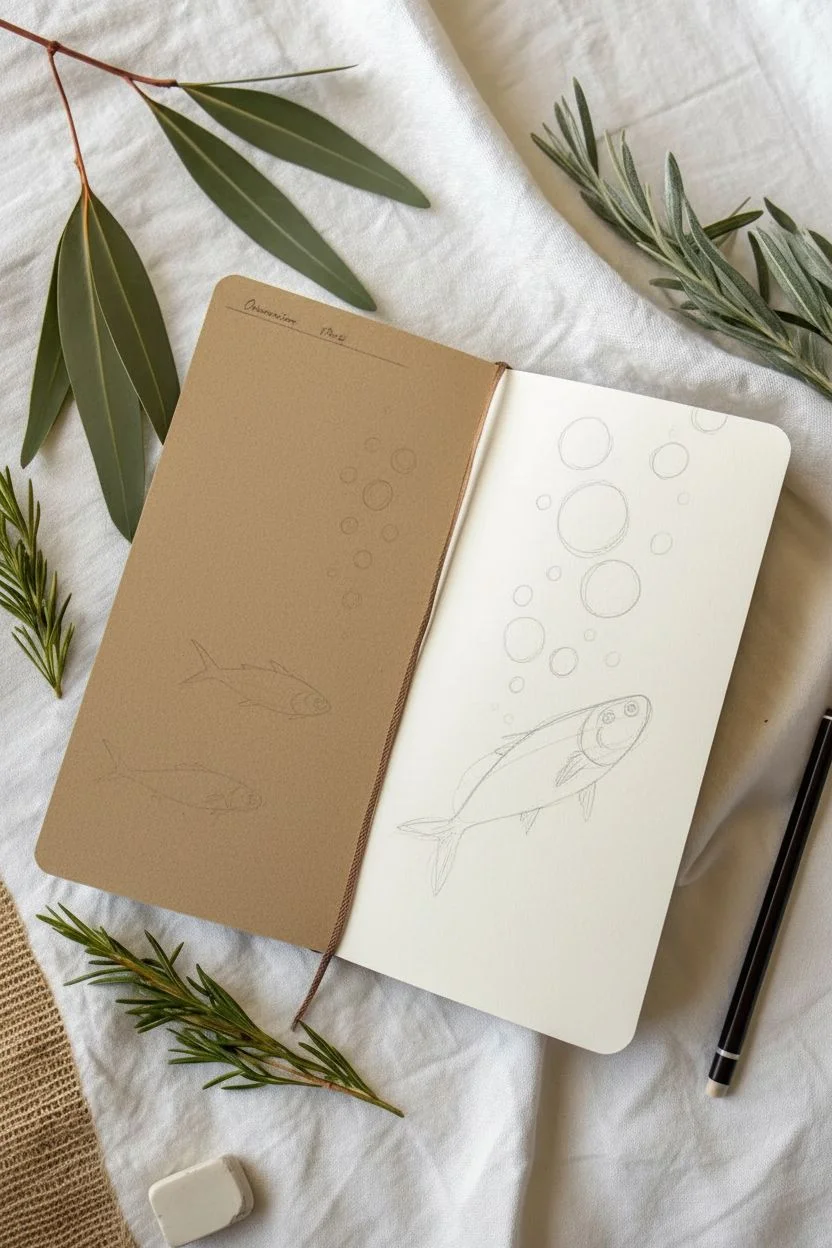
Capture the delicate beauty of underwater life with this dual-page sketchbook spread featuring fine-line fish illustrations. The contrast between the tan paper on the left and the creamy white on the right creates a lovely visual interplay, perfect for practicing different scales and details.
Step-by-Step Tutorial
Materials
- Sketchbook with mixed paper (tan/kraft and cream/white)
- Fine liner pens (sizes 005, 01, and 03)
- Graphite pencil (HB or 2B)
- Kneaded eraser
- Soft hi-polymer eraser
- Ruler (optional)
Step 1: Planning the Layout
-
Divide the Space:
Open your sketchbook to a spread where one side is toned (tan) and the other is light. If your book is all one color, you can glue a piece of kraft paper onto the left page. Visualize the flow of bubbles rising from the bottom right to the top left across the spine. -
Sketch the Header:
On the top of the left page, lightly pencil a thin horizontal line about an inch from the top edge. Write a small title like ‘Observation Note’ or the date in cursive above the line to give it a scientific journal aesthetic.
Smudge Prevention
Ink sitting on top of smooth paper can smudge easily. Place a spare sheet of paper under your drawing hand while you work to keep oils and friction away from fresh lines.
Step 2: Drawing the Small Fish (Left Page)
-
Outline Basic Shapes:
Using your pencil, draw two small elongated ovals on the lower half of the tan page. Add triangular shapes for the tails and fins. Keep the top fish slightly larger than the bottom one. -
Refine the Outlines:
Tighten your pencil sketch to define the fish shapes. Give them distinct forked tails and clearly defined dorsal fins. Add a small circle for the eye near the front of the head. -
Inking the Contour:
Switch to an 01 fine liner. Carefully trace the outline of both fish. I prefer to use broken lines occasionally on the fins to suggest lightness and transparency. -
Adding Scales and Details:
With an 005 pen, draw tiny ‘C’ shapes or cross-hatching to create the texture of scales along the body. Leave the belly area lighter to suggest a highlight. -
Sketching Small Bubbles:
Draw a vertical column of small circles rising from the fish towards the top of the page. Vary the sizes, keeping them generally small, and group them loosely.
Step 3: Drawing the Large Fish (Right Page)
-
Establish the Fish Placement:
On the white page, sketch a larger, upward-diagonal oval in the lower third. This fish should be significantly bigger than the ones on the left, acting as the focal point. -
Detail the Anatomy:
Pencil in a large, round eye, a defined gill cover, and a slightly upturned mouth. Sketch the pectoral, dorsal, and anal fins with spiky, ray-like structures. -
Ink the Main Lines:
Use an 03 pen for the main outline of the large fish to give it weight. Be sure to define the separation between the head and the body with a curved line for the gills. -
Stippling the Texture:
Switch to your 005 pen for the shading. Instead of just lines, use stippling (tiny dots) on the upper back and head to create a speckled, realistic texture. Denser dots create darker shadows. -
Drawing Fin Rays:
Draw fine lines running down the length of the fins. Add small horizontal dashes across these lines to simulate the segmented structure of the fin rays.
Level Up: White Gel
Use a white gel pen to add tiny highlight dots to the fish eyes or the tops of the bubbles. This makes them look wet and glossy, especially on the tan paper side.
Step 4: The Bubble Stream
-
Drafting Large Bubbles:
Pencil in a series of large, floating circles rising from the big fish’s mouth up to the top right corner. Make 3 or 4 of them quite large to contrast with the smaller ones. -
Inking the Bubbles:
Trace the circles with an 01 pen. Don’t worry if they aren’t perfect circles; slight wobbles make them look more organic. -
Adding Reflection:
To make the bubbles look spherical, draw a small crescent shape inside the circle on the bottom left, and a tiny highlight reflection on the top right. Use stippling inside the crescent for a gradient shadow effect. -
Connecting the Composition:
Sprinkle a few tiny bubbles around the large ones to fill the negative space. Ensure the direction of the bubbles on the right complements the smaller bubbles on the left. -
Cleanup:
Wait at least 15 minutes for the ink to fully cure. Gently erase all underlying pencil marks with your kneaded eraser to avoid damaging the paper surface.
Enjoy the peaceful rhythm of stippling and hatching as you bring this underwater scene to life on your page


Cute Fish With Big Eyes and Tiny Fins
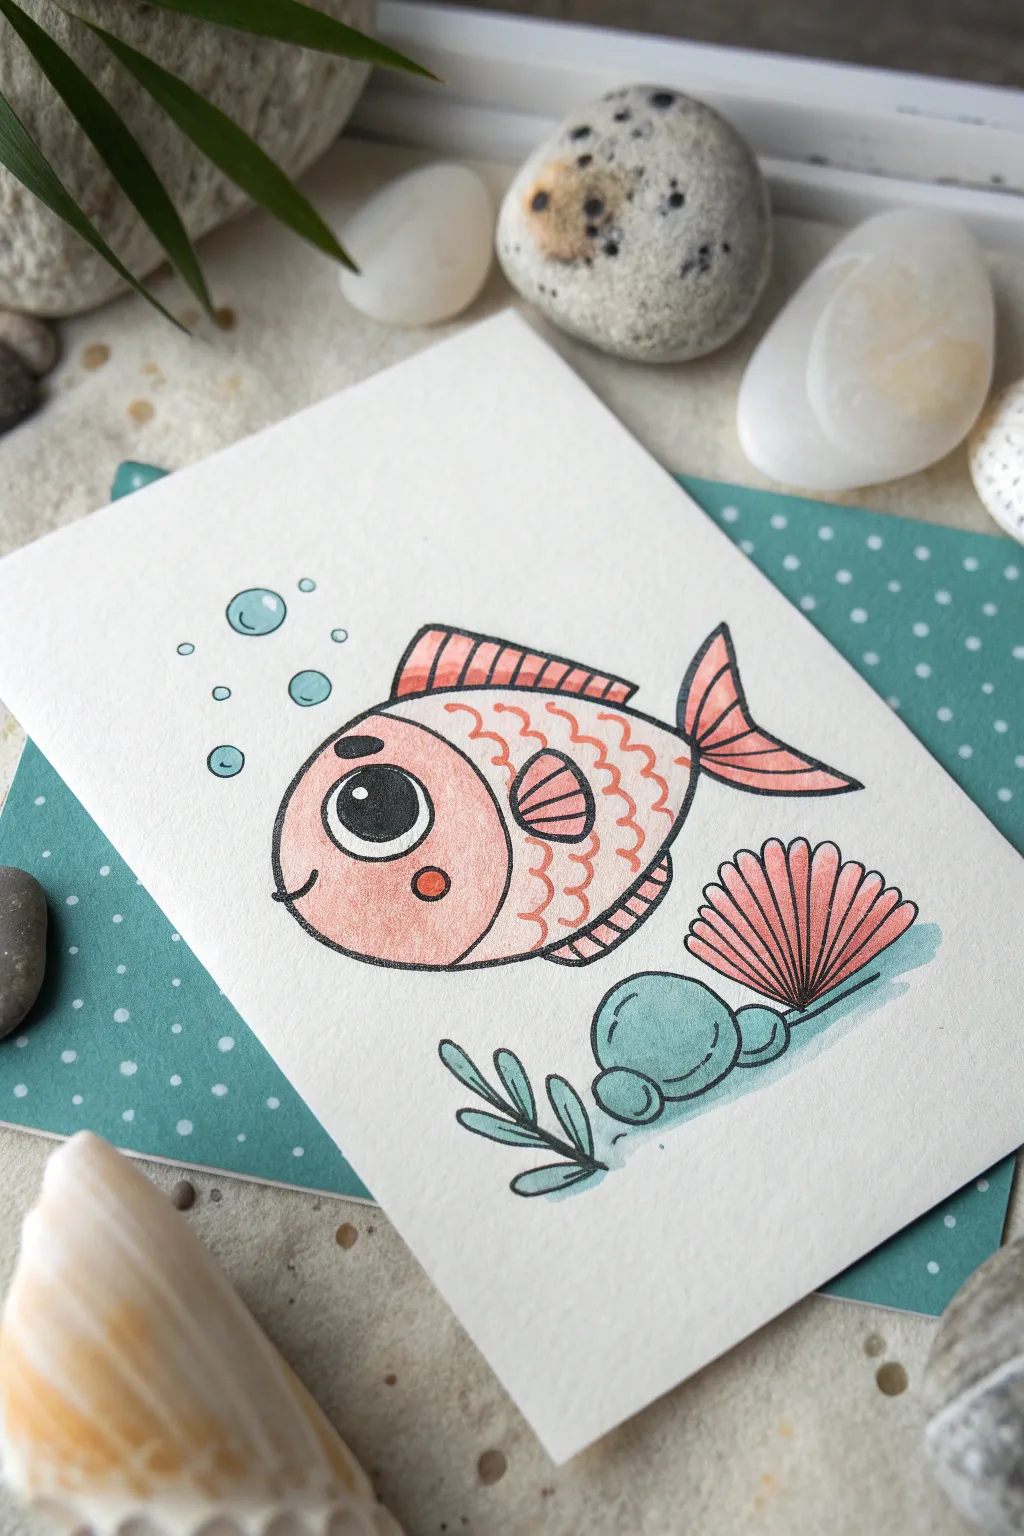
This adorable watercolor and ink illustration features a charmingly round fish with a large, expressive eye and scalloped scales. Perfect for a handmade greeting card or a cute addition to a nursery wall, its soft pastel tones create a gentle, underwater vibe.
Step-by-Step
Materials
- High-quality watercolor paper (white or cream)
- Fine liner pen (Black, waterproof, 0.3mm or 0.5mm)
- Watercolor paints (Coral/Salmon Pink, Teal/Aqua, Soft Grey)
- Small round paintbrush (Size 2 or 4)
- Pencil and eraser
- Water cup and paper towel
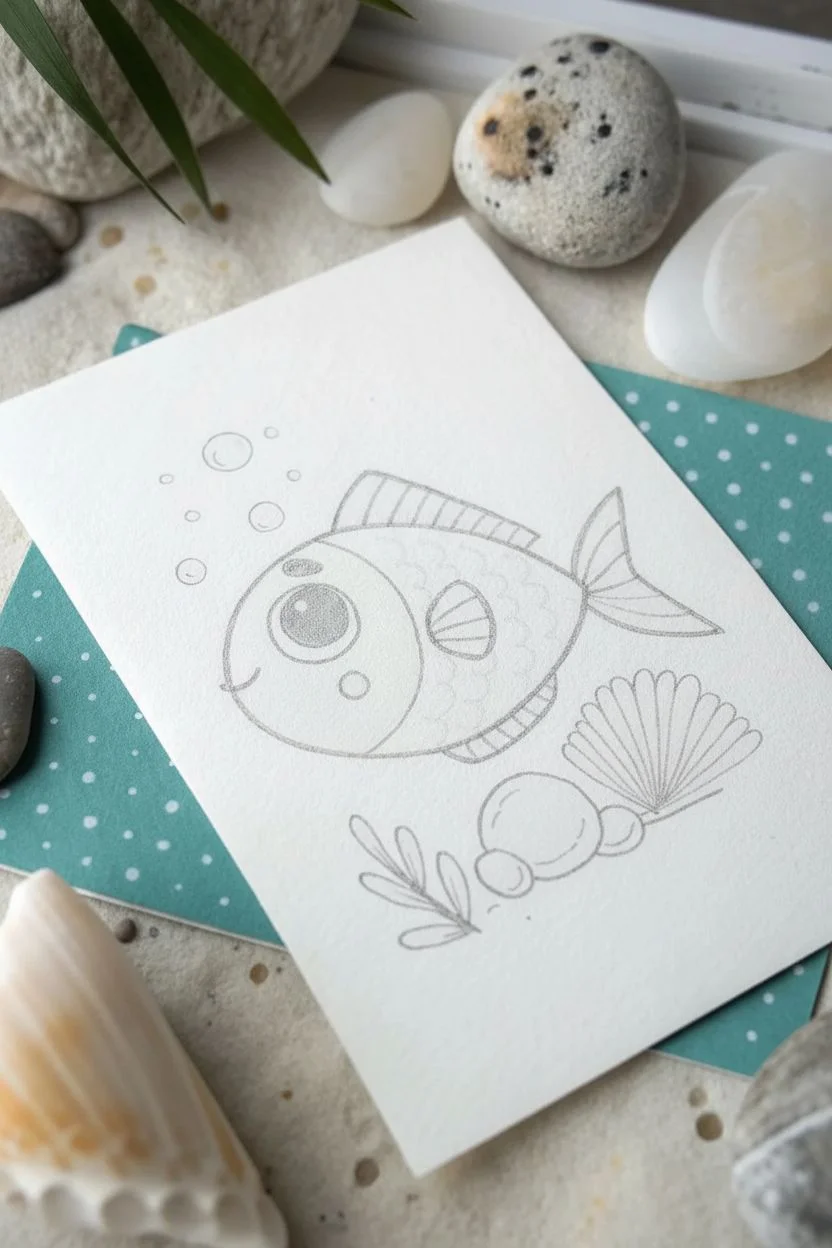
Step 1: Planning the Sketch
-
Outline the body shape:
Start with a light pencil sketch. Draw a large, slightly squashed oval shape for the main body of the fish. It should be plump and tilted slightly upward. -
Add the eye and face:
Inside the oval, towards the left side, draw a very large circle for the eye. Add a small glint circle inside it for a highlight. Draw a curved line creating a gill separation behind the eye. -
Sketch the fins and tail:
Add a small dorsal fin on top and a tiny pectoral fin on the side of the body. Sketch a forked tail at the back. Keep all the corners rounded rather than sharp for a cuter look. -
Draw the environment:
Below the fish, lightly sketch a fan-shaped seashell and two rounded rocks stacked next to it. Add a few simple leaves of sea grass poking out from the bottom. -
Add bubbles:
Draw three or four small circles floating up from the fish’s mouth area to represent bubbles.
Uneven Paint?
If your watercolor dries with hard edges or ‘blooms’, try wetting the paper slightly with clean water before applying the paint. This wet-on-wet technique helps color spread smoothly.
Step 2: Inking the Lines
-
Trace the main lines:
Using your waterproof black fine liner, carefully trace over your pencil lines. Use a steady hand to create clean, continuous strokes. -
Fill the eye:
Color in the pupil of the eye with pure black ink, leaving the small white circular highlight completely uncolored for that shiny look. -
Detail the scales:
Draw rows of small ‘U’ shapes across the body of the fish to create scales. Start from the gill line and work your way back to the tail. -
Thicken the outline:
Go over the main outer contour of the fish a second time to make the exterior line slightly bolder than the interior detail lines. This helps the character pop. -
Erase pencil marks:
Wait a moment for the ink to dry completely, then gently erase all visible pencil sketches underneath.
Make it Sparkle
Once the paint is completely dry, use a metallic silver or gold gel pen to outline the bubbles or add tiny dots to the fish scales for a magical, shimmering underwater effect.
Step 3: Water coloring
-
Paint the fish body:
Mix a watery salmon or coral pink color. Paint the entire body of the fish, but leave the eye area white. Let the color be slightly uneven for a natural texture. -
Add a rosy cheek:
While the pink paint is still slightly damp, drop a tiny circle of more concentrated red or orange paint just below the eye to create a blushing cheek. -
Color the fins:
Use a slightly darker shade of the same pink or add a touch of red to color the dorsal fin, side fin, and tail giving them a bit of contrast from the body. -
Paint the shell:
Paint the seashell in a darker coral or reddish-pink tone similar to the fins to balance the color composition. -
Color the rocks and grass:
Use a watered-down teal or aqua blue for the rocks. I like to keep this very transparent. Use the same color for the sea grass leaves. -
Tint the bubbles:
Add just a tiny accent of the blue teal color to one side of each bubble, leaving the rest white to suggest transparency. -
Add a ground shadow:
Mix a very faint grey-blue wash and paint a loose strip underneath the rocks and shell to ground the scene so the objects don’t look like they are floating.
Now you have a sweet underwater friend ready to brighten someone’s day


Striped Reef Fish Patterns
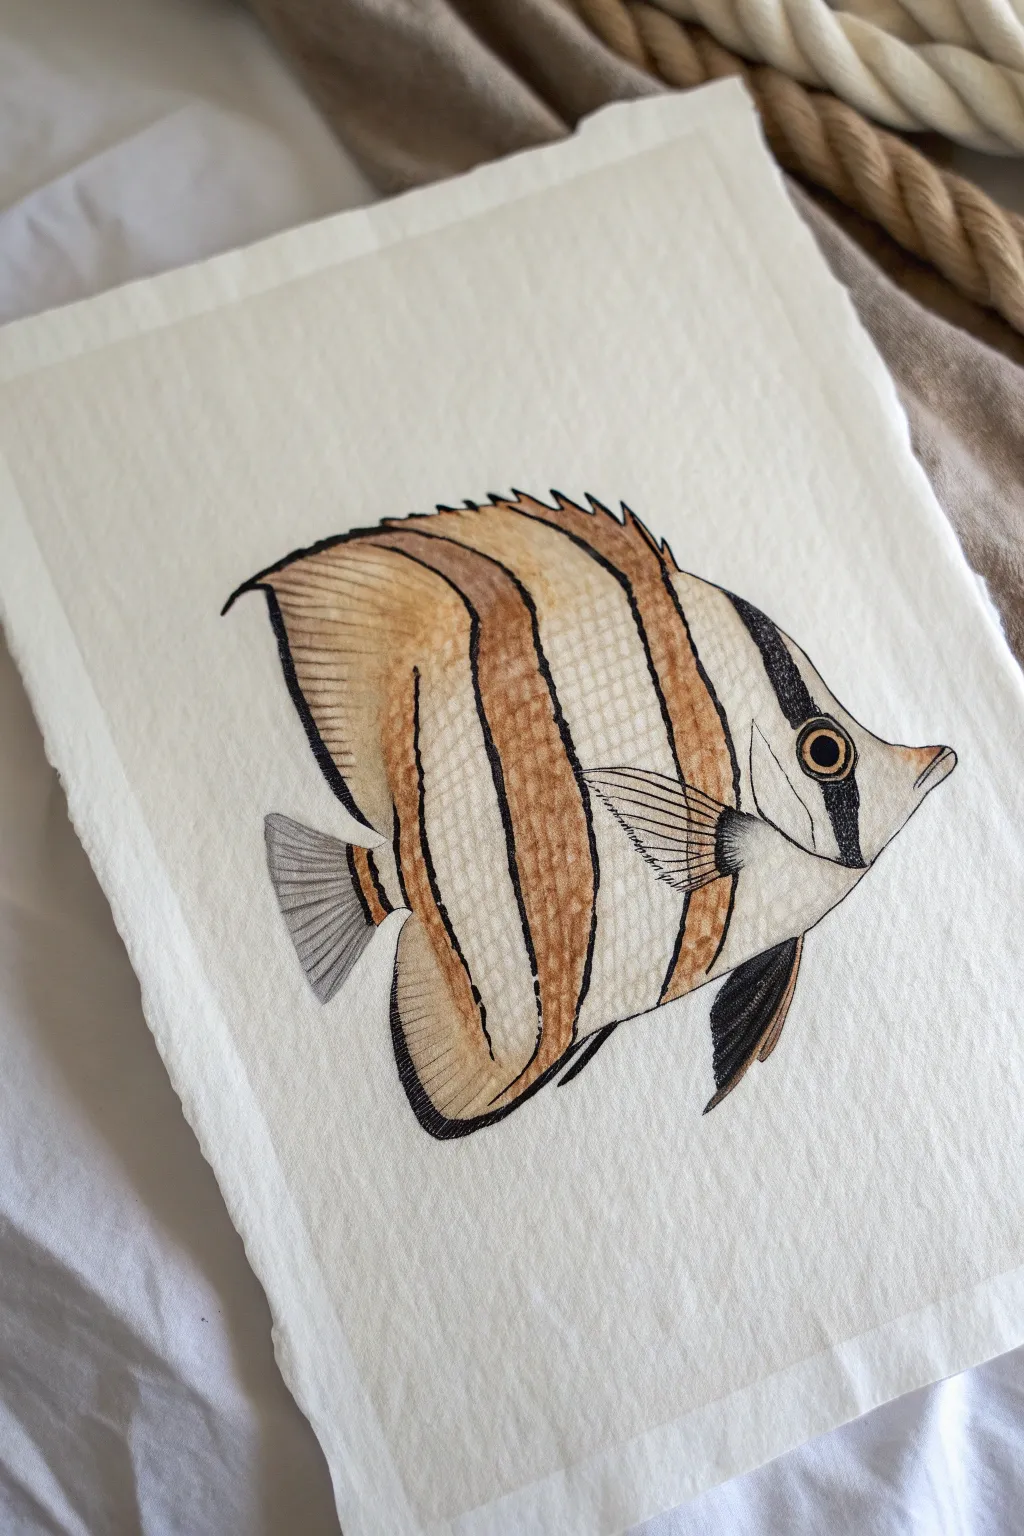
Capture the delicate beauty of coral reef life with this mixed-media illustration of a Copperband Butterflyfish. Combining the clean lines of fine-tip pens with warm, earthy watercolor washes creates a timeless, scientific illustration style on textured paper.
Step-by-Step
Materials
- Cold press watercolor paper (approx. 300 gsm)
- H or HB pencil
- Kneaded eraser
- Waterproof fine liner pens (0.1mm, 0.3mm, 0.5mm)
- Watercolor paints (Yellow Ochre, Burnt Sienna, Sepia, Prussian Blue)
- Round watercolor brushes (size 2 and 4)
- Water cup and paper towel
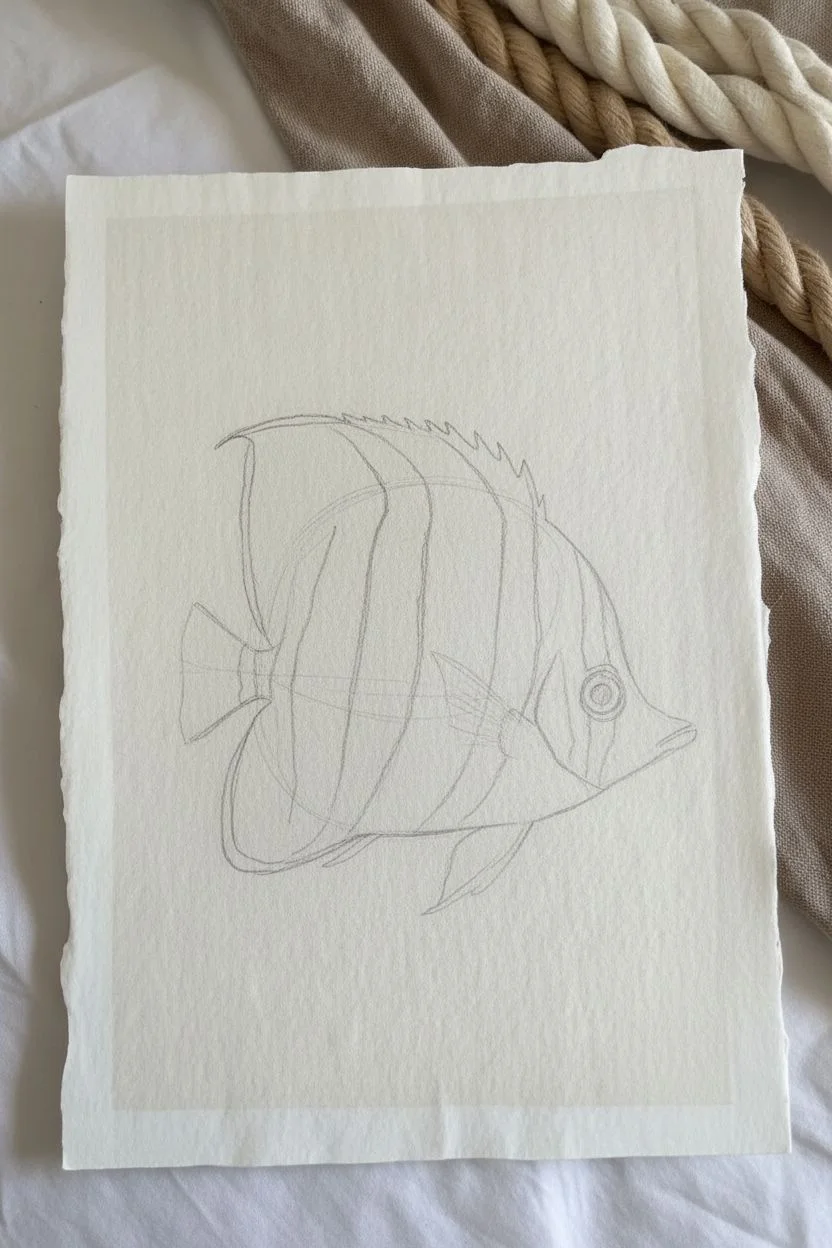
Step 1: Sketching the Framework
-
Establish the central axis:
Begin by lightly drawing a diagonal oval in the center of your page to represent the fish’s main body mass. This species has a tall, compressed body shape, so the oval should be taller than it is wide. -
Shape the unique snout:
Extend a long, pointed triangle from the front of the oval to create the distinct, beak-like mouth characteristic of butterflyfish. Keep the tip slightly upturned. -
Outline the fins:
Sketch the dorsal fin running along the top back, curving down towards the tail. Add the ventral (bottom) fins and the fan-shaped tail fin. The dorsal spines should look jagged at the front and smooth at the back. -
Map the stripes:
Lightly pencil in the guidelines for the four vertical bands. The first runs through the eye, the second behind the gills, the third across the mid-body, and the fourth near the tail base. -
Clean up the sketch:
Refine your outline, connecting the shapes into a cohesive silhouette. Use your kneaded eraser to lift away heavy graphite, leaving only a faint guide for the ink.
Bleeding Lines?
If your ink runs when painting, your pen might not be totally waterproof or the ink wasn’t dry. Wait at least 15-30 minutes after inking before touching it with a wet brush.
Step 2: Inking the Details
-
Outline the body:
Using a 0.3mm waterproof pen, carefully trace your pencil outline. Use a steady hand but don’t worry if the line isn’t perfectly smooth; a little organic variation adds character. -
Detail the dorsal spines:
Switch to a slightly thicker 0.5mm pen for the spiny front section of the top fin to give it weight. Use quick, sharp strokes to emphasize the pointy tips. -
Texture the fins:
With your finest 0.1mm pen, draw delicate parallel lines (hatching) inside the tail and soft dorsal fins. Following the direction of the fin rays helps create a sense of movement. -
Define the eye:
Draw the pupil with the 0.5mm pen, leaving a tiny white highlight un-inked to show life and reflection. Outline the iris carefully. -
Ink the stripe boundaries:
Use the 0.3mm pen to outline where the colored bands will go. I like to make these lines slightly broken or textured rather than solid walls, suggesting scales. -
Add scale texture:
Add tiny, broken cross-hatching or stippling within the lighter sections of the body to suggest a scaly texture without drawing every single scale.
Step 3: Applying Watercolor Washes
-
Prepare the base color:
Mix a watery wash of Yellow Ochre with plenty of water. You want a very pale, translucent tea color. -
Paint the first layer:
Apply this pale wash over the entire fish body, avoiding the eye and the stark white stripe areas if you prefer high contrast. Let this layer dry completely. -
Mix the stripe color:
Create a warmer, darker mix using Burnt Sienna with a touch of Sepia. This should be significantly darker than your base wash. -
Paint the characteristic bands:
Using a size 4 brush, carefully fill in the vertical bands masked out earlier. The paint should be richest in the center of the stripe and can fade slightly at the edges. -
Darken specific features:
While the stripes dry, use a concentrated Sepia or a mix of Sepia and Prussian Blue to paint the eye band. This stripe is usually the darkest on the fish. -
Shading the fins:
Add a light wash of diluted Sepia to the tail fin (caudal fin) and the rear of the dorsal fin. Leave the tips slightly lighter for a translucent effect. -
Adding depth to the body:
Once the stripes are dry, use a very diluted mix of your stripe color to add shadows along the bottom of the fish and under the pectoral fin to give the body volume. -
Final dark accents:
Use the dark Sepia/Blue mix to fill in the pelvic fins (the small ones at the bottom front). These provide a nice anchor of dark value. -
Review and refine:
Check your illustration for balance. If the pencil lines are still visible under dry paint, erase them gently. Re-ink any major lines that got lost under the watercolor.
Pro Tip: Torn Edge Look
To get the rustic paper edge shown in the reference, fold your watercolor paper back and forth several times, then dampen the fold with a brush before carefully tearing it.
Once dry, you’ll have a stunning specimen illustration ready to be framed or gifted to a marine life enthusiast
BRUSH GUIDE
The Right Brush for Every Stroke
From clean lines to bold texture — master brush choice, stroke control, and essential techniques.
Explore the Full Guide
Long, Sleek Fish in a Leaping Pose
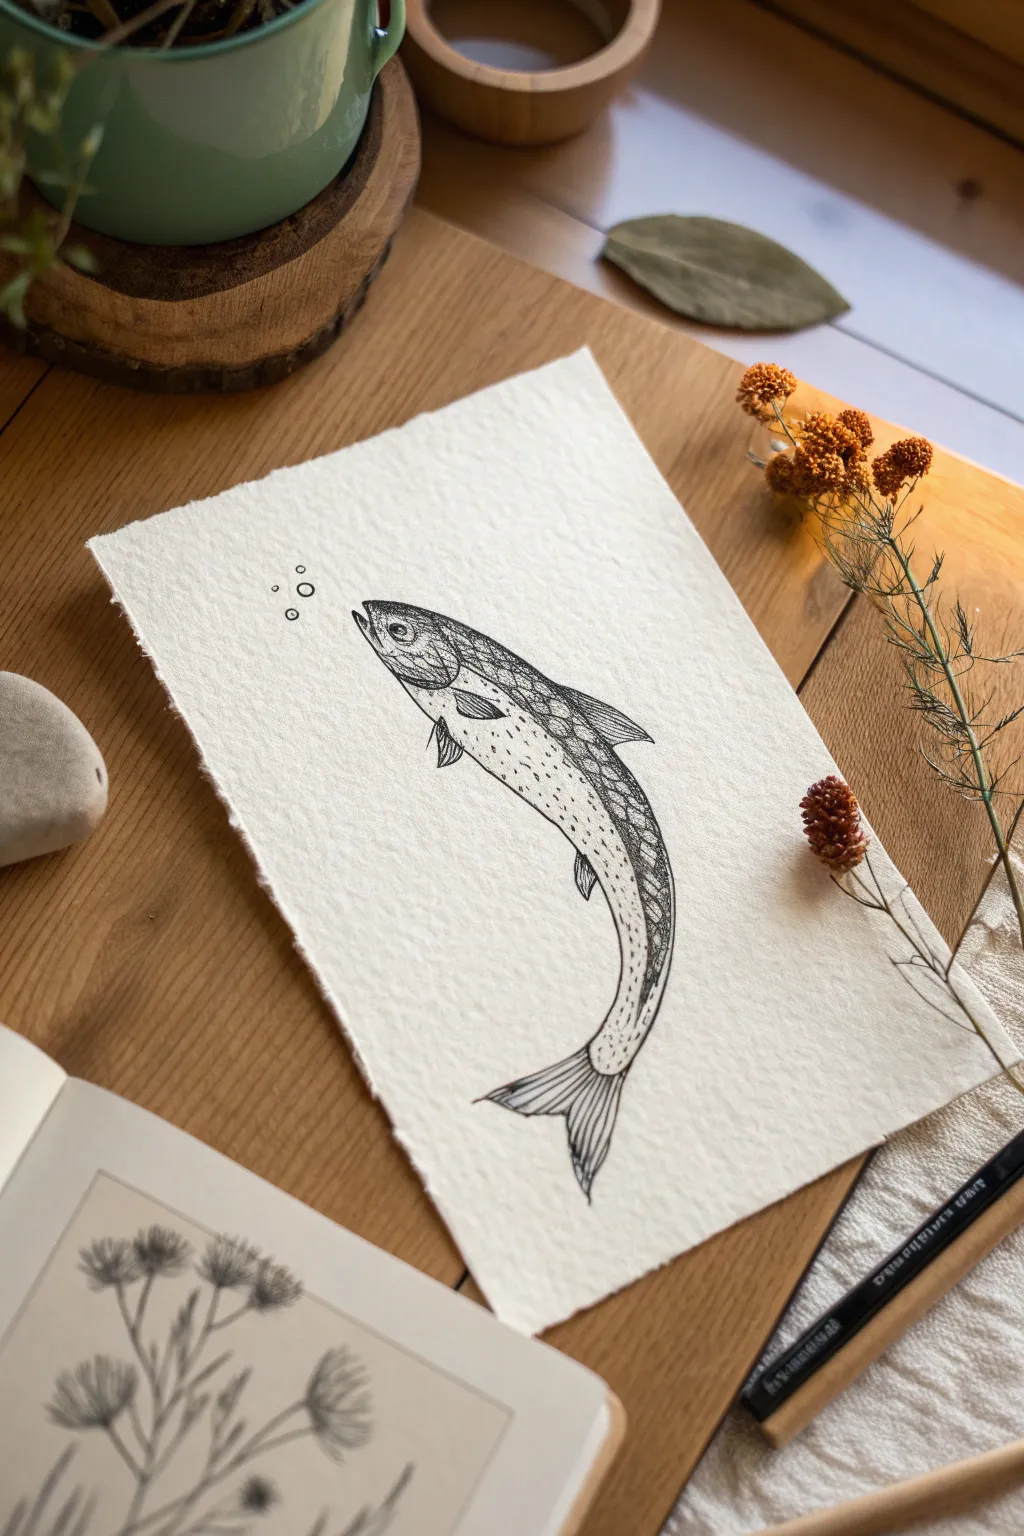
Capture the fluid motion of aquatic life with this elegant ink illustration featuring a sleek fish in mid-leap. The high-contrast black ink against toothy, deckled-edge paper creates a timeless, almost scientific study aesthetic.
Detailed Instructions
Materials
- Heavyweight textured paper (cold press watercolor or printmaking paper with deckled edges)
- Fine liner pens (sizes 005, 01, 03, and 05)
- HB Graphite pencil
- Kneaded eraser
- Ruler (optional for alignment)
- Smooth work surface
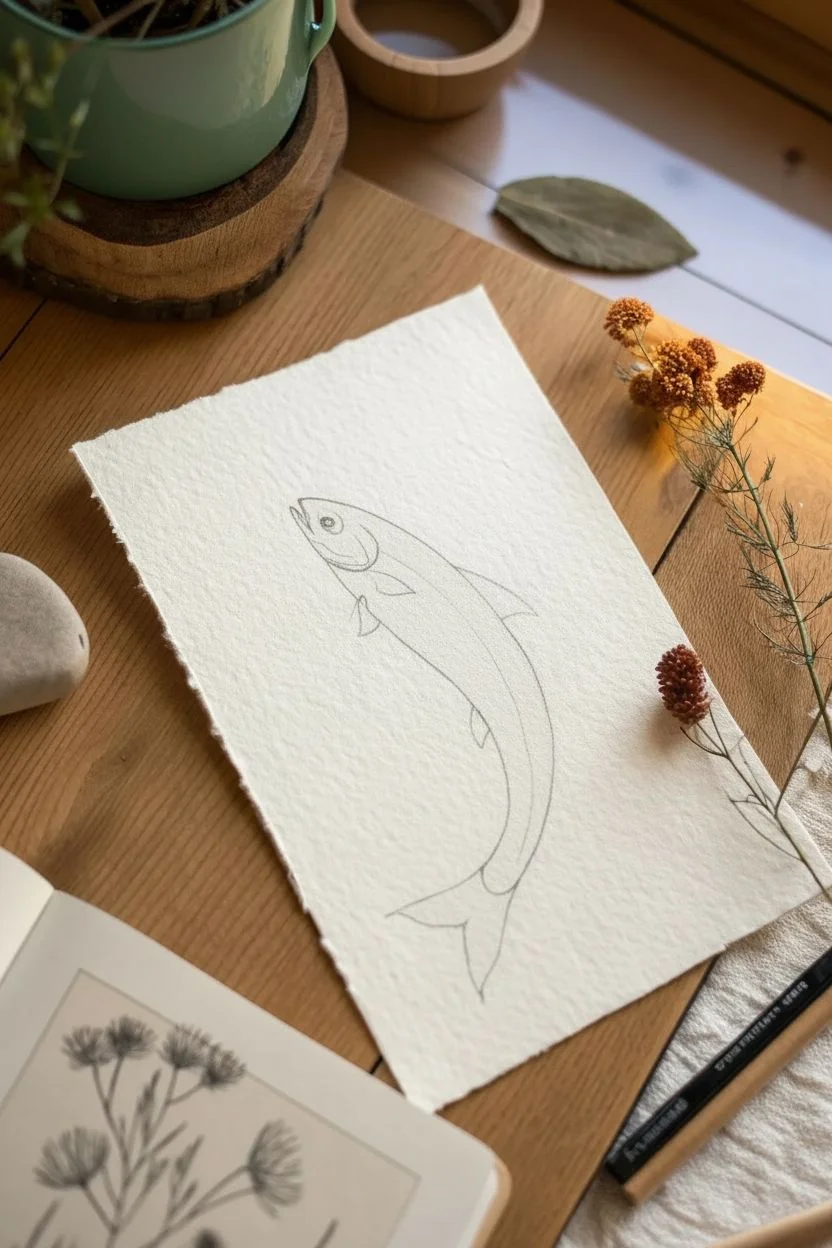
Step 1: Sketching the Form
-
Establish the curve:
Begin with your HB pencil by drawing a long, gentle ‘C’ curve. This ‘line of action’ will guide the fish’s spine and ensure that sense of upward leaping motion. -
Outline the body shape:
Lightly sketch an elongated oval around your guideline. Make it thicker near the head (upper third) and taper significantly as you reach the tail, creating a streamlined, torpedo-like silhouette. -
Define the head features:
At the top end, mark off the gill cover (operculum) with a curved line. Add a circle for the eye near the front, and map out the slightly open mouth pointing upwards. -
Add fin placement:
Sketch the triangular dorsal fin on the back. Add the pectoral fin just behind the gill cover, and the pelvic and anal fins along the belly. Finally, sketch the forked tail fin at the bottom.
Working with Texture
When using textured watercolor paper, move your pen slightly slower than usual. This ensures the ink sinks into the ‘valleys’ of the paper grain for solid lines.
Step 2: Inking the Outline
-
Trace the main lines:
Using an 03 fine liner, go over your pencil outlines. Use confident, single strokes rather than feathery ones to keep the look clean. -
Emphasize the eye:
Ink the eye circle carefully. Leave a small white highlight dot inside, then fill the rest of the pupil solid black to give the fish life. -
Refine the mouth and gills:
Detail the mouth opening and the gill cover. You can thicken the lines slightly at the intersections to add visual weight. -
Erase pencil guides:
Wait for the ink to be completely dry—I usually give it at least five minutes to avoid smudging—then gently lift all pencil marks with your kneaded eraser.
Step 3: Adding Texture and Detail
-
Scale texture strategy:
Switch to your 01 pen. Instead of drawing every single scale, we will imply texture. Cross-hatch small diamond shapes on the upper back to suggest dark scales. -
Stipple the mid-body:
As you move down the fish’s side, switch from cross-hatching to stippling (tiny dots). Concentrate the dots near the spine and let them fade out towards the white belly. -
Detail the fins:
Use the 005 (super fine) pen to draw thin lines radiating from the base of the fins to the tips. These lines should curve slightly to show the flexibility of the fin rays. -
Darken the upper back:
Return to the top dorsal area with an 05 pen to add deeper shadows. This high contrast makes the fish look three-dimensional and round. -
Add belly spots:
Using the 01 pen again, add sparse, random dots and tiny dashes along the lower flank to give the skin an organic, speckled appearance.
Wobbly Lines?
If your long lines aren’t smooth, try locking your wrist and moving your entire arm from the elbow. Drawing faster also helps reduce shake.
Step 4: Final Touches
-
Enhance the tail:
Add extra definition to the tail fin (caudal fin) with slightly thicker lines on the outer edges, emphasizing the fork shape. -
Draw the bubbles:
Above the mouth, draw three or four small circles of varying sizes rising upward. Keep the lines very thin. -
Final assessment:
Step back and look at the overall contrast. If the fish looks too flat, add a few more stippled dots along the bottom edge of the belly for shadow.
Now you have a dynamic aquatic illustration ready to be framed or gifted.
Pufferfish With Spikes and Round Form
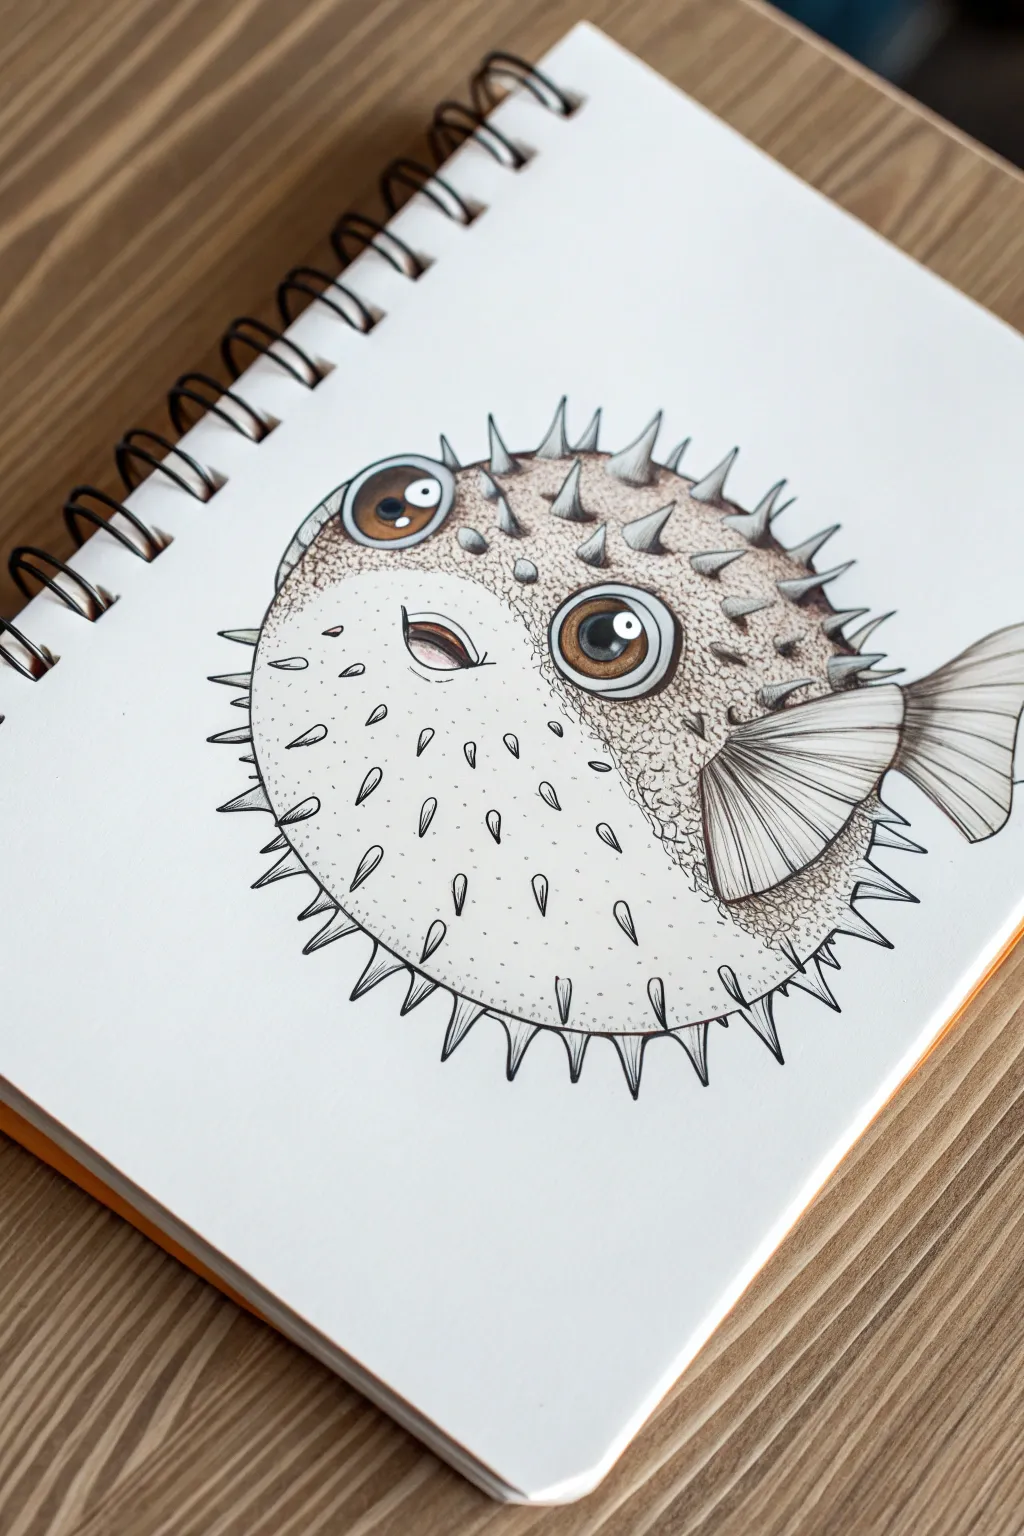
This whimsical pufferfish sketch combines clean ink lines with subtle shading to create a delightful 3D effect. The exaggerated roundness and prominent spikes make it a fun exercise in texture and volume without needing complex anatomy.
How-To Guide
Materials
- Spiral-bound sketchbook or heavy drawing paper
- HB graphite pencil
- Eraser (kneaded preferred)
- Fine liner pens (0.1mm, 0.3mm, and 0.5mm)
- Brown colored pencil (warm tone)
- White gel pen (optional for highlights)
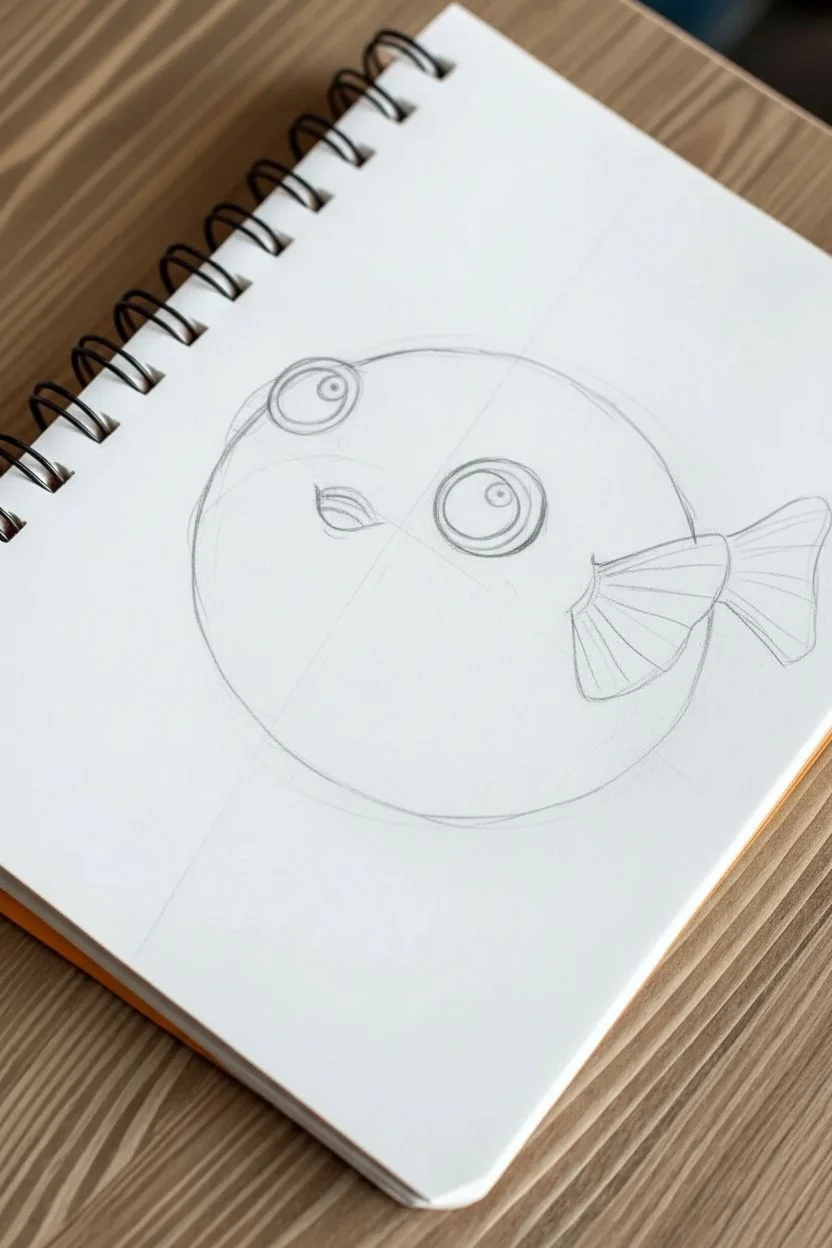
Step 1: Drafting the Basic Shape
-
Draw the main circle:
Start lightly with your pencil. Sketch a large, almost perfect circle in the center of your page. This doesn’t need to be geometrically perfect, but keep it as round as possible to emphasize the ‘puffed’ look. -
Place the eyes:
Visualize a vertical centerline. To the right of that line, near the upper third, draw a large circle for the main eye. Draw a slightly smaller, partially obscured circle on the far left edge for the other eye. -
Add the mouth:
Between the two eyes, slightly lower down, sketch a small, open mouth curve. It should look like a sideways teardrop or bean shape to give the fish a happy expression. -
Sketch the fins:
On the right side of the body, draft a fan-shaped pectoral fin attached to the side. Behind that, sketch the tail fin protruding from the back curves.
Spike Perspective
If spikes look flat, curve the base line more. A ‘smile’ curve at the bottom of the triangle makes the spike look like it’s coming towards you on a round surface.
Step 2: Adding the Details
-
Map out the spikes:
This is the crucial step. Lightly draw small triangular cones all over the body. Pay attention to perspective: spikes in the center point toward you, while spikes on the edges point outward following the curve of the sphere. -
Refine the eyes:
Inside the large right eye, draw a large pupil circle and add a smaller circle within it for a highlight. Add an eyelid curve above the eye to give it personality. -
Refine the fins:
Add lines radiating from the base of the fins to the outer edges to simulate the ribbing texture.
Step 3: Inking the Lines
-
Outline the main body:
Switch to a 0.5mm pen. Carefully trace the outer silhouette of the fish, incorporating the spikes along the edge so they feel part of the skin, not just stuck on. Skip the line where the fin attaches. -
Detail the eyes:
Use the 0.5mm pen for the thick outline of the eye and the pupil. Be careful to leave the highlight circle purely white. I like to thicken the line on the upper lid slightly for more definition. -
Ink the fins:
Use a finer 0.1mm or 0.3mm pen for the striations inside the fins. Keep these lines delicate and swift. -
Ink the surface spikes:
Trace the triangular spikes on the body. Instead of closing the bottom of the triangle with a straight line, use a slightly curved line (like a smile) to show they are bulging from the round skin. -
Add texture marks:
Using your finest pen (0.1mm), add tiny dashes, dots, or small ‘v’ shapes between the spikes, especially on the top half, to suggest rough skin texture. -
Erase pencil marks:
Once the ink is completely dry (test it with your finger first!), gently erase all underlying graphite sketches.
Go Wider
Try drawing a second, smaller pufferfish floating in the background with a surprised expression to create a narrative scene between the two characters.
Step 4: Shading and Depth
-
Shade the iris:
Use your brown pencil to color the iris of the eye. Press harder near the top for a shadow from the eyelid, fading to a lighter brown at the bottom. -
Shade the upper body:
Take the brown pencil and very lightly shade the top hemisphere of the fish. Apply more pressure near the spine and fade out as you move down towards the belly. -
Detail the spikes:
Add a tiny bit of shadow on one side of each spike using the pencil. This small detail instantly makes them look 3D. -
Enhance texture with stippling:
Go back in with your 0.1mm pen and add concentrated dots (stippling) on the upper back and around the base of the spikes where the brown pencil shading is darkest. -
Final fin shading:
Add very light pencil shading to the base of the fins where they connect to the body to create a sense of attachment.
Now you have a charmingly spiky friend ready to swim off the page

PENCIL GUIDE
Understanding Pencil Grades from H to B
From first sketch to finished drawing — learn pencil grades, line control, and shading techniques.
Explore the Full Guide
Catfish With Whiskers and Personality
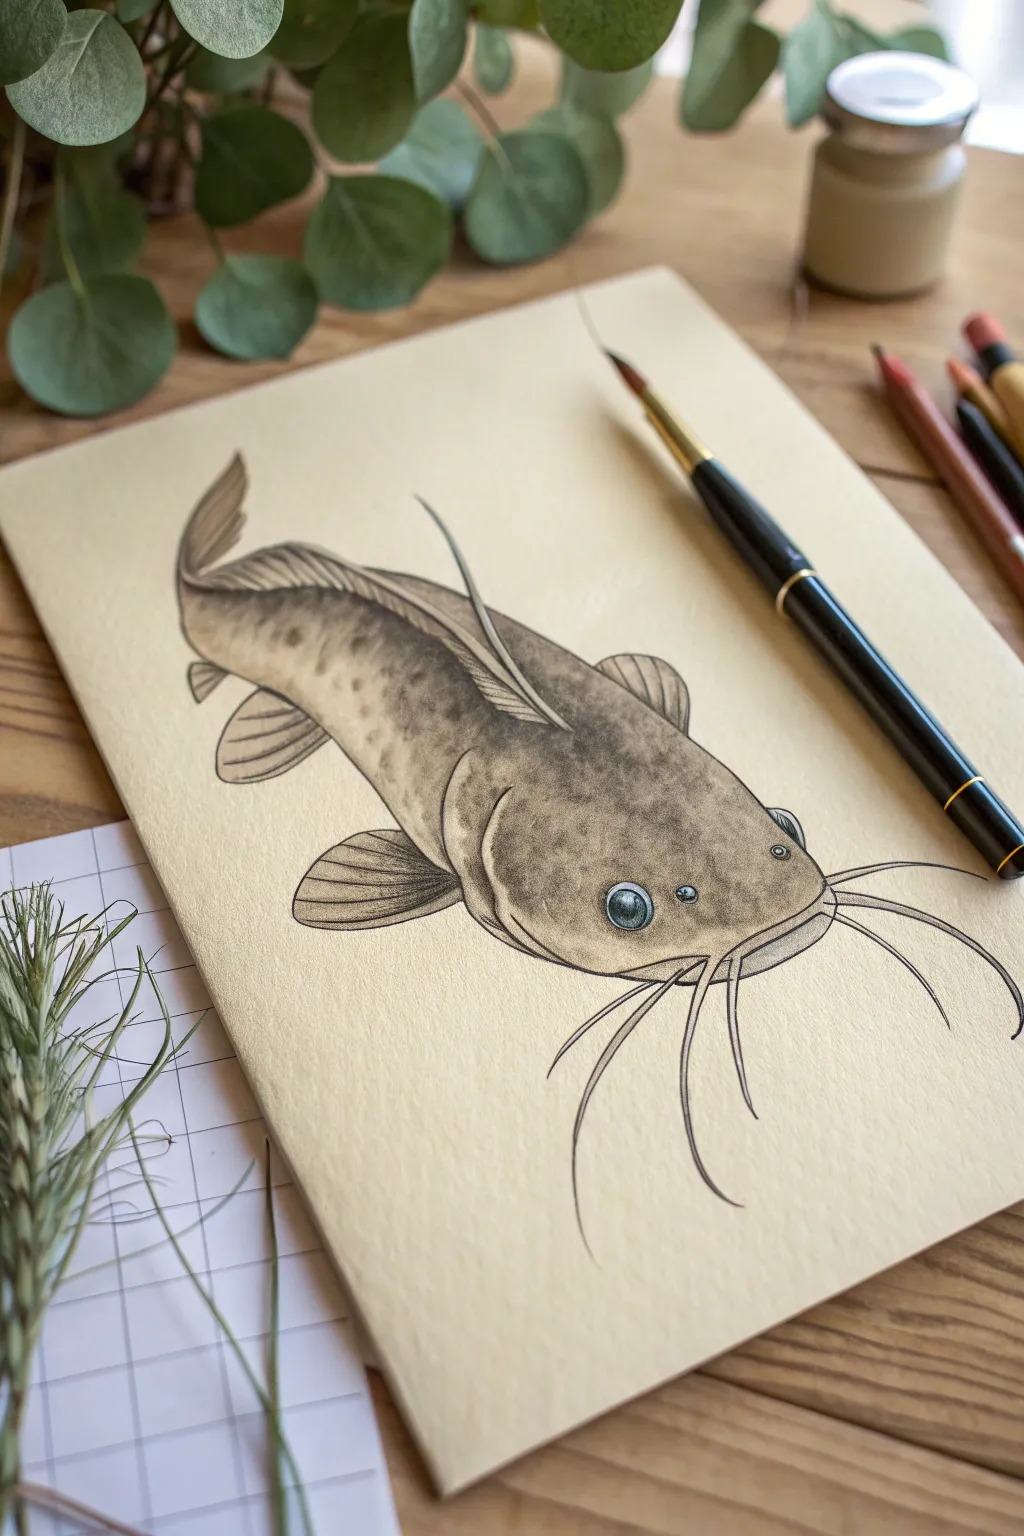
Capture the distinct personality of a bottom-dweller with this detailed catfish illustration. Using toned paper and precise shading, you’ll create a drawing that emphasizes the smooth skin texture and iconic barbels of this freshwater favorite.
Step-by-Step Guide
Materials
- A4 beige or tan toned drawing paper
- HB graphite pencil
- Soft eraser
- Fine-point black fineliner pen (0.3mm)
- Black brush pen or calligraphy pen
- Cool grey alcohol markers (light and medium tones)
- White charcoal pencil or white gel pen
- Sepia or dark brown colored pencil
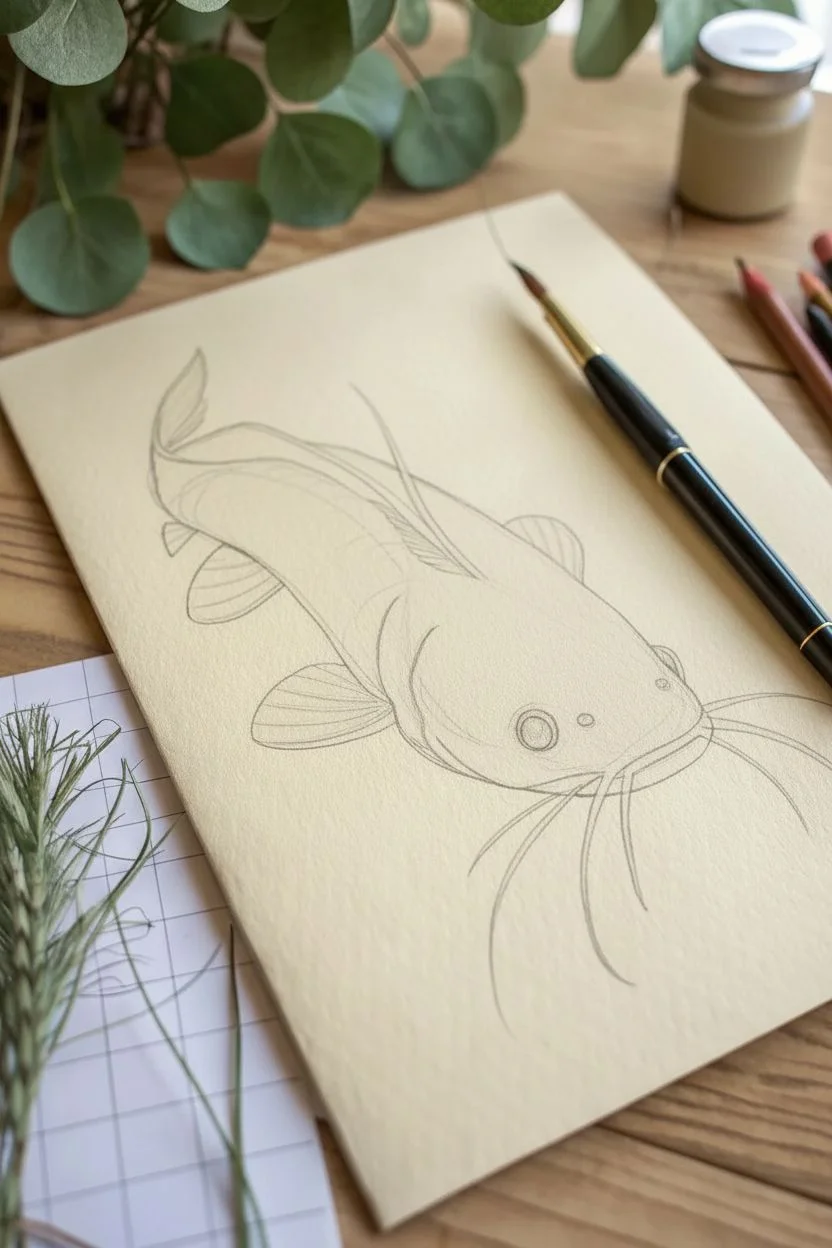
Step 1: Penciling the Structure
-
Map the body shape:
Begin with a light HB pencil sketch. Draw a long, tapering cylinder for the body that is wider at the head and narrows significantly toward the tail, slightly curving it to suggest movement. -
Define the head:
Flatten the front of the cylinder to create the catfish’s broad, shovel-like head. Add two small circles for the eyes, placing them wide apart on the top of the head rather than the sides. -
Sketch the fins:
Add the dorsal fin on the back, slightly swept backward. Draw the pectoral fins on either side just behind the head, and the pelvic and anal fins along the underside. -
Add the signature whiskers:
Draw the barbels. You’ll need two long, sweeping curves extending from the corners of the mouth—make these dramatic and overlapping. Add four shorter barbels hanging from the chin area.
Uneven Ink Lines?
If your hand shakes while inking long curves like the whiskers, try ‘ghosting’ the motion (practicing in the air) before lowering the pen, and draw from your elbow, not your wrist.
Step 2: Inking and Outlining
-
Refine the contour:
Using your 0.3mm fineliner, trace over your pencil lines. Use confident, single strokes for the long curves of the body to keep the linework clean. -
Texturize the fins:
Inside the fin outlines, draw thin, radiating lines from the base to the tips to represent the fin rays. Keep these lines slightly broken for a natural look. -
Add weight to the lineart:
Switch to a brush pen or thicken your existing lines on the underside of the fish (the belly and lower fins). This varying line weight grounds the drawing and suggests shadow.
Step 3: Shading and Details
-
Base tonal layer:
Using a light cool grey marker, fill in the top darker portion of the catfish. Leave the belly area the color of the paper to simulate countershading. -
Mottling the skin:
Catfish have smooth but mottled skin. Take your sepia colored pencil and add clusters of small, organic spots along the back and dorsal fin. Vary the pressure to make some spots prominent and others faint. -
Deepening shadows:
Use the medium grey marker to add shadows where the fins meet the body and along the very bottom edge of the fish to give it volume. -
Defined ridges:
Draw a distinct line running laterally from the head to the tail using the fineliner. This lateral line adds anatomical realism. -
Rendering the eye:
Color the iris with a mix of grey and a touch of light blue if you have it. Outline the pupil heavily in black. Leave a tiny speck of white paper for a highlight. -
Shading the whiskers:
Add a thin line of grey shadow along the underside of the long barbels. This prevents them from looking like flat wires and makes them look cylindrical.
Make It Look Wet
Use your white charcoal pencil or gel pen more aggressively on the ‘high points’ of the back. A few bright, sharp highlights instantly make the skin look slimy and aquatic.
Step 4: Final Highlights
-
Pop the highlights:
Using a white charcoal pencil or gel pen, add subtle highlights to the top of the head and the upper ridge of the body. -
Accentuate the fins:
Add thin strokes of white along the leading edges of the pectoral and dorsal fins. This creates a ‘wet’ look. -
Clean up:
Once all ink is dry, erase any remaining graphite sketch lines to leave a crisp illustration.
You now have a wonderfully detailed catfish swimming across your page, ready to add character to your sketchbook
Fish Scales: Dot, Crosshatch, or Individual Plates
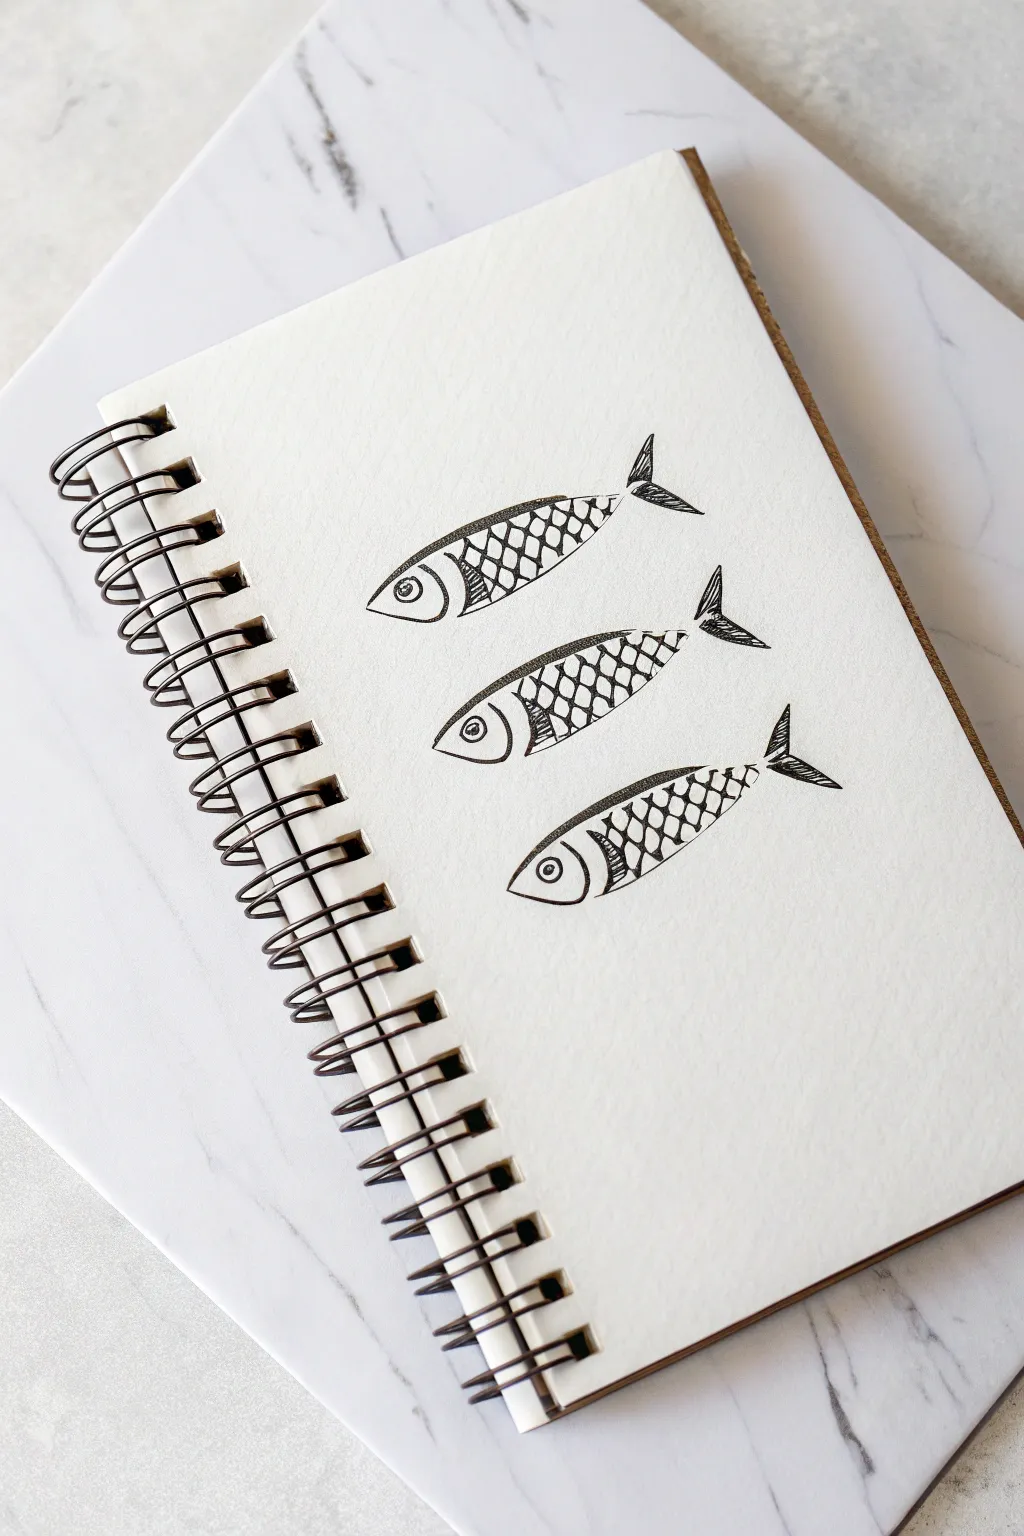
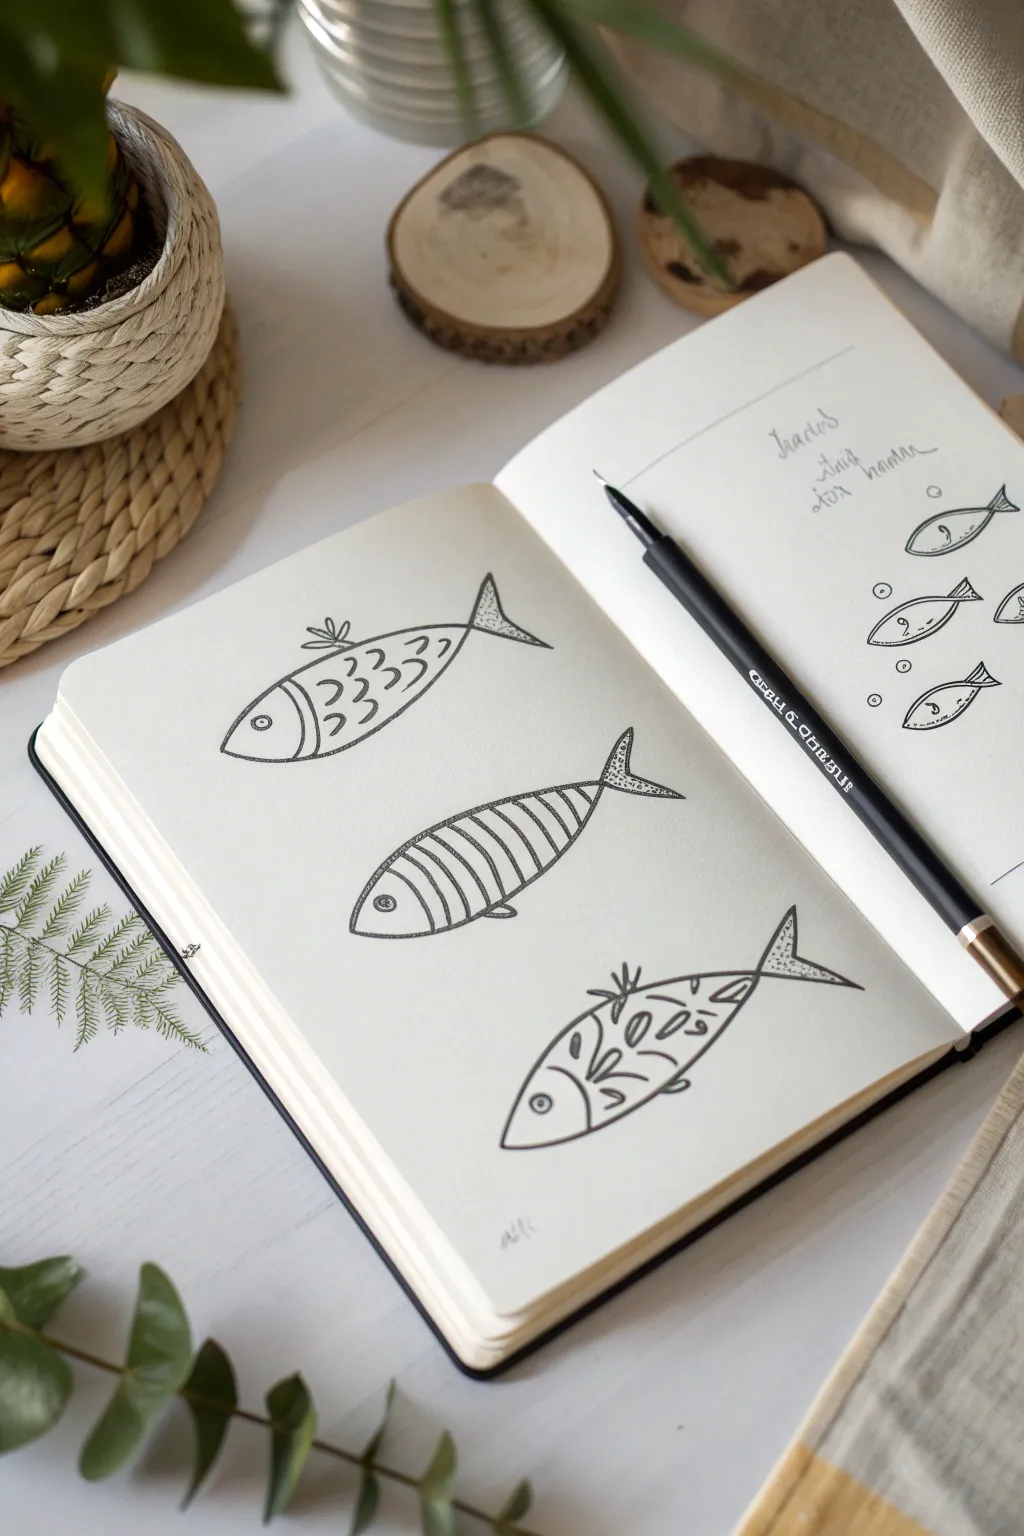
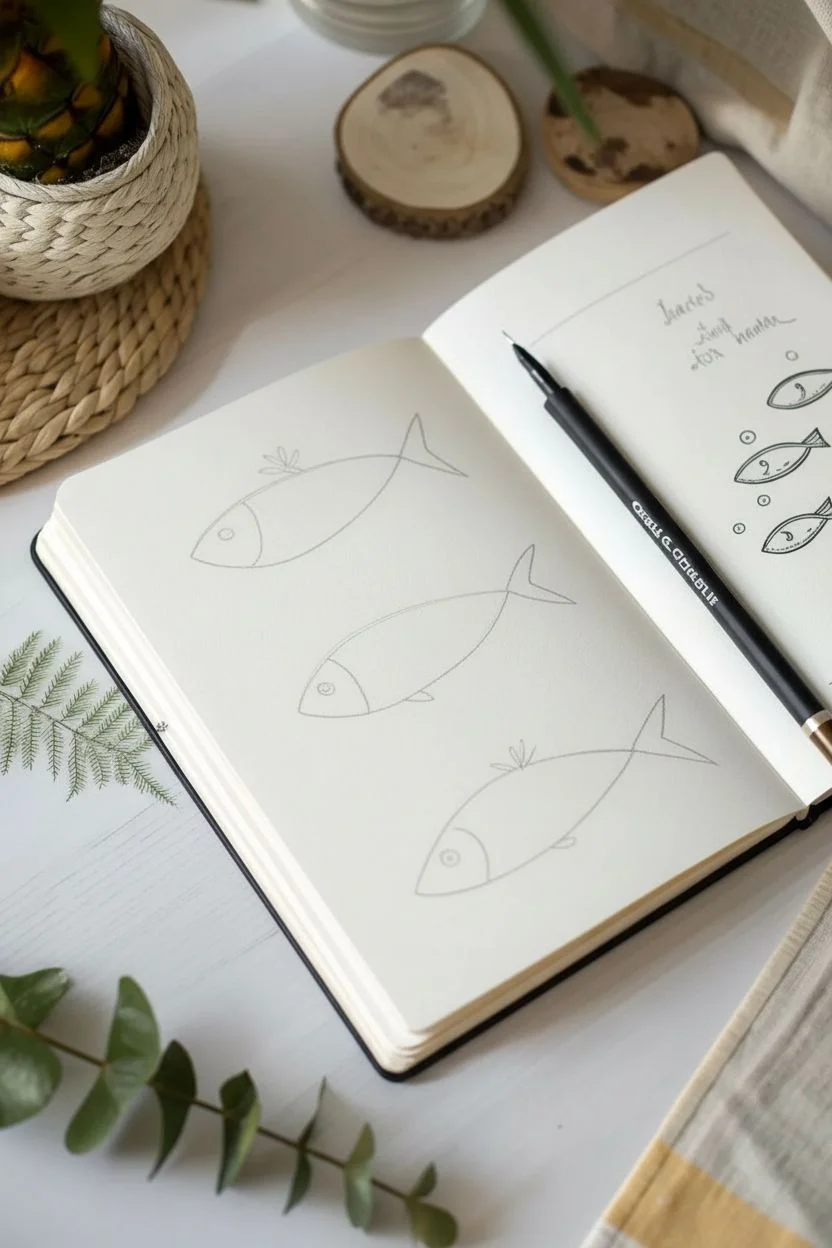
Capture the charm of tinned fish with this minimalist trio of sardines, featuring bold outlines and simple geometric scales. The stark black ink against the textured sketchbook paper creates a clean, modern illustration perfect for beginners.
Step-by-Step
Materials
- Fine-grain watercolor paper or mixed media sketchbook
- Fine liner pen (size 0.5 or 0.8)
- Pencil (HB or 2H)
- Clean eraser
- Ruler (optional, for alignment)
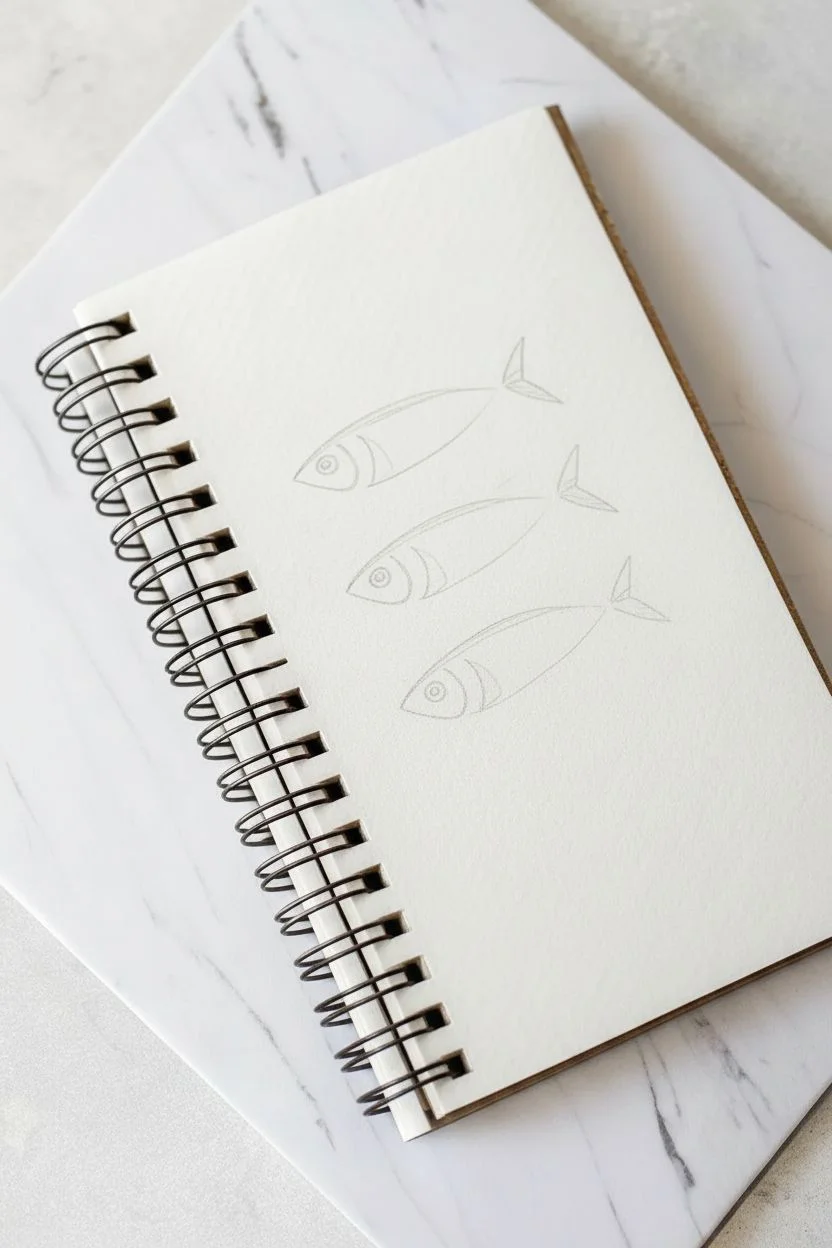
Step 1: Planning the Shapes
-
Establish placement:
Visualize three diagonal placements on your page. The fish should be stacked vertically but swimming diagonally upwards toward the right. -
Sketch the bodies:
Using a pencil and very light pressure, draw three elongated oval shapes. Make the top edge slightly straighter and the bottom edge more curved, tapering toward the tail end. -
Mark the heads:
Draw a curved vertical line inside each oval, about one-fifth of the way from the left, to separate the head from the body. -
Sketch the tails:
At the tapered right end of each body, add a simple V-shaped tail fin. The top point can be slightly longer than the bottom.
Uneven Scales?
Don’t stress if your grid lines aren’t perfect diamonds. Irregular shapes actually look more natural. Just keep the general diagonal flow consistent across all three fish.
Step 2: Inking the Outlines
-
Outline the top fish:
Switch to your fine liner pen. Start with the top fish and trace over your pencil lines for the main body shape, keeping your hand steady for a smooth arc. -
Define the head:
Ink the curved line separating the head. Add a small circle for the eye near the nose, and draw a tiny dot in the center for the pupil. -
Draw the dorsal line:
Draw a straight line running lengthwise down the upper third of the fish’s body. This creates a distinct top section for dorsal details. -
Repeat for the trio:
Repeat the outlining process for the middle and bottom fish. Try to keep their sizes consistent, but minor variations add to the hand-drawn charm.
Step 3: Adding the Scales & Details
-
Start the scale pattern:
For the main body section (below the longitudinal line you drew), draw a series of diagonal lines slanting forward. -
Complete the grid:
Draw a second set of diagonal lines slanting backward to cross the first set. This creates a diamond or grid pattern representing the scales. -
Soften the scales:
You can slightly round the bottom corners of these diamonds as you draw them to make them look more like organic fish scales rather than a stiff grid. -
Detail the dorsal area:
In that narrow top strip above the scales, draw tiny, dense vertical hatches or very tight diagonal lines to create a darker tone. -
Texture the tails:
Fill the tail fins with radiating lines. Start from the point where the tail meets the body and flick your pen outward toward the tips of the fins. -
Refine the gills:
Add a second, slightly fainter curved line just behind the head arc on one or two of the fish to suggest a gill slit.
Add a Pop of Color
Once the ink is dry, use a metallic silver watercolor or a single streak of blue highlighter across the scales to simulate a shiny, wet texture.
Step 4: Finishing Touches
-
Erase guidelines:
Wait at least five minutes to ensure the ink is completely dry. Gently erase all underlying pencil sketches. -
Deepen contrasts:
Go back over the pupils to make them pitch black. I like to thicken the upper contour line of each fish just slightly to give them a bit of visual weight. -
Check balance:
Step back and assess your drawing. If one fish looks too light, add a few more hatching lines to its dorsal fin or tail to balance the set.
You now have a striking sketchbook page that turns simple geometry into lively aquatic art


Negative Space Water With Only Fins and Ripples
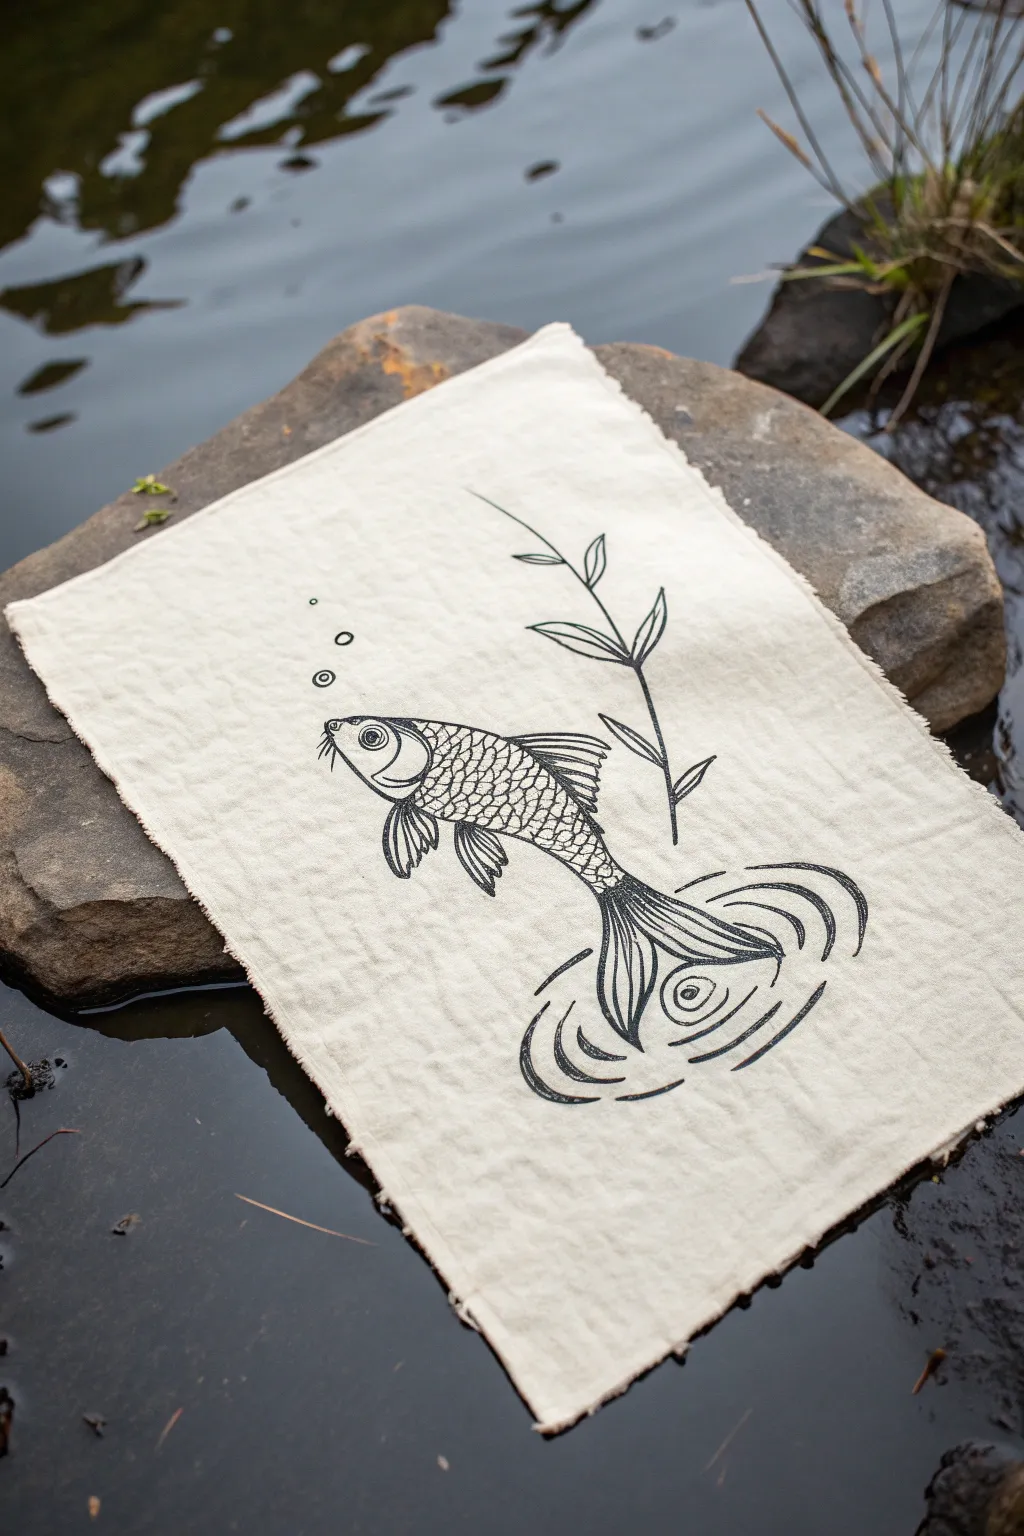

Capture the serenity of aquatic life with this striking black ink illustration on textured fabric. By combining bold linework with raw-edged linen, you create a piece that feels both organic and artistically refined, perfect for wall hanging or sewing into a larger project.
How-To Guide
Materials
- Unbleached cotton or linen fabric (light cream/natural color)
- Black fabric ink or permanent fabric marker (fine and medium tips)
- Pencil and eraser
- Ruler
- Cardboard or cutting mat (to place under fabric)
- Masking tape
- Iron (for heat setting)
- Scissors or rotary cutter
Step 1: Preparing the Canvas
-
Fabric selection:
Cut a rectangular piece of your unbleached linen or cotton fabric to your desired size, leaving about an inch of extra space around the borders. Don’t worry about hemming the edges just yet; the raw look adds character. -
Fraying the edges:
Gently pull loose threads from all four sides of your fabric rectangle to create a soft, frayed fringe about a quarter-inch deep. This mimics the organic texture seen in the reference image. -
Smooth the surface:
Iron your fabric piece until it is perfectly flat. This is crucial because drawing directly on wrinkled fabric will distort your lines and make the ink skip. -
Secure the workspace:
Tape the fabric securely to a piece of cardboard or a cutting mat. This stretches the fabric slightly to prevent bunching while you draw and protects your table from ink bleeding through.
Step 2: Sketching the Design
-
Drafting the body shape:
Using a pencil with a very light touch, sketch the main almond-shaped curve of the fish’s body in the center of the fabric. Orient it diagonally, swimming upwards towards the left. -
Adding anatomical details:
Lightly pencil in the dorsal fin on the back, the pectoral fin on the side, and the smaller ventral fins near the belly. Sketch the tail curve, positioning it so it looks like it’s just breaking the water’s surface. -
Plant and bubble placement:
Draw three small circles rising from the fish’s mouth to represent bubbles. To the right of the fish, sketch a simple aquatic plant stem with sparse, pointed leaves curving upward. -
Mapping the ripples:
At the tail, sketch concentric oval rings. These don’t need to be perfect circles; slightly flattened ovals create a better perspective of ripples on water.
Fabric Tension Tip
If the fabric bunches under your pen tip, try using an embroidery hoop to hold the area taut while you draw the fine details like the scales.
Step 3: Inking the Illustration
-
Outlining the fish:
Using a medium-tip fabric marker or brush pen, trace over your pencil lines for the fish’s main body outline and the head. Keep your hand steady but allow for slight variation in line weight to give it an organic feel. -
Detailing the face:
Switch to a finer tip pen to draw the eye, leaving a tiny white highlight in the center. Add the small whiskers (barbels) near the mouth and the curved gill line behind the head. -
Drawing the scales:
Start applying the scale pattern. I draw small, overlapping ‘U’ shapes starting from the gill line and working backward toward the tail. Make the scales slightly larger in the middle of the body and smaller near the edges. -
Defining the fins:
Fill in the dorsal and pectoral fins with fine, closely spaced lines (striations). For the ventral fins, use solid black or very dense lines to create contrast against the lighter body. -
Inking the tail:
Draw the tail fin with flowing, curved lines that seem to merge into the water ripples. The tail should look fluid, not stiff. -
Adding the ripples:
Trace the ripple ovals with a medium tip. Break the lines occasionally rather than closing every circle perfectly; this negative space makes the water look shimmering and moving. -
Plant life:
Trace the plant stem and leaves with a single, clean line. The simplicity of the plant balances the detailed texture of the fish scales.
Ink Bleeding Info
If ink bleeds into the fabric grain, your marker might be too juicy. Switch to a finer tip or minimal pigment, or prep the fabric with a clear gesso layer first.
Step 4: Finishing Touches
-
Erasing guidelines:
Allow the ink to dry completely—wait at least 30 minutes to be safe. Once dry, gently erase any visible pencil marks, being careful not to pull on the fabric weave. -
Heat setting:
To make your artwork permanent and washable, place a thin cloth over your drawing and iron it on a high setting (no steam) for several minutes. This locks the pigment into the fibers.
Now you have a serene, nature-inspired textile piece ready to display.
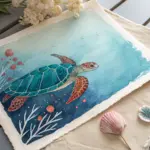
Fish Entwined With Flowers and Leaves
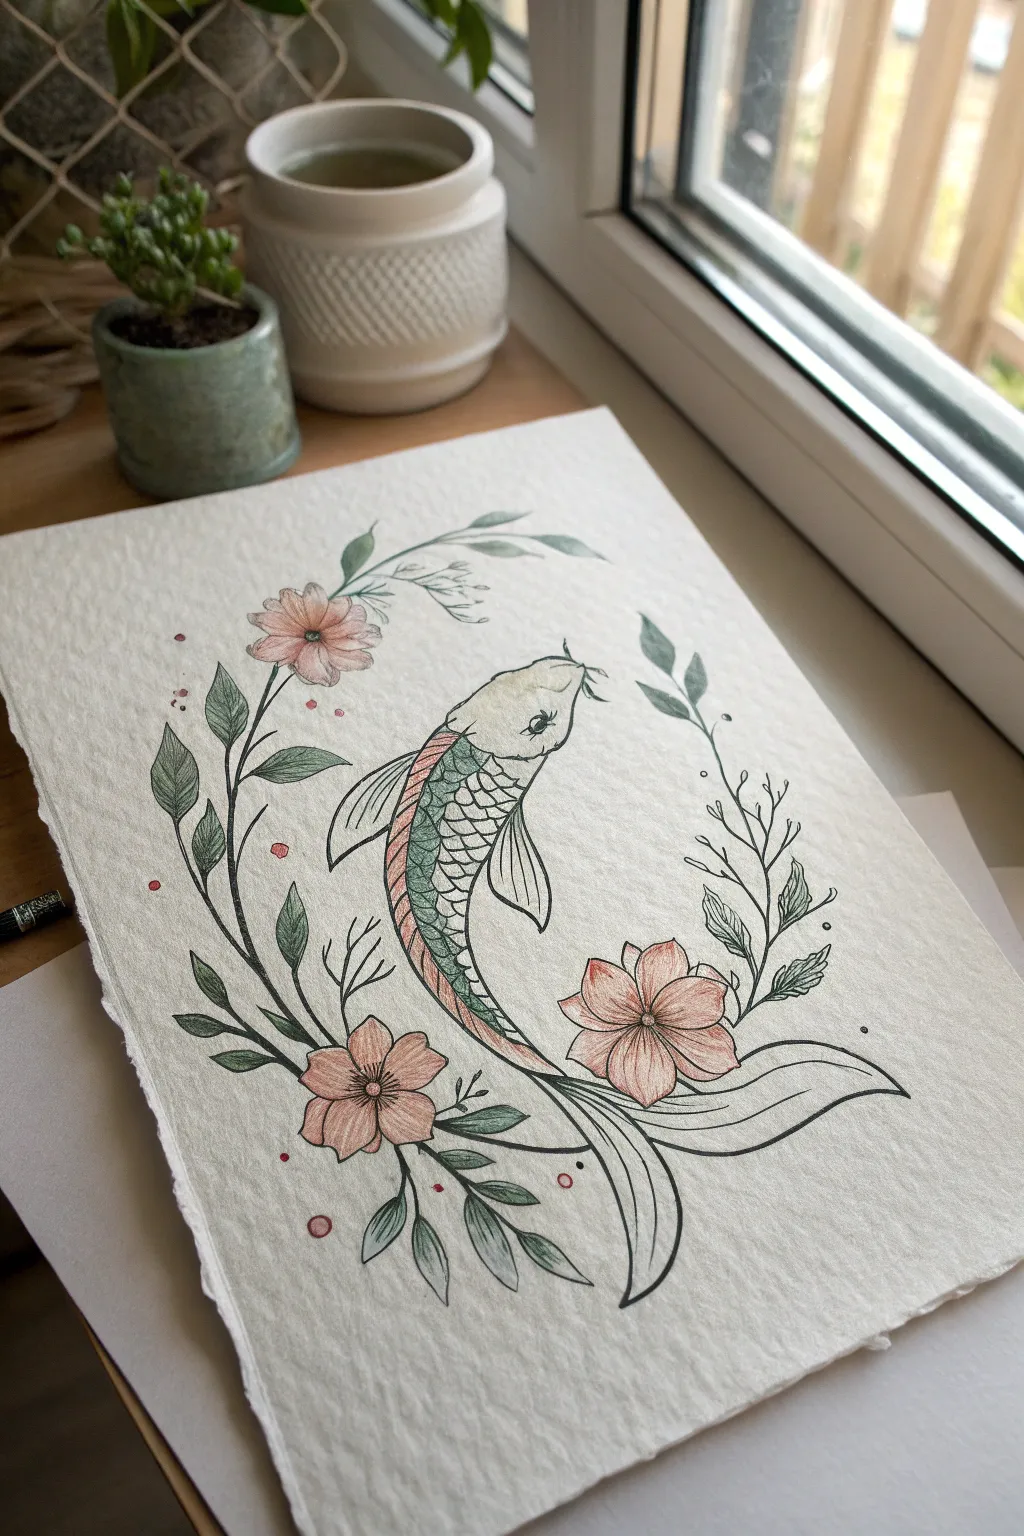
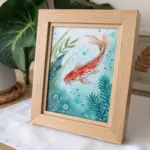
This elegant drawing combines the fluid motion of a swimming koi fish with the delicate structure of a wild floral wreath. The textured paper and soft color palette give it a timeless, organic feel perfect for framing.
Step-by-Step Guide
Materials
- Cold press watercolor paper (rough texture is ideal)
- H or HB graphite pencil for sketching
- Fine liner pen (black, waterproof, size 0.3 or 0.5)
- Colored pencils (sage green, muted pink, forest green, light grey, soft yellow)
- Kneaded eraser
- Pencil sharpener
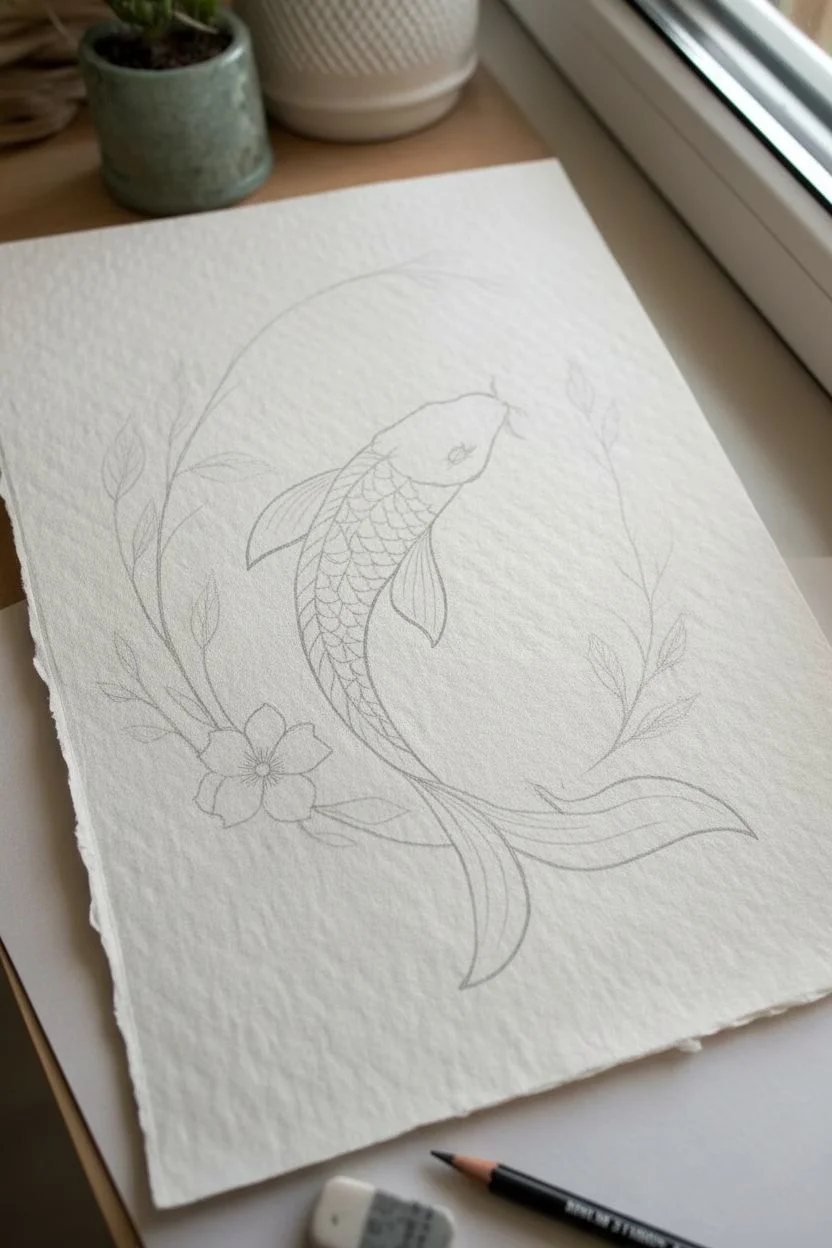
Step 1: Sketching the Composition
-
Map out the curve:
Begin by lightly drawing a large, oval-shaped guideline in the center of your paper. This invisible line will dictate the flow of the floral wreath and help center your fish. -
Outline the fish body:
In the center of your oval, sketch the koi’s body. Draw a smooth, elongated teardrop shape that curves slightly to the right, mimicking a swimming motion. Add a smaller, rounded shape for the head at the top. -
Add fins and tail:
Sketch the dorsal fin along the fish’s back and two pectoral fins near the head. Draw a long, flowing tail that sweeps downward and to the right, actually crossing over your oval guideline to integrate with the wreath. -
Placement of flowers:
Draw three circles along the left side and bottom of your oval guide to mark where the main flowers will sit. Place one high on the left, one near the bottom left, and one on the bottom right. -
Vine structure:
Connect your flower markers with a main vine line that follows the oval curve. Let the vine extend upwards past the top flower and curve gently inwards at the top right, leaving a gap so the wreath isn’t a closed circle.
Step 2: Refining the Details
-
Draw flower petals:
Flesh out your simple circles into five-petaled flowers. Keep the shapes organic and slightly irregular so they look like wild blooms rather than geometric shapes. -
Add leaves:
Along the main vine, sketch pairs of pointed, lance-shaped leaves. Vary their sizes, placing larger leaves near the bottom and smaller, delicate leaves near the gently curling tips of the vines. -
Scale pattern:
Lightly sketch a grid of scales on the fish’s body. Start behind the head and work down towards the tail, making the scales smaller as you reach the narrow part of the body. Leave the head and fins smooth. -
Facial features:
Add a small circle for the eye near the side of the head and two flowing barbels (whiskers) near the mouth area. I find that keeping the eye simple preserves the stylized look.
Use Texture
When coloring on rough paper, shade lightly at an angle. This catches the ‘tooth’ of the paper, leaving tiny white speckles that create a vintage, grainy look.
Step 3: Inking and Coloring
-
Inking the outline:
Using your fine liner pen, carefully trace over your pencil lines. Use confident, smooth strokes. For the fish’s flowing tail and the main vine stems, try to make the lines slightly thicker to add visual weight. -
Erase pencil marks:
Once the ink is completely dry—give it a few minutes to be safe—gently erase all your graphite guidelines with a kneaded eraser to leave a crisp black-and-white drawing. -
Coloring the leaves:
Take your sage green pencil and color the leaves. Use light pressure to let the paper’s texture show through. For depth, layer a bit of forest green just at the base of each leaf where it meets the stem. -
Shading the flowers:
Color the petals with a muted pink. Apply more pressure near the center of the flower and fade out towards the petal tips to create a soft gradient. Add a tiny dot of yellow or dark grey in the very center. -
Coloring the fish:
For the koi, use a mix of colors. Shade the scales lightly with grey and touches of green to suggest iridescence. Use the pink pencil to add a stripe of color along the lateral line (the side) of the fish. -
Final accents:
Add small floating circles (bubbles or pollen) around the composition using your pink and grey pencils. Darken the eye with your pen, leaving a tiny white highlight for life.
Metallic Touch
Use a gold gel pen or gold watercolor paint to fill in just a few specific scales on the koi or the centers of the flowers for a hint of shimmer.
Now you have a serene piece of nature art that captures the peaceful movement of a koi pond.
Yin-Yang Fish Pair With Mirrored Motion
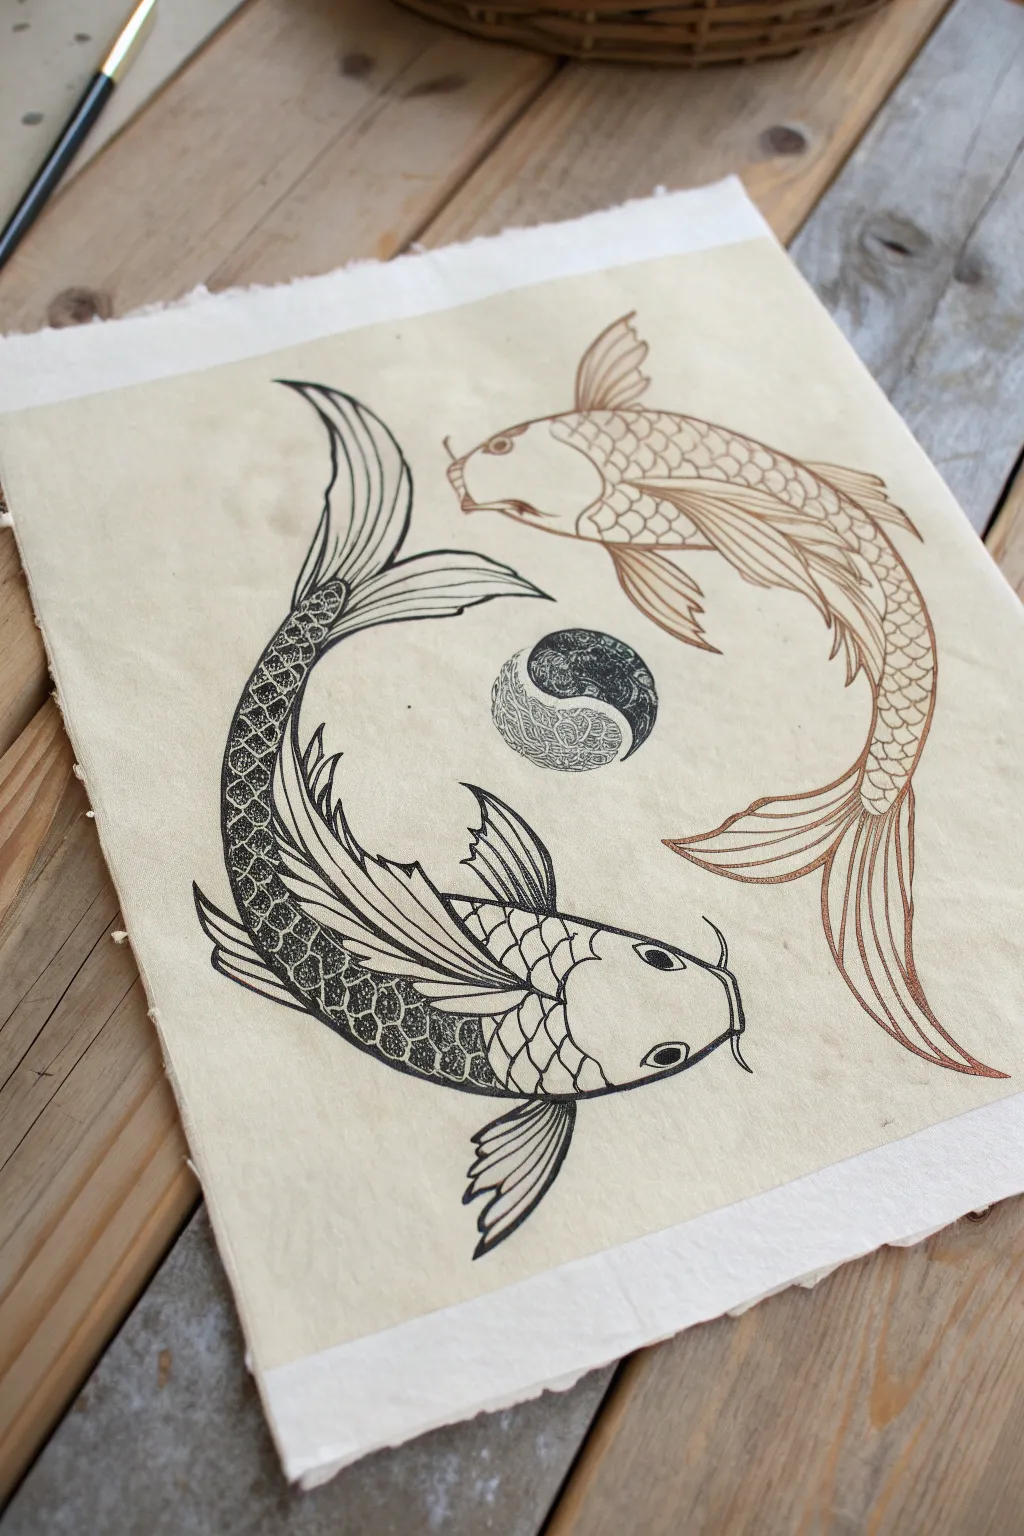
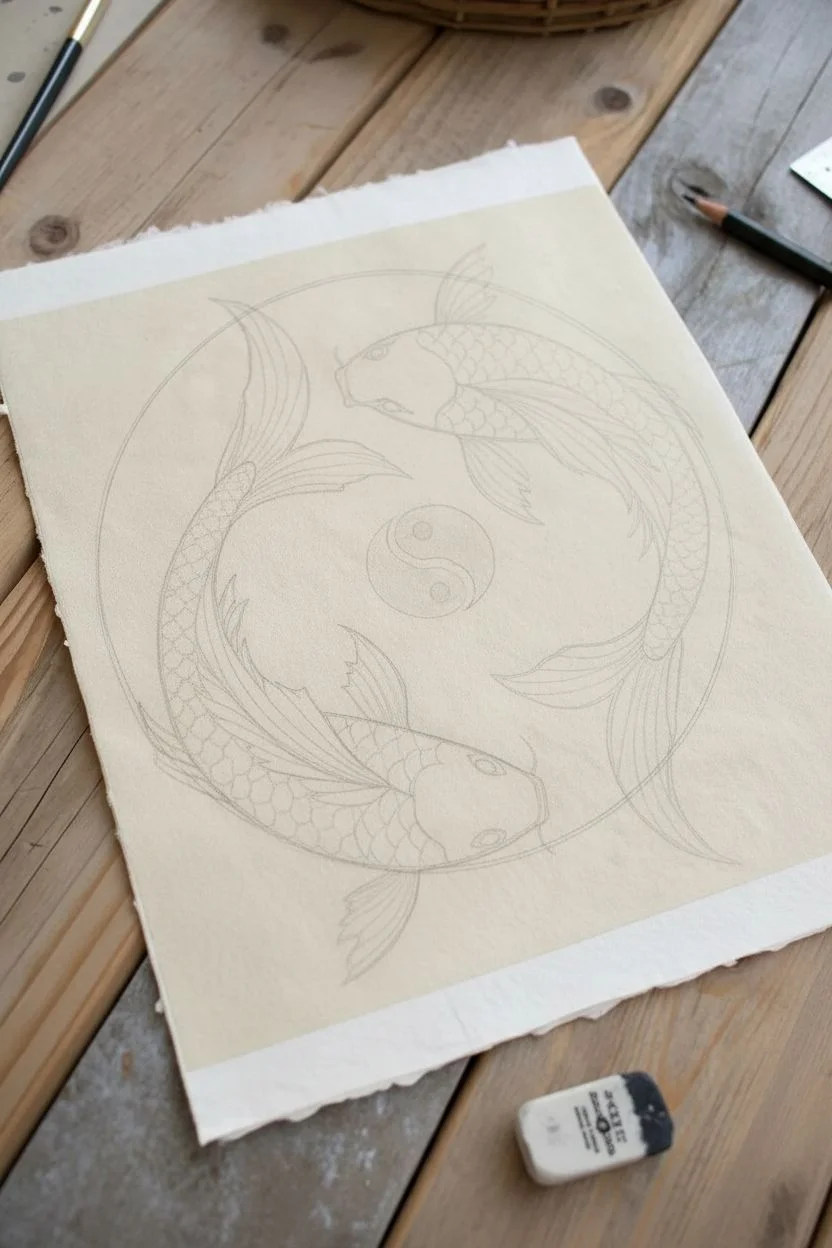
Achieve a stunning balance of motion and ink with this dual-toned koi fish illustration. Set on textured parchment paper, this piece captures the serene dance of Yin and Yang through intricate linework and contrasting sepia and black pigments.
Step-by-Step Tutorial
Materials
- Textured cream or parchment paper (heavyweight)
- Black fineliner (01, 03, and 05 sizes)
- Sepia or brown fineliner (01 and 03 sizes)
- Pencil (HB or 2H)
- Kneaded eraser
- Protractor or circular template (optional for center)
- Ruler
Step 1: Planning the Composition
-
Establish the curve:
Begin by lightly sketching a large circle in the center of your paper to guide the overall flow. Inside this, sketch a prominent ‘S’ curve that splits the circle, defining the path where the two fish bodies will contour around each other. -
Place the Yin-Yang center:
In the very center of the page, use a smaller circular object or template to trace a perfect circle. Sketch the classic wavy dividing line inside it to create the Yin-Yang symbol, ensuring it’s oriented vertically. -
Outline the fish bodies:
Sketch the rough torpedo shapes of the koi fish. The bottom fish should curve upwards on the left, and the top fish should curve downwards on the right. Keep their heads equidistant from the central symbol. -
Refine the forms:
Add the flowing tails and fins. The tails should sweep outward, following the circular momentum. Draw the dorsal fins (on the back) and the pectoral fins (on the sides) with fluid, water-like strokes.
Scale sizing tip
Scales aren’t uniform! Draw them largest at the fish’s “shoulder” (behind the head) and gradually shrink them as you approach the tail for realistic perspective.
Step 2: Inking the Black Koi (Yin)
-
Outline the dark fish:
Using your 05 black fineliner, carefully trace the outer contour of the bottom-left fish. Use confident, smooth strokes for the long curves of the body and tail. -
Detail the head and eyes:
Switch to a 03 black pen. Draw the eyes (leaving a small white highlight), the nostrils, and the prominent whiskers (barbels). Add the gill cover with a curved line just behind the head. -
Create the scale pattern:
Start drawing the scales from behind the head, moving toward the tail. These should look like overlapping semi-circles or ‘U’ shapes. Make them slightly larger near the center of the body and smaller near the tail. -
Fill the dark scales:
This is the time-consuming part. For this specific ‘Yin’ fish, we want a dark, textured look. Using a 01 pen, stipple (dot) heavily inside each scale, or use a tight irregular scribbling motion, leaving the very edge of each scale light to define the separation. -
Texture the fins:
Use the 01 black pen to draw long, thin lines radiating from the base of the fins to the tips. Add some cross-hatching or stippling at the base of the fins to suggest shadow and depth.
Ink smearing?
If you are right-handed, work from the top-left to bottom-right to avoid dragging your hand through wet ink. Or, slip a clean piece of scrap paper under your drawing hand.
Step 3: Inking the Sepia Koi (Yang)
-
Outline the light fish:
Pick up your 03 sepia or brown fineliner. Trace the outline of the top-right fish. I find that pulling the pen toward myself helps keep these long curves steady. -
Draw simple scales:
Unlike the black fish, the sepia fish stays lighter. Draw the same overlapping ‘U’ scale pattern with a 01 sepia pen, but do not fill them in darkness. Keep them open and airy. -
Add subtle shading:
To give the sepia fish volume without darkening it too much, add very tiny, sparse hatch marks just at the bottom of each scale intersection. This adds dimension while maintaining the ‘light’ aesthetic. -
Flowing fin lines:
Draw the fin striations (the long lines) using the 01 sepia pen. Keep your hand loose to mimic the flow of water through the translucent fins.
Step 4: Completing the Centerpiece
-
Pattern the Yin-Yang:
Return to the central circle. Outline it in black. Fill the top ‘dark’ section with a dense, swirling organic pattern or heavy scribbles using the black 01 pen. -
Contrast the light side:
For the bottom ‘light’ section of the symbol, use the sepia pen to draw a very light, airy pattern—perhaps small swirls or tiny circles—keeping high contrast with the black half. -
Clean up:
Wait at least 15 minutes to ensure all ink is completely bone dry. Gently erase all visible pencil sketch lines with a kneaded eraser to avoid damaging the paper fiber.
Frame your harmonious creation and enjoy the balance it brings to your space


Have a question or want to share your own experience? I'd love to hear from you in the comments below!