Fluorescent paint is my favorite way to make a piece feel like it has its own electricity. If you’ve never flipped on a UV light and watched your colors transform, you’re about to have a lot of fun.
Neon Galaxy on a Black Background
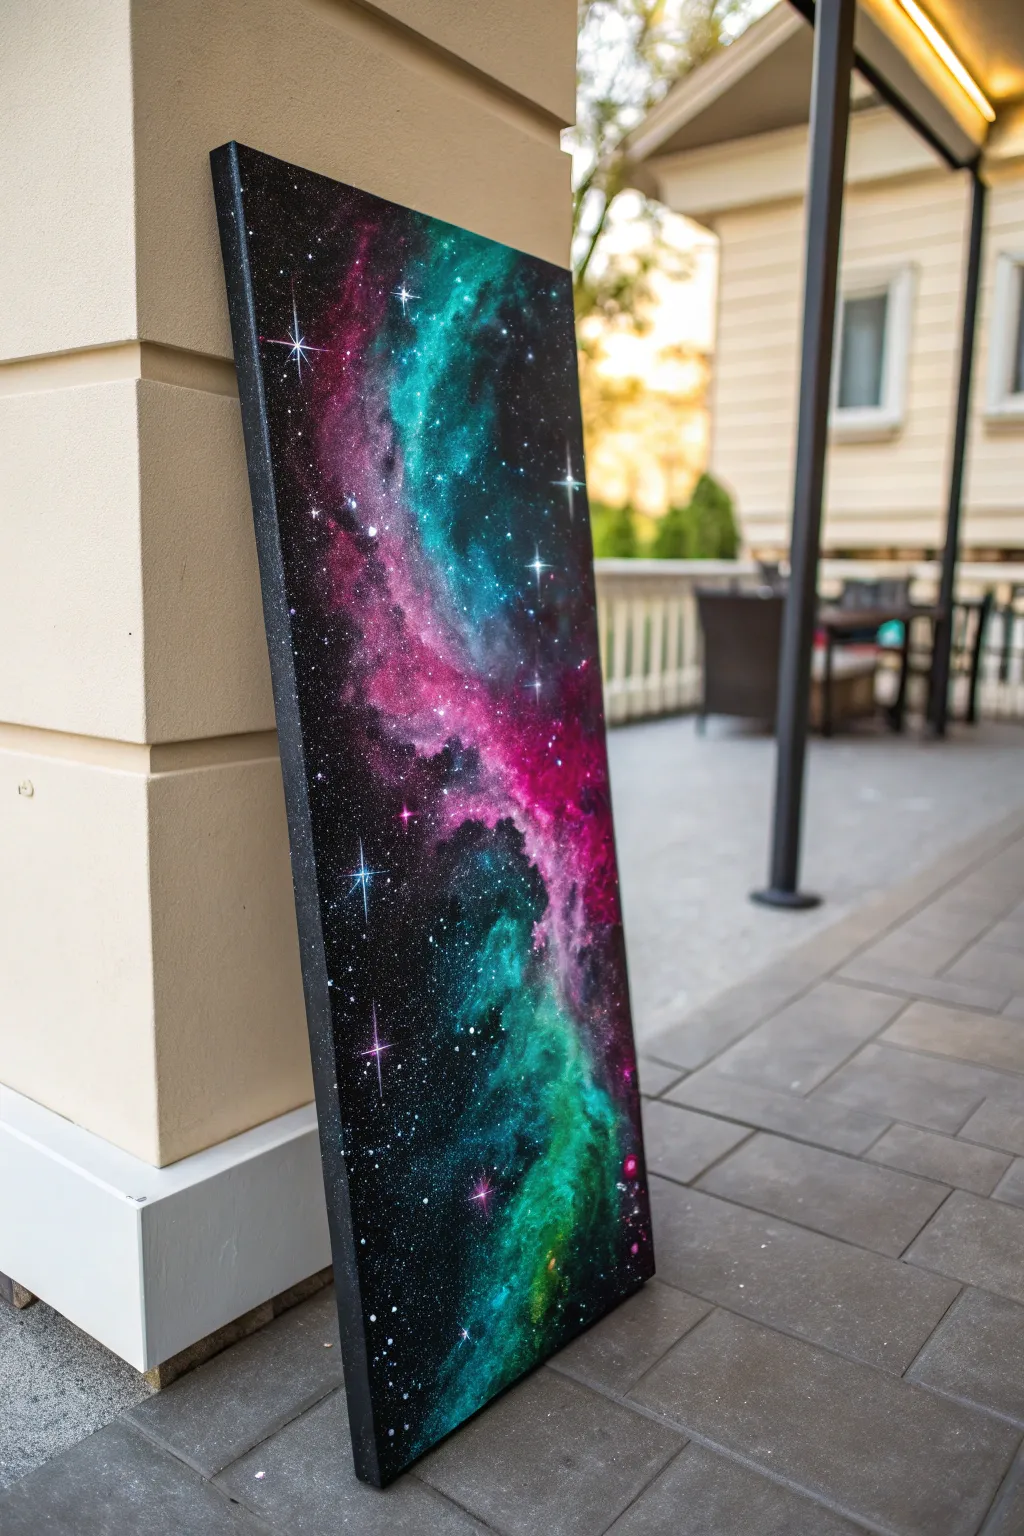
Bring the mysteries of deep space into your home with this striking vertical galaxy painting. Using a blend of rich blacks and vibrant neon acrylics, you’ll create swirling nebulas that seem to glow against the darkness of the cosmos.
Detailed Instructions
Materials
- Tall stretched canvas (e.g., 12×24 or 10×30 inches)
- Black acrylic paint (heavy body preferred)
- Neon acrylic paints: Magenta, Cyan/Turquoise, Lime Green
- Titanium White acrylic paint
- Large flat brush
- Medium round brush
- Fine liner brush
- Natural sea sponge or kitchen sponge
- Old toothbrush
- Palette and water cup
- Paper towels
Step 1: Setting the Darkness
-
Prime the canvas:
Begin by covering the entire canvas surface with black acrylic paint. Use your large flat brush to ensure even coverage, painting the sides of the canvas as well for a finished look. -
Second coat:
Once the first layer is dry to the touch, apply a second coat of black. This ensures a truly opaque, deep void that will make your neon colors pop intensely. -
Dry thoroughly:
Let the background dry completely. Any wet black paint will muddy your neon colors, so patience here is key.
Muddied Colors?
If your sponge blending turns brown or grey, the paint layers aren’t dry enough between applications. Wait for each color approach to dry completely before overlaying the next.
Step 2: Creating the Nebula
-
Prepare the sponge:
Dampen your sea sponge slightly and wring it out so it’s moist but not dripping. This helps the paint release smoothly. -
First nebula layer: Magenta:
Dip the sponge into neon magenta. Dab off the excess on your palette or a paper towel—you want a dry-brush texture, not a blob. -
Sponging the pinks:
Start dabbing the magenta in a diagonal, winding path from the top left toward the center. Use a light touch to create cloudy, soft edges that fade into the black. -
Adding the teal:
Using a clean section of the sponge (or a rinsed one), pick up the neon turquoise or cyan. Gently sponge this color adjacent to the magenta, letting them overlap slightly in the middle to create purple transitions. -
Building intensity:
While the first layers are drying, go back over the centers of your color clouds with fresh paint. Keep the edges sheer and wispy, but pack the color densely in the middle to create a glowing core. -
Green highlights:
At the bottom of the canvas, sponge in some lime green mixed with a little turquoise. This adds depth and variety to the lower nebula section. -
Intensify with white:
To make the nebulas look like they are emitting light, mix a tiny bit of Titanium White into your neon colors. Sponge this lighter mix sparingly into the absolute brightest center points of your clouds.
Glow Up
Use actual UV-reactive (blacklight) acrylics for the neon layers. Under a blacklight, the galaxy will physically glow in the dark for an incredible 3D effect.
Step 3: Stars and Details
-
Prepare the splatter:
Mix a small amount of white paint with water until it reaches the consistency of heavy cream or ink. -
Create background stars:
Dip an old toothbrush into the thinned white paint. Point the bristles toward the canvas and run your thumb across them to spray a fine mist of stars. Focus the density near the nebula clouds. -
Painting large stars:
Using a fine liner brush and pure white paint, dot in several larger, distinct stars randomly across the canvas. -
Adding flare:
Choose 3-5 of your largest stars to turn into ‘flares.’ Paint a thin vertical line through the center dot, followed by a shorter horizontal line, creating a cross shape. -
Softening the flares:
I find that dry brushing a tiny, faint halo of the underlying nebula color (pink or blue) around the biggest white stars helps integrate them into the scene. -
Final touches:
Step back and assess the composition. If a nebula looks too flat, dab a tiny bit more white-neon mix into the center. If the black looks dusty from stray splatter, touch it up with fresh black paint.
Hang this vertical piece in a hallway or narrow wall space to turn a simple corner into a window to the universe


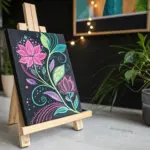
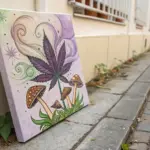
Glowing Mushrooms in a Midnight Forest
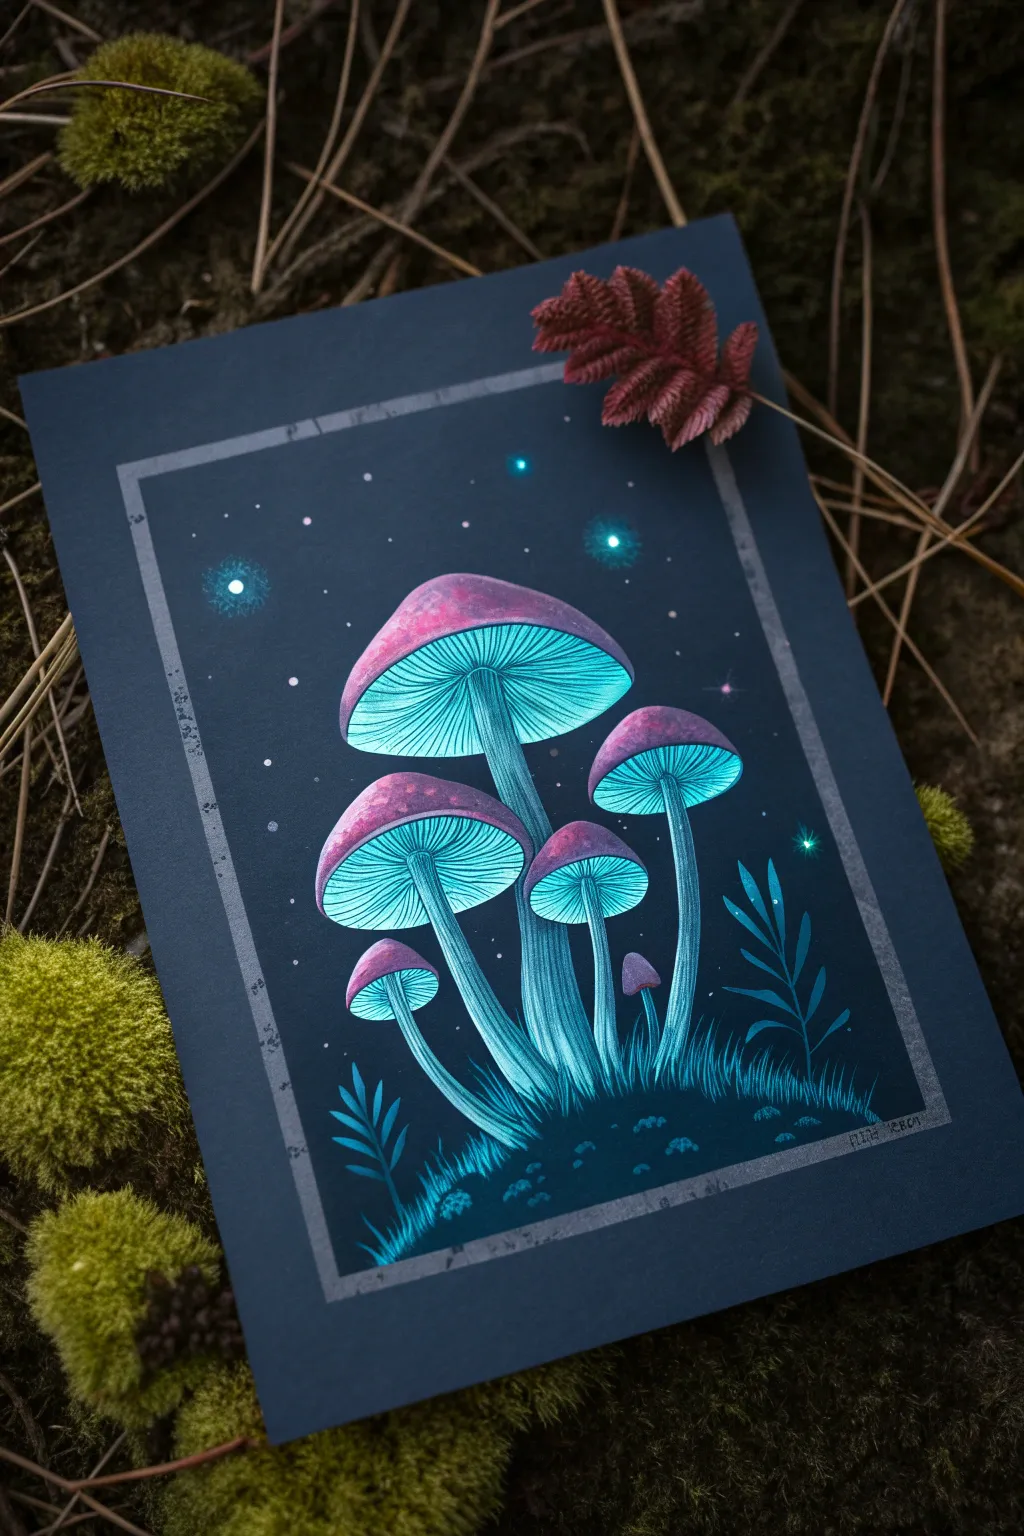
Capture the magic of a hidden forest glen with this striking illustration featuring glowing mushrooms against a deep midnight blue background. The contrast between the matte dark paper and the luminous, neon paints creates an illusion of light that seems to pulse right off the page.
Step-by-Step Guide
Materials
- Deep midnight blue or black heavyweight cardstock or mixed media paper
- Light gray colored pencil or chalk pencil (for sketching)
- Acrylic gouache or matte acrylic paints (Black, Deep Blue, Turquoise, White, Neon Blue/Cyan, Magenta/Pink, Purple)
- Fine liner brushes (sizes 0 and 00)
- Small flat brush or angle brush
- Ruler
- Metallic silver or gray marker (optional for the border)
- Palette for mixing
Step 1: Setting the Stage
-
Prepare the borders:
Begin by measuring a clean border around your dark paper. Use a ruler and your light gray pencil to lightly mark a rectangle. This frame frames the composition and gives it a finished, professional look. -
Sketch the cluster:
Lightly sketch the mushroom cluster within the frame. Start with the largest mushroom cap near the top center, then cascade downwards with three to four medium-sized mushrooms. Don’t forget the tiny ‘baby’ mushroom nestled near the stems. -
Add nature elements:
Sketch simple, sweeping lines for the stems, curving them slightly to give organic movement. At the base, draw small jagged lines for grass and a few leaf shapes on the right and left sides to balance the composition.
Uneven Glow?
If your glow looks flat, your values might be too similar. Wait for the paint to dry, then re-apply pure white only in the absolute center of the light source to maximize contrast.
Step 2: Grounded Shadows
-
Paint the base ground:
Mix a small amount of black with your deep blue paint. Using a small flat brush, fill in the bottom ground area, creating an uneven, hilly texture where the mushrooms grow. -
Define the silhouettes:
Paint the basic silhouettes of the mushroom caps with a dark purple mixed with a touch of magenta. This provides a shadow base before we add the glowing effects. Keep the paint application smooth and opaque.
Make it UV Active
Swap standard acrylics for dedicated fluorescent or UV-reactive paints. Under a blacklight, the cyan gills and pink caps will physically glow in the dark.
Step 3: Creating the Glow
-
Base the stems:
Mix a striking teal color using turquoise and white. Paint the stems, but leave tiny vertical gaps of the dark paper showing through to suggest texture. This striping effect is key to the stylized look. -
Paint the gills:
Underneath the caps, use your finest liner brush and the teal mix to paint fine lines radiating from the stem to the edge of the cap. These are the gills. I like to curve them slightly to follow the shape of the umbrella. -
Intensify the light:
Mix a neon blue or cyan with white to create a very bright highlight color. trace over the center of the stems and the inner parts of the gills closest to the stem. This gradient from bright center to darker edge creates the ‘inner glow’ effect. -
Add foliage details:
Using a slightly darker blue-green mix, carefully paint the grass blades and leafy plants at the bottom. Add highlights to just the tips of the leaves with your neon cyan mix to show the light reflecting off them.
Step 4: Magical Details
-
Cap textures:
Dry brush a little bit of pink and purple on the tops of the mushroom caps. Don’t cover the dark base completely; you want a speckled, organic texture. -
Rim lighting:
Take your whitest, brightest neon blue mix and paint a very thin line along the rim of each mushroom cap. This ‘rim light’ separates the cap from the dark background and makes it pop. -
Starry atmosphere:
Dip a toothpick or the very tip of a brush into white and pale blue paint. Dot the background with stars of varying sizes. Concentrate a few dots around the caps as if the spores themselves are glowing. -
Glowing orbs:
Select 3 or 4 larger ‘stars’ and paint a soft, translucent circle of cyan around them to create glowing orbs or fireflies hovering in the night air. -
Final border:
Define your initial pencil border with a gray paint or a metallic silver marker. A slightly rough, textured line often looks better than a perfect ruler line for this organic subject.
Step back and admire how your illuminated forest floor shines against the dark paper
Butterflies With Neon Wing Patterns
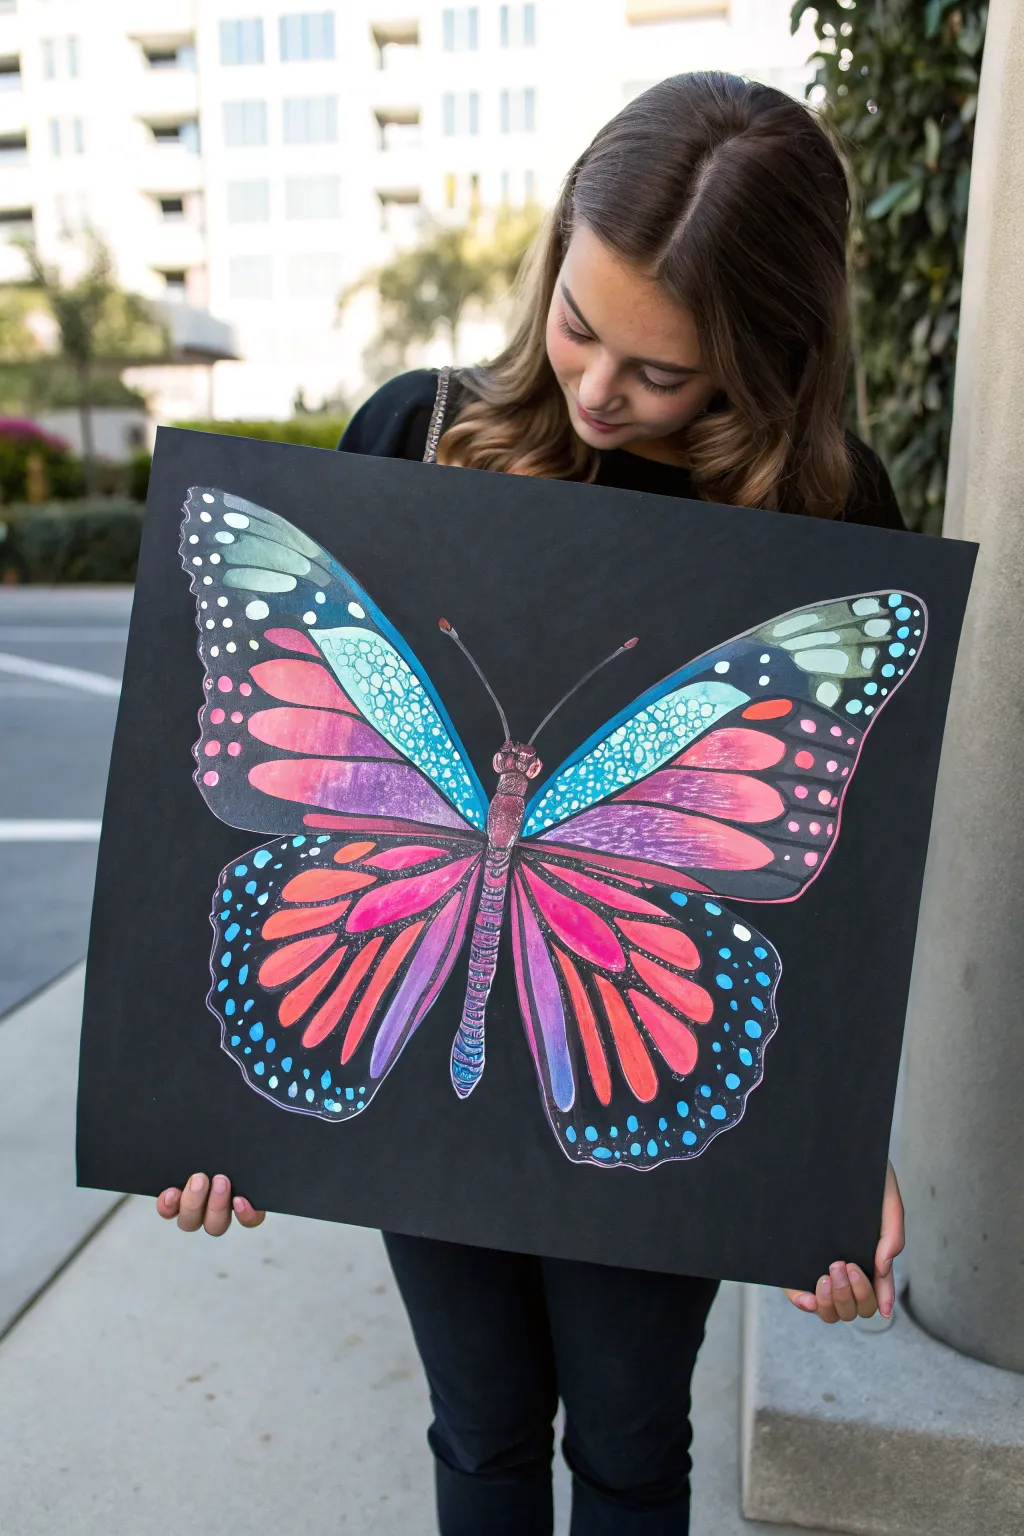
Bring the wings of a butterfly to life with electrifying neon colors that pop dramatically against a stark black background. This large-scale painting mimics the iridescent glow of nature using bright acrylics or paint markers.
Step-by-Step Guide
Materials
- Large sheet of black poster board or black foam core (approx. 24×30 inches)
- White colored pencil or chalk pencil (for sketching)
- Neon/fluorescent acrylic paints (pink, orange, blue, purple, teal)
- White acrylic paint or specialized white paint pen
- Set of paint brushes (various sizes: fine liner, small flat, medium round)
- Palette for mixing paint
- Water cup and paper towels
- Optional: iridescent glitter or metallic paint for accents
Step 1: Sketching the Anatomy
-
Find the center:
Begin by lightly marking the vertical center of your black board with your white pencil to ensure the butterfly is symmetrical. -
Body structure:
Sketch a long, slender oval for the thorax (upper body) and a segmented, elongated section below it for the abdomen. -
Wing outlines:
Project the top wings outward from the thorax, sweeping up and out to a pointed curve, then swooping back in towards the body. Draw the bottom wings as rounded teardrop shapes extending downwards. -
Internal veins:
Lightly draw the vein patterns inside the wings. These lines divide the wings into ‘cells’ that you will fill with color later. Focus on the distinct ‘tear drop’ shapes near the edges.
Step 2: Applying the Base Colors
-
Priming with white painting:
To make neon colors truly pop on black paper, paint a base layer of white inside the wing cells where you want the brightest colors. Let this dry completely. -
Gradient wings – Upper:
Start on the upper wings. Paint the inner cells near the body with a bright teal or aqua tone. While the paint is wet, blend outwards into a vibrant pink or purple towards the tips. -
Gradient wings – Lower:
For the lower wings, start with a fiery neon orange near the body, blending it into a deep magenta or stripes of purple as you move outward. -
Defining the body:
Paint the central body with purple and pink segments. Use a fine brush to add horizontal stripes across the abdomen for texture.
Uneven Coverage?
Neons are often translucent. If the color looks streaky, let the first coat dry completely and apply a second coat, rather than overworking wet paint.
Step 3: Detailing and Patterns
-
Outline defining:
Once the colorful interior sections are fully dry, carefully re-outline the black veins. If your original black paper is showing through cleanly, you can leave it; otherwise, use black paint to sharpen these dividing lines. -
Stippling texture:
On the upper wings, particularly the teal sections, use the very tip of a small brush or a dotting tool to add small, dense dots of lighter blue or white, creating a scaly texture. -
Border dots:
Along the outer black edges of the wings, paint rows of white dots. These are classic butterfly markings. -
Tinting the dots:
Once the white dots are dry, glaze over them lightly with watered-down blue or teal neon paint so they glow but aren’t stark white. -
Segmented antennae:
Draw two long, thin antennae extending from the head. Instead of a single line, paint tiny connected segments and finish with a small bulb at the tip.
Glow Up
Use true UV-reactive acrylic paints. When you hang this artwork near a blacklight, the wings will physically glow in the dark for an amazing effect.
Step 4: Final Flourishes
-
Brightening highlights:
Add pure white highlights to the center of the body and the brightest parts of the wings to create a 3D shine effect. -
Clean up edges:
Inspect the black negative space around the butterfly. If you smudged any neon paint, touch it up with matte black paint to keep the background crisp. -
Sealing the work:
If executed on poster board, keep it flat to dry. If on canvas, you can apply a spray varnish once fully cured to protect the neon vibrancy.
Now you have a stunning, luminous butterfly that captures the beauty of nature with a modern, artistic twist


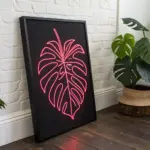
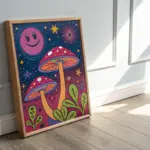
Tropical Flowers With UV-Popping Petals
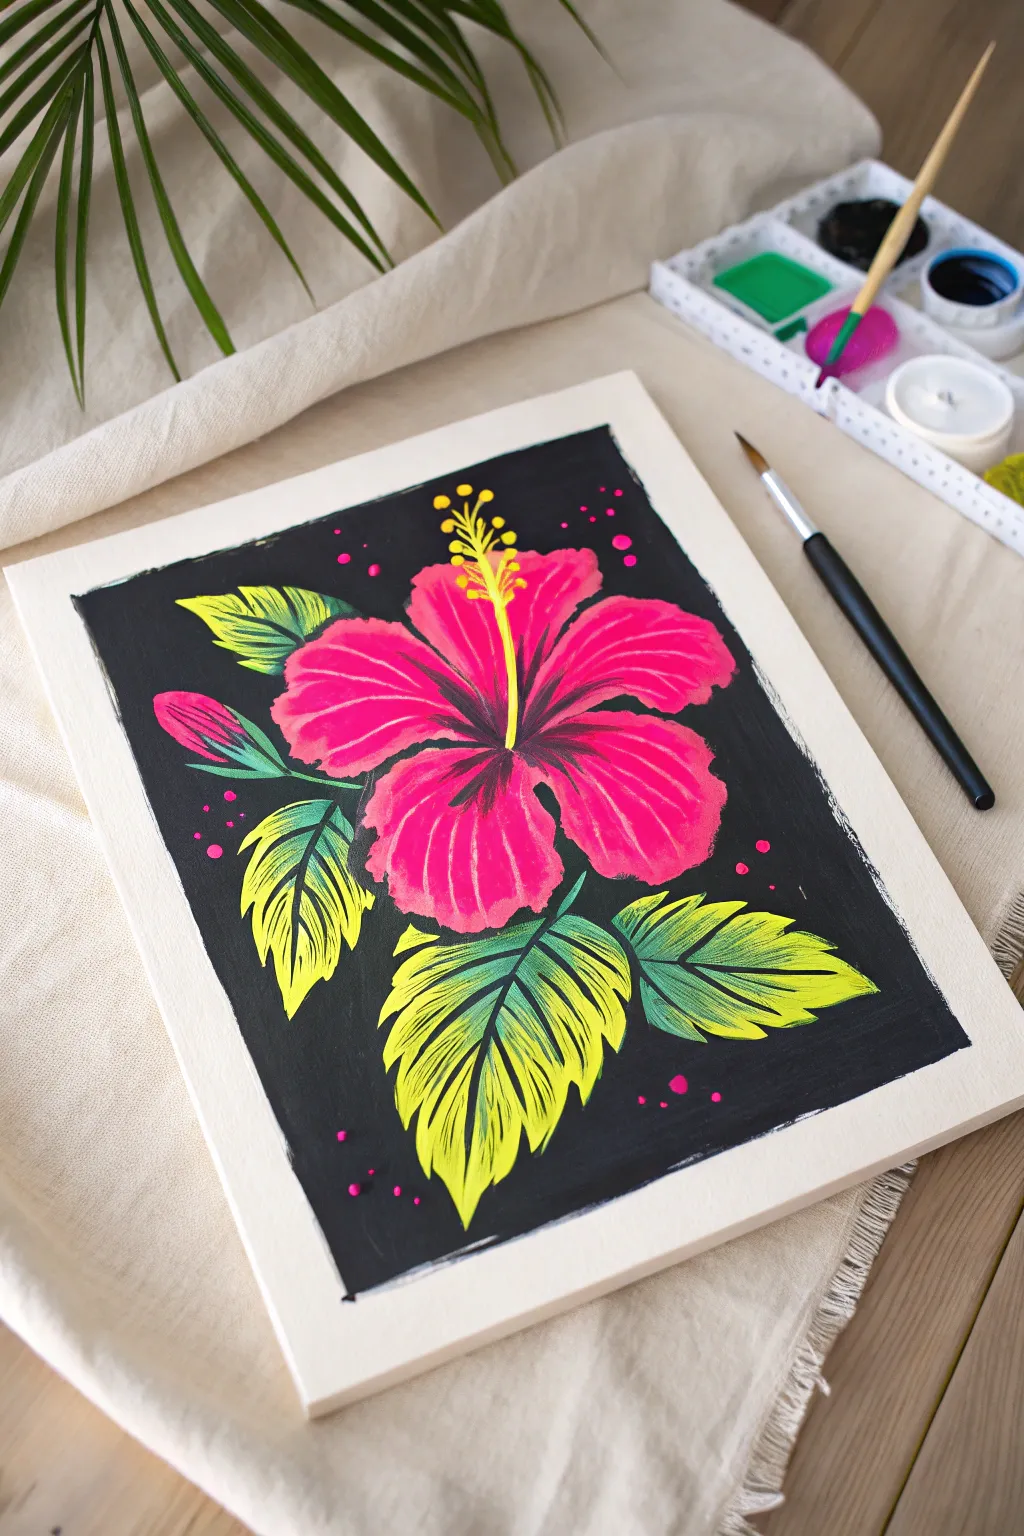
Bring the tropics to life with this vibrant, high-contrast painting of a hibiscus flower that seems to glow against the dark. Using bright fluorescent-style pinks and yellows on a rich black background creates a stunning pop art effect that is both modern and mesmerizing.
Detailed Instructions
Materials
- Canvas board or heavy mixed-media paper (e.g., 9×12 inches)
- Black acrylic paint or black gesso (matte finish preferred)
- Fluorescent pink acrylic paint
- Fluorescent yellow acrylic paint
- Deep green acrylic paint
- Teal or cool green acrylic paint
- Titanium white acrylic paint
- Flat synthetic brushes (medium and large)
- Round synthetic brushes (small for details)
- Palette for mixing paint
- Water cup and paper towels
- Pencil for sketching
Step 1: Setting the Stage
-
Prepare the background:
Start by painting a solid black rectangle in the center of your paper or canvas, leaving a crisp white border around the edges. I like to use masking tape to ensure the edges are perfectly straight, but freehand painting works if you prefer a looser look. -
Establish opacity:
If your black paint looks streaky, let the first coat dry completely and apply a second coat. A deep, solid black is crucial for making the fluorescent colors pop later. -
Sketch the outline:
Once the black background is bone dry, lightly sketch the flower shape with a white charcoal pencil or a regular pencil (you may need to press firmly to see the graphite shine). Draw five large, ruffled petals radiating from a center point, a long stamen, and several large, jagged leaves.
Glow Like a Pro
For maximum neon impact, mix a tiny amount of white acrylic ink into your fluorescent paints. It increases opacity without dulling the color as much as heavy body white paint would.
Step 2: Painting the Flower
-
Base layer for brightness:
Fluorescent paints can be transparent, so paint the silhouette of the flower petals and leaves with a thin layer of titanium white first. This acts as a primer to make the colors vivid. -
Apply the pink:
Paint the petals with your fluorescent pink. Apply it smoothly, following the direction of the petals from the center outward. -
Shadowing the center:
While the pink is still workable or just after drying, mix a tiny bit of black or deep purple into your pink to darken it. Paint this darker shade at the very center of the flower and pull it outward in streaks to create depth where the petals meet. -
Highlighting petals:
Mix a little white into your fluorescent pink to create a lighter tint. paint subtle streaks on the outer edges of the petals to simulate light hitting the ruffles. -
Painting the stamen:
Using a fine round brush and opaque yellow paint (or white first, then yellow), draw the long central stamen curving upward. Add small dots at the tip for the pollen.
Step 3: Leaves and Details
-
Base green tones:
Fill in the leaf shapes with a mix of deep green and teal. Cover the white primer you laid down earlier completely. -
Adding gradients:
While the green is wet, blend in some fluorescent yellow starting from the tips of the leaves and working inward. This creates a glowing gradient effect. -
Leaf veins:
Once the leaves are dry, use a very thin brush with black paint to draw the central vein and side veins on each leaf. This defines the shape and adds graphic contrast. -
Feathering texture:
Use your yellow paint to add feather-like strokes between the black veins on the leaves. This mimics the texture shown in the reference and adds vibrancy. -
The bud:
Don’t forget the small flower bud on the left side. Paint the bottom half green and the top tip pink, blending them slightly where they meet.
Level Up: UV Party
Paint this entire piece using specific UV-reactive acrylics. When finished, install a small blacklight fixture above the framed artwork to make it literally glow in the dark at night.
Step 4: Final Touches
-
Refine the edges:
Check the edges of your petals. If the pink has feathered too much, use your black background paint to carefully cut back in and crisp up the silhouette. -
Adding magic dust:
Dip a small round brush or a toothbrush into slightly watered-down pink paint. Gently tap or flick it to add small speckles and dots around the flower for a magical, floating pollen effect. -
Final yellow accents:
Add a few extra dots of pure yellow around the stamen and perhaps a final highlight on the brightest part of the leaves to bring everything together.
Step back and admire how the intense colors vibrate against that deep black background.
BRUSH GUIDE
The Right Brush for Every Stroke
From clean lines to bold texture — master brush choice, stroke control, and essential techniques.
Explore the Full Guide
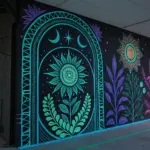
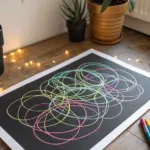
Fluorescent Mandala Dotwork
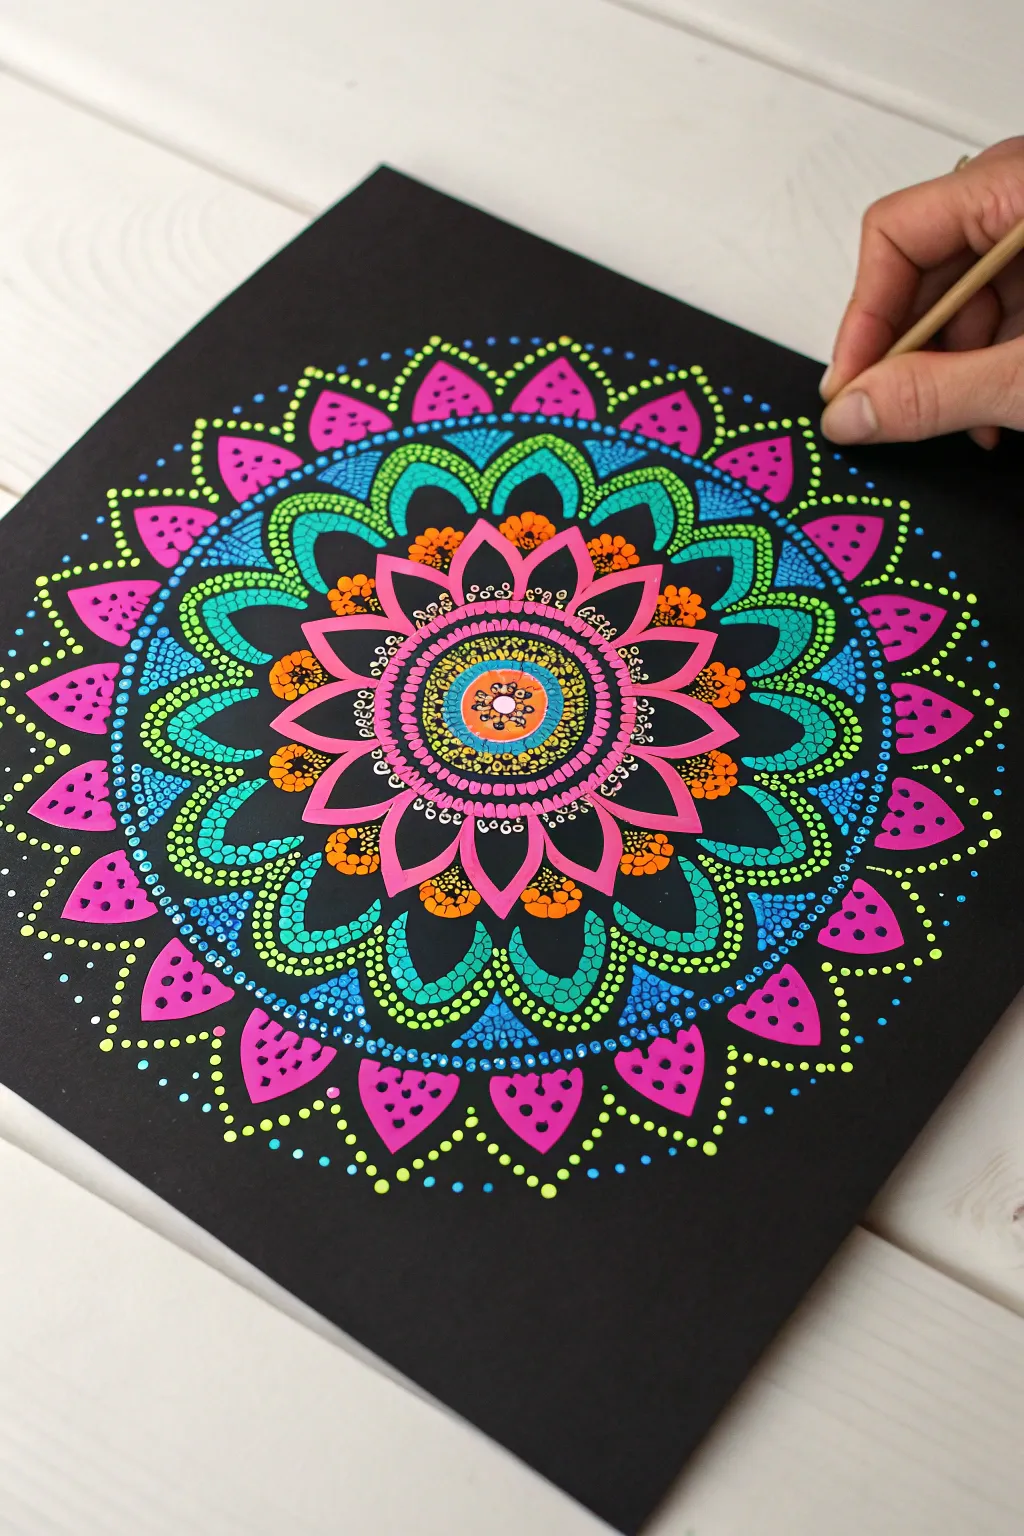
This stunning mandala project uses high-contrast fluorescent paints on a deep black background to create an artwork that practically glows. By building up layers of precise dots and swoops, you’ll create a mesmerizing, geometric design that looks incredibly complex but is built from simple, repetitive motions.
Step-by-Step Guide
Materials
- Black cardstock or a primed black canvas panel
- Fluorescent/neon acrylic paints (Hot Pink, Lime Green, Electric Blue, Bright Orange, Yellow)
- Dotting tools set (various sizes from fine styling tools to large acrylic rods)
- White charcoal pencil or chalk pencil
- Compass and ruler
- Palette or small containers for paint
- Damp cloth or paper towel
Step 1: grid_preparation
-
Find the center:
Begin by measuring your black surface to find the exact center point. Mark this lightly with your white charcoal pencil. -
Draw concentric circles:
Using your compass, draw a series of faint concentric circles radiating from the center. Space them about 0.5 to 1 inch apart to serve as guidelines for your mandala layers. -
Divide the circle:
Use a protractor and ruler to divide your circle into equal pie-slice sections (8, 12, or 16 sections work best for this design). These lines help keep your symmetry perfect as you work outward.
Consistency is Key
Keep a damp paper towel handy to wipe your tool after every few dots. Dried paint build-up on the tip will distort the shape of your dots and ruin the perfect symmetry.
Step 2: painting_the_core
-
The central dot:
Load a large dotting tool with orange paint and place a single, generous dot directly in the center. Let it settle into a perfect circle. -
First ring of dots:
Using a smaller tool and yellow paint, creating a ring of small dots immediately hugging the central orange dot. -
Creating the flower center:
Moving to the next guide circle, use pink paint to create petal shapes. Instead of simple dots, drag the dotting tool slightly inward to create a teardrop or petal effect pointing toward the center. -
Orange accents:
Place medium-sized orange dots between the tips of your pink petals to bridge the gap and add contrast.
Glow Up
Mount your finished mandala under a UV blacklight. The specific neon pigments recommended here will fluoresce brilliantly, transforming the art into a light show.
Step 3: expanding_the_design
-
Pink petal outline:
Using a very fine tool and white or light pink paint, dot a delicate outline around your main pink petals to define their shape. -
Teal swoops:
Switch to electric blue or teal. Start at the peak of a pink petal and drag a ‘swoop’ shape downwards to the left and right, framing the petal. This creates a scalloped edge. -
Walking the dots:
Inside those teal swoops, use the ‘walking the dots’ technique. Place one large green dot at the top, then continue dotting down the line without reloading paint, making the dots naturally get smaller. -
Outer petal structures:
On a wider guide circle, paint large, bold pink petal shapes. Ensure the tip of each petal aligns with your grid lines. -
Filling the negative space:
In the V-shaped gaps between the large pink petals, add clusters of orange dots. I like to arrange them like a triad or a small pyramid.
Step 4: final_layers_and_details
-
The green lattice:
Create a lace-like effect using lime green paint. Connect the tops of the large pink petals with arched rows of uniform green dots. -
Blue solid arches:
Beneath the green dot arches, paint solid curved bands of bright blue. This solid block of color creates a visual anchor for the lighter dots above. -
Outer rim accents:
On the outermost edge, create large triangular or petal shapes using bold hot pink. Fill the inside of these shapes with a few scattered black dots (or leave empty) for texture. -
Yellow highlights:
Using your smallest tool and bright yellow paint, go back and add tiny top-dots on the largest circles of your design. This ‘dot-on-dot’ technique adds incredible depth. -
Tiny floating accents:
Scatter extremely fine dots of neon green and blue in the remaining black spaces around the outer rim to make the design look like it’s dissolving into stardust. -
Erase guidelines:
Allow the painting to dry completely—ideally overnight. Once fully cured, gently erase any visible white charcoal lines with a soft eraser or damp Q-tip.
Step back and admire how the colors vibrate against the black background
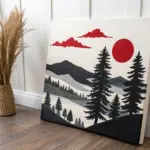
Skull and Flowers in Psychedelic Neon
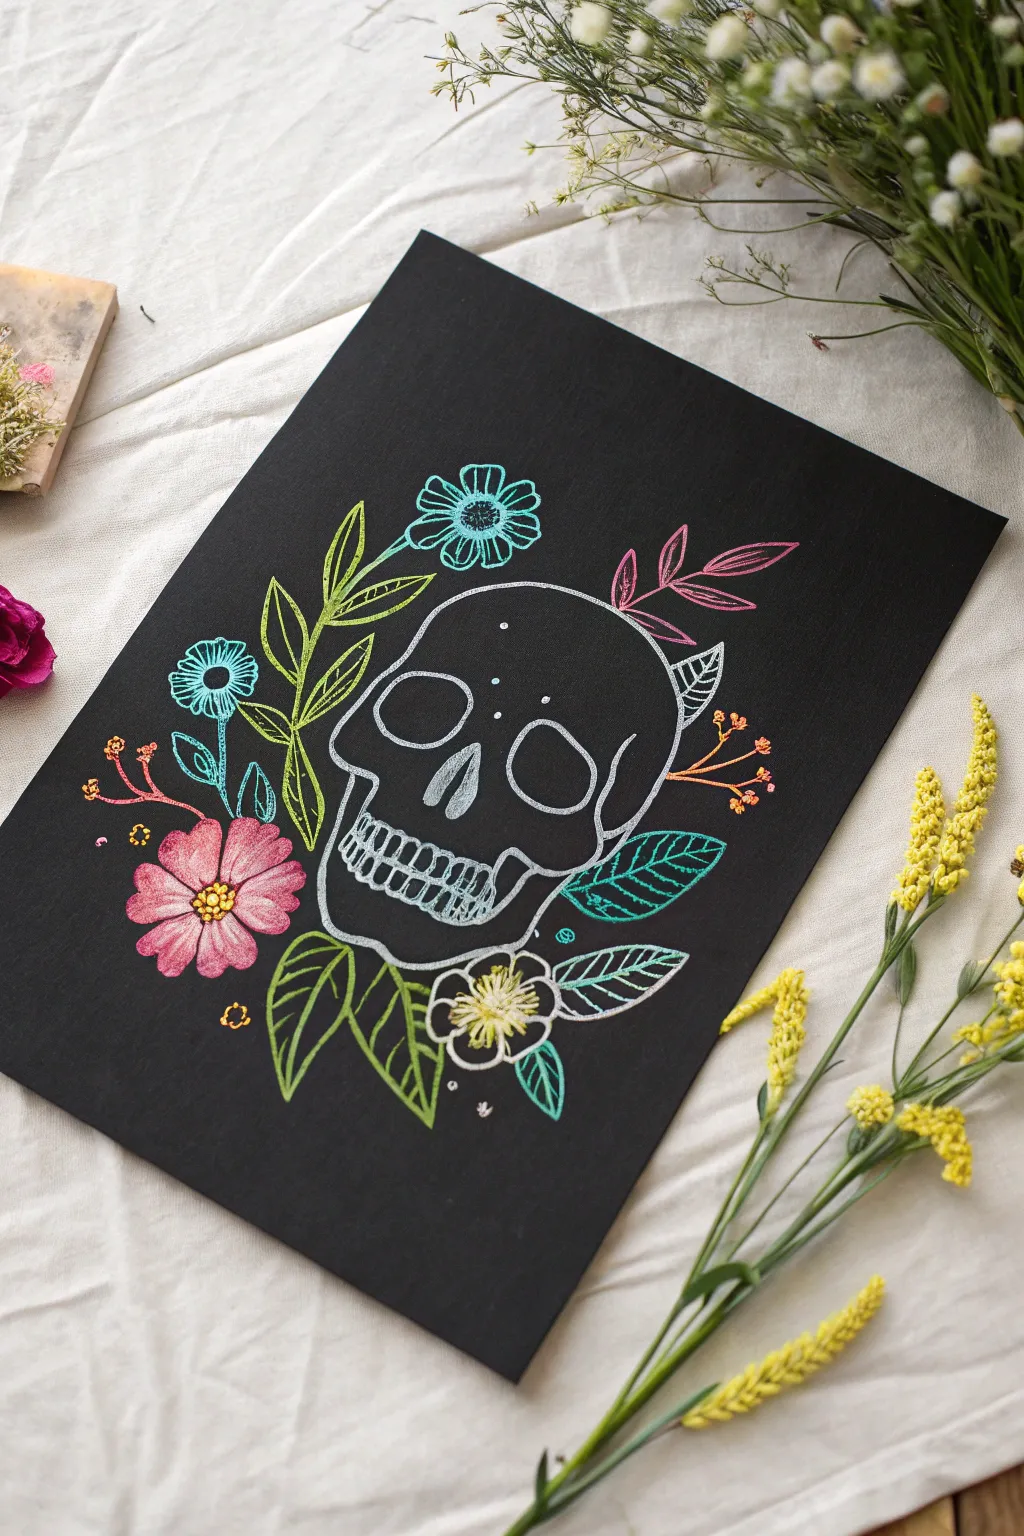
Contrast is king in this striking project that pairs the macabre imagery of a skull with vibrant, life-affirming blooms. Using fluorescent gel pens or paint markers on black paper creates an electric pop that makes the simple line work feel incredibly modern and fresh.
Step-by-Step Tutorial
Materials
- High-quality black cardstock or mixed media paper (A4 size)
- White pencil or white charcoal pencil (for sketching)
- Fluorescent/Neon gel pens or extra-fine tip paint markers (pink, blue, yellow, green, orange)
- Fine tip white gel pen or paint marker
- Pencil and eraser
- Ruler (optional)
Step 1: Sketching the Bones
-
Center Placement:
Begin by finding the visual center of your black paper. Lightly mark the top and bottom limits where the skull will sit using your white pencil, leaving plenty of room around the edges for the floral elements. -
Cranium Curve:
Draw the ‘dome’ of the skull first. Aim for a smooth, rounded shape that tapers slightly inwards as you go down towards where the cheekbones will be. -
Eye Sockets:
Sketch two large, slightly misshapen ovals for the eye sockets. They shouldn’t be perfect circles; give them a bit of an angled droop towards the outer edges for a more realistic skeletal look. -
Nasal Cavity:
Between and slightly below the eyes, draw an upside-down heart shape for the nose cavity. I usually split this into two teardrop shapes separated by a thin septum. -
Mouth and Jaw:
Sketch the upper jaw line first, then add the lower jaw hanging slightly beneath. Don’t worry about individual teeth yet; just get the overall U-shape of the mandible right. -
Teeth Details:
Lightly grid out where the teeth will go. Remember that teeth are larger in the front and get smaller as they recede back along the jawline.
Step 2: Blooming Surroundings
-
Main Flowers:
Sketch a large daisy-like flower head on the bottom left and a smaller circular bloom near the top left. Keep your lines very faint so they don’t show through the ink later. -
Leafy Sprigs:
Draw sweeping, curved stems extending from behind the skull. Add pointed, leaf shapes—some large clusters at the bottom, and delicate sprigs reaching upwards on the left side. -
Extra Flora:
Fill in the gaps with variety. Add a small bud shape on the right side and some fern-like fronds at the top right to balance the composition.
Glow Pro Tip
To make the ‘neon’ effect even stronger without special lights, double-trace your colored lines. The second pass builds up the opacity of the ink against the black paper.
Step 3: Inking the Neon
-
The White Outline:
Take your fine-tip white pen and trace over your skull sketch. Use a confident, steady hand. If a line wavers, just correct it—skulls are organic and imperfect by nature. -
Adding Skull Detail:
Add small dots above the eye sockets and subtle crack lines near the temples in white ink to give the bone texture. Fill in the teeth outlines carefully. -
Pink Petals:
Using a neon pink pen, ink the petals of the large bottom-left flower. Draw lines radiating from the center of each petal to give them texture and depth. -
Electric Blue Blooms:
Switch to neon blue for the top flower and the small bud on the left. Similar to the pink flower, add internal lines to the petals rather than coloring them in solid. -
Greenery Gradients:
Use a neon green pen for the large leaves at the bottom and the tall sprig on the left. For visual interest, you can outline the leaves in green and add vein details in yellow or a lighter green if you have it. -
Accent Colors:
Use a neon orange or reddish pen for the fern-like leaves at the top right and the small berry sprigs on the far left and right edges. -
Central Flowers:
For the flower tucked directly under the jaw, use white for the petals but fill the center with bright yellow stippling (tiny dots) to make it pop against the black. -
Final Dots:
Scatter a few tiny clusters of neon dots around the composition—like pollen or magic dust—using various colors to tie the whole piece together. -
Cleanup:
Allow the ink to dry completely (give it at least 15 minutes to be safe), then gently erase any visible pencil sketch lines with a soft eraser.
Level Up: UV Magic
Swap standard neon pens for specific UV-reactive ink markers. When you’re done, hang your piece near a blacklight bulb to make the skull and flowers literally glow in the dark.
Step back and admire how the colors vibrate against the dark background, creating a piece that is moody yet full of light

PENCIL GUIDE
Understanding Pencil Grades from H to B
From first sketch to finished drawing — learn pencil grades, line control, and shading techniques.
Explore the Full Guide
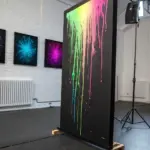
Translucent Backlit Painting on Fabric

Create a stunning, minimalist light installation that mimics the ethereal glow of sunrise or aurora. By stretching translucent mesh fabric over a deep custom frame and hiding LED strips within, you can achieve a soft, diffused gradient that transforms any room.
Step-by-Step
Materials
- 2×2 inch pine lumber (sufficient for outer frame dimensions)
- 1×1 inch pine strips (for inner mounting cleats)
- White polyester mesh or sheer voile fabric
- Heavy-duty staple gun and staples
- Wood screws and drill
- RGB LED light strip kit with remote
- Sandpaper (120 and 220 grit)
- Saw (miter or hand saw)
- Wood glue
- White fabric paint (optional, for extra diffusion)
Step 1: Building the Deep Frame
-
Measure and Cut Lumber:
Visualize the size you want your final piece to be; large squares work beautifully for this impact. Cut four pieces of your 2×2 inch lumber to create the outer perimeter of your frame, using 45-degree miter cuts for clean corners. -
Cut Inner Cleats:
Cut the 1×1 inch pine strips to fit inside the perimeter of your main frame. These should be recessed about 1 inch from the front edge; this is where you’ll attach the fabric so the LEDs can hide behind the main rim. -
Assemble the Outer Frame:
Apply wood glue to the mitered corners of your 2×2 pieces. Clamp them together securely to ensure a perfect square or rectangle, then drive screws through the sides to lock the structure in place. -
Install the Inner Cleats:
Position your 1×1 strips inside the frame, recessed from the front edge. Secure them using wood glue and screws. I usually pre-drill these holes to prevent the pine from splitting near the edges. -
Sand and Finish:
Sand the entire wooden structure, starting with 120 grit and finishing with 220 grit. Smooth out any rough patches, especially on the front face where the wood is most visible.
Dim Spots?
If the light isn’t reaching the bottom, add a second LED strip at the bottom edge. Or, install a white foamboard backing to reflect more light forward.
Step 2: Lighting and Fabric
-
Plan LED Placement:
Test your LED strip before installation. Run the strip along the inside top or bottom edge of the frame, hidden behind the 2×2 rim so the diodes face inward toward the center of the void, not directly at the viewer. -
Secure the Lights:
Peel the adhesive backing off the LED strip and press it firmly onto the inner wood surface. If you want a top-down gradient like the example, mount the lights only on the top inner ledge. -
Prepare the Fabric:
Lay your mesh or voile fabric out on a clean, flat surface. Iron out any creases carefully on a low heat setting, as wrinkles will catch the light and ruin the seamless effect. -
Initial Stapling:
Place the fabric over the front of the frame. Start by placing one staple in the center of the top rail, pulling the fabric taut but not distorting the weave. -
Opposite Side Tension:
Move to the bottom rail, pull the fabric tight directly opposite your first staple, and secure it. Repeat this process for the left and right sides, creating a diamond of tension. -
Staple the Perimeter:
Work your way out from the center staples toward the corners, pulling and stapling every 2-3 inches. Keep the tension even to ensure the mesh surface remains perfectly flat. -
Corner Folds:
When you reach the corners, fold the excess fabric neatly—similar to wrapping a gift—and staple it down on the back or side of the frame so no bulky fabric shows from the front. -
Trim Excess:
Use sharp scissors or a craft knife to trim away any excess fabric overhang on the back of the frame for a clean, professional finish. -
Enhance Diffusion (Optional):
If your mesh is too see-through and you can see the back wall, lightly mist the back of the fabric with a very thin layer of white spray paint to catch the light better. -
Final Light Test:
Plug in your LED controller and test the colors. Adjust the settings to a slow fade or a static purple-to-green gradient to replicate the ethereal look in the photo.
Interactive Art
Use sound-reactive LED strips so your artwork pulses and changes colors with music, turning the piece into a dynamic visualizer for parties.
Lean your new light sculpture against a wall and enjoy the futuristic atmosphere
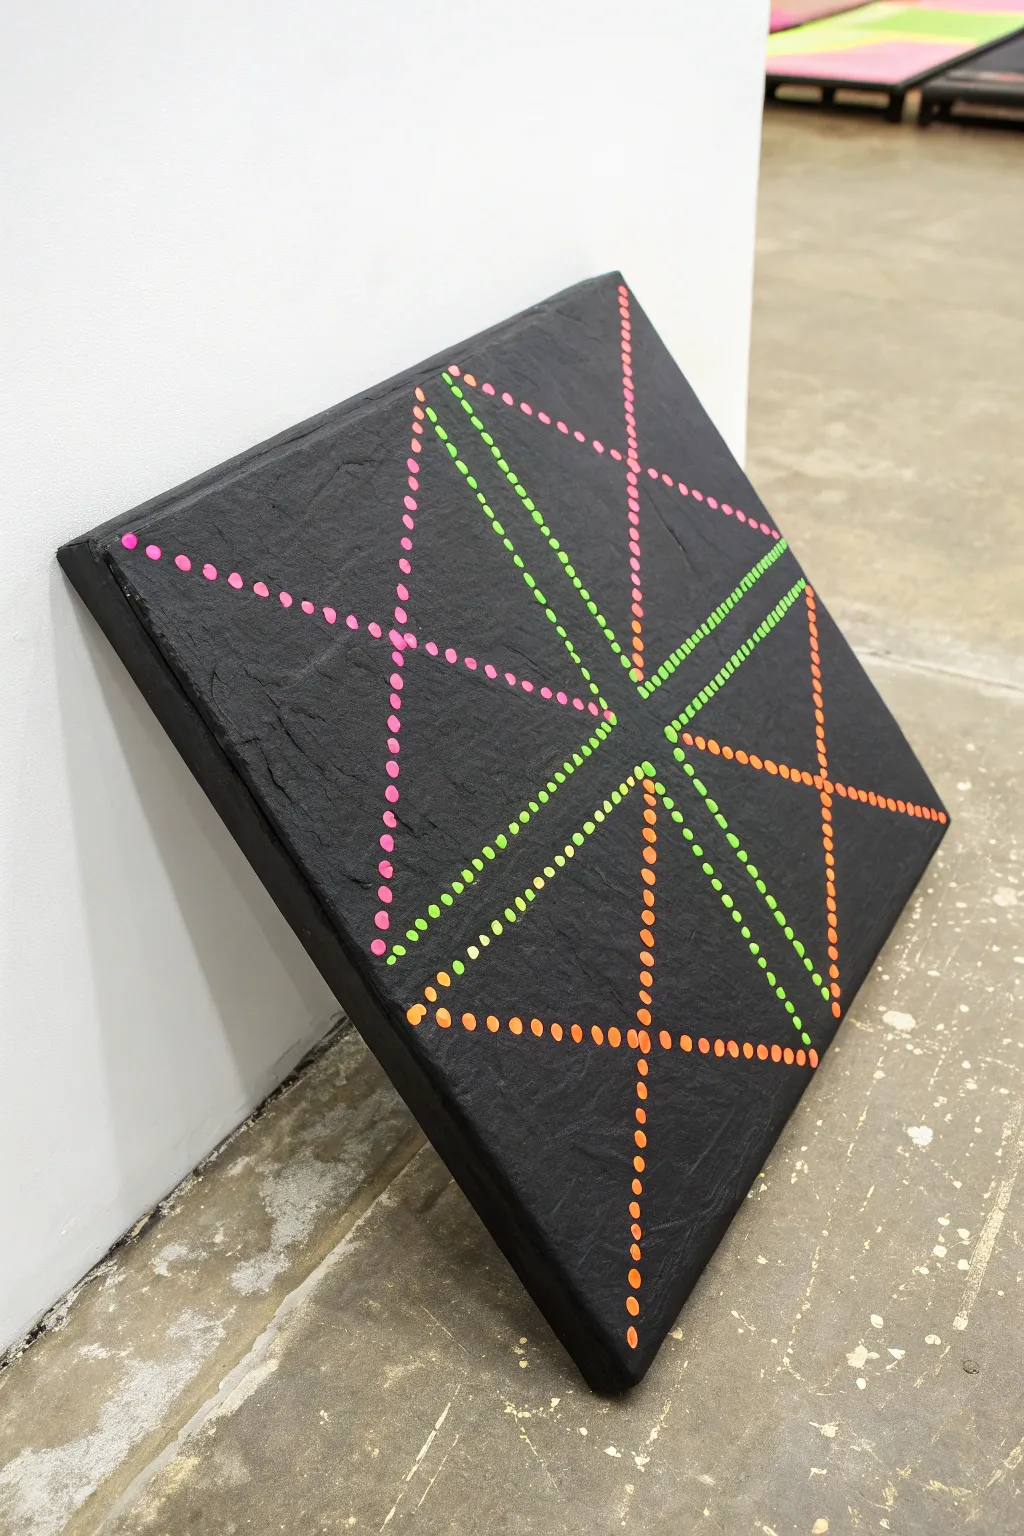
Fluorescent Texture Paste and Raised Lines

This striking project combines gritty, dark texture with vibrant pops of fluorescent color to create a modern geometric design. By building up layers of texture paste and applying dots with precision, you’ll achieve a tactile 3D effect that really makes the neon hues sing against the black background.
Step-by-Step Guide
Materials
- Square canvas or wood panel (approx. 12×12 inches)
- Black gesso or black acrylic paint
- Texture paste (sand texture or heavy modeling paste)
- Palette knife
- Ruler or straight edge
- White chalk or a white charcoal pencil
- Fluorescent acrylic paints (pink, green, orange)
- Small round paintbrush (size 1 or 2) or a dotting tool
- Matte spray varnish (optional)
Step 1: Creating the Base
-
Prepare the surface:
Begin by wiping down your canvas or panel to ensure it is free of dust. Place it on a protected work surface. -
Apply texture paste:
Scoop a generous amount of texture paste onto the center of your canvas using a palette knife. If you want that gritty look from the image, choose a paste with sand additives. -
Spread the texture:
Work the paste across the entire surface. Don’t smooth it out perfectly; use the flat edge of the knife to create ridges, peaks, and uneven valleys. -
Add directional movement:
I like to create a slightly chaotic, stucco-like pattern by changing the direction of my knife strokes frequently. Ensure the corners and edges are fully covered. -
Let it cure:
Allow the texture paste to dry completely. This is crucial as moisture trapped underneath can cause cracking later. Depending on thickness, this may take 4-12 hours.
Pro Tip: Height Boost
Mix your neon acrylics with a bit of heavy gel medium before painting. This gives the dots a raised, 3D quality that matches the rough texture of the background.
Step 2: Blackout Layer
-
Apply black base coat:
Once the texture is rock hard, coat the entire surface with black gesso or black acrylic paint. -
Work into crevices:
Use a stiff brush to dab and push the paint into all the deep texture grooves you created. White spots showing through will ruin the illusion. -
Paint the edges:
Don’t forget to paint the sides of the canvas black as well for a professional, finished look. -
Second coat:
After the first layer dries, apply a second coat of black to ensure an opaque, matte finish. Let this dry fully before moving to the design phase.
Level Up: Blacklight
Install a small UV blacklight fixture above where you hang this piece. The specific fluorescent pigments will glow intensely in the dark, transforming the art completely.
Step 3: Mapping the Geometry
-
Find the center point:
Using a ruler, lightly mark the exact center of the canvas with a piece of white chalk or charcoal pencil. -
Draw the main X:
Draw diagonal lines extending from the corners through the center point to create a large ‘X’ across the canvas. -
Create the inner diamond:
Connect the midpoints of each side to form a diamond shape that intersects your main ‘X’ lines. -
Add secondary triangles:
Sketch additional lines parallel to your main X, creating narrow triangular pathways. Keep these markings faint so they are easy to cover or erase later.
Step 4: Applying Neon Dots
-
Prepare neon paints:
Squeeze out small amounts of fluorescent pink, green, and orange paint onto your palette. They work best when not diluted with water. -
Start with pink:
Load a small round brush or dip a dotting tool into the pink paint. Begin dotting along the vertical and horizontal axis lines of your design. -
Consistent spacing:
Try to keep the space between each dot consistent—about 2-3mm apart. This rhythm brings order to the rough background texture. -
Apply the green:
Switch to green for the inner diagonal lines. The high contrast of green against black really pops here. -
Finish with orange:
Use orange for the remaining geometric sections, focusing on the outer triangles or the bottom quadrants to balance the composition. -
Clean up sketch lines:
Once the paint is totally dry, use a damp Q-trip or soft brush to gently wipe away any visible white chalk marks between the dots.
Hang your new textured masterpiece diagonally or flat against the wall to enjoy the interplay of shadow and neon light


Have a question or want to share your own experience? I'd love to hear from you in the comments below!