Food trucks are basically the perfect drawing subject: bold shapes, cute details, and endless ways to show personality. Here are my favorite food truck drawing ideas—from simple sketches you can finish fast to bigger, story-filled scenes you can really sink into.
Classic Side-View Food Truck Sketch
Capture the vintage charm of a classic French-style food truck with this detailed ink illustration. This project focuses on clean linework and subtle texture hatching to bring an industrial yet whimsical vehicle to life on your sketchbook page.
Detailed Instructions
Materials
- Sketchbook with smooth, heavy paper
- HB graphite pencil
- Kneadable eraser
- Fine liner pens (0.1mm, 0.3mm, 0.5mm)
- Ruler
- Optional: Compass or circle stencil
Step 1: Constructing the Frame
-
Establish the baseline:
Begin by lightly penciling a horizontal line across the lower third of your page to serve as the ground. -
Block out the main body:
Draw a large rectangle for the main cargo area of the truck. To the right of this, add a slightly shorter, narrower vertical rectangle for the cab area, and protruding from that, a smaller, snub-nosed shape for the front engine hood. -
Define the wheel placement:
Mark the locations for the tires. The rear wheel sits under the main cargo box, slightly towards the back, while the front wheel is positioned directly under the driver’s door area. -
Sketch the roofline:
Add a slight overhang specifically above the cab area, giving it that classic visor look found on vintage vans. -
Outline the service window:
Create a large, rectangular opening on the side of the main body for the service window. Add a smaller rectangle below it to represent the serving counter.
Wobbly Wheels?
If freehand circles are tricky, trace a coin or use a stencil for perfectly round tires. Just remember to flatten the bottom slightly for realism.
Step 2: Inking the Outline
-
Ink the main silhouette:
Switch to your 0.5mm pen. Carefully trace the external outline of the truck, ignoring the wheels for a moment. Use confident, straight strokes, using a ruler for the long roof and base lines if you want exact precision. -
Draw the tires:
Use the 0.5mm pen to ink the circles for the tires. Add a smaller concentric circle inside each for the hubcaps. Make the bottom of the tires slightly flatter where they meet the ground to show weight. -
Detail the cab features:
Switch to a 0.3mm pen. Draw the driver’s side window with rounded corners. Add the door seam line, the small door handle, and the round headlight protruding from the front nose. -
Create the service window awning:
Draw the awning above the service window. This should look like a long, thin rectangle angled slightly outward. Add small vertical lines under the awning to suggest the window frame structure. -
Add structural details:
Ink the rear bumper and the front license plate holder. Don’t forget the small vent details on the side panel near the front wheel well.
Step 3: Texture and Interior
-
Erase pencil guides:
Wait for the main ink lines to dry completely, then gently erase all graphite sketches to reveal a clean framework. -
Draw the corrugated texture:
This is the signature look of this van. Using your fine 0.1mm pen and a ruler, draw faint vertical and horizontal grid lines across the main body panels. Keep these lines very light and evenly spaced to mimic the ribbed metal siding. -
Fill the service window:
Inside the service window, sketch small details like shelves, bottles, or boxes. You don’t need to be hyper-realistic here; geometric shapes work perfectly to suggest a stocked kitchen. -
Hatch the window screen:
On the left side of the service window, use cross-hatching to create a darker, mesh-like texture, suggesting a screen or grate. -
Detail the wheels:
Use stippling (tiny dots) or dense hatching on the tires to make the rubber look dark and textured, leaving the metal rims lighter.
Level Up: Menu Board
Add a tiny sandwich board sign on the ground next to the truck. Write a microscopic ‘Menu’ or daily special on it for extra storytelling context.
Step 4: Final Touches
-
Emphasize shadows:
Thicken the lines slightly on the undercarriage and beneath the service counter shelf to create depth and shadow. -
Ground the vehicle:
Add a few quick, horizontal speed lines and tufts of grass underneath the tires to show that the truck is parked on ground, not floating in space. -
Add reflections:
Draw a few diagonal lines across the driver’s side window to suggest light reflecting off the glass surface.
Now you have a charming, vintage food truck ready to serve imaginary customers on the page


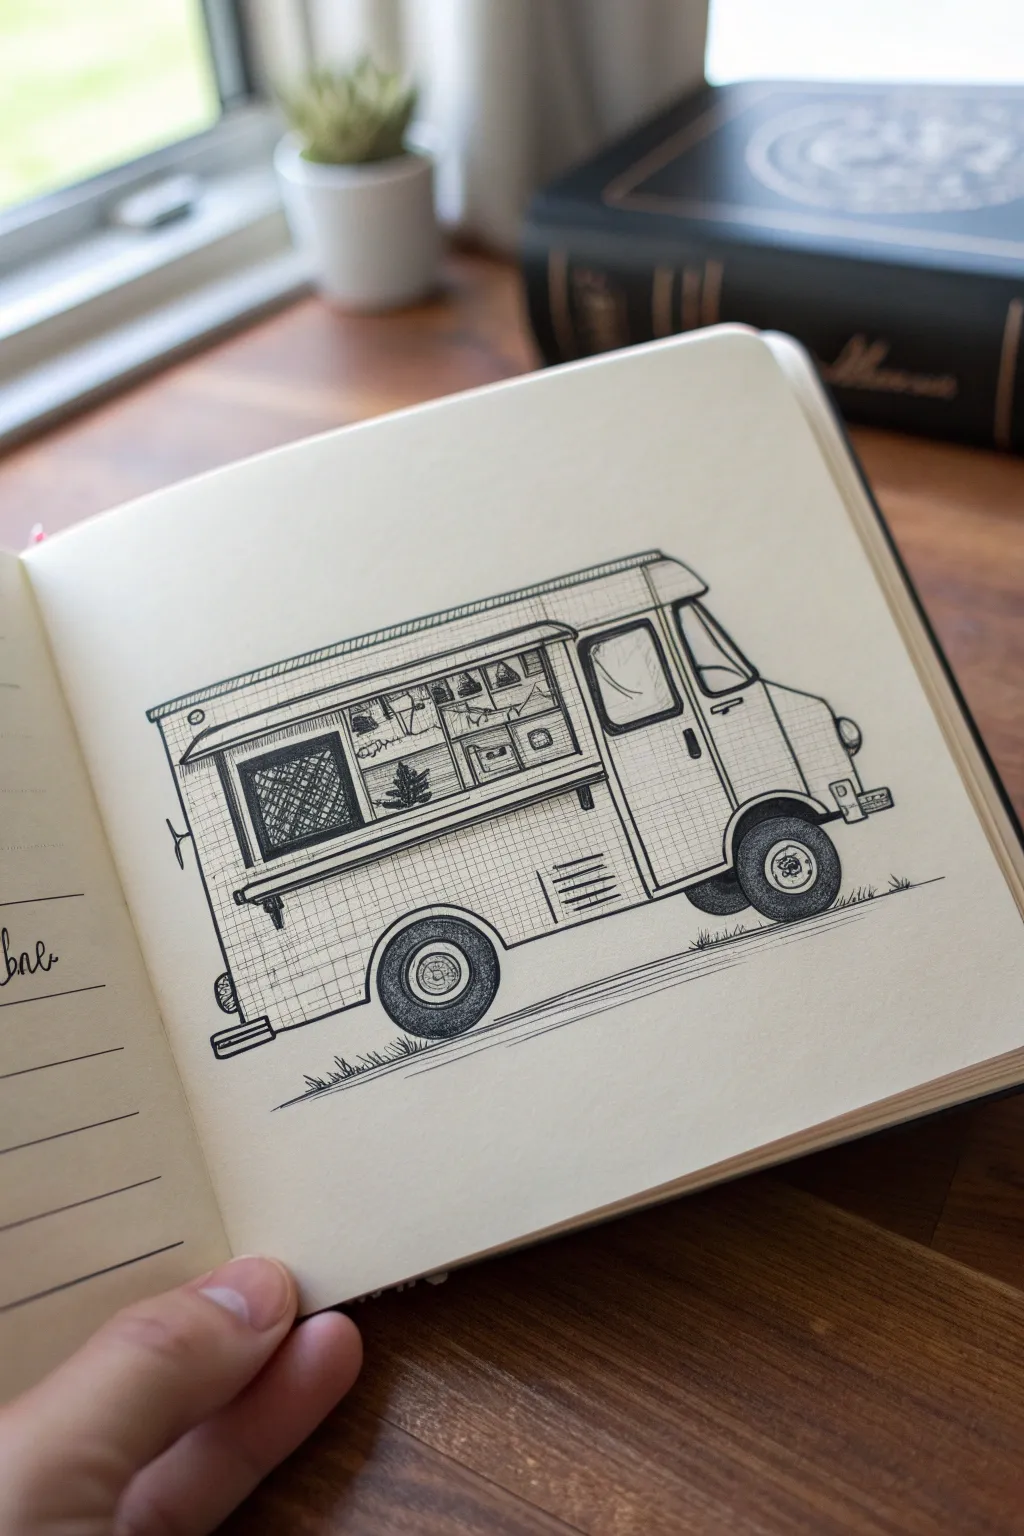
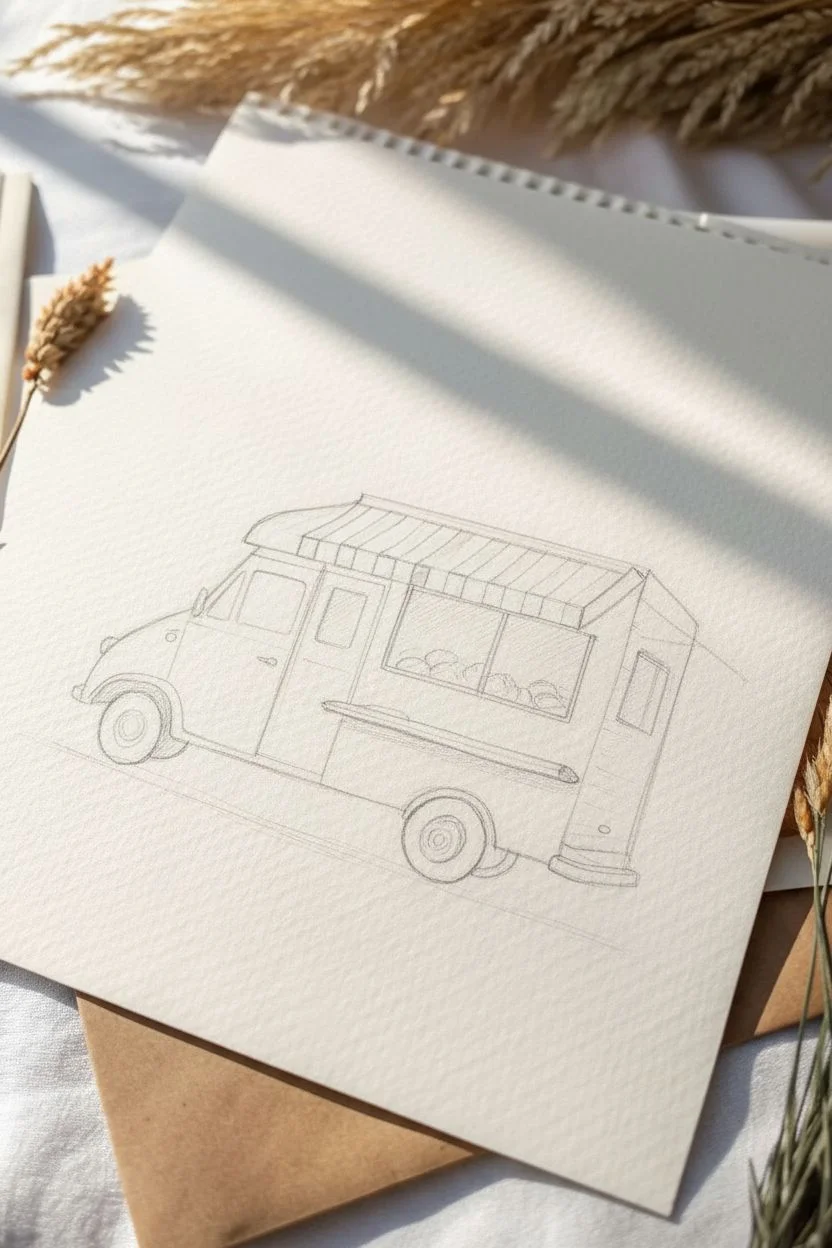
Easy Step-by-Step Shape Breakdown
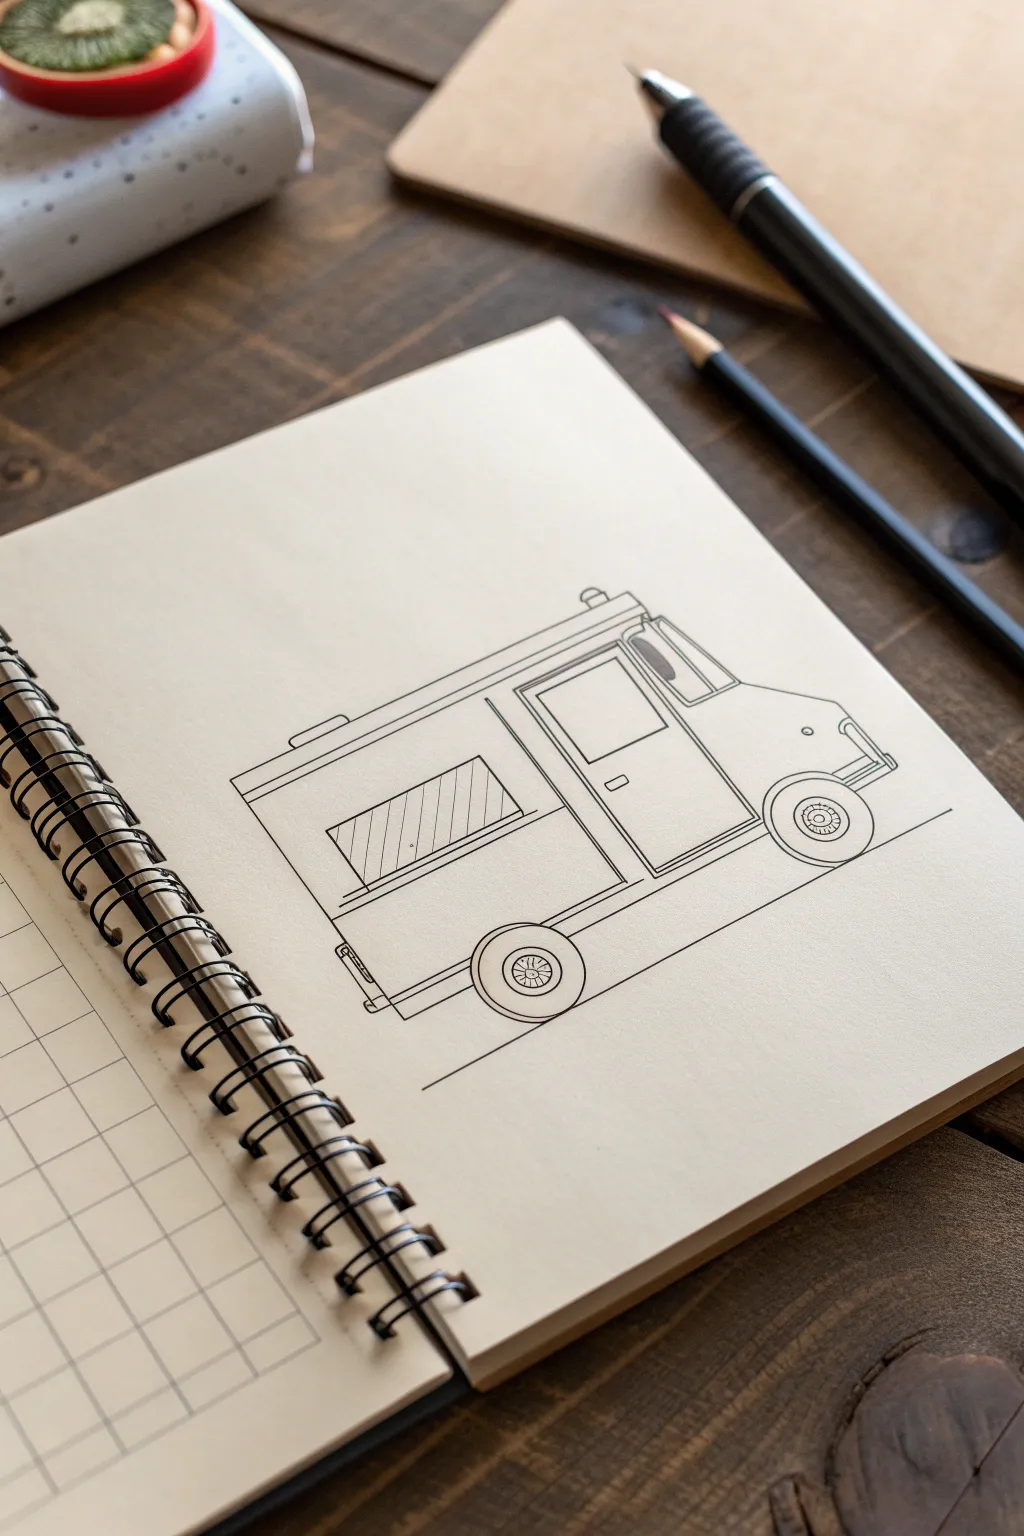
This project features a clean stick-and-ink style illustration of a classic food truck, perfect for beginners learning to build complex objects from simple shapes. The drawing uses crisp lines and geometric forms to create a charming, minimalistic vehicle on cream-colored paper.
Step-by-Step
Materials
- Spiral-bound sketchbook (cream or off-white paper preferred)
- Pencil (HB or 2B for initial sketch)
- Fine liner pen (0.5mm or 0.8mm, black)
- Ruler or straight edge
- Eraser
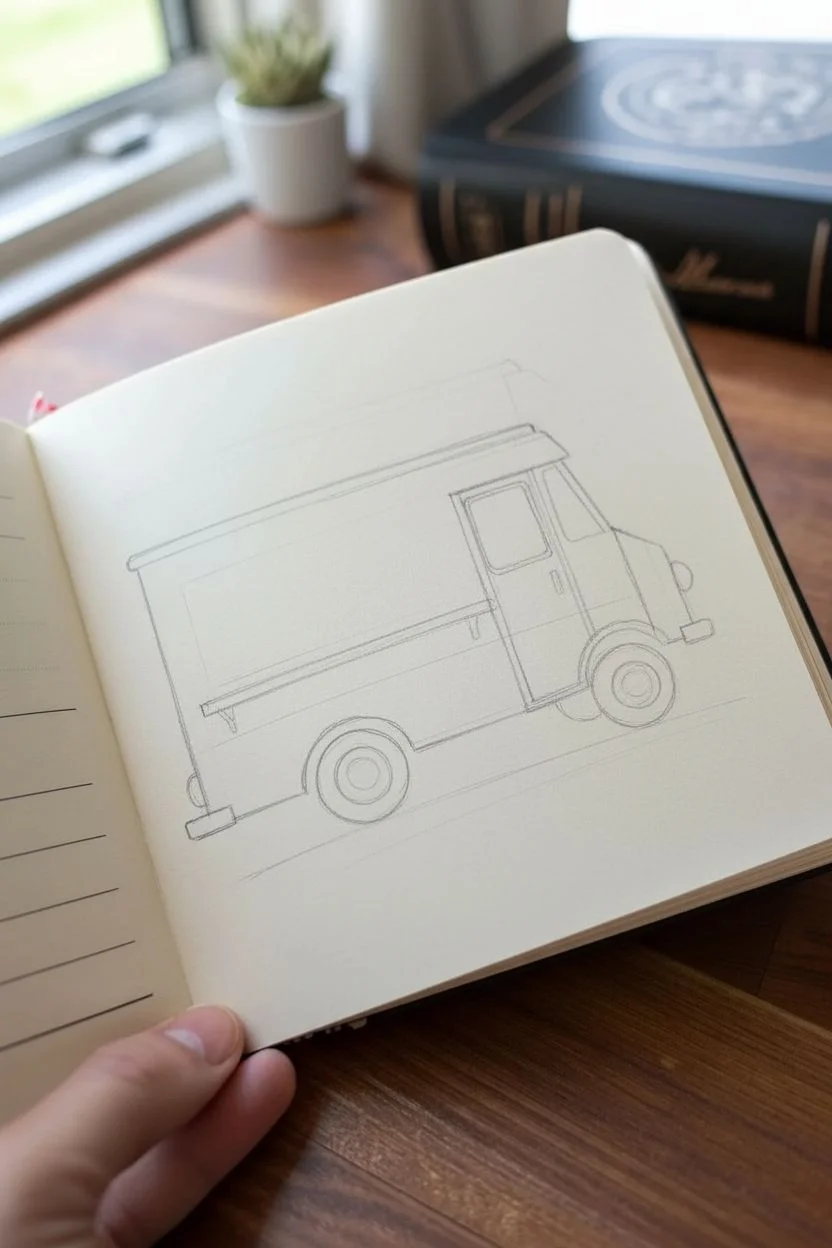
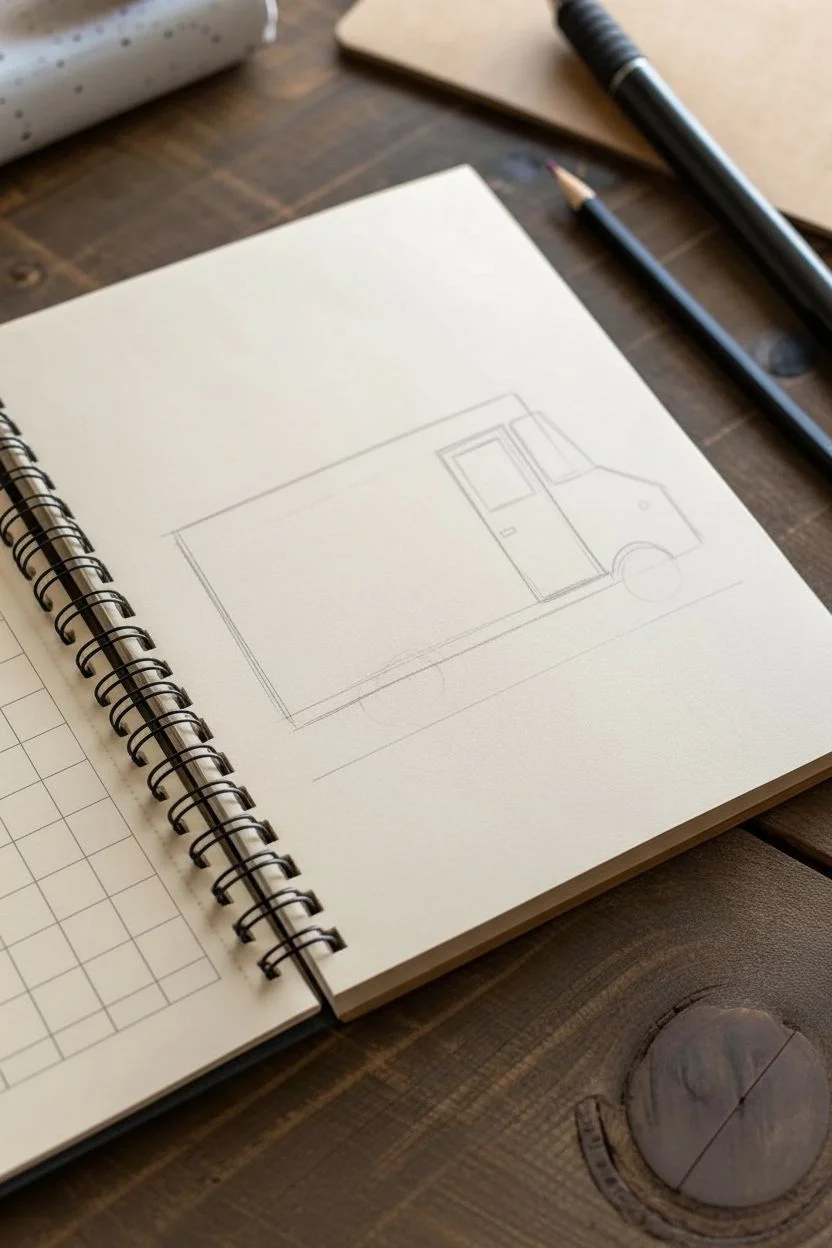
Step 1: Planning the Structure
-
Establish the ground line:
Start by drawing a faint horizontal line near the bottom of your page. This will serve as the road and anchor your truck so it doesn’t look like it’s floating. -
Draw the main body rectangle:
Sketch a large, horizontal rectangle floating slightly above your ground line. This forms the main serving area and kitchen of the truck. -
Add the front cab:
On the right side of your large rectangle, draw a smaller, somewhat trapezoidal shape. The front line should slope slightly inward to mimic a windshield and hood profile.
Clean Corners
When inking rectangles, lift your pen precisely at each corner rather than dragging it continuously. This creates sharper, more architectural intersections.
Step 2: Adding Details
-
Outline the wheels:
Draw two circles along the bottom edge of the vehicle structure—one under the main body and one under the driver’s cab. Ensure they touch the ground line. -
Define the wheel wells:
Sketch semi-circles or arches over the top half of each wheel to show the bodywork cutting away. -
Construct the serving window:
In the center of the large rectangle, draw a smaller horizontal rectangle. Add a smaller, narrower rectangle directly beneath it to represent the serving counter. -
Draw the door:
Between the serving window and the driver’s cab, draw a tall, vertical rectangle for the door using faint pencil lines. -
Sketch the window pane:
Inside the door, add a square for the window and a tiny rectangle below it for the handle. -
Add the roof edge:
Draw a thin, parallel line just below the top edge of the main rectangle and cab to give the roof some thickness and dimension. -
Detail the lights and bumpers:
Sketch small rectangular shapes on the very front and back lower corners for bumpers. Add a small ‘L’ shape at the front corner for a headlight.
Wobbly Wheels?
If freehand circles are tricky, use a circular object like a coin or a spool of thread as a stencil to get perfectly round tires every time.
Step 3: Inking and Refining
-
Ink the main outline:
Switch to your fine liner pen. Carefully trace over the outer perimeter of the entire truck first, using a ruler if you want perfectly straight mechanical lines. -
Define interior lines:
Ink the door, serving window, and roof details. Be careful not to smudge the fresh ink as you move your hand across the page. -
Detail the wheels:
Ink the circle of the wheels. Inside each wheel, draw a smaller circle for the hubcap and add tiny spokes or dots for lug nuts. -
Hatch the serving window:
Use your ruler to draw diagonal hatch lines inside the serving window rectangle. This suggests glass reflection or a closed shutter. -
Final touches:
Ink the bumpers, door handle, and any small roof vents. I usually add a small siren or vent shape on top of the roof for character. -
Erase guidelines:
Wait until the ink is completely dry—give it a few minutes to be safe. Gently erase all the underlying pencil sketches and the initial ground line.
You now have a clean, stylized food truck illustration ready to be colored or left as a minimal line drawing


Striped Awning for Instant Street-Food Vibes
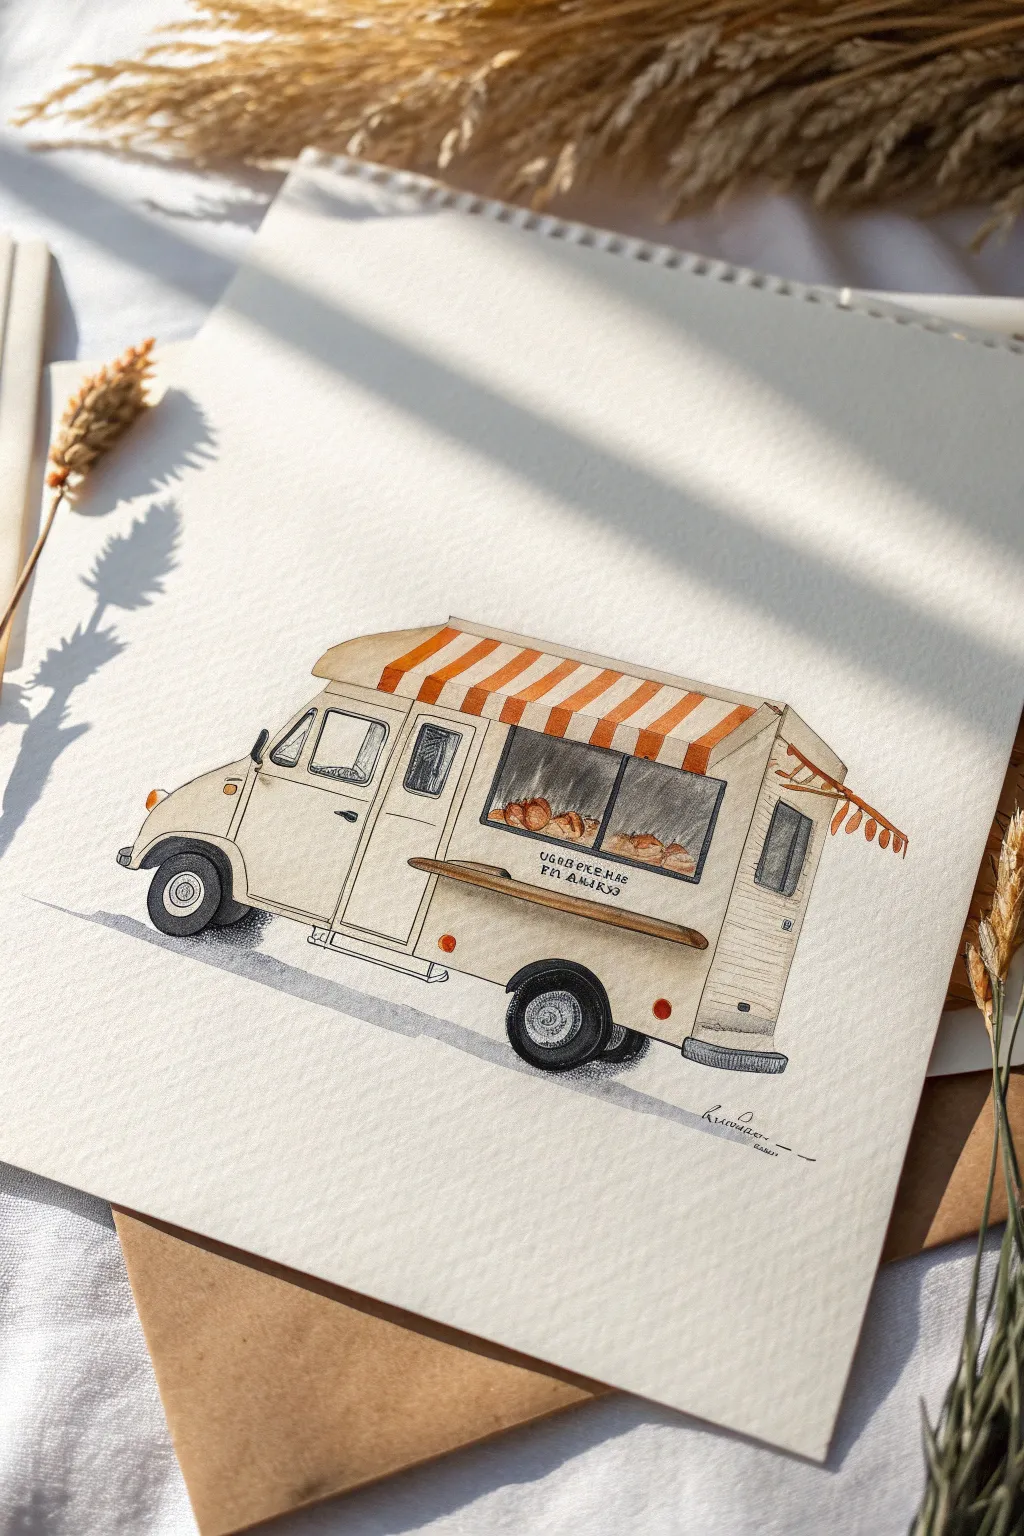
Capture the nostalgic appeal of street food culture with this delightful watercolor and ink illustration. This project combines loose, sketchy ink lines with warm, inviting watercolor washes to create a vintage-style van complete with a cheerful striped awning.
How-To Guide
Materials
- Cold press watercolor paper (300 gsm)
- HB pencil and eraser
- Waterproof fine liner pens (sizes 0.1 and 0.3, black)
- Watercolor paints (Yellow Ochre, Burnt Sienna, Cadmium Orange, Sepia, Payne’s Grey)
- Small round watercolor brushes (size 2 and 4)
- Ruler (optional, but helpful for the awning)
- Paper towel
- Water jar
Step 1: Drafting the Sketch
-
Establish the basic shape:
Start with a light pencil sketch to block out the main rectangular body of the truck. Angle the front hood downward slightly to give it that classic vintage van profile, ensuring the perspective recedes gently to the right. -
Add the wheels and windows:
Sketch two ellipses for the wheels—one at the front and one near the back. Draw the squarish windshield and the large service window on the side, leaving space above the service window for the awning structure. -
Detail the awning:
Draw the awning projecting from the side of the truck. Use your ruler if you like straight lines, but a freehand line adds character. Divide the awning into equal strips that follow the curve of the fabric. -
Refine the interior:
Lightly sketch the suggestion of baked goods inside the service window—just simple rounded shapes for buns and loaves will do. Add the counter shelf jutting out below the window.
Uneven Awning Stripes?
Don’t stress if your orange paint bleeds into the white stripes. Once dry, go over the white stripes with opaque white gouache or a white gel pen to clean up the edges and restore the crisp contrast.
Step 2: Inking the Outlines
-
Outline the main body:
Using a 0.1 waterproof fine liner, go over your pencil lines. Keep your hand loose; broken or slightly wobbly lines enhance the illustrative feel. Don’t close every single gap, especially around corners. -
Add texture marks:
Draw the corrugated textures typical of these vintage vans. Add short, vertical hatch marks along the side panels and faint horizontal lines near the bumper. Keep these lines very thin and delicate. -
Darken the tires:
Switch to a 0.3 pen for the tires to give them weight. Fill in the deepest shadows under the wheel wells with solid black ink, leaving the hubcaps white for now. -
Lettering:
Carefully ink the small lettering on the side of the truck. If you’re nervous about handwriting, penciling guidelines first is a must. Erase all pencil marks once the ink is completely dry.
Level Up: Menu Board
Draw a tiny A-frame chalkboard standing on the ground next to the truck. Paint it black and use a white gel pen to scribble a tiny ‘Today’s Special’ menu for extra storytelling.
Step 3: Watercolor Washes
-
Painting the awning:
Mix a vibrant Cadmium Orange. Carefully paint every other stripe on the awning. While the orange is wet, you can drop in a tiny touch of Burnt Sienna at the bottom edges to suggest shadow and fold depth. -
Body color foundation:
Create a very watery wash of Yellow Ochre with a tiny dot of Sepia to get a creamy beige. Apply this over the entire body of the truck, working quickly to avoid hard edges. Leave the headlights and hubcaps unpainted. -
Adding shadows:
While the beige wash is still slightly damp, drop a slightly darker, grayish-brown mix (Sepia + Payne’s Grey) along the bottom edge of the truck and under the countertop shelf to create soft form shadows. -
The interior bakery:
Paint the bread shapes inside the window using varying concentrations of Burnt Sienna and Ochre. Keep these loose and abstract—they don’t need to be perfect loaves, just warm, golden shapes. -
Window reflections:
For the windshield and side window glass, use a very diluted Payne’s Grey. Paint diagonal strokes, leaving white paper gaps to look like reflections on the glass surface.
Step 4: Final Details
-
Dark accents:
Use a stronger mix of Payne’s Grey and Sepia to paint the tires (avoiding the hubcaps) and the dark interior background behind the bread. This high contrast will make the warm colors pop. -
Hubcaps and lights:
Add a tiny touch of diluted blue-grey to the hubcaps for a metallic sheen. Paint the turn signal lights with a dot of pure orange. -
Cast shadow:
Mix a cool grey wash and paint a shadow on the ground beneath the tires and the body of the truck. Soften the edges of this shadow with a clean, damp brush so it fades out naturally. -
White highlights:
If you lost any highlights, use a white gel pen or opaque white gouache to add sparkles to the headlights, window glass, and chrome bumpers.
Now you have a charming little mobile bakery ready to serve imagination on paper


Roof-Mounted Food Icon Topper
This charming pen-and-ink illustration captures a whimsical vintage food truck carrying a giant donut cargo. Using stippling and hatching techniques, you’ll create satisfying texture and depth on a warm cream paper.
Detailed Instructions
Materials
- Cream or off-white drawing paper (smooth bristol or sketchbook paper)
- HB or 2H graphite pencil
- Kneaded eraser
- Fine liner pens (sizes 005, 01, 03, and 05)
- Ruler
Step 1: Pencil Sketching
-
Block out the main shapes:
Start lightly with your HB pencil. Draw a rectangular box for the truck body and a slightly slanted rectangular prism for the hood area. -
Add the giant donut:
Position a large oval hovering slightly above the roof. Draw a smaller oval inside for the hole, and add a wavy line running through the center to define the frosting edge. -
Detail the truck structure:
Refine the truck’s shape by adding the wheel wells, the door frame, and the serving window on the side. Draw the roof line slightly wider than the body to create an overhang. -
Draw the awning and wheels:
Sketch a scalloped edge for the serving window awning. Add two circles for the wheels, drawing smaller concentric circles inside for the hubcaps and tires. -
Finalize pencil details:
Add the windshield, headlights, grill, and the side mirrors. Don’t worry about perfect straight lines; a little hand-drawn wobble adds character.
Step 2: Inking Outlines
-
Outline the donut:
Using an 03 pen, trace the outer edge of the donut and the donut hole. Switch to an 01 pen for the wavy frosting line to keep it delicate. -
Ink the truck body:
Use the 05 pen for the main silhouette of the truck to give it weight. switch to the 03 pen for internal structural lines like the door and window frames. -
Define the details:
With an 01 pen, carefully ink the grill, headlights, and the scallops on the awning. Be precise with the wheel circles. -
Erase pencil guides:
Wait until the ink is completely dry to avoid smudging, then gently lift all graphite lines with your kneaded eraser.
Ink Smudging?
If your ink smudges when erasing pencil lines, the ink wasn’t dry enough. Wait at least 15 minutes before erasing, or test surface dryness by lightly tapping a clean finger on a heavy ink area.
Step 3: Shading and Texture
-
Stipple the donut:
This is where patience pays off. Using the 005 or 01 pen, add tiny dots to the ‘cake’ part of the donut beneath the frosting line. Cluster them denser near the bottom for shadow. -
Add sprinkles:
Draw small, scattered ovals on the top of the donut for sprinkles. Leave the inside of the sprinkles white. -
Texture the frosting:
Add very sparse stippling on the top of the donut frosting to suggest roundness, keeping the highlight areas completely clean. -
Shade the truck overhang:
Use tight vertical hatching lines under the roof overhang and under the serving window counter to create deep shadows with an 01 pen. -
Detail the wheels:
Fill in the tires with dense cross-hatching or stippling to make them look dark and rubbery, leaving the rims light. -
Ground the vehicle:
Draw diagonal hatching lines underneath the truck and wheels to cast a shadow on the ground, anchoring the vehicle so it doesn’t look like it’s floating. -
Final contrast check:
Step back and look at your drawing. I usually find I need to darken the area right under the donut to make it pop against the roof.
Level Up: Menu Board
Add a small A-frame chalkboard sign next to the truck with tiny distinct lettering. You can write ‘Donuts’ or a daily special to add narrative to your scene.
Now you have a delightful ink drawing ready to be framed or gifted to a sweet-toothed friend

PENCIL GUIDE
Understanding Pencil Grades from H to B
From first sketch to finished drawing — learn pencil grades, line control, and shading techniques.
Explore the Full Guide
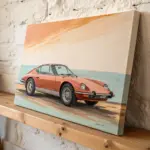
Color Scheme Challenge: Warm, Cool, or Mono
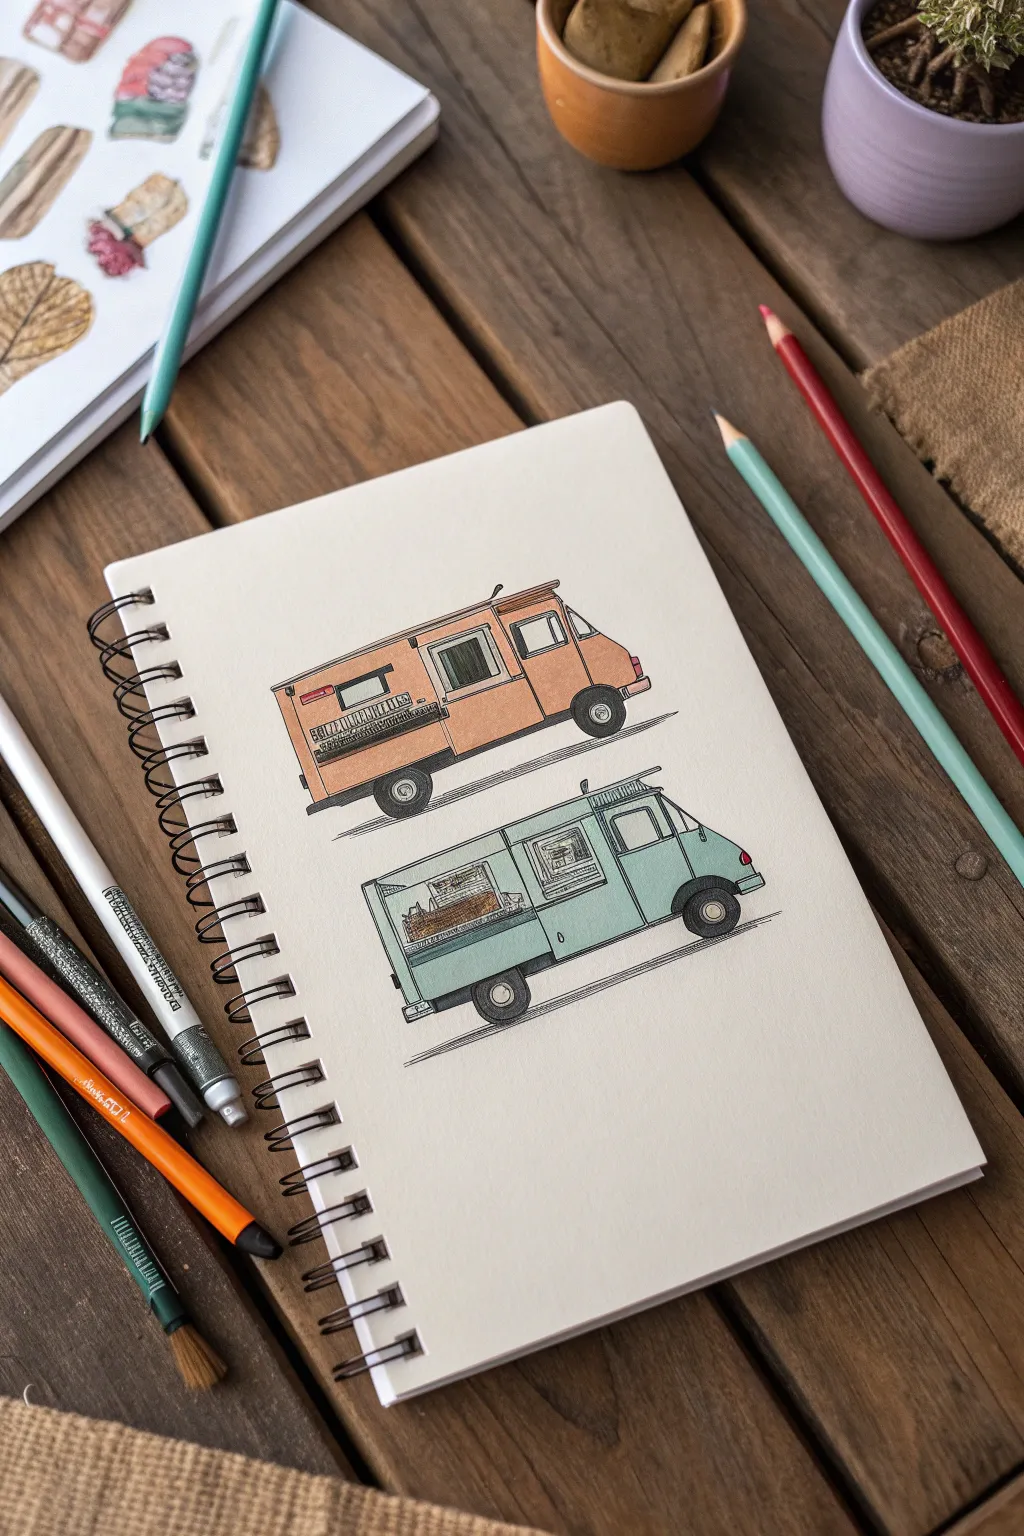

This project explores how color temperature shifts the personality of an illustration by drawing two identical food truck designs in contrasting palettes. You’ll create a clean, graphic layout featuring a warm terracotta truck stacked above a cool sage green version on crisp white paper.
Detailed Instructions
Materials
- Spiral-bound sketchbook (smooth or mixed media paper)
- Graphite pencil (HB or H for sketching)
- Fine liner pens (Black, sizes 0.1, 0.3, and 0.5)
- Colored pencils or alcohol markers (Terracotta/Burnt Sienna, Sage Green/Mint)
- Grey marker or pencil (for wheels and details)
- Ruler
- Eraser
Step 1: Drafting the Shapes
-
Set up your workspace:
Begin by orienting your sketchbook vertically. You want enough space to stack two vehicles with breathing room between them. Use a ruler to lightly mark a baseline for the top truck about a third of the way down the page. -
Block in the first truck body:
Draw the main chassis of the top truck using a rectangular box shape. Add a slight slant to the front windshield area to make it look aerodynamic, similar to a classic step van profile. -
Refine the details:
Sketch the wheel wells, the large service window on the side, and the driver’s side door. Keep your pencil pressure very light so these lines can be easily erased later. -
Duplicate the design:
Measure a gap of about 2 inches below your first drawing. Recreate the exact same truck outline here. I find it helps to use vertical guidelines to ensure the bumpers and wheels align perfectly with the truck above. -
Add structural features:
On both sketches, add the smaller details: the roof vents, the side mirrors, the bumper bars, and the serving counter inside the window. Don’t worry about shading yet; just focus on the line work.
Keep it Sharp
Sharpen your colored pencils every few minutes while shading. A fine point allows you to get into the tiny corners of the windows and wheel wells without smudging outside the lines.
Step 2: Inking the Outlines
-
Outline the main body:
Switch to a 0.5mm black fine liner. Carefully trace the outer perimeter of both trucks. Use your ruler for the long straight lines of the roof and chassis to keep that crisp, architectural look. -
Define interior details:
Using a thinner 0.3mm pen, ink the windows, door frames, and service counters. The contrasting line weights will give your drawing professional depth. -
Details and texture:
Switch to your finest 0.1mm pen. Add texture lines to the grill, the vents on the side, and the hub caps. Add tiny hatch marks on the serving window awning to suggest fabric or corrugated metal. -
Erase pencil lines:
Wait at least five minutes for the ink to set completely. Gently erase all your graphite guidelines until you have two clean black-and-white line drawings.
Step 3: Applying the Color Challenge
-
Start the warm truck:
For the top truck, select a warm terracotta or muted orange colored pencil. Color the main body evenly. Use a circular motion to avoid harsh directional streaks. -
Layering warmth:
Go back over the lower edges and corners of the orange truck with slightly more pressure to create a subtle shadow gradient. This adds volume to the flat shape. -
Start the cool truck:
For the bottom truck, pick a sage or mint green creates a refreshing contrast. Apply the base layer gently, keeping the coverage uniform across the metal panels. -
Shading cool tones:
Deepen the green color under the service window and near the wheel wells. If you have a second, darker green pencil, you can use it here for sharper definition. -
Coloring the technical parts:
Use a medium grey marker or colored pencil for the tires, bumpers, and side vents. Leave a tiny white highlight on the tires to make them look rubbery and three-dimensional. -
Window details:
Lightly shade the glass areas with a very pale blue or grey. Leave distinct white rectangles blank to represent reflections on the glass. -
Service counter warmth:
Color the ‘food’ or display items inside the service window with varied warm browns and yellows to make the interior look inviting. -
Grounding shadows:
Using a ruler and a fine black pen or grey marker, draw a series of horizontal hatch lines directly underneath the tires. This ground shadow prevents your trucks from looking like they are floating in space.
Uneven Color Coverage?
If your pencil shading looks patchy, use a colorless blender pencil or a white colored pencil to burnish the surface. This smooths out the grain and makes the color look solid like paint.
This simple exercise demonstrates how color choice alone can completely transform the vibe of your vehicle design
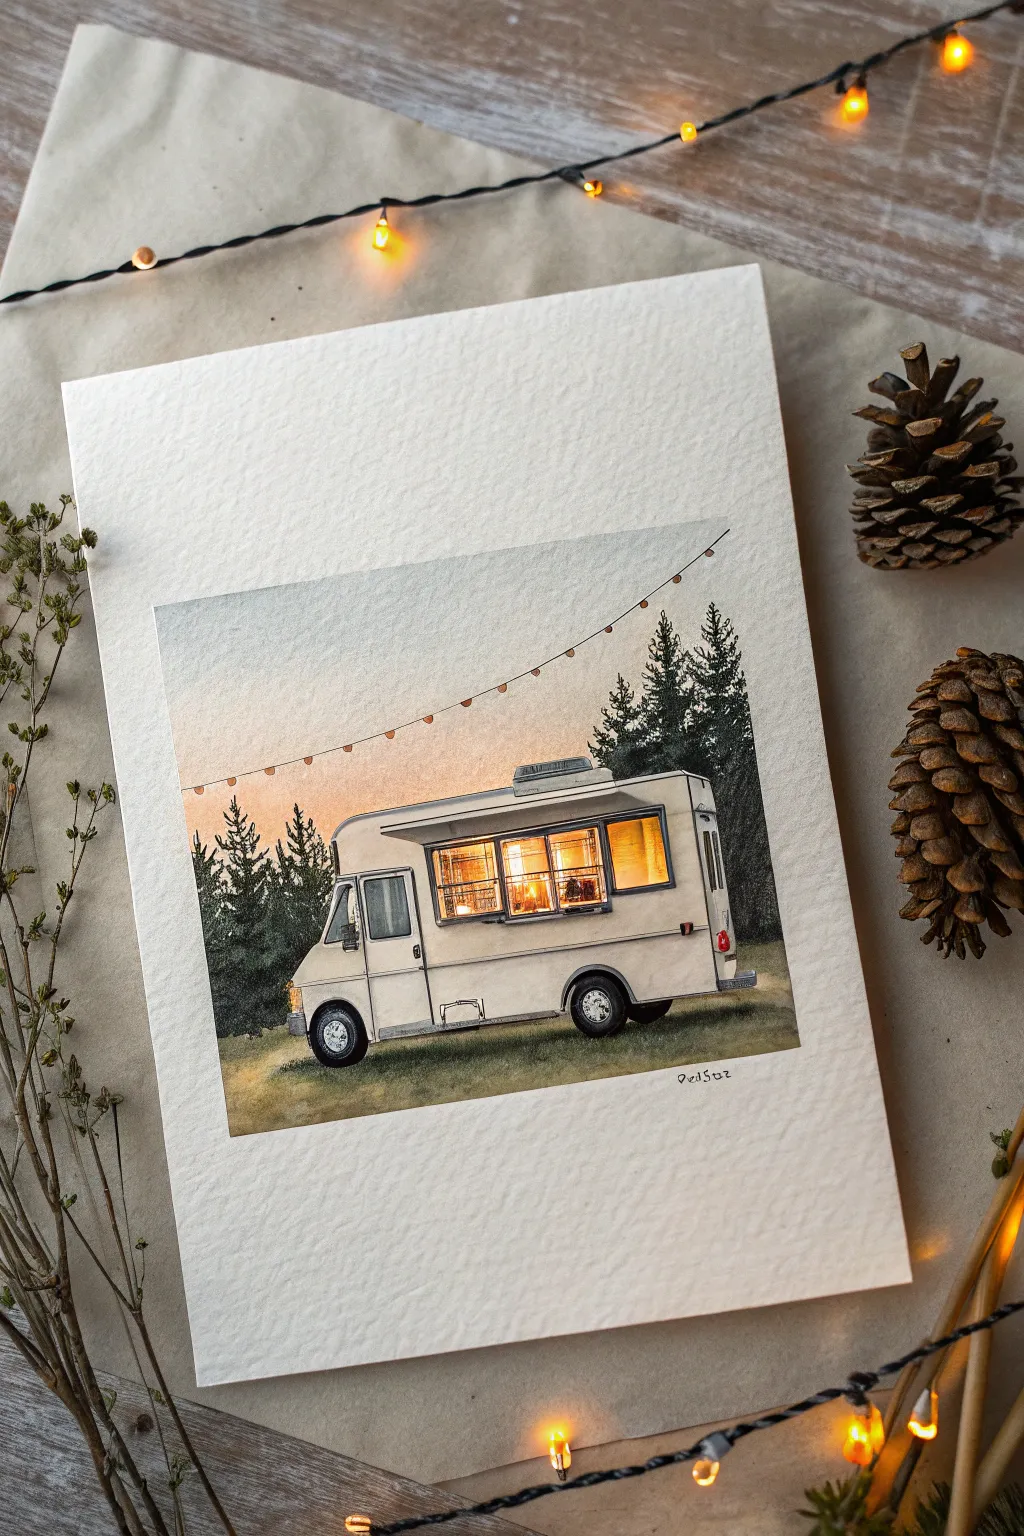
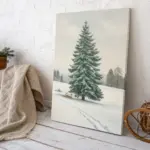
Night Market Food Truck With Glowing Lights

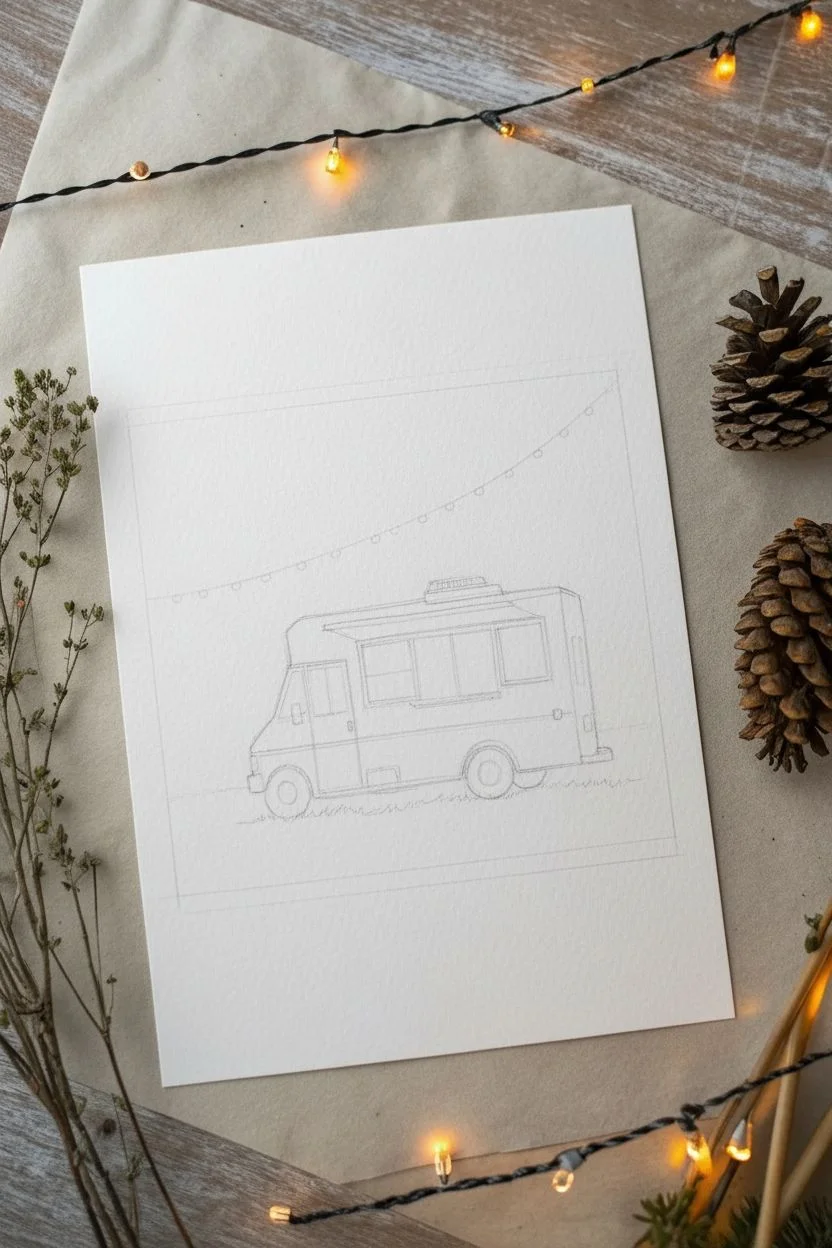
Capture the inviting glow of a vintage food truck at dusk with this atmospheric watercolor and gouache project. You will learn to balance warm interior lighting against a cool evening sky to create a serene, nostalgic scene.
Detailed Instructions
Materials
- Heavyweight cold-press watercolor paper (300gsm or higher)
- Masking tape
- Watercolor paints (Indigo, Payne’s Grey, Sap Green, Burnt Umber, Yellow Ochre, Cadmium Orange)
- White gouache paint
- Pencils (HB for sketching, 2B for details)
- Fineliner pens (0.1mm and 0.05mm, waterproof)
- Round watercolor brushes (Size 2, 4, and 8)
- Detail brush (Size 0 or 00)
- Ruler
Step 1: Sketching the Structure
-
Secure your paper:
Begin by taping the edges of your watercolor paper down to a board. Use a ruler to lightly mark a rectangular border in the center where your painting will live, leaving plenty of white space around the outside for a clean, framed look. -
Establish the horizon:
Sketch a faint horizon line about a third of the way up from the bottom of your rectangle. This ground line doesn’t need to be perfectly straight, as it represents a grassy field. -
Outline the truck body:
Using your HB pencil and ruler, draw the basic box shape of the food truck. Focus on the main angles—the flat roof, the slight slant of the windshield, and the rectangular service window on the side. Keep your lines light so they don’t show through the paint later. -
Add vehicle details:
Refine the sketch by adding the wheel wells, tires, bumper, and the AC unit on the roof. Crucially, sketch the string of lights swooping down from the upper right corner towards the truck’s roof, adding small circles for bulbs.
Step 2: Setting the Scene with Watercolor
-
Paint the sky:
Mix a very dilute wash of Indigo and a touch of Cadmium Orange separately. Wet the sky area with clean water first. Drop in the orange near the horizon for the sunset glow, and blend upward into the pale indigo for the evening sky. Let these colors bleed softly together. -
Create the grassy foreground:
Mix Sap Green with a little Burnt Umber for a muted, twilight grass color. Apply this wash to the ground area, darkening the mixture slightly right underneath the truck to suggest a shadow foundation. -
Paint the pine trees:
While the sky is dry, mix a dark, dense green using Sap Green and Payne’s Grey. Using the tip of your size 4 brush, dab in the textures of the pine trees in the background. Keep the edges ragged and natural, allowing some sky to peek through the branches.
Bleeding edges?
If paint bleeds under your tape, use a slightly damp, clean brush to gently scrub the pigment away, then dab with a paper towel. For crisp lines next time, press the tape edge firmly with a bone folder.
Step 3: The Glowing Interior
-
Warm up the windows:
This is the most critical step for the ‘glow’ effect. Use concentrated Cadmium Orange and Yellow Ochre to fill the service window and the windshield. Paint wet-on-dry to keep the edges sharp. Leave tiny flecks of white paper inside the window to represent bright light bulbs or reflections. -
Paint the truck body:
Mix a very pale, creamy grey wash. Carefully paint the body of the truck, avoiding the windows and tires. While it’s still damp, drop slightly darker grey shadow along the bottom edge and under the service window ledge to give the vehicle volume. -
Detail the interior:
Once the orange window paint is dry, use a small brush with Burnt Umber to suggest shapes inside—shelves, counters, or jars. Keep these abstract; the suggestion of clutter is enough to look realistic.
Level Up: Menu Board
Use your finest 0.05mm pen to write legible microscopic text on a tiny sandwich board sign outside the truck. Adding ‘Today’s Special’ gives the scene a lively narrative.
Step 4: Details & Determining Contrast
-
Ink the outlines:
Switch to your waterproof fineliners. Carefully trace the main lines of the truck, the window frames, and the tires. Use a broken, organic line for the trees and grass texture to keep them looking natural compared to the geometric truck. -
Darken the tires and undercarriage:
Use Payne’s Grey or black watercolor to fill in the tires and the deep shadows under the chassis. I prefer to leave the wheel hubs white or light grey for contrast. -
Add the string lights:
Draw the wire for the hanging lights with a fine pen. For the bulbs, start with a dot of yellow watercolor, and once dry, add a tiny dot of white gouache in the center of each to make them look like they are shining. -
Highlight with gouache:
Using your smallest brush and white gouache, add sharp highlights to the metal rims, the window edges, and the roof vent. These opaque white touches make the surface look like metal. -
Final foliage touches:
Deepen the shadows in the trees with a second layer of dark green mix to push them further into the background, making the illuminated truck pop forward. -
Sign and unmask:
Add your signature in small, neat script below the painted area. Wait until the paper is completely bone-dry before slowly peeling off the masking tape at a 45-degree angle to reveal your crisp, white border.
Step back and admire the cozy atmosphere you’ve created with just a few colors and careful lighting


Have a question or want to share your own experience? I'd love to hear from you in the comments below!