
If you’ve been craving fresh football painting ideas, you’re in the right headspace—this theme is packed with texture, motion, and bold shapes. I love how a simple pigskin can swing from cozy fall decor to high-energy action art depending on your color choices and brushwork.
Touchdown Catch Silhouette at Golden Hour
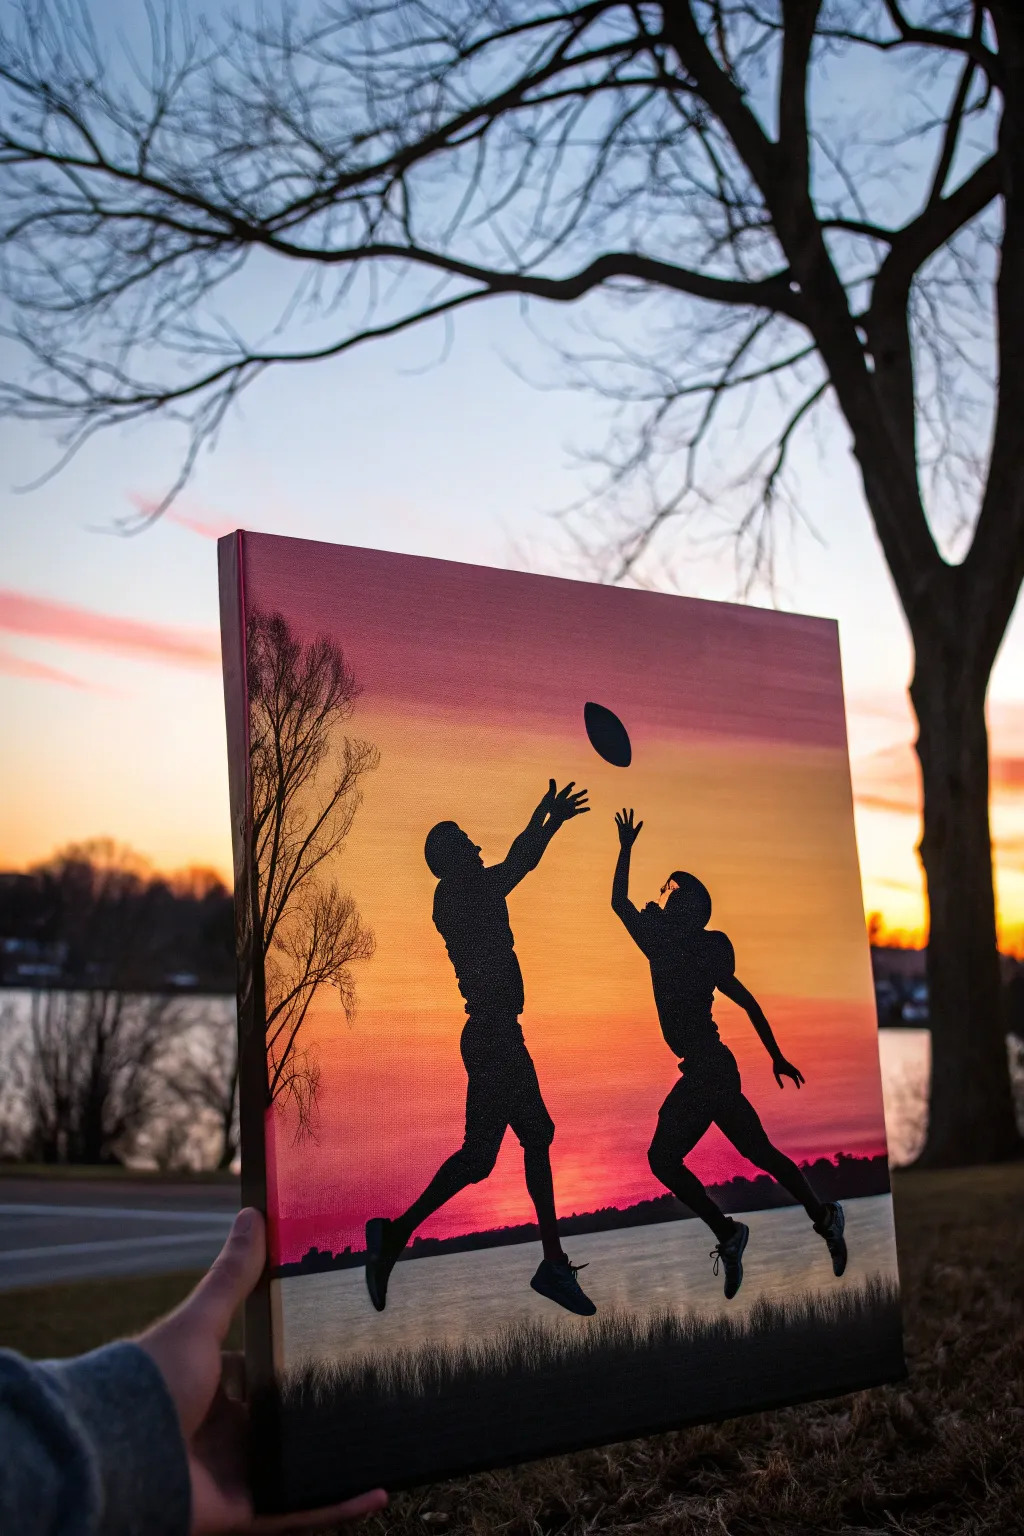
Capture the thrill of a game-winning catch against a breathtaking sunset with this vibrant acrylic painting. The striking contrast between the glowing sky and the crisp black silhouettes creates a dramatic, professional-looking piece perfect for any sports fan’s room.
How-To Guide
Materials
- Rectangular stretched canvas (e.g., 16×20 inches)
- Acrylic paints: Titanium White, Cadmium Yellow, Orange, Magenta (or Crimson), Phthalo Blue (for mixing darks), and Mars Black
- Large flat brush (1-2 inch) for blending background
- Medium flat brush
- Small round detail brush (size 0 or 1)
- Pencil and eraser
- Carbon transfer paper (optional)
- Reference photo of football players
- Palette or paper plate
- Water cup and paper towels
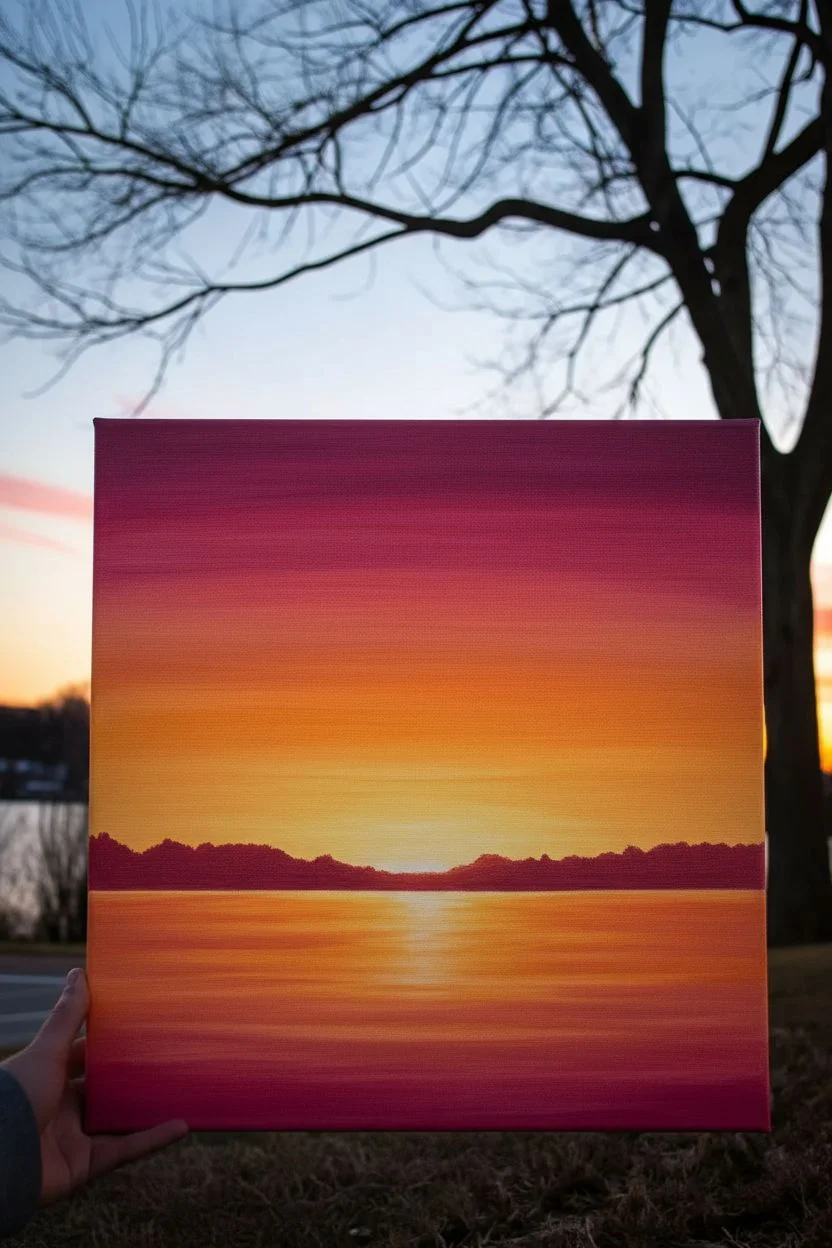
Step 1: Creating the Sunset Gradient
-
Prepare the canvas:
Start with a clean canvas. If you want a smoother surface for your silhouettes later, you can apply a quick coat of gesso and sand it lightly once dry, though standard store-bought canvases are usually ready to go. -
Mix your sunset colors:
Squeeze out your yellow, orange, magenta, and a bit of white onto your palette. You want plenty of paint available because blending acrylics requires working while the paint is still wet. -
Paint the top sky:
Using your large flat brush, start at the very top of the canvas with a mix of magenta and a tiny touch of blue or purple to deepen it slightly. Paint horizontally across the top 2-3 inches. -
Transition to pink:
Without cleaning the brush entirely, dip into the pure magenta. Paint the next section down, overlapping slightly with the darker top layer. Use long, horizontal strokes to blend them where they meet. -
Add the orange tones:
Wipe your brush on a paper towel, then pick up the orange paint. Continue moving down the canvas, blending the orange up into the pink. I find that working quickly here helps avoid hard lines. -
Blend into yellow:
Clean your brush thoroughly. Load it with bright yellow and paint the area just above the horizon line (about the bottom third of the canvas). Blend this wet yellow up into the orange for a glowing effect. -
Create the water reflection:
For the bottom section representing the water, reverse your gradient. Start with yellow just below the horizon, moving into orange, and finally pink/magenta at the very bottom. Keep the strokes horizontal to mimic water texture. -
Let it dry completely:
The background needs to be bone dry before you add any silhouettes. Depending on the thickness of your paint, give it at least 30-60 minutes.
Paint drying too fast?
If your acrylics are drying before you can blend the sunset, mix a little ‘slow drying medium’ or ‘retarder’ into your paint. A light mist of water can also help keep the canvas workable.
Step 2: Designing the Scene
-
Establish the horizon:
Using a ruler and a pencil, lightly draw a straight horizon line across the canvas where the sky meets the water. This should be roughly in the lower third of the painting. -
Sketch the distant shore:
Above your horizon line, sketch a very low, uneven line to represent distant trees or land. Keep this simple; it’s just a base for the black paint later. -
Outline the players:
Lightly sketch the two football players and the ball. You can freehand this looking at the reference, or print out a silhouette image, place carbon paper underneath, and trace the shapes directly onto the canvas for precision. -
Add foreground elements:
Sketch a large, detailed tree on the left side and some grass textures at the very bottom edge where the water ends. This frames the composition nicely.
Step 3: Painting the Silhouettes
-
Paint the distant land:
Using Mars Black and a medium flat brush, fill in the strip of distant land along the horizon line. Keep the top edge slightly jagged to suggest trees. -
Fill in the players:
Switch to a smaller brush for control. Fill in your player sketches with solid black. Be careful around the fingers and helmets; sharp edges are crucial for recognizable silhouettes. -
Refine the football:
Paint the football in the air. Make sure it is an oval shape and clearly separated from the players’ hands to show the moment before the catch. -
Paint the side tree:
On the left side, paint the trunk and main branches of the large tree. Use the very tip of your round brush to pull out thin, delicate twigs extending into the sky. -
Add grassy details:
along the very bottom edge of the canvas, use quick, upward flicking strokes with your small brush to create the look of tall grass in the foreground. -
Final touches:
Check for any patchy areas in the black paint. You might need a second coat of black on the players to make them completely opaque against the bright sunset.
Add a magical touch
For a ‘Friday Night Lights’ vibe, add tiny dots of white or light yellow along the distant horizon line to look like stadium lights or city buildings glowing in the distance.
Enjoy the feeling of triumph every time you look at your custom sports masterpiece


Quarterback Throw With Motion Streaks
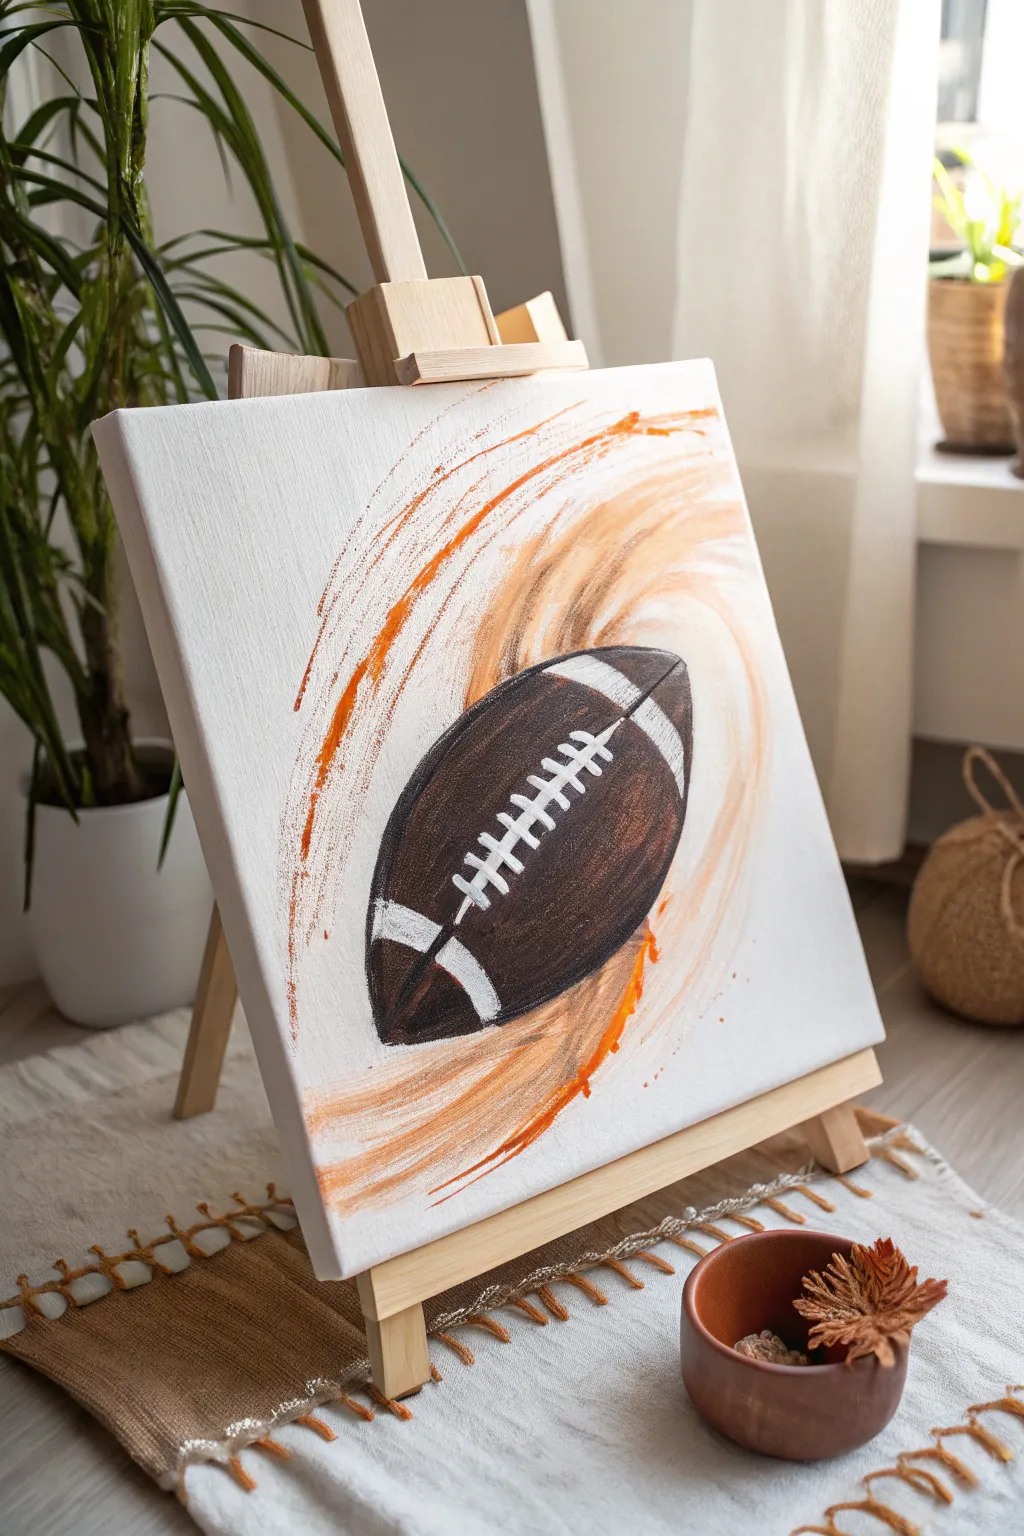
Capture the exciting energy of a perfect spiral pass with this dynamic acrylic painting. By combining a realistic football rendering with loose, gestural motion streaks, you’ll create a piece that feels alive with movement.
Detailed Instructions
Materials
- Stretched canvas (e.g., 8×10 or 11×14 inch)
- Acrylic paints (Dark Brown, Burnt Sienna, White, Black, Orange, Tan/Ochre)
- Pencil for sketching
- Flat shader brush (medium)
- Small round detail brush
- Palette or paper plate
- Cup of water and paper towels
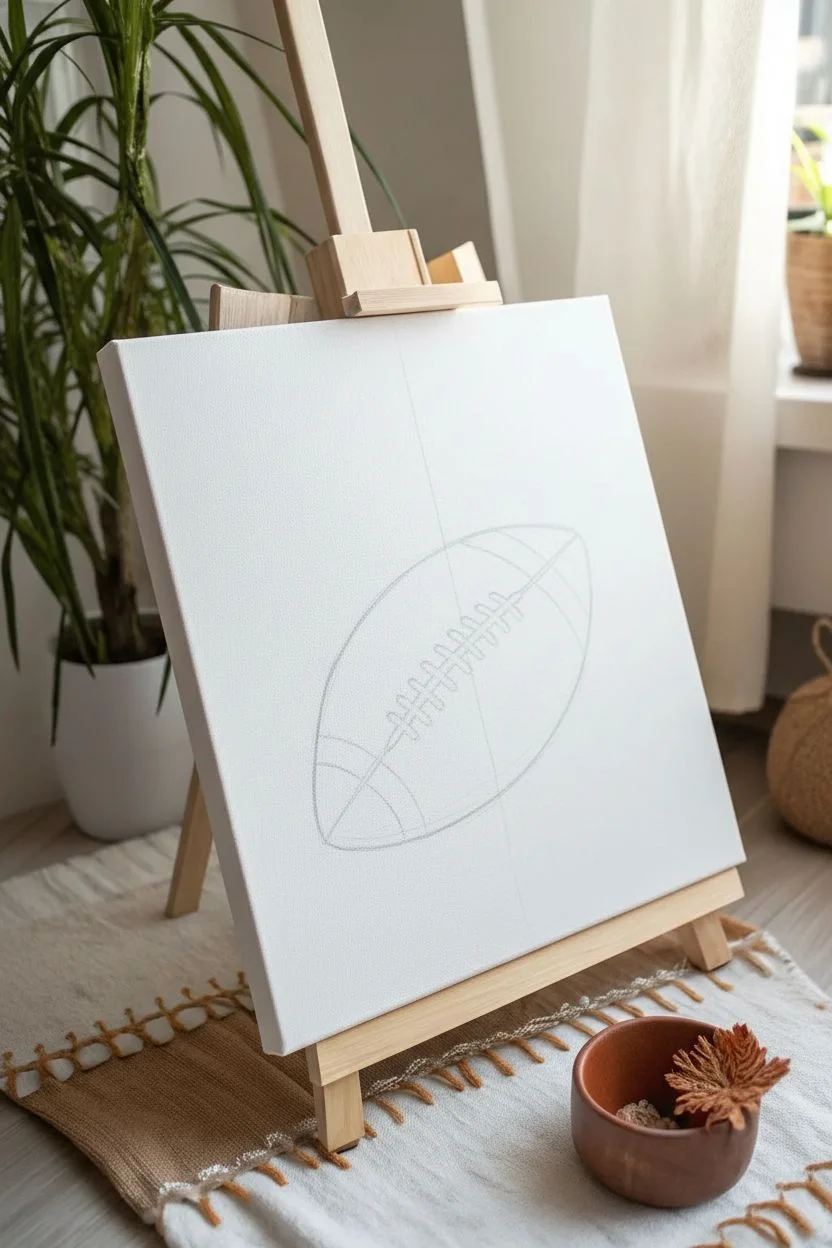
Step 1: Sketching the Shape
-
Mark placement:
Visualize the center of your canvas. You want the football to be flying diagonally, so lightly mark the top-right and bottom-left quadrants as your main axis. -
Draw the outline:
Using a pencil, draw a large oval shape on a diagonal tilt. It doesn’t need to be perfectly symmetrical; a slight point at the nose and tail helps define the football shape. -
Sketch the laces:
Lightly sketch two curved parallel lines running down the center-top of the ball for the white stripes. In the middle, mark the vertical line for the laces and the horizontal stitches crossing it.
Step 2: Painting the Football
-
Mix the base color:
Mix Dark Brown with a tiny touch of Burnt Sienna to create a rich leather tone. It should be dark but warm. -
Fill the form:
Using your flat shader brush, fill in the main body of the football with this brown mixture. Be careful to paint around the areas you marked for the white stripes and laces. -
Add shadows:
While the brown is still slightly wet, mix a drop of Black into your brown. Paint along the bottom curve of the football to create a shadow side, blending it gently upwards into the main color. -
Create highlights:
Clean your brush and pick up a lighter brown or mix a little Tan into your base color. Lightly brush the top curve of the football to suggest light hitting the leather surface. -
Paint the stripes:
Switch to a smaller brush. Using pure White, fill in the broad curved stripes near the nose and tail of the football. You might need two coats for opaque coverage. -
Detail the laces:
With your small detail brush and White paint, carefully paint the center vertical line of the laces, followed by the horizontal stitches across it. -
Refine edges:
If your white paint went outside the lines, use your dark brown mix to tidy up the edges around the stripes and laces for a crisp look.
Uneven Streaks?
If your motion lines look too heavy or like solid blocks, your brush is too wet. Dry it thoroughly on a towel and reload with very little paint to get that scratchy, fast texture.
Step 3: Adding the Motion
-
Prepare motion colors:
Squeeze out some Orange, Tan (or Ochre), and White. You want these colors accessible but not fully mixed together on the palette. -
Dry brush technique:
Use a dry flat brush—ensure it has no water in it. Dip just the tips of the bristles into the Orange and Tan paints simultaneously. -
First swirl:
Starting from the top right corner, sweep your brush in a fast, curved motion down towards the bottom left, following the curve of the football but not touching it yet. -
Adding texture:
Reload the brush sparingly. Add another swooping stroke *under* the football. The key here is speed; fast hand movements create rough, textured edges that look like motion. -
Layering lighter streaks:
Wipe your brush on a paper towel without washing it completely. Pick up some White and Tan paint. Add a few lighter streaks over the orange ones to create depth. -
Splatter effect:
I like to take a wet brush with watered-down orange paint and tap it against a finger to flick tiny droplets around the tail of the motion streak for extra energy.
Team Spirit
Swap the motion streak colors to match your favorite team’s palette. Use blue and green, or red and gold instead of the orange/tan mix to personalize the artwork.
Step back and admire the energetic movement you’ve captured on your canvas


Personalized Jersey Back With Number and Football
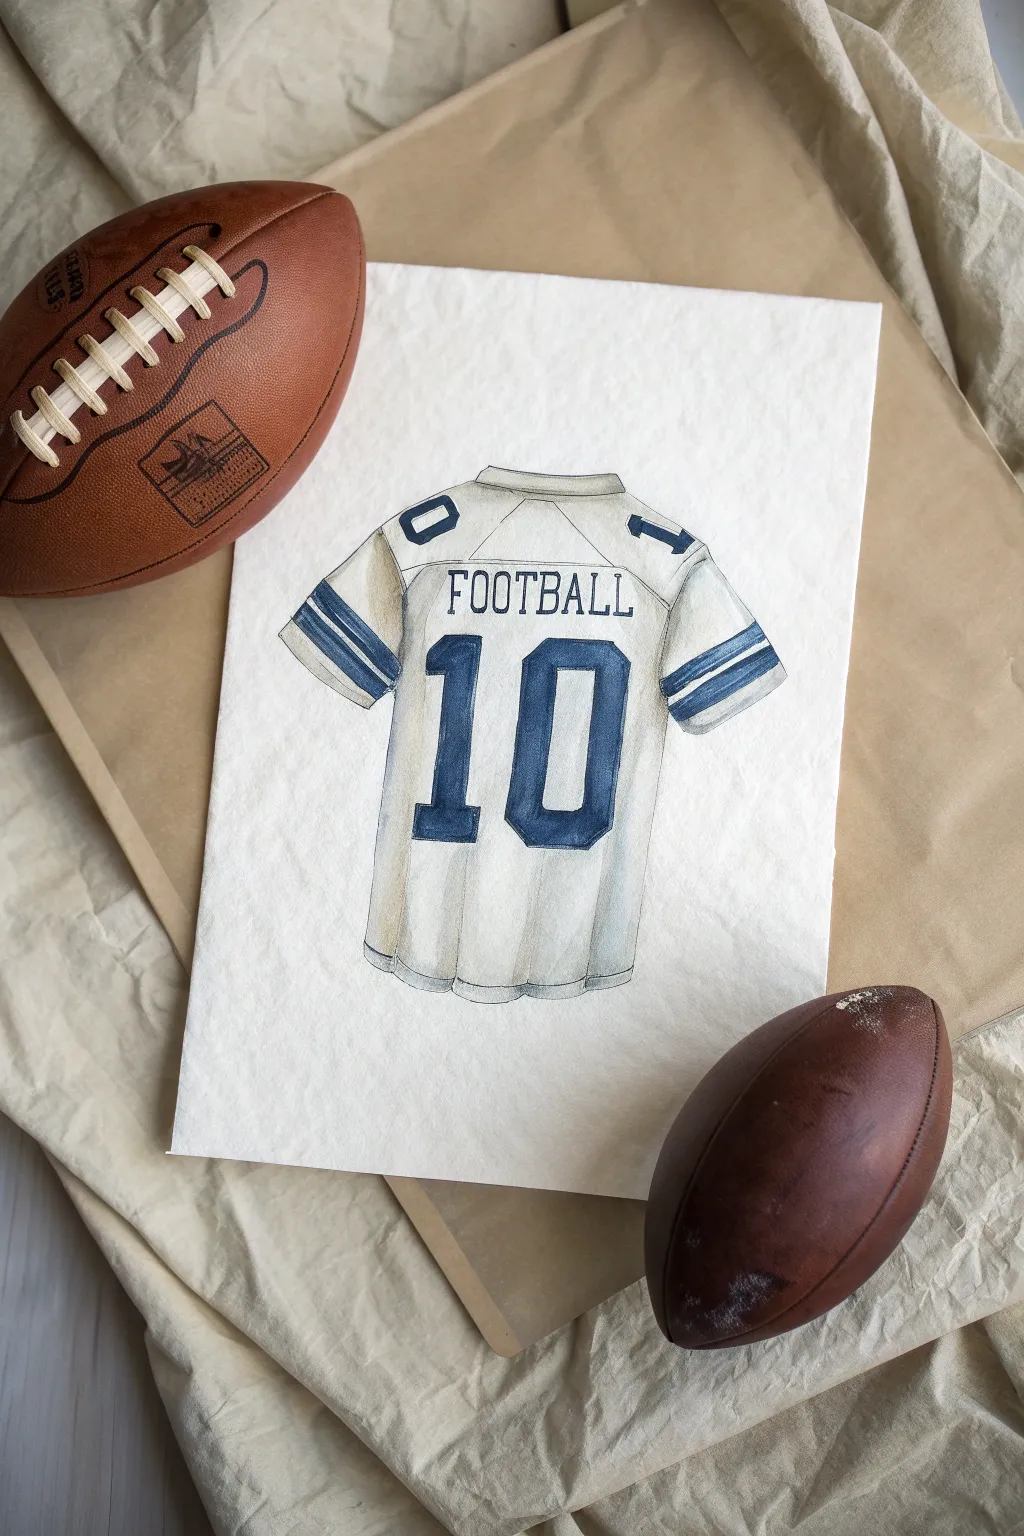
Capture the spirit of game day with this elegant watercolor illustration of a classic football jersey seen from behind. This tutorial guides you through creating crisp lettering, realistic fabric folds, and that iconic bold numbering for a personalized piece of sports art.
Detailed Instructions
Materials
- Cold press watercolor paper (white, heavyweight)
- Watercolor paints (Indigo Blue, Paynes Gray, Burnt Umber, Ivory Black)
- Pencil (HB or 2H)
- Kneaded eraser
- Fine liner pen (0.1mm or 0.3mm waterproof black)
- Ruler
- Round watercolor brushes (Size 2, 6, and 10)
- Masking tape
- Water cups and paper towels
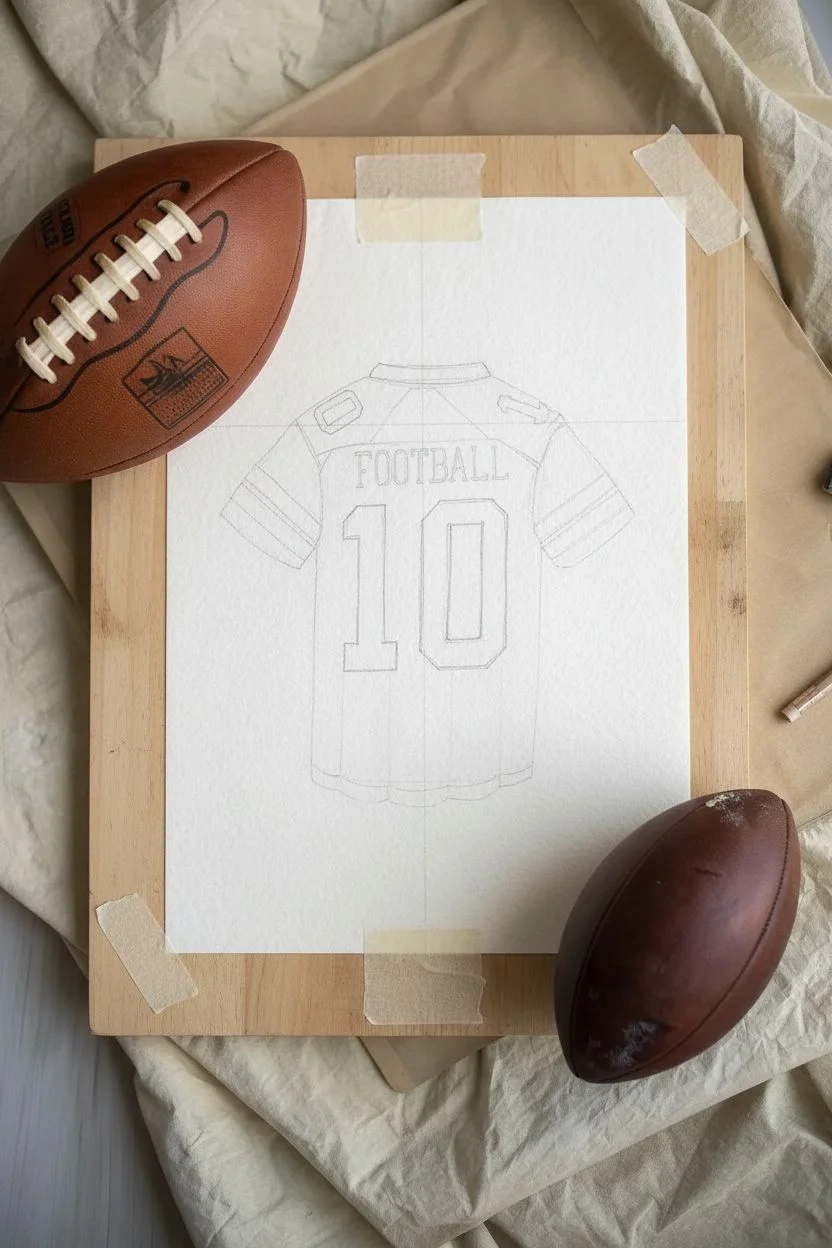
Step 1: Drafting the Design
-
Prepare your canvas:
Start by taping down your watercolor paper to a flat board. This prevents warping when we add water later. -
Lightly sketch the outline:
Using an HB pencil, draw the basic T-shape of the jersey. Keep the shoulders rounded and the sleeves slightly angled outward. -
Add construction lines:
Use a ruler to draw a very faint vertical center line. This is crucial for symmetry. Then, draw horizontal guide lines where the nameplate and numbers will sit. -
Block in the numbers:
Sketch the large ’10’ in the center. Make the font blocky with thick serifs. Ensure the ‘1’ and ‘0’ are equidistant from your center line. -
Adding the nameplate:
Above the numbers, lightly pencil in your chosen text (like ‘FOOTBALL’ shown here) in a simple sans-serif font. Space the letters evenly. -
Refining details:
Add the stripes on the sleeves and the stitching lines across the shoulders (the yoke). Draw gentle, wavy lines at the bottom hem to suggest loose fabric folds.
Bleeding Lines?
If your blue paint bleeds into the white jersey, wait for it to fully dry. Then, use white gouache or a white gel pen to crisp up the edges and overpaint the mistake.
Step 2: Inking the Lines
-
Trace with precision:
Now, take your waterproof fine liner pen. Carefully trace over your pencil lines. Keep your hand steady for the straight edges of the numbers. -
Varying line weight:
Use slightly broken or lighter lines for the internal fabric folds to keep them looking soft, while using firmer lines for the outer silhouette. -
Clean up:
Once the ink is completely dry—give it a few minutes—gently erase all the pencil marks with your kneaded eraser so the paper looks fresh.
Make it Real
Personalize the artwork by using the last name and jersey number of the specific player you are gifting it to, or replicate a local high school team’s colors.
Step 3: Painting the Details
-
Mixing the team color:
Mix a deep, rich blue using Indigo and a touch of Paynes Gray to dull it slightly. You want a classic navy or royal blue tone. -
Filling the numbers:
Using a size 6 brush, carefully paint inside the numbers. I prefer to work wetter here to avoid streak marks, pooling the pigment slightly for texture. -
Painting the stripes:
Switch to a smaller size 2 brush to paint the stripes on the sleeves and the small details on the shoulders. Keep edges crisp. -
Outline shadow:
Once the blue is dry, take very watered-down Paynes Gray. Paint a thin shadow line along the right and bottom edges of the blue numbers to give them a 3D appliquéd look.
Step 4: Creating Fabric Texture
-
Shadow wash:
Mix a very pale grey/beige wash using a tiny amount of Paynes Gray and Burnt Umber with lots of water. It should look almost clear. -
Painting folds:
Apply this pale wash to the areas where the fabric naturally bunches: under the armpits, along the side seams, and the waves at the bottom hem. -
Softening edges:
While the shadow paint is still wet, rinse your brush and run clean water along the edge of the shadow to blend it out seamlessly into the white paper. -
Final touches:
Add a few vertical streaks of the pale wash down the main body of the jersey to suggest the drape of the material.
Once dry, frame your sporty masterpiece to celebrate the season or gift it to your favorite fan


Bold Graffiti-Inspired Football Lettering
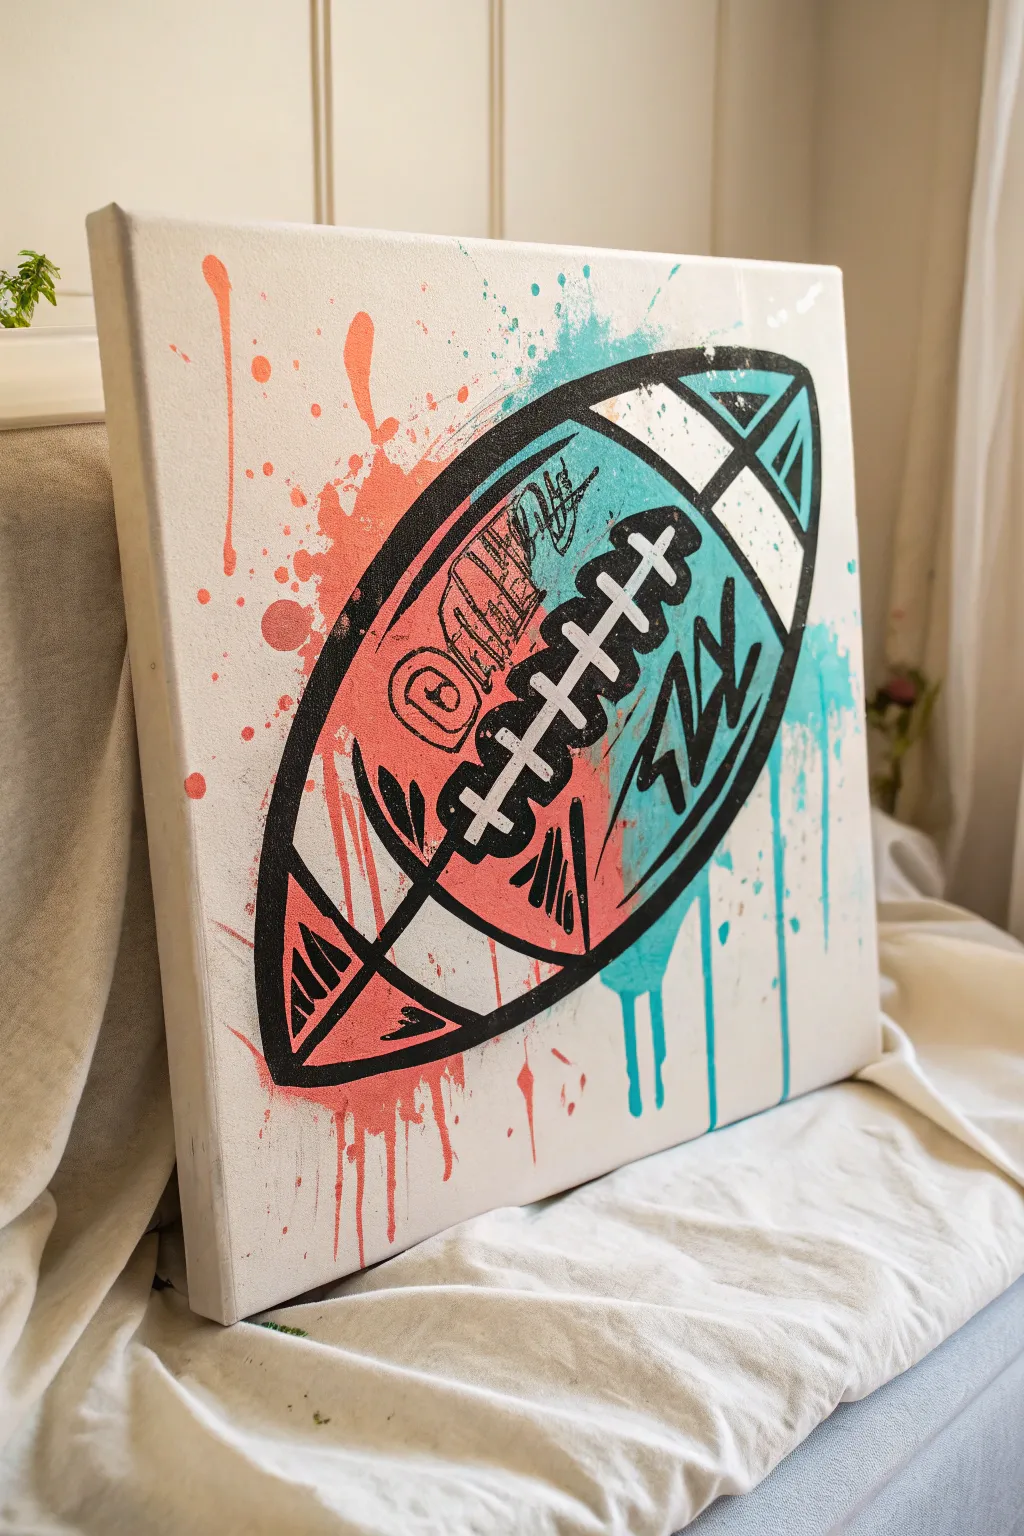
Capture the energy of the game with this vibrant, street-art inspired football painting that features bold outlines and explosive color splatters. By combining crisp stenciling with loose, freehand graffiti marks, you’ll create a piece that feels both structured and wildly energetic.
Detailed Instructions
Materials
- Square stretched canvas (approx. 16×16 inches or 20×20 inches)
- Acrylic paints: Salmon/Coral, Turquoise/Teal, Titanium White, Carbon Black
- Medium flat brush (approx. 1 inch)
- Small round detail brush (size 2 or 4)
- Black posca paint pen (broad tip) or permanent marker
- Pencil and eraser
- Ruler or straight edge
- Painters tape or masking tape
- Water cup and paper towels
- Large piece of cardstock or sketchbook paper (for stencil)
Step 1: Drafting the Design
-
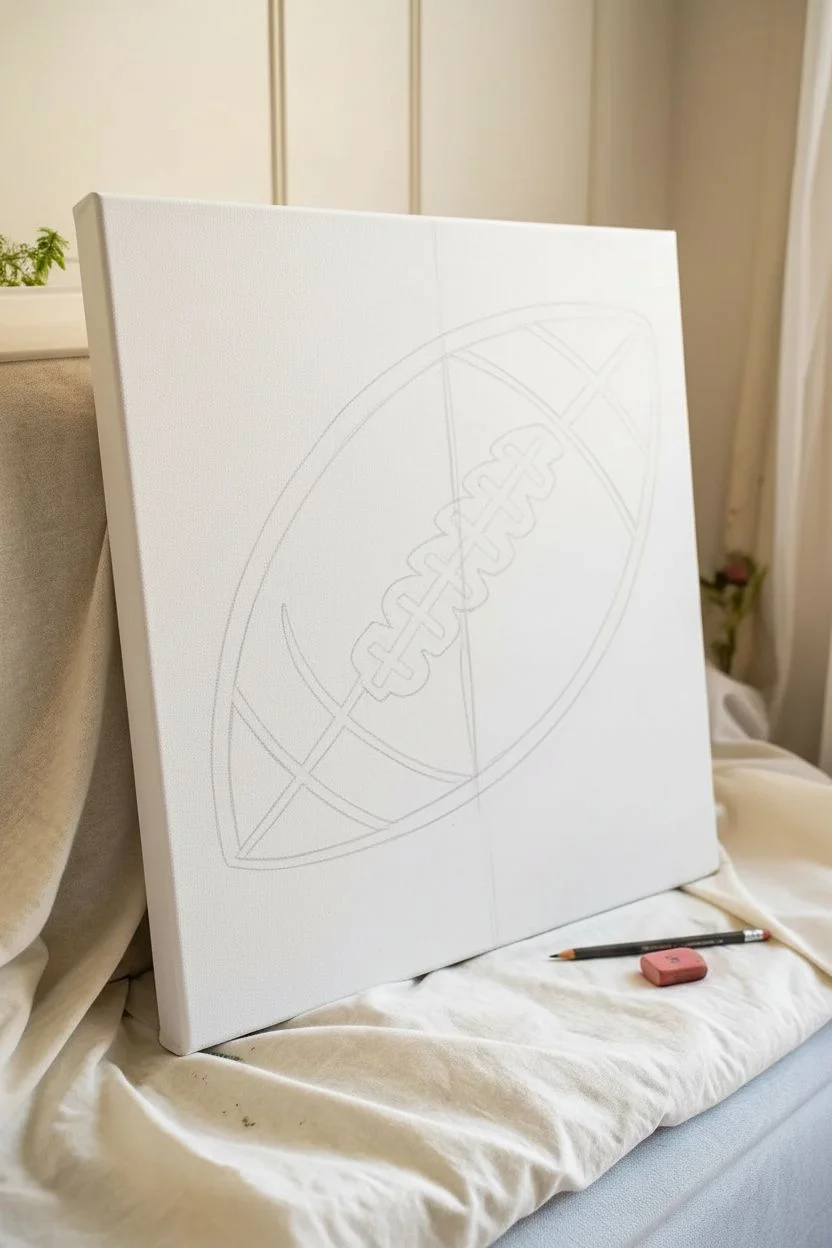
Sketch the football shape:
Begin by lightly sketching a large football shape diagonally across your canvas. Aim for a classic prolate spheroid shape, tilting it at about a 45-degree angle so it dominates the space. -
Mark the center division:
Draw a faint line down the center of the football shape to divide the background colors. This line doesn’t need to be perfectly straight; a slightly jagged or organic break adds to the graffiti feel. -
Map out the laces:
Sketch the laces in the center of the ball. Draw a long central line with about seven or eight perpendicular cross-stitched lines. Keep these chunky and distinct. -
Define the end stripes:
Add curved lines near the nose and tail of the football to create the classic stripes found on collegiate balls. These will later be painted white.
Paint bleeding under tape?
If you used tape for the stripes and paint bled under, don’t panic. The bold black outlines you add in the final phase are perfect for covering up any uneven edges.
Step 2: Explosive Color Background
-
Mix your colors:
Prepare your palette with a watery mixture of the salmon/coral paint and the turquoise paint. You want a consistency slightly thinner than heavy body acrylics to help with the dripping effects. -
Apply the salmon side:
Paint the left side of the football shape with your salmon color. Don’t worry about staying perfectly inside the lines yet; rough edges are part of the charm. -
Create the splatter effect:
Load your brush with watery salmon paint. Hold it near the canvas and tap the handle firmly with another brush or your finger to flick droplets onto the white background. I like to let a few larger drops run down vertically to create drips. -
Apply the turquoise side:
Repeat the process on the right side using the turquoise paint. Fill the main shape, then add splatters and drips extending outward toward the edge of the canvas on the right. -
Let it dry completely:
This step is crucial. Allow the paint to dry fully before moving on, otherwise your black lines will bleed into the wet color.
Step 3: Bold Outlines and Details
-
Outline the main shape:
Using black acrylic paint and a round brush (or a broad paint pen), trace the bold outer perimeter of the football. Make this line thick and confident, varying the width slightly for a hand-drawn look. -
Paint the white accents:
Fill in the two end stripes and the lace shapes with titanium white paint. You might need two coats to ensure the pink and blue underneath don’t show through. -
Outline the laces:
Once the white is dry, outline the lashes and central stitching with your black paint. Rather than perfect rectangles, give them slightly rounded or sketched corners. -
Add internal graffiti marks:
Use your smaller brush or paint marker to add scribble-style details inside the color zones. Think zags, hash marks, and loose scribbles that mimic street tags. -
Detail the stripes:
Inside the white stripes at the ends, add small black triangles or geometric shapes. These darken the ends and add visual weight to the design. -
Enhance the background:
If your background feels too sparse, add a few more intentional drips of turquoise or salmon running down from the bottom of the football shape. -
Final touches:
Review your black lines. If any paint splatters landed on top of your main black outline, touch them up with fresh black paint to bring the football to the foreground.
Pro Tip: Instant Texture
Add a tiny bit of water to your acrylics and flick the brush bristles with a toothbrush for fine mist splatters that look like spray paint overspray.
Hang your new artwork in a game room or bedroom to add a splash of athletic energy to the space
BRUSH GUIDE
The Right Brush for Every Stroke
From clean lines to bold texture — master brush choice, stroke control, and essential techniques.
Explore the Full Guide
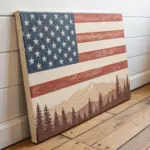
Vintage Blueprint Style Football and Helmet
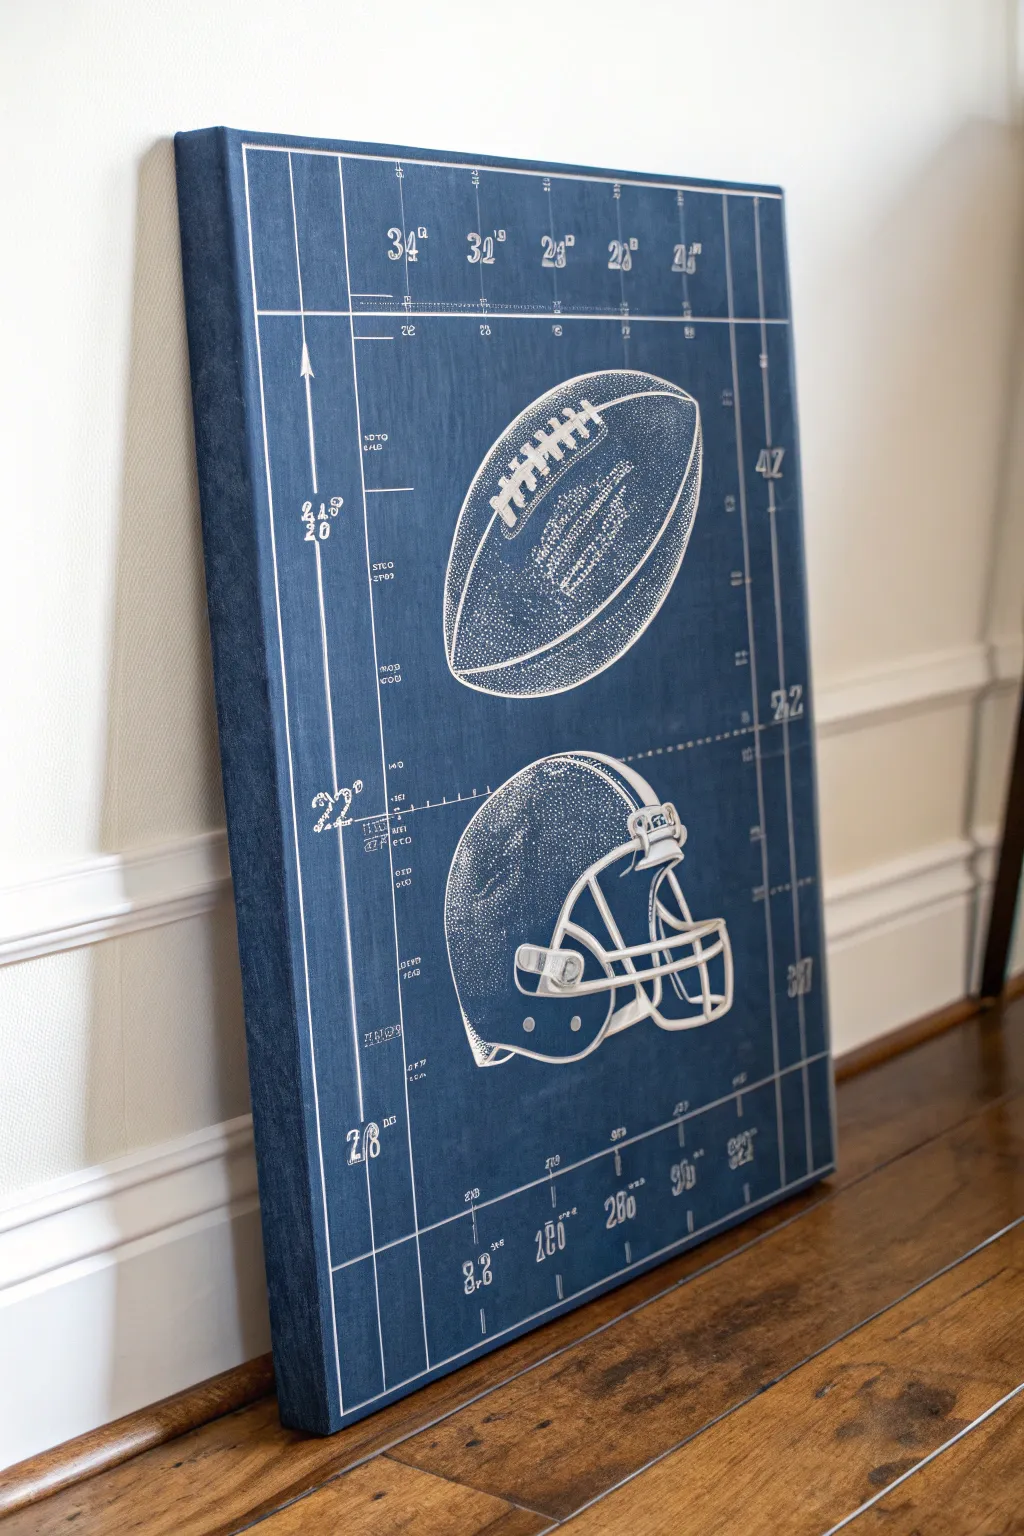
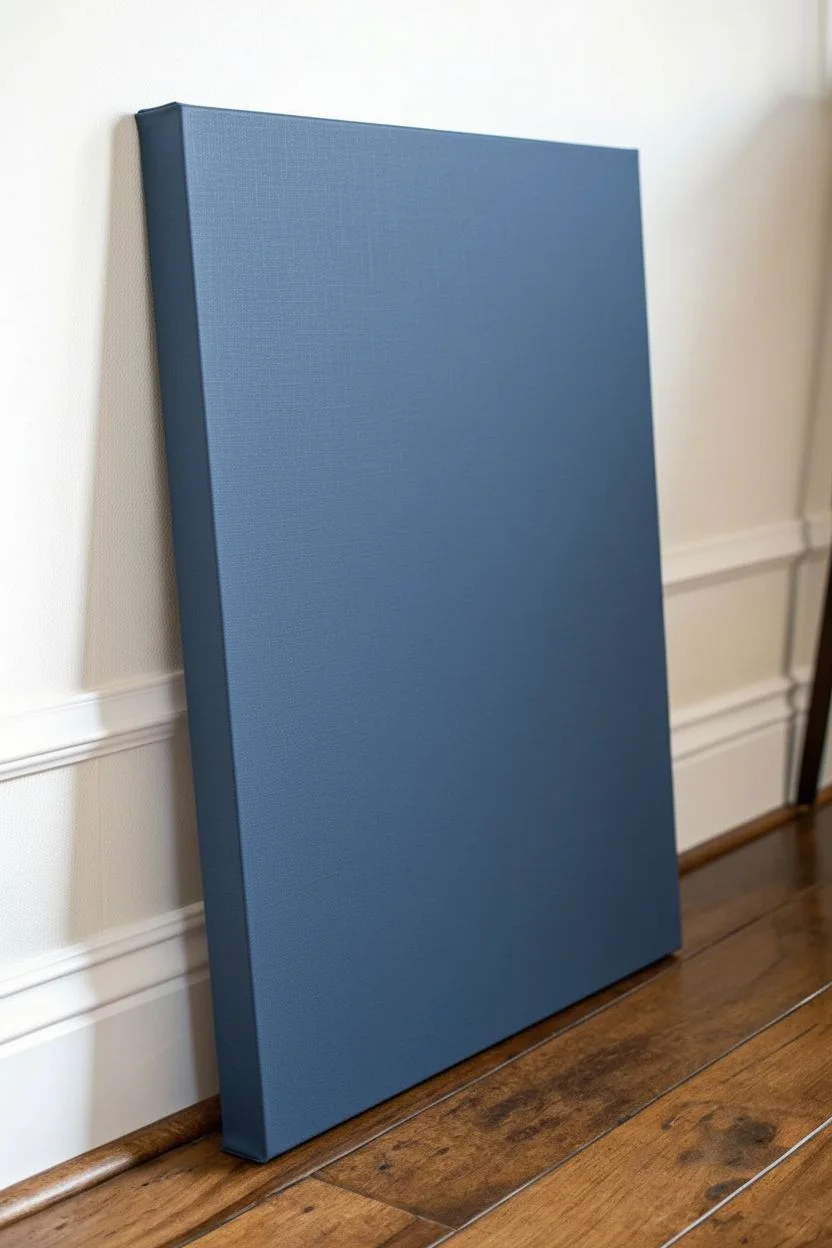
Capture the nostalgic spirit of the game with this technical-style artwork that mimics a vintage engineer’s blueprint. By layering white ink over a deep blue textured background, you can create a sophisticated piece of sports decor that looks high-end but is surprisingly approachable to DIY.
Detailed Instructions
Materials
- Large stretched canvas (at least 18×24 inches)
- Deep denim blue or navy acrylic paint (matte finish)
- White acrylic paint or white ink
- Medium flat paintbrush
- Fine-point white paint pen or gel pen (0.5mm and 1.0mm)
- White transfer paper or graphite paper
- Long ruler or T-square
- Pencil
- Computer and printer (for template)
- Painter’s tape
- Matte spray varnish
Step 1: Prepping the Canvas
-
Select your base color:
Choose a deep, dusty blue acrylic paint. To achieve that authentic ‘blueprint’ look, you want a color that isn’t too bright; think navy mixed with a tiny drop of slate grey. -
Apply the base coat:
Paint the entire front and sides of the stretched canvas with your blue paint. Use long, horizontal strokes to ensure even coverage. -
Add texture:
While the first coat is still slightly tacky, apply a second coat using a cross-hatching motion (painting vertically, then horizontally). This subtle texture mimics the old paper or fabric feel of vintage schematics. -
Let it cure:
Allow the canvas to dry completely, preferably overnight. A fully dry surface is crucial for crisp white lines later.
Straight Line Secret
If your hand is shaky, stick strips of painter’s tape along your pencil lines. Run your paint pen along the edge of the tape for a razor-sharp grid line.
Step 2: Designing the Layout
-
Find your reference imagery:
Search for vintage patent drawings or line art of a football and a helmet online. Print these images out scaled to size; you may need to tile them across several sheets of paper if your canvas is large. -
Position the main elements:
Tape your printed football and helmet images onto the canvas to determine spacing. The football usually goes on top at an angle, with the helmet below in profile view. -
Establish the grid:
Before tracing the items, use your long ruler and a faint pencil to lightly draw a border about 1.5 inches from the edge. Draw a vertical centerline and a few horizontal guides to divide the space. -
Transfer the art:
Slip sheet of white transfer paper under your printouts. Trace over the main lines of the football and helmet with a pencil to transfer the white outline onto the blue background.
Create a Worn Look
Dilute a bit of white paint with water to make a thin glaze. Lightly dry-brush this over the center of the canvas to mimic the fading of old blueprint paper.
Step 3: Inking the Blueprint
-
Draw the grid lines:
Using the thicker (1.0mm) white paint pen and your ruler, trace over your pencil grid lines. Go slowly to maintain a consistent line weight. -
Outline the objects:
Trace the main structural lines of the football and helmet with the 1.0mm pen. Focus on the silhouette, the laces, and the facemask bars. -
Add shading details:
Switch to the finer (0.5mm) pen. Use stippling (tiny dots) or fine cross-hatching to create shadows on the curve of the football and the side of the helmet. This creates that classic engraved look. -
Detail the helmet mesh:
Carefully draw tiny dots or a tight grid pattern inside the helmet shell area to simulate texture and reflection.
Step 4: Adding Technical Specs
-
Identify measurement points:
Blueprints are defined by their data. Mark small vertical dashes along your grid lines where measurements would theoretically go. -
Add arrows and leaders:
Draw long, thin arrows pointing to specific parts of the equipment (like the chin strap or the football point). Keep these lines very straight and thin. -
Lettering:
Using your best architectural handwriting (all caps, very upright), add numbers near your hash marks. Add random dimensions like ’34º’ or ‘2.8’ to make it look technical. -
Add header info:
Near the top border, add a row of numbers or a ‘FIG. 1’ label to enhance the patent aesthetic. -
Erase guidelines:
Once the ink is 100% dry (give it an hour), gently erase any visible pencil marks with a kneaded eraser. -
Seal the artwork:
Take the canvas outside and spray it with a matte varnish. This unifies the sheen of the paint and the ink, making it look like a printed piece.
Now you have a striking piece of industrial-style art ready to hang in the den or giving to your favorite sports fan
Minimalist Line Art Football With One Bold Stripe
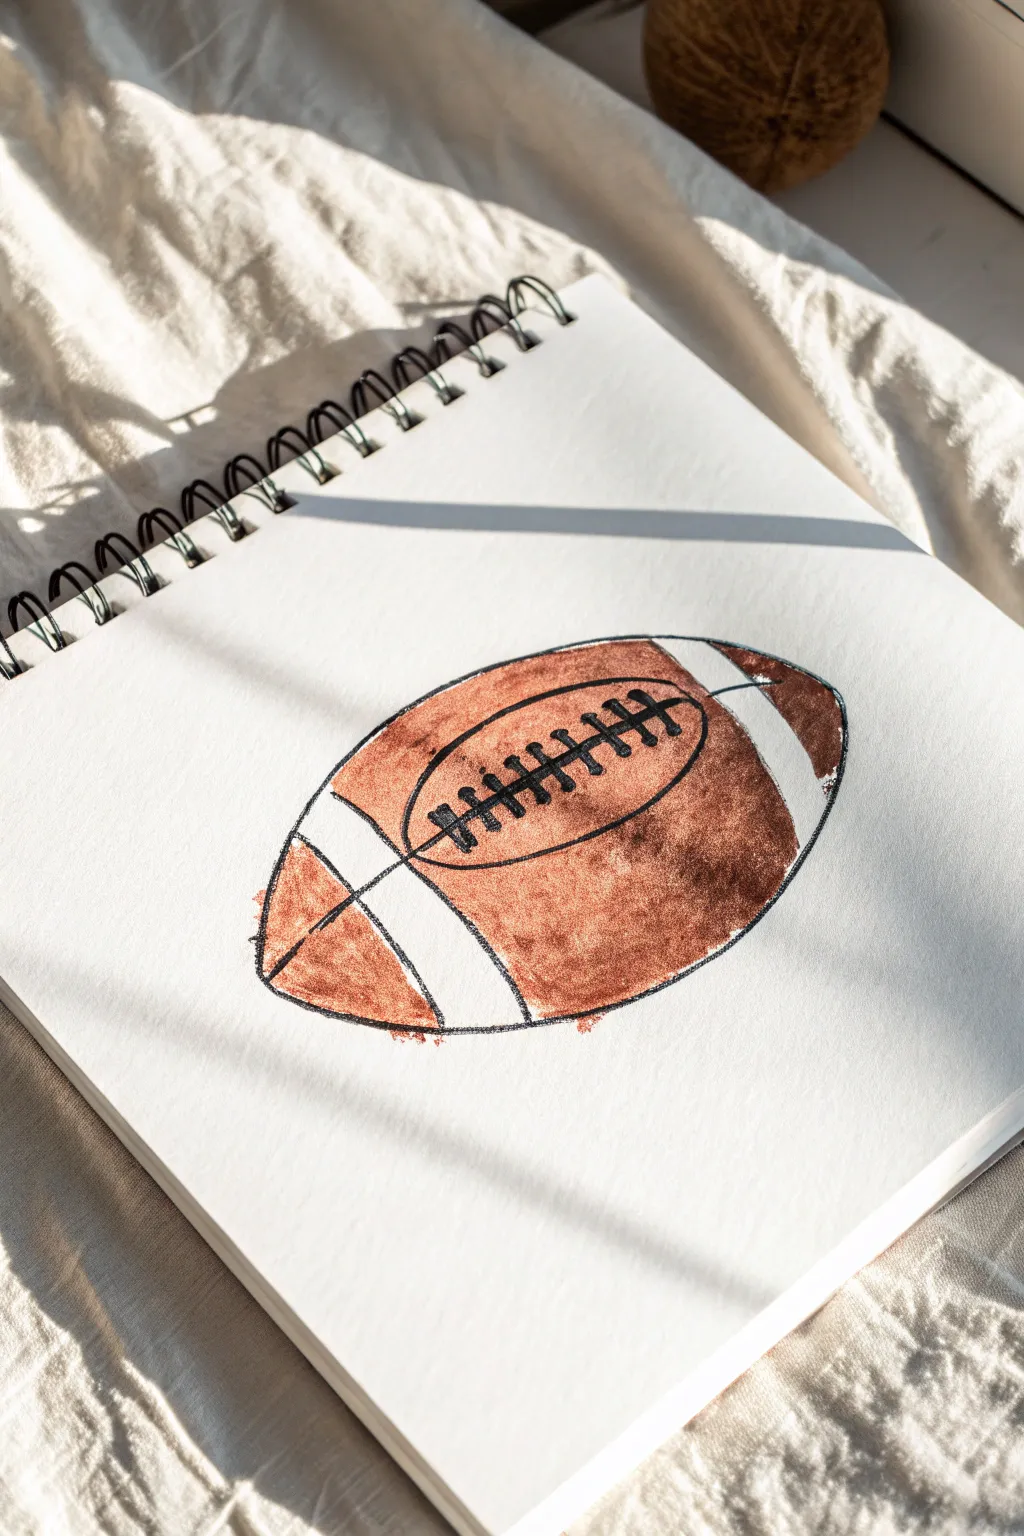
Capture the classic grit of the gridiron with this loosely styled football illustration. The combination of textured marker strokes and deliberate ink outlines gives the drawing a lively, handcrafted feel that pops off the sketchbook page.
Step-by-Step
Materials
- Spiral-bound sketchbook (heavyweight paper recommended)
- Pencil (HB or 2B)
- Eraser
- Black drawing pen (fine liner or medium nib)
- Alcohol-based art markers (dark brown, rust/red-brown)
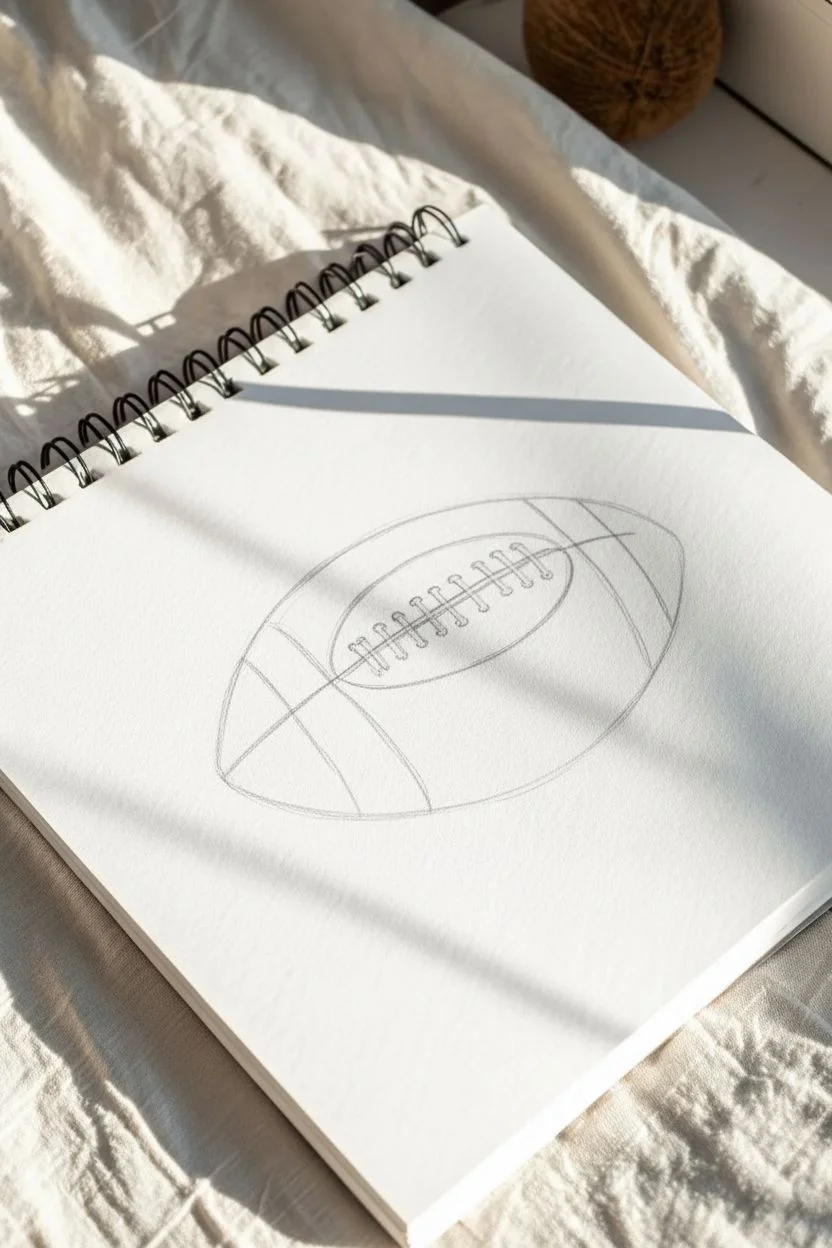
Step 1: Penciling the Structure
-
Draw the main shape:
Start lightly with your pencil. Sketch an elongated oval shape that is pointed at both ends to form the classic prolate spheroid shape of an American football. Tilt it slightly diagonally across the page for a dynamic look. -
Add the stripes:
Near each pointy end of the football, draw a curved band. These lines should follow the curvature of the main oval to make the ball look round. These will be the white stripes, so keep the area inside them clear. -
Mark the center seam:
Draw a faint curved line running lengthwise down the middle of the football, stopping before it hits the white stripes. This is your guide for the laces. -
Outline the laces patch:
Draw an oval shape around that center guideline. This represents the reinforced leather patch where the laces sit. -
Sketch the laces:
Inside that patch, draw a series of small perpendicular lines crossing the center seam. Connect them with a long horizontal line running through the middle.
Step 2: Inking the Outlines
-
Trace the perimeter:
Using your black drawing pen, go over the main outline of the football. Don’t worry about being perfectly smooth; a slightly jittery or broken line adds character to this style. -
Define the patch:
Ink the oval shape around the laces. Make this line slightly thinner if you have multiple pen sizes, or just use a lighter touch. -
Ink the laces:
Draw the cross-stitches of the laces firmly. Make them thick and bold so they stand out against the brown color you’ll add later. -
Preserve the stripes:
Ink the boundary lines for the white stripes, ensuring you clearly separate the stripe area from the rest of the leather. -
Erase pencil guides:
Once the ink is completely dry—give it a minute or two to prevent smudging—gently erase all your original pencil sketch lines.
Bleeding Lines?
If your black ink blurs when you add marker, stop immediately. Switch to a permanent pigment liner or finish all coloring first, then add the black outlines last on top of dry marker.
Step 3: Adding Color & Texture
-
Base layer of brown:
Take your lighter brown or rust-colored marker. Fill in the main body of the football, carefully skipping over the two white stripes and the laces themselves. -
Working in sections:
Color in small, circular or scrubbing motions rather than long straight lines. This creates that mottled, leather-like texture visible in the reference. -
Darkening the edges:
Go over the areas near the bottom edge and the very tips of the football a second time with the same marker or a slightly darker brown. This builds shadow and dimension. -
Refining the laces patch:
Color inside the oval patch around the laces, but try to use a slightly lighter touch or a single layer of ink so it contrasts slightly with the darker main body. -
Adding texture dots:
Tap the tip of your marker randomly over the colored areas to create tiny dots of saturated ink. This mimics the ‘pebbled’ texture of real football leather. -
Final shadow touches:
If you want more depth, add a swift, dark stroke just underneath the laces patch to make it look slightly raised.
Pro Tip: Highlight Hack
Leave tiny slivers of white paper exposed near the top curve of the ball while coloring. This creates a natural-looking glossy highlight without needing white paint.
Now you have a rugged, artistic rendering of a football ready for game day

PENCIL GUIDE
Understanding Pencil Grades from H to B
From first sketch to finished drawing — learn pencil grades, line control, and shading techniques.
Explore the Full Guide
Pop Art Football Pattern in Repeating Blocks

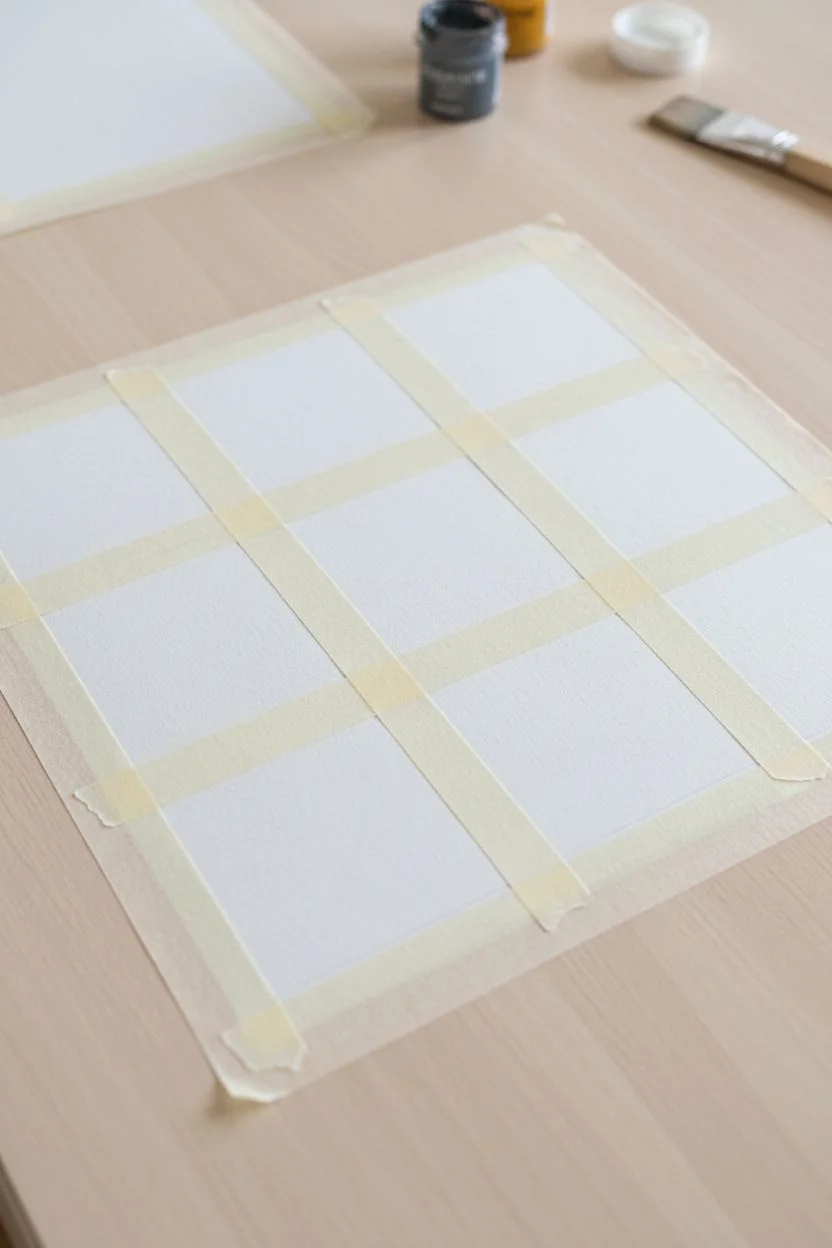
Channel your inner Andy Warhol with this striking 3×3 grid painting featuring a repeating football motif. Using a block printing method or stencils, you can easily achieve crisp white lines against saturated, retro-colored backgrounds on high-quality paper.
Detailed Instructions
Materials
- Heavyweight printmaking paper or watercolor paper (square format)
- Acrylic paints (mustard yellow, magenta, dark teal, teal green, orange, light blue, peach, pink, deep violet)
- Painter’s tape or masking tape (1/4 inch width is best)
- Ruler and pencil
- Football stencil (pre-cut or DIY from acetate) OR linoleum block and carving tools
- White block printing ink or heavy body white acrylic paint
- Flat paintbrush (medium size)
- Brayer (rubber roller) if printing, or stencil brush
Step 1: Preparing the Grid
-
Measure the Paper:
Begin with a square sheet of heavyweight paper. Heavy cotton rag paper works beautifully because it adds a slight texture that mimics a vintage print. Measure the total width and height to plan your divisions. -
Mark the Grid:
Using a light pencil touch, divide your paper into a 3×3 grid. Ensure you leave a consistent white bored around the outer edge of the entire design, approximately 1-2 inches wide. -
Tape the Borders:
Apply painter’s tape along the pencil lines to mask off the grid. Tape off the outer borders first, then the internal dividing lines. This tape naturally creates the crisp white separation between the colored blocks.
Paint Bleeding Under Tape?
Before painting colors, seal the tape edges with a thin layer of clear matte medium or white paint. This prevents colored paint from seeping under.
Step 2: Painting the Backgrounds
-
Select Your Palette:
Pour out small amounts of your nine different acrylic colors. To match the example, aim for a desaturated, retro palette rather than primary colors. You might need to mix a tiny dot of black or brown into bright colors to tone them down. -
Paint First Row:
Starting with the top left square, paint the mustard yellow block. Move to the middle top for magenta, and finish the row with the dark teal. Use a flat brush to get smooth, even coverage inside the tape lines. -
Paint Second Row:
Continue to the middle row. Paint the first square teal green, the center square orange, and the right square a soft light blue. Don’t worry if paint gets on the tape; that’s what it’s there for. -
Paint Third Row:
Finish with the bottom row: a soft pink/salmon on the left, deep violet in the center, and a warm peach or tan on the right. -
Dry and Peel:
Let the paint dry completely to the touch. Once dry, carefully peel away the tape at a 45-degree angle to reveal your clean, colorful squares separated by white grid lines.
Step 3: Adding the Football Motif
-
Prepare the Design:
You need a football image that fits comfortably inside one colored block. You can either cut a stencil from a plastic sheet or carve a soft linoleum block if you prefer a stamped texture. The example uses a simple line-art style. -
Align the First Football:
Position your stencil or stamp over the top-left yellow square. I find that rotating the football slightly diagonally adds dynamic energy to the composition. -
Apply White Ink:
If stenciling, use a dry sponge pouncer with heavy body white acrylic paint. Dab lightly up and down to prevent bleed-under. If stamping, roll white block printing ink onto your carving with a brayer. -
Repeat the Process:
Lift the stencil carefully and move to the next square. Repeat the printing process for all nine squares, maintaining roughly the same diagonal angle for consistency across the grid. -
Touch Ups:
Once all nine footballs are applied, inspect the white lines. If the stencil coverage is too faint in areas, you can carefully hand-paint over the lines with a fine liner brush and white paint to brighten them up. -
Final Cure:
Allow the white overlay to dry completely, preferably overnight, before framing or handling, as thick white paint can take longer to set.
Mix Up the Icon
Don’t stop at footballs. Try mixing generic sports icons (helmets, goal posts, jerseys) in alternating squares for a more eclectic sports gallery feel.
Hang your finished masterpiece in a game room or office to add a sophisticated touch of team spirit
Cosmic Football in Space With Neon Highlights
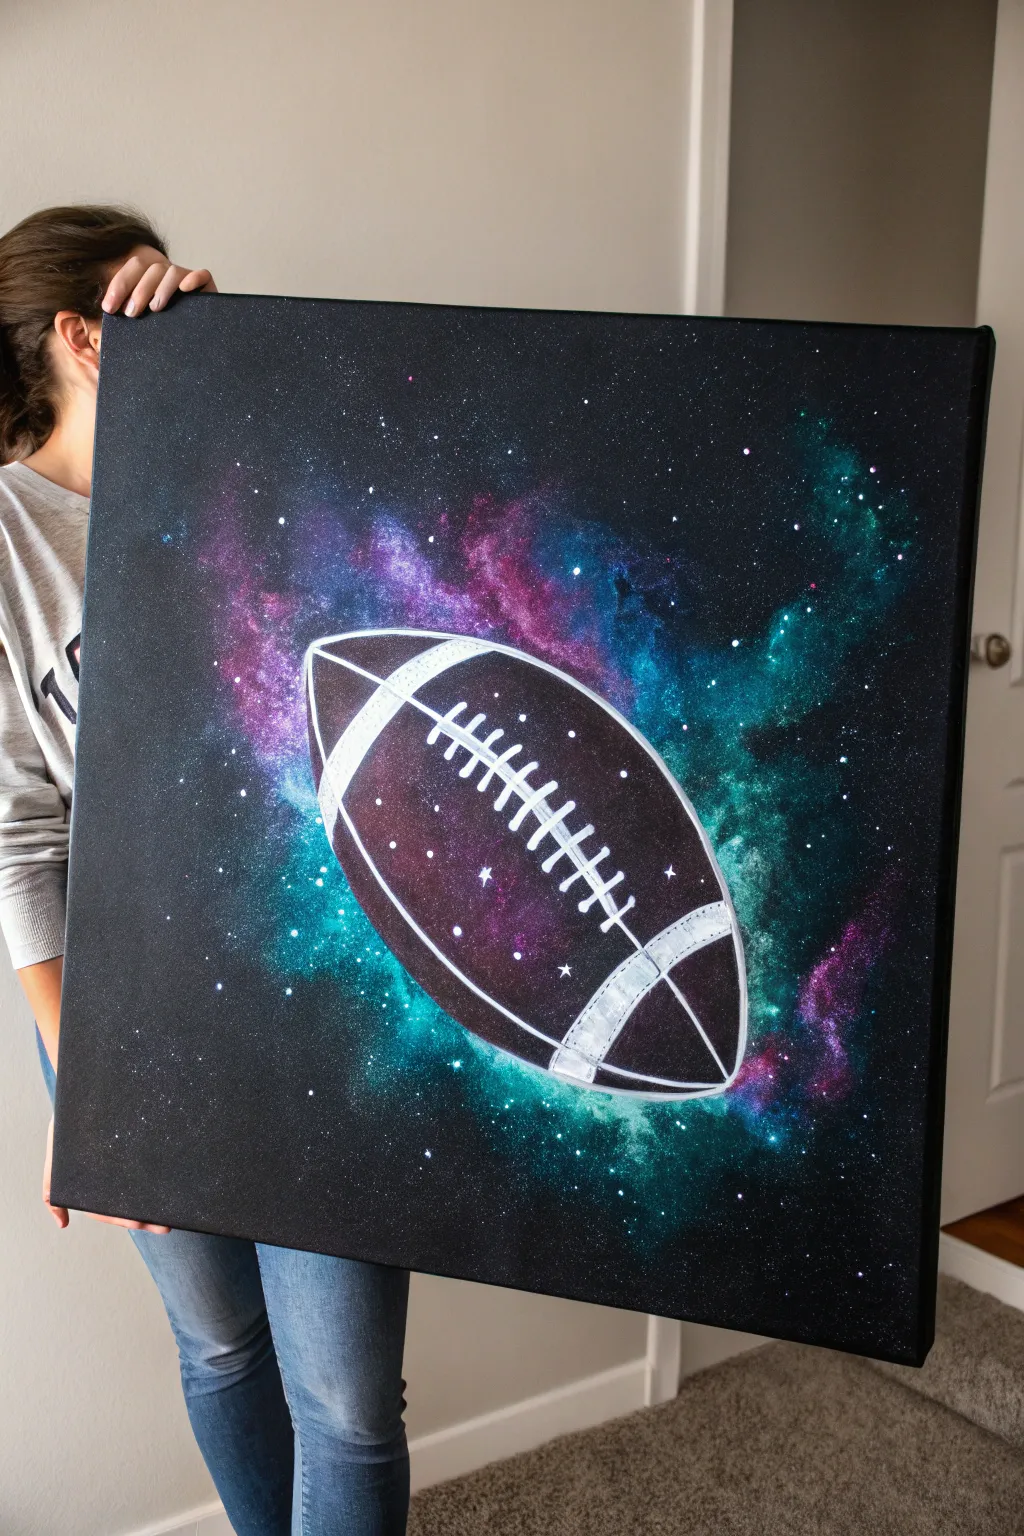
Launch your sports art into the stratosphere with this cosmic football painting that combines the gritty texture of the game with the ethereal beauty of a nebula. The stark white laces contrast dramatically against deep teals and magentas for a piece that truly pops off the black canvas.
Step-by-Step Tutorial
Materials
- Large square canvas (e.g., 24×24 inches)
- Black gesso or heavy body acrylic paint (Mars Black)
- Acrylic paints: Teal/Turquoise, Magenta/Violet, White, Burnt Umber
- Pencil or white chalk pencil
- Assorted brushes: Large flat brush, medium fan brush, fine liner brush
- Sponges (natural sea sponge or kitchen sponge)
- Toothbrush (for star spatter)
- Paper plate or palette
- Ruler
Step 1: Setting the Infinite Backdrop
-
Prime the Void:
Begin by coating your entire canvas with black gesso or black acrylic paint. Use a large flat brush to ensure full, opaque coverage. Don’t forget to paint the edges for a finished look. Let this base layer dry completely before moving on. -
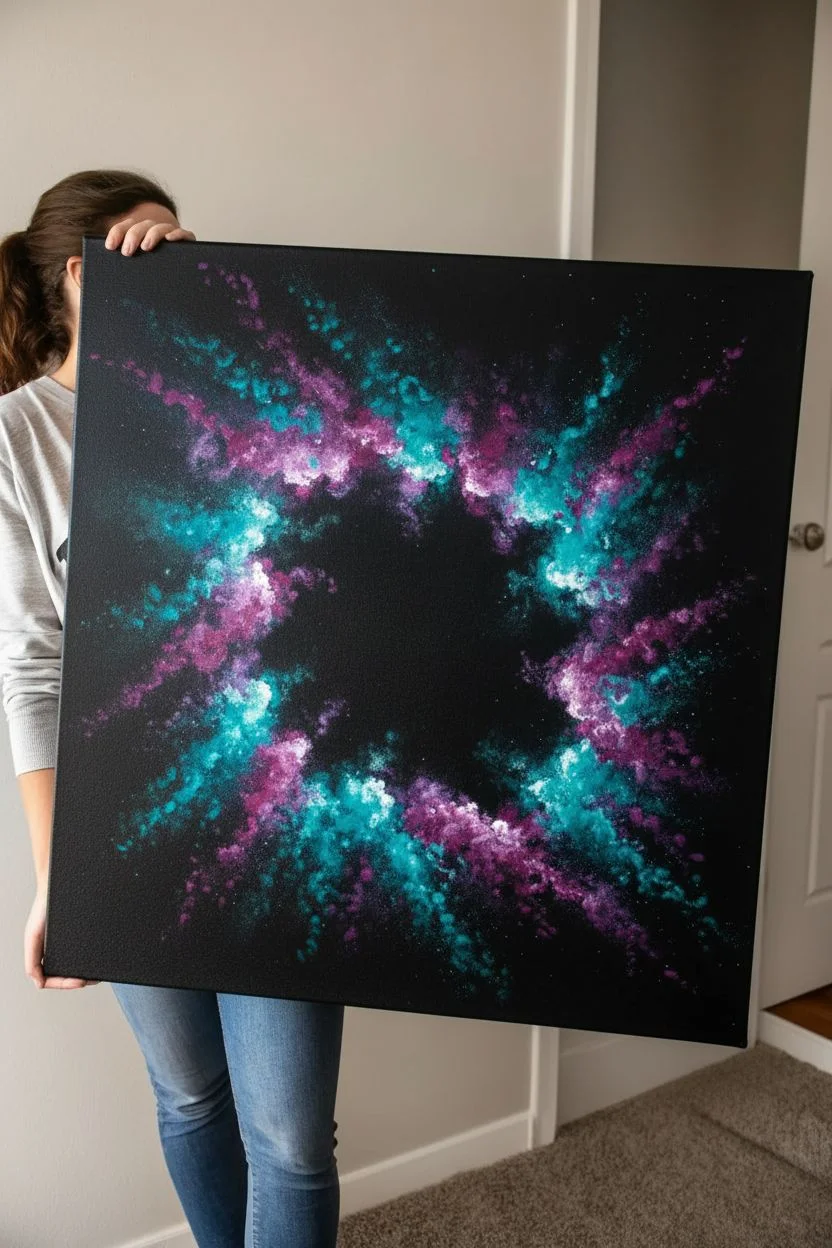
Sponge the Nebula Base:
Dip a damp sponge into your teal paint, dabbing most of it off on your palette first. Lightly stipple random, cloud-like clusters onto the black background, focusing on diagonal drifts. Keep the paint application airy and uneven. -
Add Cosmic Depth:
Using a clean section of the sponge, repeat the stippling process with magenta or violet paint. Layer some of this near the teal sections, allowing them to overlap slightly to create blended purple hues. Keep the center area somewhat dark to frame the football. -
Intensify the Glow:
Mix a tiny amount of white into your teal paint to create a lighter turquoise. Gently sponge this into the centers of your teal clouds to create a glowing core effect. Repeat this with a lighter pink mixture for the magenta sections.
Muddy Nebula?
If your galaxy colors are turning brown or grey where they overlap, let each color layer dry completely before adding the next. Wet-on-wet blending can get muddy quickly on a black base.
Step 2: Drafting the Football
-
Sketch the Outline:
Once the background is dry, use a white chalk pencil to lightly sketch the football shape in the center. Drawing a slanted oval helps create a dynamic sense of motion. Use a ruler to mark the straight centerline for the laces to ensure perspective accuracy. -
Block in the Ball:
Paint the interior of the football silhouette with a dark mixture of Burnt Umber and a touch of black. You want it to look like dark leather, but distinct from the pure black background. Save the stripes and laces area for later. -
Define the Stripes:
Paint the two curved stripes at the ends of the ball using titanium white. You may need two coats to get solid coverage over the dark background. -
Construct the Laces:
Paint the thick central white spine of the laces along your guide line. Then, paint the perpendicular stitches across it. Make them thick and deliberate, slightly tapering at the ends to show the curvature of the ball.
Level Up: Neon Aura
Use neon acrylics or even glow-in-the-dark paint for the final ‘star spatter’ layer. This will make the galaxy truly illuminate when the lights go down.
Step 3: Details and Stardust
-
Highlight the Leather:
Mix a lighter brown using Burnt Umber and a tiny bit of white. Dry brush this color onto the upper curve of the football to simulate light hitting the textured leather. -
Outline for Pop:
Using your finest liner brush and thinned white paint, carefully outline the entire football. This sharp edge separates the object from the nebula and gives it that illustrative punch. -
Detail the Laces:
Add tiny grey hash marks or shading on one side of the white laces to give them dimension, so they look raised rather than flat. -
Create the Starfield:
Dip an old toothbrush into watered-down white paint. Hold it over the canvas and flick the bristles with your thumb to spray fine mist stars across the entire piece, including over the football for a transparent effect. -
Add Hero Stars:
Use your liner brush to manually paint larger, distinct white dots in the darker areas of space. Add tiny cross-shapes to a few of the brightest stars to create a twinkling lens flare effect. -
Final Glaze:
I like to take a very watered-down wash of teal and glaze over the bottom edge of the football. This makes it look like the ball is reflecting the blue nebula light from below.
Hang this stellar masterpiece on the wall and enjoy the celestial touchdown you’ve created


Have a question or want to share your own experience? I'd love to hear from you in the comments below!