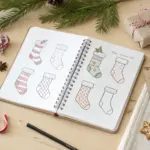
When I want an easy dose of holiday cheer, I grab a pencil and start doodling Christmas icons—it’s basically instant cozy. Here are my favorite fun Christmas drawing ideas that stay simple, cute, and totally doable, even if you’re just warming up.
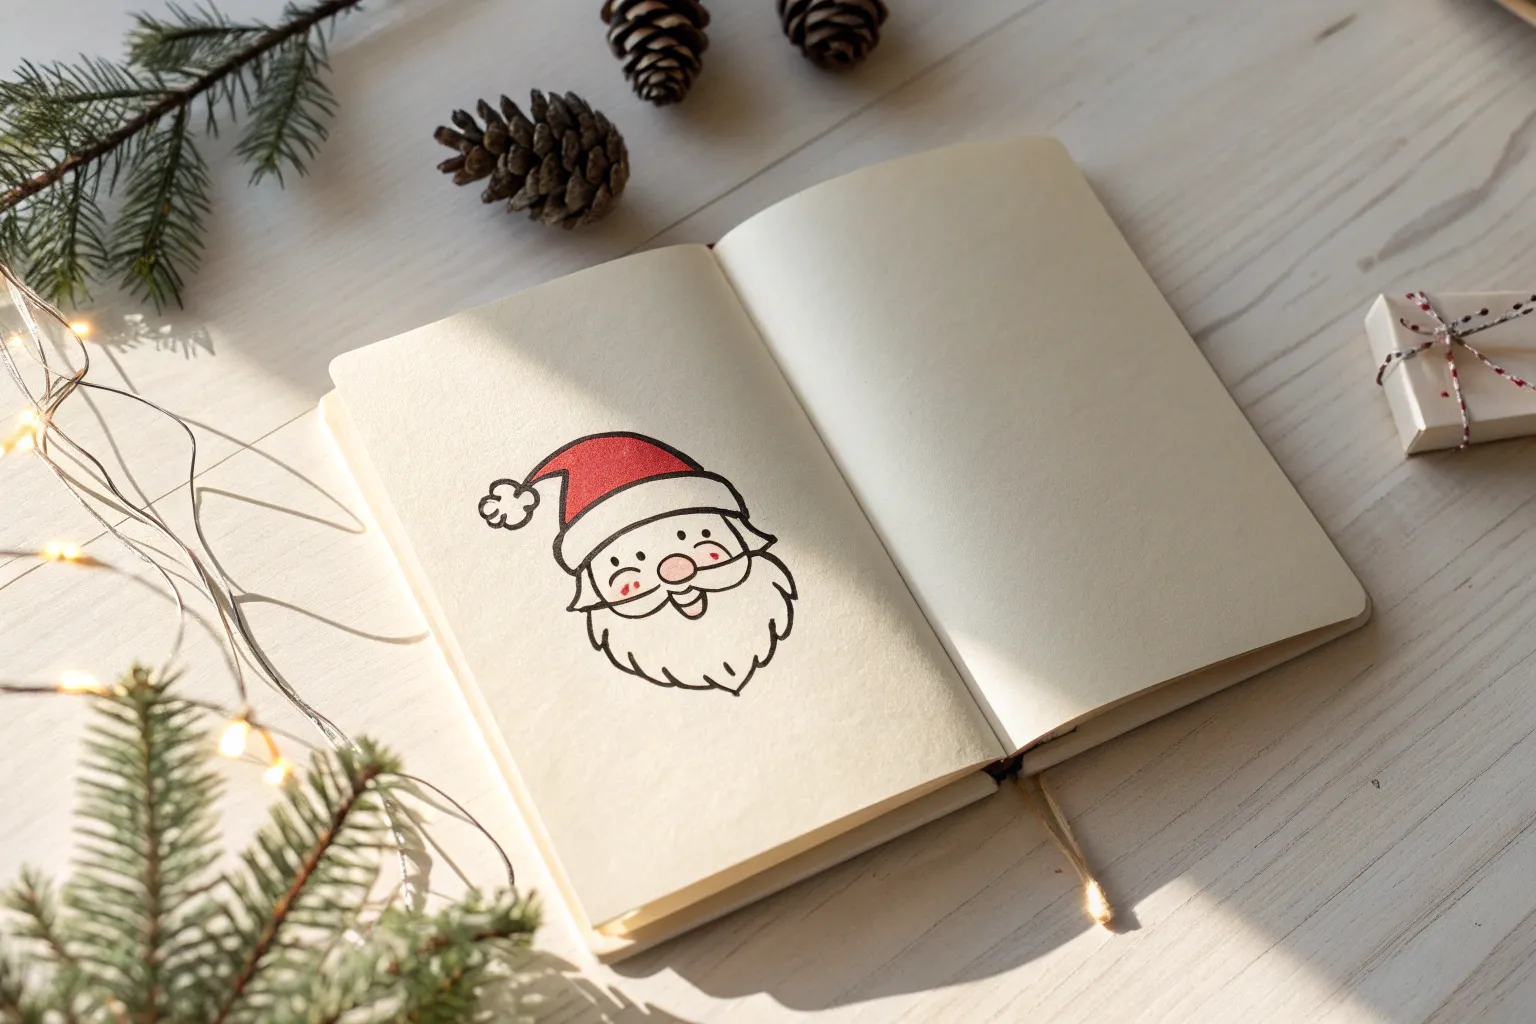
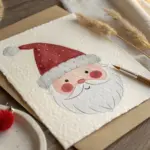
Cute Santa Face Doodle
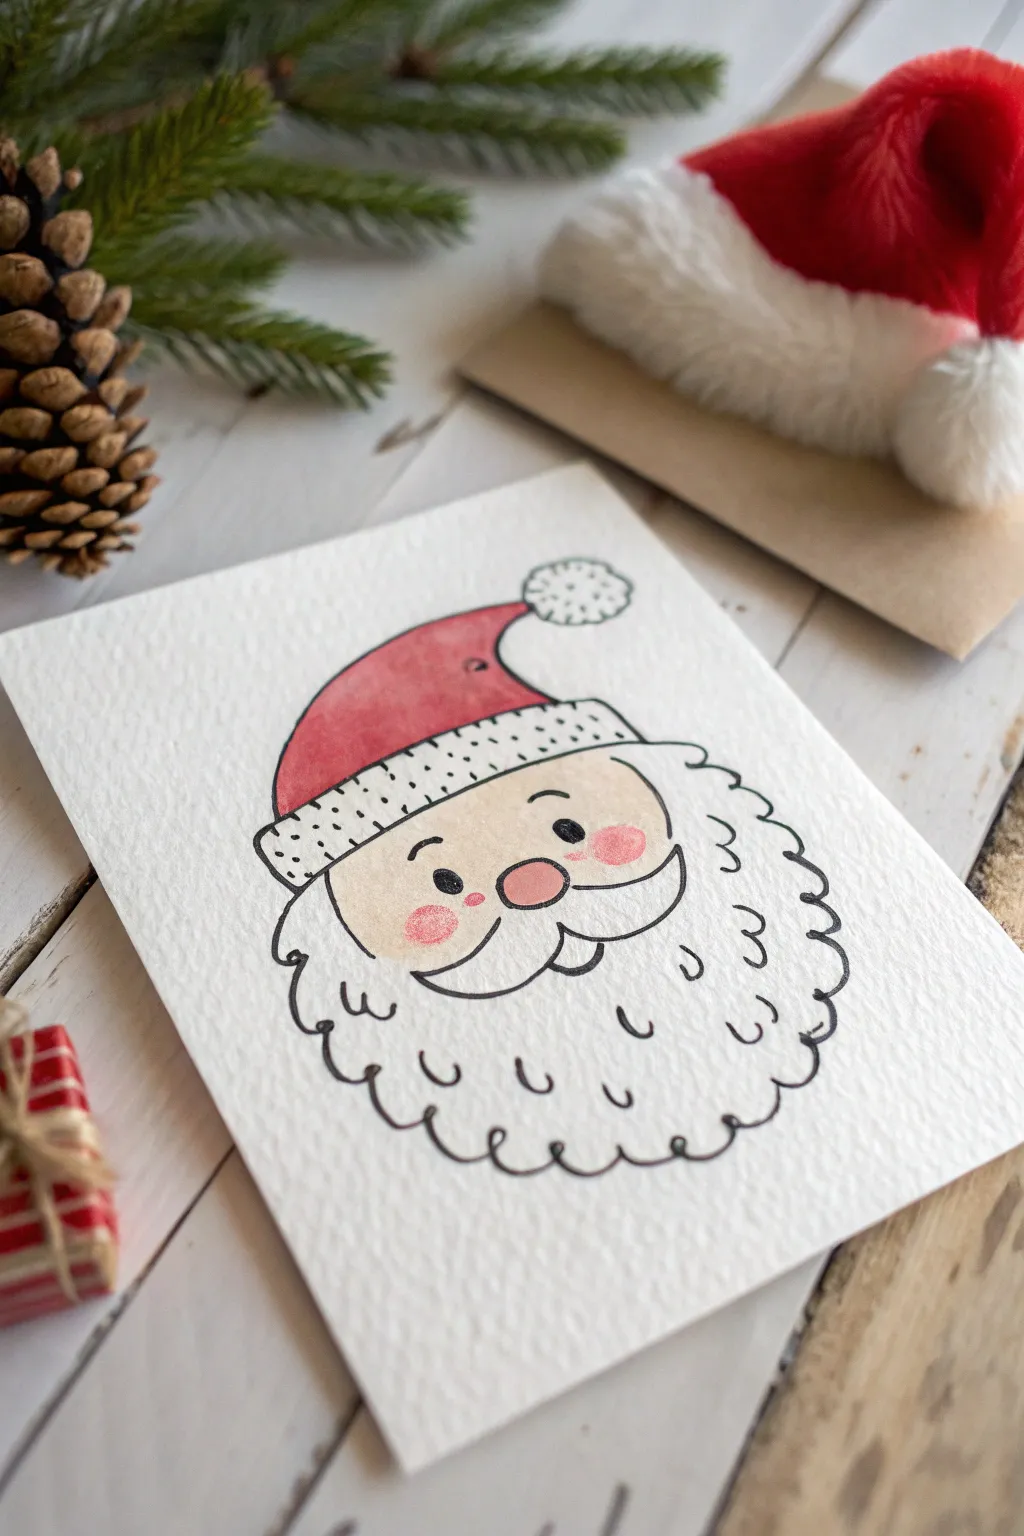
Capture the magic of the season with this incredibly sweet Santa face doodle that combines simple linework with soft watercolor touches. The textured paper gives it a professional, handmade card feel that is perfect for sending holiday greetings.
Step-by-Step Tutorial
Materials
- Cold press watercolor paper (cut to card size, approx 5×7 inches)
- Pencil (HB or H)
- Kneaded eraser
- Waterproof fine liner pen (black, size 03 or 05)
- Watercolor paints (Red, Peach/Skin tone, Pink)
- Small round watercolor brush (size 2 or 4)
- Water cup and paper towels
Step 1: Planning and Sketching
-
Map out the face shape:
Start by lightly sketching a wide, soft oval shape in the center of your watercolor paper. This doesn’t need to be perfect, as it will act as the guide for Santa’s skin. -
Add the hat brim:
Draw a rectangular band curving slightly over the top of the oval where the forehead would be. This will become the fluffy brim of the Santa hat. -
Sketch the hat body:
From the top of the brim, sketch a curved triangle shape that flops slightly to the right side. Add a small, fluffy circle at the very tip for the pom-pom. -
Outline the beard:
Instead of drawing a hard line for the jaw, lightly sketch a large, cloud-like shape surrounding the bottom two-thirds of the face. Keep your pencil pressure very light here. -
Place facial features:
In the center of the face area, sketch a small oval for the nose. Just below it, draw two curved shapes branching out for the mustache. Mark two small dots for eyes above the nose.
Step 2: Inking the design
-
Ink the main outlines:
Using your waterproof fine liner, trace over your pencil lines for the hat, face shape, and mustache with confident strokes. -
Create the beard texture:
For the beard, don’t draw a solid line. Instead, use a series of small, connected ‘u’ shapes or loops to create a fluffy, scalloped edge all around the bottom of the face. -
Detail the hat brim:
Ink the hat brim outline, then add tiny stippling dots inside the band and on the pom-pom to suggest a fuzzy, wool-like texture. -
Finalize the face:
Fill in the two small circles for the eyes with solid black ink. Draw the nose and add a small, happy mouth curve just visible beneath the mustache. -
Add internal beard details:
Draw scattered, tiny ‘u’ shapes or hooks inside the white space of the beard. These little marks add volume and makes the beard look fuller without needing to color it. -
Erase pencil guides:
Wait at least 5 minutes to ensure the ink is completely dry, then gently use your kneaded eraser to lift away all visible pencil marks.
Clean Lines Tip
Test your pen on a scrap of the same paper first. If the ink bleeds into paper fibers, switch to a finer nib or faster drawing strokes.
Step 3: Adding Watercolor
-
Paint the hat:
Mix a vibrant holiday red watercolor. Carefully fill in the main body of the hat. I like to leave the color slightly uneven to give it that charming hand-painted look. -
Wash the face:
Mix a very watery, pale peach or skin tone. Apply a light wash to the face area, being careful not to paint over the white mustache/beard or the eyes. -
Add rosy cheeks:
While the skin tone is still slightly damp (but not soaking), dab two small circles of diluted pink or light red onto the cheeks for a soft, blushing effect. -
Tint the nose:
Use a slightly more concentrated pink or light red to fill in the oval nose, making it stand out slightly more than the cheeks. -
Dry and flatten:
Let the card dry completely flat. If the watercolor paper curls slightly, you can place it under a heavy book once it is bone dry.
Sparkle Finish
Once the paint is totally dry, add a touch of clear glitter glue or a shimmer pen to the pom-pom and hat brim for magical frosty details.
Now you have an adorable, handcrafted card ready to spread some festive cheer to your loved ones


Triangle Christmas Tree With Ornaments
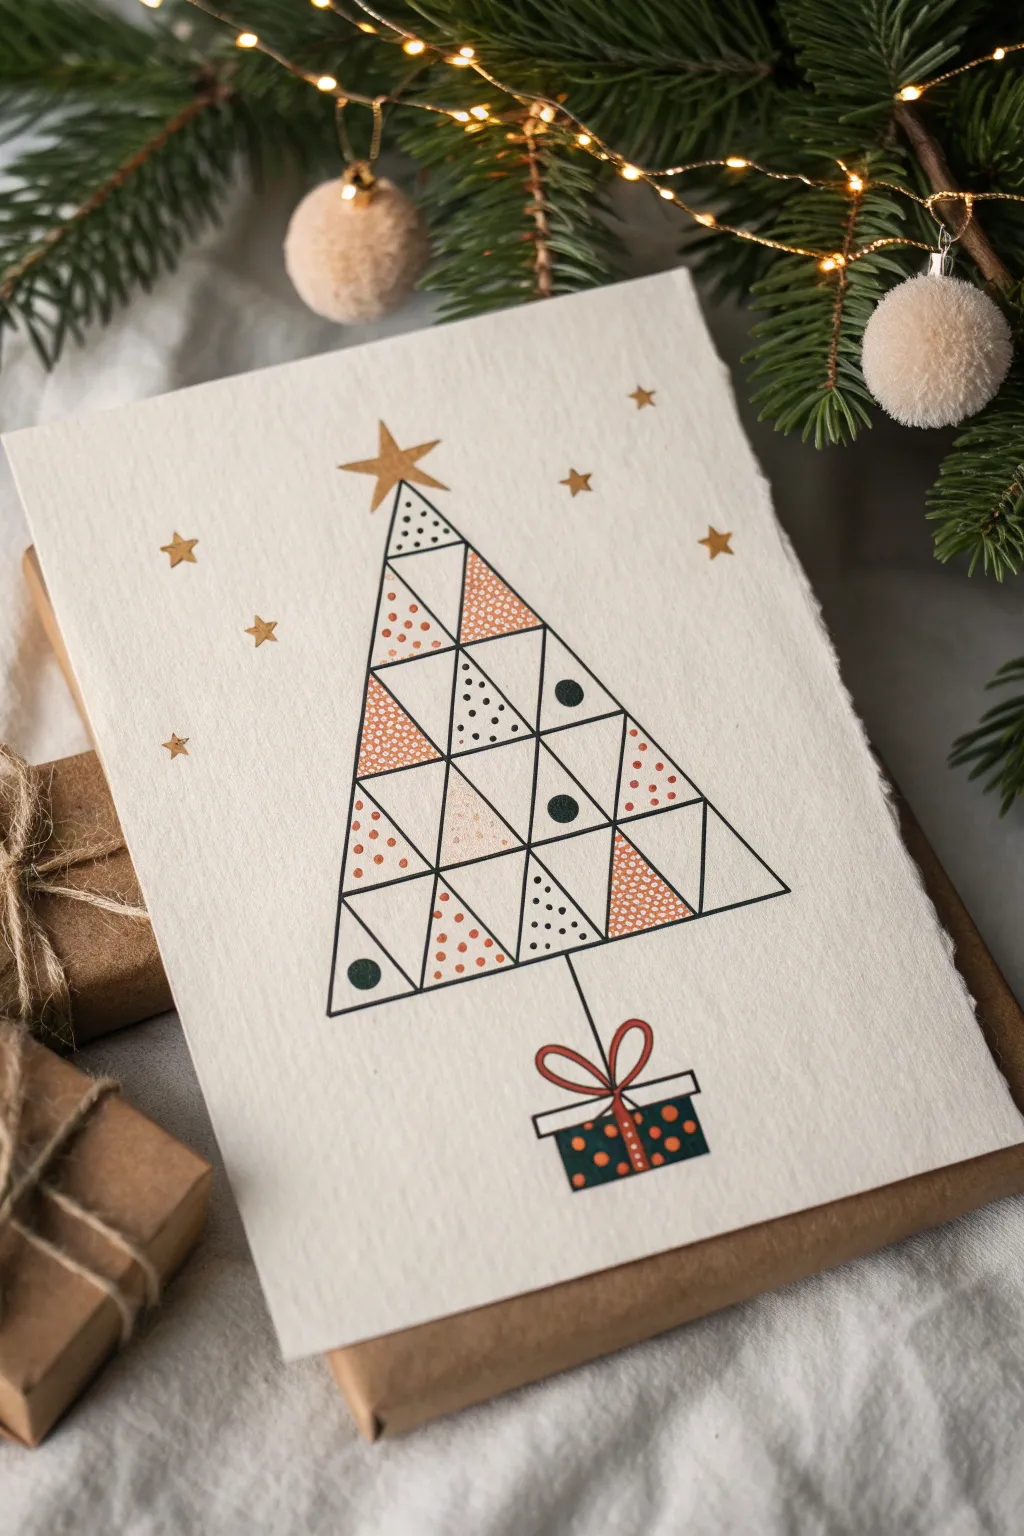
This minimalist card design uses simple geometry to create a sophisticated, modern Christmas tree. By breaking a large triangle into smaller ones, you can experiment with various patterns, dots, and textures for a playful yet elegant holiday greeting.
Step-by-Step
Materials
- Heavyweight textured cardstock or watercolor paper (cream/off-white)
- Fine-liner pens (black, 0.3mm and 0.5mm)
- Small ruler
- Pencil and eraser
- Rust or terracotta colored marker/gel pen
- Dark green marker/gel pen
- Gold metallic paint pen or marker
Step 1: Drafting the Structure
-
Paper preparation:
Cut your textured cardstock to your desired card size, such as 5×7 inches. If you are folding it, score the fold line first for a clean edge. -
Main triangle outline:
Using a pencil and ruler, lightly draw a large isosceles triangle centered on the card. This will be the outer boundary of your tree. -
Vertical axis:
Draw a faint vertical line straight down the middle of the triangle, extending below the base to act as the trunk later. -
Horizontal guides:
Mark four horizontal guidelines across the triangle to divide the height into roughly five equal tiers. -
Triangular grid:
Within these horizontal sections, use your ruler to draw diagonal lines connecting your guide marks, forming a grid of smaller alternating triangles. -
Inking the lines:
Once you are happy with the grid, trace over all your pencil lines with a black 0.5mm fine-liner. Use a ruler to keep these lines perfectly crisp. -
Erase pencil marks:
Wait a moment for the ink to dry completely, then gently erase all the underlying pencil guides.
Grid Geometry Tip
Don’t stress if your triangles aren’t mathematically identical. Slight variations in size add to the charming, hand-drawn aesthetic of the card.
Step 2: Adding Patterns & Details
-
Planning the fill:
Look at your grid. You won’t fill every triangle; leave about half of them white for a clean look. -
Dotted triangles:
Select 3-4 random triangles and fill them with evenly spaced small black dots using a finer 0.3mm pen. -
Spot color texture:
Using the rust-colored marker, fill another 3-4 triangles with a dense pattern of tiny circles or stippling to create texture. -
Solid circles:
In the remaining white triangles, draw a few solid dark-green circles centered in the space to represent ornaments. -
Base circles:
Add one or two solid circles near the bottom corners in dark green or black to weigh the design down visually.
Step 3: Finishing Touches
-
Drawing the gift:
At the bottom of the trunk line, draw a small rectangle for the box lid and a slightly smaller rectangle below it for the box itself. -
Coloring the gift:
Color the bottom of the box dark green and add small rust-colored dots. Leave the lid white for contrast. -
Adding the bow:
Draw a simple, looped bow on top of the gift box in the rust color, connecting it to the tree trunk line. -
The golden star:
At the very peak of the tree, draw a five-pointed star using your gold metallic pen. I find it helps to draw a light pencil star first to get the symmetry right. -
Scattered stars:
Surround the tree with varying sizes of small gold stars. Use tiny five-pointed shapes or simple asterisks. -
Final check:
Look over the design for any smudges or uneven lines. You can thicken the outer border of the main triangle slightly to make the tree pop more.
Smudge Prevention
When using a ruler with ink pens, wipe the edge of the ruler with a tissue after every single line to prevent ink from dragging across the paper.
Now you have a beautifully geometric handmade card ready to share with someone special


Happy Snowman With Cozy Scarf
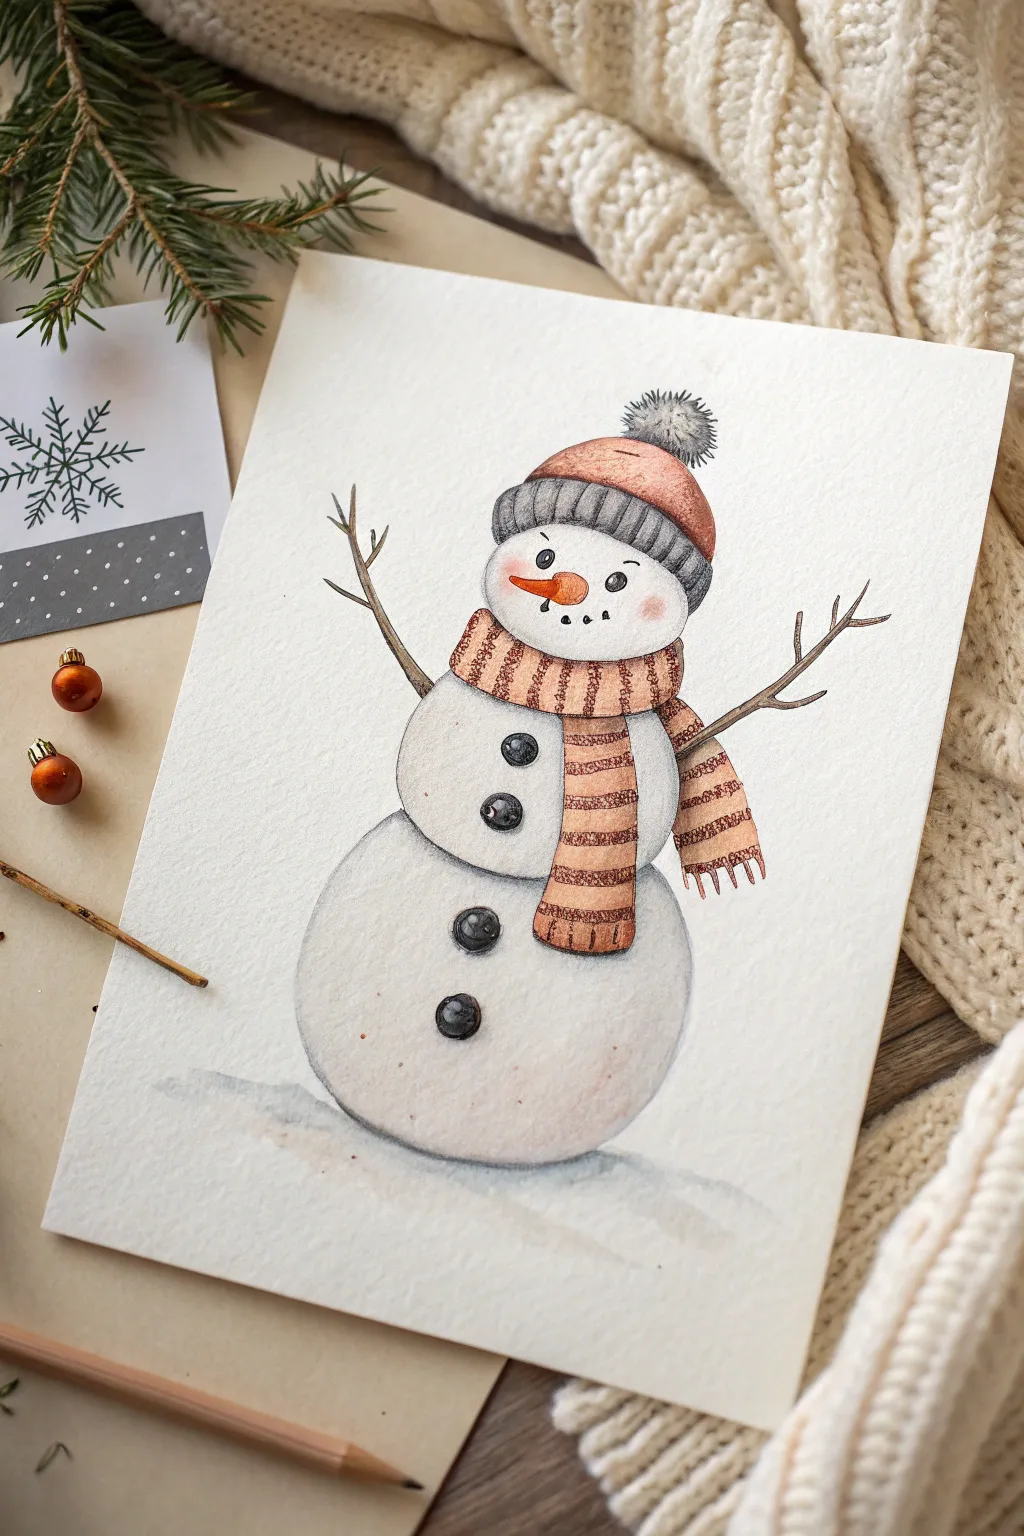
Create a heartwarming piece of winter art with this charming snowman illustration, featuring soft textures and a classic festive color palette. This project combines delicate sketching with watercolor washes and pencil details to achieve a lovely, hand-drawn greeting card style.
Detailed Instructions
Materials
- Heavyweight watercolor paper (cold press creates nice texture)
- HB graphite pencil and eraser
- Watercolors (pan or tube): Burnt Sienna, Payne’s Grey, Orange, Red/Rust
- Fine liner pen (brown or dark grey, waterproof)
- Colored pencils (grey, rust, black, white)
- Small round brushes (size 2 and 4)
- Jar of water and paper towels
Step 1: Sketching the Base
-
Block in the shapes:
Start by lightly sketching three stacked circles for the snowman’s body. Make the bottom circle the largest and widest, the middle slightly smaller, and the head round but a bit flattened on top where the hat will sit. -
Add the accessories:
Draw the hat sitting snugly on the head, including a ribbed brim and a fluffy pom-pom on top. Sketch a thick scarf wrapped around the neck area, letting the ends drape down the right side of the body. -
Define the stick arms:
Draw two thin, branching lines extending outward from the middle snowball to create twig arms. Keep the lines somewhat jagged and organic to resemble real wood. -
Refine the face:
Place a carrot nose right in the center of the face, pointing slightly to the left. Mark small dots for the eyes and a curved row of dots for a friendly smile. Add three buttons down the center of the body.
Step 2: Adding Color
-
Paint the body:
Mix a very diluted wash of grey (Payne’s Grey with lots of water) and paint the snowman’s body. Keep the centers of the snowballs white, concentrating the grey shadow only on the bottom and right edges to create volume. -
Warm up the accessories:
Using a rust or burnt orange watercolor, paint the main part of the hat and the stripes of the scarf. Leave alternating stripes white for now. Let the paint pool slightly at the edges for a natural watercolor look. -
Hat brim and details:
Paint the hat’s brim with a medium grey. While you have the grey on your brush, you can add a soft shadow under the snowman on the ground to anchor him. -
Carrot nose:
Fill in the carrot nose with a bright orange. Start with a lighter orange wash, then drop in a tiny bit of red near the base while it’s still damp to add dimension. -
Stick arms:
Use a fine brush and brown paint to carefully trace over your stick arm sketches. Vary the pressure to make the twigs look thicker at the base and thinner at the tips.
Muddy colors?
Ensure each layer is bone dry before adding pencil or a second paint color. If the paper is damp, the pencil will dig in and look harsh. Use a hairdryer to speed things up.
Step 3: Refining with Pencils
-
Texture the snow:
Once the paint is completely dry, use a grey colored pencil to softly shade the shadowed areas of the snowballs. Use small circular motions to mimic the texture of packed snow, specifically under the scarf and at the base. -
Detail the knitwear:
With a rust-colored pencil, draw small vertical lines on the orange parts of the hat and scarf. This mimics a knit texture. Do the same with a dark grey pencil on the grey hat brim. -
Scarf fringe:
Draw the fringe at the end of the scarf using the rust pencil. Make the lines slightly uneven so they look like soft yarn ends. -
Deepen the buttons and eyes:
Use a black colored pencil or waterproof pen to fill in the eyes, mouth dots, and buttons. Leave a tiny white spec in the eyes and buttons for a highlight, or add it later with white gouache or gel pen. -
Face blush:
Lightly swirl a pink or red colored pencil in a circular motion on the cheeks. Soften the edges with your finger to give him a rosy, cold-weather glow. -
Final outlines:
Gently outline the main shapes with a sharp dark grey or brown pencil. I prefer broken, sketchy lines rather than a solid heavy outline to keep the illustration feeling soft and cozy. -
Pom-pom fluff:
For the pom-pom, use short, flicking strokes radiating outward with a grey pencil. This creates a fluffy, hairy texture compared to the smooth hat.
Sparkle finish
For a magical frosty touch, mix a tiny pinch of cosmetic glitter or iridescent medium into your grey shadow paint, or dot white gel pen on top for falling snow.
Give your snowman a unique personality by changing the scarf pattern to match your favorite winter colors


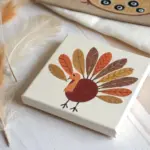
Friendly Reindeer With Big Antlers
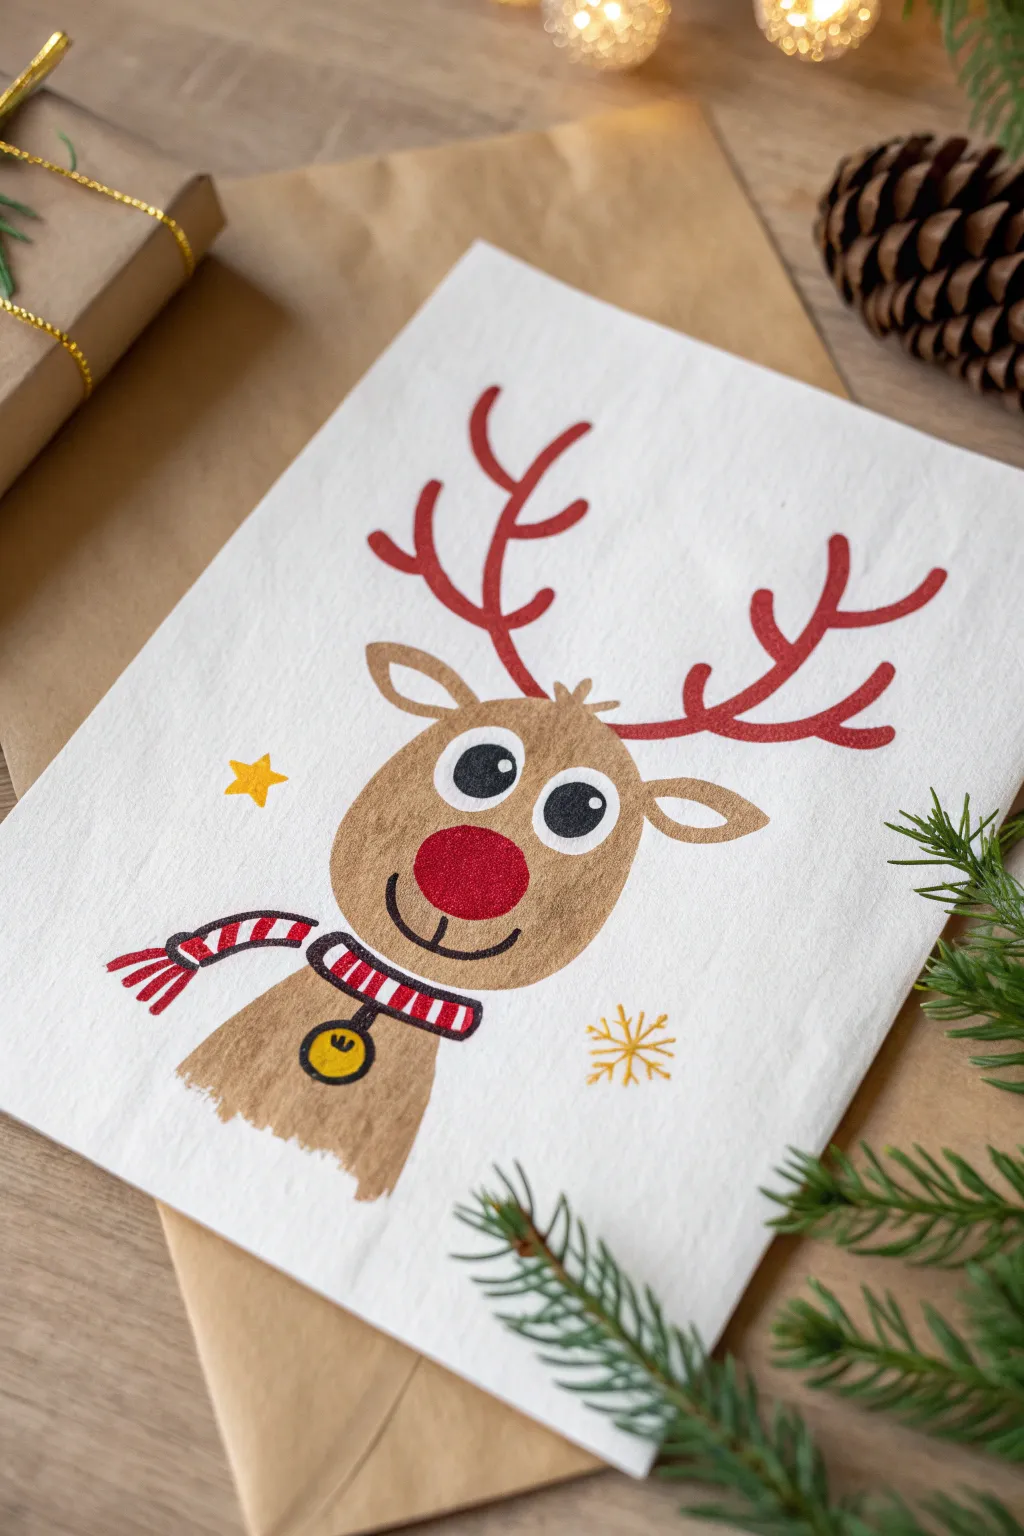
Spread holiday cheer with this charming, hand-painted reindeer card featuring expressive eyes and festive red antlers. using simple shapes and gouache or acrylic paints, you can create a professional-looking illustration that feels both modern and heartfelt.
How-To Guide
Materials
- Cold press watercolor paper (A5 size folded)
- Gouache or matte acrylic paints (brown, red, black, white, yellow)
- Round synthetic brushes (size 4 and 0/00 detail brush)
- Pencil and eraser
- Water cup and palette
- Fine-point black ink pen (optional)
Step 1: Planning and Base Shapes
-
Card Preparation:
Begin by folding your A5 watercolor paper in half to create a standard greeting card size. Run a bone folder or the back of a spoon along the crease to ensure it lays flat. -
Initial Sketch:
Lightly sketch the reindeer’s head shape in the lower center of the card. Aim for a slightly flattened oval or bean shape. Add two small leaf shapes for ears on either side near the top of the head. -
Body Outline:
Draw the neck and upper chest area extending downward from the head. Usually, a simple curved trapezoid shape works best to suggest the body without needing complex anatomy. -
Antler Placement:
Map out the large, branching antlers. Start from the top of the head and extend them upwards and outwards, giving them plenty of curves and points for a whimsical look.
Pro Tip: Paint Consistency
Gouache dries lighter than it looks when wet. Test your colors on a scrap piece of watercolor paper first to ensure the brown and red overlap well without transparency.
Step 2: Painting the Reindeer
-
Mixing the Brown:
In your palette, mix a warm, medium brown using burnt sienna and a touch of white to make it opaque. I find a creamy consistency works best for getting smooth coverage on textured paper. -
Painting the Head:
Fill in the head shape using your size 4 round brush. Use smooth, confident strokes to fill the area, being careful around the edges to keep a clean silhouette. -
Painting the Body and Ears:
Continue with the same brown mixture to fill in the neck/chest area and the two ear shapes. Leave the inner part of the ears unpainted or use a lighter beige if you prefer. -
Adding Texture:
While the brown paint is still slightly damp, you can dab it gently with a dry brush to create a subtle fur texture, though a flat matte finish looks lovely too. -
Striking Red Antlers:
Clean your brush thoroughly. Load it with bright crimson red paint. Carefully trace over your antler sketches. Since antlers are thin, you might want to switch to a smaller brush for the tips.
Troubleshooting: Watery Edges
If your paint bleeds into the paper grain excessively, your mix is too watery. Let it dry completely, then paint over the area with a thicker, more opaque layer of paint.
Step 3: Facial Features & Accessories
-
The Big Red Nose:
Paint a large, perfect circle in the lower center of the face using the same bright red as the antlers. This forms the classic Rudolph nose. -
Painting the Eyes:
Mix a solid white. Paint two large circles above the nose that slightly overlap or touch each other. Let this layer dry completely before moving on. -
Adding Pupils:
Once the white is dry to the touch, use black paint and a detail brush to add the pupils. Placing them slightly cross-eyed or looking in a specific direction adds a lot of personality. -
The Smile and Details:
Use a very fine liner brush with black paint (or a waterproof ink pen) to draw the simple curved smile line under the nose and a small vertical line connecting the nose to the mouth. -
Painting the Scarf:
Paint a curved stripe across the neck area using white paint as a base. Once dry, add red vertical stripes to create a candy-cane pattern. Don’t forget the loose end of the scarf blowing to the left. -
The Golden Bell:
Paint a small yellow circle hanging from the scarf. Once dry, add a small black outline and a curve in the middle to represent the bell’s opening.
Step 4: Final Touches
-
Decorative Elements:
To balance the composition, paint a small yellow star to the left of the reindeer and a simple snowflake shape to the right using thin lines. -
Refining Edges:
Look over your painting for any rough edges. You can use a clean, slightly damp brush to smooth out accidental jagged lines if the paint is water-soluble. -
Highlighting:
Add a tiny dot of white to the black pupils and a small curved highlight on the red nose to bring the character to life.
Now your adorable reindeer is ready to carry your warmest holiday wishes to a friend or family member
BRUSH GUIDE
The Right Brush for Every Stroke
From clean lines to bold texture — master brush choice, stroke control, and essential techniques.
Explore the Full Guide
Candy Cane With a Big Bow
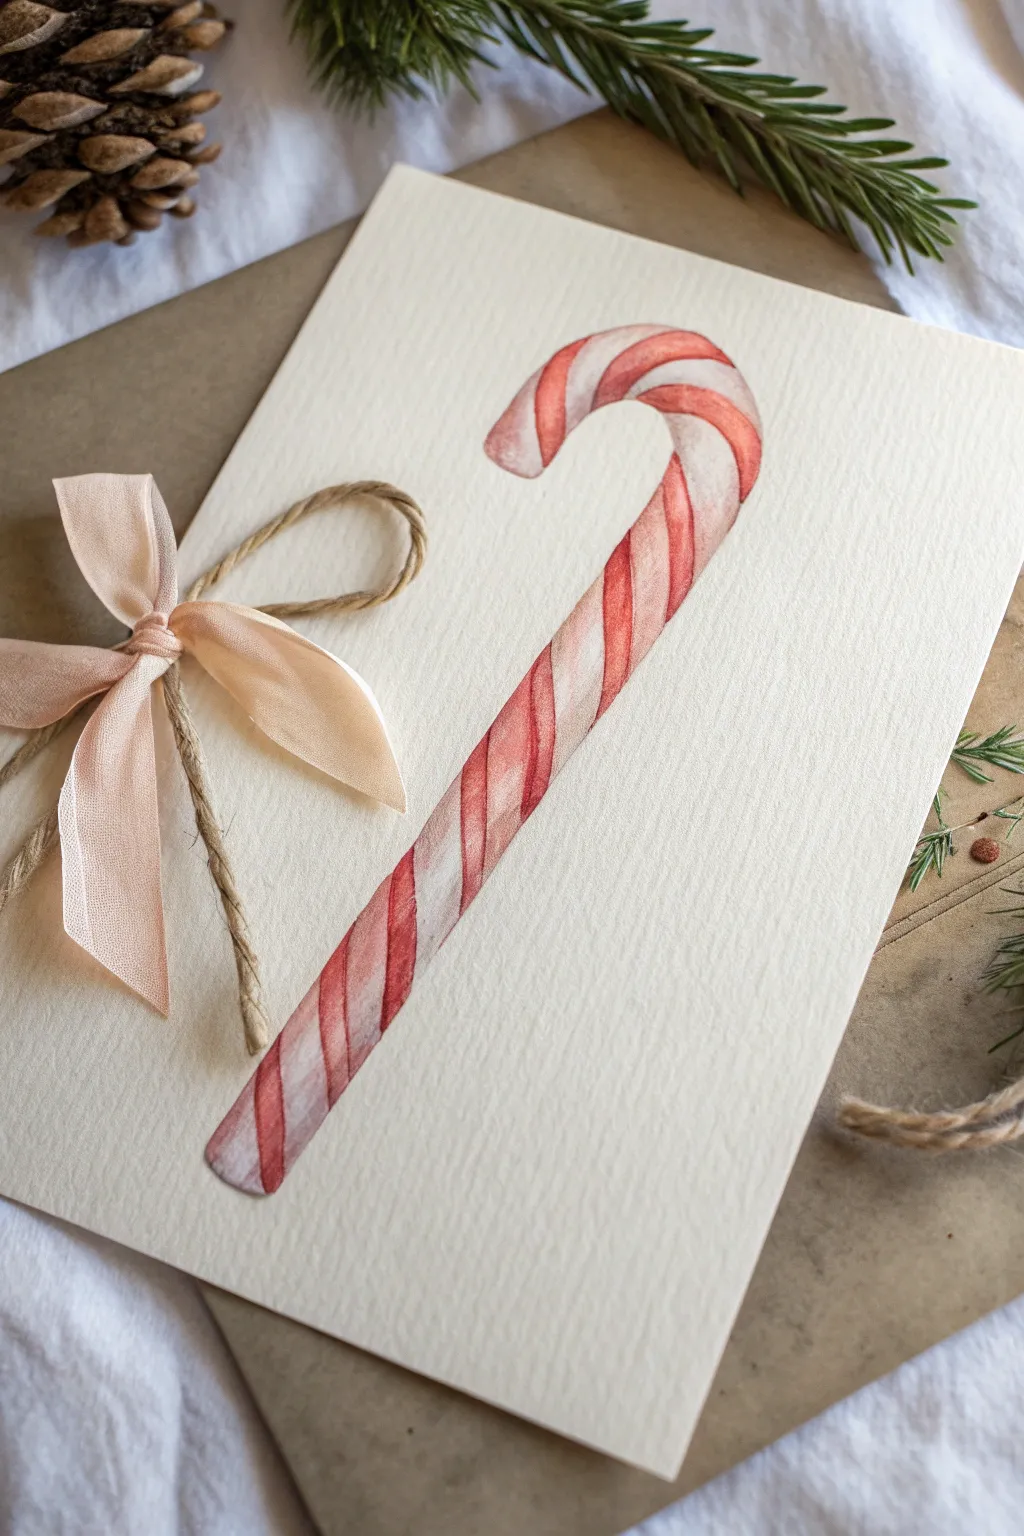
This elegant mixed-media holiday card combines the classic charm of a hand-painted watercolor candy cane with the tactile sweetness of a real ribbon bow. The textured watercolor paper adds depth to the design, making it look professional yet wonderfully homemade.
Step-by-Step
Materials
- Heavyweight cold-press watercolor paper (300gsm)
- Watercolor paints (Alizarin Crimson, Burnt Sienna, Payne’s Grey)
- Round watercolor brush (size 4 or 6)
- Pencil (HB or H)
- Kneaded eraser
- Soft pink chiffon ribbon (1/4 inch wide)
- Natural jute twine
- Small hole punch or craft knife
- Brown kraft envelope
Step 1: Sketching and Preparation
-
Prepare the paper:
Start by cutting your watercolor paper to your desired card size. A standard A5 folded to A6 works perfectly, or a flat 5×7 inch card like the one shown. -
Sketch the outline:
Lightly draw the shape of a candy cane in the center of the paper, leaning it slightly to the right. Keep your pencil pressure very light so the graphite doesn’t show through the translucent paint later. -
Add the stripes:
Sketch the diagonal stripes of the candy cane. Vary the width slightly to give it a natural, organic look rather than making them mathematically perfect. -
Erase guidelines:
Take your kneaded eraser and gently roll it over the sketch. You want to lift up most of the graphite, leaving only the faintest ghost lines to guide your brush.
Step 2: Painting the Candy Cane
-
Mix your red:
Create a vintage red hue by mixing Alizarin Crimson with a tiny touch of Burnt Sienna. This warms up the red so it doesn’t look too glaring or artificial. -
Paint the first stripes:
Using your round brush, paint every other stripe with your red mix. Start at the top curve and work your way down so you don’t smudge your work. -
Create a gradient:
As you paint each red stripe, add a tiny bit more water to the edge of the stripe that faces the light source (imagined from the left). This creates a subtle highlight and makes the candy cane look round. -
Wait for drying:
Let the red stripes dry completely. I usually give it about 10-15 minutes or use a hairdryer on a low setting. -
Mix a shadow color:
Dilute a very small amount of Payne’s Grey with plenty of water until it’s a whisper-light grey wash. -
Paint the white stripes:
Apply this pale grey wash to the ‘white’ stripes, concentrating the color on the right side of the candy cane to create a shadow side. -
Blend the shadows:
While the grey is wet, use a clean, damp brush to soften the edge towards the center, leaving the left side of the white stripe pure white paper. -
Add detail to red stripes:
Once everything is dry again, glaze a slightly darker version of your red mix on the right side of the red stripes to deepen the roundness effect.
Wet-on-Dry Precision
For crisp candy cane stripes, always use the ‘wet-on-dry’ technique. Ensure the paper is bone dry before painting adjacent stripes to prevent colors bleeding.
Step 3: Adding the Mixed Media Bow
-
Mark hole positions:
Identify the spot on the left side of the candy cane where the bow will sit. Mark two tiny dots about 1/4 inch apart vertically. -
Punch holes:
Carefully punch two small holes at your marks. If you don’t have a tiny crafted hole punch, you can use a thick needle or the tip of a craft knife. -
Thread the twine:
Cut a piece of jute twine and thread it through the holes from back to front. -
Prepare the ribbon:
Cut a length of the soft pink chiffon ribbon. Lay it flat against the paper, centered between the two twine ends emerging from the holes. -
Tie the bow:
Use the jute twine to tie a tight knot around the center of the pink ribbon, securing it against the paper. Then, tie the twine into a bow on top of the ribbon. -
Trim the ends:
Trim the tails of both the pink ribbon and the twine at an angle for a polished finish.
Scented Stationery
Before gifting, lightly mist the back of the card with peppermint essential oil spray. The scent adds a magical, multi-sensory surprise for the recipient.
Now you have a charming, handcrafted holiday card ready to warm someone’s heart
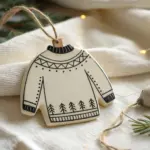
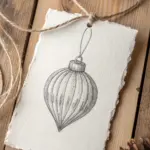
Patterned Ornaments (Mix-and-Match)
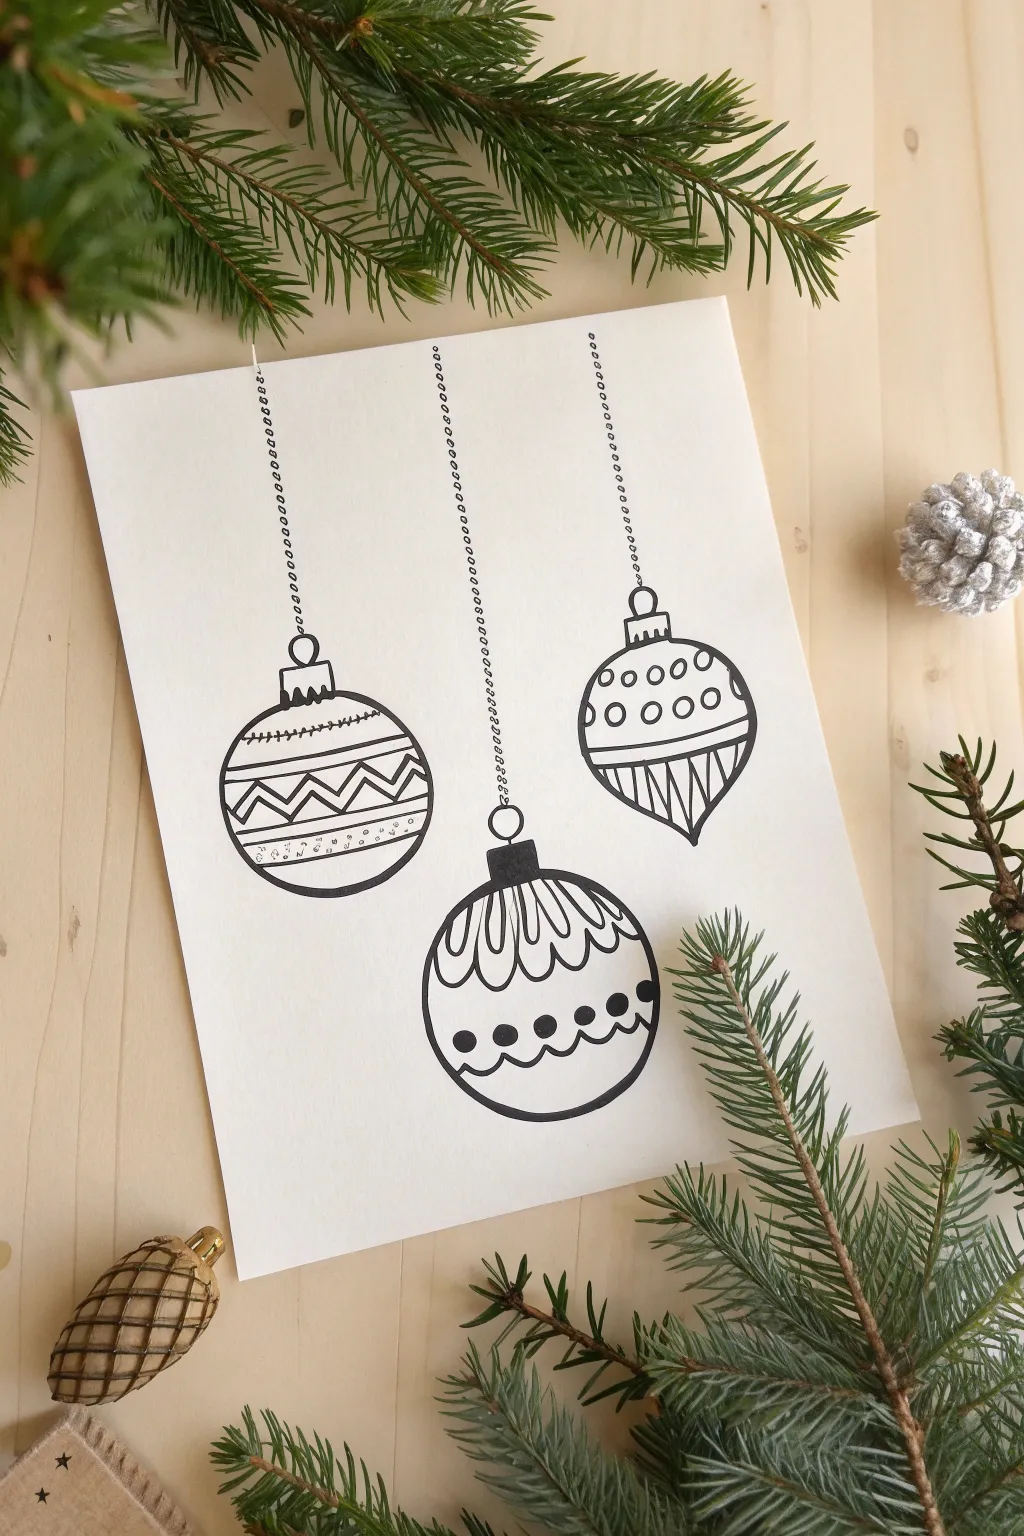
These charming hand-drawn ornaments are perfect for adding a touch of festive minimalism to your holiday cards or bullet journals. Using simple ink lines and repeating patterns, you’ll create a trio of baubles that look intricate but are surprisingly easy to sketch.
Detailed Instructions
Materials
- White cardstock or heavy drawing paper
- Fine liner pen (black, 0.3mm or 0.5mm)
- Pencil (HB or H)
- Eraser
- Ruler (optional but helpful)
Step 1: Planning and Outlines
-
Map out the positions:
Start by lightly sketching three vertical lines coming down from the top edge of your paper using your pencil. Vary the lengths so the ornaments will hang at different heights—one short on the left, one very long in the middle, and one medium length on the right. -
Sketch the basic shapes:
At the bottom of the left line, draw a classic round circle shape. For the middle line, sketch a slightly larger, spherical shape. On the right line, create a distinctive ‘onion’ or teardrop shape that points downward. -
Add caps and hooks:
Draw a small rectangle or square directly on top of each ornament shape where it meets the string. Above that square, add a tiny half-circle loop for the hook. -
Create guidelines for patterns:
Lightly draw curved horizontal lines across the bodies of the ornaments. These will serve as ‘belts’ to separate your different pattern sections. The curves should follow the roundness of the ball to give it a 3D effect.
Steady Hand Trick
Rest the side of your hand on a scrap piece of paper while drawing. This prevents smudging the ink you just laid down and stabilizes your wrist for smoother curves.
Step 2: Inking the Basics
-
Ink the strings:
Switch to your fine liner pen. Instead of tracing a solid straight line for the strings, draw a chain of tiny, uniform circles stacked on top of each other. This beading effect adds lovely texture. -
Outline the ornament shapes:
Carefully trace the outer perimeter of your three ornaments and their caps. Make these lines smooth and confident. -
Erase pencil marks:
Once the main outlines are completely dry (wait a minute to avoid smudges), gently erase your initial pencil sketches, leaving just the ink and your pattern guidelines if you want to keep them for reference.
Step 3: Adding Patterns
-
Patterning the left ornament:
For the round ornament on the left, draw a double border across the middle. Fill the center band with a zig-zag line. Above and below this band, add stripes or small rows of dots to create variety. -
Detailing the middle ornament:
On the lowest, middle ornament, draw a scalloped line (like flower petals) near the top. Add vertical lines inside these petals. Near the bottom, draw a wavy line and fill the space below it with small solid black dots for contrast. -
Decorating the right ornament:
For the onion-shaped ornament, create a band of circles across the upper half. Some circles can be hollow, others filled with a dot. On the bottom tapered section, draw vertical stripes that converge at the bottom point. -
Refine the lines:
Go back over any pattern lines that need thickening. Adding a little extra weight to the bottom curves of the patterns can help suggest shadow and volume.
Add Some Sparkle
Use a metallic gold or silver gel pen to trace over specific pattern bands or to fill in the little circles on the hanging strings for a festive shimmer.
Step 4: Final Touches
-
Darken the caps:
Color in the rectangular caps on top of the ornaments with solid black ink, or add vertical stripes to them. Solid black adds a nice visual anchor. -
Add texture to bands:
I like to revisit the empty bands on the ornaments and add tiny stippling (dots) or little hatch marks to keep the design from looking too empty. -
Final clean up:
Give the entire drawing one last review. Ensure all your ink is totally dry, then do a final pass with your eraser to remove any remaining graphite ghosts.
Now you have a set of custom-designed ornaments ready to display

PENCIL GUIDE
Understanding Pencil Grades from H to B
From first sketch to finished drawing — learn pencil grades, line control, and shading techniques.
Explore the Full Guide
Stack of Wrapped Gift Boxes

Capture the anticipation of holiday giving with this charming illustration of stacked presents. Using simple geometric shapes and soft shading, you’ll build a towering collection of gifts that looks both structured and delightfully handmade.
How-To Guide
Materials
- Heavyweight sketch paper or mixed media notebook
- HB or 2B pencil for sketching
- Fine liner pens (0.1mm and 0.3mm, black and brown)
- Watercolor paints or colored pencils (sage green, cream, burnt sienna)
- Small round paintbrush (size 2 or 4)
- Ruler (optional)
- Eraser
Step 1: Building the Structure
-
establish the base:
Start by lightly sketching a large, flat rectangular box at the bottom of your page. Draw this in perspective so you can see the top surface and two sides. This green box will be the foundation for your tower. -
stack the second tier:
Draw a slightly smaller cube shape resting directly on top of the base rectangle. Center it roughly, but it doesn’t need to be perfectly symmetrical—a little offset adds character. -
add the middle box:
Place a third, smaller cube on top of the second one. Keep your pencil lines very faint so they are easy to erase later. -
top it off:
Sketch the final, smallest cube at the very peak of the stack. This creates a pleasing pyramid composition that draws the eye upward.
Step 2: Detailing the Presents
-
draw the ribbons:
Sketch thin, parallel lines running down the center of each box to represent ribbons. For the bottom box, draw a simple flat band. For the upper boxes, ensure the ribbons follow the contour of the cubes. -
crown with a bow:
On the very top box, sketch a loose, floppy bow. Draw two loops and two tails draping down the side. Keep the lines fluid to suggest fabric softness. -
outline with ink:
Take your 0.1mm fine liner and carefully trace over your pencil lines. Use a slightly shaky or broken line style rather than using a ruler; this gives the drawing an organic, illustrative feel. -
erase guidelines:
Wait a moment for the ink to set to avoid smudging, then gently erase all the underlying pencil sketches.
Ribbon Reality Check
When drawing ribbons wrapping around a box, ensure the lines follow the same perspective angle as the box edges. This ‘wraps’ the object visually rather than flattening it.
Step 3: Adding Color and Texture
-
paint the base:
Mix a muted sage green watercolor. Apply a wash to the large bottom box. I like to keep the wash uneven, perhaps darker on the side panels, to suggest shadow and depth. -
add subtle shadows:
While the green paint is still damp on the bottom box, drop a tiny bit of darker green or grey along the bottom edge and right side to ground the object. -
pattern the white boxes:
The top three boxes are white, but they need texture. Use your fine liner to add tiny, sparse speckles or little ‘v’ shapes to simulate a speckled paper texture. -
color the ribbons:
Use a brown or dark grey fine liner to shade in the ribbons on the middle boxes. Cross-hatch them to make them look like a different material than the paper. -
shade the bow:
Use a very light wash of warm brown or beige for the top bow. Let the color pool slightly in the center knot for natural shading. -
final shading pass:
Once all paint is dry, use a grey marker or very diluted black watercolor to add a shadow cast by the ribbons onto the boxes, and by the upper boxes onto the ones below them. -
highlight details:
If you have a white gel pen, add tiny dots to the center of the bow or the edges of the green box to mimic light catching the corners.
Gift Tag Add-On
Draw a small kraft-paper tag hanging from the top bow with a string trailing down. Write a tiny name or ‘No Peeking’ on it for an extra dose of storytelling.
Now you have a festive little tower ready to decorate your journal or holiday cards
Easy Snowflake Variations
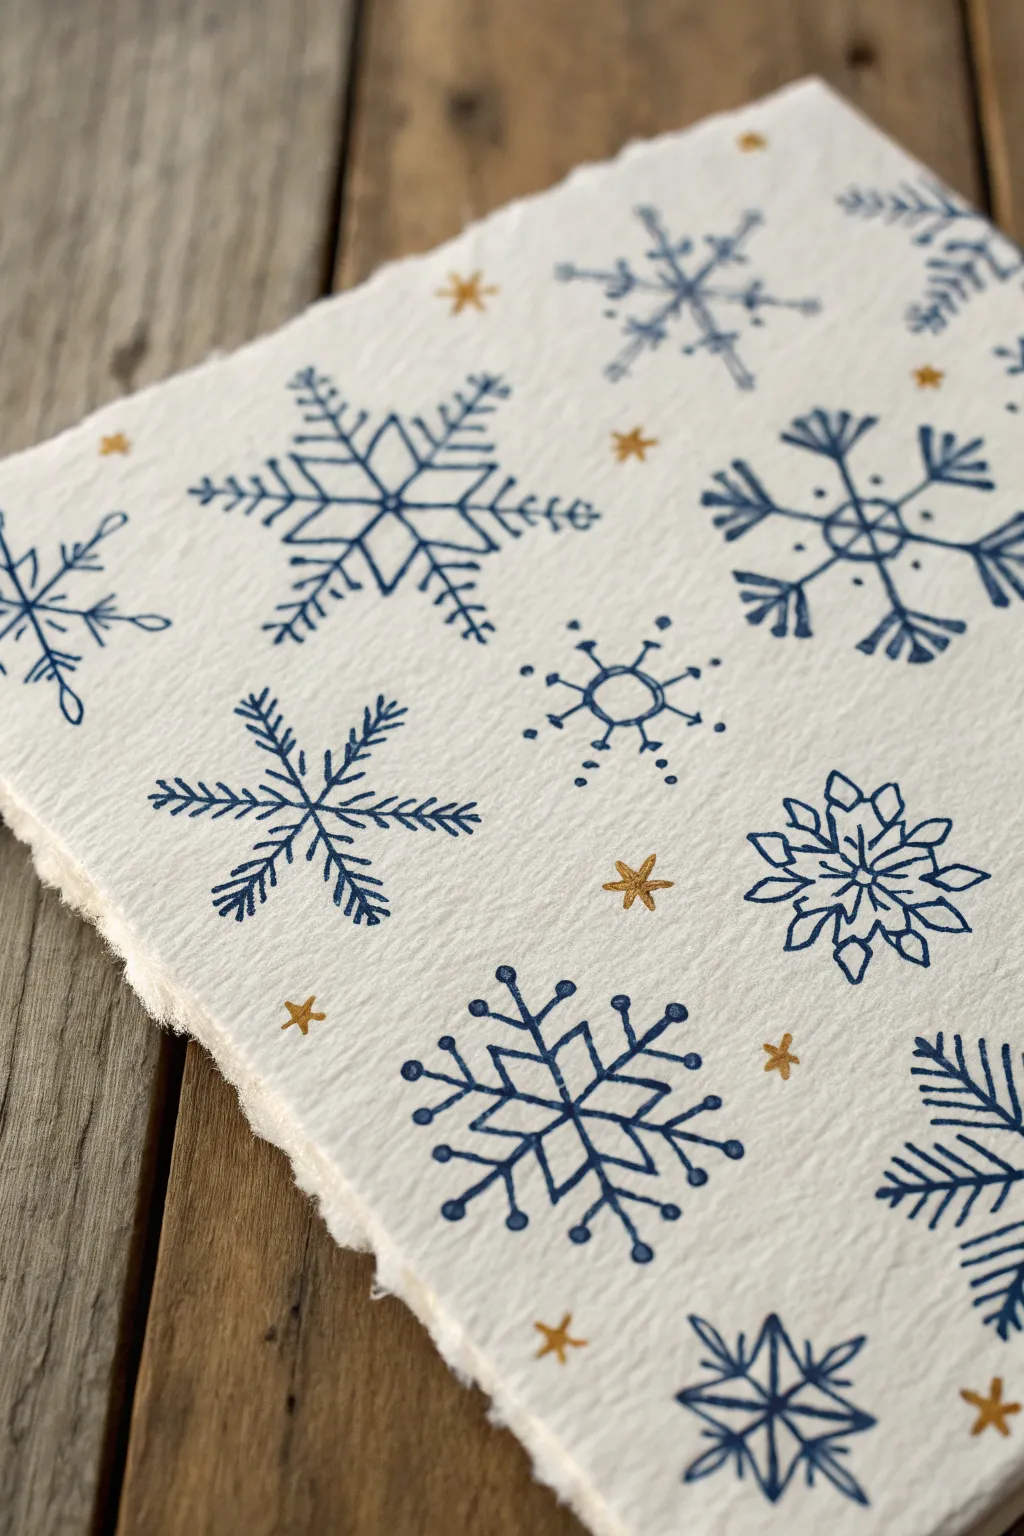
Create a charming winter composition by exploring different snowflake geometries on textured, handmade paper. The combination of deep blue ink and rustic paper textures gives this piece a classic, folky feel perfect for holiday cards or winter decor.
Step-by-Step Tutorial
Materials
- Heavyweight handmade paper with deckled edges (white or off-white)
- Fine liner pens (Dark Blue or Navy, sizes 0.5mm and 0.8mm)
- Gold gel pen or metallic marker (fine tip)
- Pencil and eraser
- Ruler
Step 1: Preparation & Layout
-
Prepare your surface:
Place your handmade paper on a flat, clean surface. If the paper is particularly textured or bumpy, tape the corners down lightly with painter’s tape to keep it steady while you draw. -
Map the spacing:
Using a pencil very lightly, mark out a rough grid of points where the centers of your snowflakes will go. Aim for a staggered pattern rather than perfect rows to keep it looking organic. -
Sketch basic skeletons:
Lightly pencil in the main axes for different snowflakes. Some should have six points (standard), while others might have four or eight for variety. Keep the lines faint so they are easy to erase later.
Bleeding Lines?
Handmade paper is thirsty! If your ink bleeds, switch to a pigment liner or micron pen, which sits on top of the fibers better than liquid ink rollers.
Step 2: Drawing the Snowflakes
-
Start with a Diamond Center snowflake:
Using your blue fine liner, draw a small diamond shape in the center of one of your guide crosses. Extend lines outward from the diamond’s corners. -
Add outward details:
On the lines extending from the diamond, add ‘V’ shapes facing outwards to create a feathery spruce-tree look. Repeat this on all four or six arms. -
Draw a Radial Star snowflake:
Move to a new spot. Draw a central point and extend six straight lines outward like spokes on a wheel. I prefer to make these lines slightly longer for dramatic effect. -
Embellish the Radial Star:
Draw small ‘V’ shapes near the tips of each spoke. Then, connect the spokes near the center with curved webbing lines to form a small inner hexagon. -
Create a Geometric snowflake:
For a bolder look, draw a six-pointed star. At the tip of each point, draw a distinct diamond shape. Connect the inner angles with straight lines to form a solid geometric core. -
Design the ‘Ball & Stick’ variation:
Draw a central circle. Extend six lines outward. Instead of sharp points, cap each line with a small filled-in circle or finding. Add small dots along the spokes for texture. -
Sketch a Leafy snowflake:
Draw your six main axes. Instead of straight ‘V’ shapes, draw curved laurel-leaf shapes extending from the center outward along the spines. -
Fill the gaps:
Continue filling your pencil grid with unique variations. Try mixing straight lines with curved brackets, or open circles with solid diamonds. Ensure no two adjacent snowflakes look exactly identical. -
Partial snowflakes:
Don’t forget the edges! Draw halves or quarters of snowflakes ‘falling’ off the edge of the paper to give the impression of an infinite pattern.
Variation Trick
Stuck on designs? Use the numbers 4, 6, and 8. Draw a 4-armed flake, then a 6-armed one, then an 8-armed one to force visual variety automatically.
Step 3: Finishing Touches
-
Erase guidelines:
eWait until the ink is completely dry—handmade paper can be absorbent and hold ink wet longer than standard paper. Gently erase your pencil marks. -
Add gold accents:
Take your gold gel pen and draw small, five-pointed stars or simple asterisks in the empty spaces between the large blue snowflakes. -
Detail with dots:
Add tiny gold dots randomly around the stars to create a magical, dusting effect. -
Review and refine:
Check your blue lines. If the textured paper caused any skips in the ink, carefully go back over those spots to ensure the lines are solid and crisp.
Your page is now filled with a flurry of unique, hand-drawn crystals ready to be displayed


Santa’s Sleigh Side View Sketch
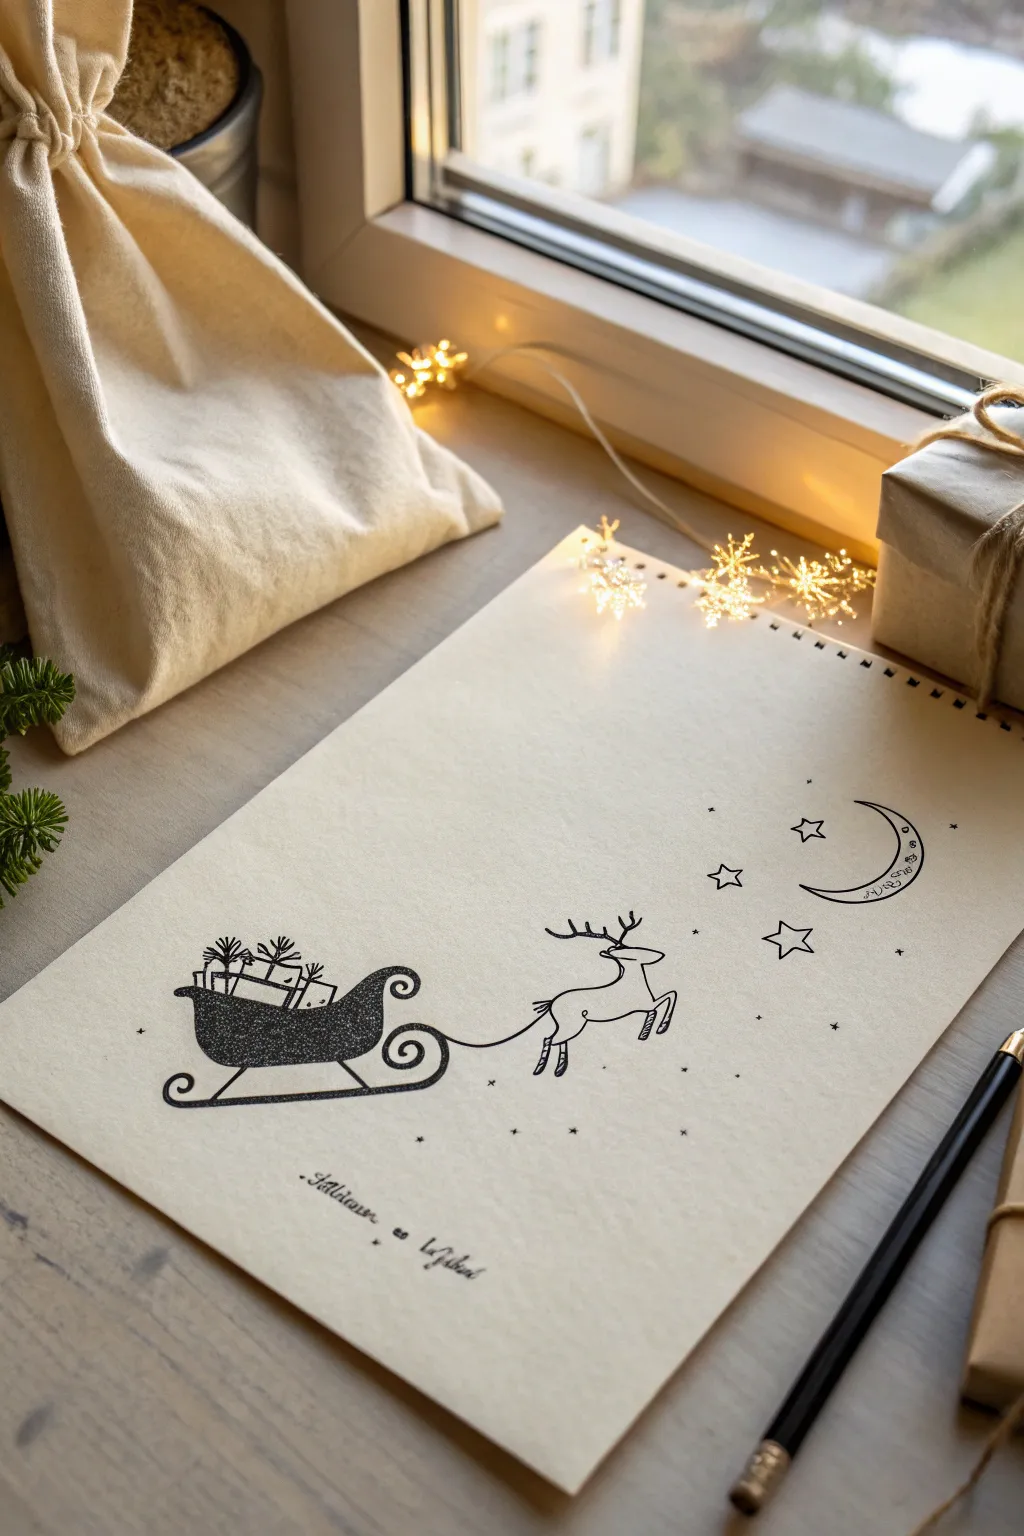
Capture the magic of Christmas Eve with this charming minimalist illustration. Using crisp black ink against cream-colored paper, you’ll create a classic scene of Santa’s sleigh and reindeer soaring past a crescent moon.
Step-by-Step
Materials
- Cream or off-white sketchbook paper (heavyweight)
- Fine-liner pen (0.3mm or 0.5mm, black)
- Thicker marker or brush pen (black)
- Pencil (HB or 2H)
- Eraser
- Ruler (optional)
Step 1: Drafting the Scene
-
Check your layout:
Begin by lightly planning the positioning of your elements with a pencil. Mark a spot in the lower-left quadrant for the sleigh and a spot slightly higher to the right for the reindeer to give the impression of upward flight. -
Form the sleigh body:
Sketch the main body of the sleigh. Draw a curved, boat-like shape. At the front, curl the line upward into a decorative swirl, and do the same for the back, making the rear swirl slightly larger. -
Add the runners:
Below the sleigh body, draw the runners. Start with a long horizontal line that curves up at the front to meet the sleigh’s nose. Add two small vertical connectors to attach the runner to the main body. -
Stack the gifts:
On top of the sleigh, lightly sketch three or four square and rectangular shapes to represent presents. Make them overlap slightly for a natural look. -
Outline the reindeer:
Move to the right side of the paper. Sketch the reindeer’s body using simple organic shapes—an oval for the chest and a smaller circle for the head. Connect them with a curved neck. -
Add legs and antlers:
Draw the legs in mid-leap. The front legs should be bent upward, and the back legs extended. Add a short tail and a majestic set of antlers branching off the head. -
Sketch the celestial elements:
In the upper right corner, outline a crescent moon. Scatter a few five-pointed stars around the moon and between the reindeer and the sleigh.
Clean Lines Pro-Tip
When filling in the large black sleigh, outline the shape first, then fill it. This creates a barrier that prevents you from accidentally coloring outside the lines.
Step 2: Inking and Details
-
Ink the sleigh silhouette:
Using your thicker marker or brush pen, carefully trace the outline of the sleigh’s body. Once outlined, fill the entire shape in with solid black ink to create a bold silhouette. -
Detail the presents:
Switch to your fine-liner pen. Outline the boxes of the gifts. Instead of filling them in, draw ribbons and bows on top using thin lines to keep them distinct from the dark sleigh. -
Define the runners:
Go back to the runners with a slightly thicker line weight than the gifts, but keep them open rather than solid filled to distinguish them from the sleigh body. -
Ink the reindeer:
Trace your reindeer sketch with the fine-liner. Keep the lines clean and continuous. I find it helpful to ink the antlers last to ensure they look delicate. -
Connect the team:
Draw a single, sweeping curved line connecting the front of the sleigh to the reindeer’s harness area, acting as the rein. -
Celestial touches:
Ink the crescent moon and the stars. For the moon, you can add a small face profile or decorative texture inside if you wish, or keep it simple like the example. -
Add text (optional):
If you want to include a holiday message, penciling a guide line at the bottom first ensures your handwriting stays straight. -
Erase and clean:
Wait at least five minutes to ensure the ink is completely dry. Gently erase all visible pencil marks, being careful near the solid black areas to avoid smudging. -
Final stardust:
To finish, add tiny dots or ‘stardust’ speckles around the reindeer’s hooves and the stars using the very tip of your fine-liner.
Golden Glow Level-Up
Use a gold gel pen or metallic marker to fill in the stars and the ribbons on the gifts. The metallic sheen looks incredible against the cream paper.
Now you have a timeless holiday illustration ready to frame or give as a card
Holiday Gnome With Oversized Hat
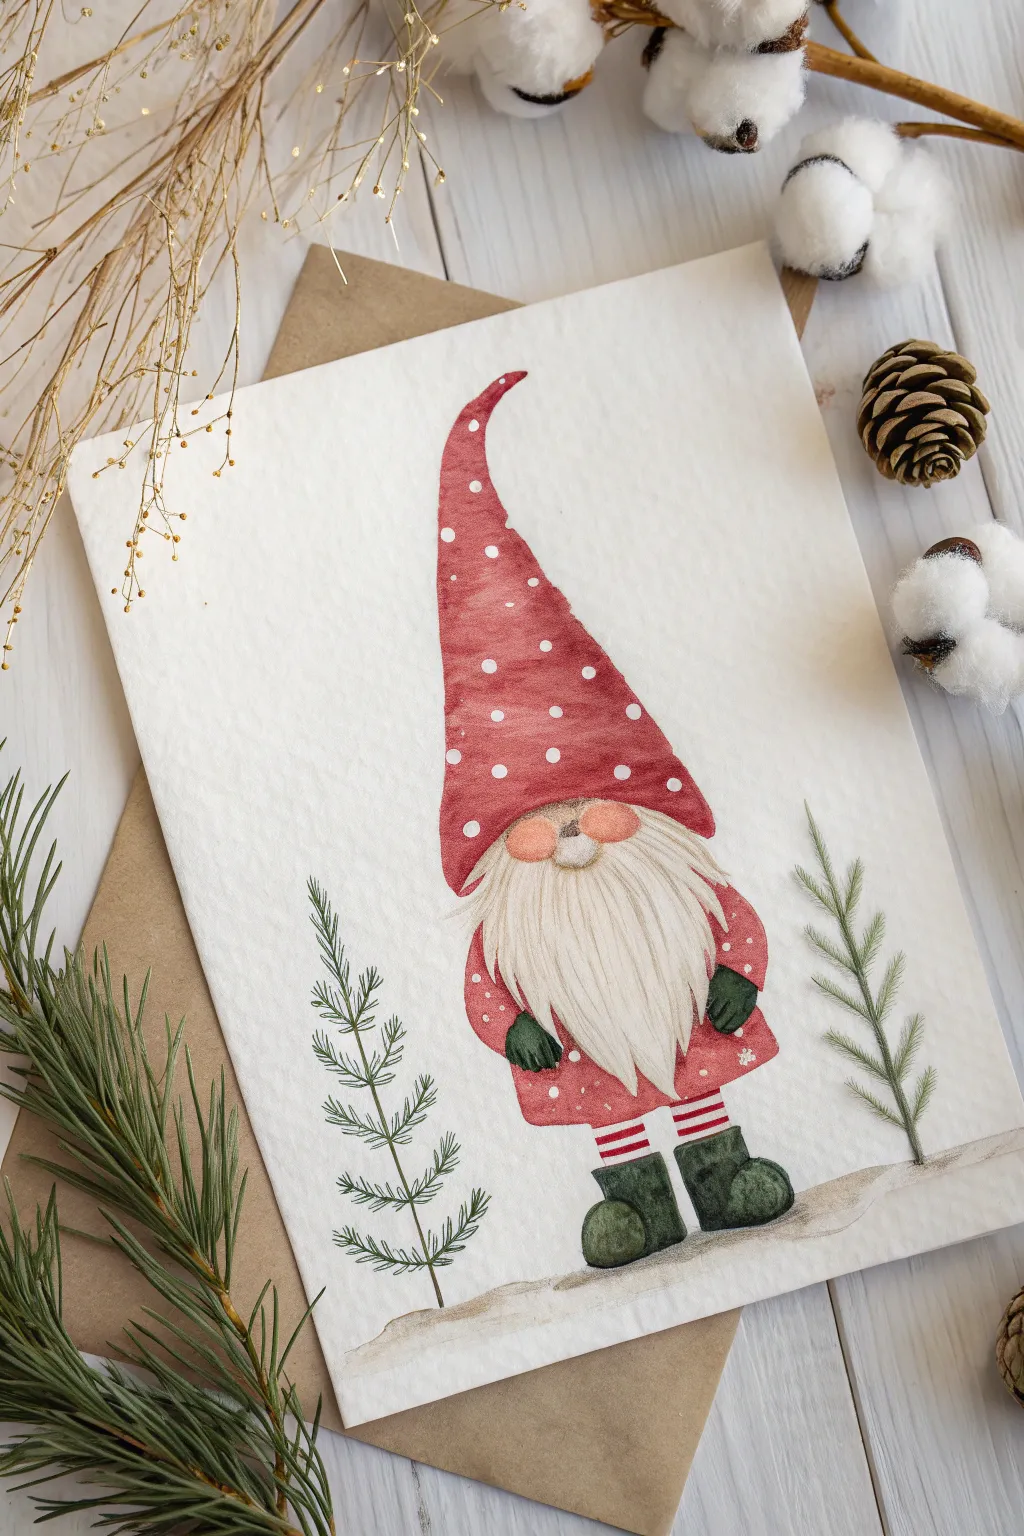
This charming holiday gnome features a delightfully oversized red hat and a fluffy white beard that anchors the character. Painted in soft watercolors with crisp details, it makes for a heartwarming addition to any handmade Christmas card or festive wall art.
Step-by-Step Tutorial
Materials
- Cold-press watercolor paper (300 gsm recommended)
- Pencil (HB or 2H)
- Kneaded eraser
- Watercolor paints (Alizarin Crimson, Sap Green, Payne’s Grey, Yellow Ochre, Burnt Sienna)
- Round watercolor brushes (Size 4 and Size 0 or 1 for details)
- White gouache or white gel pen
- Two jars of water
- Paper towels
Step 1: Sketching the Character
-
Establish the shapes:
Begin with a very light pencil sketch. Draw a large, curved triangular shape for the hat that leans to the left. Just below it, sketch a rounded, squat body shape. -
Add facial features:
Right where the hat meets the body, draw a small oval for the nose. On either side of the nose, sketch two slightly larger circles for the rosy cheeks. -
Define the beard:
From under the nose, draw a long, flowing beard shape that tapers to a point near the bottom of the body. Make the edges slightly jagged to suggest hair texture. -
Sketch the limbs:
Add two small oval shapes for mitts emerging from the beard’s sides. Draw two straight legs with striped socks and chunky boots at the bottom. -
Add nature elements:
Lightly sketch two simple pine saplings on either side of the gnome to frame the composition.
Pro Tip: Texture Trick
To give the hat a ‘wooly’ felt texture, gently blot the wet red paint with a crumpled tissue. This lifts pigment unevenly for a fabric look.
Step 2: Painting the Gnome
-
Base wash for the nose:
Mix a very dilute wash of Yellow Ochre and a touch of Burnt Sienna. Paint the nose and cheeks, keeping the color light and watery. -
Painting the hat:
Using your Alizarin Crimson, paint the large hat shape. I like to keep the paint fairly wet so the pigment pools slightly at the edges for texture. Avoid the white polka dot areas if you are skilled at negative painting, otherwise paint it solid red and we will add dots later. -
Clothing layers:
Use the same red mixture to paint the visible parts of the gnome’s coat and sleeves. Let these areas dry completely before moving on. -
Socks and boots:
Paint the stripes on the socks carefully with your smallest brush using the red mix. Paint the boots and mittens with a dark Sap Green, perhaps mixed with a little Payne’s Grey to deepen it. -
Creating the beard texture:
Mix a very watery grey using Payne’s Grey. With a fine brush, paint thin, vertical strokes following the flow of the beard to create shadow and depth, leaving plenty of paper white showing.
Step 3: Background and Details
-
Painting the trees:
Using a mix of Sap Green and a touch of brown, paint the thin stems of the pine saplings. Use short, quick strokes to flick the needles outward from the stems. -
Grounding shadow:
Mix a light, watery grey-brown. Paint a horizontal wash beneath the gnome’s boots and the trees to ground the figure, softening the edges with clean water. -
Adding the polka dots:
Once the red paint is bone dry, use white gouache or a white gel pen to add crisp polka dots to the hat and coat. Vary their placement to look natural. -
Refining the face:
Add a slightly stronger blush of red to the top of the cheeks and nose while the base skin tone is dry to make him look cold. -
Final outlines:
Wait for everything to dry completely. If desired, use a very sharp pencil or fine liner to gently re-emphasize the edges of the beard and boots for clarity.
Level Up: Sparkle & Shine
Mix a tiny pinch of iridescent mica powder into your white gouache for the snowflakes or beard highlights to give the card a magical winter shimmer.
Now you have an adorable festive friend ready to greet the season
Tiny Christmas Doodle Grid Page
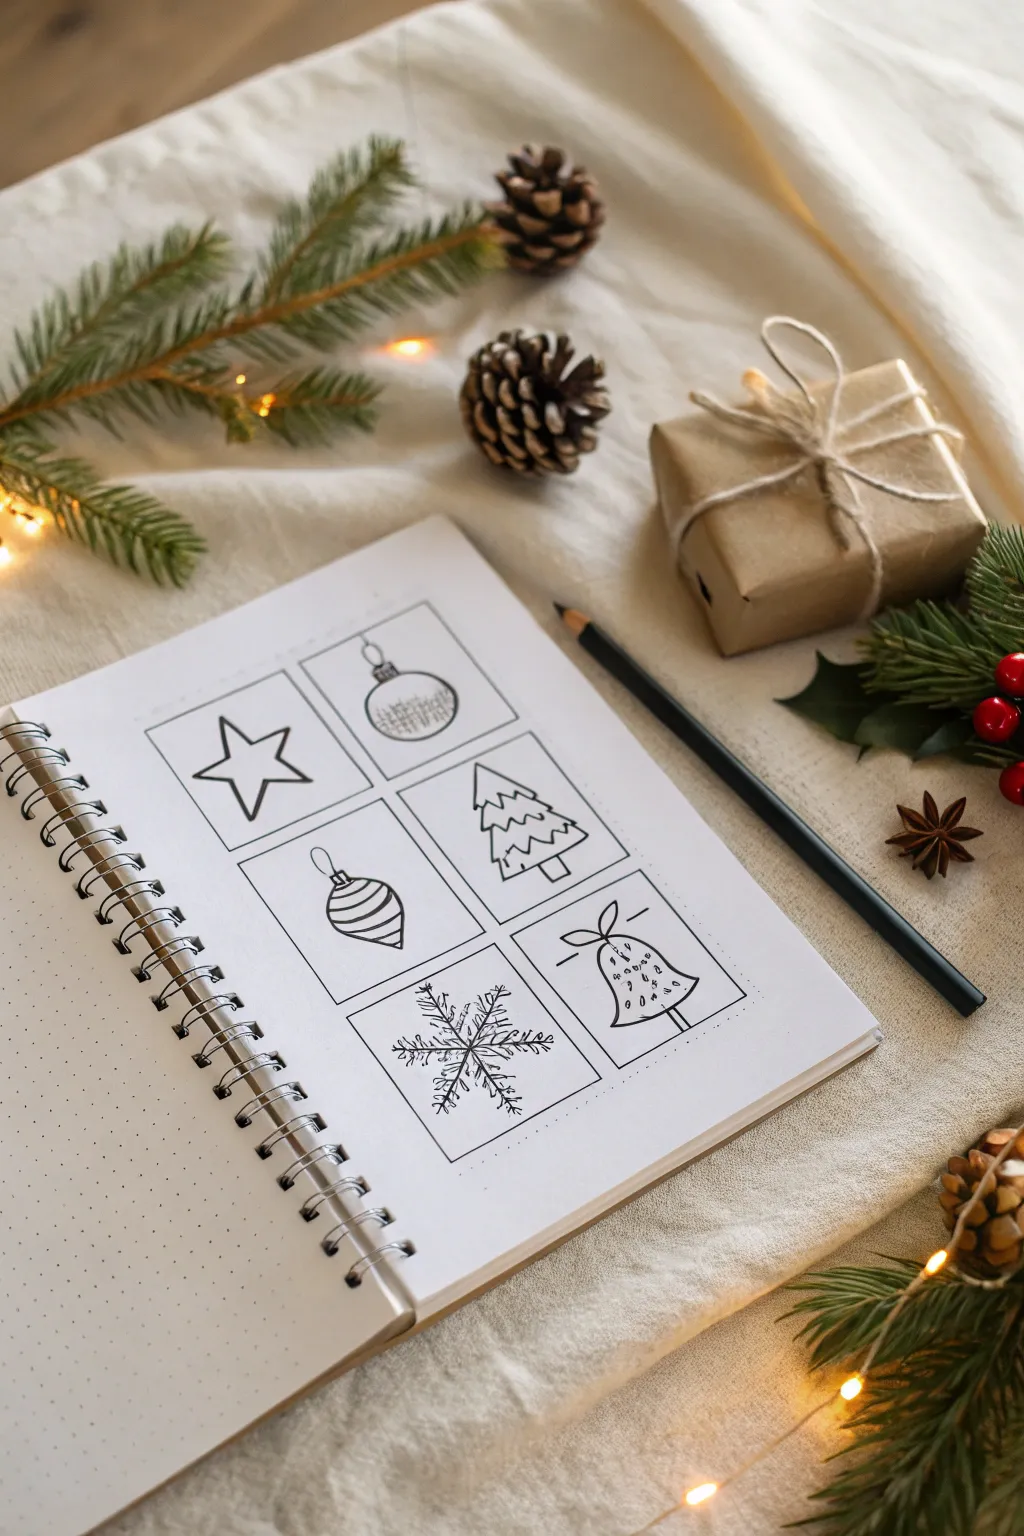
Celebrate the festive season with this charming grid of miniature Christmas illustrations. Using simple black ink lines on dot-grid paper creates a clean, modern aesthetic perfect for bullet journals or holiday cards.
Detailed Instructions
Materials
- A5 dot grid notebook or sketchbook
- Pencil (HB or H)
- Ruler
- Eraser
- Fine liner pen (01 or 03 size, black ink)
Step 1: Setting Up the Grid
-
Measure the layout:
Start by deciding on the size of your squares. For a standard A5 journal, 4×4 centimeter squares work beautifully. Leave a small gap (about 0.5 cm) between each box to keep the designs distinct. -
Draw the frame:
Using your pencil and ruler, lightly sketch a main rectangular frame that will house all six boxes. This helps ensure everything is centered on the page before you commit to individual squares. -
Divide the space:
Mark out the six individual boxes within your frame—two columns wide and three rows high. Use the dots on your paper as a guide to keep your lines perfectly straight and parallel. -
Ink the borders:
Once satisfied with the placement, go over your pencil grid with the fine liner pen. Use the ruler for crisp, sharp edges. Let the ink dry completely for a minute, then erase the pencil guidelines.
Steady Hand Pro-Tip
breathe out slowly as you draw long straight lines. It naturally steadies your hand and prevents the line directly wavering
Step 2: Sketching the Elements
-
Draft the star:
In the top-left box, lightly pencil a classic five-point star. Aim for symmetry, but don’t worry if it’s slightly whimsical; that adds charm. -
Outline the round bauble:
In the top-right box, sketch a circle with a small square cap on top and a loop. Add a horizontal band across the lower third of the sphere for decoration. -
create the tree shape:
For the middle-right box, draw a simple Christmas tree composed of three stacked triangles, getting slightly wider as you go down, centered on a small trunk. -
Shape the teardrop ornament:
In the middle-left box, sketch an elongated teardrop shape. Add the cap at the top and curved horizontal stripes across the body to suggest roundness. -
Draft the bell:
In the bottom-right box, draw a bell shape flaring at the bottom with a clapper visible. Add a bow at the very top and some decorative dots on the bell’s body. -
Plan the snowflake:
In the final bottom-left box, draw a simple cross, then an ‘X’ over it to create an eight-pointed asterisk shape. This serves as the skeleton for your snowflake.
Make It Festive
Add tiny pops of gold gel pen or red marker to just one detail in each square for a subtle, elegant splash of holiday color
Step 3: Inking the Designs
-
Ink the star:
Trace over your star with the fine liner. Keep your hand steady and connect the points with confident strokes. -
Detail the round bauble:
Ink the circle and cap. For the decorative band, draw small, vertical hatch lines within the strip to create texture. -
Define the teardrop:
Trace the teardrop ornament. When inking the stripes, curve them slightly downwards to emphasize the 3D form of the ornament. -
finalize the tree:
Go over the tree outline. I like to add zig-zag scribbles inside the triangles to mimic pine needles or garland without filling it in completely. -
Complete the snowflake:
Ink the main spokes of the snowflake. Add small ‘V’ shapes branching off the ends of each line to create the crystallized look. -
Finish with the bell:
Trace the bell and the bow. Add tiny stippling dots or small circles on the bell’s surface for a bit of sparkle effect. -
Final clean up:
Wait at least five minutes to ensure the ink is totally bone-dry. Then, gently erase all remaining pencil sketches to leave a crisp, black-and-white finish.
You now have a clean, festive spread ready to inspire your holiday planning


Have a question or want to share your own experience? I'd love to hear from you in the comments below!