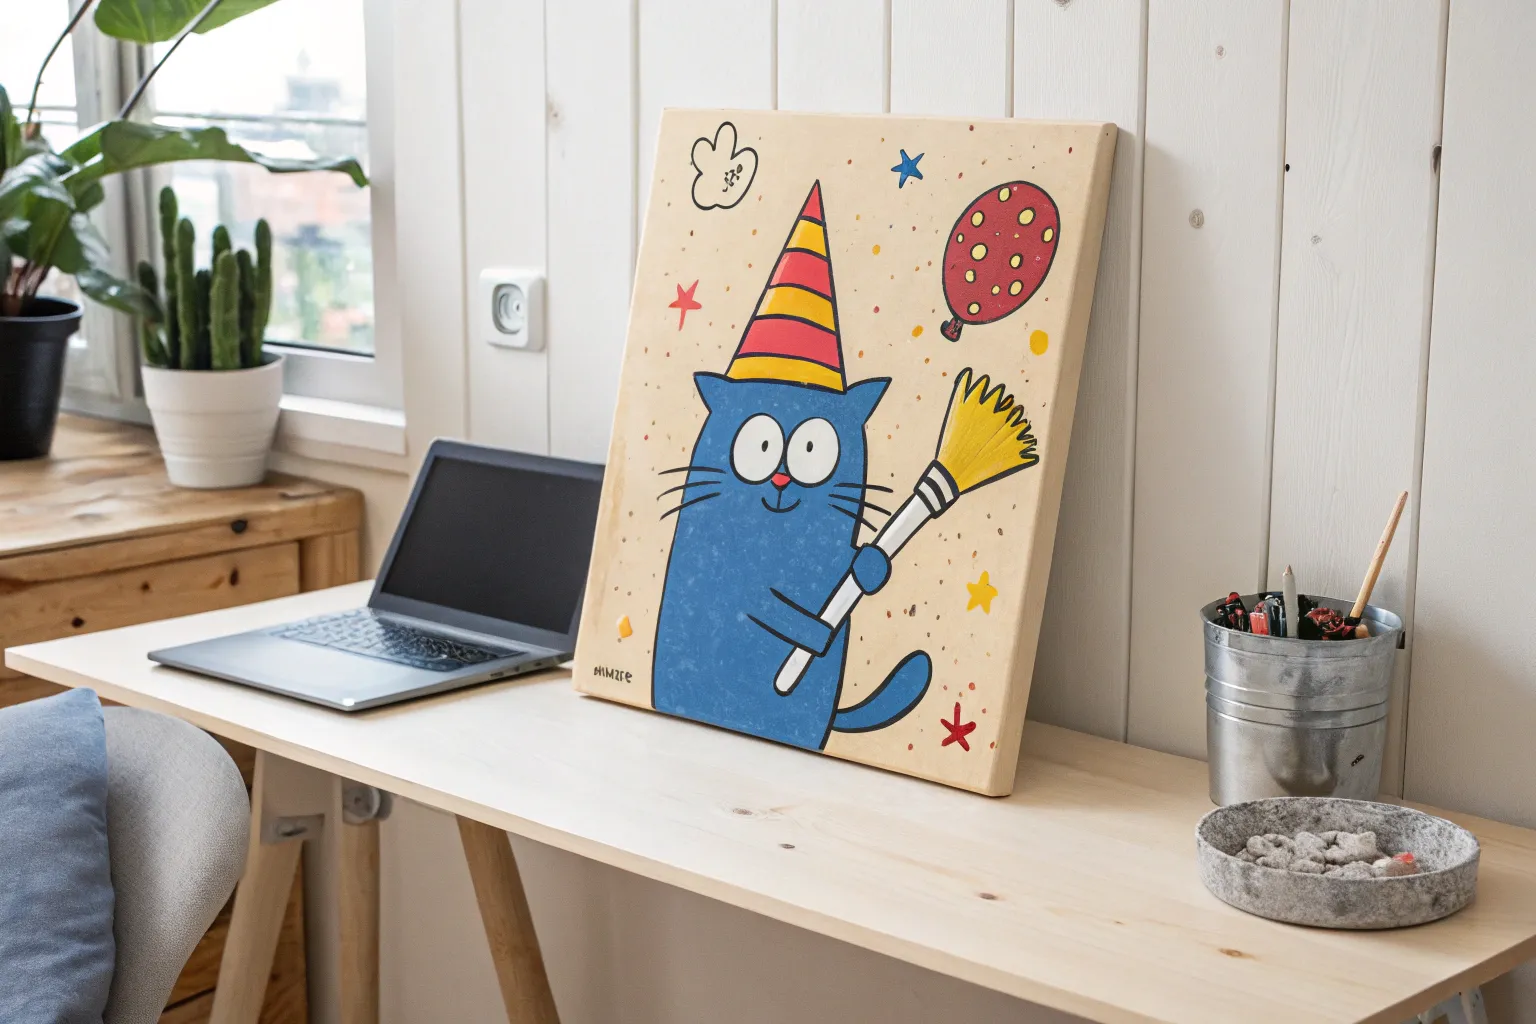
If you’ve ever wanted your canvas to make someone snort-laugh, funny acrylic paintings are the easiest way in. Here are my favorite quirky, low-pressure ideas that look even better when they’re a little imperfect.
Derpy Frog Popping Out of Water
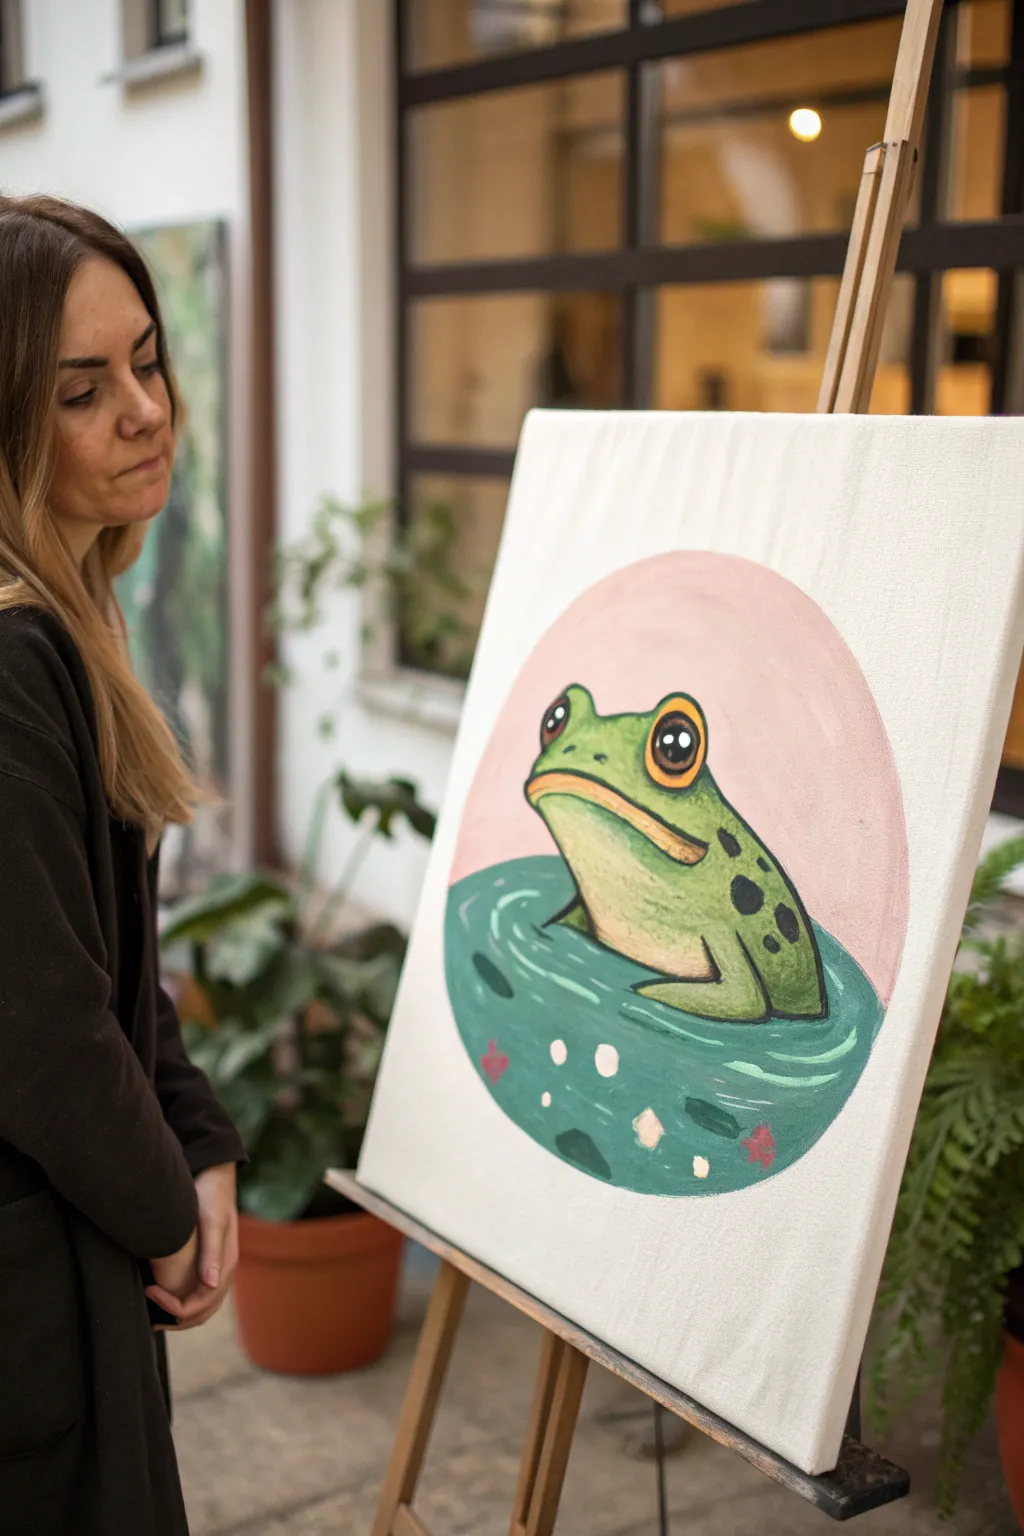
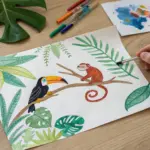
Capture a whimsical moment with this charming acrylic painting of a wide-eyed frog emerging from ripples. Its clean circular composition creates a modern, illustrative look that highlights the frog’s quirky expression perfectly.
Step-by-Step Guide
Materials
- Square canvas (stretched)
- Acrylic paints: White, olive green, yellow ochre, phthalo green, dusty pink, black, brown
- Large flat brush (for background)
- Medium filbert brush
- Fine detail liner brush
- Compass or round object for tracing (plate or bowl)
- Pencil
- Palette and water cup
Step 1: Setting the Composition
-
Outline the circle:
Begin by lightly tracing a large circle in the center of your canvas using a pencil and a round template like a dinner plate. -
Sketch the frog:
Inside the circle, sketch the basic contour of the frog’s head and body. Position the body so the bottom third will be submerged in water. -
Add facial details:
Draw two large, prominent eyes near the top of the head and a wide mouth line that curves slightly downwards for that lovable ‘derpy’ expression. -
Define the water line:
Sketch a curved line across the frog’s chest where the water meets the body, and add a few concentric ripples around it.
Step 2: Painting the Background
-
Mix the pink hue:
Create a soft, dusty pink by mixing a dab of red or magenta into a generous amount of white, neutralizing it slightly with a tiny touch of brown or ochre if it’s too bright. -
Fill the upper circle:
Using a medium flat or filbert brush, carefully paint the sky area inside the circle behind the frog. Keep your edges crisp against the pencil line. -
Paint the water base:
Mix a teal shade using phthalo green, a touch of blue, and white. Fill in the water section at the bottom of the circle, carefully painting around the frog’s body.
Uneven Circle Edges?
If painting a perfect circle freehand is tough, mask the outside area with painter’s tape or cut a hole in a piece of paper to use as a stencil for the background colors.
Step 3: Bringing the Frog to Life
-
Base coat the frog:
Mix a light olive green using yellow ochre, a touch of green, and white. Apply this as a flat base coat over the entire frog skin area. -
Paint the underbelly:
While the base is still slightly workable or after it dries, mix a creamy yellow-white and paint the throat and chest area, blending the edges softly into the green. -
Add shadows:
Darken your green mixture with a bit of brown or black. Paint shadows under the mouth line, around the base of the eyes, and along the sides of the body to create volume. -
Detail the eyes:
Paint the outer rim of the eyes with a warm orange-yellow. Fill the pupils with solid black, leaving a small white circle for the highlight later. -
Add skin texture:
Using a smaller brush, dab a few dark green or black spots onto the frog’s back and sides for pattern.
Smoother Outlines
For long, clean outlines, thin your black acrylic paint slightly with water until it has an ink-like consistency. This helps the liner brush glide without dragging.
Step 4: Refining and Outlining
-
Outline the features:
Switch to your fine liner brush and thinned black paint. Carefully outline the frog’s body, eyes, mouth, and spots to give it that crisp illustrative style. -
Enhance the water:
Mix a lighter teal or mint green. Paint curved ripple lines on the water surface, following the curve of the frog’s body to show movement. -
Add water debris:
Paint small floating shapes in the water—little pink petals or white bubbles—to add interest to the foreground. -
Final highlights:
Add a crisp white dot to each eye pupil and a thin highlight line along the top of the wet nose or brow ridge. -
Clean up edges:
Use white paint to tidy up the outer edge of the main circle if any pink or teal spilled over, ensuring a perfect round shape.
Step back and smile at the quirky little character you’ve just brought to life.

Dog With a Ridiculous Hairdo
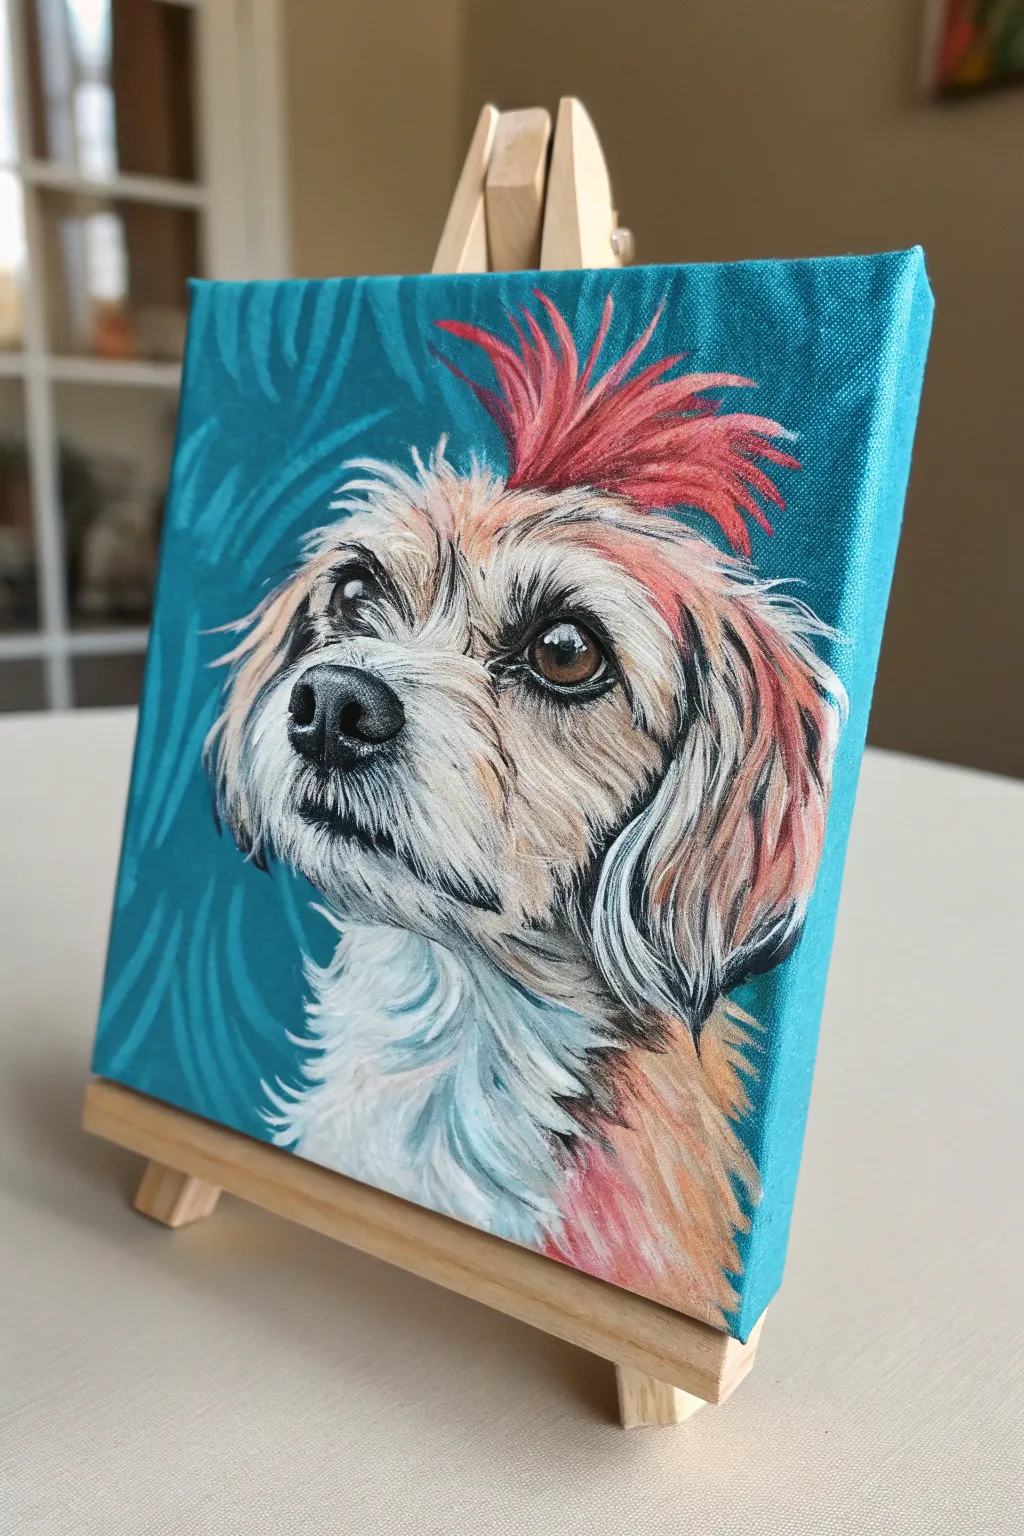
This whimsical acrylic painting captures a dog’s adventurous spirit with a bright red mohawk against a bold turquoise backdrop. The focus is on building up realistic fur textures while keeping the mood light and playful.
Step-by-Step
Materials
- Small square canvas (e.g., 6×6 or 8×8 inches)
- Acrylic paints: Titanium White, Mars Black, Burnt Sienna, Yellow Ochre, Cadmium Red, Phthalo Turquoise or Teal
- Flat brush (1/2 inch) for background
- Round brush (size 4) for blocking in
- Detail liner brush (size 0 or 00) for fur
- Water cup and palette
- Chalk or pastel pencil for sketching
Step 1: The Foundation
-
Mix the background color:
Start by mixing a vibrant teal using Phthalo Turquoise and a touch of Titanium White. You want a color that is rich and saturated but opaque enough to cover the canvas. -
Paint the background:
Use your flat brush to coat the entire canvas in the teal mixture. Apply it somewhat loosely; notice in the reference how subtle brushstrokes create a bit of movement behind the dog rather than a perfectly flat surface. -
Sketch the outline:
Let the background dry completely. Using a white chalk or pastel pencil, lightly sketch the dog’s head shape, placing the eyes slightly above the center line and leaving plenty of room at the top for the mohawk.
Step 2: Blocking In Color
-
Base coat the white fur:
Mix a light grey using a tiny dot of black in your white paint. Use the round brush to fill in the muzzle, chin, and chest area, avoiding the nose and mouth lines for now. -
Base coat the tan fur:
Mix Burnt Sienna with Yellow Ochre and a little White to create a soft tan. Block in the areas around the eyes, the ears, and the forehead. -
Establish the darks:
Using a dark grey (almost black), fill in the nose shape, the pupils of the eyes, and the dark patches inside the ears. Don’t worry about fur texture yet; just get the shapes solid. -
Layout the mohawk:
Mix Cadmium Red with a touch of Burnt Sienna to tone it down slightly. Paint the general shape of the mohawk, flicking the brush upward to suggest the direction of the hair.
Muddy Fur?
If fur colors are blending into a grey mess, let the bottom layer dry fully before adding new strokes. Crisp fur requires wet paint over dry paint.
Step 3: Creating Texture
-
Define the eyes:
Paint a warm brown ring (iris) around the black pupils. Once dry, add a tiny, crisp white reflection dot in the upper corner of each eye to bring them to life. -
Detail the nose:
Create a dark grey highlight on top of the black nose to show its texture. Use your smallest brush to dab tiny dots for the porous surface. -
Layering mid-tones:
Switch to your liner brush. Mix a slightly lighter tan than your base coat and start flicking short strokes over the brown areas to simulate layers of fur. -
Building white fur:
Load your liner brush with pure Titanium White. Paint confident, curved strokes over the muzzle and chest, letting them overlap the tan areas slightly to blend the transitions naturally. -
Shadowing the snout:
Thin down black paint to make a transparent glaze. Lightly glaze under the chin and around the mouth line to create depth without covering your fur strokes.
Accessorize
Make it more punk rock by painting a spiked collar or adding a small safety pin earring using metallic silver paint for extra attitude.
Step 4: Final Details
-
Refine the mohawk:
Mix a lighter pink-red and add highlights to the tips of the mohawk hair. Then, use a few dark red strokes at the base where the hair meets the head to ground it. -
Whiskers and stray hairs:
Using watered-down white paint on your finest brush, pull long, quick strokes for the whiskers and eyebrow hairs. I find holding the brush handle near the end helps keep these lines loose. -
Ear texture:
Add longer, sweeping strokes of dark brown and black to the tips of the ears to give them that scruffy, terrior-like appearance. -
Background touch-ups:
If any fur painting got messy, or if you want sharper edges, carefully cut back in with your original teal background color around the silhouette. -
Final highlights:
Add the brightest white touches to the tip of the nose, the wet line of the bottom eyelid, and the brightest clumps of chest fur.
Now stepping back, you should see a charming pup with a rebellious streak ready to brighten up any room


Mildly Startled Ghost Portrait
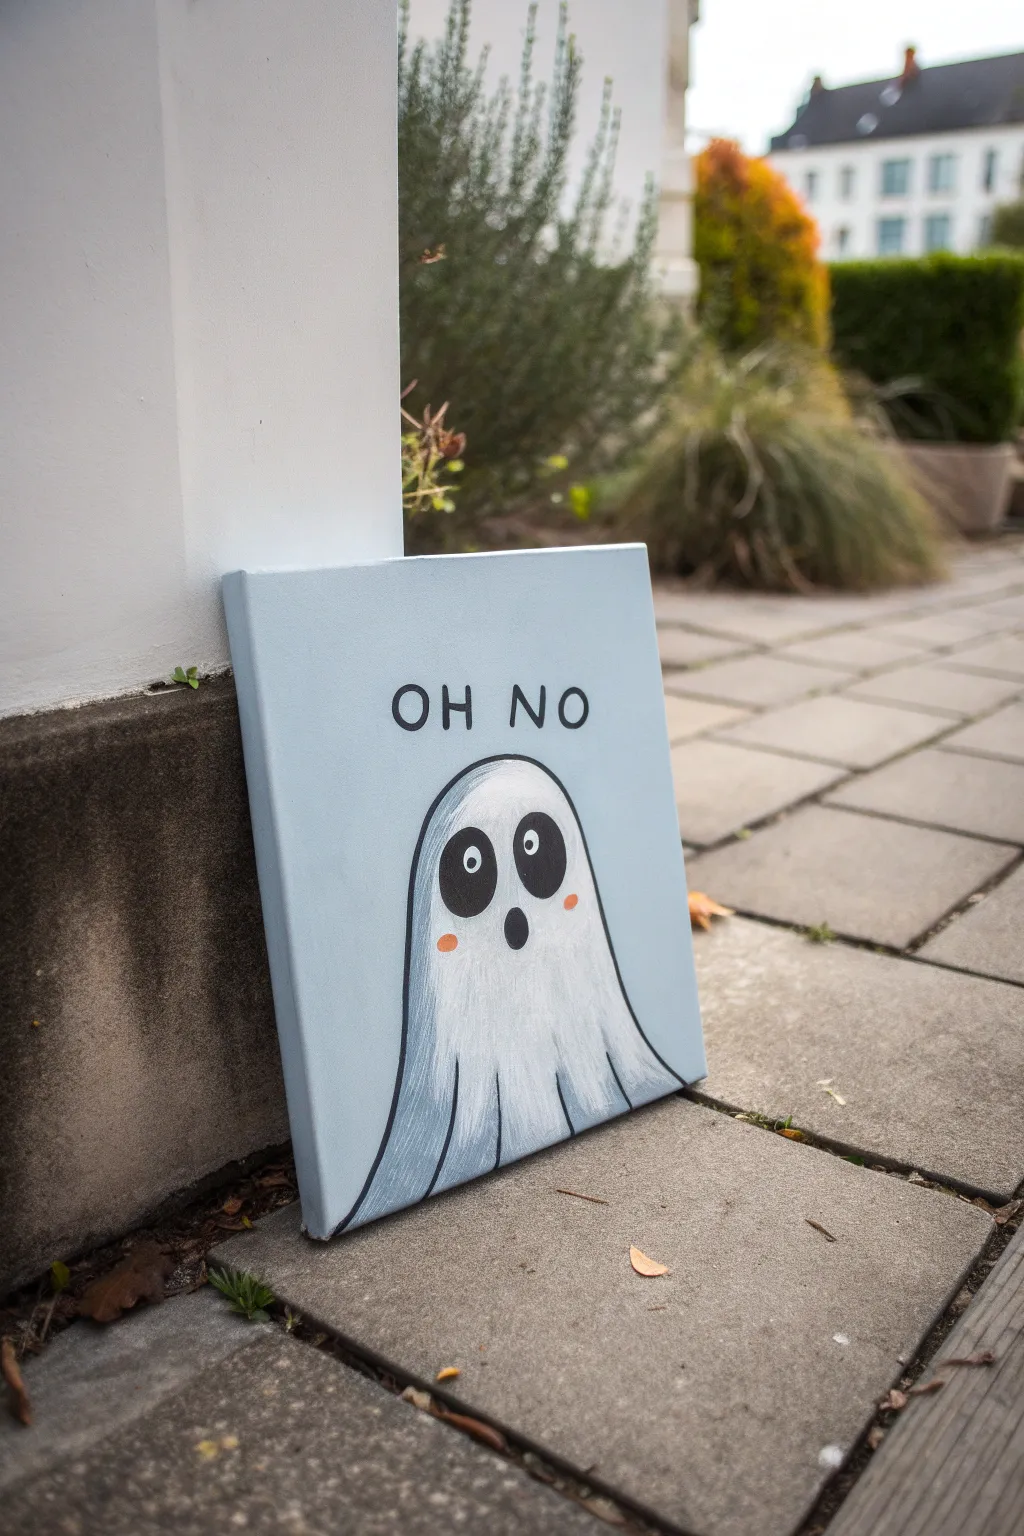
This charmingly worried little specter captures a relatable moment of mild panic in acrylics. With its clean lines and simple expression, this project is perfect for practicing smooth background coverage and basic character shading.
Step-by-Step
Materials
- Small square canvas (e.g., 8×8 or 10×10 inches)
- Acrylic paints: Titanium White, Mars Black, Phthalo Blue (or similar light blue), Red/Pink
- Flat brush (1 inch) for background
- Medium round brush (size 6 or 8) for the ghost body
- Small detail brush (size 0 or 1) for outlines and features
- Pencil and eraser
- Palette or mixing plate
- Water cup and paper towels
Step 1: Setting the Scene
-
Mix the background color:
Create a calming, muted sky blue by mixing a large amount of Titanium White with a tiny dot of Phthalo Blue and the smallest touch of black to desaturate it. You want a pale, overcast sky tone. -
Paint the background:
Using your large flat brush, cover the entire canvas with your mixed blue-grey. Use long, horizontal strokes to ensure a smooth, even finish without visible brush marks. -
Don’t forget the edges:
While you have the color mixed, paint the sides of your canvas to give the piece a finished, professional look without needing a frame. -
Let it dry completely:
Allow the background layer to dry fully before sketching. If the paint is even slightly wet, your pencil will dig into the texture and create unwanted grooves.
Clean Lines Hack
Make the black outline thin your paint slightly with water. Thick paint drags and skips, while fluid paint flows smoothly for long, continuous lines.
Step 2: Drafting the Ghost
-
Sketch the outline:
Lightly draw a simple arch shape in the bottom center of the canvas. The top should be rounded like a thumb, widening slightly as it goes down to the bottom edge. -
Add the face:
Draw two large ovals for eyes, positioned slightly higher than the center of the ghost’s head. Add a small oval mouth just below and between the eyes to create the startled ‘o’ shape. -
Sketch the text:
Above the ghost’s head, lightly pencil in the letters ‘OH NO’ in a simple, sans-serif font. Keep the spacing generous so the letters don’t feel cramped.
Glow Up
Mix glow-in-the-dark medium into your white paint for the ghost’s body. During the day it looks normal, but at night your ‘Oh No’ ghost truly haunts the room.
Step 3: Painting the Specter
-
Base coat the ghost:
Fill in the ghost shape with pure Titanium White using your medium round brush. You may need two thin coats to make it opaque enough to cover the blue background fully. -
Create the shadow mix:
Mix a light, cool grey using White and a tiny bit of Black. I sometimes add a touch of the background blue to this grey to harmonize the colors. -
Add vertical shading:
While the white base is dry, use a fairly dry brush to whisk thin, vertical streaks of your light grey up from the bottom edge of the ghost. This creates the draped, sheet-like texture. -
Define the folds:
Darken your grey mix slightly and paint a few distinct, wiggly lines near the bottom hem to suggest where the fabric folds and ripples.
Step 4: Features and Details
-
Paint the eyes and mouth:
Using your small round brush and pure Mars Black, carefully fill in the eye ovals and the small mouth. Take your time to keep the edges crisp and smooth. -
Add the eye highlights:
Once the black paint is bone dry, use a dotting tool or the back of a brush handle dipped in white to place a small reflection dot in the upper-left of each eye. -
Rosy cheeks:
Mix a soft coral or salmon pink. Paint two small horizontally oval shapes on the cheeks, situated just outside and below the eyes. -
Outline the body:
With your finest detail brush and thinned black paint (ink-consistency works best here), trace the outer edge of the ghost. Keep the line thin but consistent. -
Lettering:
Carefully paint over your penciled ‘OH NO’ text with the small detail brush and black paint. If your hand is shaky, a black acrylic paint marker is a great cheat here for cleaner lines. -
Final touches:
Check for any pencil marks that might still be visible and gently erase them once you are absolutely certain all paint is dry. Sign your work in the corner.
Now you have a delightfully anxious little ghost to add some humor to your decor


Serious Animal in Fancy Clothes
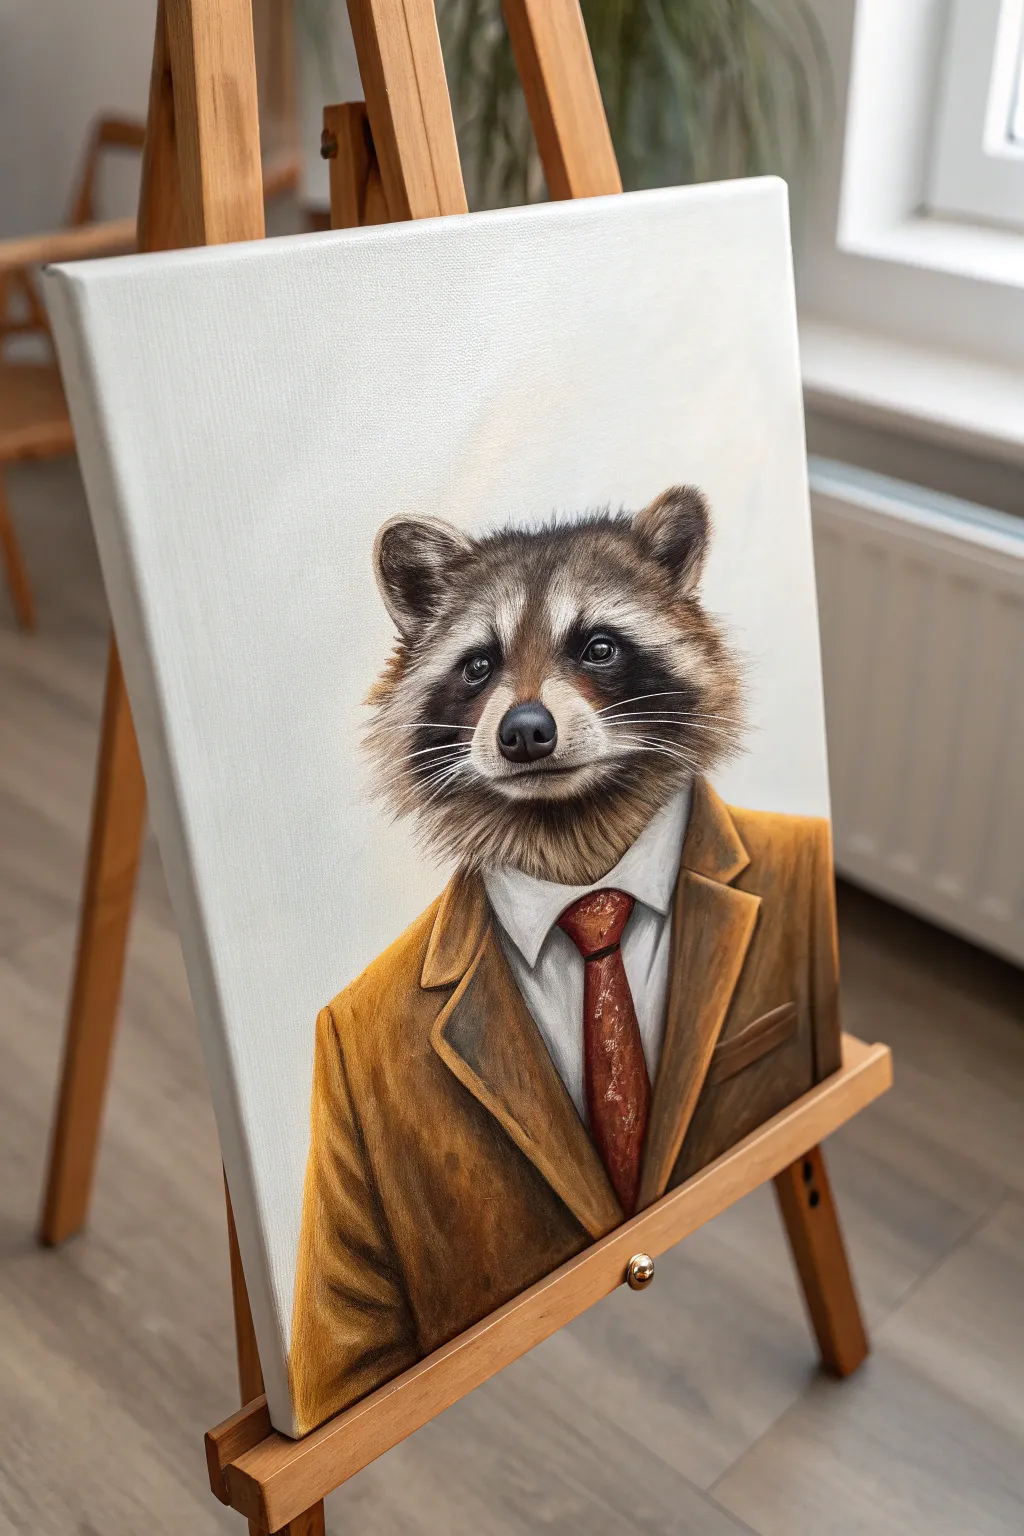
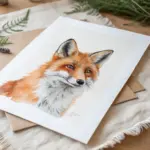
This whimsical project combines realistic animal features with formal human attire for a humorous yet classic portrait effect. The result is a charming raccoon businessman captured in acrylics on canvas, blending soft fur textures with the crisp lines of a tailored suit.
Step-by-Step Tutorial
Materials
- Stretched canvas (e.g., 16×20 inch)
- Acrylic paints: Titanium White, Lamp Black, Burnt Umber, Yellow Ochre, Burnt Sienna, Crimson Red
- Various brushes: large flat brush, medium filbert, lush small round brush for details, fine liner brush
- Palette for mixing
- Cup of water and paper towels
- Pencil and eraser for sketching
- Easel (optional but helpful)
Step 1: Sketching the Composition
-
Establish the Head Shape:
Begin by lightly sketching a wide oval for the raccoon’s head in the upper center of the canvas. Add two smaller triangles on top for the ears. -
Add the Facial Guideline:
Draw a vertical centerline and a horizontal line through the middle of the oval to help position the eyes and snout later. -
Draft the Suit:
Sketch the shoulders sloping down from the neck area. Outline the ‘V’ shape of the suit lapels and the collar of the dress shirt underneath. -
Refine Features:
Pencil in the distinct bandit mask shape around the eyes, the small nose, and the tie hanging down the center of the shirt.
Step 2: Blocking in Base Colors
-
Background Wash:
Mix a large amount of Titanium White with a tiny touch of Burnt Umber or Grey. Use a large flat brush to cover the entire background, keeping the strokes loose and nondescript. -
The Bandit Mask:
Paint the dark areas around the eyes using a mix of Lamp Black and Burnt Umber. Don’t worry about fur texture yet; just fill the shape. -
Base Fur Tones:
For the rest of the face, block in a mid-tone grey-brown using White, Black, and a drop of Burnt Sienna. -
Suit Foundation:
Mix Yellow Ochre and Burnt Umber to create a golden-brown tone. Using a filbert brush, paint the entire jacket area, ensuring clean edges where it meets the white shirt. -
Shirt and Tie Base:
Fill the shirt collar and chest area with Titanium White (add a touch of grey for shadows later). Paint the tie a deep Crimson Red mixed with a little Burnt Umber.
Fixing “Flat” Fur
If the fur looks too flat, you likely over-blended. Let it dry completely, then add a fresh layer of distinct, unblended strokes in your lightest highlight color.
Step 3: Building Fur Texture
-
Dark Fur Layers:
Switch to a small round brush. Mix a dark grey-black and start flicking short strokes outward from the center of the face, following the natural direction of fur growth. -
Mid-Tone Fur:
Mix a lighter grey-brown. Layer more flicked strokes over the dark base, concentrating on the cheeks, forehead, and edges of the ears. -
White Fur Highlights:
Using a clean brush and slightly watered-down Titanium White, paint the bright fur on the muzzle, eyebrows, and the rim of the ears. flick the brush quickly to create wispy ends. -
The Whiskers:
Use your finest liner brush with thinned white paint. With a confident, quick motion, pull long whiskers extending from the muzzle area past the cheeks.
Pro Tip: Eye Direction
Paint the white reflection ‘catchlights’ in the exact same position on both eyes (e.g., top right). This aligns the gaze and makes the expression look focused.
Step 4: Clothing Details and Finish
-
Suit Shadowing:
Mix a darker version of your suit color (adding more Umber). Paint shadows under the lapels, beneath the jaw, and in the fabric folds to give the jacket dimension. -
Tie Texture:
Dab small spots of lighter red or orange onto the tie to create a subtle patterned or textured silk look. Add a deep shadow on the side of the knot. -
Shirt Shadows:
Use a very pale grey wash to paint shadows on the white shirt, specifically right under the collar points and next to the tie. -
Eyes and Nose:
Paint the nose solid black with a tiny white highlight on top for wetness. Define the eyes with black pupils and brown irises, finishing with a sharp white catchlight in each eye to bring him to life. -
Final Adjustments:
Step back to check the contrast. I like to add a few final loose fur hairs overlapping the collar to show the head is truly in front of the clothes.
Now hang your masterpiece proudly and enjoy the distinguished charm of your new woodland professional
BRUSH GUIDE
The Right Brush for Every Stroke
From clean lines to bold texture — master brush choice, stroke control, and essential techniques.
Explore the Full Guide
Self-Portrait With Exaggerated Features
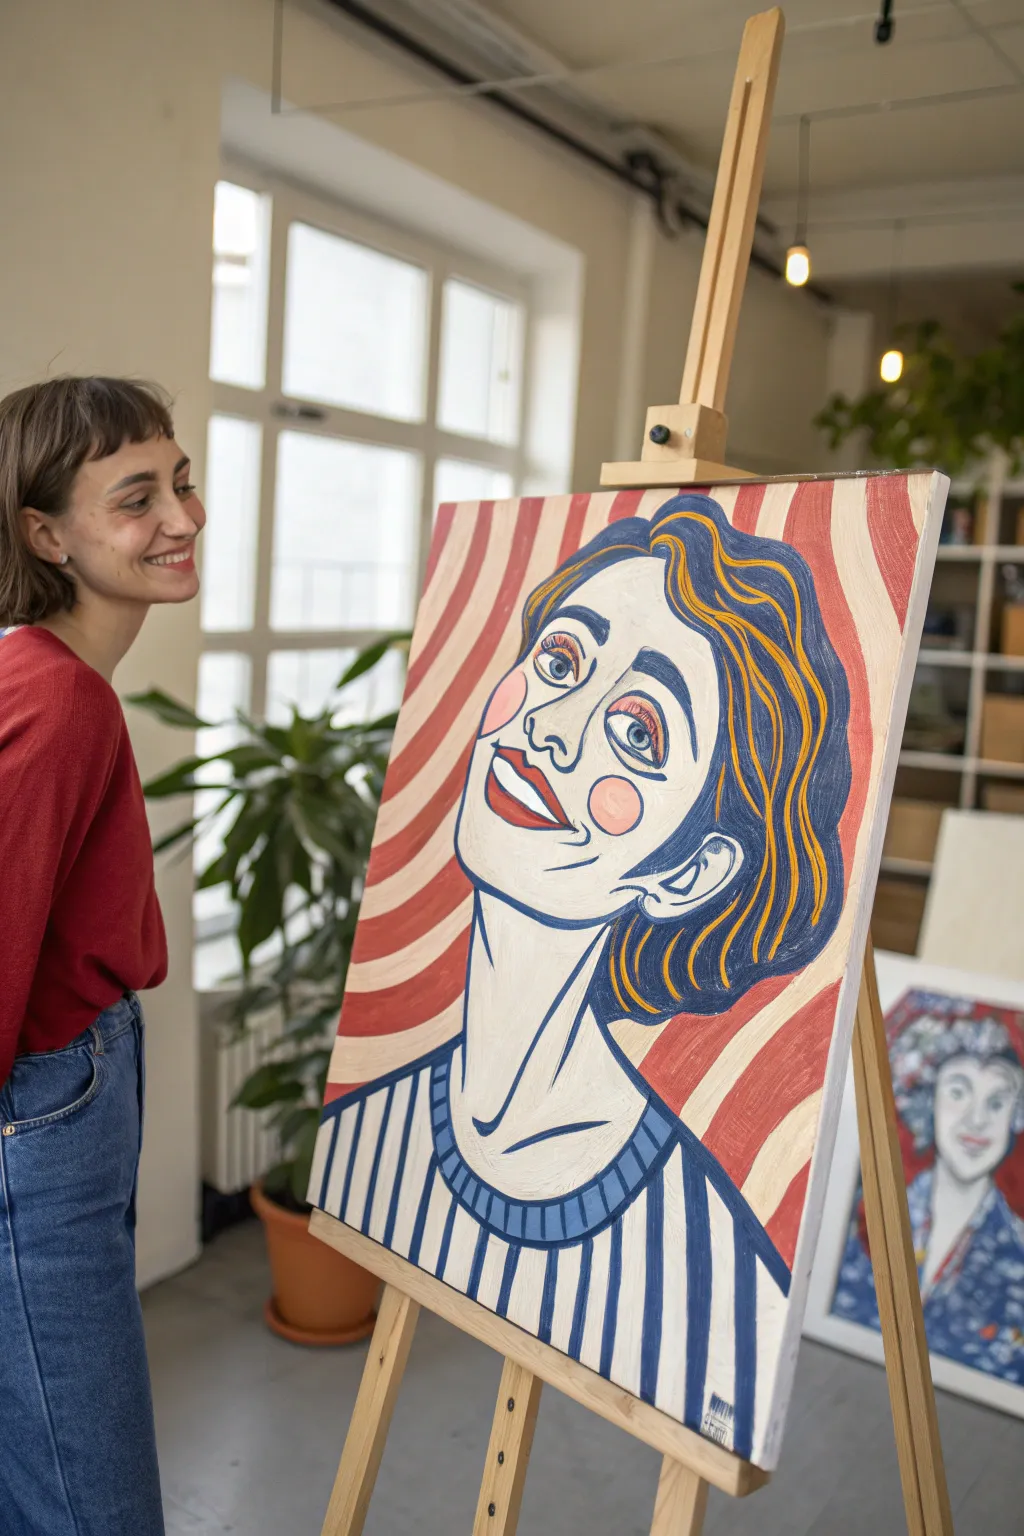
Loosen up your painting style with this playful, exaggerated self-portrait that embraces wavy lines and bold contours. The project focuses on a stylized approach where personality replaces realism, using a fun striped background to echo the movement of the hair.
Step-by-Step Guide
Materials
- Stretched canvas (e.g., 16×20 inches)
- Acrylic paints (Titanium White, Cadmium Red, Ultramarine Blue, Yellow Ochre, Burnt Umber)
- Set of synthetic brushes (large flat, medium filbert, fine liner)
- Pencil and eraser
- Palette
- Water cup and paper towels
- Table easel or standing easel
Step 1: Planning and Sketching
-
Analyze your features:
Look in a mirror and identify what makes your face ‘you,’ but think about how to stretch it. Is your smile wide? Make it massive. Are your eyes round? Make them distinct circles. This isn’t about photorealism. -
Sketch the head shape:
Using a pencil, lightly draw a long, tilted oval for the head. Extend a thick, sturdy neck downwards, branching out into rounded shoulders at the bottom of the canvas. -
Draft the oversized features:
Place the eyes slightly higher than normal and draw them large with heavy lids. Add a swooping nose and a wide, cheeky grin showing teeth. Draw two clear circles on the cheeks for blush—a classic illustrative touch. -
Outline the hair:
Draw the hair as a single, solid mass first. Give it a distinct wavy shape that frames face, sweeping it back and to the side. Don’t worry about individual strands yet, just the main silhouette. -
Map the background:
Behind the figure, sketch wavy, diagonal lines radiating outward. These will become our red and white candy-cane stripes.
Step 2: Blocking in Color
-
Mix the skin tone:
Combine a large amount of White with a tiny touch of Yellow Ochre and a speck of Red. We want a very pale, graphic skin tone. -
Paint the face and neck:
Use a large flat brush to fill in the face and neck area with your skin mixture. Apply two coats if the first one looks streaky, ensuring it’s fully opaque. -
Fill the hair base:
Mix Ultramarine Blue with a little Burnt Umber to create a deep navy. Paint the entire hair shape with a medium filbert brush. -
Paint the shirt:
Using pure White, fill in the shirt area. Let it dry completely. -
Block the background stripes:
Mix a muted red using Cadmium Red and a touch of White. Paint the alternating stripes in the background, carefully cutting in around the hair and shoulders. Leave the canvas white for the alternate stripes, or paint them with Titanium White for better coverage.
Wobbly Lines?
If your outlining hand is shaky, rest your pinky finger on a dry part of the canvas for stability. Thinning paint with a flow medium helps lines glide smoother than water.
Step 3: Adding Details and Contours
-
Add facial color accents:
Mix a soft pink and fill in the cheek circles. Use a bolder red for the lips. Paint the irises blue and the pupils black. -
Create hair volume:
Mix a mustard yellow tone using Yellow Ochre and White. Using a smaller round brush, paint confident, wavy lines flowing through the navy hair to suggest highlights and movement. -
Detail the shirt:
Load a medium round brush with your navy blue mix. Paint vertical stripes on the shirt and a thick band for the neckline. -
Start the outlining process:
This style relies heavily on linework. Thin down your navy blue paint slightly with water so it flows like ink. Using a fine liner brush, outline the jaw, neck muscles, and shirt collar. -
Define the facial features:
With the liner brush and navy paint, outline the eyes, eyelids, nose, and mouth. Add small hatch marks or simple lines to suggest eyelashes or expression lines. -
Enhance the cheeks:
Paint thin hatch marks inside the pink cheek circles to give them texture and a vintage illustration vibe. -
Refine the hair edges:
Go back with your liner brush and define the outer edge of the hair where it meets the background stripes to make it pop. -
Review and touch up:
Check your lines. If any background red smeared onto the face, touch it up with your skin tone mix. Ensure the whites of the teeth and eyes are bright.
Pop Art Punch
To make the eyes really sparkle, add a tiny, pure white dot to the pupil at the very end. It instantly brings the character to life.
Step back and enjoy the quirky personality radiating from your new stylized masterpiece


Have a question or want to share your own experience? I'd love to hear from you in the comments below!