Galaxy paintings are one of my favorite ways to play with juicy color blends, inky darks, and those tiny, satisfying star details. Here are a bunch of galaxy painting ideas you can try on different surfaces, from classic night-sky scenes to more unexpected cosmic twists.
Classic Nebula Blend on a Black Background
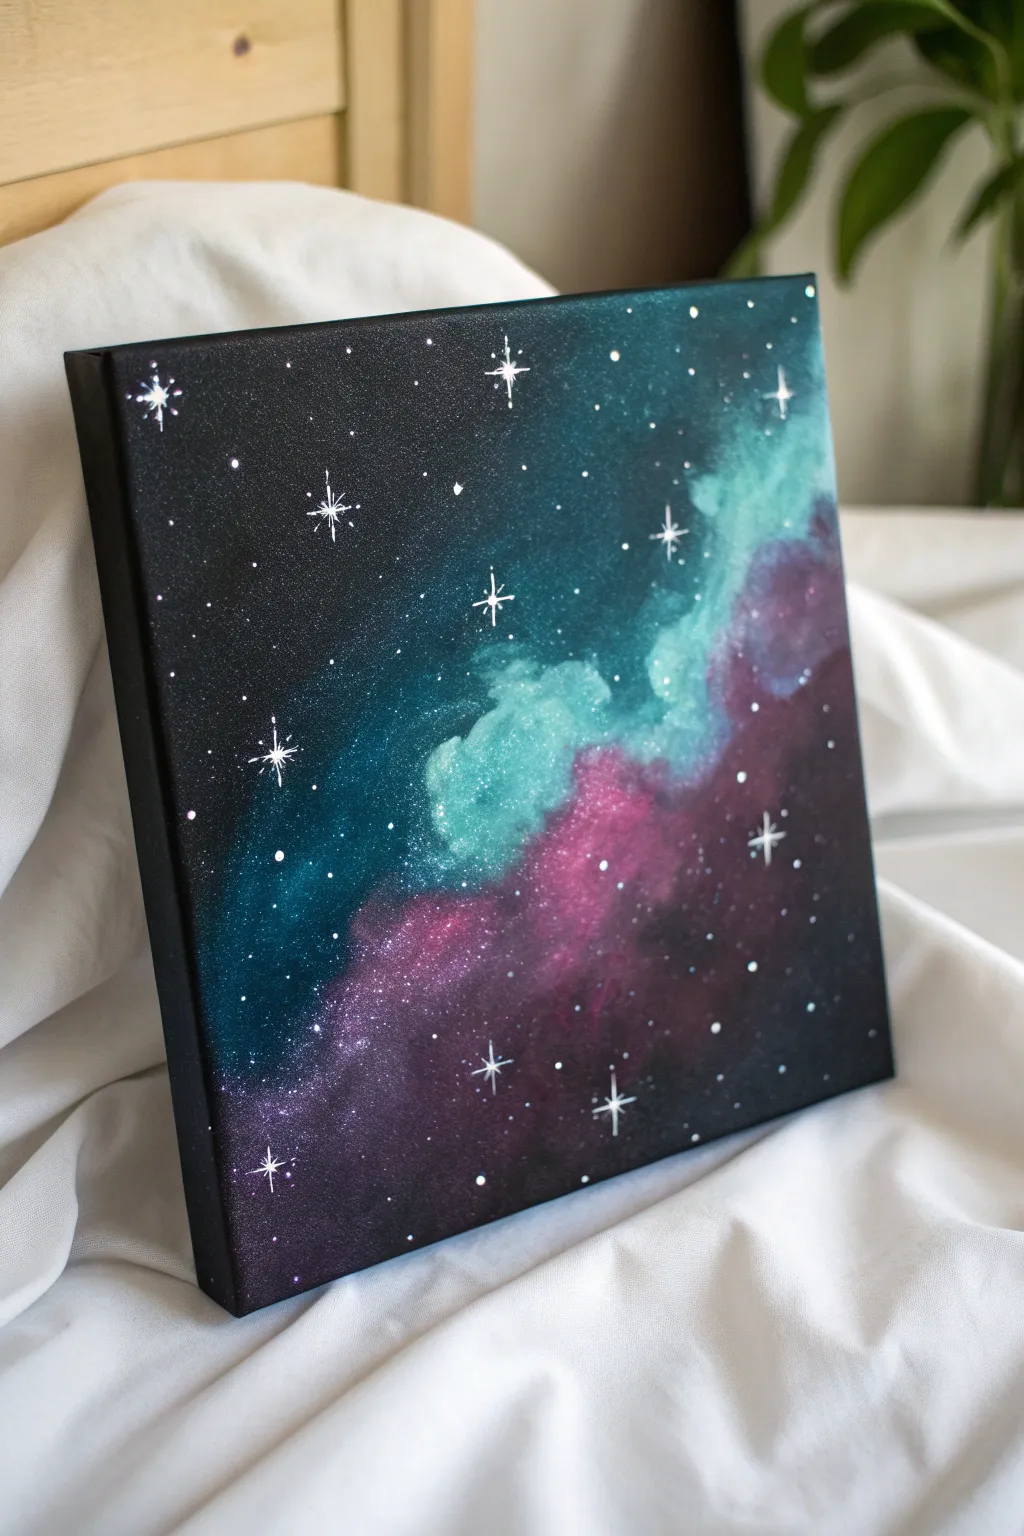
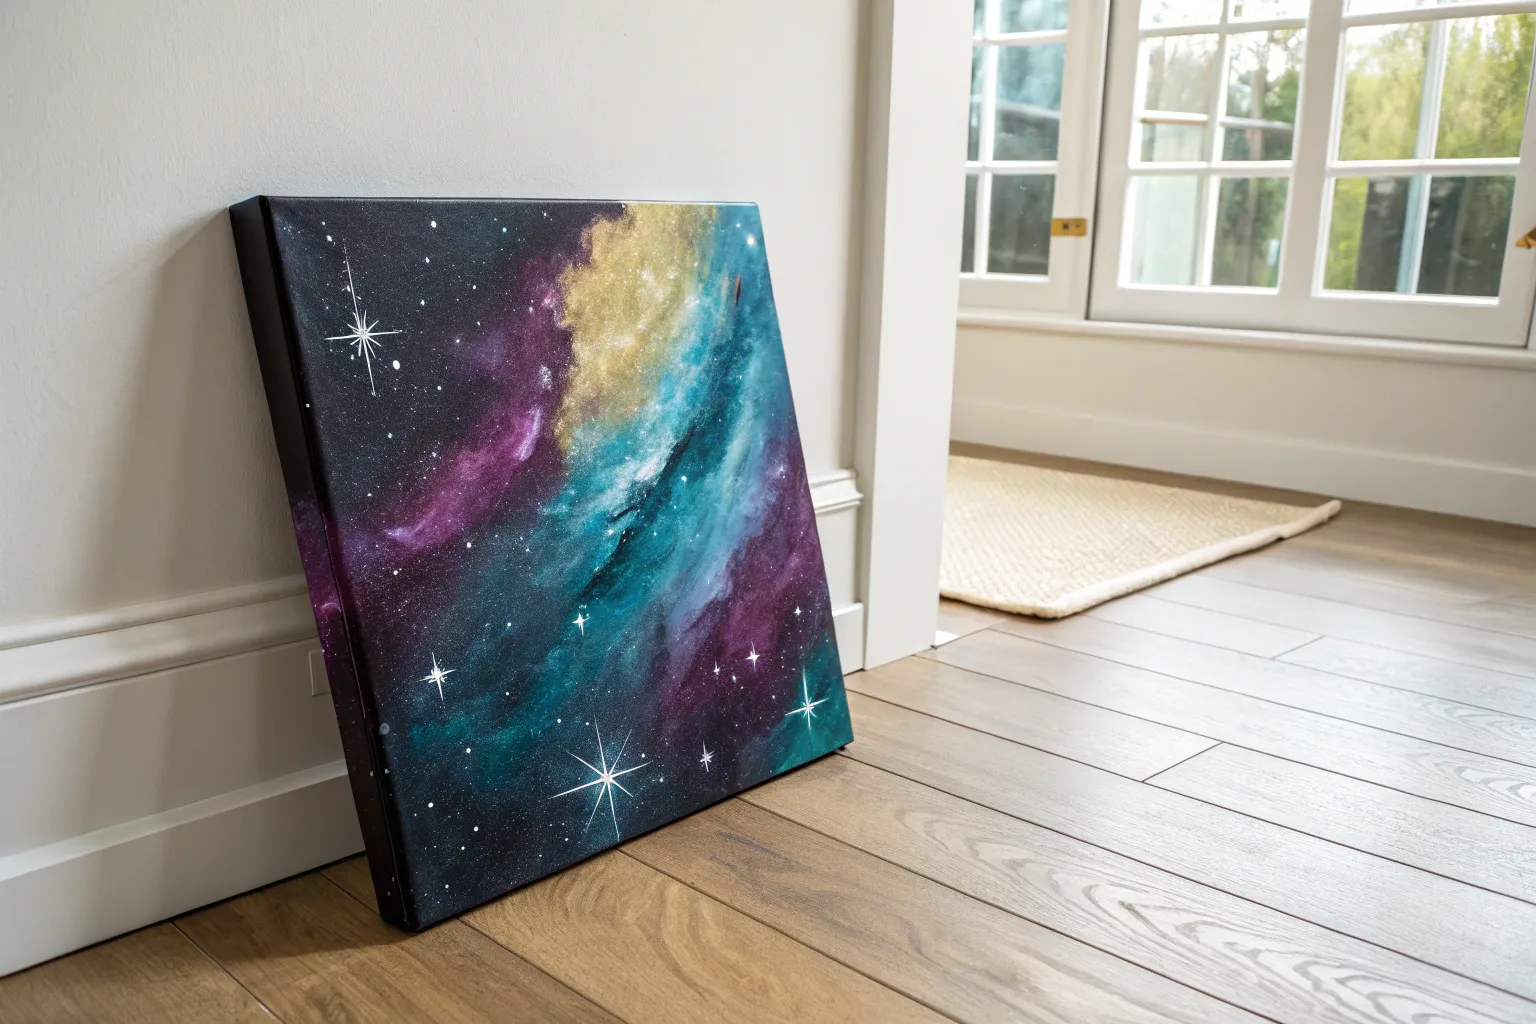
Capture the magic of deep space with this vibrant nebula painting on a black canvas. By blending shifting teal and purple hues against a stark dark background, you’ll create a glowing, ethereal effect that looks professionally done yet is surprisingly simple to achieve.
Detailed Instructions
Materials
- Square stretched canvas (e.g., 8×8 or 10×10 inch)
- Acrylic paints: Black, Titanium White, Teal/Turquoise, Magenta/Deep Violet
- Sponge applicators or a clean kitchen sponge cut into pieces
- Medium flat brush (for the base coat)
- Fine liner brush or detail brush (size 0 or 00)
- Optional: Glitter spray or iridescent medium
- Palette or paper plate
- Water cup and paper towels
Step 1: Setting the Stage
-
Prepare the canvas:
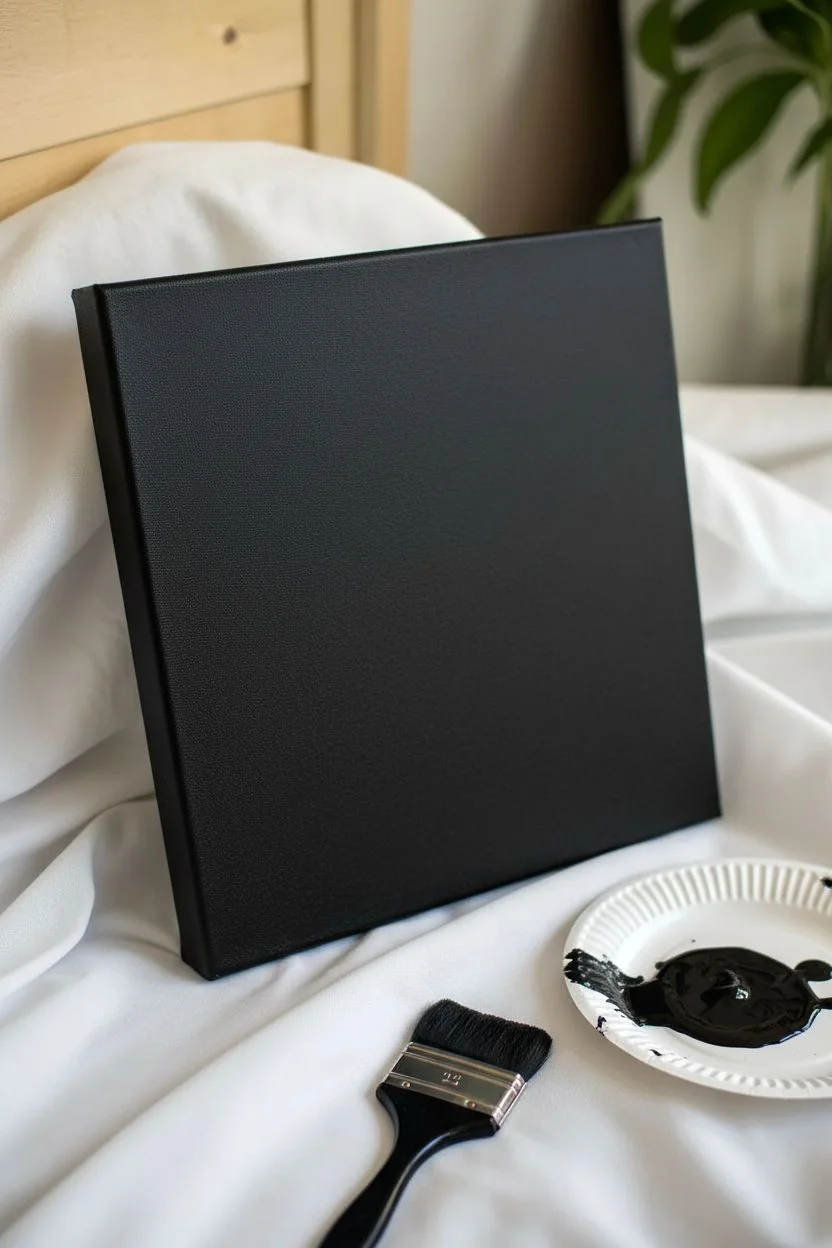
Start by laying down a solid foundation. Squeeze out a generous amount of black acrylic paint and use your medium flat brush to cover the entire front surface of the canvas. -
Don’t forget the edges:
Paint the sides of the canvas black as well so the artwork looks finished even without a frame. Ensure the coating is opaque; apply a second coat if you can still see the white canvas texture. -
Let it dry completely:
This step is crucial. The black base needs to be fully dry before adding color, otherwise your nebula colors will turn muddy and grey. Wait about 20-30 minutes.
Sponge Technique Tip
Rotate your wrist slightly between dabs when sponging the nebula. This prevents repeating the same sponge pattern over and over, keeping the cloud texture organic and random.
Step 2: Creating the Nebula
-
Load your sponge:
Take a small piece of sponge and dab it into the teal or turquoise paint. Blot the excess onto a paper towel—you want a dry-brush texture, not heavy blobs of paint. -
Start the teal cloud:
Gently dab the sponge in a diagonal line starting from the upper right quadrant, moving toward the center. Use a light, tapping motion to create a soft, cloud-like edge rather than hard lines. -
Add the magenta layer:
Using a fresh piece of sponge, pick up your magenta or deep violet paint. Blot it, then dab it along the lower edge of your teal cloud, extending down into the bottom left quadrant. -
Blend the transition:
Where the teal and magenta meet, lightly tap over the border with a very sparsely loaded sponge. This creates a fascinating purple transition zone where the colors naturally mix on the canvas. -
Build intensity:
Once the first layer of color is dry to the touch, go back in with a second layer of sponging, focusing on the center of the colored areas. This makes the nebula look brighter and more dimensional. -
Add highlights:
Mix a tiny dot of white into your teal paint to make a pale aqua. Lightly sponge this into the very center of the teal cloud to create a glowing ‘hot spot’ of gas. -
Soften the edges:
If any edges look too harsh, take a mostly clean sponge with a tiny bit of black paint and gently dab around the perimeter of your nebula to fade it back into the darkness. -
Optional shimmer:
If you want the subtle sparkle seen in some galaxy art, mist the painting lightly with a glitter spray or brush on a thin layer of iridescent medium over the colored sections now.
Muddy Colors?
If your teal and magenta are turning brown where they overlap, wait for the first color to dry completely before layering the second color on top near the border.
Step 3: Adding the Stars
-
Mix fluid white:
On your palette, mix a little water into your white acrylic paint until it has an inky consistency. This helps the paint flow smoothly off your small brush. -
Paint large hero stars:
Select 3-5 spots on the canvas for your brightest stars. Using your fine liner brush, paint a small center dot. -
Add the starbursts:
From the center dot, carefully pull four thin lines outward—up, down, left, and right—tapering them to a sharp point to create a cross shape. -
Create distant stars:
Dip the back end of your paintbrush handle into the white paint. Dot it onto the canvas to create perfectly round, larger stars scattered randomly. -
Sprinkle the stardust:
Load a toothbrush or stiff brush with watered-down white paint. Run your thumb over the bristles to flick tiny specks of ‘distant stars’ across the dark areas and the nebula clouds. -
Add variance:
I like to add a few tiny dots with the tip of the liner brush in the transition areas, making some clusters denser than others to mimic real star formations. -
Final check:
Step back and look at the composition. If a star cluster looks too empty, add a few more speckles. Let the entire piece dry for at least an hour before hanging.
Your interstellar masterpiece is now ready to bring a touch of the cosmos to your room


Spiral Galaxy With a Glowing Core
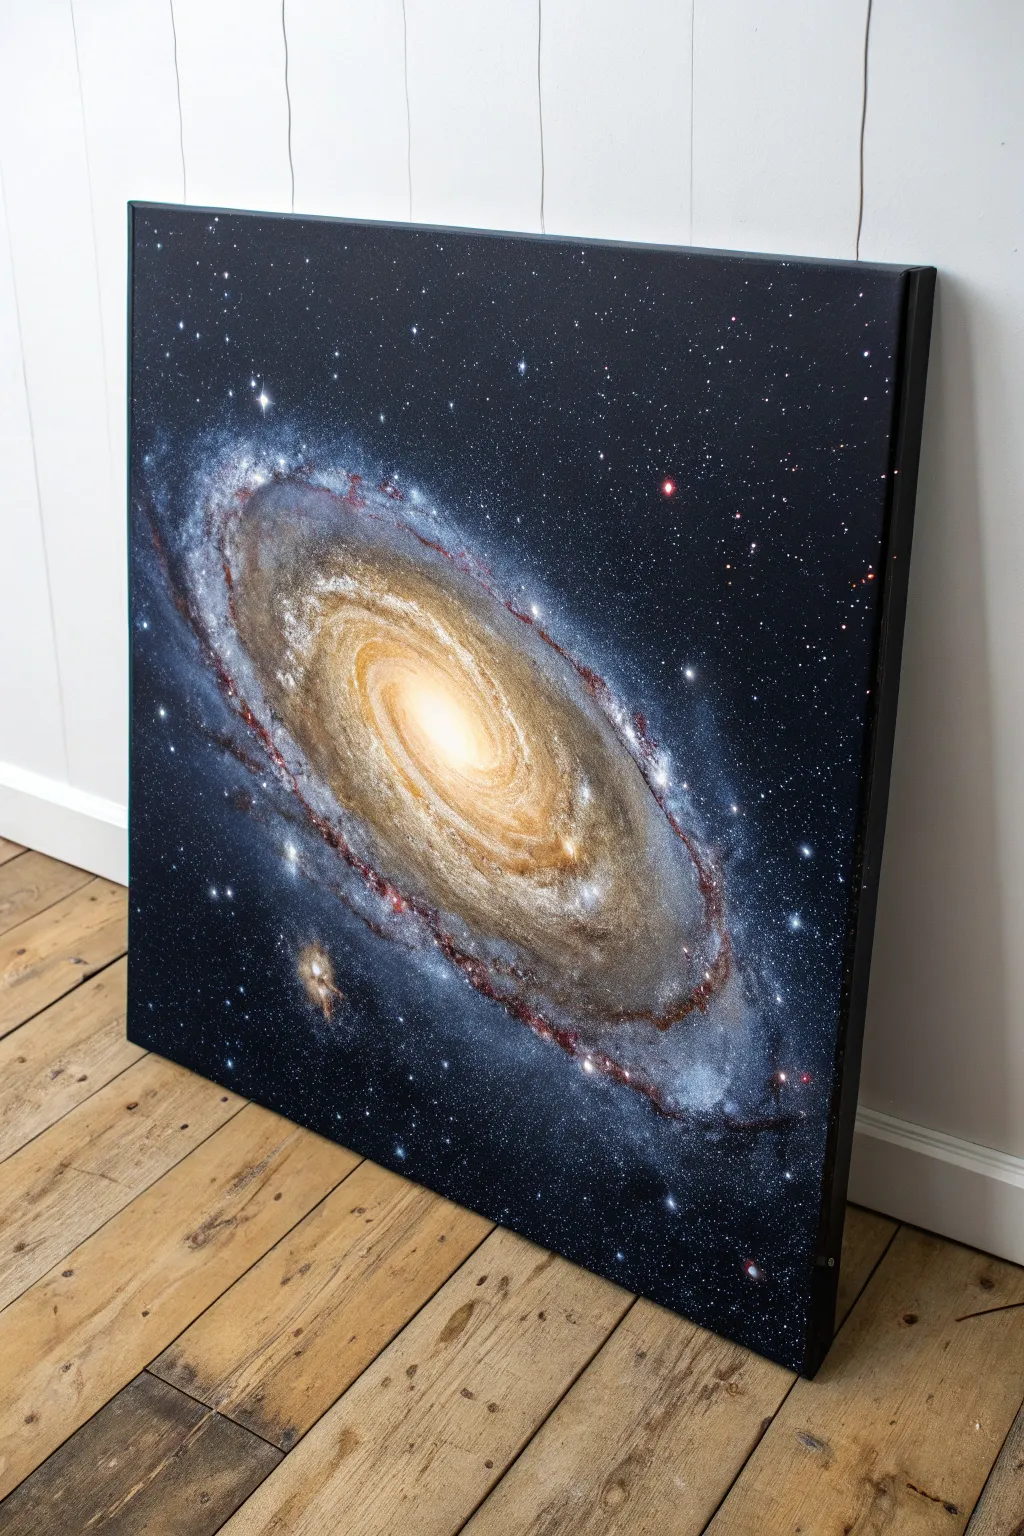
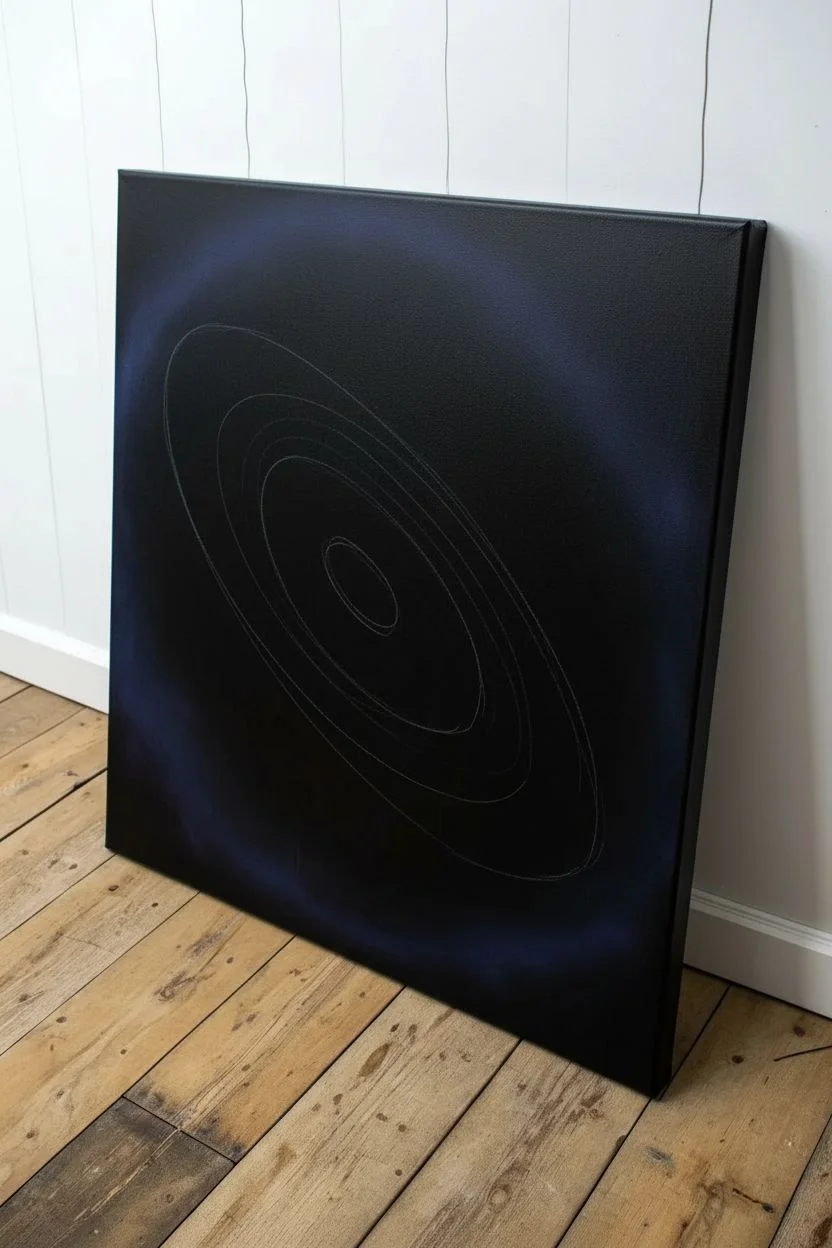
Capture the awe-inspiring beauty of the cosmos with this detailed acrylic painting of a spiral galaxy. This project focuses on building layers from deep space black to a brilliant, glowing core, resulting in a dramatic piece that feels like a window into the universe.
How-To Guide
Materials
- Large square canvas (e.g., 24×24 inch)
- Black gesso (or black acrylic paint)
- Acrylic paints: Titanium White, Ultramarine Blue, Phthalo Blue, Burnt Umber, Yellow Ochre, Cadmium Yellow, Alizarin Crimson, Dioxazine Purple
- Large flat brush (for background)
- Medium filbert brush
- Small round brush
- Fine liner brush
- Old toothbrush (for stars)
- Sponge or stippling brush
- Mixing palette
- Water container and rags
Step 1: Setting the Stage
-
Prime the Surface:
Begin by coating your entire canvas with black gesso. This provides a deep, matte foundation that makes the subsequent colors pop. If you don’t have black gesso, two coats of black acrylic paint will work, but ensure it is fully opaque. -
Establish the Galaxy Shape:
Once the black base is bone dry, lightly sketch the oval shape of the galaxy using a piece of chalk or a white charcoal pencil. Draw a diagonal ellipse that takes up most of the canvas, marking the center core and the outer limits of the spiral arms. -
Create the Deep Space Background:
Mix a small amount of Ultramarine Blue and Dioxazine Purple into your black paint. Use a large brush to apply this very dark, subtle color around the corners and edges of the canvas, blending it seamlessly into the pure black center to create atmospheric depth.
Step 2: Painting the Core and Arms
-
Lay the Foundation Glow:
Mix Titanium White with a touch of Ultramarine Blue to create a milky grey-blue. Using a sponge or a scruffy brush, dab this color lightly along the spiral arms you sketched, keeping the application misty and transparent. Do not paint the center core yet. -
Start the Golden Core:
For the center, mix Titanium White with Yellow Ochre. Using a medium filbert brush, paint the central bulge in an oval shape. Use circular motions to blend the edges outwards into the surrounding blackness, softening the transition. -
Intensify the Center:
While the ochre layer is still tacky, mix Cadmium Yellow and Titanium White. Apply this brighter mix closer to the absolute center of the core. Blend it outward so it glows naturally without hard lines. -
Add the Brightest Highlight:
Use nearly pure Titanium White (with just a tiny speck of yellow) for the very middle of the galaxy. This small, intense highlight creates the blinding luminosity of the galactic core. -
Develop the Spiral Structure:
Return to the outer arms. Mix Phthalo Blue, Titanium White, and a hint of Burnt Umber. Using a dry-brush technique, sweep this color along the spiral paths, following the curve of the ellipse. This creates the gaseous, dusty texture of the arms.
Starry Depth Trick
Make your star field look 3D by splattering a layer of faint grey stars first, letting it dry, and then splattering bright white stars on top. This creates distinct visual planes.
Step 3: Details and Dust Lanes
-
Add Warmth to the Inner Arms:
The area between the bright core and blue arms often has a brownish hue. Glaze a thin layer of Burnt Umber mixed with glazing medium (or water) over this transition zone to warm it up. -
Create Dark Dust Lanes:
Mix Alizarin Crimson with Burnt Umber and a touch of Black. Use a small round brush to paint thin, broken lines weaving through the spiral arms. These ‘dust lanes’ define the rotation of the galaxy and add immense contrast. -
Enhance the Edges:
Take a lighter blue mix (White + Phthalo Blue) and highlight the outer ridges of the spiral arms. I find that focusing on the top edges of the curves makes the galaxy look more three-dimensional. -
Soften the Transitions:
Clean a dry, soft brush and very gently sweep over areas where the paint looks too textured or rough. This helps mimic the gaseous nature of space.
Muddy Galaxy Fix
If your spiral arms turn muddy or grey, let the paint dry completely. Then, apply a thin wash of pure Phthalo Blue or Purple over the area to restore vibrant color saturation.
Step 4: Stars and Final Touches
-
Splatter the Distant Stars:
Thin down Titanium White paint with water until it is the consistency of ink. Dip an old toothbrush into the mix, test it on a paper towel, and then flick the bristles to spray fine white dots across the entire canvas, concentrating slightly more heavily on the galaxy itself. -
Add Major Stars:
Use a fine liner brush or a dotting tool to place specific, larger bright stars randomly in the background. Vary the sizes to create a sense of distance. -
Paint Diffraction Spikes:
Choose 3-4 of the brightest stars (including one near the core, perhaps). Using your liner brush and slightly thinned white paint, draw a cross (+) shape through the star center, flicking the brush outward to taper the points into sharp spikes. -
Highlight the Dust Lanes:
Mix a tiny amount of Alizarin Crimson with White to get a soft pink. lightly glaze this over parts of the dark dust lanes to suggest illuminated nebula clouds within the darkness. -
Final White Glaze:
To unify the glow, apply one last, extremely thin glaze of Zinc White (mixing white) over the core area if it needs more softness.
Step back and admire your own piece of the universe, glowing brightly on the wall


Galaxy Gradient Using Sponge Dabbing
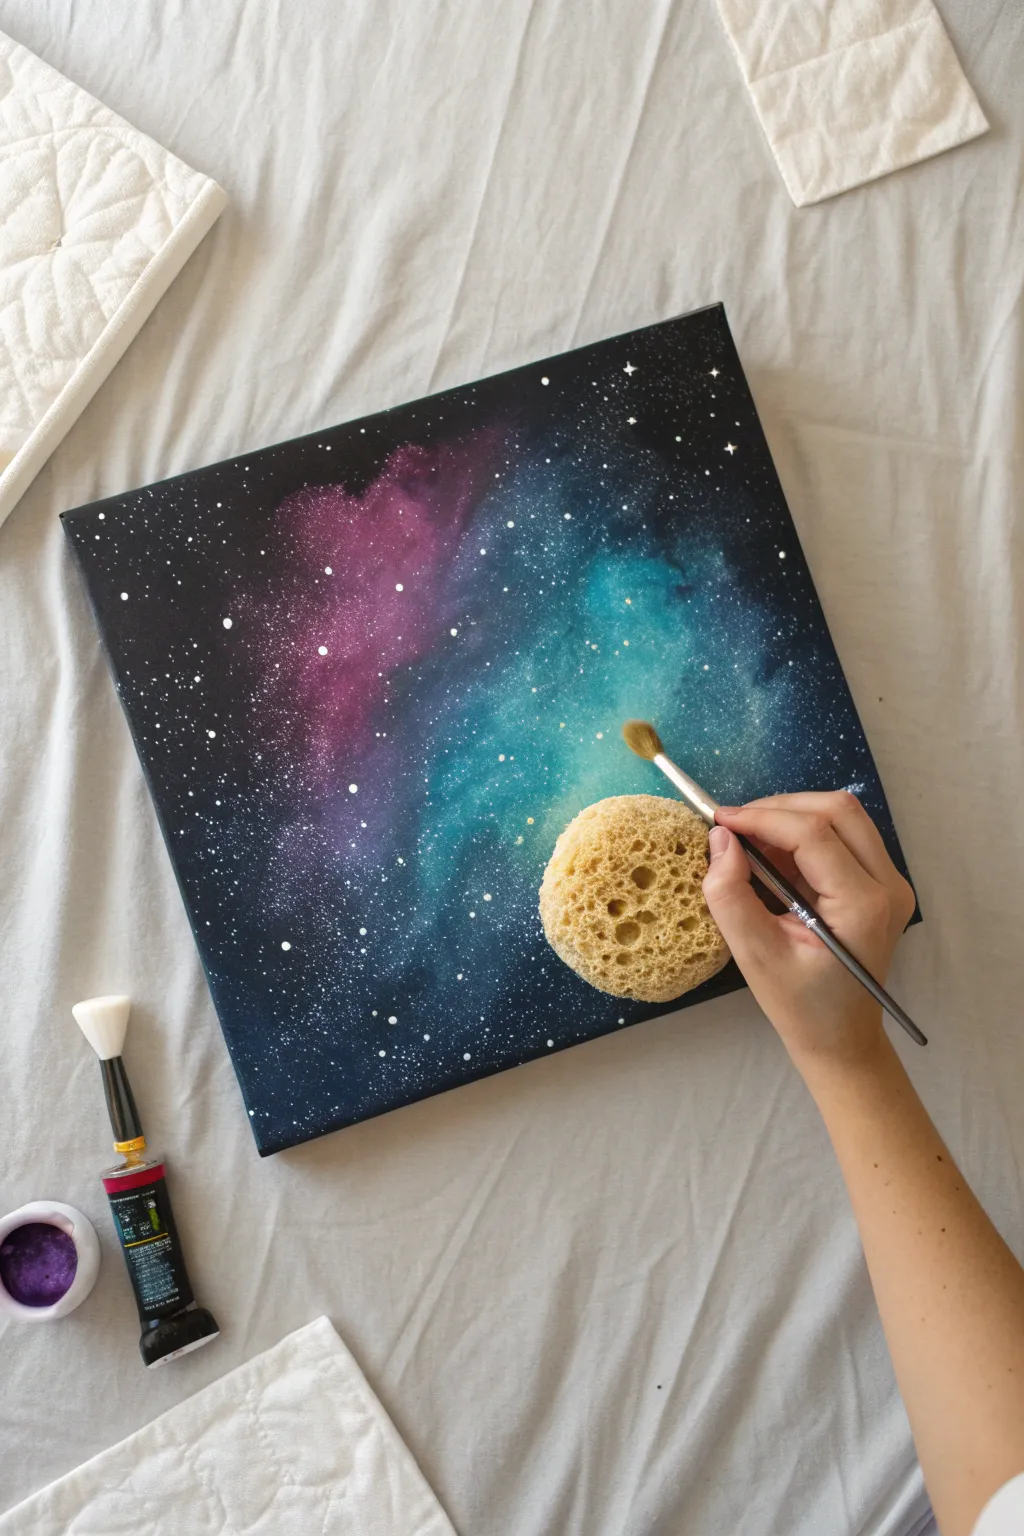
Capture the ethereal beauty of deep space with this vibrant celestial painting. Using a sea sponge creates soft, cloud-like nebula textures that blend seamlessly into a starry black abyss.
Detailed Instructions
Materials
- Square stretched canvas (approx. 12×12 inches)
- Acrylic paints: Black, Titanium White, Prussian Blue, Turquoise or Teal, Magenta or Purple
- Natural sea sponge (round)
- Flat synthetic brush (1 inch)
- Small round detail brush (size 2 or 4)
- Stiff bristle brush (e.g., old toothbrush or fan brush for splattering)
- Palette or wax paper
- Cup of water
- Paper towels or rags
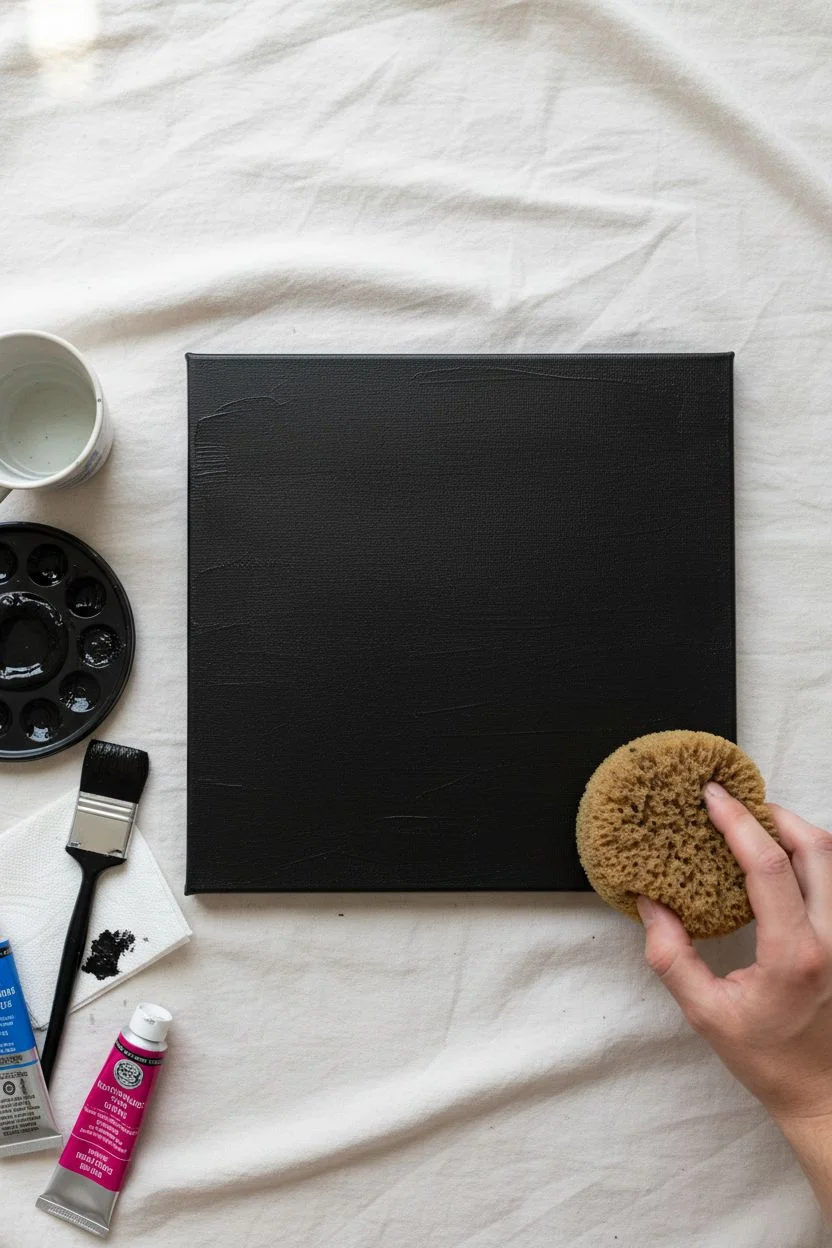
Step 1: Setting the Background
-
Prime the canvas:
Start by laying down a solid base coat. Squeeze a generous amount of black acrylic paint onto your palette and cover the entire canvas using your large flat brush. -
Ensure full coverage:
Don’t forget to paint the sides of the canvas for a professional, frameless look. Let this base layer dry completely before moving on; it should look matte and even. -
Prepare your sponge:
Dampen your sea sponge slightly with water and squeeze it out thoroughly. A damp sponge helps the acrylics blend softer without lifting the paint underneath.
Step 2: Creating the Nebula
-
Load the sponge:
Dip a small section of your sponge into the magenta or purple paint. Dab it onto a paper towel first to offload excess paint—this is crucial for a misty effect. -
Start the first nebula cloud:
Gently dab the purple sponge onto the canvas in a diagonal, organic shape. Keep the pressure light to create a wispy texture rather than a solid block of color. -
Add the teal section:
Rotate your sponge to a clean side (or rinse and squeeze thoroughly) and pick up your turquoise or teal paint. Apply this next to the purple area, allowing the edges to overlap slightly. -
Blend the transition:
While the paints are still slightly wet where they meet, softly dab over the seam to create a hazy transition between purple and teal. -
Deepen the cosmos:
Mix a tiny bit of black with Prussian blue. Dab this darker blue around the outer edges of your bright nebula clouds to fade them naturally into the black background. -
Highlight the center:
To make the galaxy glow, mix a little white into your teal paint to make a pale cyan. Lightly sponge this into the very center of your teal cloud for intensity. -
Soften harsh edges:
If any edges look too distinct, take a clean, slightly damp corner of the sponge and tap lightly around the perimeter of your color clouds to disperse the pigment.
Muddy colors?
If blending purple and teal turns gray/brown, let the first color dry completely before sponging the second near it. Overlaying dry layers keeps colors distinct.
Step 3: Adding the Stars
-
Prepare splatter paint:
Mix a small amount of titanium white paint with water until it reaches the consistency of heavy cream or ink. It needs to be fluid to fly off the bristles. -
Test the splatter:
Using a stiff brush or old toothbrush, dip into the watery white. Run your thumb across the bristles over a scrap paper first to test the splatter density. -
Create distant stars:
Hold the brush about 6-8 inches above the canvas and flick the bristles to spray a fine mist of white dots across the darker areas and the nebula clouds. -
Vary the density:
Apply more splatters in diagonal bands that follow the flow of your colored clouds, mimicking the Milky Way’s dense star clusters. -
Paint major stars:
Switch to your small round detail brush. Dip the tip into pure white (undiluted) and place specific dots where you want brighter, closer stars. -
Add cross flares:
For a few ‘hero’ stars, carefully pull the paint out from a center dot in a small cross shape (+) to create a twinkling effect. -
Final touches:
Inspect the canvas. If any large blobs of white accidentally dripped, you can dab them with a Q-tip or turn them into larger planets while the paint is wet.
Add Depth
Mix a tiny drop of metallic silver medium into your white star paint. When the light hits your finished piece, the stars will have a subtle, realistic shimmer.
Enjoy the calming process of watching your own universe unfold on the canvas


Toothbrush Star Splatter and Star Clusters
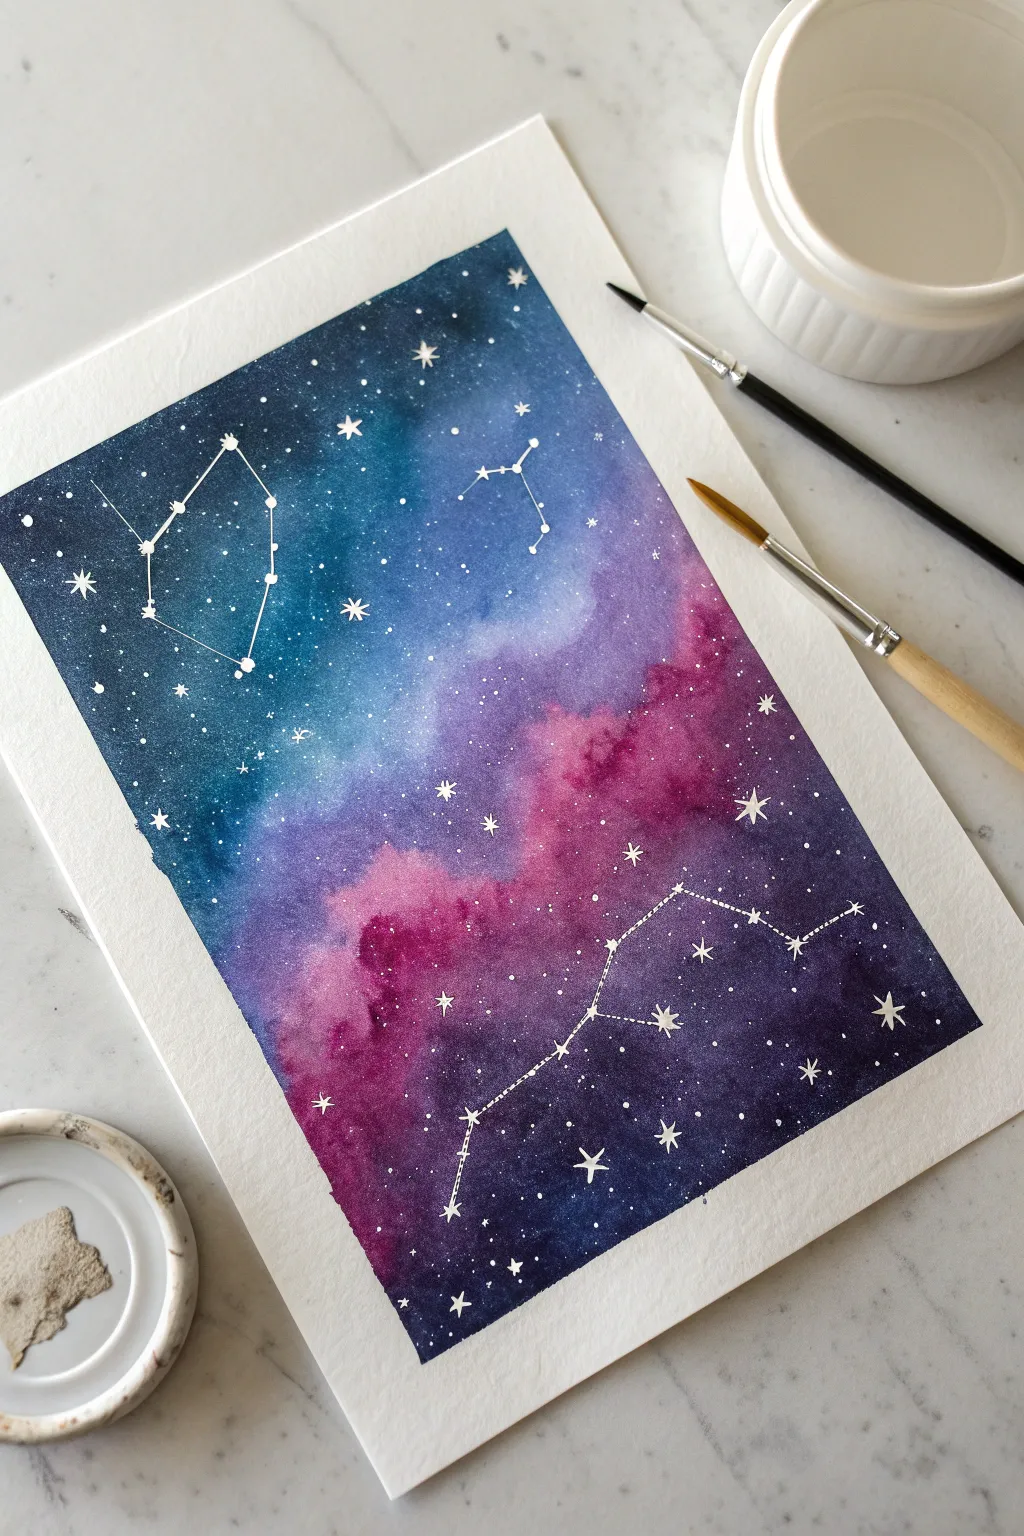
Capture the magic of the night sky with this vibrant watercolor galaxy painting featuring distinct constellations. The blend of deep blues, purples, and pinks creates a stunning cosmic backdrop for delicate white stars and geometric constellation lines.
Step-by-Step Tutorial
Materials
- Cold press watercolor paper (140lb/300gsm)
- Watercolor paints (Indigo, Phthalo Blue, Dioxazine Purple, Quinacridone Magenta/Rose)
- Masking tape or painter’s tape
- Round watercolor brushes (size 6 or 8 for washes, size 2 for details)
- White gouache or white ink
- Old toothbrush
- Clean water
- Paper towels
- Ruler (optional)
- Pencil
Step 1: Preparation & First Wash
-
Secure the paper:
Tape down all four edges of your watercolor paper to a board or table. This creates that crisp white border seen in the final piece and prevents the paper from buckling when wet. -
Wet the surface:
Using your largest brush, apply a clean layer of water across the entire rectangular area inside the tape. You want the paper to be glisten with a sheen but not have puddles. -
Lay the blue foundation:
Load your brush with Phthalo Blue and drop it into the upper third of the wet paper. Tilt the board slightly to let the paint flow naturally downwards. -
Add indigo depth:
While the blue is still wet, introduce concentrated Indigo to the top corners and edges to create the deep, dark appearance of outer space. -
Blend in the purple:
Rinse your brush and pick up Dioxazine Purple. Apply this in the middle section, slightly overlapping the blue edge so they bleed together softly.
Starry Splatter Control
Make a test splatter on scrap paper first. If big globs fall, your paint is too wet; blot the brush. Cover areas you want to keep paint-free with paper.
Step 2: Building the Galaxy
-
Introduce the pink nebula:
Clean your brush thoroughly. Load it with Quinacridone Magenta and paint the lower third, pushing the color upward into the purple area to create a vibrant nebula cloud. -
Deepen the contrast:
While the paper is still damp, go back in with your darkest Indigo mixed with a touch of Purple. DAB this dark mixture into the bottom corners and sporadic areas around the pink to make the bright colors pop. -
Refine the transitions:
If any lines look too harsh, use a clean, slightly damp brush to gently soften the edges where the pink meets the purple. I find this helps the galaxy look more ethereal. -
Add texture:
Sprinkle a few drops of clean water onto the semi-wet paint. This creates ‘blooms’ or ‘cauliflowers’ that mimic the texture of gas clouds in space. -
Let it dry complete:
Before moving on to the stars, the background must be 100% bone dry. Use a hairdryer on a low setting or wait patiently to avoid smudging.
Metallic Magic
Swap plain white gouache for metallic silver or gold watercolor for the constellation lines. It adds a beautiful shimmer that catches the light.
Step 3: Stars & Constellations
-
Mix the splatter medium:
Dilute a small amount of white gouache or white ink with a drop of water until it has the consistency of heavy cream. -
Create distant stars:
Dip an old toothbrush into the white mixture. Aim the bristles at the paper and run your thumb across them to flick a fine mist of ‘stars’ across the galaxy. -
Add prominent stars:
Using your smallest detail brush (size 0 or 2), paint larger individual dots scattered randomly. To make them twinkle, paint a tiny cross or four-pointed star shape over a few of the larger dots. -
Sketch the constellations:
Identify where you want your constellations to go. Lightly pencil in the main anchor points, or just visualize the geometric shapes if you feel confident. -
Connect the dots:
Load your detail brush with concentrated opaque white gouache. Paint the specific larger stars that form the constellation nodes. -
Draw the lines:
With a steady hand and the very tip of your brush, connect the constellation stars with fine, straight lines. You can use dotted or dashed lines for a stylized look. -
Final drying time:
Allow the white gouache to dry completely. It sits on top of the watercolor, so it can smear easily if touched too soon. -
Reveal the border:
Slowly and carefully peel away the masking tape. Pull the tape away from the painting at a 45-degree angle to ensure a crisp, clean edge.
Frame your cosmic creation or gift it to a stargazer who loves the night sky
BRUSH GUIDE
The Right Brush for Every Stroke
From clean lines to bold texture — master brush choice, stroke control, and essential techniques.
Explore the Full Guide
Galaxy Sky With Pine Tree Silhouettes
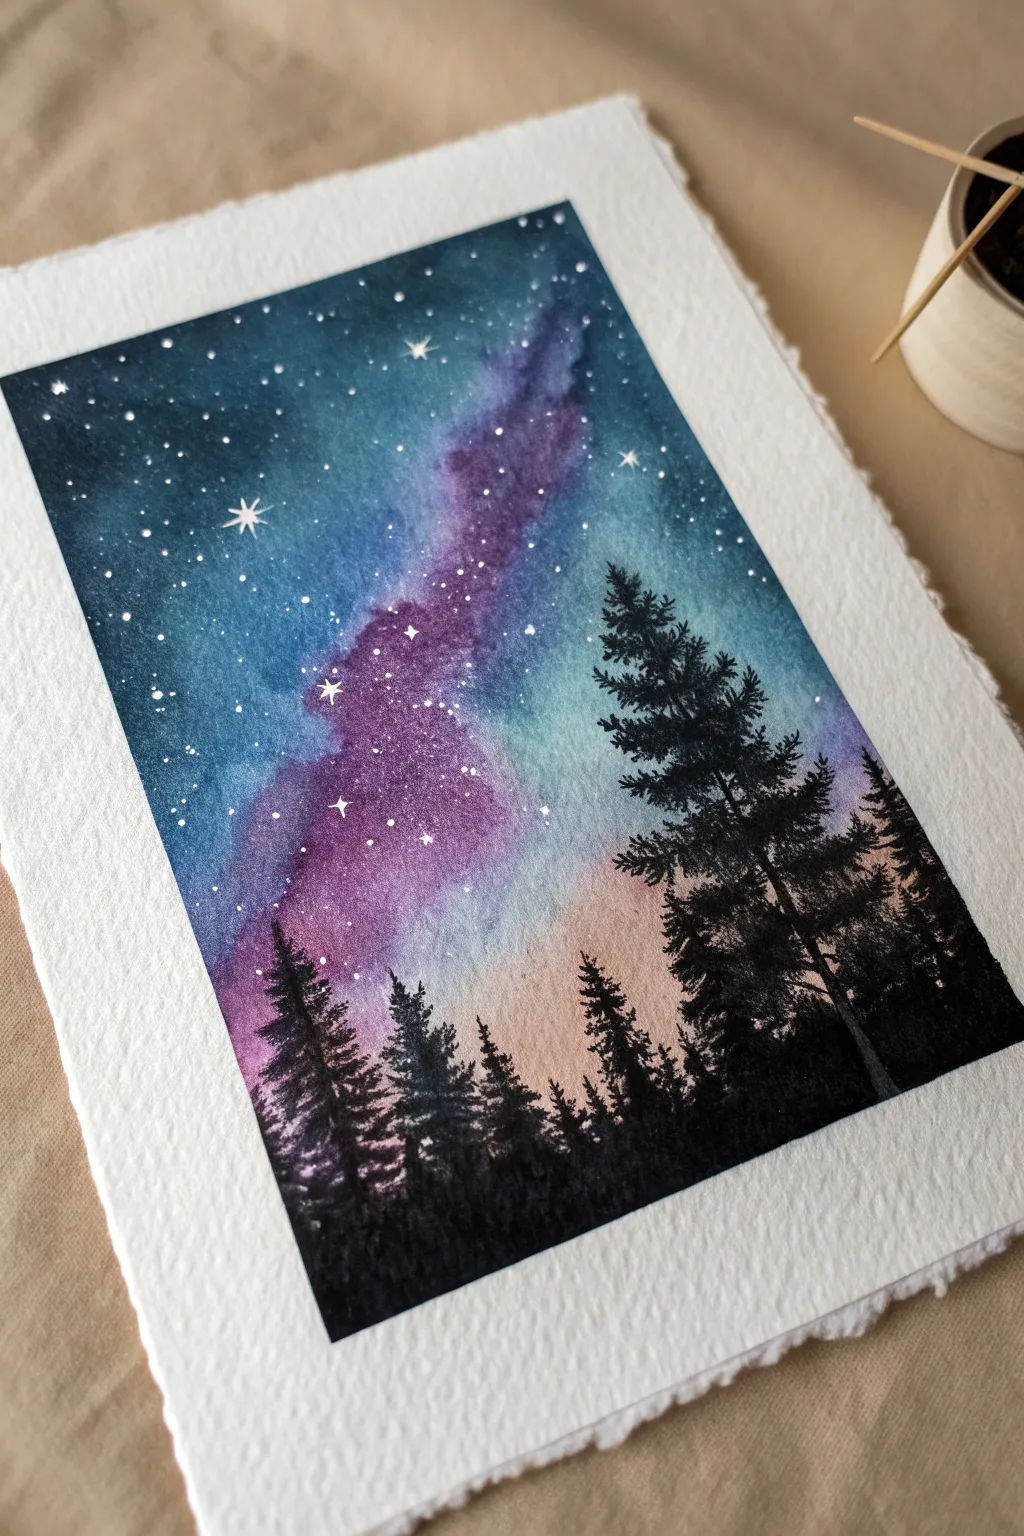
Capture the magic of a starry night with this watercolor project that blends a vibrant galaxy sky with grounding pine silhouettes. The contrast between the soft, bleeding colors of the Milky Way and the crisp, dark trees creates a stunning depth that looks deceptively complex to achieve.
Step-by-Step
Materials
- Cold press watercolor paper (300gsm, 100% cotton recommended)
- Painter’s tape or masking tape
- Watercolor paints (Indigo, Prussian Blue, Turquoise, Magenta/Purple, Black)
- White gouache or white gel pen
- Large round brush (size 10 or 12)
- Small round or detail brush (size 0 or 2)
- Clean water container
- Paper towels
- Old toothbrush (optional for stars)
Step 1: Preparation and The First Wash
-
Secure your paper:
Tape your watercolor paper down to a board or hard surface using painter’s tape on all four sides. This prevents the paper from buckling when wet and creates that crisp white collection border seen in the image. -
Wet the paper:
Using your large round brush, apply a clean coat of water over the entire paper surface. You want an even sheen, not puddles, to prepare for the wet-on-wet technique. -
Lay the horizon glow:
While the paper is wet, mix a very pale, watered-down wash of magenta or a soft peach tone. Lightly brush this near the bottom third of the paper where the tree line will eventually be, keeping it very faint.
Step 2: Painting the Galaxy Sky
-
Start the nebula:
Load your brush with a vibrant purple or magenta mix. Paint a diagonal swathe starting from the bottom left quadrant up toward the top right, letting the pigment bloom into the wet paper. -
Add the deep blues:
Switch to Prussian Blue or Turquoise. Paint around the purple streak you just created, gently nudging the blue paint so it touches the purple borders and blends slightly, but don’t overmix or you’ll get mud. -
Darken the corners:
Mix a deep Indigo. Apply this to the top left and top right corners of the sky to create depth, making the center galaxy look brighter by comparison. -
Refine the blend:
If edges look too hard, clean your brush, dampen it slightly, and gently soften the transition areas between the blue and purple zones. -
Let it dry completely:
This is crucial. The paper must be bone dry before moving on. You can use a hairdryer on a low, cool setting if you are impatient.
Pro Tip: Lifting Color
While the sky layer is still wet, use a clean, thirsty brush or a twisted paper towel to lift a small streak of color out of the purple nebula. This creates a bright, glowing core for your galaxy.
Step 3: Creating the Stars
-
Prepare the stars:
Dilute a small amount of white gouache with water until it has a creamy consistency, like melted ice cream. -
Splatter texture:
Load a brush or an old toothbrush with the white paint. Tap the brush against a finger or another brush handle over the dry painting to create a spray of fine white dots for distant stars. -
Paint larger stars:
Using your smallest detail brush or a white gel pen, manually dot in slightly larger stars and a few cross-shaped ‘twinkling’ stars, focusing them near the nebula band.
Troubleshooting: Bloom Marks
If you see ‘cauliflower’ blooms in your sky, you likely added water to a drying area. Don’t fight it! These textures actually look great in galaxy paintings and add organic variance.
Step 4: Adding the Silhouettes
-
Mix the black:
Mix a very saturated black watercolor paint. I prefer mixing Indigo and Burnt Umber for a more natural dark tone, but pure black works too. It should be thick, not watery. -
Establish the tree line:
Paint an uneven, jagged line across the bottom of the paper to represent the distant forest floor and smaller bushes. -
Paint the main trunks:
Using your detail brush, paint a few thin vertical lines extending upward. Place the tallest tree slightly off-center to the right side for better composition. -
Start the branches:
Starting from the top of your trunk line, tap your brush tip gently to create small, upward-facing branches. As you move down, make the branches wider and slightly heavier. -
Build texture:
Use a stippling or tapping motion to mimic pine needles. Don’t paint individual needles; instead, think of them as clumps of shadow hanging off the branches. -
Fill the forest:
Add shorter, varying-height trees to the left and right of the main tree, ensuring the bottom area is solid black to ground the image. -
Final dry:
Let the black silhouettes dry completely. If the black looks faded or gray after drying, add a second layer to ensure a true silhouette effect. -
Remove tape:
Slowly peel the painter’s tape away from the paper at a 45-degree angle to reveal your clean, crisp edges.
Once the tape is peeled away, you have a serene little window into a vast universe ready to display or gift
Taped Diamond Window Galaxy Layout
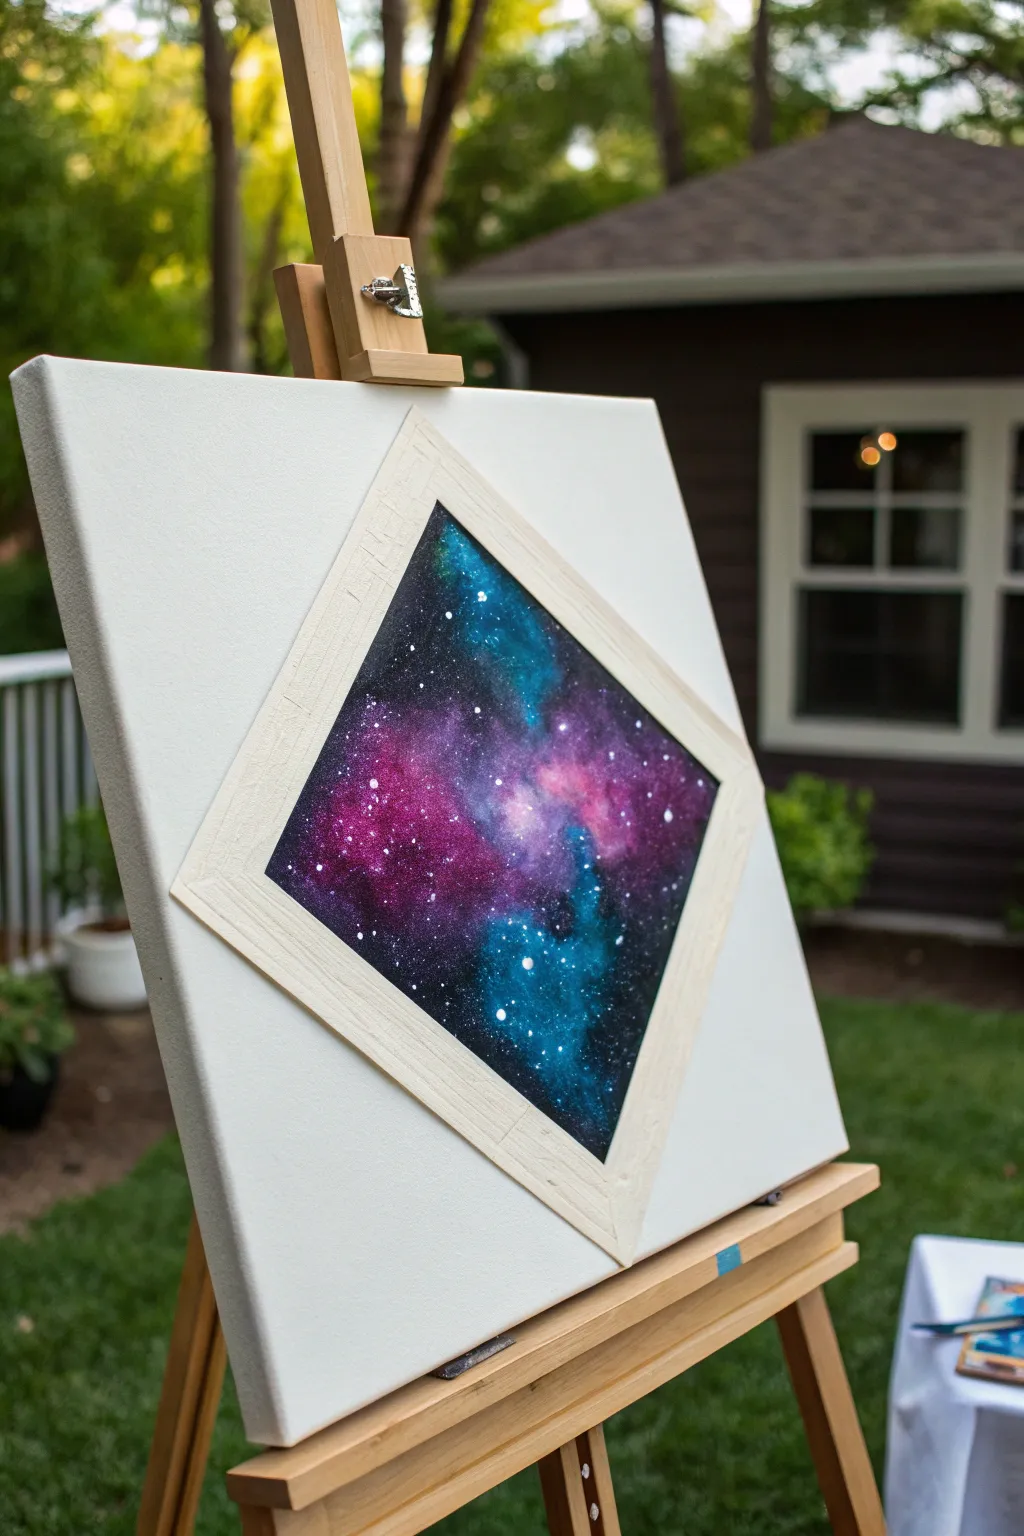
Frame the infinite beauty of the cosmos within a crisp, geometric window on your canvas. By using masking tape to create a negative space border, you’ll achieve a striking contrast between clean white canvas and a vibrant, swirling nebula.
Step-by-Step Tutorial
Materials
- Square or rectangular stretched canvas
- Painter’s tape or masking tape (approx. 1 inch width)
- Black acrylic paint
- Purple acrylic paint (violet/magenta)
- Blue acrylic paint (teal/cyan)
- Titanium white acrylic paint
- Sponge applicators or kitchen sponge pieces
- Small round brush or old toothbrush (for stars)
- Palette or paper plate
- Ruler
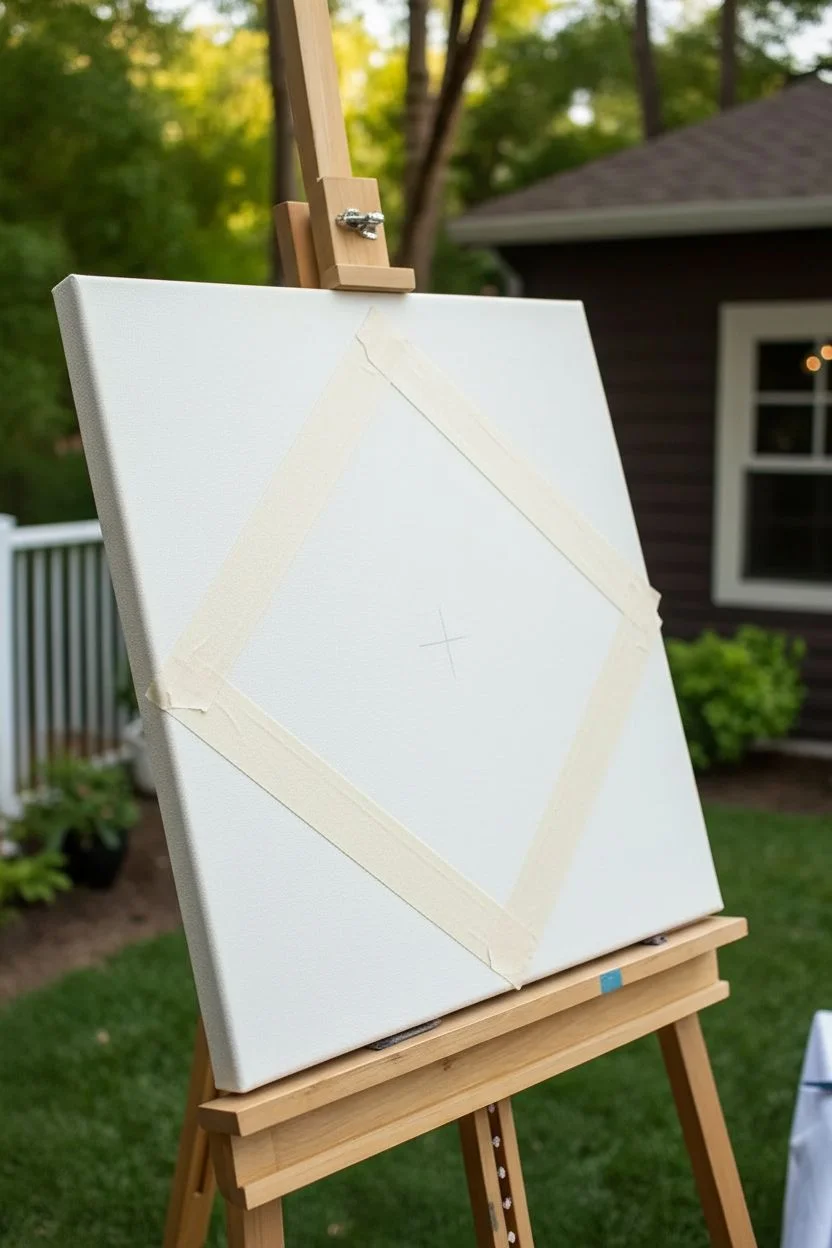
Step 1: Preparation & Taping
-
Measure the center:
Place your canvas on a flat surface. Use a ruler to lightly mark the exact center point of the canvas with a pencil, which will help guide your diamond shape placement. -
Create the diamond outline:
Tear off four strips of painter’s tape. Arrange them to form a diamond shape in the center of the canvas. Ensure the corners of your diamond align vertically and horizontally with the canvas edges. -
Seal the edges:
Press down firmly along the inner edges of the tape strips. You want to make sure the seal is tight so paint doesn’t bleed underneath, which keeps your future lines crisp. -
Protect the outer canvas:
Since this design relies on a stark white background, cover the white canvas space outside the diamond with paper or extra tape if you are a messy painter, though careful sponge work usually suffices.
Step 2: Painting the Nebula
-
Apply the black base:
Squeeze black acrylic paint onto your palette. Using a sponge applicator, dab black paint into the corners of the diamond and along the tape edges, leaving the center somewhat patchy or empty. -
Start with purple:
Load a clean sponge with purple paint. Dab this color into the center area and merge it slightly with the black edges. Don’t over-blend; you want texture. -
Add teal accents:
While the purple is still semi-wet, sponge in your teal or bright blue paint. Focus on areas where the purple meets the black to create a glowing transition effect. -
Intensify the depth:
Go back in with a little more black on your sponge to darken the very outer points of the diamond, ensuring the center nebula looks bright by comparison. -
Create cloudy textures:
Use a very small amount of white mixed with pink or light blue on a sponge to gently highlight the brightest parts of the nebula clouds. Use a tapping motion to keep it soft.
Seal the Tape
Before adding color, paint a thin layer of white over the inner tape edge. This seals gaps; any bleed-through will be white on white, keeping final lines sharp.
Step 3: Stars & Reveal
-
Mix star paint:
Water down a small amount of titanium white paint until it reaches an ink-like consistency. -
Splatter the stars:
Dip an old toothbrush or stiff brush into the thinned white paint. Use your thumb to flick the bristles over the diamond area, creating a spray of tiny white stars. -
Add larger stars:
Use a fine liner brush or the tip of a toothpick to dot a few larger, brighter stars in the center of the galaxy clusters. -
Let it dry completely:
I usually wait at least 20 to 30 minutes for the acrylics to dry fully. If you peel the tape while the paint is wet, you risk dragging distinct lines or smudging the white border. -
The grand reveal:
Slowly peel back the painter’s tape at a 45-degree angle alongside the canvas. Watch as the crisp, clean edges reveal your floating window into space.
Muddy Colors?
If your galaxy looks brown/gray, you likely over-blended while the paint was wet. Let layers dry slightly between colors, or use separate sponges for each hue.
Display your artwork on an easel or wall to show off that satisfying contrast between the clean canvas and deep space

PENCIL GUIDE
Understanding Pencil Grades from H to B
From first sketch to finished drawing — learn pencil grades, line control, and shading techniques.
Explore the Full Guide
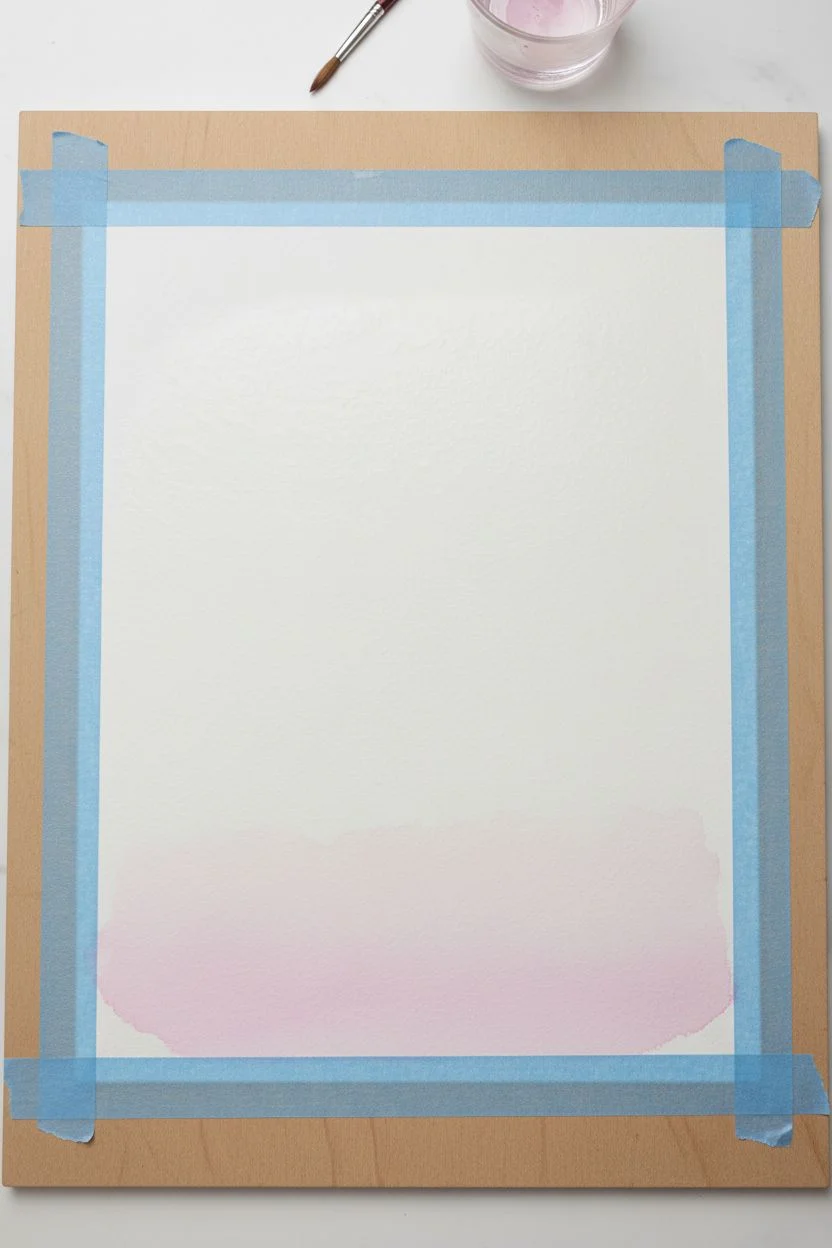
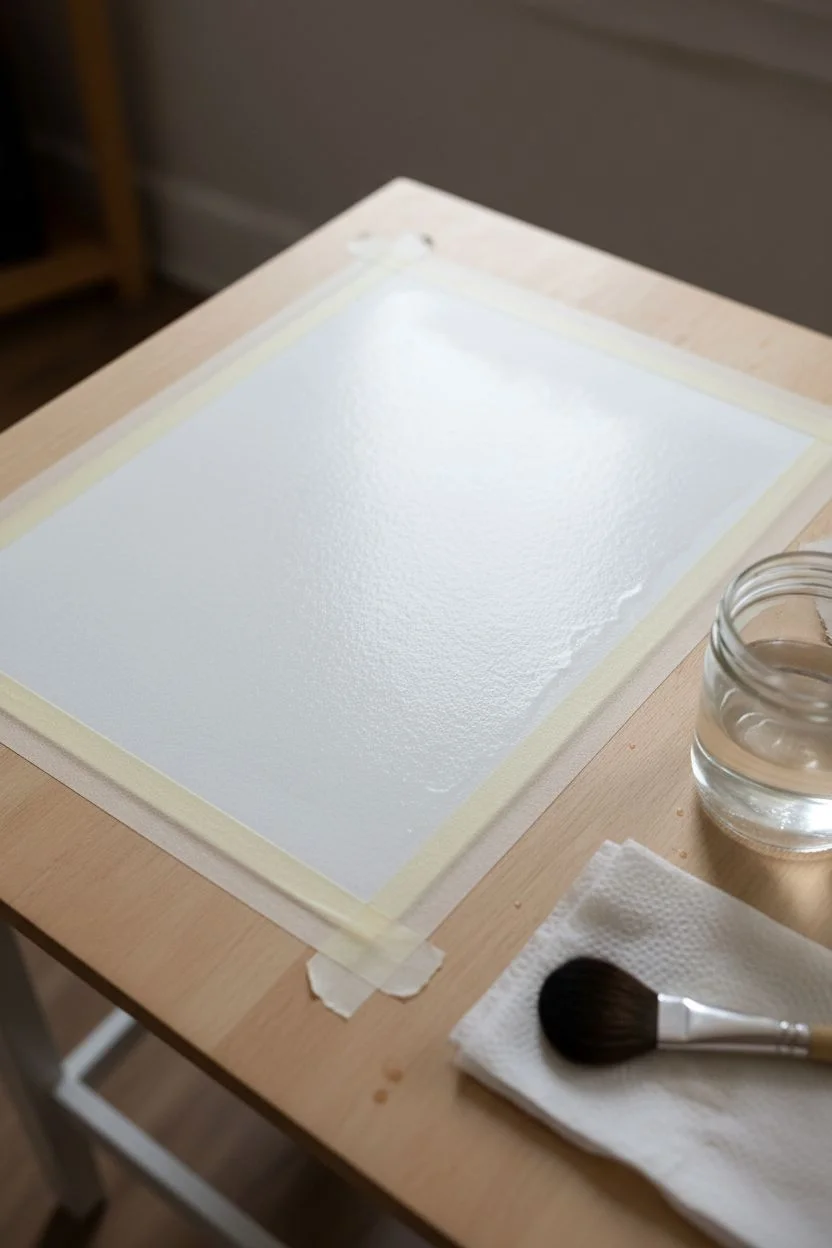
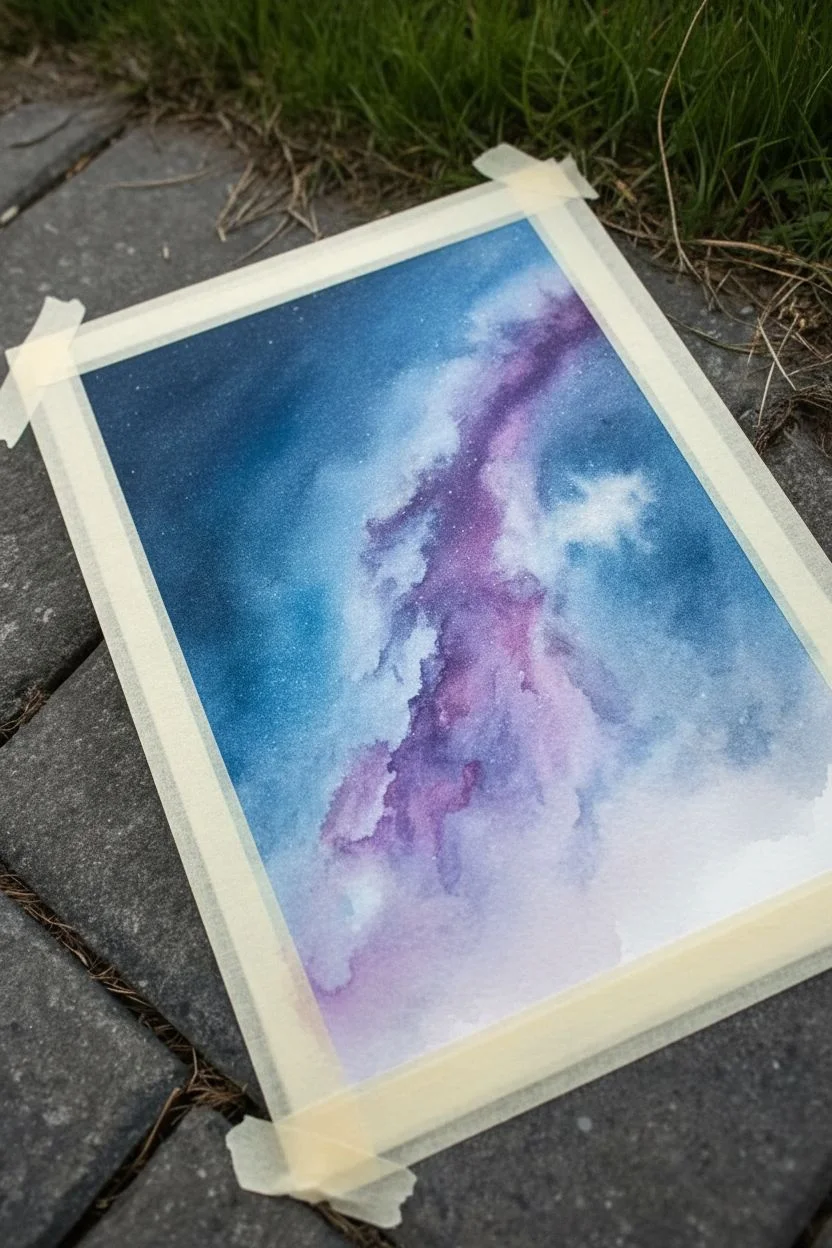
Clean Border Galaxy Wash on Taped Paper
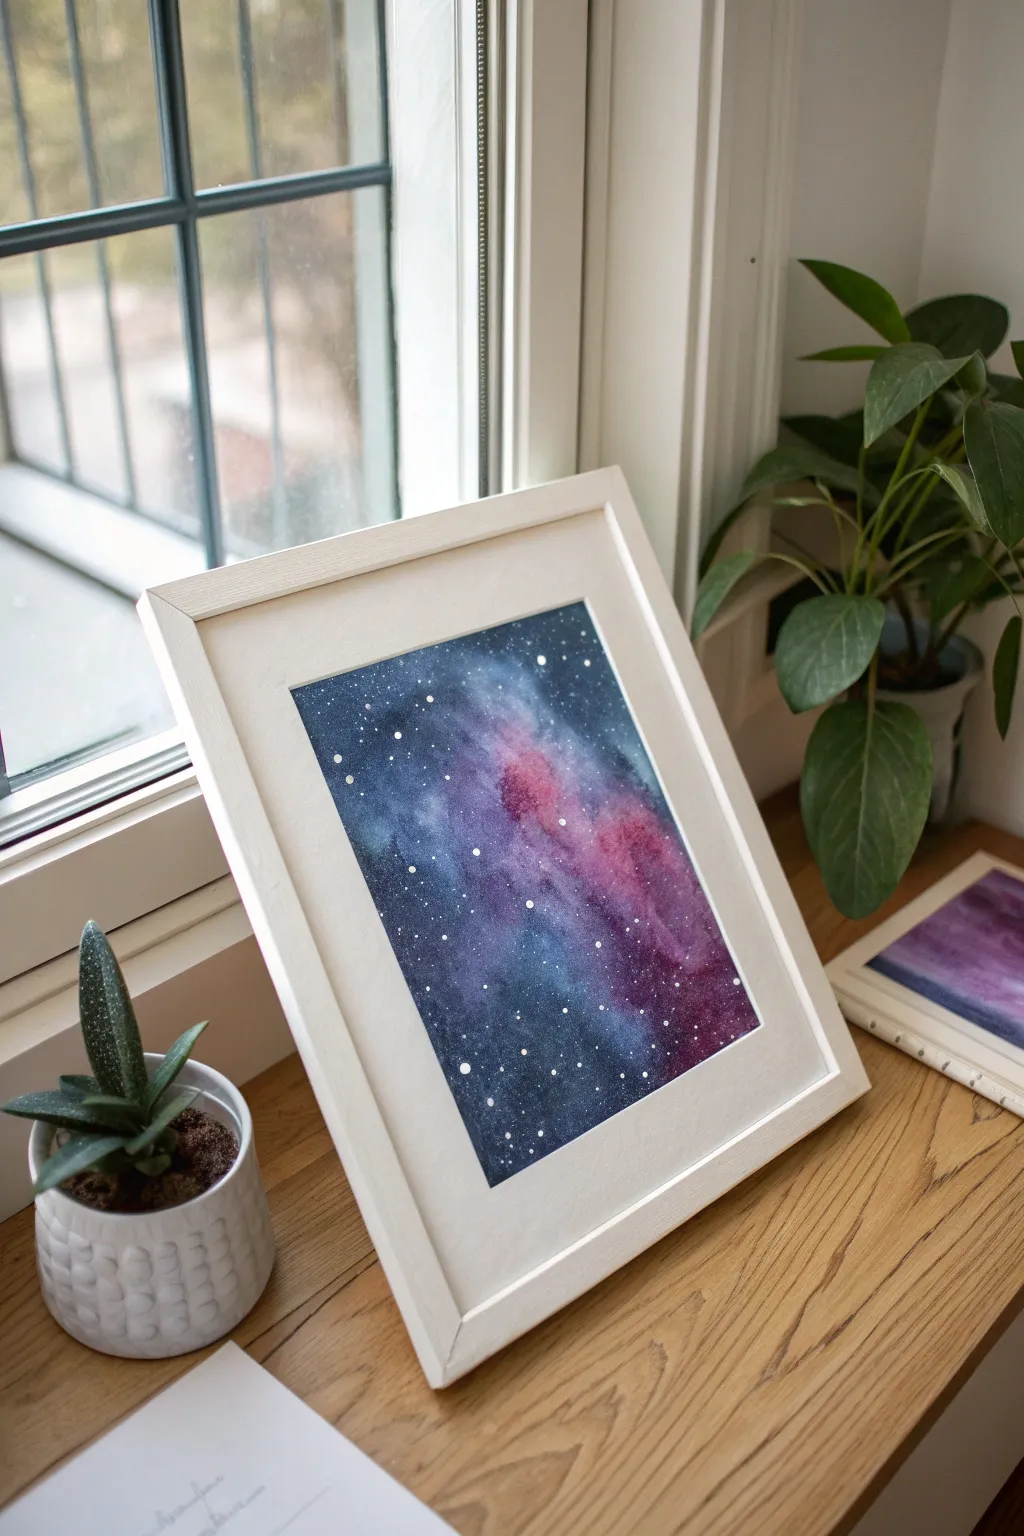
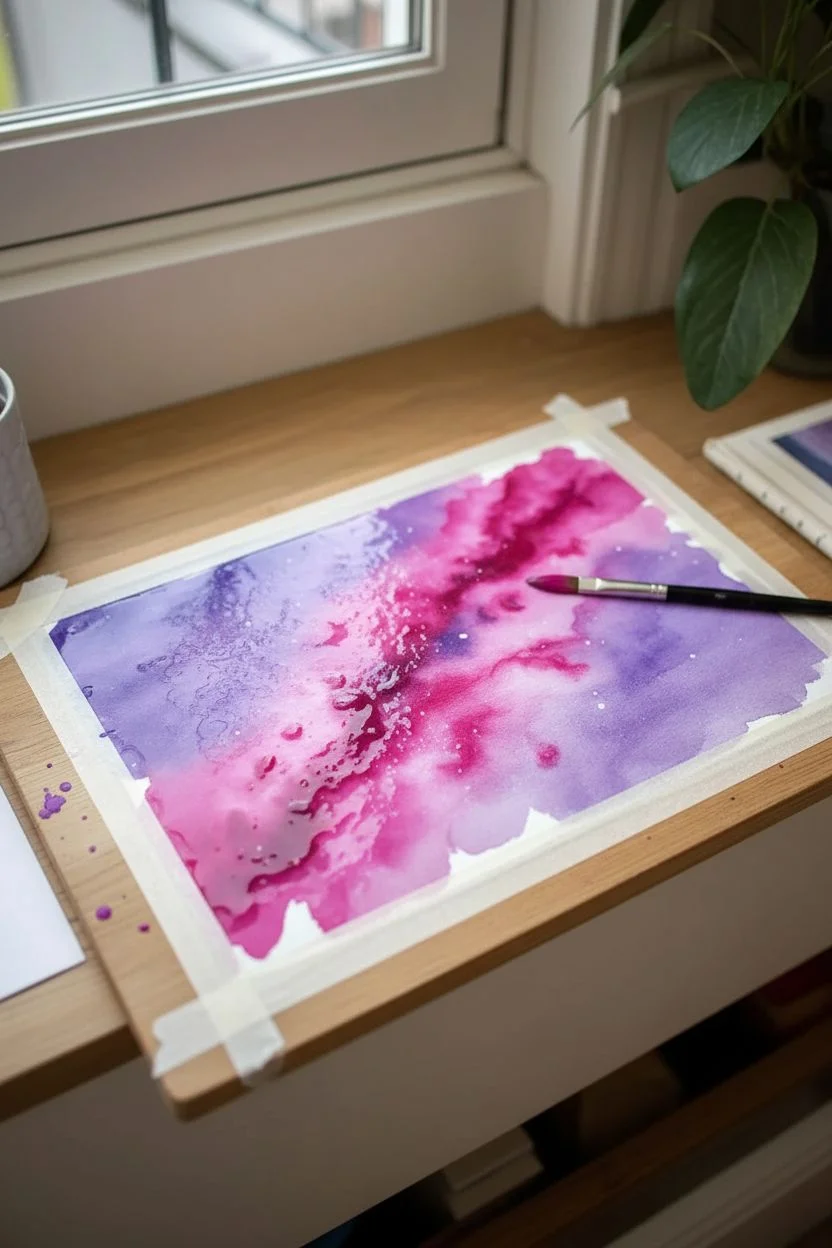
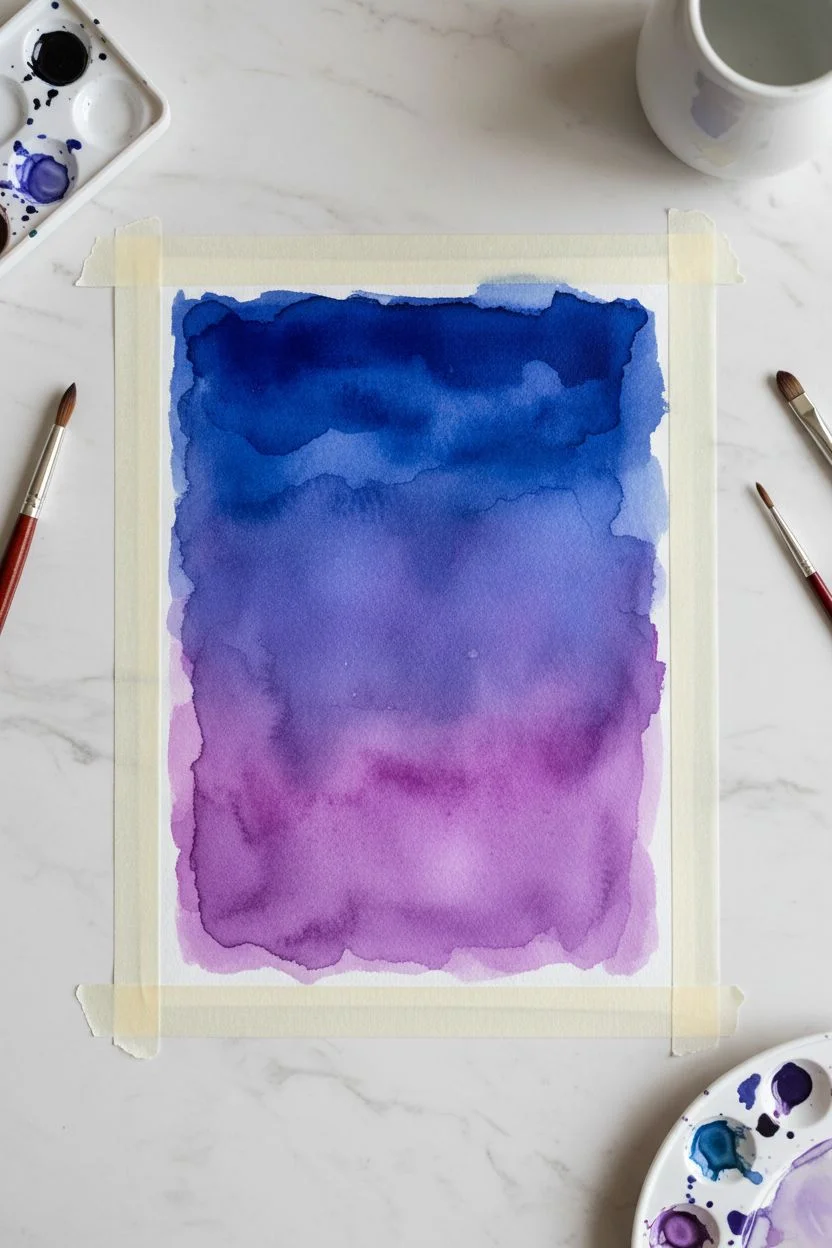
Capture the ethereal beauty of a nebula with this vibrant watercolor project that contrasts wild, flowing blends against sharp, geometric edges. Even beginners can achieve professional-looking results by letting the water do most of the hard work for you.
Step-by-Step
Materials
- Cold press watercolor paper (minimum 140lb/300gsm)
- Painter’s tape or artist’s masking tape
- Watercolor paints (Indigo, Payne’s Grey, Magenta, Purple, Cyan)
- Round watercolor brushes (size 8 and size 4)
- White gouache or white acrylic ink
- Old toothbrush or stiff fan brush
- Two jars of water
- Paper towels
- Wooden board or stiff cardboard (to tape paper onto)
Step 1: Preparation and Base Layer
-
Secure the paper:
Begin by taping your watercolor paper down to a sturdy board. Press the edges of the tape firmly to ensure a crisp seal, as this will create that satisfying clean white border later. -
Wet the surface:
Using your larger brush and clean water, apply an even coat of water to the entire paper surface inside the tape lines. You want a sheen on the paper, but avoid creating puddles. -
Drop in bright colors:
While the paper is wet, load your brush with vibrant magenta and purple. touches. Drop these colors onto the paper in a diagonal or clustered cloud formation, leaving some lighter areas for variation. -
Blend softly:
Let the bright colors bloom naturally into the wet paper. You can tilt the board slightly to encourage movement, but try not to overwork the paint with your brush.
Step 2: Building Depth
-
Introduce deep blues:
Prepare a mixture of indigo and cyan. While the first layer is still damp (but not soaking), start adding this blue around the edges of your pink and purple clusters. -
Darken the corners:
Mix a concentrated Payne’s Grey or a very dark Indigo. Apply this to the outer corners and edges of your composition, blending inward toward the center. -
Create transitions:
Clean your brush and use it slightly damp to soften the transitions where the dark blue meets the lighter pink nebula clouds. This prevents harsh lines from forming. -
Add saturation:
If your colors look too pale, drop in more concentrated paint into the wet areas. Watercolor dries lighter, so don’t be afraid to go bold with pigment at this stage. -
Dry completely:
This is crucial: allow the painting to dry fully. The paper should be flat and warm to the touch. You can use a hairdryer on a low setting if you need to speed this up.
Bleeding Edges?
If paint seeped under the tape, wait until fully dry, then gently use a white gel pen or white gouache to touch up and straighten the border line.
Step 3: The Starry Finish
-
Prepare the stars:
Dilute a small amount of white gouache or acrylic ink with a drop of water until it has a creamy consistency, similar to heavy cream. -
First spatter application:
Load an old toothbrush or stiff brush with the white mixture. Hold it over the painting and run your thumb across the bristles to flick tiny specks of paint onto the dark galaxy background. -
Hand-paint larger stars:
Using your smallest round brush (size 4 or smaller), dip the tip into pure white gouache and manually dot a few larger, brighter stars in the darkest areas of the sky. -
Add a focal point:
If you like, pick one or two of the largest stars and add tiny cross-hatches to create a “twinkle” effect. -
Final drying time:
Let the white stars dry completely. Gouache dries quickly, usually within a few minutes. -
The reveal:
Now for the best part. Carefully peel the tape away from the paper. Pull slowly at a 45-degree angle away from the painting to prevent the paper from tearing.
Add Dimension
Mix a tiny amount of iridescent medium or metallic watercolor into your purple hues for a nebula that shimmers subtly when the light hits it.
Frame your cosmic creation simply to let the vibrant colors and sharp borders speak for themselves
Mini Galaxy Series on Small Square Canvases
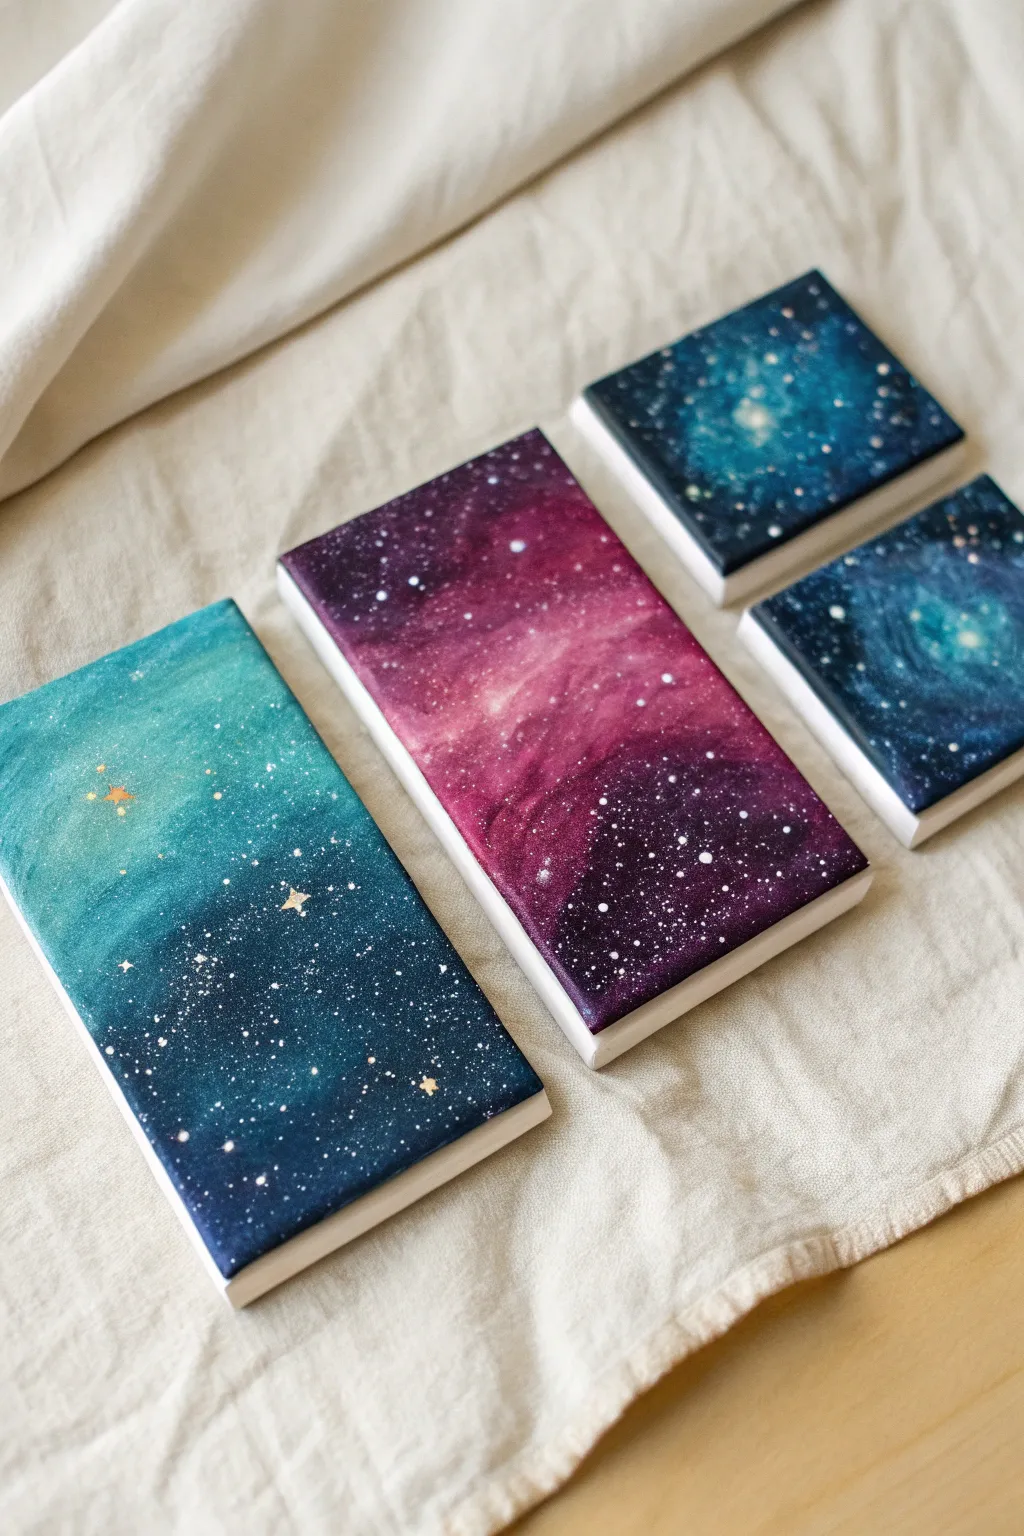
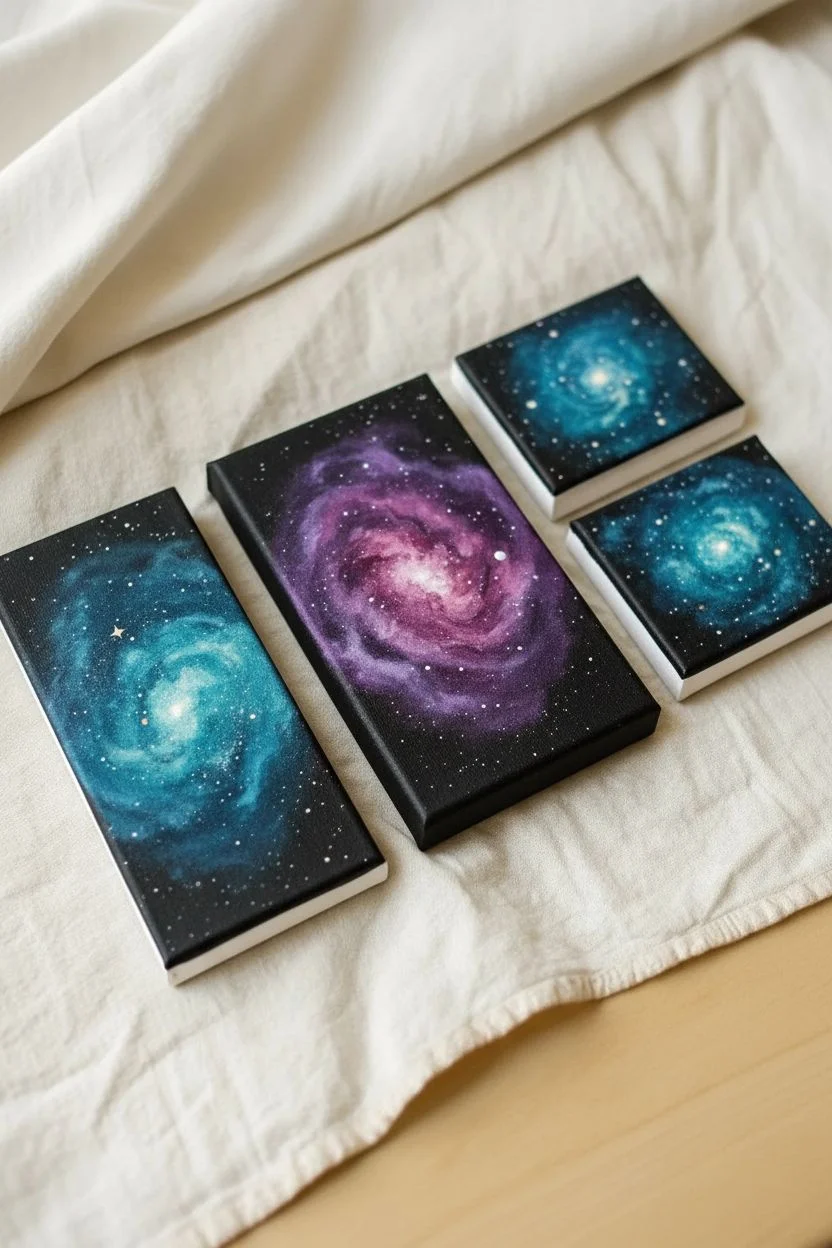
Capture the infinite wonder of the cosmos on a petite scale with this series of small canvases. The combination of deep indigos, violet hues, and teal mists creates a stunning set of galaxy paintings that look beautiful individually or arranged as a constellations cluster.
Detailed Instructions
Materials
- Small stretched canvases (various miniature sizes)
- Acrylic paints (black, phthalo blue, dioxazine purple, magenta, teal, titanium white)
- Make-up sponge wedges or textural sea sponge
- Soft synthetic brushes (flat shader and liner sizes)
- Old toothbrush (stiff bristles)
- Cup of water and paper towels
- Palette or paper plate
- Metallic gold paint (optional for star accents)
Step 1: Base and Blending
-
Prepare the workspace:
Lay down your cream cloth or drop sheet to protect surfaces, as the splattering step can get messy later. -
Prime the background:
Start by painting the entire surface of each canvas with a coat of black acrylic paint to create a deep space foundation. Don’t forget to paint the sides for a finished gallery look. -
Mix your nebulas:
While the black is still slightly damp or just tacky, sponge on your first color clusters. For the teal canvas, dab a mix of teal and phthalo blue; for the purple one, lay down some deep violet. -
Create depth with sponges:
Using a clean part of your sponge, gently dab the edges of your colored areas to blend them softly into the black background. You want a smoky, cloud-like transition rather than hard lines. -
Layering lighter hues:
Mix a small amount of white into your main colors (teal or magenta) to create a tint. Sponge this lighter mixture into the center of your colored clouds to simulate the glowing core of a nebula. -
Deepen the contrast:
If you lost too much darkness, lightly sponge black back around the corners and outer edges of the canvas to re-establish the deep void of space and make the colors pop.
Sponge Control
Don’t overload your sponge. Dab excess paint onto your palette before touching the canvas. This ‘dry brush’ style creates that airy, dusty gas texture essential for realistic nebulas.
Step 2: Stars and Details
-
Prepare the splatter mix:
Dilute a small dollop of titanium white paint with water on your palette until it reaches an ink-like consistency. -
Test the consistency:
Dip an old toothbrush into this watery white paint and run your thumb across the bristles over a scrap paper to ensure it sprays fine dots, not large blobs. -
Create the star field:
Gently flick the toothbrush bristles over the canvases to create a spray of distant stars. Concentrate more splatter in the lighter ‘nebula’ areas for a glowing effect. -
Hand-paint major stars:
Switch to a fine liner brush or a toothpick. carefully place larger individual white dots to represent closer, brighter stars against the dark background. -
Add distinctive twinkles:
For the largest stars, paint a tiny cross or use the tip of your brush to drag the white paint slightly outward in four directions to create a glimmering cross-shape. -
Optional gold accents:
I occasionally like to dip a fine brush into metallic gold paint to add just two or three highlight stars on the teal canvas for warmth and variety. -
Final drying time:
Let the canvases sit undisturbed until fully dry. Since acrylics dry quickly, this usually takes about an hour depending on how thick your sponge layers were.
Blobby Stars?
If your toothbrush creates accidentally large puddles instead of mist, quickly blot them gently with a corner of a paper towel. You can paint over the mistake later with a bit of nebula color.
Arrange these cosmic miniatures together on a shelf or desk to bring a little piece of the universe into your room


Sketchbook Galaxy Spread for Daily Practice
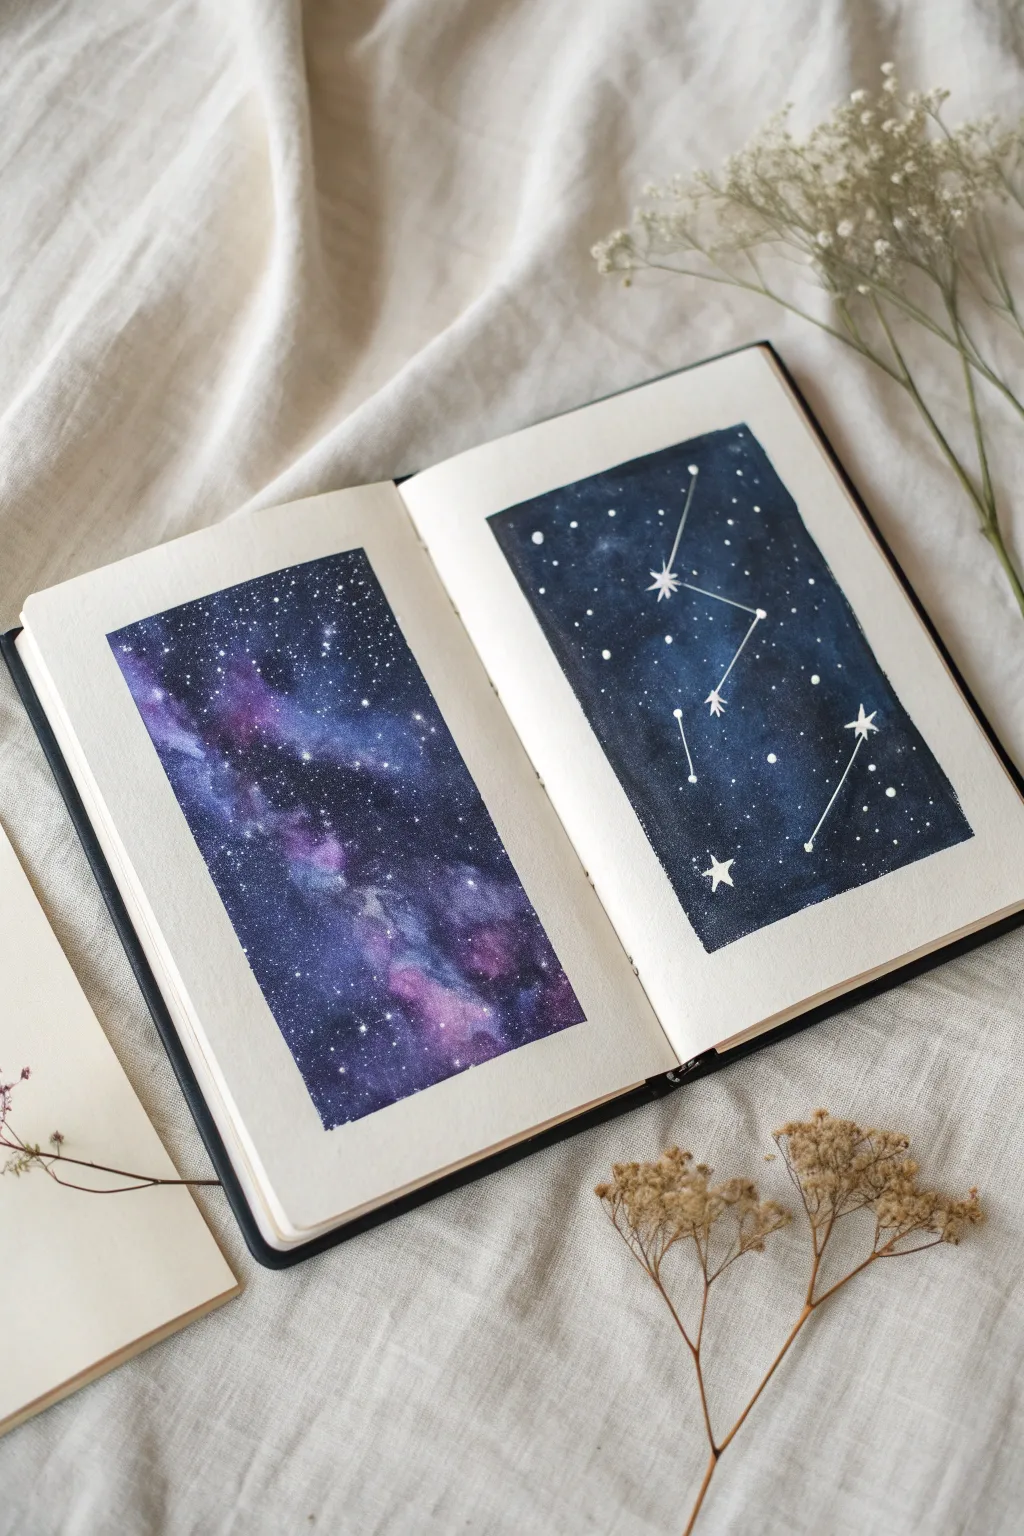
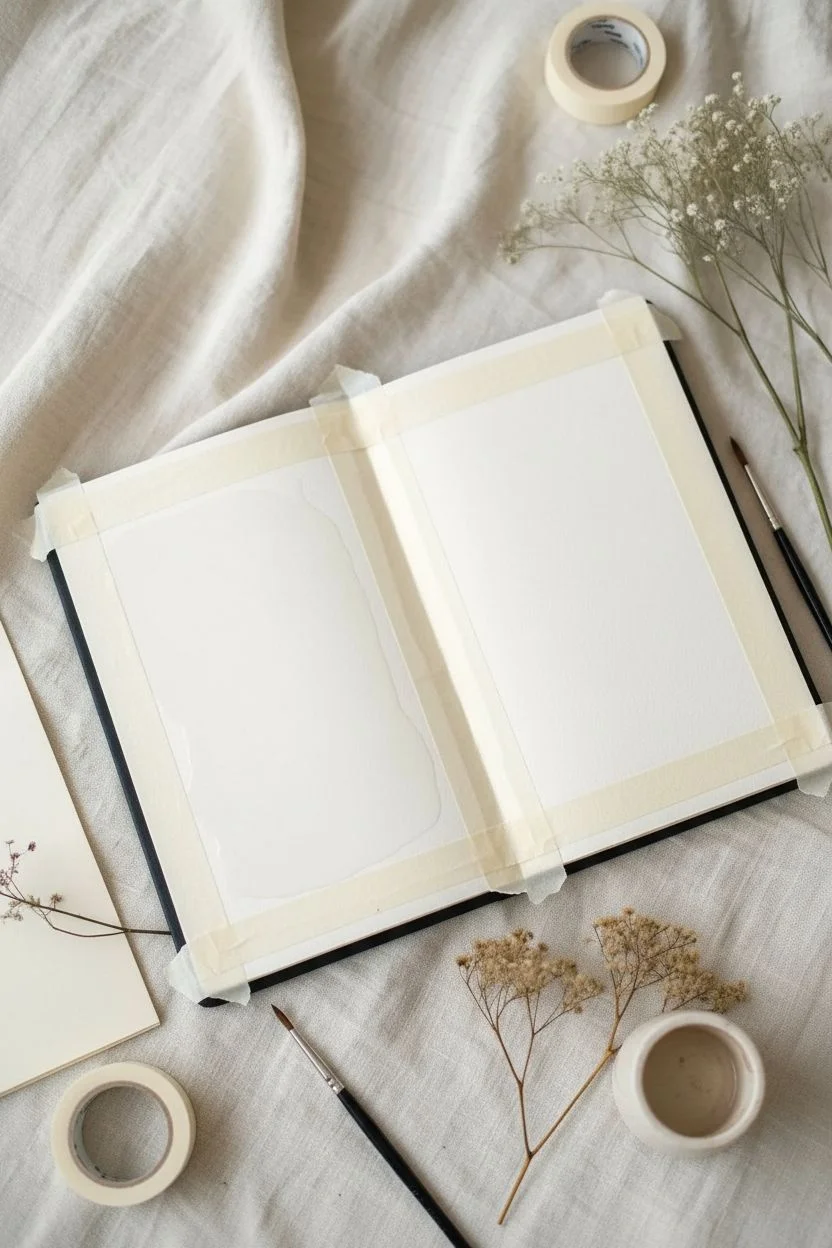
Capture the vastness of space across a double-page spread with two distinct celestial styles. One side features a soft, blending nebula in vibrant purples and blues, while the other offers a graphic, crisp constellation study against a deep midnight sky.
Step-by-Step Tutorial
Materials
- Watercolor sketchbook (A5 or similar size)
- Artist tape or masking tape
- Watercolor paints (Indigo, Prussian Blue, Purple/Violet, Magenta, Black)
- White opacity gouache or white acrylic ink
- Round watercolor brushes (size 4 and 8)
- Fine liner brush or white gel pen
- Clean water and paper towels
- Old toothbrush (optional for splattering)
Step 1: Preparation
-
Tape the borders:
Begin by taping off a clean rectangular border on both the left and right pages of your open sketchbook. Press the tape edges down firmly with your fingernail to prevent paint from seeping underneath and to ensure those crisp, satisfying edges later. -
Pre-wet the paper:
For the left page (the nebula), lightly wet the area inside the tape with clean water. You want the paper to be shiny but not forming deep puddles.
Step 2: Left Page: The Nebula
-
Lay the base colors:
While the paper is damp, drop in patches of magenta and bright purple in a diagonal motion across the rectangle. Let the pigments bleed slightly into the wet paper. -
Add depth with blues:
While the purples are still wet, introduce Prussian Blue around the edges and in the gaps between the purple sections. Allow the blue to touch and blend with the purple, creating new violet transitions naturally. -
Deepen the contrast:
Mix a concentrated Indigo or a touch of Black. Apply this darkest shade to the very corners and edges of the rectangle to make the center nebula colors pop effectively. -
Create soft clouds:
If an area looks too flat, lift a tiny bit of color with a clean, damp brush or dab in a drop of water to create ‘blooms’ that mimic gas clouds. -
Dry completely:
Let this page dry fully before moving on. I usually wait until the paper is warm to the touch again if checking carefully. -
Splatter stars:
Dilute some white gouache or acrylic ink with a tiny bit of water. Load an old toothbrush or a stiff brush and flick fine specs of white paint over the dark background to create a starfield.
Bleeding Edges?
If paint leaked under the tape, use white gouache to tidy up the edges, or cover the mistake by drawing a thin gold or silver border frame around the painting.
Step 3: Right Page: The Constellation
-
Paint the solid background:
For the right page, mix a large amount of Indigo and Black. You want a flat, consistent wash rather than a blended look. Apply this dark mixture evenly across the entire taped rectangle. -
Second coat (optional):
If the first layer looks streaky after drying, apply a second layer of the dark wash to achieve a truly opaque, midnight-sky look. -
Plotting main stars:
Once the dark background is bone dry, take your white gouache or a white gel pen. Place four or five larger dots to mark the primary stars of your chosen constellation (like the cross shape shown here). -
Draw the starbursts:
Turn these main dots into stars by drawing a vertical line and a horizontal line through the center, tapering the ends so they look like twinkling flares. -
Connect the constellation:
Using a very fine liner brush or gel pen, draw thin, straight lines connecting your main stars. -
Add background stars:
Fill the surrounding empty space with small dots of varying sizes. Keep them sparser than the nebula page to maintain the graphic, organized feel of this side. -
Final highlights:
Add a few tiny ‘distant’ stars using a faint grey-blue mix to add depth behind the bright white stars.
Pro Tip: Better Stars
Test your splatter technique on a scrap paper first. If the drops are too big, your brush is too wet. Blot it on a paper towel before flicking for finer mist.
Step 4: Revealing the Spread
-
Check for dryness:
Ensure absolutely everything is dry. If the paint is wet, removing tape can smudge your hard work. -
Peel the tape:
Slowly peel the tape away from your paper at a 45-degree angle. Pulling slowly helps prevent tearing the sketchbook paper.
Close your sketchbook knowing you have captured a piece of the infinite universe in your hands
Constellation Lines Over a Starry Galaxy
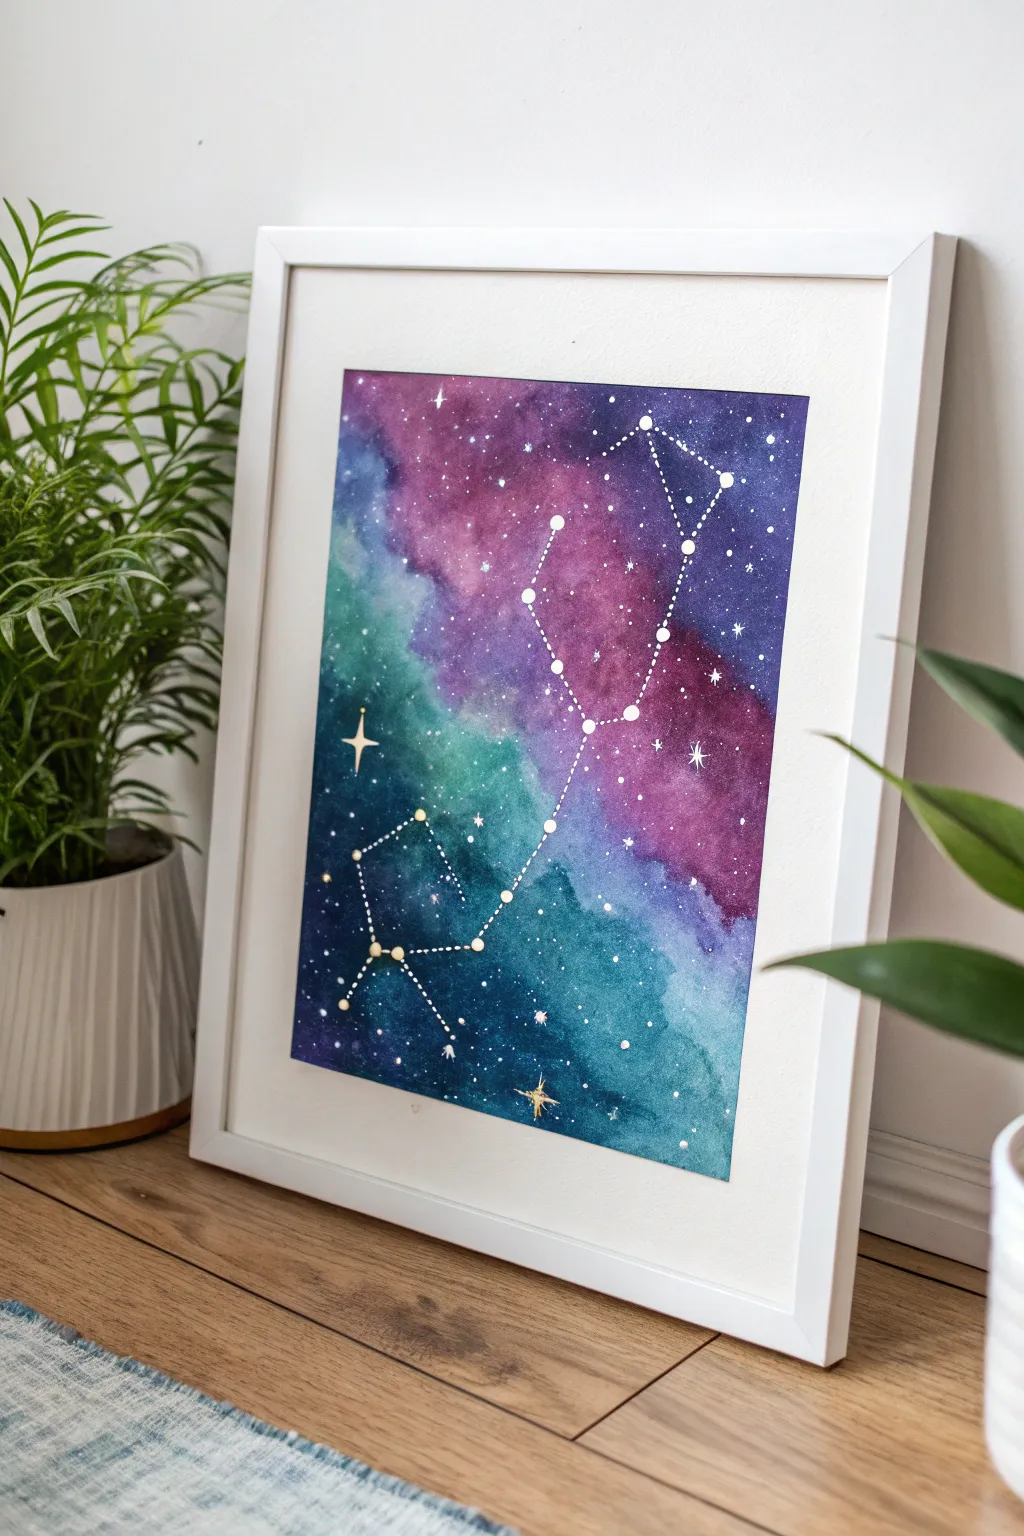
Capture the magic of the night sky with this mesmerizing watercolor galaxy painting featuring your favorite constellation. The nebulous blend of teal, purple, and deep indigo creates a dreamy backdrop for crisp, white star lines.
Step-by-Step
Materials
- High-quality watercolor paper (cold press, at least 300gsm)
- Watercolor paints (teal, violet, indigo, magenta)
- White gouache or white acrylic ink
- Assorted watercolor brushes (large round for washes, fine liner for details)
- Masking tape
- Jar of clean water
- Paper towels
- Pencil and ruler
- Gold paint or metallic pen (optional for stars)
Step 1: Preparing the Canvas
-
Secure the paper:
Begin by taping down all four edges of your watercolor paper to a hard board or your work surface. This prevents buckling when the paper gets wet and creates a crisp white border. -
Pre-wet the surface:
Using a clean, wide brush, apply a light, even coat of clean water over the entire paper area inside the tape. You want the paper to be glistening but not forming puddles.
Step 2: Creating the Galaxy Wash
-
Lay down the teal:
Load a large round brush with a vibrant teal or turquoise watercolor. Dab it onto the wet paper in random patches, focusing on the lower left and center areas, letting the pigment bloom naturally. -
Add violet tones:
While the paper is still damp, introduce a rich violet or purple hue. Apply this to the upper right section and areas adjacent to the teal, allowing the colors to touch and bleed into one another. -
Deepen with indigo:
To create the feeling of deep space, drop concentrated indigo or dark blue paint into the corners and edges of the painting. I find this really adds necessary contrast against the brighter colors. -
Blend softly:
Gently tilt the board to encourage the colors to mix organically. If hard edges form, soften them with a slightly damp, clean brush. -
Create texture:
While the paint is drying but still has a sheen, you can lightly lift some color with a crumpled paper towel to create cloud-like nebula effects. -
Let it dry completely:
Allow the background layer to dry fully. This is crucial; if the paper is cool to the touch, it’s likely still damp inside.
Bleeding Lines?
If your white lines feather into the background, the underlayer wasn’t dry enough. Wait longer or use a hairdryer on low heat before adding details.
Step 3: Adding the Stars
-
Splatter faint stars:
Dilute some white gouache or acrylic ink with a tiny bit of water. Load a brush, hold it over the painting, and tap the handle against another brush to spray fine mist-like stars across the galaxy. -
Paint larger stars:
Using a fine liner brush and opaque white paint, manually dot in larger, brighter stars in areas that need a little sparkle. -
Add a starburst:
Choose one or two focal points to paint a four-pointed starburst shape, adding a magical twinkle effect to the composition.
Zodiac Customization
Personalize this by painting the recipient’s zodiac sign constellation. Add their birthdate in small, elegant script at the bottom corner for a great gift.
Step 4: Drawing the Constellation
-
Map the points:
Reference an image of your chosen constellation (like Virgo shown here). Look for the brightest stars in the pattern and lightly mark their positions with a pencil. -
Paint the constellation stars:
Paint over your pencil marks with solid white circles. Make the primary stars of the constellation slightly larger than the background stars. -
Connect the dots:
Using your finest liner brush and white ink (or a white gel pen for easier control), draw thin, straight lines connecting the stars to form the constellation shape. -
Optional gold accents:
If you want extra shimmer, layer a tiny dot of gold paint in the center of the largest constellation stars.
Step 5: Final Touches
-
Remove tape:
Once you are certain the paint is 100% dry, carefully peel away the masking tape at a 45-degree angle away from the painting to reveal clean edges. -
Frame your work:
Place your finished galaxy art into a simple white frame to complement the bright stars and let the colors truly pop.
Hang your celestial masterpiece where it can catch the light and remind you of the vast beauty above
Shooting Stars and Comet Trails for Motion

Capture the magic of a starry night with this vibrant watercolor galaxy painting featuring dynamic shooting stars. The scene showcases a glowing purple nebula cutting through a deep blue sky, grounded by a silhouette of pine trees.
How-To Guide
Materials
- Cold press watercolor paper (300 gsm)
- Watercolor paints (Indigo, Prussian Blue, Turquoise, Violet/Purple, Magenta, Black)
- White gouache or white gel pen
- Masking tape
- Large flat wash brush
- Medium round brush (size 6 or 8)
- Small detail brush (size 0 or 1)
- Two jars of water
- Paper towels
- Old toothbrush (optional for spatter)
Step 1: Setting the Sky
-
Prepare the Paper:
Tape down all four edges of your watercolor paper to a board or table to create a clean white border and prevent buckling. -
Wet on Wet Base:
Using your large flat brush, apply a generous layer of clean water across the entire sky area, stopping just above where you want the ground to be. The paper should glisten but not have puddles. -
Creating the Nebula:
While the paper is wet, load your round brush with a mix of Magenta and Violet. Drop this color diagonally through the center of the paper to form the milky way band, letting the edges bloom softly. -
Deepening the Blues:
Frame the purple nebula by painting the corners and surrounding sky area with Prussian Blue and Turquoise. Let these blue tones touch the wet purple edges so they blend naturally, but try to keep the center distinct. -
Adding Contrast:
Drop concentrated Indigo or a mix of Blue and Black into the very top corners and the outer edges of the sky while still wet. This creates depth and makes the central nebula appear to glow. -
Lifting Highlights:
Rinse your brush and dry it on a paper towel. Gently lift a few spots of color within the purple nebula to create lighter, cloudy patches. I find this adds a nice dimensional feel to the galaxy cloud.
Muddy Colors?
If your violet and blue turn gray where they meet, rinse your brush more often. Only mix colors on the paper while they are wet, and avoid overworking the same spot repeatedly.
Step 2: Stars and Details
-
The Drying Phase:
Allow the sky layer to dry completely. The paper must be bone dry before the next step, or your stars will blur. -
Star Spatter:
Dilute white gouache with a tiny bit of water until it’s creamy. Load an old toothbrush or stiff brush and tap it over the painting to create a spray of fine stars. Concentrate more stars along the purple band. -
Painting Shooting Stars:
Using a small detail brush and opaque white gouache, paint thin, tapered lines for the shooting star trails. Make the head of the star slightly thicker and let the tail fade out. -
Adding Larger Stars:
Use the tip of your detail brush or a white gel pen to add a few larger, distinct stars. Create cross-shapes for twinkling stars to add variety.
Step 3: Grounding the Scene
-
Painting the Grass:
Mix a muted green or brown tone. Paint the uneven hilly ground at the bottom of the paper, overlapping slightly with the bottom of the sky wash. -
Creating Tree Silhouettes:
Mix a dense black or very dark Payne’s Grey. Using your smallest brush, paint a row of pine trees along the horizon line. -
Detailing the Trees:
Start with a vertical line for the trunk, then stipple or dab small jagged branches extending outward, getting wider towards the bottom of each tree. -
Varying Heights:
Ensure the trees are different heights and widths to look natural. Group some closer together and leave small gaps for the sky to peek through. -
Final Reveal:
Once the painting is 100% dry, carefully peel away the masking tape at a 45-degree angle to reveal your crisp white border.
Add a Glow
Before the final trees are painted, add a very pale yellow wash near the horizon line to suggest distant city lights or the last remnants of sunset.
Frame your masterpiece to highlight the vibrant contrast between the dark trees and the luminous galaxy sky
Galaxy Painting With Layered Glow Effects
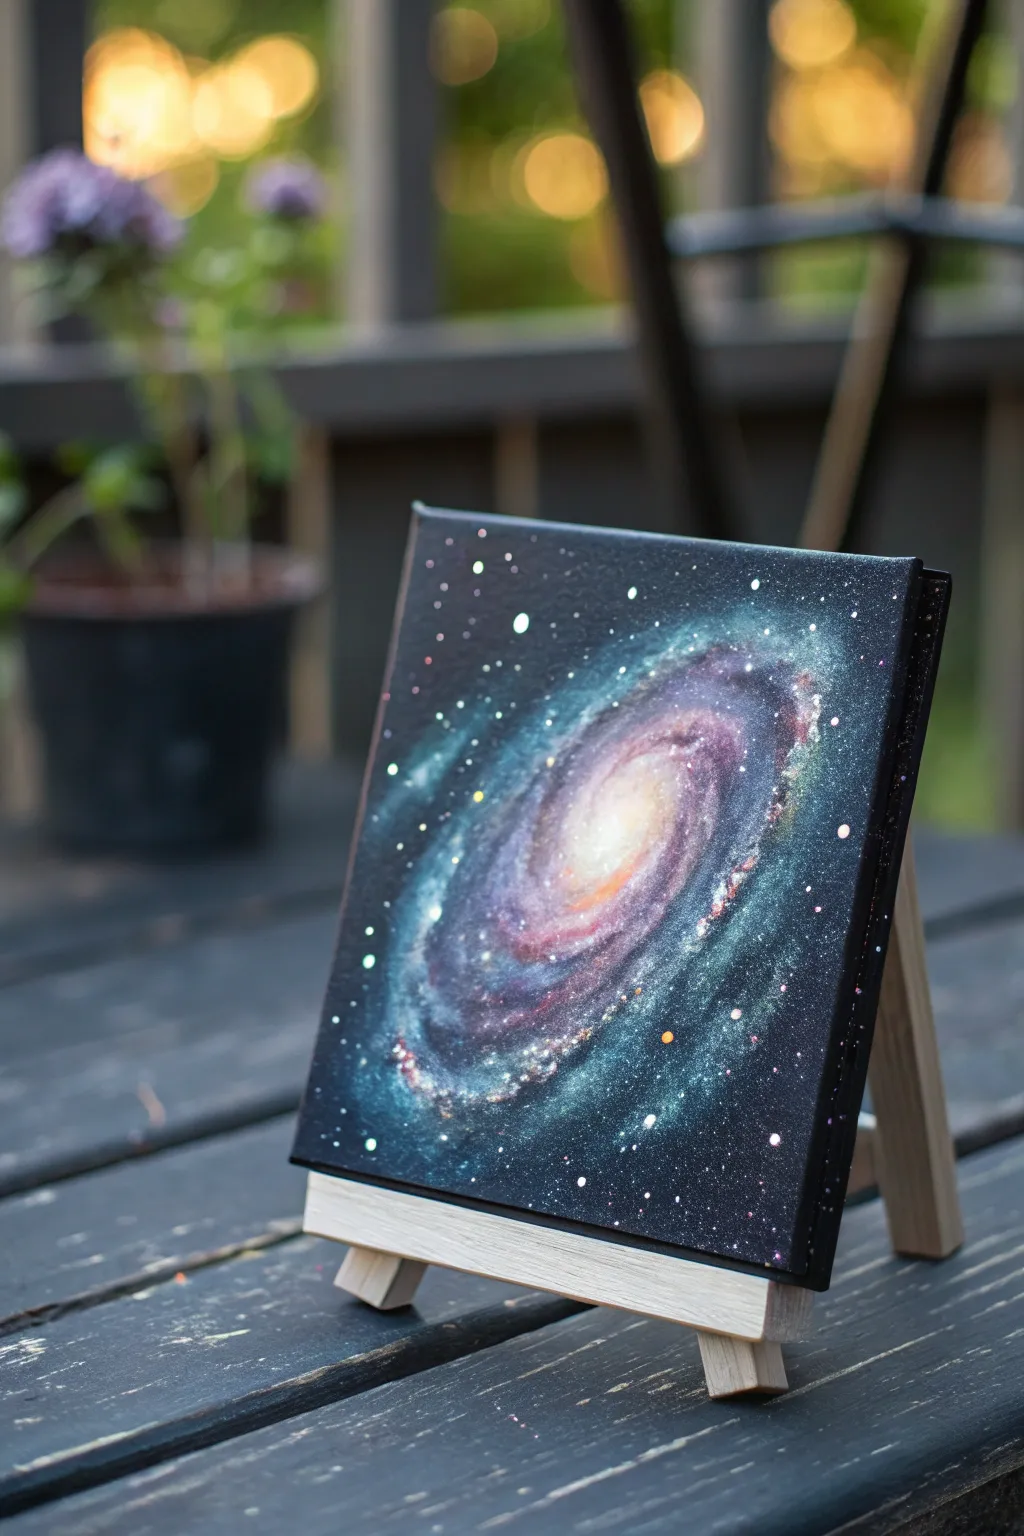
Capture the mesmerizing depth of space with this vibrant spiral galaxy painting on a small square canvas. Using layered acrylics and careful blending, you’ll create a luminous core surrounded by swirling arms of teal and violet stardust that truly pops against the dark background.
Step-by-Step Guide
Materials
- Small square stretched canvas (e.g., 6×6 or 8×8 inches)
- Acrylic paints: Black, Titanium White, Phthalo Blue, Teal/Turquoise, Dioxazine Purple, Magenta, Warm Yellow or Orange
- Gesso (optional, for smoother priming)
- Flat shader brushes (medium and small)
- Round detail brush (size 0 or 1)
- Old toothbrush or stiff fan brush (for splattering)
- Cup of water and paper towels
- Mini wooden easel for display
Step 1: Setting the Stage
-
Prime the background:
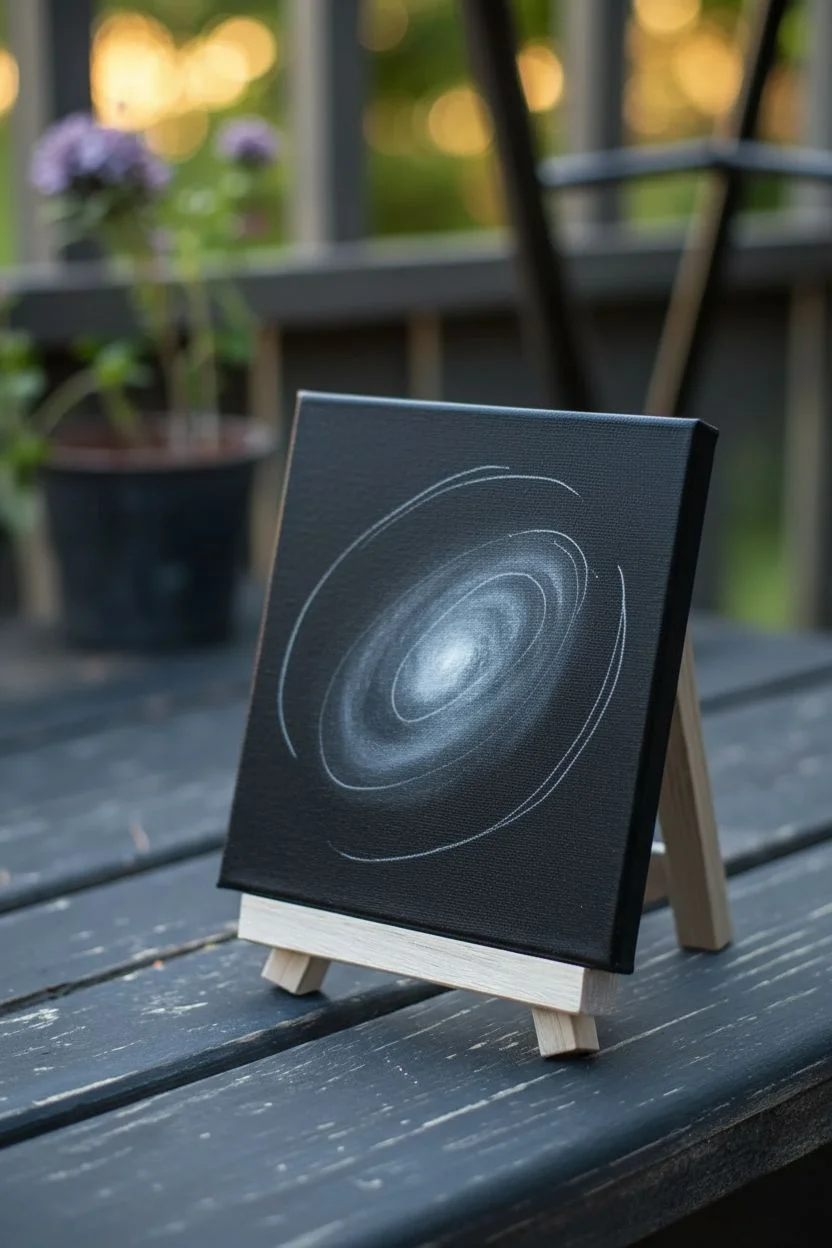
Start by coating your entire canvas with a solid layer of black acrylic paint. Don’t forget to paint the edges for a professional finish. Let this base layer dry completely before moving on. -
Draft the shape:
Using a very diluted white paint or a white charcoal pencil, lightly sketch an oval shape in the center. Then, mark two main curved arms extending from opposite sides of the oval to establish the spiral motion.
Step 2: Creating the Core
-
Lay the first glow:
Mix a small amount of warm yellow with plenty of white to create a pale buttery color. Paint the very center of your spiral with this mixture, keeping the edges soft. -
Intensify the brightness:
While the previous layer is still slightly tacky, add a tiny dot of pure titanium white right in the middle of the core. Blend it outwards slightly to create a radiating light effect. -
Add warmth:
Glaze a very thin layer of watered-down orange or peach just around the white center. This transition color makes the galaxy look hot and energetic.
Fixing Muddy Colors
If your purple and teal blend into a gray mess, stop! Let the first layer dry completely before adding the second color on top. Acrylics blend best wet-on-wet only if you work fast.
Step 3: Building the Spiral Arms
-
Start with purple:
Load a small flat brush with purple and a touch of magenta. Paint the inner curves of the spiral arms, stemming immediately from the glowing core. Use a dry-brush technique to feather the edges so they fade into the black. -
Introduce the teal:
Mix teal with a little blue. Apply this color to the outer edges of the spiral arms, overlapping slightly with the purple areas. The blend of cool teal against the warm center creates instant depth. -
Soften the transitions:
With a clean, slightly damp brush, gently softly scrub the areas where the purple and teal meet the black background. You want a smoky, nebulous look rather than hard lines. -
Highlight the gas clouds:
Mix white with your teal to create a pastel mint shade. Dab this onto the most prominent outer curves of the arms to simulate dense clouds of gas reflecting light. -
Add inner arm highlights:
Similar to the step above, mix white with a tiny bit of magenta. Add subtle highlights to the inner purple arms to give them volume and dimension.
Sparkle Upgrade
For a magical touch, mix a pinch of fine iridescent glitter or shimmer medium into your final varnish coat. It creates a subtle twinkle that changes as you walk past the painting.
Step 4: Stars and Details
-
Prepare the star paint:
Thin down some titanium white paint with water until it reaches an inky consistency. It should drip easily from the brush but still be opaque. -
Splatter the background:
Dip an old toothbrush or stiff brush into the thinned white. Holding it over the canvas, flick the bristles with your thumb to create a spray of fine stars. Focus the heaviest splatter along the spiral arms. -
Add foreground stars:
Using your smallest detail brush, hand-paint a few larger, distinct white dots around the galaxy. Place them randomly, with a few sitting on top of the spiral arms to show depth. -
Create distant suns:
For color variation, dot a few tiny specks of orange, pink, or teal among the white stars. This subtle detail mimics nearby planets or distant colored stars. -
Enhance the glow:
I like to take a very dry brush with a tiny amount of white and lightly scuff over the densest star clusters within the spiral arms. It makes those areas look like a cohesive milky way. -
Final check:
Step back and look at the overall composition. If the center has lost its punch, add one final, tiny dab of pure white to the very middle to re-establish the focal point. -
Seal it:
Once fully dry (give it at least 24 hours), apply a gloss varnish. The gloss finish will deepen the blacks and make the neon colors appear even more luminous.
Place your finished cosmic masterpiece on a mini easel and enjoy your personal view of the universe
Galaxy on Natural Textures Like Wood Slices
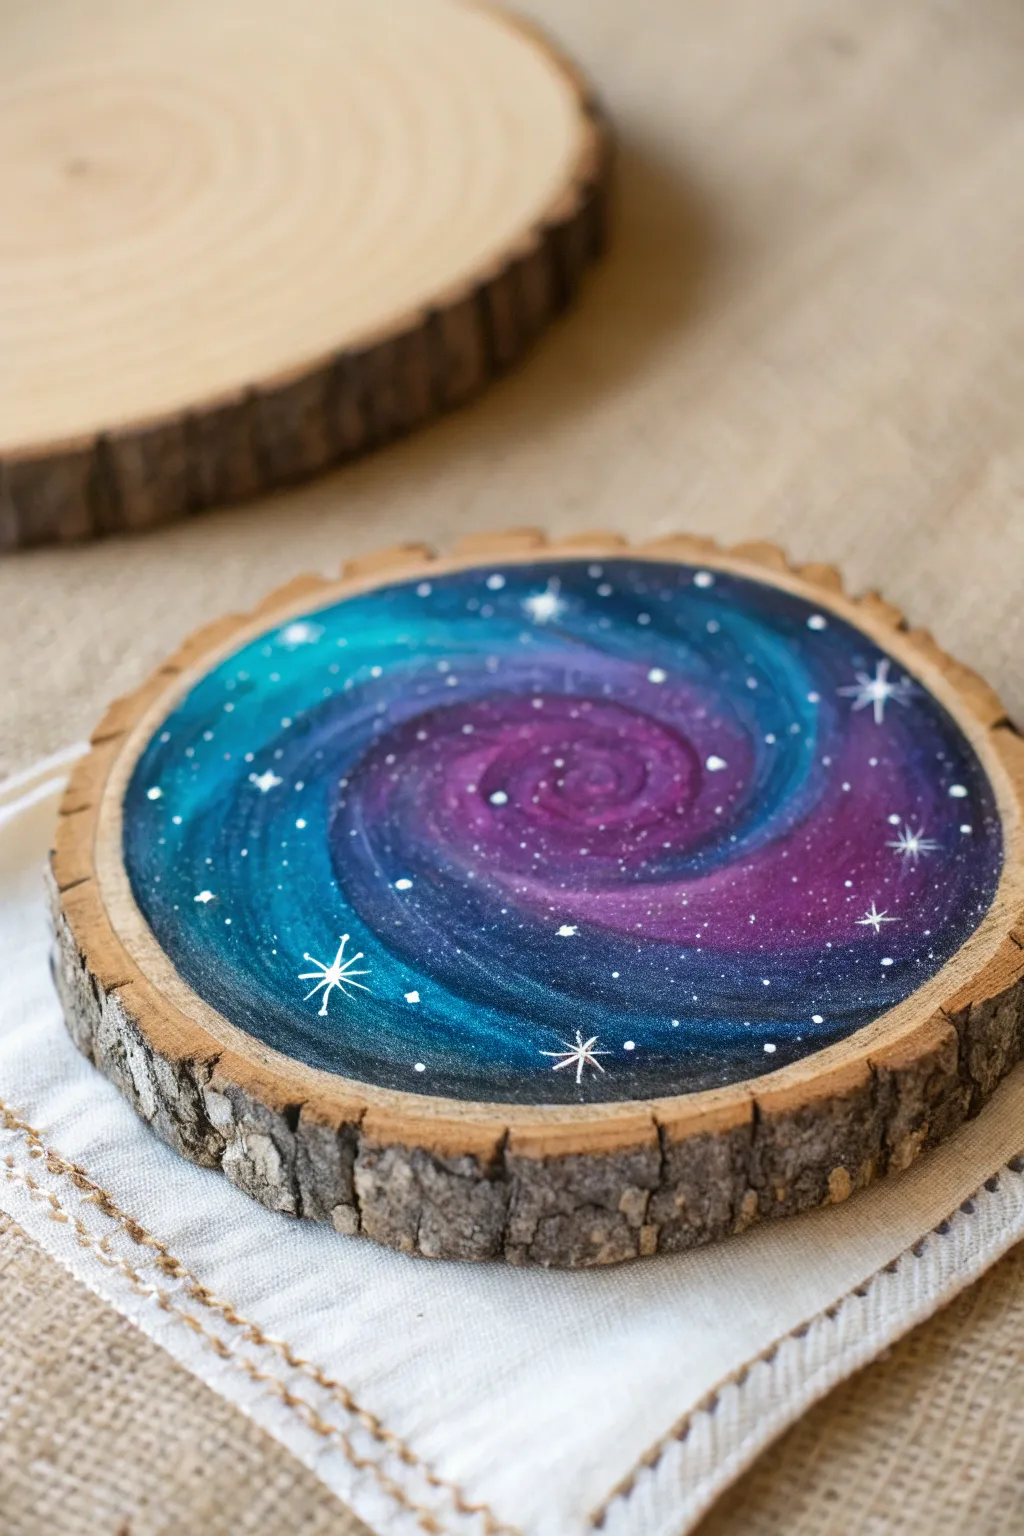
Transform a simple slice of nature into a window to the cosmos with this mesmerizing galaxy painting. The contrast between rough bark and a smooth, vibrant nebula creates a stunning decorative piece perfect for coasters or wall art.
Step-by-Step Tutorial
Materials
- Wood slice with bark (approx. 4-5 inches)
- White gesso or acrylic primer
- Acrylic paints (black, navy blue, turquoise/teal, violet/purple, magenta, titanium white)
- Flat brush (medium size)
- Small blending brush or sponge
- Fine detail liner brush (size 0 or 00)
- Paper plate or palette
- Cup of water and paper towels
- Gloss varnish (optional)
Step 1: Preparing the Canvas
-
Clean surface:
Begin by wiping the wood slice with a dry cloth to remove any loose sawdust or dirt. The surface needs to be relatively clean for the paint to adhere properly. -
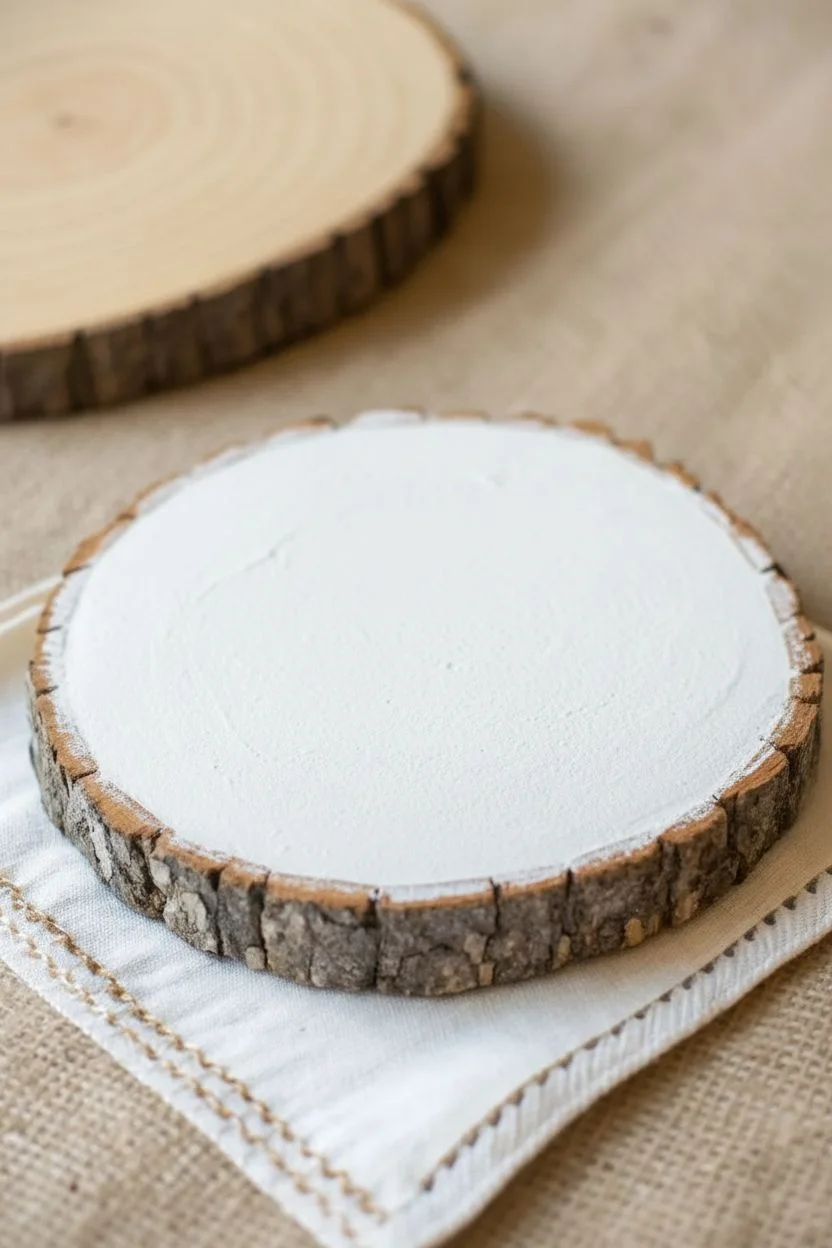
Prime the wood:
Apply a thin, even coat of white gesso to the flat top surface of the wood. Stay within the inner ring and avoid getting primer on the bark edge, as we want to keep that rustic border natural. -
Dry completely:
Let the primer dry fully. This step is crucial because raw wood is very absorbent; the primer ensures your galaxy colors remain vibrant rather than soaking in and becoming dull.
Step 2: Building the Galaxy
-
Base coat:
Using your flat brush, paint the entire primed area with black acrylic paint. While it’s still slightly wet, mix in a tiny bit of navy blue around the edges to create subtle depth. -
Establish the center:
While the background is drying just a bit, load a small brush or sponge with violet paint. Dab a spiral shape starting from the center, moving outwards. Don’t worry about perfect lines; galaxies are organic. -
Add teal swirls:
Wipe your brush and pick up some turquoise or teal. Paint curved strokes that hug the violet spiral, creating the arms of the galaxy. Let the colors overlap slightly where they meet the black background. -
Deepen the hues:
To make the colors pop, mix a little magenta into your violet on the palette. Apply this richer purple to the very center of the spiral, intensifying the ‘core’ of your galaxy. -
Blend softly:
Take a clean, slightly damp brush or sponge and gently dab the edges where the colors meet the black void. I find this helps soften harsh lines and creates that glowing, ethereal gas cloud effect. -
Layering light:
Mix a tiny amount of white into your teal paint to make a light aqua. Lightly dry-brush this highlight onto the crests of the teal swirls to give them dimension and movement. -
Let it set:
Allow these layers to dry for about 10-15 minutes. The paint needs to be dry to the touch before we add the final details, or the sharp stars will blur into the background.
Cosmic Softness
Work wet-on-wet for the nebula clouds. If the paint dries too fast, mist it lightly with water to keep blending smooth.
Step 3: Stars and Details
-
Splatter stars:
Water down a small amount of titanium white paint until it’s milky. Dip a stiff brush (or toothbrush) into it and gently flick the bristles with your thumb to spray tiny dots across the painting. -
Paint major stars:
Switch to your fine detail liner brush. Dip it in pure white paint and place distinct dots in the darker areas and along the spiral arms to represent larger, closer stars. -
Create starbursts:
Choose 3-5 of your larger white dots to turn into twinkling stars. Carefully paint a thin vertical line and a thin horizontal line crossing through the center dot. -
Refine starbursts:
For extra sparkle, add smaller diagonal lines between the main cross lines on your biggest stars. Keep your hand steady and lift the brush at the end of the stroke for a sharp point. -
Final touch-ups:
If any stars look too prominent or messy, you can carefully reshape them with a bit of black or navy paint once the white is dry. -
Preserve the piece:
Once the painting is completely cured (usually overnight), apply a clear gloss varnish over the painted area. This seals the work and gives the galaxy a beautiful, wet-looking shine.
Glitter Upgrade
Mix just a pinch of fine holographic glitter into your sealing varnish for a galaxy that truly sparkles in the light.
Display your miniature universe on a coffee table or hang it up to admire the depth of space captured on wood
Tiny Galaxy Paintings on Smooth Stones
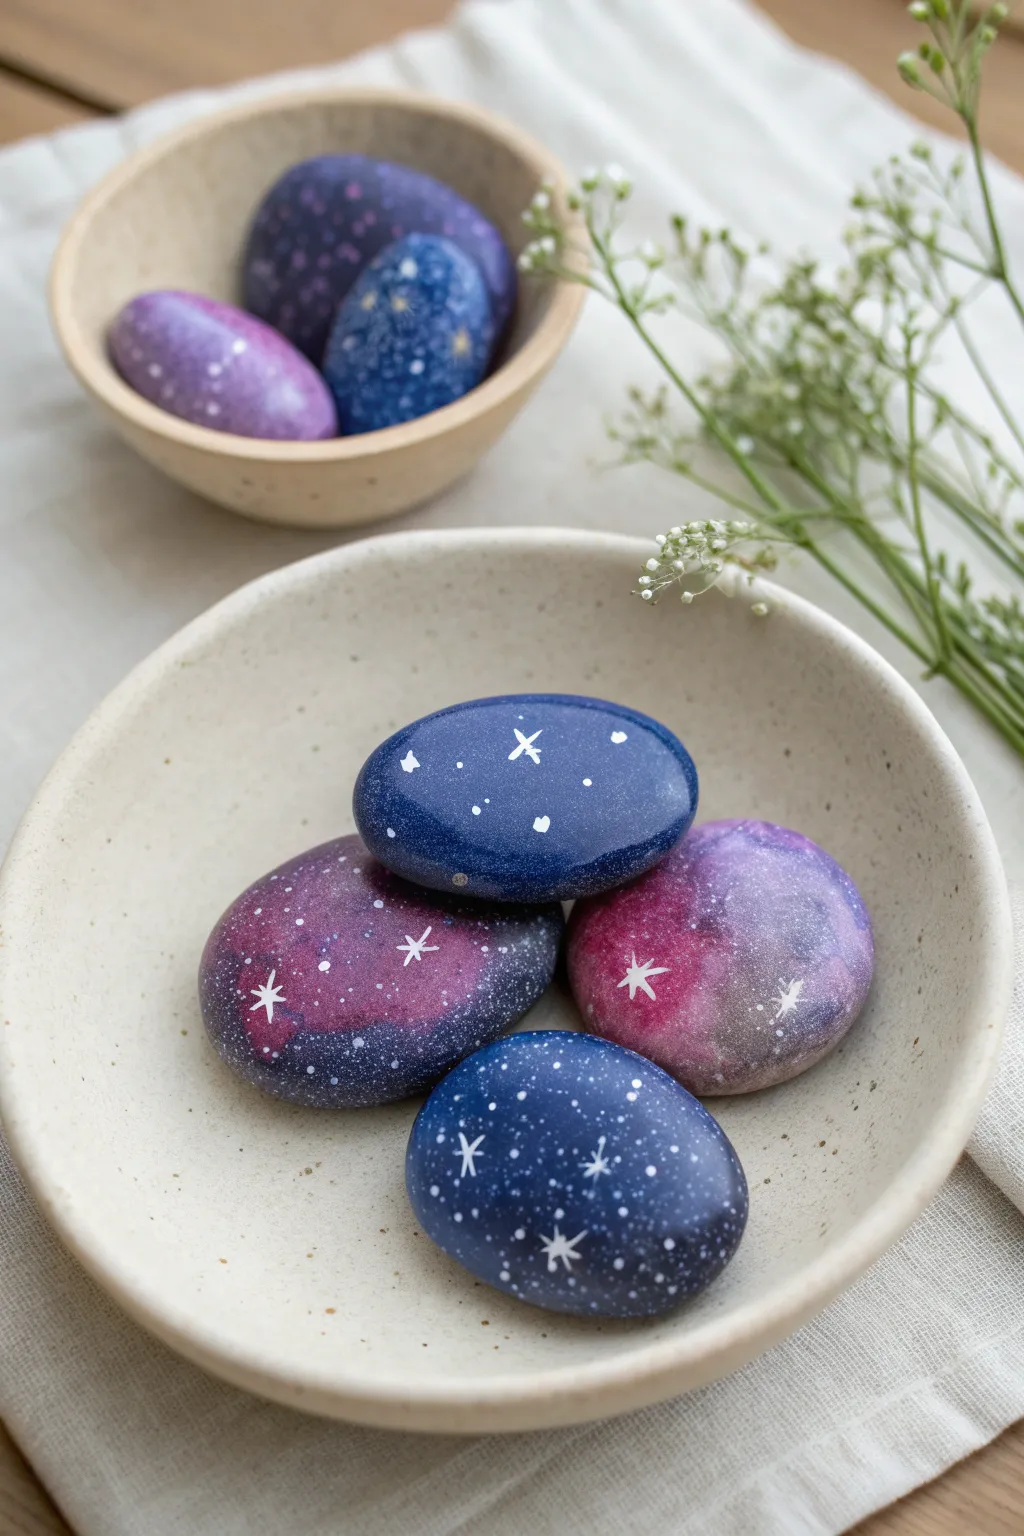
Transform ordinary river rocks into celestial treasures with this mesmerizing galaxy painting technique. The smooth, rounded surface of the stones is the perfect canvas for blending deep violets, indigos, and starry highlights into a portable piece of the cosmos.
Detailed Instructions
Materials
- Smooth, flat stones (river rocks are ideal)
- Acrylic paints (black, navy blue, purple, magenta/pink, white)
- Flat paintbrush (medium size)
- Small makeup sponge or sea sponge piece
- Fine detail paintbrush (size 0 or 00)
- Old toothbrush (optional for speckling)
- Gloss varnish or clear sealer (spray or brush-on)
- Paper plate or palette
- Cup of water and paper towels
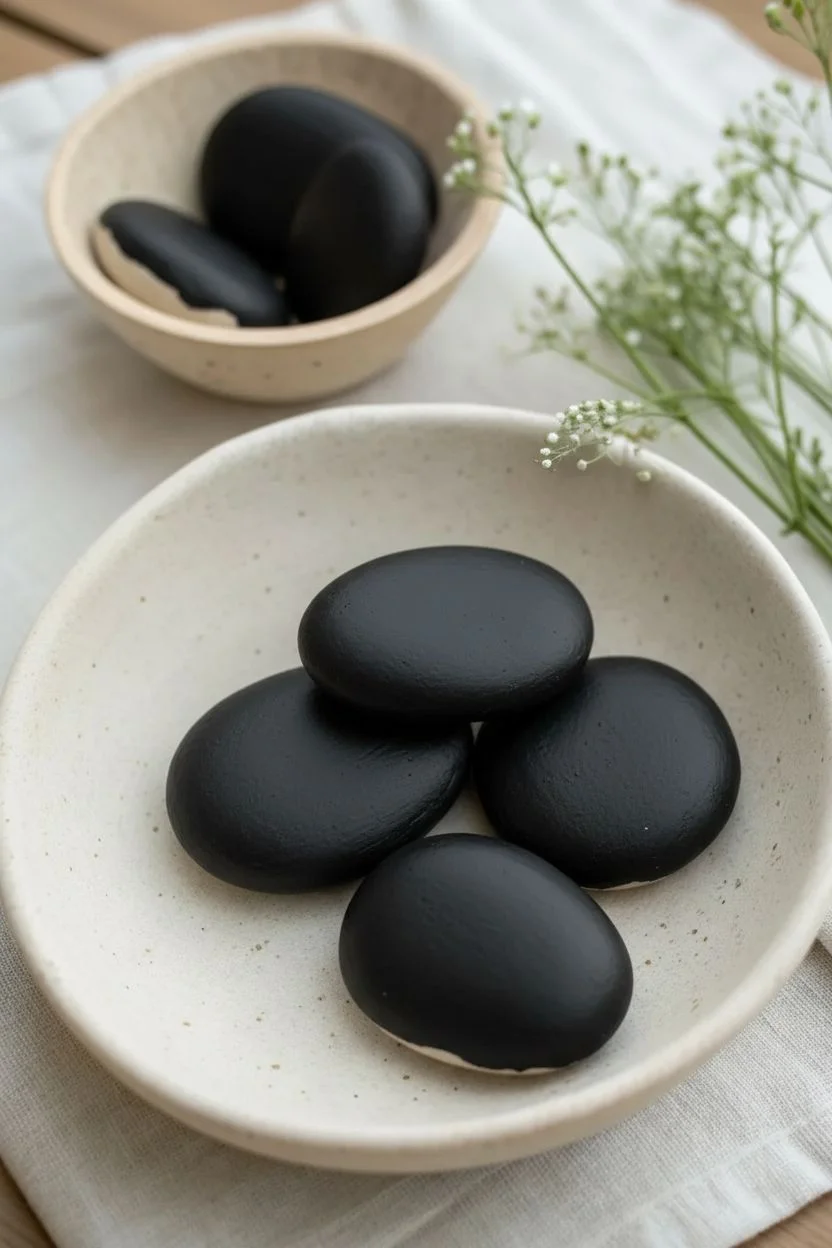
Step 1: Preparing the Void
-
Clean your canvas:
Before starting, scrub your stones with soap and water to remove any dirt or grit. Let them dry completely, as moisture will prevent the paint from adhering properly. -
Apply the base coat:
Paint the entire top surface of the stone with solid black acrylic paint. I usually bring the color down the sides but leave the very bottom unpainted for easier handling. -
Second coat:
If the stone’s natural gray or brown shows through, apply a second coat of black once the first is dry to ensure a deep, opaque background.
Muddy colors?
If your galaxy looks gray or muddy, you likely didn’t let the layers dry enough. Wait for the blue layer to be touch-dry before adding pinks to keep the colors distinct.
Step 2: Building the Nebula
-
Load your sponge:
Squeeze small amounts of navy blue, purple, and magenta paint onto your palette. Take your small sponge and dab it into the darkest blue. -
Dab off excess:
Tap the sponge on a clean part of the palette to remove most of the paint. The sponge should be almost dry—this helps create cloudy, airy textures rather than solid blobs. -
Create the first cloud layer:
Lightly sponge the navy blue onto the black stone in an irregular, swooping shape across the center or diagonal. -
Add purple tones:
With a clean part of the sponge (or after rinsing and drying), pick up the purple paint. Sponge this sparingly over parts of the blue, letting the colors overlap and blend naturally. -
Brighten with magenta:
Dab a tiny amount of magenta or bright pink into the center of your nebula cloud. This creates glowing focal points and simulates the brighter gases of a galaxy. -
Soften the edges:
If your sponge marks look too harsh, take a mostly clean sponge with a tiny bit of black paint and gently dab the outer edges of your color cloud to fade it back into the darkness.
Level Up: Constellations
Before sealing, use a silver or gold metallic pen to connect specific stars with thin lines, creating real zodiac constellations like the Big Dipper or Orion.
Step 3: Starlight and Shine
-
Mix watery white:
On your palette, add a few drops of water to your white acrylic paint until it has the consistency of thin ink or milk. -
Flick the stars:
Dip an old toothbrush or a stiff bristled brush into the thinned white paint. Using your thumb, flick the bristles over the stone to spray a fine mist of tiny stars. Test on paper first to control the spray. -
Paint major stars:
Using your finest detail brush and un-thinned white paint, carefully dot a few larger stars randomly in the lighter colored areas. -
Add cross stars:
Choose two or three of the largest dots and carefully paint tiny intersecting lines through them to create a twinkling four-point star effect. -
Let it cure:
Allow the stone to dry completely for several hours or overnight. The thickest dots of paint need to be fully hard before the next step. -
Seal the galaxy:
Apply a coat of gloss varnish to the stone. The gloss finish deepens the dark colors, making the black look like infinite space and protecting your artwork from chipping.
Place your finished stones in a decorative bowl or gift them as lucky charms to friends who need a little space
Galaxy on Found Objects Like Leaves or Shell Shapes
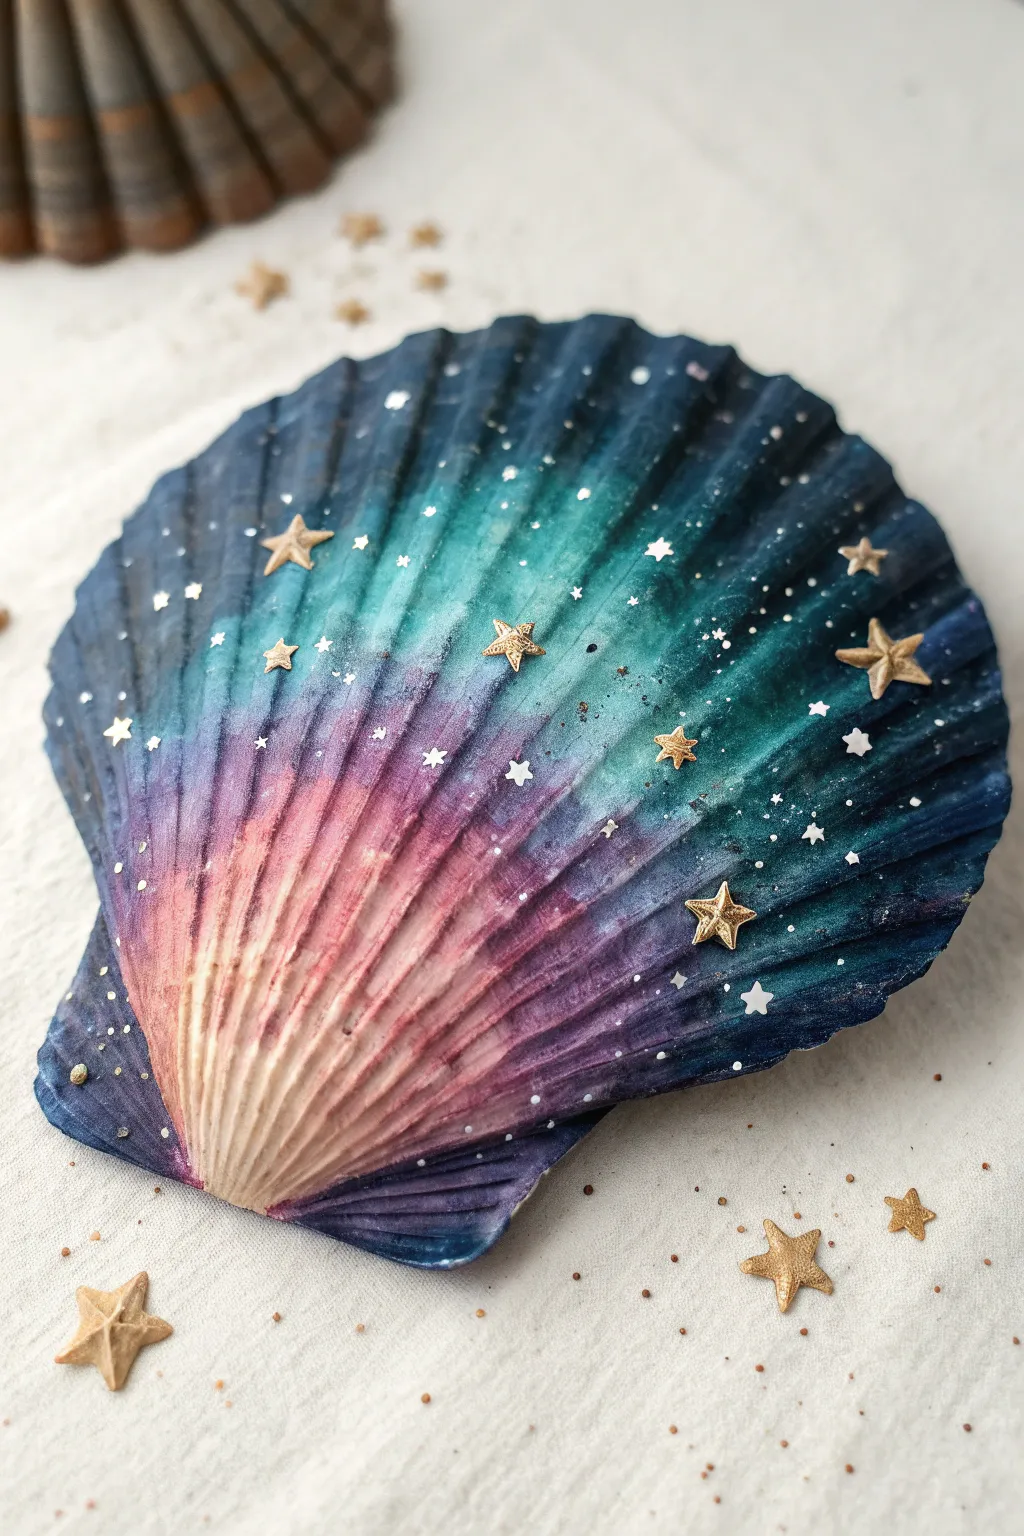
Transform a simple beach find into a stunning piece of the universe with this galaxy shell project. The natural ridges of the scallop shell create a beautiful texture that mimics cosmic rays when painted with deep blues, teals, and vibrant pinks.
How-To Guide
Materials
- Large scallop shell (cleaned and dried)
- White gesso or primer
- Acrylic paints (black, navy blue, teal, purple, magenta, white)
- Metallic gold acrylic paint
- Small flat paintbrushes and a detail brush
- Sponge dabber or small makeup sponge
- Gold star charms or sequins
- Strong craft glue (like E6000)
- Gloss varnish or sealant
- Old toothbrush (for splattering)
Step 1: Base Preparation
-
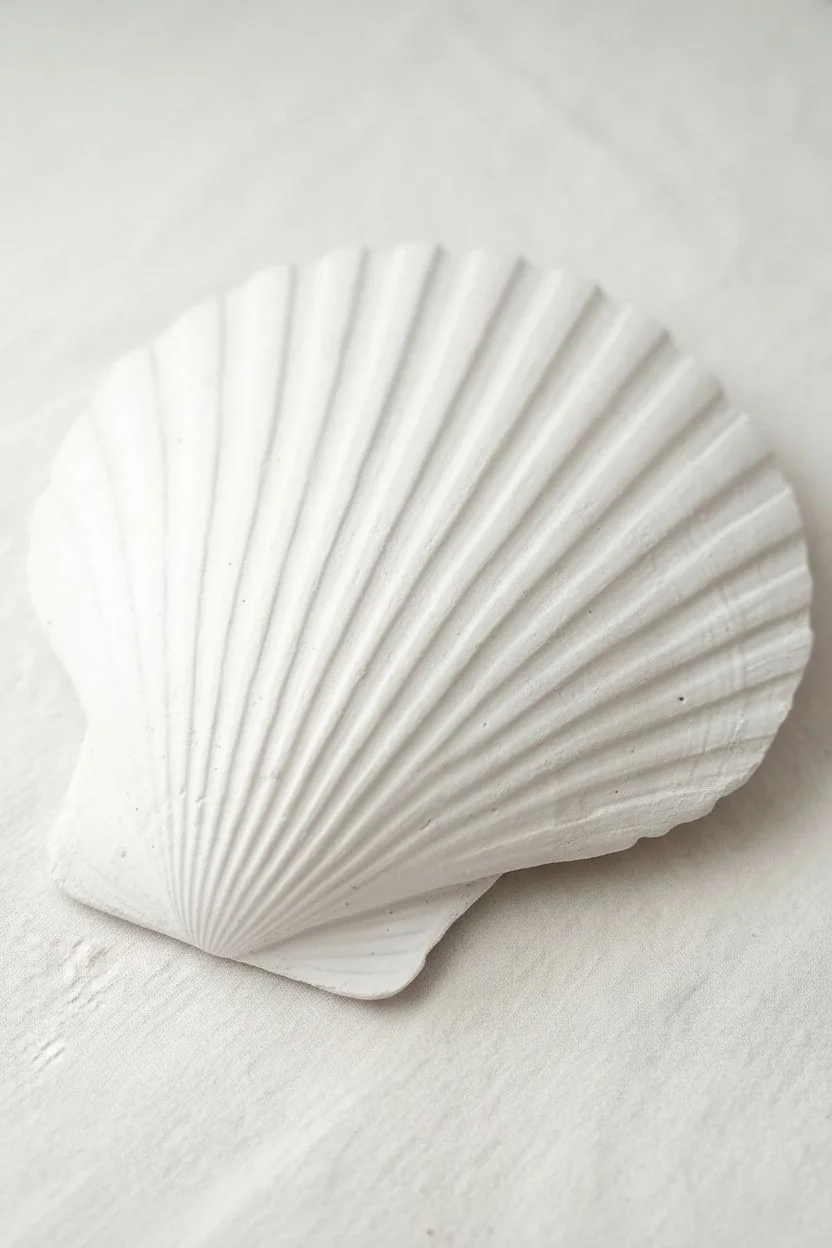
Clean the Canvas:
Ensure your scallop shell is thoroughly cleaned of any sand or salt and completely dry. If the surface is very rough, you can lightly sand any jagged edges, but try to preserve the natural ridges. -
Prime the Surface:
Apply a coat of white gesso or primer to the inside of the shell. This step is crucial because natural shells are porous; the primer ensures your galaxy colors will pop rather than soaking into the calcium. -
Dry Time:
Let the primer dry completely before moving on to the color application. This usually takes about 20-30 minutes.
Uneven Blending?
If your gradient looks stripey, don’t panic. Wait for it to dry, then use a slightly damp sponge with a tiny bit of paint to dab over the harsh lines, softening the transition.
Step 2: Creating the Galaxy Gradient
-
Start with Darkness:
Using a flat brush, paint the outer edges of the shell with a mix of black and navy blue. Bring this dark color about one-third of the way in towards the center, following the direction of the ridges. -
Add the Teal Band:
While the dark blue is still slightly wet, blend in a teal or deep turquoise color next to it. Use a clean, slightly damp brush to blur the line where the navy meets the teal, creating a smooth transition. -
Introduce Purple:
Moving inward, apply a band of violet or deep purple paint. Blend this into the teal section carefully. I like to use a small sponge here to dab the transition area for a softer, gaseous look. -
Bright Core:
Paint the area closest to the bottom hinge of the shell with magenta or bright pink. This will act as the glowing core of your nebula. -
Radiant Center:
Finally, at the very base where the shell hinges, lightly dry-brush a touch of cream or pale peach to create a ‘light source’ effect. Blend this upward into the pink.
Add a Pearl Fix
Mix a tiny amount of iridescent medium or pearl powder into your lighter pink and teal paints before applying. This adds a subtle, magical shimmer that catches the light.
Step 3: Stars and Details
-
Creating Depth:
Once the base background is dry, take a very small amount of black paint on a dry brush and lightly sweep it along the deepest grooves of the shell’s ridges in the outer areas to accentuate the texture. -
Splatter Stars:
Dilute a small drop of white acrylic paint with water until it’s fluid. Dip an old toothbrush into it and flick the bristles with your thumb to spray fine ‘stars’ across the dark blue and teal sections. -
Larger Stars:
Use a fine detail brush or a toothpick dipped in white paint to add a few specifically placed larger stars or cross-shaped twinkles in the darker areas. -
Gold Accents:
Using metallic gold paint and a fine brush, paint tiny dots or asterisks interspersed among the white stars for warmth and variety. -
Attach Charms:
Select 5-7 small gold star charms or sequins. Apply a tiny dot of strong craft glue to the back of each and press them firmly onto the shell, scattering them organically like constellations.
Step 4: Protection
-
Seal the Artwork:
Once all paint and glue are fully cured, apply a layer of gloss varnish over the entire painted surface. This protects the paint from chipping and gives the galaxy a wet, shimmering appearance.
Display your cosmic creation on a small stand or use it as a stunning jewelry dish to hold your favorite rings
Surreal Galaxy Portal in a Simple Room Scene
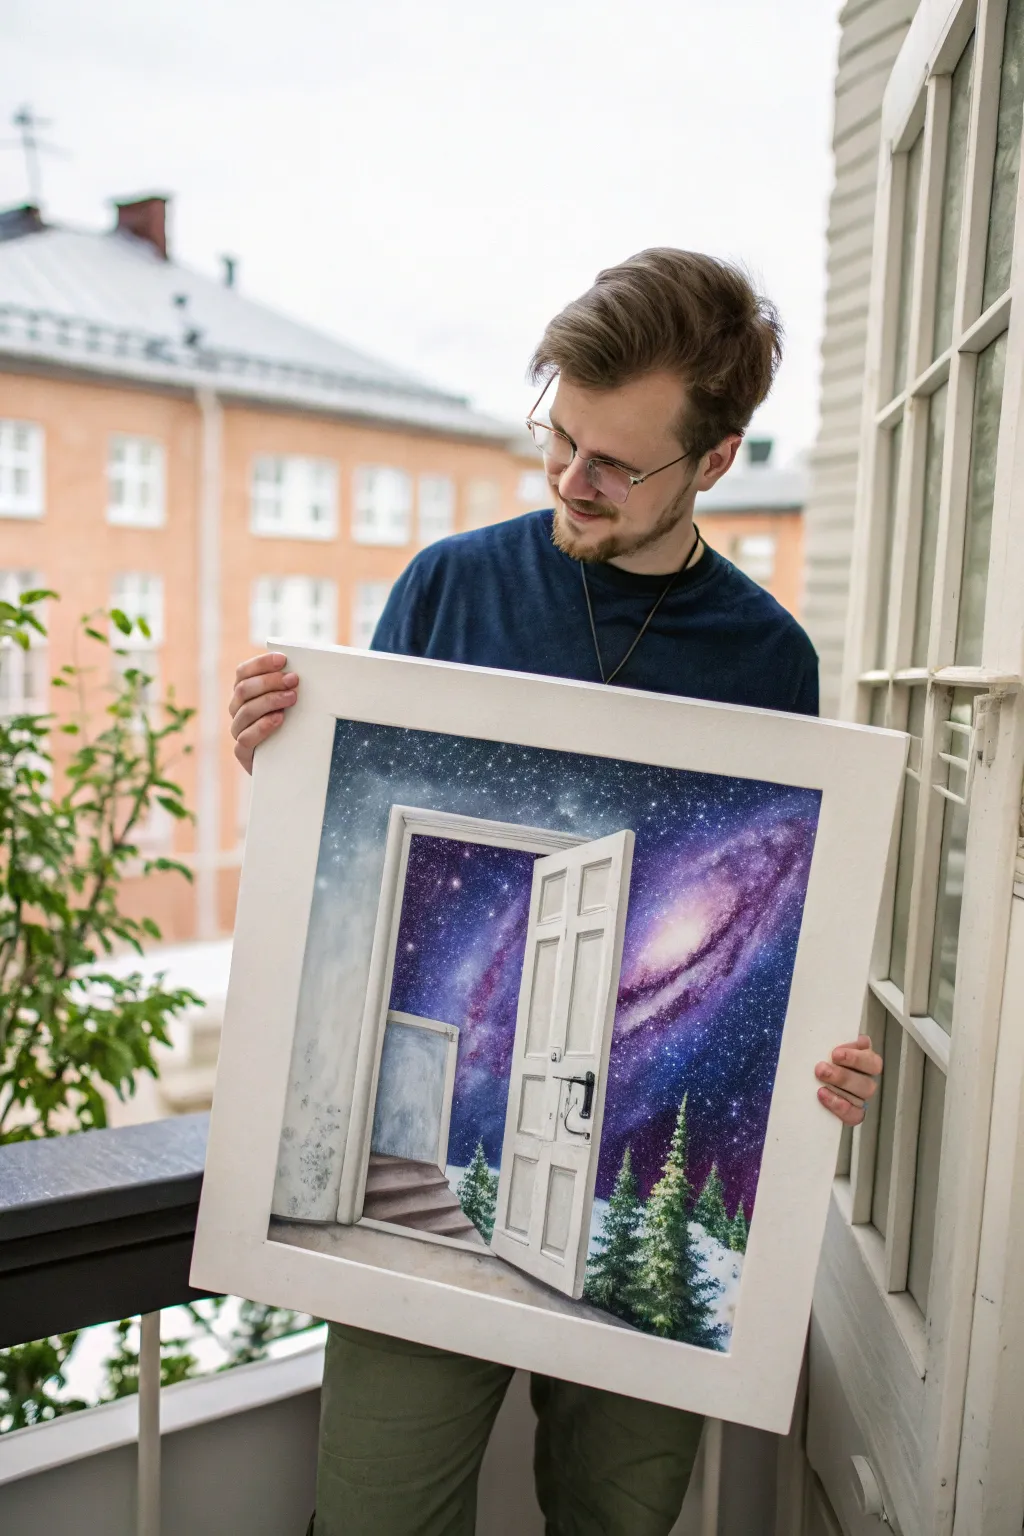
Blend the surreal with the natural in this imaginative acrylic painting, featuring a mundane white door opening into a vibrant galaxy. The contrast between the grounded, snowy pines and the infinite purple cosmos creates a striking visual metaphor that feels like stepping into another dimension.
Step-by-Step
Materials
- Large square sturdy canvas (e.g., 20×20 inches)
- Acrylic paints (Titanium White, Mars Black, Dioxazine Purple, Phthalo Blue, Magenta, Burnt Umber)
- Set of brushes: 1-inch flat brush, Filbert brush, rigger or liner brush
- Painter’s tape or masking tape
- Ruler
- Old toothbrush (for stars)
- Palette knife
- Water cup and paper towels
Step 1: Setting the Scene
-
Establish the background:
Begin by painting your entire canvas with two coats of Titanium White to ensure a bright surface, allowing it to dry completely between layers. -
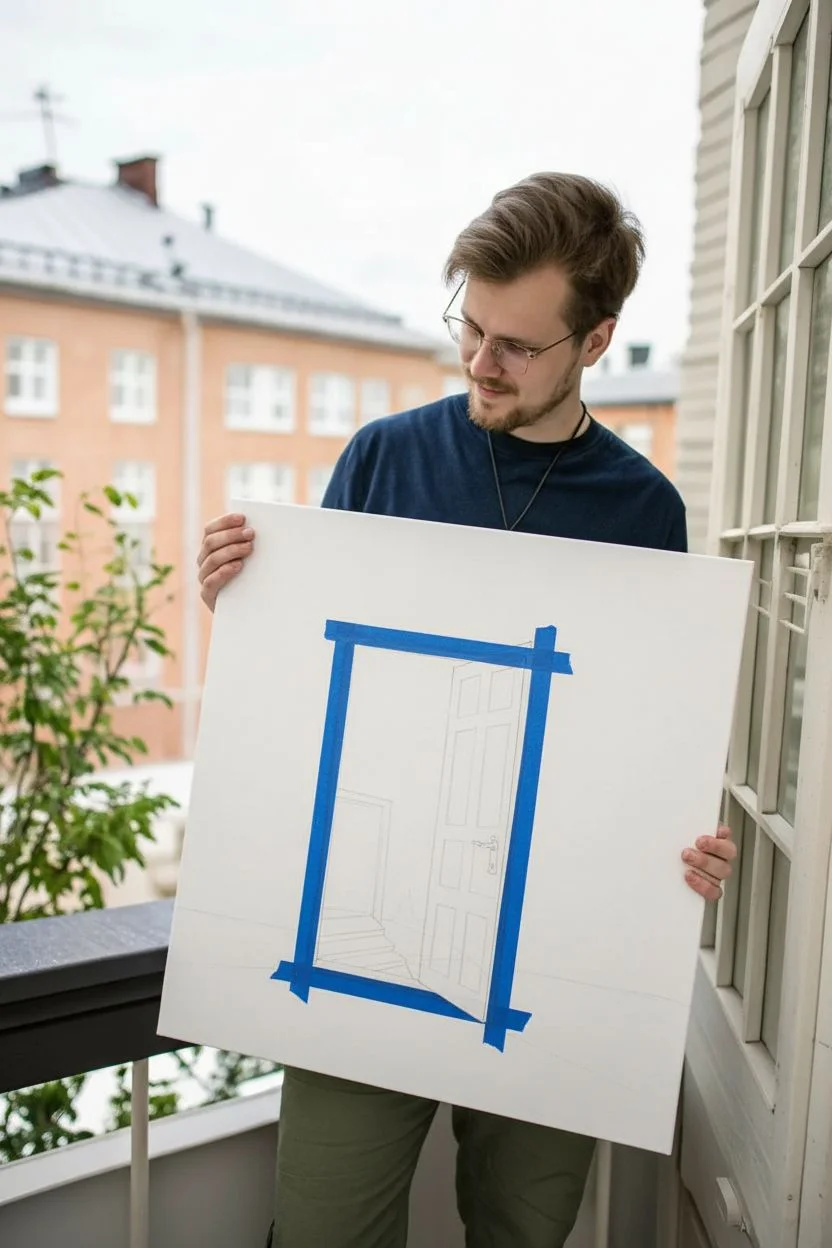
Sketch the composition:
Using a pencil and ruler, lightly draw the outline of the door frame in the center, slightly angled to create perspective. Sketch the door itself swinging open to the right. -
Mask the interior:
Apply painter’s tape carefully along the inner edges of the door frame and the door itself. This protects the area where the galaxy will go, keeping your straight lines crisp while we paint the ‘real world’ surroundings first.
Cosmic Depth
To make the galaxy feel deeper, glaze a thin layer of transparent black over the corners of your nebula after it dries. This vignette effect draws the eye to the bright center.
Step 2: Painting the Foreground Reality
-
Block in the walls:
Paint the area surrounding the door frame. The reference uses a pale, mottled grey-blue to suggest an interior wall or a misty void. Mix a tiny touch of black and blue into white and apply it loosely. -
Create the floor:
At the bottom of the doorway, paint simple wooden floorboards or steps leading up to the threshold using Burnt Umber mixed with white for a faded look. -
Detail the door frame:
Remove the tape shielding the frame exterior. Paint the door frame white, using a light grey mix to add shadows on the left side and top to give it three-dimensional depth. -
Paint the door panels:
Paint the door itself white. Use a thin round brush with light grey paint to outline the rectangular panels on the door, ensuring the perspective lines converge toward a vanishing point. -
Add hardware:
With a liner brush and black paint, carefully draw the handle and lock mechanism. Add tiny white highlights to make the metal look reflective.
Step 3: Creating the Cosmic Portal
-
Base coat for the galaxy:
Now focus on the rectangular opening inside the door frame. Paint this entire negative space with Mars Black to serve as the deepest part of space. -
Building the nebula:
While the black is still slightly tacky, sponge or brush on patches of Dioxazine Purple and Phthalo Blue. I find that blending these colors directly on the canvas creates the most natural cloud-like effect. -
Adding the Milky Way:
Mix Magenta with a little White. create a sweeping diagonal band across the black emptiness to represent the galaxy’s core. Soften the edges with a dry brush so it glows rather than looking like a solid stripe. -
Sprinkle the stars:
Dip an old toothbrush into watered-down white paint. Flick the bristles with your thumb to spray a fine mist of stars over the purple and black areas. Mask off the white door again if you’re worried about splatter.
Glow Effect
Mix fluorescent paint into your white for the brightest stars or the nebula core. Under blue light, your galaxy will literally glow like a portal.
Step 4: The Snowy Threshold
-
Paint the snowy ground:
At the very bottom of the ‘galaxy’ opening, paint a small strip of white snow that spills slightly over the threshold, connecting the two worlds. -
Plant the pine trees:
Using a fan brush or the edge of a flat brush, dab in dark green pine trees silhouetted against the galaxy. Make the ones in the background smaller and lighter to create depth. -
Frost the branches:
Take pure Titanium White on a small round brush and tap it onto the tops of the pine branches to look like heavy, fresh snow. -
Final touches:
Check your edges. If the galaxy paint bled onto the white door, clean it up with opaque white paint for a sharp, architectural finish.
Hang this piece where it can serve as a daily reminder that adventure is just a doorway away


Have a question or want to share your own experience? I'd love to hear from you in the comments below!