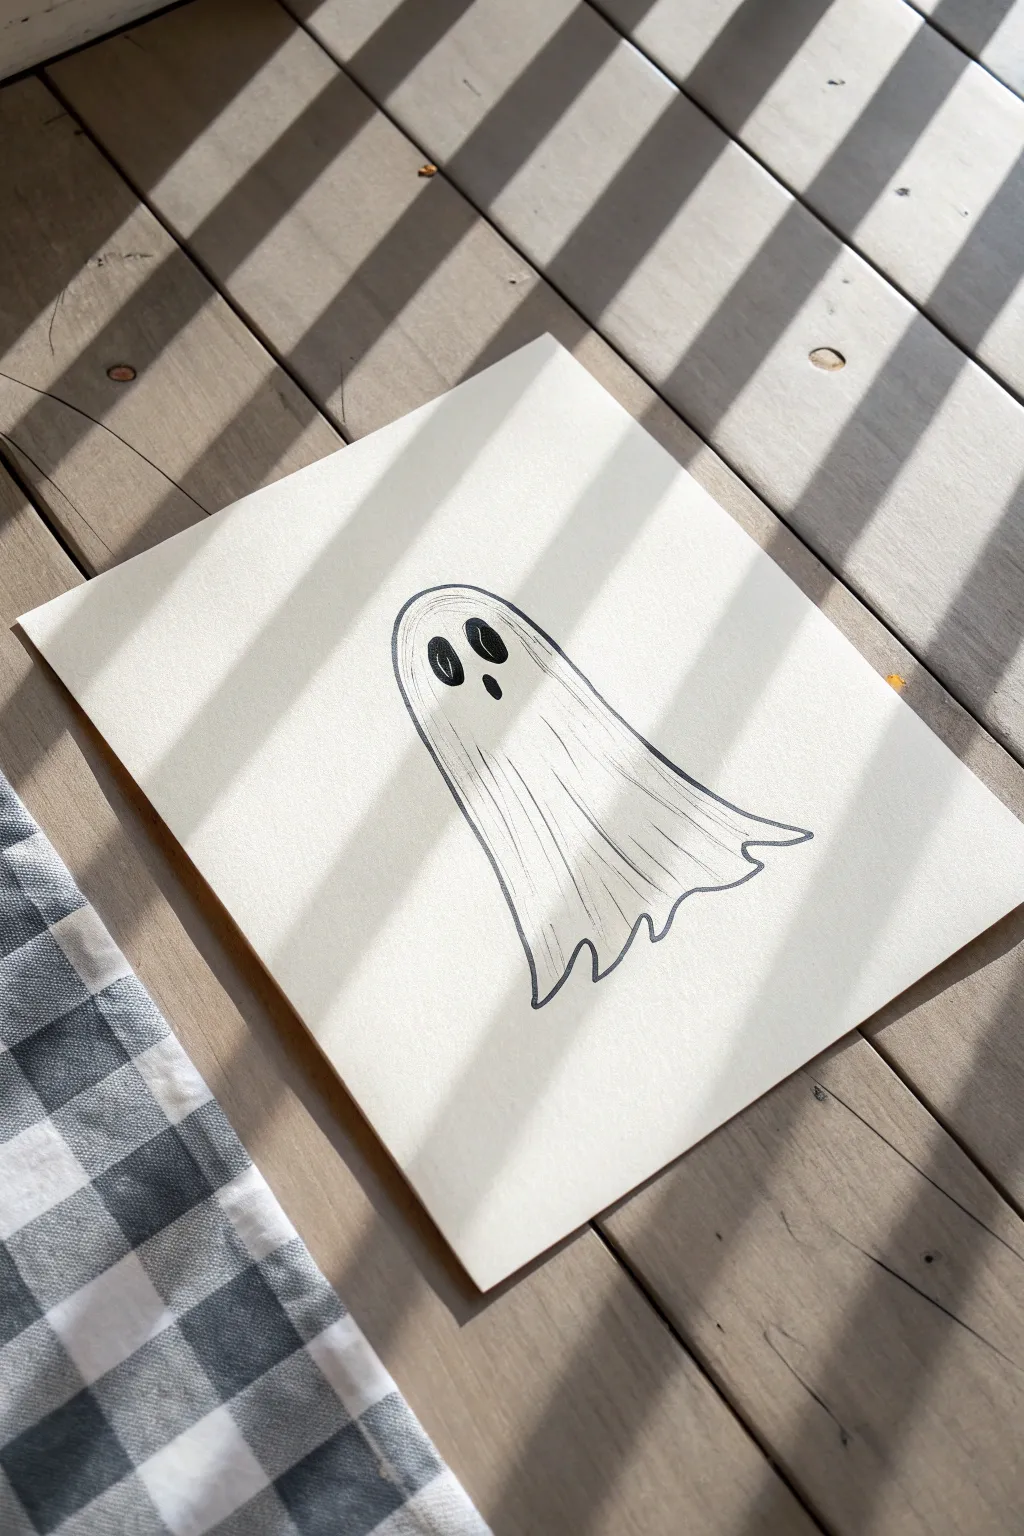
If you’re craving something spooky-cute and super doable, ghost drawings are the perfect place to play. I love how a simple sheet shape can turn into a whole cast of characters with just a few lines and a little personality.
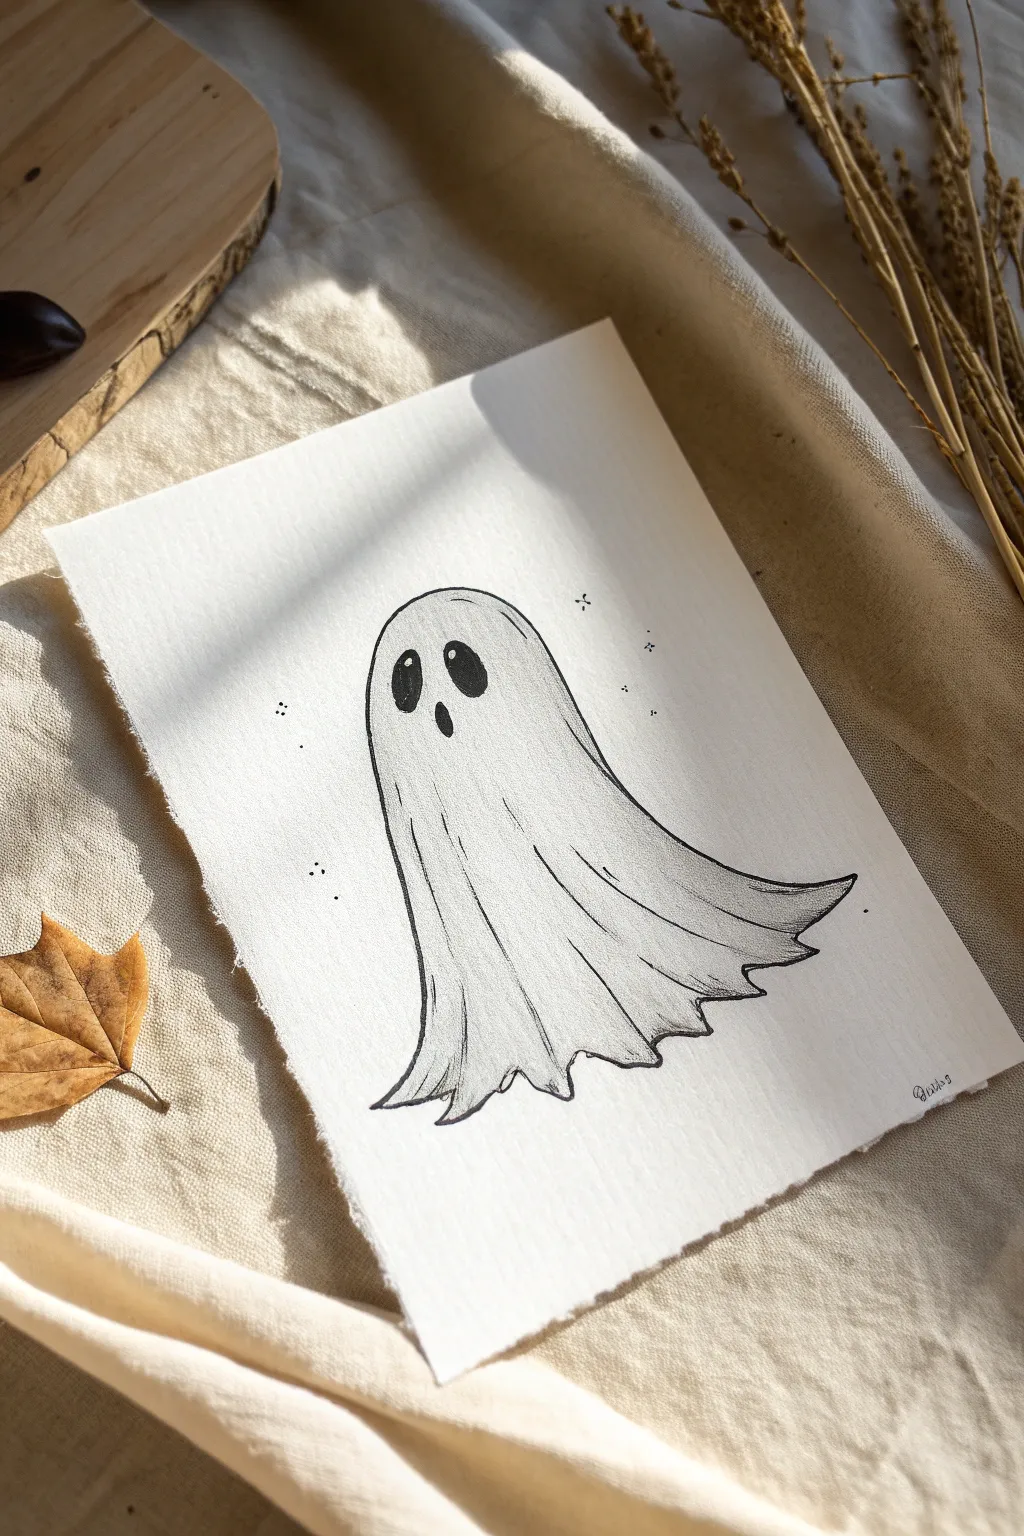
Classic Sheet Ghost With Wavy Hem
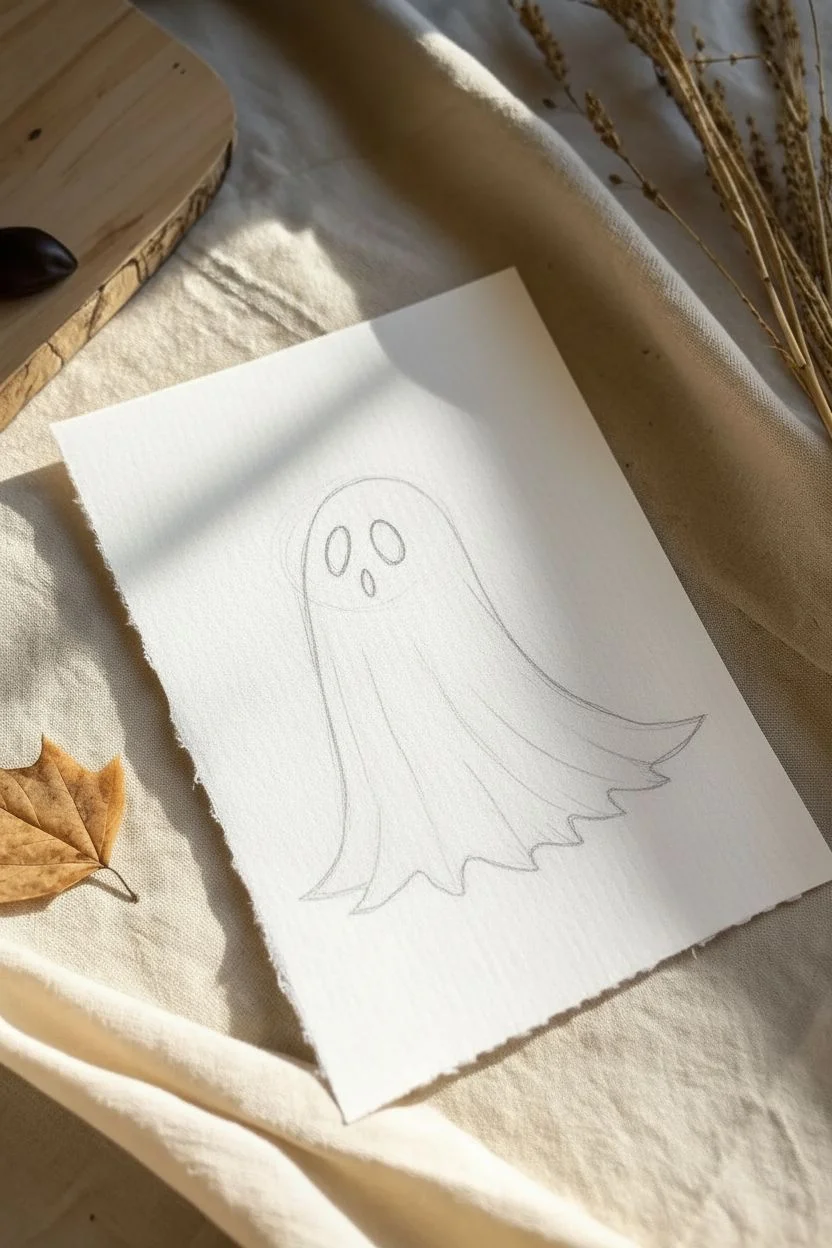
Capture the charm of Halloween with this delightfully simple sheet ghost illustration. Featuring soft shading and a friendly expression, this minimalist artwork relies on clean linework and subtle details to bring the spirit to life.
How-To Guide
Materials
- White drawing paper (smooth bristol or sketchbook paper)
- Pencil (HB or 2B)
- Black fine liner pen (0.5mm or 0.8mm)
- Orange marker or colored pencil
- Soft graphite pencil (4B or 6B) for shading
- Blending stump or cotton swab
- Eraser
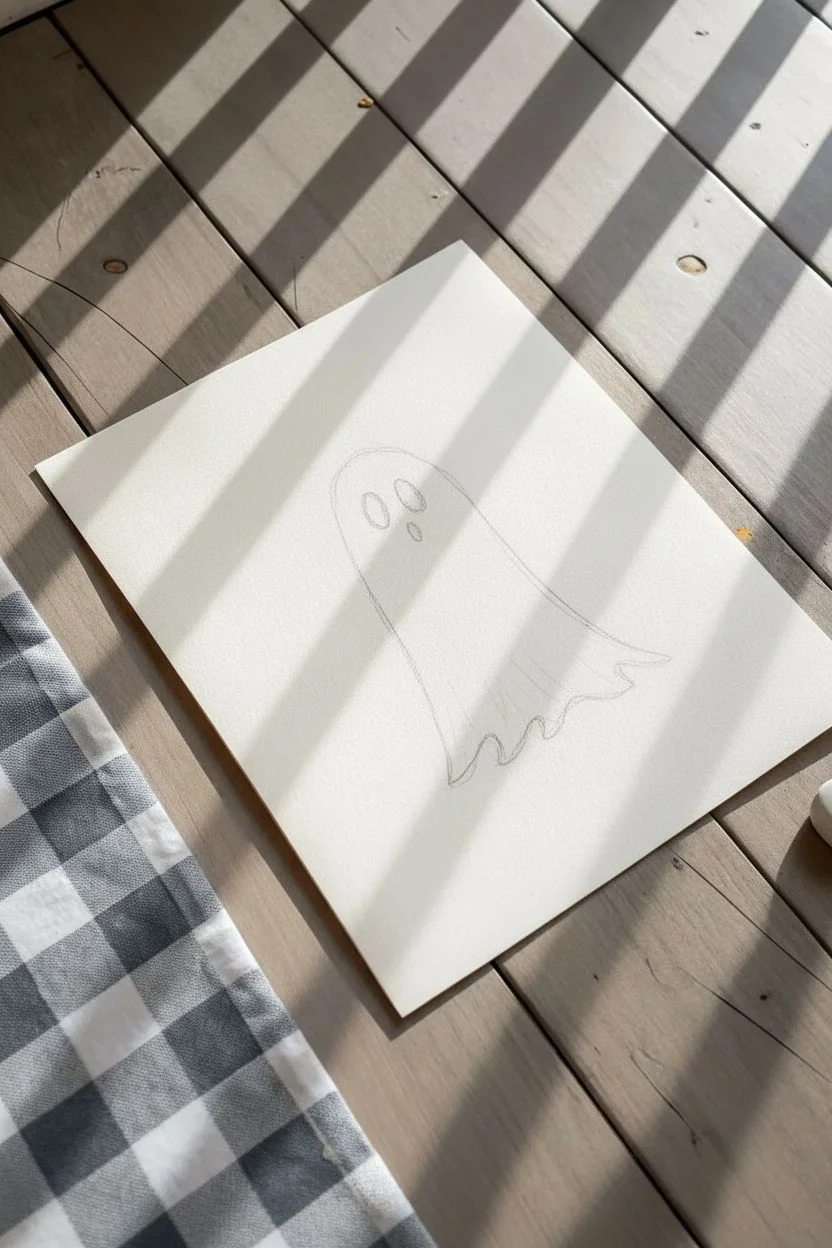
Step 1: Drafting the Outline
-
Set the foundation:
Begin by lightly sketching a large, inverted ‘U’ shape in the center of your paper. This arc will form the head and main body of the ghost. -
Extend the sides:
Draw two vertical lines coming down from the ends of the ‘U’ shape. Angle them slightly outward as they descend to create a flowing, sheet-like appearance. -
Create the hem:
Connect the bottom of the two side lines with a wavy, undulating line. Think of how a tablecloth drapes; make the waves uneven for a more natural fabric look. -
Check symmetry:
Step back and look at your shape. It doesn’t need to be perfect, but ensure the head is nice and rounded.
Smoother Gradients
When shading with graphite, hold your pencil at a low angle and use the side of the lead rather than the tip. This prevents harsh scratch marks.
Step 2: Adding the Face
-
Position the eyes:
About one-third of the way down from the top of the head, lightly sketch two medium-sized ovals. Space them widely apart to increase the cuteness factor. -
Draw the mouth:
Place a small, simple ‘u’ shape directly between and slightly below the eyes for a tiny smile. -
Add cheek details:
Sketch two small horizontal ovals just below the outer corners of the eyes where the blush will go.
Step 3: Inking and Details
-
Trace the body:
Using your black fine liner, carefully go over the main outline of the ghost. Keep your hand steady for a smooth, consistent line weight. -
Ink the facial features:
Outline the eyes and the mouth. For the eyes, you can color them in solid black now, leaving tiny white circles near the top as highlights if you wish, though plain black works too. -
Erase guidelines:
Wait a moment for the ink to dry completely to avoid smudging, then gently erase all your initial pencil sketches.
Ink Smearing?
If your fine liner smears when you erase or blend, switch to a waterproof archival ink pen, or let the drawing sit for at least 15 minutes before erasing.
Step 4: Shading and Color
-
Apply blush:
Take your orange marker or colored pencil and fill in the small cheek ovals. This pop of color instantly gives the ghost character. -
Start shading:
Using a soft graphite pencil (like a 4B), lightly scribble along the inner edge of the left side of the ghost. -
Add depth to the hem:
Add a little bit of graphite shading right above the wavy bottom line, focusing on the ‘valleys’ of the waves to show folds. -
Blend the shadows:
Take a blending stump or a cotton swab and gently rub the graphite marks you just made. Pull the graphite inward toward the center of the ghost to create a soft gray gradient. -
Refine the contrast:
If the blending made the outline look fuzzy, you can carefully re-trace the black outer line one last time to make it crisp again.
Enjoy your charming little ghost drawing as a spooky decoration or a handmade card


Cute Kawaii Ghost With Big Sparkly Eyes

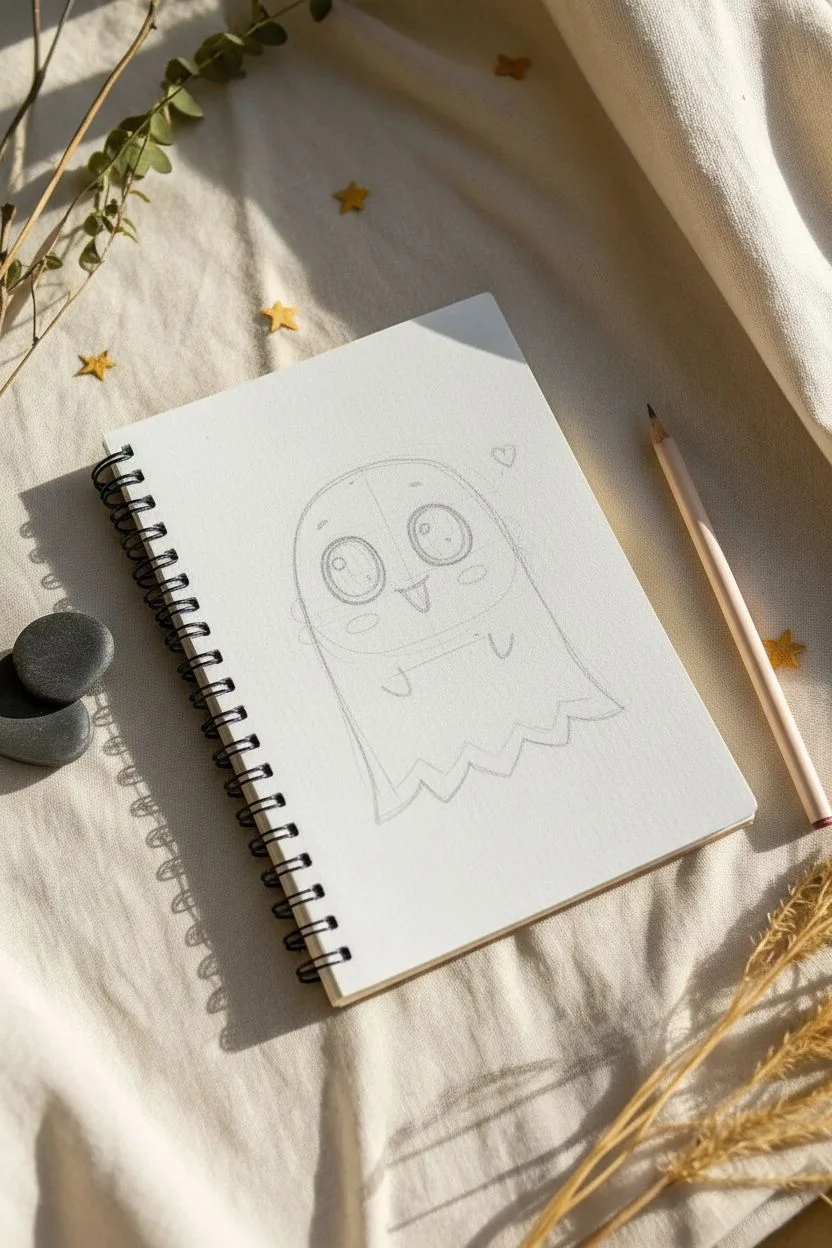
Capture the spooky season with a dose of sweetness by drawing this adorable kawaii ghost. This project features big, shimmering eyes and a friendly expression that’s perfect for a sketchbook doodle or a handmade Halloween card.
Step-by-Step Tutorial
Materials
- Sketchbook or drawing paper (heavyweight preferred)
- Pencil (HB or H for initial sketch)
- Fine liner pen (black, 0.3mm or 0.5mm)
- Thicker black marker or brush pen
- Grey marker (light cool grey)
- Pink marker or colored pencil
- White gel pen or Posca marker
- Eraser
Step 1: Basic Outline
-
Sketch the Head Shape:
Begin lightly with your pencil. Draw a large, inverted ‘U’ shape for the ghost’s body. The top should be nice and rounded like a smooth dome. -
Define the Sides:
Extend the lines of the dome downwards, widening them just slightly as you go to give the ghost a soft, draped fabric look. Keep the lines relatively straight but organic. -
Create the Jagged Hem:
Connect the bottom of the two side lines with a wavy, jagged line. Draw about five or six points, making the ones in the center slightly longer than the ones on the edges to suggest dimension.
Step 2: Facial Features
-
Position the Eyes:
Draw two large ovals in the upper half of the ghost’s body. Space them apart slightly, but keep them large enough to dominate the face for that kawaii effect. -
Add Eye Details:
Inside each oval, draw a smaller circle near the top right for the main highlight. Add a tiny circle near the bottom left for a secondary reflection. These will remain white later. -
Draw the Mouth:
Right between the eyes, slightly lower down, draw a small ‘U’ shape. Close the top with a flat line to create an open mouth smile, and draw a small curved line inside for the tongue. -
Add Arms and Blush:
Draw two small, simple ‘U’ curves on the body below the face for little nubby arms. Add oval shapes just under the eyes for rosy cheeks. -
Add Charm Points:
Draw a tiny floating heart to the right of the ghost’s head and a small curved eyebrow line above the left eye to add expression.
Bleeding Lines?
If your markers bleed into the white eye highlights, don’t panic. Let the black ink dry fully, then use an opaque white gel pen or Posca paint pen to redraw the white dots on top.
Step 3: Inking and Coloring
-
Outline the Body:
Take your fine liner pen and carefully trace over your pencil lines for the ghost’s outer shape. Keep your hand steady for smooth curves. -
Ink the Details:
Outline the mouth, arms, tongue, and the little floating heart. Do not outline the blush marks. -
Fill the Eyes:
Using a thicker black marker or carefully filling with your fine liner, color in the large pupils. Be very careful to leave the white highlight circles completely empty. -
Erase Sketches:
Wait a moment for the ink to dry completely to avoid smearing. Gently erase all your underlying pencil sketches. -
Apply Blush:
Use a pink marker or colored pencil to fill in the oval cheek spots. If using a marker, one horizontal swipe usually looks cleanest. -
Color the Mouth:
Fill in the tiny tongue shape with the same pink color used for the cheeks. -
Add Grey Shading:
Take your light cool grey marker. Add a band of shading along the bottom jagged edge of the ghost. Make the shading slightly uneven, following the points of the hem. -
Shadow the Sides:
I like to run a thin line of the same grey marker up the left side of the ghost’s body to give it a bit of roundness and volume. -
Final Sparkle:
Using a white gel pen, add tiny dots or ‘sparkles’ inside the black parts of the eyes if you want extra shimmer, or refine the highlights if your marker bled slightly.
Pro Tip: Eye Placement
The secret to ‘kawaii’ proportions is placing the eyes low on the face. Keep the eyes aligned with the middle of the head rather than the very top for maximum cuteness.
Your little spirit is now ready to haunt your sketchbook with absolute cuteness


Floating Side-Swoosh Ghost Pose
Capture the playful movement of a friendly ghost as it floats through the air with this simple yet expressive drawing. Using just fine liners and a touch of shading, you’ll create a charming specter on textured paper that feels both classic and lively.
Step-by-Step
Materials
- Textured watercolor or mixed media paper (heavyweight)
- Black fine liner pen (0.3mm or 0.5mm)
- Graphite pencil (HB or 2B)
- Soft eraser
- Blending stump or cotton swab
Step 1: Drafting the Form
-
Establish the curve:
Begin lightly with your pencil. Sketch a long, gentle ‘S’ curve that starts near the top center of your paper and swoops down towards the bottom right. This will be the spine of your ghost’s movement. -
Outline the head:
Draw a rounded dome shape at the top of your guide line. It should be slightly taller than a perfect semicircle to give the ghost that classic sheet-draped look. -
Shape the left side:
From the left side of the head, draw a line that falls almost straight down but curves slightly inward near the bottom, ending in a jagged, wavy hemline. -
Create the swoosh:
From the right side of the head, extend a line that follows your initial ‘S’ curve, flaring out dramatically to the right. This creates the illusion of fabric trailing behind the ghost as it flies. -
Finish the hem:
Connect the bottom left and right lines with a ragged, uneven line. Make sure to include several sharp points and dips to represent the torn or folded bottom of a sheet. -
Position the face:
Lightly sketch two large ovals for eyes and a smaller, thinner oval for the mouth. Place them high on the head, looking slightly to the left.
Step 2: Inking the Outline
-
Trace the silhouette:
Take your black fine liner and carefully go over your pencil outline. Use confident, single strokes where possible to keep the line work clean. -
Fill the features:
Color in the eye and mouth ovals completely with the black pen. Leave them solid black for that classic hollow-eyed appearance. -
Add fold lines:
Draw thin, varying length lines moving upward from the sharp points of the hem. These lines indicate creases in the fabric and enhance the sense of motion. -
Erase pencil marks:
Wait a minute for the ink to fully dry, then gently erase all your initial graphite sketches so only the clean ink remains.
Fixing Smudges
If you accidentally smear graphite on the white background, use a kneaded eraser. Press and lift repeatedly rather than rubbing to lift the stain cleanly.
Step 3: Shading and Details
-
Start shading the right:
Using the side of your graphite pencil, apply very light shading along the right-hand outline of the ghost. This establishes the light source coming from the left. -
Deepen the folds:
Add slightly darker pencil strokes inside the creases you drew earlier, specifically where the fabric bunches up near the hem. -
Blend for softness:
I like to take a blending stump here and gently smudge the graphite. Pull the shadow inward from the edge to create a smooth, rounded gradient on the form. -
Accentuate the flow:
Add a few very faint, long pencil streaks following the curve of the body from the head down to the tail, reinforcing the swooping direction. -
Sparkle details:
With your fine liner, add tiny clusters of dots and small four-pointed stars around the ghost to give it a magical, dusty atmosphere.
Add Dimension
Use a white gel pen to add tiny reflection dots inside the black eyes. It instantly changes the ghost from spooky to cute and soulful
Sign your magical creation in the corner and display it for a touch of spectral charm


Boo Speech Bubble Ghost Doodle
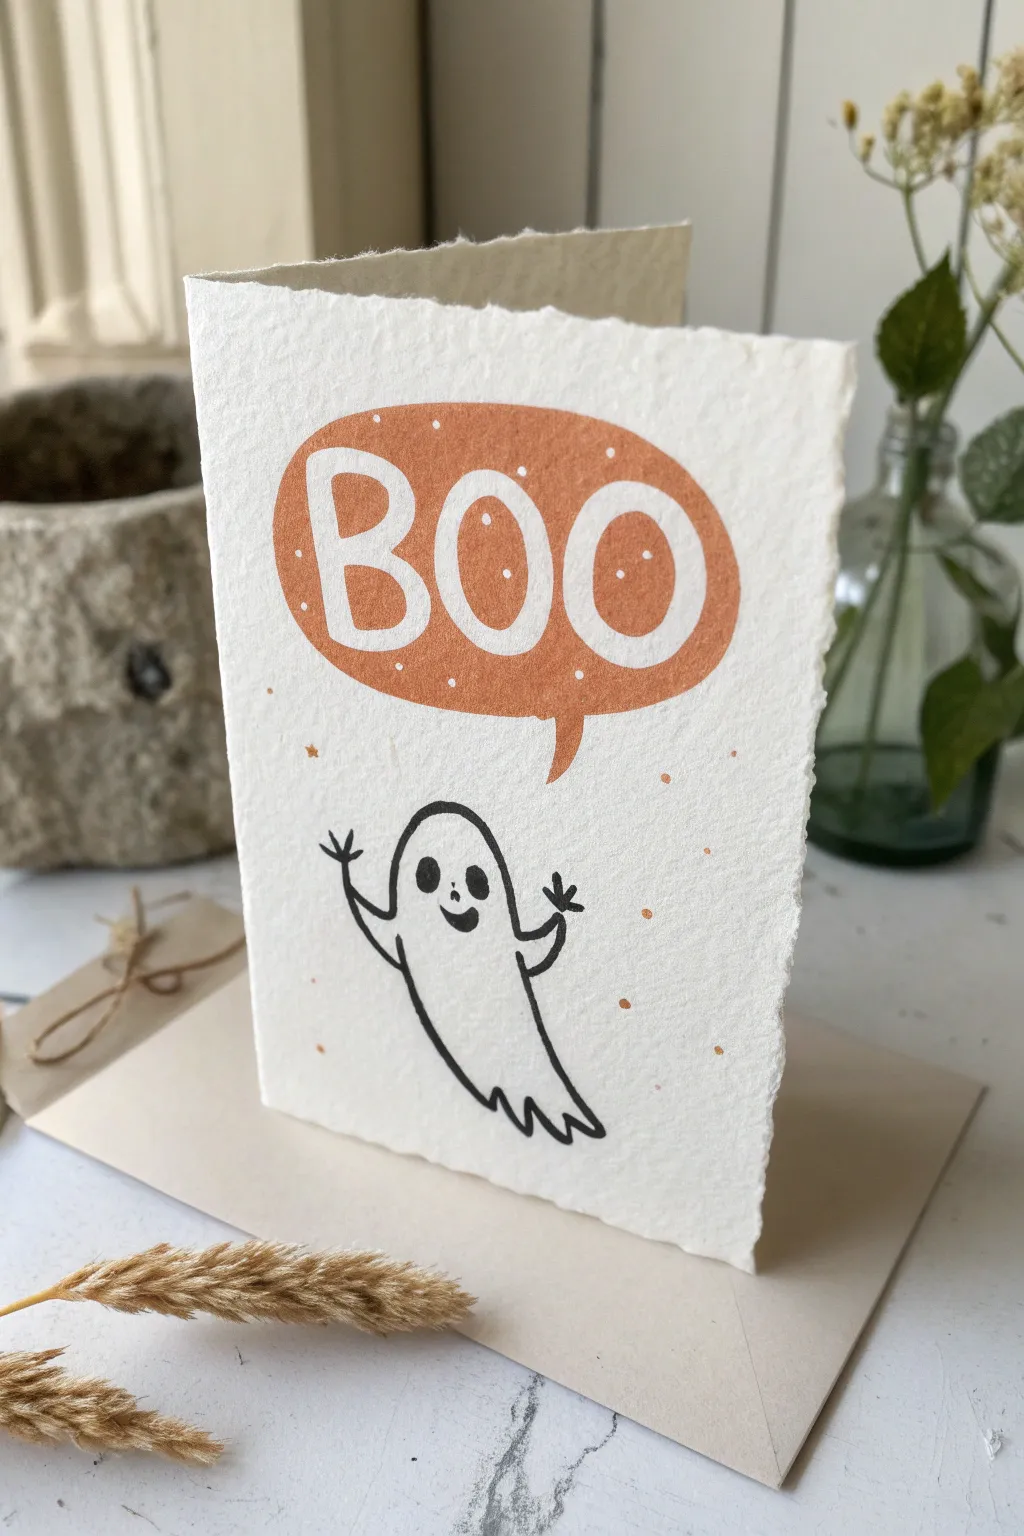
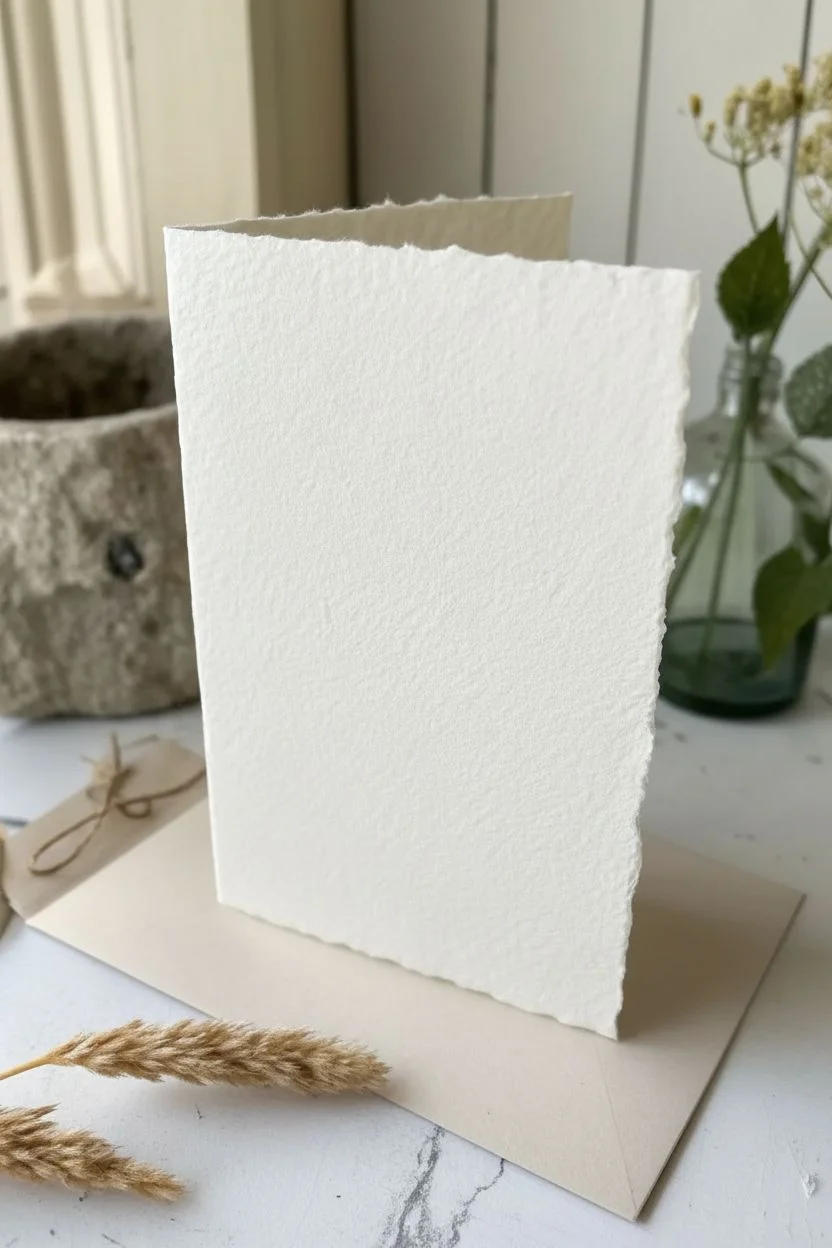
This charming handmade greeting card features a playful, minimalist ghost doodle paired with a bold speech bubble. The textured, deckled-edge paper gives it a sophisticated, artisanal feel that elevates the simple line art into a keepsake.
Detailed Instructions
Materials
- Heavyweight watercolor paper or textured cardstock (300gsm is ideal)
- Black monoline pen or fineliner (0.5mm or 0.8mm)
- Burnt orange watercolor paint or gouache
- Small round paintbrush (size 2 or 4)
- Pencil and eraser
- Ruler (for tearing paper)
- Cream or beige envelope
Step 1: Preparing the Card Base
-
Create the deckled edge:
Instead of cutting your cardstock with scissors, place a heavy ruler firmly along the line where you want the edge to be. Slowly tear the paper upwards against the ruler’s edge to create that soft, fuzzy deckled look shown in the photo. -
Fold the card:
Once you have your rectangle torn to size (approximately 5×7 inches when unfolded), score the center lightly with a bone folder or dull knife, then fold it crisply in half to create a standing card.
Clean Lines Pro Tip
If painting around letters is tricky, use masking fluid on the ‘BOO’ first. Let it dry, paint the orange over everything, then peel the rubbery mask away to reveal perfect white text.
Step 2: Drawing the Ghost
-
Sketch the outline:
Lightly sketch a rounded hill shape for the ghost’s head near the bottom center of the card. Extend the lines down, angling the left side outward slightly. -
Add the ghost tail:
Connect the bottom of the ghost with a zig-zag line. Make the points varying sizes—some sharp, some slightly curved—to give it movement. -
Give it arms:
Draw two small, U-shaped arms raised high on either side of the body. Add three tiny fingers to each hand for a classic doodle style. -
Draw the face:
Inside the head area, sketch two tall ovals for eyes and a kidney-bean shape for a smiling mouth. Keep the features centered and relatively small. -
Ink the ghost:
Using your black fineliner, trace over your pencil lines confidently. Fill in the eyes and mouth completely solid black.
Step 3: Painting the Speech Bubble
-
Outline the bubble:
Above the ghost, lightly sketch a large, slightly flattened oval shape using your pencil. Add a small triangular tail pointing down toward the ghost’s head. -
Draft the lettering:
Inside the oval, lightly write the word ‘BOO’ in large bubble letters. The letters should be thick and fill most of the space. -
Prepare the paint:
Mix a burnt orange watercolor or gouache. You want a consistency that is opaque enough to cover the paper but fluid enough to glide smoothly. -
Paint the background:
Carefully paint the orange space *around* the letters ‘BOO’, leaving the letters themselves the white of the paper. This negative space technique makes the text pop. -
Refine the edges:
Use the tip of your brush to smooth out the outer edge of the oval speech bubble so it looks deliberate and clean. -
Let it dry completely:
Allow the paint to fully dry. If the paper buckles slightly, you can place it under a heavy book once it is bone dry.
Level Up: 3D Elements
Make the ghost pop by drawing it heavily on a separate piece of paper, cutting it out, and attaching it to the card with adhesive foam squares for a fun 3D shadow effect.
Step 4: Final Details
-
Erase guidelines:
Once the ink and paint are absolutely dry, gently erase any remaining pencil marks from the sketch. -
Add texture dots:
Dip your brush tip back into the orange paint and add tiny, random dots scattered around the ghost and speech bubble for background texture. -
Paint bubbles inside letters:
Add tiny white dots inside the orange speech bubble background using white gouache or a gel pen if you accidentally painted over some spots, or leave small paper flecks unpainted as shown.
Now you have an adorable, handcrafted card ready to spook someone special

PENCIL GUIDE
Understanding Pencil Grades from H to B
From first sketch to finished drawing — learn pencil grades, line control, and shading techniques.
Explore the Full Guide
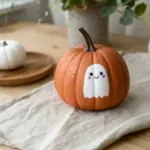
Spooky-Cute Ghost With Pumpkin Buddy
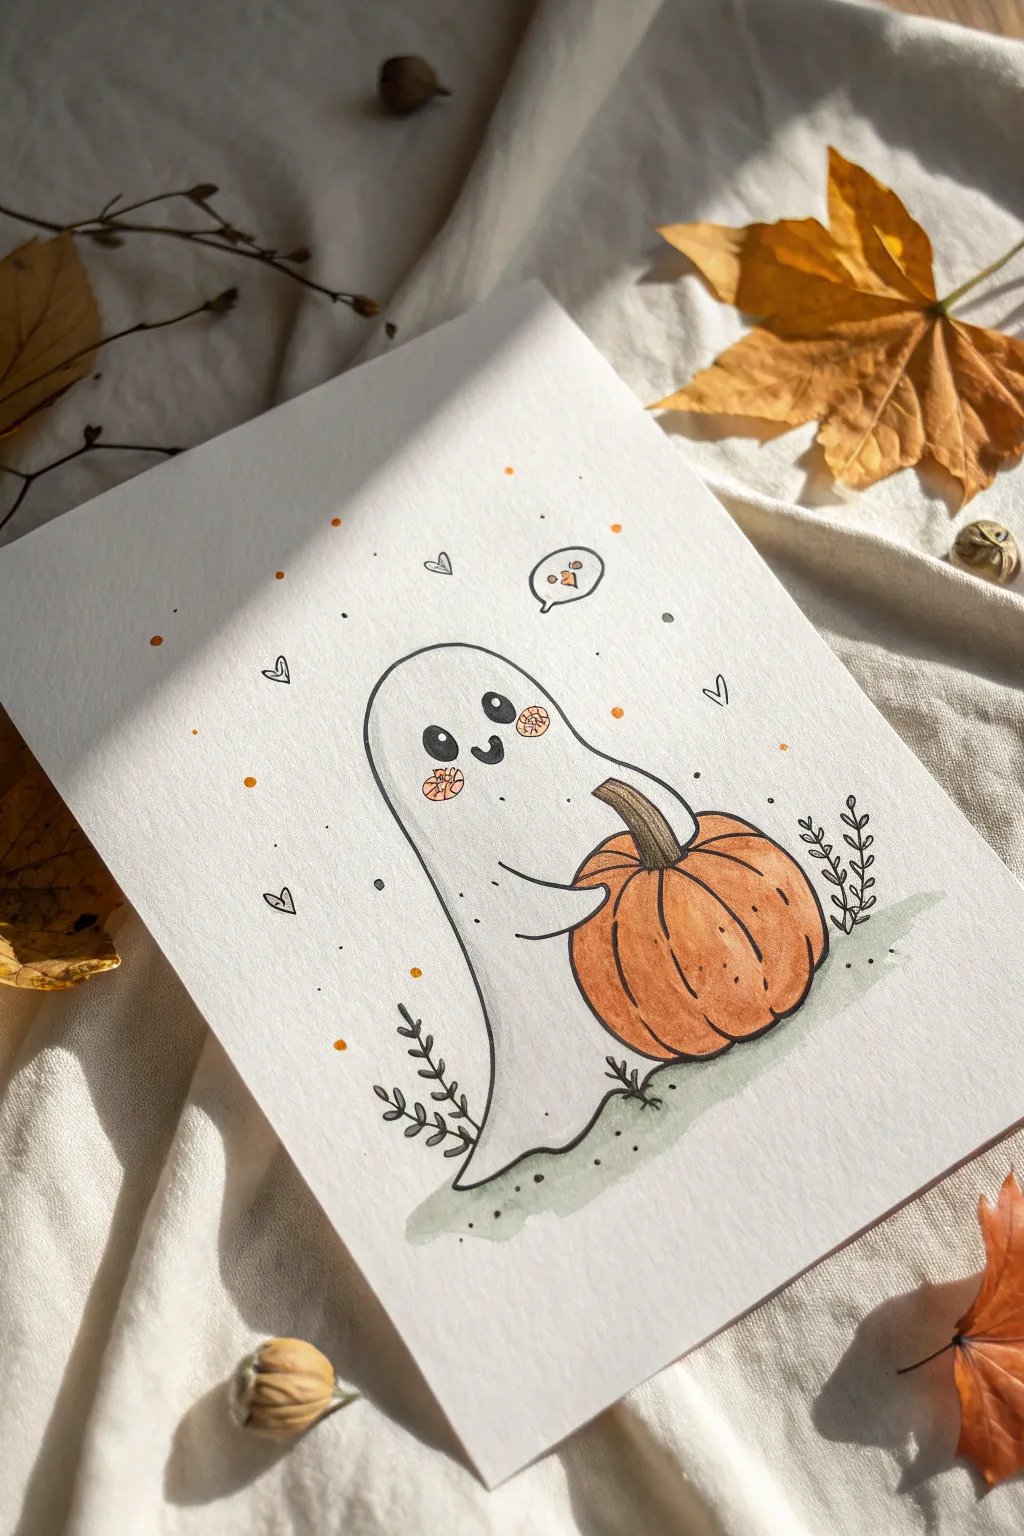
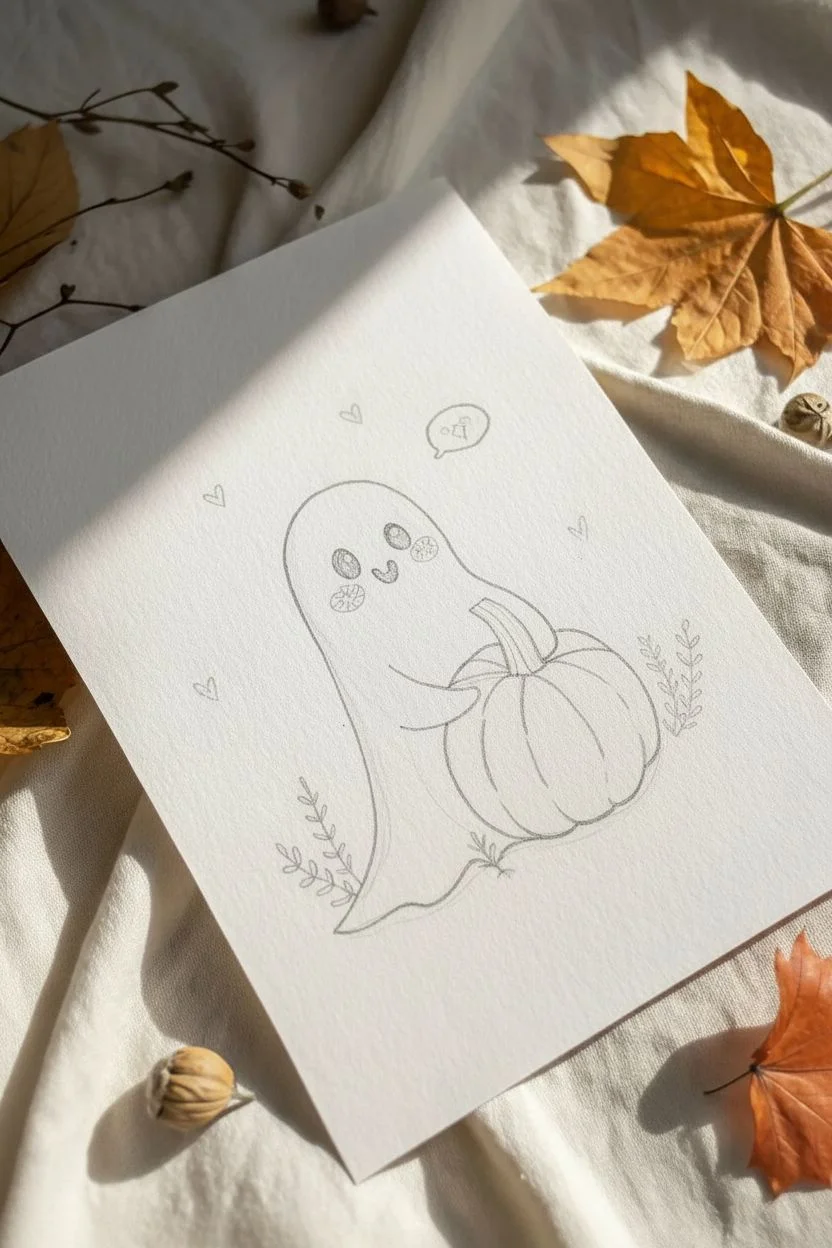
Capture the cozy side of spooky season with this adorable illustration of a friendly ghost hugging a pumpkin. This mixed-media project combines simple ink line work with soft watercolor washes to create a heartwarming piece perfect for greeting cards or seasonal decor.
Step-by-Step Guide
Materials
- Cold press watercolor paper (A5 or similar size)
- Waterproof fine liner pens (black, size 0.3 and 0.5)
- Watercolor paints (Orange, Burnt Sienna, Payne’s Grey, Green Gold)
- Small round brushes (size 2 and 4)
- Pencil (HB) and eraser
- Orange fine tip marker or gel pen
- White gel pen (optional)
- Paper towel and water cup
Step 1: Sketching the Composition
-
Outline the ghost shape:
Start by lightly sketching a tall, rounded dome shape for the ghost’s head, curving the lines down and flaring them out slightly at the bottom to create the trailing sheet effect. -
Add the pumpkin:
Position a round, squat pumpkin shape overlapping the lower right side of the ghost’s body. Draw curved vertical lines to indicate the pumpkin’s segments. -
Sketch the arms:
Draw two small, nubby arms emerging from the ghost’s body. The left arm should extend outward, and the right arm should curve to rest gently on the pumpkin. -
Detail the face:
Place two large, oval eyes widely spaced on the face and a small, U-shaped smile right between them. Don’t forget round cheeks. -
Incorporate background elements:
Lightly sketch some simple leafy twigs near the ghost’s bottom edge and a small thought bubble above the head.
Step 2: Inking the Lines
-
Inking the main outlines:
Using a 0.5 waterproof fine liner, trace over your pencil lines for the ghost and pumpkin. Keep your hand relaxed to achieve that slightly organic, hand-drawn look. -
Refining the face:
Fill in the oval eyes with black ink, leaving small white circles for highlights. Use the thinner 0.3 pen for delicate facial details like the mouth. -
Adding texture details:
Draw the small leaves on the bottom twigs and the tiny hearts and dots scattered in the background using the 0.3 pen. -
Erase pencil marks:
Wait until the ink is completely dry—I usually give it a full minute or two—then gently erase all underlying pencil sketches to keep the paper clean.
Clean Lines
If your hand shakes while inking, try ‘pulling’ the lines toward your body rather than pushing the pen away. It offers way more control.
Step 3: Painting with Watercolors
-
Painting the pumpkin base:
Mix a bright orange watercolor and apply a light wash to the pumpkin segments. Leave the top highlights dry or very pale to suggest roundness. -
Adding pumpkin depth:
While the orange is still slightly damp, drop a touch of Burnt Sienna or darker orange into the bottom curves and the seams between segments to create shadow. -
Coloring the stem:
Use a mix of brown and grey to paint the pumpkin stem. Let the color be slightly uneven to mimic natural texture. -
Ghost shadows:
Dilute a tiny amount of Payne’s Grey with lots of water. Paint a very sheer shadow along the left side of the ghost and under the arms to separate the white shape from the paper. -
Grounding the figure:
Mix a muted Green Gold or light grey-green and paint an irregular patch beneath the ghost and pumpkin to ground them, letting the color fade out at the edges.
Ink Smearing?
Waterproof pens aren’t truly waterproof until fully dry. If ink bleeds when you paint, wait at least 15 minutes after drawing before using water.
Step 4: Final Details
-
Adding rosy cheeks:
Once the face area is dry, use a small dab of diluted pink or orange paint for the cheeks. You can draw a little grid pattern over them with a fine orange pen for a stylized touch. -
Filling the thought bubble:
Paint a tiny orange heart inside the thought bubble to show your ghost is full of love. -
Scattered accents:
Use an orange marker or watercolor on a small brush to add random orange dots throughout the background for a confetti effect. -
Highlights:
If your watercolor covered the eye highlights, use a white gel pen to add the sparkle back in for that bright-eyed look.
Now you have a sweet, spooky friend ready to haunt your sketchbook or brighten someone’s day
Ghost Holding a Trick-or-Treat Bucket
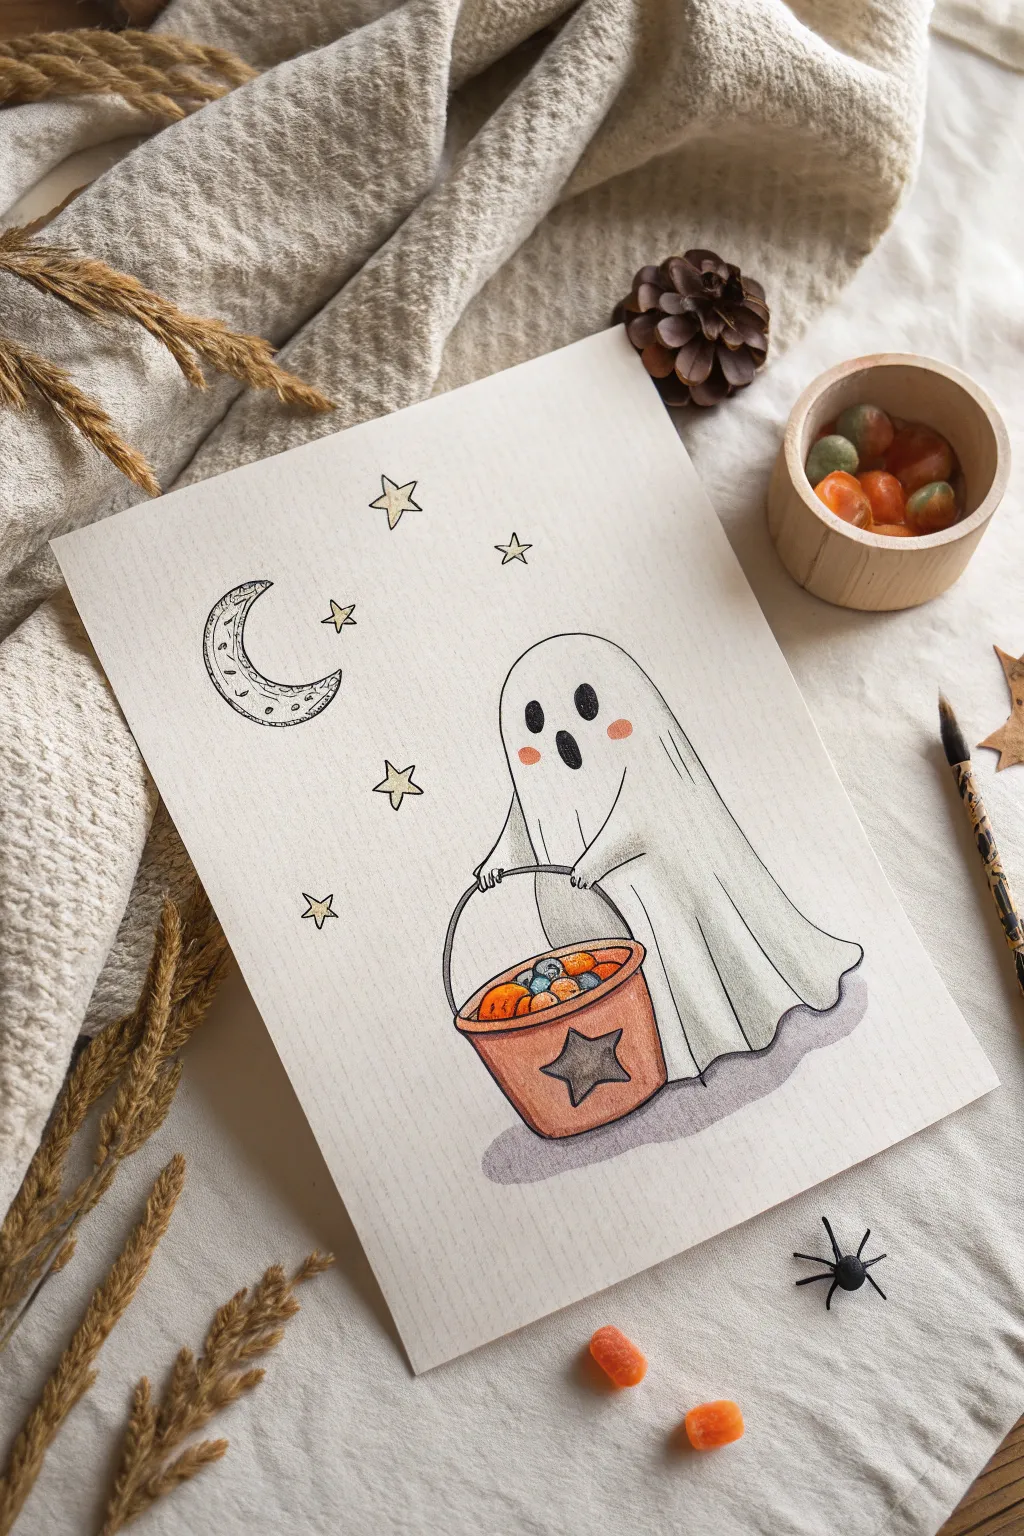
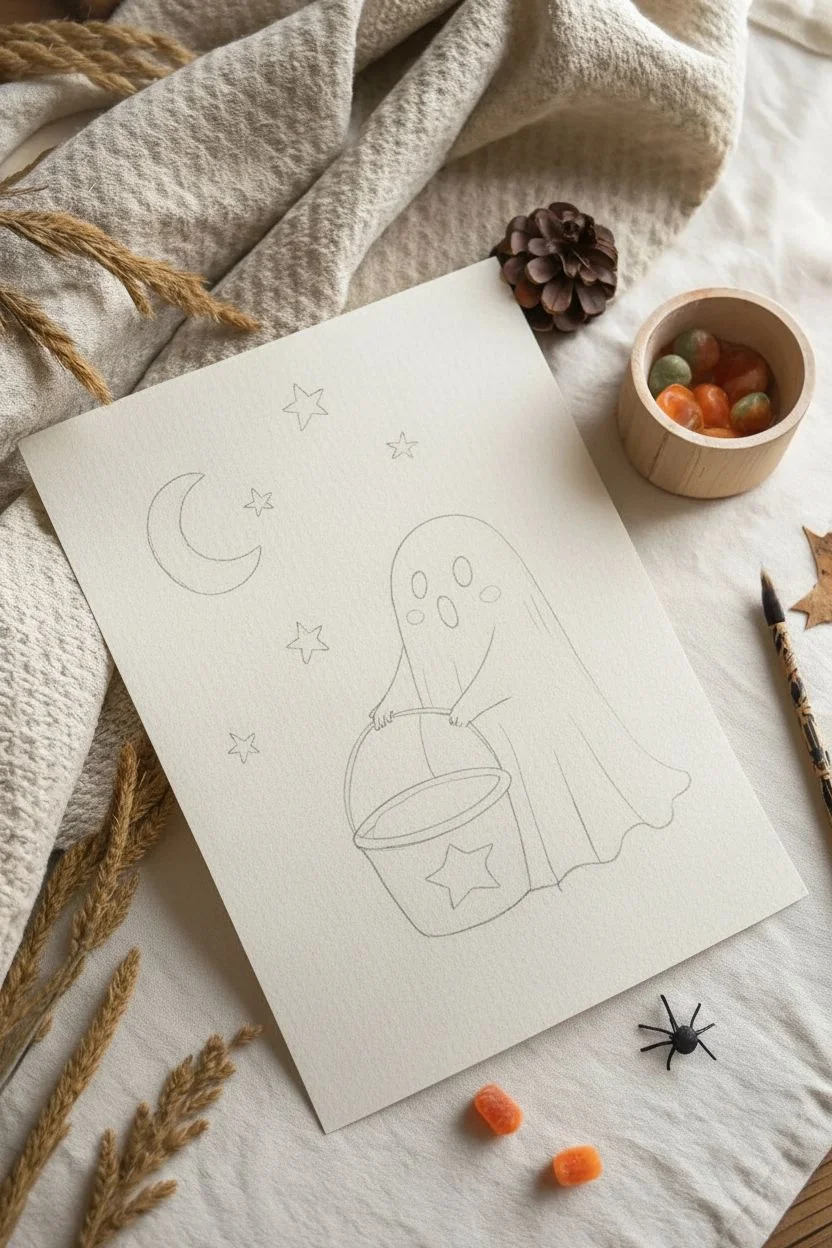
Capture the innocent charm of Halloween with this adorable drawing of a bewildered blushing ghost holding a candy bucket. Using simple ink lines and soft colored pencil shading on textured paper creates a cozy, nostalgic illustration style.
How-To Guide
Materials
- Textured mixed media or watercolor paper (cream or off-white recommended)
- Fine liner pen (black, 0.3mm or 0.5mm)
- Soft colored pencils (orange, grey, yellow, light blue, pink)
- Pencil (HB for sketching)
- Eraser
Step 1: Sketching the Shapes
-
Outline the ghost body:
Start by drawing a large, rounded upside-down ‘U’ shape for the ghost’s head. Extend the lines downward, letting them flare out slightly towards the bottom to create the flowing sheet effect. -
Add the bottom hem:
Connect the bottom lines with a wavy, rippled line to simulate fabric draping on the ground. Keep the curves loose and organic. -
Position the bucket:
Sketch a slanted cylindrical shape near the bottom center of the ghost. It should overlap the ghost’s body slightly. This will become the trick-or-treat bucket. -
Draw the arms:
Add two small, simple curves extending from the ghost’s body to hold the bucket handle. They should look like little nubs of fabric rather than detailed hands.
Wobbly Lines?
If your hand shakes or lines aren’t straight, embrace it! This drawing style thrives on ‘nervous’ lines which fit the timid ghost character perfectly.
Step 2: Inking the Details
-
Ink the main outlines:
Using your fine liner, go over your pencil sketch with confident strokes. Don’t worry if lines aren’t perfectly smooth; a little wobble adds character to the spooky theme. -
Create the face:
Draw three vertical ovals for the face: two for the eyes and a slightly larger, open oval for the surprised mouth. Fill them in solid black, leaving no white spots. -
Detail the bucket:
Draw the rim of the bucket and the thin wire handle being gripped by the ghost. Add a large star shape on the front of the bucket for decoration. -
Fill the bucket:
Sketch small circles and ovals piling up inside the rim of the bucket to represent an assortment of candies and treats. -
Add celestial elements:
To the left of the ghost, draw a crescent moon with a textured inner curve. Scatter several five-pointed stars around the ghost to balance the composition. -
Erase pencil marks:
Wait until the ink is completely dry to prevent smudging, then gently erase all underlying graphite lines.
Paper Texture Tip
Place a piece of sandpaper or textured cardstock under your drawing paper while shading. The colored pencil will pick up that grain for an instant vintage look.
Step 3: Adding Color & Texture
-
Color the bucket:
Use an orange colored pencil to fill in the bucket. Apply uneven pressure to create texture, pressing harder on the sides for a rounded 3D effect. -
Tint the candies:
Lightly color the varied candy shapes with alternating bright colors like blue, orange, and yellow to make them pop against the white ghost. -
Shade the star:
Fill in the star on the bucket with a dark grey pencil to match the monochromatic feel of the outline. -
Add ghostly shading:
Take a light grey pencil and very gently shade only the fold lines of the sheet and the bottom right side of the ghost. This subtle shadow gives the figure volume. -
Create a shadow cast:
Using a grey or mauve pencil, draw a flattened oval shadow underneath the ghost and bucket to ground the figure on the paper. -
Apply blush:
I like to use a pink pencil to add two soft, circular patches under the ghost’s eyes for that cute, embarrassed look. -
Color the stars and moon:
Lightly fill the stars and the moon with pale yellow. Keep the coloring sketch-like rather than fully opaque.
Now you have a charming little candy collector ready to haunt your sketchbook or Halloween card
BRUSH GUIDE
The Right Brush for Every Stroke
From clean lines to bold texture — master brush choice, stroke control, and essential techniques.
Explore the Full Guide
Dapper Ghost With Top Hat and Bow Tie
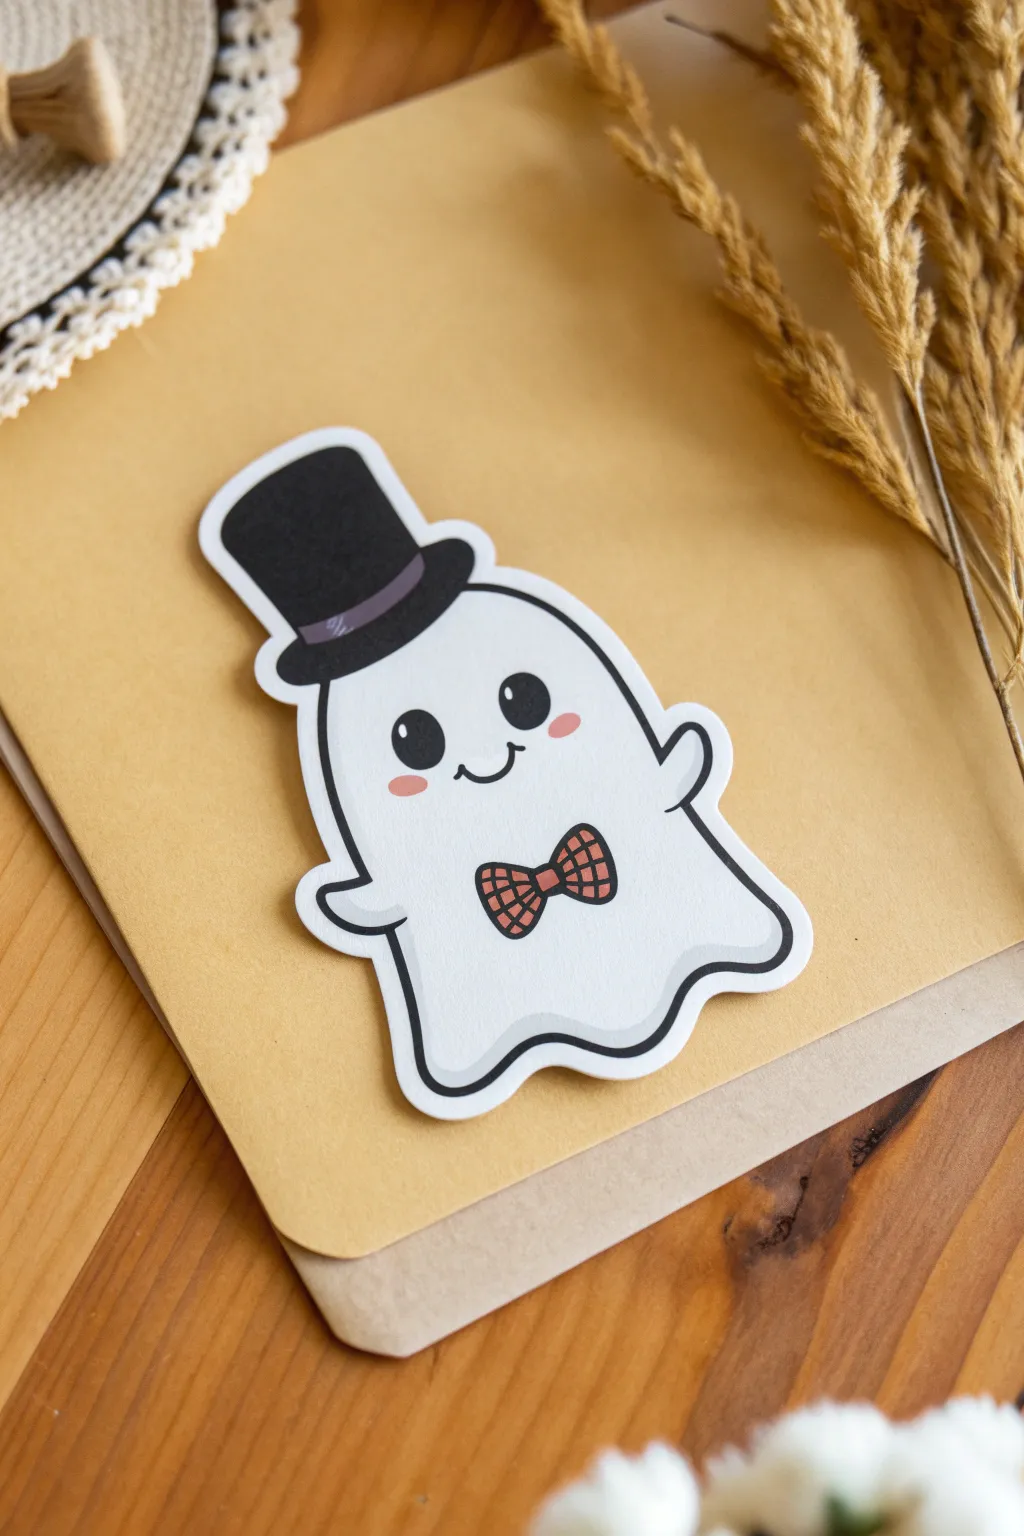
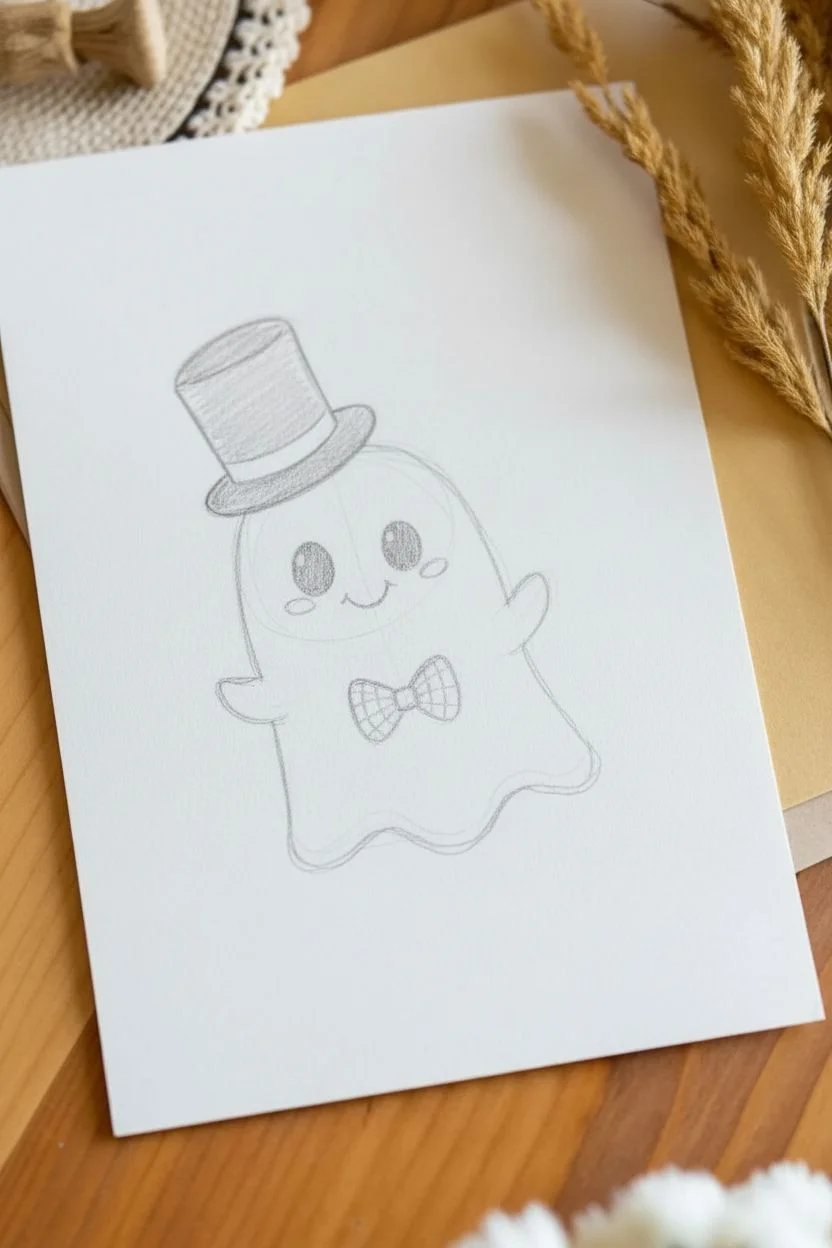
This charming little phantom proves that haunting can be a high-class affair with his jaunty top hat and plaid bow tie. The crisp black outlines and soft, rosy cheeks give him an adorable personality perfect for greeting cards or Halloween decorations.
Step-by-Step Guide
Materials
- Heavyweight white cardstock or sticker paper
- Pencil (HB or lighter)
- Fine-point black permanent marker or drawing pen
- Thick black marker (chisel tip or brush pen)
- Alcohol markers or color pencils (Dark Grey, Red, Pink)
- Scissors (precision or detail scissors are best)
- Eraser
Step 1: Sketching the Outline
-
Draft the basic shape:
Start by drawing a large, upside-down ‘U’ shape for the ghost’s body. Don’t close the bottom just yet; instead, sketch a wavy, undulating line to create the classic flowing spectral hem. -
Add the arms:
On the left side of the body, draw a small, rounded nub sticking out for the first arm. On the right side, draw a similar arm, but angle it upwards slightly as if he is waving hello. -
Top off the hat:
Positioned slightly to the left on the ghost’s head, sketch a top hat. Draw a narrow oval for the brim, and then a tall cylinder shape rising from it. Angle it slightly for a jaunty look. -
Sketch the face:
Place two large oval eyes in the upper center of the face. Below and between them, draw a small ‘u’ shape for a smiling mouth. -
Create the bow tie:
Centered on the chest area, sketch a butterfly shape for the bow tie. It should be relatively small compared to the body but large enough to add detail later.
Smudged Ink?
If your black outlines smudge when erasing, switch to a pigment-based liner like a Micron pen, which dries waterproof and smudge-proof almost instantly.
Step 2: Inking and Coloring
-
Outline the main shapes:
Using your fine-point black pen, carefully go over your pencil lines. I prefer to start with the face so I don’t smudge it later. Ensure the eyes are filled in solid black, leaving a tiny white circle in each for a sparkle highlight. -
Thicken the perimeter:
Switch to your thicker black marker to outline the entire ghost shape. This creates that bold ‘sticker’ look. Be sure to outline the hat brim and the main body line with a steady hand. -
Color the hat:
Fill in the top hat with solid black. Leave a thin strip just above the brim uncolored for now—this will be the hat band. -
Detail the hat band:
Color the reserved hat band strip with a dark grey marker. This separates the brim from the crown and adds dimension. -
Create the plaid tie:
Color the bow tie with a red marker. Once dry, use a very fine black pen to draw a grid pattern over the red to create a plaid texture. -
Add the blush:
Take a soft pink marker or colored pencil and add two small horizontal ovals right under the eyes for rosy cheeks. -
Erase guidelines:
Once the ink is completely dry—give it a minute or two—gently erase any visible pencil sketch lines to clean up the artwork. -
Add subtle shading:
To give the ghost some depth, use a very light grey marker to add a thin shadow line along the bottom hem and under the arms.
Sticky Situation
Turn this into a real sticker by drawing directly on full-sheet label paper, or run your finished cardstock cutout through a Xyron sticker maker machine.
Step 3: Cutting and Finishing
-
Create the border:
Draw a faint pencil line around the entire finished drawing, leaving about an 1/8th inch (3-4mm) gap of white space. This creates the die-cut sticker effect. -
Cut out the ghost:
Using precision scissors, cut carefully along that outer pencil line. Turn the paper, not your scissors, to get smooth curves around the arms and hat. -
Final check:
Inspect the edges. If your cutting left any sharp points where the line should be smooth, gently trim them off for a professional finish.
Now you have a polite little haunt ready to spice up your stationery setup
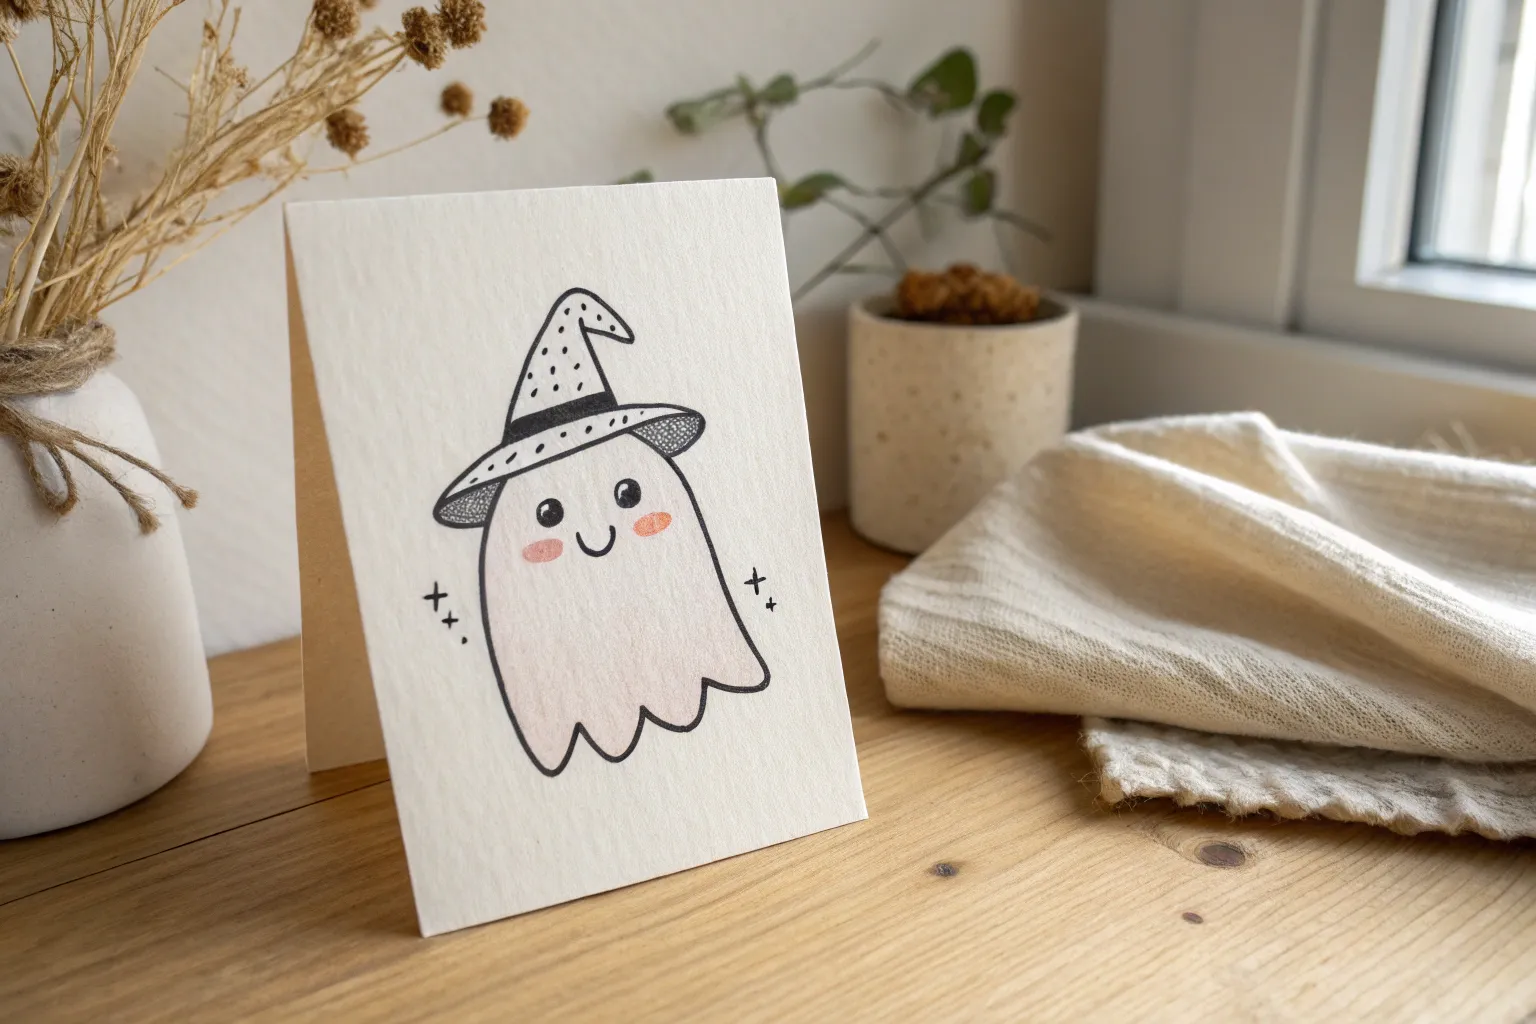
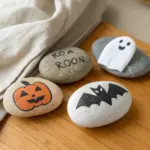
Ghost in a Witchy Hat for Halloween Mood
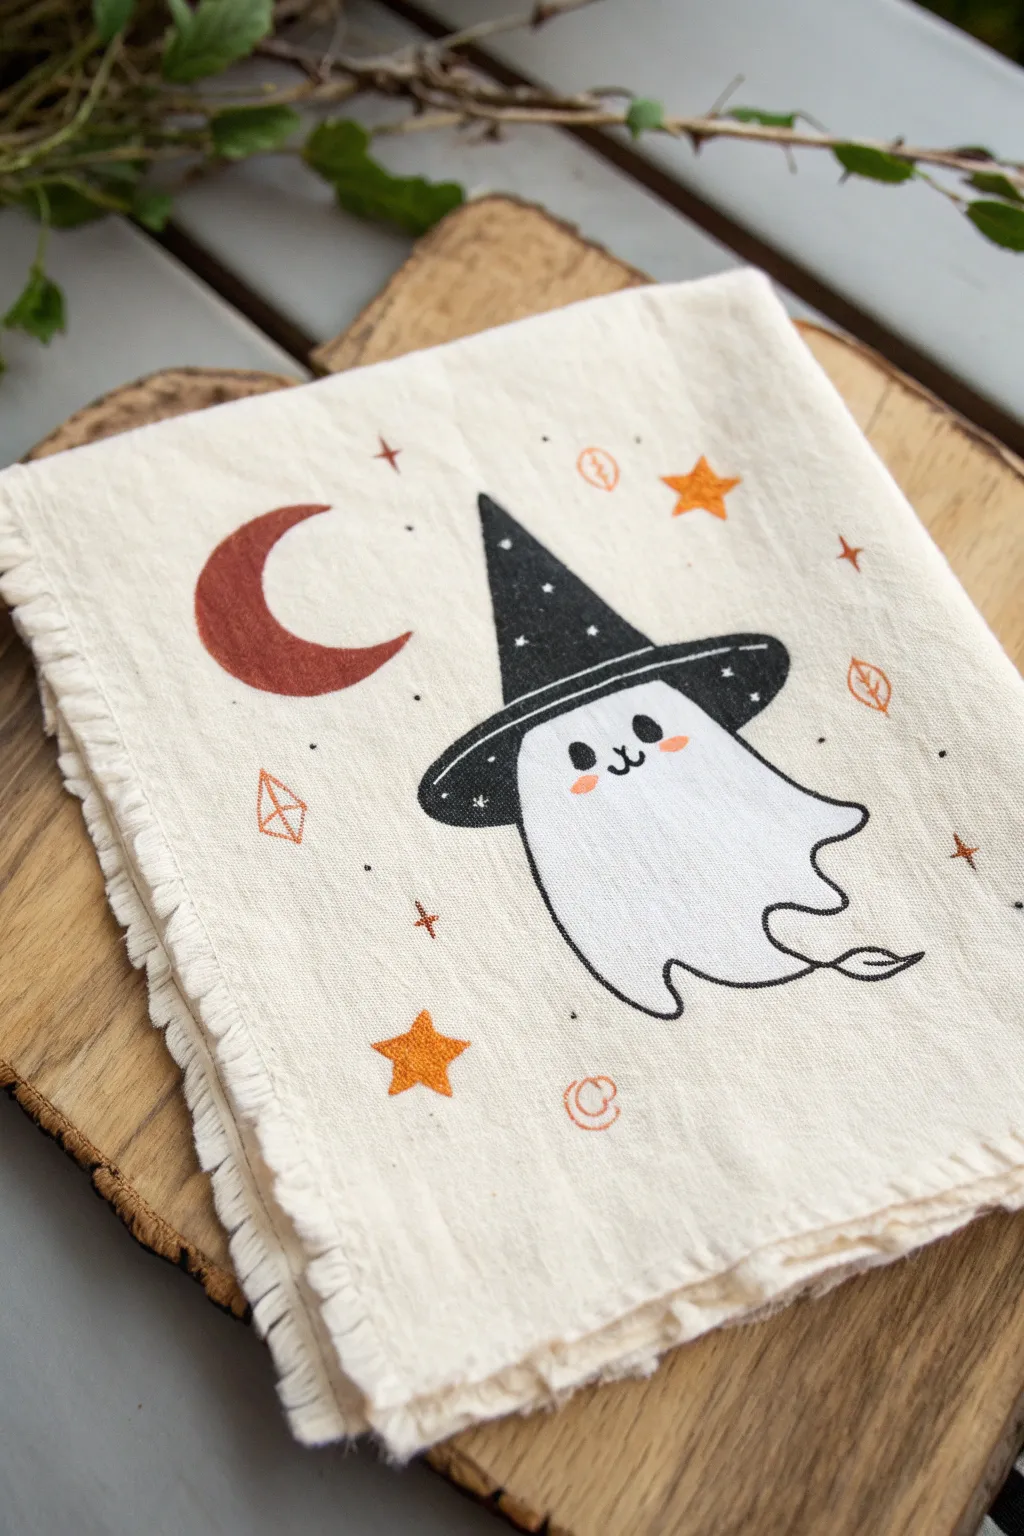
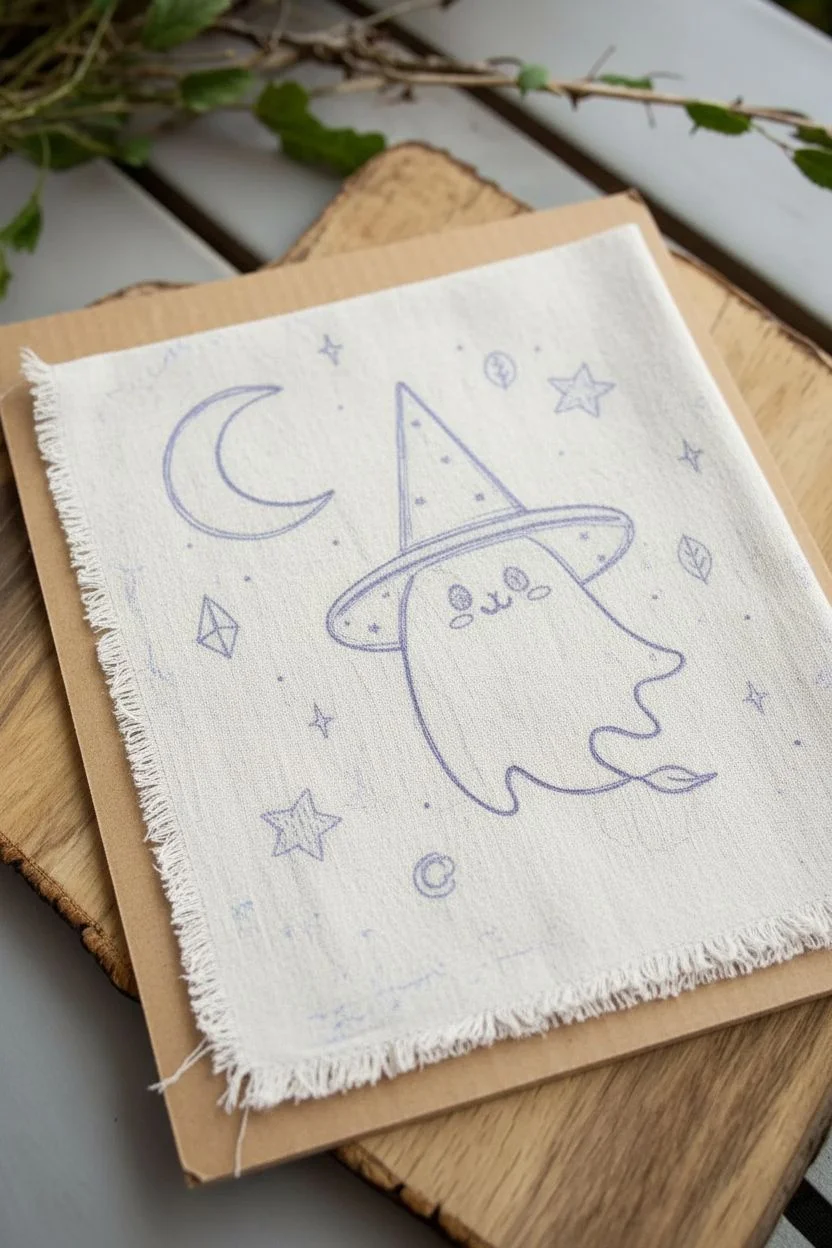
Transform a plain linen cloth into adorable Halloween decor with this hand-painted ghost design. Featuring a charming spirit in a celestial hat surrounded by moons and stars, this project adds a cozy, handmade touch to your seasonal table setting.
Step-by-Step
Materials
- Light beige linen or cotton fabric square (approx. 14×14 inches)
- Fabric medium
- Acrylic paints (black, white, terracotta/rust orange, light pink)
- Fine detail paintbrushes (sizes 00 and 1)
- Water-erasable fabric pen or pencil
- Small flat brush
- Paper plate or palette
- Iron and ironing board
- Cardboard (to place under fabric)
Step 1: Preparation & Sketching
-
Prepare the fabric:
Begin by washing and drying your linen fabric to remove any sizing, which helps the paint adhere better. Iron it completely flat so you have a smooth working surface. -
Create the frayed edge:
Pull threads along all four sides of your fabric square to create a rustic, frayed border about a half-inch deep. This gives the napkin that cozy, handmade finish. -
Secure the workspace:
Place a piece of cardboard or heavy cardstock underneath your fabric layer. This prevents paint from bleeding through to your table surface. -
Sketch the ghost:
Using your water-erasable pen, lightly draw a round, gumdrop-shaped ghost in the center. Give him a little tail that curves upward to the right. -
Add the hat:
Draw a wide brim sitting low on the ghost’s ‘head’, curving slightly over the forehead. Add a tall, pointed cone shape on top for the witch hat. -
Sketch celestial details:
around the ghost, sketch a crescent moon to the left and scatter three or four traditional five-point stars. Add tiny diamonds, circles, and sparkles to fill the negative space.
Clean Lines Tip
If your hand feels shaky outlining on textured linen, slightly dilute the black paint with a drop of water. It improves flow and reduces snagging on the fabric weave.
Step 2: Painting the Design
-
Mix your medium:
Mix your acrylic paints with fabric medium according to the bottle instructions (usually a 2:1 or 1:1 ratio). This ensures the paint stays soft and doesn’t crack after washing. -
Paint the ghost body:
Using the white mixture and a flat brush, fill in the ghost’s body. You may need two thin coats to get solid coverage on the beige linen, letting the first coat dry for about 20 minutes in between. -
Fill in the hat:
Switch to your black paint mixture. Carefully fill in the hat brim and the cone, being mindful of the edges where it meets the white ghost body. -
Add the moon and stars:
Using the terracotta or rust orange paint, fill in the crescent moon and the larger stars. I find a size 1 round brush works best for these sharper points. -
Paint minor details:
Use the same orange hue to trace the outline of the diamond shapes, small floating leaves, and tiny swirl accents you sketched earlier.
Make It Sparkle
Mix a tiny amount of gold fabric glitter into the orange paint for the stars and moon. Under candlelight, your napkin will have a magical, subtle shimmer.
Step 3: Details & Finishing
-
Add the face:
Once the white body is fully dry, use a fine detail brush (size 00) and black paint to add two small oval eyes and a tiny ‘w’ mouth. -
Rosy cheeks:
Dip the tip of a small brush or a cotton swab into light pink paint and dab two little oval cheeks right under the eyes. -
Outline the ghost:
With the fine liner brush and black paint, carefully outline the entire ghost body. Keep the line thin and slightly organic rather than perfectly straight. -
Hat details:
Paint two thin white horizontal stripes on the hat’s brim. Then, use the tip of your brush to dot tiny white stars and specks onto the black hat cone. -
Background specs:
Add tiny black dots and miniature cross-shapes randomly around the background to tie the whole composition together. -
Set the paint:
Allow the project to dry for at least 24 hours. Then, heat set the design by ironing the reverse side of the fabric on a medium-high setting for 3-5 minutes.
Enjoy using your charming new napkin for a spooky snack or display it as a wall hanging


Ghost With Tiny Arms and Expressive Emotions
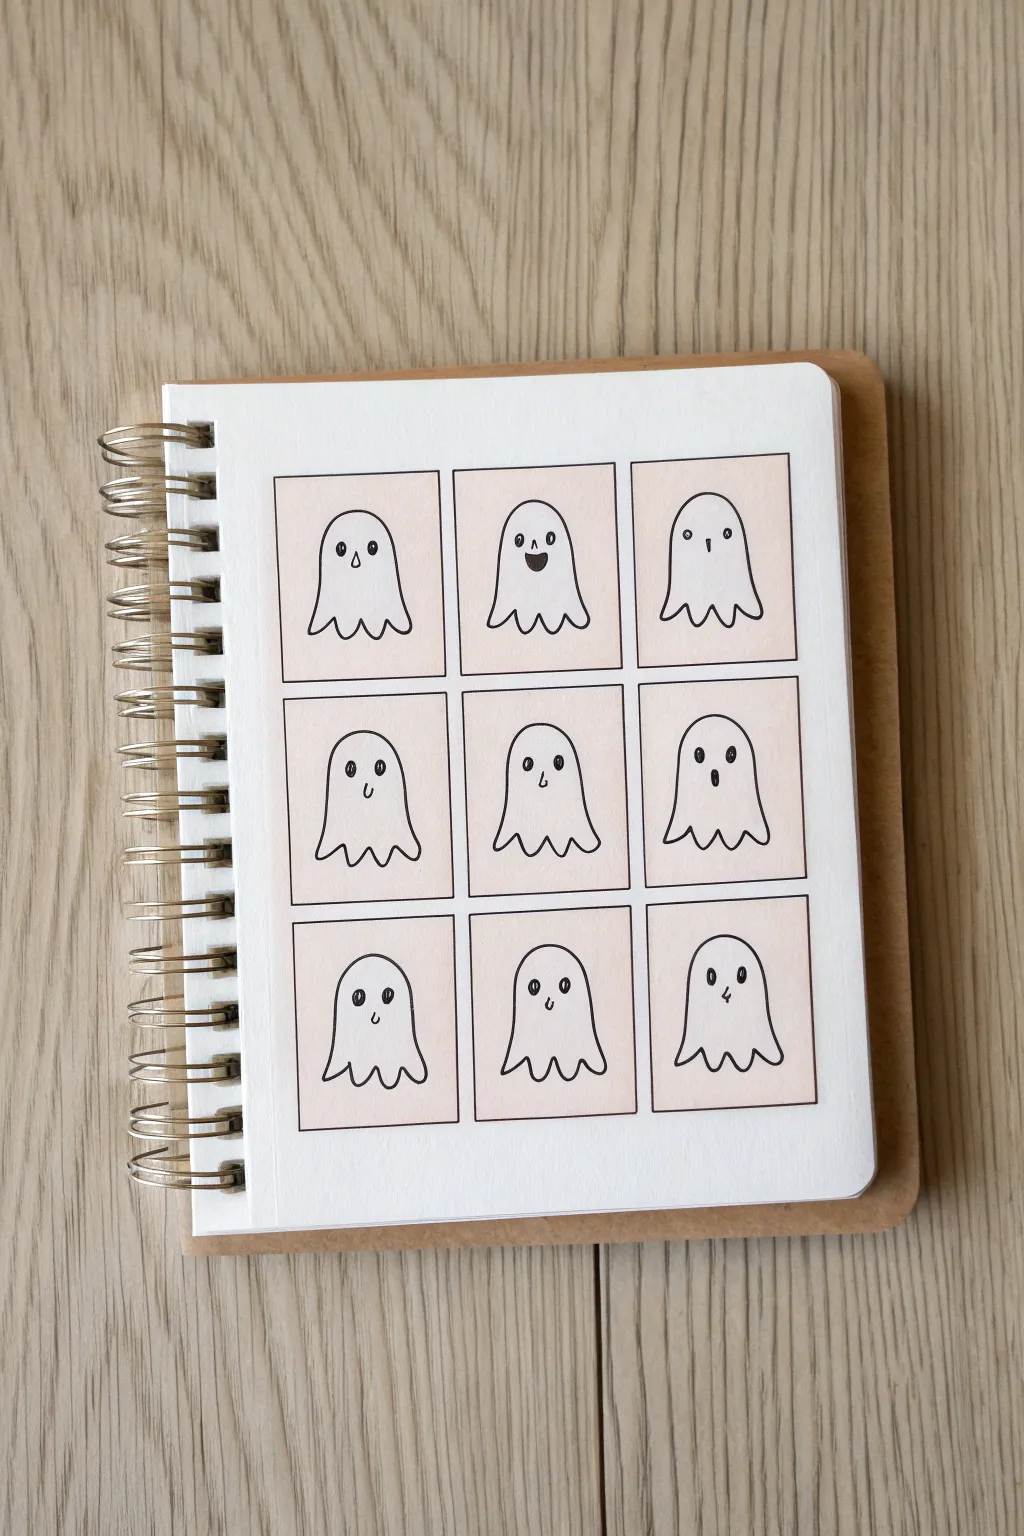
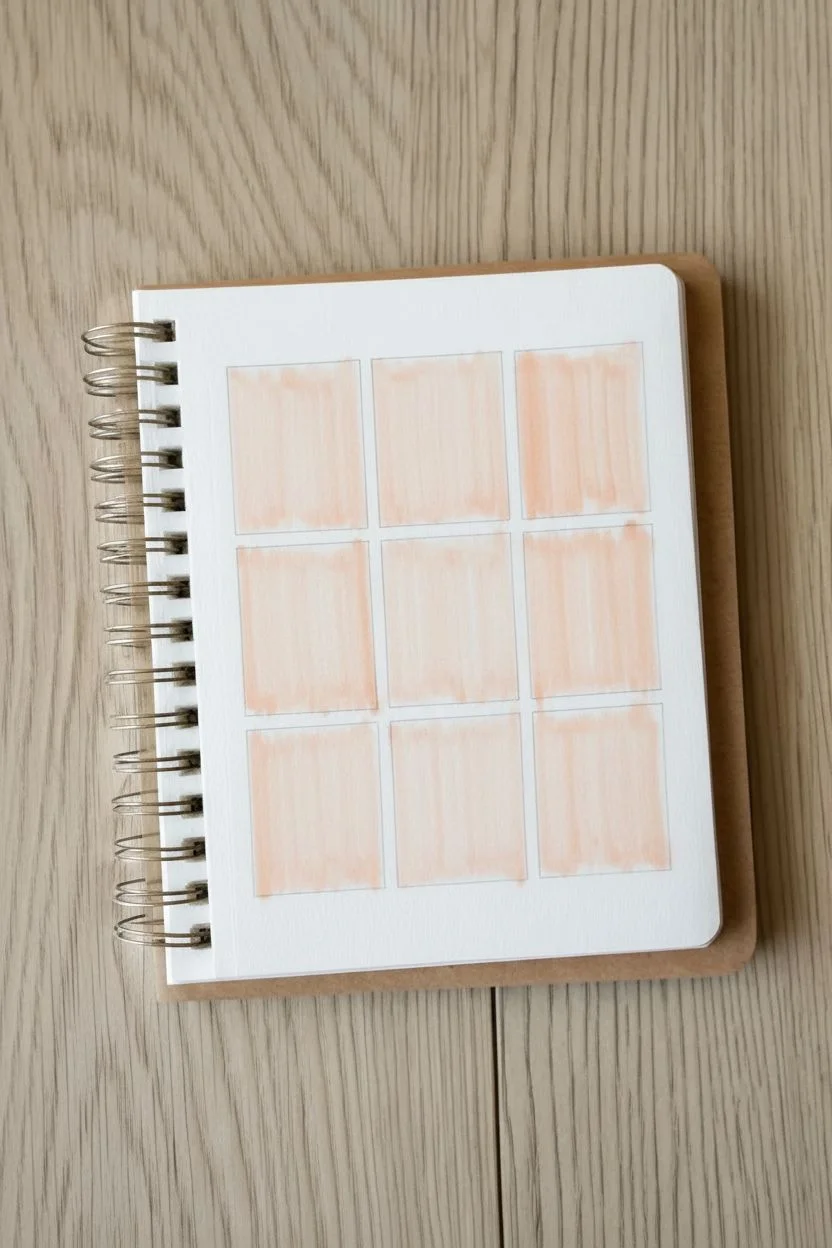
This charming project features a grid of nine lovable ghosts, each showcasing a unique facial expression to capture a different mood. It is a perfect exercise for practicing simple character design and adds a playful, supernatural touch to any sketchbook page.
Detailed Instructions
Materials
- Spiral-bound sketchbook or mixed media paper
- Fine liner pen (black, size 0.3 or 0.5)
- Ruler
- Pencil (HB or H)
- Eraser
- Light peach or soft pink alcohol marker (or colored pencil)
Step 1: Setting the Composition
-
Lightly sketch the grid:
Start by using your ruler and pencil to draw a 3×3 grid on your paper. Since there are nine ghosts, you need nine even rectangles. Aim for rectangles that are roughly 1.5 inches wide by 2 inches tall, leaving a small gap between each one for a neat gallery look. -
Refine the spacing:
Check the margins around your grid to ensure it sits centrally on the page. It helps to mark the center point of the page first and work outward so your grid doesn’t end up skewed to one side. -
Add the background color:
Take your light peach or pink marker and carefully fill in each rectangular box. I like to use long, vertical strokes to keep the ink application smooth and avoid obvious streaks. Let this dry completely before moving on to avoid ink bleeding.
Ink Confidence
If you’re nervous about inking directly over the marker, draft the ghost faces lightly in pencil first to ensure the expressions look exactly how you want.
Step 2: Drawing the Ghost Shapes
-
Outline the first ghost body:
In the top left box, use your black fine liner to draw a simple arch shape. Start from the bottom left, curve up towards the top of the box, and come back down. -
Create the wavy bottom:
Instead of drawing a straight line across the bottom, connect the two sides of your arch with a wiggly, scalloped line. Aim for three or four little bumps to suggest the ghost is floating. -
Repeat for the remaining boxes:
Continue this process for the other eight boxes. Try to make the ghosts generally the same size, but don’t worry about perfection; slight variations in their ‘floatiness’ add character. -
Add the defining outline:
Go over the rectangular borders of your peach boxes with the black fine liner. This frames each ghost like a little trading card. Use your ruler again here for crisp, straight lines.
Step 3: Adding Expressions
-
Top row: The Classic & The Happy:
For the first ghost, draw two medium circles for eyes and a tiny triangle mouth. For the middle ghost, draw oval eyes and a wide, D-shaped open mouth to make it look excited. -
Top row: The Surprised:
On the third ghost (top right), draw small dot eyes and a tiny vertical oval mouth, giving it a look of mild shock. -
Middle row: The Shy & The Confused:
For the first ghost in the second row, add sideways glances by drawing pupils on the right side of the eyes and a small ‘u’ mouth. The middle ghost gets one eye slightly higher than the other and a questioning hook mouth. -
Middle row: The Spooked:
For the rightmost ghost in the middle row, darken the eyes into tall ovals and add a taller oval mouth to create a classic ‘Ooooo’ expression. -
Bottom row: The Sweet & The Skeptical:
Give the bottom-left ghost large, shiny eyes (leave a white dot in the dark pupil) and a tiny smile. The middle ghost gets small bead eyes and a crooked or very small mouth. -
Bottom row: The Anxious:
For the final ghost, draw taller oval eyes and a small, nervous squiggly mouth. -
Adding tiny arms:
Go back through and add tiny, nub-like markings at the bottom corners of the ghost bodies where the wavy line starts. These subtle curves act as little arms or just folds in the sheet. -
Clean up sketch lines:
Once the black ink is totally dry, gently run your eraser over the whole page to remove the original pencil grid lines.
Uneven Color Fix
If your marker leaves streaks, color in small circular motions rather than straight lines to blend the pigment more seamlessly into the paper fibers.
Now you have a whole gallery of expressive spirits ready to haunt your notebook
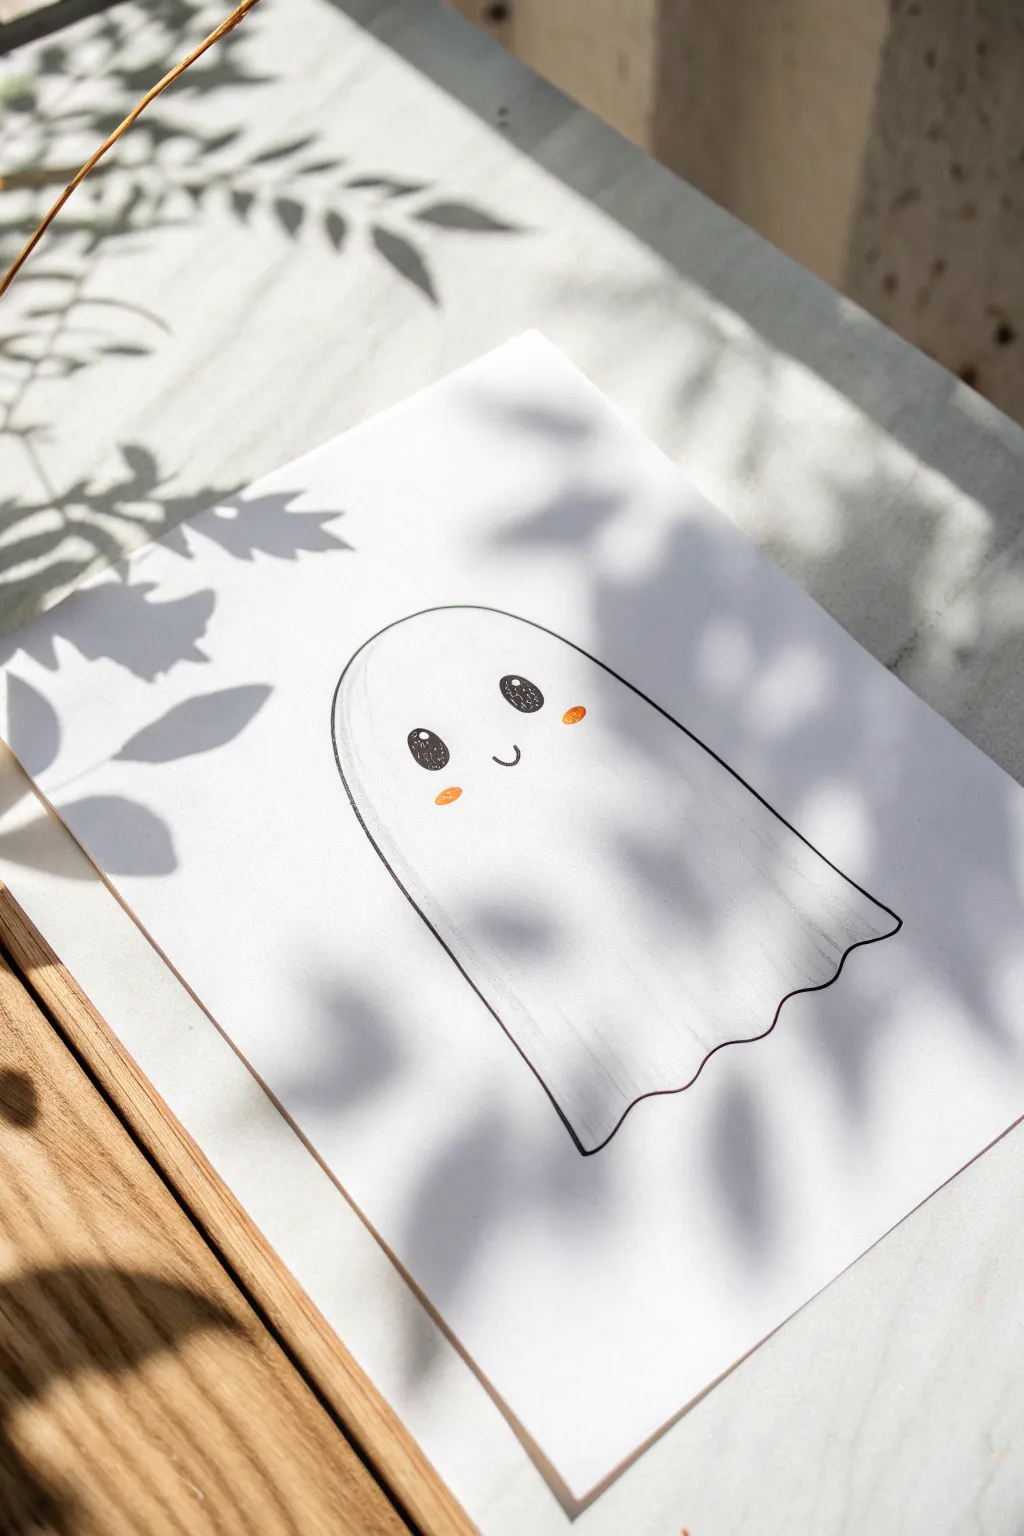
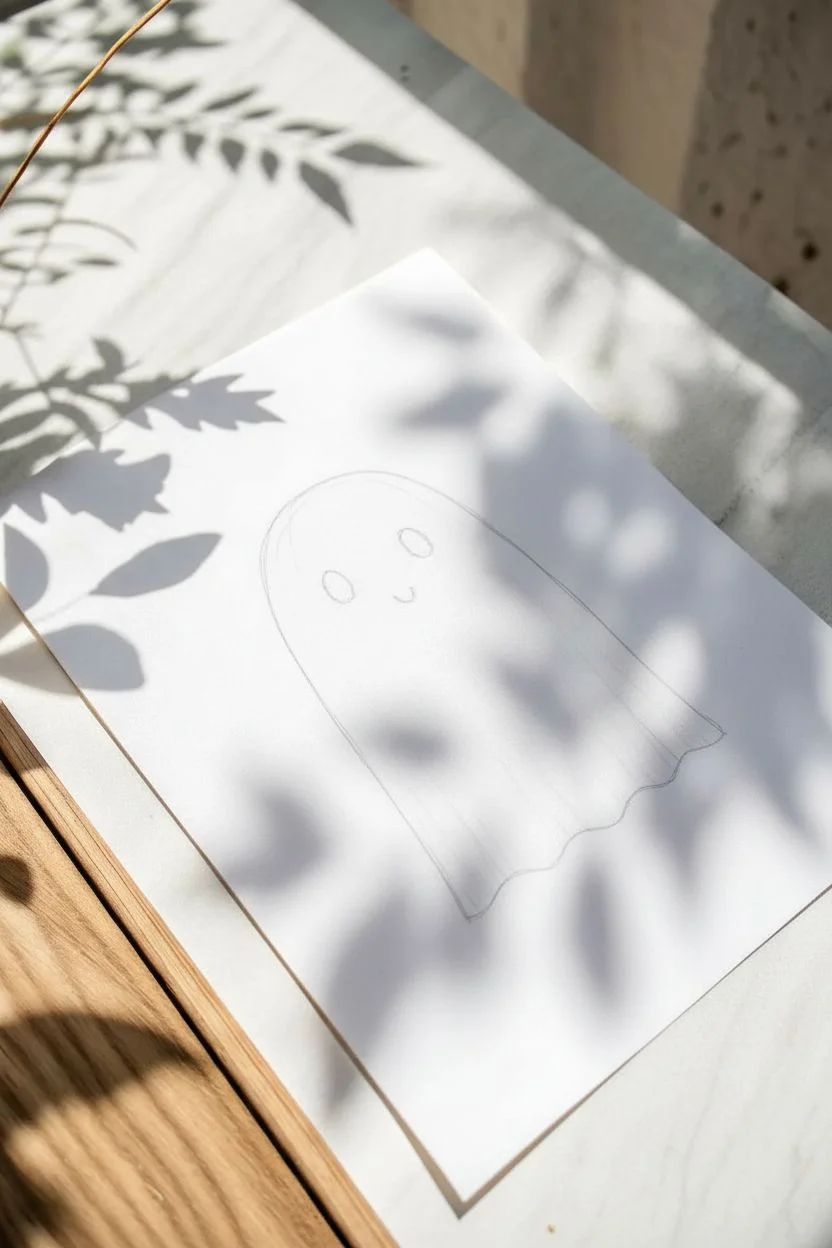
Simple Ghost With Soft Edge Shading
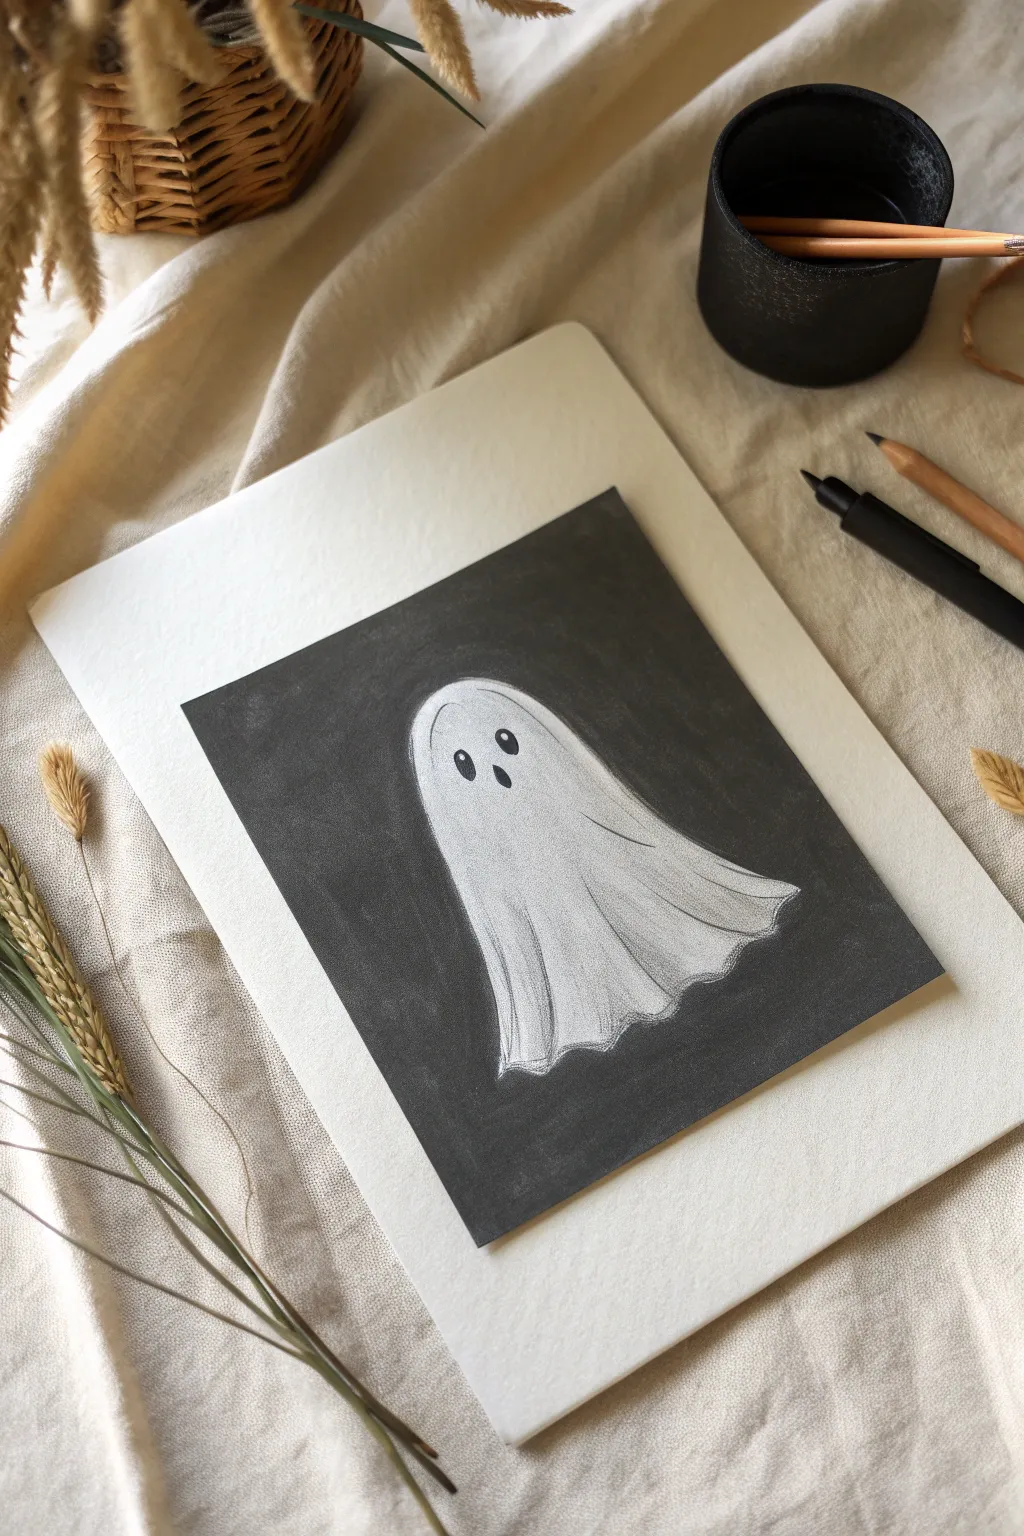
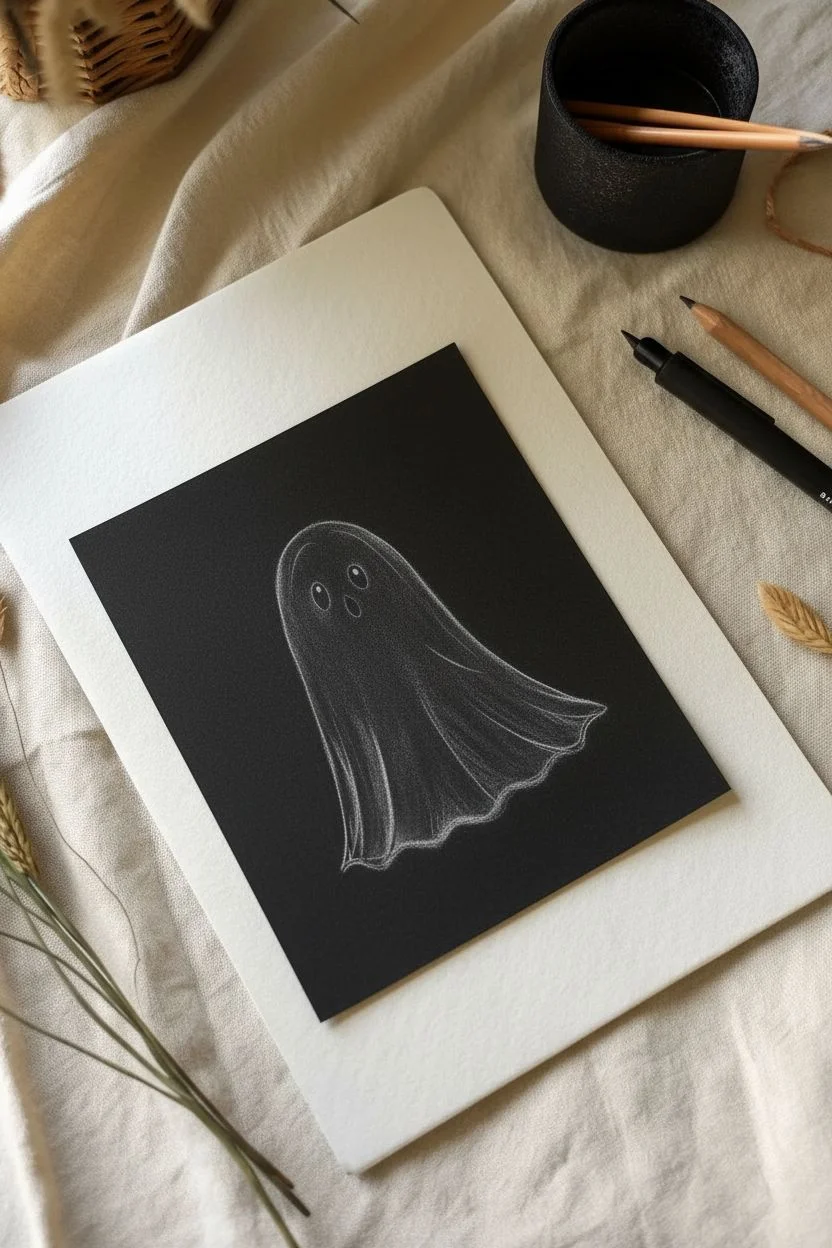
This charming project captures the classic spirit of Halloween with a soft, glowing ghost set against a deep charcoal background. The contrast between the stark black paper and the luminous white shading creates a beautiful, spectral effect that feels both spooky and cute.
Step-by-Step Tutorial
Materials
- Black drawing paper or cardstock (cut to a rectangle)
- White pastel pencil or white charcoal pencil
- Soft charcoal stick (black) or black pastel
- Blending stump (tortillon) or cotton swab
- White gel pen or fine liner
- Black fine liner or marker
- Larger sheet of textured cream or white paper for mounting
- Double-sided tape or glue stick
- Fixative spray (optional)
Step 1: Setting the Scene
-
Prepare the background:
Begin by cutting your black drawing paper into a vertical rectangle, roughly 5×7 inches. If you don’t have black paper, you can use a soft black charcoal block to densely shade a rectangle onto white paper, blending it until perfectly smooth and dark. -
Sketch the outline:
Using your white pastel pencil with very light pressure, sketch the basic ghostly shape. Start with a rounded dome for the head. -
Form the body:
Extend lines down from the head, creating a flowing, draped look. Let the lines flare out slightly towards the bottom. -
Add the hem:
Connect the bottom lines with a wavy, rippled edge to simulate floating fabric.
Step 2: Building the Ghost
-
Initial fill:
Lightly color inside your ghost outline using the white pastel pencil. Don’t press hard yet; you want a semi-transparent, hazy base layer. -
Create folds:
Draw faint vertical lines running from the bottom waves upward towards the ‘shoulders’ of the ghost. These will guide your shading for the fabric folds. -
Deepen the highlights:
Pressing harder with your white pencil, color the tops of the folds (the parts of the fabric that would stick out). This creates the high points. -
Shadowing the valleys:
Leave the areas between the folds—the ‘valleys’—darker. You can lightly shade these with a black pencil or simply leave the background showing through to create depth. -
Blend for softness:
Use your blending stump or a cotton swab to gently smudge the white pastel. I like to blend in the direction of the fabric flow (up and down) to maintain the texture.
Clean Lines Tip
Keep a kneaded eraser handy. If your white pastel smudges into the black background, dab it (don’t rub) to lift the dust without ruining the dark paper texture.
Step 3: Refining Details
-
Define the edges:
Go back over the outer contour of the ghost with the white pencil to make the silhouette crisp against the dark background. -
Draw the face:
Using a black fine liner or marker, draw two tall ovals for eyes and a smaller oval for the mouth. Place them slightly higher up on the head. -
Add eye highlights:
Add a tiny dot of white gel pen inside each black eye oval to give the ghost a cute, lively expression. -
Intensify contrast:
If the background looks a bit dusty from the white pastel, carefully darken the space immediately around the ghost with black charcoal or marker to make the white really pop.
Make It Glow
For a supernatural effect, lightly smudge a tiny bit of white pastel into the black background immediately surrounding the ghost to create a faint aura.
Step 4: Mounting and Finishing
-
Protect the art:
If you used pastel or charcoal, give the drawing a quick spray with fixative to prevent smudging. -
Prepare the mount:
Take your larger sheet of textured cream or white paper. This creates a gallery-style matte for your drawing. -
Center the artwork:
Place your black ghostly drawing in the center of the cream paper to check the positioning. -
Adhere:
Apply double-sided tape or a thin layer of glue to the back of the black paper and press it firmly onto the cream mount.
Now you have a timeless, haunting little artwork ready to display for the season
Ghost Doodle Sheet With 12 Quick Variations
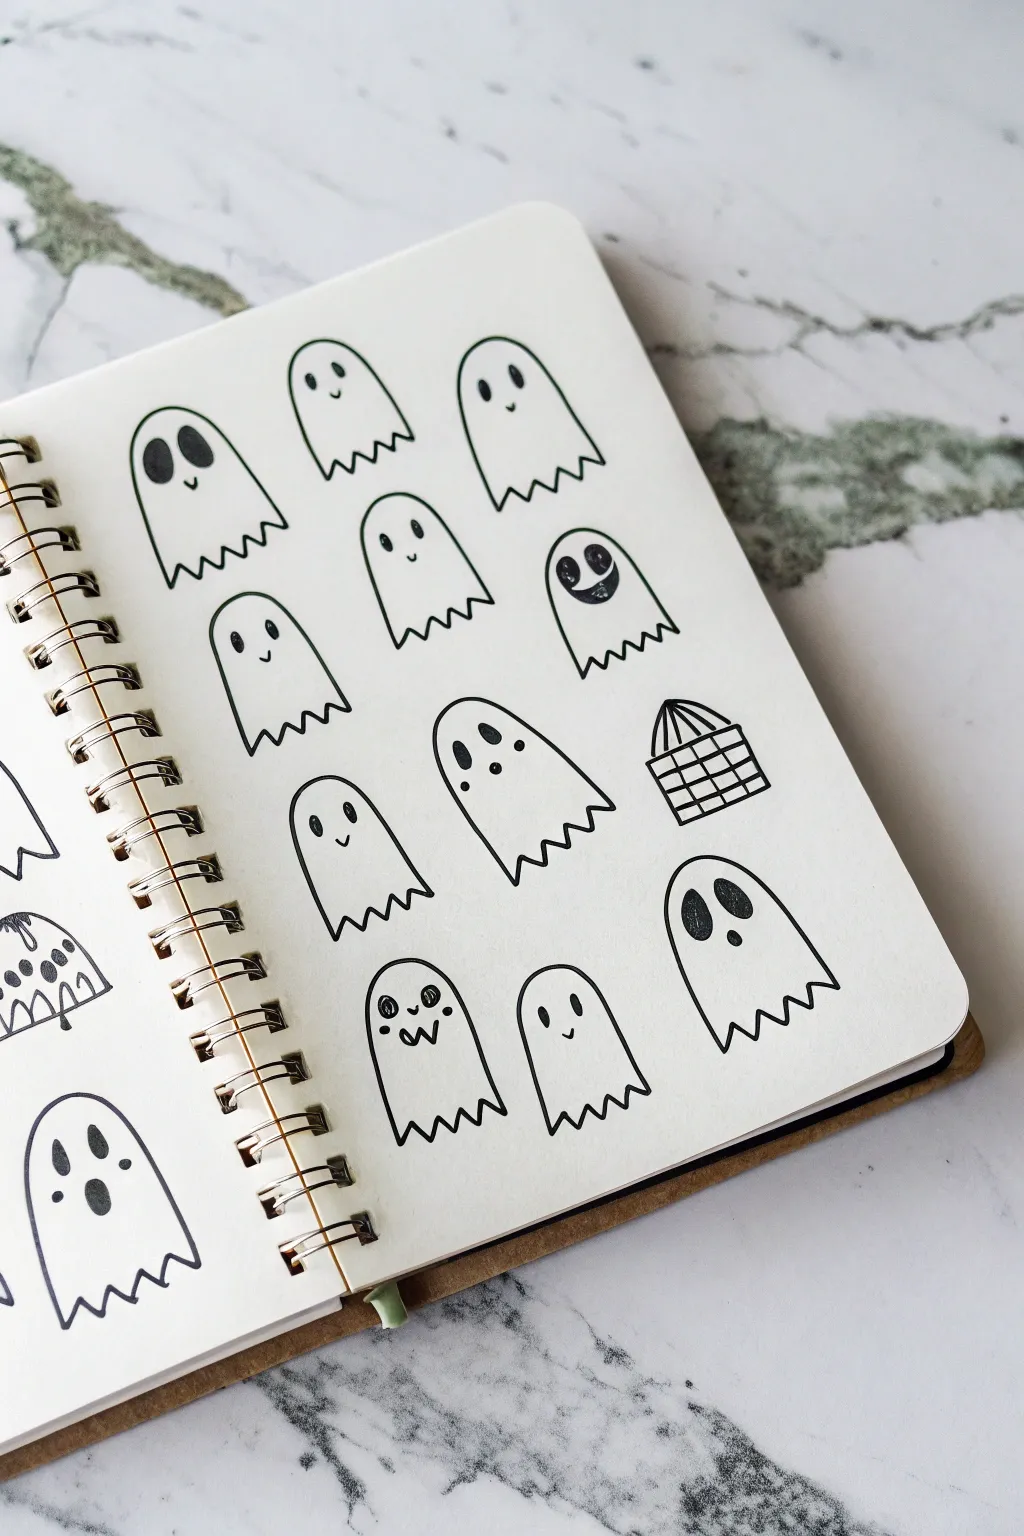

Fill your sketchbook with this charming haunted house of doodles, featuring twelve unique ghost personalities that range from spooky to sweet. This simple line art project is perfect for practicing expressions and creating cute Halloween-themed stationery or journal spreads.
Detailed Instructions
Materials
- Spiral-bound sketchbook or bullet journal
- Fine liner pen (black, 0.5mm or 0.8mm)
- Pencil (optional, for sketching)
- Eraser
Step 1: Setting the Layout
-
Planning the grid:
Visualize a grid on your page that is roughly three ghosts wide and four ghosts tall. This doesn’t need to be mathematically perfect—the charm lies in the hand-drawn organic feel—but keeping them somewhat aligned helps the page look cohesive. -
Sketching the base shapes:
If you’re nervous about ink, lightly sketch an upside-down ‘U’ shape for each ghost. Vary the height and width slightly for each one; some can be tall and slender, while others are short and stout.
Step 2: Drawing the Ghost Bodies
-
The classic shape:
Start with the first ghost in the top left. Draw a high arch for the head. -
Adding the squiggly hem:
Instead of a flat line at the bottom, close the shape with a jagged or wavy line. Think of drawing sharp ‘M’ or ‘W’ shapes connected together to mimic a tattered sheet. -
Varying the hemlines:
As you draw the subsequent ghost bodies, mix up the bottom edges. Make some waves smooth and curvy, while others can be sharp and triangular like cartoon teeth. -
Creating movement:
For a few ghosts, like the one in the third row, angle the body slightly to the left or right to make it look like they are floating or dancing.
Sheet Variation
Make the bottom hem ‘curtains’ match the ghost’s mood. Use sharp spikes for angry or scared ghosts, and soft, rolling curves for the calm and happy ones.
Step 3: Giving Them Personality
-
The friendly duo:
For the top left ghost, draw two large, tall ovals for eyes and fill them in completely black. Add a tiny ‘u’ shape between them for a smile. -
The classic spook:
Move to the next ghost. Use simple dots for eyes and a small smile. Keep the features small and centered high on the head for a cute look. -
Expressive eyes:
Experiment with eye shapes. For the ghost in the second row, draw larger circles but leave a white highlight inside to make them look shiny. -
The wobbly ghost:
Draw one ghost with a very wavy body outline, suggesting it’s shaking or shimmering. Give it large, surprised circular eyes with big pupils. -
The blushing ghost:
Create a shy expression by drawing eyes that look sideways and adding two tiny diagonal lines under the eyes for blush marks. -
The silly face:
For a playful variation, draw a ‘w’ mouth instead of a smile. Pair this with wide-set eyes to give the character a mischievous vibe. -
The surprised O-face:
Draw three vertical ovals: two for the eyes and a larger one in the center for an open mouth, like it’s saying ‘Boo!’ -
The wandering eye:
Draw two large circles for eyes, but place the black pupils looking in different directions for a goofy, confused effect. -
The happy squint:
Use small upside-down crescents for eyes to make a ghost look like it is laughing or smiling with its eyes closed. -
Adding accessories:
In the fourth row, try drawing a simple grid pattern on one ghost’s bottom half (like a plaid skirt) or give one a dripping texture on its head for variety.
Ink Smudging?
If your hand smudges the ink as you move across the page, place a scrap piece of paper under your drawing hand to protect the finished ghosts while you work.
Step 4: Final Details
-
Deepening the blacks:
Go back over the eyes and mouths. I like to make sure the black ink is solid and dark, which really makes the expressions pop off the white page. -
Erasing sketches:
Once the ink is completely dry—give it a good minute—gently erase any pencil guide lines you might have made earlier. -
Reviewing the spread:
Check the spacing. If there’s an awkward empty spot, you can fill it with a tiny floaty doodle like a small star or a bat.
Now you have a whole page of spirited characters ready to haunt your next journaling session
Ghost With a Cozy Mug and Steam Swirls
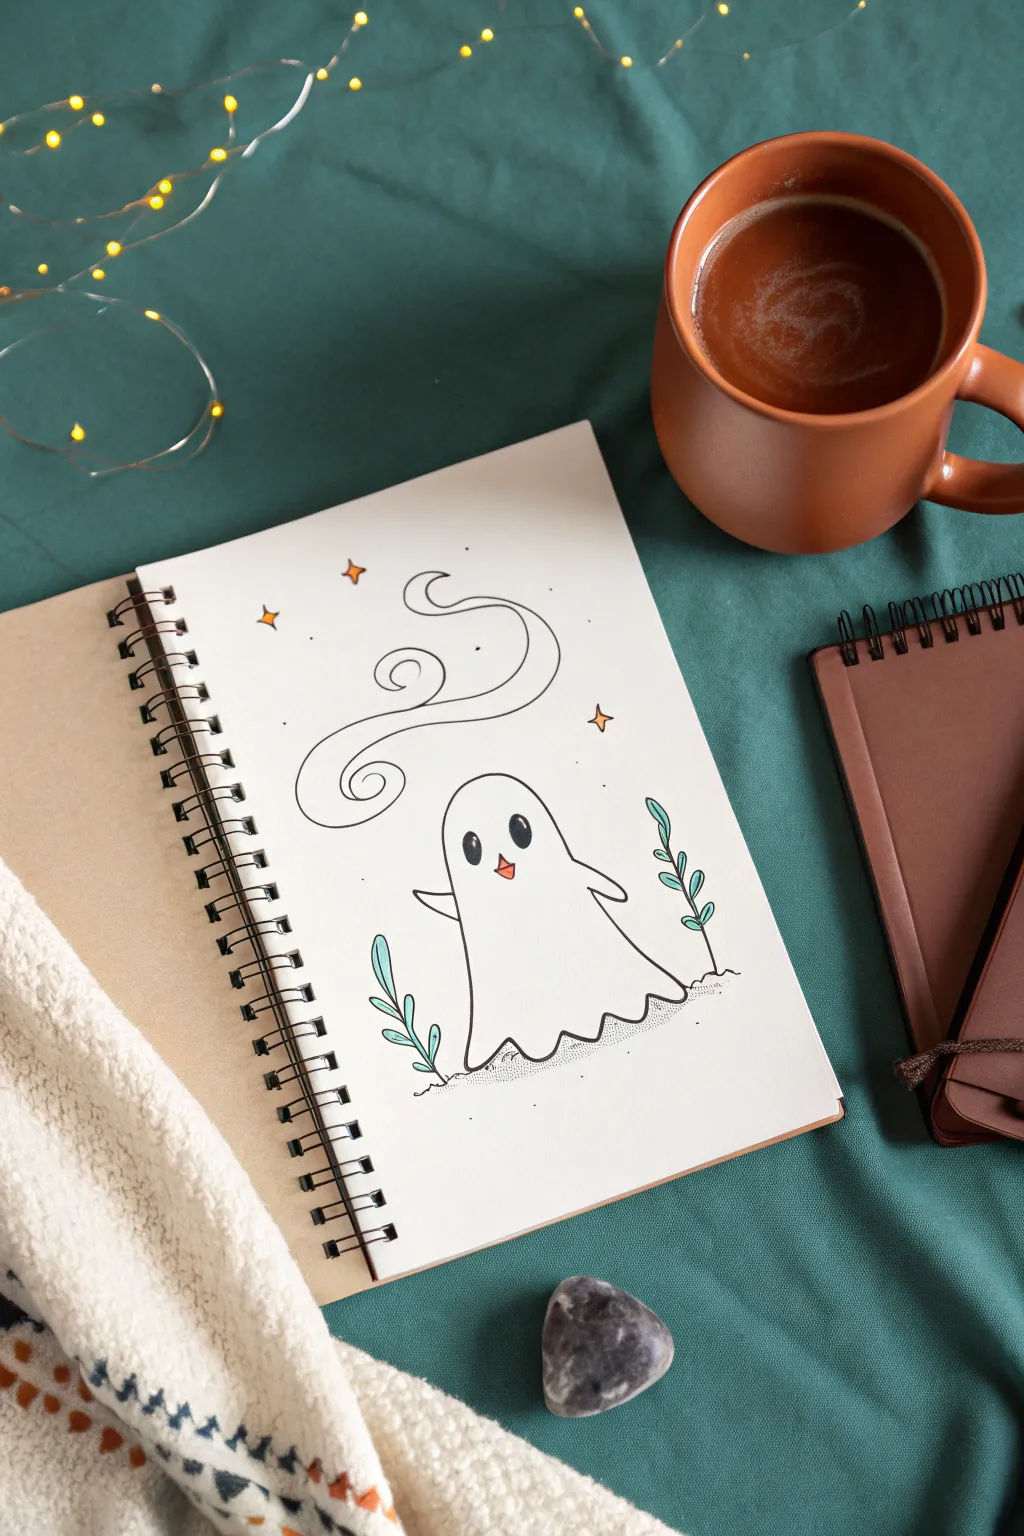
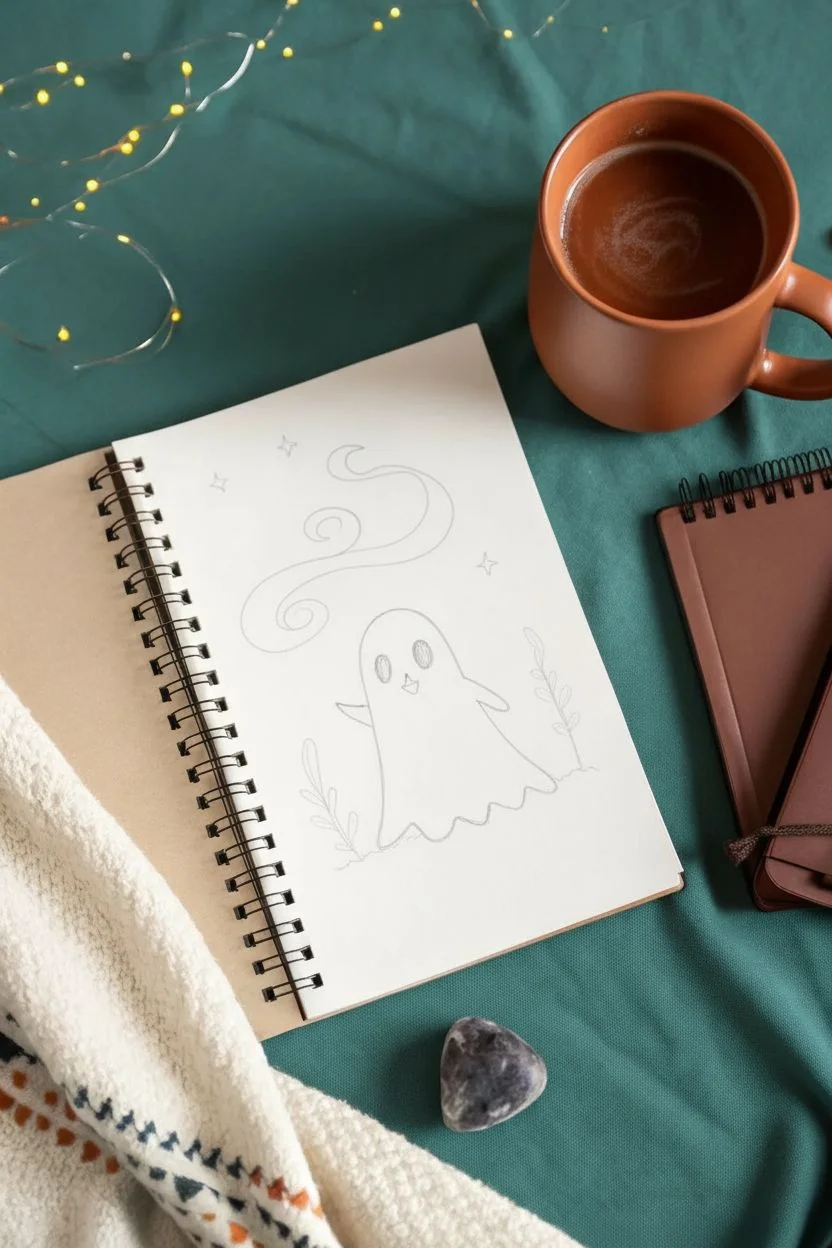
This charming sketch captures a friendly spirit emerging from the ground, surrounded by gentle foliage and swirling mist. With just a few simple lines and subtle pops of color, you can create a cozy, slightly spooky illustration perfect for an autumn sketchbook.
Step-by-Step Guide
Materials
- Sketchbook or drawing paper (heavyweight preferred)
- Pencil (HB or similar)
- Eraser
- Black fine liner pen (0.3mm or 0.5mm)
- Thicker black marker or brush pen (for filling eyes)
- Teal or mint green marker/colored pencil
- Orange or burnt sienna marker/colored pencil
Step 1: Drafting the Ghost
-
Outline the head:
Start near the center of your page by drawing a smooth, upside-down ‘U’ shape. This will be the top of the ghost’s head so make it nice and round. -
Form the body:
Extend the lines of the ‘U’ downwards, letting them widen slightly as you go to give the ghost a draped, sheet-like appearance. -
Add the wavy base:
Connect the bottom two lines with a scalloped, wavy line. Aim for about four or five little bumps to simulate the gathered fabric at the bottom of the spirit. -
Sketch the arms:
Draw two small nubs protruding from the sides of the body. Keep them rounded and short, angled slightly upwards like little flippers. -
Place the facial features:
Lightly sketch two oval shapes for the eyes in the upper third of the head. Between and slightly below them, draw a tiny triangle for the mouth.
Step 2: Adding Atmospheric Details
-
Draw the steam swirls:
Above the ghost’s head, sketch a large, flowing ‘S’ shape that loops back on itself. Create a second line parallel to the first to turn it into a ribbon-like wisp of steam or mist. -
Add a second swirl:
Draw a smaller, similar swirl just below the first one, making it look like it’s drifting out from behind the larger wisp. -
Sketch the foliage:
On the left side of the ghost, draw a curved stem with three or four simple, pointed leaves. Repeat this on the right side with a slightly taller stem. -
Add starry accents:
Scatter three small, four-pointed sparkles around the ghost—one on the left, one on the right, and one near the top left corner. -
Suggest the ground:
Lightly sketch a horizontal horizon line right at the base of the ghost, breaking the line where the ghost’s body sits.
Smoother Swirls
Draw the steam swirls from your shoulder rather than your wrist. This larger movement helps create fluid curves.
Step 3: Inking and Coloring
-
Ink the main outlines:
Using your fine liner, carefully trace over your pencil lines for the ghost, steam, and plants. Keep your hand steady for clean, crisp lines. -
Fill the eyes:
Use a thicker black marker to fill in the oval eyes completely. Leave a tiny white speck in the upper corner of each eye for a highlight if you want extra cuteness. -
Erase pencil marks:
Once the ink is fully dry—I usually give it a solid minute or two just to be safe—gently erase the underlying pencil structure. -
Color the mouth and stars:
Take your orange marker or pencil and fill in the triangular mouth. Use the same color to fill in the three sparkles floating around the ghost. -
Color the leaves:
Use the teal or mint green tool to color just the leaves on your plants, leaving the stems black. -
Stipple the ground:
Using your fine liner, make tiny dots (stippling) along the ground line you sketched earlier. Concentrate the dots just under the ghost and near the plant bases for shading.
Glow Up Idea
Trace the outer edge of the ghost with a very light grey marker one or two times to give it a soft, shadowed dimension.
Now you have a sweet little spectral friend ready to haunt your pages
Ghost With Lantern Lighting the Dark
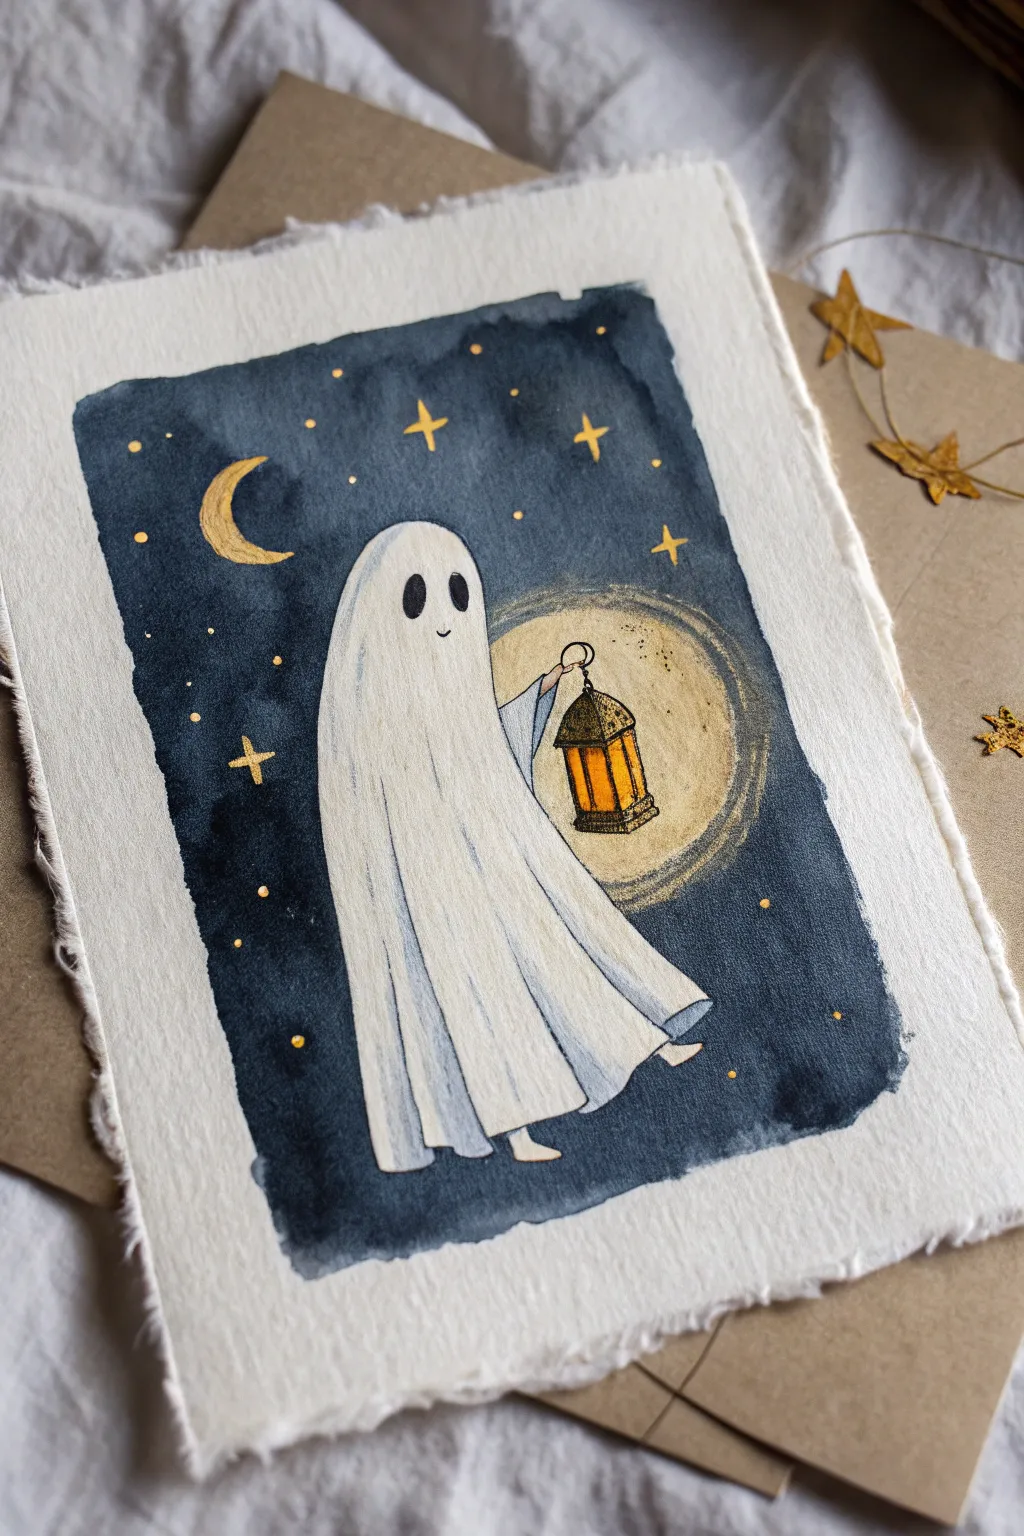
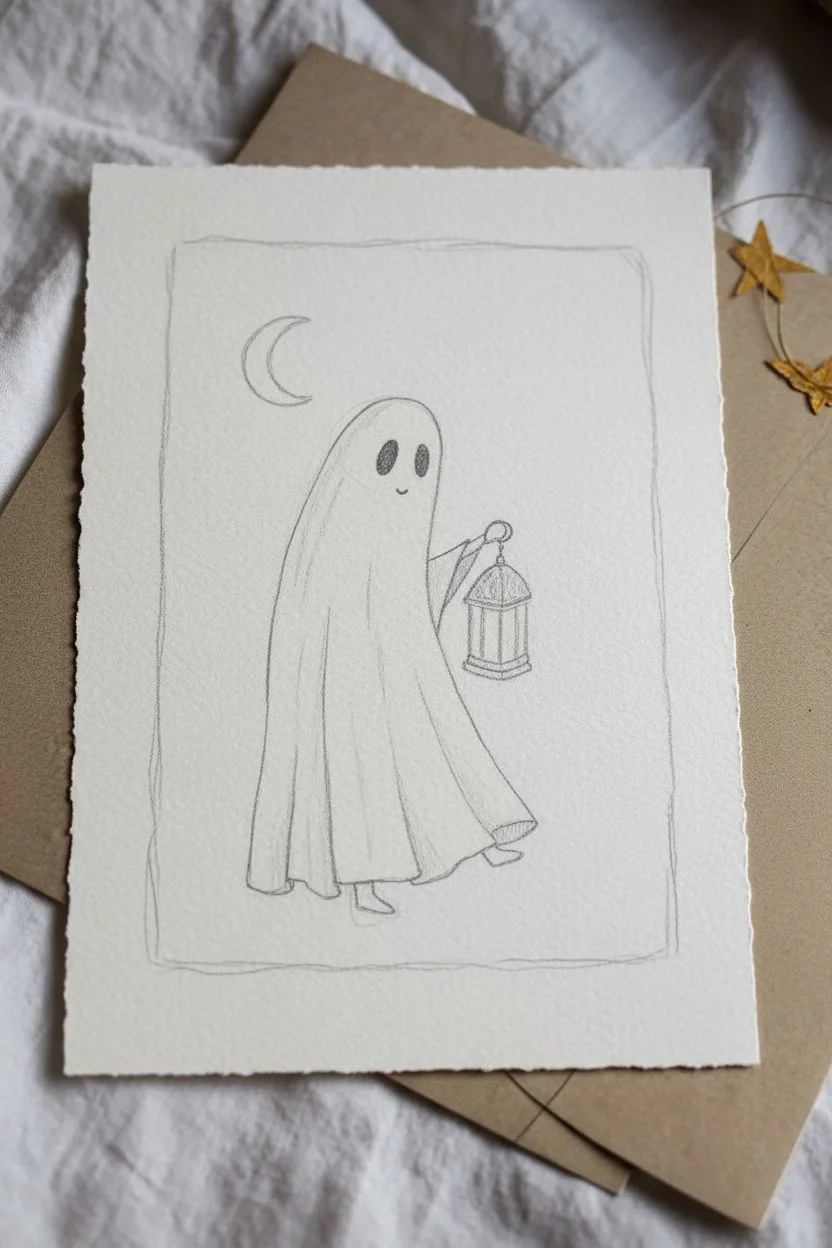
Capture the magic of a starry night with this charming watercolor illustration of a friendly phantom lighting their way. Using a deep indigo wash and touches of gold, you’ll create a cozy rather than spooky atmosphere perfect for seasonal greeting cards.
Detailed Instructions
Materials
- Cold press watercolor paper (deckled edge optional)
- Watercolor paints (Indigo/Payne’s Grey, Yellow Ochre, Burnt Sienna)
- White gouache or white gel pen
- Gold metallic watercolor or gold ink
- Pencil (HB) and eraser
- Round watercolor brushes (size 2 and 6)
- Fine liner pen (black, waterproof)
- Masking fluid (optional)
- Clean water and paper towels
Step 1: Sketching the Composition
-
Outline the ghost:
Begin by lightly sketching a tall, rounded arch shape for the ghost’s body. Let the bottom hem flow with wavy, fabric-like folds to suggest movement, rather than a straight line. -
Add the arm and lantern:
Draw a small arm emerging from the right side of the sheet. Hanging from the hand, sketch a vintage lantern shape—a rectangular prism with a capped lid and a wire handle. -
Detail the face and moon:
Place two tall oval eyes high on the head and a tiny curved smile between them. In the upper left corner, sketch a crescent moon facing inward. -
Define the background border:
Instead of filling the whole page, draw a rough, organic rectangular border around your ghost. This framed look gives the piece a lovely vignette style.
Bleeding Edges?
If your dark blue sky bleeds into the ghost while painting, use a clean, damp brush to ‘lift’ the unwanted color while it’s still wet, dabbing it onto a paper towel.
Step 2: Painting the Background
-
Prepare the wash:
Mix a generous amount of Indigo or Payne’s Grey. You want a deep, midnight blue tone that is consistent but not fully opaque. -
Paint around the ghost:
Using your size 6 brush, carefully paint the night sky inside your rectangular border. Work slowly around the ghost’s outline and the moon to keep the paper white in those areas. -
Create the lantern glow:
Around the lantern, leave a rough circular area unpainted or wash it very lightly with clean water to dilute the blue paint as it approaches the light source. This creates a halo effect. -
Dry thoroughly:
Let this dark layer dry completely. I prefer to wait at least 15 minutes to avoid any colors bleeding into the white areas later.
Make It Sparkle
Sprinkle a pinch of ultra-fine iridescent glitter onto the wet gold paint of the moon and stars. When dry, shake off the excess for real texture and shine.
Step 3: Bringing the Ghost to Life
-
Add shadows:
Dilute a tiny bit of your dark blue or grey with lots of water to make a pale shadow wash. Paint vertical stripes following the folds of the ghost’s sheet to give it dimension. -
Paint the feet:
At the very bottom hem, use a skin tone or pale beige to color the tiny feet peeking out. -
Fill the eyes:
Using deeply concentrated black or dark indigo paint, fill in the oval eyes, leaving a tiny pinprick of white paper in each for a sparkle highlight.
Step 4: Illumination and Details
-
Light the lantern:
Paint the glass panes of the lantern with a bright Yellow Ochre or warm orange. Let the color fade slightly in the center to look like a burning flame. -
Paint the lantern frame:
Use Burnt Sienna or a dark brown to carefully paint the metal structure of the lantern. A size 2 brush works best for these fine lines. -
Create the halo:
Take a very diluted yellow or gold wash and paint a large circle around the lantern (over the dark blue background). If the blue is dry, the yellow will sit on top creating a greenish-glow transparency. -
Add metallic accents:
Using gold paint, fill in the crescent moon. Then, paint small four-point stars scattered across the dark background. -
Apply finishing touches:
For extra magic, add tiny dots of gold or white gouache around the stars to simulate distant stardust. If needed, re-outline the lantern with a fine black pen to sharpen the details.
Once dry, your luminous little ghost is ready to frame or send as a delightful autumn greeting
Ghost With Heart Motif for Sweet Spooky Vibes
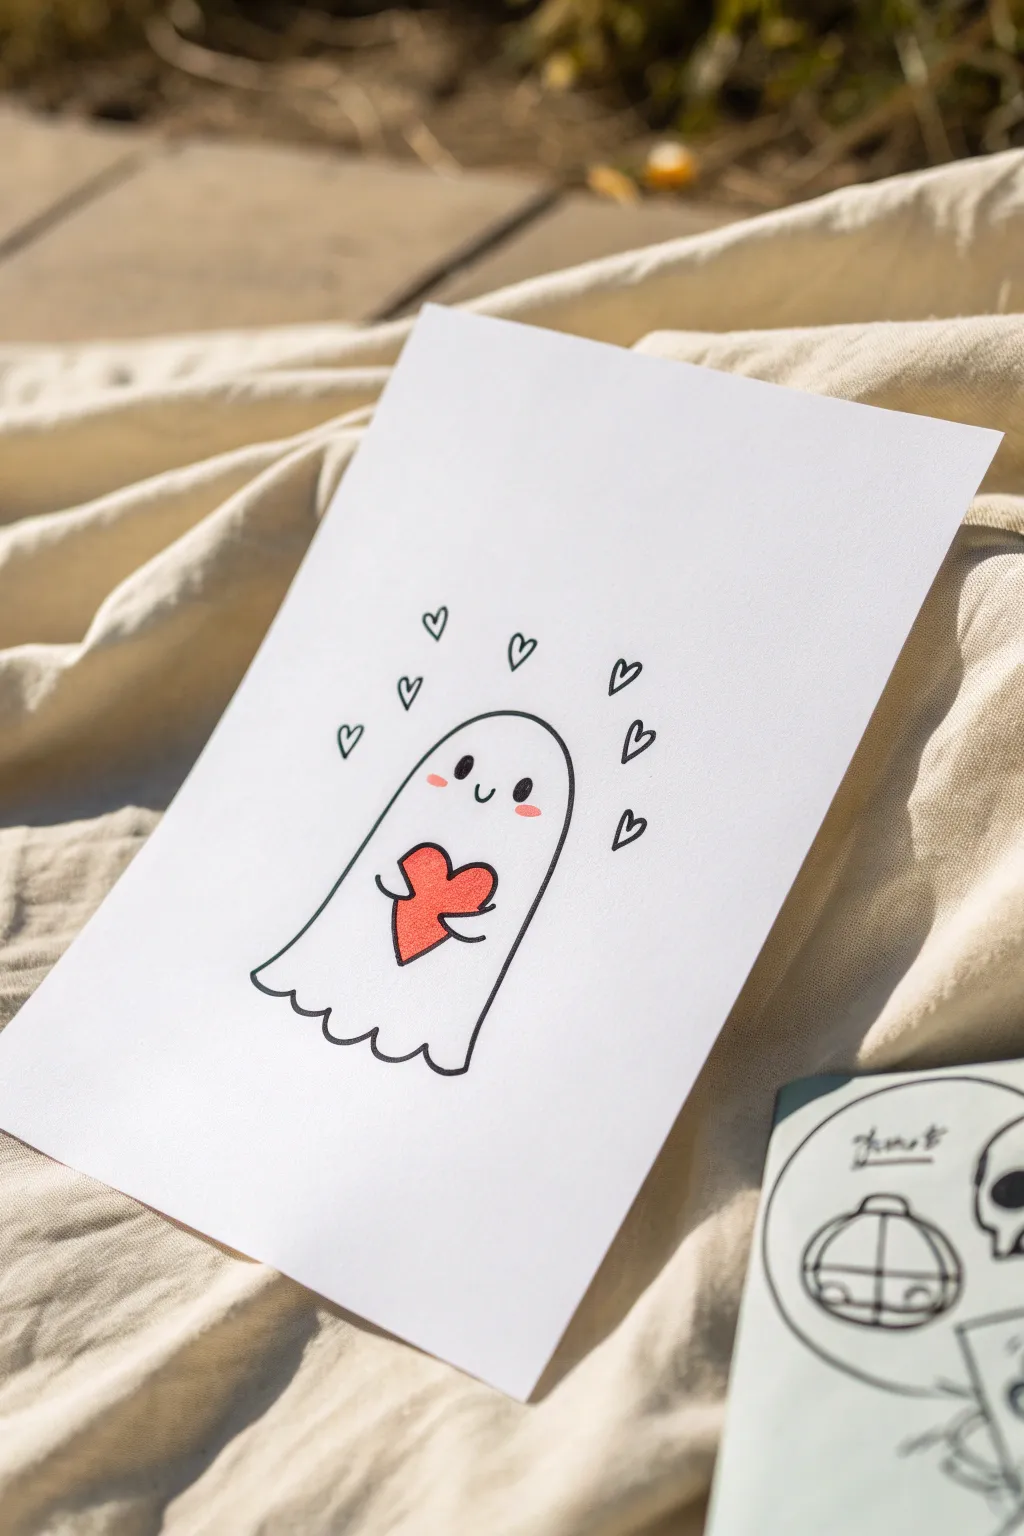

This adorable line art project captures the softer side of the spooky season with a friendly ghost clutching a vibrant red heart. It features clean back ink lines and minimalist coloring, making it a perfect quick sketch for greeting cards or seasonal decor.
Step-by-Step Tutorial
Materials
- White heavyweight drawing paper or cardstock (A5 size works well)
- Black fineliner pen (0.5mm or 0.8mm nib)
- Red marker or colored pencil
- Pencil (HB or 2B)
- Eraser
Step 1: Drafting the Outline
-
Start the head:
Begin by lightly sketching a smooth, upside-down ‘U’ shape in the center of your paper with your pencil. This will form the top of the ghost’s head and its sides. -
Form the body:
Extend the sides of the ‘U’ downwards, widening slightly as you go to give the ghost a soft, drape-like appearance. -
Create the hem:
Connect the bottom left and right lines with a wavy, scalloped line. Aim for about four or five gentle curves to simulate the bottom of a sheet. -
Add the face:
Near the top-center of the shape, sketch two small ovals for eyes and a tiny ‘u’ shape right between them for a smiling mouth. -
Sketch the heart:
In the middle of the body, draw a large heart shape. It should be positioned low enough so there is space for the arms. -
Draw the arms:
Add two short, curved lines coming from the side of the body, wrapping inward to touch the sides of the heart, showing that the ghost is holding it. -
Add floating hearts:
Sketch about five or six smaller heart outlines floating in an arch above the ghost’s head to frame the character.
Clean Lines Pro-Tip
When inking long curves like the ghost’s head, lock your wrist and move your entire arm from the elbow. This prevents shaky lines.
Step 2: Inking and Coloring
-
Ink the main outline:
Using your black fineliner, firmly trace over the main ghost shape. Try to keep your hand steady for a smooth, continuous line. -
Define the features:
Ink the eyes, filling them in completely black except for small white dot highlights if you want extra cuteness. Ink the smile and the scalloped bottom hem. -
Ink the accessories:
Trace the outline of the central heart and the small floating hearts above the head. -
Erase preparatory marks:
Wait a moment for the ink to dry completely to avoid smudging. Then, gently erase all your underlying pencil sketches. -
Color the heart:
Take your red marker or colored pencil and fill in the large heart the ghost is holding. A marker gives a bold, flat color like the example, while pencil adds texture. -
Add rosy cheeks:
Using a lighter touch with the red marker or a pink pencil, add two small oval blushes right under the eyes. -
Final check:
Inspect your lines. If any parts of the black outline look thin, go over them once more to thicken the line weight slightly for a bolder cartoon look.
Level Up: Mix Media
Cut the ghost out leaving a white border, and mount it on black construction paper using foam tape for a cool 3D pop-up effect.
Now you have a charming little spirit ready to spread some love this Halloween
Ghost Wearing Accessories Like Glasses or a Scarf
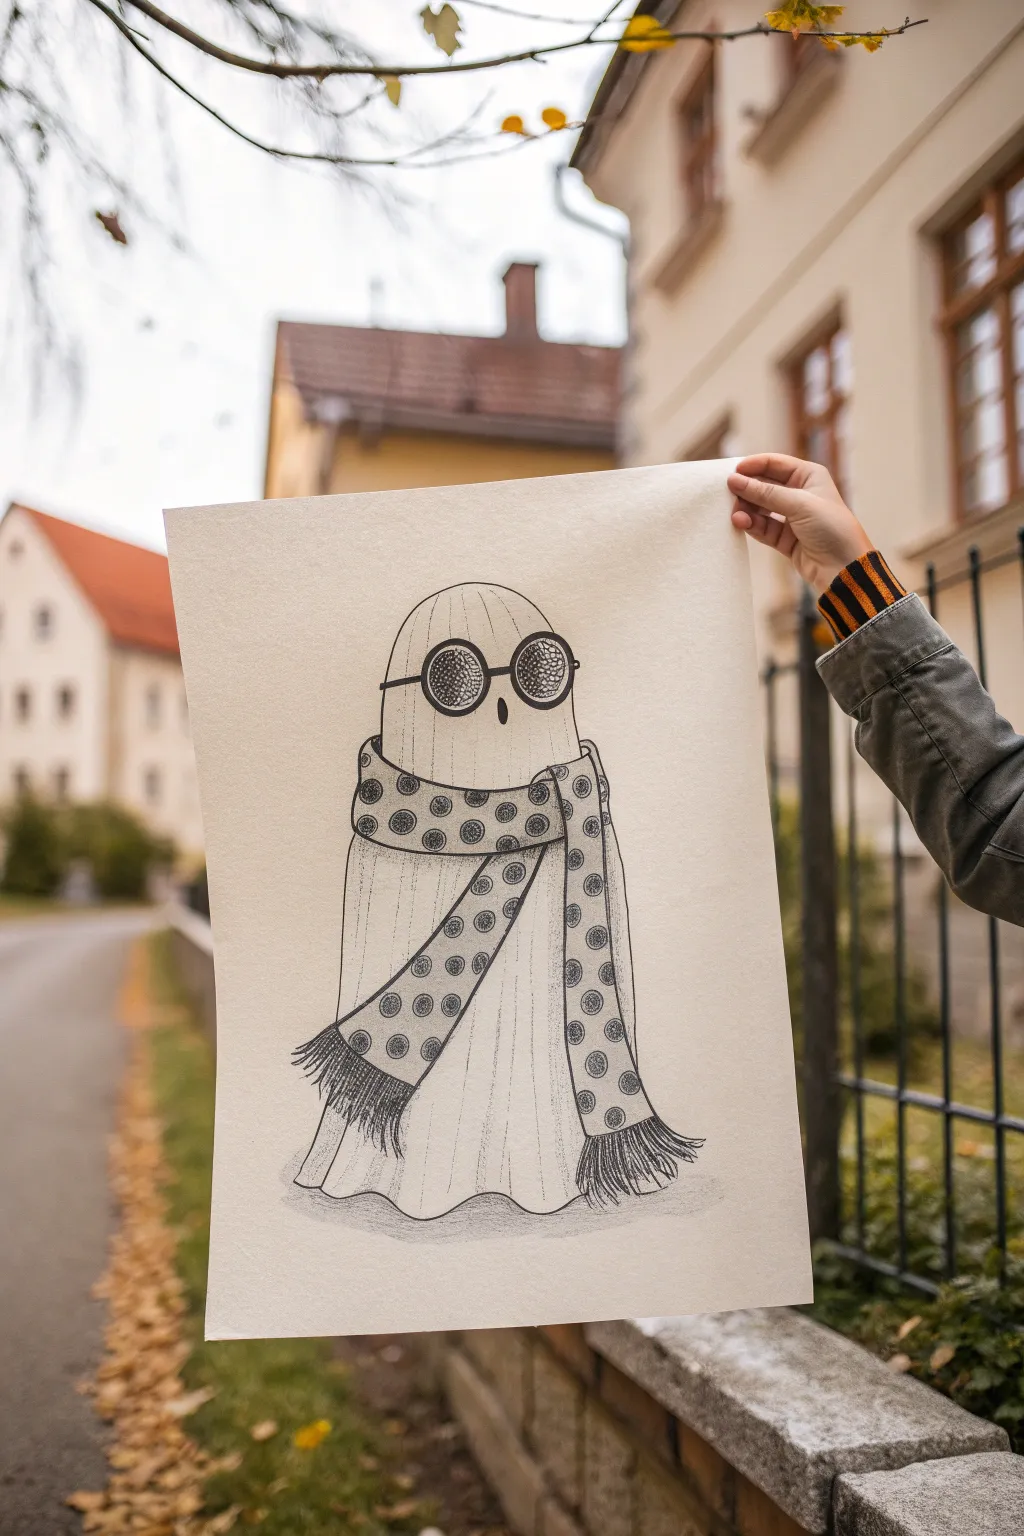
This charming illustration features a classic sheet ghost upgraded with stylish round spectacles and a cozy polka-dot scarf. Using fine liners and ink techniques like stippling and hatching, you’ll create a texture-rich character that feels both spooky and sophisticated.
Detailed Instructions
Materials
- High-quality drawing paper (smooth bristol or mixed media, approx. A3 size)
- Pencil (HB for sketching)
- Kneaded eraser
- Fine liner pens (sizes 0.1, 0.3, and 0.5mm)
- Black brush pen or broad marker
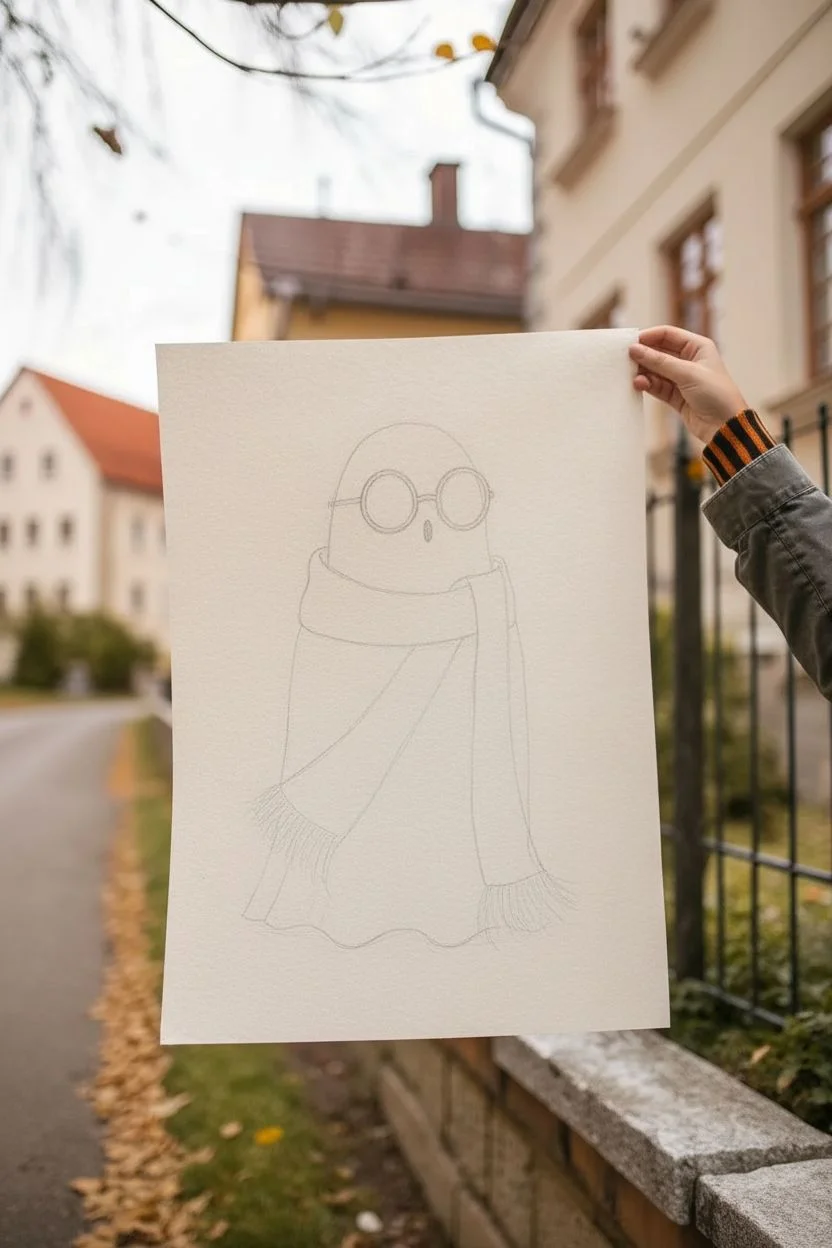
Step 1: Sketching the Structure
-
Map out the ghost shape:
Start by lightly sketching a tall, rounded arch shape for the ghost’s head and body. Keep the lines faint so they can be erased later. The shape should flare out slightly at the bottom like a bell. -
Position the glasses:
About a third of the way down from the top of the curve, draw two perfect circles for the glasses lenses. Add a small bridge connecting them and the arms extending back around the ‘head’. -
Add the mouth:
Draw a small, vertically oval shape right in the center below the bridge of the glasses for the surprised mouth. -
Drape the scarf:
Sketch the scarf wrapping around the ghost’s neck area. Draw one end draping down the front-left side and the other wrapping around the back and hanging down the right side. Don’t worry about the pattern yet; focus on the flow of the fabric. -
Define the bottom hem:
Create a wavy, uneven line at the bottom of the ghost to represent the folds of the sheet hitting the ground. Add a few vertical lines moving upward from the waves to suggest fabric folds.
Ink Smearing?
If your fine liners are smudging when you erase, switch to pigment-based liners (drawing pens) rather than water-based ones, or simply wait longer before erasing.
Step 2: Inking the Details
-
Outline the main forms:
Using a 0.3mm fine liner, carefully go over your pencil lines for the ghost’s body and the scarf outline. Keep your hand steady for smooth curves. -
Detail the glasses:
Thicken the frames of the glasses using a 0.5mm pen to make them stand out. Fill in the mouth completely black. -
Add the glasses texture:
This is a key detail: instead of coloring the lenses black, use a 0.1mm pen to fill them with tight, tiny stippling (dots) or a very dense cross-hatch pattern. This gives them a tinted, retro look. -
Draw the scarf pattern:
Inside the scarf outline, draw large, evenly spaced circles. Fill the space *around* the circles with tiny stippling dots using your finest pen. This creates a negative space polka-dot effect. -
Refine the dots:
Inside each polka dot, add a subtle texture—like a small, messy spiral or a cluster of lighter dots—to make them look like fabric rather than empty holes.
Step 3: Adding Texture and Depth
-
Add vertical hatching:
To give the ghost form, use the 0.1mm pen to draw long, thin, vertical lines running down the body. These shouldn’t be solid; break them up to look like faint fabric grain. -
Shade the folds:
Where the sheet folds at the bottom or tucks under the scarf, add denser hatching lines to create shadows. This adds three-dimensional volume. -
Create the fringe:
At the ends of the scarf, draw many fine lines bunching together to create the fringe tassels. Make them look slightly frayed and natural. -
Deepen the scarf shadows:
Add extra shading under the scarf where it wraps around the neck to show it is sitting on top of the sheet. -
Ground the ghost:
Lightly sketch a shadow on the ‘ground’ beneath the wavy hem using soft graphite cross-hatching or a very light grey marker if you have one. -
Final cleanup:
Wait at least 15 minutes for the ink to fully cure, then gently erase all remaining pencil marks with your kneaded eraser to leave a crisp black-and-white image.
Add a Splash of Color
Make the drawing pop by coloring just the scarf with a deep orange or burgundy watercolor wash, leaving the ghost and background strictly black and white.
Hang this whimsical piece in an entryway to greet guests with a spooky yet stylish hello
Ghost in Pajamas for a Bedtime Mini Scene
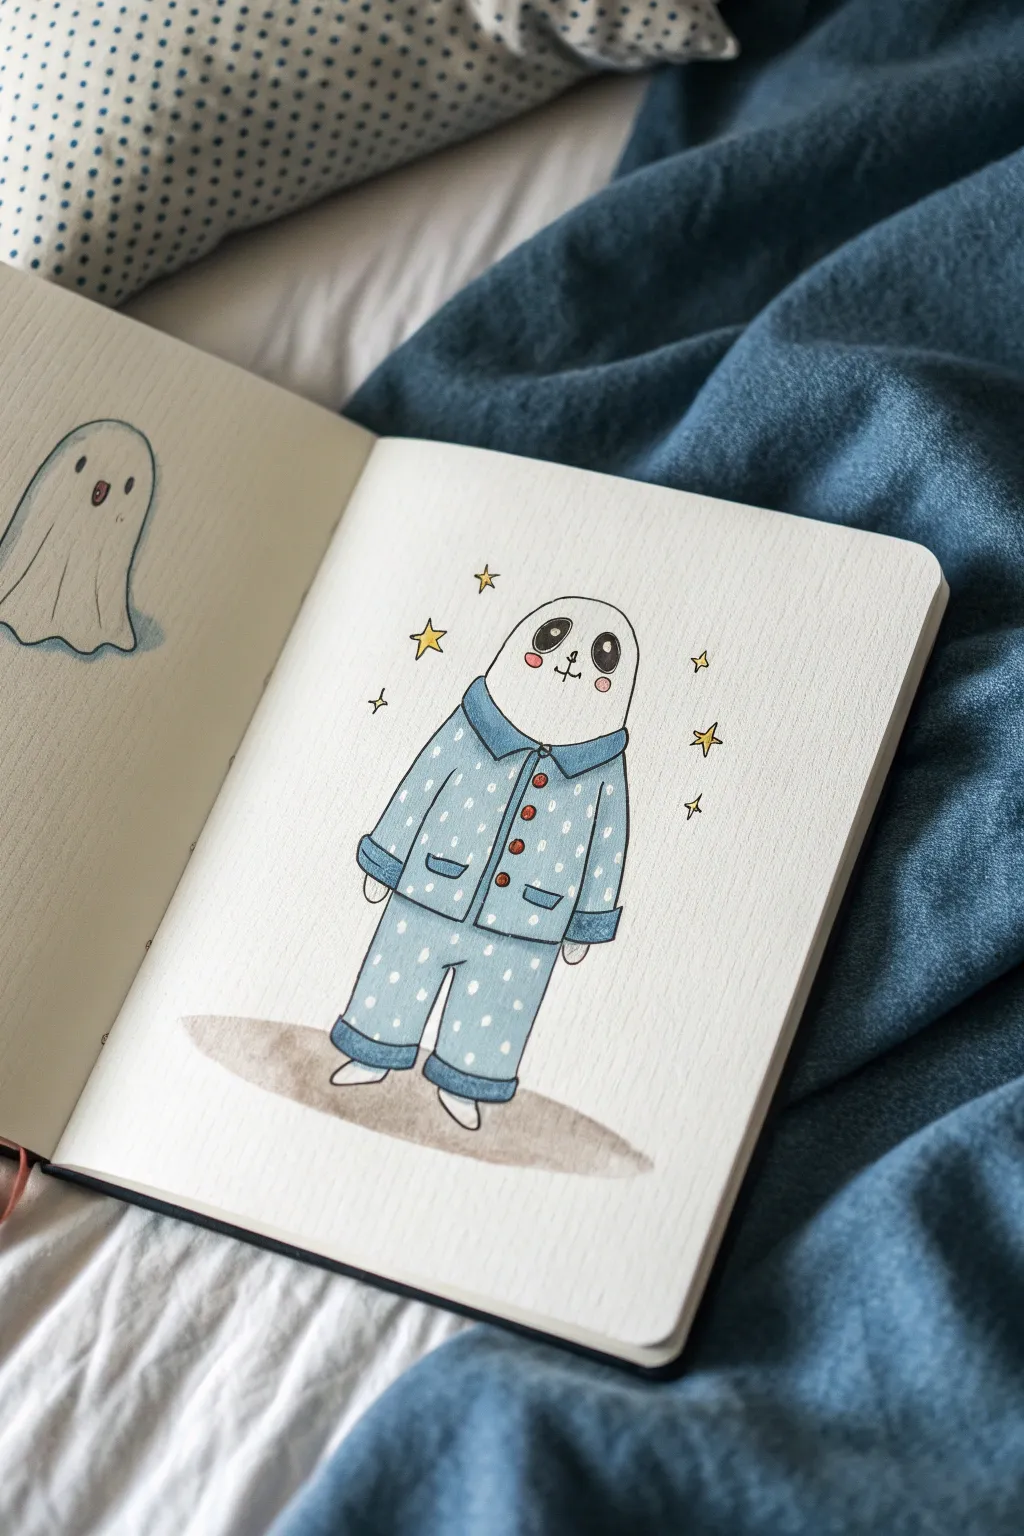
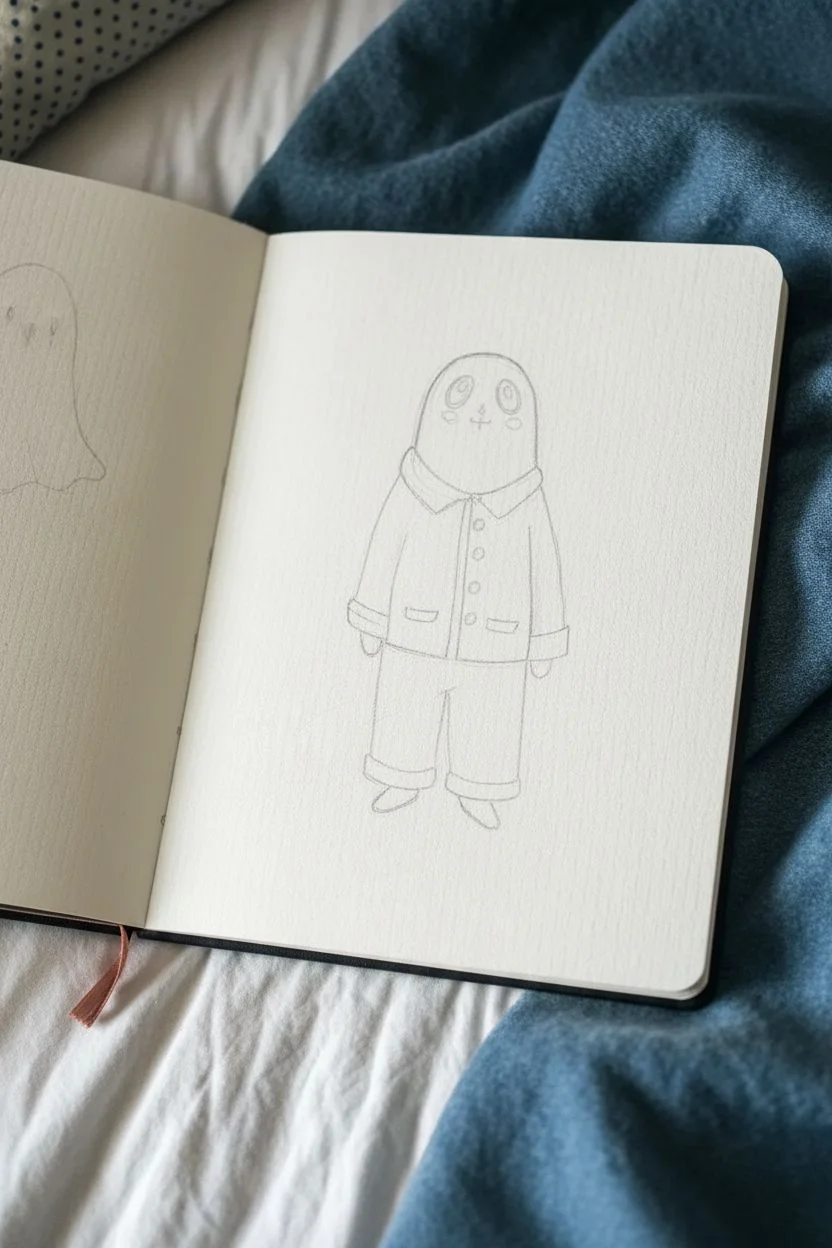
Transform a classic spooky specter into a cozy bedtime buddy with this adorable illustration featuring a ghost in blue polka-dot pajamas. The soft watercolor textures and playful star accents make this a perfect addition to any sketchbook spread.
Step-by-Step Guide
Materials
- Sketchbook with mixed media or watercolor paper
- HB Graphite pencil
- Kneaded eraser
- Fine liner pen (0.3mm or 0.5mm, waterproof black ink)
- Watercolor paints (Light Blue, Dark Blue, Red, Yellow, Warm Grey)
- Small round watercolor brush (size 2 or 4)
- White gel pen or gouache (for details)
Step 1: Sketching the Base
-
Outline the head:
Start by lightly sketching a smooth, inverted U-shape for the ghost’s head. Keep the top rounded and the sides gently sloping down. -
Form the body:
Extend the lines downward to create the body, widening slightly toward the bottom to suggest the shape of the pajama pants. -
Add the collar:
Draw a rounded collar just below the head area. It should look like two soft triangles meeting in the middle. -
Define the sleeves:
Sketch the arms resting at the sides. Add cuffs to the wrists to separate the sleeves from the little rounded ghost hands peeking out. -
Draw the pajamas:
Draw a vertical line down the center of the chest for the button placket. Add a horizontal line near the bottom to separate the shirt from the pants. -
Finish the outfit:
Complete the pants by drawing the legs and adding cuffs at the ankles. Sketch tiny, simple feet at the very bottom.
Keeping Dots Uniform
When adding the polka dots with a gel pen, engage your whole arm rather than just your wrist. Create a relaxed, rhythmic tapping motion to keep the spacing random but balanced.
Step 2: Inking the Lines
-
Trace with fine liner:
Carefully go over your pencil lines with a waterproof black fine liner. Keep your hand steady for clean, crisp lines. -
Draw the face:
Inside the head shape, draw two large ovals for eyes and color them black, leaving small white highlights. Add a tiny nose and a simple mouth line. -
Add buttons and pockets:
Ink three or four small circles down the front placket for buttons. Add two small rectangles on the shirt front to suggest pockets. -
Erase pencil marks:
Wait until the ink is completely dry to avoid smudging, then gently erase all visible pencil guidelines with your kneaded eraser.
Step 3: Adding Color
-
Paint the pajamas base:
Mix a soft, light blue watercolor wash. Fill in the pajama shirt and pants, being careful to work around the tiny white polka dots if you are skilled enough to leave negative space, or simply paint it solid to add dots later. -
Darken the trim:
Using a slightly darker blue or adding a touch of indigo to your mix, paint the collar, wrist cuffs, and ankle cuffs for contrast. -
Color the buttons:
Dip your smallest brush into red paint and carefully dab the buttons down the center of the pajamas. -
Add rosy cheeks:
Dilute a tiny bit of red or pink paint with plenty of water. Gently apply small circles of blush under the ghost’s eyes. -
Ground the figure:
Mix a warm grey wash and paint an oval shadow beneath the ghost’s feet to ground the character in space. -
Paint the stars:
Using a bright yellow, paint small, simple star shapes scattered around the ghost’s head to enhance that dreamy bedtime vibe.
Smudged Ink?
If your black fineliner smudges when you apply watercolor, stop immediately. Verify your pen is labeled ‘waterproof’ or ‘archival.’ If not, let the paint dry and re-ink later.
Step 4: Final Details
-
Add white polka dots:
If you painted the pajamas solid blue earlier, take a white gel pen or opaque white gouache now. Dot small, evenly spaced circles all over the light blue sections of the pajamas. -
Highlight the eyes:
Reinforce the highlights in the eyes with your white gel pen if the paper white got covered during the inking process.
Once the paint is dry, you’ll have a charmingly sleepy spirit ready for a restful night in your sketchbook
Transparent Ghost Over a Patterned Background
This charmingly simple ghost relies on loose, expressive line work to create the illusion of flowing fabric rather than a rigid cartoon outline. The result is a spirited illustration that feels airy and light, perfect for minimalist Halloween decor.
How-To Guide
Materials
- High-quality white cardstock or drawing paper (heavyweight prevents bleed-through)
- Black fineliner pen (0.5mm or 0.8mm)
- Pencil (HB or 2B)
- Soft eraser
- Ruler (optional, if you want to frame it precisely)
Step 1: Planning the Spirit
-
Lightly sketch the outline:
Start with a very light pencil sketch of an elongated ‘n’ shape. Don’t worry about making it perfect; this is just a guide for the ghost’s head and body. -
Define the bottom hem:
At the bottom of your arch, sketch a wavy, uneven line. Instead of a straight line, create small peaks and troughs to mimic the way a bedsheet would drape on the floor. -
Mark the facial features:
Place two vertical ovals near the top third of the shape for the eyes. Add a small dot or tiny oval slightly lower and centered for the mouth.
Ink Flow Tip
Keep your hand relaxed and loose while drawing the inner fold lines. If you grip the pen too tightly, the lines will look rigid like wire rather than soft fabric.
Step 2: Inking the Outline
-
Trace the head:
Using your black fineliner, trace over the top curve of your pencil sketch. Keep the line slightly loose—it doesn’t need to be mechanically smooth. -
Draw the side drapery:
As you bring your pen down the sides, let the line flare out slightly. Imagine the fabric is resting on an invisible shoulder or arm, creating a slight bump before falling straight down. -
Create the jagged hem:
Ink the bottom edge with confident, jagged strokes. Connect the bottom points back up to the side lines, ensuring the fabric looks like it has volume and folds.
Add a Background
Since this ghost has ‘transparent’ vibes, draw a simple geometric pattern (like faint gingham or stripes) behind it in gray ink to enhance the see-through effect.
Step 3: Adding Fabric Texture
-
Draw the primary folds:
This is the most crucial step for the ‘transparent’ look. Draw long, vertical lines starting from just under the ‘head’ area down to the points of the bottom hem. -
Vary line weight and length:
I like to make these fold lines slightly thinner or broken compared to the outer outline. Don’t draw them all parallel; let them curve slightly to follow the flow of the ghost’s body. -
Connect folds to the hem:
Ensure that your vertical fold lines connect to the ‘valleys’ (the inward curves) of your bottom hem. This physically explains where the fabric is bunching up. -
Add secondary contour lines:
Add a few shorter, fainter lines near the sides and top curve. These suggest movement and roundness without cluttering the center of the figure.
Step 4: Finishing Touches
-
Fill the eyes:
Color in the oval eyes with your black pen. Leave a tiny, uncolored white circle in the upper right or left corner of each oval to create a highlight—this brings the ghost to life. -
Define the mouth:
Fill in the small mouth circle. You usually don’t need a highlight here, a solid black dot works best to look like a hollow ‘O’. -
Double-check your lines:
Look for any gaps in your main outline. If the line looks too thin in places, go over it once more to thicken it, giving the ghost a definite presence on the page. -
Erase pencil guides:
Wait until the ink is completely dry—give it a solid minute or two to prevent smudging. Then, gently erase all your initial pencil markings. -
Optional shading:
If you want slightly more depth, add very minimal hatching (tiny parallel diagonal lines) at the very bottom of the folds where shadows would naturally gather.
Now you have a delightfully spooky spectre ready to frame or gift


Have a question or want to share your own experience? I'd love to hear from you in the comments below!