Picking paint for a girls’ room is half color story, half imagination—like designing a backdrop for her everyday life. Here are my favorite girls room paint ideas, starting with the classics and ending with a few artsy twists that feel like pure magic.
Soft Blush Pink Walls
Transform a plain bedroom into a serene sanctuary by combining classic wainscoting with a modern, soft pink hue. This project balances the crisp, architectural lines of white board-and-batten paneling with the warmth of a gentle blush upper wall for a timeless look.
How-To Guide
Materials
- Blush pink interior latex paint (eggshell or matte finish)
- Bright white interior paint (semi-gloss or satin finish)
- MDF boards or primed pine strips (1×3 or 1×4 inch)
- Top cap moulding (dado rail)
- Construction adhesive (Liquid Nails)
- Finishing nails & nail gun (or hammer)
- Wood filler
- Caulk and caulk gun
- Fine-grit sandpaper (220 grit)
- Painter’s tape
- Level (long spirit level)
- Roller, tray, and angled sash brush
- Drop cloths
Step 1: Preparation & Planning
-
Measure and calculate:
Begin by deciding the height of your wainscoting. A standard height is about one-third or two-thirds up the wall; in this design, it sits roughly 4-5 feet high. Measure your total wall width. -
Map the grid:
Calculate the spacing between your vertical battens. Aim for equal spacing, usually between 16 to 24 inches apart, adjusting slightly so you don’t end up with awkward tiny slivers at the room’s corners. -
Clear and clean:
Remove any existing baseboards if you plan to replace them, or scuff-sand the current ones if you intend to integrate them into the design. Ensure the walls are clean and dust-free.
Uneven Walls?
If your drywall is wavy, your vertical boards might not sit flush. Don’t force them deeper with nails; instead, use construction adhesive and fill the gaps behind the board with ample caulk later.
Step 2: Painting the Blush Upper
-
Tape the line:
Use a pencil and your level to mark a horizontal line where the top of the wainscoting will sit. Apply painter’s tape just below this line to protect the lower area. -
Cut in the edges:
Using an angled sash brush, carefully paint the perimeter of the upper wall, cutting in along the ceiling line and corners with your chosen blush pink color. -
Roll the color:
Roll the blush pink paint onto the upper wall section. Apply two even coats for the richest color payoff, allowing sufficient drying time between layers.
Spacer Block Trick
Cut a scrap piece of wood to the exact width of your intended spacing. Use this as a physical guide between vertical battens rather than measuring every single time for faster, uniform installation.
Step 3: Installing the Board-and-Batten
-
The horizontal rails:
Install the top horizontal rail first, aligning it perfectly straight with your level. Secure it using construction adhesive and finishing nails into the studs where possible. -
Baseboard installation:
If you removed the old baseboards, install a flat 1×4 or similar board along the floor to act as the bottom rail. This grounds the grid structure. -
Vertical battens:
Cut your vertical strips to fit snugly between the top rail and the baseboard. Adhere them to the wall according to your spacing map, using a level on every single piece to ensure they are plumb. -
Top cap moulding:
For a finished look, add a small protruding ledge or moulding piece on top of the upper horizontal rail. This creates a traditional dado rail effect.
Step 4: Finishing Details
-
Fill the holes:
Go over every nail hole with wood filler. Overfill slightly, as the filler shrinks when drying. I always do a second pass just to be safe. -
Caulk the seams:
Run a bead of paintable caulk along every edge where wood meets wall or wood meets wood. Smooth it immediately with a wet finger for a seamless, built-in appearance. -
Sand smooth:
Once the filler is dry, sand the wood patches flush with the board surface. Lightly sand the rest of the wood to prepare it for paint. -
Prime the wood:
Apply a high-quality primer to the raw wood pieces and the wall sections inside the grid squares to ensure an even finish texture. -
Paint the woodwork:
Paint the entire lower section—boards and the wall between them—in bright white. Use a semi-gloss or satin finish for durability and easy cleaning. -
Color blocking connection:
Remove the upper tape carefully. If needed, do tiny touch-ups where the blush meets the white cap to ensure a crisp, professional line.
Step back and admire the sophisticated balance you’ve brought to the space


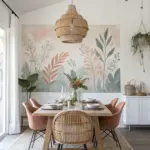
Warm Off-White With Color Pops
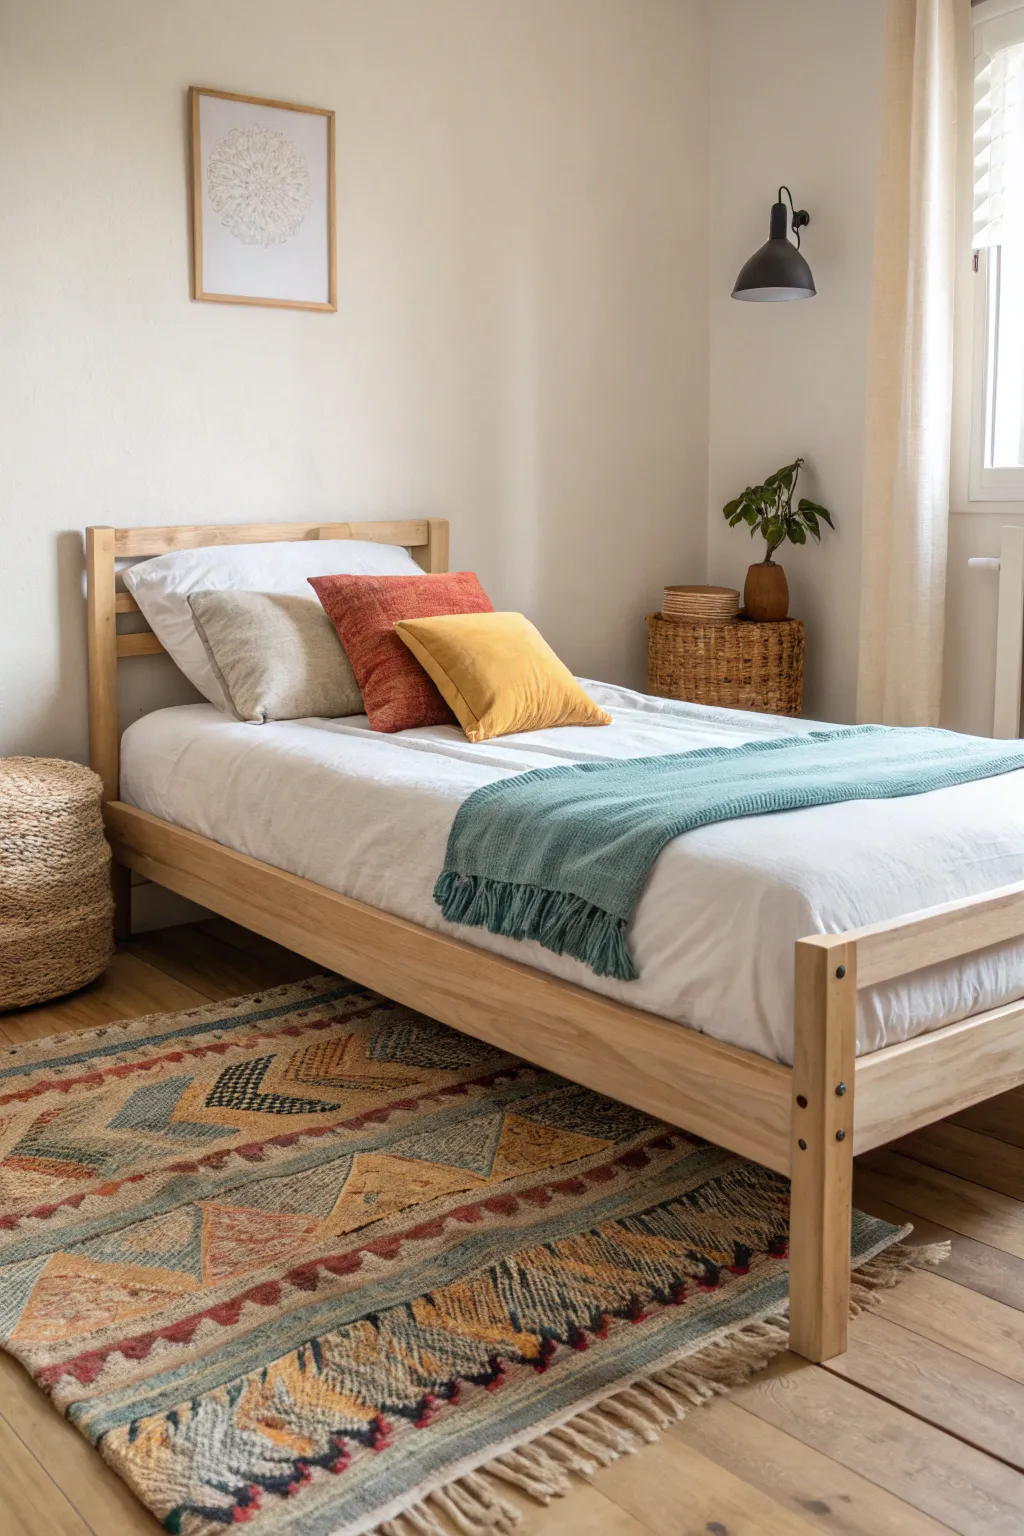
Transform a plain bedroom into a cozy, bohemian sanctuary using warm off-white tones and vibrant textiles. This project balances neutral walls with colorful accents like rust, mustard, and teal to create a space that feels both relaxing and energized.
Step-by-Step
Materials
- Warm off-white interior latex paint (eggshell finish)
- Painter’s tape
- Drop cloths
- Paint roller and tray
- Angled sash brush
- Sanding block (fine grit)
- Screwdriver (for outlet covers)
- Light natural wood bed frame
- Patterned kilim or woven rug
- Textured throw pillows (rust, mustard, beige)
- Teal throw blanket with tassels
- Woven basket plant stand
- Natural fiber pouf or ottoman
- Simple botanical wall art in a light wood frame
Step 1: Prepping the Canvas
-
Clear and clean:
Begin by removing all furniture from the room or pushing heavy items to the center and covering them with drop cloths. Remove outlet covers and switch plates with a screwdriver. -
Surface prep:
Clean the walls with a damp sponge and mild soap to remove dust or grease. Fill any nail holes with spackle, let dry, and sand smooth with your sanding block for a flawless finish. -
Tape edges:
Apply painter’s tape carefully along the baseboards, ceiling line, and window trim. Press the tape edges down firmly to prevent paint bleed.
Uneven Edges?
If paint bled under the tape, wait for it to fully dry. Use a small artist’s brush and your trim color (or wall color) to carefully touch up the line for a sharp finish.
Step 2: Painting the Walls
-
Cutting in:
Start by ‘cutting in’ the corners and edges with your angled sash brush. Paint a 2-3 inch border around all taped areas where the roller can’t reach. -
Rolling the first coat:
Dip your roller into the warm off-white paint. Apply the paint in ‘W’ or ‘M’ shaped strokes to distribute it evenly, then fill in the gaps. I like to work in small 3-foot sections at a time. -
Drying time:
Allow the first coat to dry completely according to the manufacturer’s instructions, usually about 2-4 hours. This patience ensures the second coat adheres properly. -
Second coat:
Apply a second coat of paint using the same technique to ensure rich, opaque coverage with no patchy spots. -
Clean up:
Remove the painter’s tape while the paint is still slightly tacky to avoid peeling. Reinstall outlet covers once the walls are fully dry.
Step 3: Styling the Space
-
Lay the foundation:
Position your patterned kilim rug. Orient it so that it extends comfortably beyond the sides and foot of where the bed will go, anchoring the sleeping area. -
Assemble the bed:
Place the light wood bed frame on top of the rug. Make the bed using crisp white sheets as a neutral base that will make your color pops stand out. -
Create the pillowscape:
Arrange the pillows against the headboard. Start with standard white pillows in the back. Layer the beige textured pillow, then the rust-colored square pillow, and finish with the smaller mustard accent pillow in front. -
Add texture:
Drape the teal throw blanket across the foot of the bed. Ideally, let the tassels hang over the side to add movement and softness to the straight lines of the bed frame. -
Corner accents:
Place a woven basket or turned-over hamper as a makeshift side table. Arrange a potted plant on top to bring life and height to the corner. Add a woven pouf nearby for extra texture. -
Wall art:
Hang the simple botanical artwork centered above the bed. The light wood frame should coordinate with the bed frame to tie the look together.
Layer Up
Mix materials for a deeper boho look. Combine linen, velvet, and wool textures in your pillows and throws to make the space feel curated rather than just color-blocked.
Enjoy the soothing atmosphere of your newly refreshed, warm off-white bedroom retreat


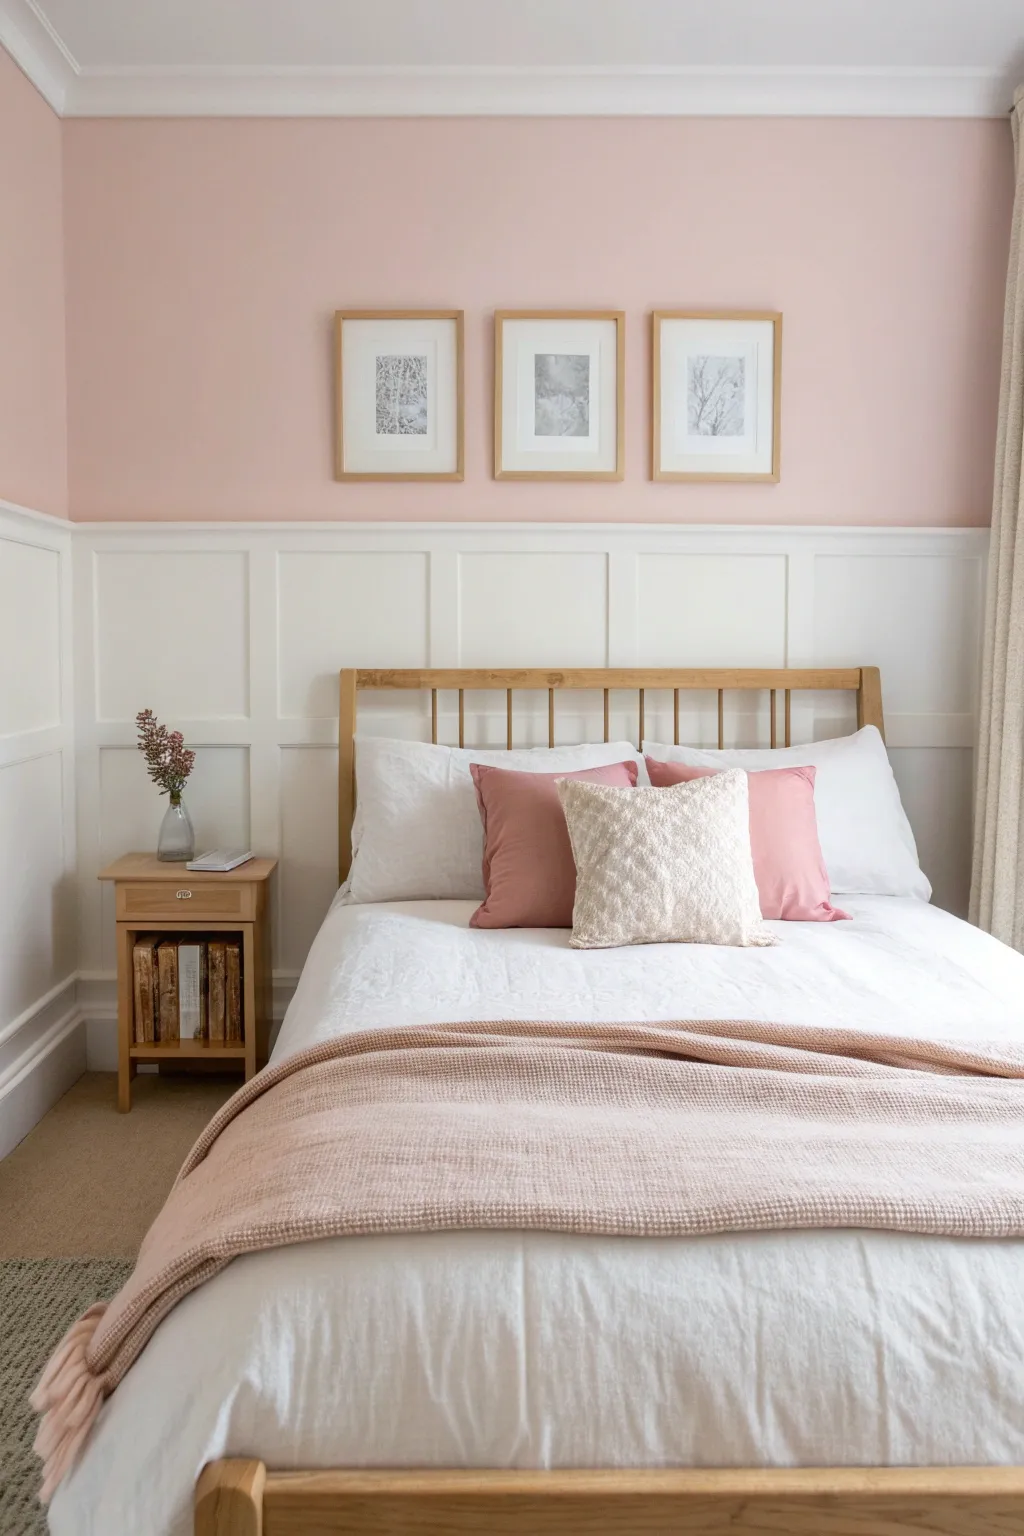
Two-Tone Half Wall in Dusty Rose
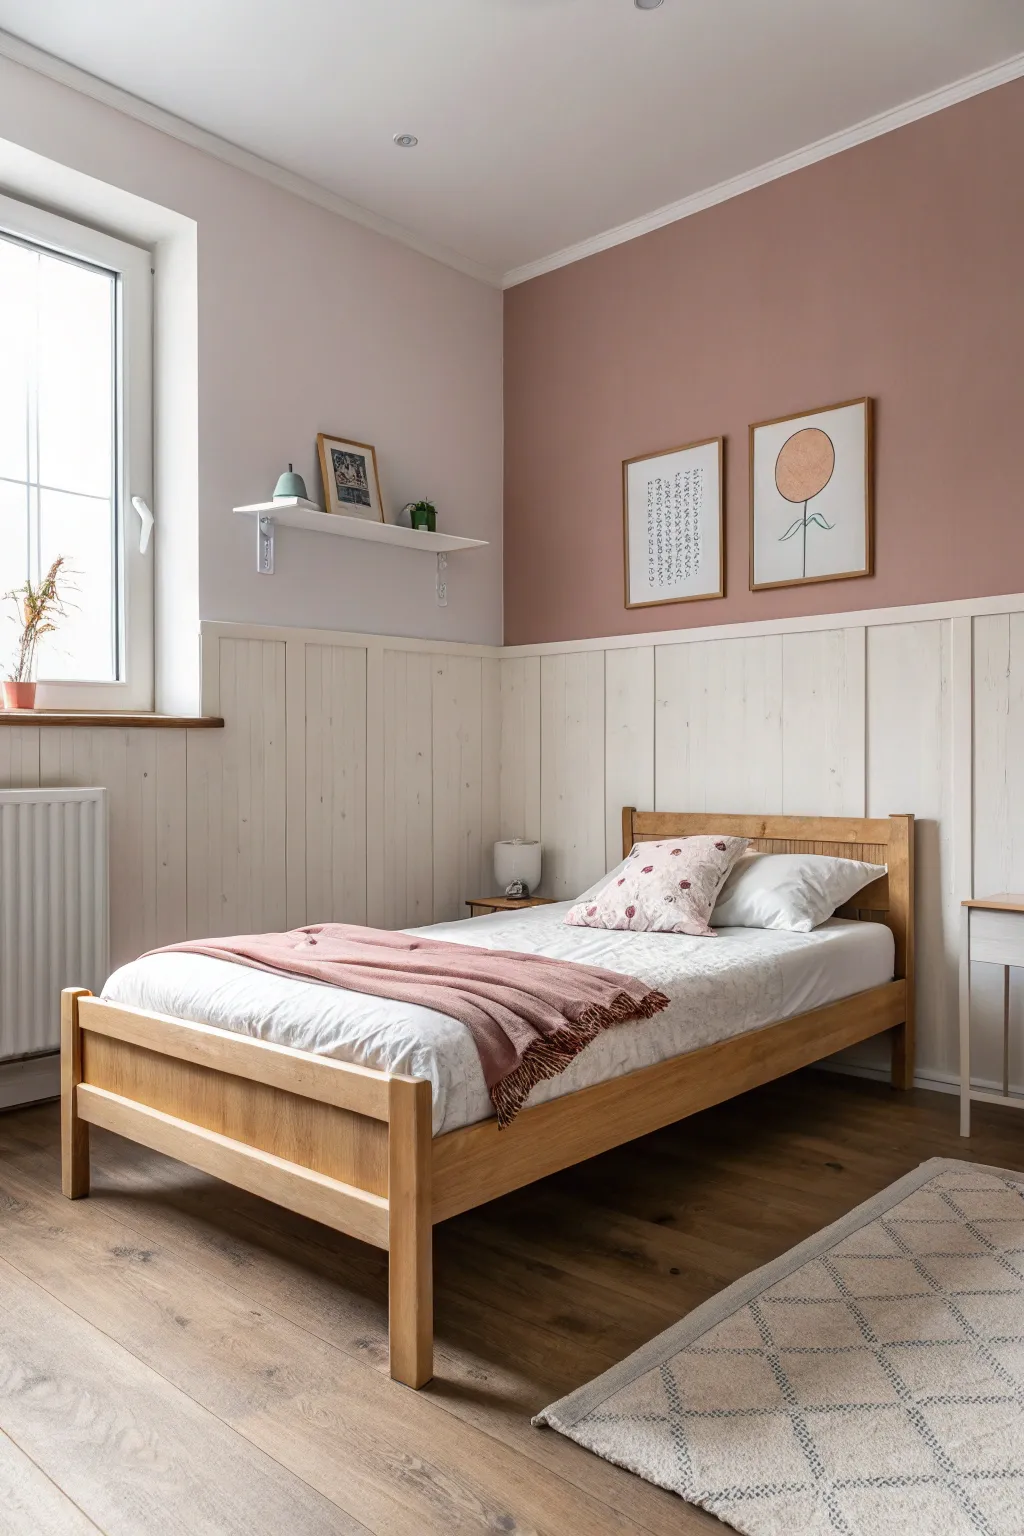
Transform a simple bedroom into a cozy retreat with this timeless two-tone wall treatment that pairs classic white wainscoting with a warm, dusty rose upper wall. This project combines beginner-friendly woodwork with a soft color palette to add architectural interest and character to any space without a full renovation.
Step-by-Step Guide
Materials
- Dusty rose latex interior paint (eggshell or satin finish)
- White semi-gloss paint for trim
- Paint roller and tray
- 2-inch angled sash brush
- 1×3 or 1×4 pine boards or MDF strips (for battens and top rail)
- Paneling sheets (beadboard or smooth ply) – optional
- Construction adhesive (e.g., Liquid Nails)
- Brad nailer and 1.5-inch brad nails
- Wood filler
- Caulk and caulk gun
- Sandpaper (120 and 220 grit)
- Level and measuring tape
- Painter’s tape
- Stud finder
- Drop cloths
Step 1: Planning and Wall Prep
-
Determine panel height:
Decide on the height of your wainscoting. A standard chair rail height is around 32-36 inches, but for this modern cottage look, aim slightly higher, around 40-48 inches from the floor. -
Clear and clean:
Remove any existing baseboards if you plan to replace them or install the paneling flush against the floor. Clean the walls thoroughly with a damp cloth to remove dust and grease. -
Mark your level line:
Using a long level or a laser level, mark a continuous horizontal line around the entire room at your chosen height. This will ensure your top rail sits perfectly straight. -
Locate studs:
Use a stud finder to mark the location of all wall studs slightly above your level line so you know where to nail securely later.
Clean Caulk Lines
Keep a small bucket of water and a rag handy while caulking. Frequently wiping your finger clean prevents buildup and ensures a smooth, professional concave joint along the trim.
Step 2: Installing the Woodwork
-
Install vertical boards (battens):
Measure and cut your vertical batten strips to fit between the floor (or baseboard) and your level line. Apply construction adhesive to the back of the first strip. -
Secure the first batten:
Place your first batten, usually starting in a corner. Use your level to ensure it is perfectly vertical before nailing it into the wall with a brad nailer. -
Space remaining battens:
Determine your spacing (12-16 inches apart looks traditional). Cut a scrap piece of wood to that exact length to use as a spacer block as you move along the wall, gluing and nailing each vertical strip. -
Install the top rail:
Cut your horizontal top rail boards. Place them directly on top of your vertical battens, aligning the top edge with your level line. Nail these securely into the studs you marked earlier. -
Add the picture ledge (optional):
If you want the shelf effect shown in the trim, attach a slightly wider board flat on top of the horizontal rail to create a narrow ledge for small decor items.
Step 3: Finishing the Trim
-
Fill nail holes:
Go over every board and fill the small nail holes with wood filler. I find it easiest to slightly overfill them, as the filler shrinks when drying. -
Caulk the seams:
Run a thin bead of paintable caulk along every seam where the wood meets the wall and where boards meet each other. Smooth it with a wet finger for a seamless, built-in look. -
Sand smooth:
Once the filler is completely dry, sand the wood filler flush and lightly scuff the rest of the wood with 220-grit sandpaper to prepare it for paint.
Level Up: Hidden Storage
Make the top rail ledge 3-4 inches deeper and install discreet hooks underneath it to create functional hanging space for bags or planned outfits.
Step 4: Painting the Two Zones
-
Tape off edges:
Apply painter’s tape to the floor, adjacent walls, and ceiling edges. Protect your floor with drop cloths. -
Paint the paneling:
Apply a coat of primer if using raw wood. Then, paint the entire lower section—battens, wall space between them, and top rail—in a crisp white semi-gloss. Use a brush for corners and a roller for flat areas. -
Cut in the upper color:
Once the white trim is dry, tape off the top edge of the rail precisely. Use an angled brush to ‘cut in’ the dusty rose paint along the ceiling line, corners, and right above the tape. -
Roll the upper wall:
Use a roller to fill in the rest of the upper wall with the dusty rose color. Work in ‘W’ shapes to blend the paint evenly. -
Apply second coat:
Allow the first coat to dry according to the can’s instructions, then apply a second coat for rich, opaque coverage. -
Remove tape:
Carefully peel off the painter’s tape while the paint is still slightly tacky to ensure a crisp, clean line.
Step back and enjoy the structured elegance and warm ambiance your new wall treatment brings to the room


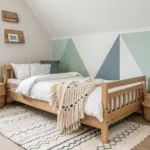
Sage Green for a Calm Girl’s Space
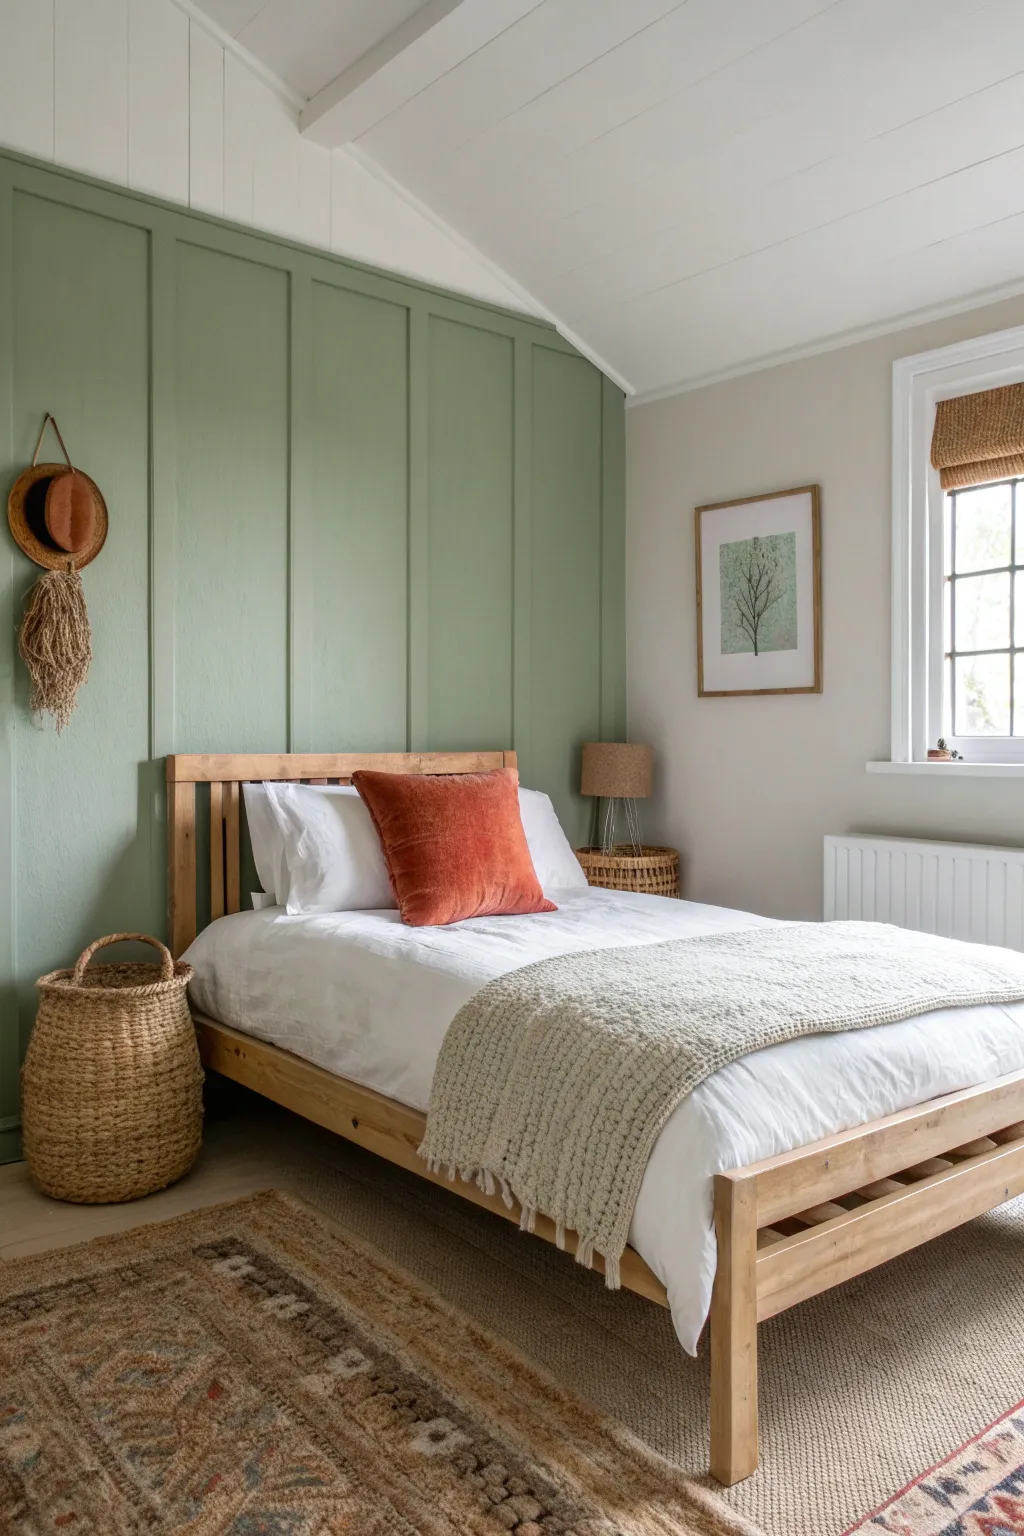
Transform a plain bedroom into a serene retreat with this DIY board and batten wall feature. The soft sage green tone combined with the vertical paneling adds immediate height and a timeless, calming character to the room.
Detailed Instructions
Materials
- MDF boards (1×3 inch strips)
- Small top trim molding (optional)
- Construction adhesive (e.g., Liquid Nails)
- Sage green paint (satin finish)
- Primer
- Bubble level or laser level
- Tape measure
- Caulk gun and paintable caulk
- Wood filler
- Sandpaper (120 and 220 grit)
- Paint roller and brushes (angled sash brush)
- Brad nailer and 1.5-inch nails
Step 1: Preparation & Planning
-
Assess the wall:
Clear the wall completely and remove any existing baseboards if you plan to replace them. If keeping them, ensure your vertical battens will sit flush on top of them. -
Calculate spacing:
Measure the total width of your wall. Decide on the number of vertical panels (battens) you want; spaces between 16 to 24 inches usually look best. Do the math to ensure even spacing between each board. -
Mark the layout:
Use a pencil and a tape measure to mark exactly where each vertical board will go. I like to mark the center point of each board to help visualize the final look.
Uneven Walls?
If your walls are wavy, the boards might pop off. Use a bit more adhesive and ‘cross-nail’ (aiming nails at opposing angles) to grip the drywall better.
Step 2: Installing the Trim
-
Install the top horizontal rail:
Decide on the height for your paneling. In this project, it goes fully floor-to-ceiling, but often a top rail is needed if stopping partway up. For this full-wall look, cut your vertical boards to fit perfectly between the floor (or baseboard) and the ceiling. -
Secure the first batten:
Start at one far corner. Apply construction adhesive to the back of your first MDF strip. Press it firmly against the wall. -
Nail it in place:
Use your brad nailer to secure the board. A few nails at the top, middle, and bottom are sufficient to hold it while the glue cures. -
Verify leveling:
Before moving to the next board, place your level against the installed batten. Vertical accuracy is crucial here; even a slight tilt will differ visibly across the wall. -
Install remaining battens:
Work your way across the wall, using your predetermined spacing marks. Apply adhesive, level, and nail each board individually.
Add a Picture Ledge
Top the paneling with a slightly deeper 1×2 or 1×3 horizontal board cap. This creates a perfect narrow shelf for displaying art frames or small plants.
Step 3: Finishing Touches
-
Fill the holes:
Take a small amount of wood filler on your finger or a putty knife and fill every nail hole. Overfill slightly as it shrinks when drying. -
Caulk the seams:
Run a thin bead of paintable caulk along every edge where the wood meets the wall. This is the secret to making it look like built-in carpentry rather than glued-on sticking. -
Smooth it out:
Wet your finger and run it along the fresh caulk to create a smooth, concave seal. Wipe away excess immediately with a damp rag. -
Sand the filler:
Once the wood filler is totally dry, sand it smooth with fine-grit sandpaper until it is flush with the board surface.
Step 4: Painting
-
Prime the wood:
MDF is thirsty. Apply a coat of primer specifically to the new wooden strips to seal them, preventing uneven paint absorption later. -
Cut in edges:
Using an angled sash brush, paint the corners and edges of the battens with your sage green paint first. Get into all the nooks the roller can’t reach. -
Roll the first coat:
Apply the sage green paint to the flat wall sections and the faces of the battens using a standard roller. Let this dry completely according to the can’s instructions. -
Sand lightly:
I prefer to do a very quick, light sanding between coats with fine paper to knock down any bumps, ensuring a professional finish. -
Apply final coat:
Roll on the second coat of sage green for full, rich coverage. Remove any painter’s tape while the paint is still slightly tacky to avoid peeling.
Enjoy the peaceful atmosphere your new accent wall brings to the room
BRUSH GUIDE
The Right Brush for Every Stroke
From clean lines to bold texture — master brush choice, stroke control, and essential techniques.
Explore the Full Guide
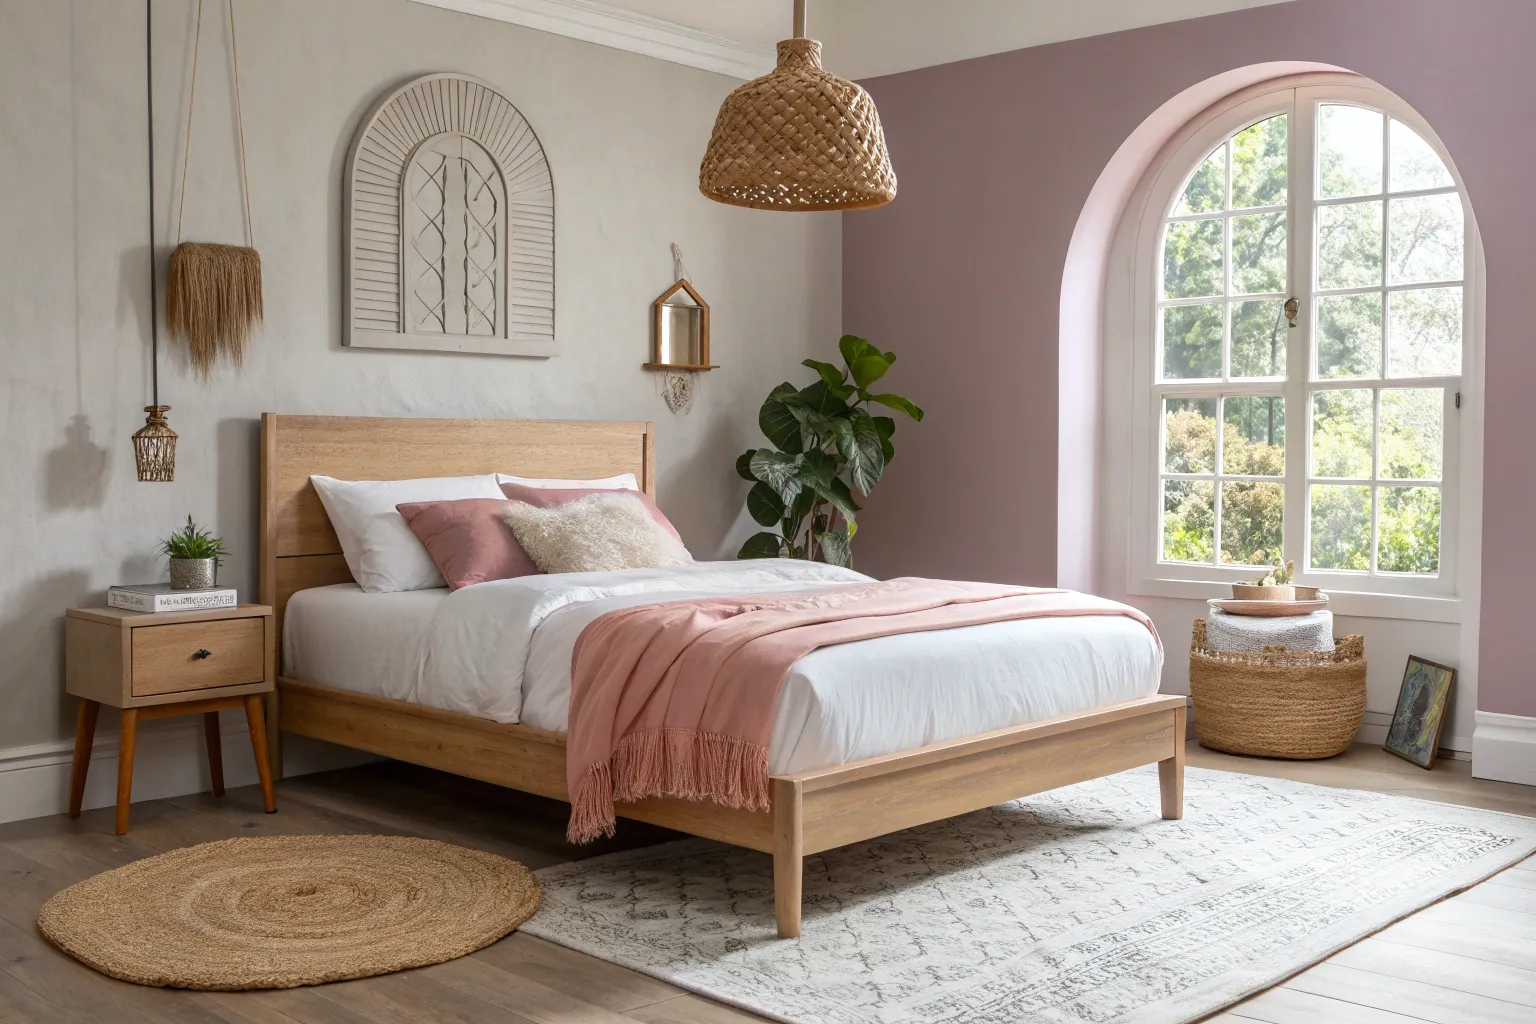
Dreamy Lavender Wash
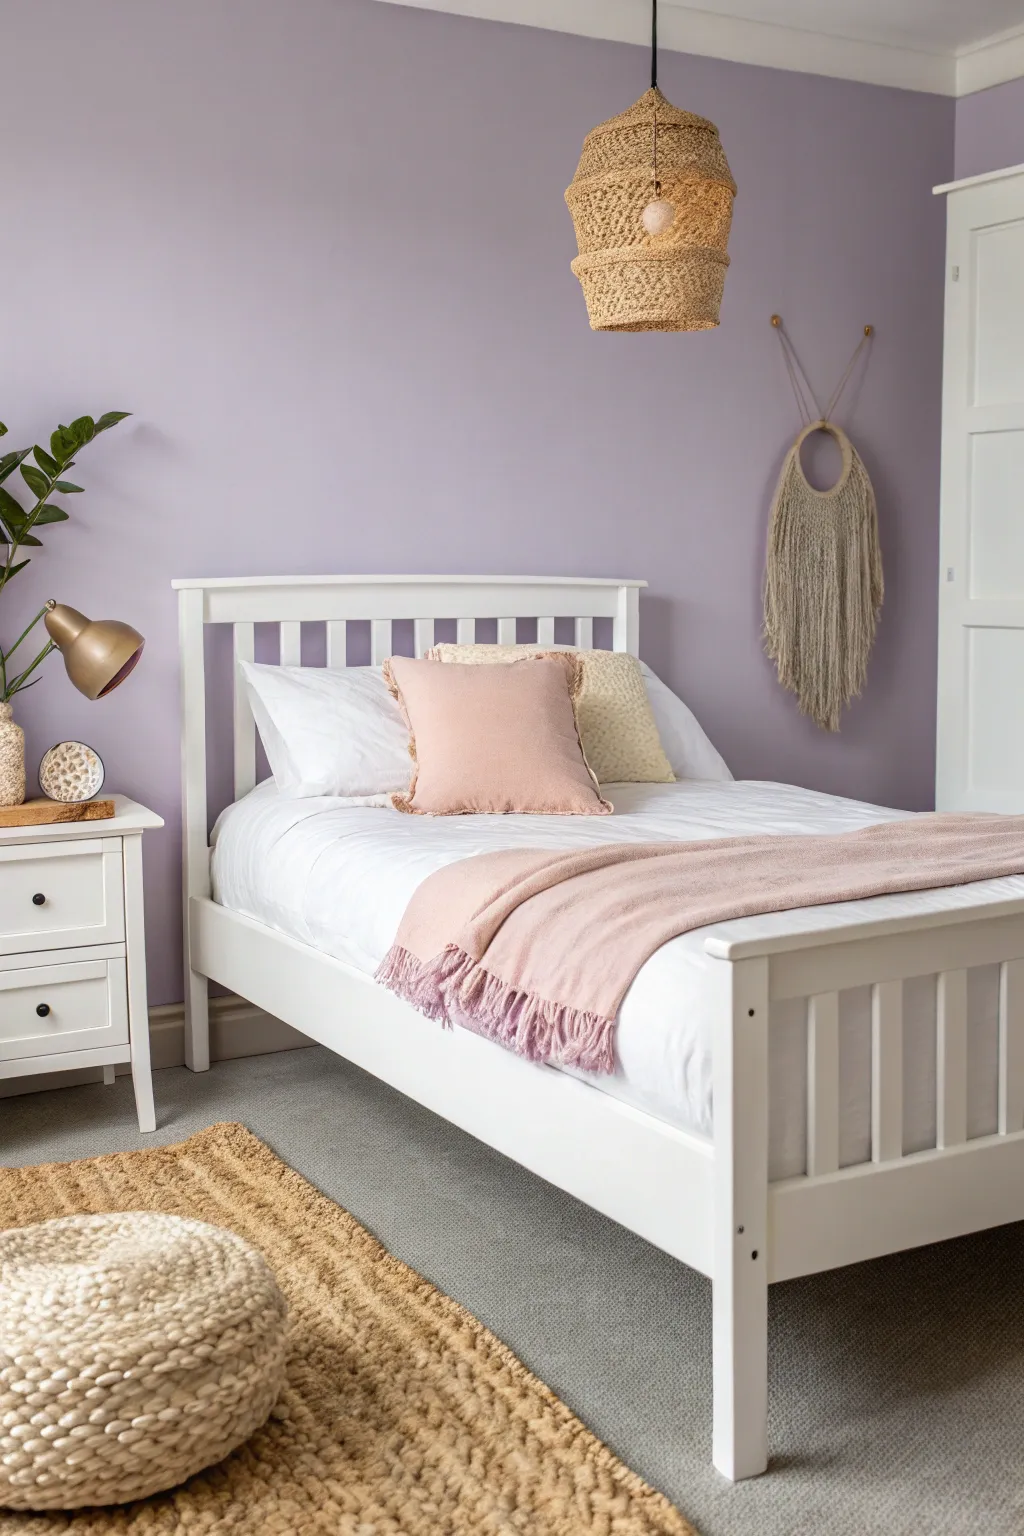
Transform a plain bedroom into a serene sanctuary with this soft lavender wash and boho-chic styling project. The calming purple tones paired with crisp white furniture create a space that feels both youthful and sophisticated, perfect for growing with a child.
Step-by-Step
Materials
- High-quality interior satin or eggshell paint (soft lavender shade)
- Bright white semi-gloss trim paint
- Paint roller with extension pole
- Angled sash brush (2 inch)
- Painter’s tape
- Drop cloths
- Spackle and sandpaper
- White simple wooden bed frame
- Woven pendant light fixture
- Macramé wall hanging
- Blush pink throw pillows and blanket
- Jute or woven textured rug
- Brass or gold accent lamp
Step 1: Setting the Stage
-
Clear and Prep:
Before dipping any brushes, clear the room entirely or move furniture to the center and cover it completely with drop cloths. Remove all switch plates and outlet covers. -
Patch Imperfections:
Inspect the walls for any nail holes or dings. Apply a small amount of spackle, smooth it out, and once dry, lightly sand the patches until flush with the wall surface. -
Clean the Walls:
Wipe down the walls with a damp cloth or a mild TSP substitute to remove dust and oils. This ensures your lavender paint adheres perfectly for a lasting finish. -
Tape the Trim:
Carefully apply painter’s tape along the baseboards, window trim, and ceiling edges. Press the tape edges down firmly with a putty knife or your finger to prevent bleed-through.
Swatch Watch
Lavender shifts dramatically with light. Paint large sample swatches on different walls and view them morning, noon, and night before committing to a gallon.
Step 2: Painting the Lavender Wash
-
Cut In the Edges:
Using your angled sash brush, paint a 2-3 inch border of lavender paint along all the taped edges, corners, and around outlets. I like to feather out the edges so they blend seamlessly when rolling. -
Roll the First Coat:
Pour your lavender paint into a tray. Load the roller evenly and apply the paint to the large wall sections using a ‘W’ motion to distribute it, then rolling vertically to smooth it out. -
Keep a Wet Edge:
Work across the wall from one side to the other, always maintaining a ‘wet edge’ where you overlap slightly with fresh paint to avoid lap marks. -
Dry and Assess:
Allow the first coat to dry completely according to the manufacturer’s instructions, usually 2-4 hours. Check for any patchy areas or thin spots. -
Apply Second Coat:
Repeat the cutting-in and rolling process for a second coat. This deepens the color and provides that rich, professional finish shown in the photo. -
Remove Tape:
While the paint is still slightly tacky (but not wet), slowly peel off the painter’s tape at a 45-degree angle to get a crisp, clean line.
Step 3: Styling the Space
-
Assemble the Bed:
Position your white wooden bed frame against the main wall. The crisp white against the new lavender paint creates the essential contrast for this look. -
Dress the Bed:
Start with fresh white sheets as a base. Layer on warmth with a blush pink duvet or bedspread. -
Layer Textures:
Fold a soft pink throw blanket with fringe at the foot of the bed. Add a mix of pillows—one solid pink linen and one textured cream or boucle—to create depth. -
Hang the Lighting:
Install the woven pendant light fixture. The natural rattan texture warms up the cool tones of the lavender walls. -
Install Wall Decor:
Hang a neutral macramé piece on an adjacent wall or near the corner. This adds visual interest without cluttering the serene color palette. -
Add Greenery:
Place a leafy green plant like a ZZ plant or snake plant on a bedside table to bring life and a pop of contrasting color to the corner. -
Final Touches:
Position a textured pouf or small jute rug on the floor. Finish with a brass reading lamp on the nightstand for a touch of metallic elegance.
Texture Twist
Dip-dye the bottom fringe of your macramé hanging or the throw blanket in a diluted version of your wall paint for a custom, cohesive look.
Step back and enjoy the peaceful, dreamy atmosphere you have created in this refreshed space
Soft Teal That Grows With Her
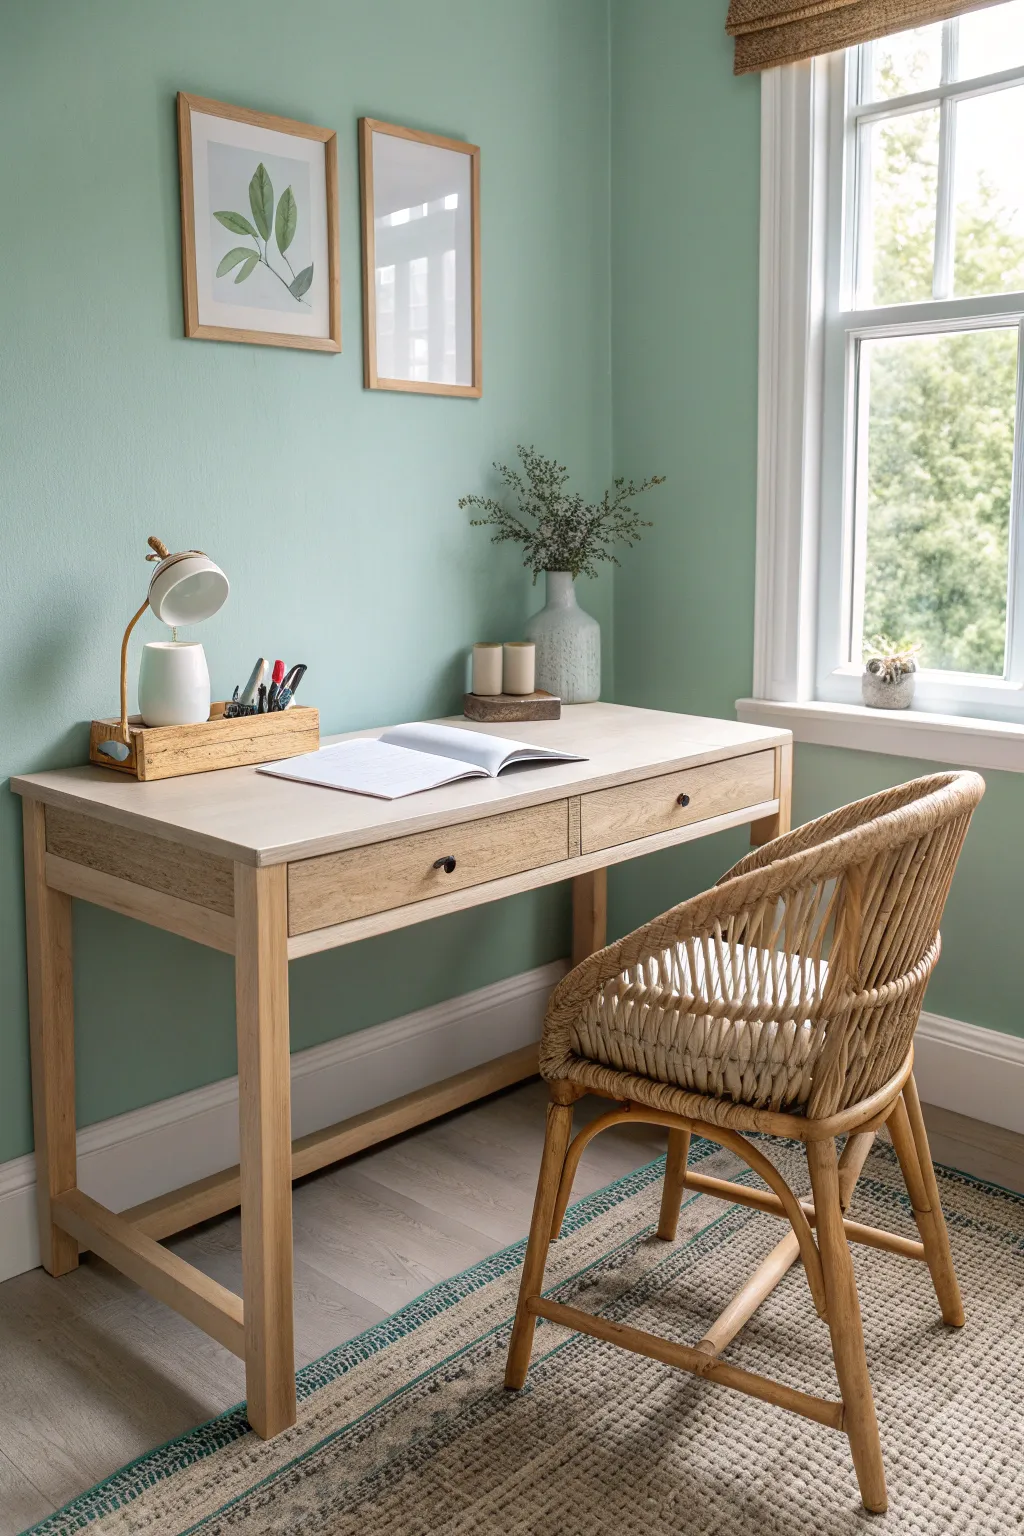
Capture the serene atmosphere of a light-filled study corner featuring soft teal walls and natural wood textures. This acrylic painting project focuses on rendering light, shadow, and varied textures like wicker and wood grain.
Step-by-Step Guide
Materials
- Acrylic paints (Titanium White, Burnt Umber, Yellow Ochre, Teal/Turquoise, Sap Green, Payne’s Grey)
- Canvas board or stretched canvas (11×14 or similar)
- Flat brushes (various sizes)
- Round brushes (small for details)
- Palette knife (optional for mixing)
- Pencil for sketching
- Ruler
- Water cup and paper towels
Step 1: Sketching the Layout
-
Establish the Perspective:
Begin by lightly drawing the corner of the room. Use your ruler to ensure the vertical line of the corner is straight and parallel to the canvas edge. -
Block in Main Furniture:
Sketch the basic rectangular shapes for the desk and the window frame. Pay attention to the perspective lines of the desk drawers and tabletop receding slightly. -
Add the Chair and Accessories:
Draw the curved outline of the wicker chair and mark the position of the desk lamp, organizer, and wall art frames. Keep lines light and erasable.
Fixing Wobbly Lines
If your furniture edges look uneven, use masking tape. Apply tape along the pencil lines, paint over the edge, and peel it off while the paint is still slightly wet for a crisp line.
Step 2: Painting the Room Background
-
Mix the Wall Color:
Create the signature soft teal by mixing Turquoise with plenty of Titanium White and a tiny touch of Yellow Ochre to warm it up. This shouldn’t be too saturated. -
Apply the Base Wall Coat:
Paint the wall sections using a large flat brush. Vary the tone slightly—make the corner area a bit darker (add a touch of Grey) to suggest shadow depth. -
Paint the Window Trim:
Use Titanium White with a microscopic dot of Grey for the window frame so it isn’t stark white. Paint crisp straight lines along your sketch marks. -
Render the Outdoor View:
For the window view, dab in blurry greens using Sap Green mixed with White and Yellow. Keep it soft and out of focus to suggest depth beyond the glass.
Step 3: Rendering the Desk and Chair
-
Base Tone for Wood:
Mix Burnt Umber, Yellow Ochre, and White to create a pale birch wood color. Fill in the desk shape with flat color first. -
Adding Wood Grain:
Once the base is dry, use a slightly darker mix of the same colors. With a dry, flat brush, lightly sweep horizontal lines across the drawers to mimic wood grain. -
Chair Structure:
Block in the chair’s legs and main frame with a medium tan color. I find it helpful to paint the general shape solid before adding the woven texture. -
Wicker Texture Details:
Switch to a small round brush. Using a mix of dark brown and light cream, paint small, repetitive curved strokes to create the woven rattan pattern on the chair back. -
Shadows and Highlights:
Add shadows underneath the desk and chair legs using a watered-down Payne’s Grey glaze to ground the furniture onto the floor.
Add Realistic Lighting
Mix a transparent glaze of white and yellow. Very lightly dry-brush this over the desktop and chair seat where the natural light from the window would hit to create a sunlit glow.
Step 4: Final Details & Floor
-
Painting the Floor:
Paint the floor area with a cool grey-brown mix. Paint strokes should be horizontal. -
Adding the Rug:
Paint the rug area with a textured, stippling motion using a dry brush. Use creams and greys, adding a thin teal border to tie it to the walls. -
Desk Accessories:
Paint the lamp, open book, and pencil organizer. Use pure white for the brightest highlights on the lamp shade and the open pages of the book. -
Wall Art Frames:
Paint the two rectangular frames on the wall. For the botanical art inside, just hint at leaf shapes with pale green rather than painting every detail.
Step back and admire your peaceful interior scene, perfect for adding a touch of calm to any room

PENCIL GUIDE
Understanding Pencil Grades from H to B
From first sketch to finished drawing — learn pencil grades, line control, and shading techniques.
Explore the Full Guide
Greige Walls for an Easy-to-Update Girl’s Room
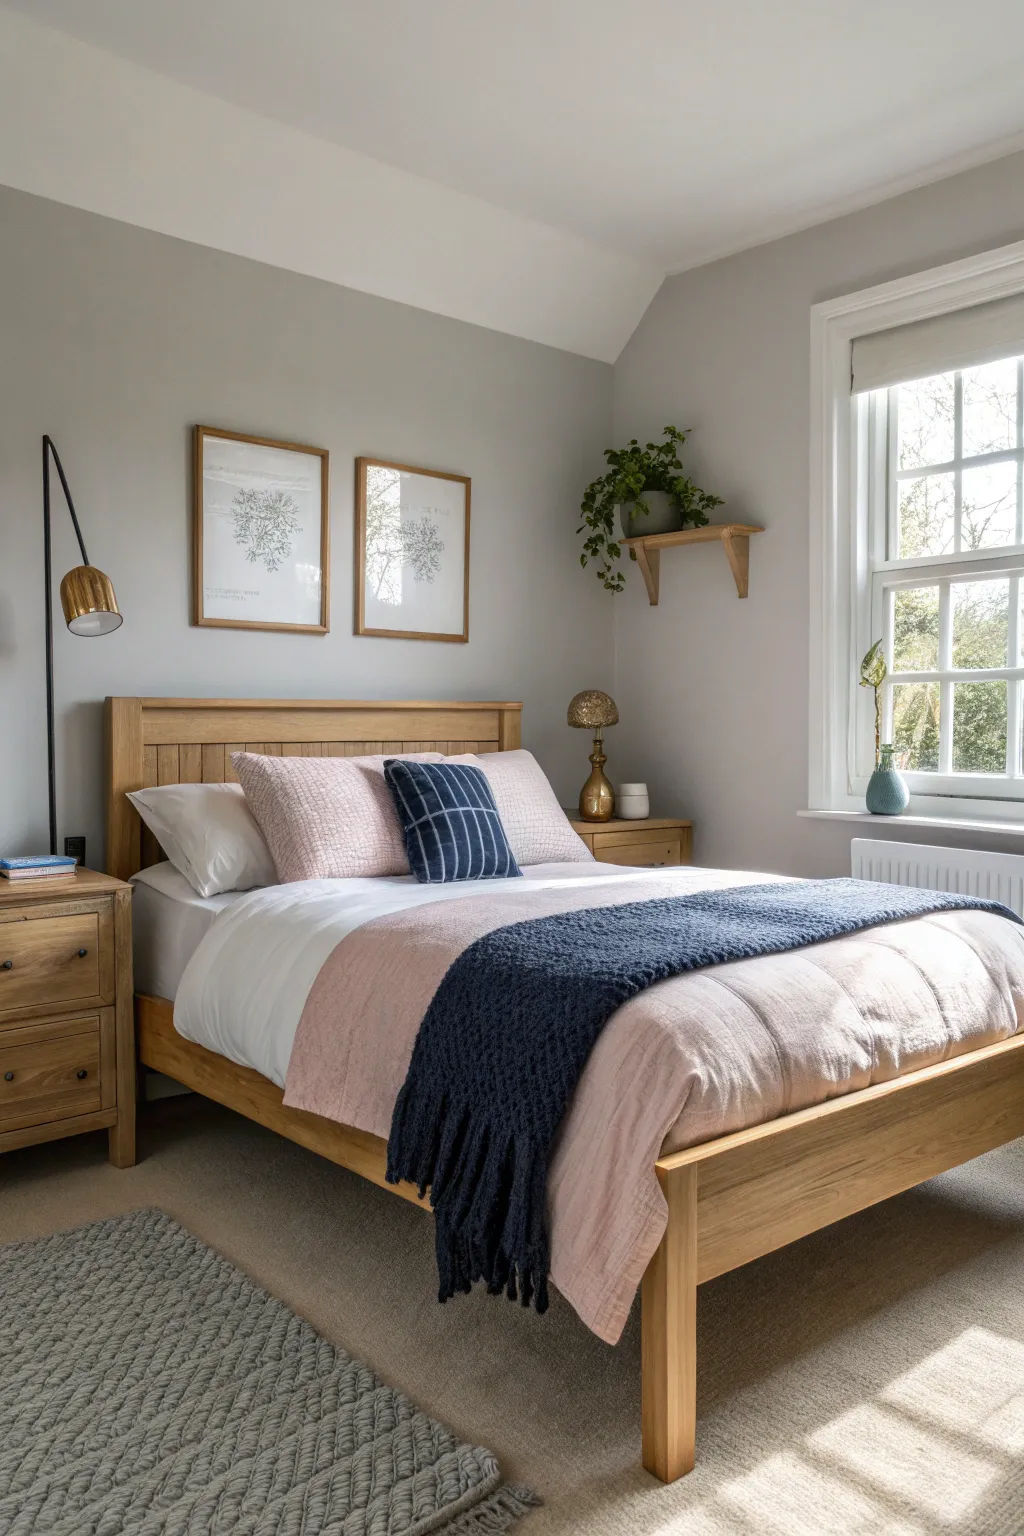
Transform a bedroom into a versatile, sophisticated sanctuary using a warm greige palette and natural wood accents. This project creates a calm, cozy atmosphere perfect for growing kids or guest spaces, balancing modern neutrals with classic textures.
How-To Guide
Materials
- High-quality interior latex paint (Greige – satin or eggshell finish)
- Painter’s tape
- Drop cloths
- Spackle and putty knife
- Sandpaper (fine grit)
- Paint rollers (microfiber covers)
- Roller cage and extension pole
- Angled sash brush (2-2.5 inch)
- Paint tray and liners
- Floating wood shelf
- Oak or light wood bed frame
- Blush pink linen bedding set
- Navy blue throw blanket (knit texture)
- Botanical prints with wooden frames
Step 1: Preparation & Wall Painting
-
Clear and Prep:
Remove all furniture, switch plates, and outlet covers from the room. Lay down drop cloths to protect the flooring completely. -
Patch Imperfections:
Inspect the walls for nail holes or dings. Fill them with spackle, let dry, and sand smooth until flush with the wall surface. -
Clean Walls:
Wipe down the walls with a damp cloth or a mixture of TSP substitute and water to remove dust and grease, ensuring better paint adhesion. -
Tape Trim:
Apply painter’s tape carefully along the baseboards, window trim, and ceiling edges. Press the tape edges down firmly to prevent paint bleed. -
Cut In the Edges:
Using your angled sash brush, ‘cut in’ a 3-inch border of greige paint around the ceiling line, corners, baseboards, and window frames. -
Roll the First Coat:
Pour paint into the tray. Dip the roller and apply paint in ‘W’ or ‘V’ patterns, filling in the sections while the cut-in edges are still wet to blend seamlessly. -
Dry and Repeat:
Allow the first coat to dry according to the manufacturer’s instructions (usually 2-4 hours). Apply a second coat for full, rich coverage. -
Remove Tape:
While the second coat is still slightly tacky, carefully peel off the painter’s tape at a 45-degree angle to ensure clean lines.
Swatch It First
Greige changes heavily with light. Paint large swatches on different walls and observe them at morning, noon, and night before committing to a gallon.
Step 2: Styling & Furnishing
-
Position the Bed:
Assemble your light oak bed frame and center it on the main wall. This natural wood tone warms up the cool greige walls beautifully. -
Layer the Bedding:
Start with crisp white sheets, then add a blush pink quilt or duvet. Fold the top edge down slightly to reveal the layers. -
Add Texture with Throws:
Drape a heavy, navy blue knit throw blanket across the foot of the bed. I like to let it hang somewhat casually for a relaxed look. -
Arrange Pillows:
Place two white sleeping pillows at the back. Layer two blush pink shams in front, and finish with a small rectangular accent pillow featuring a navy pattern. -
Install the Shelf:
Mount a small wooden shelf high in the corner near the window. Use a level to ensure it is straight and secure it into studs or with wall anchors. -
Add Greenery:
Place a trailing plant, like a pothos or ivy, on the high shelf. The organic shapes break up the straight lines of the room. -
Hang Artwork:
Hang two matching wood-framed botanical prints above the bed. Ensure they are centered horizontally over the headboard and spaced evenly apart. -
Lighting & Rugs:
Place a floor lamp with a metallic shade on one side and a table lamp on the nightstand. Finish the space with a textured grey area rug at the foot of the bed.
Metallic Pop
Swap standard hardware on the nightstand or use a brass lamp to add a touch of glam that contrasts nicely with the matte greige walls.
Enjoy the calm and adaptable beauty of your newly refreshed space
Moody Plum Accent Wall
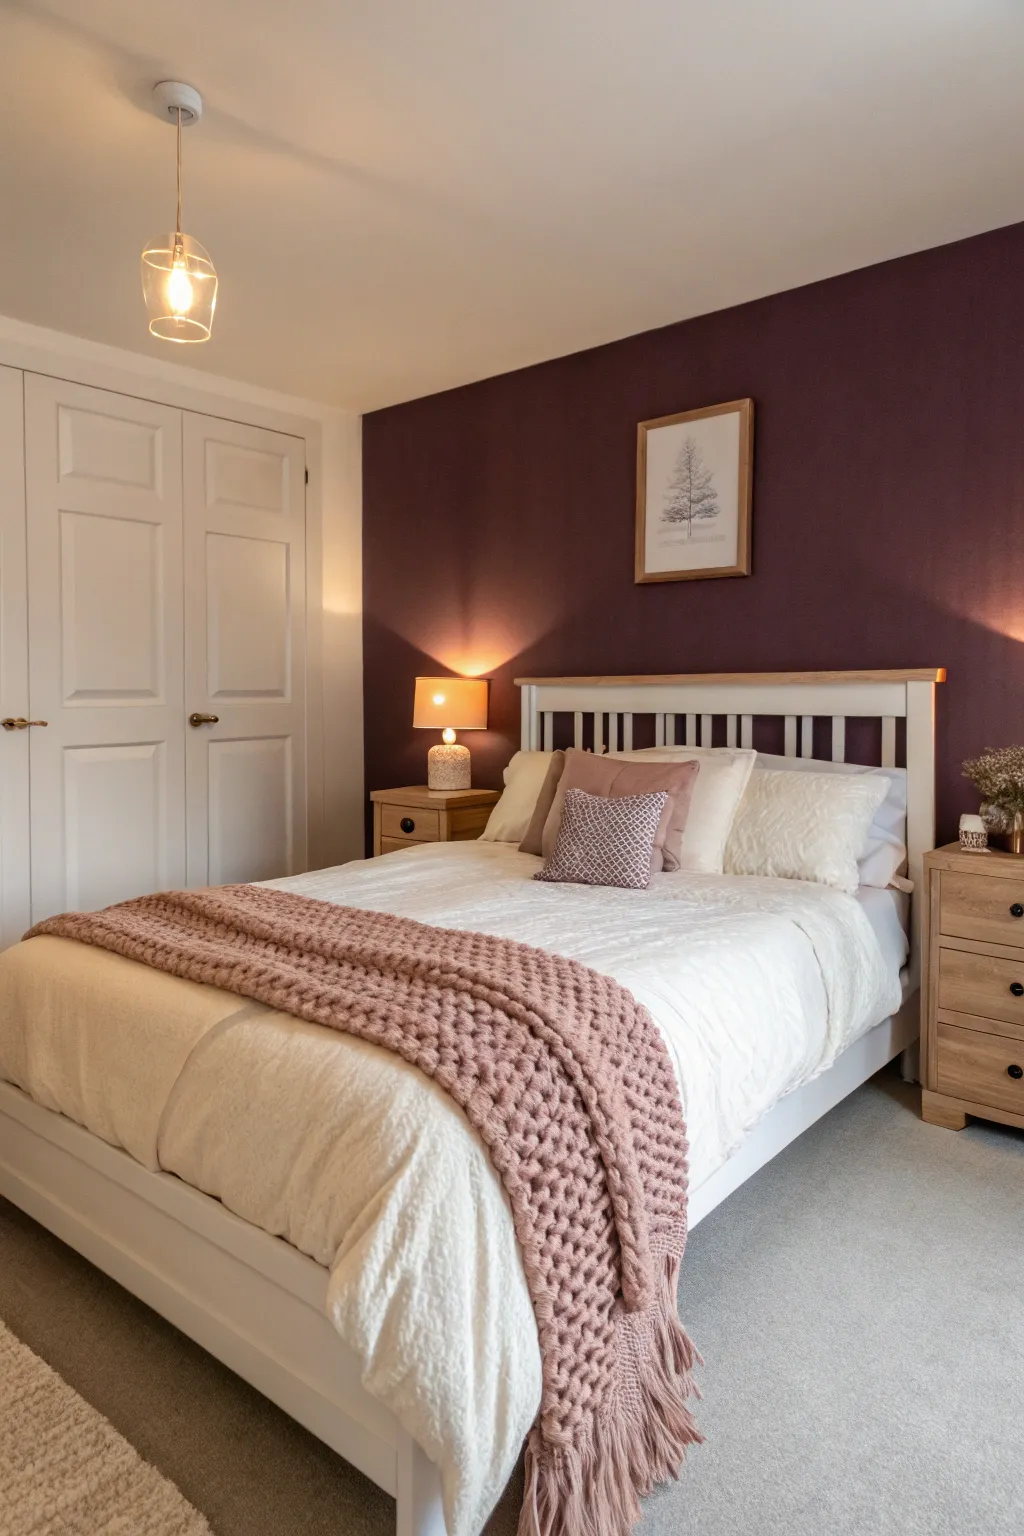
Transform a plain bedroom into a cozy sanctuary with a deep, moody plum accent wall that adds instant warmth and sophistication. This rich hue creates a stunning backdrop for light furniture and soft pink textiles, balancing boldness with serenity.
Step-by-Step Tutorial
Materials
- Deep plum interior latex paint (matte or eggshell finish)
- White ceiling paint (optional, for touch-ups)
- Painter’s tape (1.5 or 2 inch width)
- Drop cloths or plastic sheeting
- Screwdriver (for removing outlet covers)
- Spackle and putty knife
- Sandpaper (fine grit)
- Microfiber cloth
- Angled sash brush (2.5 inch)
- Paint roller frame and extension pole
- Microfiber roller covers (3/8 inch nap)
- Paint tray and liners
- Ladder
Step 1: Preparation
-
Clear the area:
Move the bed and bedside tables away from the wall you intend to paint. If possible, move them to the center of the room or out entirely to give yourself plenty of working space. -
Protect the floors:
Lay down drop cloths or plastic sheeting specifically along the base of the wall, ensuring they are secured so they don’t slide around while you walk. -
Remove hardware:
Use a screwdriver to take off any electrical outlet covers or light switch plates on the wall. Store the screws in a ziplock bag taped to the back of the plate so they don’t get lost. -
Clean the surface:
Wipe down the wall with a damp microfiber cloth to remove dust and cobwebs. A clean surface ensures the paint adheres properly and looks smooth. -
Patch imperfections:
Inspect the wall for nail holes or dents. Fill them with spackle using a putty knife, let dry completely, and then lightly sand the area until it is flush with the wall surface.
Tinting Primer Tip
For deep colors like plum, ask the paint store to mix a gray-tinted primer for you. Using a gray base coat will help you achieve full opacity in fewer coats than painting over white.
Step 2: Taping and Cutting In
-
Apply painter’s tape:
Carefully apply painter’s tape along the ceiling line, baseboards, and adjacent walls. Press the edges down firmly with your finger or a putty knife to prevent paint bleed. -
Open the paint:
Stir your plum paint thoroughly with a stir stick. Pigments in dark colors often settle at the bottom, so mix until the consistency and color are completely uniform. -
Load the angled brush:
Dip your 2.5-inch angled sash brush into the paint, covering about a third of the bristles. Tap it against the side of the can to remove excess; avoid wiping it, as that removes too much paint. -
Cut in the edges:
Paint a 3-inch border along the tape lines at the ceiling, corners, and baseboards. I find that doing one section at a time helps keep a ‘wet edge’ for blending later. -
Check for coverage:
Since this is a dark color, ensure your cut-in lines are solid. If the first pass looks streaky, let it dry and do a second pass around the edges before rolling.
Fixing Roller Marks
If you see streaks after drying, you likely pressed too hard on the roller or didn’t keep a wet edge. Apply one final, light coat using very gentle pressure to even out the sheen.
Step 3: Rolling the Wall
-
Prepare the roller:
Pour paint into the tray liner. Load your roller by rolling it back and forth in the deep end, then smoothing it out on the ridges until it is saturated but not dripping. -
Start rolling:
Begin near one corner of the wall. Apply the paint in a ‘W’ or ‘M’ pattern to distribute the paint evenly across a roughly 3×3 foot section. -
Fill in the section:
Without reloading, roll back over the ‘W’ pattern to fill in the gaps. use vertical strokes from top to bottom to smooth out the texture. -
Maintain a wet edge:
Move to the adjacent section immediately, slightly overlapping with the wet paint of the previous section. This prevents visible lap marks once the paint dries. -
Finish the first coat:
Continue across the entire wall until covered. Don’t worry if it looks patchy or uneven at this stage; dark colors almost always require two coats. -
Let it dry:
Allow the first coat to dry for at least 4 hours, or according to the manufacturer’s instructions on the can. Dark pigments can take a bit longer to set.
Step 4: Second Coat and Finishing
-
Apply the second coat:
Repeat the cutting in and rolling process exactly as before. This second layer will provide the true depth and richness of the plum color. -
Remove tape while wet:
This is crucial: slowly peel off the painter’s tape while the second coat is still slightly tacky/damp. Pull the tape away from the painted area at a 45-degree angle for a crisp line. -
Touch up:
Once the tape is off, inspect your edges. Use a small artist’s brush to fix any tiny imperfections where the paint might have bled or missed a spot. -
Reinstall hardware:
Wait until the wall is completely dry to the touch (ideally overnight) before screwing the outlet covers back on and moving your furniture back into place.
Step back and admire the dramatic depth your new accent wall brings to the room


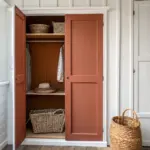
Painted Arch Behind the Bed
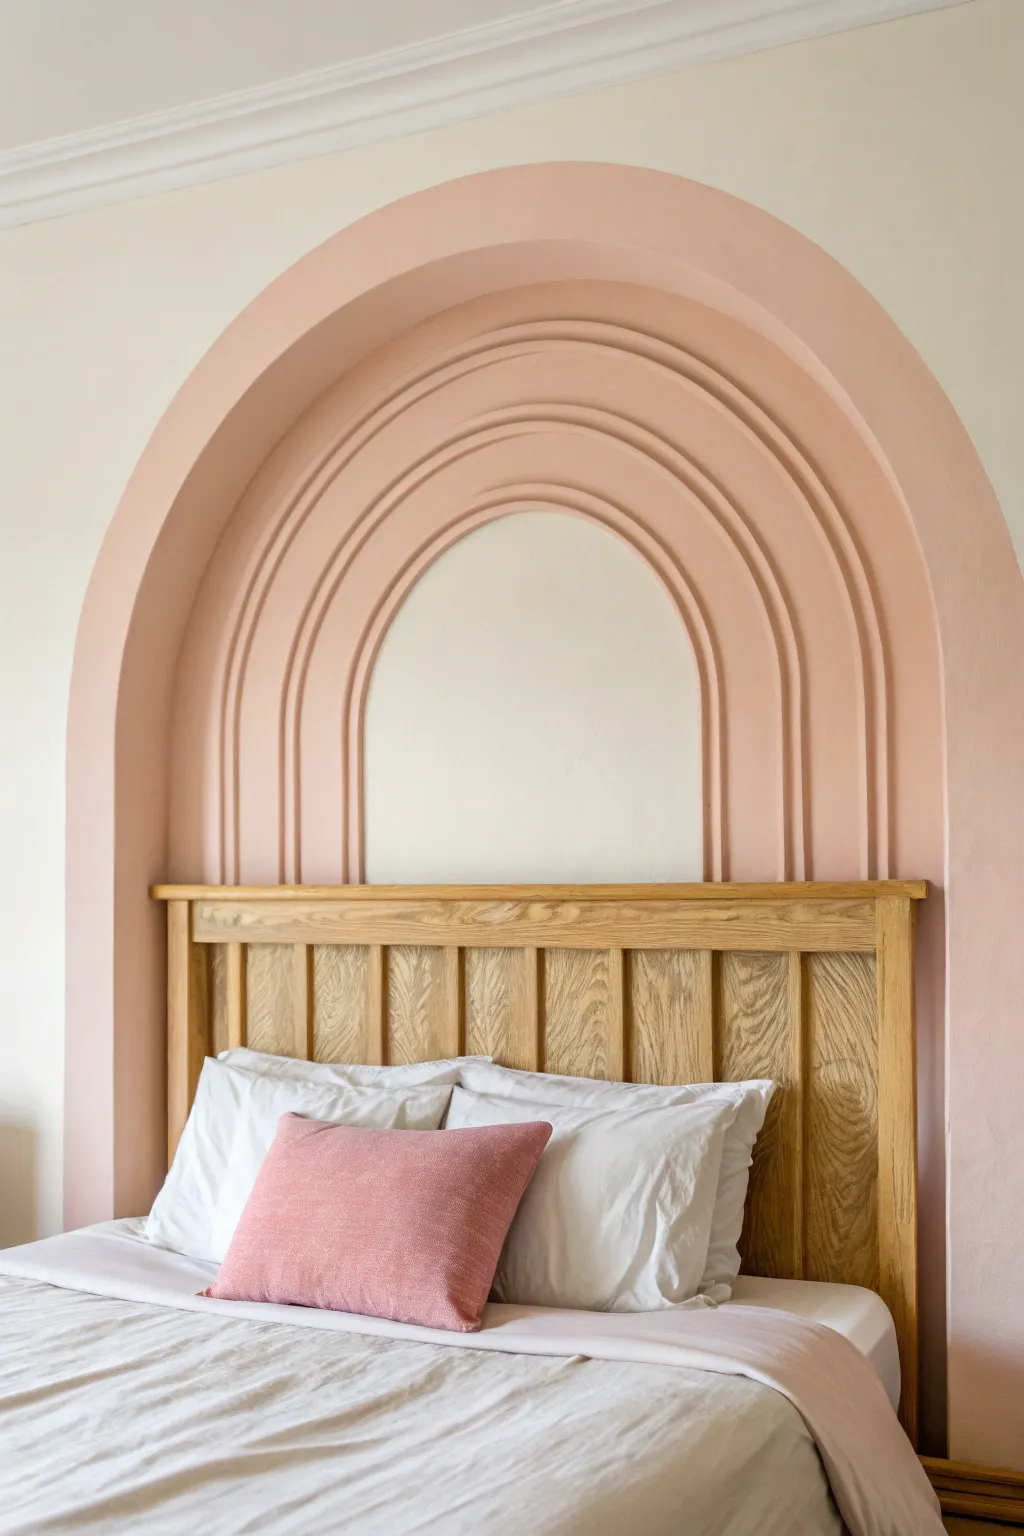
Move beyond a simple painted arch by adding stunning architectural depth with this tiered relief technique. This project creates a soft, peachy focal point that frames the bed wth elegant, concentric shadows.
Step-by-Step
Materials
- Pencil
- String and pushpin/nail
- Measuring tape
- Flexible MDF trim or bending plywood (approx. 1/4 inch thick strips)
- Construction adhesive
- Brad nailer and 1-inch brad nails
- Drywall compound or joint compound (large bucket)
- Wide putty knife (6-inch)
- Smaller putty knife (2-inch)
- Sanding sponge (medium and fine grit)
- Wall primer
- Peach/blush interior latex paint (matte finish)
- Paint roller and tray
- Angled sash brush
- Painter’s tape
Step 1: Planning the Arches
-
Measure the center:
Locate the exact horizontal center of where your bed will sit against the wall. Mark this centerline vertically up the wall to your desired maximum height. -
Draw the outermost arch:
Tie a string to a pencil. Pin the other end of the string to the centerline at the height where the curve should begin (usually matching the height of your headboard posts). Draw your largest arch. -
Mark inner tiers:
Shorten the string by about 3-4 inches and draw a second, smaller arch inside the first. Repeat this process until you have four or five concentric guide lines drawn on the wall.
Smooth Operator
Use a damp sponge instead of sandpaper for the final smoothing. It melts the compound slightly for a glass-like finish without creating dust.
Step 2: Building the Structure
-
Cut the flexible trim:
Cut your flexible MDF or bending plywood into strips. The width of these strips determines the depth of your relief—I usually aim for about 1 inch deep for a subtle look. -
Attach the first strip:
Apply construction adhesive to the back of a flexible strip. Align it carefully along your *outermost* pencil line or the edge of the recess if you are building into a niche. -
Secure with nails:
While holding the strip against the curve, use a brad nailer to secure it every few inches. The tension can be tricky, so take your time to keep it flat against the wall. -
Install remaining tiers:
Repeat the gluing and nailing process for each inner arch line. Ensure the gap between strips is consistent, as this forms the flat ‘step’ between levels.
Textured Venetian Look
Mix a textured additive or sand into your paint for a gritty, old-world plaster feel that mimics authentic Mediterranean architecture.
Step 3: Creating the Plaster Effect
-
Fill the gaps:
Once the adhesive dries, use a putty knife to fill the spaces between the wooden strips with drywall compound. You want to create a smooth transition from the wall to the strip. -
Sculpt the curves:
Apply a thick layer of compound over the wooden strips themselves to hide the wood grain and nail holes. Use your finger or a rounded contour tool to smooth the inside corners. -
Let it dry completely:
This thick application needs time. Allow it to dry overnight; it will likely shrink and crack slightly, which is normal. -
Sand and refine:
Sand the dried compound with a medium-grit sponge to knock down high spots. Wipe away dust with a damp cloth. -
Apply a second coat:
Skim a thinner second layer of joint compound over everything to fill cracks and create a seamless, plaster-like surface. Let this dry thoroughly. -
Final sanding:
Use a fine-grit sanding sponge to polish the curves until they feel perfectly smooth to the touch.
Step 4: Painting
-
Prime the surface:
Apply a high-quality wall primer over the entire relief structure. Drywall compound absorbs paint differently than the wall, so this step ensures an even finish. -
Cut in the edges:
Using an angled sash brush, carefully paint the corners and deep recesses of the tiers with your peach paint. -
Roll the flattest areas:
Use a small roller for the face of the wall and the larger flat sections of the arch interior. Apply two coats for the richest color.
Now you have a stunning, architectural feature that transforms the entire room with softness and dimension
Color-Blocked Reading Corner
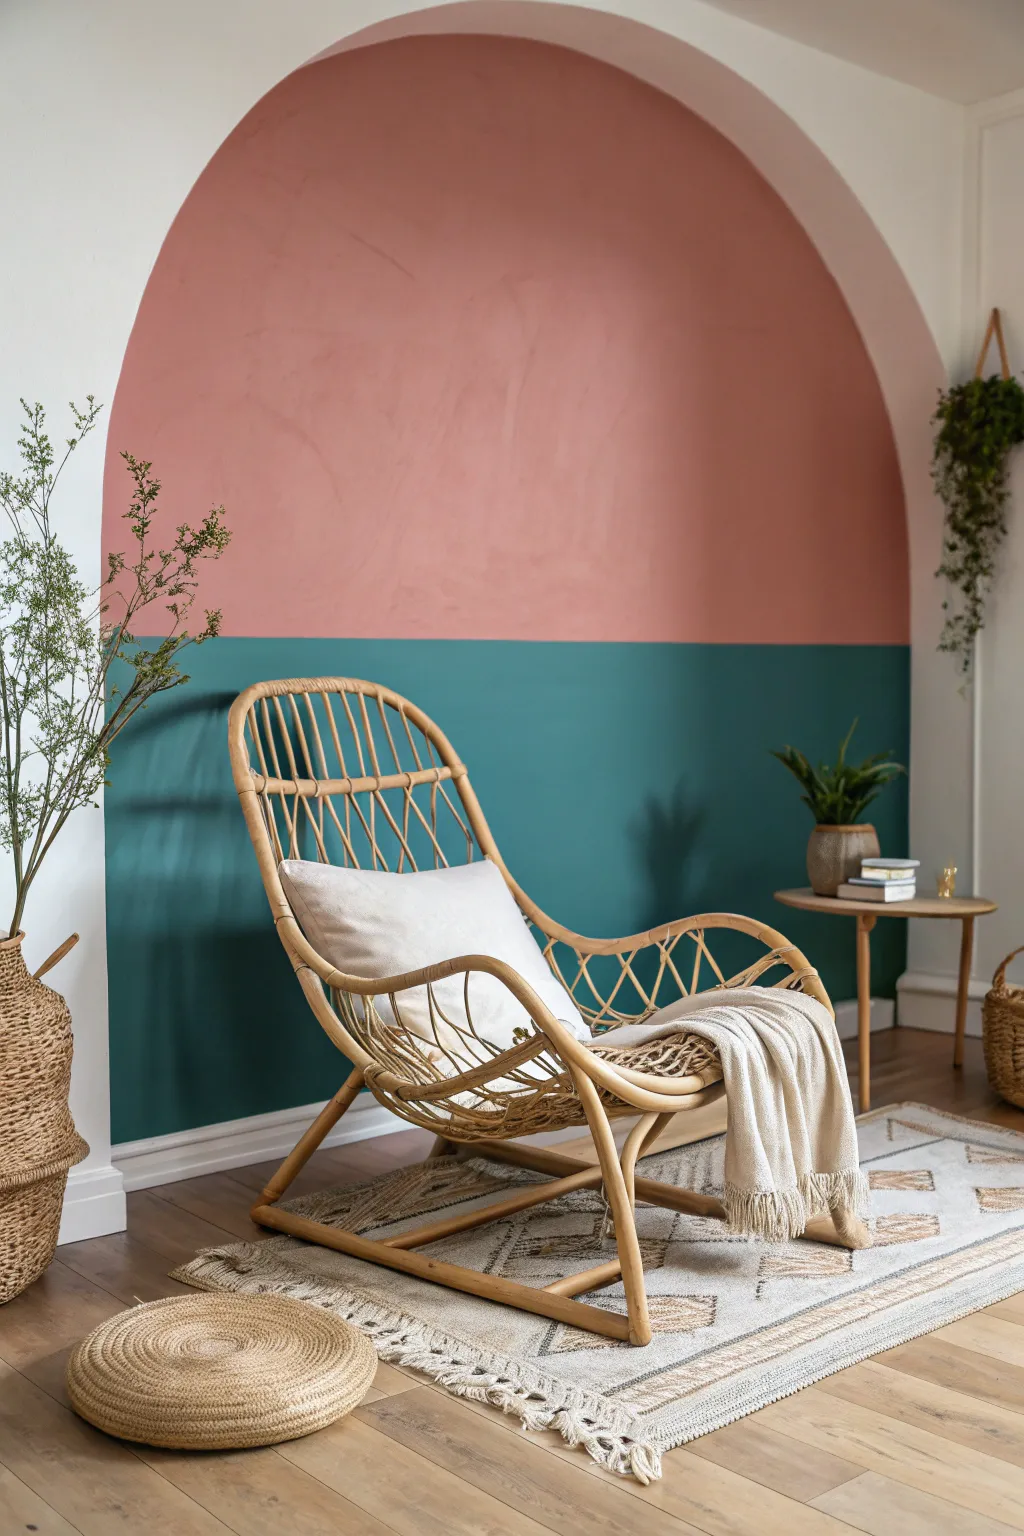
Transform a plain white wall into an architectural focal point with this clever color-blocked arch. By combining a soft salmon pink with a grounding teal bottom, you create the illusion of a cozy niche without any structural renovation.
Detailed Instructions
Materials
- Dusty pink interior latex paint (matte or eggshell)
- Deep teal/green interior latex paint (matte or eggshell)
- White wall paint (for touchups)
- Pencil
- String
- Thumbtack or small nail
- Painter’s tape (high quality)
- Laser level or long spirit level
- Measuring tape
- Angled sash brush (2-inch)
- Small foam roller and tray
- Drop cloth
Step 1: Drawing the Guide
-
Measure the width:
Decide exactly where you want your reading nook to be and measure the desired width of your arch. Mark the center point of this width on the wall at the height where the arch’s curve will begin. -
Create a compass:
Tie a piece of non-stretchy string to a pencil. Measure the string so the distance between the pencil tip and the end matches the radius of your arch (half the total width). -
Draw the curve:
Secure the free end of the string to your center mark using a thumbtack or tape. Pull the string taut and lightly draw the semi-circle arch on the wall with your pencil, moving from one side to the other in a smooth motion. -
Extend the sides:
Use a spirit level or laser level to draw two straight vertical lines down from the ends of your semi-circle all the way to the baseboard. This creates the legs of your arch. -
Mark the horizon line:
Decide where the color split will happen—usually about waist height or just above the chair back looks best. Use a laser level to draw a straight horizontal line across the entire arch at this height.
Seal the Tape Edge
Before painting your main color, paint over the tape edge with your existing WALL color first. This seals the gap, so any bleed is invisible, leaving you with perfect razor-sharp lines.
Step 2: Painting the Teal Base
-
Tape the lower section:
Apply painter’s tape along the outside of the vertical lines for the bottom section only. Press the edges down firmly to prevent bleed. -
Create the upper boundary:
Place a strip of tape directly *above* your horizontal horizon line. This way, you can paint the bottom section without worrying about crossing into the pink zone. -
Cut in the edges:
Use your angled sash brush to carefully paint the teal color along the tape lines and the baseboard. I prefer to do this slowly to ensure crisp lines later. -
Roll the fill:
Use a small foam roller to fill in the rest of the bottom rectangle with the teal paint. Apply two coats for full coverage, letting the paint dry completely between coats. -
Remove tape while wet:
After the final teal coat, carefully peel off the tape while the paint is still slightly tacky to avoid pulling up dry chips. Let the teal section cure for at least 24 hours before proceeding.
Step 3: Painting the Pink Arch
-
Tape the horizon:
Once the teal paint is fully dry, place a strip of delicate-surface tape (usually purple or yellow) directly *over* the top edge of the teal paint to protect your crisp line. -
Outline the curve:
Using a steady hand and your angled brush, carefully ‘cut in’ the curved top of the arch. While you can try taping curves, painting freehand with a loaded brush often yields smoother results if you go slow. -
Fill the top:
Use the brush to paint the side vertical lines down to meet the tape. Then, use your roller to fill in the pink area, blending it into your brushwork while everything is wet. -
Second coat:
Apply a second coat of pink paint once the first is dry to the touch, ensuring the color is solid and opaque. -
Final reveal:
Gently peel away the horizontal tape strip to reveal the sharp line between the pink and teal. Use an eraser to remove any visible pencil marks on the white wall outside the shape.
Uneven Arches
If your pencil arch looks wobbly, double-check that your string isn’t elastic. Stretchy string creates ovals. Use twine or fishing line for a consistent radius swing.
Step back and admire how a few hours of painting completely redefined the energy of the room
Painted Panel Look Without Wallpaper
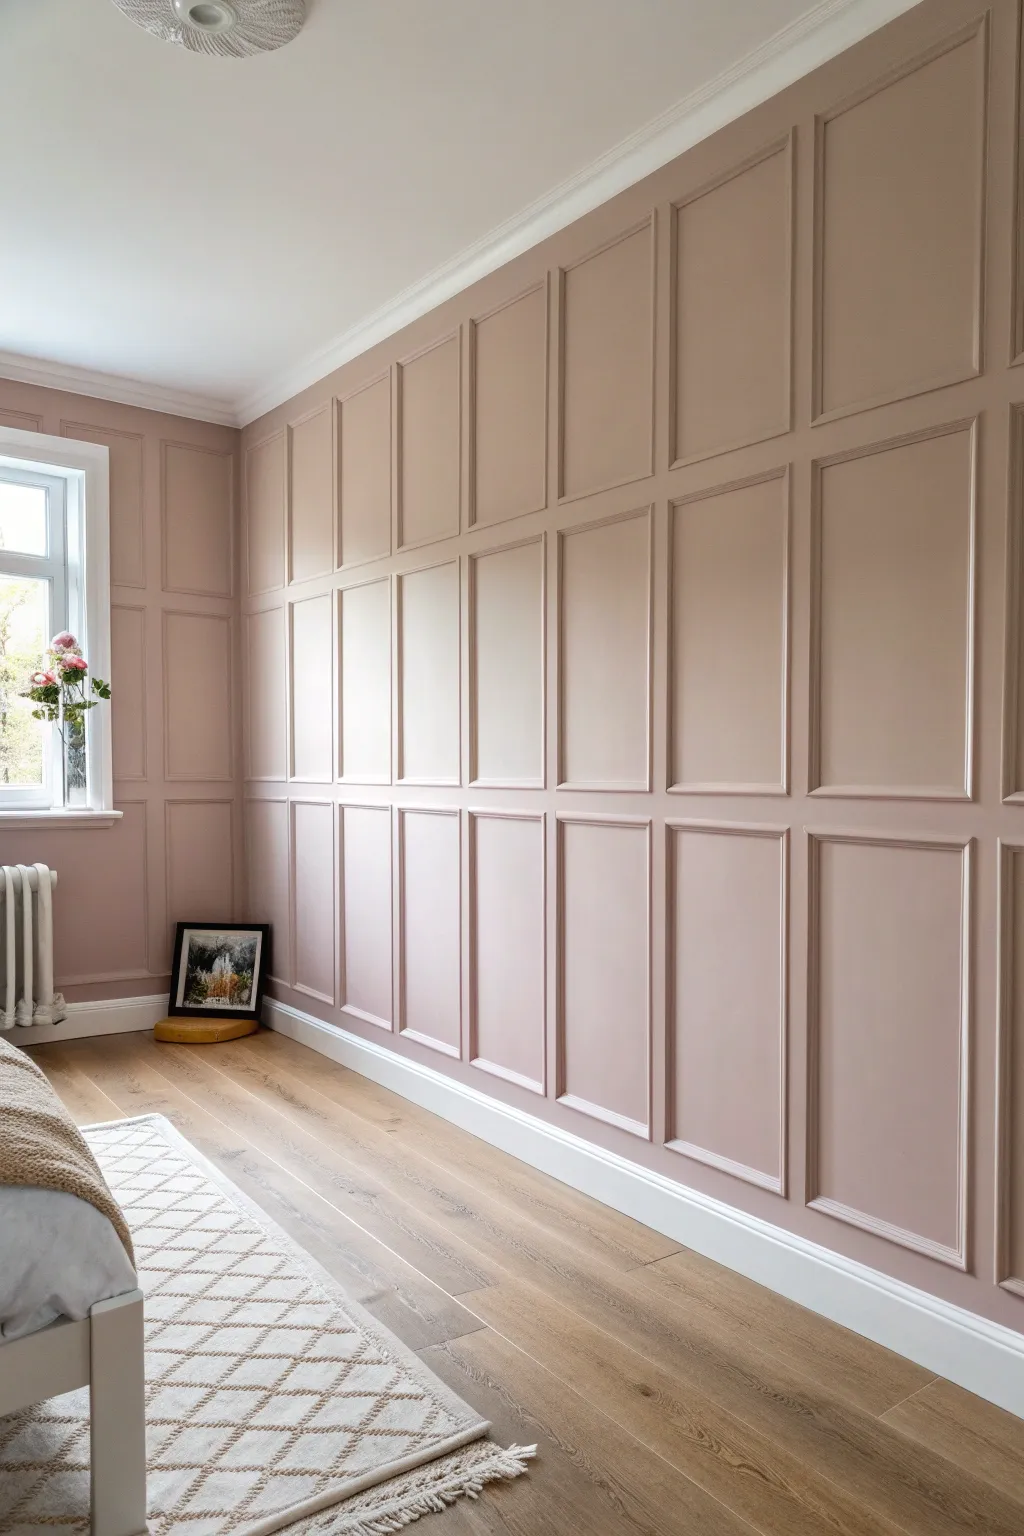
Transform a plain wall into a sophisticated architectural feature with this full-height grid paneling project. The structured molding creates depth and shadow, while the muted pink paint offers a soft, modern warmth that feels grown-up yet whimsical.
Detailed Instructions
Materials
- Primed MDF strips (approx. 2-inch width)
- Panel molding trim (optional, for inside boxes)
- Construction adhesive (Liquid Nails)
- Caulk gun
- Paintable decorators caulk
- Wood filler
- Fine-grit sandpaper (220-grit)
- Laser level
- Tape measure
- Miter saw or hand saw with miter block
- Brad nailer with 1.5-inch nails (or hammer and finish nails)
- Interior satin or eggshell paint (color: Dusty/Antique Pink)
- Paint roller (medium nap)
- Angled sash brush (2-inch)
- Drop cloths and painter’s tape
- Pencil/chalk line
Step 1: Planning and Layout
-
Measure the Wall:
Measure the total width and height of your wall. This is the most crucial step to ensure your grid looks intentional rather than accidental. -
Calculate Spacing:
Decide on the number of vertical and horizontal boxes you want. Subtract the total width of your vertical battens from the wall width, then divide the remaining space by the number of columns to find the gap size. -
Mark Vertical Lines:
Using a laser level or a long spirit level, mark the positions for your vertical battens on the wall with a pencil. I find it helpful to mark both sides of where the wood will sit to avoid confusion later. -
Mark Horizontal Lines:
Determine the height of your horizontal rails. Mark these lines across the wall to intersect with your vertical markings, creating a visual grid before you cut any wood.
Spacer Block Trick
Cut a scrap piece of wood to the exact width of your desired gap. Use this ‘spacer block’ to quickly position your horizontal rails without measuring every single time.
Step 2: Installation
-
Install Border Frame:
Start by attaching the top horizontal rail (near the ceiling or crown molding) and the bottom rail (resting on the skirting board) using construction adhesive and brad nails. -
Attach Vertical Battens:
Cut your vertical MDF strips to fit snugly between the top and bottom rails. Apply adhesive to the back, place them along your vertical layout lines, and secure them with nails. -
Cut Horizontal Rails:
Measure the specific distance between each vertical batten individually. Walls are rarely perfectly straight, so cutting each horizontal piece to fit its specific slot ensures a tight fit. -
Install Horizontal Rails:
Apply adhesive and nail the horizontal pieces into place between the vertical battens, double-checking with a small level on each piece to ensure the grid remains square. -
Add Decorative Trim (Optional):
For the elevated look in the photo, miter cut small panel molding strips and install them inside each rectangle, framing the inner edge of your grid boxes.
Step 3: Finishing and Painting
-
Fill Nail Holes:
Go over every nail hole with wood filler. Overfill slightly as the filler will shrink when drying. -
Sand Smooth:
Once dry, sand the wood filler flush with the surface using 220-grit sandpaper. Run your hand over the join; if you can feel it, you’ll see it after painting. -
Caulk the Seams:
Run a thin bead of paintable decorators caulk along every edge where the wood meets the wall and where wood meets wood. Smooth it immediately with a wet finger or caulk tool. -
Prime the Wood:
If your MDF isn’t pre-primed, or where you’ve sanded extensively, apply a coat of primer to prevent the paint from soaking in unevenly. -
Cut In Edges:
Using your angled sash brush and the dusty pink paint, carefully paint all the intricate corners, edges, and sides of the grid paneling first. -
Roll the Flat Surfaces:
Use a medium nap roller to paint the flat wall sections inside the boxes and the faces of the grid strips. This texture helps blend the wood and wall together into one cohesive unit. -
Apply Second Coat:
Allow the first coat to dry completely according to the can’s instructions, then apply a second coat for rich, opaque color coverage.
Two-Tone Twist
For a bold twist, paint the inside of the grid boxes a slightly darker shade of pink than the framework. This subtle contrast adds incredible depth.
Step back and admire how this elegant grid structure completely redefines the character of the room
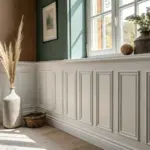
Paint the Ceiling a Soft Tint
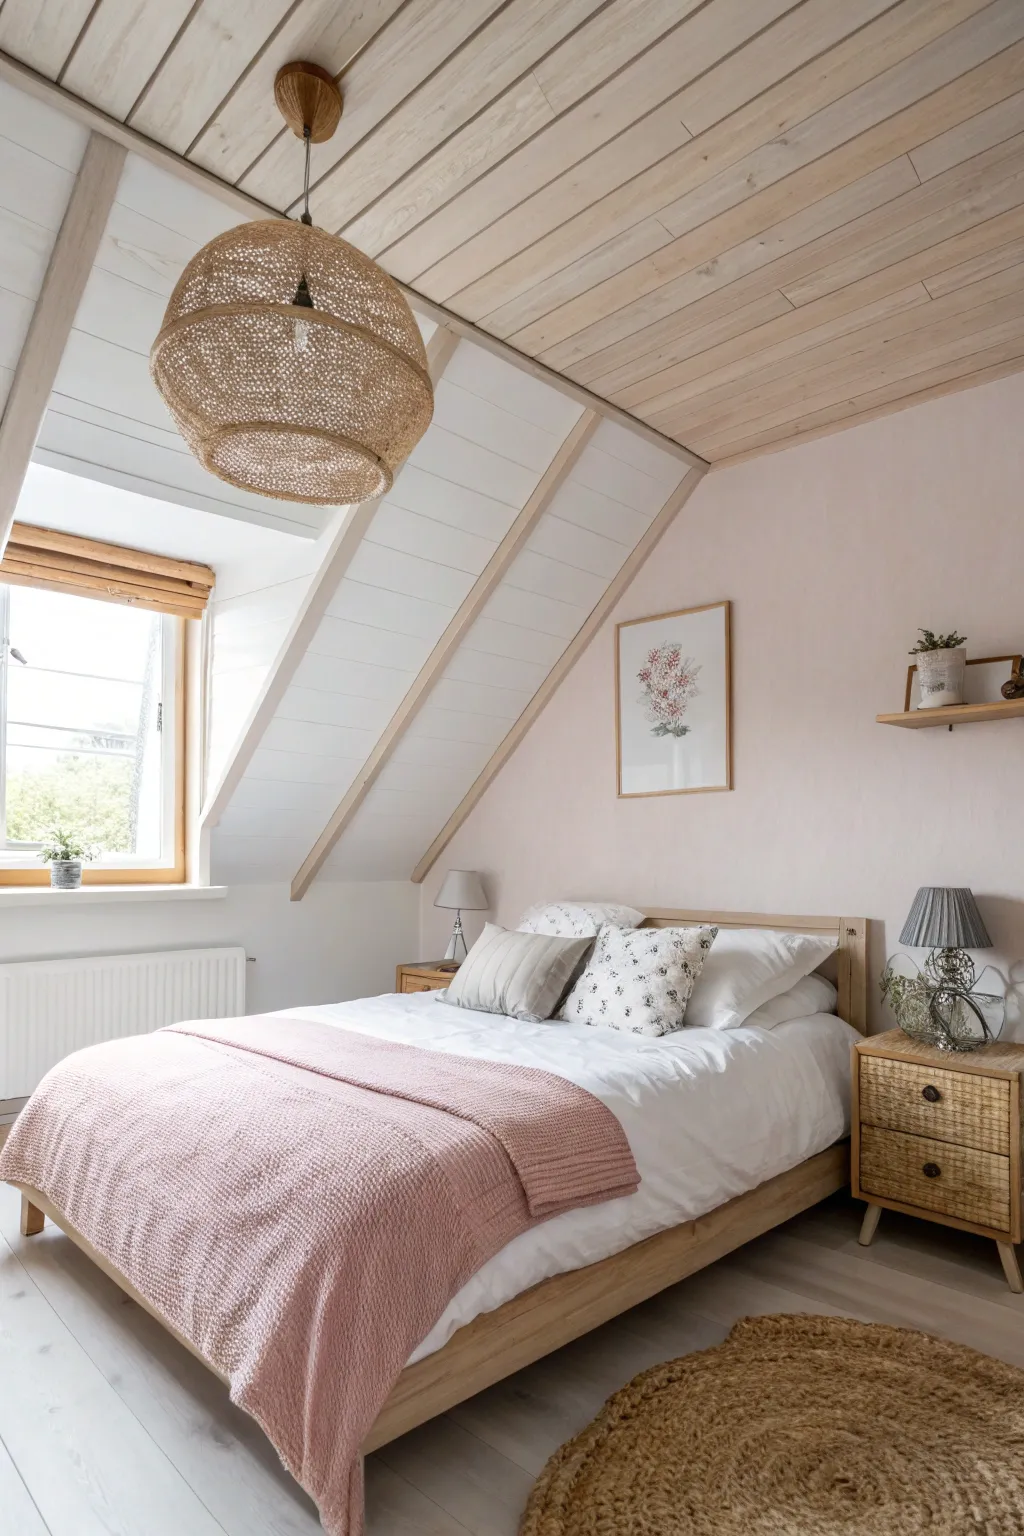
Transform a rustic wooden ceiling into a bright, airy feature using a custom whitewash technique that preserves the wood grain while adding a soft, tinted glow. This approach works beautifully on tongue-and-groove paneling to make slanted ceilings feel higher and more open.
Step-by-Step Guide
Materials
- Matte white ceiling paint
- Water based glazing liquid or water
- Mild detergent and sponge
- Sanding block (120-grit)
- Painter’s tape
- Drop cloths
- Empty mixing bucket
- Stir stick
- 3-inch angled synthetic brush
- Clean, lint-free rags
- Step ladder
Step 1: Preparation
-
Clear the room:
Remove all furniture, rugs, and decor from the room to protect them from drips and dust. If the bed frame is too heavy to move, cover it entirely with a heavy-duty plastic drop cloth. -
Clean the surface:
Using a mild detergent and warm water, thoroughly wipe down the ceiling planks to remove dust, cobwebs, and any oils. Let the wood dry completely before moving on. -
Protect surrounding areas:
Apply painter’s tape carefully along the top edge of the walls where they meet the ceiling. Don’t forget to tape off any exposed beams you intend to keep natural wood, just like the ones in the photo. -
Light scuffing:
Run a 120-grit sanding block lightly over the planks. You aren’t trying to strip the wood, just opening up the grain slightly to accept the wash better. -
Wipe away dust:
Use a damp rag or tack cloth to remove every speck of sanding dust. Any leftover dust will create grittiness in your finish.
Step 2: Creating the Wash
-
Mix the base:
In your empty bucket, combine 1 part matte white paint with 1 part water. For a more durable finish on older wood, I prefer using a clear glazing liquid instead of water. -
Test the consistency:
Stir thoroughly until the mixture is uniform. Dip your brush in and test it on a scrap piece of wood or an inconspicuous corner. It should be milky and translucent, not opaque. -
Adjust opacity:
If the test patch is too white, add more water/glaze. If it’s too transparent, add a splash more paint. Keep tweaking until you get that perfect soft tint level.
Knot Bleed Prevention
If your wood has dark knots, dab them with a clear shellac-based primer before washing. This stops resin from bleeding through and yellowing your beautiful white finish over time.
Step 3: Application
-
Work in sections:
Plan to work on 2-3 planks at a time. Do not try to paint the whole ceiling at once, as the wash needs to be manipulated while wet. -
Brush it on:
Dip your synthetic brush into the wash and apply it generously along the length of the planks, working with the grain. Ensure the wash gets into the grooves between boards. -
Let it sit briefly:
Allow the mixture to sit on the wood for about 30 to 60 seconds. The longer it sits, the more opaque the white tint will become. -
Wipe off excess:
Take a clean, dry lint-free rag and gently wipe the surface in the direction of the wood grain. This removes the excess paint and reveals the wood texture underneath. -
Check for pooling:
Look closely at the V-grooves between planks. Use a dry corner of your rag or a dry brush to soak up any pools of liquid so they don’t drip later. -
Maintain a wet edge:
Immediately move to the next 2-3 planks while the edge of the previous section is still damp to avoid lap marks. -
Beam detailing:
If you are painting around exposed natural beams, use a smaller artist’s brush to carefully cut in the wash right up to the beam edge for a crisp line.
Tinted Warmth
For a ‘soft tint’ that isn’t stark white, mix a drop of beige or gray paint into your wash mixture. This mimics the aged wood look seen in the photo perfectly.
Step 4: Finishing Up
-
Assess coverage:
Step back and look at the ceiling as a whole. If some areas look too dark, you can apply a very light second coat of wash to those specific spots. -
Remove tape:
Peel off the painter’s tape while the wash is still slightly tacky to prevent peeling any dried film. -
Dry time:
Allow the ceiling to cure for at least 24 hours before moving furniture back in, as the humidity in the room may be slightly elevated.
Enjoy the relaxed, airy atmosphere your new whitewashed ceiling brings to the space
Tiny Star Speckles for a Night-Sky Feel
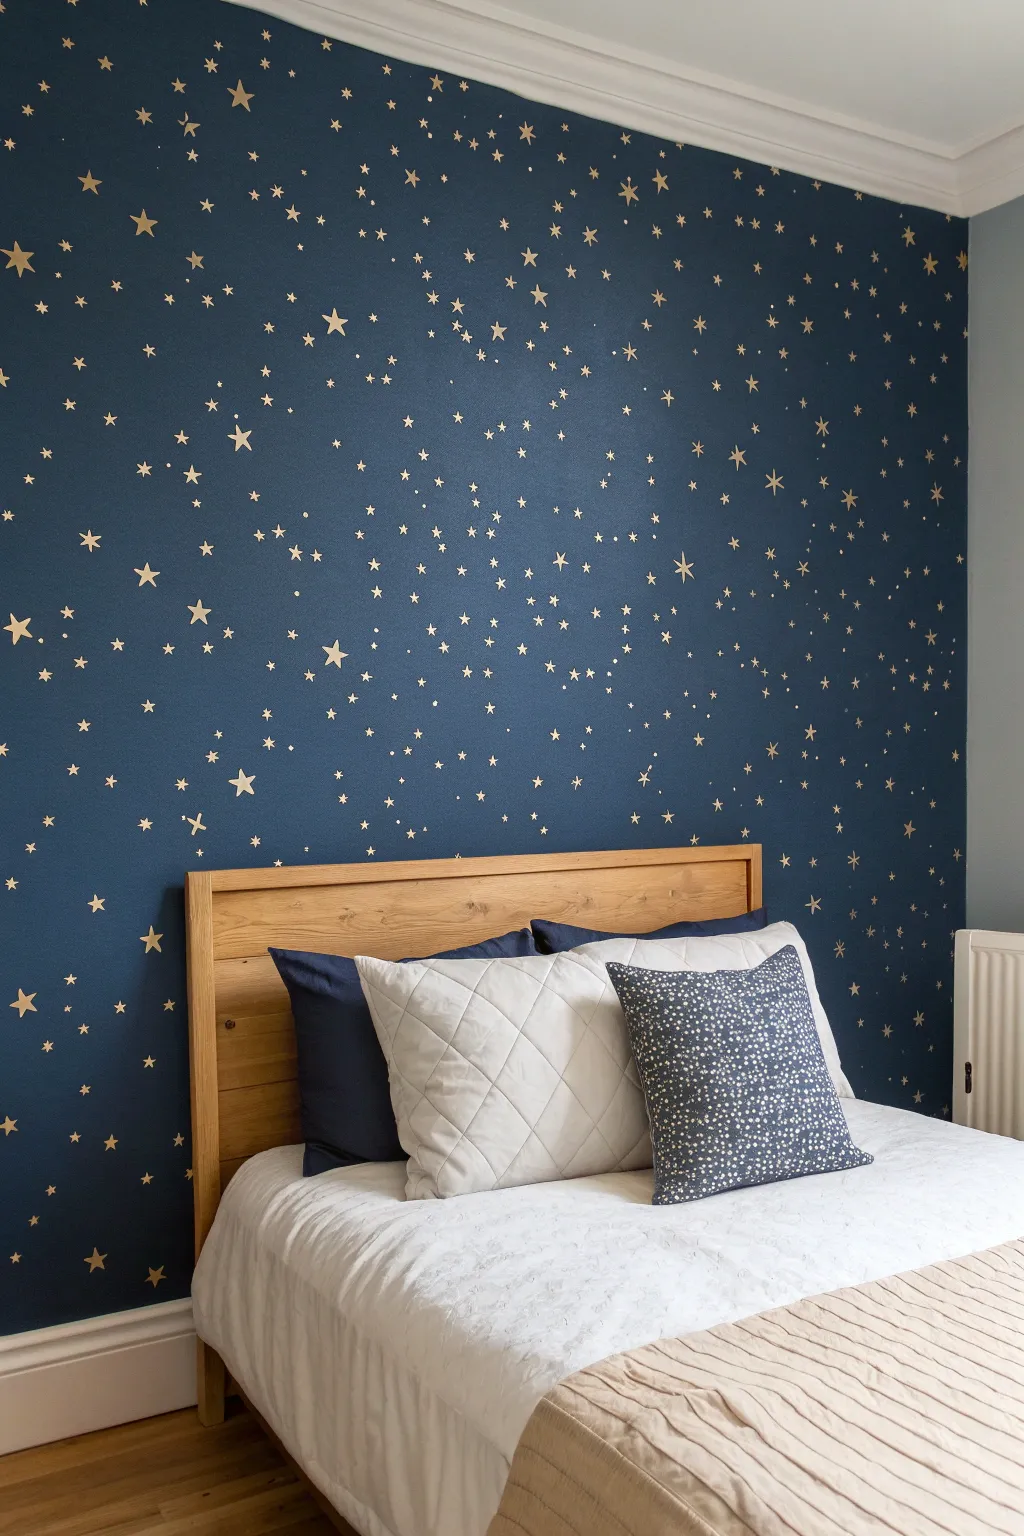
Transform a plain bedroom wall into a dreamy, stargazing sanctuary with this night-sky painting project. By layering golden stars over a deep navy backdrop, you create a magical atmosphere perfect for drifting off to sleep.
How-To Guide
Materials
- Deep navy blue wall paint (matte or eggshell finish)
- Metallic gold craft paint or interior latex paint
- Paint roller and tray
- Star stencils (assorted sizes)
- Painter’s tape
- Small stencil brushes or sponge pouncers
- Paper towels
- Small artist’s brush (for touch-ups)
- Drop cloth
- Laser level or chalk line (optional)
Step 1: Setting the Scene
-
Prep the room:
Clear the furniture away from the wall you intend to paint. Lay down a drop cloth to protect your flooring from any accidental drips or spills. -
Clean the surface:
Wipe down the wall with a damp cloth to remove dust and oils. This ensures your base coat adheres perfectly and provides a smooth canvas for the stars. -
Tape the edges:
Apply painter’s tape along the baseboards, ceiling line, and adjacent walls to ensure crisp, clean lines for your dark base color.
Less is More on the Brush
The #1 mistake with stenciling is using too much paint. Your brush should be ‘dry’ enough that it leaves no texture, just color. This ensures crisp star points every time.
Step 2: Painting the Midnight Backdrop
-
Cut in the edges:
Using an angled brush, paint a border of the deep navy blue around the taped edges of the wall. -
Roll the first coat:
Use a roller to fill in the main section of the wall with the navy paint. Work in ‘W’ shapes to distribute the paint evenly. -
Apply a second coat:
Once the first coat is completely dry to the touch, apply a second coat for full, rich opacity. This depth of color is crucial for making the gold pop later. -
Let it cure:
Allow the base wall color to dry fully, ideally overnight. Applying stencils to tacky paint can peel off your hard work.
Glow in the Dark Option
Mix a clear glow-in-the-dark medium into your gold paint or apply a top coat of it over the finished stars. By day, they are gold; by night, they softly glow.
Step 3: Applying the Stars
-
Plan your constellation:
Before painting, take a moment to look at your wall. Decide if you want a random scatter or a dense cluster pattern like the Milky Way. -
Prepare the stencil:
Select a variety of star sizes. If using a large sheet stencil, secure it to the top corner of the wall with painter’s tape. -
Load the brush:
Dip your stencil brush or sponge pouncer into the metallic gold paint. Only pick up a tiny amount of paint. -
Offload excess paint:
Dab the brush onto a paper towel until it feels almost dry. I find this prevents paint from bleeding under the stencil edges. -
Stipple the paint:
Apply the paint over the stencil openings using a gentle up-and-down dabbing motion. Avoid brushing side-to-side. -
Vary the sizes:
Move the stencil around the wall. Switch between large five-point stars, tiny four-point sparkles, and simple dots to create depth. -
Check spacing:
Step back frequently to ensure the distribution feels balanced. Fill in any large empty gaps with smaller star clusters. -
Freehand details:
For a truly organic look, use a fine artist’s brush to add tiny dots or extra sparkles where the stencil couldn’t reach. -
Clean up edges:
If any gold paint bled, wait for it to dry, then carefully touch it up with a small amount of the navy wall paint. -
Remove tape:
Peel away the painter’s tape from the ceiling and baseboards slowly while the paint is still slightly fresh to avoid chipping.
Enjoy the peaceful ambiance of your new starry retreat every night


Have a question or want to share your own experience? I'd love to hear from you in the comments below!