Glitter painting is one of my favorite ways to make light feel real on a flat surface—like you can almost hear it shimmer. If you’re craving ideas that go beyond “add sparkle,” these are all about using glitter texture to create movement, glow, and drama.
Shimmering Ocean Horizon
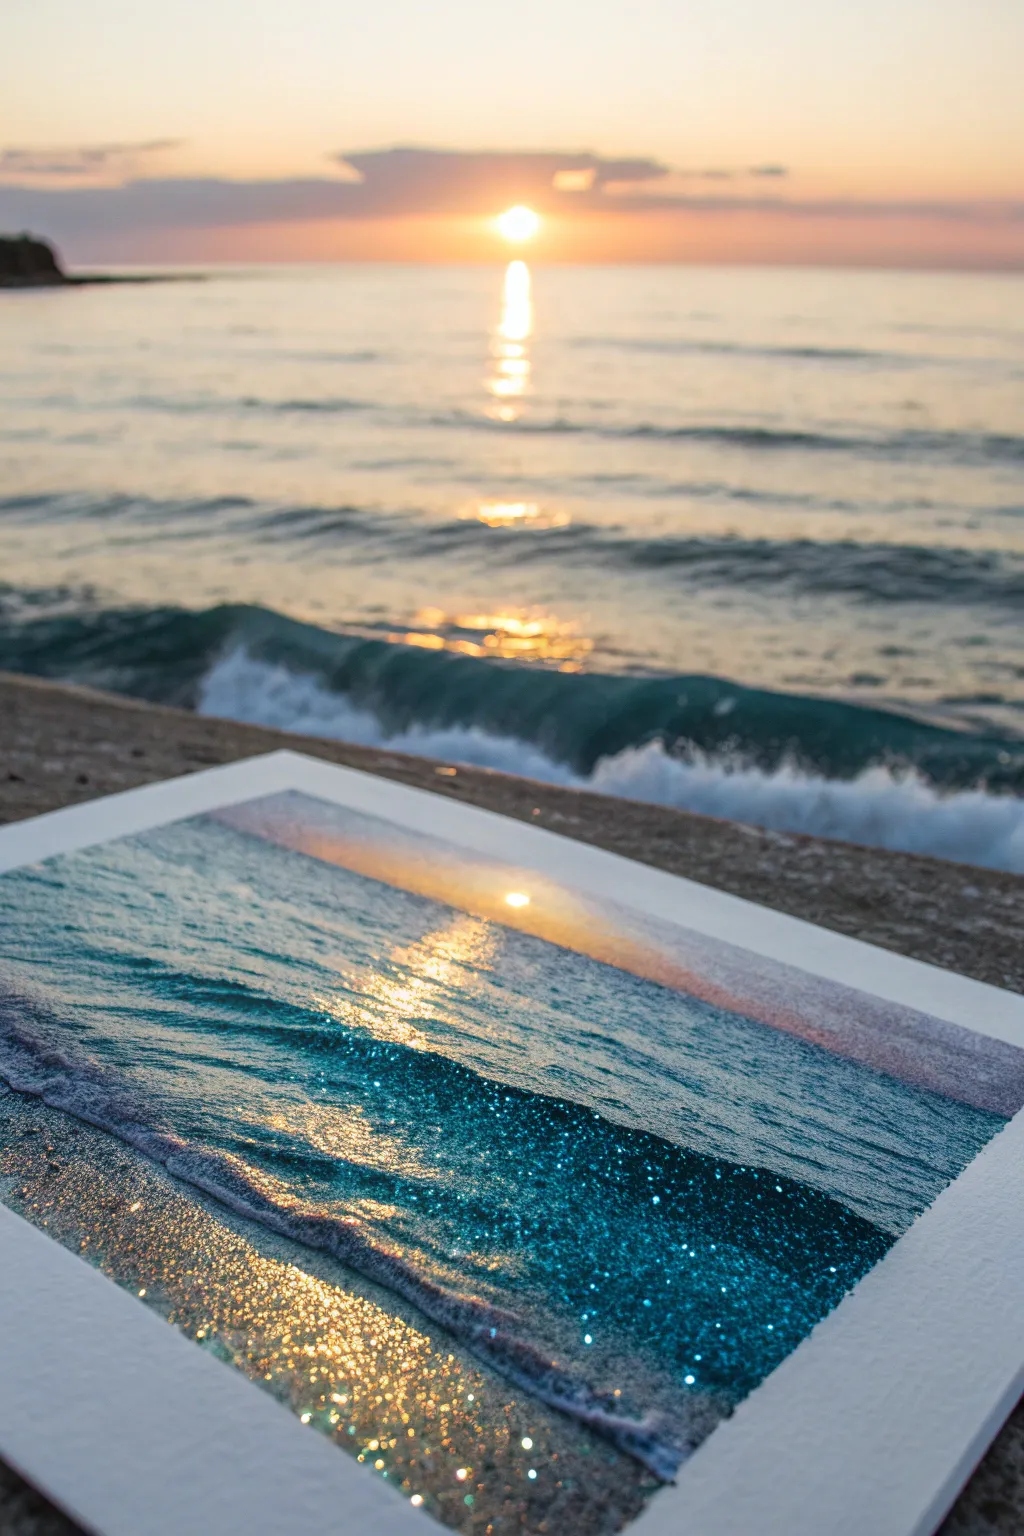
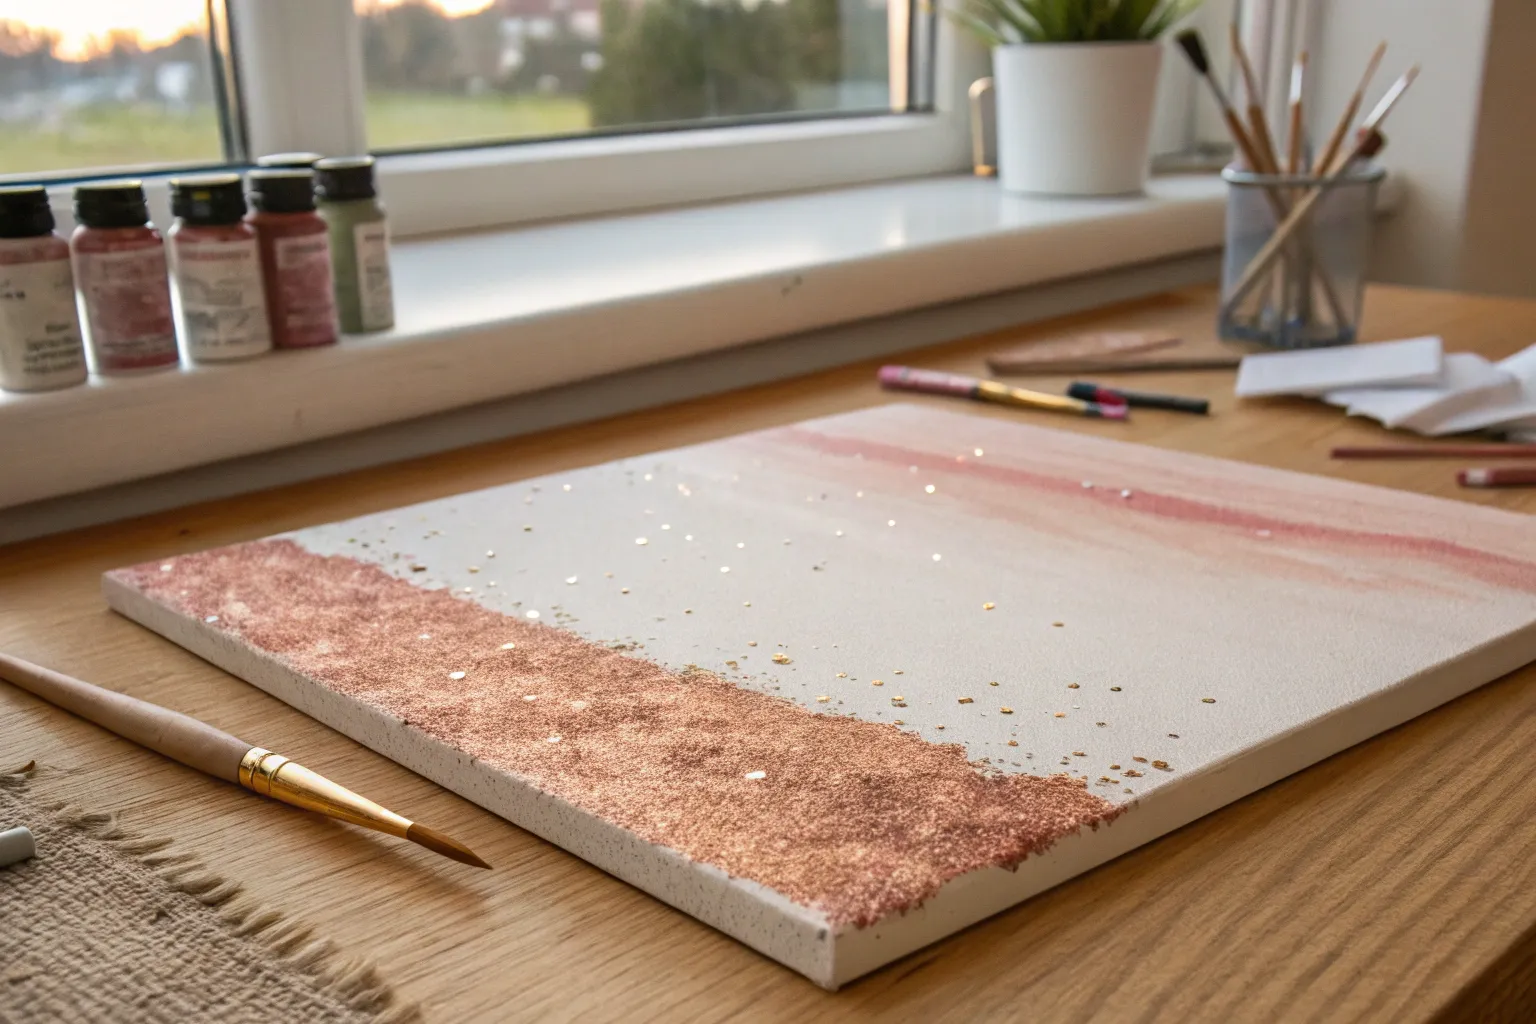
Capture the magic of golden hour with this stunning mixed-media seascape that literally sparkles in the light. By combining acrylic washes with carefully placed glitter, you’ll recreate the shimmer of sunlight dancing across ocean waves.
Step-by-Step Tutorial
Materials
- Heavyweight watercolor paper or canvas board
- Masking tape (1 inch wide)
- Acrylic paints (Phthalo Blue, Turquoise, Titanium White, burnt Umber, Yellow Ochre, Cadmium Orange)
- Glitter assortment (Fine iridescent blue, chunky holographic silver, fine gold)
- Mod Podge or clear craft glue
- Flat shader brushes (various sizes)
- Fan brush (optional)
- Palette knife
- Cup of water and paper towels
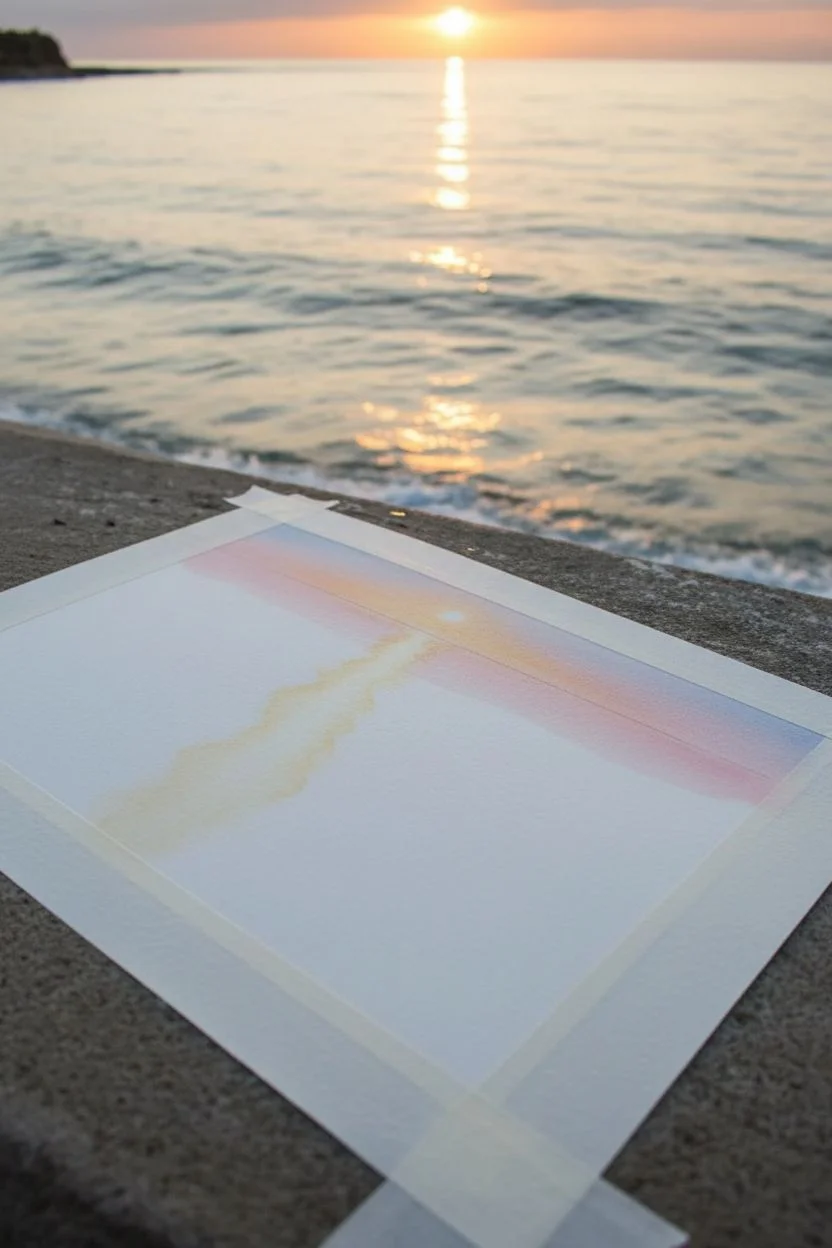
Step 1: Setting the Scene
-
Tape the border:
Begin by applying masking tape around all four edges of your paper or canvas. Press down firmly to ensure a clean crisp white border when peeled away later. -
establish the horizon:
Lightly sketch a straight horizontal line about one-third of the way down from the top of the paper. This separates your sky from the sea. -
Paint a sunset sky:
Mix a soft gradient for the sky. Start with a pale orange at the horizon line, blending upward into a soft pinkish-purple and finally a very light blue at the top. Keep the paint thin and watery for a hazy look. -
Add the sun reflection:
While the sky dries, paint a vertical column of white mixed with a tiny touch of yellow in the center of the water area, extending from the horizon down to the bottom. This is your light path.
Glitter Control
If glitter gets where you don’t want it, use a small piece of masking tape to lift the stray specks before the glue dries completely.
Step 2: Painting the Ocean
-
Block in deep water:
Mix Phthalo Blue with a touch of Turquoise. Paint distinct horizontal strokes on either side of your central light path, getting darker as you move away from the center reflection. -
Create the wave shape:
Using a smaller flat brush, paint a darker, curving line diagonally across the foreground to suggest a wave breaking onto the shore. Use a deep blue mixed with a tiny bit of Burnt Umber for shadow. -
Paint the wet sand:
For the foreground beach, mix Burnt Umber, White, and Yellow Ochre. Apply this to the bottom section, streaking in some of the sky colors (orange/pink) to show the wet sand reflecting the sunset. -
Add seafoam details:
Load a brush with watery Titanium White. lightly dab and drag it along the edge of your wave and where the water meets the sand to create foamy textures. -
Refine the light path:
Go back over your central reflection with horizontal dashes of pure white and pale yellow, breaking up the blue water to make it look like shimmering ripples.
Texture Boost
Mix coarse sand or salt into your acrylic paint for the beach section before adding glitter to create a realistic grainy texture.
Step 3: The Glitter Application
-
Mix your glue medium:
Pour a small amount of Mod Podge or clear glue onto your palette. It works best if you work in sections so the glue doesn’t dry before the glitter sticks. -
Apply blue shimmer:
Paint a thin layer of glue over the darkest blue parts of the waves. Sprinkle fine iridescent blue glitter over these areas. I find tapping the glitter jar gently gives better control than pouring. -
Highlight the wave crests:
Apply glue specifically to the white foam edges of the wave. Use the chunky holographic silver glitter here to mimic sea spray catching the light. -
Gild the reflection:
Carefully paint horizontal lines of glue over your sun reflection path. Dust fine gold glitter here, concentrating the heaviest amount near the horizon line. -
Add sand sparkle:
Mix a tiny pinch of gold glitter directly into your wet sand paint color (or apply glue over dry paint) to make the beach texture look wet and glistening. -
Shake off excess:
Once the glue has set for a minute, tilt the painting vertically over a waste bin or paper sheet to tap off the loose glitter. -
Seal the artwork:
Allow the piece to dry completely (at least an hour). Then, gently dab—don’t drag—a layer of clear gloss varnish or diluted glue over the glitter to keep it from shedding. -
The reveal:
Carefully peel away the masking tape at a 45-degree angle to reveal your clean white border and frame your sparkling masterpiece.
Place your painting in direct sunlight to see the ocean come to life as the glitter catches every ray


Gold Drip Over Color Blocks
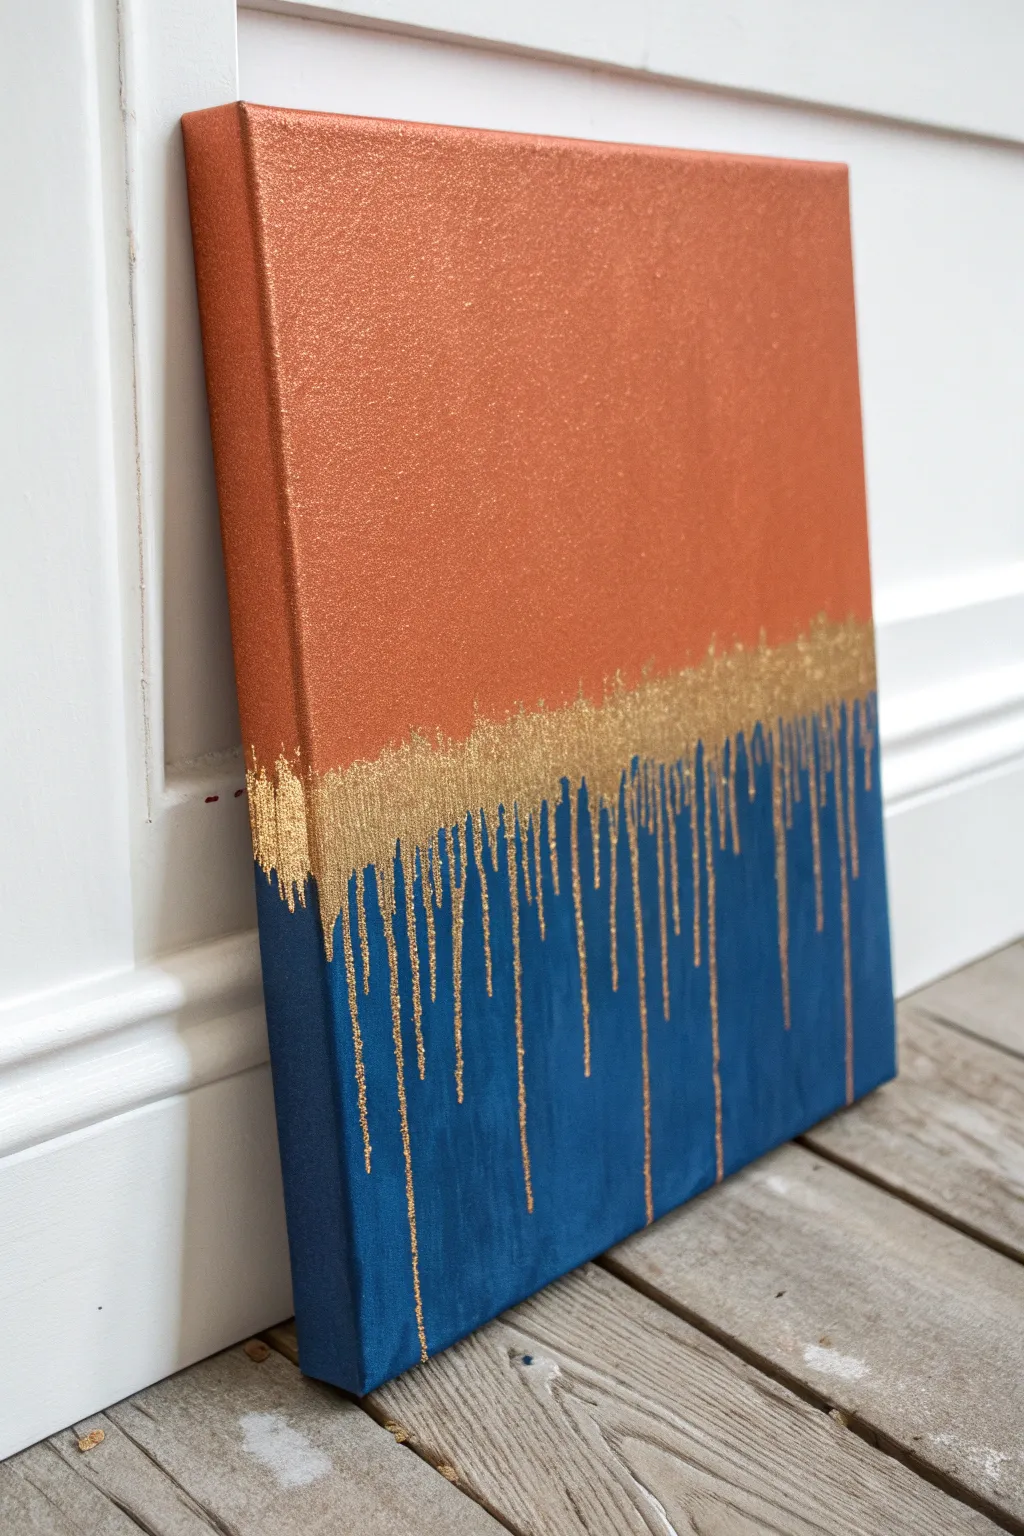
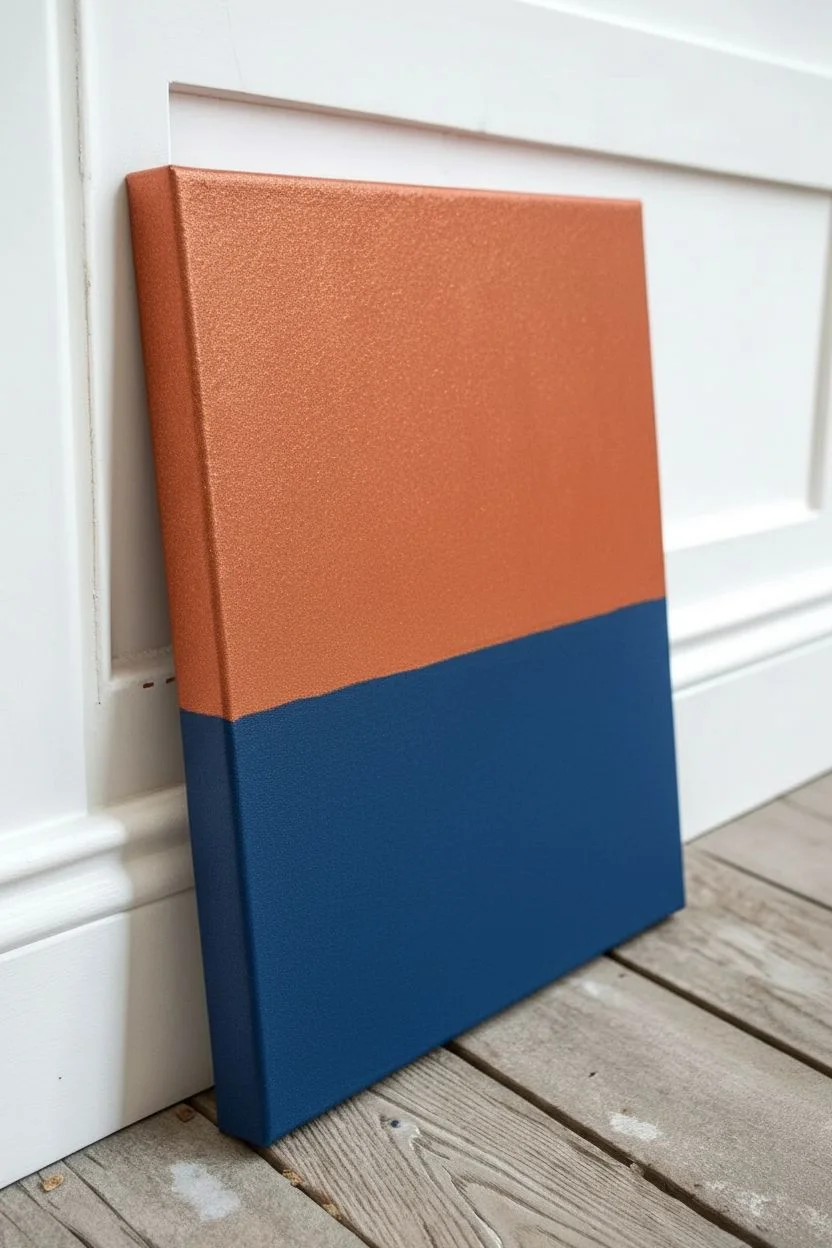
This striking dual-tone canvas combines the warmth of metallic copper with deep navy blue for a sophisticated look. A jagged line of gold glitter drips connects the two zones, adding texture and movement to this modern abstract piece.
Step-by-Step
Materials
- Stretched canvas (square or rectangular)
- Painter’s tape or masking tape
- Metallic copper acrylic paint
- Navy blue acrylic paint
- Gold glitter (fine)
- Gold glitter glue (or clear craft glue mixed with glitter)
- Flat paintbrushes (large and medium)
- Small round detail brush
- Palette or paper plate
- Cup of water
- Newspaper or drop cloth
Step 1: Base Colors
-
Prepare the workspace:
Lay down newspaper or a drop cloth to protect your floor or table from paint spills and glitter. -
Mark the horizon line:
Decide where you want the split between colors to happen. Place a strip of painter’s tape horizontally across the canvas. Press the edges down firmly to prevent bleed-through. -
Paint the top section:
Using a large flat brush, apply the metallic copper paint to the top half of the canvas. Ensure you paint the top edge and the upper side edges of the canvas for a finished look. -
Apply a second copper coat:
Let the first layer dry completely. Apply a second coat of copper to ensure rich, opaque coverage with plenty of shimmer. -
Paint the bottom section:
Once the top is dry, carefully peel off the tape. Now, paint the bottom half with your navy blue acrylic. Be steady near the line where it meets the copper, but don’t worry about perfection as the glitter will cover the transition. -
Finish the blue edges:
Continue the navy blue paint around the bottom and lower side edges of the canvas. Let the entire canvas dry completely before moving on.
Drips not defined?
If your glitter drips look too faint, wait for the first layer to dry clear, then paint a second layer of glitter glue directly over the same lines to build opacity.
Step 2: Gold Drip Effect
-
Prepare the glitter mix:
Pour some gold glitter glue onto your palette. If you want a more intense sparkle, I like to mix loose fine gold glitter directly into the glue to create a thick, sparkly paste. -
Create the jagged border:
Using a medium brush, dab your glitter mixture along the horizon line where the two colors meet. Create an uneven, jagged texture rather than a straight line to serve as the source of the drips. -
Start the main drips:
Switch to a small round detail brush. Load it with the glitter mixture and gently pull lines down from the jagged border into the navy section. -
Vary the lengths:
Make some drips long, extending almost to the bottom, and keep others short. This variation creates a natural, fluid organic look. -
Add thickness variation:
Go back over a few drips to make them slightly thicker at the top and tapering to a fine point at the bottom. -
Enhance with loose glitter:
While the glue is still wet on the canvas, gently sprinkle a pinch of loose dry glitter over the wet drips. This adds extra dimension and ensures the gold really catches the light. -
Tap off excess:
Once the glue has set slightly (after about 10-15 minutes), lift the canvas and gently tap the back to dislodge any loose glitter that didn’t stick. -
Final dry time:
Lay the canvas flat again and allow the glitter glue to dry completely, preferably overnight. This ensures the drips harden properly without running.
Add metallic leaf
Instead of glitter glue for the textured border, use gold leaf adhesive and genuine gold leaf flakes for a luxurious, high-shine metal finish.
Hang your shimmering new artwork in a well-lit spot to watch the gold accents sparkle throughout the day


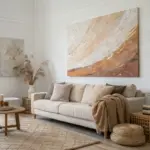

Abstract Glitter Gradient Wash

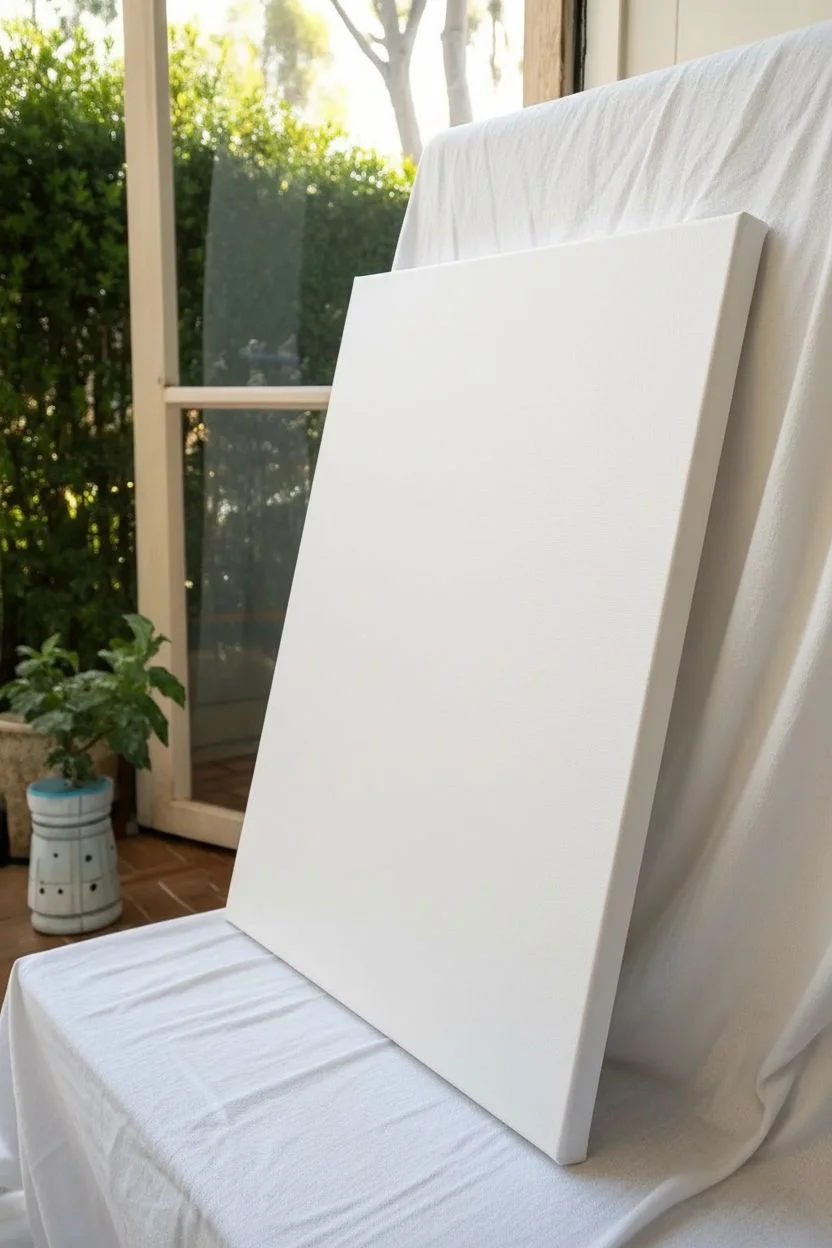
Capture the ethereal beauty of twilight with this stunning abstract gradient canvas. By blending deep purple into brilliant teal and overlaying a gentle shimmer, you’ll create a piece that feels like a window into a starry galaxy.
Step-by-Step Tutorial
Materials
- Canvas (stretched on a frame)
- White floating frame (optional)
- Acrylic paints: Royal Purple, Teal/Turquoise, Titanium White
- Medium or heavy body acrylic blending medium
- Large flat paintbrush (2-3 inches)
- Fine glitter (silver or iridescent)
- Gloss varnish or clear spray sealant
- Old toothbrush or stiff bristle brush
- Water cup and palette
- Drop cloth
Step 1: Preparation & Base Coat
-
Prepare your workspace:
Lay down a drop cloth to protect your table or floor. This project involves splattering later on, so ensure you have ample space covered. -
Prime the canvas:
Even if your canvas is pre-primed, applying a fresh coat of Titanium White helps the subsequent colors pop. Use a large flat brush to apply an even layer and let it dry completely. -
Set up your palette:
Squeeze out generous amounts of your Royal Purple and Teal paints. Place a dollop of mixing medium next to each color, or premix it if you prefer a longer working time.
Step 2: Creating the Gradient
-
Apply the teal anchor:
Start at the bottom third of the canvas. Using a clean, damp large flat brush, apply the Teal paint in horizontal strokes, covering the bottom edge thoroughly. -
Apply the purple anchor:
Without washing your brush yet (unless it’s overloaded), switch to the Royal Purple paint. Apply this to the top third of the canvas, ensuring deep, opaque coverage along the top rim. -
Begin the merge:
Dip your brush slightly into the bending medium. Work from the purple section downwards into the empty middle space, bringing the dark color down into the white center. -
Blend upwards:
Wipe your brush on a paper towel but don’t rinse it fully. Pick up a little more Teal and work from the bottom section upwards, meeting the purple in the middle. -
Smooth the transition:
This is the crucial step. With a very lightly damp brush, use long, continuous horizontal strokes back and forth across the meeting point of the two colors. The goal is to eliminate hard lines. -
Adjust the fade:
If the middle looks muddy, add a tiny touch of white or mixing medium to your brush to help the colors transition smoothly into one another. Keep blending until the gradient looks soft and seamless. -
Dry time:
Allow the gradient layer to dry completely. This might take hour or two depending on the thickness of your paint.
Wet Brush Tip
Keep a misting spray bottle of water handy. If your acrylics start drying too fast while blending the gradient, a light mist over the canvas keeps the paint workable longer.
Step 3: Adding the Sparkle
-
Add first glitter layer:
While the paint is technically dry, I like to apply a thin layer of gloss medium or varnish. While it is still wet, sprinkle your fine silver glitter primarily over the darker purple sections to mimic distant stars. -
Create the stars:
Mix a small amount of Titanium White paint with water until it reaches an ink-like consistency. It needs to be fluid but opaque. -
Splatter technique:
Dip an old toothbrush or stiff bristle brush into the watered-down white paint. Hold it near the canvas and run your thumb across the bristles to flick tiny specks onto the surface. -
Vary the density:
Focus the splatters more heavily near the top purple section and let them fade out as you move down into the teal, just like stars emerging in the evening sky. -
Add larger stars:
For a few prominent stars, dip the backend of a small paintbrush into the white paint and gently dot a few specific spots on the darker upper half. -
Seal the glitter:
Once the white splatter is fully dry, apply a final coat of gloss varnish or spray sealant. this locks the glitter in place so it won’t shed over time. -
Frame it:
Once cured, place your canvas into a white floater frame. Secure it from the back according to the frame’s instructions to give it that polished gallery look.
Muddy Middle?
If the purple and teal mix into a dull grey in the center, let it dry completely. Then, glaze over the middle with a translucent wash of blue to bring the vibrancy back.
Hang your shimmering gradient piece near a window where the natural light can catch the glitter and make the stars sparkle


Sparkly Sunburst Rays
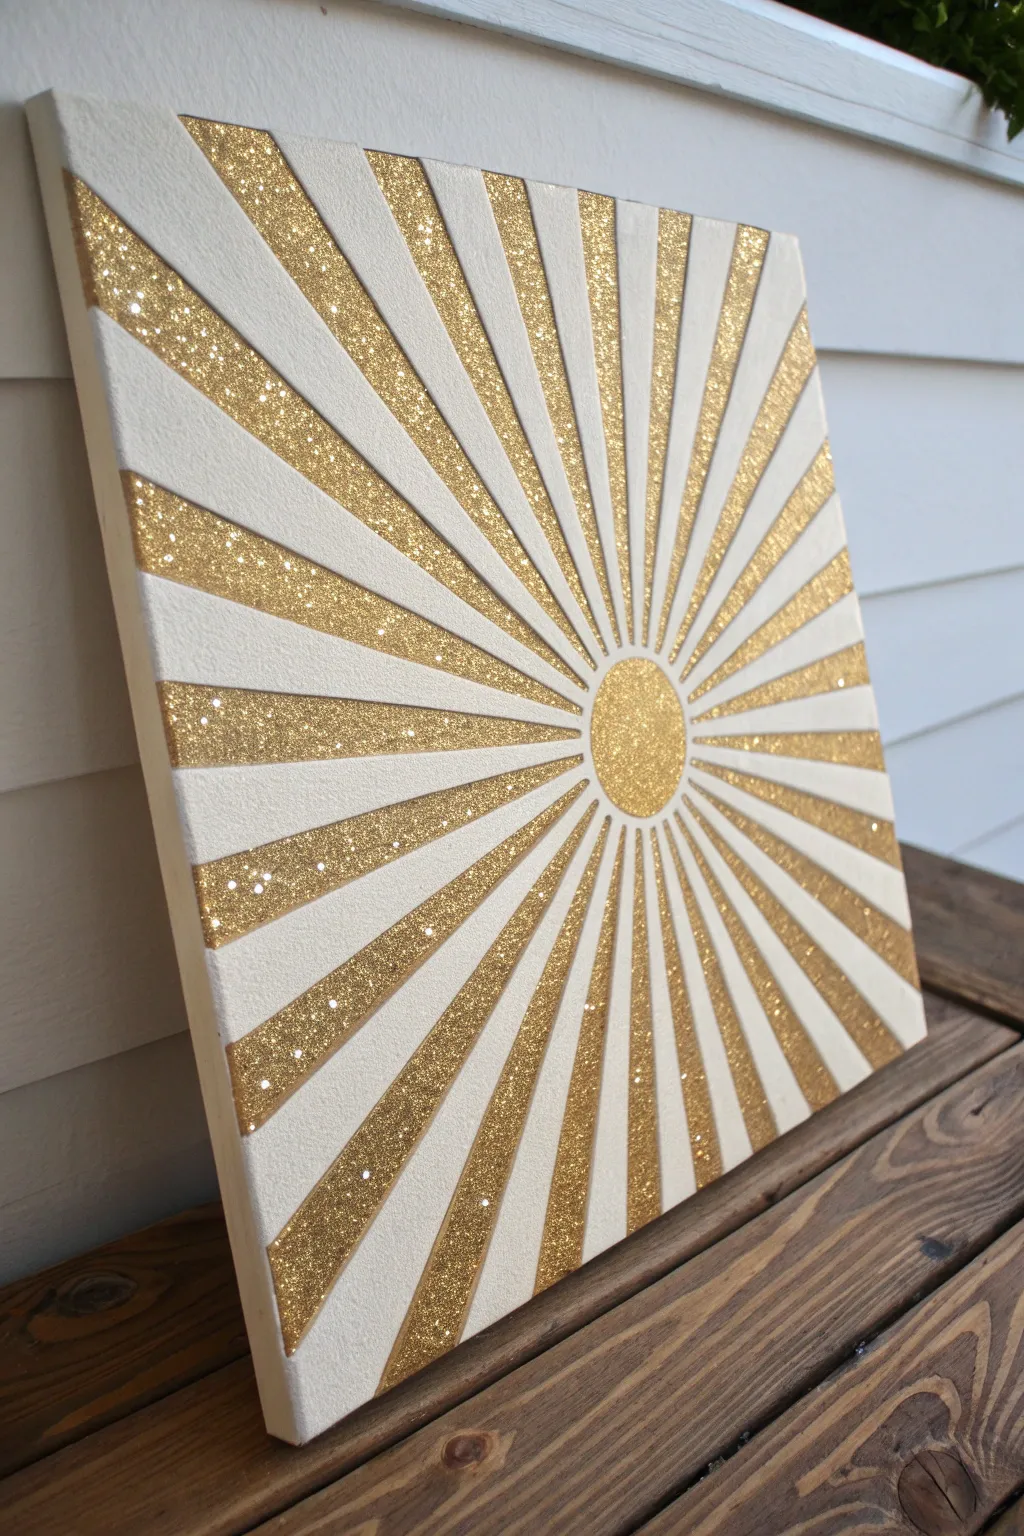
Let the sunshine in with this striking geometric canvas that captures the warmth of a golden sunburst. Using simple masking techniques and plenty of glitter, you can create a piece that radiates joy and adds a modern, sparkly touch to any wall.
Detailed Instructions
Materials
- Square stretched canvas (12×12 or similar)
- White acrylic paint (if canvas isn’t pre-primed)
- Painter’s tape or masking tape (various widths if desired)
- Gold glitter (fine or chunky based on preference)
- Mod Podge or white craft glue
- Gold acrylic paint (optional, for base coat)
- Paintbrushes (flat and round)
- Compass or round object to trace
- Pencil
- Ruler or straight edge
- Exacto knife or craft blade
- Clear spray sealant (glossy)
Step 1: Preparing the Canvas
-
Prime the surface:
Start with a clean slate. Even if your canvas is pre-primed, giving it a fresh coat of white acrylic paint ensures a bright, crisp background. Let it dry completely before moving on. -
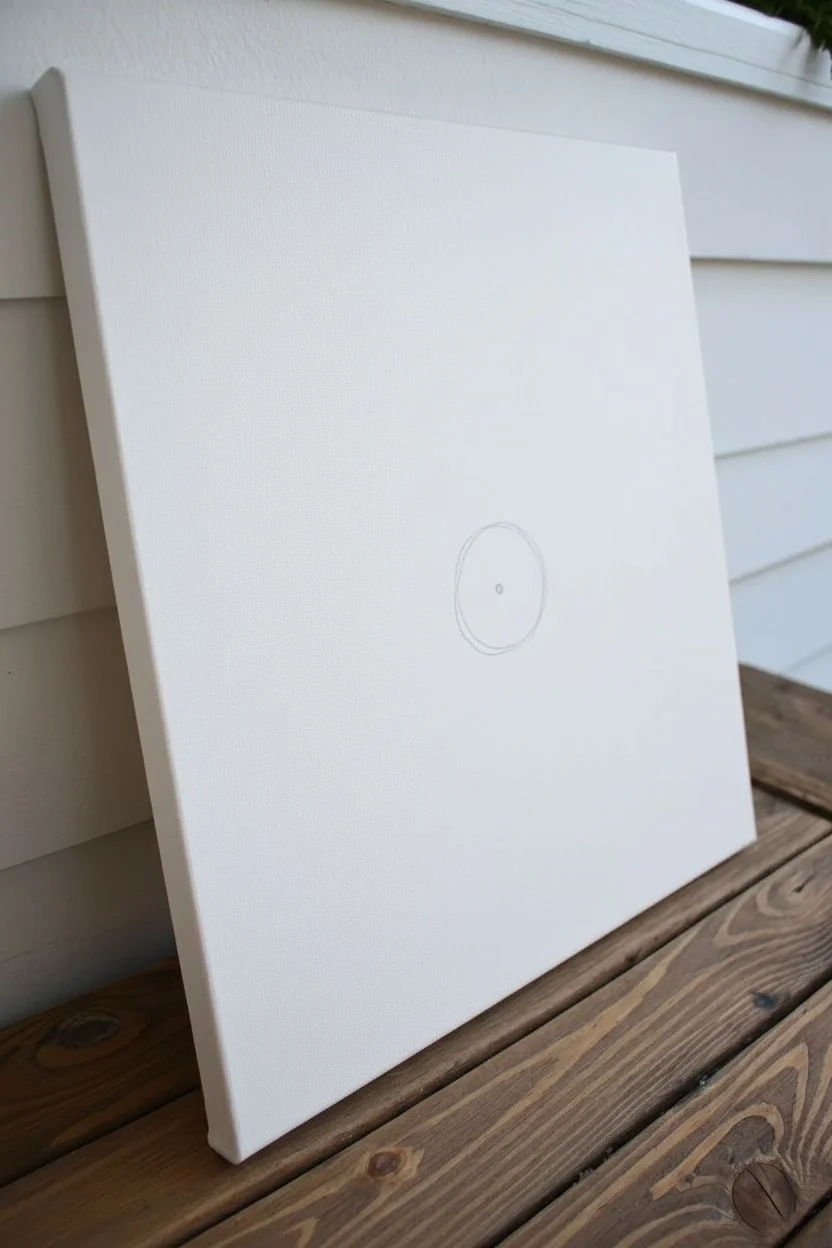
Mark the epicenter:
Decide where you want your sun to originate. For this design, I like to place the center point slightly off-center and lower than the middle, rather than dead center, to create a more dynamic composition. Mark this spot lightly with a pencil. -
Draw the sun:
Using a compass or by tracing a small round object like a lid or cup, draw a circle around your center point. This will be the glowing core of your sunburst.
Step 2: Mapping the Rays
-
First tape lines:
This step requires patience. Take your painter’s tape and lay a strip starting from the edge of your pencil circle extending all the way to the canvas edge. Press it down firmly. -
Create the pattern:
Continue placing strips of tape radiating outward from the circle. The tape strips represent the white spaces (the negative space) in the final painting. The gaps between the tape will become your gold rays. -
Trim the center overlap:
Your tape strips will likely overlap near the center circle. This is expected. Don’t worry about the messiness inside the circle for now. -
Refine the circle:
Take your Exacto knife and very carefully trace around the pencil line of your center circle, cutting through the layers of tape. Peel away the tape ends that venture inside the circle, leaving a perfect, clean boundary. -
Check the spacing:
Look at the gaps between your tape strips. These gaps should look like wedges—narrow near the circle and wider at the canvas edge. Adjust if the spacing looks uneven. -
Seal the edges:
To prevent paint or glue from bleeding under the tape, brush a very thin layer of your white background paint over the tape edges. This seals the seal and ensures razor-sharp lines later.
Bleeding Lines?
If glitter glue seeped under tape, wait for it to dry fully. Use an Exacto knife to gently scrape the excess off the white paint, then touch up with white paint if needed.
Step 3: Adding the Sparkle
-
Base coat (Optional):
For a deeper, richer gold finish, paint the exposed canvas areas (the rays and center circle) with gold acrylic paint first. This prevents white spots from showing through if your glitter coverage isn’t perfectly solid. -
Apply adhesive to rays:
Working in sections so the glue doesn’t dry too fast, apply a generous, even layer of Mod Podge or craft glue to the exposed wedge shapes (the rays). Do not glue the center circle yet. -
Glitter the rays:
Pour your gold glitter generously over the wet glue. Don’t be shy—completely cover the wet areas. Gently tap the canvas edge on your table to help settle the glitter into the glue. -
Dry and shake:
Allow the ray sections to dry partially (about 15-20 minutes). Then, lift the canvas and tap off the excess loose glitter onto a sheet of paper to reuse later. -
Glitter the sun:
Now apply glue to the center circle. Add a fresh coat of glitter here, perhaps using a slightly finer or chunkier grain if you want subtle texture contrast, or keep it uniform. -
The crucial reveal:
Wait until the glue is dry to the touch but not fully cured (usually about an hour). Carefully peel back the painter’s tape. Pull slowly at a sharp angle away from the glitter to keep the lines crisp.
Pro Tip: Custom Tape
Standard blue tape creates wide white gaps. For thinner rays or more delicate lines, slice your painter’s tape into narrower strips before applying it to the canvas.
Step 4: Finishing Touches
-
Tidy up:
Use a small, dry paintbrush to sweep away any stray glitter specks that landed on the white stripes. If a speck is stubborn, you can gently scrape it off with your craft knife. -
Protect your work:
Take the canvas to a well-ventilated area and spray it with a clear, glossy sealant. This is vital for glitter art; it locks the sparkles in place so they don’t shed over time. -
Final cure:
Let the sealant dry completely according to the can’s instructions. Once dry, your radiant sunburst is ready to hang.
Hang your shimmering creation near a window to catch the natural light and watch it glow throughout the day
BRUSH GUIDE
The Right Brush for Every Stroke
From clean lines to bold texture — master brush choice, stroke control, and essential techniques.
Explore the Full Guide
Silhouette With Glitter Hair
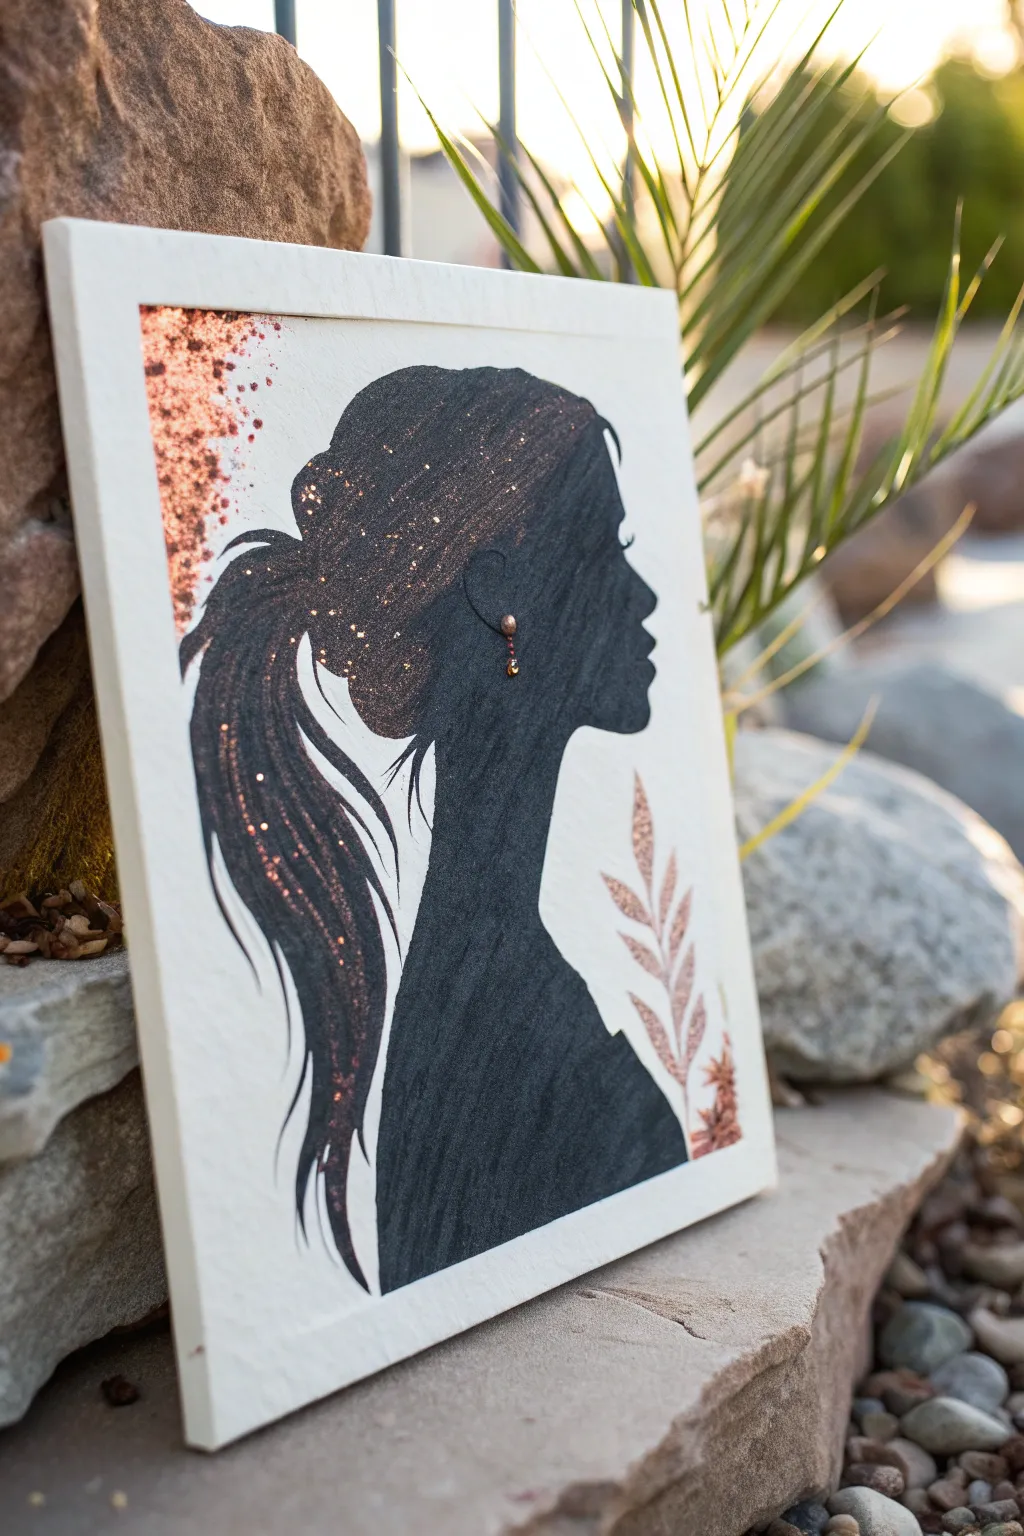
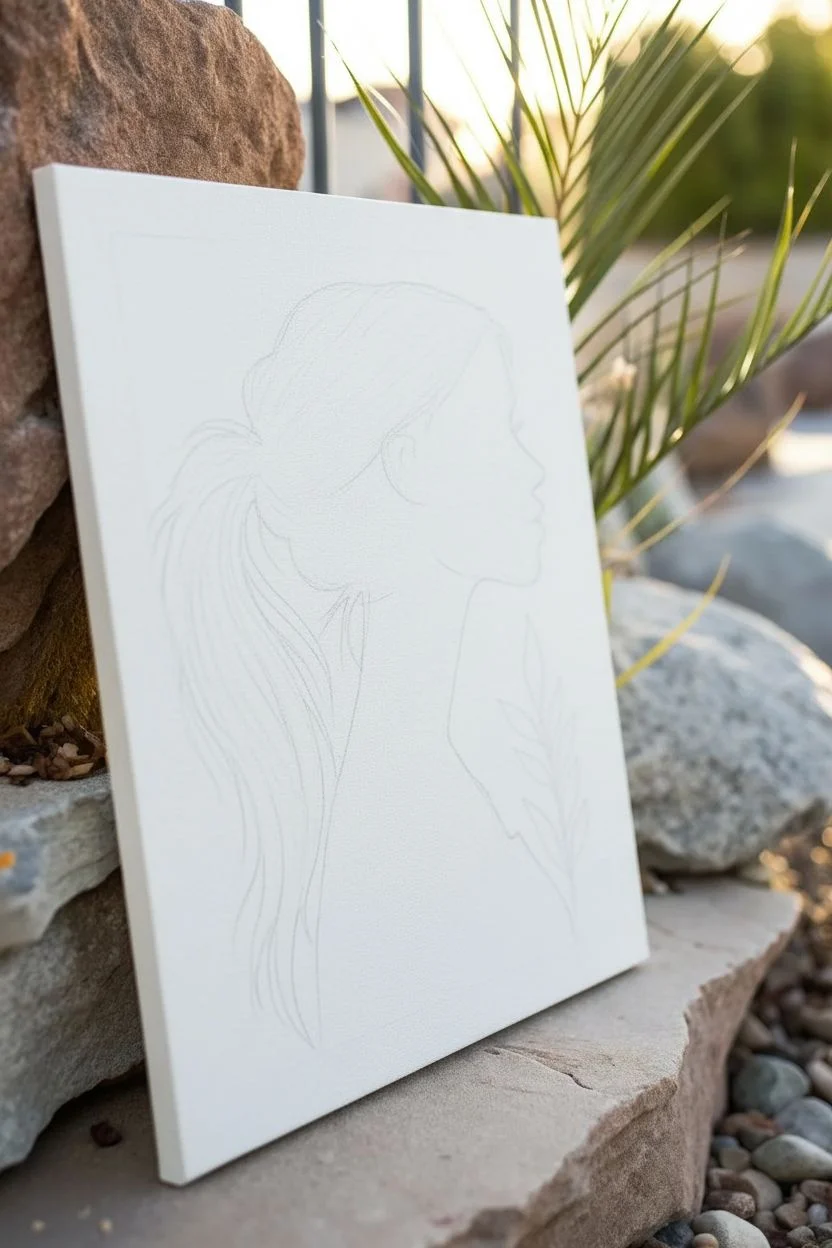
Capture the elegance of a classic profile silhouette brought to life with the warmth of copper glitter highlights. This mixed-media piece balances the stark drama of black ink with the playful texture of sparkle, perfect for a chic wall accent.
Step-by-Step
Materials
- Canvas board or heavy mixed-media paper (8×10 or similar)
- Black acrylic paint or India ink
- Fine-tipped paintbrush (liner brush)
- Flat paintbrush (medium size)
- Fine loose glitter (copper or rose gold)
- Mod Podge or clear craft glue
- Pencil and eraser
- Profile reference photo or stencil
- Small rhinestone or bead (for the earring)
- Paper towel or rough paper for masking
- Spray sealant (glossy, optional)
Step 1: Planning and Sketching
-
Source your subject:
Find a profile photo you love—this could be a stock image or a photo of a friend. Print it out to the size of your canvas if you plan to trace it. -
Transfer the outline:
Lightly sketch the profile onto your canvas board using a pencil. If drawing isn’t your strong suit, cut out your printed photo and trace around it to get the proportions just right. -
Define the hair flow:
Within your outline, lightly draw the sweeping curves for the ponytail. These guide lines will be crucial when you switch your brush strokes to mimic hair texture later. -
Sketch the botanical element:
In the lower right corner, lightly sketch a simple leafy branch. Keep the leaves slender and spaced out to balance the composition without overcrowding it.
Hair Flow Pro Tip
Follow the curve of the head when applying glue strokes for the hair. Curved lines look much more natural and voluminous than straight vertical ones.
Step 2: Painting the Silhouette
-
Outline in black:
Using your fine-tipped brush and black acrylic paint, carefully go over your pencil lines. Focus on getting the details of the nose, lips, and eyelashes sharp and crisp. -
Fill the solid areas:
Switch to your medium flat brush to fill in the neck and shoulders. Apply the paint smoothly and opaque; you may need a second coat to ensure no white canvas shows through. -
Create hair texture:
For the hair, don’t fill it in completely solid. Use your fine brush to paint individual flowing strands, leaving tiny gaps of white space occasionally to suggest light and movement. -
Dry completely:
Let the black paint dry fully before moving on to the glitter. This prevents the glitter from sticking where you don’t want it.
Stray Sparkle Fix
Glitter stuck where it shouldn’t be? wait for the main image to dry, then use a small piece of blue tack or masking tape to lift individual specks cleanly.
Step 3: Adding the Glitter
-
Apply glue for highlights:
Identify where the light would hit the hair—usually the crown and the curve of the ponytail. Paint thin streaks of clear glue or Mod Podge over these black hair strands. -
Glitter the hair:
While the glue is wet, sprinkle your copper glitter generously over the hair area. I like to press it down gently with a dry finger to ensure good adhesion. -
Create the background splash:
In the upper left corner, dab sponge-like patches of glue or flick glue droplets from a brush to create a random, organic texture. Sprinkle glitter over these damp spots. -
Glitter the leaves:
Paint the leaf shapes in the bottom right with your glue. Carefully pour glitter over them to create a solid copper botanical accent. -
Shake off excess:
Wait about 10–15 minutes for the glue to set, then tilt your canvas over a sheet of paper to tap off the loose glitter. Funnel the excess back into your jar.
Step 4: Finishing Touches
-
Add the jewelry:
Place a tiny dot of strong craft glue on the earlobe area. Using tweezers, set a small copper bead or rhinestone there to create a dimensional earring. -
Clean up edges:
If any stray glitter stuck to the white background, use a piece of masking tape to gently lift it away without damaging the paper surface. -
Seal (Optional):
To prevent shedding over time, you can spray a light coat of clear gloss sealant over the entire piece. Do this in a well-ventilated area.
Hang your shimmering portrait near a window to catch the afternoon light
Glitter Moon With Soft Halo
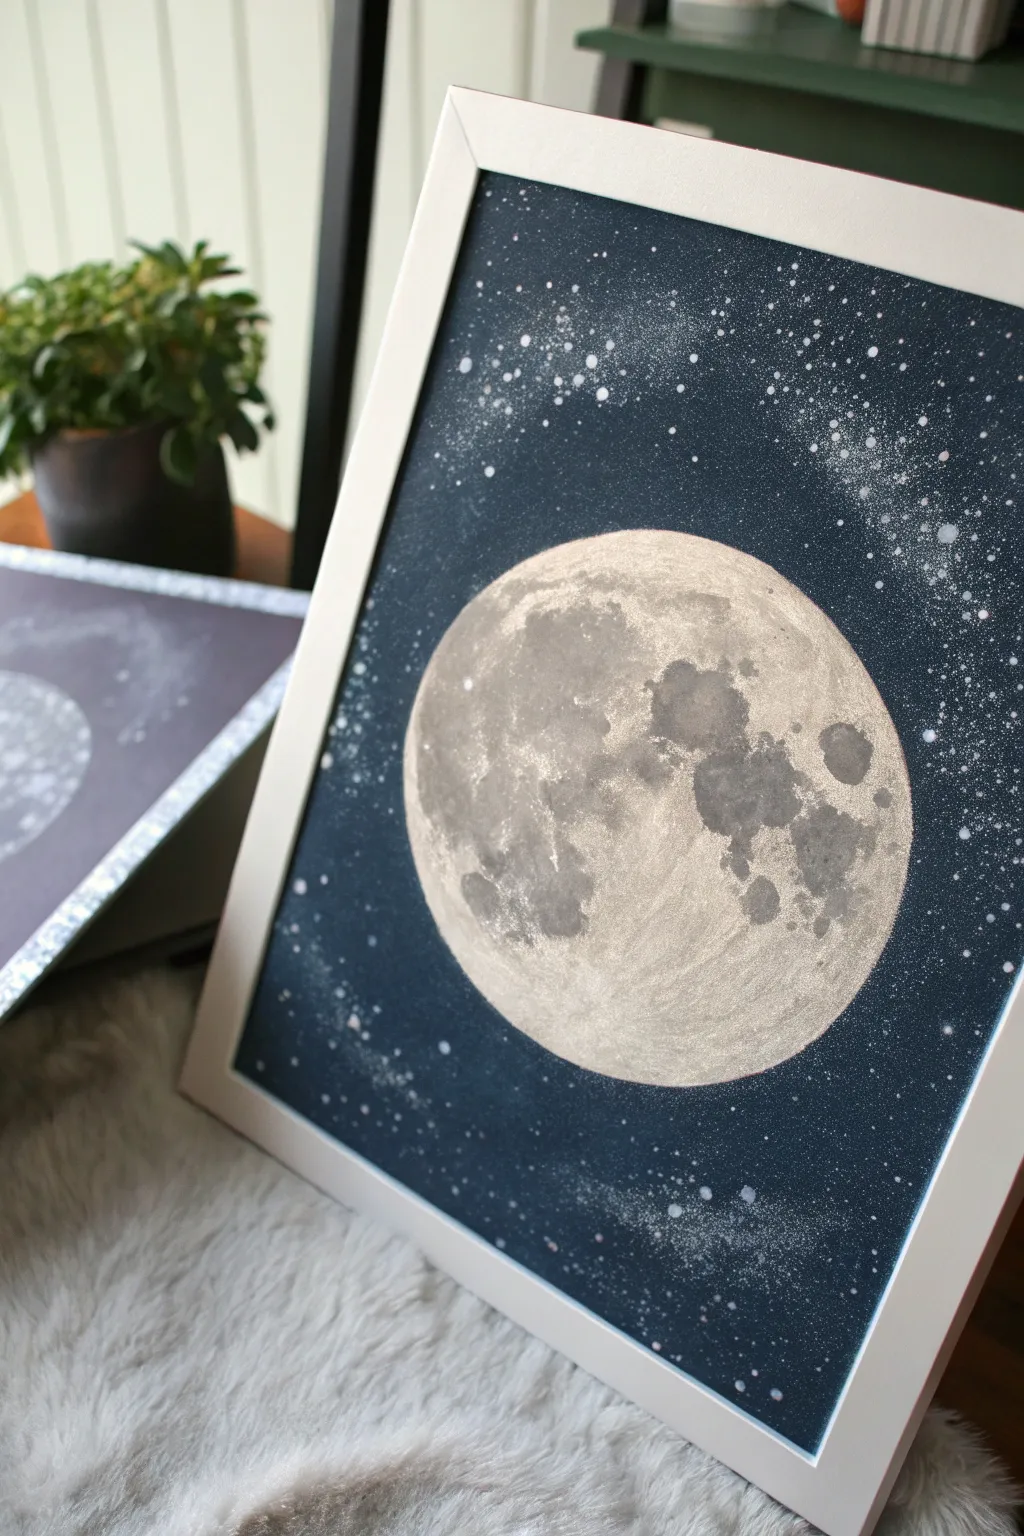
Bring the calming glow of the night sky into your home with this stunning lunar artwork. By combining matte acrylics with subtle glitter accents, you’ll create a moon that seems to radiate a gentle halo against a starry backdrop.
Step-by-Step Tutorial
Materials
- Square canvas or heavy cardstock (e.g., 12×12 inch)
- Dark navy blue acrylic paint
- Mars Black acrylic paint
- Titanium White acrylic paint
- Light grey acrylic paint
- Silver or iridescent fine glitter paint (or loose glitter glue)
- Circle stencil or compass
- Flat wide brush
- Medium round brush
- Old toothbrush (for splatter effect)
- Palette or paper plate
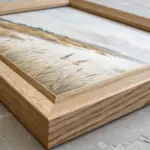
- White or light wood frame (to match the image)
Step 1: Setting the Night Scene
-
Prepare your canvas:
Ensure your painting surface is clean and dust-free. If you are using cardstock, tape the edges down to your workspace to prevent curling. -
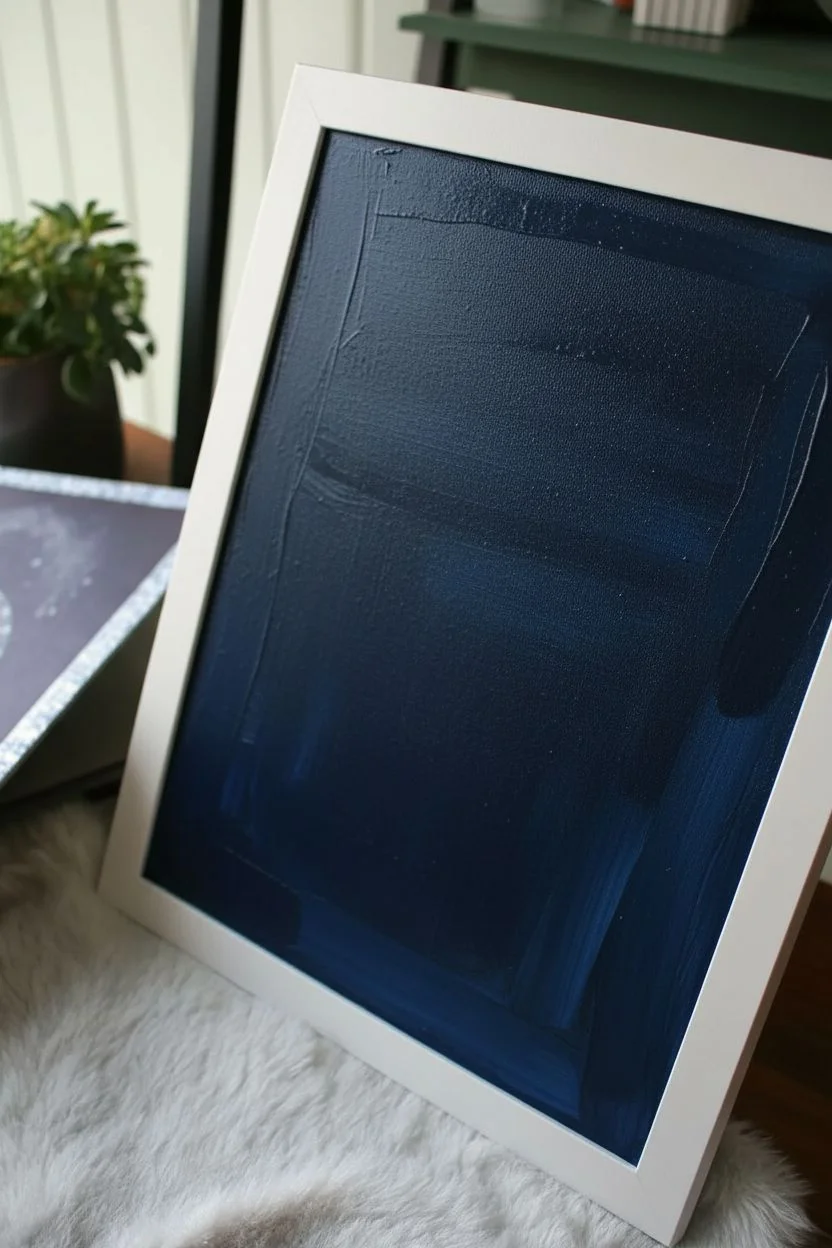
Mix the background color:
On your palette, mix a large amount of dark navy blue with a touch of black. You want a deep, midnight blue that isn’t quite pure black. -
Paint the sky:
Using your wide flat brush, cover the entire surface with the midnight blue mixture. Use long, smooth strokes to ensure even coverage. -
Let it dry:
Allow the background layer to dry completely. This is crucial so your moon doesn’t turn muddy blue. A hairdryer on a cool setting can speed this up.
Splatter Control
Is the splatter getting everywhere? Cut a paper circle the size of your moon and place it over the painted moon before spraying to keep the lunar surface clean.
Step 2: Forming the Moon
-
Outline the shape:
Place a plate, bowl, or use a compass to lightly trace a large circle in the center of your dry canvas with a pencil. -
Base coat the moon:
Mix Titanium White with a tiny drop of light grey. Fill in the circle completely. It doesn’t need to be perfectly opaque yet; some texture is actually good here. -
Add texture:
While the white paint is still slightly tacky, dab—don’t brush—more pure white paint onto the surface using a dry brush or sponge. This creates the cratered texture of the lunar surface.
Step 3: Adding Lunar Details
-
Create the heavy shadows:
Mix a medium grey tone. Looking at a reference photo of the moon (or the image above), paint the large ‘seas’ or darker patches. These are organic, irregular shapes mostly on the right side. -
Blend the craters:
Use a damp brush to gently soften the edges of your grey patches so they don’t look like hard blobs. I find tapping the edges with my fingertip blends this best. -
Add highlights:
Use pure white paint to add bright spots on the edges of your craters, particularly on the left side where the ‘light source’ hits stronger. -
Apply the shimmer:
Once the moon painting is dry, brush a thin, translucent layer of silver glitter paint over the entire moon disc. This gives it that magical, reflective quality.
Cosmic Glow
Mix a tiny drop of glow-in-the-dark pigment into your white star paint. The artwork will look elegant by day and magically illuminate when the lights go out.
Step 4: The Starry Halo
-
Prepare splatter paint:
Water down a small amount of white acrylic paint until it has the consistency of heavy cream. -
Create the galaxy:
Dip an old toothbrush into the watered-down white paint. Hold it over the painting and run your thumb across the bristles to spray fine mist droplets. -
Concentrate the stars:
Focus your splatter heavily around the upper right and lower left corners to create a milky way effect, keeping the area directly next to the moon slightly clearer for contrast. -
Add glitter stars:
While the white specks are wet, sprinkle a tiny pinch of loose silver glitter over the heavy star clusters, or dab tiny dots of glitter glue on top of larger stars. -
Frame your work:
Once absolutely dry, place your artwork in a simple white frame without glass, or with the glass behind the art, to let the texture and glitter shine through.
Hang your celestial masterpiece in a spot where the evening light can catch the glitter and make your moon glow


Have a question or want to share your own experience? I'd love to hear from you in the comments below!