If you love mixing seasonal crafts with a little sporty flair, golf pumpkin ideas are such a fun sweet spot. I’m sharing a bunch of ways to carve, paint, and build golf-inspired pumpkins that look great on display and are genuinely enjoyable to make.
Classic Golfer Silhouette Carve
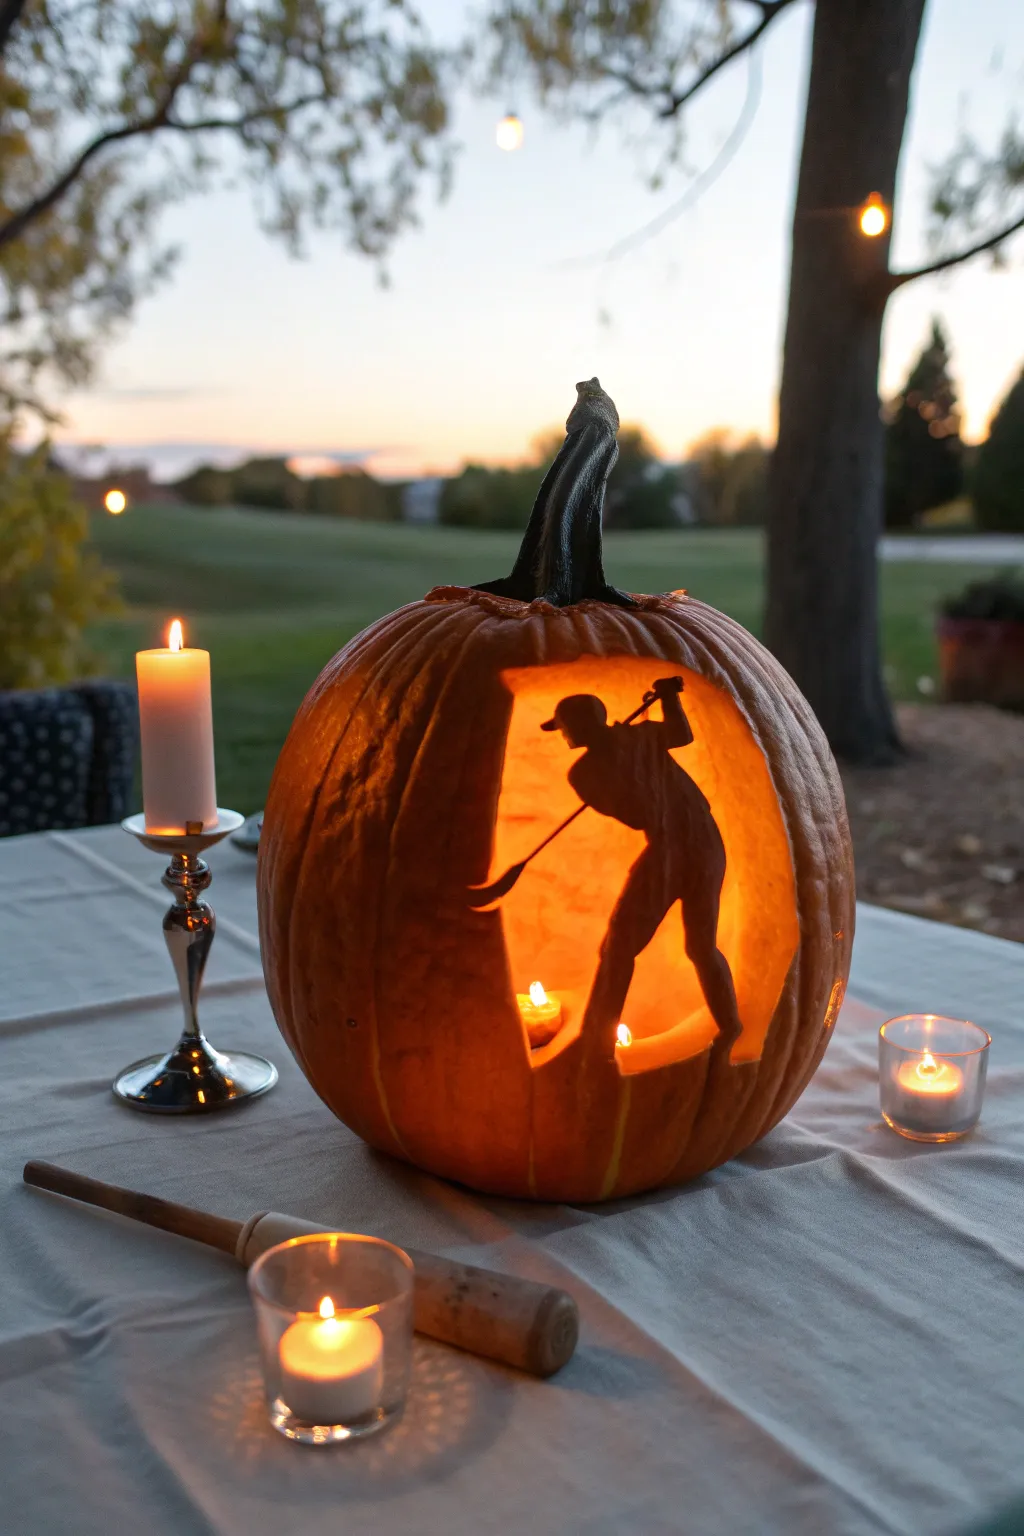
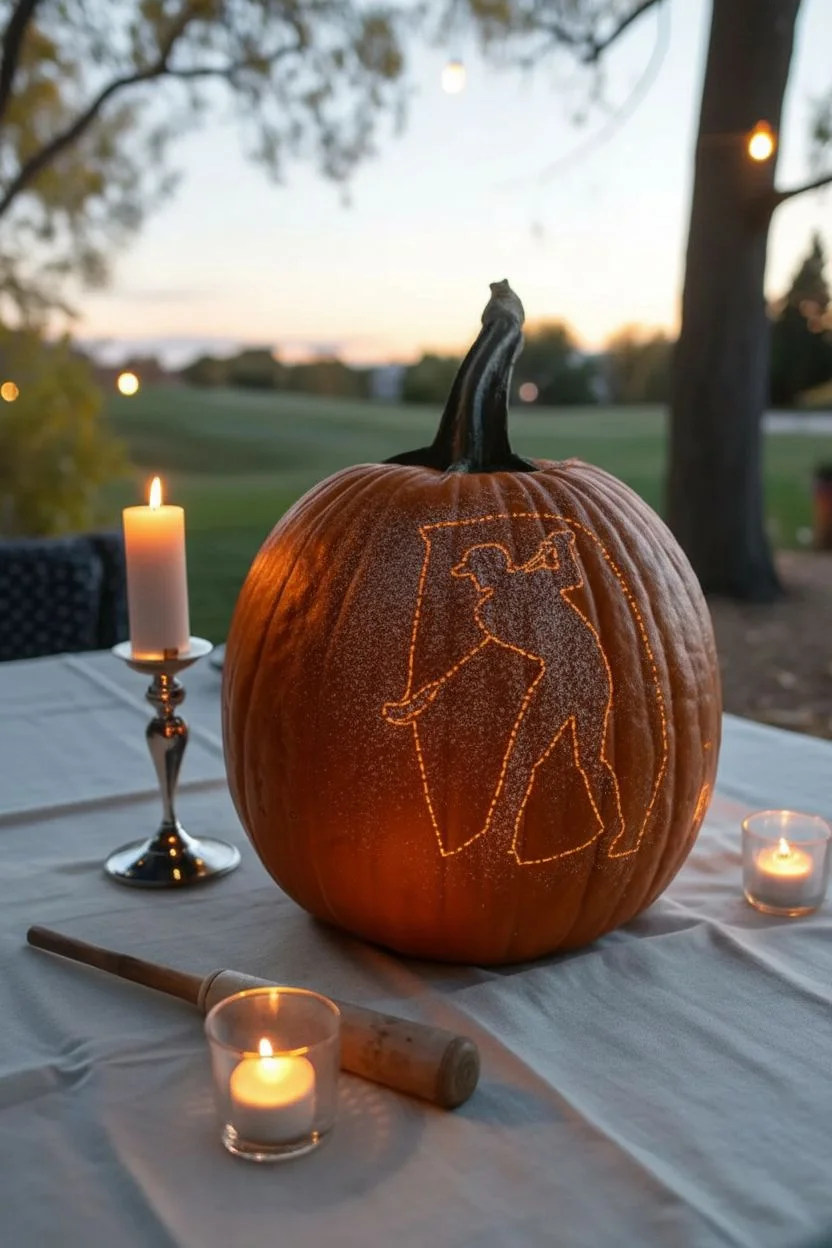
Capture the elegance of a perfect swing with this sophisticated pumpkin carving that uses shading techniques rather than simple cutouts. By scraping away layers of skin to varying depths, you create a warm, glowing silhouette of a golfer mid-swing that stands out beautifully against the twilight.
Step-by-Step Tutorial
Materials
- Medium-sized, symmetrical pumpkin
- Printed golfer silhouette template
- Tape or pins
- Needle tool or push pin (for transfer)
- Linoleum cutter or clay loop tools
- Small paring knife or X-Acto knife
- Large metal spoon or pumpkin scraper
- Tea light candles or LED puck light
- Wet cloth or paper towels
Step 1: Preparation and Transfer
-
Select your canvas:
Choose a pumpkin with a relatively flat, smooth side. Avoid deep ridges where the golfer will be placed, as this makes the delicate shading work much harder. -
Gut the pumpkin:
Cut a lid (or cut from the bottom) and remove all seeds and strings. Scrape the inside wall behind your intended design area until it is about 1 inch thick; this ensures the light will shine through the shaded areas properly. -
Place the template:
Print your golfer silhouette. Tape it securely to the center of the pumpkin’s best side. You may need to make small relief cuts in the paper so it curves around the pumpkin’s surface without wrinkling. -
Transfer the design:
Using your needle tool or push pin, poke holes along every line of the design—both the outline of the golfer and the rectangular border framing him. Keep holes about 1/8 inch apart. -
Connect the dots:
Remove the paper pattern. To make things clearer, I like to lightly rub a bit of flour or cornstarch over the holes so they show up white against the orange skin.
Step 2: Carving the Silhouette
-
Cut the outline skin:
Using your X-Acto knife or small paring knife, gently trace the dotted line of the rectangular frame and the golfer’s body. You are only cutting through the tough outer skin here, not punching through the pumpkin wall. -
Remove the background skin:
The goal is to remove the skin *around* the golfer, leaving the golfer dark. Use a linoleum cutter or loop tool to peel away the orange skin inside the rectangle but *outside* the golfer’s body. -
Establish the background depth:
Continue scraping the background area (the negative space around the golfer). Aim to remove about half the wall’s thickness. The deeper you go, the brighter the glow will be. -
Refine the edges:
Go back with your small knife to clean up the edges of the golfer’s silhouette, especially around the cap, the golf club shaft, and the legs. These edges need to be crisp for the silhouette to read clearly. -
Be careful with the club:
The golf club shaft is very thin. Work slowly around it. If you scrape too aggressively near it, the thin piece of skin representing the club might snap off.
Stay Sharp
A shallow cut around the golfer’s outline effectively ‘stops’ your scraper tool from slipping and accidentally gauging the dark silhouette area.
Step 3: Finishing Touches
-
Thin the wall from inside:
If the background isn’t glowing brightly enough yet, don’t scrape the outside anymore. Instead, go inside the pumpkin and scrape the wall behind the design to make it thinner. -
Smooth the background:
Use a wide loop tool to smooth out ridges in the shaved background area. A smoother texture will provide a more uniform, amber glow like a sunset. -
Clean surface:
Wipe down the outside of the pumpkin with a damp cloth to remove any sticky pumpkin bits or marker lines. -
Add preservation:
Rub a tiny amount of petroleum jelly on the exposed light-colored flesh. This helps prevent the pumpkin shriveling and turning brown too quickly. -
Lighting check:
Place your candles or LED lights inside. Check the design in a dark room. If the golfer looks too washed out, the background might be too bright, or you may need to darken the silhouette with a marker (though leaving the skin is best).
Green Lighting
Use a green LED votive or a green glow stick in the bottom of the pumpkin to simulate the grass of the fairway beneath the golfer’s feet.
Light it up and watch your golfer tee off into the autumn night


Putting Stance Stencil Pumpkin
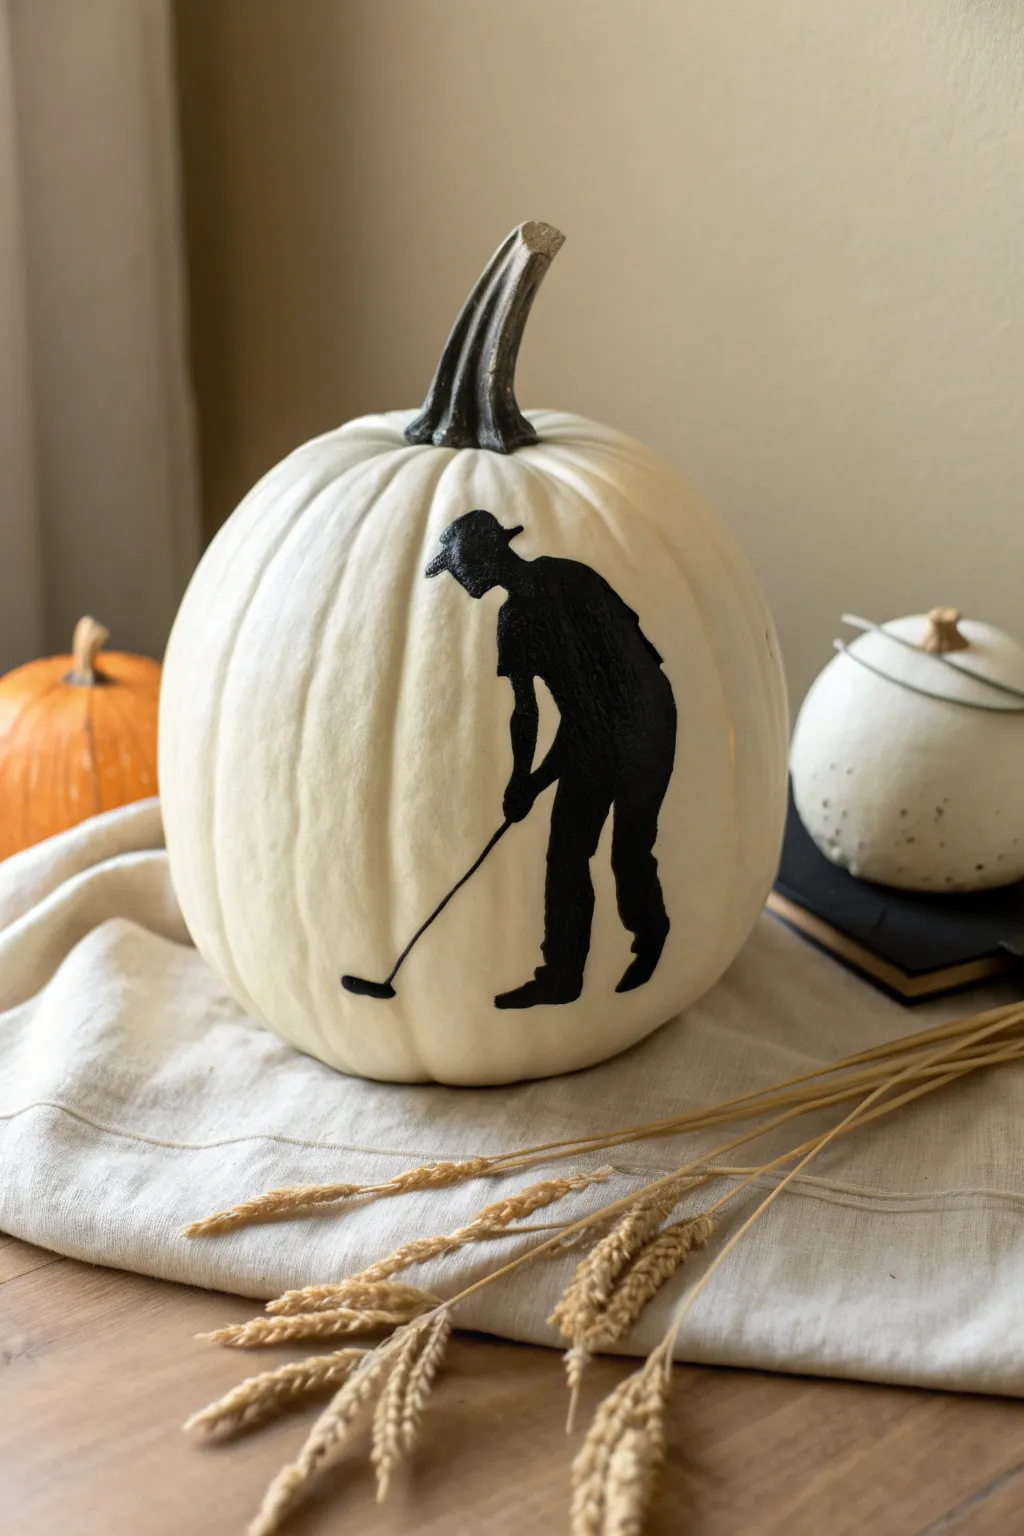

Celebrate your love for the green with this elegant, minimalist pumpkin design featuring a classic golfer silhouette. The stark contrast of black paint against a creamy white pumpkin creates a sophisticated look perfect for a golf enthusiast’s autumn display.
Detailed Instructions
Materials
- Medium-sized white pumpkin (real or faux)
- Black acrylic craft paint (matte or satin finish)
- Printable golfer silhouette stencil
- Painter’s tape or stencil adhesive spray
- Fine-point black permanent marker or pencil
- Small round detail brush (size 0 or 1)
- Flat shader brush (size 4 or 6)
- Craft knife (X-Acto)
- Cardstock or standard printer paper
- Damp cloth for clean up
Step 1: Preparation & Tracing
-
Prepare the surface:
Begin by thoroughly cleaning your white pumpkin. If using a real pumpkin, wash it with a mild soap solution and dry completely. For a faux pumpkin, a quick wipe with a damp cloth removes any dust or manufacturing residue. -
Print the artwork:
Find a silhouette image of a golfer bending over to putt. Scale the image on your computer so it fits comfortably on the flattest face of your chosen pumpkin. -
Create the stencil template:
Print the golfer image onto cardstock for durability, or regular paper if that’s what you have on hand. Carefully cut out the black silhouette using scissors for the outer edges and a craft knife for tighter spots like the space between the arms and legs. -
Position the design:
Place your paper cut-out against the pumpkin. Move it around until you find a relatively smooth section where the ribs of the pumpkin won’t distort the image too much. -
Secure the template:
Once positioned, use small loops of painter’s tape on the back or a light mist of stencil adhesive to hold the paper firmly against the curved surface. -
Trace the outline:
With a fine-point pencil or a very light touch with a thin permanent marker, trace the entire perimeter of the golfer. Don’t forget to trace the golf club shaft and the putter head down to the ground.
Bleeding Edges?
If paint bleeds into the pumpkin texture, wait for it to dry fully. Then, carefulyl scratch away the excess black paint with a toothpick or craft knife for a sharp line.
Step 2: Painting the Silhouette
-
Outline with paint:
Remove the paper template. Dip your fine-point detail brush into the black acrylic paint. I find it helpful to slightly thin the paint with a drop of water for this step to help it glide over the pumpkin’s texture. -
Define the edges:
Carefully paint over your traced lines, creating a crisp, clean border for your silhouette. Pay special attention to the golfer’s hat and the thin line of the golf club. -
Fill the larger areas:
Switch to your flat shader brush.Load it with black paint and begin filling in the center of the silhouette—the torso, legs, and back. -
Work in layers:
Apply the first coat thinly. It might look streaky or gray at first, but don’t panic. Let this base layer dry for about 10-15 minutes. -
Apply the second coat:
Go back over the filled area with a second coat of black paint. dab the paint on rather than dragging it if you notice the previous layer lifting. -
Refine the details:
Switch back to the small detail brush. Clean up any jagged edges on the outline. Ensure the club shaft is straight and connects properly to the hands and the putter head. -
Paint the putter head:
carefully paint the small shape of the putter head near the bottom. It should look like it is resting on the ‘ground’ plane. -
Add the ball (optional):
Paint a tiny black dot a few inches away from the putter face if you want to depict the ball about to be struck, though the solitary figure looks quite striking on its own.
Add a Little Green
Glue preserved moss or green felt at the base of the silhouette to create a realistic ‘putting green’ texture under the golfer’s feet.
Step 3: Finishing Touches
-
Inspect for gaps:
Look at the pumpkin from different angles. The curves of the pumpkin can sometimes hide white spots in the paint coverage. Fill these in with the detail brush. -
Clean up mistakes:
If you slipped outside the lines, use a damp Q-tip or a stiff brush dipped in water to gently scrub away the wet paint before it sets. If it’s already dry, you can gently scrape it off faux pumpkins with a fingernail. -
Dry completely:
Allow the finished pumpkin to dry undisturbed for at least an hour before handling or moving it to your display area.
Place your finished masterpiece on a table alongside some fall wheat stalks for a hole-in-one seasonal display


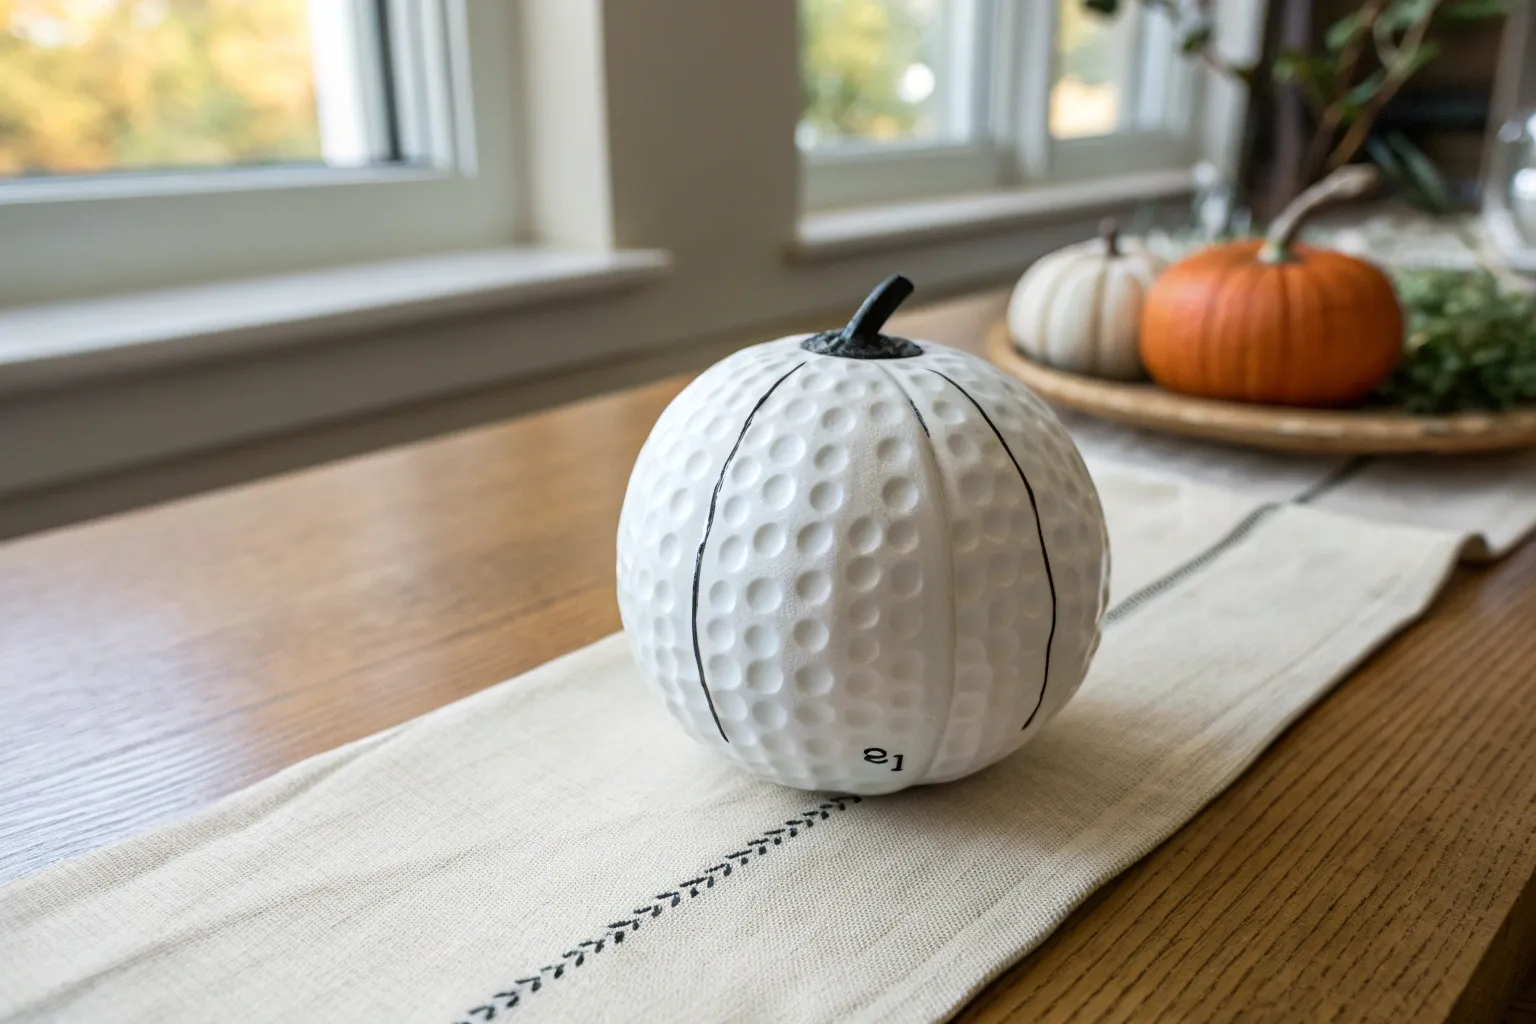
Giant Golf Ball Painted Pumpkin
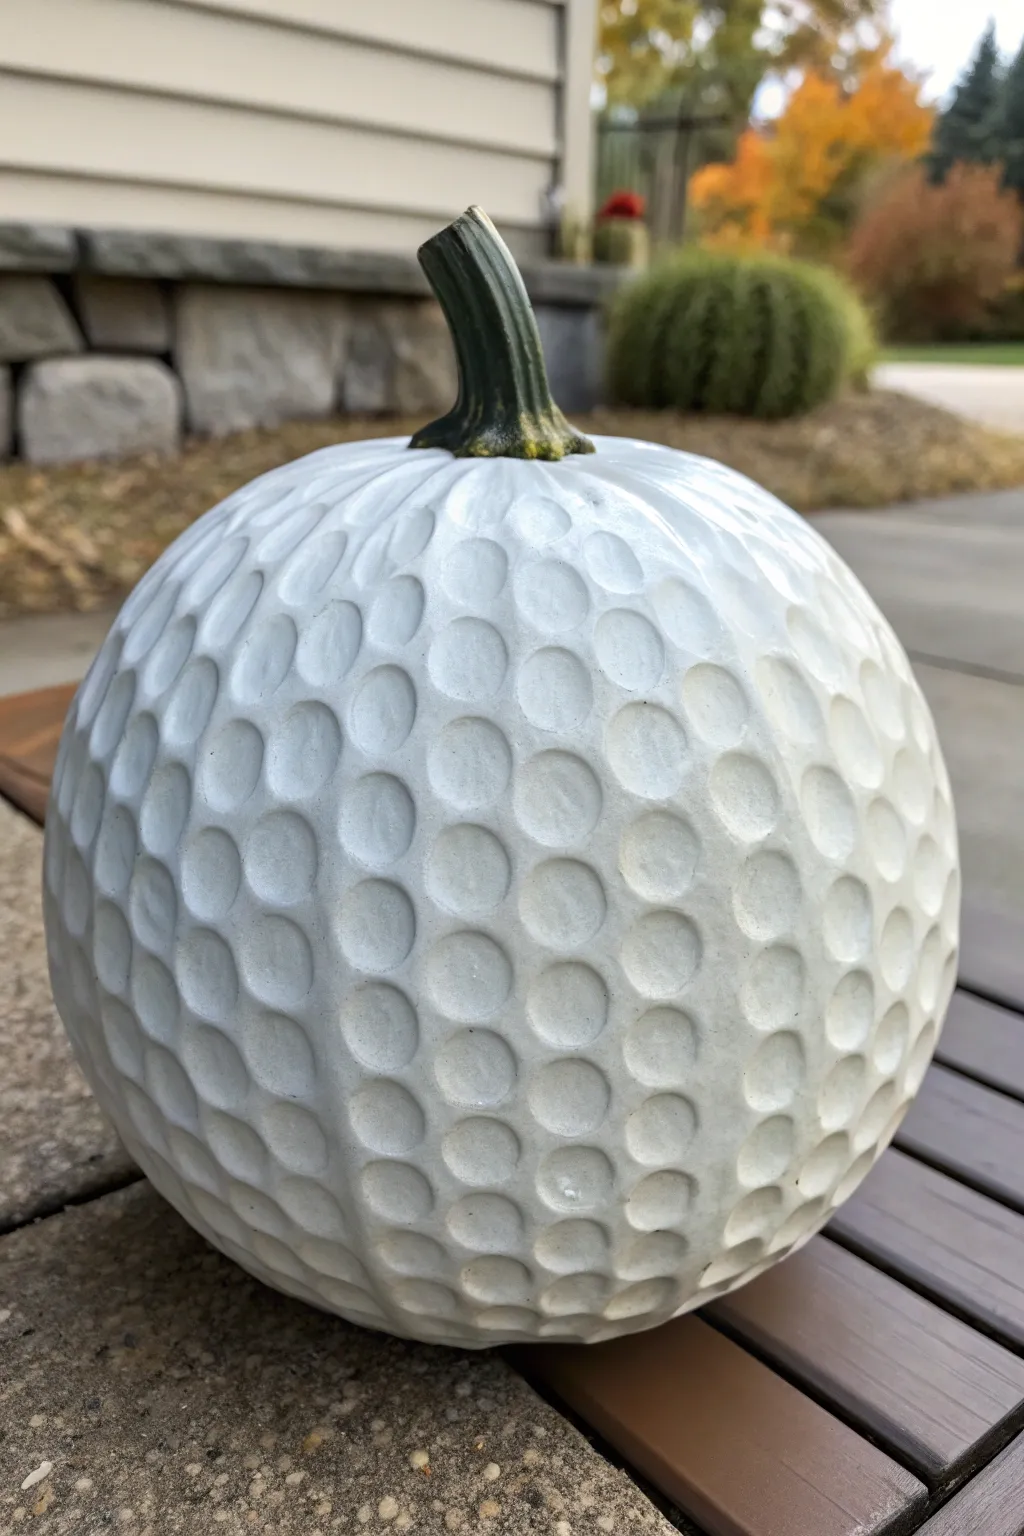
Transform an ordinary pumpkin into a larger-than-life golf ball with this clever carving technique. By creating uniform dimples across the surface and adding a coat of crisp white paint, you’ll achieve that distinct aerodynamic texture that every golfer recognizes immediately.
Step-by-Step
Materials
- Medium to large perfectly round pumpkin
- White spray paint or white glossy acrylic paint
- Melon baller / parisienne scoop
- Sandpaper (medium grit)
- Painter’s tape or masking tape
- Clean rag or tack cloth
- Clear sealant spray (optional)
- Small detail brush
Step 1: Preparation
-
Clean surface:
Begin by thoroughly washing your pumpkin with mild soap and water to remove any dirt or field debris. -
Dry completely:
Wipe the pumpkin down with a dry towel and let it air dry completely to ensure no moisture remains in the skin. -
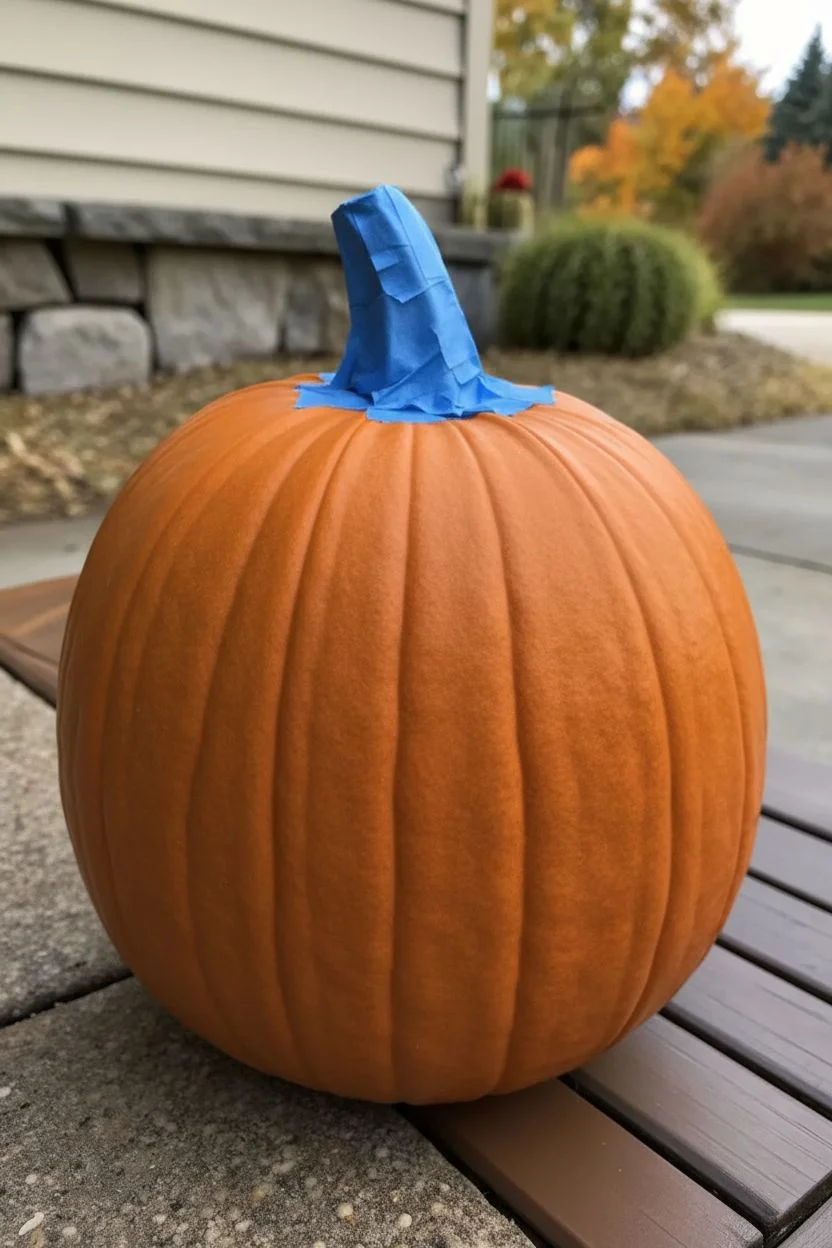
Protect the stem:
Carefully wrap the entire green stem with painter’s tape or masking tape. Since we want to keep the stem looking natural and green, you need to seal it off tightly so no white paint sneaks in later.
Sharpen Your Scoop
If the melon baller struggles to pierce the skin, file the edges slightly with a metal file. A sharper tool creates cleaner circles and reduces hand fatigue.
Step 2: Creating the Dimples
-
Tool selection:
Grab a sharp melon baller. This is the secret weapon for getting those perfectly round, shallow divots that characterize a golf ball. -
Test create:
Find a discreet spot near the bottom of the pumpkin to practice your scooping technique. You want to remove just the brightly colored outer skin, revealing the lighter rind underneath, without digging too deep into the flesh. -
Begin the pattern:
Start near the top of the pumpkin, just below the stem. Press the melon baller firmly into the skin and twist slightly to scoop out a shallow circle. -
Spacing:
Move horizontally around the pumpkin, creating a row of dimples. Keep the space between them very narrow—just a millimeter or two—so it looks like a tightly packed grid. -
Alternate rows:
For the second row, try to position your dimples in the spaces between the divots of the row above, creating a honeycomb-style pattern. -
Work downward:
Continue this alternating pattern all the way down the pumpkin. It takes patience, but maintaining consistent spacing is key to the illusion. -
Clean edges:
Once all dimples are carved, check for any hanging bits of skin. You can gently sand rough edges with a piece of sandpaper or scrape them away with your fingernail.
Step 3: Painting and Finishing
-
Surface prep:
Wipe the pumpkin down one last time with a tack cloth or slightly damp rag to remove any pumpkin dust from the sanding. -
First coat:
In a well-ventilated area, apply an even coat of white spray paint. I prefer to do light, sweeping passes rather than one heavy coat to prevent drips from pooling in the dimples. -
Drying time:
Allow the first coat to dry according to the can’s instructions, usually about 15 to 20 minutes. -
Second coat:
Apply a second coat of white paint. Ensure you are spraying from different angles so the paint fully covers the inside edges of the carved dimples. -
Inspect coverage:
Check for any orange spots showing through. If necessary, use a small detail brush dipped in white acrylic paint to touch up deep crevices that the spray missed. -
Seal (optional):
For extra longevity, especially if this will live outdoors, you can apply a coat of clear sealant spray once the white paint is fully dry. -
Reveal stem:
Once the paint is completely dry to the touch, carefully peel away the painter’s tape from the stem to reveal the natural green contrast.
Paint Pooling Issue
If paint pools in the dimples, don’t wipe it! Use the corner of a paper towel to gently wick up the excess liquid while it’s still wet to save the texture.
Place your giant golf ball on the porch or near the green for a sporty autumn display


Crossed Clubs Graphic Pumpkin
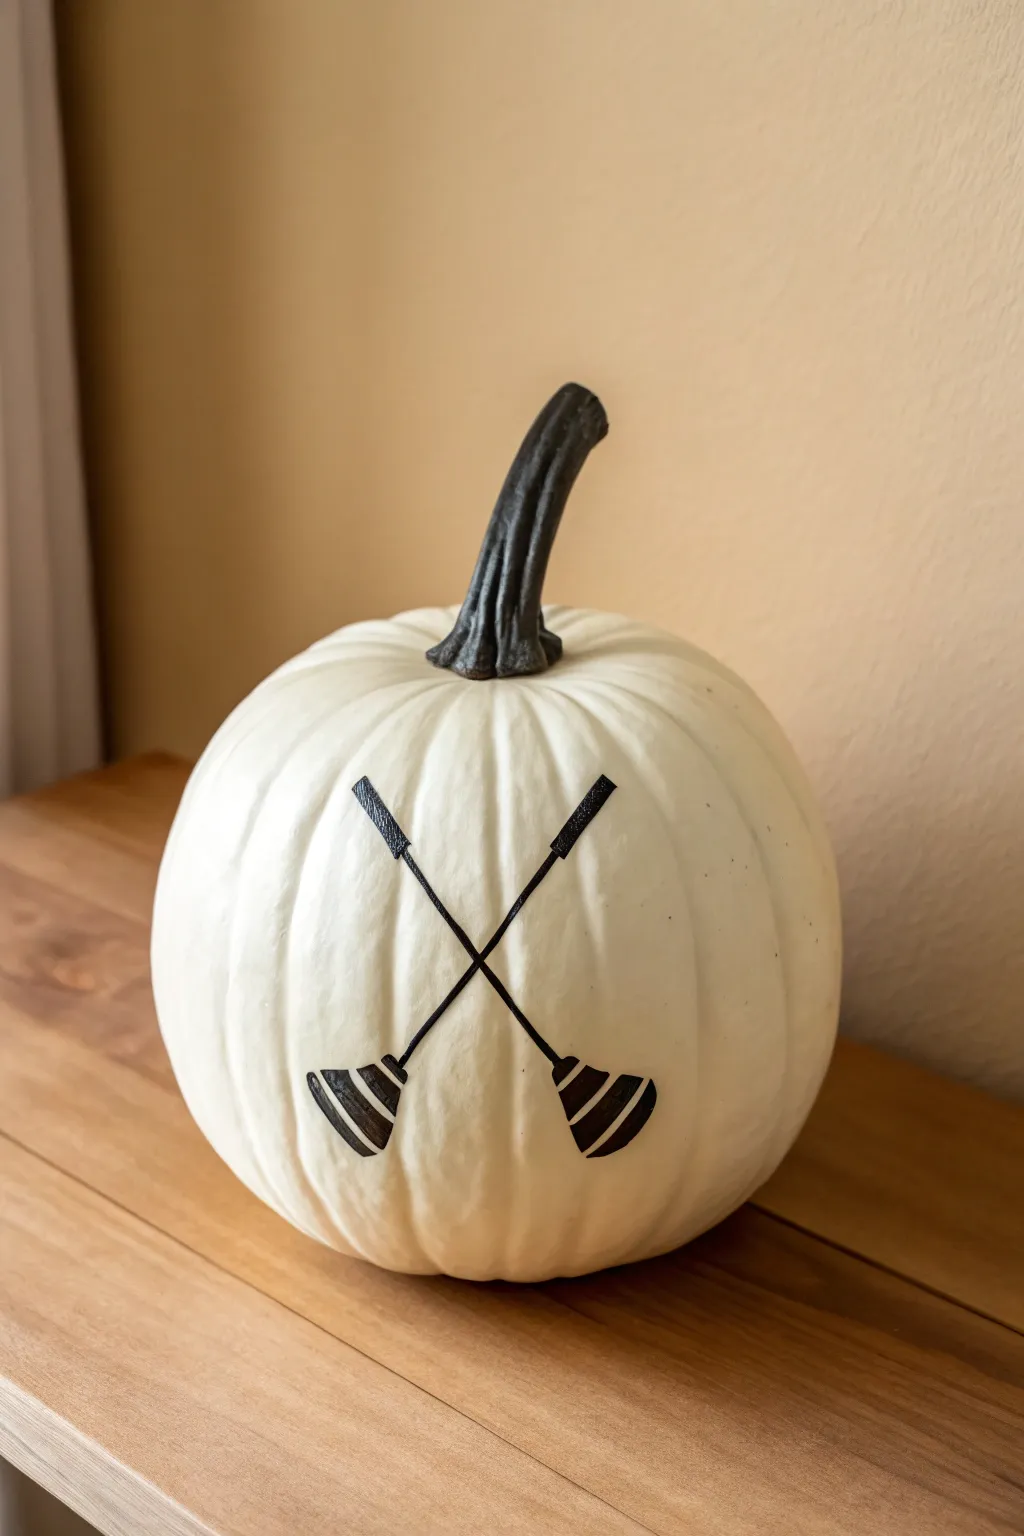
For a sleek and sporty autumn accent, this project transforms a simple white gourd into a country club-worthy decoration. The striking contrast of black crossed clubs against the pale pumpkin skin creates a modern graphic look perfect for any golf enthusiast’s home.
Detailed Instructions
Materials
- Medium-sized pumpkin (real or faux)
- White matte spray paint (if pumpkin isn’t already white)
- Black slate or matte acrylic paint
- Fine-grit sandpaper (optional)
- Flat shader brush (small, size 4 or 6)
- Fine liner brush (size 0 or 00)
- Pencil
- Ruler or straight edge
- Painter’s tape (optional)
- Clear matte sealer spray
Step 1: Preparation & Base Coat
-
Clean the surface:
Begin by thoroughly wiping down your pumpkin with a damp cloth to remove any dirt or oils. If using a faux pumpkin, a quick wipe with rubbing alcohol helps paint adhere better. -
Create the white canvas:
If your pumpkin isn’t naturally perfectly white, apply two thin coats of matte white spray paint. Let the first coat dry for about 20 minutes before applying the second to ensure an even, opaque finish. -
Prep the stem:
Since we want the stem to match the graphic, wipe it down specifically to ensure no dust is hiding in the crevices.
Wobbly Lines?
If painting straight lines on a round pumpkin is tough, use thin electrical tape or painter’s tape to mask off the shafts before painting.
Step 2: Designing the Graphic
-
Find the center:
Locate the ‘face’ of your pumpkin—the smoothest side. Use a ruler to find the visual center where your clubs will cross. -
Draft the shafts:
Lightly sketch an ‘X’ shape using a pencil. For straight lines on a curved surface, I sometimes use a flexible sewing tape measure as a guide. The lines should be roughly 4-5 inches long. -
Thicken the lines:
Draw parallel lines next to your initial ‘X’ marks to give the shafts some thickness. They should be slender, about 1/8th of an inch wide. -
Sketch the grips:
At the top end of each shaft, draw a small rectangle slightly wider than the shaft itself to represent the handle grip. -
Outline the club heads:
At the bottom of the shafts, sketch semi-circular or D-shaped club heads facing outward. Make sure they are symmetrical in size. -
add stripe details:
Inside the club heads, lightly draw two or three horizontal lines to create the striped pattern visible in the design.
Step 3: Painting & Finishing
-
Paint the stem:
Using your flat shader brush and black acrylic paint, cover the stem completely. Work the paint into the twisted grooves for full coverage. -
Outline the clubs:
Switch to your fine liner brush. Carefully trace the outer edges of your penciled club design with black paint. Resting your pinky finger on the pumpkin helps stabilize your hand. -
Fill the shafts:
Fill in the long shafts and the grip rectangles. Use smooth, long strokes to avoid a choppy texture. -
Fill the club heads:
Paint the solid sections of the club heads, being very careful to leave the negative space (the white stripes) unpainted. -
Touch up edges:
Once the first layer is dry to the touch, inspect your lines. If any edges look fuzzy, clean them up carefully with a tiny bit of white paint. -
Second coat application:
Apply a second coat of black paint to the design and the stem to achieve that deep, opaque finish shown in the photo. -
Seal the work:
Allow the paint to cure for at least an hour. To protect your design from scratching, lightly mist the entire pumpkin with a clear matte sealer.
Sharper Stripes
For the crispest white stripes on the club heads, paint the whole head black first. Once dry, use a white paint pen to draw the stripes over the top.
Place your finished pumpkin on a rustic wood stand or near the entryway to welcome guests with a touch of sporty elegance


Have a question or want to share your own experience? I'd love to hear from you in the comments below!