When October hits, I love filling my sketchbook with Halloween drawing prompts that swing from cozy-cute to properly spooky. Here are my go-to Halloween drawing ideas—starting with the classics everyone craves, then drifting into weirder, moodier territory.
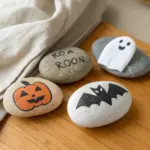
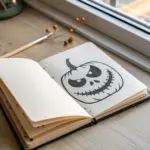
Cute Sheet Ghosts With Big Expressions
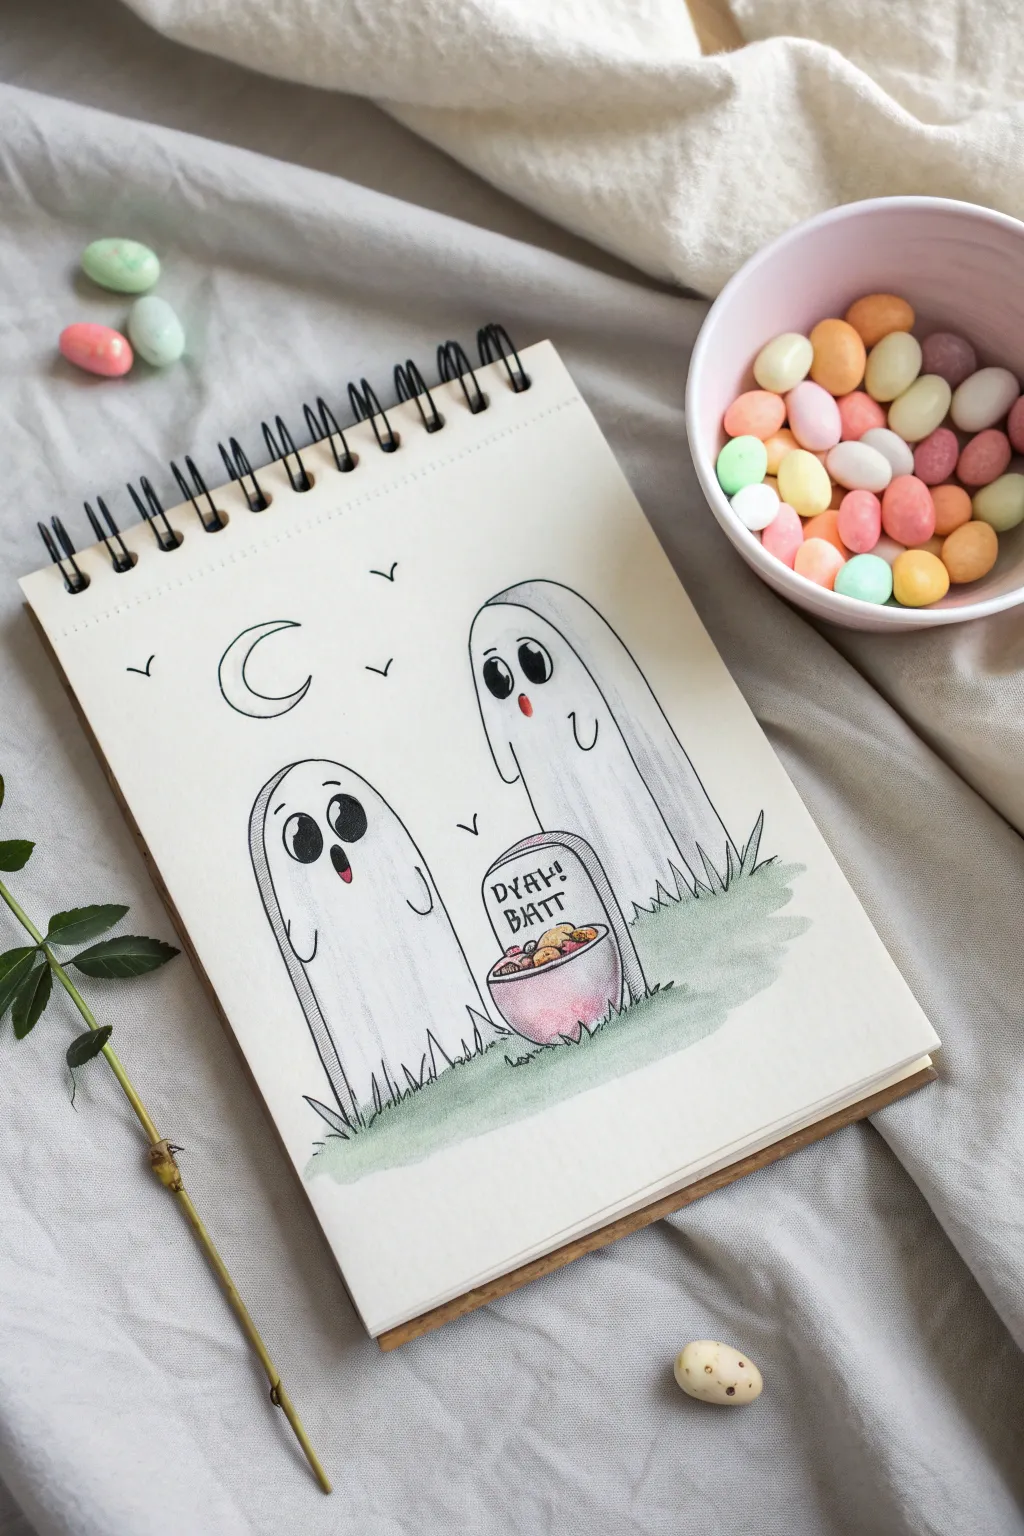
Capture the whimsical side of Halloween with this adorable sketch of two saucer-eyed ghosts discovering a treasure trove of candy. This charming illustration combines clean ink lines with soft, dreamy shading for a quick but impressive seasonal doodle.
How-To Guide
Materials
- Sketchbook (smooth or mixed media paper preferred)
- HB Graphite pencil
- Eraser (kneaded eraser works best)
- Fine liner pen (black, water-resistant if using watercolor, size 0.3mm or 0.5mm)
- Colored pencils (soft grey, pink, light green, orange)
- Optional: White gel pen for highlights
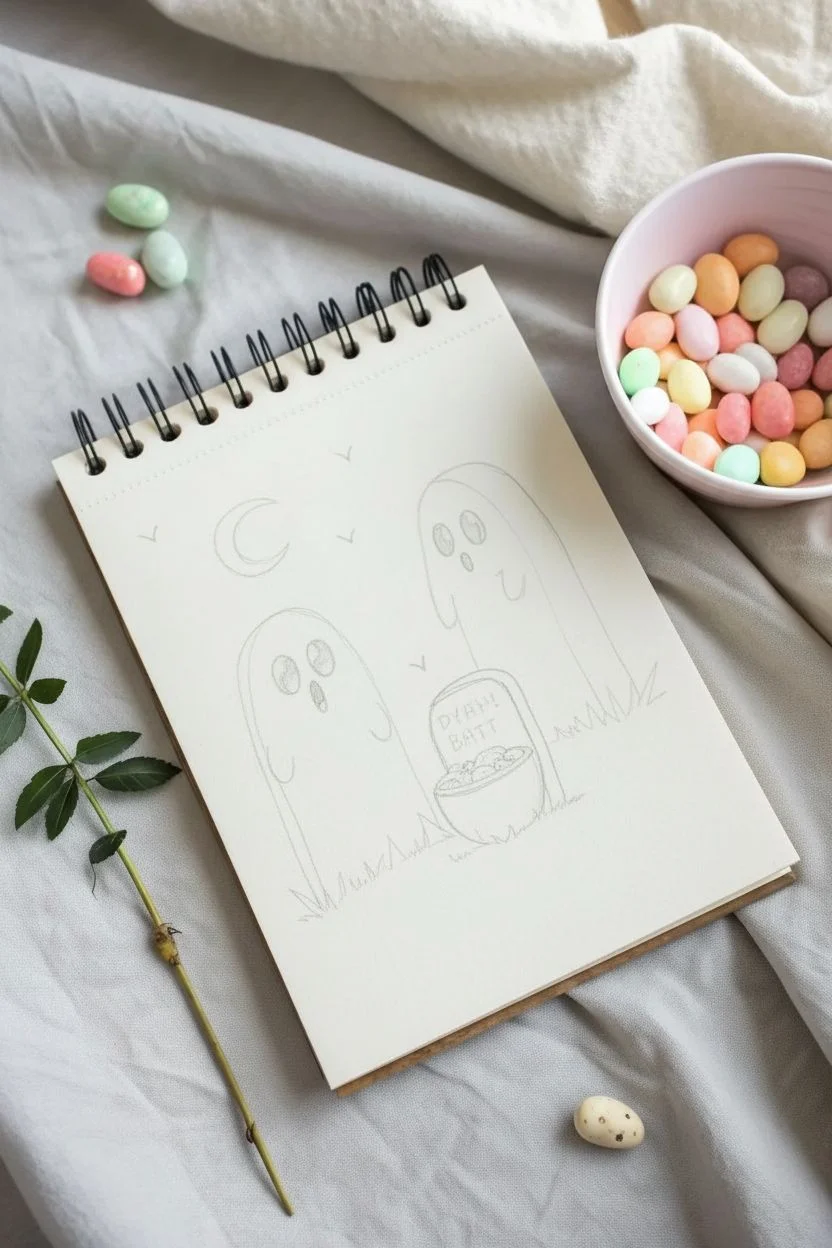
Step 1: Planning the Composition
-
Light Sketching:
Start by lightly sketching two tall, rounded oblong shapes for the ghosts using your graphite pencil. Place the left ghost slightly lower than the one on the right to create depth. -
Adding the Candy Bowl:
Draw a small, rounded pot shape sitting on the ground between the two ghosts. Add a rectangular tombstone shape rising up from behind the bowl. -
Setting the Scene:
Sketch a crescent moon in the upper left corner and add a few small ‘v’ shapes scattered around for flying bats.
Uneven Eyes?
If your circles aren’t perfect, don’t worry! Slightly wonky eyes actually make the ghosts look goofier and more charming. Just make sure the white highlights face the same direction.
Step 2: Refining the Characters
-
Ghostly Features:
Draw two large, oval eyes on each ghost. For the left ghost, add a small, open oval mouth to show surprise. For the right ghost, draw a small circle mouth. -
Adding Arms:
Sketch tiny, U-shaped curves on the sides of their bodies to suggest little hands or sheet folds. -
Grounding:
Add jagged grass tufts along the bottom edge of the ghosts and around the candy bowl so they aren’t floating in space. -
Candy Details:
Fill the top of the bowl with small circles and ovals to represent the candy haul. -
Lettering:
Pencil in the text ‘BOO! TREAT’ or similar playful lettering onto the tombstone shape.
Step 3: Inking the Lines
-
Main Outlines:
Using your fine liner, trace over the pencil lines of the ghosts’ bodies. I like to keep these lines fairly clean and continuous. -
Face Emphasis:
Ink the eyes carefully. Fill in the pupils solid black but leave a large white circle in each eye for that shiny, cute reflection. -
Texture details:
Ink the grass with quick, upward flicking motions to make it look spiky. -
Erase Sketches:
Once the ink is completely dry (give it a full minute), gently erase all underlying pencil marks to clean up the page.
Softer Shadows
To get that ultra-smooth shading on the ghosts’ sides, try smudging your pencil shading gently with a cotton swab or a paper blending stump.
Step 4: Soft Shading & Color
-
Shadowing the Ghosts:
Take a grey colored pencil/pastel and very lightly shade the sides of the ghosts and under their arms. This gives them roundness. -
Vertical Textures:
Add delicate vertical lines on the ghosts’ bodies using the fine liner to suggest the texture of fabric folds. -
Rosy Cheeks:
Use a pink pencil to add small blush circles under the eyes and a touch of color inside their open mouths. -
Coloring the Bowl:
Color the candy bowl pink or purple, and use orange and yellow for the candies inside. -
Grass Effect:
Lightly shade the ground area with a soft green pencil, fading it out as you move away from the figures. -
Final Touches:
Add a few extra dots or sparkles in the sky for magic dust.
Now you have a delightfully spooky scene ready to haunt your sketchbook pages


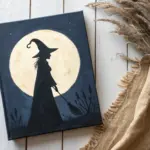
Witch Hats, Brooms, and Swirly Spell Smoke
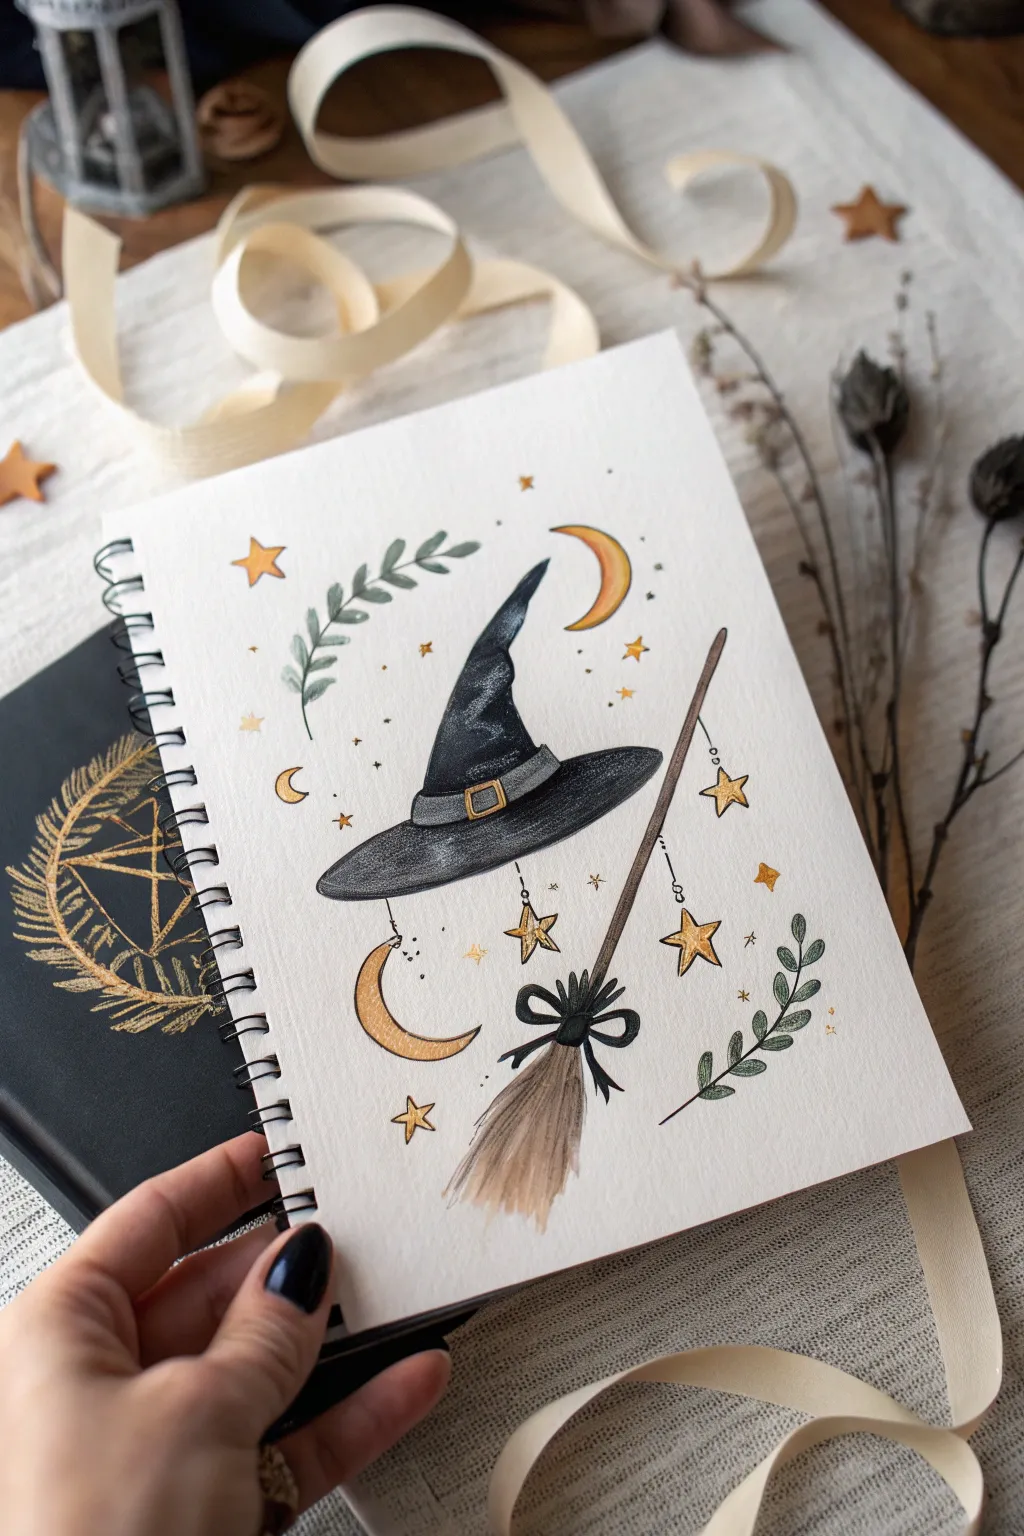
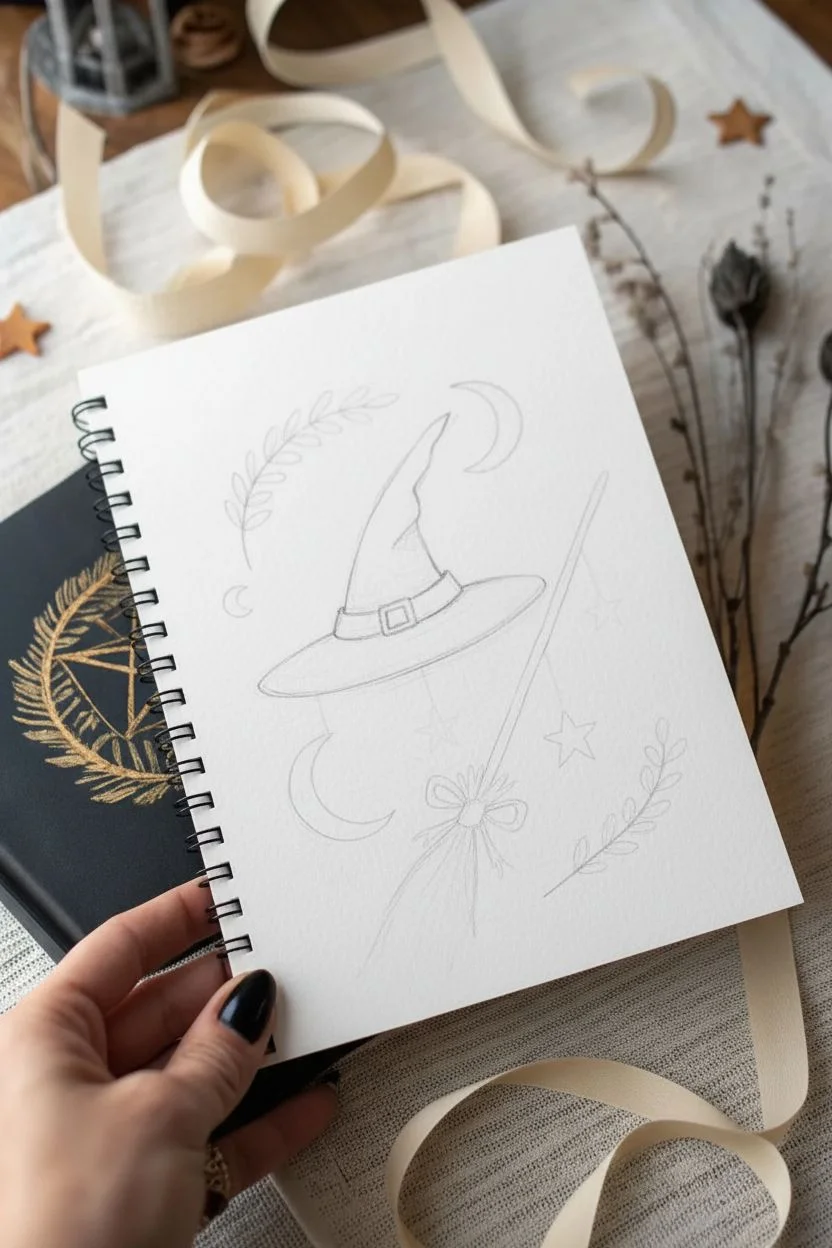
This enchanting illustration combines classic Halloween motifs with delicate celestial elements for a cozy, magical vibe. Using a mix of fine details and warm, earthy tones, you’ll create a charming sketchbook page featuring a floppy witch’s hat and a rustic broom surrounded by stars and foliage.
Detailed Instructions
Materials
- Mixed-media or watercolor sketchbook
- HB pencil and good eraser
- Fine liner pens (Black, 0.1mm and 0.3mm)
- Watercolor paints or alcohol markers (Black/Dark Grey, Tan/Brown, Golden Yellow/Ochre, Sage Green)
- Small round paintbrush (size 2 or 4)
- Gold gel pen or metallic paint (optional)
Step 1: Sketching the Composition
-
Place the central elements:
Begin by lightly sketching the outline of the witch hat in the upper center of the page. Draw a wide, curved brim and a crumpled, pointed cone that tilts slightly to the left. -
Add the broom:
Below and slightly to the right of the hat, sketch the broomstick handle at a diagonal angle. Draw the bristles fanning out at the bottom. -
Connect with details:
Sketch a simple belt around the base of the hat cone with a small square buckle. Add a bow where the broom handle meets the bristles. -
Fill the negative space:
Draw various sizes of five-pointed stars scattered around the main objects. Add two crescent moons—one near the top right and one near the bottom left. -
Add nature elements:
Sketch two leafy sprigs: one curving near the top left of the hat and another near the bottom right of the broom handle to balance the composition.
Step 2: Inking the Outline
-
Outline the hat:
Using your 0.3mm fine liner, trace over your hat sketch. Use slightly shaky or broken lines for the hat’s wrinkles to suggest a worn fabric texture. -
Ink the broom:
Outline the broom handle and the bow. For the bristles, use quick, flicking strokes downward to create a straw-like texture rather than outlining the whole shape. -
Trace celestial shapes:
Carefully ink the stars and moons. Keep your hand steady for crisp points on the stars. -
Add fine details:
Switch to a 0.1mm pen. Draw tiny strings dangling from the broom handle or hat brim, attaching to a few hanging stars. Add small dots or sparkles in empty spaces. -
Clean up:
Once the ink is completely dry, gently erase all your pencil guidelines. I like to double-check that the ink hasn’t smeared before brushing away the eraser dust.
Uneven Ink Lines?
Don’t panic if your lines wobble! Go back and creatively thicken the line in those spots to make it look intentional, adding line weight variety.
Step 3: Adding Color & Shading
-
Paint the hat:
Fill in the witch hat with black or dark grey watercolor. If using watercolor, dilute the paint for the highlighted areas on the cone folds to give it volume. -
Color the broom:
Use a warm tan or brown for the broom bristles and a slightly darker wood tone for the handle. Let the bristle strokes show through to maintain texture. -
Highlight the gold:
Paint the crescent moons, stars, and the hat buckle with a golden yellow or ochre. You can layer this to make it vibrant. -
Greenery details:
Use a muted sage green for the leafy sprigs. Keep the color soft so it doesn’t overpower the black hat. -
Deepen shadows:
Once the base layers are dry, add a second layer of dark grey or black to the deepest folds of the hat and underneath the brim for contrast. -
Finalize the bow:
Color the bow on the broom black. Make sure to leave tiny white slivers or use a white gel pen later to define the loops so they don’t look like a solid blob. -
Add metallic touches:
If you have a gold gel pen or metallic paint, add tiny accents to the center of the stars or the rim of the moons for a magical shimmer.
Magic Sparkle Tip
Use a white gel pen to add tiny dots or ‘constellations’ on the black hat after the paint dries to simulate a starry night texture on the fabric.
Now your sketchbook page is ready for the spooky season with a touch of magic.


Bats in a Moonlit Sky Silhouette Scene
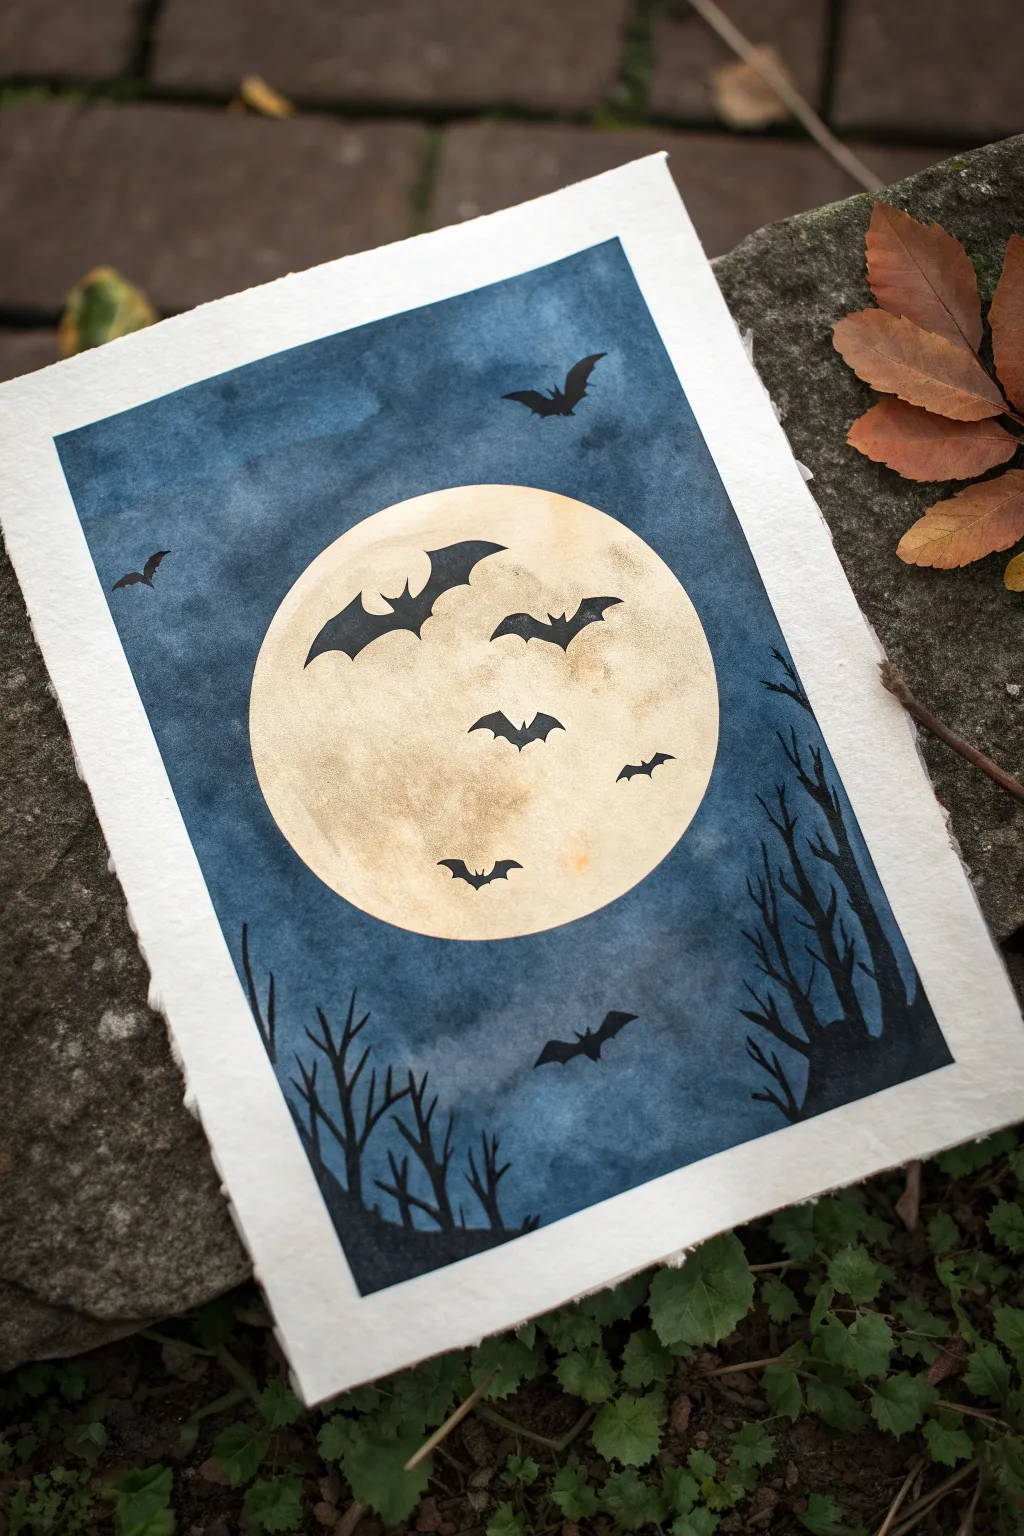
Capture the eerie beauty of a Halloween night with this watercolor painting featuring a bright, full moon amidst a moody blue sky. The stark contrast of black silhouettes against the soft washes creates a dramatic and festive piece of art that looks deceptively professional.
How-To Guide
Materials
- Cold press watercolor paper (approx. 300 gsm)
- Painter’s tape or masking tape
- Watercolor paints (Indigo, Prussian Blue, Payne’s Grey, Yellow Ochre, Burnt Sienna)
- Black ink or black gouache for silhouettes
- Round watercolor brushes (Size 8 for washes, Size 0 or 1 for details)
- Compass or a round object to trace (bowl or lid)
- Pencil and eraser
- Masking fluid (optional but recommended)
- Palette for mixing
- Two jars of water and paper towels
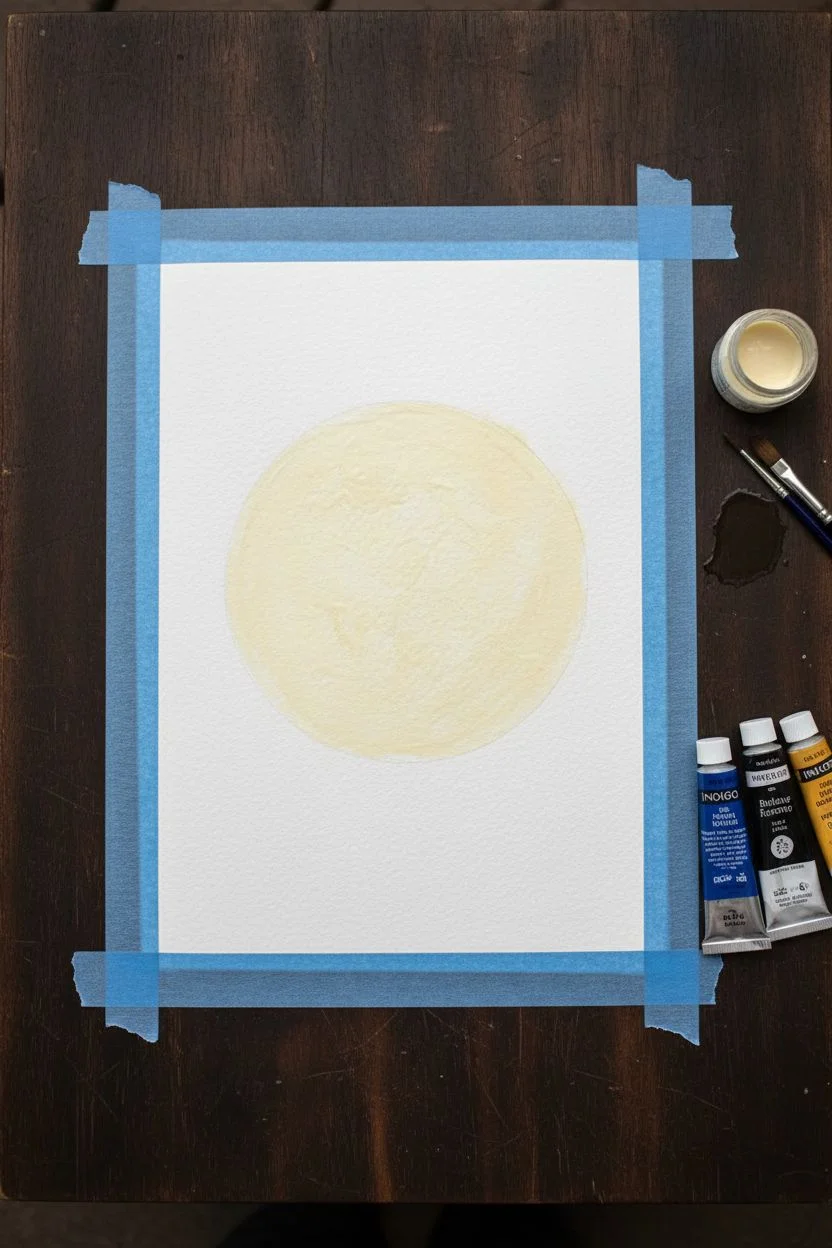
Step 1: Preparation & Masking
-
Secure the paper:
Begin by taping down all four edges of your watercolor paper to a board or table. This creates a clean white border and prevents buckling when the paper gets wet. -
Sketch the moon:
Using a compass or a round household object like a bowl, lightly trace a large circle in the center of your paper. Keep the pencil lines very faint so they don’t show through later. -
Protect the moon area:
If you have masking fluid, carefully paint it inside the circle to protect the moon’s shape. If not, you will need to paint carefully around this circle in the next phase. Let the masking fluid dry completely.
Don’t Be Perfect!
For the moon’s texture, blotchy is better. Imperfect water stains actually look more like craters than perfectly painted circles do.
Step 2: Painting the Sky
-
Pre-wet the paper:
Load your large brush with clean water and wet the entire area outside the moon circle. The paper should be glisten but not have standing puddles. -
Mix your blues:
Prepare a rich mixture of Indigo and Prussian Blue. I like to keep this quite saturated so the night sky looks deep and moody. -
Apply the first wash:
Start dropping the blue paint into the wet paper, working from the edges inward toward the moon. The wet-on-wet technique will help the colors bloom and create cloud-like textures naturally. -
Deepen the shadows:
While the paper is still damp, drop darker concentrations of Indigo or Payne’s Grey into the corners and edges to create a vignetting effect. -
Create texture:
Dab areas with a clean, thirsty brush or a crumpled tissue to lift a little pigment here and there, suggesting hazy clouds drifting across the night sky. -
Let it dry completely:
This is crucial; wait until the sky is 100% bone dry before moving on. If used, gently rub off the masking fluid to reveal the white circle.
Step 3: Painting the Moon
-
Base moon wash:
Dilute a tiny amount of Yellow Ochre with plenty of water. Paint a very pale, watery wash over the entire moon circle. -
Add lunar details:
While the moon is damp, drop in tiny touches of diluted Burnt Sienna or dirty brush water in random blotches to create craters and surface texture. Keep this very subtle.
Spattered Stars
Before removing the tape, cover the moon with a paper scrap and flick white gouache or acrylic paint over the blue sky to add distant stars.
Step 4: Adding Silhouettes
-
Outline the bats:
Once the background is totally dry, use your smallest brush and black ink (or gouache) to lightly outline the shapes of flying bats. Place several inside the moon for high contrast and a few in the dark sky. -
Fill in the bats:
Carefully fill in the bat shapes with solid opaque black. Make sure the wings have sharp, pointed tips. -
Sketch the trees:
At the bottom corners, sketch faint guidelines for the gnarly, dead trees. They should frame the scene rather than block the moon. -
Paint the tree trunks:
Using the same opaque black, paint thick, uneven trunks rising from the bottom edge. Let your hand shake slightly to give the wood a rough, organic look. -
Add spindly branches:
Switch to your finest detail brush to pull thin branches upward. Taper them off into sharp points that reach toward the sky. -
Final touches:
Review your silhouettes. If the black looks patchy after drying, apply a second coat to ensure they are solid and stark against the background. -
Reveal the border:
Once everything is completely dry, slowly peel off the painter’s tape at a 45-degree angle to reveal crisp white edges.
Now step back and admire your spooky moonlit masterpiece before displaying it for the season


Spiders and Spiderweb Corners for Instant Spookiness
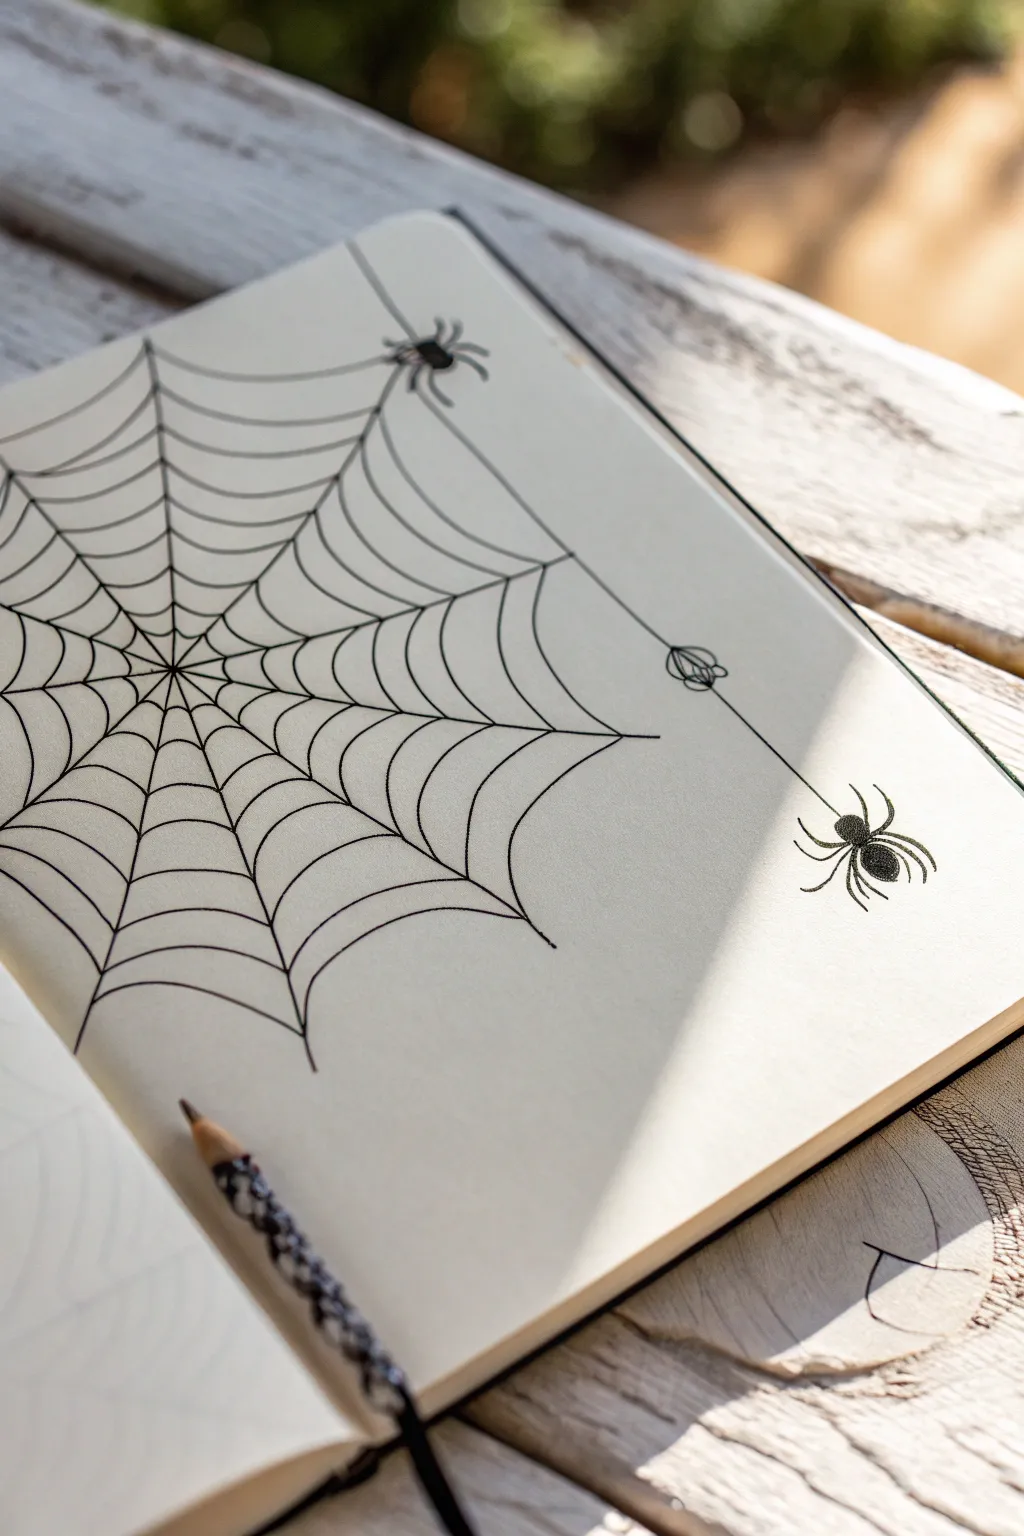
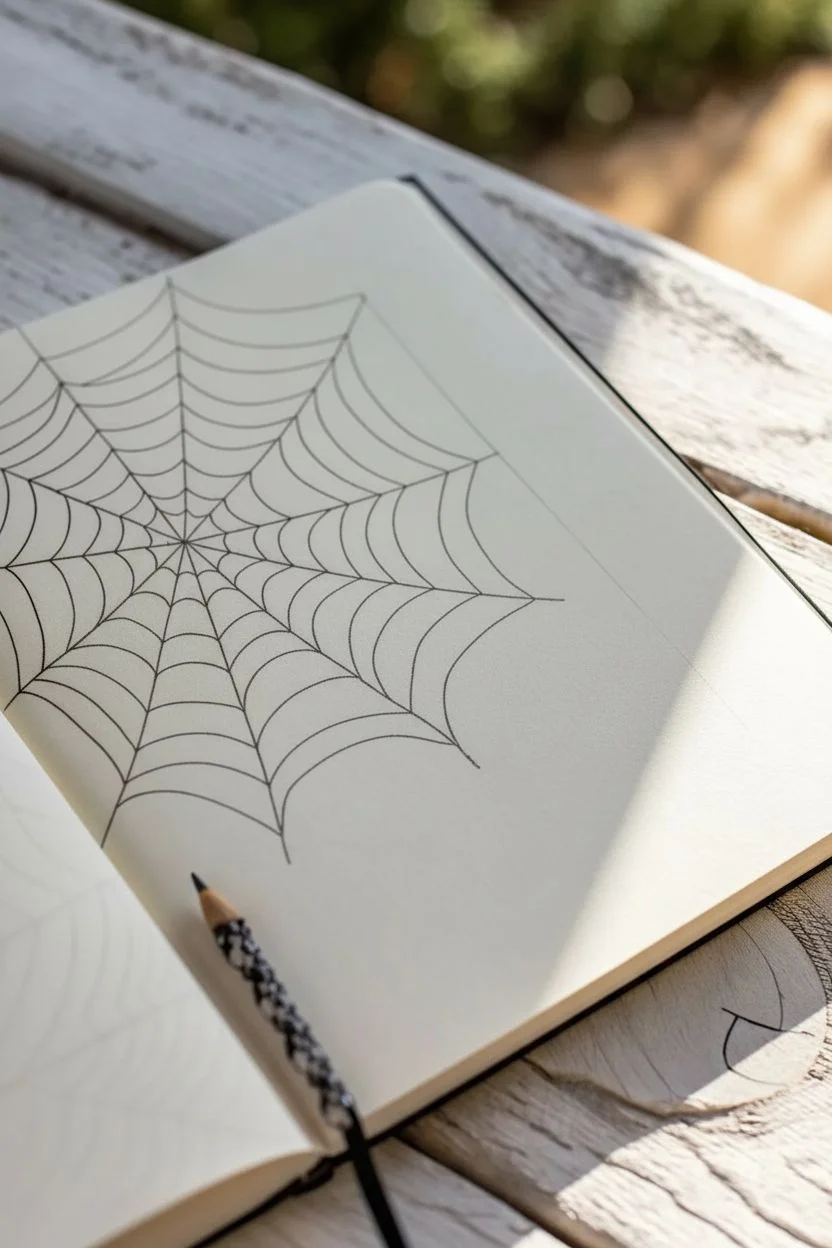
Transform the blank corner of your sketchbook into a spooky trap with this minimalist spiderweb drawing. The crisp black lines against the cream paper create a stark, classic Halloween aesthetic that is surprisingly simple to master.
Step-by-Step Tutorial
Materials
- Sketchbook with cream or off-white paper
- Fine liner pen (black, 0.3mm or 0.5mm)
- Pencil (HB or 2B)
- Eraser
- Ruler (optional)
Step 1: Drafting the Structure
-
Mark the center point:
Begin by deciding where your web will anchor. For this corner design, imagine a point just off the top-left edge of the page. You can lightly mark a dot near the corner as a reference point if it helps. -
Pencil the radial lines:
Using your pencil, lightly sketch straight lines radiating outward from your corner point. Draw about 7 to 9 main lines that fan out across the page, extending different lengths to create an asymmetrical, organic shape. -
Sketch the spiral curves:
Starting close to the corner, lightly sketch scalloped, curved lines connecting the radial spokes. These should dip inward like little hammocks between each spoke. -
Expand the web:
Continue adding rows of these scalloped connections, moving further out. As you get further from the center, increase the spacing between the rows slightly to mimic a real web’s structure. -
Add anchor threads:
Draw one long, straight thread extending from the outer edge of the web down towards the bottom right of the page. Why limit the spookiness to just the corner? This line will hold our dangling spider.
Wobbly Lines?
Don’t stress if your hand shakes! Imperfect, jittery lines actually make spiderwebs look more realistic and organic than severe straight lines.
Step 2: Inking the Web
-
Trace the radial spokes:
Switch to your fine liner pen. Carefully trace over your pencil radial lines. I like to keep my wrist loose here; slight wobbles actually make the silk look more natural than ruler-perfect lines. -
Ink the inner curves:
Begin inking the scalloped connecting lines, starting from the center and working outward. Ensure the lines connect cleanly to the radial spokes. -
Inking the outer edges:
As you ink the outer rows, allow the ends of some radial lines to extend slightly past the last connecting thread, giving the web an unfinished, tattered look. -
Draw the hanging thread:
Ink the long vertical line for the dangling spider. You can add a tiny knot or thickening midway down the line to suggest a previous catch or a silk bundle. -
Erase pencil marks:
Wait at least five minutes for the ink to fully dry to avoid smudging. Then, gently erase all visible pencil guidelines to reveal the crisp black structure.
Level Up: Shadow Play
Use a light grey marker or diluted ink to add a very faint drop shadow underneath the spiders and the thickest web strands to make them pop off the page.
Step 3: Adding the Arachnids
-
Position the first spider:
Place a small spider on the upper edge of the web. Draw two distinct sections: a smaller head (cephalothorax) and a larger, rounder abdomen. -
Legs for the first spider:
Add eight legs to the top spider. Draw them jointed and bent, giving a sense of weight as it crawls along the silk. The front legs should reach forward. -
Draw the dangling spider’s body:
At the end of your long hanging thread, draw the second spider. Create a round abdomen and a smaller head section right at the end of the line. -
Detail the dangling spider:
Fill in the body of the hanging spider with solid black ink, leaving a tiny sliver of white if you want to suggest a highlight. This adds dimension without needing shading. -
Add hanging legs:
Draw the legs for the hanging spider extending upwards and outwards, as if it is suspended in mid-air. The legs should look spindly and delicate. -
Final touches:
Review your drawing. You can thicken the intersection points where threads meet to simulate the sticky glue droplets found on real webs.
Now you have a delightfully creepy corner illustration that frames your page perfectly
BRUSH GUIDE
The Right Brush for Every Stroke
From clean lines to bold texture — master brush choice, stroke control, and essential techniques.
Explore the Full Guide
Haunted House on a Hill With Crooked Windows
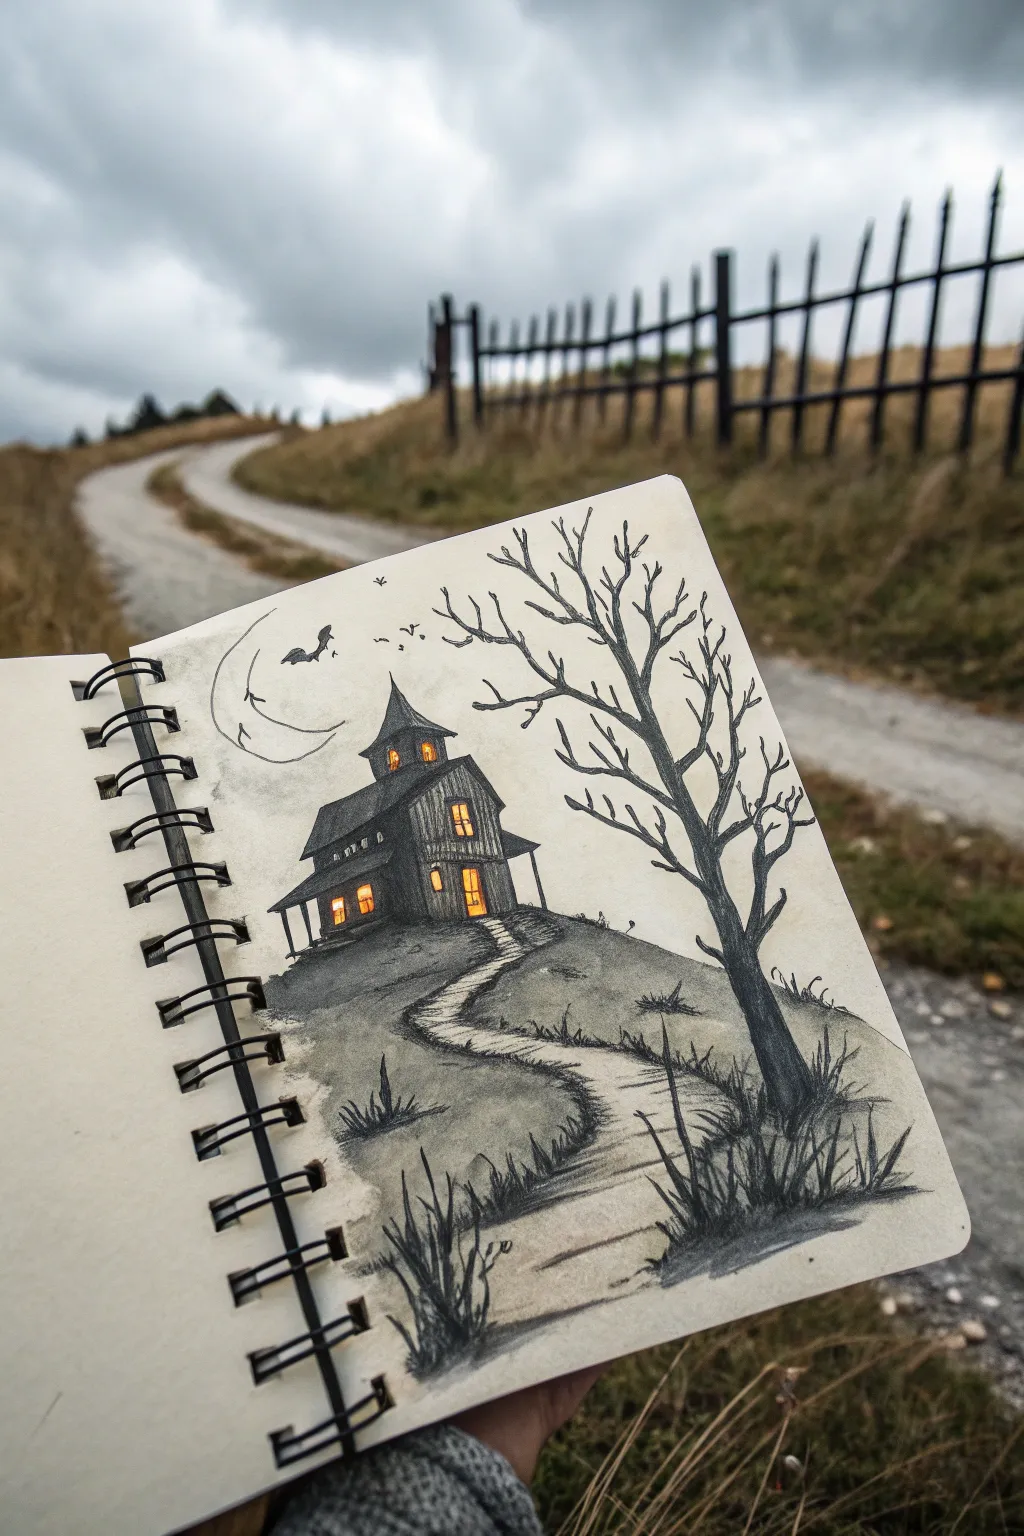
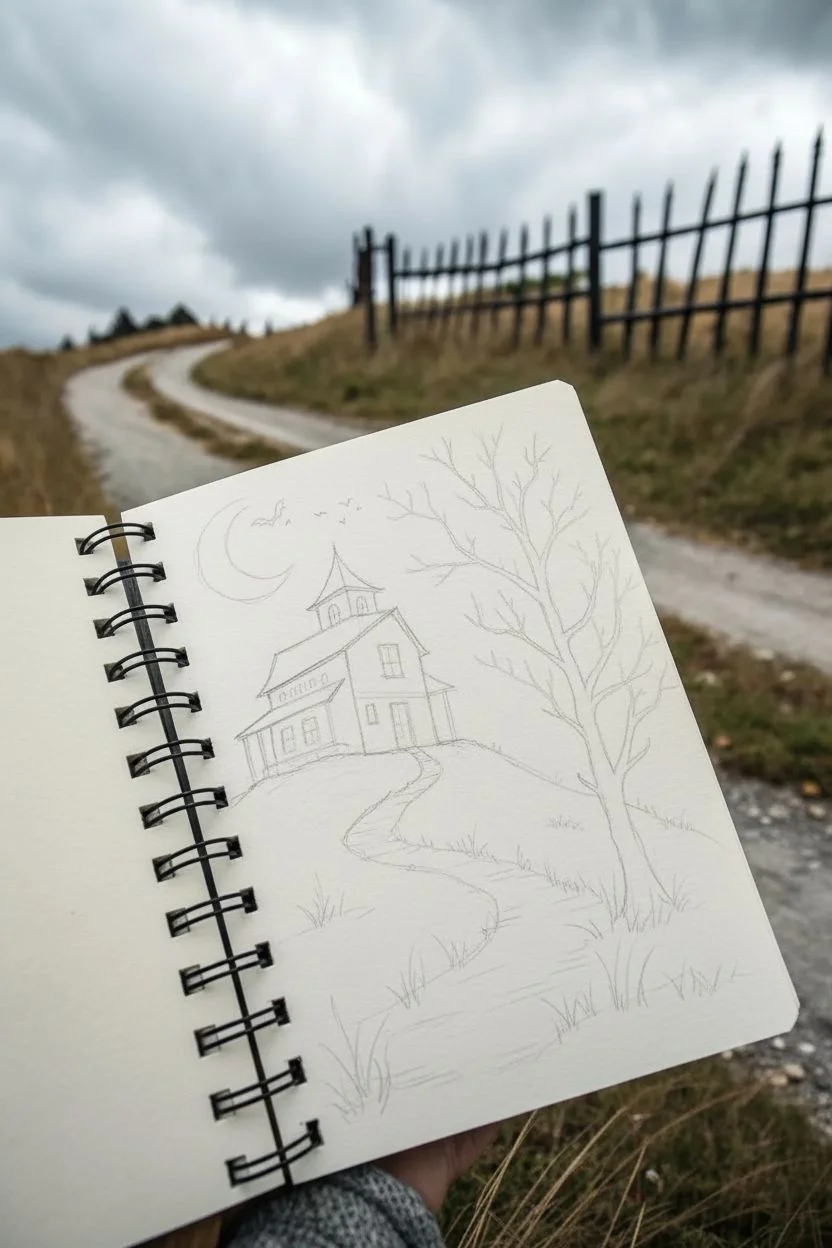
Capture the eerie essence of Halloween with this atmospheric sketch of a haunted house perched atop a winding hill. Using ink for stark contrasts and a touch of warm color for the glowing windows creates a captivating, moody scene.
Step-by-Step Guide
Materials
- Spiral-bound sketchbook or heavy drawing paper
- Pencil (HB or 2B) and eraser
- Black fineliner pens (various sizes, e.g., 0.1, 0.3, 0.5)
- Black brush pen or marker
- Charcoal pencil or soft graphite (4B-6B)
- Orange and yellow colored pencils or markers
- Blurring tool or cotton swab
Step 1: Setting the Scene
-
Curve the landscape:
Begin with a light pencil sketch. Draw a large, sloping hill that dominates the bottom two-thirds of the page. Add a winding path that snakes from the bottom right corner up towards the center of the hill. -
Draft the house structure:
At the peak of the hill, lightly box out the main shape of the house. Include a main rectangular body, a smaller side extension, and a tall, pointed tower on the left side. -
Add the gnarled tree:
Sketch the skeleton of a large, bare tree on the right side of the hill. Make the trunk thick at the base and have the branches reach out aggressively like skeletal fingers towards the house. -
Sketch environmental details:
Add a crescent moon in the upper left sky. Draw a few simple ‘v’ or ‘m’ shapes for bats near the moon and house. Lightly mark where clumps of grass will go along the path.
Pro Tip: Scary Shading
Don’t shade the sky uniform grey. Leave the area around the house and moon lighter to create a natural ‘vignette’ that draws the eye to the focal points.
Step 2: Inking the Details
-
Outline the house:
Grab your 0.3 or 0.5 fineliner. Go over your house sketch with confident strokes. Don’t use a ruler; slightly wobbly lines add to the ‘haunted’ and aged aesthetic. -
Define the windows:
Draw the windows, making them slightly crooked or uneven. Add grid lines inside them, but ensure the frames look old and warped. -
Texture the roof and wood:
Using a fine 0.1 pen, draw vertical lines on the walls to simulate wood siding. Add darker shading under the eaves and rooflines to give the structure weight. -
Ink the tree silhouette:
Fill in the tree trunk and branches with solid black or very dark, dense hatching. Let the tips of the branches taper off into sharp points for a spiky look. -
Create the path:
Outline the winding path using broken, jagged lines rather than smooth curves. This makes the road look unpaved and rough.
Level Up: Smoke & Fog
Use a white gel pen to draw wisps of fog drifting across the bottom of the hill or smoke curling out of a chimney for extra movement.
Step 3: Atmosphere and Shading
-
Grass and foliage:
Along the edges of the path and the base of the hill, use quick, upward flicking motions with your pen to create tall, sharp blades of overgrown grass. -
The moon and bats:
Ink the crescent moon with a thin line. Fill in the bat silhouettes completely black to make them pop against the sky. -
Add charcoal depth:
Using a charcoal pencil or soft graphite, shade the hill itself. Apply more pressure near the bottom of the page and fade it out as you go up, creating a gradient. -
Smudge for mood:
Take a cotton swab or blending stump and gently smudge the charcoal on the hill. I find this creates that misty, foggy ground effect perfect for spooky scenes. -
Deepen shadows:
Add extra shading around the base of the tree and the house to ground them. This shadow anchors the objects so they don’t look like they are floating.
Step 4: The Final Glow
-
Base layer for lights:
Color in the window panes with a bright yellow pencil or marker. This is the source of the house’s life. -
Warm up the glow:
Layer orange pencil around the edges of the yellow windows. This creates a flickering, warm candlelight effect that contrasts beautifully with the grey surroundings. -
Final clean up:
Erase any remaining stray pencil lines that haven’t been covered by ink or charcoal. Check your contrast and darken any blacks that look too grey.
Now you have a marvellously moody sketchbook piece ready to haunt your portfolio
Graveyard Sketch With Fog, Stones, and Bare Trees
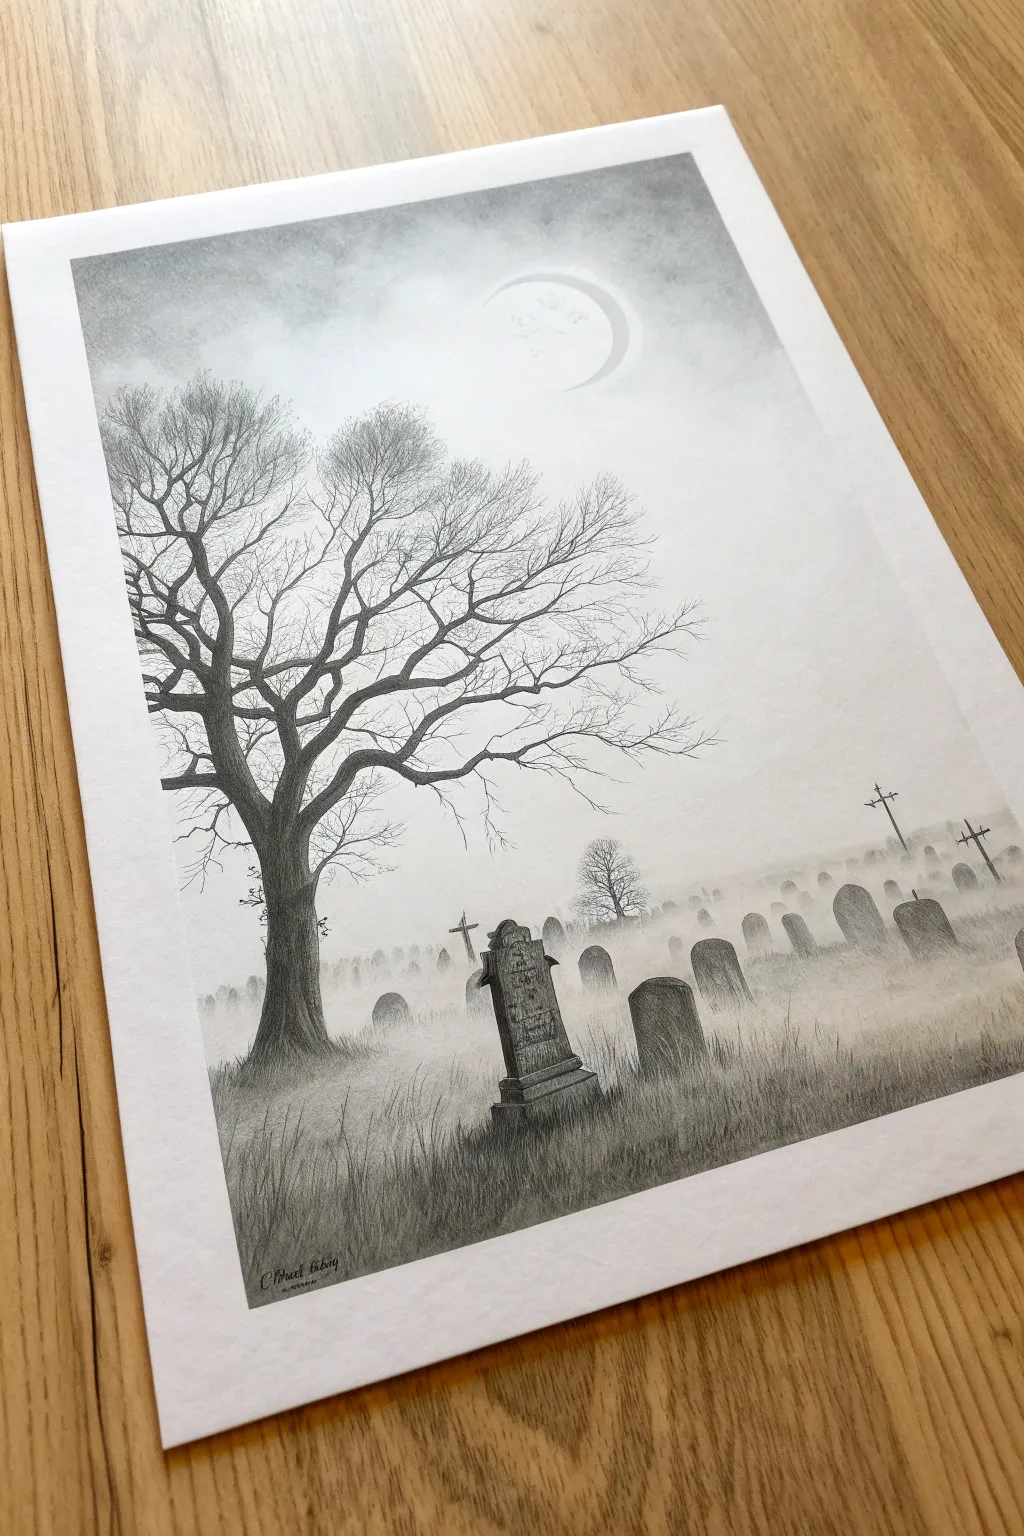
Capture the haunting silence of a graveyard at dawn with this atmospheric pencil drawing. This project focuses on building depth through soft shading and creating a believable, eerie fog that blankets the tombstones.
How-To Guide
Materials
- High-quality drawing paper (smooth or vellum finish)
- Graphite pencils (HB, 2B, 4B, 6B)
- Blending stumps (tortillons) or soft tissue
- Kneaded eraser
- Precision mechanical eraser (optional)
- Ruler (for horizon line guidance)
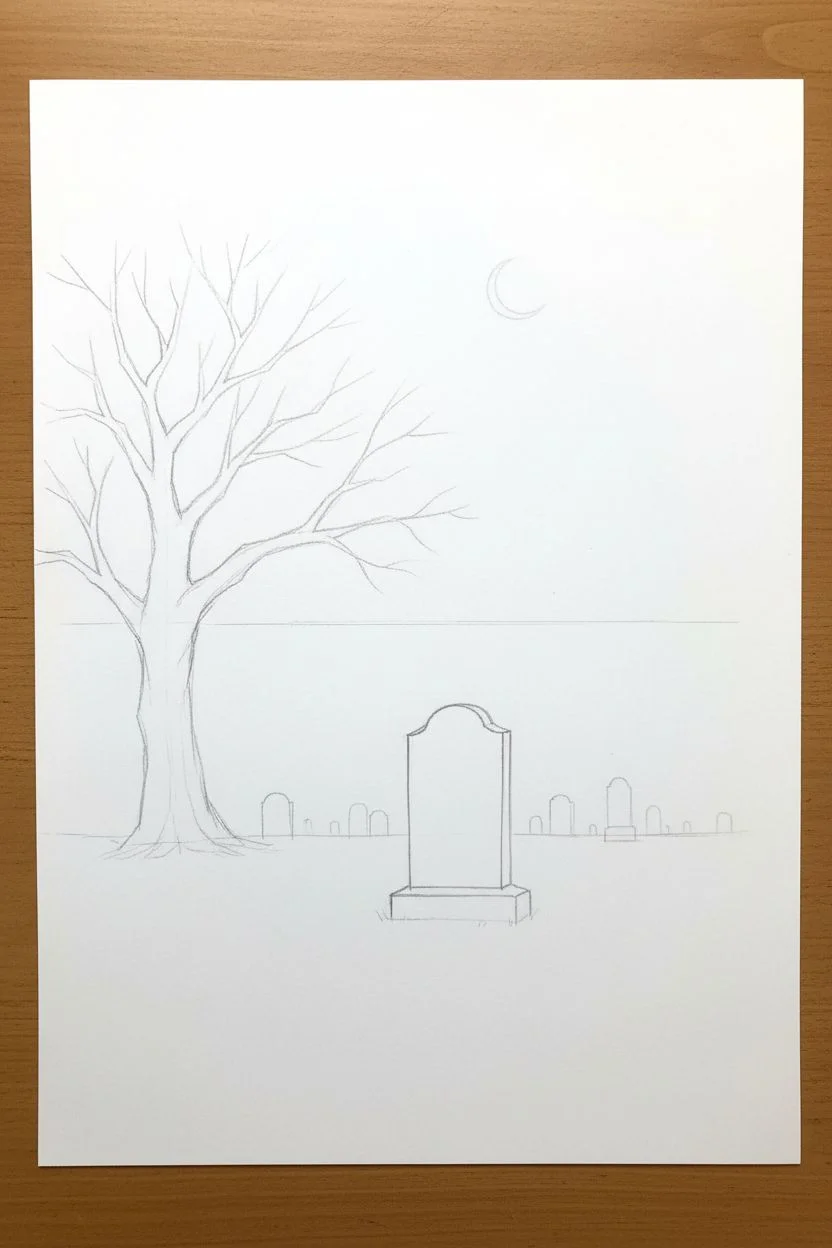
Step 1: Setting the Scene
-
Establish the horizon:
Lightly sketch a faint horizontal line about one-third of the way up the page. This will be your ‘vanishing point’ level for the fog, though you won’t need perfect perspective lines since the fog obscures so much. -
Draft the main tree:
Using an HB pencil, sketch the skeletal structure of the large tree on the left. Focus on the trunk’s thickness at the base and have the main branches reach out aggressively towards the center. -
Place the tombstones:
Sketch the outline of the primary tombstone in the foreground, slightly off-center. Then, lightly draw smaller, simpler tombstone shapes receding into the background, making them progressively smaller and fainter as they move up toward the horizon line. -
Outline the moon:
Very faintly trace a crescent moon shape high in the sky. You want this line to be barely visible so it doesn’t look like a cartoon outlines later.
Smudge Control
Graphite smudges easily. Place a clean sheet of scrap paper under your drawing hand to protect the finished areas while you work on the details.
Step 2: Developing the Tree
-
Darken the trunk:
Switch to a 4B or 6B pencil to fill in the tree trunk. Use vertical, jagged strokes to simulate rough bark texture. Leave tiny slivers of white paper showing through to suggest light caching the edges. -
Branch complexity:
Work your way up the branches, switching to a 2B pencil for the midsized limbs and an HB for the finest twigs at the very tips. The intricate network of fine lines is what gives the tree its eerie, wintery feel. -
Refining the silhouette:
Ensure the connections between branches look seamless. Thick branches should taper naturally into thin ones without abrupt stops.
Step 3: Creating the Atmosphere
-
Base shading for the sky:
Using the side of a 2B pencil, apply a light, even layer of graphite across the entire upper sky, avoiding the moon area. -
Blending the sky:
Take a tissue or blending stump and smooth out the sky graphite until it is a soft, uniform gray. This creates the hazy backdrop essential for a spooky mood. -
Defining the moon:
Use a kneaded eraser to lift any accidental smudges from inside the crescent moon, keeping it bright white against the gray sky. -
The fog effect:
Start shading the ground from the bottom up, getting lighter as you approach the horizon line. Blend heavily with a stump. The area near the horizon should be almost white or very pale gray to simulate dense fog obscuring the distance.
Add a Crow
For extra narrative, draw a tiny silhouette of a crow perched on one of the high tree branches or resting atop the nearest tombstone.
Step 4: Detailing the Graveyard
-
Foreground tombstone detail:
Detail the main tombstone with a 4B pencil. Add cracks, weathered edges, and illegible inscriptions. Shade the side facing away from the moon darker to give the stone volume. -
Mid-ground stones:
Fill in the stones behind the main one using a 2B pencil. I like to keep these slightly out of focus—don’t draw sharp outlines; let the edges blur slightly into the ‘fog’ you created. -
Background silhouettes:
For the furthest stones and the distant crosses, use an HB pencil and very light pressure. They should look like faint gray ghosts effectively vanishing into the mist. -
Grass texture:
At the base of the tree and the foreground tombstone, use quick, upward flicking strokes with a sharp 2B pencil to draw tall, unkempt grass. Let the grass blades overlap the bottom of the tombstone to ground it in the scene. -
Final atmosphere check:
Use your kneaded eraser to tap lightly on the mid-ground area, lifting faint clouds of graphite to create patches of drifting mist between the tombstones.
Step back and admire the moody, silent world you have created on paper

PENCIL GUIDE
Understanding Pencil Grades from H to B
From first sketch to finished drawing — learn pencil grades, line control, and shading techniques.
Explore the Full Guide
Skulls and Skeleton Hands Holding Halloween Treats

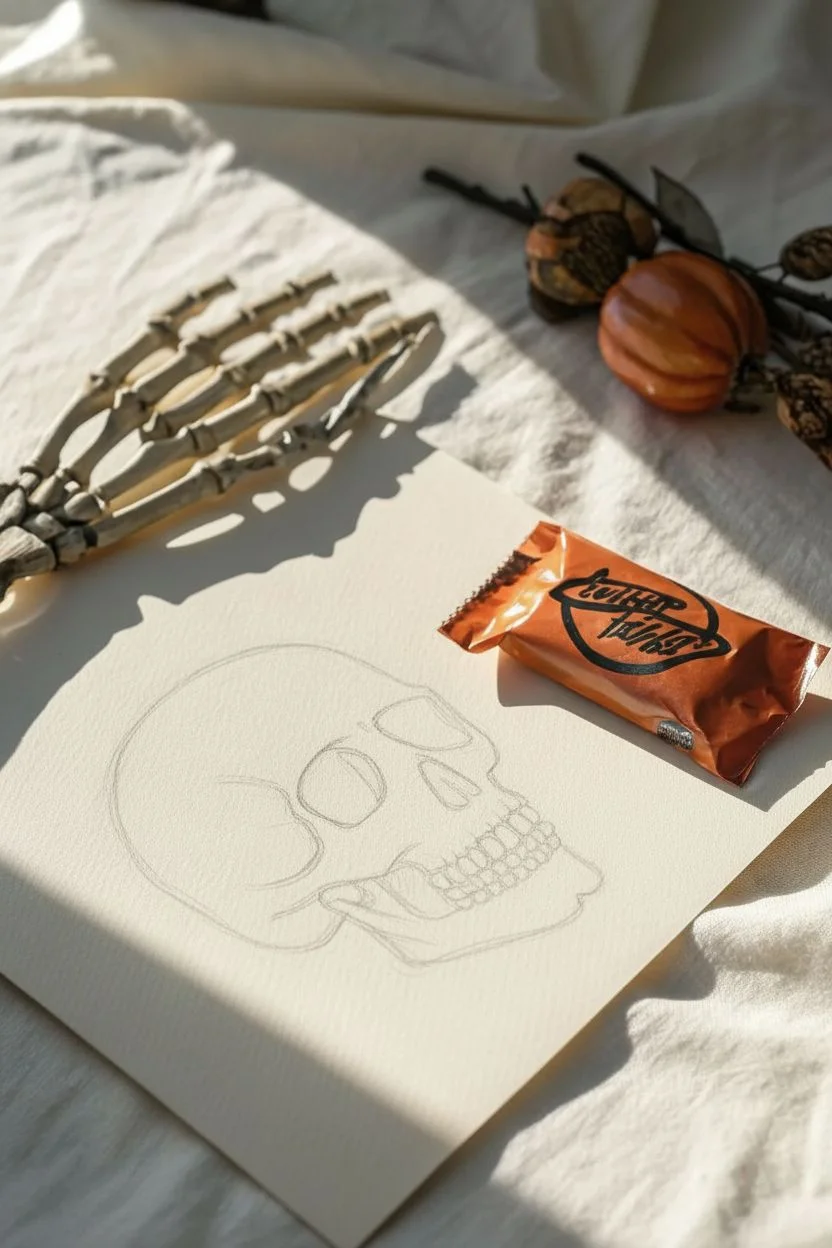
Capture the spooky essence of Halloween with this classic anatomical skull illustration. Using simple ink techniques like hatching and stippling, you’ll create a striking, vintage-inspired piece perfect for seasonal decor or greeting cards.
Step-by-Step
Materials
- Heavyweight cream or off-white drawing paper (smooth bristol or mixed media)
- Graphite pencil (HB or 2H)
- Kneaded eraser
- Fine liner pens (sizes 005, 01, 03, and 05) in black
- Ruler (optional for proportion checking)
- Reference image of a skull profile
Step 1: Sketching the Foundation
-
Establish the Cranium:
Start lightly with your pencil. Draw a large, slightly flattened circle for the main part of the skull (the cranium). Think of it as a deflated ball rather than a perfect sphere to get that anatomical look. -
Map the Face Shape:
Attach a squarish shape to the lower front of your circle for the face area. Drop a jawline down from the bottom, curving it slightly forward. It should look a bit like a lightbulb lying on its side. -
Place Facial Features:
Lightly sketch the eye socket (orbit) as a large, uneven D-shape. Add the triangular nasal cavity just to the right of the center line. Sketch the cheekbone (zygomatic arch) swooping back from the eye socket. -
Outline the Teeth:
Sketch a horizontal curve for the separation between upper and lower teeth. Draw individual teeth shapes, making the front ones larger and the back ones smaller and flatter. Don’t worry about perfection; organic irregularities look more realistic.
Ink Confidence
Don’t stress about wiggly lines. In organic subjects like bone, shaky lines actually look more realistic and add character than perfectly straight ones.
Step 2: Inking the Outline
-
Main Contours:
Switch to your 05 or 03 pen. Go over your main pencil lines, but keep the line slightly broken in areas where the light would hit, like the top of the head. This suggests form rather than a flat sticker. -
Define the Suture Lines:
At the back of the skull, draw the squiggly suture lines using a 01 pen. Let your hand shake a little to create that jagged, zipper-like texture characteristic of bone plates joining together. -
Darken the Cavities:
Using your 05 pen, fill in the deep shadows of the eye socket and nasal cavity. Don’t make them solid black yet; leave tiny flecks of white or use very dense cross-hatching to give it depth and texture. -
Inking the Jaw and Teeth:
Carefully outline the teeth with a 01 pen. Add small ‘roots’ or separation lines between the teeth and the gum line. Define the heavy shadow under the cheekbone with a confident, thick line.
Smudge Alert
If you are smearing ink while drawing, place a scrap piece of paper under your drawing hand. This acts as a barrier and protects your work from hand oils.
Step 3: Adding Texture and Depth
-
Beginning the Hatching:
Take your 005 or 01 pen. Start adding shading using parallel diagonal lines (hatching) on the rounded part of the cranium. Keep the lines closer together near the outline and spread them out as you move toward the center. -
Cross-Hatching the Hollows:
In darker areas like the temple divot and under the cheekbone, add a second set of lines perpendicular to your first set. This cross-hatching builds darker values without losing the drawn texture. -
Stippling for Texture:
Now for the fun, meditative part. Use the 01 pen to add dots (stippling) inside the eye socket and nasal cavity, specifically around the edges of the black areas. This gradients the dark shadow into the lighter bone. -
Refining the Teeth:
Add tiny vertical hatch marks at the top of the upper teeth and bottom of the lower teeth to simulate the gum line curvature. I personally like to darken the gaps between teeth to make them pop. -
Bone Texture Details:
Add small imperfections—tiny cracks, pits, or scratches—using your finest 005 pen. Concentrate these around the jawline and the suture lines for an aged, weathered appearance. -
Cleanup:
Once the ink is completely dry (give it a few minutes to be safe), gently erase all underlying pencil marks with your kneaded eraser. Roll the eraser over the paper rather than scrubbing to protect the ink. -
Final Contrast Check:
Step back and look at your drawing. If the eye socket or jaw shadow isn’t dark enough, go back in with the 05 pen and thicken those shadow shapes to increase the contrast.
Now you can frame your spooky masterpiece or lay it out with some treats for a perfect seasonal vignette
Vampire Portrait With Dramatic Lighting and Cape Shapes
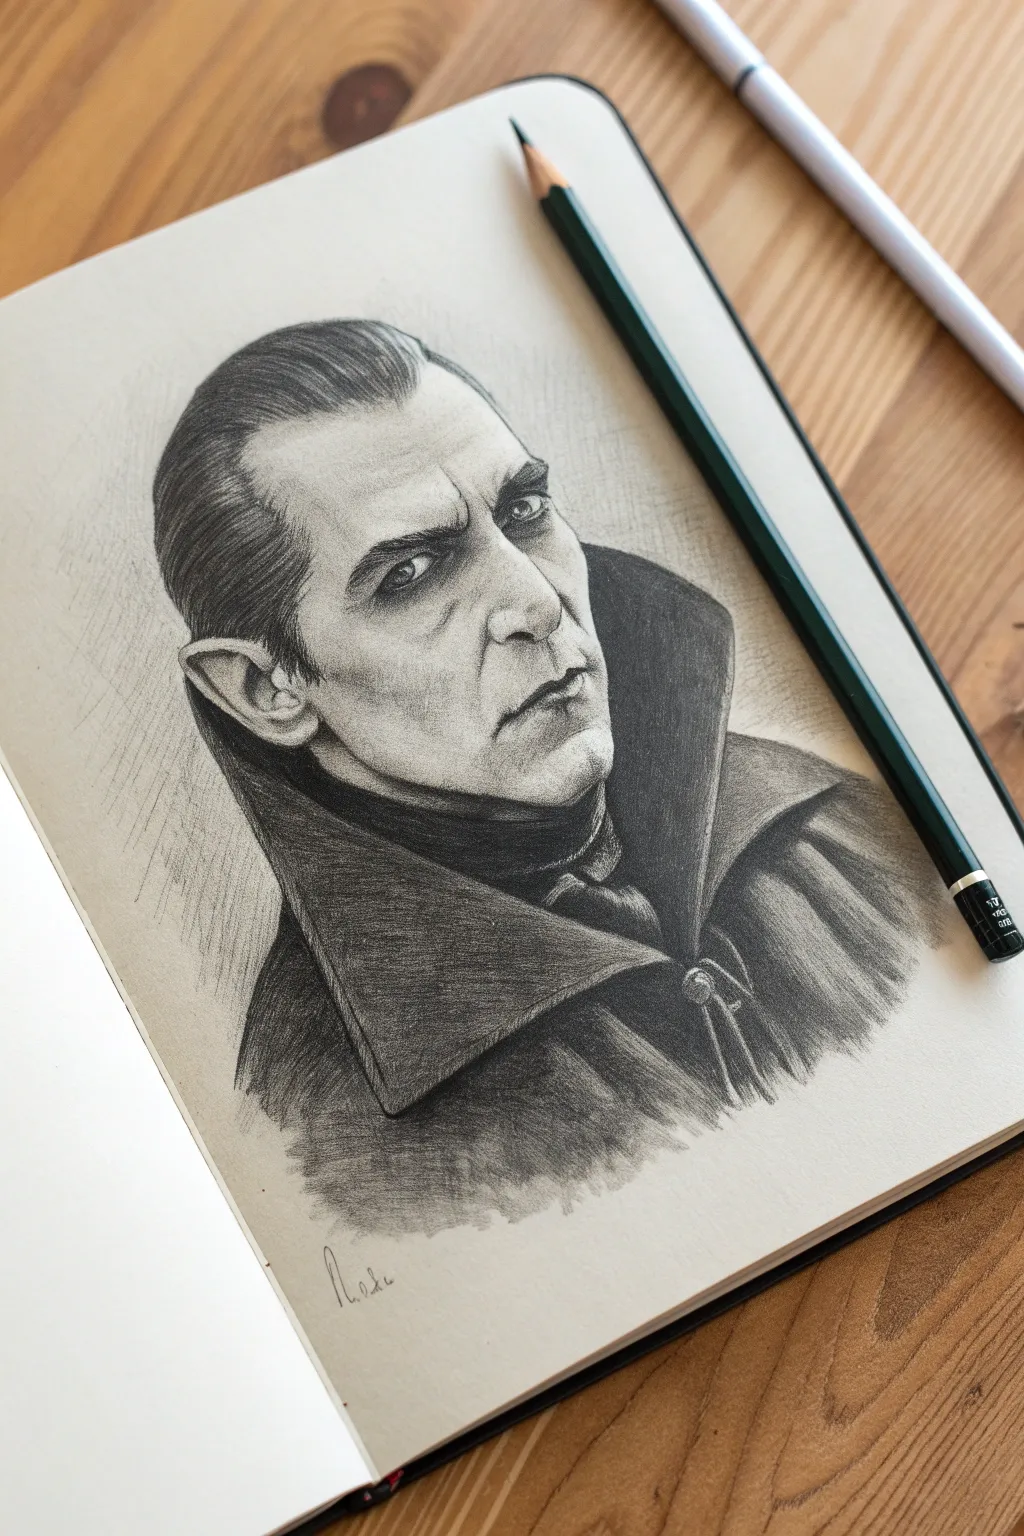
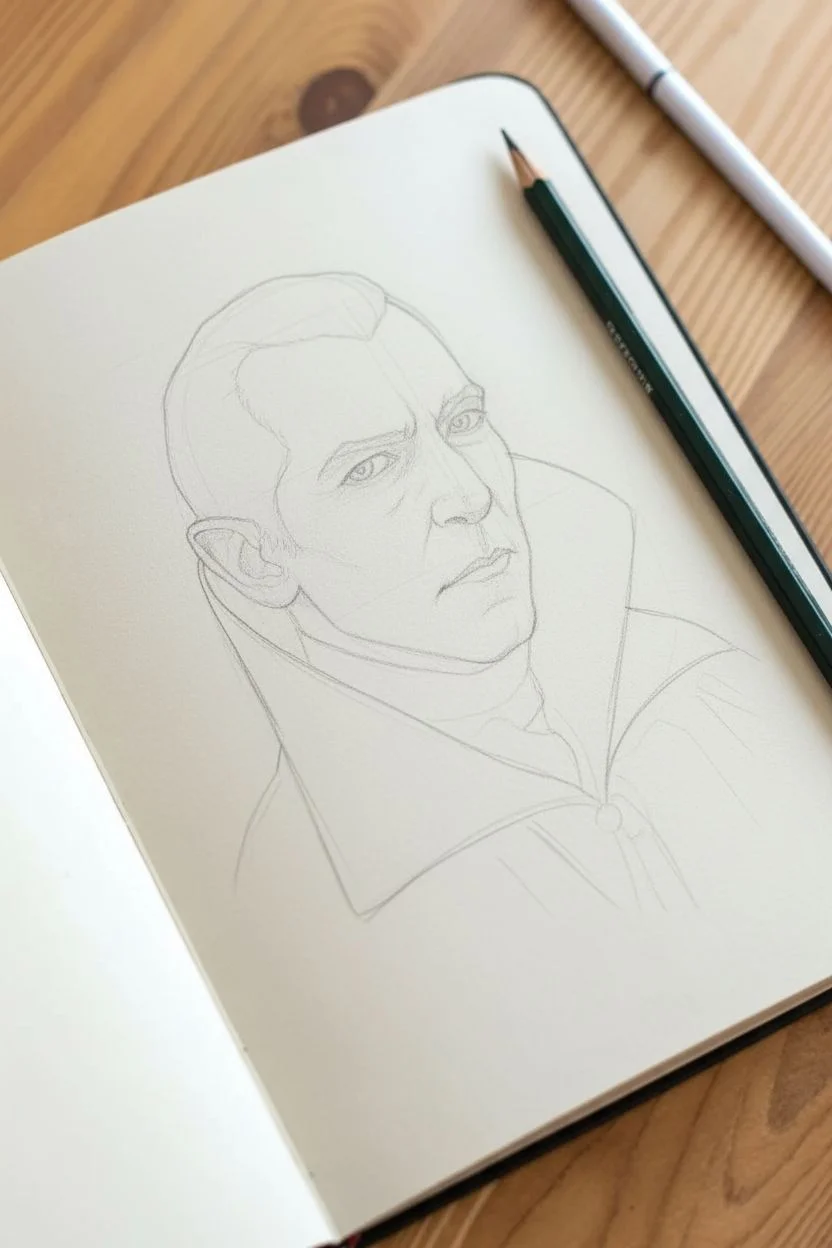
Capture the brooding elegance of the most iconic vampire in cinema history with this tonal pencil study. Using graphite on toned paper allows you to push the dramatic contrast of light and shadow, perfect for creating that signature Gothic atmosphere.
How-To Guide
Materials
- Toned sketchbook paper (tan or grey)
- Graphite pencils (HB, 2B, 4B, 6B)
- White charcoal or pastel pencil
- Blending stump (tortillon)
- Kneaded eraser
- Reference photo of Bela Lugosi as Dracula
Step 1: Laying the Foundations
-
Initial Ghost Sketch:
Begin with an HB pencil using incredibly light pressure. Map out the general oval of the head and the sweeping ‘V’ shape of the high collar. Don’t press hard; these lines are just guides. -
Check Proportions:
Mark the eye line about halfway down the face. The nose should end halfway between the eyes and chin. Sketch the widow’s peak hairline, ensuring it sits high on the forehead. -
Refining Features:
Lightly draw the piercing eyes, the aquiline nose, and the thin, stern lips. Add the distinct pointed ear on the left side. Don’t worry about shading yet, just get the shapes accurate.
Keep it clean
Place a scrap piece of paper under your drawing hand. This prevents your palm from smudging your pencil work or transferring oils to the paper surface.
Step 2: Developing the Face
-
The Eyes Have It:
Switch to a 2B pencil to define the pupils and eyelids. Add heavy shading under the brow bone to create that intense, sunken look characteristic of the vampire. -
Sculpting the Nose:
shade the side of the nose away from the light source. Leave the bridge of the nose the color of the paper for now to act as a mid-tone highlight. -
Cheekbones and Jaw:
Use the side of your pencil lead to shade the hollows of the cheeks. Define the jawline sharply, separating the pale skin from the dark neck area. -
The Widow’s Peak:
For the slicked-back hair, use long, sweeping strokes following the curvature of the skull. Start from the hairline and pull back, leaving some gaps for highlights.
Add a spooky glow
Use a red colored pencil very lightly in the eyes or as a subtle outline around the figure to hint at his bloodthirsty nature without overpowering the grey.
Step 3: The Dramatic Collar
-
Base Tone for Clothing:
Use a 4B pencil to lay down a solid, dark base tone for the cape and collar. The collar stands up stiffly, so keep your edges crisp and straight. -
Deepest Shadows:
Switch to a 6B pencil to push the darkest blacks where the collar meets the neck and under the lapels. This high contrast is crucial for the dramatic effect. -
Texture and folds:
Add subtle variations in the dark areas to suggest heavy velvet fabric. Use a blending stump to smooth out the pencil strokes on the clothing, making it look softer than the face.
Step 4: Highlights and Final Details
-
Smoothing the Skin:
Lightly blend the facial shading with your stump. The goal is to make the skin look pale and smooth, contrasting with the textured hair and clothing. -
Adding White Highlights:
Take your white charcoal pencil and apply touches to the highest points: the bridge of the nose, the top of the cheekbone, the wetness in the eyes, and a streak on the slicked hair. -
Refining the Hair:
Go back into the hair with your sharpest 4B pencil to add individual strands over the blended base, giving it realistic depth. -
The Mouth:
Darken the corners of the mouth and the line between the lips. Add tiny vertical shading lines on the lips to show texture without making them look too full. -
Final Contrast Check:
Stand back and look at your drawing. Deepen the blacks in the background or clothing if the drawing feels flat. The pale face should pop forward against the dark attire.
Now you have a timeless, eerie portrait ready to watch over your Halloween festivities


Mummy Wrap Lines That Create Form and Motion
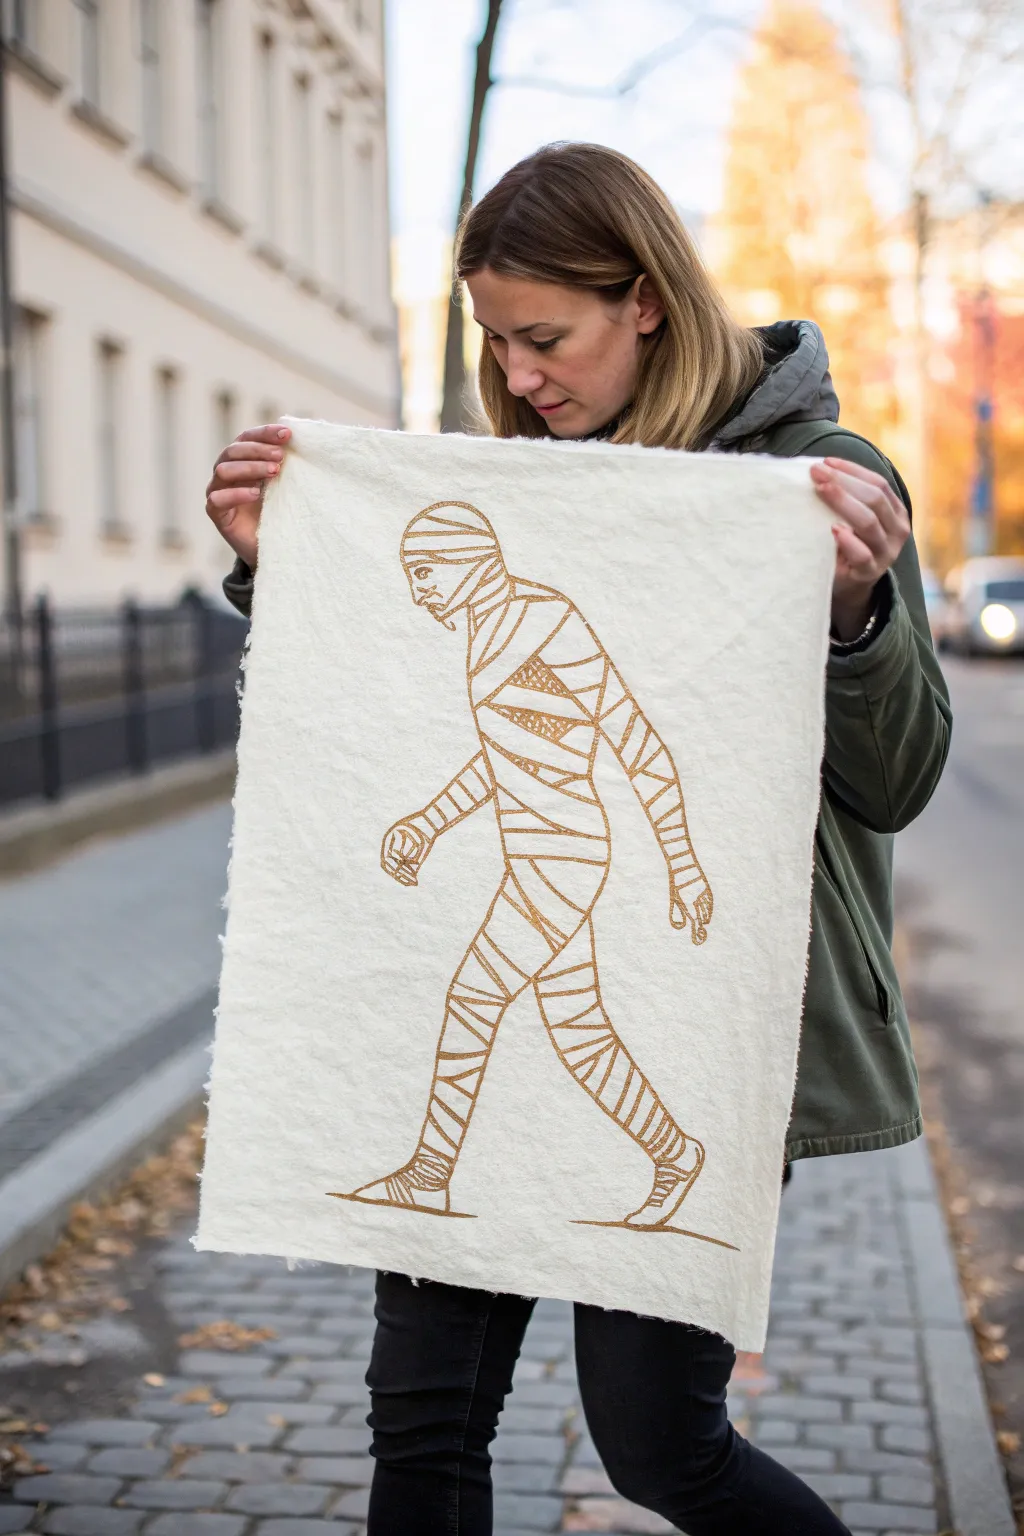

Capture the spooky season with this elegant, minimalist mummy illustration on textured handmade paper. By using the mummy’s bandages to contour the body, you create a convincing sense of volume and movement with just a few simple lines.
Detailed Instructions
Materials
- Large sheet of handmade paper or watercolor paper (rough/cold press)
- Pencil (HB or 2H)
- Eraser
- Gold or sepia metallic paint marker (medium tip)
- Fine liner pen (brown or sepia)
- Ruler (optional)
- Reference photo of a walking person
Step 1: Planning the Pose
-
Select your paper:
Choose a paper with character. The example uses a large sheet of off-white handmade paper with beautiful deckled edges, which adds an ancient feel to the artwork. -
Lightly sketch the skeleton:
Start with a very faint pencil sketch of a simple stick figure walking. Mark the position of the head, the angle of the spine, and the stride of the legs to establish the motion. -
Flesh out the silhouette:
Draw a light outline around your stick figure to create the body’s shape. Keep the figure relatively slender, as the ‘bandages’ will add bulk later. -
Refine the stride:
Ensure the back foot is lifting off the ground and the front foot is planting firmly. This walking posture is crucial for the dynamic feel of the piece.
Step 2: Drafting the Wrappings
-
Define the head wrap:
Sketch horizontal bands across the face, leaving a small negative space for the eye and mouth area. The bands should curve slightly downward to show the roundness of the skull. -
Map the torso angles:
For the chest and stomach, draw diagonal lines that wrap around the form. Vary the angles—some going diagonally up, some down—to suggest crisscrossed bandages. -
Wrap the limbs:
On the arms and legs, draw lines that curve around the cylindrical shapes. I like to make these curves pronounced; if they are too flat, the figure will look 2D. -
Add overlap details:
Sketch a few small triangles or loose ends where bandages might overlap or fray. This breaks up the uniform pattern and adds realism. -
Clean up the sketch:
Once you are happy with the placement of your wrap lines, gently erase the initial stick figure guides, leaving only the bandage outlines visible.
Ink bleeding?
Handmade paper is absorbent. If your marker usually bleeds, spray the paper with a matte fixative or hairspray first to seal the fibers before drawing.
Step 3: Inking the Figure
-
Test your marker:
On a scrap piece of paper, test your metallic or sepia marker to ensure the flow is smooth and the color matches your vision. -
Outline the head:
Begin inking at the top. Trace over your pencil lines for the head wrappings with steady, confident strokes. -
Ink the torso and arms:
Work your way down the body. When drawing the bandages, don’t just clear the outline; draw the *end* of one bandage meeting the edge of the body to emphasize the wrapped effect. -
Create texture with hatching:
In the darker areas or where bandages overlap heavily (like under the arm or the inner thigh), add small hatching lines with a finer pen to create shadow. -
Ink the legs and feet:
Continue the marker work down the legs. Pay attention to the ankles; wrap the lines tightly here to show the anatomy tapering down to the foot. -
Add a ground line:
Draw a simple, loose horizontal line under the feet to ground the character so it doesn’t look like it’s floating in space. -
Let it dry completely:
Metallic markers can take a moment to set, especially on textured paper. Give it at least 10-15 minutes to avoid smudging. -
Erase pencil marks:
Once the ink is totally dry, gently run your eraser over the entire drawing to remove any remaining graphite guidelines.
Level Up: Ancient Look
Brew strong black tea and lightly sponge it onto the paper before drawing. Let it dry to create an aged, parchment-like background for your mummy.
Now you have a stylish piece of Halloween art ready to hang or display
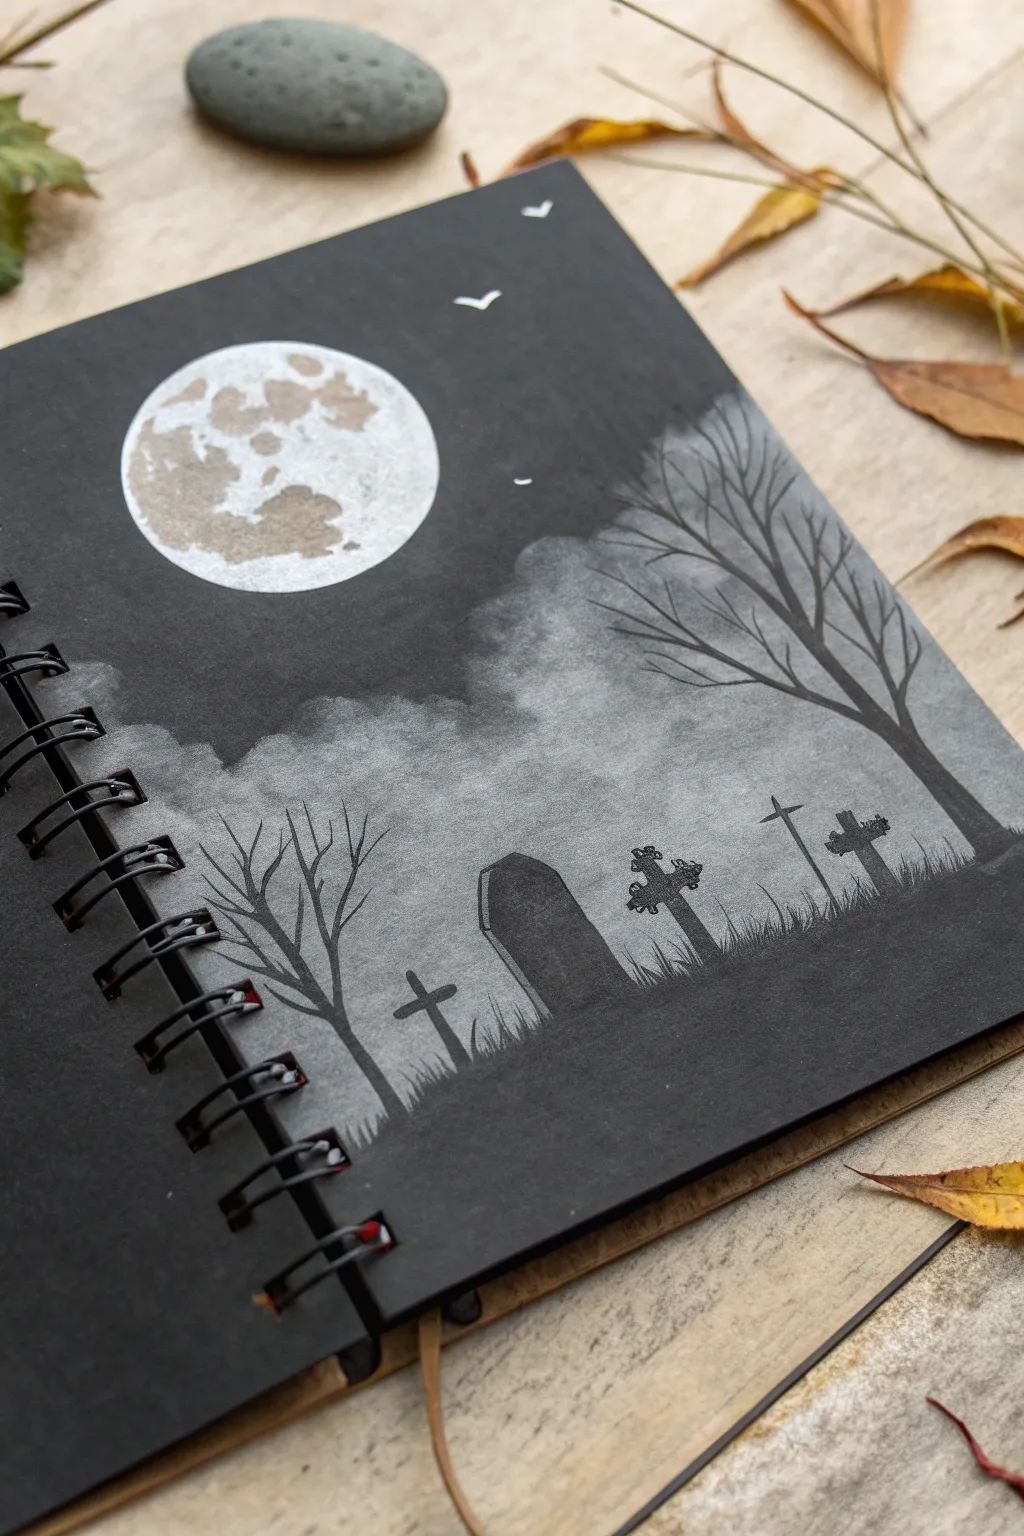
Negative Space Moon and Mist for an Eerie Minimal Drawing

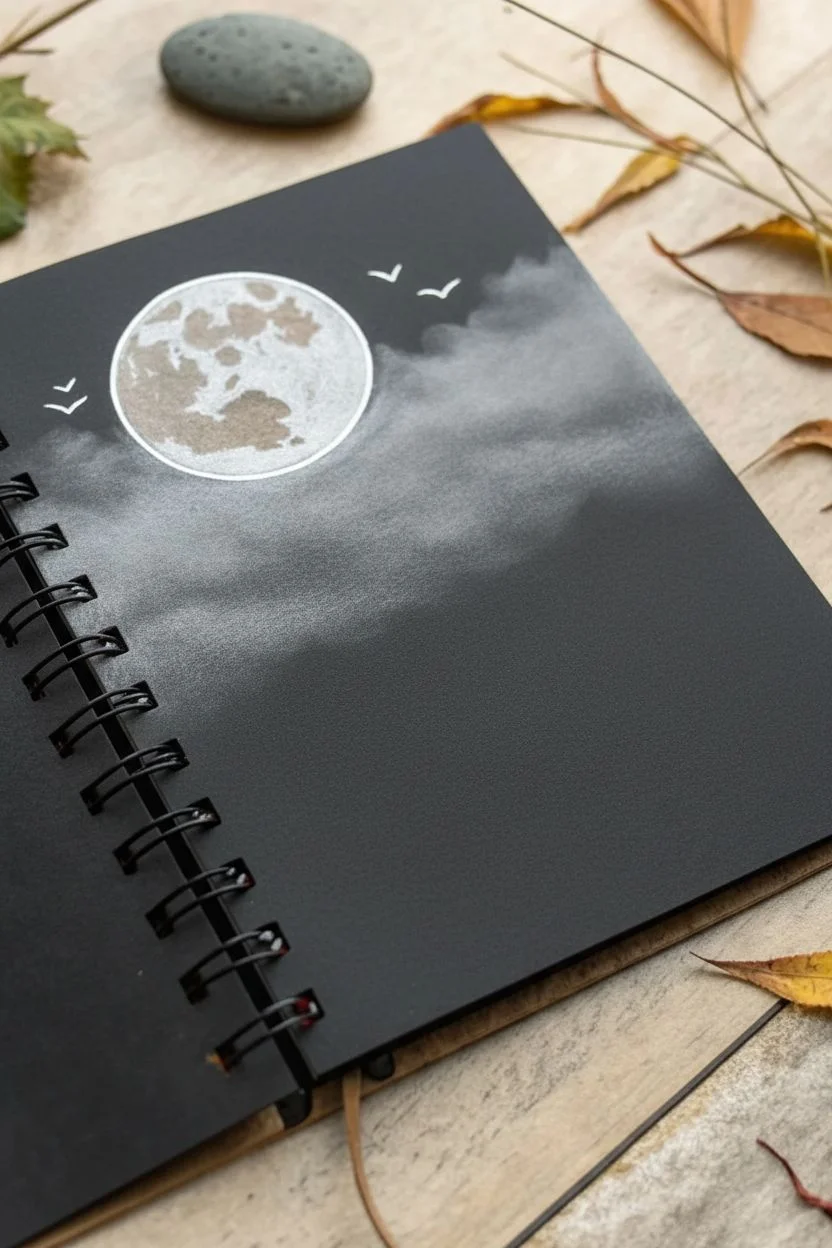
Capture the stillness of a foggy Halloween night with this striking high-contrast drawing. By using white mediums on black paper, you’ll build glowing moonlight and spectral mist around dark, stark silhouettes.
Step-by-Step
Materials
- Black sketchbook paper or cardstock
- White gel pen (e.g., Gelly Roll or Posca)
- White charcoal pencil or white pastel pencil
- Soft blending stump or tortillon
- Graphite pencil (hard, like H or 2H)
- Circle template or compass (optional)
Step 1: Setting the Scene: Moon and Mist
-
Lightly sketch the moon:
Begin by placing your moon in the upper left quadrant. Use a white charcoal pencil to very faintly trace a circle. If you want a perfect shape, I like to use a small lid or roll of tape as a guide here. -
Fill the moon partially:
Using the white charcoal, fill in the moon’s circle, but leave random patches of the black paper showing through to represent craters and lunar mare. -
Brighten the edges:
Go over the outer rim of the moon with your white gel pen to give it a crisp, glowing edge, contrasting sharply against the charcoal texture inside. -
Create the atmospheric mist:
Take your white pastel or charcoal pencil and lay it somewhat flat against the paper. Scumble roughly horizontally across the middle of the page to create the fog bank. -
Blend the fog:
Use your blending stump or a clean fingertip to smudge the white charcoal. Rub in circular motions to soften the edges, making the mist look translucent and rolling. -
Layer the clouds:
Add a few more patches of white charcoal just below the moon and blend them out softly so they look like drifting clouds illuminated by the moonlight. -
Add distant birds:
With the very tip of your white gel pen, draw two or three tiny ‘V’ shapes near the moon to suggest bats or birds flying high in the distance.
Smudge Control
Place a scrap piece of paper under your hand while drawing. This prevents your palm from smearing the delicate white charcoal mist while you work on the trees.
Step 2: Drawing the Silhouettes
-
Outline the ground:
Switch to a black marker or pen if you need to darken the bottom area, though on black paper, you are simply leaving the bottom negative space untouched. Visualise a horizon line about one-third up from the bottom. -
Sketch the main tree:
On the right side, draw a large, bare tree trunk leaning slightly inward. Use a black pen or marker if the charcoal dust has lightened the paper, or just draw firmly with a black pencil to define the shape over the mist. -
Branch out:
Extend branches from the main trunk. Keep them jagged and taper them to fine points as they reach into the misty area. Let the white mist behind them help define their dark shape. -
Add a secondary tree:
On the left side, draw a smaller, thinner tree skeleton. Ensure the branches reach upwards, overlapping the lower edge of the mist layer. -
Position the tombstones:
Sketch the outlines of various grave markers along the horizon line. Include a classic coffin shape, a few crosses, and rectangular stones for variety. -
Detail the silhouettes:
Fill in these tombstone shapes completely so they are solid black. If you used charcoal for the mist low down, you might need to use a black brush pen or marker to make these silhouettes truly opaque. -
Ground the scene:
Draw short, vertical strokes along the base of the tombstones and trees to simulate overgrown grass. This integrates your objects into the ground rather than having them float. -
Enhance the contrast:
Check your mist layer. If the silhouettes aren’t popping enough, add a little more white charcoal just behind the tombstones and smudge it to increase the backlight effect.
Silhouettes Not Dark Enough?
If the black paper looks grey against the white charcoal, go over your trees and graves with a deep black Posca marker or India ink for true, opaque darkness.
Now you have a moody, atmospheric landscape perfect for the spooky season

Have a question or want to share your own experience? I'd love to hear from you in the comments below!