Hands are one of those subjects that can feel tricky and totally addictive at the same time. These hand drawing ideas will give you tons of practical ways to practice, from classic gestures to imaginative concepts that still stay rooted in hands.
Closed Fist With Clear Knuckle Planes
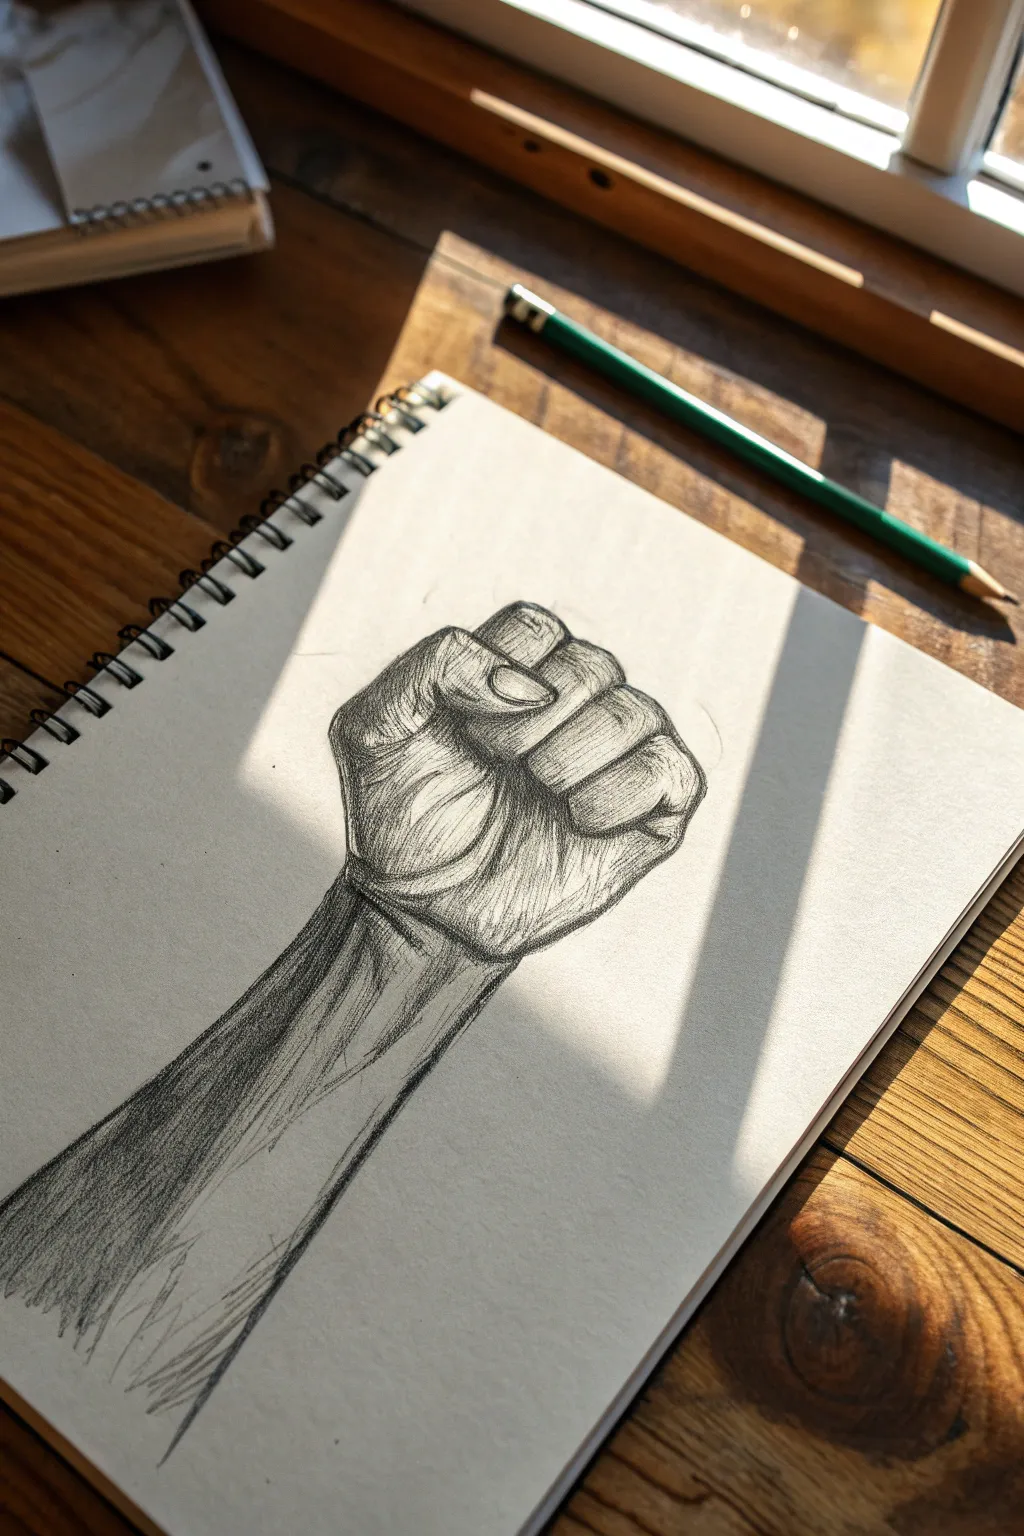
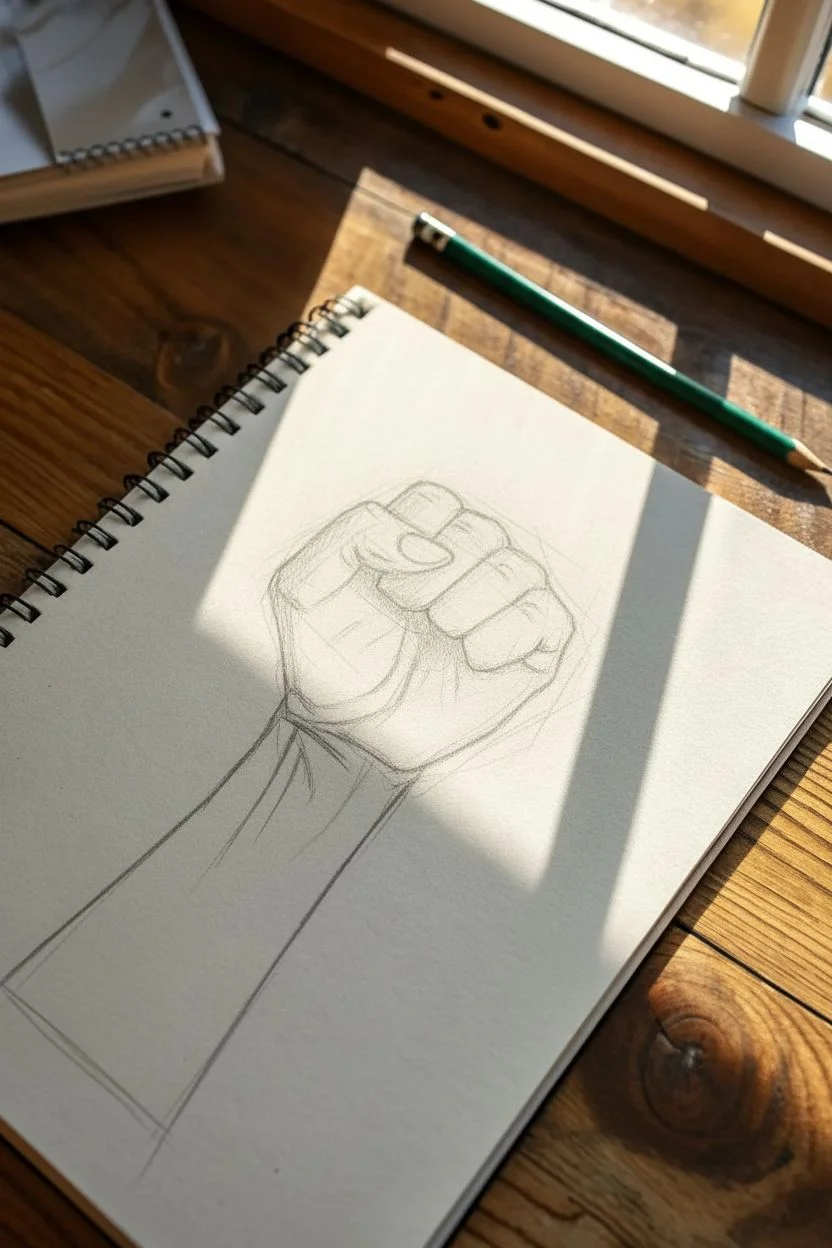
This study of a clenched fist is a fantastic exercise in understanding the mechanical structure of the hand. By breaking the hand down into solid blocks and planes, you’ll capture the tension and strength inherent in this powerful pose.
Step-by-Step Guide
Materials
- Spiral-bound sketchbook or drawing paper
- Graphite pencils (HB for sketching, 2B/4B for shading)
- Kneaded eraser
- Pencil sharpener
Step 1: Constructing the Core Shapes
-
Establish the Wrist Line:
Begin by drawing two diagonal, parallel lines moving upward towards the right to form the wrist and forearm. Keep these lines relatively straight but allow for slight curvature where the muscles would naturally bulge. -
Block the Main Palm Mass:
At the top of your wrist lines, sketch a boxy, somewhat trapezoidal shape. This represents the main mass of the palm and the base of the knuckles. Don’t worry about fingers yet; just get that solid foundation down. -
Indicate Key Finger Joints:
Lightly sketch the general arc of the knuckles at the top of your box shape. Mark small circles or ovals where the base of each finger connects to the hand. -
Draw the Thumb Segment:
Add the thumb shape on the left side. It should fold inward across the front of the fist. Drawing it as two cylindrical segments helps maintain structure—one segment for the base and one for the tip pressing against the index finger. -
Outline the Folded Fingers:
Draw the main block of the four fingers folded down. Treat the index and middle fingers as the dominant shapes, as they are most visible. The ring and pinky fingers will recede slightly to the right.
Step 2: Refining Planes and Anatomy
-
Define the Knuckles:
This is crucial for the ‘clear planes’ look. Draw the top surface of the knuckles (the metacarpophalangeal joints) as distinct, rounded rectangular shapes. Imagine them like small hills on the back of the hand. -
Shape the Finger segments:
Break the visible fingers into their respective phalanges. The segment between the main knuckle and the middle joint should look like a short cylinder or block. Add the crease lines where the skin folds. -
Detail the Thumb Nail:
Sketch the thumbnail on the thumb. Notice how the perspective makes it look foreshortened; it wraps around the curvature of the digit. -
Add Skin Folds and Tension:
Draw the wrinkles and stretched skin on the back of the hand, radiating from the wrist towards the knuckles. These lines emphasize the tightness of the fist. -
Refine the Thumb Connection:
Deepen the lines where the thumb presses against the index finger. The skin here should look compressed.
Flat Hands?
If the fist looks flat, your shading might be too uniform. Increase contrast significantly—make the darks nearly black in the creases and keep highlights purely white.
Step 3: Shading and Form
-
Establish Light Source:
Assume the light is coming from the top-left (similar to the photo). This means shadows will fall heavily on the right side of the fingers and under the wrist. -
Base Shading on the Forearm:
Using the side of your pencil, lay down a consistent mid-tone gray along the right side of the wrist and forearm. Leave the left edge lighter to suggest a highlight. -
Darken the Deep Creases:
Switch to a softer pencil (like a 2B or 4B) to darken the specific crevices between the fingers and where the fingers tuck into the palm. These should be the darkest points on your page. -
Model the Knuckles:
Shade the sides of each knuckle to make them pop upward. I find it helps to leave the very top center of the knuckle almost white to show the bone pressing against the skin. -
Hatch Texture on the Skin:
Use directional hatching strokes on the back of the hand. Follow the contour of the muscles—curved strokes help the hand look round and organic rather than flat. -
Cast Shadows:
Add a cast shadow underneath the thumb and the curled fingers to separate them from the palm area. -
Final Contrast Check:
Step back and squint at your drawing. Deepen the shadow focusing on the far right edge of the hand and wrist to unite the form and maximize volume.
Boxy Fingers
Visualize fingers as rectangular boxes first, not sausages. Draw the front, top, and side planes distinctly before rounding off the edges. This gives that structural, chiseled look.
Now you have a dynamic, powerful hand study that shows off strong anatomical knowledge


Pointing Gesture With Foreshortening
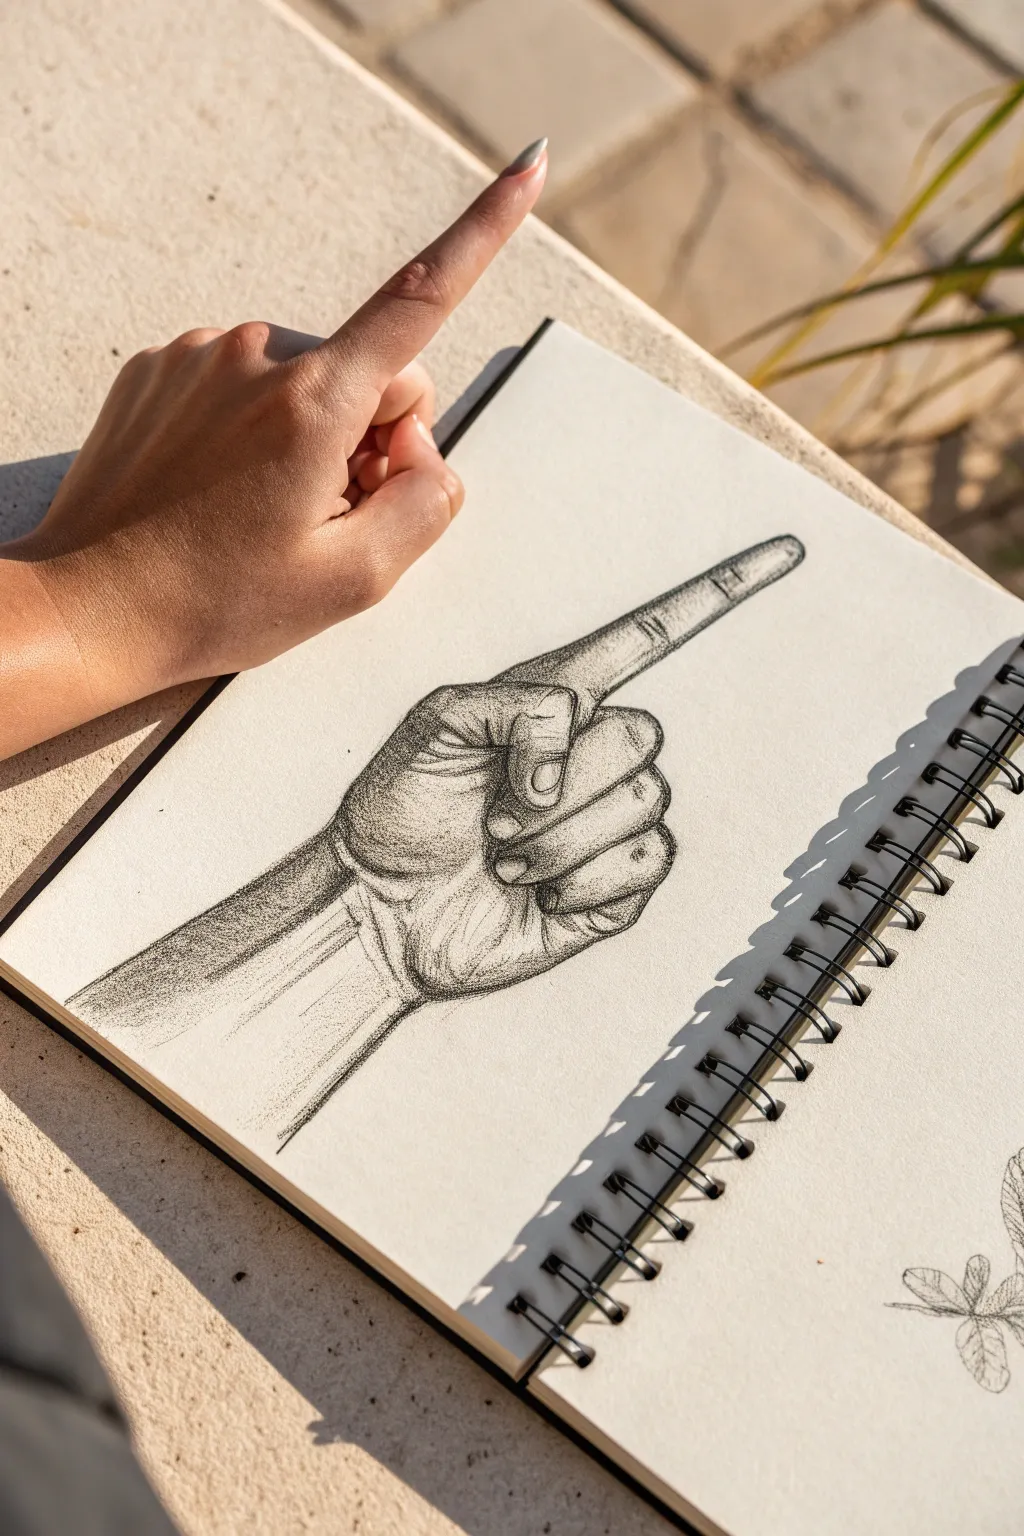
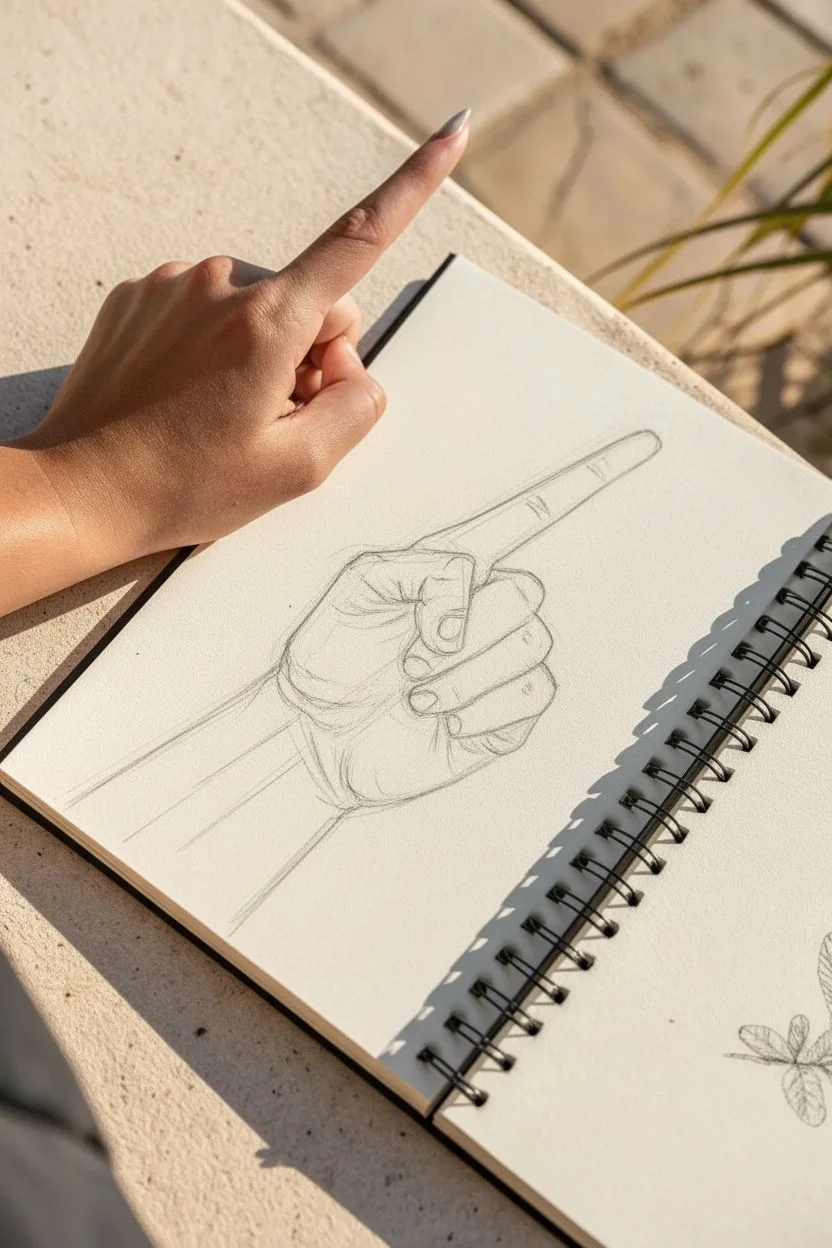
This project tackles the challenging but rewarding subject of a foreshortened finger using a classic graphite shading technique. By focusing on volume and directional lines, you’ll create a convincing illusion of depth that makes the hand seem to reach right off the page.
How-To Guide
Materials
- Spiral-bound sketchbook (smooth or medium tooth paper)
- Graphite pencils (HB as a base, 2B and 4B for shading)
- Kneaded eraser
- Precision mechanical pencil or fine liner (optional for details)
- Blending stump (tortillon)
Step 1: Constructing the Hand
-
Establish the wrist angle:
Begin by drawing two light parallel lines diagonally across the lower left of your page to represent the wrist and arm. The angle is important here; it should sweep upwards toward the center of the page. -
Sketch the palm block:
At the end of the wrist lines, sketch a rough, slightly rounded square shape. This serves as the main mass of the palm. Keep your pressure extremely light so you can erase these guidelines later. -
Place the thumb joint:
Draw a rounded triangular shape extending from the left side of your palm block. This will become the meaty base of the thumb. -
Add the folded fingers:
Sketch the three folded fingers (middle, ring, pinky) as a single mass first, curling inward against the palm. Then, divide them with simple lines to indicate individual digits. -
Draft the pointing finger:
Draw the index finger extending straight out from the top right corner of the palm block. Since it is pointing away, pay attention to the segments; make the tip slightly narrower than the base, but verify the length isn’t exaggerated. -
Refine the thumb position:
Draw the thumb crossing over the curled index finger. The tip of the thumb should rest just below the first knuckle of the index finger, locking the curled fingers in place.
Step 2: Refining Contours
-
Outline the main shapes:
Switch to a slightly sharper pencil. Go over your construction lines, adding the organic curves of the skin to replace the blocky guidelines. Pay attention to the subtle bumps at the knuckles. -
Define the fingernails:
Sketch the fingernail on the pointing finger and the thumb. The pointing finger’s nail should be viewed slightly from the side, while the thumb nail is more frontal. -
Add skin folds:
Draw the small creases where the fingers bend. While looking at the reference, mark the wrinkles on the knuckles of the pointing finger—these are crucial for showing the cylindrical form. -
Clean up guidelines:
Use your kneaded eraser to gently lift away the initial blocky construction lines, leaving only your refined contour drawing.
Model Your own Hand
Struggling with the angle? Use your non-drawing hand as a live model. Place it in the pose and observe how the skin folds overlap.
Step 3: Shading and Texture
-
Establish a light tonal base:
Using an HB pencil, apply a very light, even layer of shading over the shadowed areas of the hand, particularly the side of the palm and under the fingers. -
Stipple the texture:
Instead of smooth shading, we want a granular, skin-like texture. Use a duller pencil tip to create a stippling or ‘grainy’ effect across the main surfaces of the hand. -
Deepen the creases:
Switch to a 2B or 4B pencil. Darken the deep crevices between the folded fingers and the heavy shadow where the thumb presses against the index finger. -
Contour hatching:
Add directional hatching lines across the pointing finger. These curved lines should wrap around the form like rings, emphasizing the roundness of the finger. -
Enhance the knuckles:
Add shading around the wrinkles on the knuckles. I find that leaving small highlights right next to the darkest wrinkle lines makes the skin look suitably folded and realistic. -
Shade the wrist:
Apply a gradient of shadow running along the bottom edge of the arm and wrist, fading as it moves upward toward the light source. -
Final Contrast:
Use your darkest pencil to re-emphasize the outline in shadowed areas only (like the bottom of the fingers), giving the drawing weight and anchoring it to the page.
Fixing “Sausage” Fingers
If fingers look rubbery, your outlines are too smooth. Add slight angular changes at each joint to simulate the bone structure underneath.
Now you have a dynamic hand study that captures both gesture and realistic texture


Peace Sign Gesture Practice
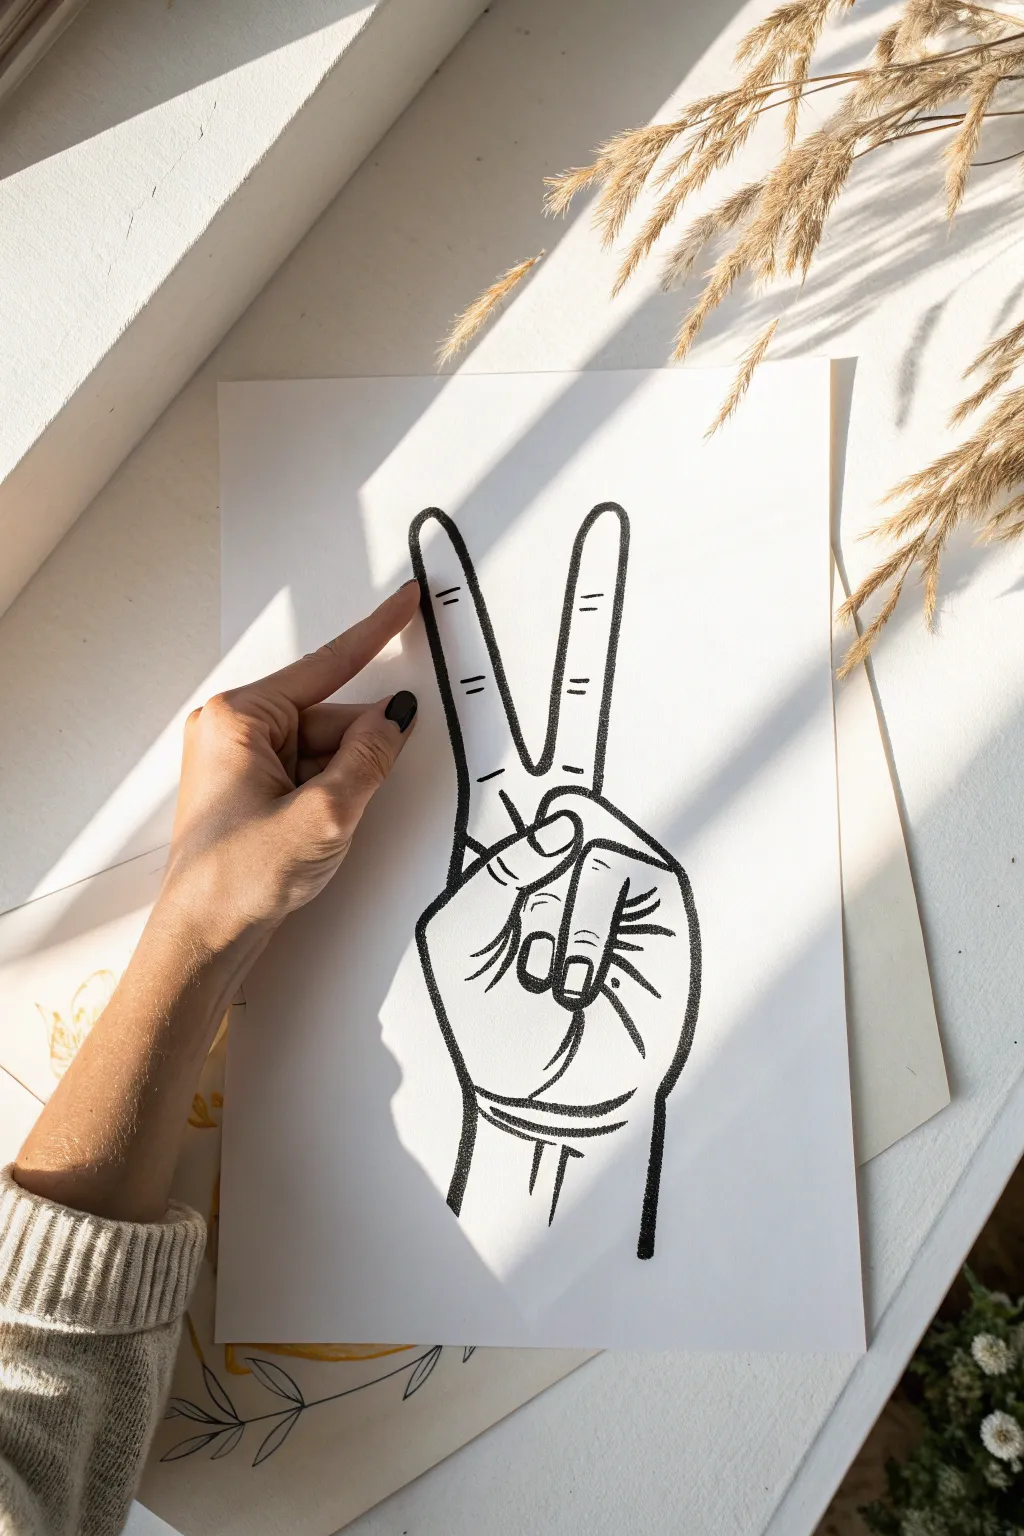
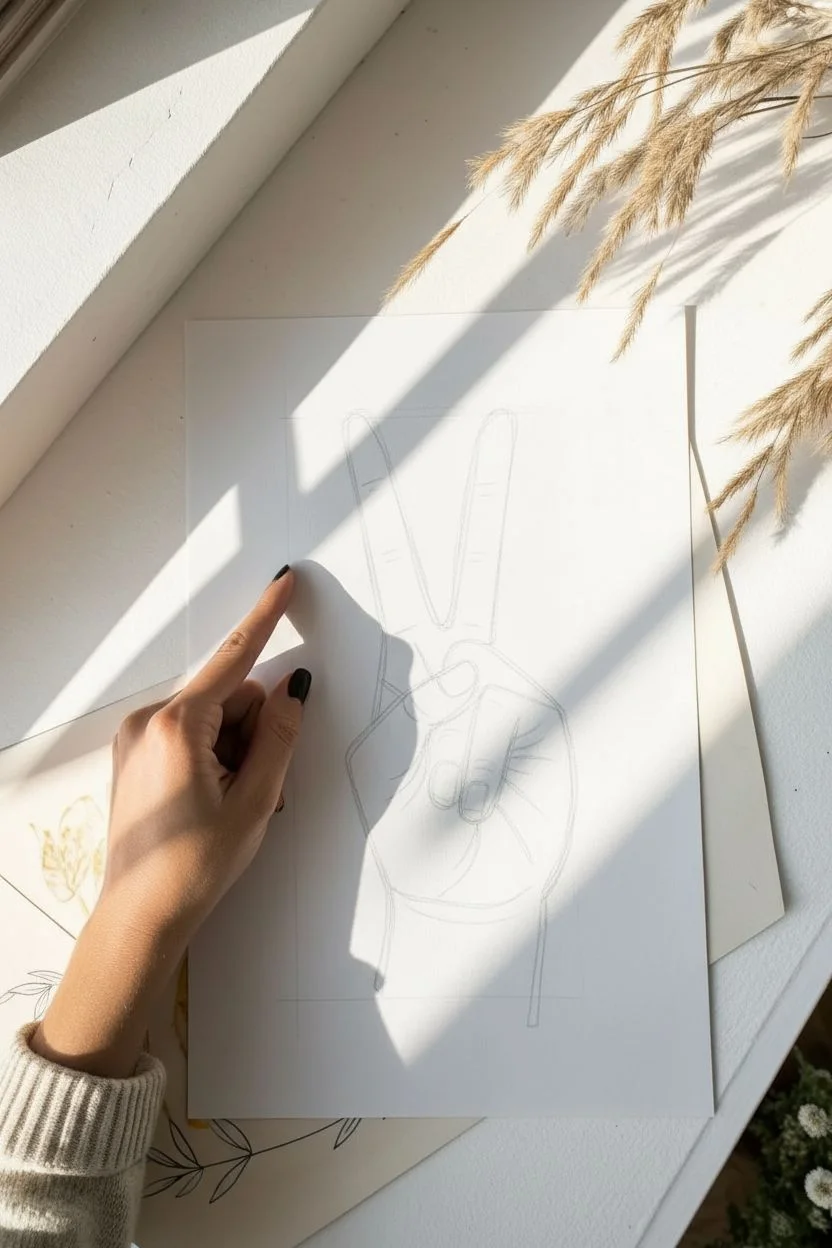
Master the art of expressive gestures with this bold, graphic peace sign drawing. Using confident linework and a focus on anatomical proportions, this project creates a striking minimalist piece perfect for modern decor.
Step-by-Step Guide
Materials
- High-quality white drawing paper or cardstock (A4 or similar)
- Graphite pencil (HB or 2B)
- Eraser
- Fine-point black liner pen (0.5mm)
- Thick black marker or brush pen (for bolder outlines)
- Ruler (optional for checking proportions)
Step 1: Constructing the Skeleton
-
Establish the palm base:
Start near the bottom third of your paper. Lightly sketch a square shape with a slightly curved bottom edge to form the main block of the palm. Keep your pencil strokes very faint so they can be erased later. -
Map the finger directions:
From the top corners of your palm square, draw two long straight lines extending upward at a slight outward angle (like a ‘V’). These will be the center guides for your index and middle fingers. -
Position the folded fingers:
Sketch a rough oval shape overlapping the middle of the palm square. This indicates where the ring and pinky fingers will curl inward toward the palm. -
Sketch the thumb placement:
Draw an angled line originating from the left side of the palm, crossing over the oval you just drew. This will guide the thumb as it tucks over the folded fingers.
Step 2: Fleshing Out the Form
-
Outline the raised fingers:
Draw the contours of the index and middle fingers around your ‘V’ guides. Make the tips rounded and keep the width relatively consistent, tapering slightly at the top. Notice how the middle finger is typically just a bit longer. -
Add knuckle details:
Mark the location of the knuckles on the raised fingers with light horizontal dashes. This helps you visualize where the skin creases will go later. -
Define the folded fingers:
Refine the oval shape into distinct fingers. Draw the curled segments of the ring and pinky fingers, showing the ends tucked into the palm. -
Draw the thumb structure:
Flesh out the thumb, ensuring the tip overlaps the folded index finger slightly. The thumb knuckle should have a distinct curve on the outer edge of the hand. -
Connect the wrist:
Extend two lines downward from the base of the palm to create the wrist. Add a slight curve at the bottom of the palm to suggest the heel of the hand.
Pro Tip: Line Weight
Vary your line thickness. Use a heavier line for the outer silhouette and a much thinner line for interior details like knuckles and palm creases to create depth.
Step 3: Inking and Definition
-
Start the final outline:
Switch to your thick black marker or brush pen. Begin tracing the outer perimeter of the hand shape. I find it helpful to start with the ‘V’ shape to establish the main focal point right away. -
Ink the raised fingers:
Trace the index and middle fingers with confident, continuous strokes. Don’t worry if the line varies slightly in thickness; it adds character. -
Detail the knuckles:
Use your finer 0.5mm pen to draw the creases on the fingers where the joints bend. Draw two small horizontal lines at each joint for a graphic look. -
Ink the folded sections:
Carefully trace the thumb and the curled fingers. Pay attention to overlapping lines; the thumb line should interrupt the lines of the fingers beneath it to show depth. -
Add palm creases:
Draw a few curved lines on the palm (the ‘life line’ and ‘heart line’) using the finer pen. These lines should curve around the base of the thumb. -
Refine the wrist:
Ink the wrist lines, keeping them disjointed from the palm lines slightly for a stylistic touch. Add a horizontal curved line at the wrist base for the skin crease. -
Deepen the shadows:
To give the drawing weight, use the thick marker to re-go over the outermost silhouette lines, specifically on the ‘underside’ of the hand where shadows would naturally fall. -
Cross-hatching details:
Add tiny, hatched lines near the webbing between the fingers and where the fingers fold into the palm. This suggests tension in the skin without shading the whole area. -
Clean up:
Wait for the ink to become completely dry to the touch. Take your eraser and gently remove all the underlying pencil sketches to reveal the crisp black and white contrast.
Troubleshooting: Shaky Lines
If your long lines (like the fingers) look shaky, try drawing faster. Slow hand movement often causes wobbles. Lock your wrist and move from your elbow.
Now you have a bold, graphic hand study that captures a classic gesture with style


Thumbs-Up With Rounded Forms
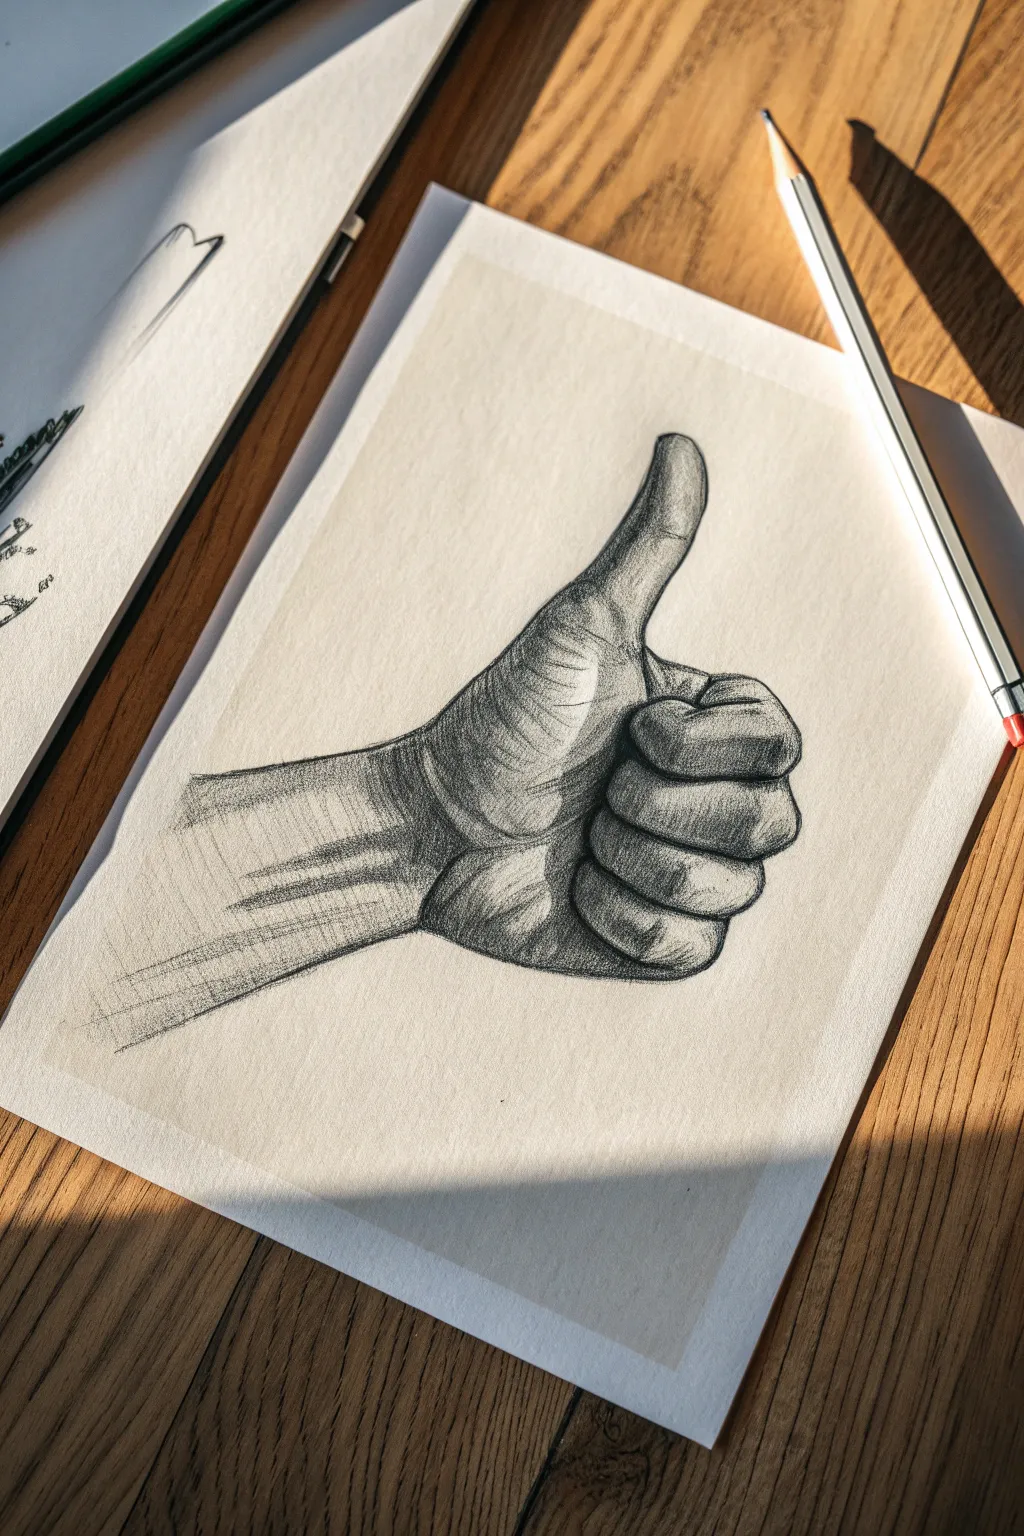
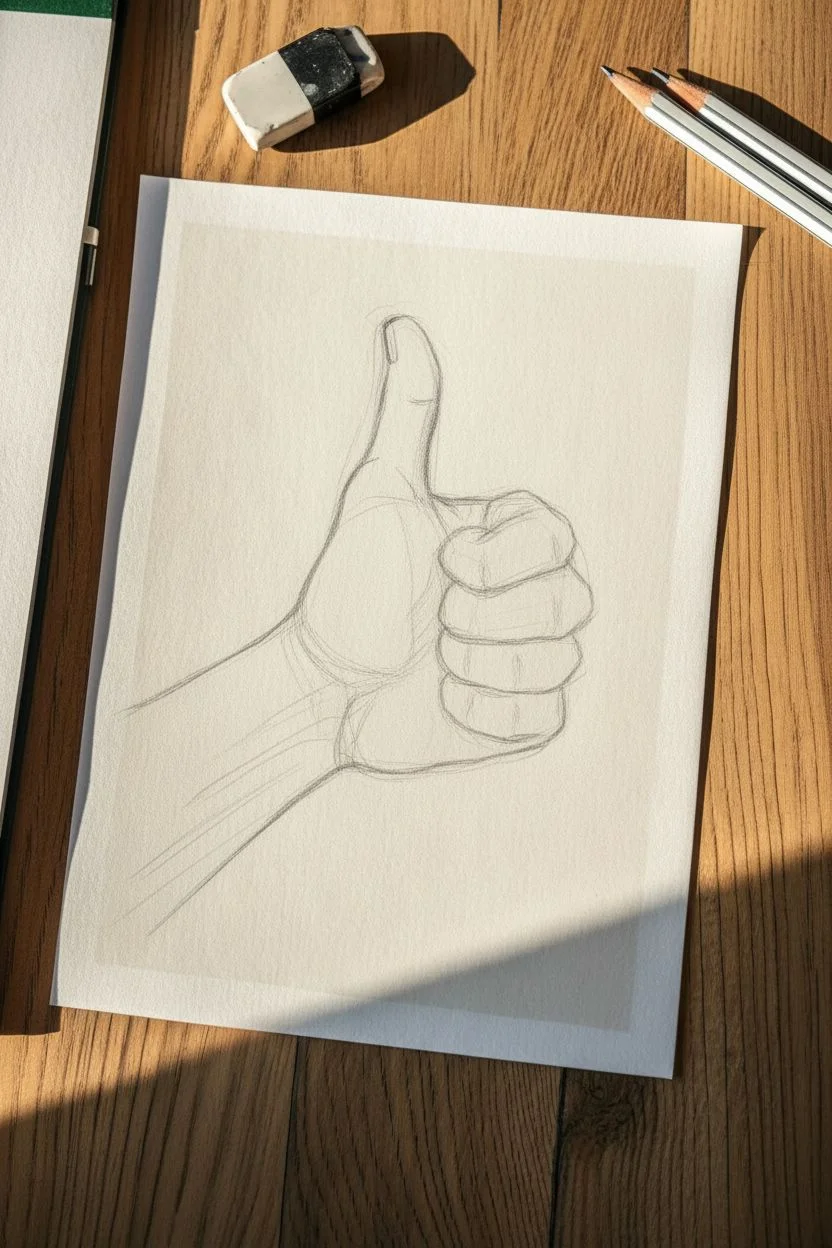
Learn to draw a convincing thumbs-up gesture by breaking down the hand into simple, rounded forms before adding realistic shading. This study emphasizes the spherical nature of the curled fingers and the tension in the extended thumb.
Step-by-Step
Materials
- High-quality drawing paper (smooth or vellum finish)
- HB graphite pencil (for initial sketching)
- 2B and 4B graphite pencils (for shading)
- Fine-point mechanical pencil (optional for details)
- Kneaded eraser
- Pencil sharpener
Step 1: Constructing the Base Forms
-
Map the palm area:
Start lightly with your HB pencil. Draw a skewed, rounded square shape to represent the main block of the palm. This serves as the anchor for the fingers and wrist. -
Establish the thumb angle:
Draw a long, curved line extending upward from the side of the palm block. This gesture line determines the angle of the thumb. Add a sausage-like oval shape around this line to flesh out the thumb’s volume. -
Block in the curled fingers:
Instead of drawing individual fingers immediately, visualize a solid, rounded mass curled against the palm. Draw a large oval shape overlapping the palm block where the knuckles will be. -
Define the wrist connection:
Sketch two parallel lines extending from the bottom of the palm block to form the wrist. Let them widen slightly as they move away from the hand to suggest the forearm construction.
Step 2: Refining the Outline
-
Detail the thumb segments:
Refine the thumb by marking the joint. The tip should curve slightly back, creating a dynamic ‘hitchhiker’ shape. Outline the nail bed, ensuring it wraps around the form rather than sitting flatly on top. -
Separate the fingers:
Divide the large oval mass into four distinct segments for the fingers. The index finger should be the most prominent, pressing against the thumb’s base. Make the middle finger knuckle the highest point of the fist. -
Add skin folds:
Sketch the creases where the thumb joins the hand (the thenar web). These folds are crucial for showing the compression of skin as the hand creates a fist. -
Clean up the linework:
Use your kneaded eraser to lift away the initial construction lines, leaving only a faint, clean outline of the hand’s final contour.
Directional Stroking
Always curve your hatching lines around the form of the finger, like wrapping a piece of string around a tube. Straight lines will flatten out your drawing instantly.
Step 3: Shading and Texture
-
Establish the light source:
Decide on your light direction. In the reference, light comes from the top right, creating shadows on the left side of the thumb and the underside of the curled fingers. -
Apply base hatching:
Switch to a 2B pencil. Use rhythmic, parallel hatching lines that follow the curvature of the skin. This ‘bracelet shading’ technique on the thumb reinforces its cylindrical shape. -
Darken the deep creases:
Use a 4B pencil to add deep contrast in the crevices between fingers and the folds of the palm. These dark accents separate the forms and separate the thumb from the rest of the fist. -
Sculpt the knuckles:
Add shading to the sides of each curled finger segment, leaving the tops lighter to indicate the bone pushing against the skin. This creates the rounded, three-dimensional look. -
Render the wrist tendons:
Lightly shade horizontal bands across the wrist and vertical lines along the forearm to suggest tendons and veins under the skin. Keep these strokes lighter than the hand itself. -
Deepen the core shadows:
Identify the darkest areas away from the light source—usually the bottom edge of the hand and the side of the wrist. Layer cross-hatching here to build density. -
Refine the thumbnail:
Add subtle vertical striations on the thumbnail and a small rim of shadow around the cuticle area to set it into the finger. -
Final contrast check:
Step back and assess your values. If the drawing feels flat, darken the deepest shadows with your softest pencil to make the highlights pop.
Cross-Hatch Contrast
Try using a fine-point pen over your finished pencil sketch for an ink-wash style, or use white charcoal on toned paper to make the highlights really jump off the page.
Now you have a solid grasp of drawing expressive hand gestures through rounded forms

PENCIL GUIDE
Understanding Pencil Grades from H to B
From first sketch to finished drawing — learn pencil grades, line control, and shading techniques.
Explore the Full Guide
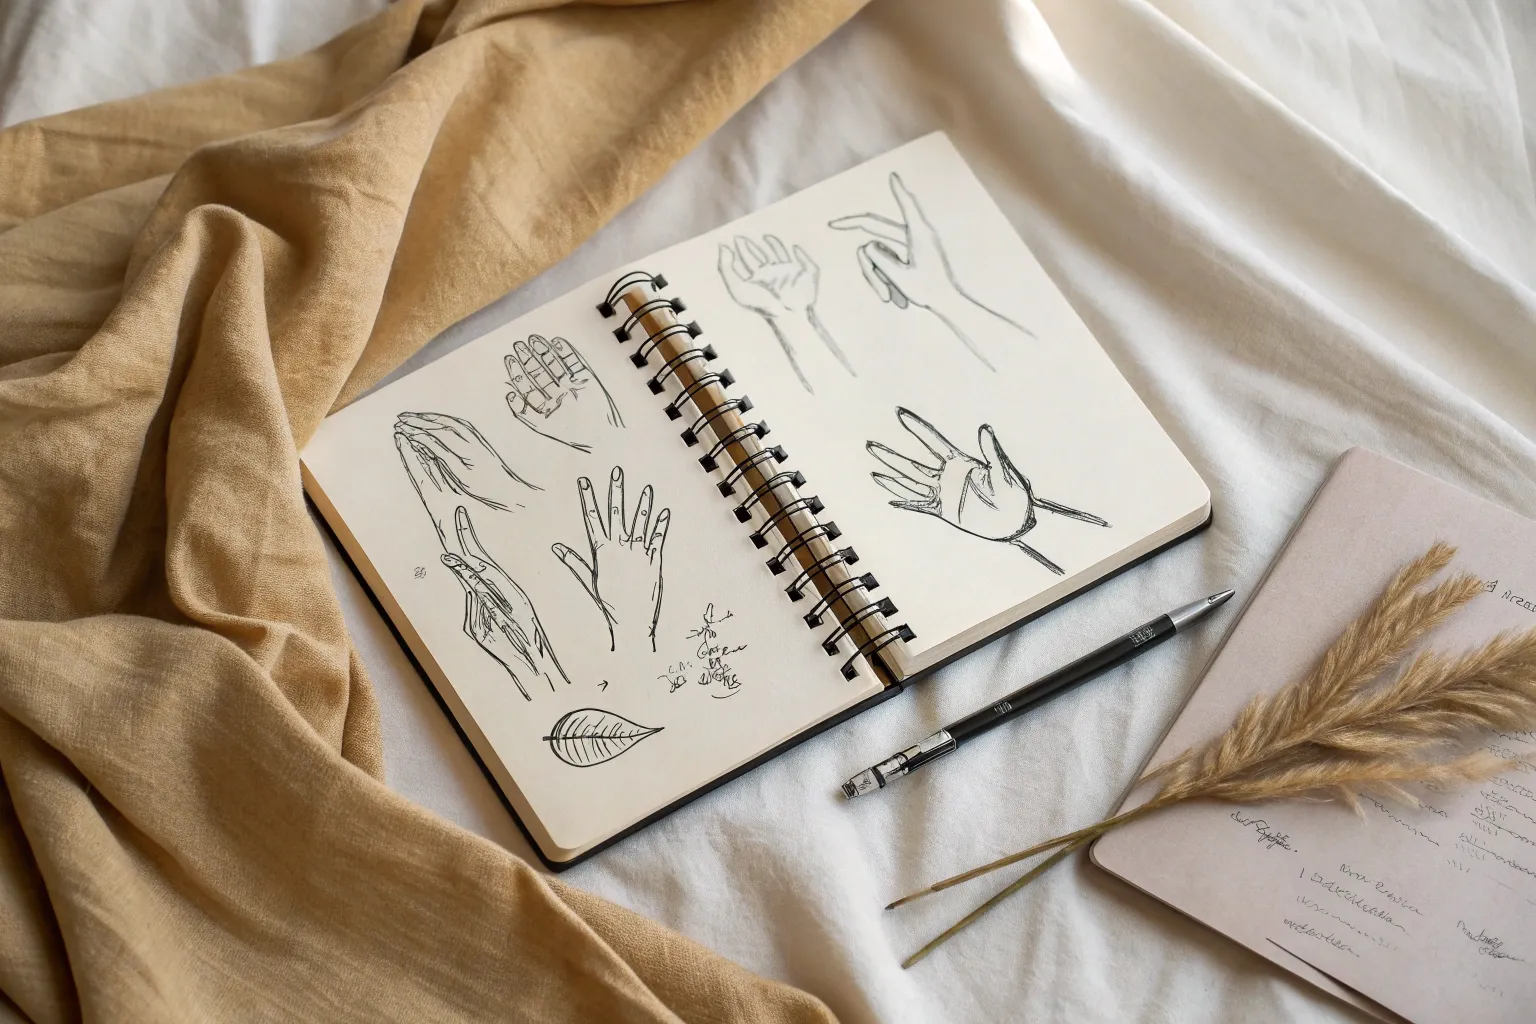
Hand Pose Mini Library Sheet
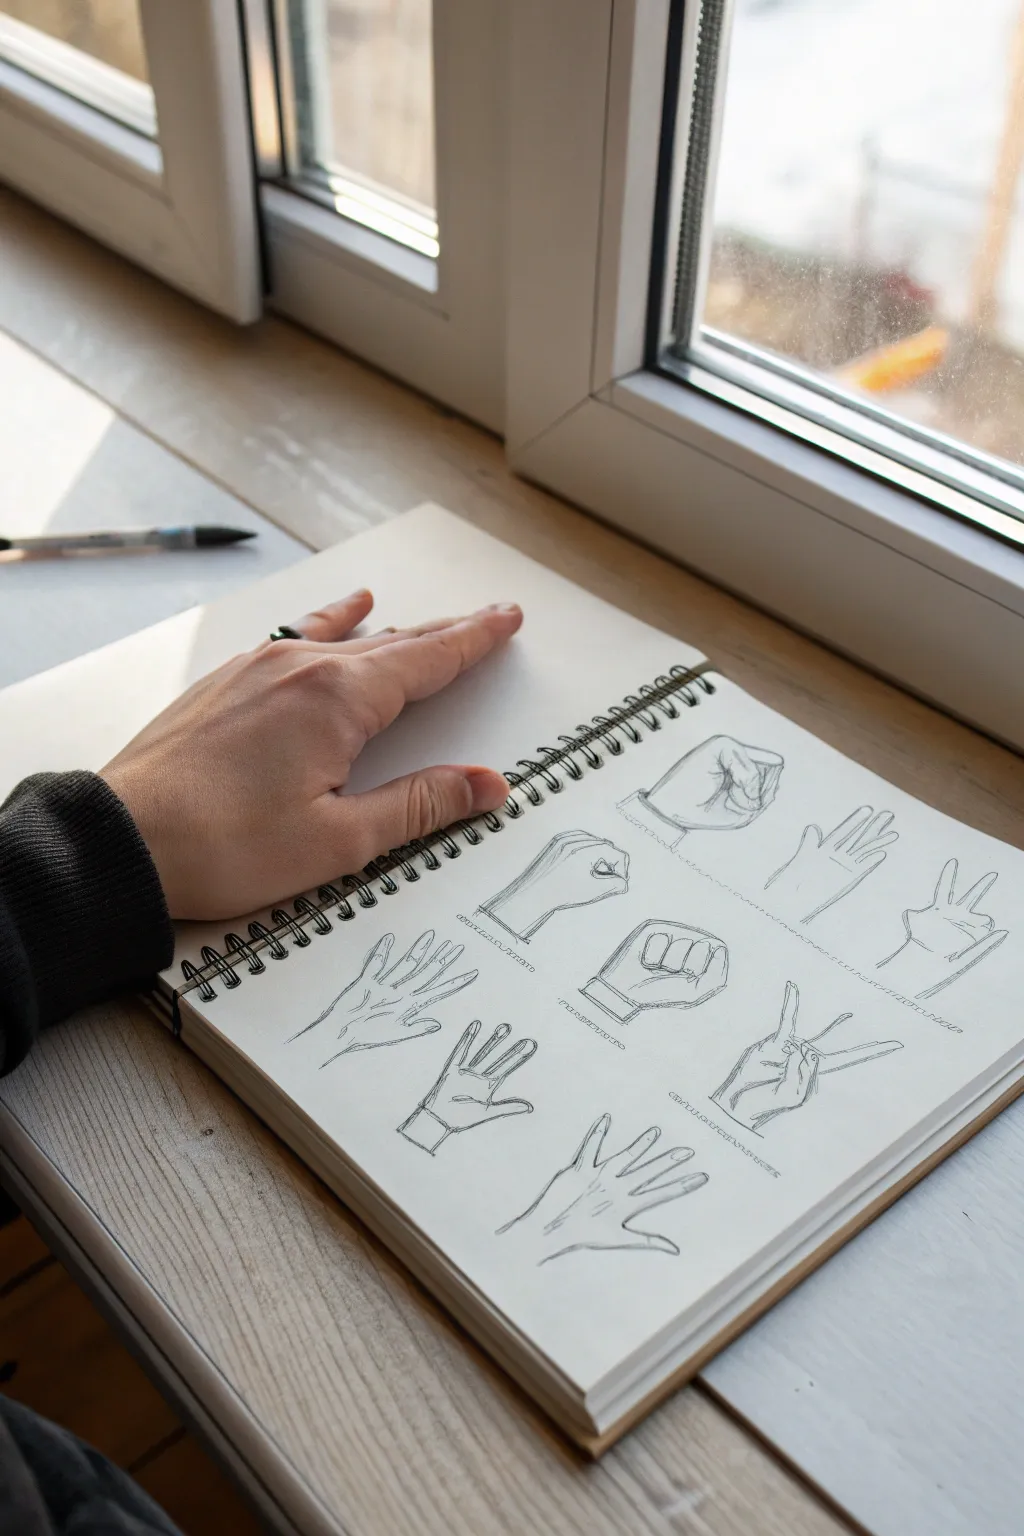
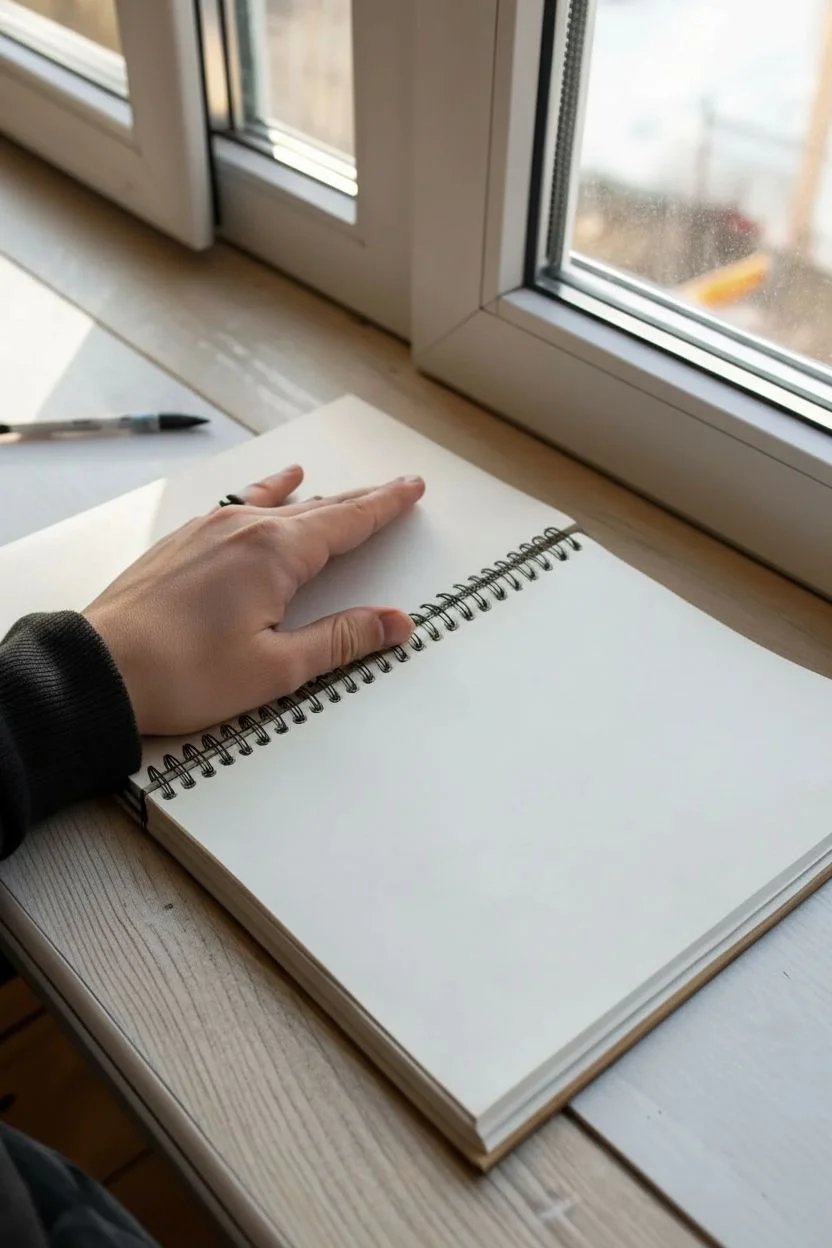
This study sheet project focuses on capturing the complex anatomy of the hand through quick, gestural sketches of various poses. By filling a single page with multiple angles—from tight fists to open palms—you create a valuable reference guide while training your eye to see geometric forms.
Step-by-Step Guide
Materials
- Wirebound sketchbook (smooth or medium tooth paper)
- Graphite pencil (HB or 2B recommended)
- Fine-liner pen (optional, for final outlines)
- Eraser (kneaded eraser is best)
- Your own non-drawing hand (as a model)
Step 1: Planning the Layout
-
Visualize the grid:
Before making a mark, look at your blank sketchbook page. Imagine a loose grid of nine spaces—three rows of three. This mental structure keeps your sketches organized without looking too rigid. -
Observe your model:
Hold up your non-drawing hand. Rotate it and look for interesting shapes. You aren’t just drawing fingers; you’re looking for the blocky shape of the palm and the cylindrical flow of the wrist.
Wonky Fingers?
If fingers look like sausages without structure, draw the joints as small spheres first. Connecting these spheres with straight lines forces you to respect the bone structure underneath.
Step 2: Sketching the Closed Fists
-
Block in the main mass:
Start with the top row. For the first fist pose, lightly sketch a square or rectangular block to represent the metacarpals (the back of the hand). -
Add the thumb wedge:
Attach a triangular wedge shape to the side of your block where the thumb connects. Keep lines very faint at this stage. -
Divide the knuckles:
Draw faint lines across the front face of the curled fingers to indicate where the knuckles sit. Don’t draw individual fingers yet; treat them as a single mass first. -
Define the contours:
Now, press a little harder to carve out the individual fingers wrapping around. Notice how the pinky tucks in tighter than the index finger. -
Refine the wrist:
Add the two parallel lines for the wrist, paying attention to the slight bulge of the ulna bone on the pinky side.
Step 3: Open Hands and Gestures
-
Sketch the open palm:
Move lower on the page. Draw a pentagon shape—this represents the palm. The top is wider than the wrist connection. -
Establish finger flow:
Draw light ‘sticks’ or directional lines extending from the palm to map where the fingers will point. Notice they usually fan out rather than pointing straight up. -
Flesh out the fingers:
Draw cylinders around your directional lines. Remember that fingers have three segments (except the thumb). Make the joints slightly wider than the segments between them. -
Draw the ‘V’ sign:
For the peace sign or ‘V’ gesture, group the ring and pinky fingers together into a curled mass. Only extend the index and middle fingers, creating a distinct separation between them.
Change Your View
Don’t just draw flat palms. Try foreshortening by pointing a finger directly at your eyes. Draw the fingertip as a large circle and overlap the shapes behind it to create depth.
Step 4: Detailing and Values
-
Check proportions:
Pause and look at your sketches. Is the thumb roughly reaching the middle of the index finger’s first segment? Adjust lengths if the fingers look too spaghetti-like. -
Add skin folds:
Draw the small creases where the fingers bend and where the thumb meets the palm. These little lines add immense realism and show volume. -
Mark the nails:
Lightly indicate fingernails on the extended fingers. Use simple geometric U-shapes or squares depending on the angle; they help show the rotation of the finger tip. -
Deepen the shadows:
I like to squint at my own hand to see the darkest shadows. Add some shading between tight fingers or under the curl of a fist to pop the form off the page. -
Finalize outlines:
Go over your favorite lines with a slightly sharper pencil tip or a confident stroke to clear up the ‘hairy’ sketch lines. You want a crisp, definition around the silhouette. -
Clean up:
Gently erase the initial plotting blocks and directional sticks, leaving only your detailed contour drawings visible.
Now you have a dynamic reference sheet to consult whenever you get stuck drawing hands in future artworks
Continuous Line Hand Drawing
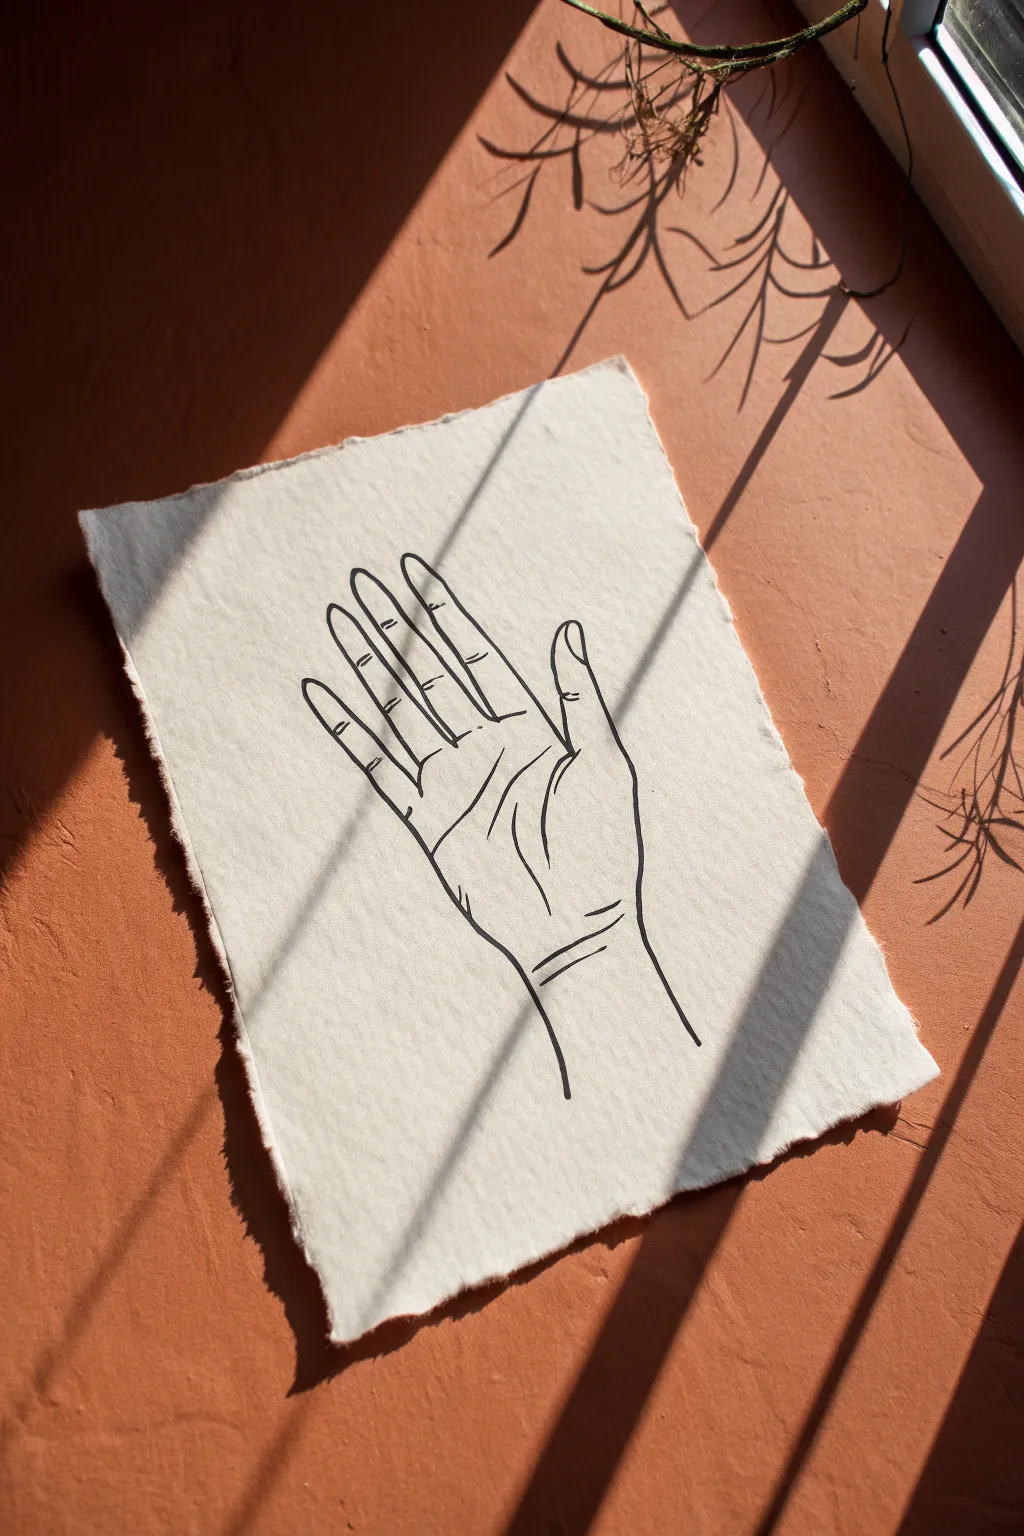

Capture the elegance of human anatomy with this striking yet simple line drawing project. Using handmade paper and bold ink, you will create a piece of art that feels both modern and timeless, perfect for minimalist decor.
How-To Guide
Materials
- Textured handmade paper (rag or cotton)
- Black ink fine liner (size 0.5 or 0.8)
- Pencil (HB or 2H)
- Kneaded eraser
- Ruler (optional, to deckle edges)
- Water for paper tearing technique
Step 1: Preparing the Canvas
-
Select your paper:
Choose a high-quality, textured paper. Heavyweight cotton rag paper works best to replicate the rustic look in the photo. -
Create deckled edges:
If your paper has straight machine-cut edges, create a faux-deckled look. Fold the paper where you want the edge to be, run a wet brush or finger along the crease, and gently tear away the excess strip. This gives that beautiful, organic, fuzzy edge. -
Flatten the sheet:
If the tearing process curled the paper, place it under a heavy book for an hour to ensure you have a flat drawing surface.
Wobbly Lines?
Don’t stress if your hand shakes. Embrace the imperfections! In line art, slightly wavering lines add character and emphasize the ‘hand-drawn’ aesthetic.
Step 2: Sketching the Structure
-
Establish the palm base:
Using your pencil very lightly, draw a square-ish shape in the lower center of the page. This will act as the anchor for the palm of the hand. -
Mark finger points:
Above your palm square, make small dots where the tip of each finger should end. Notice how the middle finger is the highest point, with the ring and index fingers slightly lower, and the pinky the lowest. -
Draft the thumb:
Sketch a curved oval shape extending from the right side of the palm base. The thumb should be positioned lower than the fingers and angling outward. -
Connect the forms:
Lightly draw lines connecting your fingertips down to the palm base. Don’t worry about details yet; just focus on getting the proportions and lengths right. -
Refine the outline:
Go over your sketch to add the gentle curves of the knuckles and joints. I find it helpful to look at my own hand as a reference for these natural bends.
Step 3: Inking the Drawing
-
Start with the outline:
Switch to your black fine liner. Begin tracing the outer perimeter of the hand. Keep your pressure consistent to create a solid, confident line. -
Draw the fingers:
Work finger by finger, tracing the sides. Leave small gaps or make the lines slightly thinner near the fingernails to suggest delicacy. -
Add the fingernails:
Draw simple U-shapes or ovals at the tips of the fingers. Keep these minimal; you don’t need intricate detailing here, just the suggestion of the nail shape. -
Detail the knuckles:
Add small, slightly curved horizontal lines at the finger joints. These shouldn’t be straight lines, but soft curves that follow the cylindrical shape of the finger. -
Define the palm lines:
Draw the major creases of the palm (the heart, head, and life lines). Use sweeping strokes rather than jagged ones to keep the flow organic. -
Add the wrist:
Extend two lines downward from the palm base to form the wrist. Add a couple of horizontal curved lines across the wrist to indicate the natural skin creases there. -
Review line weight:
Look at the drawing as a whole. You may want to go back and slightly thicken the outer contour lines to make the hand pop against the textured paper, while keeping the interior palm lines thinner.
Level Up: Gold Leaf
Add a touch of luxury by carefully applying a small amount of liquid gold leaf to the fingernails or tracing one single palm line in gold.
Step 4: Finishing Touches
-
Let the ink dry:
Wait at least 15-20 minutes. Textured paper can hold ink longer than smooth paper, and smudging at this stage is heartbreaking. -
Erase pencil marks:
Gently roll your kneaded eraser over the drawing to lift the graphing pencil lines. Kneaded erasers are gentler on the paper fibers than standard rubber erasers. -
Final inspection:
Check for any lines that need connecting or small gaps that look unintentional. Touch them up carefully.
Now you have a serene piece of artwork ready to be framed or gifted to a friend
BRUSH GUIDE
The Right Brush for Every Stroke
From clean lines to bold texture — master brush choice, stroke control, and essential techniques.
Explore the Full Guide
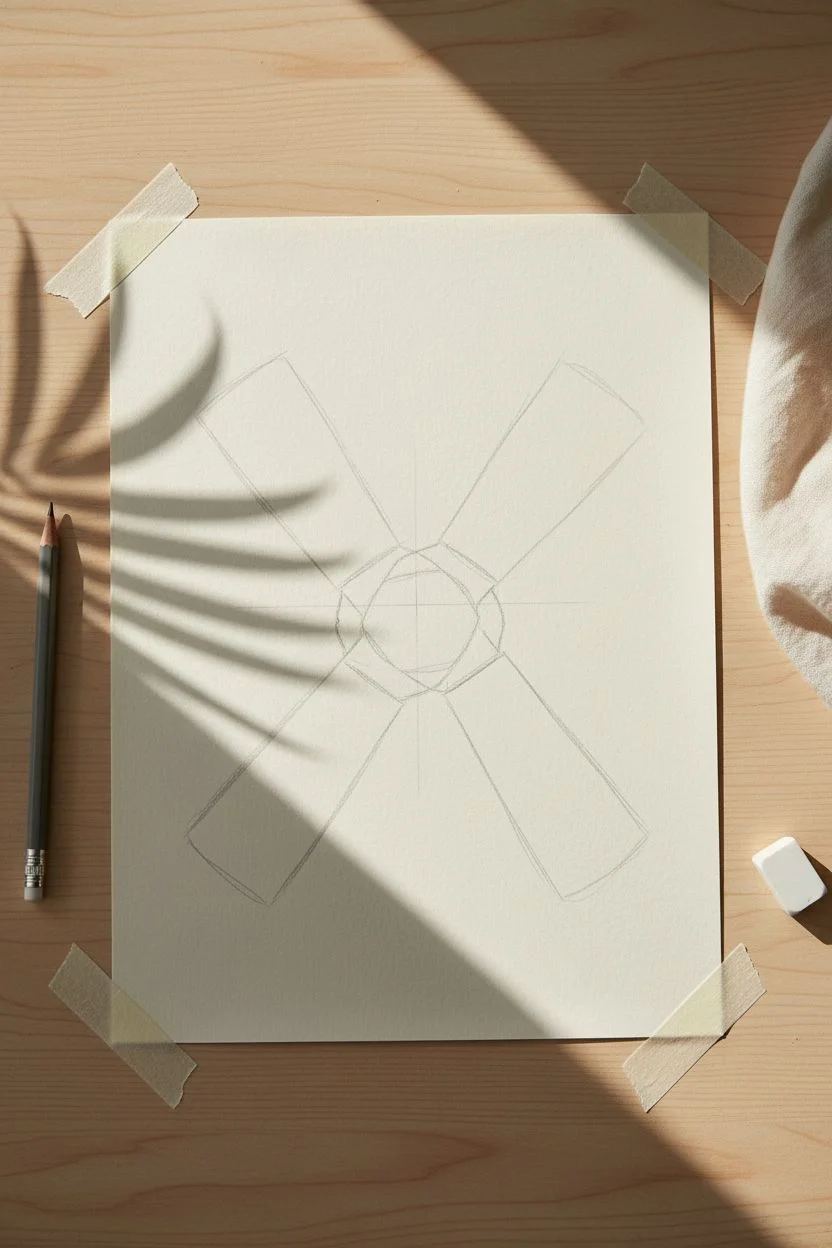
Construction Breakdown: Boxes and Cylinders
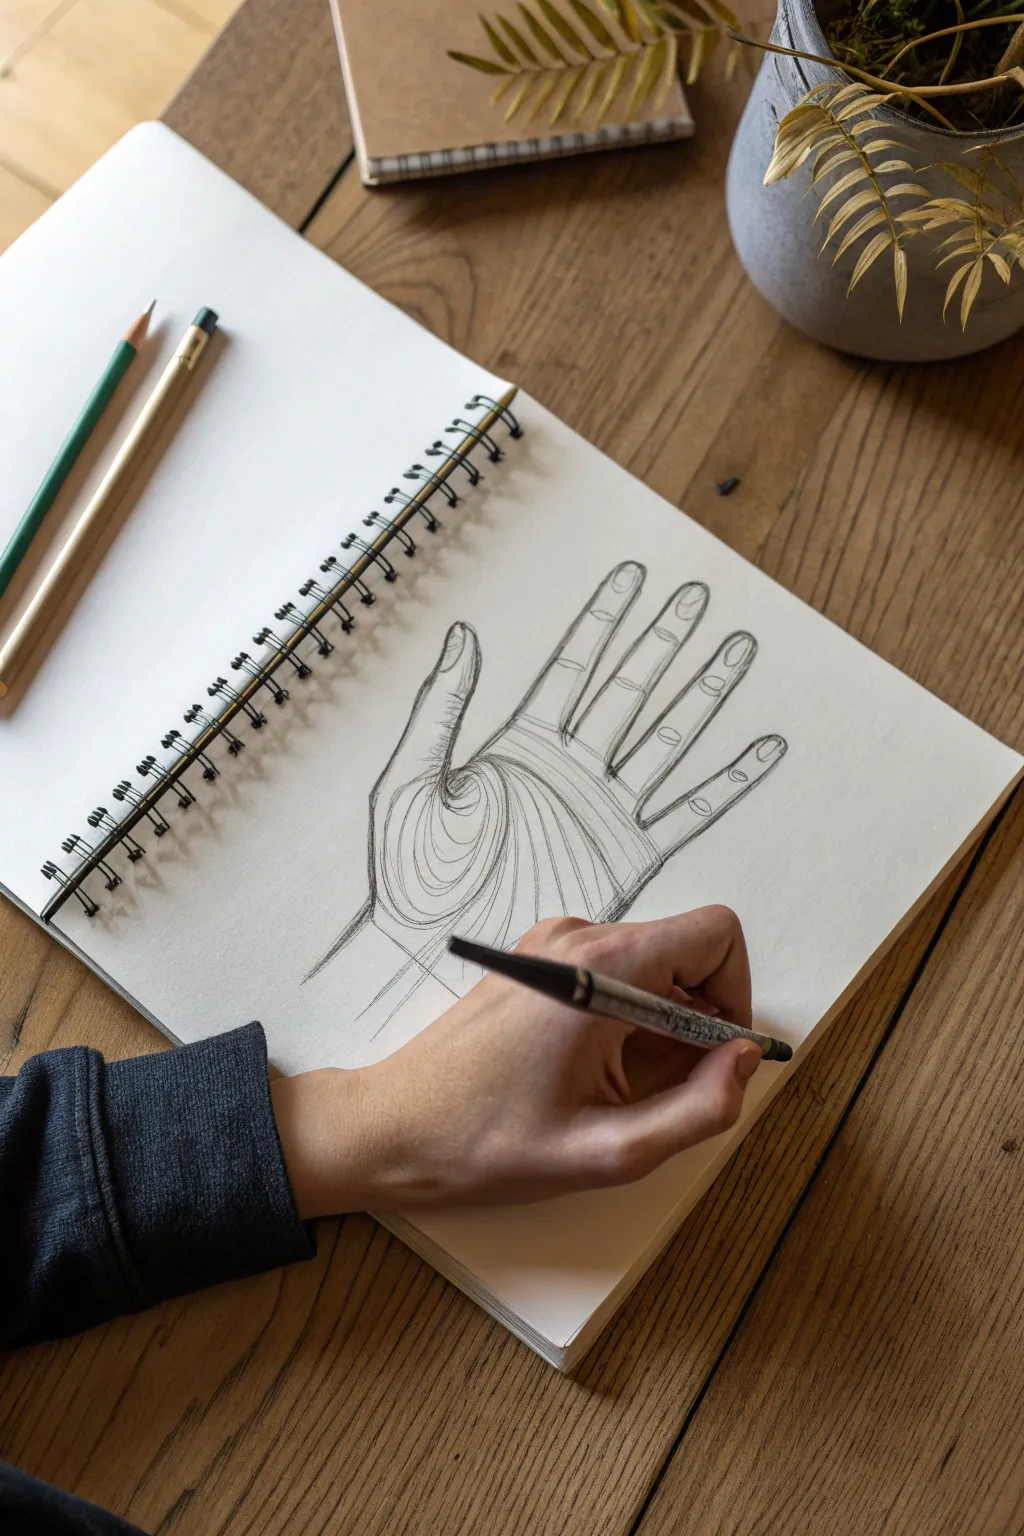
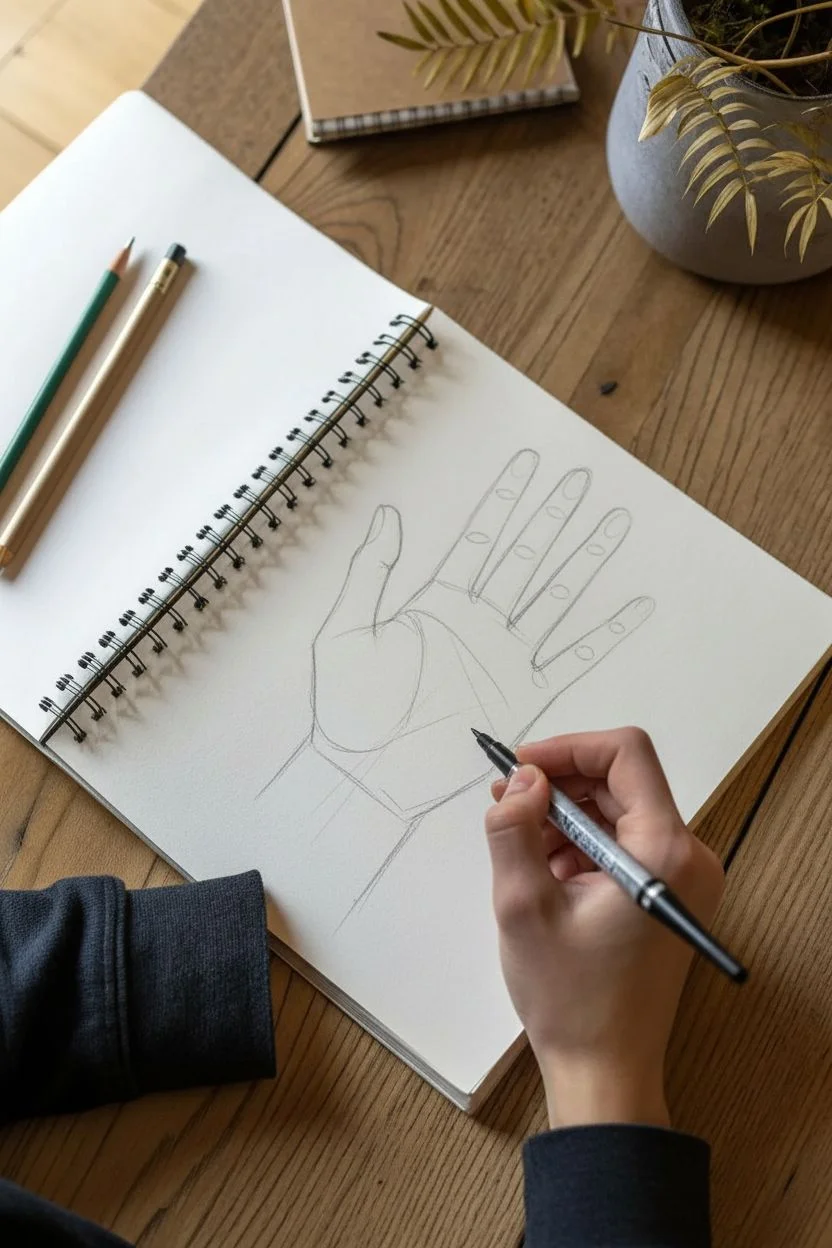
Learn to visualize the three-dimensional form of the hand by breaking it down into structural volumes. This topographic-style sketch uses contour lines and cylindrical segments to help you understand depth and curvature.
Step-by-Step Tutorial
Materials
- Spiral-bound sketchbook with smooth white paper
- HB or 2B graphite pencil (for initial layout)
- Fine-liner pen (black, approx. 0.5mm or 0.8mm)
- Eraser
- Your own non-dominant hand (for reference)
Step 1: Planning the Structure
-
Observe your reference:
Position your non-dominant hand comfortably on the table in a relaxed, open pose. Notice how the fingers aren’t perfectly straight sticks; they have distinct segments separated by knuckles. -
Lightly sketch the palm:
Using your graphite pencil, draw a light, loose square or pentagon shape to represent the main mass of the palm. Keep your pressure extremely light so these lines are easy to erase later. -
Block in the fingers:
Extend lines from the palm for each finger. Instead of outlining the whole finger immediately, draw circular joints where the knuckles are. Think of these as hinges connecting the sections of the fingers. -
Define the thumb:
Sketch the thumb shape, paying attention to the large muscle pad at its base (the thenar eminence). This area is much rounder and fuller than the rest of the palm. -
Outline the silhouette:
Once your structural markers are in place, lightly trace the overall outline of the hand. Don’t worry about details like wrinkles or fingernails yet; just focus on the silhouette.
Visualize the Wrap
Imagine you are wrapping a piece of string or wire around the finger. The line should curve significantly to show the roundness. Flat lines will flatten the drawing.
Step 2: Inking the Form
-
Switch to ink:
Pick up your fine-liner pen. We will start defining the drawing permanently now. Begin with the outline of the thumb, using a confident, continuous stroke where possible. -
Ink the finger segments:
Trace the outline of the fingers. As you come to the fingertips, draw small oval shapes for the nails. This helps establish the orientation of each finger. -
Add joint indicators:
At each knuckle (both the connection to the palm and the mid-finger joints), draw small ellipses or curved lines. These act as cross-contours, showing that the finger is a cylinder, not a flat shape. -
Start the topographic lines:
Begin drawing curved lines inside the palm. Start near the base of the thumb. Imagine these lines traveling over the surface of the skin like water flowing over a hill. -
Create the palm swirl:
Draw concentric circles or spirals on the fleshy pad of the thumb base. This visualizes the roundness of that muscle. I find it helpful to start from the center point and spiral outward. -
Connect the contours:
Extend the curved lines from the thumb area across the rest of the palm. Let the lines dip slightly in the hollow of the palm and curve upward over the muscular ridges. -
Contour the fingers:
Draw curved cross-contour lines along the length of each finger segment. These should curve away from the viewer to reinforce the cylindrical shape. -
Refine the wrist:
Extend the lines down into the wrist area. Use straight, parallel lines here to suggest the flatter nature of the tendons entering the forearm.
Try Different Volumes
Apply this same technique to other organic objects like apples, stones, or feet. It trains your brain to see 3D volume on a 2D surface.
Step 3: Finishing Touches
-
Thicken outer lines:
Go back over the main silhouette of the hand with your pen. Making the outer line slightly thicker than the interior contour lines helps pop the hand off the page. -
Add shading variation:
Identify where shadows would naturally fall (usually between fingers or under the palm). Add a few extra, closely spaced hatch marks in these areas to suggest depth. -
Let the ink dry:
Wait at least a full minute to ensure the ink is completely set. Smudging fresh ink is the easiest way to ruin a clean drawing. -
Erase pencil guides:
Gently run your eraser over the entire drawing to remove the initial graphite sketch. Your clean, ink structure study is now complete.
Now you have a dynamic study that clearly defines the volume and structure of the hand
Two Hands Clasped Together
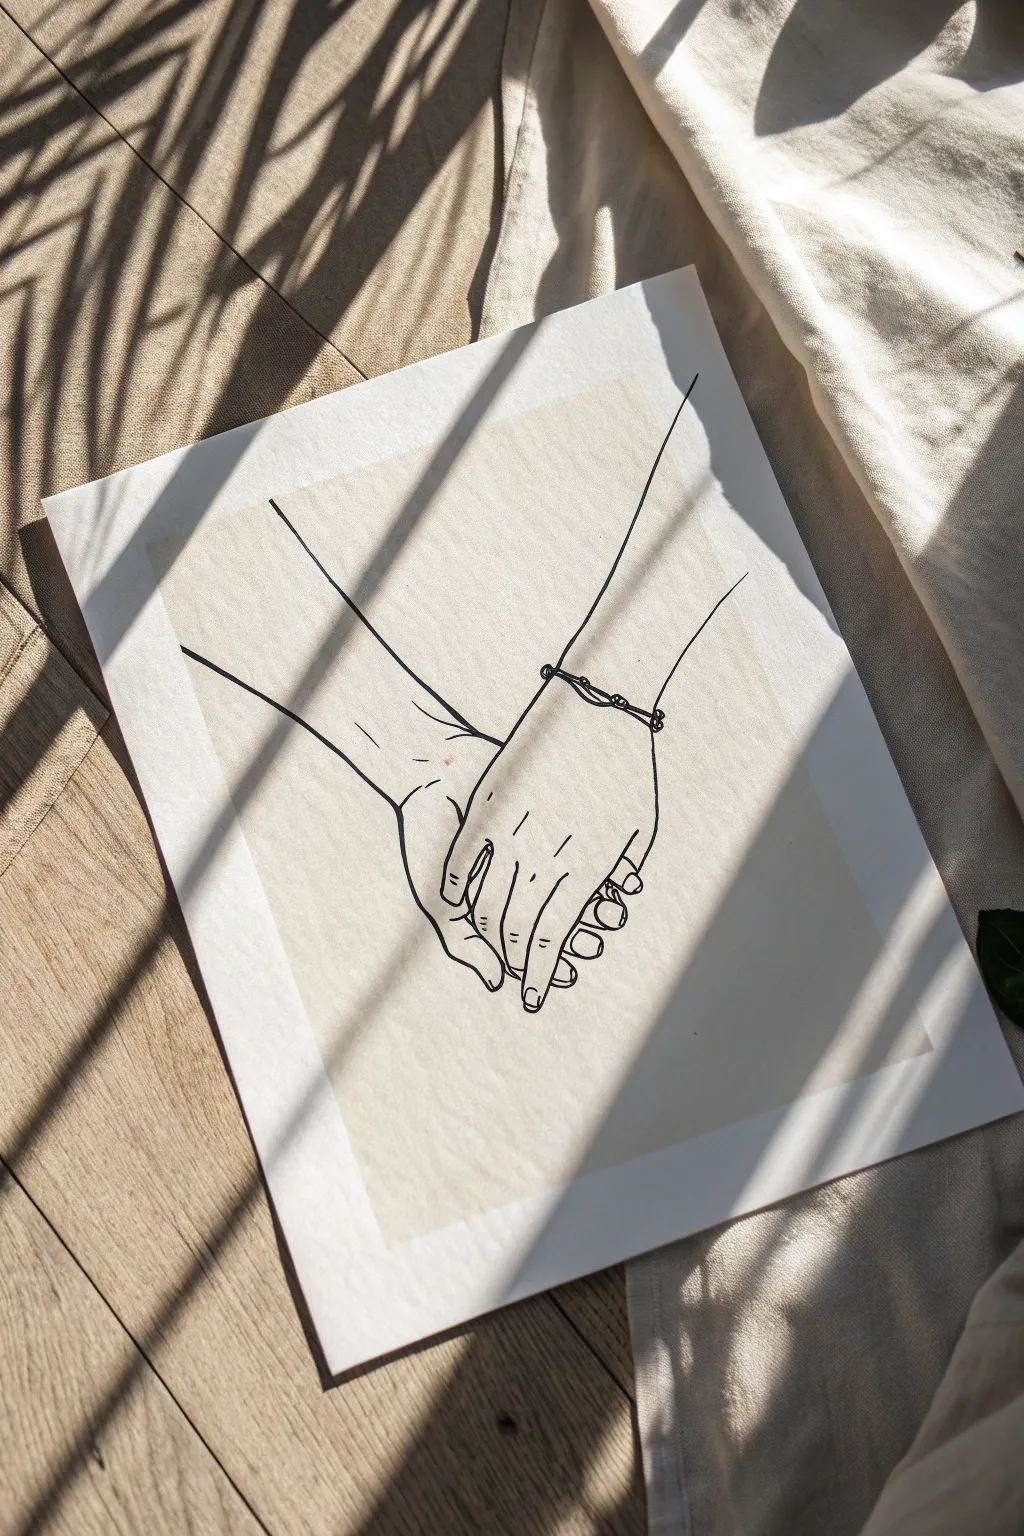
This elegant line drawing captures the gentle intimacy of two hands holding, rendered in a striking minimalist style. The simple black contours against a textured cream background create a modern, clean aesthetic perfect for wall art or a personalized card.
How-To Guide
Materials
- Heavyweight cream or light beige cardstock (textured finish preferred)
- Fine liner pen (0.3mm or 0.5mm, black, waterproof)
- Pencil (HB or 2H)
- Soft kneadable eraser
- Ruler (optional, for centering)
- Reference photo of your own hands or the image provided
Step 1: Drafting the Basic Shapes
-
Set up your workspace:
Tape your textured paper down to a flat surface using drafting tape or masking tape to keep it from shifting while you sketch. -
Establish the composition:
Use your pencil to lightly mark the center of the page. The hands should meet slightly below the center point, with the arms extending diagonally upward and outward toward the top corners. -
Sketch the left arm block:
Draw the basic rectangular shape of the left arm entering from the top-left area. Keep the lines very faint so they can be erased later. -
Sketch the right arm block:
Draw the opposing arm entering from the top-right area. This arm will be slightly ‘on top’ visually, overlapping the other hand. -
Outline the hand placement:
At the end of the left arm block, sketch a rough oval where the hand will be. Do the same for the right arm, positioning its oval over the first one to indicate the clasping gesture.
Drawing proportions
Hands look awkward? Check the wrist width. Wrists should generally be slightly narrower than the width of the hand across the knuckles.
Step 2: Refining the Form
-
Define the top hand (right side):
Start with the hand that is visibly on top (the one coming from the right). Sketch the curve of the thumb wrapping around the other hand’s palm area. -
Draw the fingers:
Sketch the four fingers of the top hand. They should be relaxed, slightly curled, and resting gently on the back of the bottom hand. -
Detail the knuckles:
Add subtle bumps for the knuckles. Don’t over-detail; keep the lines smooth and flowing rather than jagged or anatomical. -
Define the bottom hand (left side):
Now sketch the visible parts of the bottom hand. You’ll mainly see the side of the palm, the thumb tucked in, and the tips of the fingers peeking out from underneath the top hand. -
Refine the finger interaction:
Pay close attention to where the fingers interlock. Lightly suggest fingernails on the visible fingers using small, curved U-shapes. -
Add the bracelet detail:
On the wrist of the top (right) hand, sketch a dainty bracelet. A simple chain line with a few small beads or knots adds a lovely touch of realism without clutter.
Tracing shortcut
Photograph your own hands in this pose, print it out, and use a light box (or a bright window) to trace the main contours directly.
Step 3: Inking and Final Touches
-
Prepare your pen:
Test your fine liner on a scrap piece of the same paper to ensure the ink flows smoothly and doesn’t bleed too much into the texture. -
Ink the main outlines:
Begin tracing over your pencil lines with confident, steady strokes. I find it helpful to pull the pen toward me rather than pushing it away for smoother curves. -
Vary line weight (optional):
If you want slightly more depth, thicken the lines where shadows would naturally fall, such as underneath the fingers or where the wrists meet the edge of the page. -
Ink the delicate details:
Use a lighter touch for the fingernails, the bracelet, and the small crease lines on the knuckles and palm. These lines should be thinner than the main arm contours. -
Let the ink cure:
Wait at least 10-15 minutes for the ink to dry completely. If you erase too soon, you risk smudging crisp lines. -
Erase pencil guides:
Gently rub the kneadable eraser over the entire drawing to lift the graphite layout lines, leaving only your clean ink work. -
Final inspection:
Check for any gaps in your lines. If needed, carefully extend lines to ensure they connect fully, giving that complete, polished illustration look.
Frame your minimal drawing in a simple wood frame to emphasize the natural, understated beauty of the piece


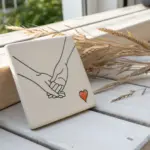
Hands Forming a Heart Shape
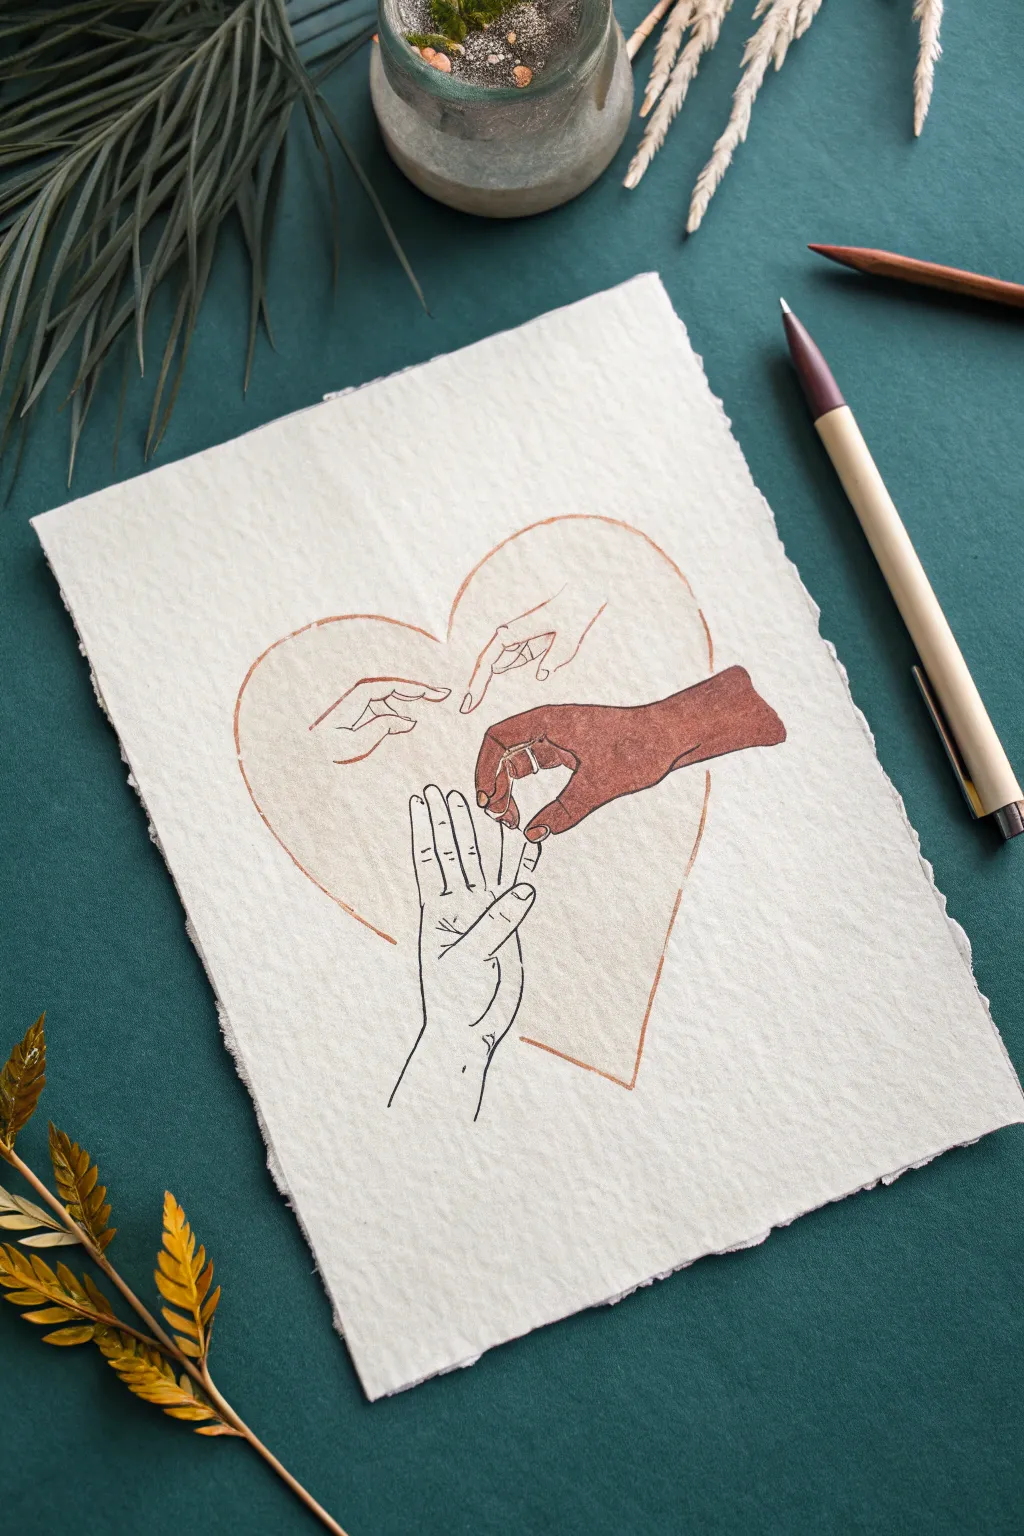
This delicate and meaningful artwork features a warm ink illustration on textured paper, combining simple line work with a single bold block of color. It captures a gentle connection between hands set against a soft heart backdrop, perfect for framing or gifting.
Step-by-Step Tutorial
Materials
- Heavyweight cold-press watercolor paper or textured handmade paper (deckle edge preferred)
- Fine liner pen (0.3mm or 0.5mm, black or dark sepia)
- Brown/Terracotta brush pen or watercolor paint
- Soft colored pencil (peach or terracotta)
- Pencil (HB or 2H)
- Eraser (kneaded preferred)
- Ruler (optional)
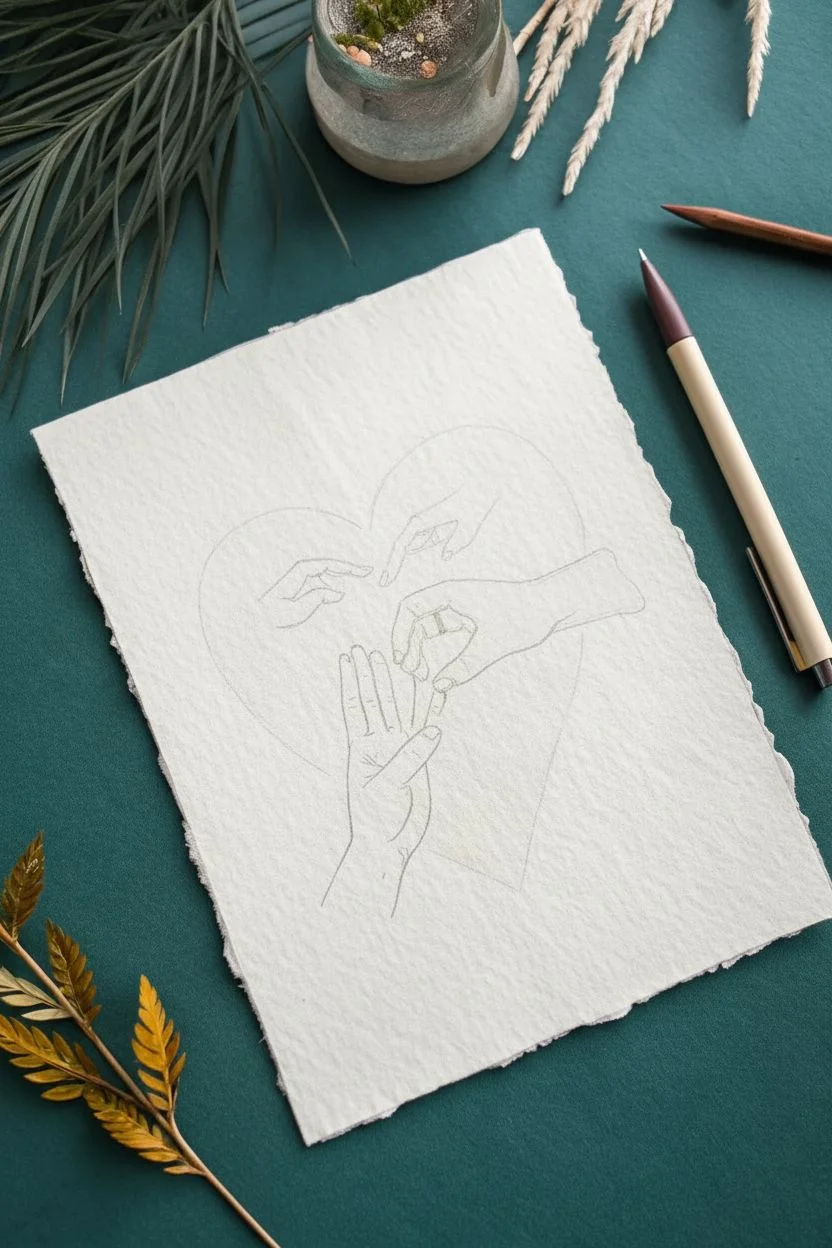
Step 1: Preparation and Sketching
-
Paper selection:
Begin by selecting a piece of high-quality, textured paper. If your paper doesn’t have a deckle edge and you want that rustic look, you can carefully tear the edges against a ruler to create a rough, fibrous border. -
Establish the heart shape:
Lightly sketch a large, open heart shape in the center of your page using an HB pencil. Keep your lines extremely faint, as this will guide the composition but won’t be the main focal point. -
Position the main hand:
Sketch the central hand first—the one that will eventually be colored solid brown. Draw it reaching in from the right side, fingers slightly curled as if holding something small or making a gesture. -
Add the lower hand:
Draw the outline of the vertical hand coming up from the bottom. Position the index finger so it appears to be gently touching or interacting with the thumb of the first hand. -
Sketch the upper hands:
Add the remaining two hand outlines near the top of the heart. These should be smaller gestures, reaching inward, creating a sense of movement and interaction within the heart shape.
Fixing Smudges
If you accidentally smudge ink on the textured paper, try gently scraping the surface with a craft knife to remove the top fiber layer, or cover it with a tiny white gel pen dot.
Step 2: Inking and Coloring
-
Outline the heart:
Use a soft colored pencil in a peach or light terracotta shade to trace over your pencil heart. Use a sketchy, light touch rather than a solid hard line to maintain an organic feel. -
Partially erase instructions:
Before adding ink, lightly dab your drawing with a kneaded eraser. You want the pencil guides to be barely visible—just enough to see where to draw without leaving heavy graphite under the ink. -
Ink the line drawings:
Using your fine liner pen, carefully trace the outlines of the bottom hand and the two upper hands. Keep your lines steady but allow for slight variations in thickness to mimic natural drawing. -
Add detailing details:
Add small details to the line-drawn hands, such as fingernails, knuckles, and the natural creases of the palm. These small distinct lines give the hands character. -
Color the focal hand:
For the main hand reaching from the right, use your brown brush pen or watercolor paint to fill it in completely. Work carefully around the edges to keep the silhouette sharp. -
Add the ring detail:
If you wish to replicate the image exactly, leave a tiny negative space (white paper showing) on the ring finger of the brown hand to represent a ring, or go back in with a white gel pen later. -
Refine the outline:
Once the brown ink or paint is dry, you can choose to outline this hand with your fine liner for defined edges, or leave it distinct solely through its color block.
Step 3: Finishing Touches
-
Check geometric balance:
Step back and look at the composition. If the heart shape feels too faint, lightly layer a bit more colored pencil to define the boundary without overpowering the hands. -
Clean up:
Once all ink and paint are fully dry, gently erase any remaining visible pencil marks. Be especially gentle near the colored areas to avoid smudging. -
Final assessment:
Inspect your line work. If any lines look too thin or broken, darken them slightly to ensure the uncolored hands can stand up visually against the bold colored hand.
Make It Personal
Instead of a generic composition, trace photos of your own family’s hands. Use different skin tone shades for each hand to represent specific people in your life.
Now you have a touching piece of art that celebrates connection and unity
Pattern-Filled Hand Silhouette
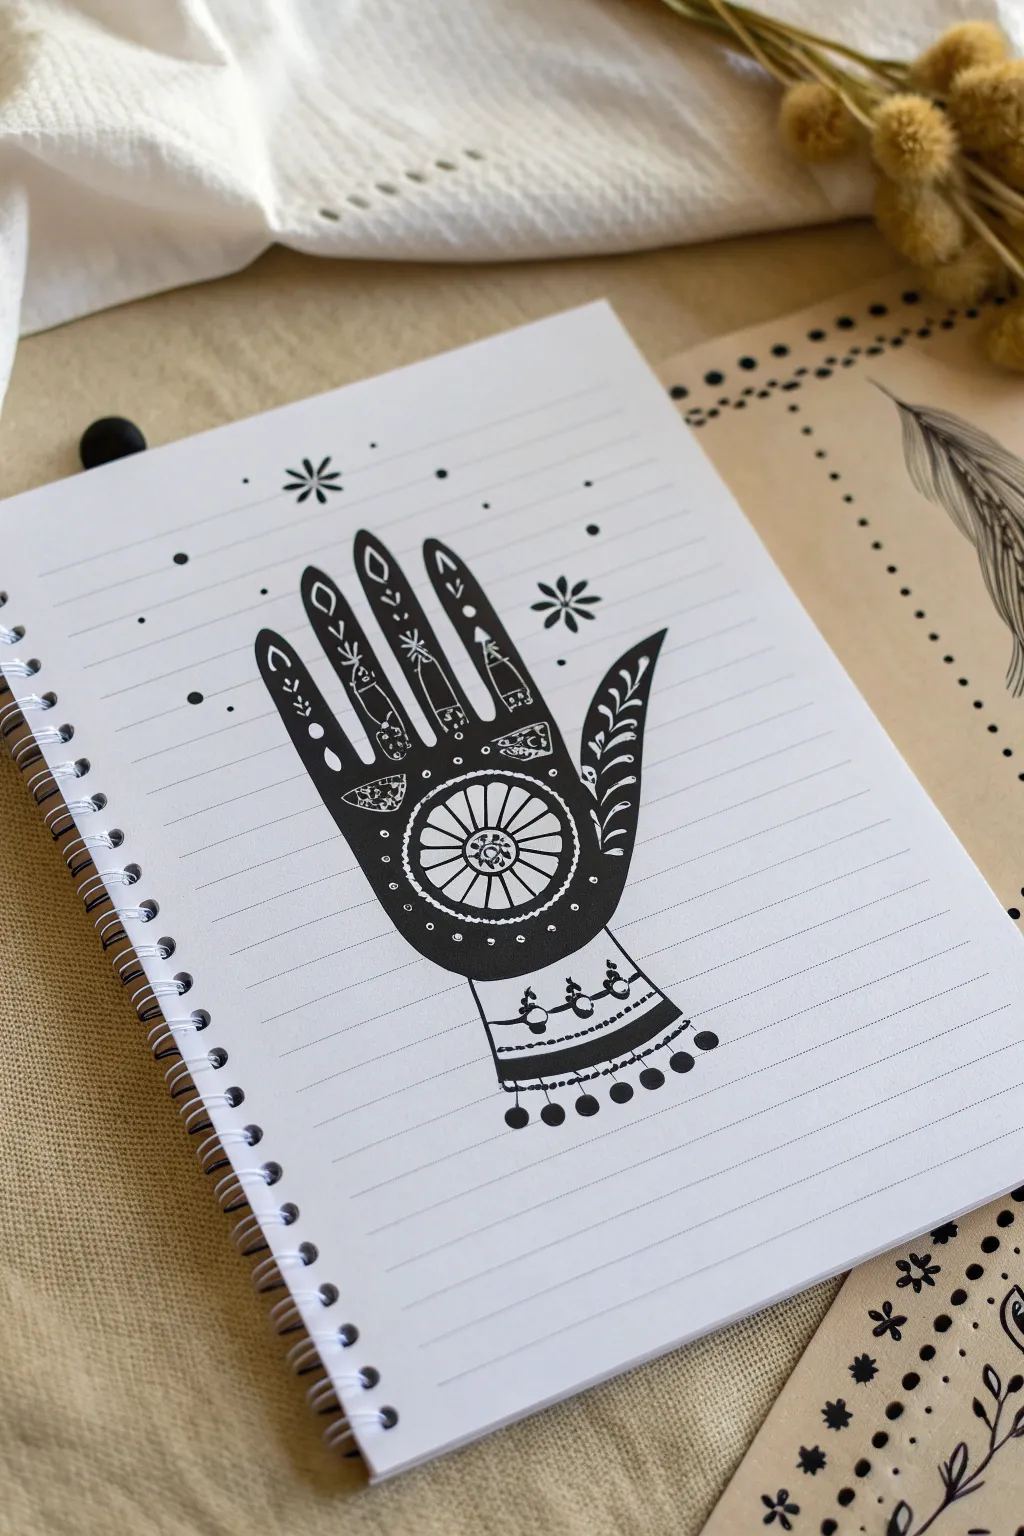

This intricate black ink illustration transforms a simple hand silhouette into a mystical talisman featuring celestial and botanical motifs. The high-contrast design uses negative space to reveal delicate patterns within the solid black palm, creating a striking focal point for your sketchbook.
How-To Guide
Materials
- Lined spiral notebook or sketchbook paper
- HB pencil
- Eraser
- Fine liner pen (0.1mm or 0.3mm)
- Black brush pen or broad marker for filling
- White gel pen (optional, for corrections)
Step 1: Sketching the Framework
-
Outline the hand shape:
Begin by lightly tracing your own non-dominant hand on the paper, or freehand a symmetrical hand shape. Ensure the fingers are slightly separated to allow room for details later. -
Refine the silhouette:
Smooth out the pencil lines, making the fingers taper elegantly. Draw the thumb slightly shorter than the index finger. Flatten the wrist area to prepare for the decorative cuff. -
Sketch the central medallion:
In the center of the palm, draw a medium-sized circle using a compass or by tracing a small circular object like a bottle cap. -
Add internal guides:
Lightly sketch the internal patterns inside the fingers. Draw teardrop shapes at the fingertips, small leaf sprigs in the remaining finger segments, and a fern-like frond curving up the thumb.
Use Negative Space
Draw your internal patterns slightly larger than you think necessary. When the surrounding black ink is applied, white shapes tend to visually shrink.
Step 2: Inking the Details
-
Outline the main shapes:
Switch to your fine liner pen. Carefully trace the main outline of the hand and the large central circle. Do not fill anything in yet. -
Draw the medallion details:
Inside the central circle, draw a smaller concentric circle. Connect the two circles with straight lines radiating outward like wheel spokes. Add a small flower or starburst in the very center. -
Ink the finger patterns:
Go through each finger and outline your sketched designs—the geometric arrows, tiny leaves, and teardrops. These shapes will remain white, so ensure the lines are clean and closed. -
Detail the thumb:
Draw the leafy vine pattern inside the thumb. Make sure the leaves are clearly defined so they don’t get lost when we add the black fill later. -
Add floating elements:
Draw small floating shapes—circles, triangles, or dots—in the empty spaces between your main finger patterns to add texture.
Step 3: Filling and Embellishing
-
Fill the background:
Using a thicker black brush pen or marker, proceed to color the entire hand silhouette black, being extremely careful to color *around* your internal pattern drawings. The patterns should remain the white of the paper. -
Refine edges:
Once filled, use your fine liner to crisp up any edges where the black ink meets the white patterns. -
Draw the wrist cuff:
Below the solid black palm, draw two horizontal parallel lines. Inside, sketch a simple vine or chain pattern with small berries or beads. -
Add dangling charms:
At the very bottom of the wrist cuff, draw short vertical lines ending in filled black circles to mimic hanging beads or tassels. -
Add external celestial elements:
Surround the hand with simple doodles. Place an eight-pointed flower or star near the thumb and middle finger. Scatter small solid dots around the aura of the hand. -
Erase pencil marks:
Wait until the ink is completely dry—I usually give it at least 15 minutes to be safe—then gently erase all visible pencil sketches. -
Final touches:
Add white dots inside the black filled areas using a white gel pen if you want extra detail, or simply darken any uneven black areas for a solid matte finish.
Smudge Prevention
When filling large black areas, place a scrap piece of paper under your drawing hand. This prevents oils from your skin from affecting the paper and stops ink smears.
Your mystical hand illustration is now complete and ready to guard your creative thoughts
Contour Line Illusion Across the Hand
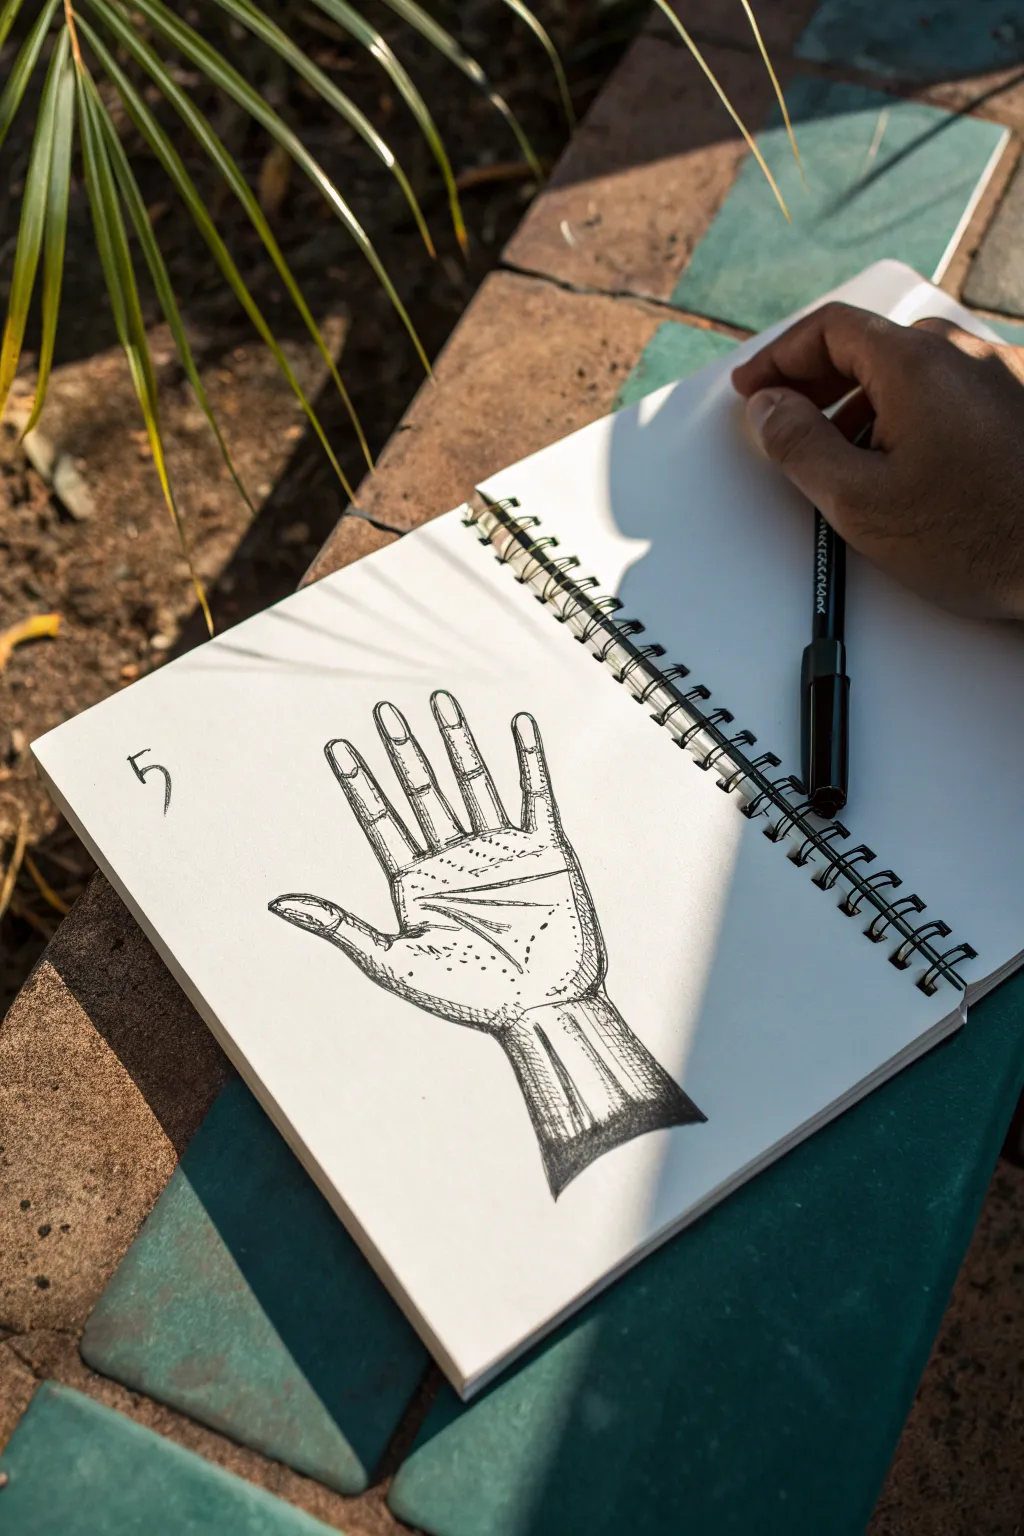
This project combines precise anatomical outlining with classic textural techniques like stippling and hatching to create a hand study that feels both scientific and artistic. By using fine ink lines, you’ll capture the gentle curves of the palm and the solid structure of the wrist without needing heavy shading.
Step-by-Step Guide
Materials
- Sketchbook or drawing paper (heavyweight preferred)
- HB or 2B Graphite pencil
- Eraser
- Fine liner pen (0.3mm or 0.5mm, black)
- Ruler (optional)
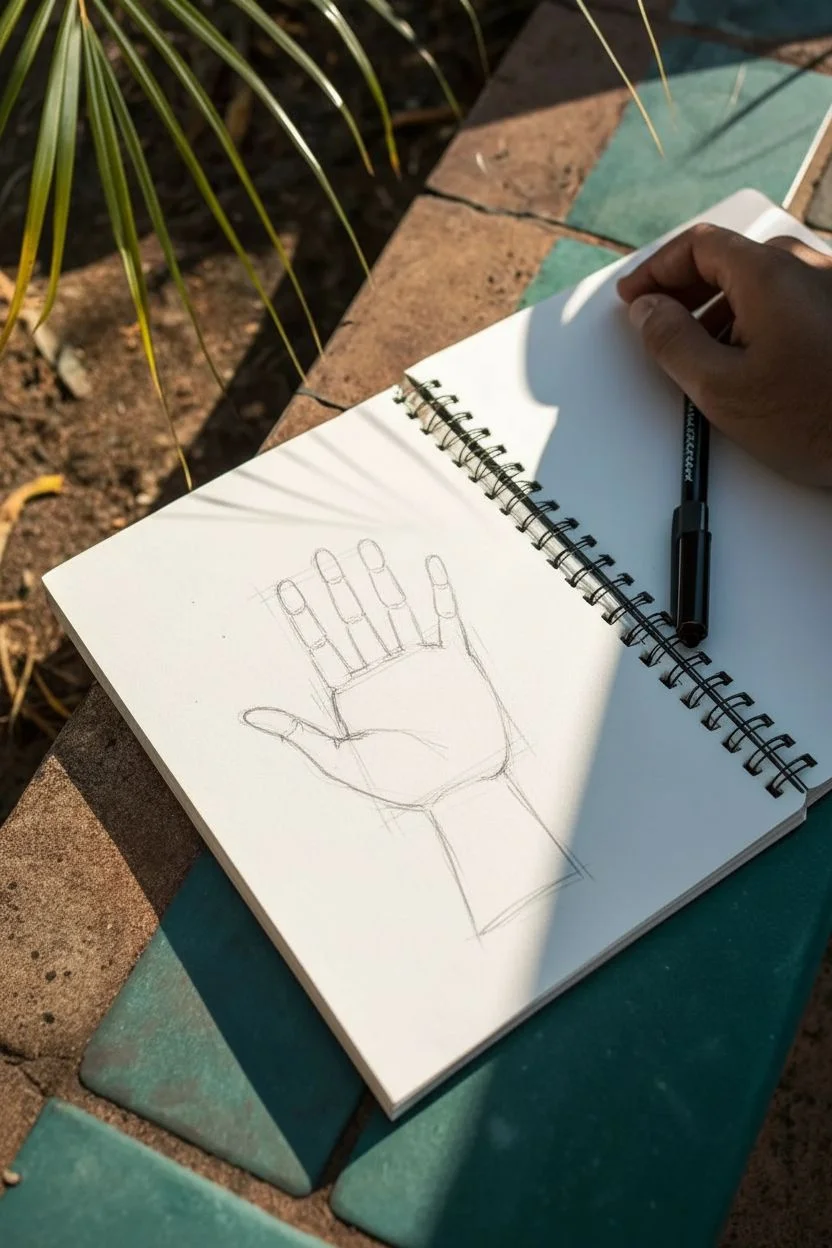
Step 1: Basic Skeletal Structure
-
Establish the wrist block:
Begin at the bottom center of your page. Lightly sketch a trapezoidal shape for the wrist, slightly wider at the top than the bottom, to anchor the hand’s position. -
Map the palm shape:
Drawing upwards from the wrist, sketch a square-like shape with rounded corners. This represents the main body of the palm, extending slightly wider on the thumb side. -
Position the fingers:
Mark the lengths of the fingers with simple straight lines first. Ensure the middle finger is the longest, with the index and ring fingers slightly shorter, and the pinky the shortest. -
Outline the finger segments:
Flesh out the fingers around your guide lines. Draw the segments (phalanges) for each finger, remembering to leave small gaps or indents where the joints will be. -
Sketch the thumb:
Draw the thumb extending from the lower side of the palm at roughly a 45-degree angle. Give it a strong, curved base where it meets the wrist.
Keep it Loose
Don’t try to make every hatching line perfectly parallel. Slight variations in angle and spacing make the drawing look more organic and hand-drawn.
Step 2: Refining the Outline
-
Define the contours:
Go over your rough pencil sketch with a slightly firmer pressure. Smooth out the connections between the fingers and the palm, creating the ‘webbing’ curves. -
Add the fingernails:
Sketch the fingernail shapes at the top of each digit. Keep them simple—just rounded rectangles that follow the curve of the fingertip. -
Mark the major palm lines:
Lightly draw the three major creases of the palm (the heart, head, and life lines). In this specific style, try rendering them as elongated triangles rather than single lines. -
Initial Inking:
Take your fine liner pen and carefully trace the entire outer silhouette of the hand and wrist. Keep your line weight consistent. -
Erase pencil guides:
Once the ink is completely dry, gently erase the graphite construction lines, leaving just the clean ink outline.
Step 3: Shading and Texturing
-
Hatching the fingers:
Start adding texture to the fingers. Use short, horizontal hatching lines across the joints (knuckles) to suggest bending skin. -
Defining the palm creases:
Ink the triangular palm lines you sketched earlier. Fill the interior of these shapes with very fine stippling (dots) or light hatching lines to give them depth. -
Stippling the palm:
Add patches of stippling around the base of the thumb and the fleshy mount under the pinky. Keep the dots denser near the edges and sparser towards the center of the palm. -
Shading the wrist:
This is the darkest part of the drawing. Use vertical hatching lines running up the wrist section. I like to layer these lines closer together on the right side to create a shadow effect. -
Cross-hatching for volume:
On the shadowed side of the wrist (the right side in the image), add diagonal lines over your vertical ones. This cross-hatching builds deep contrast. -
Adding knuckle details:
Draw small, curved brackets (( )) around the finger joints to emphasize the bony structure beneath the skin. -
Final texture check:
Look for areas that feel too flat. Add a few sporadic dots or tiny dashes along the fingers and palm to simulate skin texture and pores. -
Number the study:
To mimic the scientific classification look of the original image, draw a slender number ‘5’ to the left of the pinky finger.
Ink Smearing?
If you are erasing guides over fresh ink, wait at least 5 minutes. Identifying ‘dry’ ink can be tricky; touch it lightly with a clean tissue first to test.
Now you have a striking anatomical study that beautifully balances line weight and negative space


Have a question or want to share your own experience? I'd love to hear from you in the comments below!