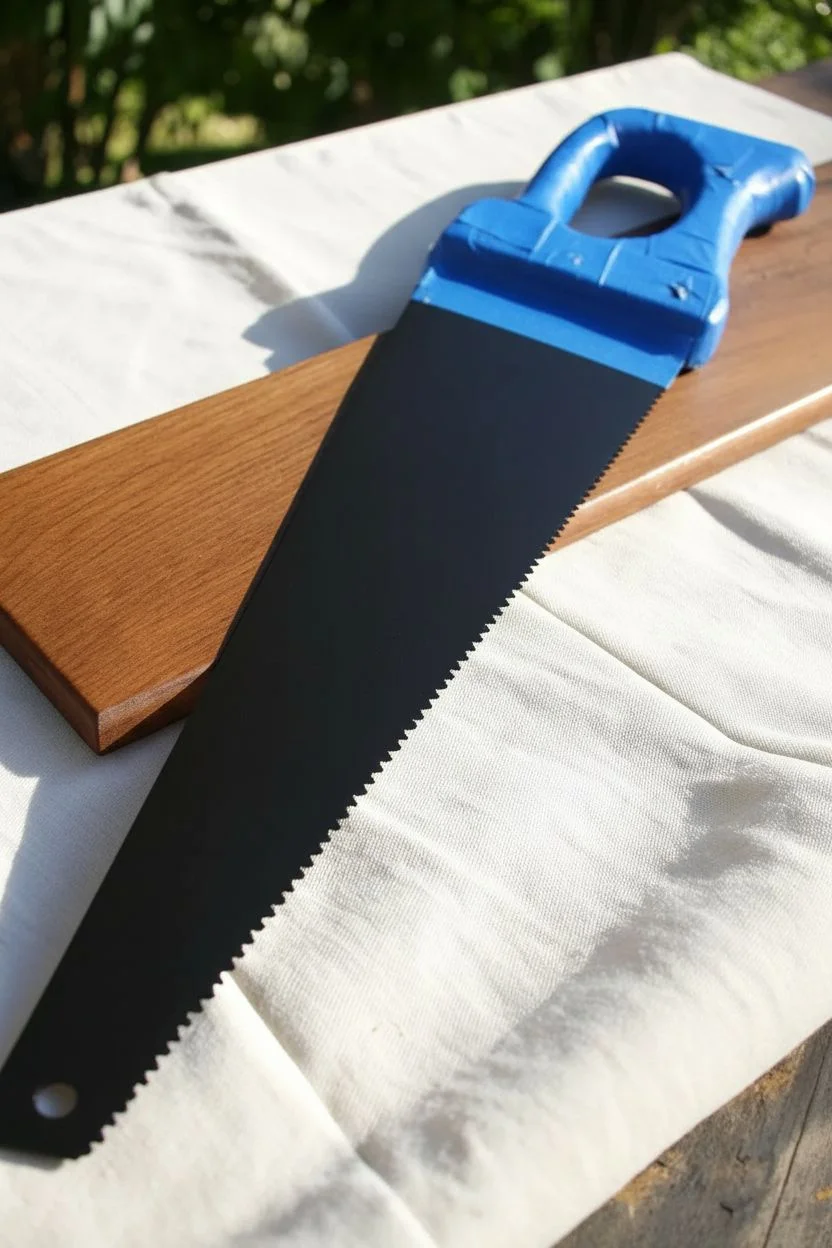
I love how a beat-up hand saw can turn into the coolest little canvas—long, skinny, and full of character. Here are my favorite hand saw painting ideas that really work with the blade’s shape, the teeth edge, and that gorgeous metal texture.
Pine Tree Forest Line on a Hand Saw
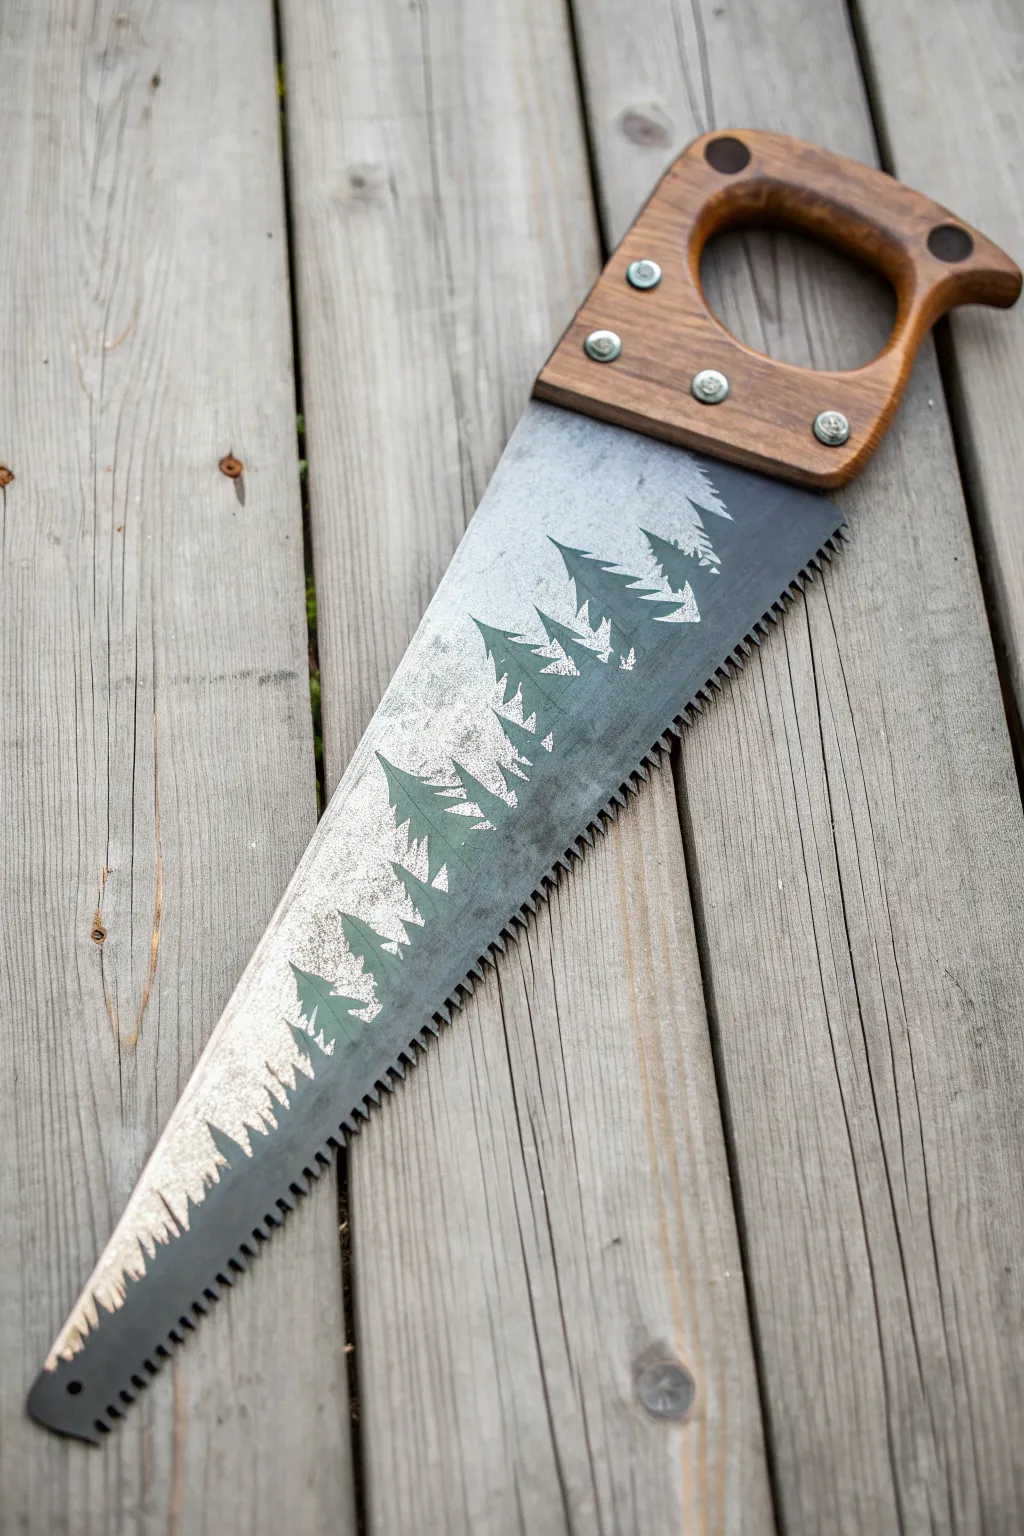
Transform an old workshop tool into a stunning piece of rustic decor with this subtle yet striking design. By painting a silhouette of pine trees along the blade, you can capture the serene beauty of a misty forest right on a vintage hand saw.
How-To Guide
Materials
- Vintage hand saw (cleaned)
- Sandpaper (medium and fine grit)
- Painter’s tape or masking tape
- Metal primer (gray or white)
- Acrylic paint (forest green, white, black)
- Small flat brush
- Detail brush
- Stencil brush or sponge (optional)
- Clear matte sealer spray
- Isopropyl alcohol or degreaser
Step 1: Preparing the Canvas
-
Clean the blade:
Begin by thoroughly cleaning the saw blade with a degreaser or isopropyl alcohol to remove any workshop oil, dirt, or rust dust. The surface needs to be completely clean for the paint to adhere properly. -
Sand for texture:
Lightly sand the entire metal surface of the blade using medium-grit sandpaper. This scuffs up the metal just enough to give the paint something to grip onto without ruining the vintage patina. -
Protect the handle:
Wrap the wooden handle carefully with painter’s tape. You want to ensure no stray paint splatters on that beautiful aged wood. -
Create the horizon line:
Decide where you want your forest floor to sit. Since this design floats in the middle, you don’t need a hard ground line, but you can tape off the serrated teeth edge if you want to keep them paint-free for contrast.
Rust is Your Friend
Don’t sand away all the natural rust! Leaving some orange-brown spots on the unpainted metal adds authentic character and warmth to the final piece.
Step 2: Painting the Forest
-
Mix your misty base color:
Mix a very light gray using white and a tiny dot of black acrylic paint. You want a color that is just slightly lighter than the metal blade to create a ‘mist’ or highlight effect behind the trees. -
Apply the background mist:
Using a sponge or a dry brush, lightly dab this misty gray color in a triangular patch stretching from the handle towards the tip. Keep the edges irregular and faded to mimic fog rolling through. -
Let it dry completely:
Allow this base layer to dry fully. If the metal is cold, this might take a bit longer than usual, so be patient. -
Design the trees:
You can either freehand the trees or cut a simple stencil from cardstock. The design features sharp, triangular pine trees of varying heights. -
Paint the tree silhouettes:
Load your brush with dark forest green paint. If you want the deep contrast seen in the photo, mix in a little black. Start painting the tree shapes over your misty background. -
Refine the branches:
Use a detail brush to flick paint outwards and downwards from the center trunk line of each tree. This jagged, uneven technique mimics pine needles perfectly. -
Create depth with layering:
I like to paint the larger trees in the foreground with a darker, more saturated green, and the smaller background trees with a slightly lighter shade to create a sense of distance. -
Add snow or highlight details:
Once the green is dry, take a very dry brush with a tiny amount of white paint. Lightly whisk it over the tops of the branches on the ride side of each tree to suggest sunlight or a dusting of snow.
Step 3: Finishing Touches
-
Distress the design (Optional):
For a truly weathered look, lightly sand over your painted trees with fine-grit sandpaper once they are bone dry. This reveals some metal through the paint. -
Remove the tape:
Carefully peel off the painter’s tape from the handle. Do this slowly to avoid peeling up any paint near the edges. -
Clean up edges:
If any paint bled onto the metal where you didn’t want it, use a cotton swab dipped in rubbing alcohol to wipe it away for a crisp look. -
Seal the artwork:
Spray the entire blade with a clear matte sealer. This prevents the metal from rusting further and protects your painting from scratches. -
Attach hanging hardware:
Since saws don’t have hooks, you can loop a sturdy wire through the handle hole or weld a small washer to the back for easy wall mounting.
Add a Moon
Paint a faint, pale yellow circle or crescent moon in the upper corner of the blade to transform your forest into a moody night scene.
Now you have a rugged piece of art that brings the outdoors inside your workshop or home


Distressed Flag on a Vintage Hand Saw
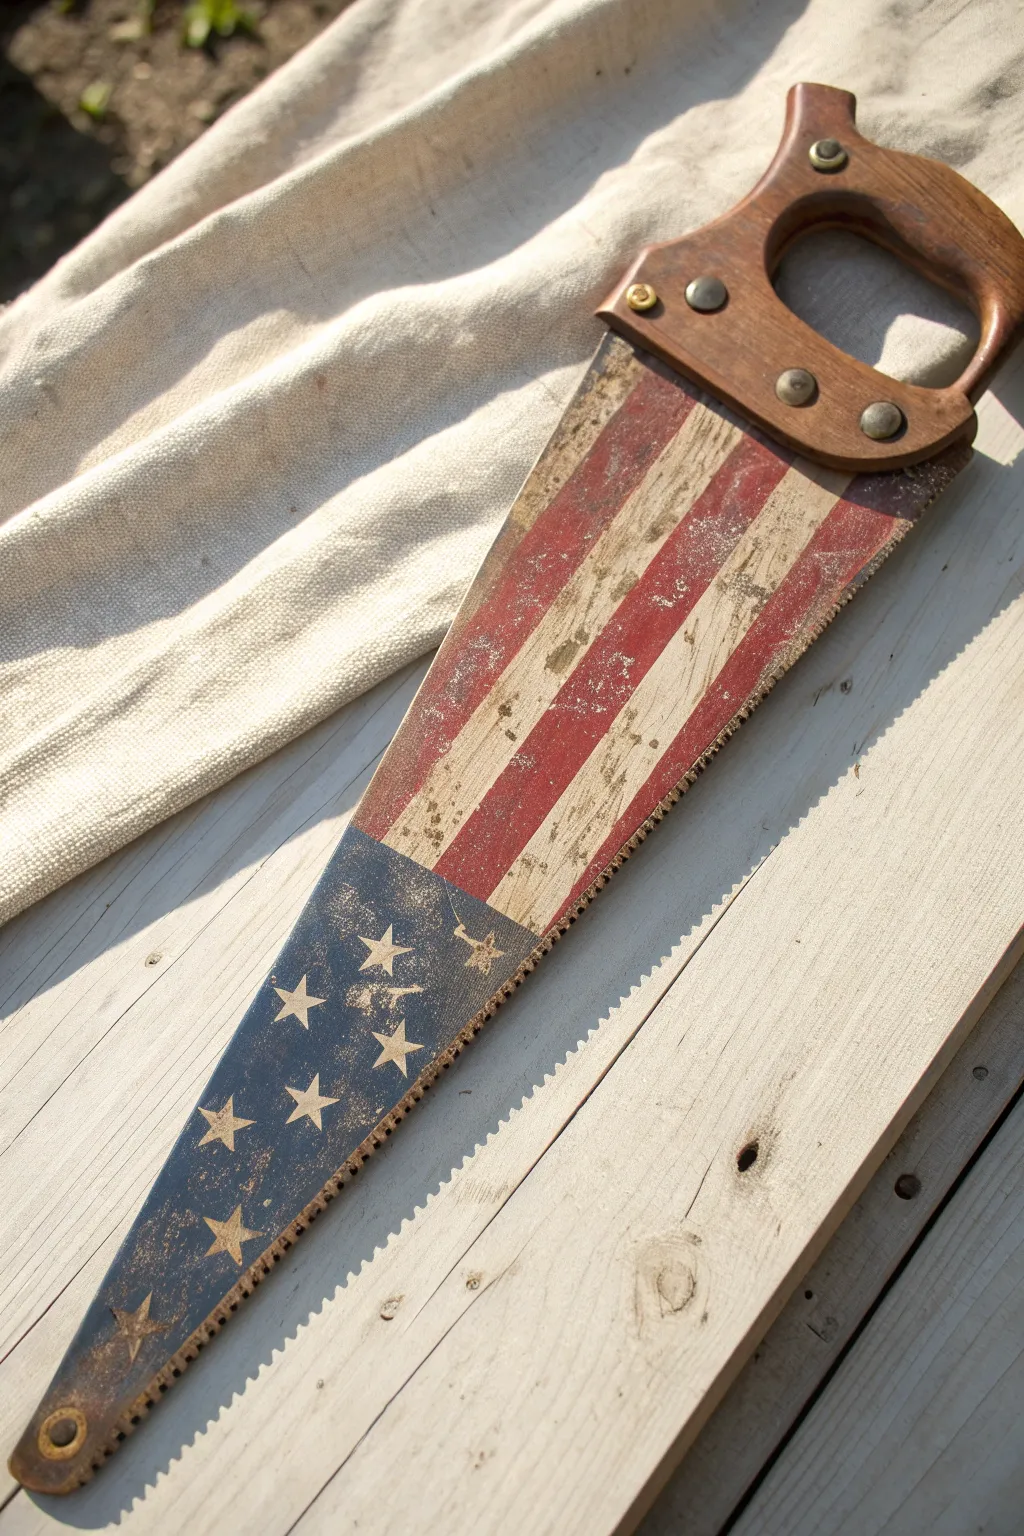

Transform an old, forgotten workshop tool into a striking piece of patriotic decor with this distressed flag project. The weathered metal of a vintage saw provides the perfect canvas for a primitive Americana look that feels authentic and time-worn.
Step-by-Step
Materials
- Vintage hand saw (cleaned)
- White chalk paint or matte acrylic
- Red chalk paint or matte acrylic
- Navy blue chalk paint or matte acrylic
- Painter’s tape (1-inch width)
- Star stencil (small scale)
- Stencil brush or cosmetic sponge
- Medium & fine grit sandpaper (120 & 220)
- Dark antique wax or brown glaze
- Clean lint-free rags
- Matte spray sealer (optional)
- Soap and water for cleaning
- Ruler
Step 1: Cleaning & Prep
-
Clean the surface:
Begin by cleaning the saw blade thoroughly with warm soapy water to remove years of workshop grime and oil. Dry it completely to prevent immediate rusting. -
Light sanding:
Scuff the metal blade gently with medium-grit sandpaper. You aren’t trying to remove all the patina, just providing some ‘tooth’ for the paint to grip onto the smooth metal. -
Handle protection:
If you want to keep the wooden handle its original color, carefully wrap the base where it meets the metal with painter’s tape to avoid accidental smudges.
Wax On, Wax Off
Work the dark antique wax securely into the ‘teeth’ edge of the saw. The dark buildup there adds massive contrast and highlights the tool’s original purpose.
Step 2: Planning & Base Coat
-
Mark the union:
Measure about one-third of the blade’s length starting from the narrow tip. Mark this line lightly; this lower section will become the blue field. -
Tape the stripes:
Starting from the wooden handle down to your marked line, apply strips of painter’s tape diagonal to the blade’s edge to create your stripes. -
Paint white stripes:
Apply white chalk paint to the exposed metal stripes. I like to pounce the brush slightly rather than dragging it to get better coverage on the slick metal. -
Remove tape:
Carefully peel back the tape while the paint is still slightly tacky to ensure crisp lines, then let the white sections dry completely. -
Tape for red stripes:
Once the white paint is fully dry, place tape over your white stripes to protect them. -
Paint red stripes:
Fill in the alternating exposed stripes with your red chalk paint. Two thin coats are usually better than one thick one here.
Step 3: The Blue Field
-
Tape the boundary:
Apply a piece of tape across the top of the blue section (over the bottom of your dry red/white stripes) to create a sharp line. -
Paint the background:
Paint the bottom triangular section of the saw with your navy blue paint. Allow this to dry thoroughly before proceeding. -
Position the stencil:
Place your star stencil over the dry blue paint. Secure it with a bit of tape so it doesn’t shift on the tapered surface. -
Stipple the stars:
Using a very dry stencil brush or sponge with just a tiny amount of white paint, lightly tap over the stencil openings to create the stars.
Customize the Handle
If the original wooden handle is too plain, sand it down and restain it with a dark walnut stain, or carve the year into the wood for a personalized touch.
Step 4: Distressing & Finishing
-
Initial distressing:
Once all paint is bone dry, take your fine-grit sandpaper and sand over the entire painted area. Focus on the edges and high spots where wear would naturally occur. -
Heavy distressing:
Sand more aggressively in random patches until you see the dull grey of the metal saw blade peeking through the stripes and stars. -
Clean dust:
Wipe away all the sanding dust with a slightly damp rag or a tack cloth. -
Apply antique wax:
Rub a small amount of dark antique wax over the entire painted surface with a lint-free cloth. This instantly ages the bright colors and settles into the sanded scratches. -
Buff the finish:
Let the wax sit for about 10 minutes, then buff it gently with a clean cloth to achieve a soft, primitive sheen. -
Seal (optional):
If you plan to hang this outdoors or in a humid garage, give it a light coat of clear matte spray sealer to protect the metal from further rust.
Now you have a piece of rugged Americana ready to hang in your entryway or workshop


Cardinal on Snowy Branches

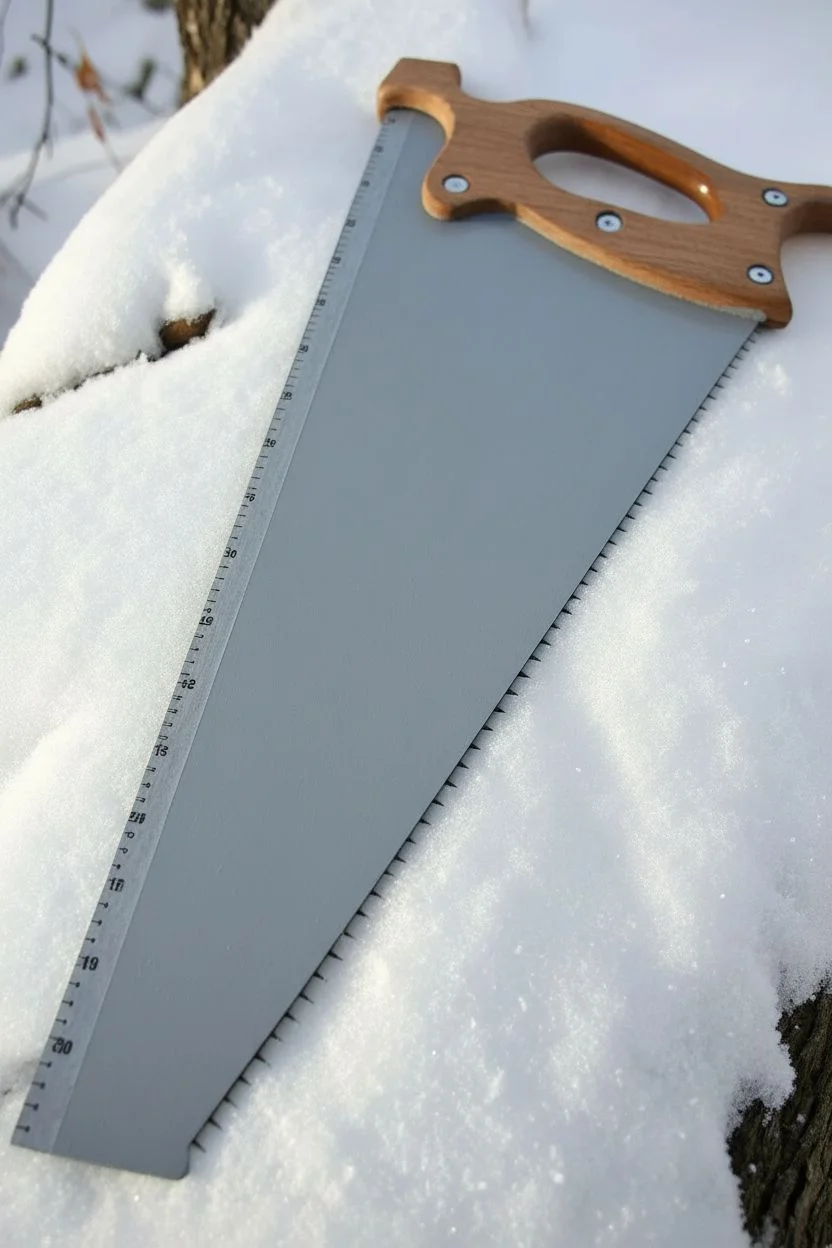
Transform an old, rusty tool into a stunning piece of winter decor with this detailed tutorial. You’ll learn how to capture the vibrant contrast of a red cardinal against a muted, snowy backdrop on a unique metal canvas.
Step-by-Step Guide
Materials
- Vintage hand saw (cleaned and rust-free)
- Metal primer (spray or brush-on)
- Acrylic paints: Titanium White, Mars Black, Burnt Umber, Cadmium Red, Alizarin Crimson, Payne’s Grey, Burnt Sienna
- Assorted brushes: flat shader (1/2″), round (#4, #6), liner brush (00 or 0)
- Ruler or painters tape (optional for the ruler edge effect)
- Clear acrylic sealer (matte or satin)
- Graphite paper and stylus (optional for tracing)
- Masking tape
- Natural sea sponge
Step 1: Preparation & Background
-
Preparing the Metal:
Clean your saw blade thoroughly with mild soap and water to remove any grease or oil. If there is significant rust, sand it lightly with fine-grit sandpaper. Once dry, wipe it down with rubbing alcohol. -
Priming the Surface:
Apply a coat of metal primer to the entire blade area you intend to paint. Let this cure completely according to the manufacturer’s instructions to ensure your artwork adheres well. -
Creating the Sky:
Mix Titanium White with a tiny touch of Payne’s Grey to create a soft, cold winter sky color. Using a wide flat brush, paint the background using horizontal strokes. Preserve the measuring markings on the top edge if you want that rustic ruler look; use masking tape to protect this strip if needed. -
Adding Texture:
While the background paint is still slightly wet, I like to use a clean, dry brush to feather the edges lightly, giving the sky a soft, atmospheric feel. Allow the background to dry completely.
Paint Slipping?
If paint slides off the metal surface, your primer layer might be too thin or slick. Lightly scuff the primer with fine sandpaper for better tooth.
Step 2: Painting the Structure
-
Sketching the Composition:
Use a white chalk pencil or very light graphite touches to sketch the main branch diagonals and the oval shape for the cardinal’s body. Ensure the main branch enters from the bottom left and reaches upward toward the right. -
Basecoating the Branches:
Mix Burnt Umber with a little Mars Black. Using a #6 round brush, paint the thick main branches. Keep your hand loose to create natural, organic curves rather than straight lines. -
Adding Branch Details:
Switch to a liner brush with thinned Burnt Umber to pull out thinner twigs and smaller branches reaching out from the main limbs. Let these taper off into fine points. -
Highlighting the Bark:
Mix a light grey-brown using White and Burnt Umber. With a liner brush or small round brush, add broken lines along the top edges of the branches to suggest light hitting the bark texture.
Step 3: The Cardinal
-
Base Cardinal Shape:
Fill in the bird’s body shape with a mix of Cadmium Red and a touch of Burnt Sienna to create a warm, dark red base. Don’t worry about detailing feathers yet. -
Building Red Tones:
Once the base is dry, apply pure Cadmium Red to the chest and upper back. Use Alizarin Crimson towards the tail and under the wing to create shadow and depth. -
Facial Features:
Use Mars Black and a fine liner brush to paint the cardinal’s distinctive face mask around the beak and eyes. Create a small black triangle for the beak. -
Wing and Tail Detail:
With the liner brush and thinned dark red or grey, paint fine lines to suggest individual wing feathers and the long tail feathers. Add a tiny white catchlight to the eye to bring it to life. -
The Crest:
Use the liner brush to flick upwards from the head with Cadmium Red to create the messy, spiked crest characteristic of cardinals.
Add Sparkle
Mix a tiny pinch of iridescent glitter or mica powder into your final white snow highlights. It catches the light just like real frost.
Step 4: Winter Details
-
Adding Snow to Branches:
Load a round brush or a small piece of sea sponge with Titanium White. Dab the paint along the tops of the branches to create fluffy, piled-up snow. Let it overhang slightly to look heavy. -
Snow Shadows:
While the white is wet, add a tiny amount of light blue-grey to the bottom of the snow piles to give them volume and dimension. -
Painting Dried Leaves:
Using Burnt Sienna and Cadmium Red, paint small, three-pointed maple leaf shapes dangling from the lower branches. -
Leaf Highlights:
Add tiny veins to the leaves with thinned Burnt Umber and top them with a small cap of snow using your white paint. -
Final Adjustments:
Check your composition. Add small feet gripping the branch using diluted black or grey. If the bird needs to stand out more, add a very faint wash of white around him to simulate a frosty glow. -
Sealing the Work:
Once the entire painting is completely dry (wait at least 24 hours), apply two coats of clear acrylic sealer to protect the metal from future rust and preserve your painting.
Hang your saw by the handle for a rustic, cozy addition to your winter home decor


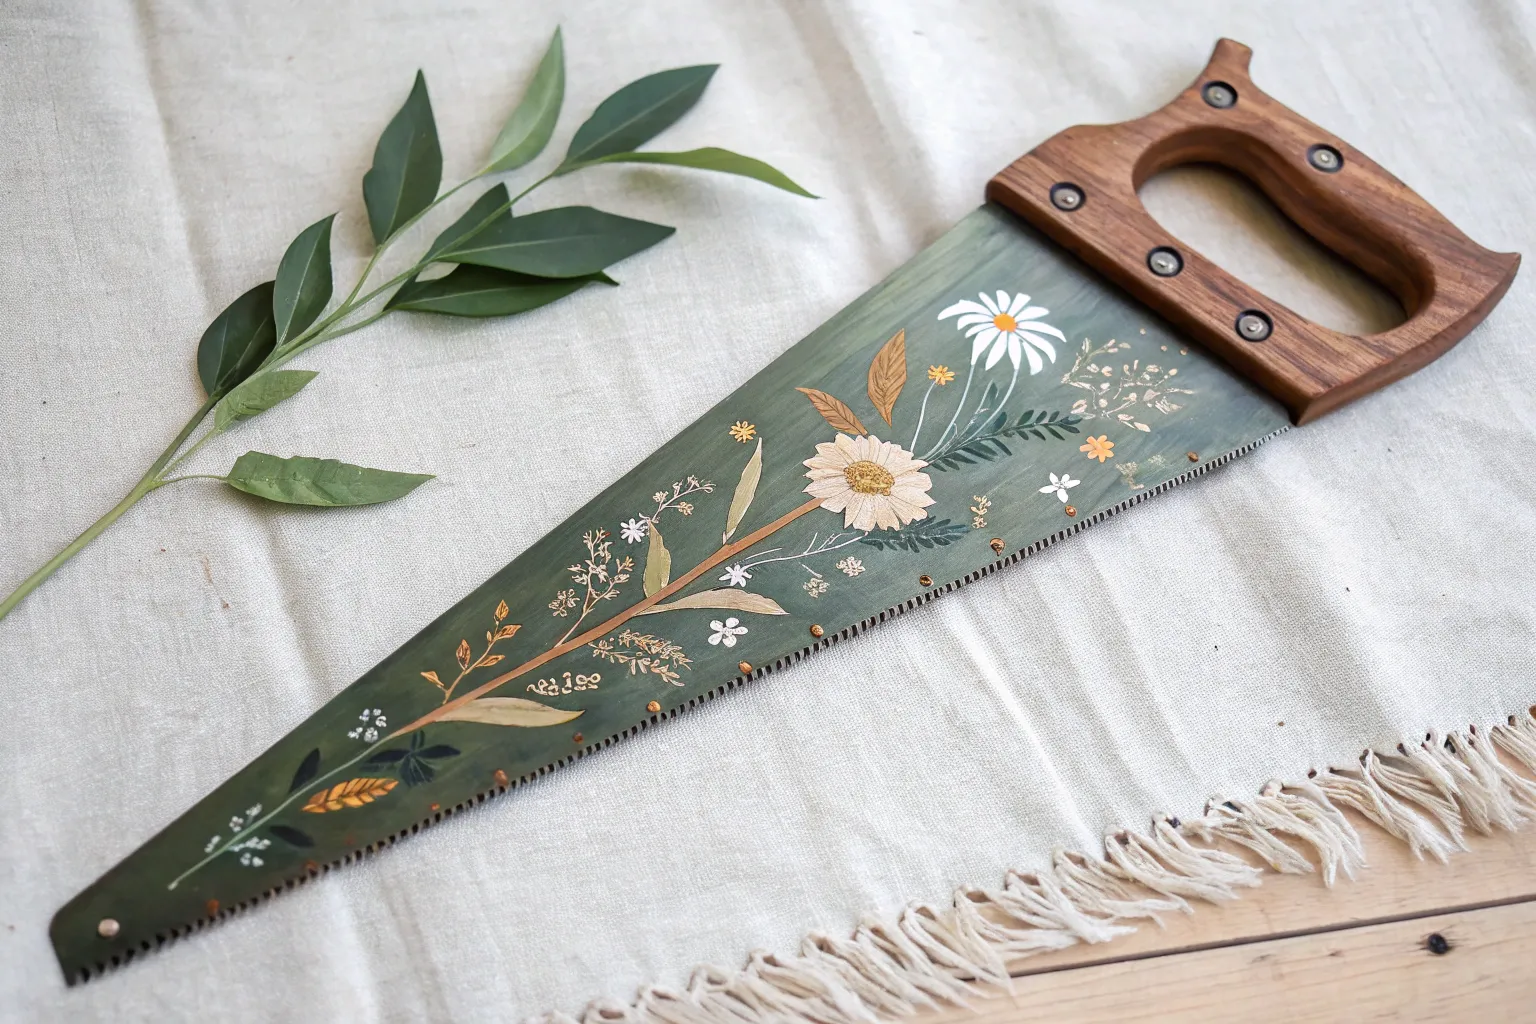
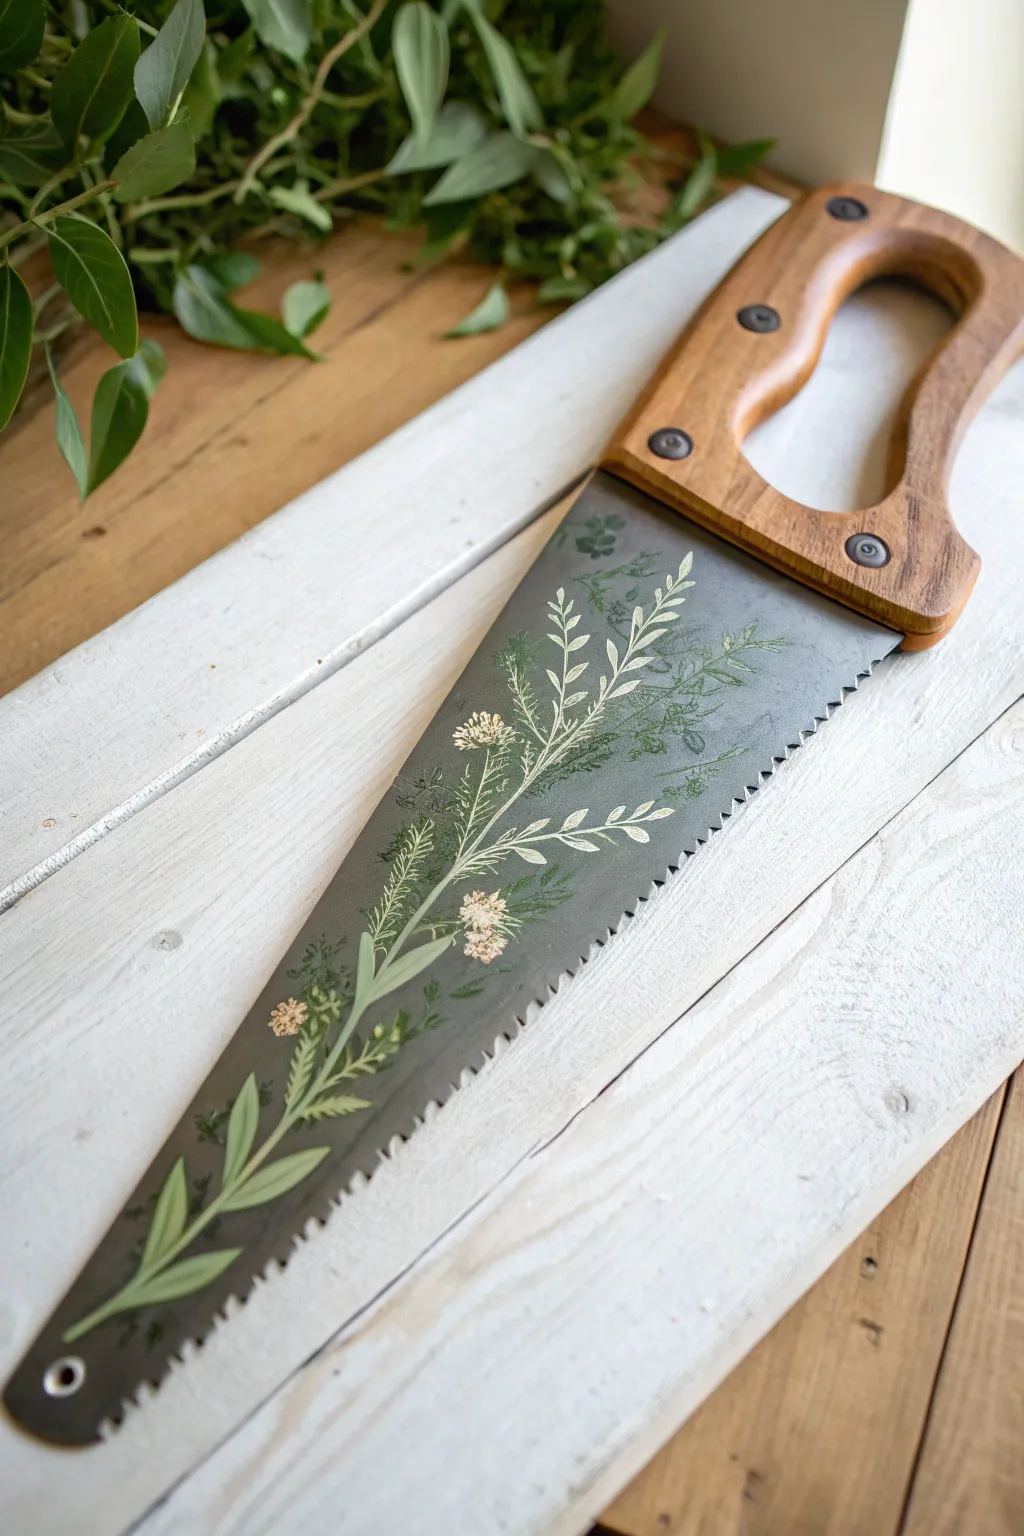
Wildflower Meadow Along the Tooth Edge

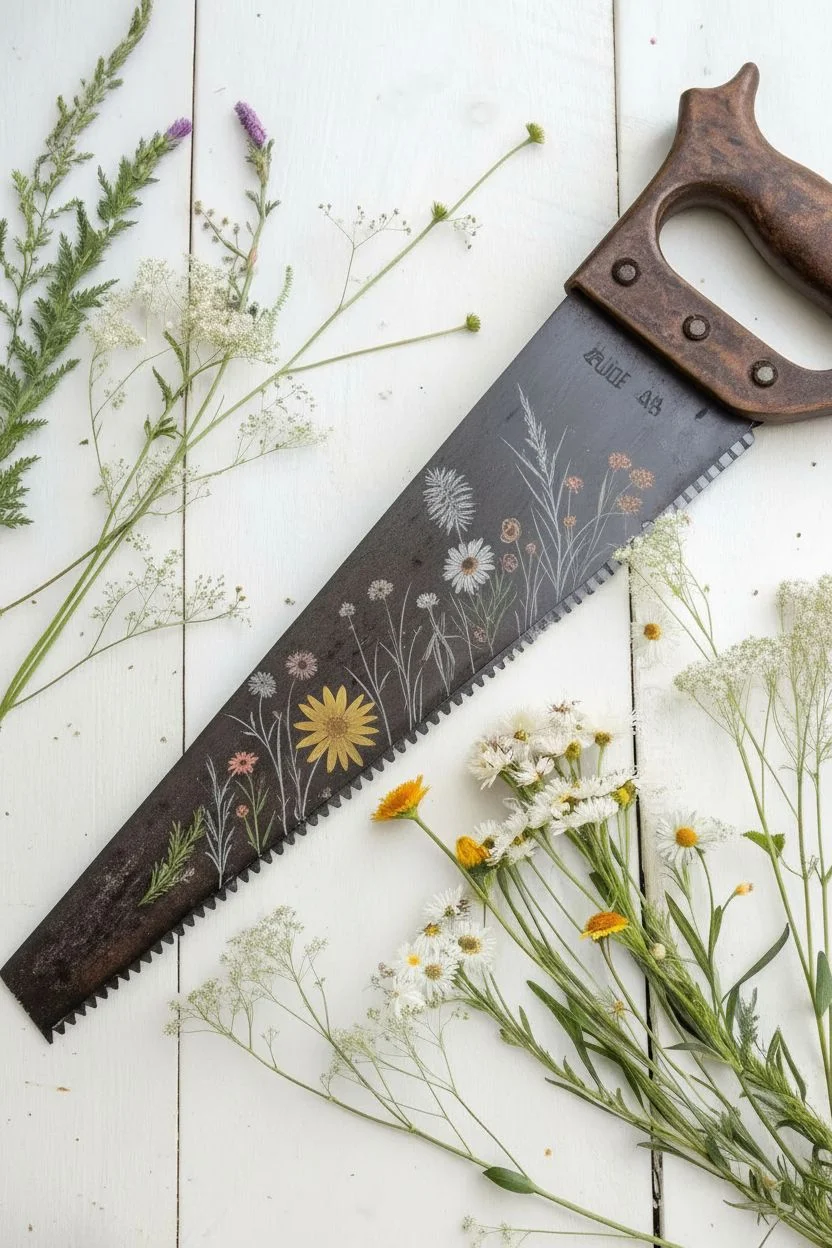
Transform a rusty garage find into a delicate piece of botanical art by painting a meadow of wildflowers along the toothed edge of a vintage hand saw. The dark, weathered metal provides the perfect high-contrast background for dainty daisies, stems, and leaves.
Detailed Instructions
Materials
- Vintage hand saw (cleaned but retaining patina)
- Acrylic craft paints (white, yellow, mustard, muted green, sage green, burnt orange, brown)
- Detail brushes (liner brush, size 0 and 00 round)
- Flat brush (small)
- Chalk or white charcoal pencil
- Matte clear sealer spray
- Palette or small plate
- Water cup and paper towels
Step 1: Preparation
-
Clean surface:
Gently clean the saw blade with warm soapy water and a stiff brush to remove loose dirt and grease. Avoid scrubbing too hard if you want to keep the existing rust and patina, which adds character to the background. -
Dry thoroughly:
Dry the metal completely with a lint-free cloth. Let it sit in a warm spot for an hour to ensure no moisture remains in the metal pores. -
Sketch the layout:
Using a chalk or white charcoal pencil, lightly sketch the location of your tallest flower stems. Focus the design along the bottom toothed edge, letting the ‘meadow’ grow upward towards the handle.
Paint won’t stick?
If the metal is too slick or oily, the paint may bead up. Wipe the specific painting area with a cotton ball soaked in rubbing alcohol to degrease the surface before trying again.
Step 2: Painting the Greenery
-
Stem base layer:
Mix a muted green with a tiny drop of brown. Using a liner brush, paint thin, wispy lines following your sketched guides. Vary the lengths, making some tall reaching toward the handle and others short near the teeth. -
Add leafy details:
Switch to a size 0 round brush. Along the lower stems, add small, fern-like fronds and simple lance-shaped leaves. Keep the paint application slightly translucent in areas to mimic delicate vegetation. -
Create depth:
Mix a lighter sage green. Paint fresh stems overlapping the darker ones you just created. This layering builds the illusion of a dense, wild meadow.
Step 3: Adding the Blooms
-
Daisy petals:
For the prominent white daisy, use a small round brush. Press the brush down and lift sharply toward the center to create teardrop-shaped petals. I find rotating the saw slightly rather than my hand helps keep the petals even. -
Golden centers:
Dip the back end of your brush handle into mustard yellow paint found on your palette. Dot this into the center of your daisy for a perfect circle. -
Yellow wildflowers:
Using the same yellow, paint a larger flower near the teeth using long, thin strokes radiating from a center point. Think of a compass rose shape. -
Tiny filler flowers:
Mix white with a touch of yellow. Use the tip of your smallest brush or a toothpick to dab clusters of tiny dots at the tips of the tallest thin stems. These represent Queen Anne’s Lace or baby’s breath. -
Orange accents:
Paint small, circular blooms with burnt orange paint. Keep these smaller than the daisy to maintain visual balance. -
Seed heads:
Mix brown with a little orange. Create fluffy seed heads by using a dry brush technique—wipe most paint off the brush and dab lightly in an oval shape at the top of a few stems.
Use real references
For the most realistic meadow look, tape actual pressed flowers or reference photos next to your workspace. Copying the irregular angles of real stems makes the final piece feel organic.
Step 4: Finishing Touches
-
Highlights:
Add tiny slivers of pure white to the tips of the green leaves and one side of the flower centers to suggest sunlight hitting the meadow. -
Clean up:
Once the paint is fully dry to the touch, gently wipe away any visible chalk layout lines with a damp cotton swab. -
Seal the art:
Take the saw to a well-ventilated area. Spray the painted section with a matte clear sealer. Two light coats are better than one heavy coat to prevent drips.
Hang your new rustic masterpiece securely on a wall or prop it on a mantel to bring a touch of the garden indoors
BRUSH GUIDE
The Right Brush for Every Stroke
From clean lines to bold texture — master brush choice, stroke control, and essential techniques.
Explore the Full Guide
Coastal Waves and Shore Birds
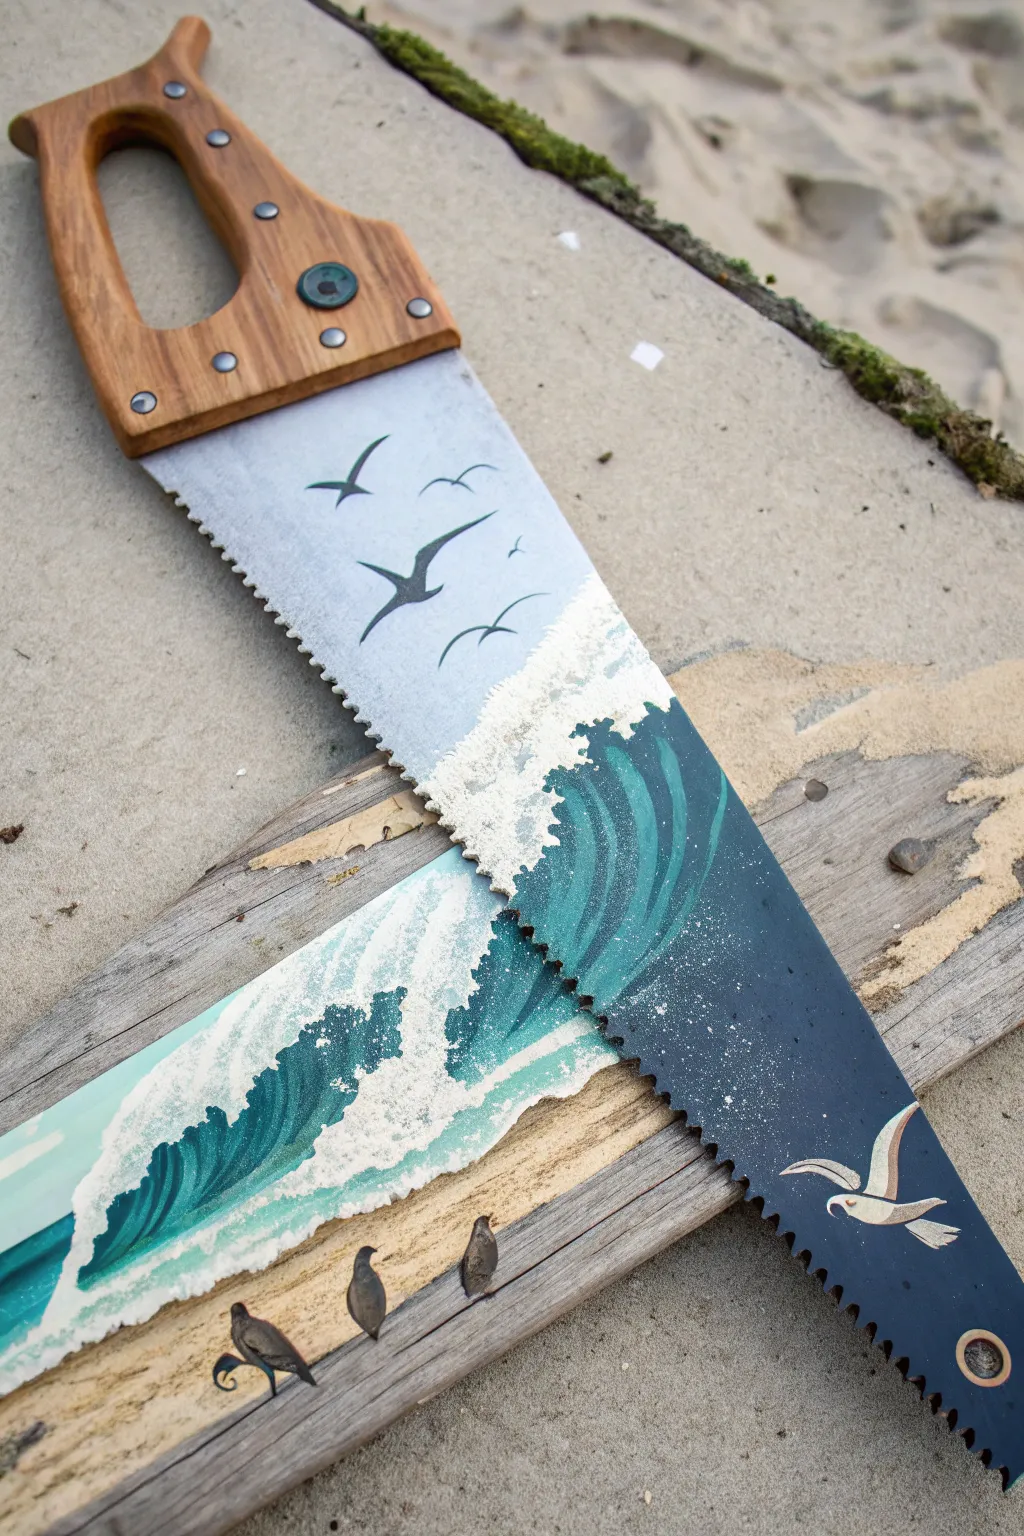
Transform a vintage tool into a stunning piece of coastal decor with this dynamic seascape painting. By utilizing the unique shape of a hand saw, you’ll capture the energy of crashing waves and soaring gulls in a truly memorable artwork.
How-To Guide
Materials
- Vintage hand saw (cleaned and sanded)
- Metal primer (spray or brush-on)
- Acrylic paints (Titanium White, Phthalo Blue, Phthalo Green, Payne’s Grey, Black, Cream/Buff)
- Flat shader brushes (various sizes)
- Small round detail brushes (size 0 and 1)
- Old toothbrush (for splatter effect)
- Sea sponge or scrunched paper towel
- Painter’s tape
- Clear acrylic sealant (matte or satin finish)
- Sandpaper (220 grit)
- Small driftwood piece (optional, for mounting)
- Three small stones (optional, for 3D birds)
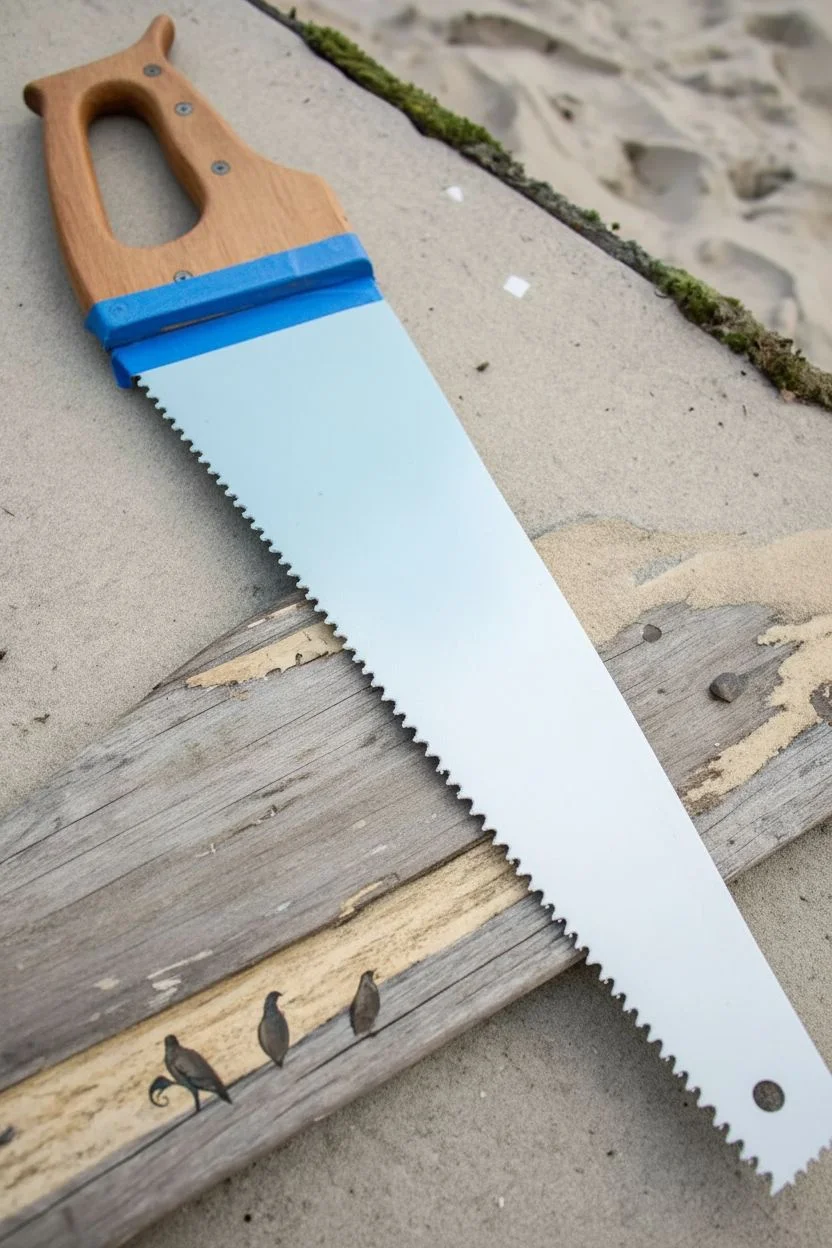
Step 1: Preparation and Base Coat
-
Clean the surface:
Before painting, ensure the saw blade is free of rust and grease. Scrub it with a wire brush if necessary, then wipe it down with isopropyl alcohol to remove any oily residue. -
Tape the handle:
Protect the wooden handle by carefully wrapping the edge where it meets the metal with painter’s tape. This ensures crisp lines and keeps the wood finish pristine. -
Apply primer:
Apply a coat of metal primer to the entire blade. This is crucial for adhesion. Allow it to dry completely according to the manufacturer’s instructions. -
Create the gradient sky:
Mix Titanium White with a tiny dot of Phthalo Blue. Start painting from the handle downwards, gradually adding more white as you move toward the middle of the saw to create a soft, faded sky effect.
Paint Slipping?
If your acrylics are sliding off the metal, the surface likely wasn’t roughed up enough. Lightly sand the slippery area with 220-grit paper and re-prime before trying to paint again.
Step 2: Painting the Ocean Swell
-
Block in the dark water:
Mix Phthalo Blue, Phthalo Green, and a touch of Payne’s Grey to create a deep teal. Paint the lower half of the saw blade, curving the top edge upward to simulate the shape of a rising wave. -
Add wave translucency:
While the dark teal is still slightly tacky, mix a lighter version of the teal using more white. Paint vertical , curved strokes inside the crest of the wave to show light shining through the water. -
Detail the wave structure:
Using a smaller flat brush, add deeper shadows underneath the curl of the wave with your darkest blue-black mix to create volume and depth. -
create the sea foam:
Dip a sea sponge or scrunched paper towel into Titanium White. Dab it along the top edge of the wave where it meets the sky to create a textured, frothy foam line. -
Paint the crashing spray:
Using a small round brush, stipple white paint loosely below the main foam line, dragging some strokes downward to mimic falling water. -
Add mist with splatter:
Dilute a little white paint with water. Load an old toothbrush, hold it over the wave section, and flick the bristles with your thumb to spray fine ‘sea mist’ dots over the dark water.
Level Up: 3D Elements
Mount the finished saw on weathered barn wood. Glue real sea glass or tiny shells along the bottom edge of the mounting board to enhance the beachcomber aesthetic.
Step 3: Adding Life and Details
-
Paint the distant birds:
Using a size 0 detail brush and black paint thinned slightly with water, paint simple ‘V’ shapes in the upper sky area. Vary the sizes to suggest different distances. -
Refine the bird silhouettes:
Thicken the bodies of the larger birds slightly, giving their wings a graceful curve rather than a sharp angle. -
Paint the foreground gull:
Near the tip of the saw (bottom right), sketch a larger gull swooping down. Use a mix of cream and grey for the body, highlighting the wing edges with white. -
Paint the secondary wave (optional):
If you are mounting this on a wide board as shown in the inspiration photo, replicate the wave steps on a smaller scale on a secondary piece of wood or directly on the mounting board below the saw. -
Create the 3D birds (optional):
Find three small, smooth stones that resemble bird bodies. Paint them greyish-brown. Glue them to a piece of driftwood and paint tiny black beaks and legs directly onto the wood.
Step 4: Finishing Touches
-
Dry thoroughly:
Allow the entire painting to cure for at least 24 hours. Acrylics on metal can take a bit longer to fully set than on canvas. -
Seal the artwork:
Apply two coats of clear acrylic sealant. I prefer a matte finish here to avoid glare that might compete with the metallic nature of the saw. -
Remove tape:
Gently peel away the painter’s tape from the wooden handle. If you see any rough edges, you can touch them up with a tiny bit of paint or scrape them clean with a fingernail.
Hang your reclaimed masterpiece in a well-lit spot to let those ocean blues truly shine
Night Sky Using the Metal as Stardust
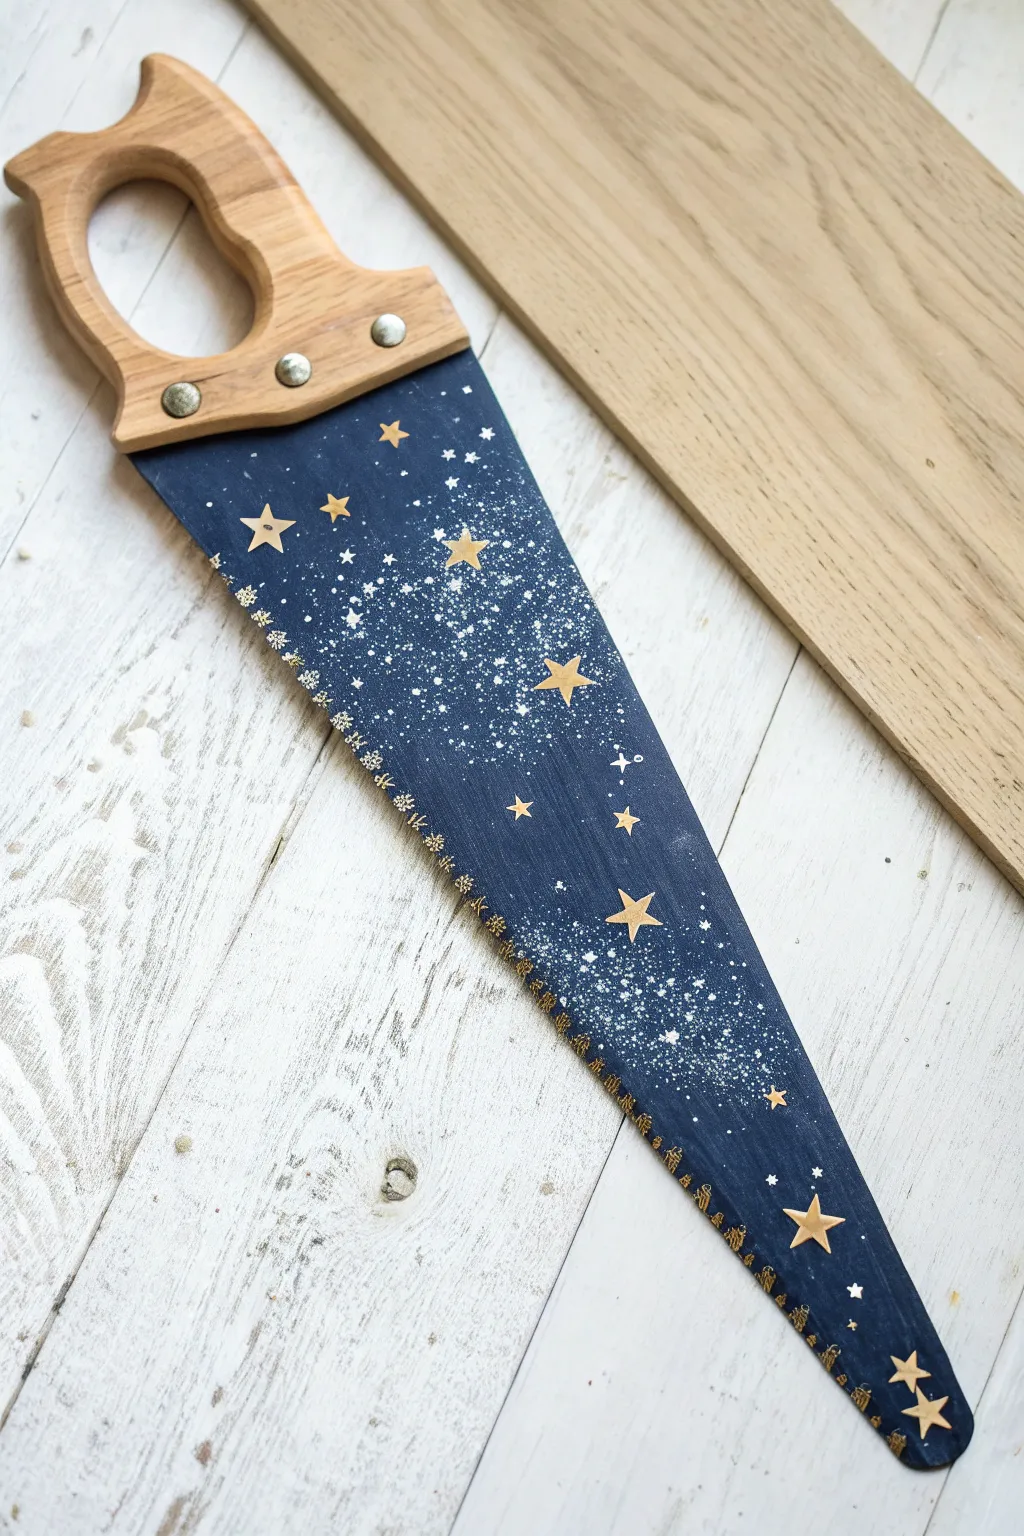
Transform an old, rusty tool into a dreamy piece of wall art with this night sky hand saw project. By using the natural serrated edge as a design feature and layering deep blues with shimmering gold, you’ll create a magical galaxy scene.
Step-by-Step Guide
Materials
- Vintage hand saw
- Sandpaper (medium and fine grit)
- Painter’s tape
- Deep navy blue acrylic paint
- Metallic gold acrylic paint
- White acrylic paint
- Medium flat brush
- Small round detail brush
- Old toothbrush
- Clear matte sealer spray
- Clean rag
- Mild soap and water
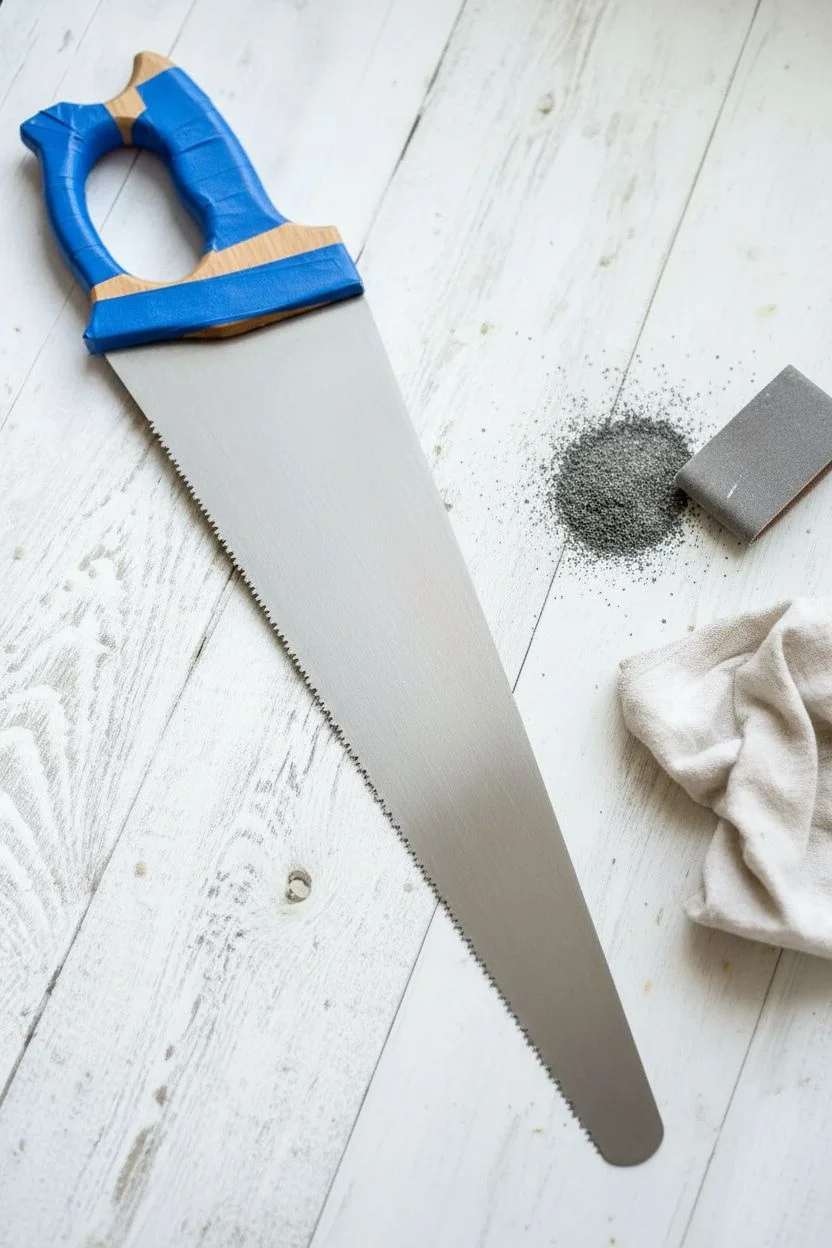
Step 1: Preparation
-
Clean the surface:
Begin by removing any loose rust, dirt, or grease from the saw blade using warm soapy water and a stiff brush. -
Sand the blade:
Once dry, lightly sand the both sides of the metal blade to create a ‘tooth’ for the paint to grip. Clean off the dust with a rag. -
Tape the handle:
Carefully apply painter’s tape to the wooden handle right where it meets the metal. This ensures a crisp, clean line and protects the wood from stray paint strokes.
Step 2: Creating the Galaxy Base
-
Base coat application:
Using a medium flat brush, apply a layer of deep navy blue acrylic paint to the entire flat surface of the saw blade. -
Smooth coverage:
Allow the first coat to dry completely, then add a second coat to ensure the metal doesn’t show through. Smooth brushstrokes work best here. -
Creating stardust:
Dip an old toothbrush into white acrylic paint that has been slightly thinned with water. Run your thumb across the bristles to flick tiny speckles onto the blue background. -
Concentrate the stars:
Focus the splatters in a diagonal band across the center to mimic the Milky Way, leaving the edges a bit sparser for depth.
Toothbrush Splatter Technique
Test your splatter on a scrap piece of paper first. If the drops are too big, your paint is too thick; add a drop of water.
Step 3: Gilded Details
-
Painting the teeth:
Using a smaller brush, carefully paint the serrated teeth of the saw with metallic gold paint. I find it easiest to dab the paint on rather than brush it to get into the crevices. -
Adding major stars:
With a small round detail brush and gold paint, hand-paint five-pointed stars of varying sizes scattered across the galaxy field. -
Detailed star placement:
Place larger stars near the bottom and middle, and tiny micro-stars near the top to create a sense of perspective. -
The finishing touch:
Add a few tiny white dots with the tip of a paintbrush handle or a toothpick to represent distant, bright planets among the gold stars.
Make it Shine
Glue small rhinestones into the center of the largest gold stars for a 3D effect that catches the light beautifully.
Step 4: Final Steps
-
Remove the tape:
When the paint is fully dry to the touch, slowly peel back the painter’s tape from the handle to reveal your clean edge. -
Protect your work:
Take the saw outside or to a well-ventilated area and spray the entire painted surface with a clear matte sealer to prevent chipping and rust.
Hang your cosmic creation horizontally or prop it on a mantle to bring a piece of the night sky indoors

PENCIL GUIDE
Understanding Pencil Grades from H to B
From first sketch to finished drawing — learn pencil grades, line control, and shading techniques.
Explore the Full Guide
Climbing Vines Wrapping the Saw Shape

Transform an ordinary hand saw into a piece of rustic botanical decor with this delicate painting project. Dark grey matte paint provides the perfect moody background for wispy, climbing vines and tiny white blossoms that seem to grow right up the blade.
How-To Guide
Materials
- Vintage or new hand saw (wooden handle preferred)
- Sandpaper (120 and 220 grit)
- Painter’s tape
- Metal primer (spray or brush-on)
- Dark charcoal grey or slate matte acrylic paint
- Assorted greens acrylic paint (olive, sage, forest green)
- White and cream acrylic paint
- Detail brushes (liner brush, round size 0 and 2)
- Flat brush (1 inch)
- Clear matte sealer spray
- Sponge or rag (for cleaning)
Step 1: Preparation
-
Clean the blade:
Before anything else, wipe down the saw blade thoroughly with a damp sponge and a little dish soap to remove oils, dirt, or grease. -
Sand the metal:
Scuff the surface of the metal blade with 120-grit sandpaper if it’s rusty or very smooth. This creates ‘tooth’ for the paint to grip. -
Protect the handle:
Carefully wrap the wooden handle where it meets the metal with painter’s tape. You want a crisp line so no paint gets on the finished wood. -
Prime the surface:
Apply a coat of metal primer to the entire blade. Let this dry completely according to the manufacturer’s instructions to prevent future rust.
Paint Sliding Off?
If acrylic paint beads up or slides off the metal, the surface is too smooth. Sand it again lightly with fine grit paper and re-apply the primer.
Step 2: Creating the Background
-
Apply base color:
Using your 1-inch flat brush, paint the entire blade with the dark charcoal grey paint. Aim for full, opaque coverage. -
Second coat:
Once the first layer is dry to the touch, apply a second coat of grey. This ensures a rich, smooth canvas for your vines. -
Dry thoroughly:
Allow the base coat to cure for at least an hour. The background needs to be completely non-tacky before you start the delicate line work.
Pro Tip: Loading the Brush
For the thinnest vine tendrils, thin your paint with a tiny drop of water until it has an ink-like consistency, allowing it to flow off the liner brush smoothly.
Step 3: Painting the Vines
-
Plan the composition:
Visualize a central vine starting from the pointed tip of the saw and meandering up towards the center. You can lightly sketch this with a white chalk pencil if you need a guide. -
Paint the main stem:
Mix a medium sage green with a touch of white. With a liner brush, paint a thin, wavy line extending from the bottom tip upwards. -
Add secondary branches:
From the main stem, paint smaller branches extending outwards to the left and right. Keep these lines very fine and slightly curved. -
Layer darker leaves:
Using a forest green shade and a size 2 round brush, press and lift to create small, elongated leaf shapes near the base of the vine. These should be your largest leaves. -
Add mid-tone foliage:
Switch to an olive green. Paint fern-like fronds and smaller leaves further up the vine. I like to overlap these slightly with the stem for a natural look. -
Create wispy details:
With your lightest green or a pale mint, use the very tip of your liner brush to add tiny, hair-like shoots and very small leaves at the top of the design.
Step 4: Adding Blooms and Finishing
-
Dab the flowers:
Load a small round brush with cream or off-white paint. Gently dab clusters of dots to form small wildflower heads attached to the ends of the branches. -
Add highlights:
Once the green leaves are dry, add a tiny streak of lighter green or white to the center of a few main leaves to give them dimension. -
Clean up:
Check the teeth of the saw. If paint globs have collected there, gently wipe them away or use a toothpick to define the sharp edges again. -
Remove tape:
Carefully peel away the painter’s tape from the handle while the paint is still slightly flexible to avoid chipping. -
Seal the artwork:
Finish by spraying the entire blade with a clear matte sealer. This protects the acrylic from scratching against the metal surface.
Hang your botanical saw art in a garden shed or entryway for a unique touch of rustic charm
Mushrooms and Forest Floor Close-Up
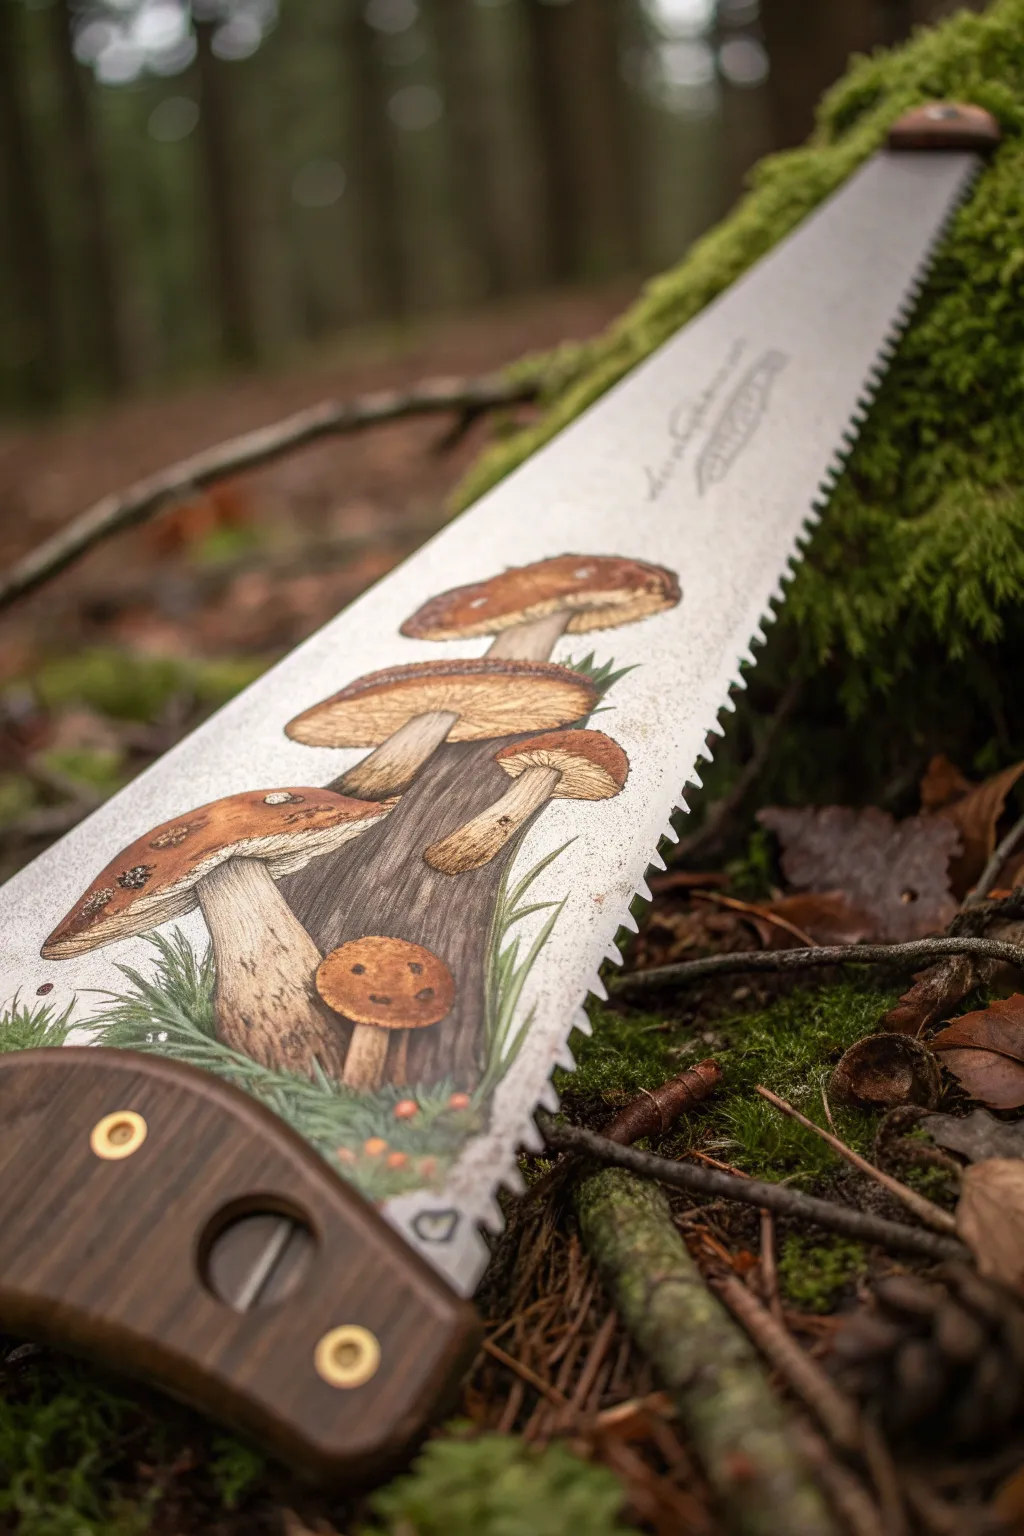

Transform a rustic hand saw into a piece of woodland decor featuring a detailed close-up of mushrooms growing from a stump. This project uses acrylics to capture the earthy textures of bark, moss, and fungal caps directly on the metal blade.
Step-by-Step
Materials
- Clean hand saw (with wooden handle)
- Metal primer (spray usually works best)
- Acrylic paints (Titanium White, Burnt Umber, Raw Sienna, Yellow Ochre, Sap Green, Hookers Green, Burnt Sienna)
- Small flat shader brushes (size 4 and 6)
- Fine liner brush (size 0 or 00)
- Sandpaper (fine grit)
- Rubbing alcohol
- Clear acrylic sealer (matte or satin)
- Palette and water container
Step 1: Preparation
-
Clean the Surface:
Begin by thoroughly cleaning the metal blade of the saw. Use a rag with rubbing alcohol to remove any grease, oil, or factory residue, as these will prevent paint adhesion. -
Establish Texture (Optional):
If the blade is extremely smooth or glossy, lightly scuff the painting area with fine-grit sandpaper to give the primer something to grab onto, then wipe away the dust. -
Prime the Metal:
Apply a coat of metal primer to the area where you intend to paint. A white or light grey spray primer provides a neutral base that helps the mushroom colors pop.
Paint Slipping?
If acrylics bead up on the metal, the surface is likely too slick or oily. Let it dry, lightly sand that spot, and apply a fresh dab of primer before trying again.
Step 2: Drafting and Blocking
-
Sketch the Composition:
Using a light pencil or watered-down Burnt Sienna on a liner brush, sketch the outline of a central tree stump and a cluster of four to five mushrooms of varying sizes growing from it. -
Paint the Vertical Stump:
Block in the tree stump shape with a dark mix of Burnt Umber and a touch of black. Paint vertical strokes to mimicking the direction of the wood grain. -
Base Coat the Mushrooms:
Fill in the mushroom caps with a solid coat of Burnt Sienna. For the stems, use a creamy mix of Titanium White and a tiny drop of Raw Sienna. Don’t worry about shading yet; just get the shapes solid.
Natural Texture
Use a sea sponge instead of a brush to dab various greens around the base. This creates a realistic, fluffy moss texture that contrasts nicely with the smooth mushrooms.
Step 3: Adding Detail and Texture
-
Texture the Bark:
Once the dark stump base is dry, mix a lighter grey-brown. Use a ‘dry brush’ technique—wiping most paint off your brush—to drag minimal paint vertically down the stump, highlighting the ridges of the bark. -
Shade the Stems:
Mix a wash of diluted Burnt Umber. Glaze the bottom sections of the mushroom stems and right underneath the caps to create cylindrical volume. -
Create Cap Volume:
Add dimension to the mushroom caps by painting the centers with a lighter Ochre mix and keeping the edges darker brown. Blend these transitions while the paint is still slightly wet. -
Detail the Gills:
Under the caps, paint thin, closely spaced lines using a liner brush and a pale yellow-brown mix to represent the pores or gills of the mushrooms. -
Add Speckles:
For that realistic forest look, use the tip of your smallest brush to dab tiny irregular dots of white or dark brown on the mushroom caps, giving them an organic, imperfect texture.
Step 4: Foreground and Finishing
-
Paint the Base Grass:
Mix Sap Green with a little black for a dark shadow color. Paint short, upward strokes at the base of the mushrooms and stump to establish the deep shadows of the grass. -
Layer Lighter Blades:
Mix Sap Green with bright yellow or white. Using your liner brush, flick quick, thin strokes upwards over the dark base to create individual blades of grass catching the light. -
Add Background Whisps:
Paint a few faint, translucent sprigs of grass behind the mushrooms using a very watered-down green to push them into the background. -
Highlight the Bark:
Go back to the stump with a nearly white mixture and add ultra-fine vertical highlights to the most prominent ridges of the wood. -
Protect Your Work:
Allow the painting to cure for at least 24 hours. Once fully dry, apply two thin coats of clear acrylic sealer to protect the paint from scratching and moisture.
Hang your rustic masterpiece on a wall or prop it on a shelf to bring a slice of the forest indoors


Hand-Lettered Quote on the Blade
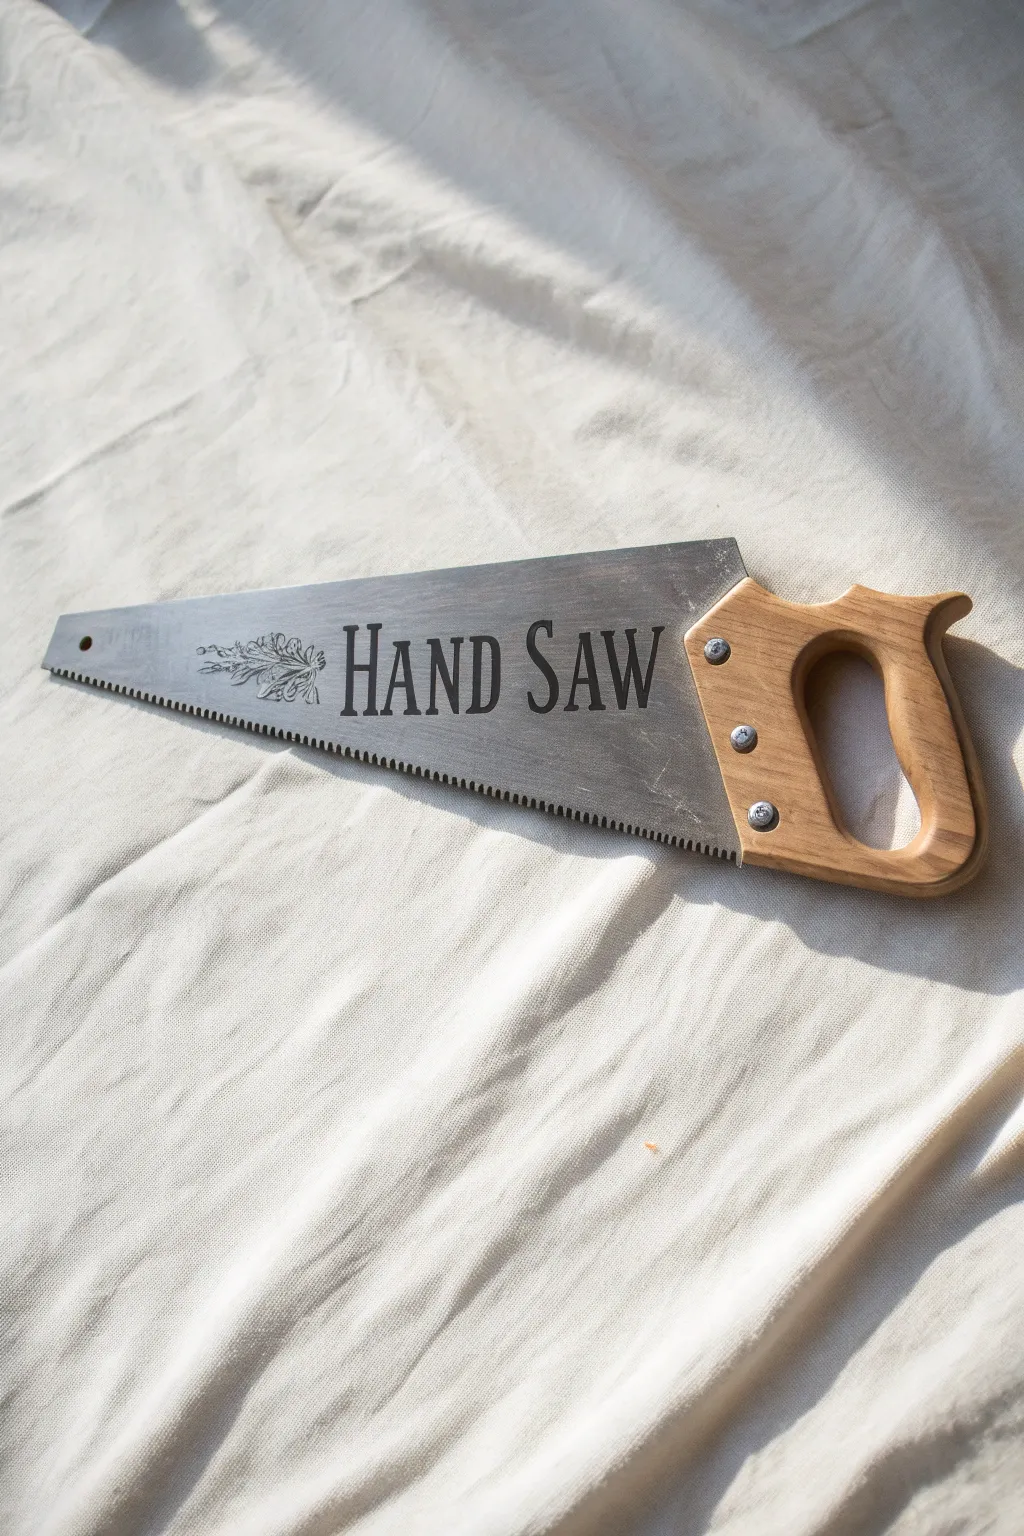
Transform an ordinary workshop tool into a piece of charming rustic decor with this simple lettering project. The sleek metal surface of the saw blade provides a perfect, slightly industrial canvas for bold typography and delicate botanical accents.
Step-by-Step Tutorial
Materials
- Vintage or new hand saw (wooden handle preferred)
- Sandpaper (medium and fine grit)
- Isopropyl alcohol or degreaser
- Carbon transfer paper
- Pencil
- Printed template of text and design
- Black enamel paint or multi-surface acrylic paint
- Fine liner brush (size 0 or 00)
- Painter’s tape
- Clear matte sealer spray (optional)
Step 1: Preparation
-
Clean surface:
Begin by thoroughly cleaning the metal blade of your saw. Use a degreaser or isopropyl alcohol on a lint-free cloth to remove any factory oils, rust dust, or grime that could prevent paint adhesion. -
Light sanding:
If your saw is old and rusty, use medium grit sandpaper to smooth it down. Even for new saws, give the metal face a very light scuffing with fine-grit sandpaper to give the paint something to grip onto. -
Final wipe:
Wipe the blade down one last time with alcohol to remove the sanding dust. The surface needs to be perfectly clean and dry before moving on. -
Protect handle:
Apply a strip of painter’s tape along the wooden handle where it meets the metal. This ensures you won’t accidentally get paint on the beautiful wood grain while working.
Paint Slipping?
If paint beads up on the metal, the surface is too oily. Wipe it clean again with vinegar or alcohol, and try lightly scuffing the exact area of the letters with sand paper.
Step 2: Design Transfer
-
Create template:
Design your text on a computer using a font like ‘Playfair Display’ or a similar serif typeface. Scale it so ‘HAND SAW’ fits comfortably in the center of the blade, leaving room for the floral element on the left. -
Position design:
Print your design and trim the paper. Tape the printed template onto the saw blade exactly where you want the final lettering to sit. -
Insert transfer paper:
Slide a sheet of carbon transfer paper (dark side down) between your printed template and the metal blade. -
Trace outlines:
Using a pencil, trace the outline of the letters and the floral sprig with firm pressure. I find a ballpoint pen works well here too, as it glides smoothly over the paper. -
Check transfer:
Lift a corner of the paper to ensure the carbon is transferring clearly to the metal. Proceed until the entire design is traced, then remove the papers.
Step 3: Painting
-
Outline letters:
Load a fine liner brush with black enamel or multi-surface acrylic paint. Carefully outline the serif letters first. These paints are durable on metal but can be slippery, so work slowly. -
Fill letters:
Once the outlines are established, fill in the body of the letters. Keep your paint layer thin to avoid globs or drips; you can always add a second coat for opacity later. -
Detail floral element:
Move on to the floral sprig. Use the very tip of your liner brush to create the delicate leaves. Unlike the letters, these don’t need to be fully filled in; line work often looks best here. -
Refine edges:
Look closely at the serifs and sharp corners of your letters. Use a clean, damp brush or a toothpick to gently scrape away any paint that went outside your intended lines while it’s still semi-wet. -
Dry and recoat:
Allow the first coat to dry completely according to the manufacturer’s instructions. If the black looks streaky against the metal, apply a second thin coat for a solid finish. -
Seal (optional):
If you plan to hang this in a damp area like a garage or porch, spray the entire blade with a clear matte sealer to prevent future rust and protect your artwork.
Pro Tip: Steady Hand
Rest your pinky finger on a dry part of the saw blade while painting. This anchors your hand, giving you significantly more control for those sharp serif lines.
Once dry, simply remove the tape and hang your new industrial-chic artwork for everyone to admire
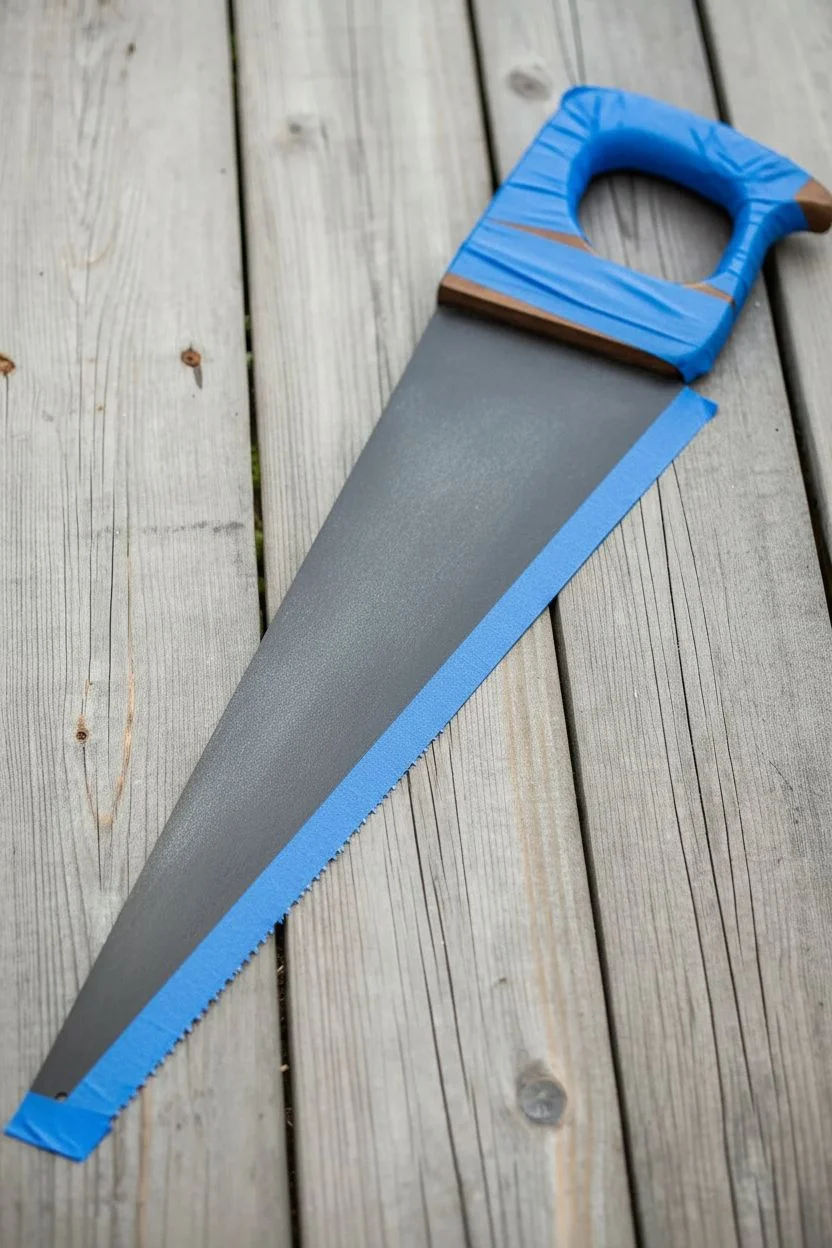
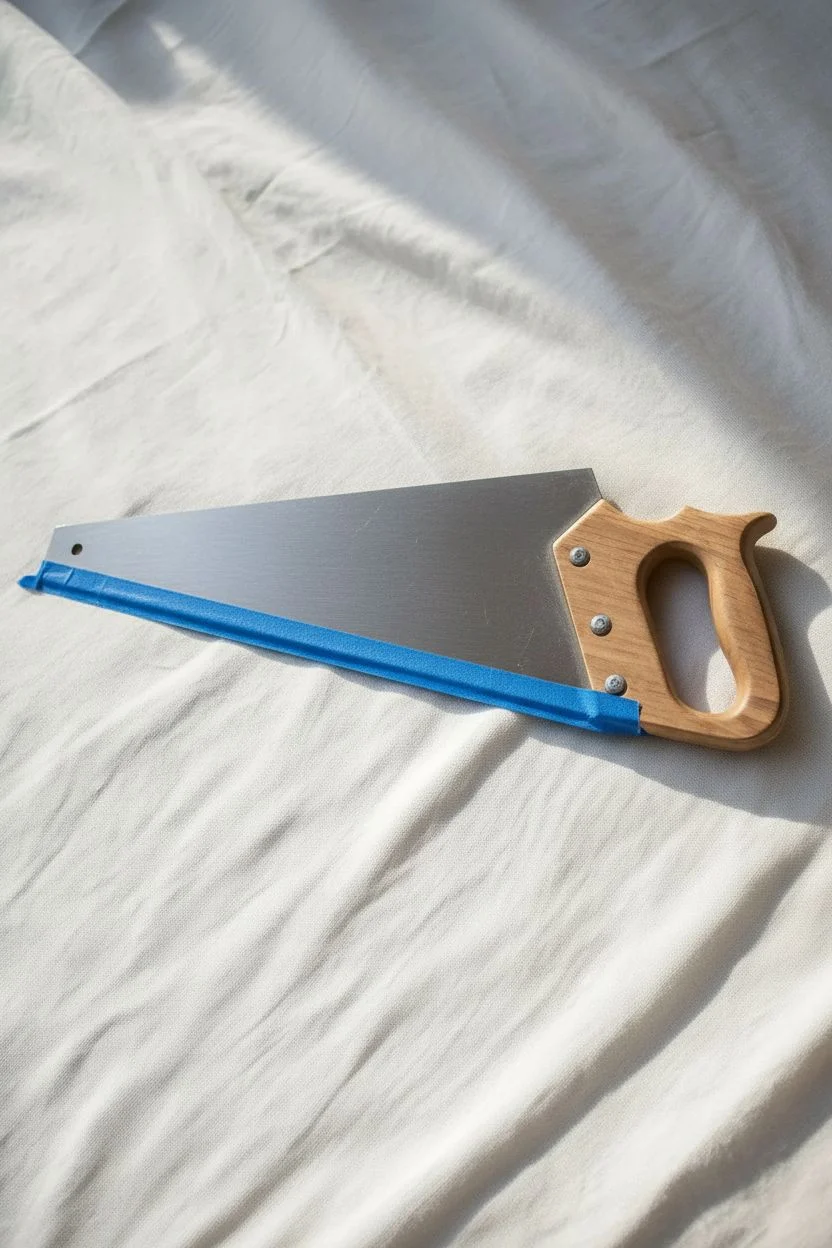
Blueprint-Style Line Art of Tools

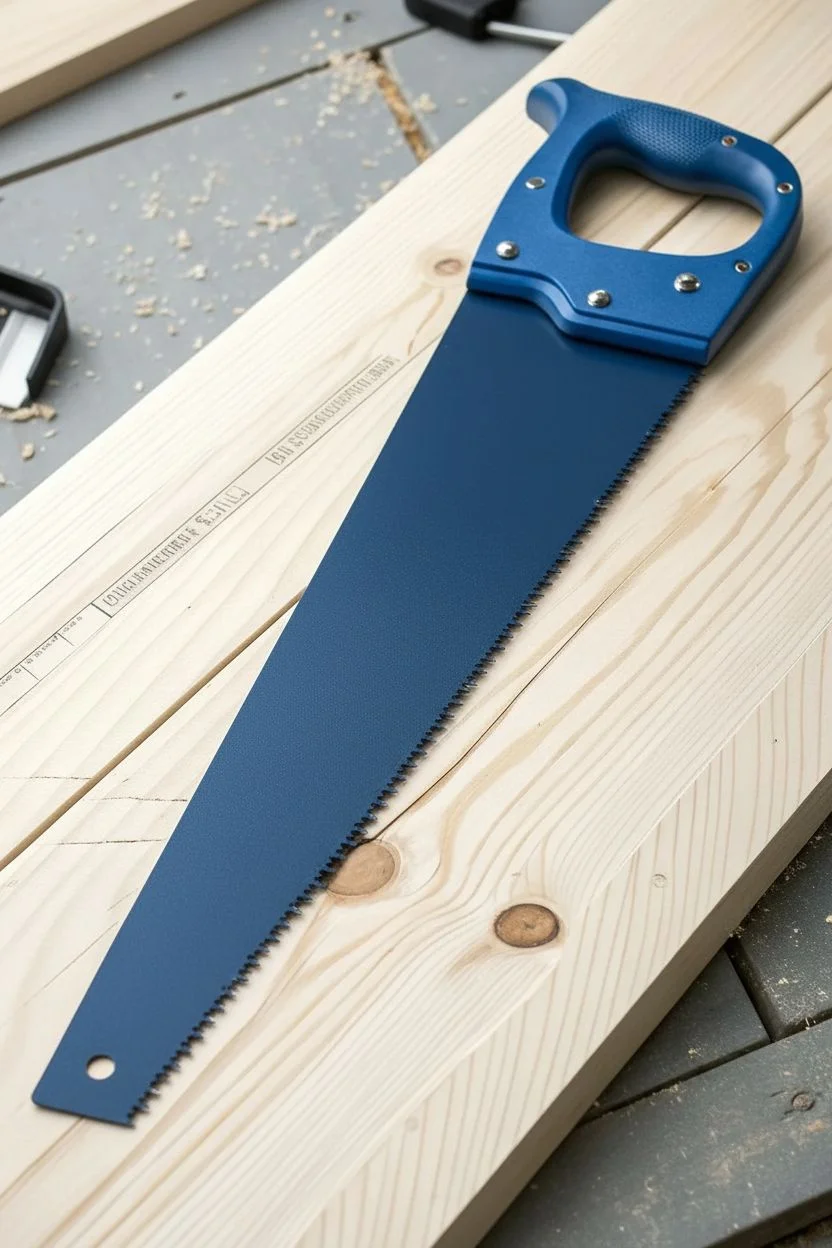
Transform an ordinary hand saw into a piece of industrial art with this blueprint-inspired design. By layering crisp white lines over a deep matte blue base, you’ll create a striking faux-technical drawing that celebrates the tool’s own geometry.
Step-by-Step Guide
Materials
- Standard hand saw (vintage or new)
- Sandpaper (120 and 220 grit)
- Painter’s tape
- Deep Navy Blue spray paint (matte finish)
- White acrylic paint pen (fine tip/0.7mm)
- White acrylic paint pen (medium tip/2mm)
- Ruler or straight edge
- Compass or circle template
- White transfer paper (optional)
- Clear matte acrylic sealer spray
Step 1: Preparation & Base Coat
-
Clean surface:
Begin by thoroughly cleaning the saw blade with soapy water or degreaser to remove any oil, sawdust, or rust. Dry it completely. -
Protect the handle:
If the handle is removable, unscrew it and set it aside. If it’s fixed, carefully wrap the entire handle in painter’s tape, ensuring the edge where the plastic meets the metal is sealed tight. -
Sand the blade:
Scuff the metal surface with 120-grit sandpaper to help the paint adhere, then smooth it out with 220-grit. Wipe away all dust with a tack cloth. -
Apply primer:
Spray a thin coat of metal primer onto the blade. Let it dry according to the can’s instructions, usually about 30 minutes. -
Spray the base color:
Apply the matte Deep Navy Blue spray paint in long, even strokes. I prefer doing three very light coats rather than one heavy one to avoid drips. Let this cure for at least 24 hours to ensure a hard surface for drawing.
Step 2: Designing the Blueprint
-
Plan the layout:
Sketch your blueprint design on a piece of paper first. Focus on technical elements: measurement lines, a central focal point (like a seal or logo), and geometric diagrams. -
Draw guide lines:
Using your ruler and a very light pencil touch, mark the center line running down the length of the saw blade. This anchor helps keep your text and diagrams symmetrical. -
Draft the text blocks:
Lightly pencil in boxes where your stylized text will go. In the image, there is a block near the handle and another smaller block near the tip. -
Sketch the central emblem:
Use a compass or circle template to pencil in the concentric circles for the central logo design about one-third of the way down from the handle.
Straight Line Secret
Flip your ruler upside down (bevel up) when using paint pens. This prevents the ink from bleeding under the ruler’s edge and smudging your crisp lines.
Step 3: Inking the Details
-
Line the long edges:
Start with the medium-tip white paint pen and your straight edge. Draw the bold parallel lines running down the length of the saw, leaving gaps where your central logo will sit. -
Ink the central logo:
Switch to the fine-tip pen. carefully trace your circular pencil lines. Add the inner details, such as the stylized figure or symbol inside the circle. -
Add technical notations:
Using the fine-tip pen, draw the dimension lines—these are the thin lines with arrows at the ends intersecting the main drawing. Add small numbers to represent measurements. -
Lettering the top section:
Fill in the text near the handle using a blocky, stencil-style font. If you aren’t confident freehanding, use white transfer paper to trace a printed font onto the surface first. -
Detail the schematic box:
Near the tip of the saw, draw the square schematic diagram. Use the ruler to create the internal angled lines and fill in the small, decorative text blocks representing technical specs. -
Add the bottom text:
Letter the final text block near the bottom edge. Keep the spacing consistent and the letters vertical. -
Final clean up:
Once the paint pen ink is fully dry (give it an hour), very gently erase any visible pencil marks with a clean, soft eraser. -
Seal the artwork:
Finish by spraying two light coats of clear matte acrylic sealer over the entire blade. This protects your fine white lines from scratching or fading over time.
Fixing Wobbly Lines
If a line goes crooked, don’t wipe it! Let the white paint dry completely, then touch it up with a small brush and a bit of the original navy spray paint.
Hang your new industrial masterpiece in the workshop or living room to show off your precision skills
Rust Patina With Transparent Color Washes
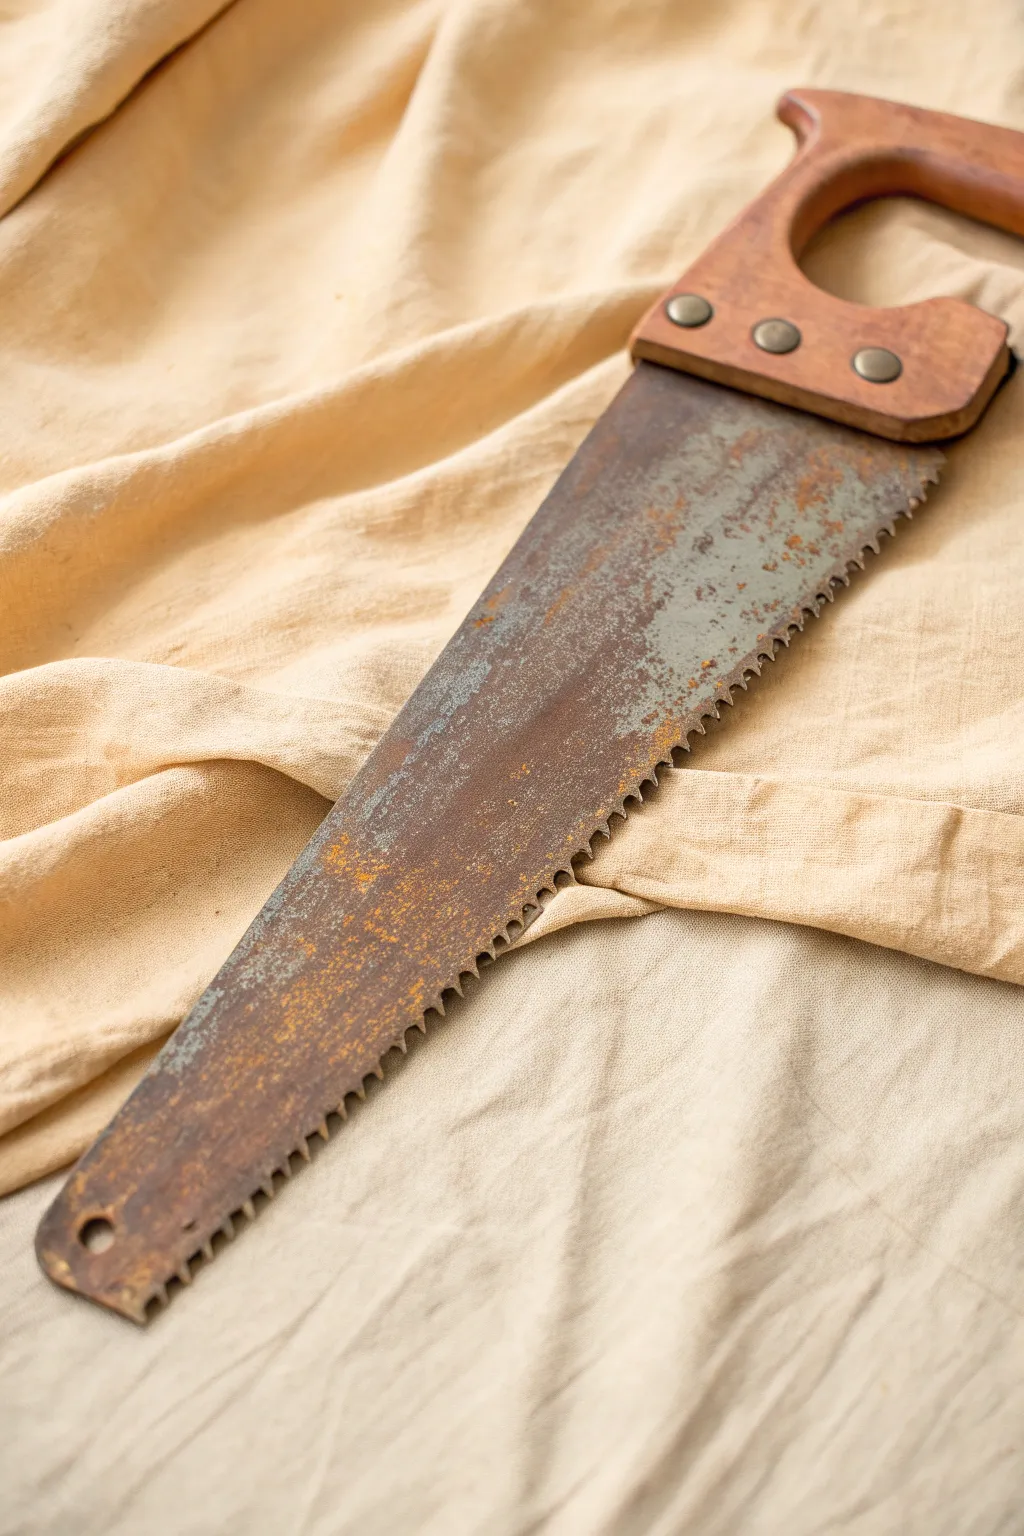
Transform a new or cleaned vintage saw into a beautifully aged artifact using layered paint techniques. This project captures the organic, weathered look of oxidized metal through clever stippling and color washes.
Step-by-Step Tutorial
Materials
- Old hand saw (clean surface)
- Acrylic paints: Burnt Sienna, Raw Umber, Yellow Oxide, black
- Sea sponge (natural)
- Stipple brush or old stiff-bristled brush
- Matte medium or glazing liquid
- Water spray bottle
- Paper towels
- Painter’s tape
- Clear matte sealer (spray)
Step 1: Preparation and Base Coat
-
Prep the Surface:
Clean the saw blade thoroughly with degreaser to remove any oils. If the handle is wood and you want to keep it pristine, wrap it carefully with painter’s tape to protect it from the faux rust process. -
Mix the Base Grey:
Create a dull metal base color by mixing black with a significant amount of white, adding a tiny dot of Raw Umber to warm it up slightly. You want a dark, stormy grey. -
Apply Base Layer:
Sponge this grey mixture all over the metal blade. Don’t aim for perfect opacity; leaving some of the original metal showing through adds depth. Let this layer dry completely.
Rust Looks Too Orange?
If your rust looks too bright or cartoonish, glaze over the bright spots with a very watery wash of Raw Umber or Burnt Umber to bring the tone back to a natural dark brown.
Step 2: Building the Rust Texture
-
First Rust Layer:
Mix Burnt Sienna with a little matte medium to make it translucent. Dip your sea sponge into this mix, offload most of the paint on a paper towel, and dab it randomly across the blade. -
Focus on Edges:
Concentrate your sponge dabbing heavily along the toothed edge and the spine of the saw, as these areas naturally accumulate the most rust on real tools. -
Adding Depth:
While the sienna is still tacky, mix a darker rust tone using Burnt Sienna and a touch of Raw Umber. Stipple this into the center of your larger rust patches to create a sense of corrosion depth. -
Yellow Oxidation:
For that fresh oxidation look, mix Yellow Oxide with plenty of water or glazing liquid. Using a small stiff brush, flick or lightly stipple this into distinct areas, particularly where the metal meets the handle. -
Blurring the Lines:
Mist the blade very lightly with your water spray bottle. This causes the wet acrylics to bleed slightly, creating natural-looking water stains and eliminating harsh sponge marks. -
Texture Stippling:
Load a dry stiff brush with thick Burnt Sienna paint (no water). Pounce the brush vertically onto the surface to create physical texture, simulating the pitted feel of old rust.
Step 3: Finishing Details
-
The Green Wash:
I like to add a hint of verdigris or mossy tone. Mix a tiny drop of green with grey and lots of water. Wash this very sheer glaze over the non-rusted grey areas to dull the ‘newness’ of the base coat. -
Enhancing the Handle:
Remove the tape from the handle. If it looks too new, dry brush a little Raw Umber lightly over the wood grain, focusing near the screws and grip areas to simulate years of oily hands holding it. -
Hardware Aging:
Don’t forget the brass screws. Dab a little of your brown-black mix onto the screw heads and wipe it back immediately, leaving grime in the crevices. -
Final Splatter:
Dilute Burnt Sienna until it is ink-like. dips an old toothbrush into it and run your thumb across the bristles to spray fine speckles across the entire blade for a cohesive finish. -
Seal the Work:
Once fully dry (give it a few hours), spray the entire piece with a clear matte sealer. This dulls any accidental shine from the paint and unifies the surface texture.
Add Actual Texture
Mix cinnamon or fine sand into your Burnt Sienna paint for the heavy rust areas. This creates gritty, raised patches that feel real to the touch.
Now you have a stunningly weathered piece that brings vintage charm to any wall
Faux Stained Glass Panels on a Hand Saw
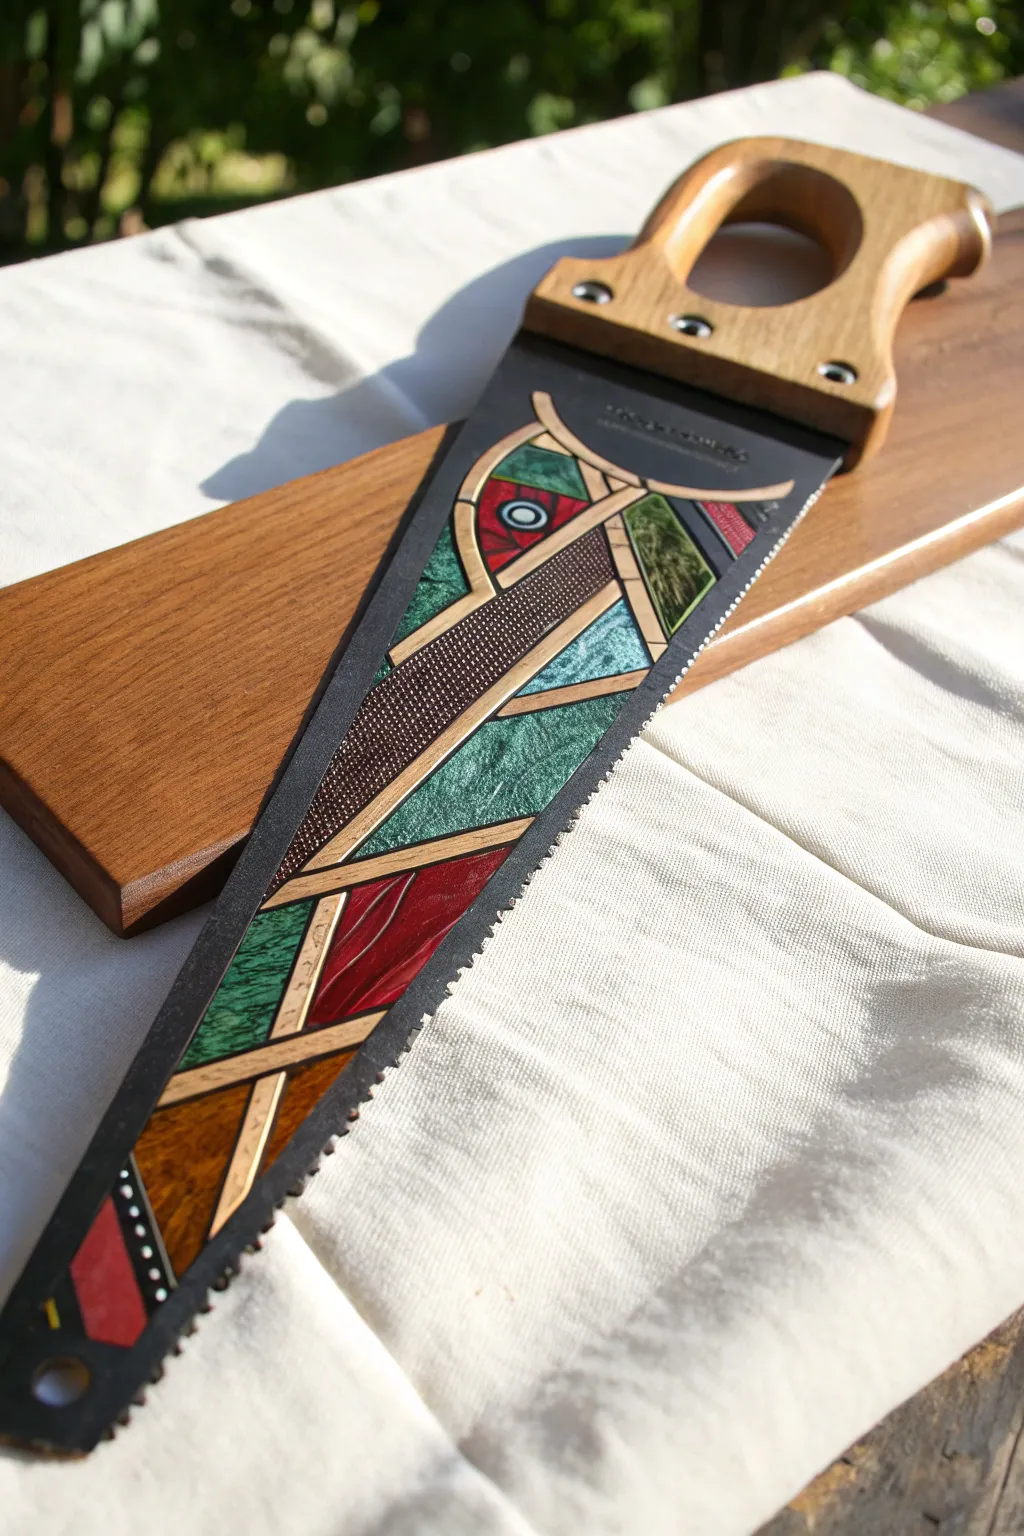
Transform an old carpenter’s saw into a striking piece of wall art that mimics the luminosity of stained glass without the fragility. This project uses metallic paints and bold black outlines to create a segmented, geometric design that looks beautiful catching the light.
How-To Guide
Materials
- Vintage hand saw
- Sandpaper (medium and fine grit)
- Black spray paint, matte finish
- Painter’s tape or masking tape (various widths)
- Metallic acrylic craft paints (teal, copper, red, gold, green)
- Textured acrylic mediums (optional, for the ‘hammered’ metal look)
- Sharp craft knife or razor blade
- Fine liner brush
- Small flat brush
- Clear acrylic sealer spray (gloss)
- Clean rags
- Mineral spirits (for cleaning blade)
Step 1: Preparation & Base Coat
-
Clean the blade:
Before painting, ensure the saw blade is free of rust and grime. Use sandpaper to scuff the surface slightly, then wipe it down thoroughly with mineral spirits to remove any oils. -
Protect the handle:
Carefully wrap the wooden handle in painter’s tape to protect it from stray paint marks. If the handle screws are removable, you might choose to take the handle off entirely for easier access. -
Priming the surface:
Spray the entire metal blade with a matte black spray paint. This serves as your ‘lead’ lines and provides a uniform background for the colors to pop against. Let it dry completely.
Bleeding Edges?
If paint seeps under your tape, don’t panic. Wait for it to dry completely, then use a black permanent marker or black paint pen to redraw the line. It’s much easier than using a brush!
Step 2: designing the grid
-
Plan your geometry:
Using thin strips of painter’s tape (or cutting wider tape into slivers), lay out your geometric design directly on the black blade. The tape lines will remain black, creating the faux lead came look. -
Create curves and angles:
Don’t stick to just straight lines. As seen in the example, gently curve the tape to create organic shapes like the teardrop section near the handle. Press all edges down firmly to prevent bleed. -
Seal the tape edges:
I like to brush a very thin layer of the black base paint over the tape edges. This locks the tape down and ensures that if any paint bleeds under, it matches the background anyway.
Step 3: Applying Color & Texture
-
Mix your textures:
To mimic the look of textured glass, mix a little thickening medium or sand texture gel into some of your metallic paints. This is key for sections like the copper ‘hammered’ area in the center. -
Base color application:
Start painting the open sections between the tape. Use a flat brush for larger triangular areas. Apply multiple thin coats rather than one thick glob to avoid peeling later. -
Create the ‘hammered’ effect:
For the textured bronze or brown section, stipple the thick paint on with a stiff brush to create raised bumps that will catch the light. -
Marbleizing the green:
For the green sections, apply a base of metallic teal. While wet, dab a crumpled piece of plastic wrap on top and lift it off to create a crinkled, marbled glass texture. -
Adding details:
Paint the faux ‘wood’ strips used in the design with a light gold or beige. You can use a fine liner brush to add faint grain lines once the beige is dry. -
The focal point:
Paint the small circular ‘eye’ detail in the upper red section. Use a dotting tool or the back of a brush handle to get a perfect circle for the pupil. -
Let it cure:
Allow the paint to dry fully. Since we are using multiple layers and textures, give it a solid few hours or even overnight to set.
Pro Tip: Liquid Lead
For a raised texture on the black lines that feels like real solder, trace over your black gaps with dimensional fabric paint (Puffy Paint) in black after removing the tape.
Step 4: Revealing the Design
-
Peel the tape:
Carefully peel away the masking tape strips. Pull the tape back at a sharp angle to get the cleanest lines. This reveals the matte black ‘lead’ lines underneath. -
Touch ups:
If any paint bled under the tape, use your fine liner brush and the matte black paint to tidy up the edges and sharpen the geometric boundaries. -
Adding gold accents:
The example features thin gold lines accenting the black borders. Use a gold paint marker or a very steady hand with your liner brush to trace selected curves for extra dimension. -
Final seal:
Spray the blade section with a high-gloss clear acrylic sealer. The gloss is essential to making the paint look like reflective glass. -
Hardware check:
If you removed the handle, reattach it now. If you taped it, remove the protection and give the wood a quick polish with furniture wax to match the shiny new blade.
Now hang your upcycled masterpiece in a well-lit spot where the metallic paints can shimmer and shift throughout the day


Have a question or want to share your own experience? I'd love to hear from you in the comments below!