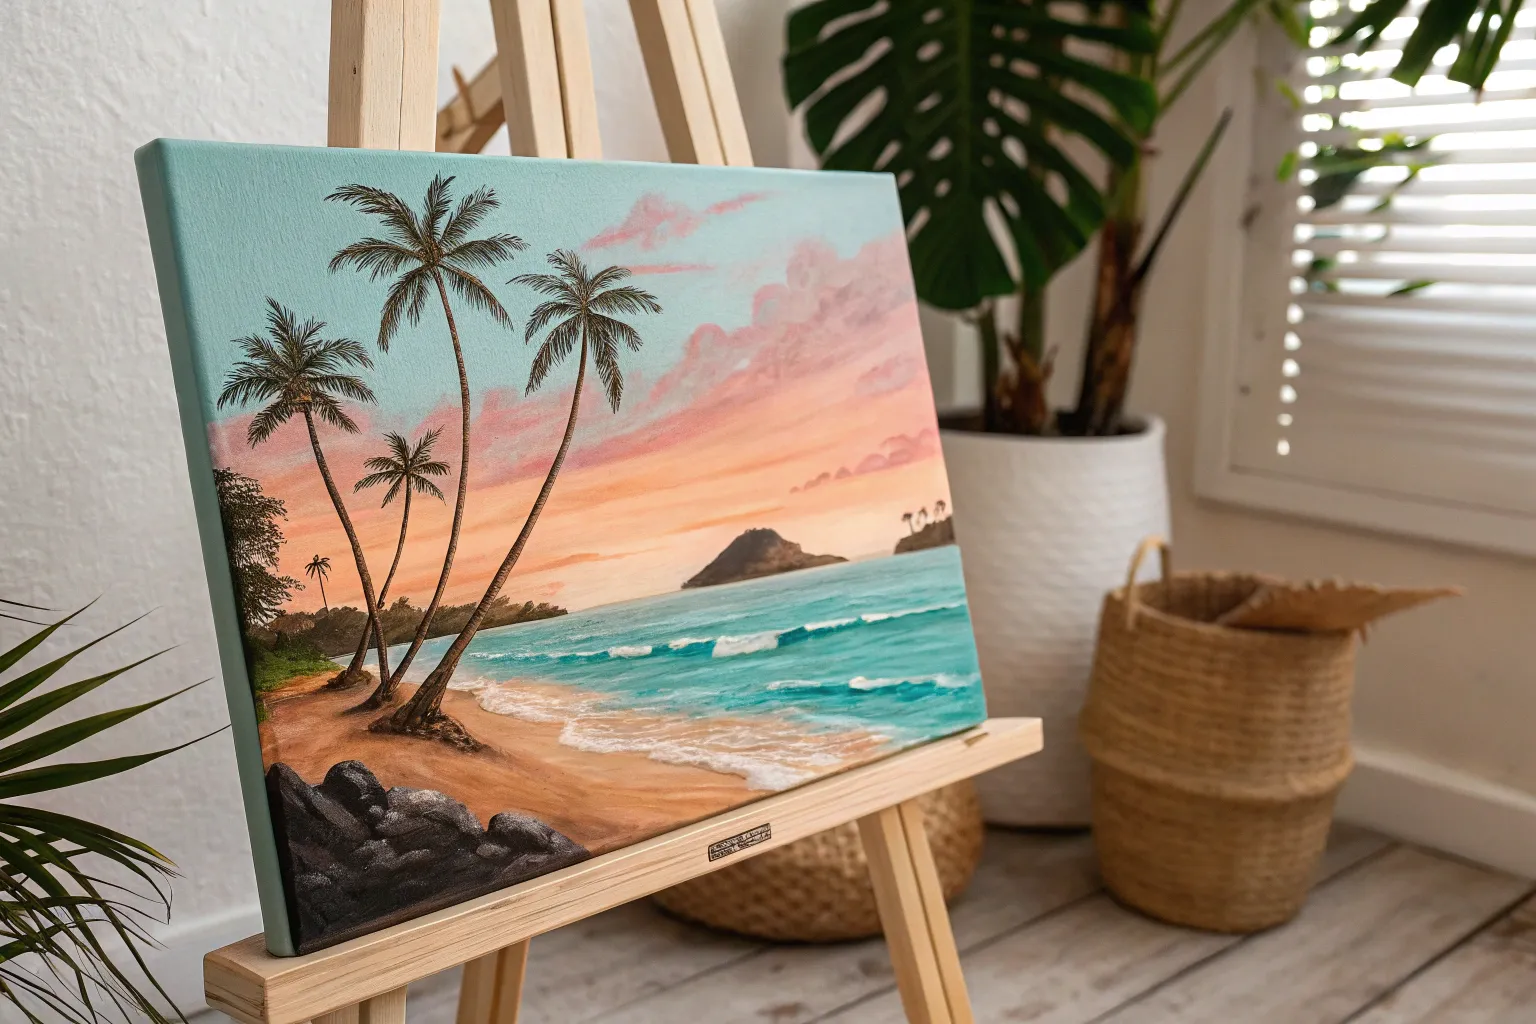
When I’m craving that Hawaii glow on my paper, I reach for big skies, turquoise water, and those instantly recognizable island silhouettes. Here are my favorite Hawaii painting ideas—starting with classic vacation scenes and drifting into more playful, artsy twists you can totally make your own.
Palm Silhouettes at Sunset
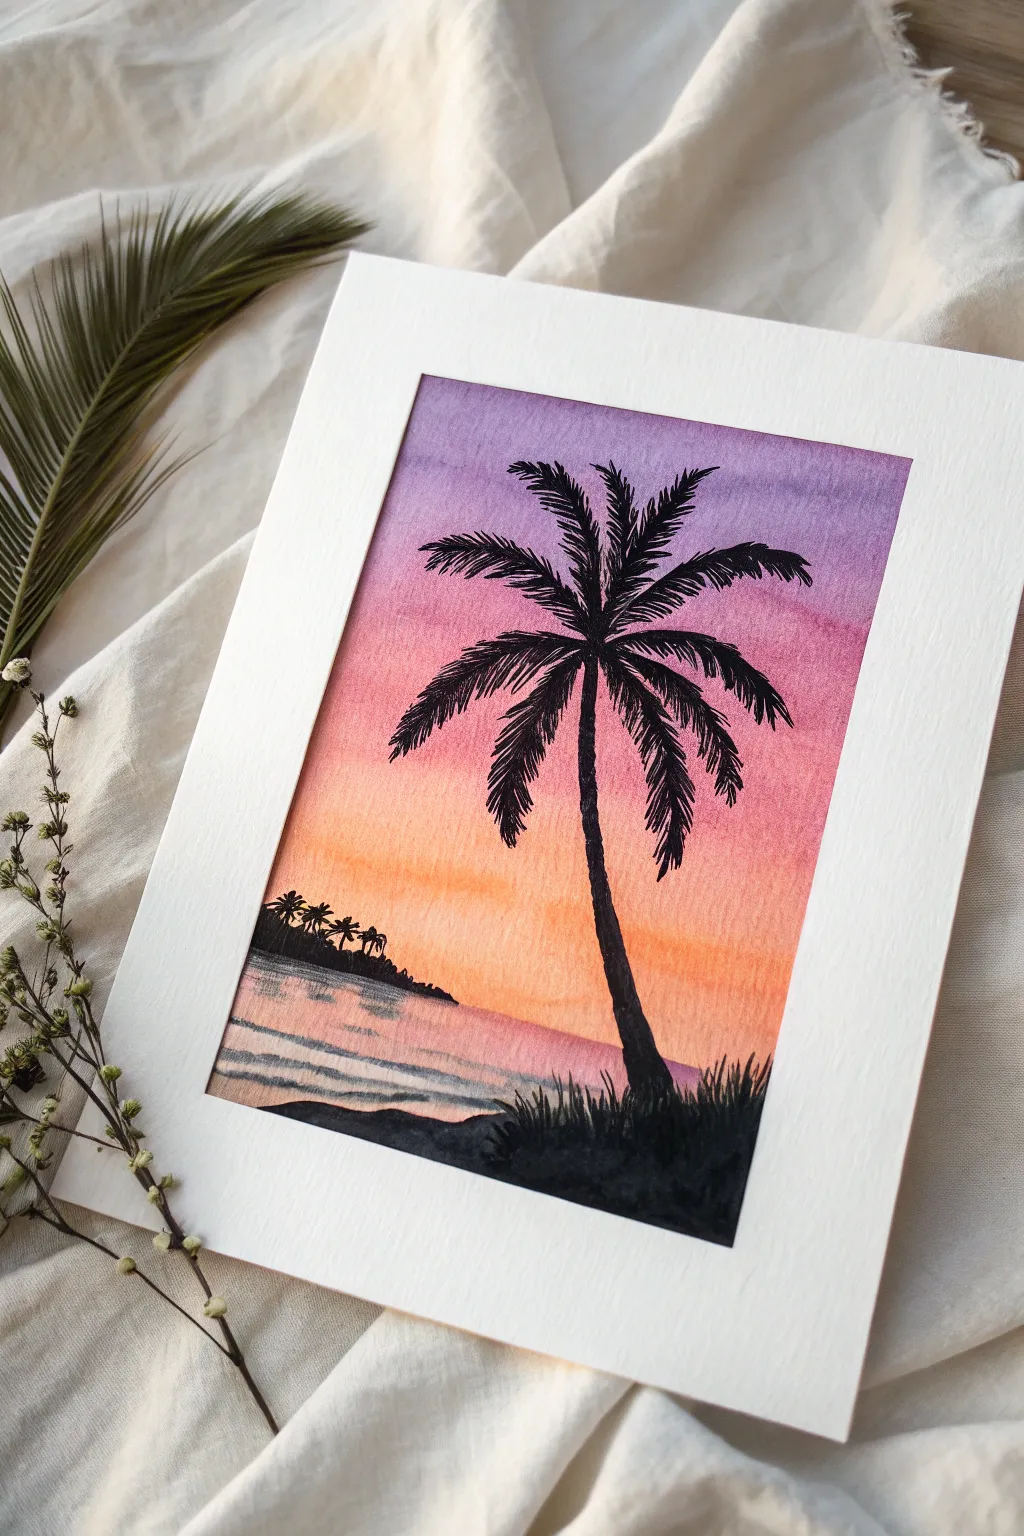
Capture the magic of a Hawaiian evening with this vibrant watercolor tutorial featuring a bold palm tree silhouette against a gradient sky. The rich blend of purples, pinks, and warm oranges creates a stunning backdrop that is surprisingly simple to achieve.
Detailed Instructions
Materials
- Cold press watercolor paper (minimum 140lb)
- Watercolor paints (Purple, Magenta, Orange, Yellow)
- Black gouache or waterproof black ink
- Flat wash brush (3/4 inch)
- Round brush (size 6)
- Detail liner brush (size 0 or 1)
- Masking tape
- Jar of clean water
- Paper towels
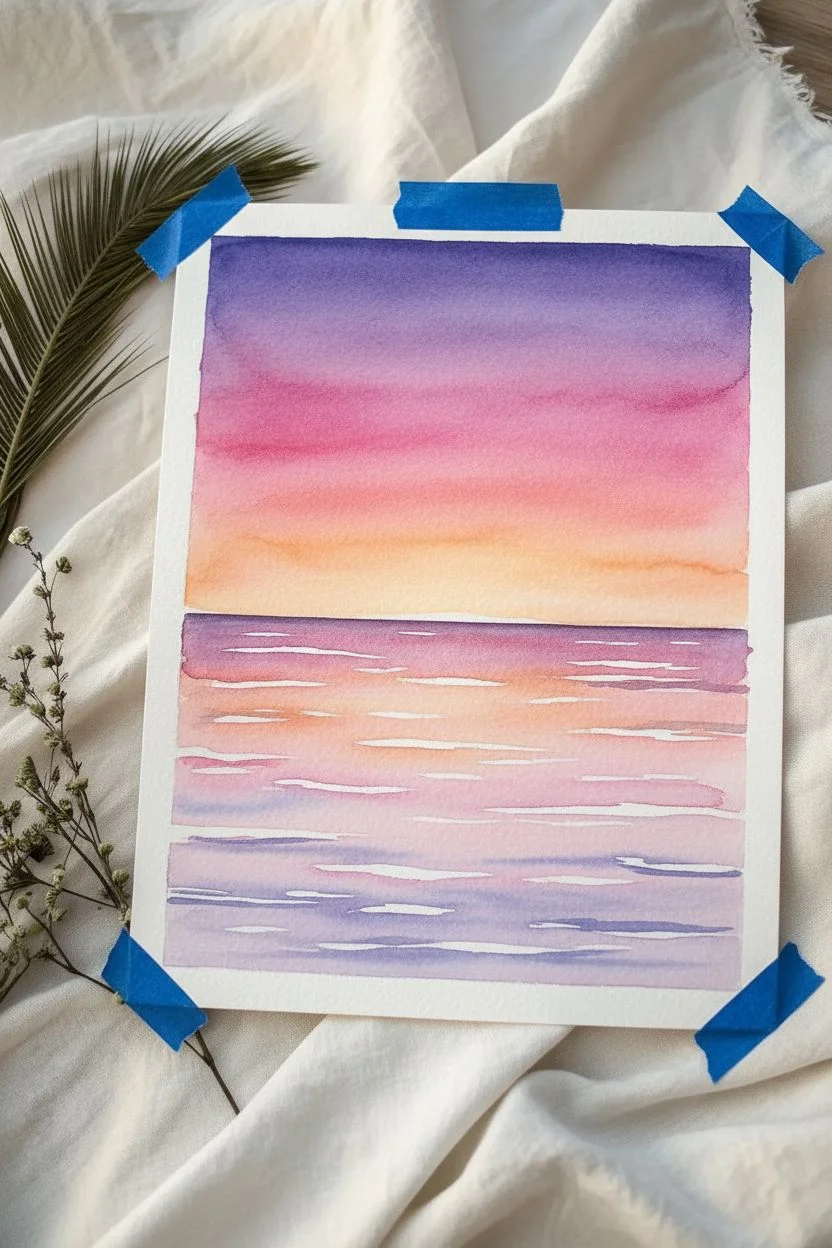
Step 1: Painting the Sky Gradient
-
Prepare your paper:
Tape down all four edges of your watercolor paper to a board using masking tape. This creates that crisp white border shown in the photo and prevents the paper from buckling while wet. -
Pre-wet the sky area:
Using your large flat brush and clean water, gently wet the top two-thirds of the paper. You want an even sheen, but avoid creating puddles. -
Start with purple:
Load your brush with a watery mix of purple paint. Apply it horizontally across the very top of the paper, letting the pigment flow into the wet surface. -
Transition to magenta:
Clean your brush quickly and pick up a vibrant magenta. Paint directly below the purple, slightly overlapping the edges so the colors bleed together naturally. -
Add the warm glow:
Rinse your brush thoroughly. Mix a bright orange and apply it below the pink. Finish the sky section with a pale yellow near the horizon line to create a glowing sunset effect. -
Soften the blend:
While the paint is still damp, I like to use a clean, slightly damp brush to run horizontal strokes across the transition zones if the lines look too harsh.
Mastering the Silhouette
Use black gouache instead of watercolor for the tree. Gouache is opaque and matte, ensuring a solid, bold black that covers the vibrant background without multiple coats.
Step 2: Creating the Water Reflection
-
Paint the water base:
Below the horizon line, reintroduce your sky colors in reverse order but much lighter. Paint light washes of pink and purple, leaving distinct horizontal white gaps to represent light reflecting on waves. -
Add water texture:
Once the base wash is damp (not soaking), use the tip of your round brush with slightly darker purple and blue tones to paint thin horizontal ripples. -
Establish the horizon:
Ensure the meeting point between the sky and water is straight, but don’t worry about being perfect as we will cover parts of it with land later. -
Let it dry completely:
This is crucial. The background must be bone-dry before you add the black silhouettes, or the black ink will bleed into the sky.
Step 3: The Silhouette Details
-
Sketch the distant island:
Using black gouache or thick black watercolor, paint a small, rounded landmass on the distant horizon line on the left side. -
Add tiny trees:
Use your smallest detail brush to paint minuscule palm tree shapes on top of that distant island. Keep them simple—just tiny vertical lines with dot-like fronds. -
Paint the foreground land:
With the round brush and solid black, fill in the bottom right corner with an uneven, bumpy shape to create the shoreline where the main tree stands. -
Draw the main trunk:
Using the size 6 round brush, paint a curved line upward from the foreground land. Make the base wider and taper it slightly as you reach the top center of the sky. -
Form the frond structure:
Switch to your liner brush. Paint 7-9 main curved spines radiating from the top of the trunk, drooping downward gracefully like a fountain. -
Add the leaflets:
With short, quick flicking motions, paint the individual leaves hanging off each spine. Keep your strokes loose and jagged to mimic the texture of palm fronds. -
Ground the tree:
Paint small, grassy spikes along the bottom black foreground to give the scene texture and make the tree look firmly planted. -
Reveal the border:
Wait until the black paint is completely dry, then slowly peel away the masking tape at a 45-degree angle to reveal your clean white frame.
Add Some Sparkle
Once the painting is dry, use a white gel pen to add tiny oscillating lines on the water’s surface for high-contrast highlights or to add a glimmering star in the purple sky.
Framing this piece with a wide white mat will really make those sunset colors pop against the silhouette


Tropical Fish Color Study
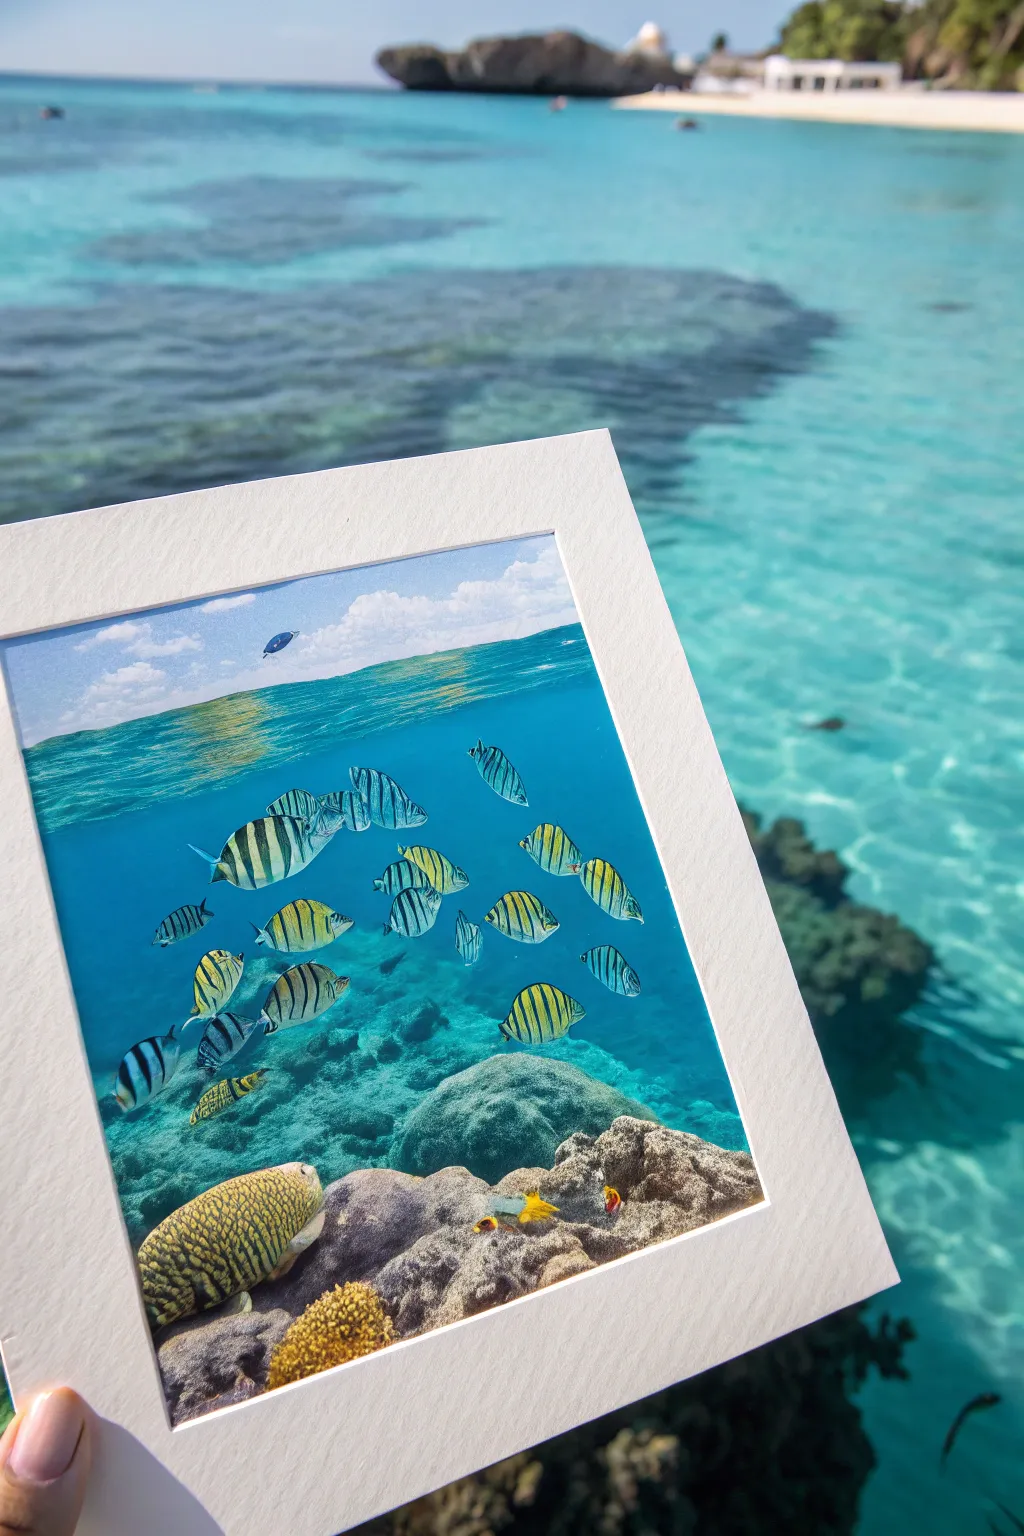
Capture the magic of both worlds with this split-view underwater painting, showcasing vibrant sergeant major fish against a deep blue reef. This project combines wet-on-wet washes for the ocean depths with detailed brushwork for the playful marine life.
Detailed Instructions
Materials
- Heavyweight watercolor paper (300 gsm or higher)
- Watercolor or gouache paints (Prussian Blue, Phthalo Turquoise, Lemon Yellow, Lamp Black, Burnt Sienna, White)
- White painter’s tape or masking tape
- Round brushes (sizes 2, 6, and 10)
- Liquid masking fluid (optional but recommended)
- Pencil and eraser
- Two jars of water
- White mat board frame for finishing
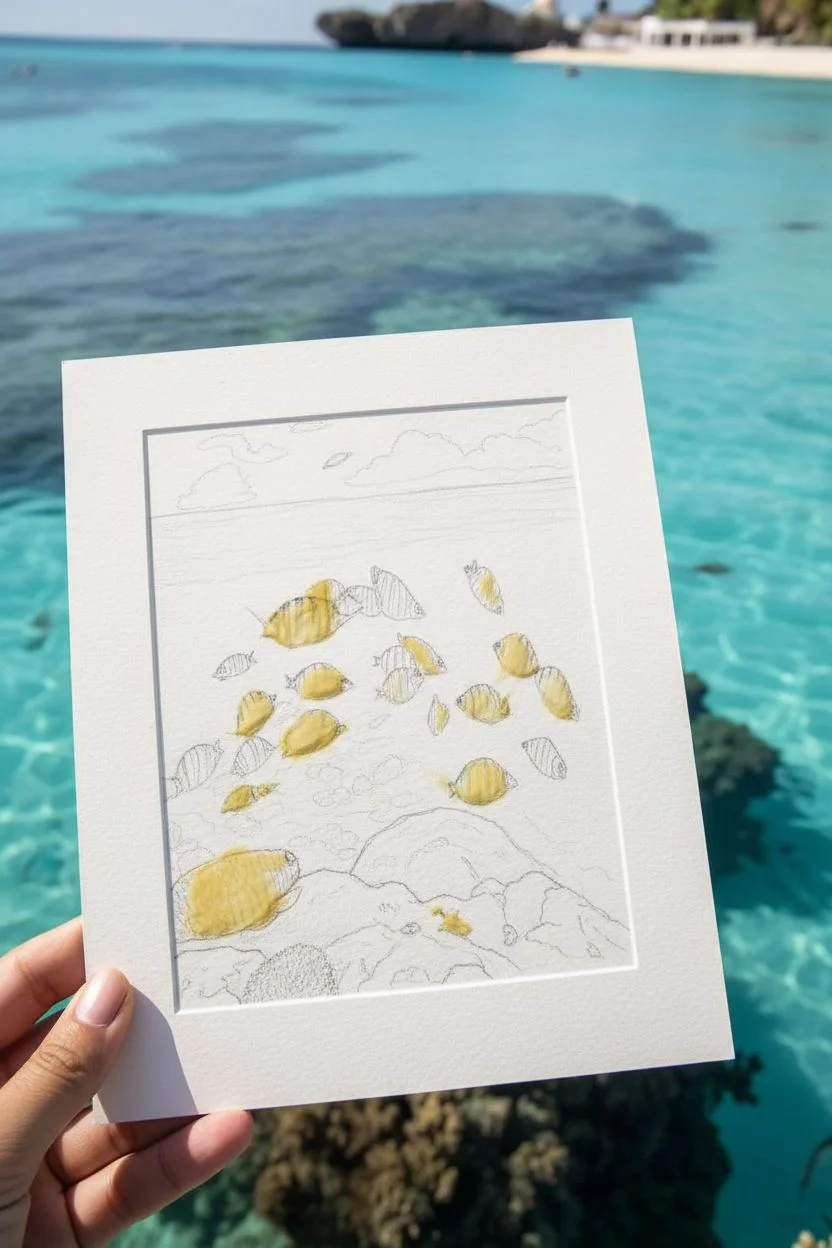
Step 1: Sketching and Masking
-
Establish the horizon line:
Lightly draw a straight horizontal line across the upper third of your paper. This separates the sky from the underwater world. Above this, sketch a few faint cloud shapes. -
Outline the reef structure:
In the lower third, sketch the rough, organic shapes of the coral rocks. Don’t worry about perfect details yet; just establish the main mounds and foreground elements. -
Position the fish:
Draw the outlines of the sergeant major fish. Place a school of them swimming through the middle section, varying their sizes to create depth. Add one larger fish closer to the bottom left for foreground interest. -
Protect the highlights:
If you’re using masking fluid, carefully paint over the fish shapes and the brightest parts of the coral. This preserves the white of the paper, ensuring your yellow tones will pop later.
Masking Glue Stuck?
If masking fluid tears the paper upon removal, the paper was likely still damp or the fluid sat too long. Always ensure paper is bone dry before rubbing.
Step 2: Creating the Ocean Gradient
-
Prepare the sky wash:
Wet the paper above the horizon line with clean water. Drop in a very pale wash of diluted blue, leaving white spaces for the clouds to keep them soft and fluffy. -
Mix the ocean blues:
Create a gradient pool on your palette. You’ll need a deep Prussian Blue for the bottom depths, transitioning into a lighter Phthalo Turquoise or teal for the upper water. -
Paint the deep water:
Using your largest brush, apply the deep blue wash starting from the bottom of the water section (just above the rocks) and working upward. Ensure the color is saturated. -
Blend towards the surface:
As you move closer to the horizon line, gradually mix in more water and your turquoise shade. Based on my experience, working quickly while the paper is damp creates the smoothest transition. -
Add surface texture:
While the paint is still slightly damp, use a clean, dry brush to lift out horizontal streaks near the surface line. This mimics the shimmering reflection of light on the water.
Step 3: Painting Marine Life
-
Remove the mask:
Once the background ocean layer is completely bone-dry, gently rub off the masking fluid to reveal the crisp white paper underneath. -
Base coat the fish:
Paint the bodies of the fish with a bright Lemon Yellow. Keep the wash transparent so it glows against the blue background. -
Add the stripes:
Using your smallest detail brush (size 2), mix a strong black. Carefully paint the vertical stripes on the fish specifically characteristic of sergeant majors—usually five narrow bars. -
Detail the fins:
Use a light grey wash to add transparency to the dorsal and tail fins. A tiny touch of white gouache can add a highlight to their eyes for focus. -
Paint a solitary swimmer:
Don’t forget the tiny blue fish silhouette near the surface for scale. A quick dab of dark blue creates this distant detail.
Pro Tip: Depth of Field
Blur the fish and rocks slightly as they get further away. Sharp details belong in the foreground; softer edges push elements into the distance.
Step 4: Rock and Coral Textures
-
Base the coral rocks:
Mix Burnt Sienna with a touch of blue to get a muted grey-brown. Wash this over the rock shapes at the bottom. -
Add texture and shadow:
While the rock base is damp, drop in darker concentrations of brown and indigo into the crevices to create volume and roughness. -
Highlight the coral:
Use a dry brush technique with thicker, opaque paint (yellow ochre or light brown) to scumble over the top of the rocks. This suggests sunlight hitting the texture. -
Refine the foreground:
For the yellowish brain coral in the foreground, paint a base of yellow ochre, then use fine, dark squiggly lines to create the brain-like pattern. -
Final assembly:
Erase any remaining pencil lines and place your dried painting into a clean white mat board to give it that polished gallery look.
Now you have a refreshing slice of the ocean to brighten up your wall or desk


Waterfall in a Lush Valley
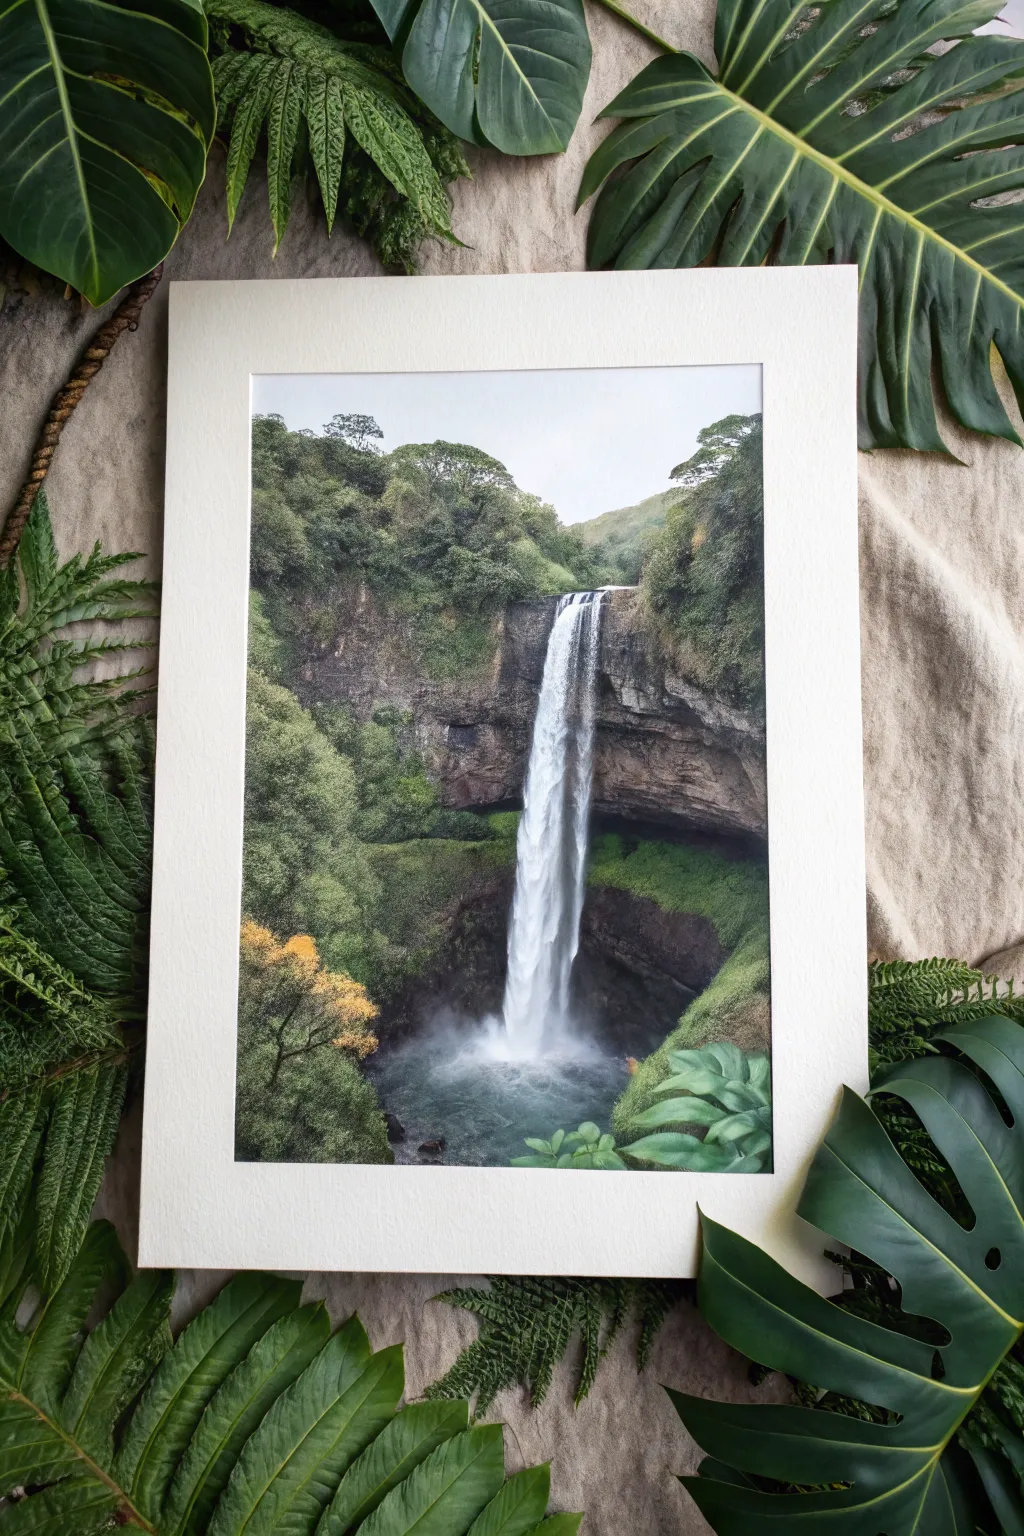

Capture the serene power of a Hawaiian waterfall plunging into a hidden pool with this detailed watercolor tutorial. The crisp white matting frames the lush greens and misty blues, creating a window into a tropical paradise.
Step-by-Step Guide
Materials
- Cold press watercolor paper (140lb/300gsm)
- Watercolor paints (Sap Green, Hooker’s Green, Indigo, Burnt Umber, Yellow Ochre, Ultramarine Blue, White Gouache)
- Masking fluid
- Synthetic round brushes (sizes 2, 6, and 10)
- Flat wash brush (3/4 inch)
- White mat board
- Paper towels and two water jars
- Pencil (HB) and kneaded eraser
Step 1: Planning and Preparation
-
Sketch the composition:
Lightly sketch the cliff edges, the main vertical column of the waterfall, and the pool at the bottom. Keep lines faint so they don’t show through the paint later. -
Protect the white water:
Apply masking fluid carefully over the main body of the waterfall and the misty spray zone at the bottom. Use an old brush or a silicone applicator for this, as masking fluid ruins good brushes. -
Let it dry completely:
Ensure the masking fluid is 100% dry before touching it with any water or paint.
Muddy Greens?
If your greens look dull, avoid mixing more than 3 colors. Let layers dry completely between coats—working wet-on-wet too long turns lush forests into brown slush.
Step 2: Background and Underpainting
-
Paint the sky:
Wet the sky area above the cliffs with clean water. Drop in a very pale wash of Ultramarine Blue, keeping it light and airy to suggest an overcast or misty day. -
Base layer for cliffs:
Mix a diluted wash of Burnt Umber and Indigo. Apply this to the rock faces flanking the waterfall, letting the colors blend organically on the paper. -
Establish greenery values:
While the rock layer is still damp, dab in Sap Green on the top edges of the cliffs to create soft, distant foliage.
Step 3: Building Depth and Texture
-
Deepen the shadows:
Once dry, mix a stronger concentration of Indigo and Burnt Umber. Paint the dark recesses of the cliff, especially directly behind the waterfall area, to make the white water pop later. -
Layer the foliage:
Using your size 6 round brush, stipple Hooker’s Green mixed with a touch of Indigo to create dense bushes on the cliff sides. Vary your pressure to simulate leaf textures. -
Add highlights:
Mix Sap Green with Yellow Ochre. Paint the sunlit areas of the trees on the left and right slopes, layering over the darker greens to create volume. -
Detail the rock face:
Use a size 2 brush with dark brown paint to add cracks, ledges, and jagged textures to the vertical rock walls.
Level Up: Texture
Sprinkle a pinch of table salt onto the wet rock areas while painting. As it dries, the salt pushes pigment away, creating incredible natural rocky textures.
Step 4: The Water and Finishing Touches
-
Remove the mask:
Gently rub away the masking fluid to reveal the pristine white paper of the waterfall. -
Create water movement:
With a very dilute mix of Ultramarine and a touch of Indigo, paint vertical streaks down the waterfall to show flow and shadow. Leave plenty of pure white paper visible. -
Paint the pool:
Paint the pool at the base with a teal mix (Viridian or Hooker’s Green + Blue). Darken the edges near the rocks and keep the center near the splash zone lighter. -
Add the mist:
Use a small amount of White Gouache and dry-brush it at the base of the falls where the water hits the pool. Gently soften the edges with a clean, damp brush. -
Foreground details:
Paint the closest foliage in the bottom corners with your sharpest brush, using saturated greens and distinct leaf shapes to create a sense of scale. -
Final yellow pop:
I like to add a tiny touch of Yellow Ochre or bright yellow to one bush on the lower left to guide the eye and break up the green monotony. -
Mat and frame:
Once fully dry, center your white mat over the painting to clean up the edges and give it a professional gallery look.
Step back and enjoy the tranquil tropical escape you have created right on your paper


Rainbow Over a Rainforest Ridge
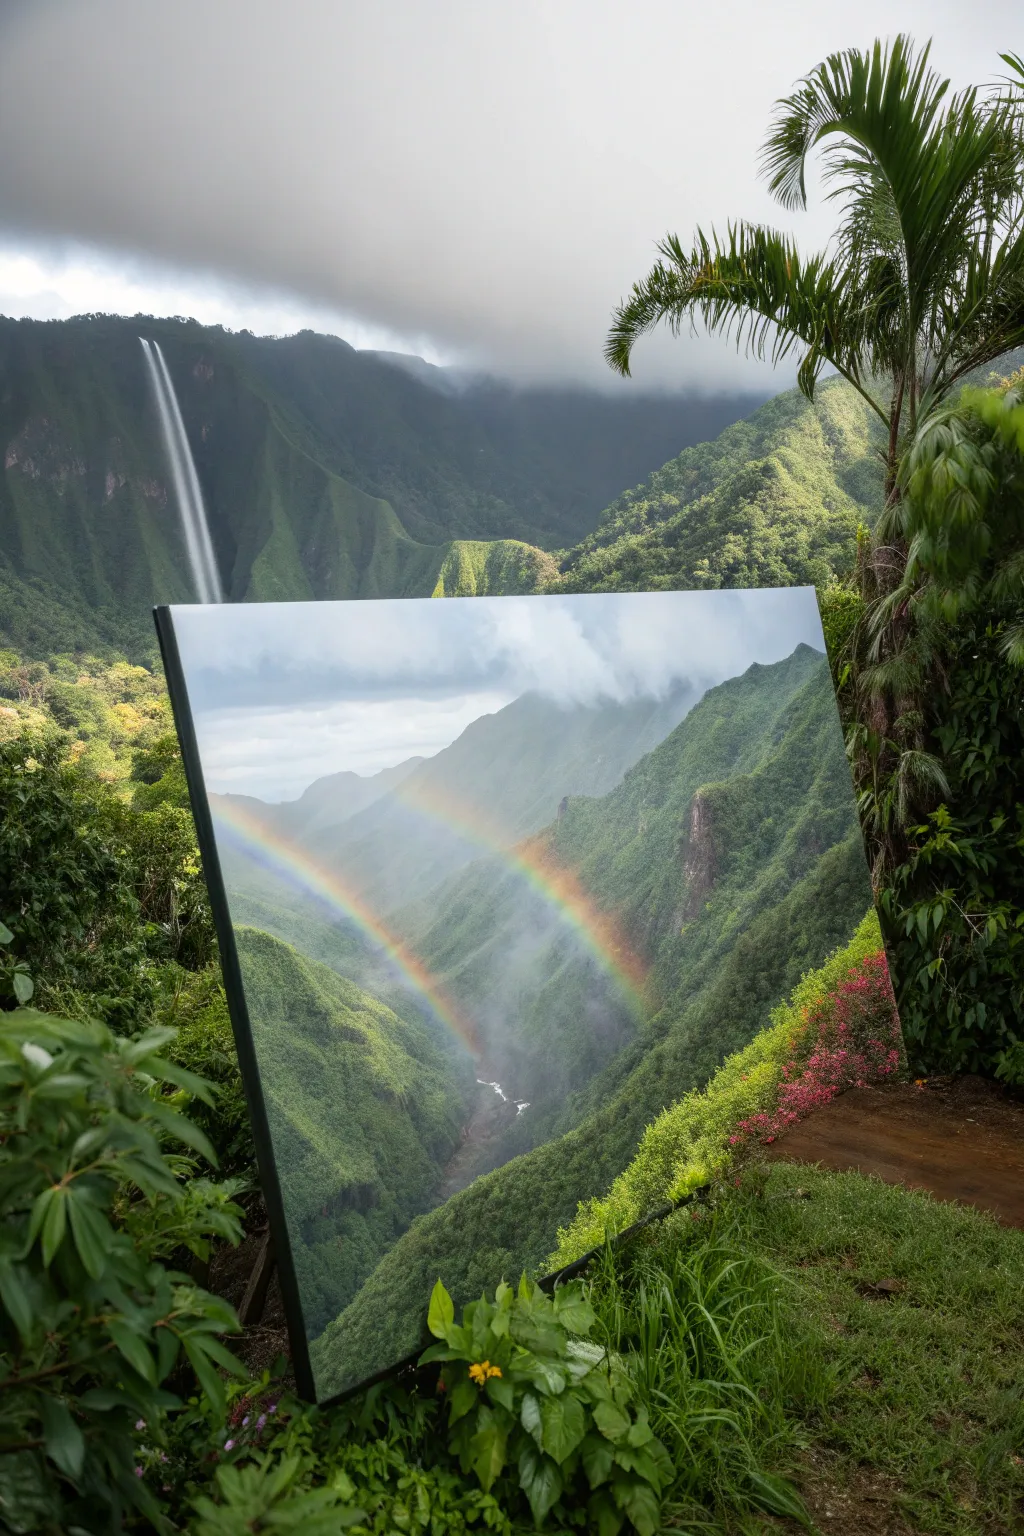

Capture the ethereal beauty of a Hawaiian rainforest with this majestic valley landscape painting. The dramatic play of light, misty atmosphere, and vibrant double rainbow creates a stunning window into paradise that you can display anywhere.
Step-by-Step
Materials
- Large rectangular canvas (24×36 inches or similar)
- Acrylic paints: Phthalo Green, Sap Green, Hooker’s Green, Ultramarine Blue, Phthalo Blue, Titanium White, Burnt Umber, Yellow Ochre, Cadmium Yellow, Alizarin Crimson
- Floetrol or acrylic glazing medium
- Large flat brushes (2-inch and 1-inch)
- Medium filbert brush
- Small round detail brush
- Fan brush (optional)
- Palette knife
- Water spray bottle
- Easel or drop cloth
Step 1: Sky and Atmosphere
-
Prime the canvas:
Begin by applying a thin wash of Titanium White mixed with a tiny drop of Phthalo Blue across the entire upper half of the canvas to establish a cool, airy base. -
Block in the sky:
Mix Titanium White with a touch of Payne’s Grey or a mix of Black and Blue. Using a large flat brush, paint the upper sky area with sweeping horizontal strokes. -
Create the cloud layer:
While the sky paint is still tacky, use a dry brush to scumble in thick, fluffy white clouds along the top edge, softening the bottoms so they blend into the atmosphere. -
Add atmospheric perspective:
For the distant mountain peaks, mix Phthalo Blue, a little White, and a tiny bit of Green. Paint the silhouette of the furthest ridge, keeping the edges soft and hazy to push them into the background.
Step 2: Valleys and Vegetation
-
Structure the ridges:
Using a darker value of blue-green (Ultramarine Blue + Hooker’s Green), block in the shapes of the prominent valley walls on the left and right sides. -
Deepen the shadows:
Mix your darkest greens using Sap Green and Burnt Umber. Apply this to the crevices and lower sections of the valley walls where the light doesn’t reach. -
Layer the highlights:
On the ridges facing the imagined light source, stipple on lighter greens mixed with Yellow Ochre. I like to keep these strokes loose to mimic distant tree canopies. -
Paint the riverbed:
At the very bottom center of the ‘V’ shape, paint a thin, winding river using a grey-blue tone. Add tiny flecks of pure white to suggest rapids or water movement. -
Add foreground foliage:
In the bottom right corner, paint a cluster of bushes using brighter Sap Green and Cadmium Yellow. Dab in touches of Alizarin Crimson to create the look of wild tropical flowers.
Rainbow Too Opaque?
If your rainbow covers up the mountains too much, wipe it gently with a damp cloth immediately. Remix with more glazing medium or water to increase transparency.
Step 3: The Double Rainbow
-
Prepare the glaze:
This is the crucial step. Mix a generous amount of glazing medium with very small amounts of your rainbow colors (Red, Orange, Yellow, Green, Blue, Violet) on your palette. -
Paint the primary arc:
Using a clean 1-inch flat brush, sweep the first arch across the valley. Ensure the paint is very translucent so the mountains show through distinctly. -
Refine the spectrum:
While the glaze is wet, carefully blend the color transitions. The red should be on the outer edge of the primary bow and violet on the inner edge. -
Add the secondary bow:
Paint a second, much fainter arch outside the first one. Remember that the color order is reversed here: violet on the outside, red on the inside. -
Brighten the inner sky:
Lightly glaze the area inside the primary rainbow with a very subtle warm white wash. The sky inside a rainbow is naturally brighter than the sky outside it. -
Final mist effects:
Use a dry brush with a tiny amount of white to dab ‘mist’ rising from the valley floor, partially obscuring the bottom of the rainbow legs for realism.
Soften Those Edges
For distant mountains, use a clean, dry blending brush to gently blur the ridge line into the sky. Hard edges make objects look closer than they really are.
Step back and admire your personal window into the lush serenity of the islands
BRUSH GUIDE
The Right Brush for Every Stroke
From clean lines to bold texture — master brush choice, stroke control, and essential techniques.
Explore the Full Guide
Moonlit Ocean With Silver Path
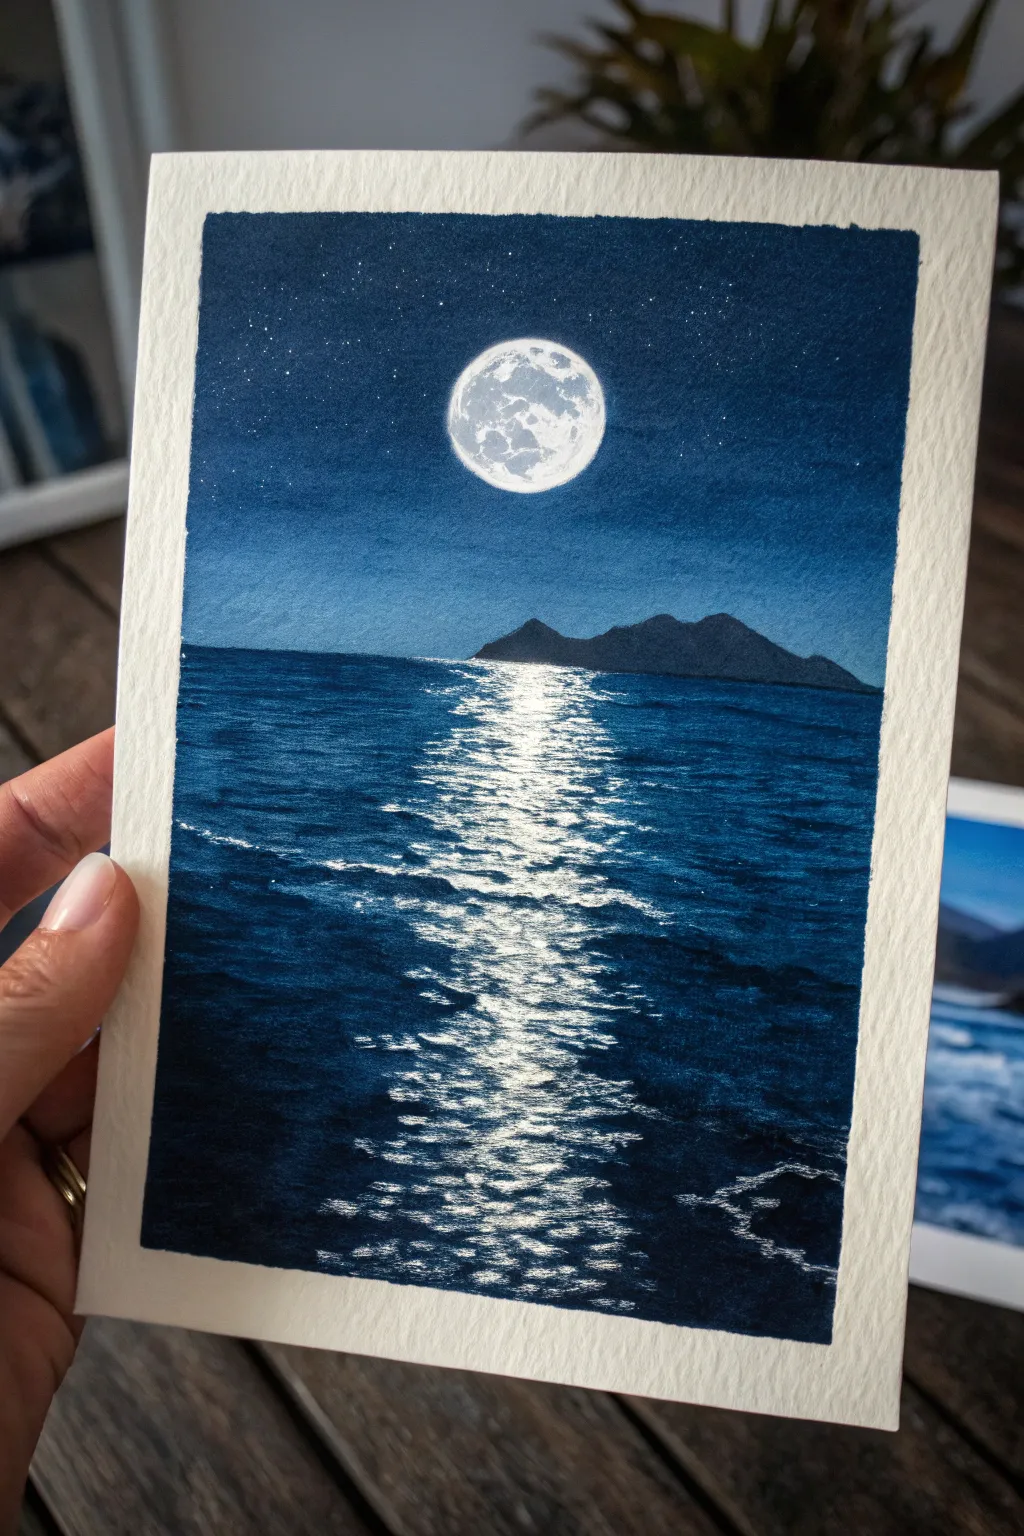
Capture the serene magic of Hawaii at night with this deep blue watercolor study, featuring a glowing full moon and its brilliant path across the waves. This project focuses on heavy contrast and wet-on-wet techniques to build depth in the ocean and sky.
Step-by-Step Guide
Materials
- Cold press watercolor paper (300gsm/140lb)
- Masking tape
- Pencil (HB)
- Masking fluid (drawing gum) and an old brush
- Watercolor paints: Indigo, Prussian Blue, Phthalo Blue
- White Gouache or a White Gel Pen
- Round brushes (sizes 2, 6, and 10)
- Two jars of water
- Paper towels
- Salt (optional for texture)
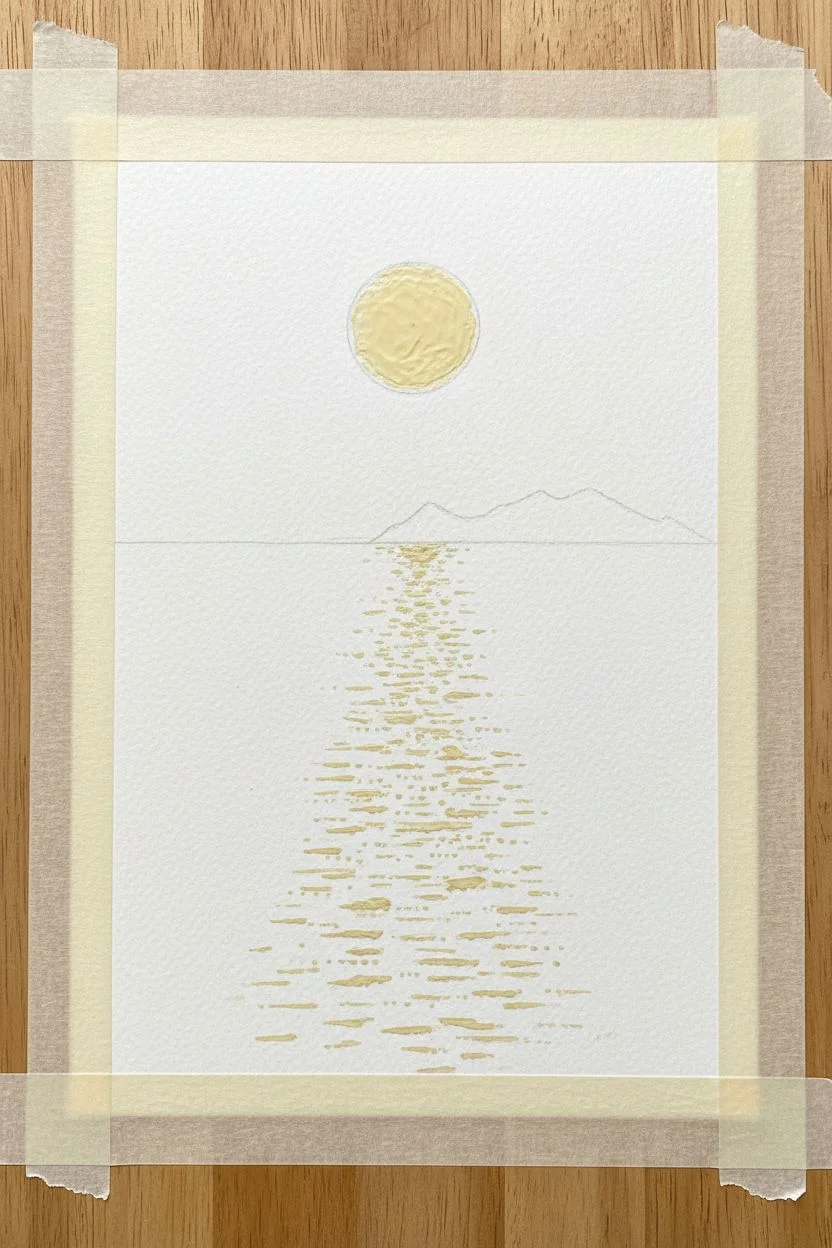
Step 1: Preparation and Masking
-
Secure the paper:
Tape your watercolor paper down to a board on all four sides. This creates that crisp white border seen in the final piece and prevents the paper from buckling under heavy washes. -
Sketch the layout:
Using a pencil, very lightly draw the horizon line about halfway down the paper. Sketch the outline of the distant island peaks just above the horizon, and faint circle for the full moon high in the sky. -
Plan the shimmer:
Before painting, visualize the inverted triangle of moonlight on the water. It should be widest at the horizon and taper slightly as it comes toward you. -
Mask the moon:
Dip an old brush into soap first (to save the bristles), then apply masking fluid carefully to fill in the moon circle. Let it dry completely. -
Mask the highlights:
This is the most crucial step for the sparkle effect: use masking fluid to stipple intricate, horizontal dash marks in the center of the water. Start dense and thin near the horizon, getting wider and more scattered as you move down the page. Let this dry perfectly.
Step 2: Painting the Sky and Island
-
Wet the sky:
With a large clean brush, apply clear water to the sky area only, stopping right at the horizon line. -
Apply the gradient:
While wet, drop in a mix of Indigo and Prussian Blue at the top edge. As you pull the paint down toward the horizon, add more water or switch to a lighter Phthalo Blue to create a natural fade toward the water line. -
Darken the night:
While the sky is still damp but not soaking, drop concentrated Indigo into the upper corners to create a vignette effect. Let the sky dry completely. -
Paint the island:
Mix a very dark, grey-blue shade using Indigo and a touch of Burnt Umber or Black. Paint the island silhouette with a steady hand, ensuring the bottom edge is completely flat against the horizon.
Preserve Your White
No masking fluid? Use white wax crayon or a piece of candle to draw the reflection lines before painting. The watercolor will resist the wax, keeping the paper white.
Step 3: Creating the Ocean
-
Base ocean layer:
Paint the water area with a wash of Prussian Blue. You can paint right over your dried masking fluid squiggles. Keep the color slightly lighter near the horizon line. -
Adding depth:
While the blue is still wet, drop in horizontal strokes of Indigo on the left and right sides of the paper, framing the central bright path. I like to leave the center slightly lighter blue to suggest the glow. -
Wave details:
Once the base ocean layer is dry, use a smaller brush (size 2 or 4) with concentrated Indigo. Paint horizontal, slightly wavy lines around the masked areas to define the ripples, darker and thinner in the distance, broader in the foreground. -
Foreground ripples:
Add a few white gel pen lines or white gouache strokes in the very foreground waves (bottom right corner) to suggest foam or movement. -
Dry thoroughly:
Wait until the paper is bone dry. If it feels cool to the touch, it is still wet.
Moon Glow Trick
To make the moon really luminous, gently scrub the sky paint immediately surrounding the moon with a clean, damp brush to lift a tiny halo of color.
Step 4: Refining and Finishing
-
Remove the mask:
Gently rub away the masking fluid from the moon and the water using your finger or a rubber cement pickup tool. You should see brilliant white paper underneath. -
Detail the moon:
Mix a very watery, pale grey using diluted Indigo. Carefully dab in the craters on the moon, leaving some areas pure white for brightness. -
Soften the edges:
If the water reflection looks too sharp, use a barely damp brush to gently soften the edges of some of the white sparkles, blending them slightly into the blue. -
Add stars:
Load a toothbrush or stiff brush with white gouache. Cover the bottom of the painting with paper, and flick fine mist over the sky to create stars. Add a few specific larger stars with a gel pen. -
Final reveal:
Peel off the tape slowly at a 45-degree angle to reveal your clean edges.
Now you have a stunning, high-contrast seascape that captures the peaceful solitude of a midnight swim.
Hula Silhouette at Golden Hour
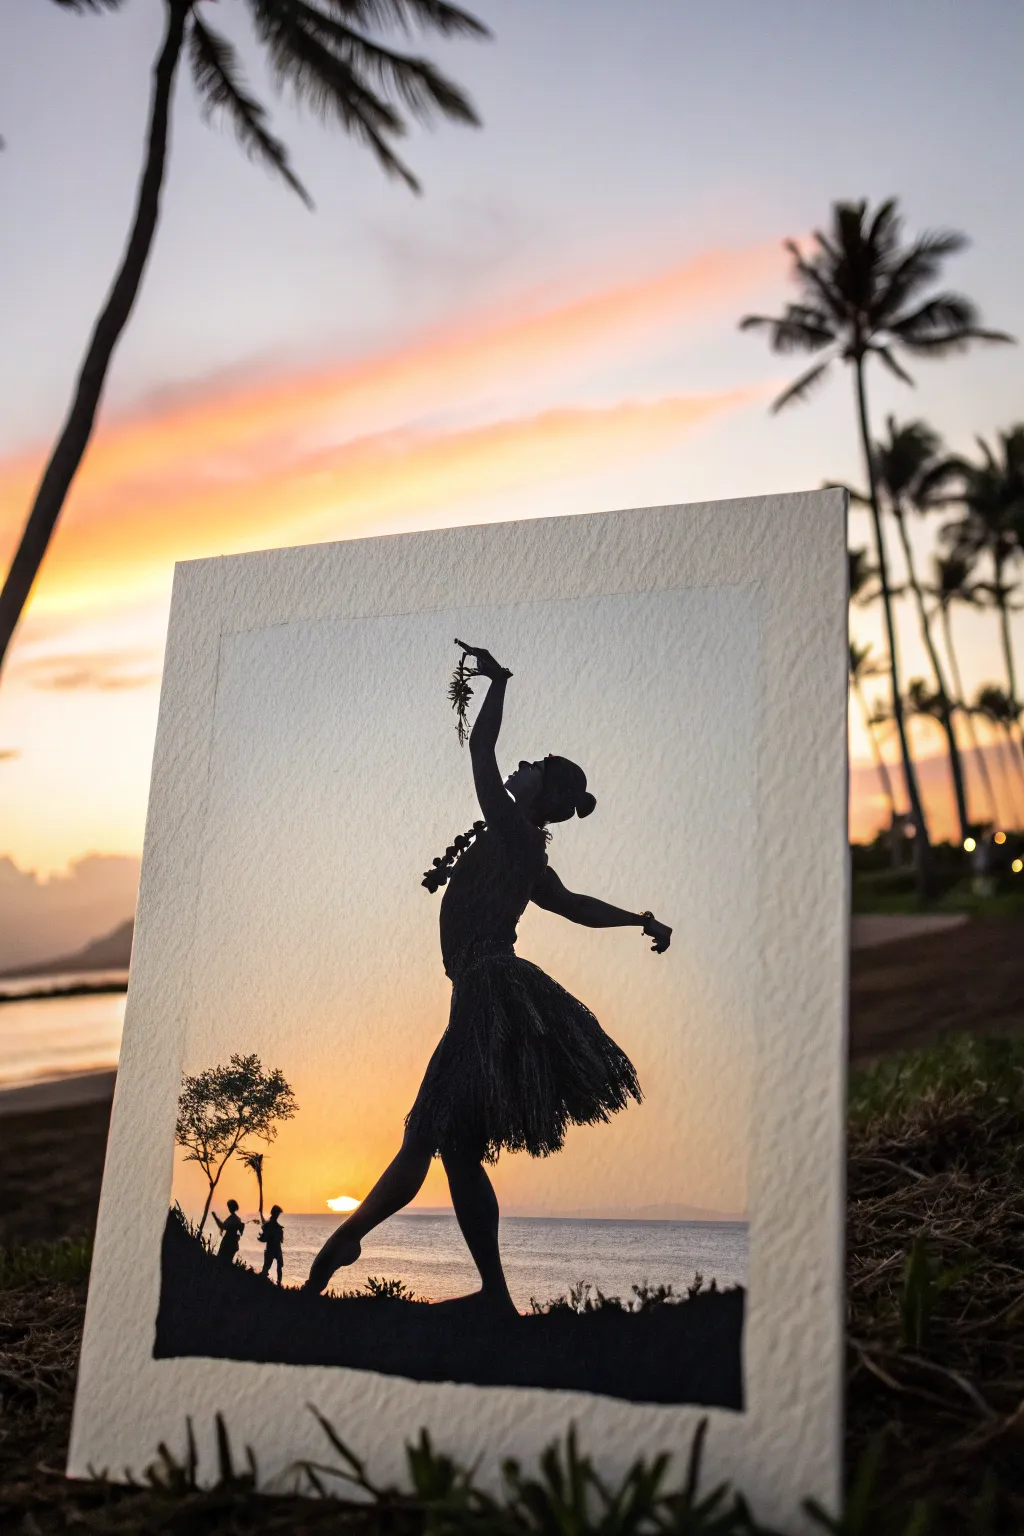
Capture the graceful spirit of the islands with this striking silhouette painting that plays with light and shadow. The vibrant sunset gradient provides a stunning backdrop for the detailed black form of the hula dancer, creating a piece that feels both dynamic and serene.
Step-by-Step Tutorial
Materials
- Cold-pressed watercolor paper (140lb/300gsm)
- Masking tape
- Pencil and eraser
- Watercolor paints: Yellow Ochre, Cadmium Orange, Burnt Sienna, Payne’s Gray (or diluted black)
- Black Gouache or India Ink (for the silhouette)
- Small round brush (size 0 or 1)
- Medium round brush (size 6 or 8)
- Reference photo of a hula dancer
- Jar of water
- Paper towels
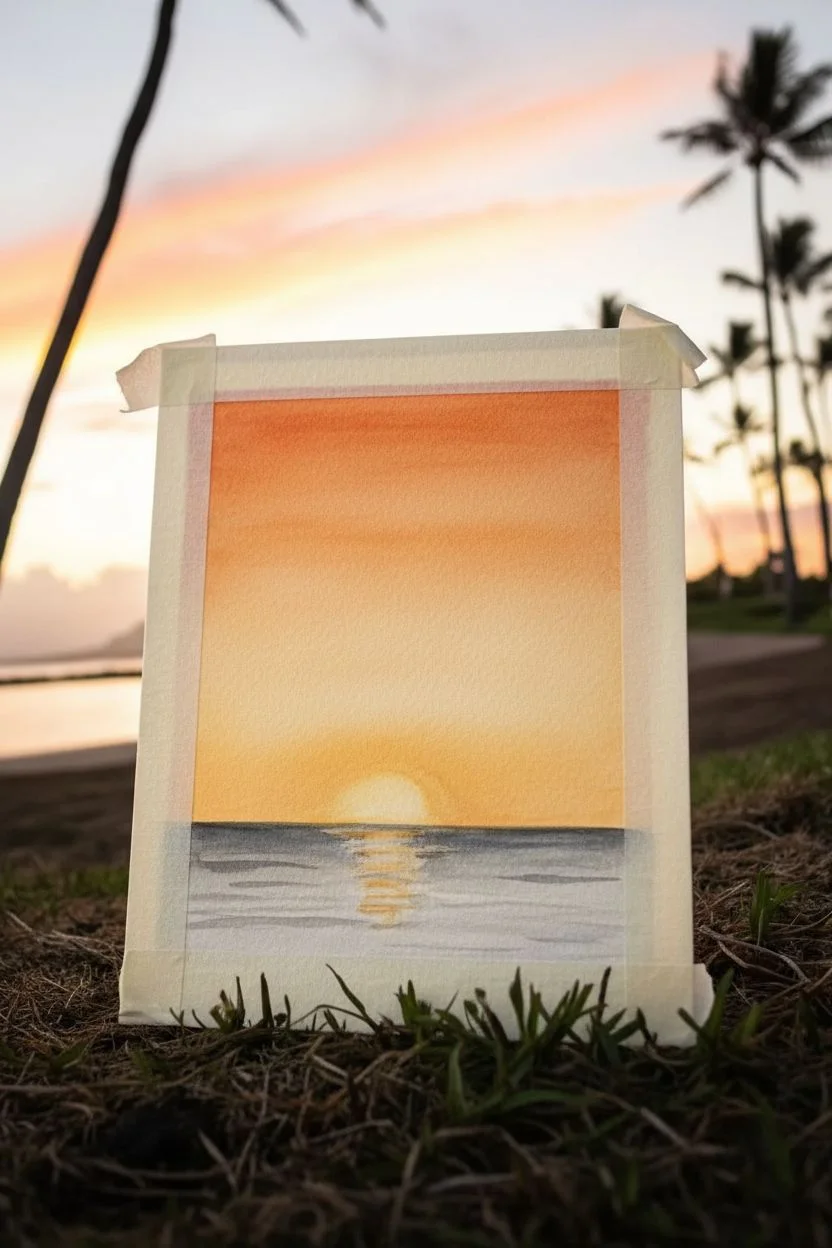
Step 1: Preparing the Sunset Sky
-
Secure the paper:
Begin by taping down all four edges of your watercolor paper to a board or table. This prevents buckling and creates a crisp white border around your finished piece. -
Sketch the horizon:
Lightly draw a straight horizontal line about a quarter of the way up from the bottom to mark the ocean horizon. Keep this line faint so pencil marks don’t show later. -
Pre-wet the sky:
Using a clean, wet brush, apply a layer of water to the entire sky area above your horizon line. The paper should glisten but not have standing puddles. -
Apply the yellow base:
Starting just above the horizon line, paint a band of Yellow Ochre. Let the wet paper help diffuse the edges softly upwards. -
Blend in the orange:
While the yellow is still damp, introduce Cadmium Orange above it. Use gentle horizontal brushstrokes to merge the two colors, creating a seamless transition. -
Add warmth near the top:
Towards the top of the paper, mix a touch of Burnt Sienna into the orange for a slightly darker, duskier tone, reinforcing that ‘golden hour’ glow. -
Paint the water:
For the ocean section below the horizon, dilute a mix of Payne’s Gray and Purple or Blue. Paint horizontal streaks, leaving some white paper showing to represent the sun’s reflection on the waves. -
Let it dry completely:
It is crucial to let this background layer bone dry. If the paper feels cool to the touch, it’s still wet. I insist on waiting here, otherwise, the next black layer will bleed.
Bleeding Lines?
If your black silhouette starts to spiderweb into the sky, the background wasn’t dry enough. Stop immediately, let it dry, and then carefully clean up the edge with white gouache.
Step 2: Creating the Silhouette
-
Draft the figure:
Lightly sketch the outline of the hula dancer over the dry background. Pay attention to the extension of the arms and the arch of the back to capture movement. -
Outline the body:
Switch to your smallest brush and black gouache (or very concentrated watercolor). carefully outline the dancer’s torso, head, and arms. Gouache is preferred here for its opacity. -
Paint the skirt texture:
For the grass skirt, don’t just fill it in solid. Use quick, downward flicks of your brush to mimic the movement and texture of the straw, letting the strands fan out. -
Detail the lei and haku:
Add the floral headpiece and the lei around the neck. Use small, bumpy shapes to suggest flowers rather than perfect circles. -
Include the implement:
Carefully paint the ‘uli’uli (feather gourd rattle) in the dancer’s raised hand. Use the very tip of your brush to capture the feathery texture dangling down. -
Anchor the feet:
Paint the legs and feet, ensuring the pose looks grounded. The back foot is raised on the toes, which emphasizes the dance step. -
Add the foreground landscape:
Paint an undulating black shape along the bottom edge to represent the rocky shoreline or grassy hill the dancer stands on. -
Create background elements:
On the left side of the foreground hill, paint a tiny, delicate tree silhouette and a couple of smaller figures to give the scene a sense of scale. -
Final touches:
Check your black areas for patchiness. Apply a second coat of gouache if needed to get a true, deep black silhouette against the glowing sky. -
Reveal the border:
Once everything is completely dry, slowly peel away the masking tape at a 45-degree angle to reveal your clean, professional white edges.
Add Sparkle
For a magical touch, use a white gel pen to add tiny highlights on the ocean ripples or define the separation between the dancer’s arm and body if they overlap.
Now you have a piece of paradise captured on paper to brighten up any room

PENCIL GUIDE
Understanding Pencil Grades from H to B
From first sketch to finished drawing — learn pencil grades, line control, and shading techniques.
Explore the Full Guide
Taro Leaves Botanical Pattern
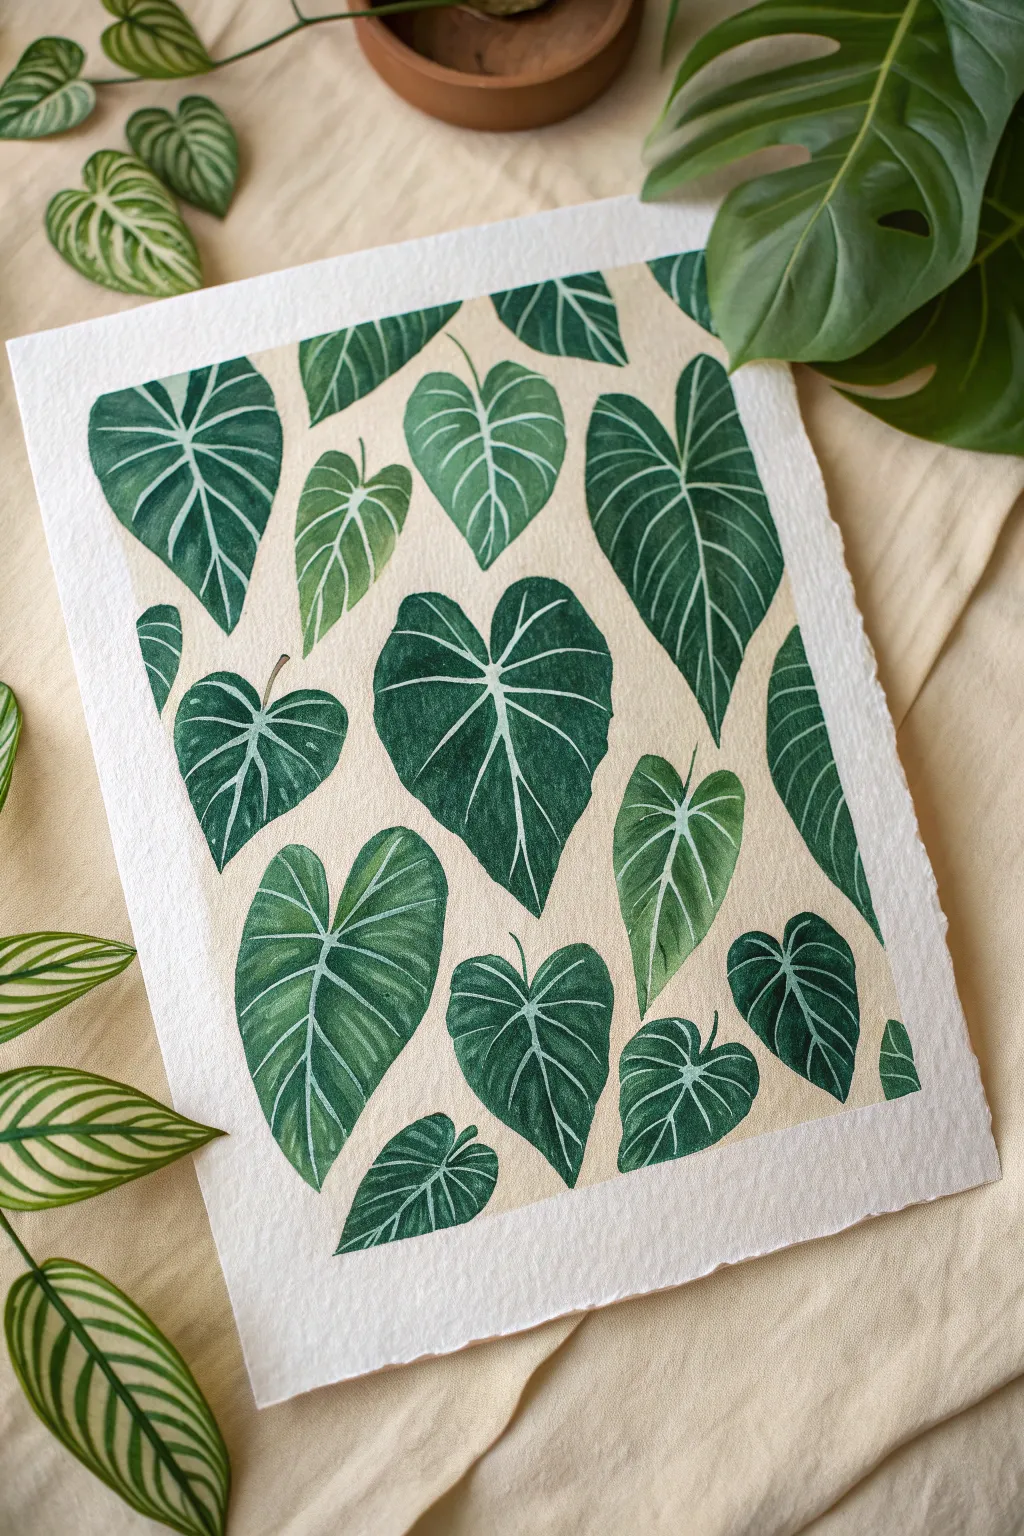
Capture the lush vibrancy of the islands with this elegant botanical pattern featuring iconic Philodendron or Taro leaves. This watercolor project focuses on rich variations of green and delicate vein work, all set against a warm, sandy background.
Detailed Instructions
Materials
- Cold press watercolor paper (300 gsm)
- Masking tape
- Pencil (HB or H)
- Kneaded eraser
- Watercolor paints (Sap Green, Hooker’s Green, Indigo, Yellow Ochre, Burnt Sienna)
- Small round brushes (size 2 and 4)
- Fine liner brush (size 0 or 00)
- White gouache or white gel pen
- Two jars of water
- Paper towels
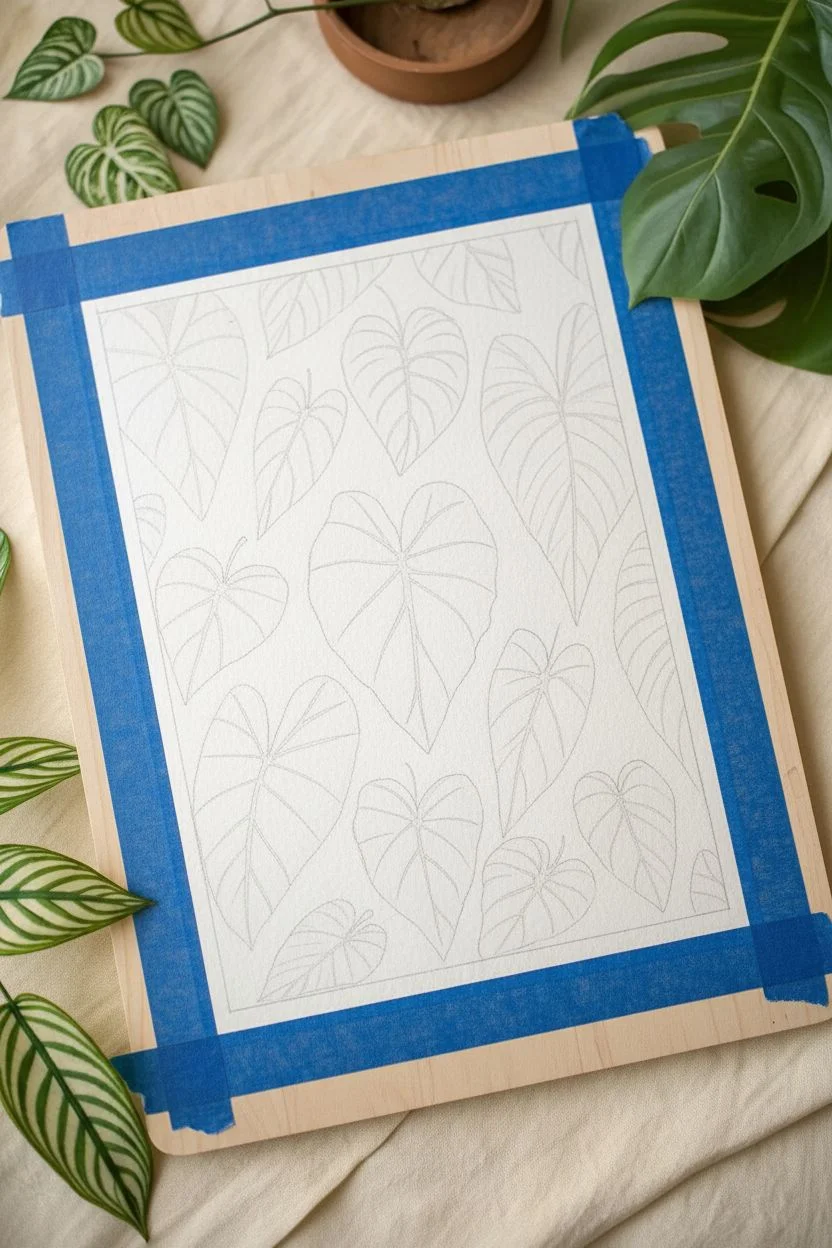
Step 1: Preparation and Sketching
-
Secure the paper:
Tape your watercolor paper down to a board or table using masking tape. Create a crisp border by taping off a rectangle in the center, leaving a wide margin of white paper around the edges. -
Map out the composition:
Lightly sketch heart-shaped leaf outlines scattered across the page. Aim for a random, organic pattern where leaves point in different directions and vary in size. -
Refine the shapes:
Go back over your outlines to define the characteristic pointed tips and rounded lobes of the taro leaves. Draw a central vein line down the middle of each leaf. -
Add vein details:
Sketch the secondary veins branching out from the center line. Keep these lines very faint, as they serve only as a guide for your white details later. -
Lighten the sketch:
Roll your kneaded eraser gently over the entire drawing. You want the graphite to be barely visible so it doesn’t dirty your green paint later.
Step 2: Painting the Background
-
Mix the background wash:
Create a very dilute, creamy beige color using plenty of water mixed with a touch of Yellow Ochre and a tiny dot of Burnt Sienna. -
Apply the wash:
Paint the negative space around the leaves with this sandy color. Work carefully around your leaf outlines to maintain crisp edges. -
Let it dry completely:
Allow the background to dry fully. If the paper feels cool to the touch, it is still damp.
Master the Veins
If your hand shakes, rest your pinky on a dry part of the paper to stabilize your brush while painting the fine white lines.
Step 3: Layering the Leaves
-
Mix your base greens:
Prepare three different puddles of green: a light yellow-green, a medium forest green, and a deep, shadowy blue-green (mix in Indigo for this). -
Start with the lightest leaves:
Choose a few smaller leaves to paint with your lightest green mixture. Fill the leaf shape solidly, but lift your brush slightly near the veins if you want a softer look. -
Paint the medium leaves:
Select the majority of your leaves and paint them with the standard forest green. Ensure the paint is watery enough to flow but pigmented enough to be opaque. -
Add depth with dark leaves:
Use the deep blue-green mixture for the largest or ‘closest’ leaves. This contrast creates visual interest and depth in the pattern. -
Create texture within leaves:
While a leaf is still wet, you can drop a tiny bit of darker green near the center line or the edges to create a subtle gradient. -
Dry thoroughly:
This is crucial—ensure every green leaf is bone dry before moving on to the fine details, or the white lines will bleed.
Monstera Variation
Switch up the pattern by adding holes (fenestrations) to some larger leaves to transform them into Monstera leaves.
Step 4: Adding Veins and Details
-
Prepare the details:
Dilute a small amount of white gouache with water until it has the consistency of heavy cream. Alternatively, prime your white gel pen. -
Draw the central vein:
Using your finest liner brush or pen, draw a clean, thin line down the center of each leaf, following the curve of the shape. -
Add branching veins:
Paint the side veins radiating from the center. I find it helpful to curve these lines slightly toward the leaf tip to make them look more natural. -
Vary line weight:
Try to make the veins slightly thicker near the center and taper them off to be hair-thin as they reach the edge of the leaf. -
Final touches:
Once the white gouache is dry, erase any remaining stray pencil marks and carefully peel off the masking tape to reveal the crisp edges.
Frame this serene botanical study to bring a permanent piece of tropical paradise into your home
Abstract Turquoise Water Gradients
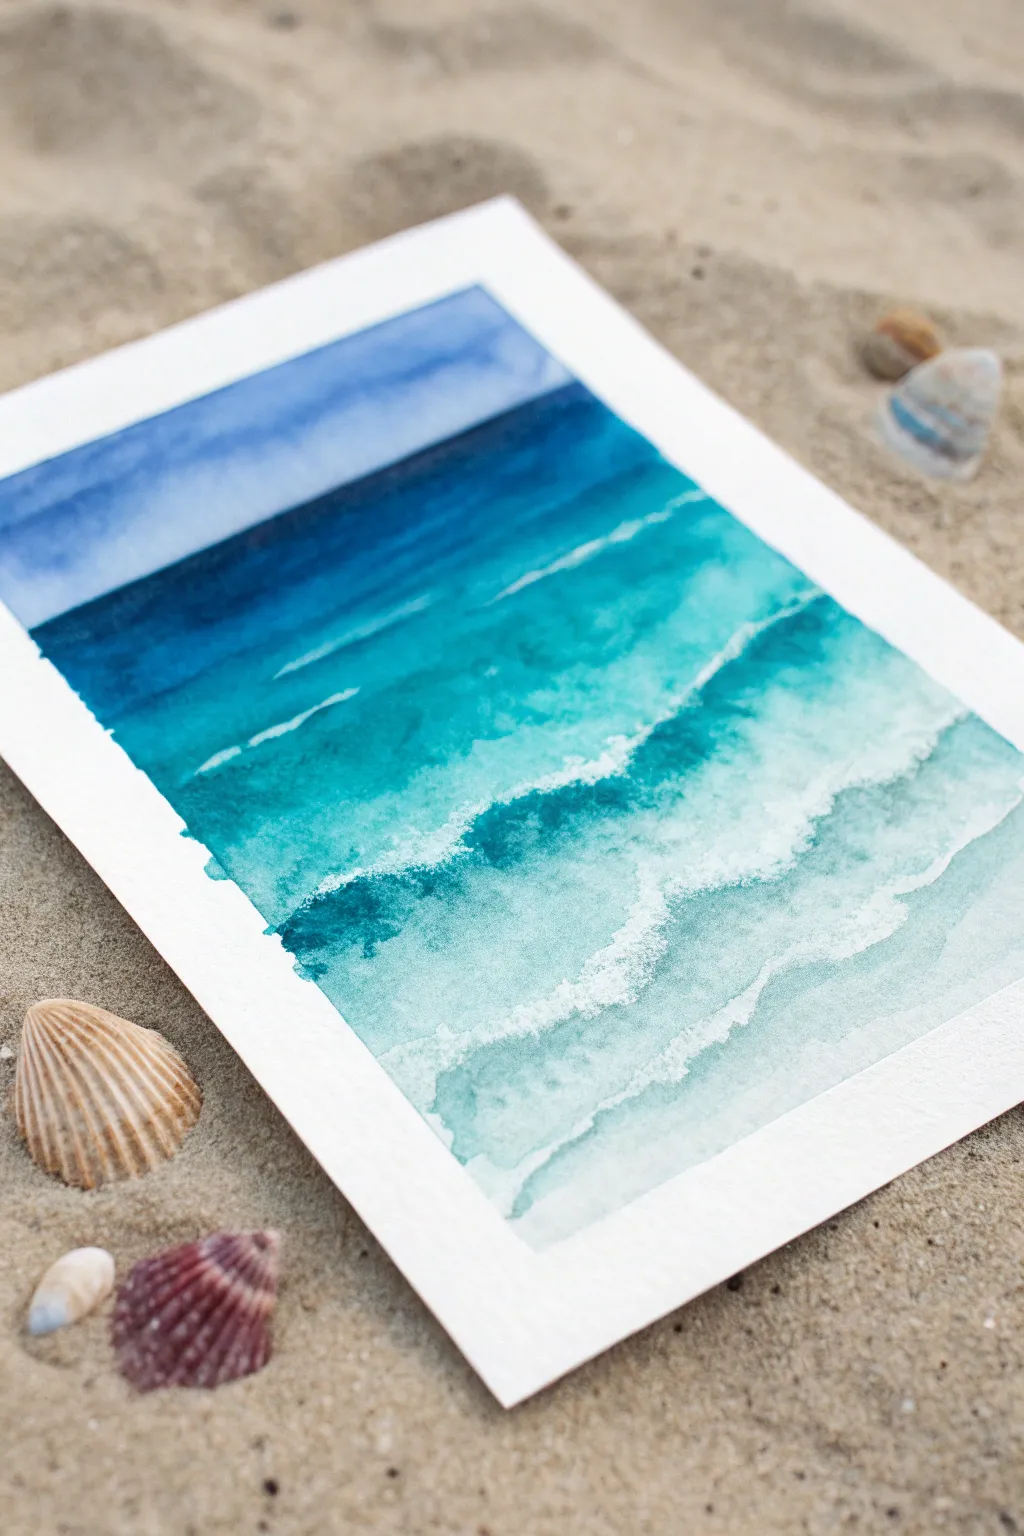
Capture the tranquil beauty of Hawaiian waters with this serene watercolor project. By layering rich blues and vibrant turquoises, you’ll create a stunning gradient that mimics the depth of the ocean meeting the shore.
How-To Guide
Materials
- Cold Press Watercolor Paper (140lb/300gsm), taped down
- Watercolor Paints: Indigo, Phthalo Blue, Turquoise, Viridian, White Gouache
- Round Brushes (Size 8 and 4)
- Flat Wash Brush (1 inch)
- Masking Fluid (optional)
- Clean Water & Paper Towels
- Painter’s Tape
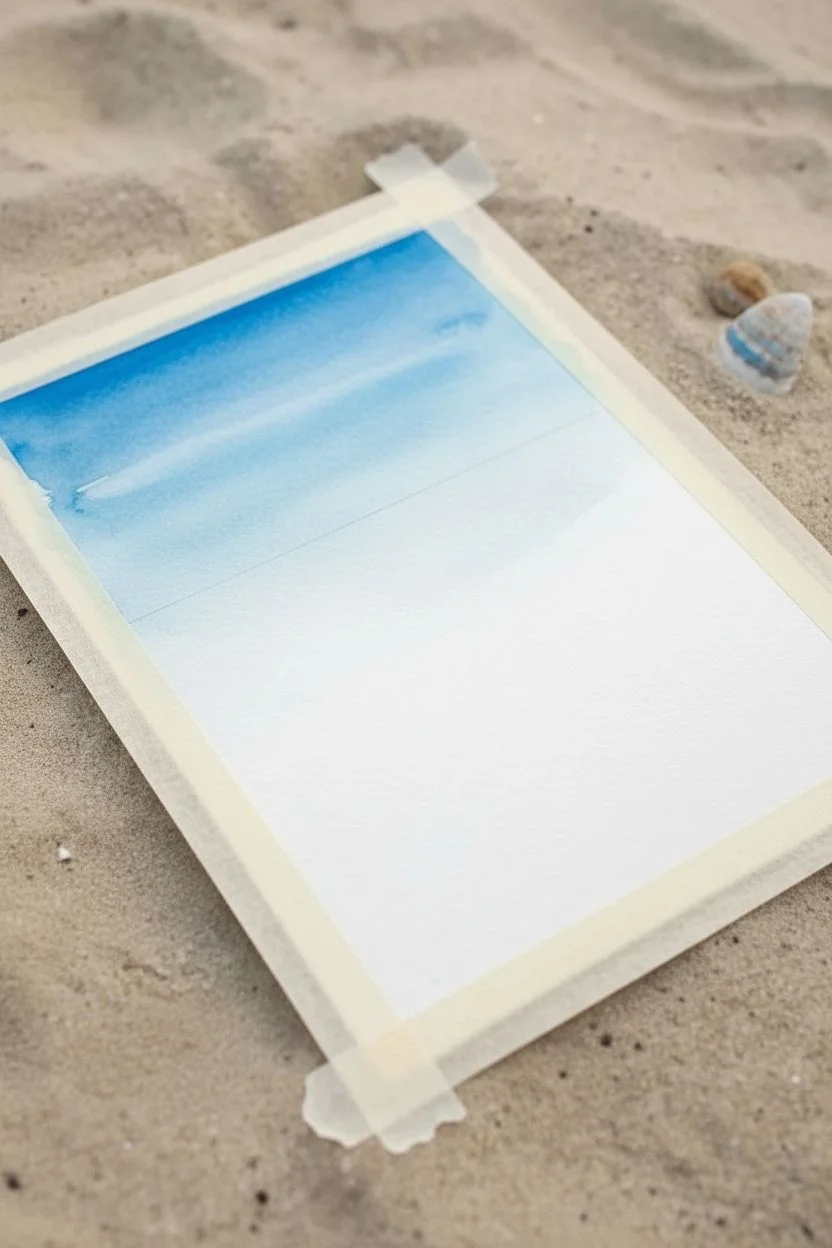
Step 1: Planning and Sky
-
Tape edges:
Begin by securely taping down all four edges of your watercolor paper to a board. This creates the crisp white border seen in the example. -
Mark the horizon:
About one-third of the way down the page, lightly mark a straight horizontal line with a pencil. This will separate the sky from the ocean. -
Wet the sky area:
Using your flat wash brush, apply a clean layer of water to the sky area only. The paper should be glistening but not forming puddles. -
Paint the sky gradient:
Load your brush with a diluted Phthalo Blue. Start at the very top of the paper and sweep across, gradually adding more water as you move down toward the horizon to create a fade. -
Soft clouds:
While the sky is still damp, lift out a few horizontal streaks using a clean, thirsty brush or the corner of a paper towel to suggest faint cloud movement.
Muddy Waters?
If your ocean colors look muddy, let the layers dry completely between wash applications. Wet-on-wet is great for gradients, but too much mixing on paper turns brown.
Step 2: Deep Ocean and Horizon
-
Define the horizon line:
Mix a strong concentration of Indigo and Phthalo Blue. Using the flat edge of your brush or a Size 8 round, paint a crisp, dark line right at the pencil mark. -
Deep water gradient:
Immediately below the horizon line, wash in the deep blue mix, keeping the color saturated. This represents the deepest part of the ocean. -
Transition to teal:
As you move down the paper, start mixing Turquoise into your blue. Paint horizontal strokes, allowing the deep blue to bleed naturally into the teal. -
Create wave troughs:
While the paint is wet, leave slight gaps or use a damp brush to lift horizontal lines effectively suggesting the rolling movement of distant waves.
Step 3: Shallows and Foam
-
Turquoise transition:
Switch to a mix of Turquoise and a touch of Viridian for the mid-section. The color should be vibrant and translucent. -
The shoreline gradient:
Dilute your paint significantly as you reach the bottom third. The water here is shallow, so the color should be very pale, almost blending into the white of the paper. -
Dry completely:
Allow the entire painting to bone dry. This is crucial before adding the sharp white details. -
Prepare the foam:
Squeeze out some white Gouache. I find gouache works better than watercolor white because it sits opaquely on top of the blue layers. -
Paint the wave crests:
Using a smaller Size 4 brush, paint jagged, irregular lines horizontally across the turquoise section to represent breaking wave crests. -
Add seafoam texture:
Dry brush the gouache slightly below the wave crests. Drag the brush quickly so the paint ‘skips’ over the tooth of the paper, creating a bubbly foam texture. -
Shoreline foam:
At the very bottom, paint wider, softer bands of white to show the foamy water rushing up onto the sand. -
Final highlights:
Add tiny dots and thin lines of pure white gouache in the darkest blue areas to suggest distant whitecaps catching the light. -
Reveal the border:
Once everything is perfectly dry, slowly peel away the painter’s tape at a 45-degree angle to reveal your clean, professional edges.
Sparkle Effect
Sprinkle a tiny pinch of coarse sea salt onto the wet turquoise paint while drying. Brush it off later to create unique, organic textures that look like sea spray.
Frame your personal slice of paradise or gift it to someone who needs a little beachside calm


Have a question or want to share your own experience? I'd love to hear from you in the comments below!