There is something undeniably special about capturing love on canvas through color and texture, making the humble heart shape a perfect vessel for artistic experimentation. Let’s explore some inspiring ways to interpret this timeless symbol using tools you likely already have in your studio, from kitchen scraps to classic brushes.
Dotted Mandalas with Cotton Swabs
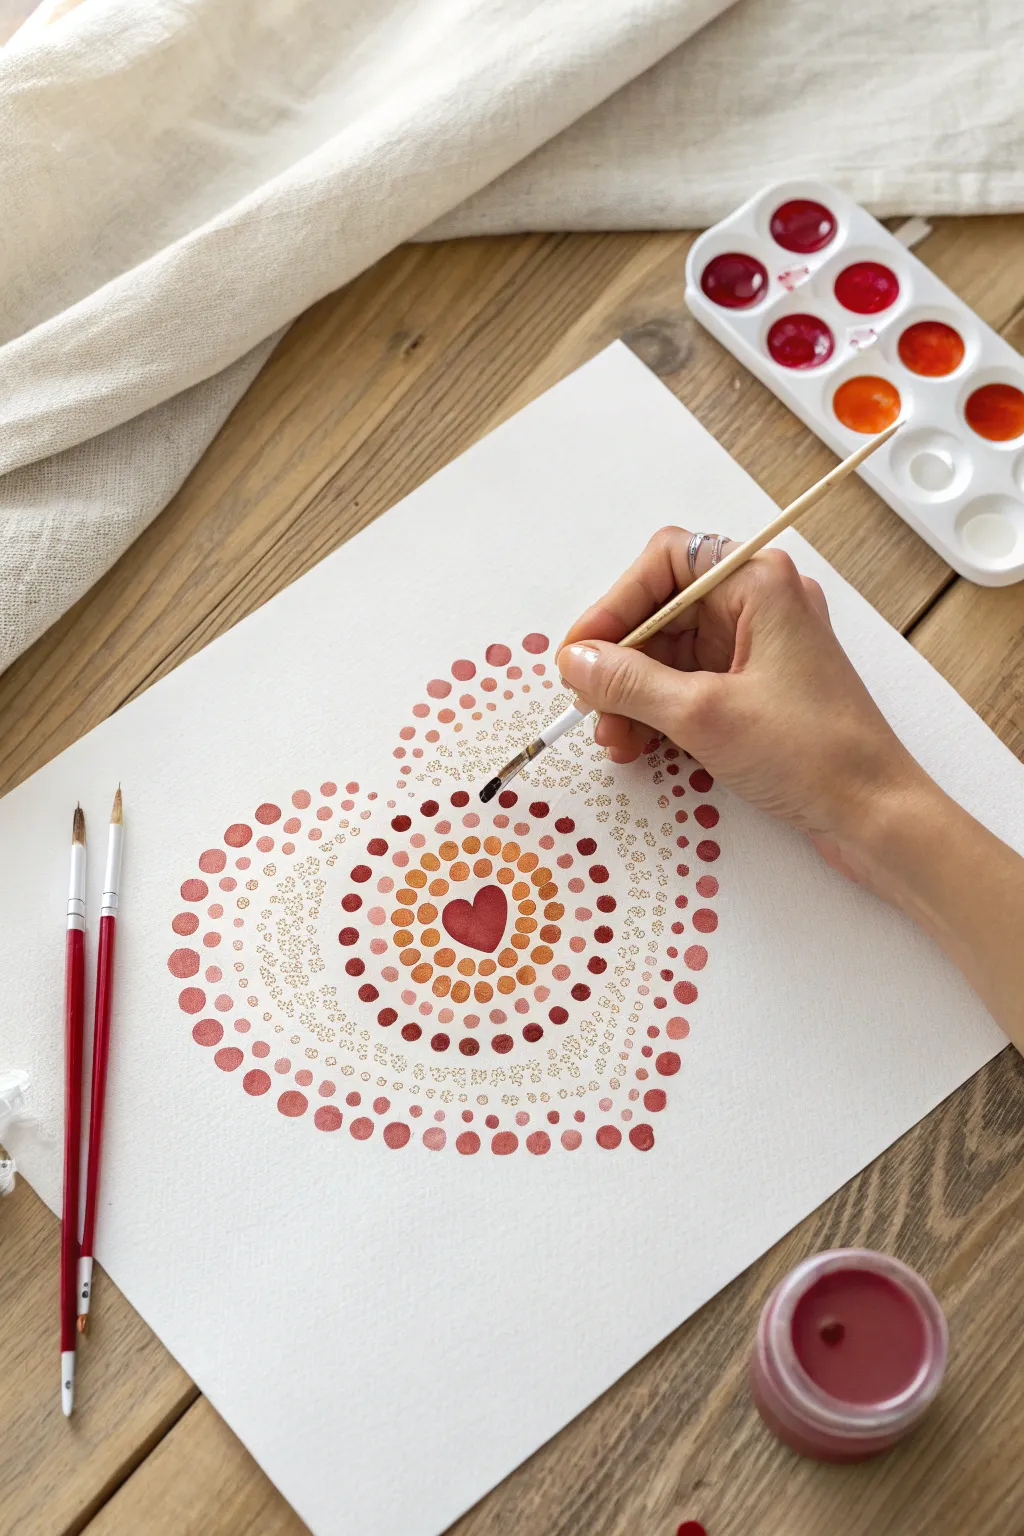
Combine the meditative practice of mandala making with the fluidity of watercolors in this warm, heart-shaped design. Using a pointillism technique, you will build layers of red, orange, and gold to create a piece that feels both structured and organic.
Step-by-Step Guide
Materials
- Cold-press watercolor paper
- Watercolor paints (shades of red, burgundy, orange, peach)
- Metallic gold watercolor paint
- Round paintbrush (size 4 or 6)
- Fine detail paintbrush (size 0 or 1)
- Pencil and eraser
- Water jar and paper towels
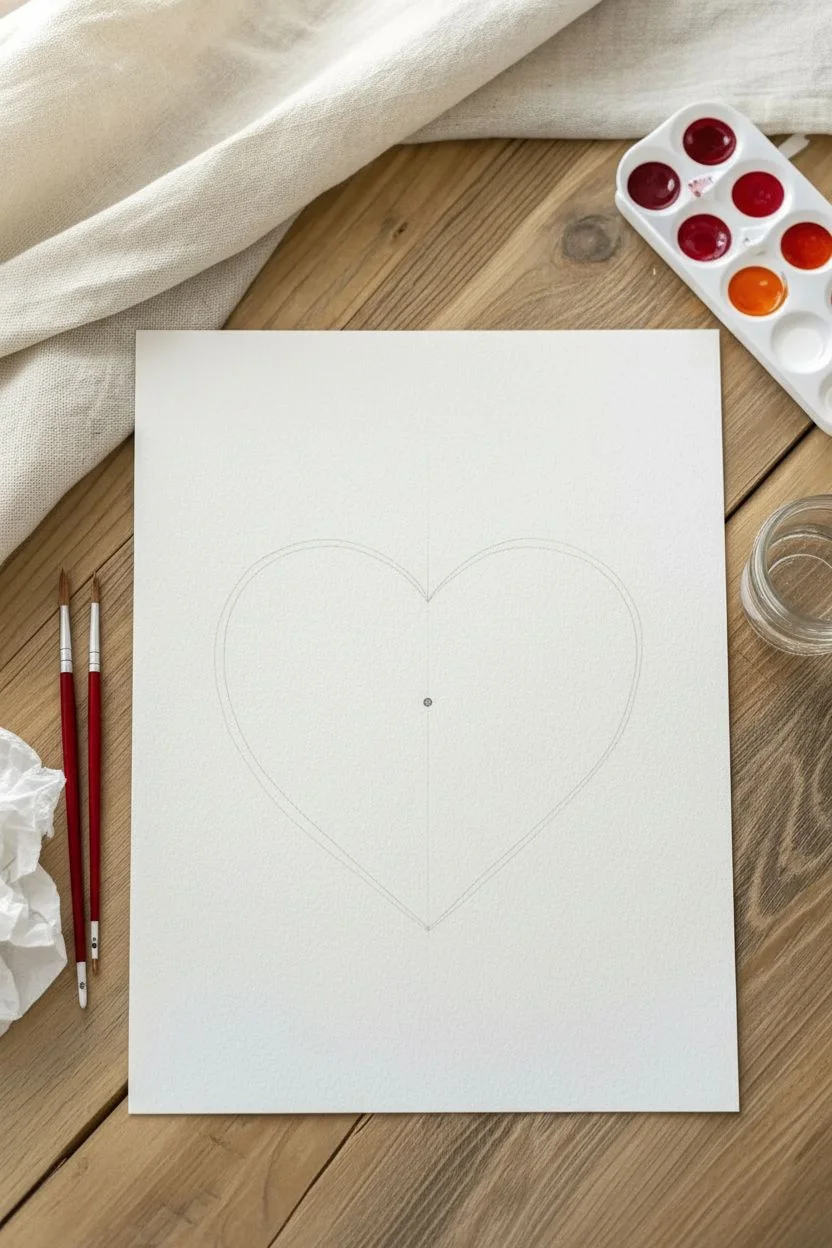
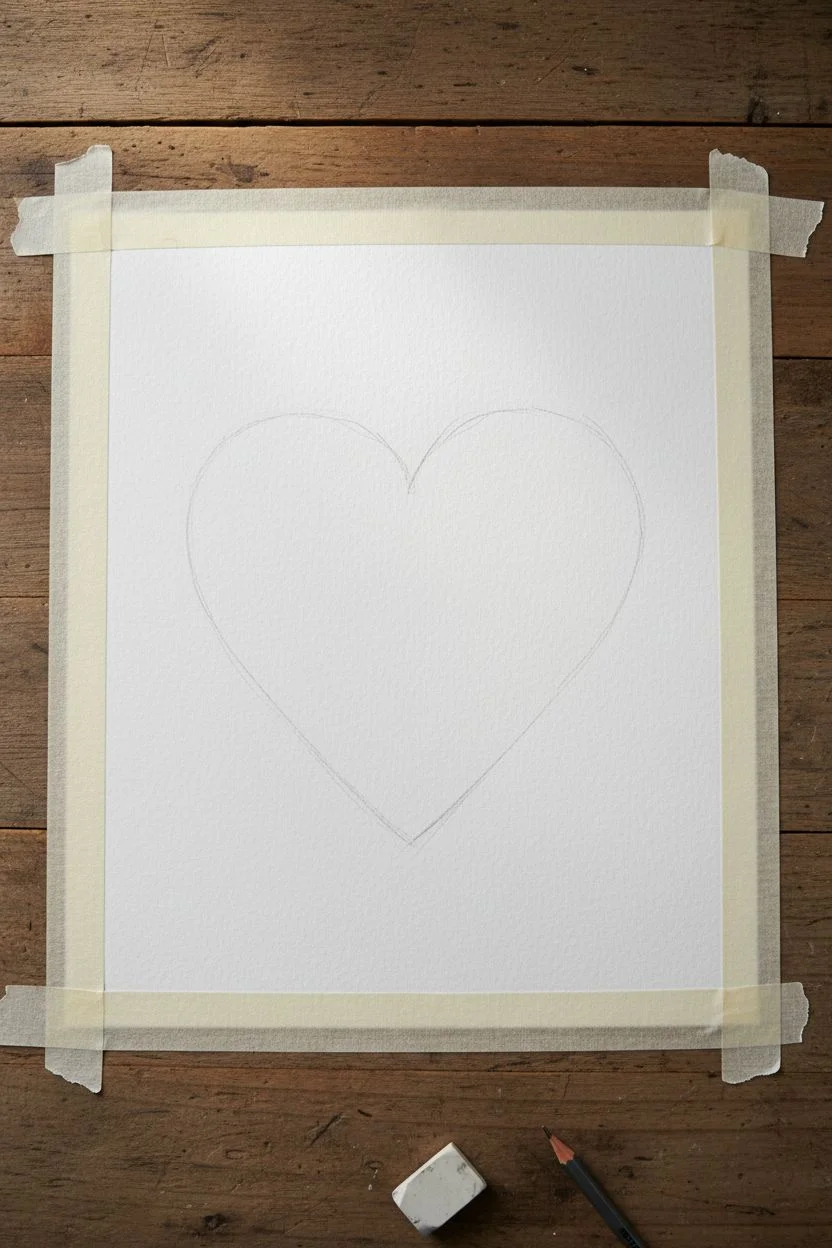
Step 1: Drafting the Guide
-
Draw the outline:
Lightly sketch a large, symmetrical heart shape on your watercolor paper using a pencil. This will serve as the outer boundary for your design. -
Mark the center:
Place a tiny dot in the visual center of the heart to act as your anchor point for the expanding patterns.
Paint Consistency
Keep your paint texture like heavy cream. If it’s too watery, the dots will run; too thick, and they will crack when dry.
Step 2: The Central Core
-
Paint the heart:
Mix a rich, ruby red paint to a creamy consistency. Directly over your center mark, paint a small, solid heart shape. -
Start the first ring:
Load your round brush with orange paint. Carefully dab a ring of small dots immediately surrounding the central heart. -
Create the second ring:
Mix a warm reddish-orange tone. Paint a second concentric circle of dots around the orange ring, making these slightly larger. -
Add the third ring:
Switch to a deep burgundy or dark red. Create a third ring of distinct, round dots. I like to reload my brush every two dots to keep the size consistent. -
Expand outward:
Continue creating circular rings of dots, alternating between peach, orange, and red tones, until you have a circular mandala shape that fills about half the width of your pencil outline.
Step 3: Defining the Shape
-
outline the border:
Mix a soft, vintage red or dark pink. Using your larger round brush, paint a series of large, bold dots directly along your pencil sketch line to define the heart shape. -
Add an inner border:
Create a second row of dots just inside the outer border dots, following the curvature of the heart shape. -
Form the corner accents:
In the open spaces at the top lobes and the bottom point of the heart, paint loose clusters of medium-sized dots in varying shades of red to bridge the gap between the circle and the heart outline.
Level Up
For perfectly uniform large dots on the outer border, try dipping the back end of your paintbrush handle into the paint instead of using the bristles.
Step 4: The Golden Filler
-
Prepare the detail brush:
Switch to your fine detail brush (size 0 or 1) and mix a metallic gold or a very pale peach color. -
Stipple the negative space:
Begin filling the white space between the central mandala and the outer heart border with tiny, delicate specks or ‘stardust’ dots. -
Vary the density:
Concentrate more tiny dots near the central rings and let them spread out comfortably as they reach the outer border. -
Dry and erase:
Allow the painting to dry completely for at least 30 minutes. Once the paint is bone dry, gently erase any visible pencil marks from the outer edge.
Frame your beautiful dotted heart or turn it into a handmade card for someone special.


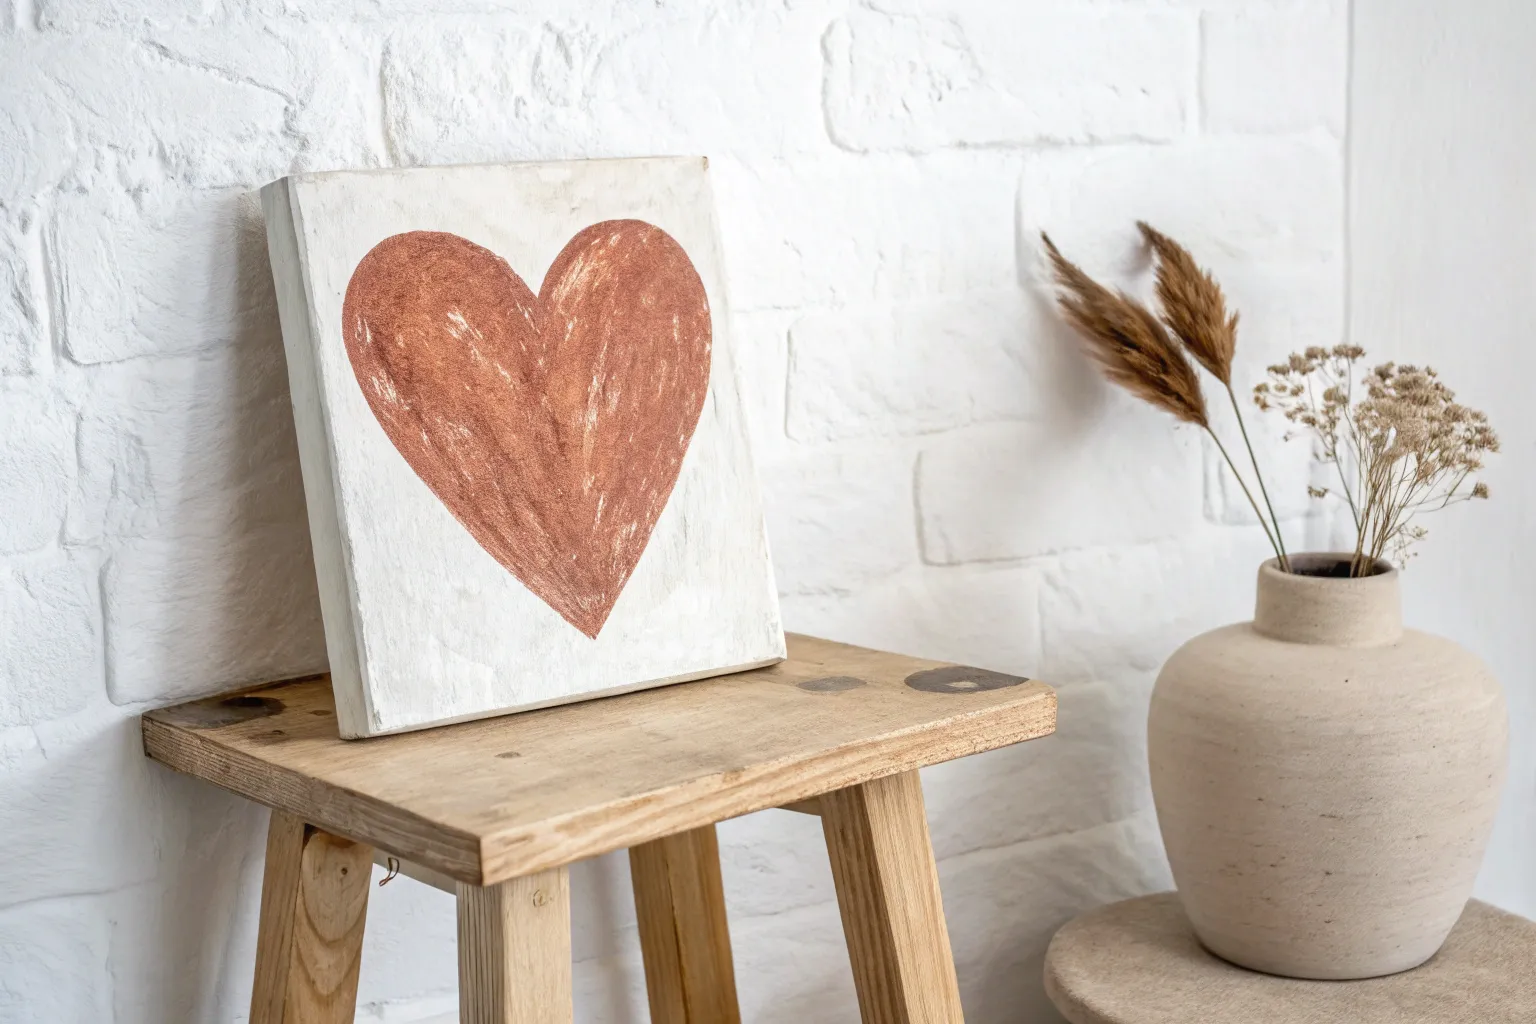
Rustic Scraped Textures
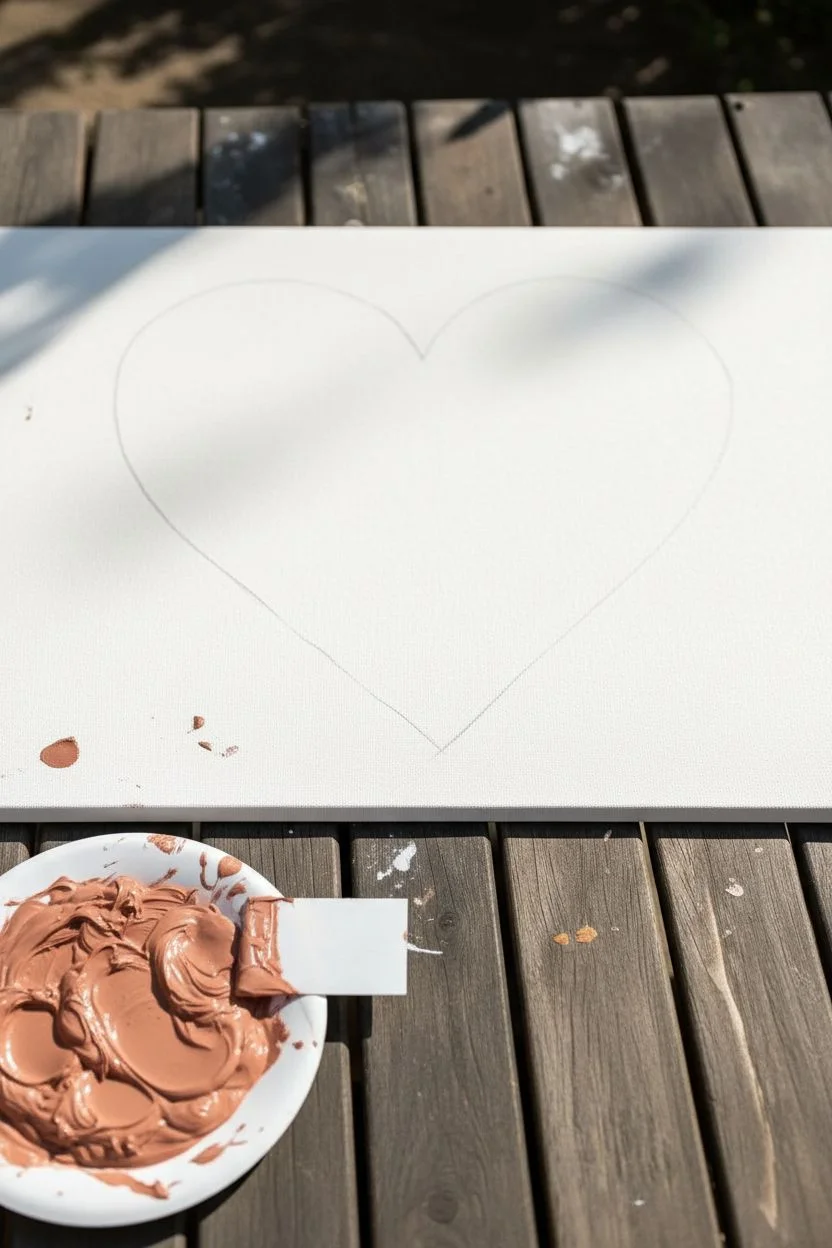
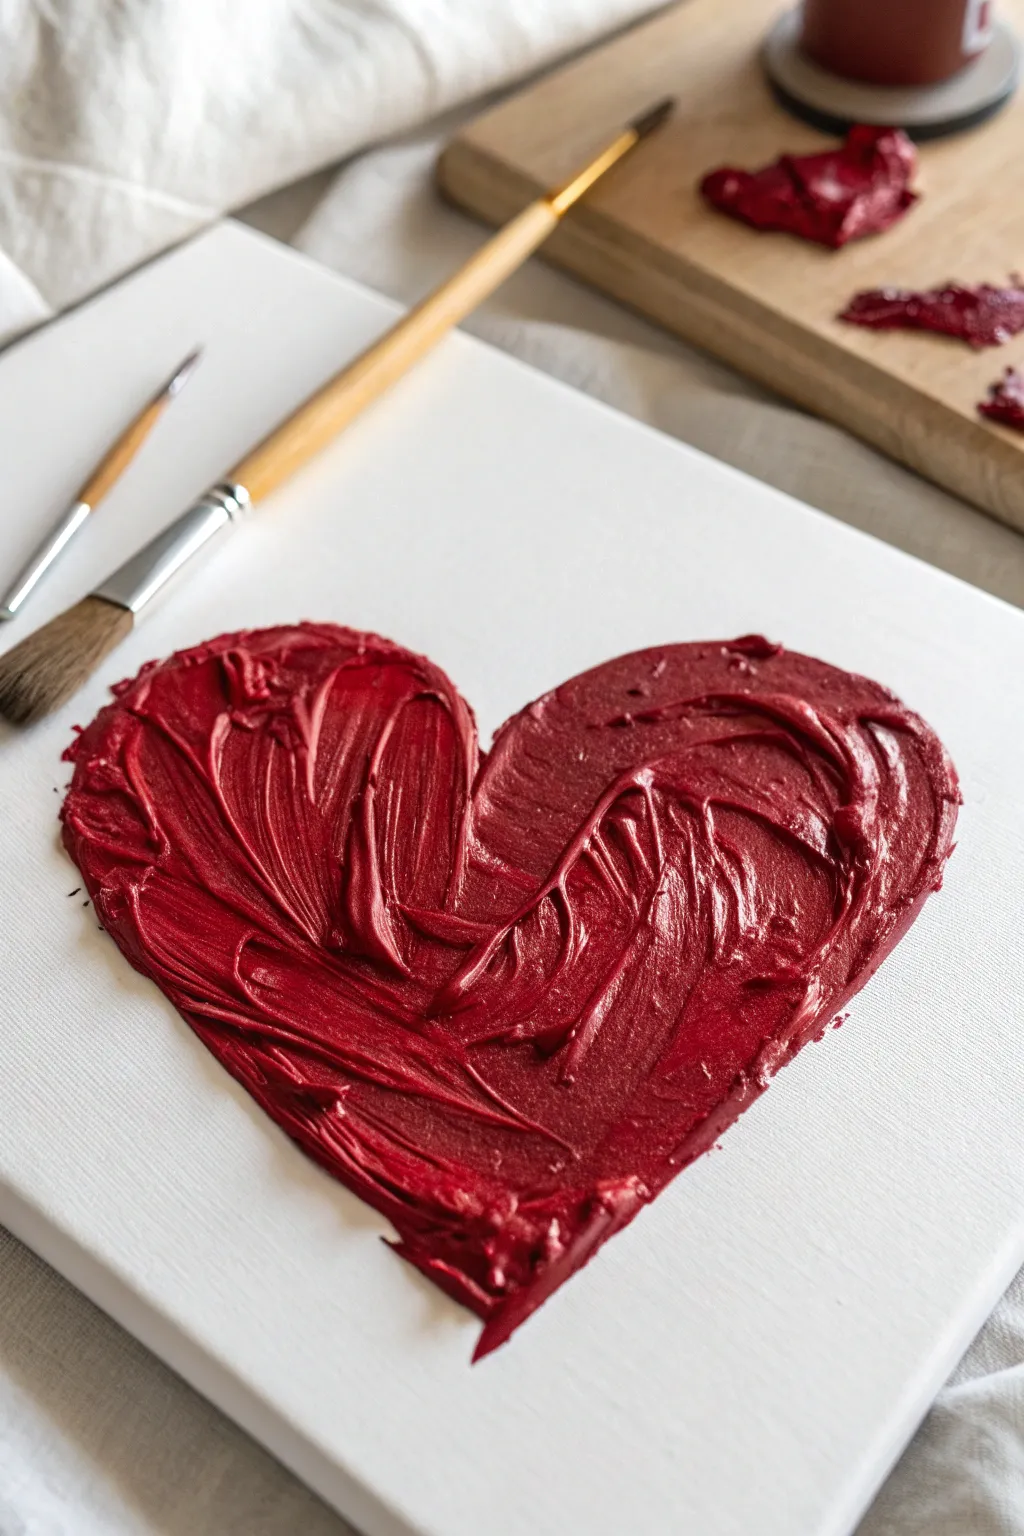
Capture the beauty of raw texture with this minimal yet striking art piece that uses scraping techniques to create depth and movement. The earthy tones and physical ridges of the paint give this heart a warm, handcrafted feel perfect for modern farmhouse decor.
Step-by-Step Tutorial
Materials
- Stretched white canvas (square or rectangular)
- Heavy body acrylic paint (Terracotta, Burnt Sienna, or Copper)
- Modeling paste or texture gel medium
- Flat plastic scraper, putty knife, or old credit card
- Pencil
- Palette or mixing plate
- Paper towels
Step 1: Preparation & Mixing
-
Prepare the workspace:
Lay your canvas on a flat, stable table rather than an easel, as you will need to apply downward pressure while scraping. -
Sketch the outline:
Using a pencil, lightly draw a large, symmetrical heart shape in the center of the canvas to serve as your guide. -
Dispense the paint:
Squeeze a generous amount of your terracotta-colored acrylic paint onto your mixing palette. -
Add texture medium:
Add an equal part of modeling paste to the paint; this thickener is the secret to getting those deep ridges that hold their shape. -
Blend the mixture:
Mix the paint and paste together thoroughly with your scraper until you achieve a uniform, frosting-like consistency.
Clean Sweep Tip
Wipe your scraper tool with a paper towel between every few strokes. This prevents dried clumps from dragging through your fresh smooth wet layers.
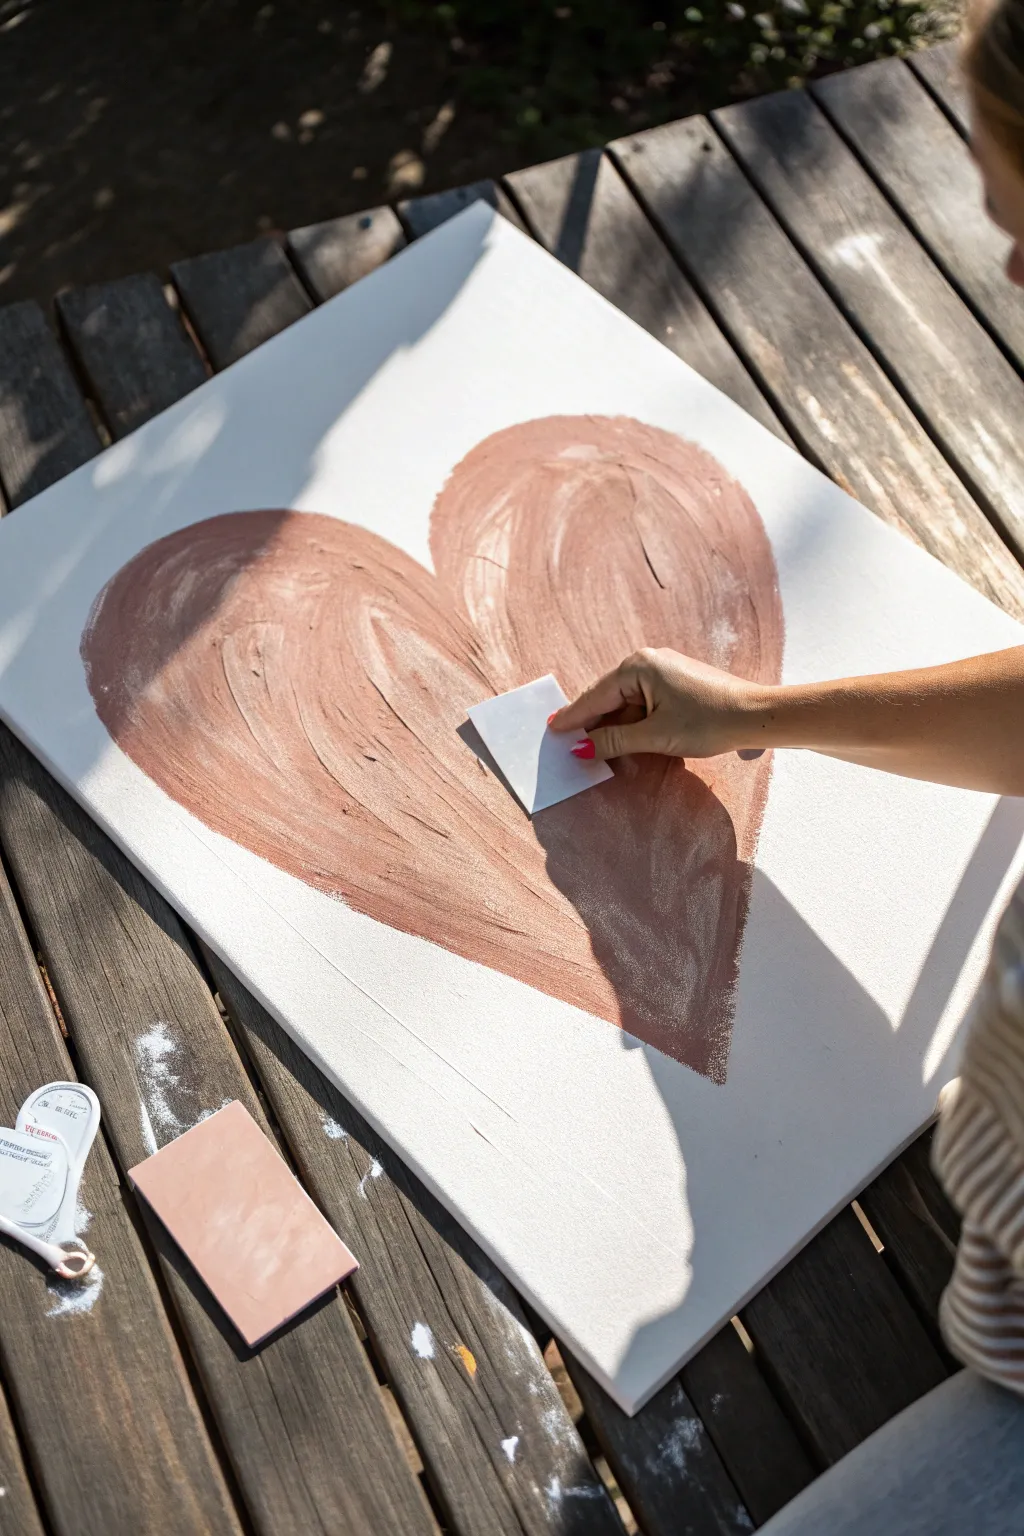
Step 2: Applying the Texture
-
Load the scraper:
Scoop up a substantial amount of the thick paint mixture onto the straight edge of your plastic scraper. -
Start at the curve:
Place the loaded scraper at the top of the left heart lobe, just inside your pencil line. -
Drag and define:
Press down firmly and drag the tool downward along the curve of the heart, depositing a thick layer of paint. -
Create the outline:
Continue scraping along the pencil perimeter first; this ensures you have crisp, clean edges before filling the middle. -
Fill the left side:
Working from the top left, use sweeping, curved motions to pull the paint toward the center and bottom point. -
Define the right lobe:
Replenish your scraper and repeat the process for the right side, carefully following the upper arch. -
Fill the right side:
Drag the medium down the right side to meet the left at the bottom point. -
Merge the center:
Use the scraper to blend the meeting point in the middle of the heart so there isn’t a harsh vertical line separating the halves.
Level Up: Metallic Glow
Mix a small drop of iridescent copper or gold medium into your paint. It will highlight the ridges when the light hits the texture.
Step 3: Texturing & Drying
-
Add directional movement:
Go back over the wet paint with clean, long swipes, following the curve of the heart to create satisfying drag marks. -
Adjust pressure:
I like to vary my hand pressure here; press harder to reveal thin spots and lighter to leave thick ridges. -
Clean the edges:
If any paint spilled over your initial pencil outline, use a clean edge of the scraper or a damp cloth to tidy it up immediately. -
Inspect the ridges:
Look at the painting from the side to ensure you have enough physical texture and height variation. -
Clean tools:
Wipe off your scraper immediately, as modeling paste becomes very difficult to remove once it hardens on tools. -
Allow to cure:
Let the artwork dry flat for at least 24 hours, as the thick impasto layers take much longer to set than standard acrylics.
Once fully cured, hang your textured masterpiece where natural light can play across the ridges and bring the heart to life


Marbled Effect with Plastic Wrap
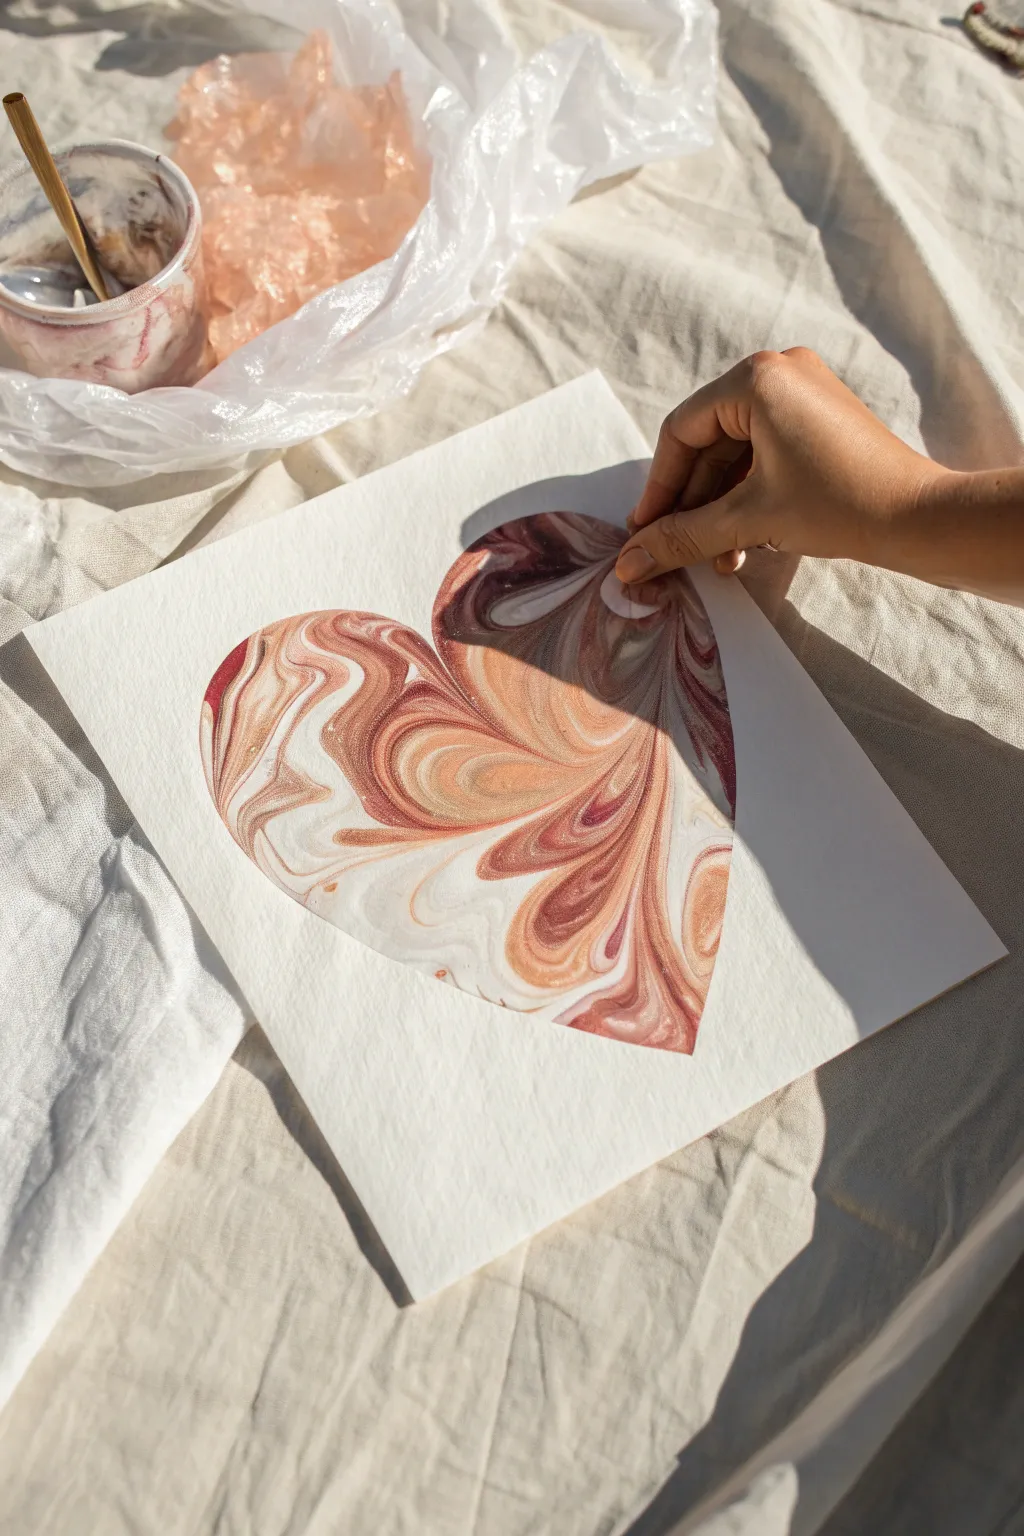
Create a sophisticated, faux-stone effect using nothing more than acrylic paint and kitchen cling film. This technique mimics the organic veins of natural marble, resulting in a unique piece of art perfect for cards or wall decor.
Step-by-Step
Materials
- Heavy watercolor paper or mixed media cardstock
- Acrylic paints (Dusty Rose, Burgundy, Cream, Metallic Gold)
- Plastic cling wrap
- Scissors
- Pencil
- Work surface cover
Step 1: Preparing the Palette
-
Protect your space:
Lay down a drop cloth or old sheet, as seen in the photo, to protect your table from accidental acrylic spills. -
Select paper:
Choose a thick, heavyweight paper like watercolor paper; this prevents the sheet from buckling under the weight of the wet paint. -
Mix custom shades:
To achieve the look in the image, you’ll need soft, earthy tones. If you don’t have premixed colors, mix a bit of white into red and brown to create a dusty rose.
Avoid Muddy Colors
Stop manipulation early! If you over-mix the paints under the plastic, they will blend into a single brown sludge rather than keeping distinct, beautiful marbled veins.
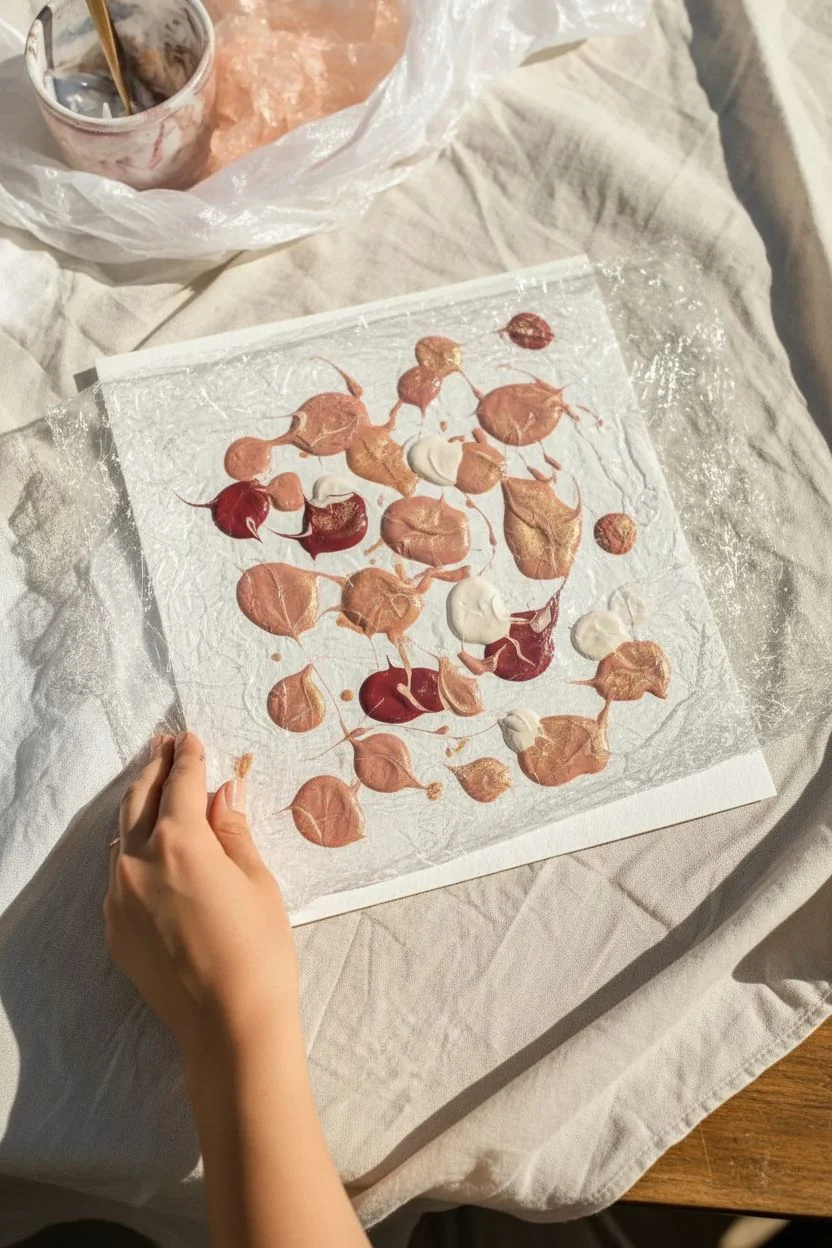
Step 2: The Smoosh Technique
-
Apply paint dots:
Squeeze or brush generous dollops of your chosen colors directly onto the paper. -
Distribute randomly:
Place the colors in a random pattern, ensuring you have a good balance of the dark burgundy and the lighter cream dots. -
Prepare the wrap:
Tear off a piece of plastic cling wrap that is slightly larger than your paper. -
Cover the paint:
Gently lay the plastic wrap over the wet paint blobs, trying not to press down hard just yet. -
Manipulate the paint:
Using your fingertips, gently press down on the plastic to squish the paint blobs. -
Create the swirls:
Slide your fingers over the plastic to push colors into one another, creating distinct veins and swirls. -
Check the coverage:
Ensure the paint covers enough surface area to fit the size of the heart you plan to cut later. -
Peel carefully:
Once you are happy with the marble pattern, lift the plastic wrap straight up to create slight texture ridges. -
Let it cure:
I like to set this aside in a sunny spot and let it dry completely—this may take a few hours depending on paint thickness.
Step 3: Shaping the Heart
-
Flip the paper:
Once dry, turn the paper over so the blank side is facing up. -
Sketch the outline:
Lightly draw a large heart shape on the back of the paper with a pencil. -
Refine the shape:
Adjust your sketch until the curves are symmetrical and the size utilizes the best part of your marbled painting. -
Cut the design:
Using sharp scissors, carefully cut along your pencil line to create a crisp, clean edge. -
Erase marks:
If any pencil marks are visible on the edges, gently erase them. -
Flatten the artwork:
If the paint has caused the heart to curl slightly, place it under a heavy book overnight to flatten it out.
Pro Tip: Metallic Veining
Add a few drops of metallic gold or copper paint into the mix. When the light hits the finished heart, these veins will catch the light and look like real mineral deposits.
Now you have a stunning, organic art piece ready to frame or gift!


Geometric Mosaic Hearts
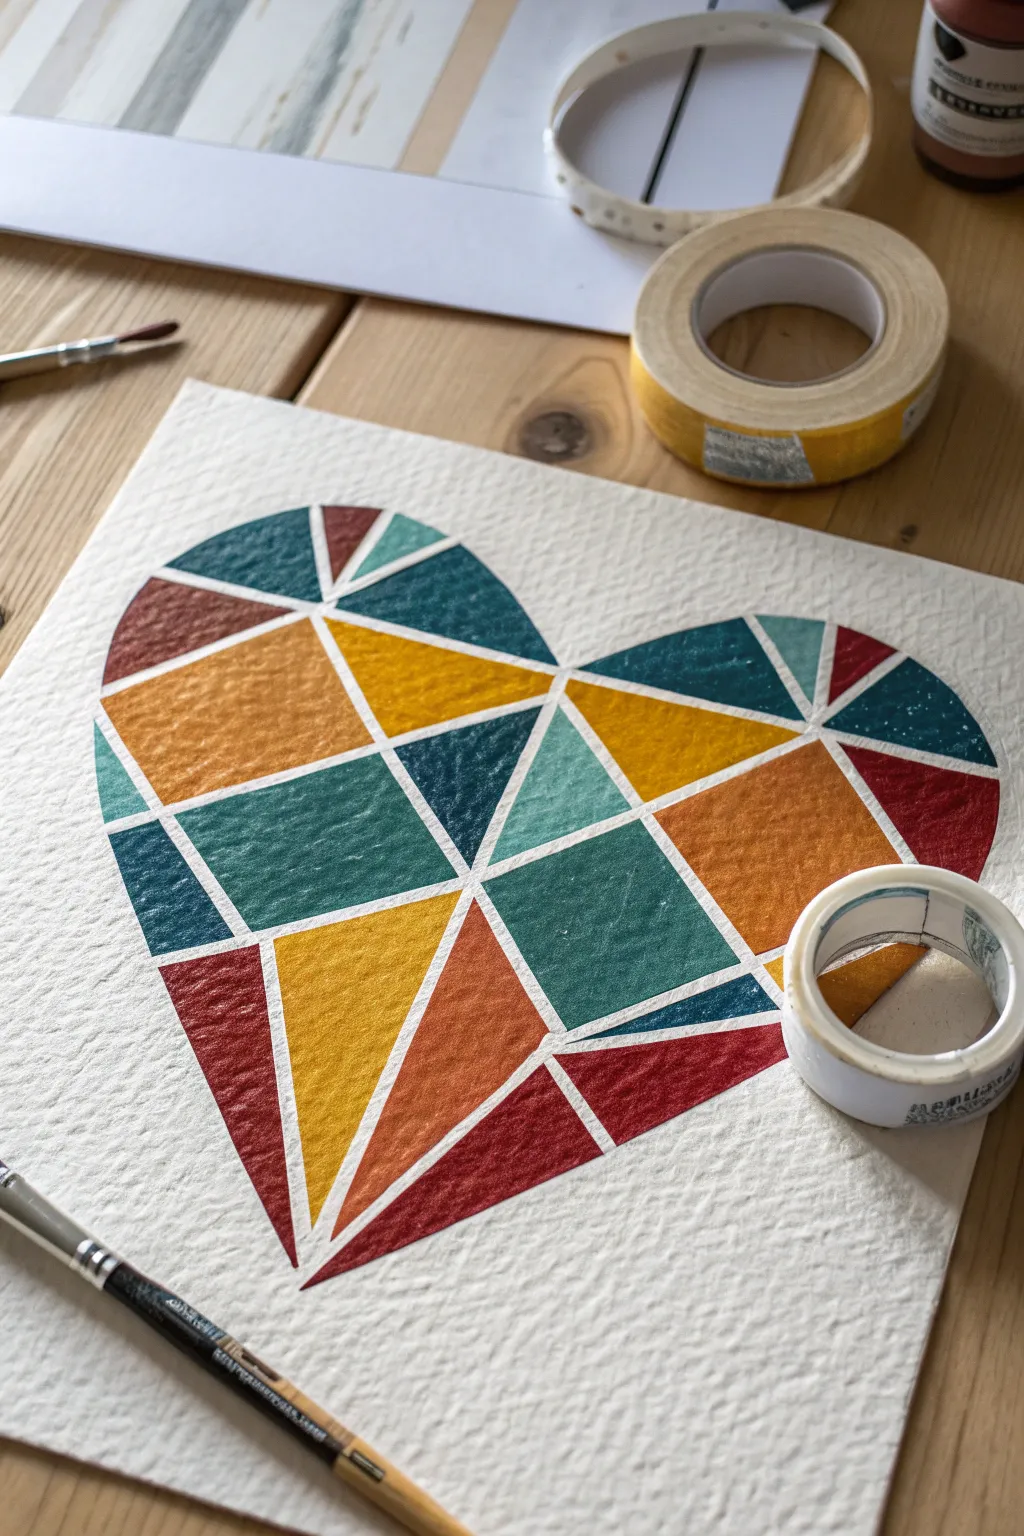
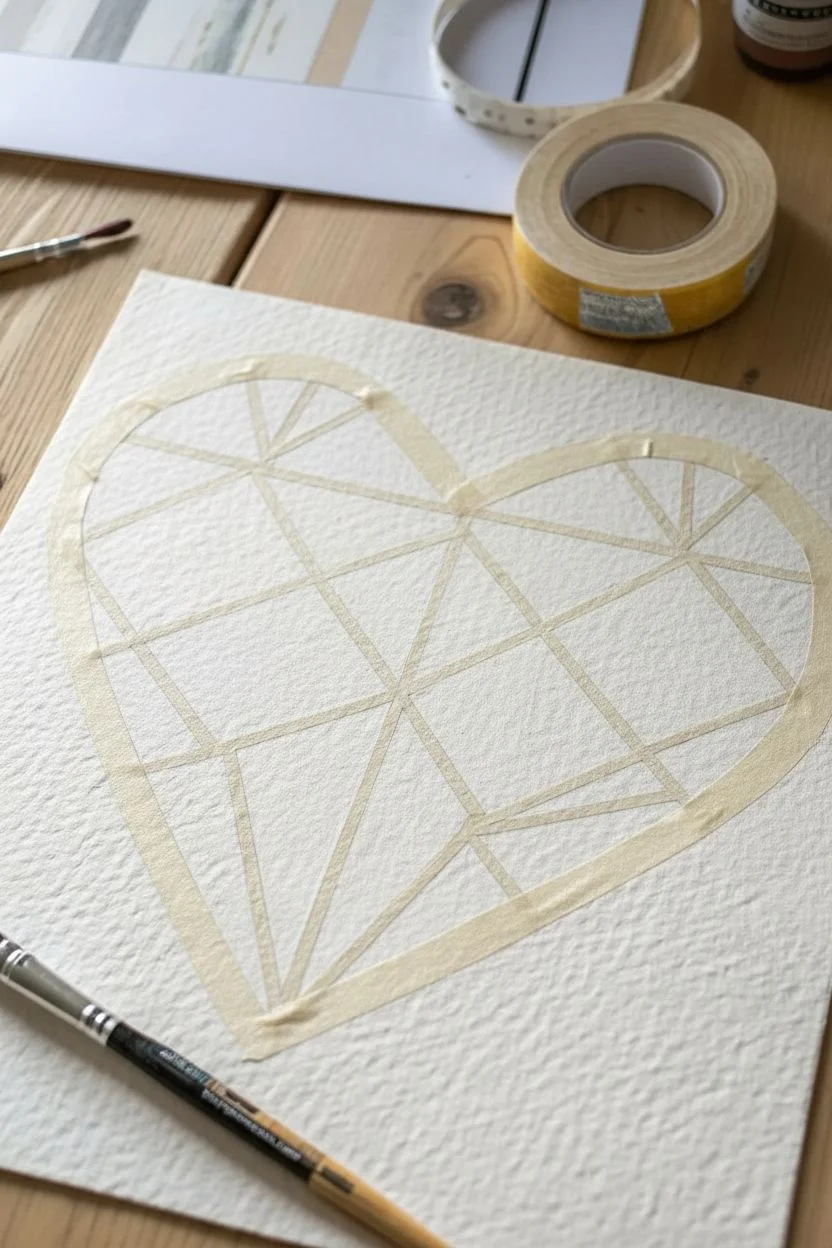
This project combines the clean structures of geometry with the organic texture of watercolor paper. By using a clever masking technique, you’ll create a vibrant, stained-glass effect that looks incredibly professional yet is beginner-friendly.
Step-by-Step Guide
Materials
- Cold-press watercolor paper (300 gsm)
- Artist’s masking tape or washi tape (approx. 5mm – 10mm width)
- Watercolor or gouache paints
- Flat shader brush (size 6 or 8)
- Round detail brush (size 2)
- Pencil and eraser
- Craft knife or precision scissors
- Paper towel
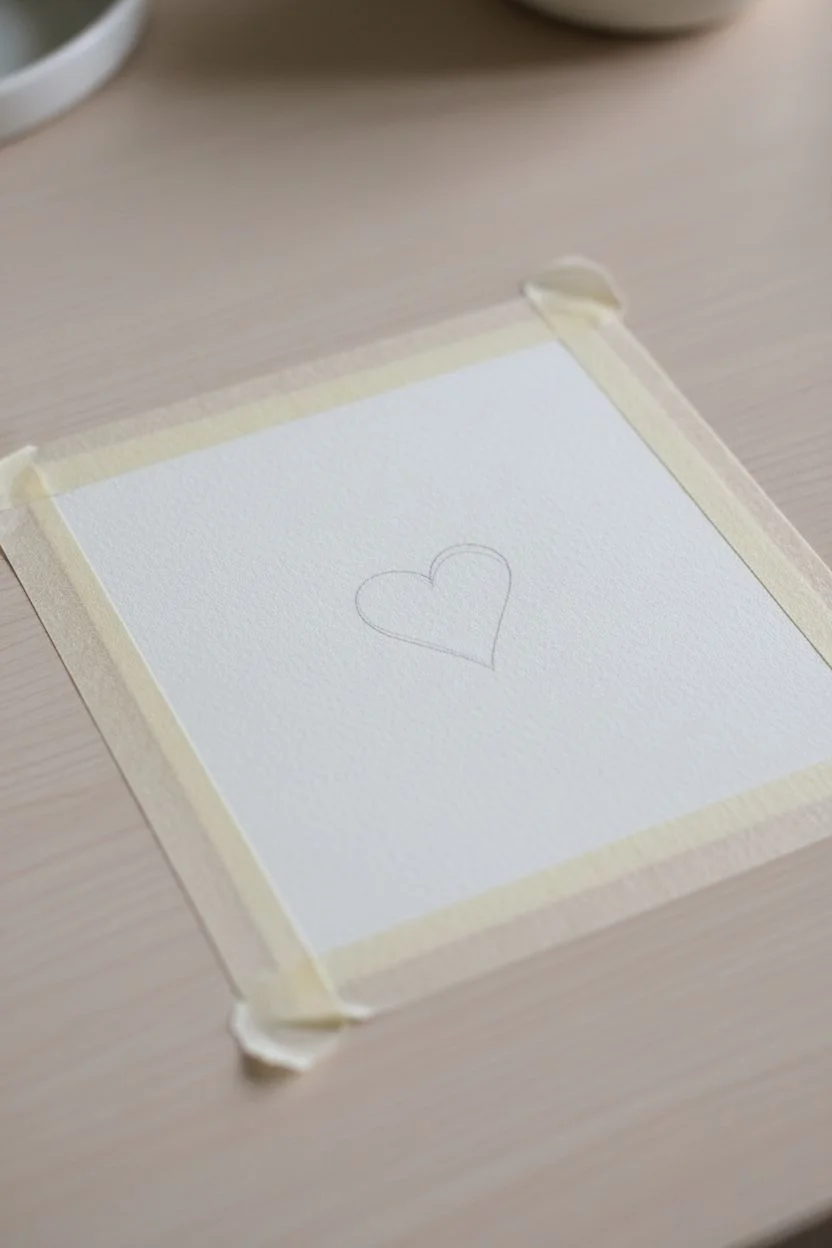
Step 1: Design and Masking
-
Sketch the outline:
Begin by lightly drawing a large, symmetrical heart shape in the center of your watercolor paper using a pencil. -
Map the first lines:
Take your masking tape and lay down one or two long strips that cut across the heart, dividing it into large sections. -
Create the mosaic:
Continue adding strips of tape in a random, crisscrossing pattern to create smaller triangles, trapezoids, and diamond shapes. -
Vary the sizes:
Try to avoid making all shapes the same size; having a mix of large and small geometric pockets makes the composition more dynamic. -
Trim the edges:
Use a craft knife to gently trim the tape strips exactly where they meet the pencil outline of the heart, removing the excess tape extending into the background. -
Seal the tape:
I always take a moment here to run the back of a spoon or my fingernail firmly over the edges of the tape to ensure a tight seal against the paper.
Seal the Deal
To get perfectly crisp lines, paint a thin layer of clear water or white paint over the tape edges first. This seals the tape, so any bleeding is invisible!
Step 2: Painting the Mosaic
-
Prepare your palette:
Mix your paint colors. To match the example, choose a muted, retro palette: deep teal, mustard yellow, burnt orange, and burgundy. -
Start with yellow:
Load your flat brush with the mustard yellow and fill in scattered shapes across the heart, ensuring no two yellow shapes are touching. -
Add the teal tones:
Rinse your brush thoroughly and switch to the deep teal, filling in another set of shapes to balance the warm yellow. -
Apply the reds:
Paint the remaining shapes with your burnt orange and burgundy shades, creating a rich contrast against the cooler blue tones. -
Mind the edges:
When painting the shapes along the bordered edge, use your smaller round brush to paint carefully right up to your pencil line for a crisp outer curve. -
Check for gaps:
Look closely at the tape intersections and dab a little extra paint there to ensure the color goes all the way to the masking line.
Make it Shine
For a luxe finish, replace one of the paint colors with metallic gold watercolor. Paint 3-5 random geometric sections with the gold for a shimmering accent.
Step 3: The Reveal
-
Let it dry completely:
Wait until the paint is bone dry to the touch; rushing this step can cause the paper to tear or the paint to smudge. -
Begin peeling:
Pick a corner of the tape and peel it back slowly at a sharp 45-degree angle, pulling away from the painted area. -
Clean up the lines:
Once all tape is removed, gently erase the original pencil outline around the heart. -
Final touches:
If any paint bled under the tape, you can gently scrape it away with a craft knife or touch it up with a distinct opaque white paint.
Step back and admire crisp white channels cutting through those rich blocks of color!
BRUSH GUIDE
The Right Brush for Every Stroke
From clean lines to bold texture — master brush choice, stroke control, and essential techniques.
Explore the Full Guide
The Negative Space Stencil
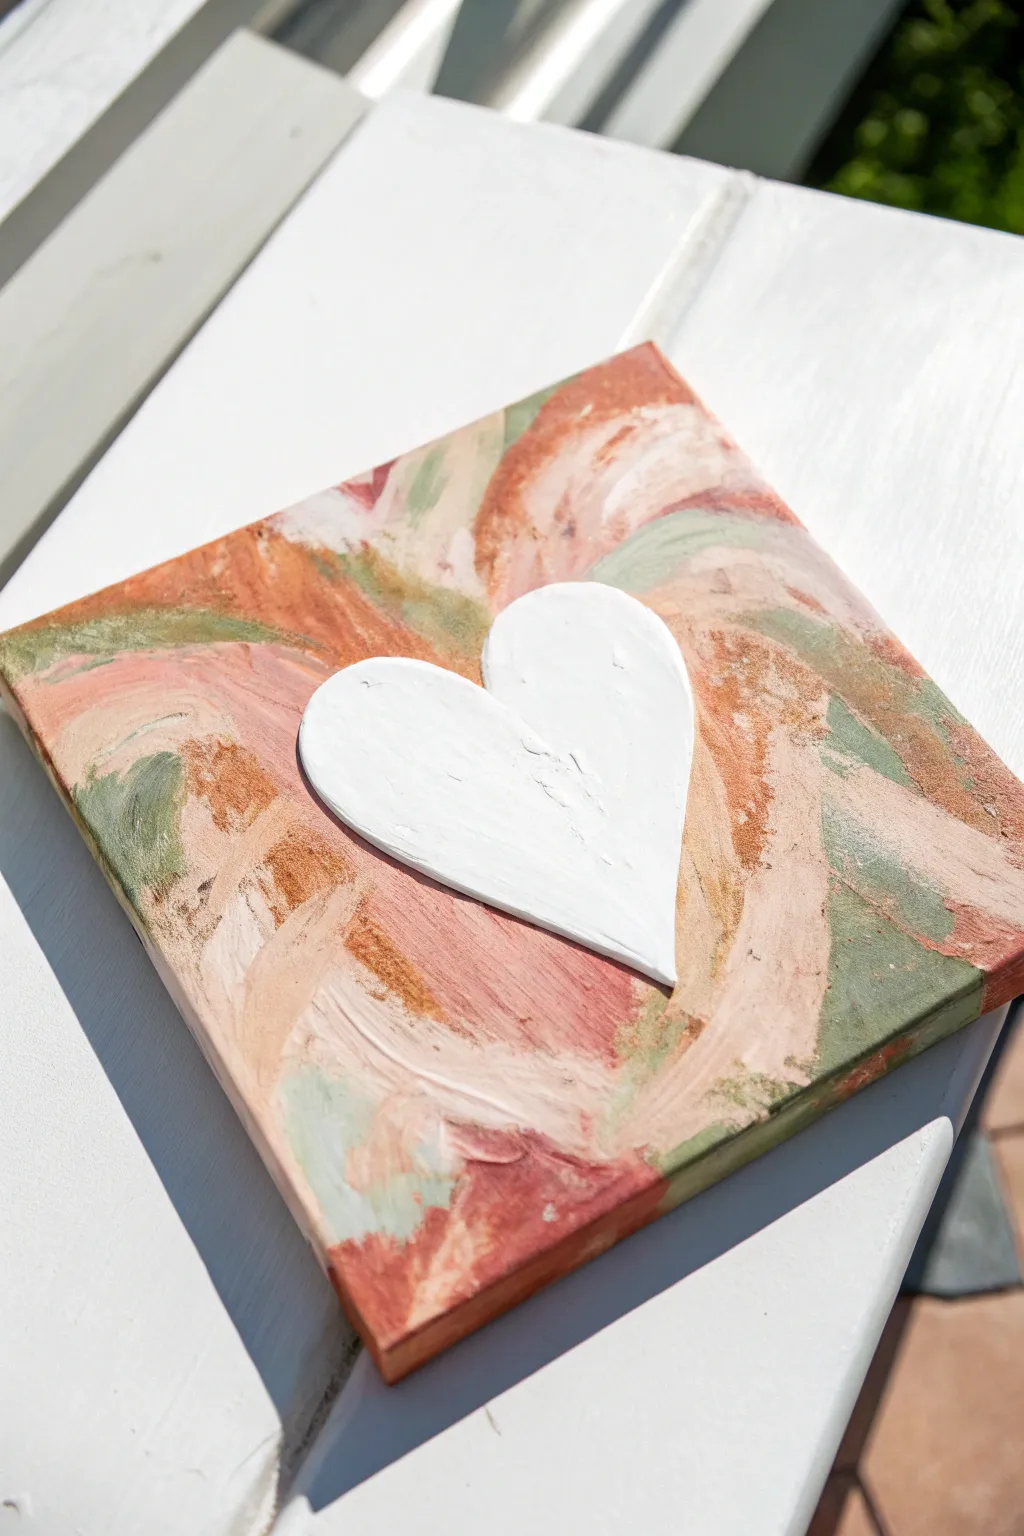
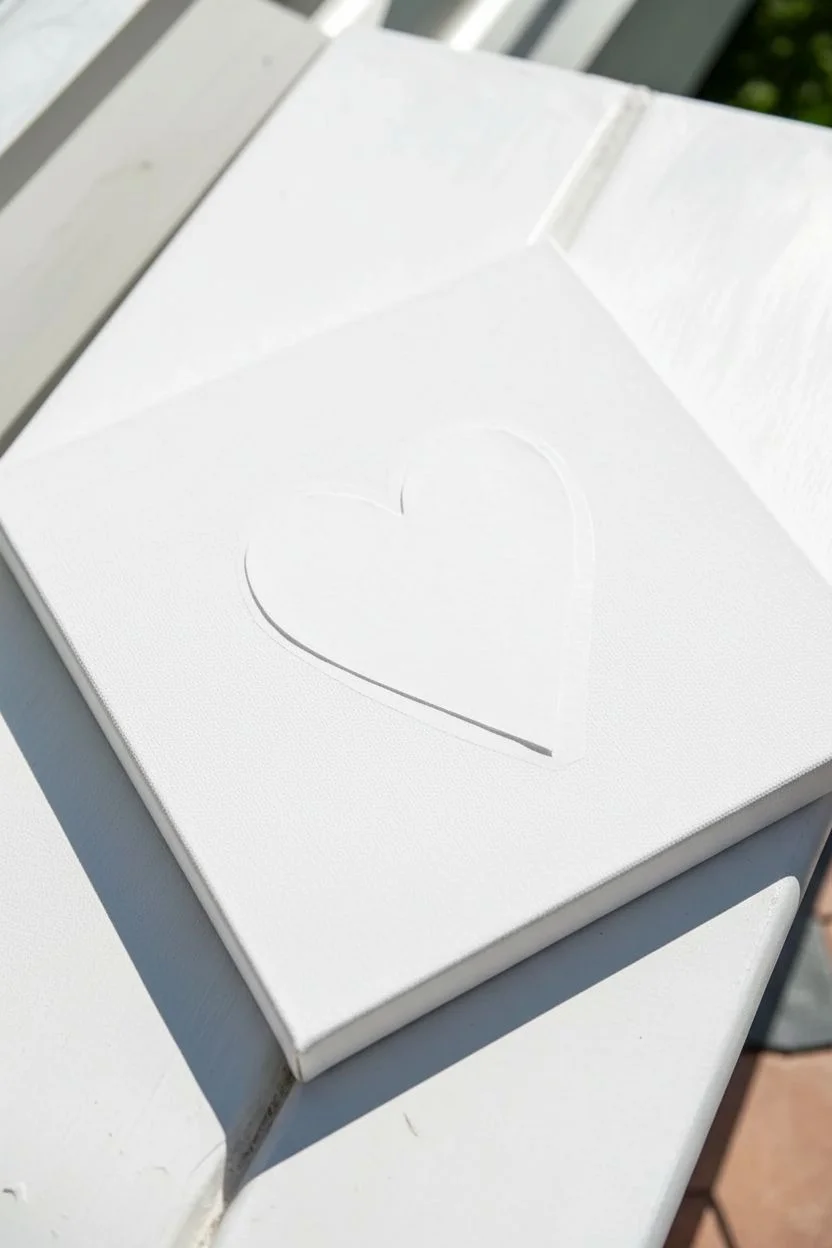
This project combines loose, abstract brushwork with defined shapes to create a modern piece of wall art. By using a resist technique and modeling paste, you will achieve the satisfying contrast between the smooth, swirled background and the crisp, textured white heart.
How-To Guide
Materials
- Square canvas (e.g., 8×8 or 10×10 inches)
- Acrylic paints: Terracotta/Rust, Sage Green, Beige/Cream
- White modeling paste or heavy body acrylic plain white
- Contact paper or wide painter’s tape
- Scissors
- Flat synthetic paintbrush (1-inch width)
- Small palette knife
- Pencil
Step 1: Creating the Mask
-
Shape your stencil:
Cut a piece of contact paper or adhere strips of wide painter’s tape together to form a square slightly smaller than your canvas. -
Draw the design:
Flip the contact paper over to the backing side and sketch a simple, symmetrical heart shape in the center using a pencil. -
Cut it out:
Carefully cut along your pencil line with scissors. You will be using the heart shape itself as a mask (sticker), not the outer paper. -
Apply the mask:
Peel the backing off your paper heart and adhere it strictly to the center of your clean white canvas. -
Seal the edges:
Run your fingernail or a credit card firmly along the edges of the heart sticker to ensure a tight seal, which prevents paint from bleeding underneath.
Step 2: Painting the Background
-
Prepare the palette:
Squeeze out small amounts of the terracotta, sage green, and beige paints onto a palette or paper plate. Don’t mix them yet. -
Start with warm tones:
Dip your flat brush into the terracotta paint and apply it to the canvas using curved, sweeping strokes. I like to start from the corners and work inward. -
Introduce cool tones:
Without washing your brush (wipe it gently on a rag if needed), pick up the sage green. Apply this in the empty spaces, letting it streak slightly into the terracotta. -
Blend with neutrals:
Pick up the beige or cream paint and use it to soften the transitions between the rust and green areas, creating a marbled effect. -
Cover the edges:
Make sure you paint right over the edges of your heart sticker. This is crucial for defining the ‘negative space’ shape later. -
Finish the background:
Continue painting until the entire canvas surface is covered in swirly, abstract strokes. Don’t overwork it; visible brush texture adds character.
Pro Tip: Crisper Lines
Before applying your colored paints, brush a thin layer of white acrylic over the edges of your heart sticker. This seals the mask so any seepage is white-on-white, leaving perfect crisp lines.
Step 3: Revealing and Texturing
-
Remove the mask:
While the paint is still slightly tacky (but not wet), carefully peel up the heart sticker to reveal the clean white canvas underneath. -
Let it dry:
Allow the background paint to dry completely—usually about 20 to 30 minutes—before proceeding to the texture step. -
Apply modeling paste:
Scoop a generous amount of white modeling paste (or thick heavy body white acrylic) onto your palette knife. -
Fill the heart:
carefully dragging the paste into the empty heart shape. Use the tip of the knife to push the paste right up to the paint lines. -
Create surface texture:
Instead of smoothing the paste perfectly flat, tap the flat side of the knife against the surface to create peaks and rough ridges similar to the photo. -
Clean the borders:
If any white paste went over your painted background, use a damp cotton swab or clean brush to wipe it away immediately. -
Final cure:
Lay the canvas flat in a safe area and allow the modeling paste to dry completely, which may take several hours depending on thickness.
Level Up: Metallic Touch
Mix a tiny drop of gold ink or metallic bronze paint into your terracotta color before painting the background. It adds a subtle warmth that glows when the light hits the texture.
Once dry, this tactile piece adds a lovely pop of earthy color and modern dimension to any room.
Soft Wet-on-Wet Watercolors
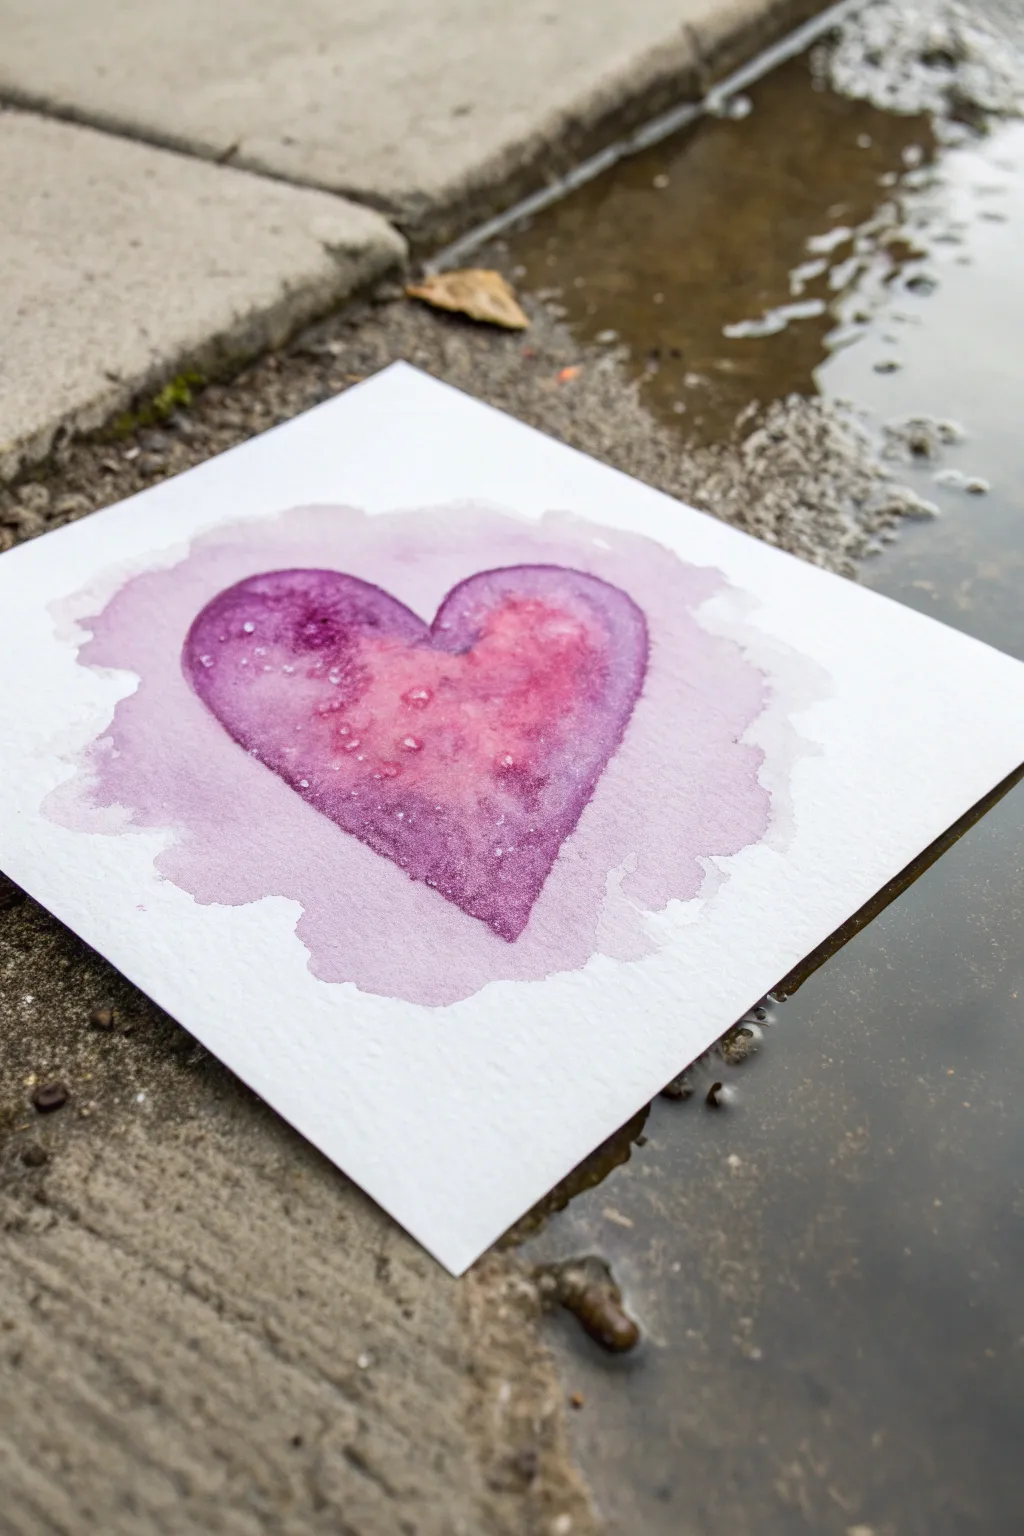
This project creates a dreamy, textured heart using the magic of salt reactions and wet-on-wet blending. You will learn to control fluid colors to create a gemstone-like effect with a soft, watery border.
Step-by-Step Guide
Materials
- Cold press watercolor paper (300 gsm)
- Watercolor paints (Violet/Purple and Magenta/Rose)
- Round watercolor brush (Size 6 or 8)
- Coarse sea salt or Kosher salt
- Jar of clean water
- Paper towel
- HB Pencil
- Painter’s tape (optional)
Step 1: Preparation
-
Prepare the paper:
Cut your watercolor paper into a square shape, roughly 6×6 inches. -
Secure the workspace:
If you prefer flat paper, tape the edges of your square to your work surface using painter’s tape. -
Sketch the outline:
Lightly draw a simple heart shape in the center of the paper with your pencil. Keep the lines faint so they disappear under the paint.
Salt Timing Pro Tip
Apply salt when the paper is shiny wet, not damp. If the shine is gone, the paint has dried too much and the salt won’t push the pigment away to create the texture.
Step 2: Painting the Heart
-
Mix your colors:
Prepare two puddles of paint on your palette: a concentrated violet and a vibrant magenta. -
Wet the shape:
Dip your clean brush into the water and carefully paint the inside of the heart shape with just clear water. -
Check the sheen:
Tilt your head to look at the paper in the light; the heart should be evenly glossy, but no large puddles should be sitting on top. -
Apply the violet:
Load your brush with the violet paint and gently touch the tip to the perimeter of the wet heart. Watch the color bloom inward. -
Add the center color:
Rinse your brush slightly, pick up the magenta, and drop it into the center of the heart. -
Blend softly:
Use the tip of your brush to gently nudge the magenta and violet together where they meet, allowing them to swirl without over-mixing. -
Add texture:
While the paint is still very wet and shiny, pinch a small amount of coarse salt and sprinkle it mostly over the center and lower sections of the heart.
Step 3: The Background Wash
-
Dilute the purple:
Take your violet paint mixture and add significantly more water to it until it is a very pale, tea-like consistency. -
Paint the halo:
Paint a loose, jagged shape around the outside of the heart using this pale wash. I find that leaving a tiny hairline gap of white paper between the heart and the background adds a nice separation. -
Soften the edges:
Dip your brush in water and drag it along the outer edge of this pale background shape to feather it out, making it look organic and shapeless.
Level Up: Metallic Pop
Once the painting is totally dry and salt-free, trace the very edge of the heart with a fine-tip gold paint marker or metallic watercolor for a gilded look.
Step 4: Finishing
-
Wait for the magic:
Let the painting dry completely undisturbed. This is crucial as the salt needs time to absorb the pigment. -
Test dryness:
Touch a corner of the paper to ensure it is bone dry and cool to the touch, not damp. -
Remove the salt:
Gently rub your finger over the dried heart to brush away the salt crystals, revealing the star-like textures beneath. -
Final clean up:
Erase any pencil marks that are still visible around the edges of the paint.
You have now created a beautiful, textured watercolor heart perfect for cards or framing

PENCIL GUIDE
Understanding Pencil Grades from H to B
From first sketch to finished drawing — learn pencil grades, line control, and shading techniques.
Explore the Full Guide
Expressive Layered Outlines
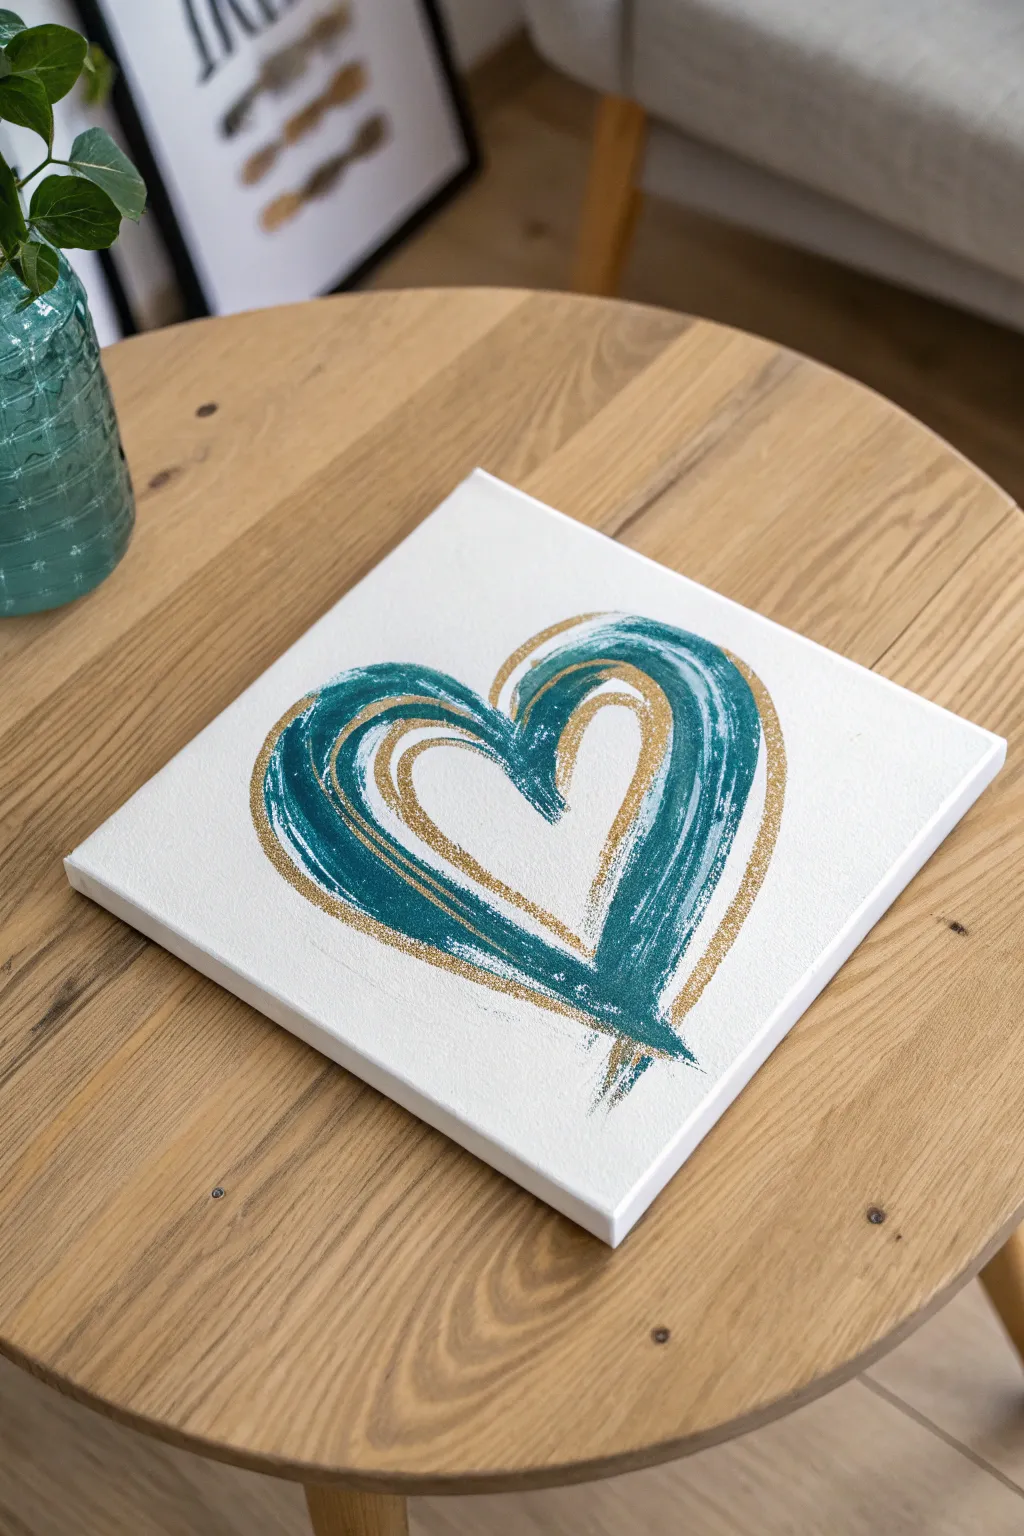
Modern minimalism meets abstract expressionism in this striking heart art piece. The contrast between the rough, dry-brushed teal texture and the shimmering metallic gold creates a sophisticated focal point for any room.
Detailed Instructions
Materials
- Square stretched canvas (approx. 12×12 inches)
- Acrylic paint: Deep Teal or Turquoise
- Acrylic paint: Metallic Gold
- Flat bristle brushes (1-inch and 1/2-inch widths)
- Palette or paper plate
- Cup of water
- Paper towels
- Pencil (optional)
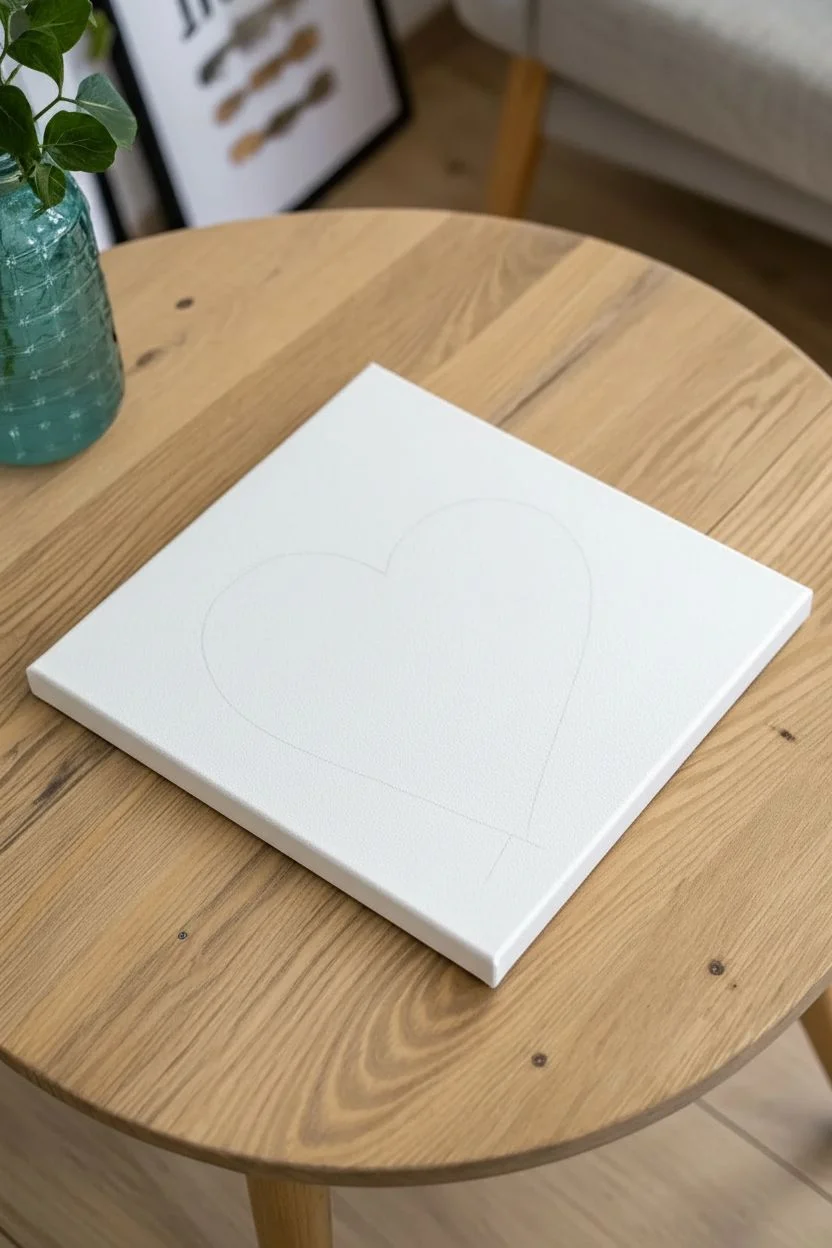
Step 1: Preparation and Planning
-
Prepare the canvas:
Start with a clean, white primed canvas. If your canvas isn’t pre-primed, apply coat of white gesso and let it dry completely to ensure a bright background. -
Visualize the flow:
Before painting, practice the motion of the heart shape in the air. This heart is made of two main C-curves that meet at the bottom but stay open at the top. -
Light sketching:
If you feel unsure about freehand painting, use a pencil to very faintly mark the top curves and the bottom point of the heart to guide your brushstrokes.
Step 2: The Metallic Layer
-
Load the gold:
Squeeze a generous amount of metallic gold paint onto your palette. Dip your 1/2-inch flat brush in, ensuring the bristles are coated but not dripping. -
Create the first curve:
Starting from the top left of the heart shape, sweep the brush down and toward the center bottom in a swift, confident motion. -
Mirror the motion:
Repeat this motion for the right side of the heart, starting at the top right and curving down to cross over your first stroke slightly at the bottom. -
Add inner echoes:
Using the edge of the brush or a slightly lighter touch, add a smaller, sweeping curve inside the main heart shape on both left and right sides. -
Create outer accents:
Add a few loose, disconnected strokes on the outside of the main shape to give the piece movement and energy. -
Let it shine:
Allow this gold layer to dry completely. This is crucial so the metallic sheen isn’t dulled by the next layer of paint.
Muddy Colors?
Ensure the gold layer is bone dry before adding teal. If they interact while wet, the metallic shine dulls, and the colors will turn into a sludgy green hue.
Step 3: The Bold Teal Overlays
-
Mix the teal:
Prepare your teal paint. I like to mix a little Phthalo Green with Blue to get a deep, rich turquoise hue. -
Dry brush technique:
Load a slightly larger flat bristle brush (1-inch) with teal paint, then wipe the excess off onto a paper towel. The brush should be relatively dry to achieve that scratchy texture. -
The main left stroke:
Paint a bold stroke over the left side of your gold heart foundation. Press firmly at the start (top) and lift pressure as you sweep down. -
Leave gaps:
Don’t try to cover the gold completely. The beauty of this style lies in the imperfections where the white canvas and gold paint peek through the teal streaks. -
The main right stroke:
Execute the right-side curve, overlapping the bottom point. Allow the bristles to split slightly to create multiple lines within one stroke. -
Inner details:
Using the narrower edge of the brush, add a thin, curved line of teal inside the heart, following the gold lines you painted earlier. -
Outer framing:
Add a quick, sweeping stroke on the outer left edge of the heart to bulk up the shape and add dimension. -
Refine the tail:
At the bottom point where the halves meet, flick the brush slightly downwards to create a tapered, artistic finish. -
Check the balance:
Step back from the canvas. If one side looks too heavy, add a very light, dry-brushed streak to the opposite side to balance the visual weight.
Level Up
Sprinkle fine loose glitter over the wet gold paint immediately after application for extra texture, or use gold leaf adhesive and foil for a blindingly bright shine.
Hang your masterpiece in a focused spot to let the metallic accents catch the light beautifully.
Family Tree Fingerprints
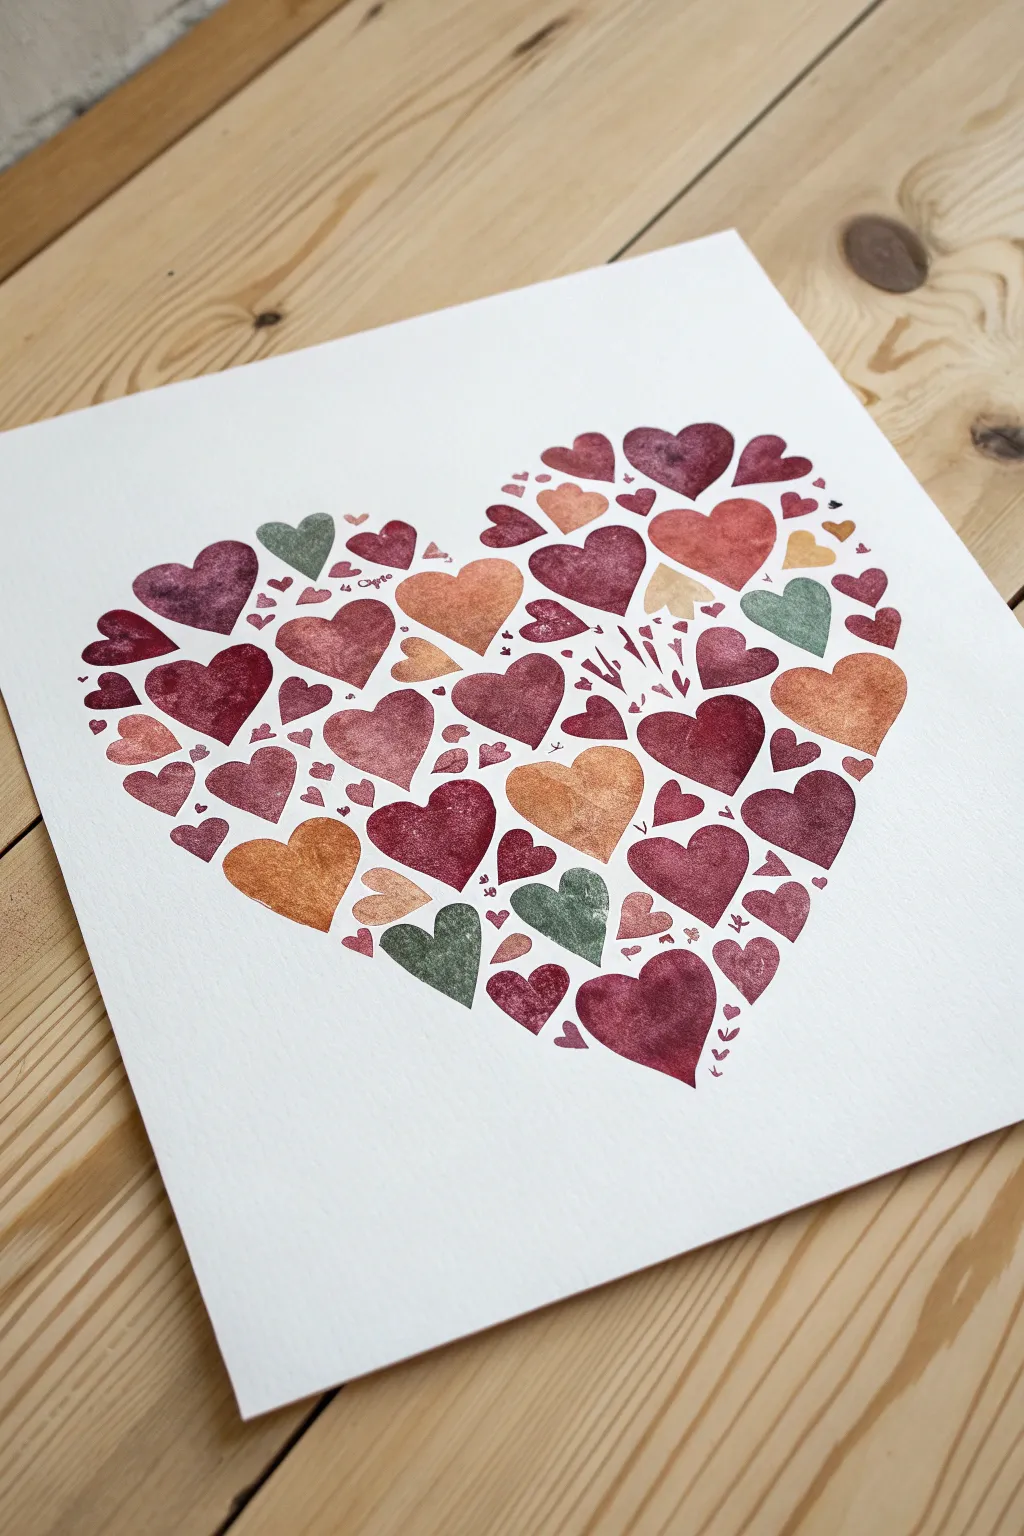
This project creates a stunning large heart composed of dozens of smaller, individually painted watercolor hearts. Using an earthy palette of burgundy, terracotta, and sage, it beautifully mimics the concept of a fingerprint family tree with the elegance of fine art.
Step-by-Step Tutorial
Materials
- Cold-press watercolor paper (300 gsm)
- Watercolor paints (tubes or pans)
- Round brushes (sizes 2 and 6)
- Pencil (HB or H)
- Kneaded eraser
- Mixing palette
- Two jars of water
- Paper towels
- Masking tape
Step 1: Preparation
-
Secure the paper:
Tape your watercolor paper down to a flat board or your table surface using masking tape to prevent it from buckling while you paint. -
Sketch the guide:
Using a pencil, very lightly draw a large, symmetrical heart shape in the center of your paper. This will serve as the boundary for your mosaic. -
Lighten the guide:
Take your kneaded eraser and gently dab (don’t rub) the pencil line until it is faint and barely visible. You want just enough of a ghost line to see where to paint without the graphite showing through later.
Bleeding Hearts?
If your hearts are running into each other, you are working too fast. Paint one heart, then move to a non-adjacent area to let the first one dry slightly before painting next to it.
Step 2: Color Patterning
-
Mix the burgundy:
On your palette, mix a deep burgundy red. You want a saturated mix, so use less water and more pigment. -
Mix the terracotta:
Create a warm terracotta or peach shade by mixing orange with a little brown and white (or simply dilute orange heavily). -
Mix the sage:
Mix a muted green. I like to add a tiny touch of red to my green paint to desaturate it into a natural, earthy sage tone. -
Mix the mauve:
Finally, prepare a dusty pink or mauve color to act as a bridge between the deep reds and the lighter peaches.
Make it Personal
Turn this into a true family tree artwork by using a fine-point archival ink pen to write the names or initials of family members inside the larger hearts once the paint is fully dry.
Step 3: Painting the Mosaic
-
Anchor the bottom:
Using your size 6 brush, paint the first medium-sized heart right at the bottom tip of your pencil guide. -
Define the perimeter:
Paint disjointed hearts along the pencil line curve to establish the shape. Rotate the hearts slightly so their angles follow the curve of the large heart. -
Vary the sizes:
As you work your way up the outline, alternate between painting larger hearts and smaller ones to keep the edge organic. -
Start filling the center:
Begin filling the interior space. Switch colors frequently between your burgundy, terracotta, sage, and mauve pools to create a balanced distribution. -
Control the spacing:
Leave a small, consistent amount of white paper between each heart. They should sit close together like puzzle pieces but never touch. -
Add texture:
While a heart is still wet, you can drop in a tiny dot of water or a darker pigment to create a ‘bloom’ effect that mimics the texture seen in the reference image. -
Insert green accents:
Use the sage green sparingly. Aim to have about one green heart for every five or six red/pink ones to keep the warmth dominant.
Step 4: Finishing Details
-
Fill the gaps:
Switch to your smaller size 2 brush. Look for awkward white gaps between the larger shapes and fill them with tiny hearts. -
Add micro-accents:
Paint tiny specks, dots, or ‘confetti’ hearts in the densest areas to make the arrangement feel tight and cohesive. -
Let it dry:
Allow the painting to dry completely for at least an hour. If the paper feels cool to the touch, it is still damp. -
Final erase:
Once you are 100% certain the paint is bone dry, gently erase any remaining visible pencil guide lines from the perimeter.
Now you have a beautiful, collective symbol of love ready to frame and display.


Thick Impasto Textures
This project celebrates the beauty of heavy body acrylics with a simple yet striking heart motif. By building up layers of thick paint, you’ll create a dimensional piece that utilizes light and shadow to pop off the canvas.
How-To Guide
Materials
- Small stretched canvas (white)
- Heavy body acrylic paint (Deep Red or Alizarin Crimson)
- Gloss gel medium or modeling paste
- Flat hog bristle brush (Size 10 or 12)
- Palette knife
- Pencil
- wooden palette or mixing plate
Step 1: Preparation & Mixing
-
Prepare the canvas:
Place your stretched canvas on a flat, protected surface. Ensure it is free of dust or lint. -
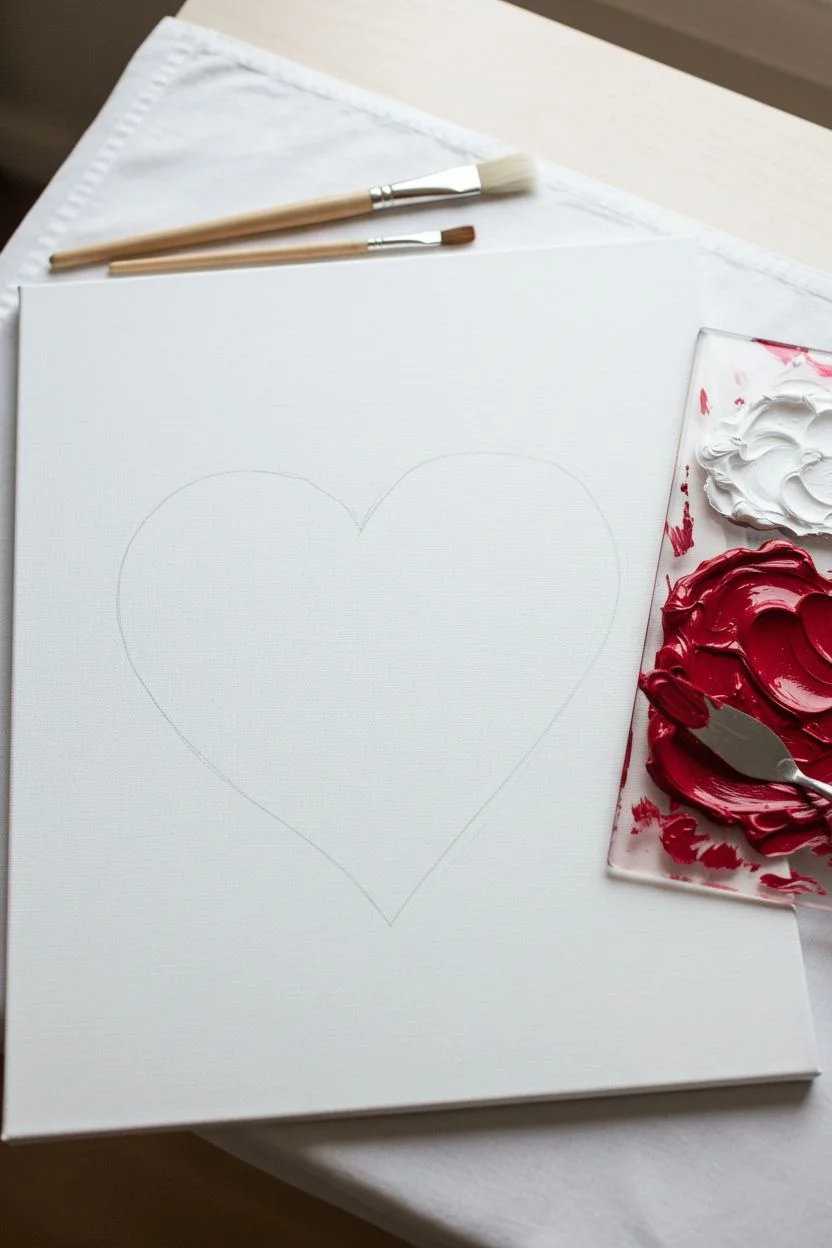
Sketch the outline:
Lightly draw a large, symmetrical heart shape in the center of the canvas using a pencil. Keep the lines faint so they won’t show through later. -
Dispense the paint:
Squeeze a generous amount of deep red acrylic paint onto your palette. -
Add thickening medium:
Squeeze an equal amount of gloss gel medium or modeling paste next to the red paint. This is the secret ingredient for holding those thick brush ridges. -
Mix consistency:
Using a palette knife, thoroughly mix the paint and medium together until you have a uniform color. I like to aim for a consistency similar to cake frosting.
Step 2: Creating the Base
-
Load the brush:
Dip your flat bristle brush into the mixture, coating the bristles evenly but not excessively for this first step. -
Paint the underlayer:
Fill in the pencil outline with a standard, flat layer of the red mixture. This ensures no white canvas will peek through the texture later. -
Smooth the edges:
Use the edge of your brush to tidy up the perimeter of the heart, ensuring clean, sharp lines against the white background.
Paint Flattening out?
If your ridges disappear as they dry, your paint ratio was too high. Add more modeling paste to the mix next time, as it holds stiffness better than paint alone.
Step 3: Building the Impasto Texture
-
Scoop the paint:
Now for the fun part: use your brush to scoop up a large glob of the paint mixture. You want the brush fully loaded with excess paint. -
Start the left curve:
Starting at the top of the left heart lobe, press the brush down and drag it along the curve towards the bottom point. Don’t smooth it out; let the bristles leave deep trails. -
Texture the right curve:
Reload the brush heavily and repeat the motion on the right lobe, following the curve of the heart shape down to the center. -
Build the center:
Apply more thick paint to the middle of the heart where the lobes meet. Use short, curving strokes to blend the two sides while maintaining a chaotic, ridge-filled texture. -
Encourage ridges:
If an area looks too flat, dab extra paint onto it and lightly lift the brush to create small peaks. -
Check the silhouette:
Look at the painting from an angle. Use the tip of your brush to nudge the thick paint back inside the lines if it has spilled over the edge. -
Final inspection:
Ensure the texture looks consistent and luscious across the whole shape. -
Dry flat:
Leave the canvas flat on a table to dry. Because the paint is so thick, gravity will cause it to drip if you hang it up too soon.
Add Dimension
Before the red dries, streak a tiny amount of pure white or dark maroon into your brush. One single stroke will create a beautiful marble effect.
Allow this piece to cure for at least 24 hours before displaying your dimensional masterpiece
Bubble Wrap Stamping patterns
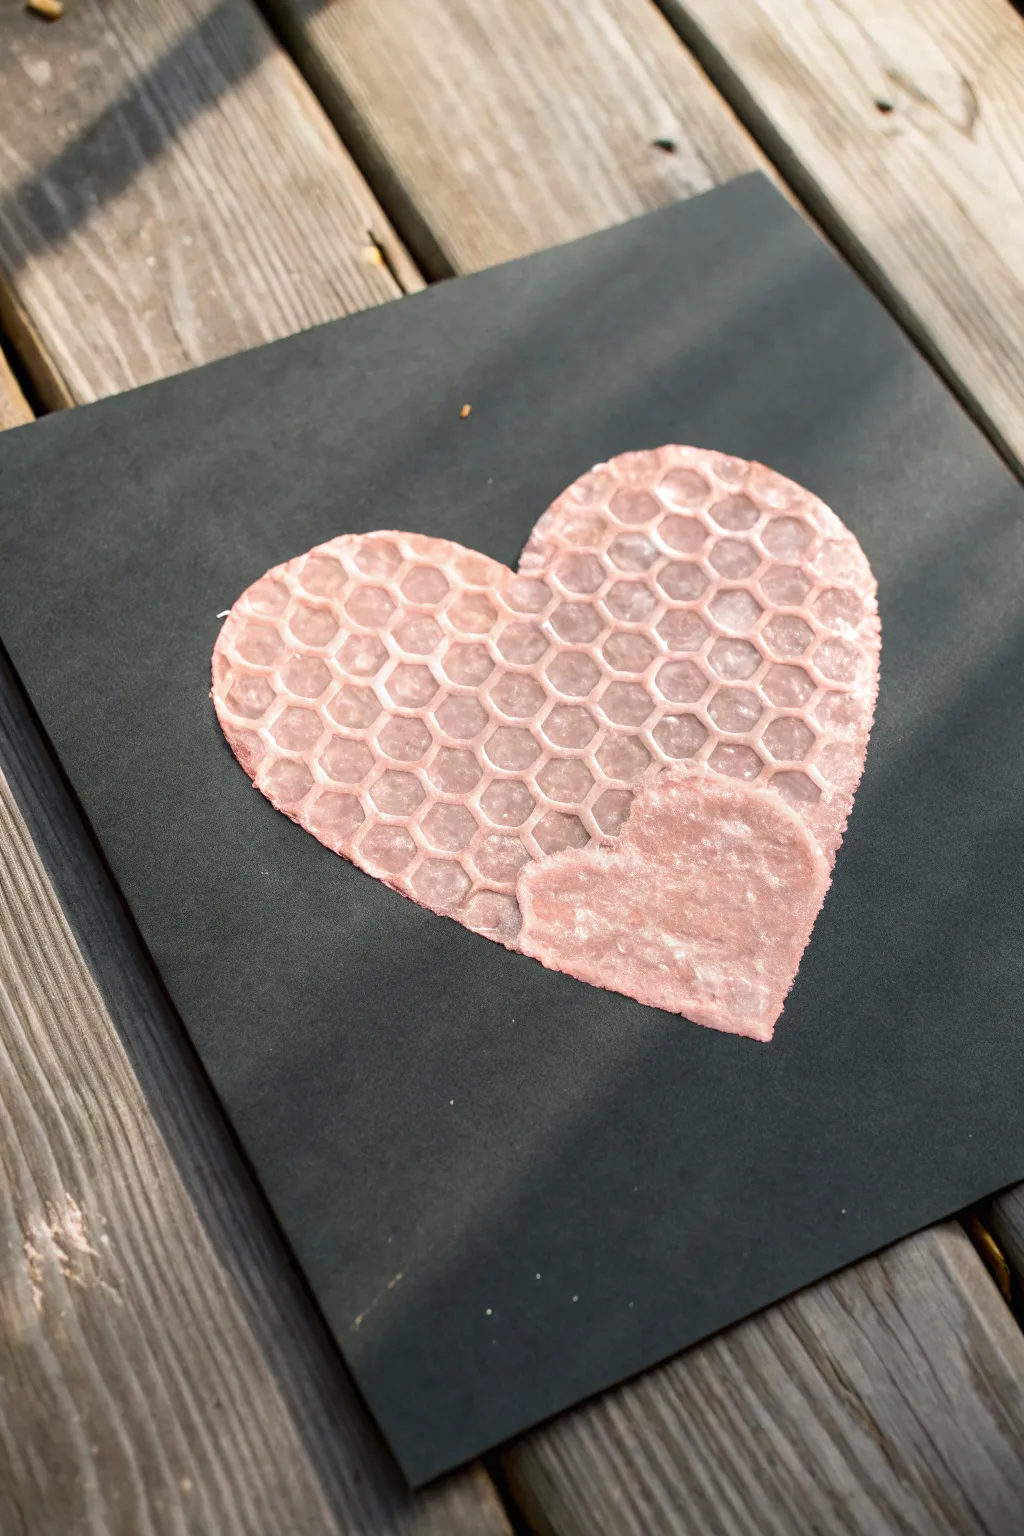

This striking art project utilizes the unique geometric pattern of honeycomb packing paper to create a textured heart that pops against a dark background. It features a lovely contrast between the open honeycomb structure and a solid, shimmer-textured accent patch.
Detailed Instructions
Materials
- Black cardstock or heavy construction paper
- Honeycomb packing paper (or hexagonal bubble wrap)
- Light pink acrylic paint (pearlescent or metallic finish recommended)
- Flat cosmetic sponge or foam paintbrush
- Scissors
- Paper plate or palette
- Pencil
Step 1: Shaping the Stamp
-
Prepare the base:
Cut your black cardstock into a precise square shape to serve as the sophisticated background for your artwork. -
Flatten the material:
Take a sheet of honeycomb packing paper and smooth it out on your table so it lies relatively flat. -
Sketch the outline:
Using a pencil, lightly draw a large, symmetrical heart shape directly onto the packing material. -
Cut the main heart:
Carefully cut out the heart shape with scissors, ensuring you get a clean edge around the perimeter. -
Create the accent:
Cut a second, much smaller heart shape from a scrap piece of the packing material to serve as the solid accent patch shown in the image.
Paint Consistency
Use “heavy body” acrylics rather than fluid craft paints. The thicker consistency sits on top of the honeycomb ridges better without running into the gaps, keeping the geometric pattern sharp.
Step 2: Applying the Paint
-
Dispense paint:
Pour a small amount of pink acrylic paint onto your paper plate. I prefer using a metallic pink for that extra shine seen in the photo. -
Load the sponge:
Dip your foam brush or cosmetic sponge into the paint, then dab off any excess on a clean part of the plate. -
Coat the texture:
Gently dab the paint onto the raised texture of the large heart cutout. -
Check coverage:
Ensure the paint is applied evenly across the honeycomb grid but isn’t dripping into the holes, which would ruin the geometric effect. -
Prepare the accent heart:
For the smaller accent heart, apply a much heavier, thicker coat of paint, effectively filling in the holes to create a more solid, crushed texture.
Ombre Effect
Instead of a single pink tone, dab a darker pink at the top of the heart and fade to a lighter rose at the bottom before stamping to create a beautiful gradient transition.
Step 3: Printing the Design
-
Position the main heart:
Center the large, painted heart cutout over your black cardstock with the painted side facing down. -
Press into place:
Gently lay the stamp onto the paper. -
Apply pressure:
Use the palm of your hand to press firmly and evenly across the entire surface of the stamp. -
Avoid shifting:
Be careful not to wiggle or slide the material while pressing, or the crisp lines will smear. -
Reveal the pattern:
Grab one edge of the packing material and lift it straight up to reveal the honeycomb print. -
Add the accent:
Take the smaller, heavily painted heart stamp and position it over the bottom right section of the main heart. -
Stamp the detail:
Press the small heart down firmly to transfer the solid block of color and texture. -
Final reveal:
Peel away the small stamp to show the layered effect. -
Dry:
Allow the painting to sit undisturbed until the acrylic paint is completely dry to the touch.
Display your geometric heart on a wall or as a unique greeting card front to share the love.
Sunset Silhouette Container
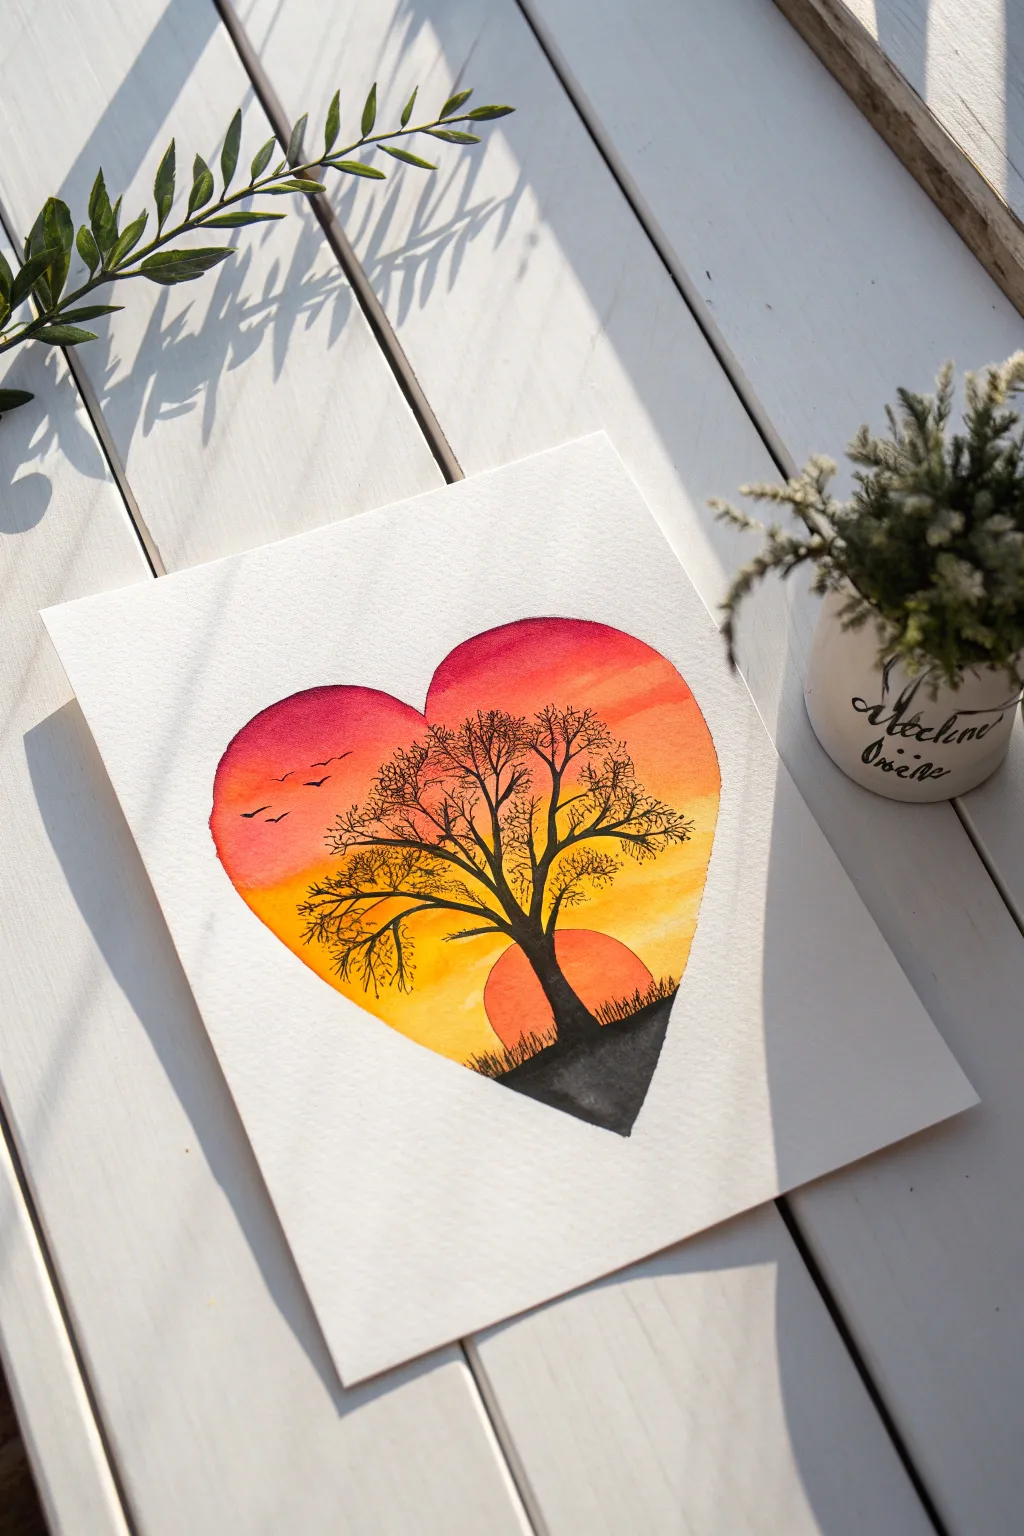
This project captures the warmth of a setting sun contained within a classic heart shape, creating a beautiful focal point on the page. By blending watercolors for the sky and using stark black for the tree, you create a striking contrast that looks professional yet is very beginner-friendly.
How-To Guide
Materials
- Cold press watercolor paper (300gsm)
- Pencil and eraser
- Watercolor paints (Lemon Yellow, Cadmium Orange, Alizarin Crimson, Lamp Black)
- Round watercolor brush (size 6 or 8)
- Detail brush (size 0 or 1) or a black fine liner pen
- Clean water and paper towels
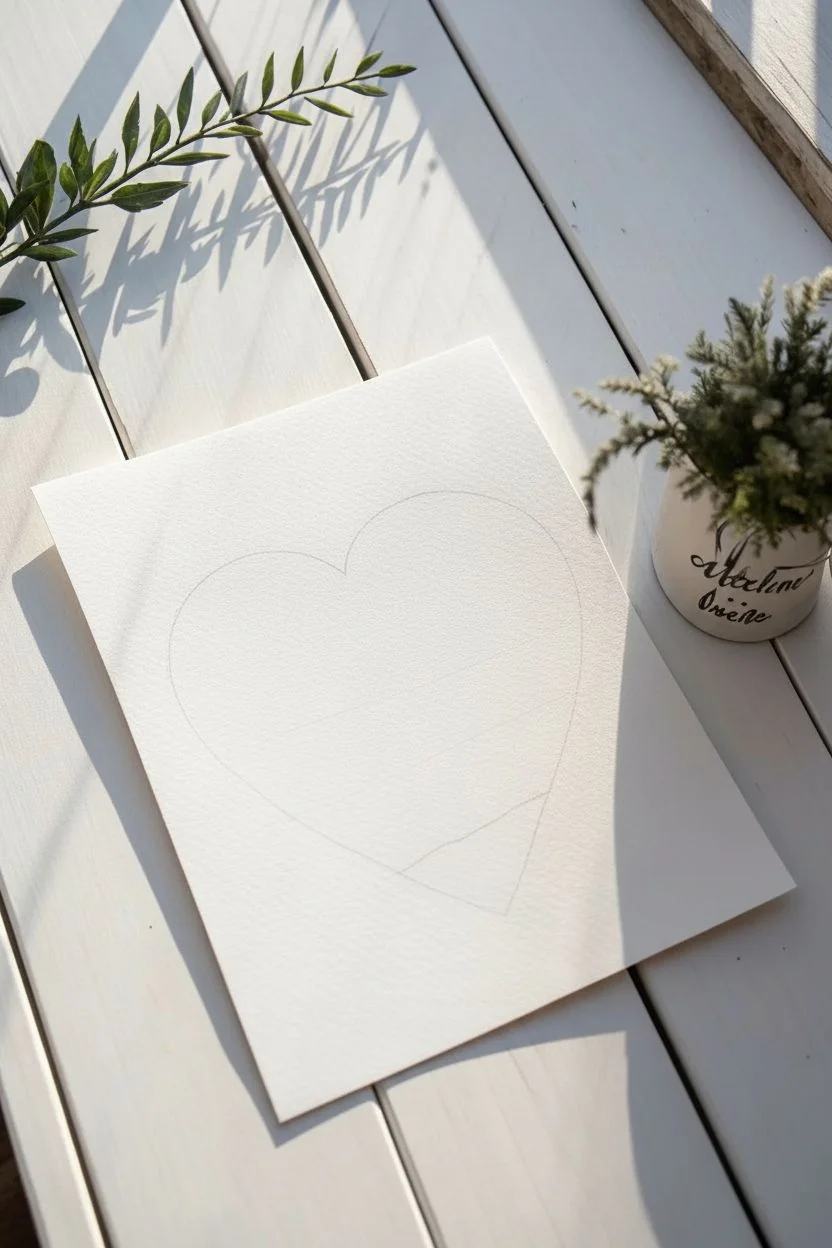
Step 1: Sketching the Frame
-
Outline the heart:
Start by lightly sketching a large heart in the center of your paper. Keep your pencil pressure very light so the graphite doesn’t show through the yellow paint later. -
Define the ground:
Draw a sloping curved line inside the bottom right of the heart to indicate where the grassy hill will be. This helps you know where to stop your sky gradient.
Step 2: The Sunset Gradient
-
Prepare your palette:
Pre-mix puddles of yellow, orange, and crimson red on your palette so you can work quickly while the paper is wet. -
Wet the paper:
Using your clean size 6 brush and water, carefully paint the inside of the heart shape. You want the paper to be glistening damp, but not holding a swimming pool of water. -
Apply the glow:
Drop the yellow paint into the bottom third of the heart, letting it flow naturally up slightly. Paint right over the area where the sun will eventually be. -
Add the middle tones:
Rinse your brush and apply the orange paint to the middle section of the heart, gently touching the edge of the yellow to let them merge softly. -
Deepen the sky:
Apply the crimson red to the top curve of the heart. Clean your brush, dry it slightly, and tickle the border where red meets orange to create a smooth transition. -
Dry partially:
Let the paper dry until the shine is just gone but the paper is cool to the touch. -
Paint the sun:
Using a slightly thicker mix of orange, paint a semi-circle resting on your pencil ground line. Since the background is dry, this will stand out clearly. -
Total drying time:
Allow the entire painting to dry completely. If the paper is cold, it’s still wet. I usually wait about 10-15 minutes here to ensure crisp lines for the silhouette.
Bleeding Edges?
If paint spills outside your heart outline, dip a clean, damp stiff brush into the mistake to scrub it gently, then immediately blot with a paper towel to lift the color.
Step 3: Silhouetting the Scene
-
Paint the ground:
Load your brush with concentrated black watercolor (creamy consistency) or black ink. Fill in the hill area at the bottom right, covering the bottom of your sun slightly. -
Form the trunk:
Start from the hill and pull a thick, wavy line upward to create the tree trunk. The trunk should get slightly thinner as it goes up. -
Branch out:
Extend 3 to 4 main branches from the top of the trunk. Let them curve and twist naturally rather than making them perfectly straight. -
Add detail twigs:
Switch to your size 0 detail brush or a waterproof black pen. Add many tiny, spindly twigs coming off the main branches, filling the upper space of the heart. -
Texturize the grass:
Use the very tip of your detail brush to flick tiny vertical lines upwards along the top edge of the black hill to mimic grass blades. -
Add life:
Paint three or four tiny ‘V’ shapes in the upper left pink area to represent birds flying in the distance. -
Clean edges:
Once the paint is bone dry, gently erase any visible pencil marks around the outside of the heart for a crisp finish.
Level Up: Lettering
Use a white gel pen or white gouache to add a romantic date, initials, or a short quote within the black silhouette area of the hill for a personalized touch.
Frame this piece or scan it to use as a lovely custom greeting card for someone special
Cosmic Splatter Art
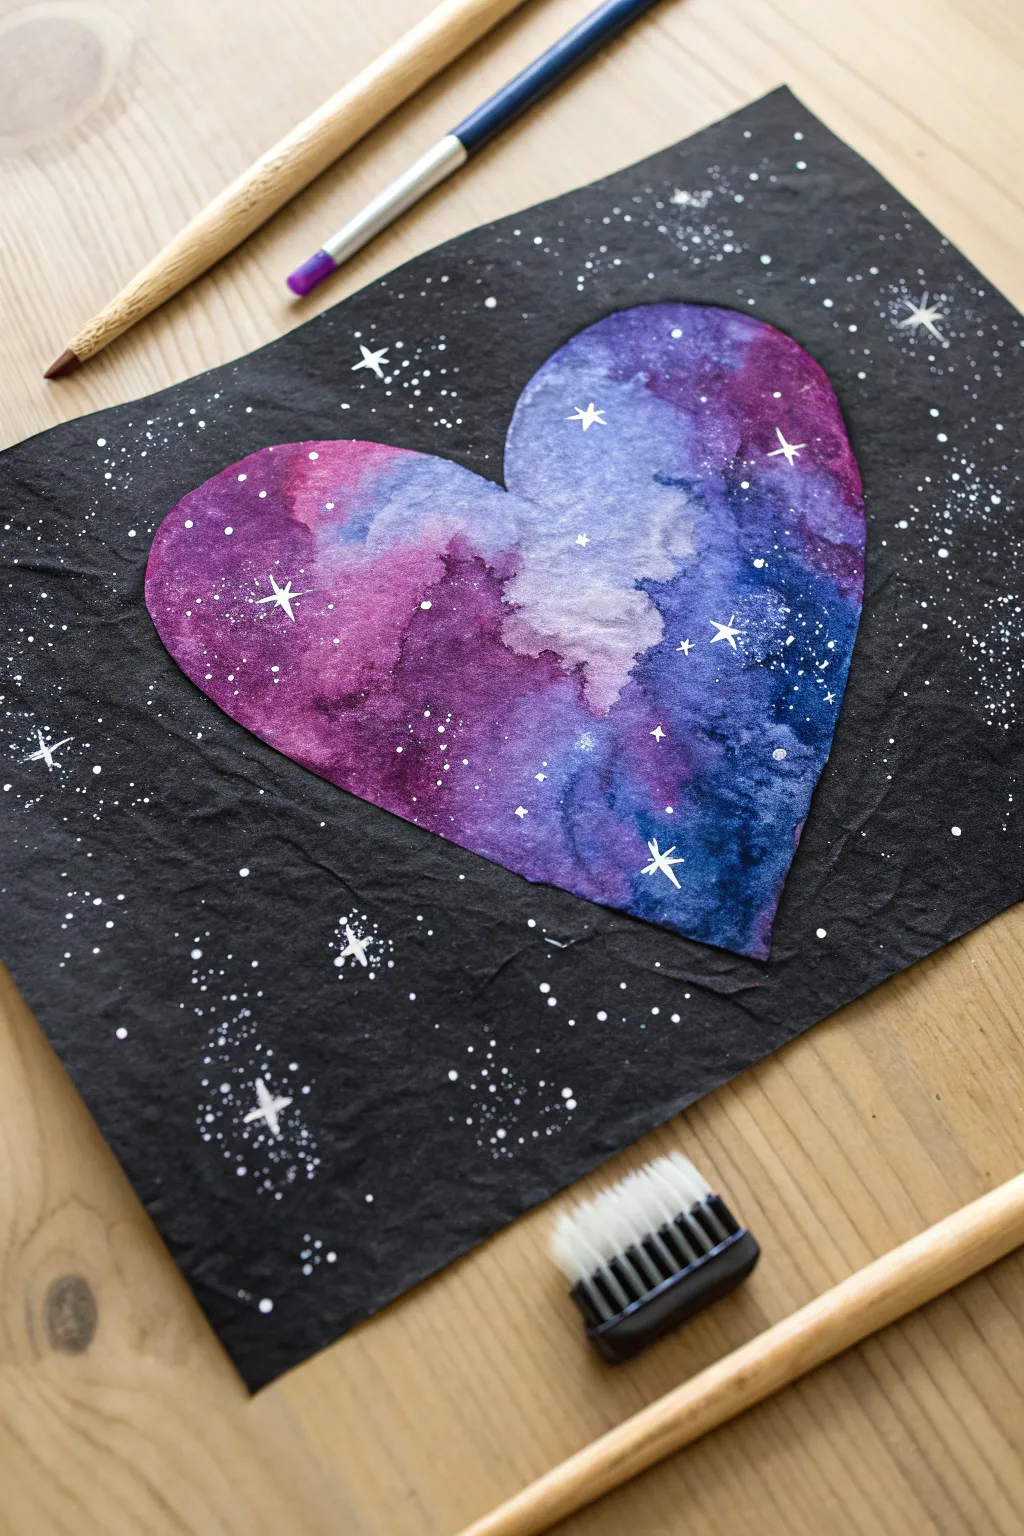
Capture the magic of the universe with this striking mixed-media project. By combining a vibrant watercolor nebula with a textured black background, you’ll create a high-contrast window into space that looks intricate but is surprisingly beginner-friendly.
Step-by-Step Tutorial
Materials
- Cold-press watercolor paper
- Watercolors (magenta, purple, indigo, blue)
- Black construction or charcoal paper
- White gouache or white ink
- Round brush (size 6 or 8)
- Fine detail brush (size 0)
- Old toothbrush
- Scissors
- Glue stick
- Pencil
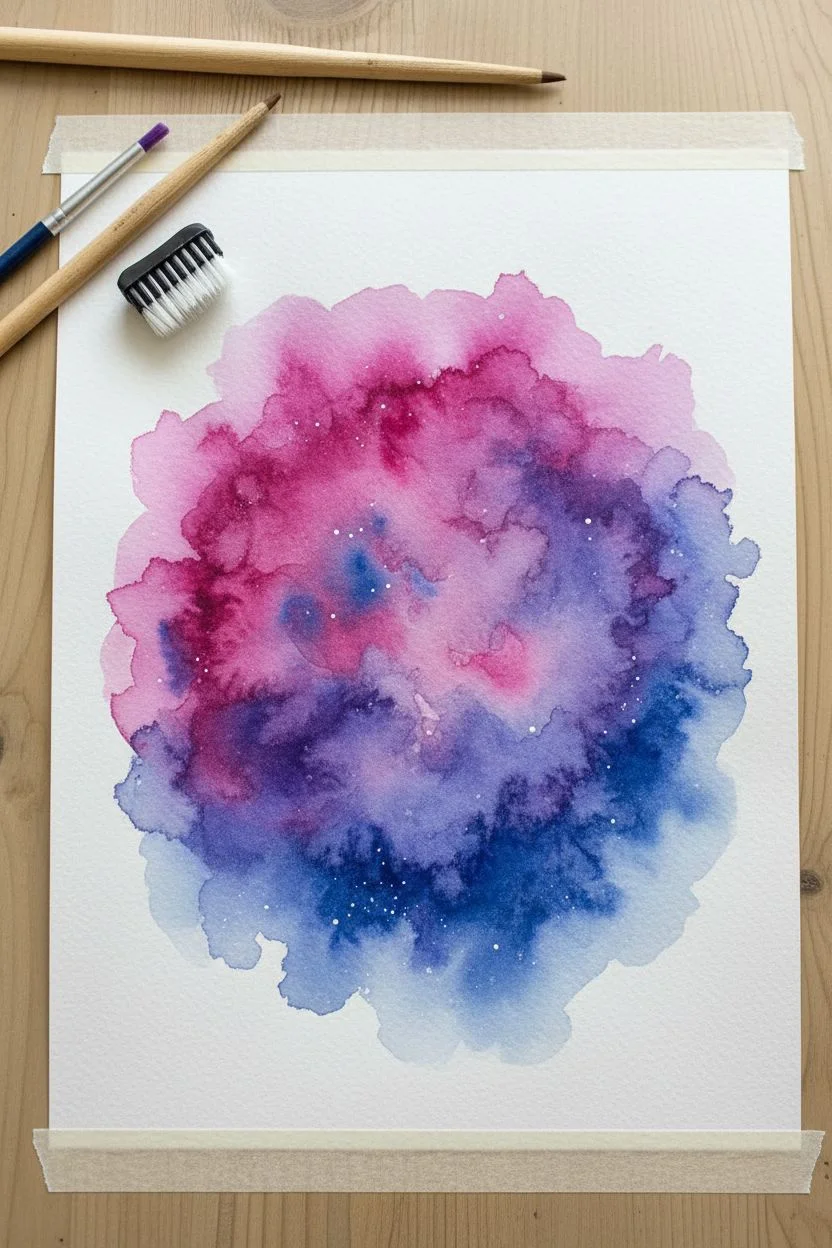
Step 1: Painting the Galaxy
-
Prepare the paper:
Tape down your watercolor paper to a flat surface to prevent warping, then apply a light wash of clean water to the center area. -
Drop in color:
Load your round brush with magenta or pink and dab it onto the wet paper, allowing the color to bloom naturally. -
Add depth:
While the paper is still wet, introduce purple and blue shades around the pink areas, letting them touch and bleed together. -
Darken the edges:
Add concentrated indigo or dark blue to the outer edges of your painted area to create a deep space effect. -
Create texture:
I like to tilt the paper slightly to encourage the pigments to pool and mix, creating those organic nebula shapes. -
Dry completely:
Allow the paint to dry fully. You can use a hairdryer on a low setting if you are eager to move to the next step.
Step 2: Assembly & Texture
-
Shape the heart:
Once the painting is dry, lightly draw a heart shape on the back of the paper (or trace a template) and cut it out with sharp scissors. -
Texture the background:
Take your sheet of black paper and gently crumple it into a ball, then carefully flatten it back out. This recreates the crinkled texture seen in the photo. -
Mount the artwork:
Apply glue evenly to the back of your watercolor heart cutout. -
Positioning:
Press the heart firmly into the center of the crinkled black background, smoothing it down from the center outward.
Too Much Water?
If your paper starts buckling heavily or the colors turn into a brown puddle, use a paper towel to gently lift excess water and let it dry before adding more layers.
Step 3: The Starry Finish
-
Mix the stars:
Dilute a small dab of white gouache or ink with a drop of water until it has a milky consistency. -
Add splatter:
Dip an old toothbrush into the white mix and run your thumb across the bristles to flick tiny specks across the heart and the black background. -
Paint larger stars:
Using your fine detail brush and undiluted white paint, dot a few distinct stars onto the galaxy and the background. -
Create twinkles:
Paint small crosses with elongated vertical lines to create ‘twinkling’ stars effectively highlighting the composition. -
Final details:
Add tiny clusters of three dots in empty black spaces to mimic distant constellations.
Make It Shimmer
For an extra magical touch, mix a little metallic silver watercolor or iridescent medium into your splatter mix to make the galaxy genuinely sparkle in the light.
Now you have a breathtaking piece of cosmic art that beautifully balances color and texture.
Framing the View with Hands
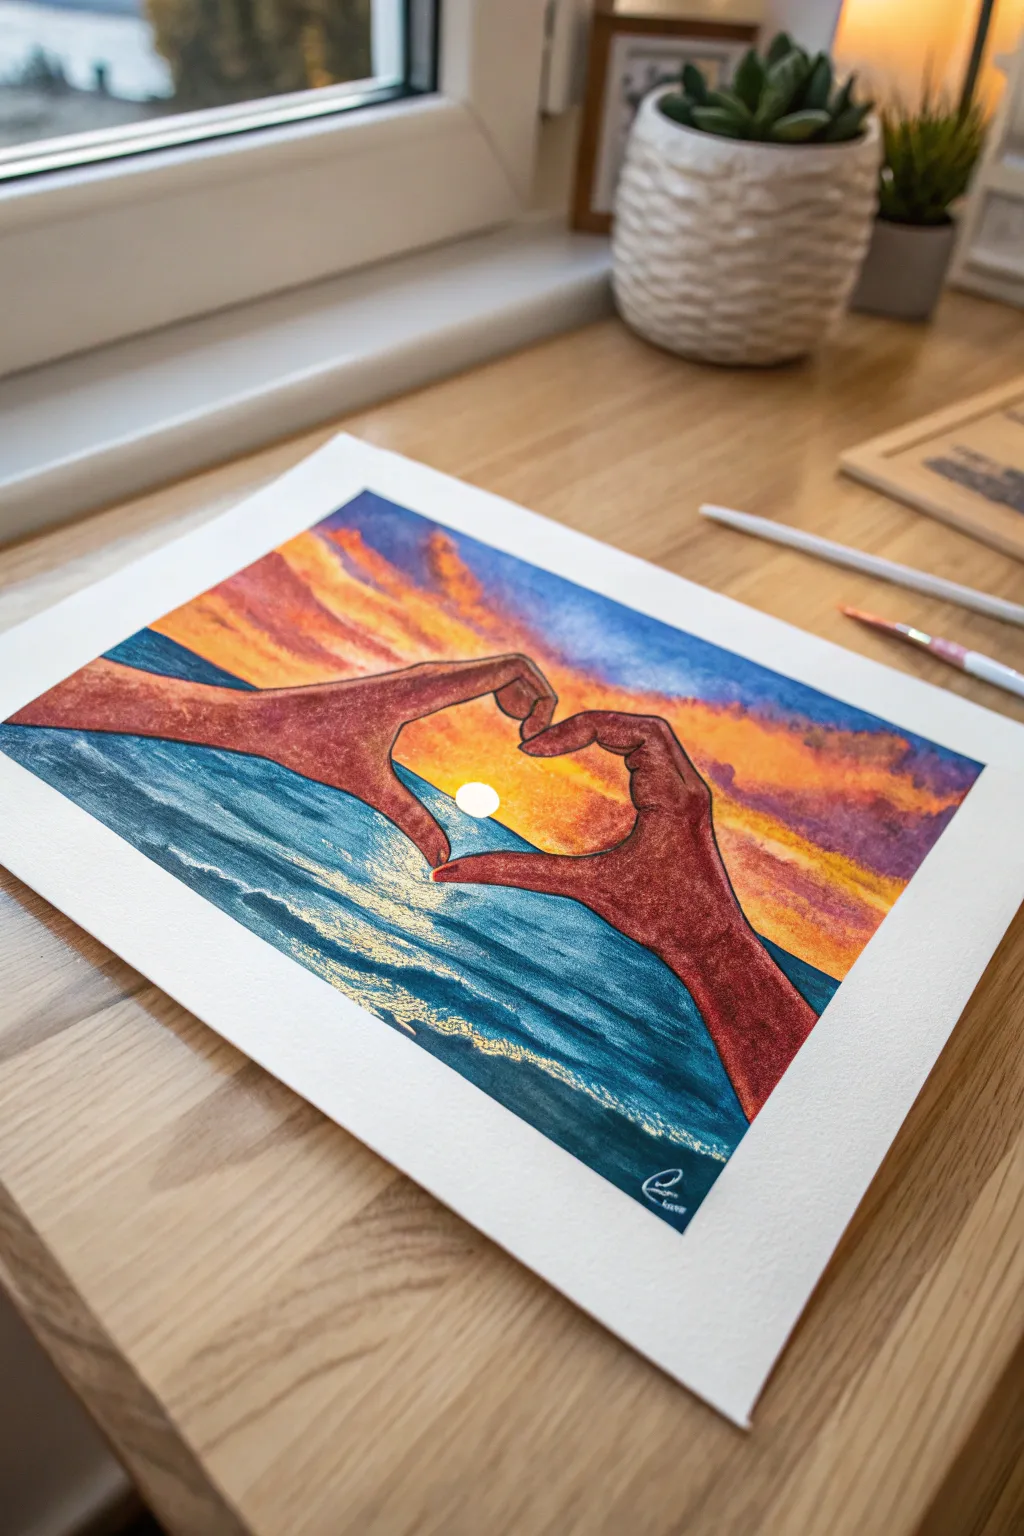
Capture the fleeting beauty of a sunset held within a heart shape in this vibrant watercolor project. The contrast between warm skin tones and the cool, glistening ocean creates a deeply emotional and artistic composition.
Step-by-Step Guide
Materials
- Cold press watercolor paper (300 gsm)
- Watercolor paints (tubes or pan set)
- Round brushes (sizes 4 and 8)
- Fine liner brush or white gel pen
- Masking fluid (optional)
- Painter’s tape
- Pencil and eraser
- White gouache
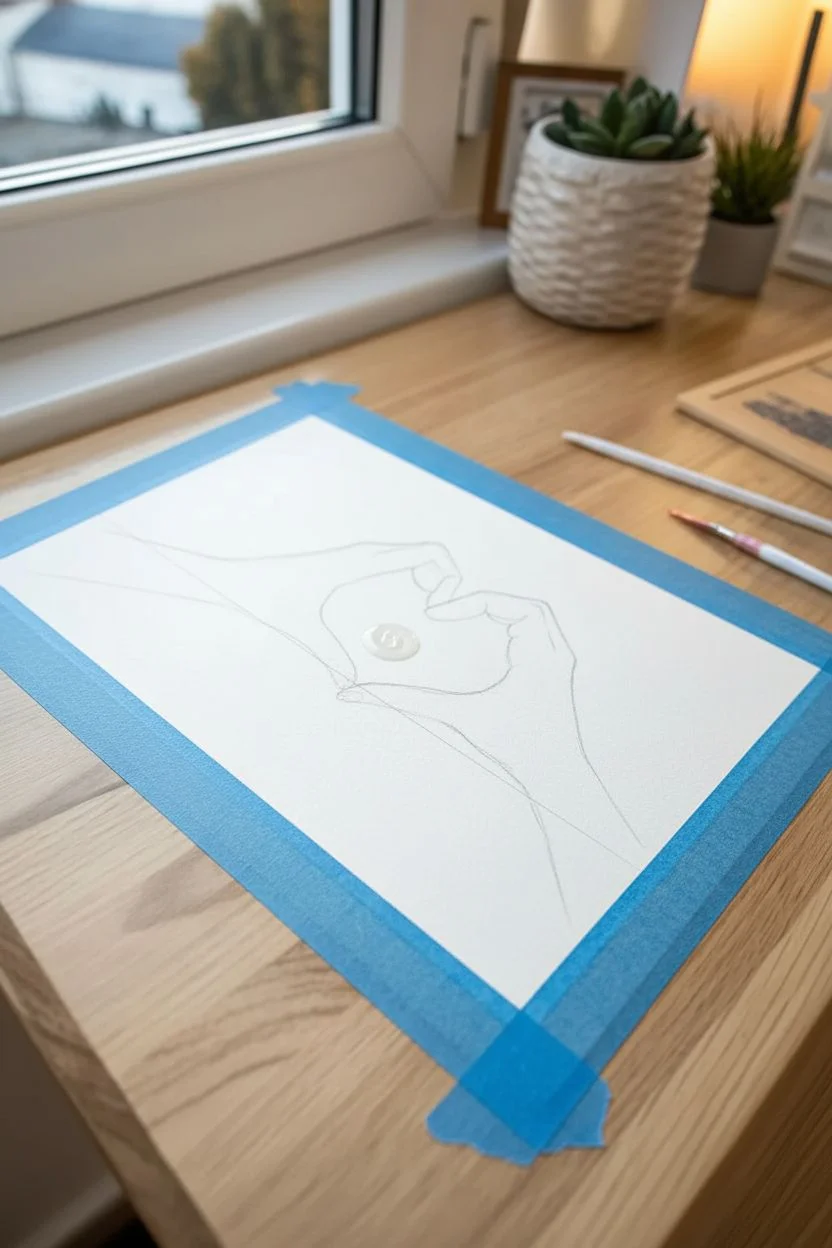
Step 1: Sketching and Preparation
-
Secure the canvas:
Tape down all four edges of your watercolor paper to a board or table to prevent buckling and create a crisp white border. -
Outline the hands:
Lightly sketch two hands coming together to form a heart shape in the center of the paper. Focus on the silhouette rather than tiny details like wrinkles. -
Set the scene:
Draw a straight horizontal line behind the hands for the ocean horizon and a small circle right in the center of the heart gap for the sun. -
Protect the light:
If you have masking fluid, apply a drop over the sun circle and let it dry. If not, you will just need to paint carefully around it.
Drawing Hands
Hands are tricky! Troubleshooting tip: Take a photo of your own hands making the heart shape against a window. Use that reference photo to get the proportions and finger angles correct.
Step 2: Painting the Sky
-
Wet the sky area:
Using clean water, wet the paper everywhere above the horizon line, avoiding the hand shapes. -
Apply the upper blues:
Drop a rich cobalt or ultramarine blue into the top corners, letting it fade as it moves toward the center. -
Infuse sunset stripes:
While the paper is still damp, paint streaks of violet and magenta across the sky to create cloud formations. -
Warm the horizon:
Paint a vibrant band of orange and yellow right above the horizon line, blending it slightly upward into the purples without creating mud.
Level Up: Golden Hour
For a magical finish, swap the white gouache for metallic gold paint when doing the water reflection. It will make the artwork shimmer beautifully when the light hits it.
Step 3: Creating the Ocean
-
Define the horizon:
Once the sky is dry, load your brush with deep teal or Prussian blue. Paint a sharp, straight line across the horizon. -
Fill the water:
Fill in the rest of the ocean area with varying shades of blue, making it darker at the bottom corners and slightly lighter near the center. -
Add wave texture:
While the paint is wet, lift out a few horizontal lines with a thirsty brush, or wait until dry to dry-brush darker blue lines for waves.
Step 4: The Hands
-
Mix skin tones:
Create a warm skin tone using burnt sienna, a touch of red, and yellow ochre. Since this is a sunset scene, lean towards warmer, reddish hues. -
Base layer:
Paint the hands entirely with a diluted wash of your mixed color to establish the base tone. -
Shadow and depth:
While the base is damp, drop darker brown mixed with a little purple into the wrists and the outer edges of the fingers to create volume. -
Sunset glow:
I like to glaze a thin layer of crimson or orange along the inner edges of the fingers to show the light reflecting off the skin.
Step 5: Illuminating Details
-
Reveal the sun:
Rub off the masking fluid from the sun. Paint it with a very pale yellow, leaving the center nearly white. -
Paint the reflection:
Using white gouache or a white gel pen, draw horizontal scribbles on the water directly below the sun to create a shimmering path of light. -
Highlight the waves:
Add smaller touches of white to the crests of the waves on the left and right for extra texture. -
Final touches:
Deepen any shadows on the hands with a second layer of paint if needed, then peel off the tape to reveal your clean edges.
Enjoy the warmth of this captured moment on your wall.


Have a question or want to share your own experience? I'd love to hear from you in the comments below!