When I’m painting hope, I’m really painting that moment when the air shifts—when things aren’t perfect yet, but you can feel the light coming. These ideas are packed with visual metaphors you can turn into your own story, no matter your style or skill level.
Sunrise After the Storm
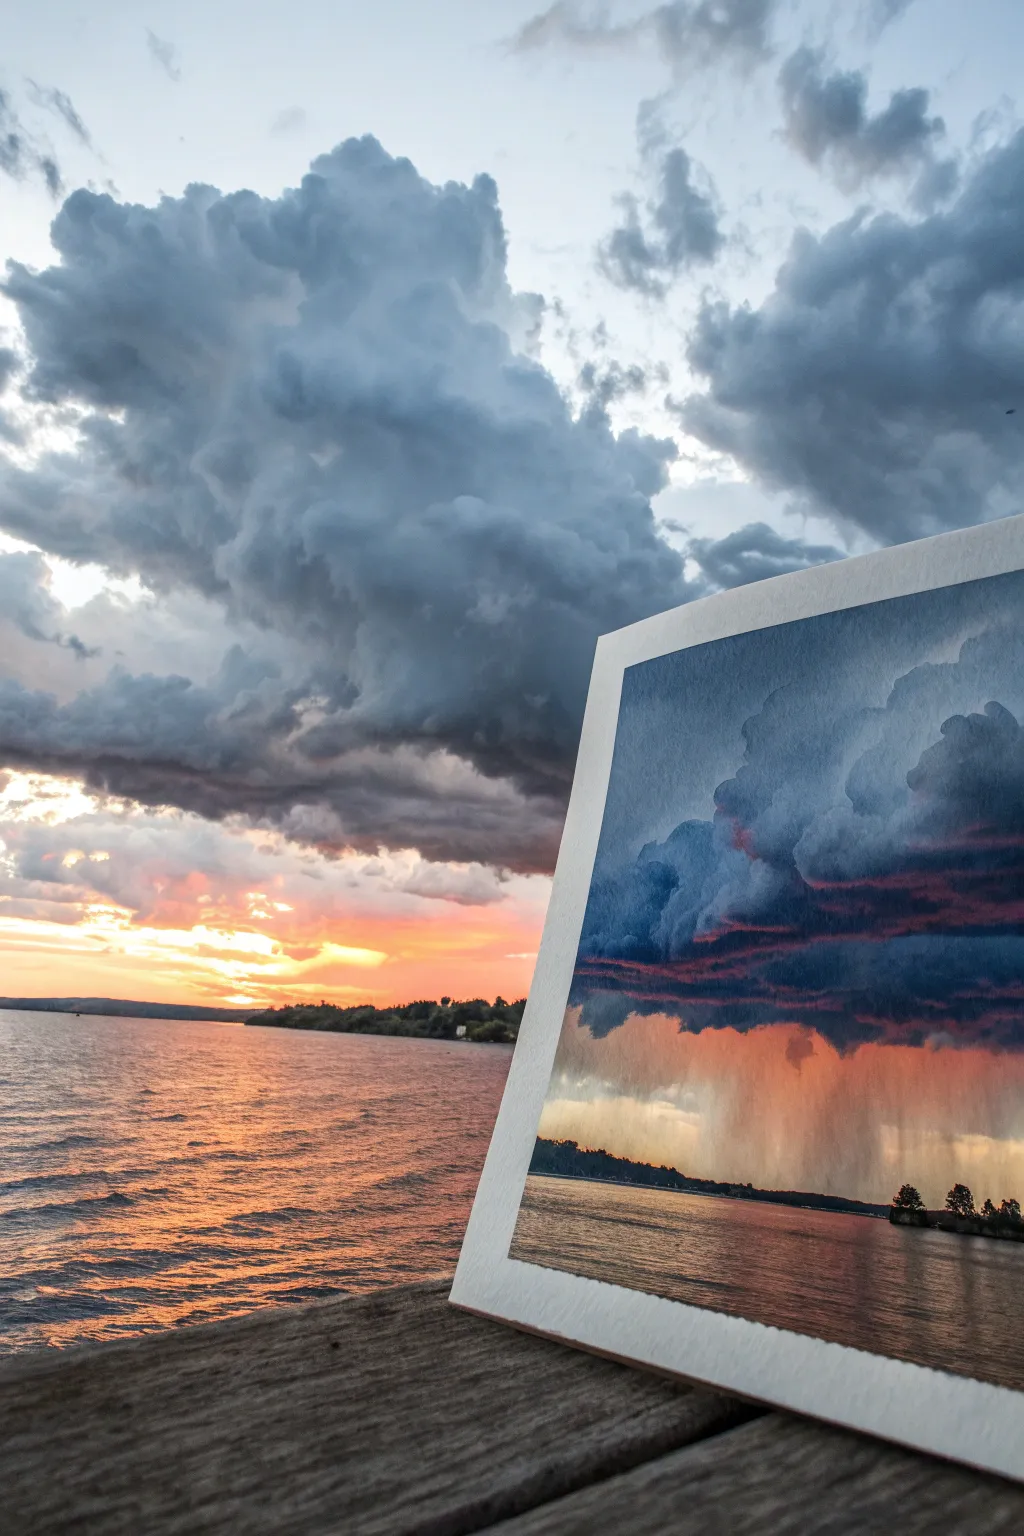
Capture the intense beauty of a fading storm with this watercolor project, which focuses on dramatic contrasts between menacing clouds and warm sunset light. You will learn to create rainy atmospheric effects and reflective water surfaces in a striking landscape composition.
Step-by-Step
Materials
- Cold Press Watercolor Paper (140lb/300gsm), approx. 5×7 inches
- Watercolor Paints (Indigo, Payne’s Gray, Ultramarine Blue, Alizarin Crimson, Cadmium Orange, Burnt Sienna)
- Masking Tape
- Flat Brush (3/4 inch)
- Round Brush (Size 8)
- Detail Brush (Size 2)
- Two Jars of Water
- Paper Towels
- Hardboard or Table for taping
Step 1: Preparation and Sky Foundation
-
Secure Your Paper:
Begin by taping down all four edges of your watercolor paper to a hardboard. This creates a clean white border and prevents the paper from buckling when wet. -
Wet the Sky Area:
Using your large flat brush and clean water, dampen the upper two-thirds of the paper where the sky will be. You want the paper glistening but not swimming in puddles. -
Establish the Glow:
While the paper is wet, drop in a light wash of Cadmium Orange right along the horizon line, blending it upwards slightly. This warm underpainting will serve as the inner light of the storm. -
Add Rosy Tones:
Mix a diluted Alizarin Crimson and gently brush it just above the orange, letting the colors bleed together softly to create that transitional sunset hue.
Rain Texture Trick
While the rain area is damp, drag a dry, stiff brush vertically downward through the paint. This lifts slight streaks of pigment, creating realistic rain shafts.
Step 2: Building the Storm Clouds
-
Mix Shadow Colors:
Prepare a rich, dark mixture using Indigo and a touch of Payne’s Gray. You want this paint directly from the tube or pan with very little water for maximum opacity. -
Form the Heavy Clouds:
Start painting the large cloud masses at the top of the paper. Use the belly of your Size 8 round brush to dab and roll the paint onto the paper, leaving the white of the paper or lighter washes peeking through in areas for highlights. -
Create Cloud Depth:
While the indigo layer is still damp, drop in even darker concentrations of Payne’s Gray into the bottom edges of the clouds to give them volume and weight. -
Soften the Edges:
Clean your brush, damp it slightly, and gently run it along the bottom edge of the dark clouds to blur the line where the clouds meet the sunset colors below. -
Paint the Rain Curtains:
To create the effect of distant rain (virga), take a watery wash of gray-purple and drag your brush vertically downward from the dark clouds into the orange horizon, letting the strokes fade out. -
Mid-Tone Transition:
Add some mid-tone blues (Ultramarine) in the middle sky area to bridge the gap between the dark storm and the bright sunset, keeping everything loose and wet-in-wet.
Warmth Boost
After drying, glaze a very watery layer of Quinacridone Gold over the orange sunset area for an intense, glowing light effect.
Step 3: The Water and Horizon
-
Reflect the Sunset:
Moving to the bottom third, wet the water area lightly. Mirror your sky colors by painting horizontal strokes of Cadmium Orange and Alizarin Crimson directly below the horizon line. -
Add Water Ripples:
While the warm wash is damp, use the tip of your brush with some diluted Indigo to create horizontal streaks across the water. These represent the ripples catching the dark sky. -
Establish the Horizon Line:
Once the sky and water are mostly dry (damp to the touch but not shiny), mix a very dark, near-black color using Indigo and Burnt Sienna. -
Paint Distant Land:
Using the Size 8 brush, paint a solid, organic strip across the horizon line to represent the far shore. Keep the top edge varied to suggest tree lines. -
Detail the Trees:
Switch to your Size 2 detail brush. Use the dark mixture to paint tiny vertical spikes and dots along the top of the landmass to suggest individual pine trees or uneven foliage. -
Create Island Silhouettes:
On the right side of the water, paint a small, detached island silhouette using the same dark mixture, anchoring it with a straight horizontal line at the base.
Step 4: Final Touches and Reveal
-
Darken Water Reflections:
Glaze a thin layer of dark blue over the bottom corners of the water to create a vignetting effect that draws the eye toward the light. -
Dry Completely:
Allow the painting to dry fully. If the paper feels cold to the back of your hand, it is still wet; wait until it is room temperature. -
Remove Tape:
The best moment: slowly peel the masking tape away at a 45-degree angle, away from the painting, to reveal your crisp white borders.
Step back and admire how the dark stormy tones make the sunset colors glow even brighter


Lighthouse Cutting Through Darkness
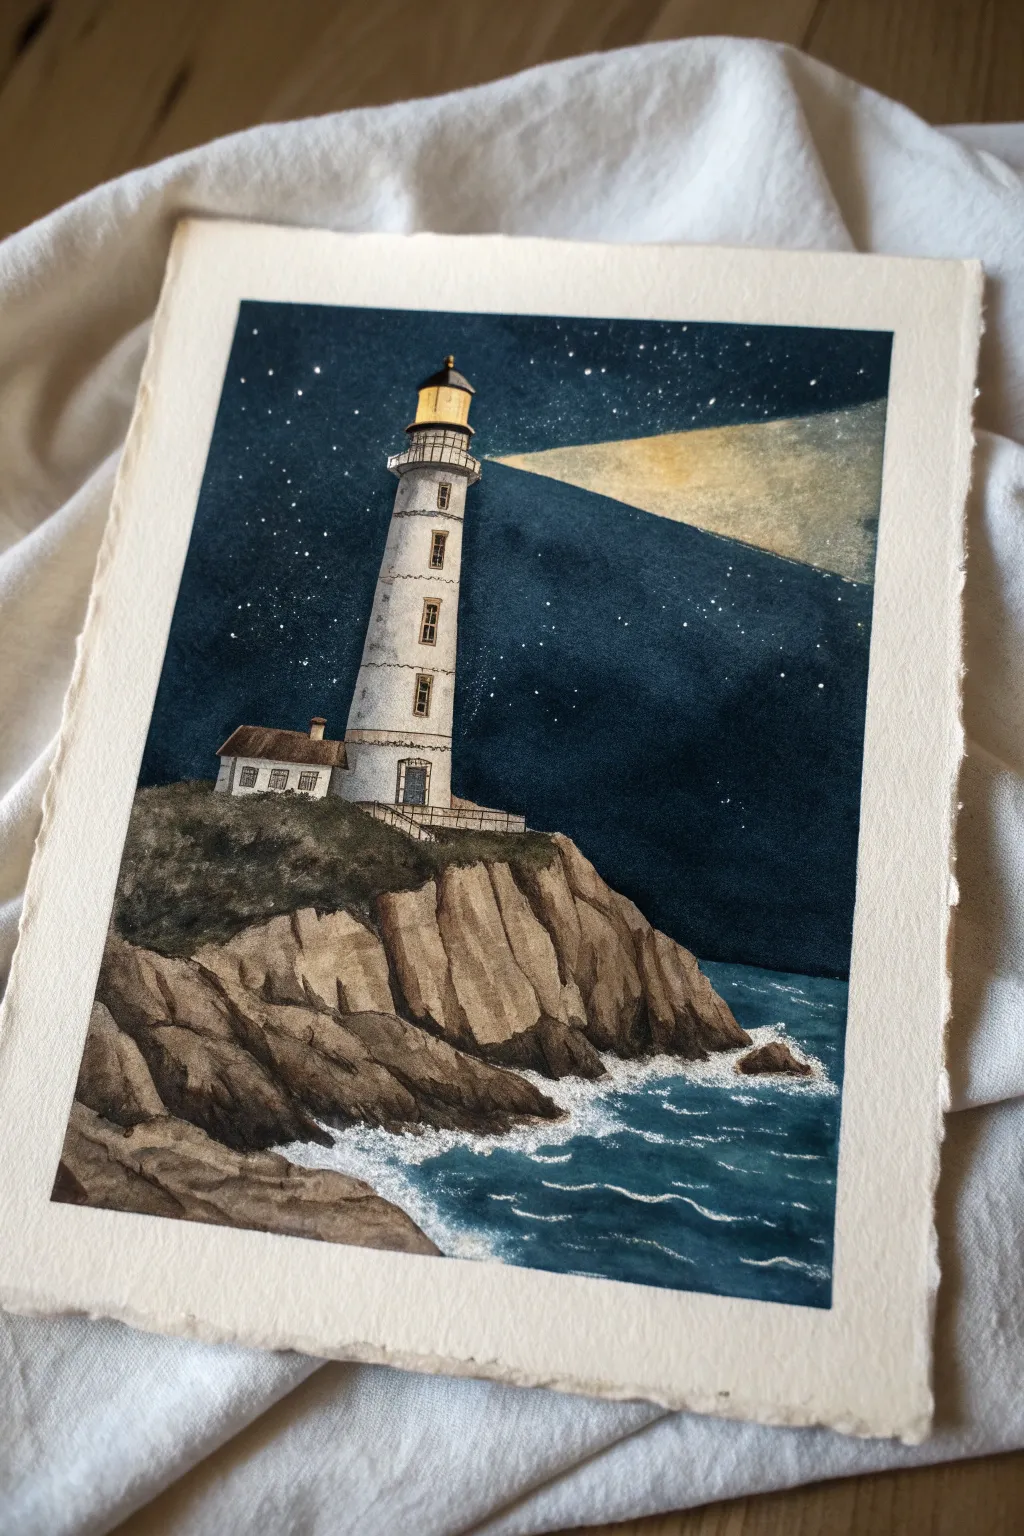
This striking watercolor project captures the serene strength of a lighthouse cutting through a dark, starry night. By layering deep indigo washes against jagged cliff textures, you’ll create a powerful contrast that feels both dramatic and hopeful.
Step-by-Step Guide
Materials
- Cold press watercolor paper (300gsm/140lb)
- Watercolor paints: Indigo, Paynes Gray, Burnt Sienna, Yellow Ochre, Lamp Black, Titanium White (gouache works best)
- Artist tape or masking tape
- Pencil (HB) and eraser
- Masking fluid
- Round brushes (sizes 2, 6, and 10)
- Fine liner brush or white gel pen
- Ruler
- Mixing palette
- Two jars of water
Step 1: Sketch and Preserve
-
Draft the composition:
Begin by taping down your paper to prevent buckling. Lightly sketch the horizon line about one-third up from the bottom. Draw the jagged outline of the cliff face, keeping the lines organic and irregular. -
Construct the lighthouse:
Use a ruler to lightly draw the lighthouse structure on top of the cliff. It should be tall and tapered. Sketch the lantern room at the top and the small adjoining house at the base. -
Map the light beam:
Very faintly mark where the beam of light will extend from the lantern room. It should widen as it goes off the right edge of the page. This area needs to be kept pristine and light. -
Protect the whites:
Apply masking fluid carefully over the entire lighthouse shape, the small house, and the white foam lines where the water meets the rocks. Let this dry completely before painting.
Step 2: Painting the Sky and Sea
-
First sky wash:
Mix a large amount of Indigo with a touch of Lamp Black. Using your largest brush, lay down a wash over the sky area, carefully painting *around* the triangular beam of light. Keep the wash wet to avoid harsh lines. -
Deepening the night:
While the first layer is still damp, drop in concentrated Indigo and Paynes Gray into the corners and upper edges to create a vignetted, deep night effect. Let this layer dry fully. -
The beam of light:
Once the sky is dry, wet the triangular beam area with clean water. Drop in very diluted Yellow Ochre near the lantern, fading it out to almost clear water as it moves right. This creates a soft glow. -
Base ocean layer:
Paint the water area with a mix of Prussian Blue or Indigo. Keep horizontal brushstrokes to mimic the movement of waves. Leave the area near the masking fluid (the foam) slightly lighter.
Uneven Sky Wash?
If your large dark sky dries with blotchy ‘cauliflower’ edges, wait for it to fully dry, then lightly glaze over the entire area with a very watery layer of Indigo to unify the tones.
Step 3: Rocks and Texture
-
Cliff base tones:
Mix Burnt Sienna with a little Paynes Gray to get a desaturated brown. Paint the cliff face in vertical sections, following the jagged cracks of the rocks. -
Adding rock dimension:
While the rocks are damp, drop darker brown (more Paynes Gray) into the shadow crevices and the bottom edge of the cliff to create visual weight. -
Foliage texture:
Mix a deep, muddy green using your Indigo and Yellow Ochre. Stipple this onto the top of the cliff, right under the lighthouse, to suggest grassy, rugged terrain. -
Ocean depth:
Go back to the water and add darker, thin wavy lines of pure Indigo to create the peaks and troughs of the waves, emphasizing surface movement.
Level Up: Metallic Touch
Use gold watercolor paint or a gold leaf pen for the lantern room light and a few select stars. This adds a subtle, magical shimmer that catches the light when viewed from an angle.
Step 4: Refining Details
-
Reveal the lighthouse:
Gently rub away the masking fluid from the lighthouse and foam areas. Clean up any pencil lines with an eraser if they are too visible. -
Lighthouse shadowing:
Use a diluted grey wash to paint the shadowed side (left side) of the lighthouse tower, giving it a cylindrical form. Paint the roof of the small house in a soft brown. -
Windows and railings:
Using your smallest brush (size 0 or 2), paint the tiny windows with a dark grey. Add the railing details and the lantern room structure with fine, precise lines. -
The lantern glow:
Paint the glass of the lantern room with a bright, saturated Yellow Ochre or lemon yellow to represent the source of the light. -
Stars and sea foam:
Load a stiff brush with White Gouache and flick it over the dark sky to create stars. Use the same white paint to add crisp highlights to the crashing waves at the cliff’s base.
Peel off your tape to reveal a crisp border that frames your illuminated seascape beautifully
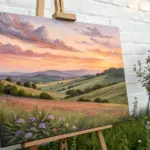
A Path From Shadow to Light

This evocative painting captures the quiet promise of a new day, featuring a winding country road leading toward a glowing horizon. Using soft watercolor washes and careful layering, you’ll recreate the sense of depth and atmospheric perspective that makes this scene so hopeful.
How-To Guide
Materials
- Cold press watercolor paper (140lb/300gsm), approx 11×14 inches
- Watercolor paints: Indigo, Burnt Umber, Yellow Ochre, Cadmium Orange, Sap Green, Payne’s Gray
- Large flat wash brush (1-inch)
- Round brushes (sizes 4, 8, and 12)
- Masking tape
- Masonite board or sturdy surface
- 2 jars of water (one clean, one dirty)
- Paper towels
- Palette
- Pencil (HB) and kneaded eraser
Step 1: Preparation and Sketching
-
Secure the paper:
Tape your watercolor paper down firmly to your board on all four sides. This creates that crisp white border seen in the reference and prevents buckling when we add water. -
Sketch the horizon:
Using your HB pencil, lightly draw the horizon line about a third of the way up from the bottom. Keep it faint; graphite can be hard to erase under paint. -
Map the road:
Sketch the winding road starting wide at the bottom center and narrowing drastically as it curves toward the horizon line, creating a strong vanishing point. -
Suggest trees:
Lightly indicate the tree line in the distance and the larger bare trees on the right side. Don’t draw every branch, just the main trunk lines and general shapes.
Winning the Wash
Work quickly when painting the sky to avoid ‘blooms’ or hard edges. If the paper starts to dry while you are still blending colors, stop and let it dry completely before wetting it again to add more layers.
Step 2: Painting the Sky
-
Wet the sky area:
Use your large flat brush to apply clean water to the entire sky area, stopping right at the tree line. The paper should glisten but not have puddles. -
Apply the glow:
Drop in a dilute wash of Yellow Ochre near the horizon where the sun is rising. While wet, blend in a touch of Cadmium Orange to intensify the center light source. -
Add the upper sky:
While the paper is still damp, pick up a mix of Indigo and a tiny bit of Payne’s Gray. Paint the top of the sky, letting the blue bleed downward but stopping before it touches the yellow to avoid creating green. -
Create soft clouds:
Lift out pigment with a thirsty (damp but clean) brush to create soft cloud shapes, or dab gently with a crumpled paper towel. Let the sky layer dry completely.
Step 3: The Middle Ground
-
Paint the distant trees:
Mix a cool, muted green using Sap Green and Indigo. Paint the distant tree line along the horizon. Keep the edges vague to suggest they are far away. -
Wash the fields:
Using a large round brush, apply a wash of Burnt Umber and Yellow Ochre for the dry winter grass on either side of the road. Add more water as you get closer to the horizon to fade the color. -
Suggest texture:
While the field wash is damp, drop in slightly darker brown spots to suggest uneven terrain and brush, but keep it loose.
Add Winter Frost
To give the scene a frosty morning look, sprinkle a tiny pinch of salt onto the wet field washes. When it dries and you brush the salt off, it leaves beautiful crystal-like textures.
Step 4: The Road and Foreground
-
Base coat for the road:
Mix a watery grey-blue using Payne’s Gray and a touch of Indigo. Paint the entire road surface with the flat brush, following the curve of your sketch strokes. -
Define the asphalt:
Once the base is dry, use a size 8 round brush with a darker, more saturated mix of the same grey to add texture to the road, leaving some lighter areas to look like wet reflections. -
Paint the yellow lines:
Mix an opaque Yellow Ochre (or use a touch of gouache if you have it). Carefully paint the double yellow line down the center. Break the lines as they recede into the distance to imply perspective. -
Add the road edges:
Use a dark mix of Burnt Umber and Payne’s Gray to paint the shoulder and the dark grass right next to the asphalt. This sharp contrast will make the road pop.
Step 5: Final Details
-
Paint the foreground trees:
Using your smallest round brush (size 4) and a dark mix of Burnt Umber and Indigo, paint the distinct bare trees on the right. Use a shaky hand to make the branches look organic and twisted. -
Add fine branches:
Extend the tree branches upward into the sky area. Ensure the paint is fairly dry (less water) so you get crisp, fine lines. -
Enhance shadows:
Glaze a very watery purple-grey over the bottom left foreground to deepen the shadows, anchoring the composition. -
Reveal the border:
Wait until the painting is bone dry. Slowly peel away the masking tape at a 45-degree angle to reveal your clean white edges.
Step back and admire how the light draws the eye down the road, creating a perfect symbol of hope and journey


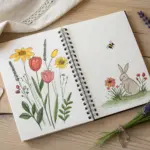
Bird Leaving an Open Cage
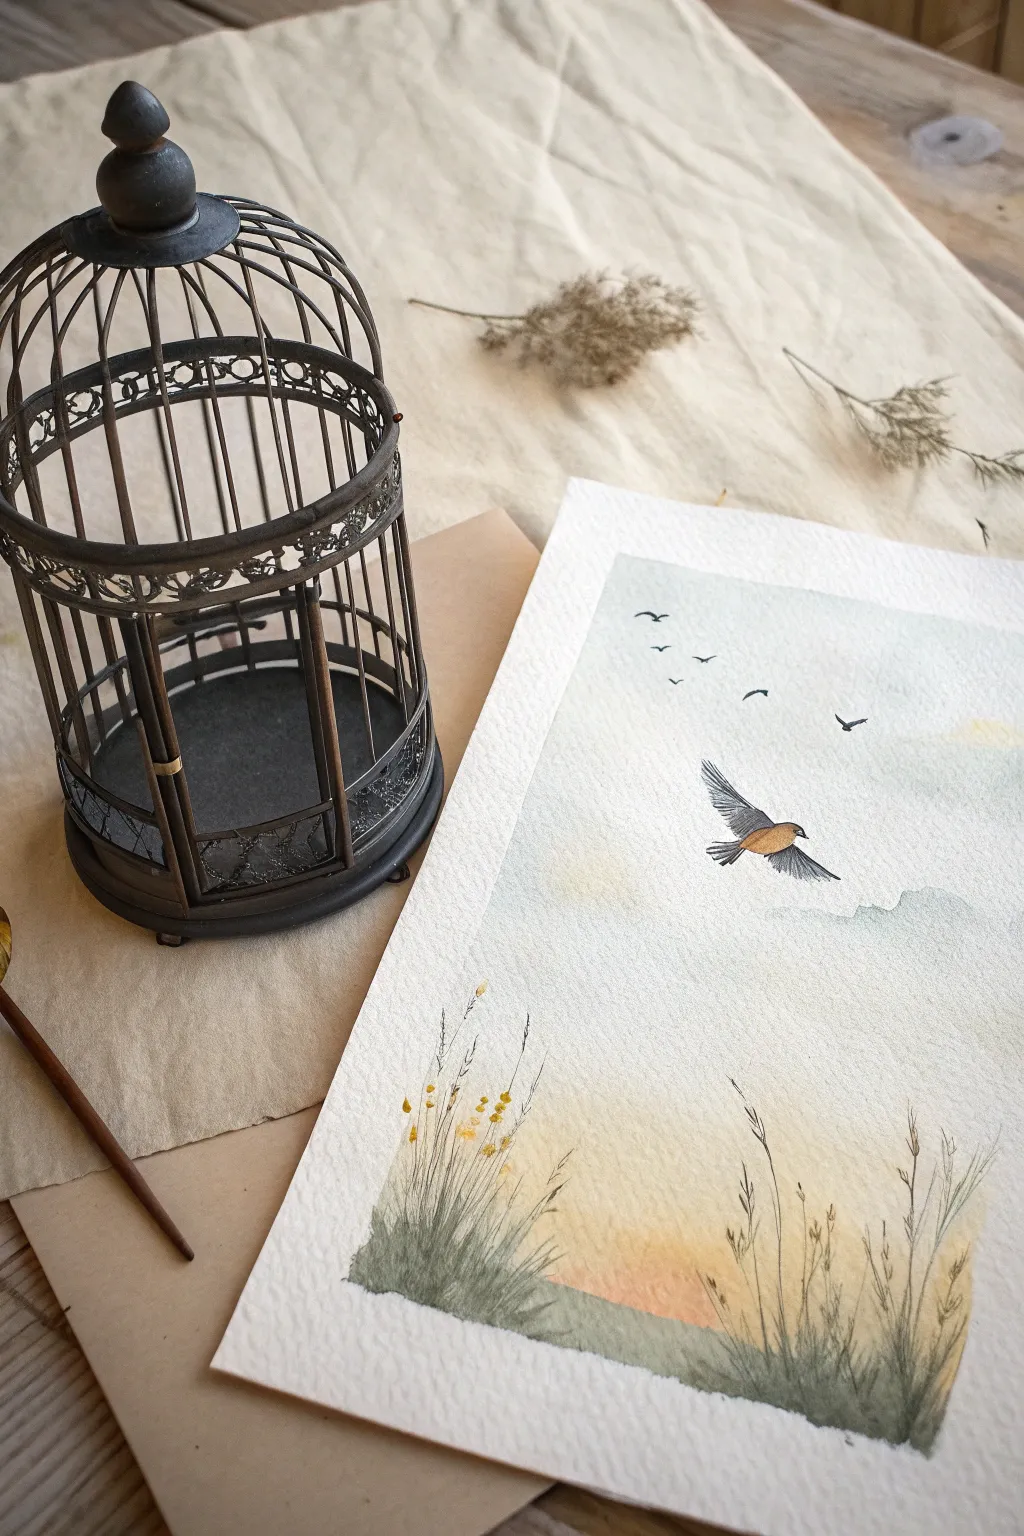
This serene watercolor painting captures the uplifting spirit of hope with a lone bird soaring freely above a grassy meadow. Using soft washes and delicate dry-brush details, you’ll create an atmospheric sky and gently swaying grasses.
Step-by-Step
Materials
- Cold press watercolor paper (300 gsm)
- Watercolor paints (Cerulean Blue, Yellow Ochre, Burnt Sienna, Payne’s Gray, Sap Green, Sepia)
- Round watercolor brushes (sizes 8 and 2)
- Rigger or liner brush for fine details
- Clean water jar
- Paper towels
- Pencil (HB or H)
- Kneaded eraser
- Masking tape
Step 1: Planning and Sky
-
Tape the edges:
Secure your watercolor paper to a board using masking tape. This creates that crisp, professional white border shown in the image and prevents the paper from buckling when wet. -
Sketch the composition:
Lightly sketch the horizon line about one-third of the way up the page. Draw a small, simple outline of the main bird in the upper middle section, focusing on the wing angles. -
Wet the sky area:
Using your large round brush, wet the entire sky area with clean water. Stop just before you reach the horizon line to keep a separation between land and sky. -
Apply the blue wash:
Drop in a dilute wash of Cerulean Blue at the very top of the paper. Let it gently diffuse downwards, fading out as it reaches the middle of the sky to create an atmospheric gradient. -
Add warmth:
While the paper is still slightly damp in the lower sky, brush in a very pale wash of Yellow Ochre near the horizon. Let it bleed slightly into the white space, hinting at a soft sunset glow. -
Paint distant clouds:
Mix a faint grey using a touch of Payne’s Gray and water. Dab this loosely along the transition zone between the blue and yellow for soft, undefined clouds. Let the sky dry completely.
Soft Edges
For fluffier clouds, dab the wet sky paint with a clean, crumpled tissue. This lifts the pigment and leaves realistic white shapes.
Step 2: The Meadow
-
Base layer for grass:
Mix a muted green using Sap Green and a touch of Burnt Sienna. Paint a loose, uneven wash along the bottom strip of the paper to establish the ground. -
Darken the foreground:
While the green base is still wet, drop in concentrated pigment (Sap Green mixed with Payne’s Gray) at the very bottom corners to create depth and anchor the scene. -
Suggest grass blades:
Once the ground is damp but not soaking, use the tip of a smaller brush to flick upward strokes. This lifts pigment and creates soft, grassy textures along the horizon line. -
Dry completely:
Let the entire painting dry thoroughly before moving to the fine details. If the paper is cool to the touch, it’s still wet.
Level Up: Texture
Add a sprinkle of salt onto the wet grass wash before it dries. The salt crystals absorb pigment, creating a stunning blooming texture.
Step 3: Birds and Details
-
Paint the bird’s body:
For the main bird, mix Burnt Sienna for the chest and underbelly. Apply this carefully within your pencil sketch, leaving the wing areas empty for now. -
Detail the wings:
Use a mix of Sepia and Payne’s Gray for the wings and tail feathers. Use small, overlapping strokes to mimic individual feathers, keeping the tips sharp. -
Add the beak and eye:
Switch to your smallest liner brush. With concentrated black or dark Sepia, add a tiny dot for the eye and a fine line for the beak. -
Draw distant birds:
Using the same dark mix, paint tiny ‘v’ or ‘m’ shapes high in the sky to represent the distant flock. Vary their sizes and angles to make the movement look natural. -
Define foreground grass:
Mix a dark green-grey. Use the rigger brush to paint tall, thin stalks of grass rising from the bottom, overlapping the sky slightly. -
Add wildflowers:
Dip the tip of your brush in thick Yellow Ochre or pure yellow gouache. Dot tiny flowers onto the tops of some of the tallest grass stalks. -
Final touches:
Check the balance of your composition. If the foreground needs more weight, add a few more dark, crisp grass blades in the corners. -
Remove tape:
Once the paper is bone dry, carefully peel away the masking tape at a 45-degree angle to reveal the clean edges.
This gentle scene serves as a daily reminder that freedom and new beginnings are always on the horizon
BRUSH GUIDE
The Right Brush for Every Stroke
From clean lines to bold texture — master brush choice, stroke control, and essential techniques.
Explore the Full Guide
Rainbow Breaking Through Clouds
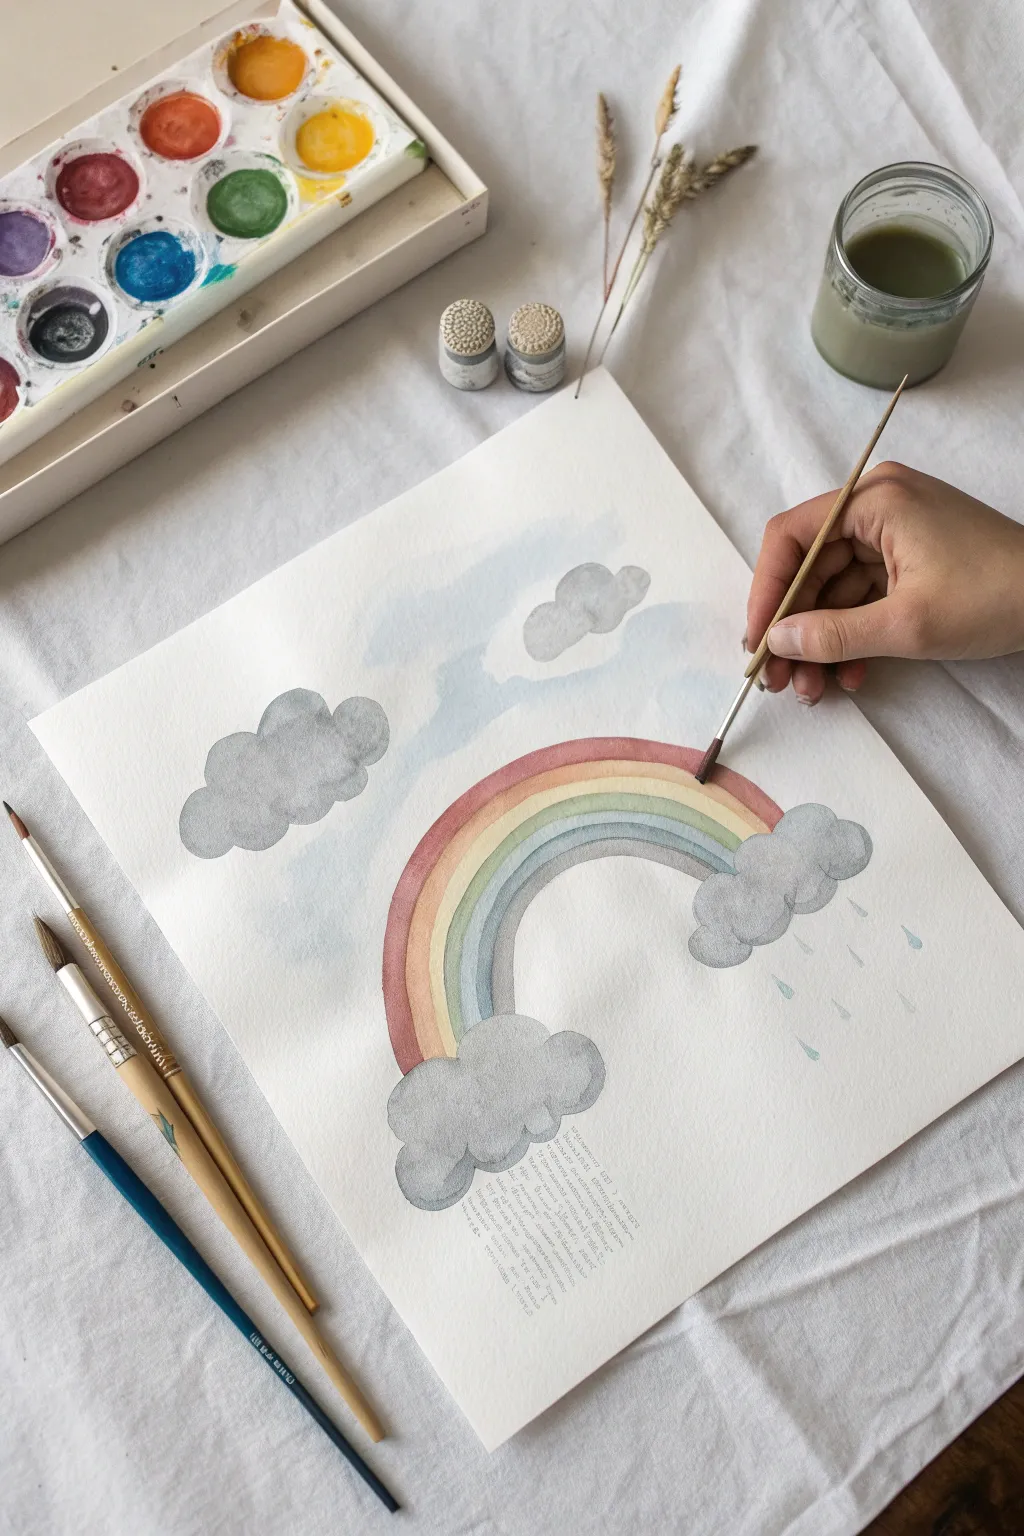
Capture the gentle promise of a clearing storm with this soft watercolor illustration. Featuring a muted rainbow arcing between grey clouds, this piece balances rainy moods with the brightness of color.
Step-by-Step
Materials
- Cold-pressed watercolor paper (at least 300gsm)
- Watercolor paint set (focus on muted primaries and greys)
- Round watercolor brushes (size 4 and 8)
- Pencil (HB or lighter)
- Kneaded eraser
- Two jars of water
- Paper towels
- Masking tape (optional)
Step 1: Sketching the Layout
-
Secure the paper:
If you prefer a crisp border, tape your watercolor paper down to a board. Otherwise, ensure you have a flat, clean surface to work on. -
Outline the clouds:
Using your pencil very lightly, sketch two large, fluffy cloud shapes near the bottom third of the paper. They should be roughly mirrored but organic in shape. -
Arch the rainbow:
Lightly draw the arch of the rainbow connecting the two bottom clouds. Getting the curve consistent can be tricky, so take your time and use an eraser if needed. -
Add background elements:
Sketch a few smaller, simpler cloud shapes in the upper left and right corners. I like to keep these higher up to create depth. -
Lighten the lines:
Gently roll a kneaded eraser over your sketch to lift up excess graphite. You want the lines barely visible so they don’t show through the transparent paint.
Muddy water warning
Change your rinse water frequently! If your water gets brown or grey, it will dirty your yellow and orange rainbow stripes, making them look dull instead of bright.
Step 2: Painting the Elements
-
Mix a cloud grey:
Create a watery grey mix. You can use a pre-made Payne’s Grey dulled with a touch of water, or mix ultramarine blue with a tiny bit of burnt sienna. -
Wash the main clouds:
Using your size 8 brush, fill in the two large bottom clouds. Keep the wash fairly wet and uniform, allowing the pigment to settle naturally for a soft texture. -
Paint background clouds:
Use a slightly more watered-down version of your grey mix for the upper floating clouds. This makes them appear further away. -
Let the clouds dry:
Wait until the cloud shapes are completely dry to the touch. If you paint the rainbow too soon, the colors will bleed into the grey clouds. -
Prepare the rainbow palette:
Mix your rainbow colors: a dusty red, a soft orange, a pale yellow, a sage green, a light blue, and a muted indigo. Keep the tones earthy rather than neon bright. -
Paint the red band:
Start with the outermost red band. Using the size 4 brush, carefully paint a clean stripe following your pencil arch. -
Continue the spectrum:
Working inward, paint the orange band right next to the red. If the red is still wet, the colors might bleed slightly—this is okay for a softer look, but wait for it to dry if you want crisp lines. -
Complete the inner bands:
Finish the rainbow with the yellow, green, blue, and indigo stripes. Ensure the ends of the rainbow tuck neatly ‘behind’ the grey clouds painted earlier.
Bleed control
For a ‘wet-on-wet’ look in the rainbow without making a mess, leave a hairline gap of dry paper between each colored stripe. The eye won’t notice, but the paint stays put.
Step 3: Finishing Touches
-
Add rain droplets:
Load a small brush with a very pale blue wash. Paint small tear-drop shapes falling from the right-hand cloud and the blue band of the rainbow. -
Layer the clouds:
Once the first layer of grey is dry, you can add a second, darker layer to the bottom or sides of the main clouds to give them volume and shadow. -
Soften harsh edges:
If any cloud edges look too sharp, use a clean, damp brush to gently scrub the edge and soften it while the paint is drying. -
Optional text:
If you wish to add faint text like in the reference, use a very fine liner brush with watered-down grey paint to write illegible, scribbled text below the main cloud cluster for texture. -
Final assessment:
Check for any uneven patches. If the rainbow looks too pale, you can carefully add a second layer of paint over the dry stripes to boost saturation.
Allow the painting to dry completely before removing any tape or framing your artwork
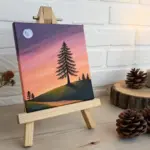
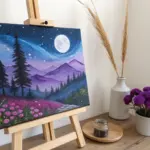
North Star Over a Sleeping Landscape
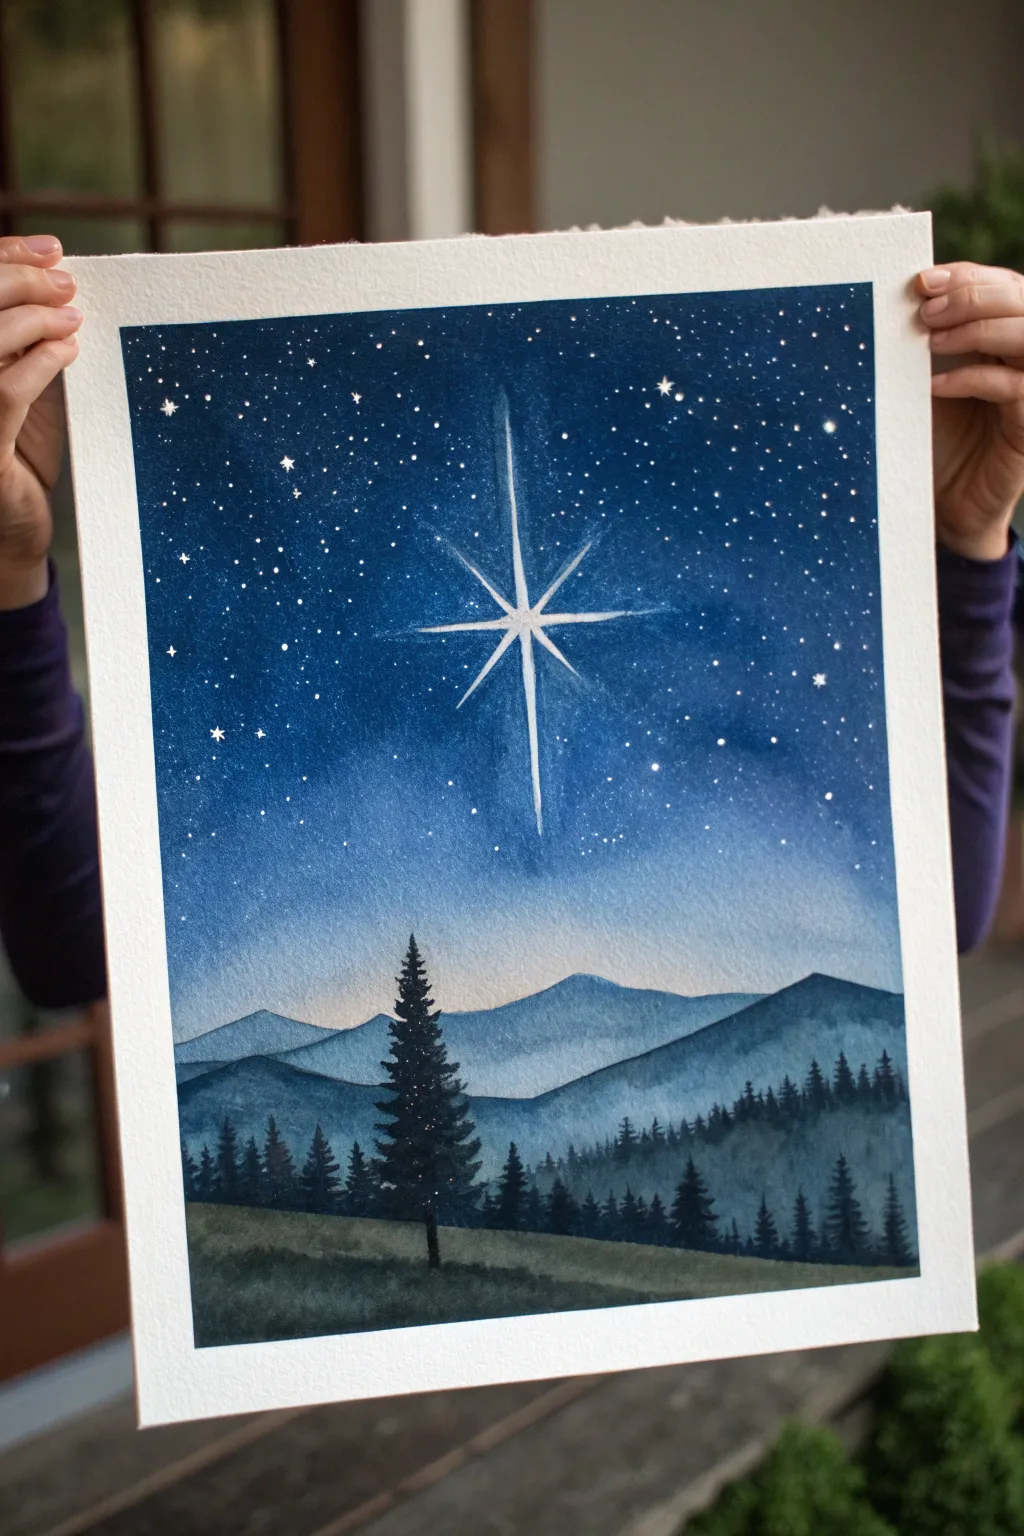
Capture the serene beauty of a winter night with this watercolor project, featuring a brilliant North Star guiding the way over misty mountains. The contrast between the deep indigo sky and the delicate, star-filled haze creates a stunning sense of depth and hope.
Step-by-Step Tutorial
Materials
- Cold press watercolor paper (140lb/300gsm), taped down
- Watercolor paints: Indigo, Prussian Blue, Phthalo Blue, Burnt Umber, Payne’s Grey
- White gouache or bleeding proof white ink
- Large flat wash brush
- Medium round brush (size 6 or 8)
- Fine detail brush (size 0 or 1)
- Clean water jars
- Masking tape
- Paper towels
- An old toothbrush for spattering
Step 1: Sky Gradient
-
Prepare the paper:
Begin by securing your watercolor paper to a board with masking tape on all four sides. This ensures a clean border and prevents the paper from buckling during the heavy washes. -
Wet the sky area:
Using your large flat brush, apply a clean water wash over the top two-thirds of the paper. You want the surface to be glistening but not holding puddles. -
Establish the deep night:
Load your brush with a rich, dark mix of Indigo and a touch of Payne’s Grey. Start painting from the very top edge, applying the pigment heavily. -
Create the gradient:
As you move down the paper, gradually introduce Phthalo Blue or Prussian Blue to the mix. Let the paint naturally dilute with the water on the paper as you near the horizon line, creating a fade from deep darkness to a lighter, glowing blue near where the mountains will be. -
Add a touch of warmth:
Just before the wash dries, gently lift a little pigment right at the horizon or drop in a very faint, watered-down wash of just clear water to create a misty separation where the sky meets the earth. -
Let it dry completely:
This is crucial. The paper must be bone dry before moving on to the stars, or they will blur into fuzzy blobs rather than crisp points of light.
Star Burst Control
If your North Star lines look shaky, use a ruler edge or tape as a guide. Ensure the blue sky is 100% dry specifically where the tape touches to avoid ripping.
Step 2: Stars and the North Star
-
Spatter the background stars:
Dilute a small amount of white gouache with water until it has a milky consistency. Dip an old toothbrush into it and run your thumb across the bristles to flick tiny specks across the dark upper sky. -
Draft the North Star:
With your fine detail brush and opaque white gouache, paint a small center dot where you want your main star. Then, carefully pull a long vertical line straight down, tapering it to a fine point. -
Complete the star shape:
Paint a matching vertical line going upward, then a shorter horizontal line crossing the center. Add four very small diagonal rays in the corners of the cross to create that classic twinkling starburst effect. -
Highlight secondary stars:
Look for a few random spots in the sky to add slightly larger dots with the tip of your brush, creating varying star sizes for a more realistic galaxy look.
Step 3: Mountains and Mist
-
Paint the distant ridge:
Mix a watery wash of Phthalo Blue and a tiny bit of Indigo. Paint the silhouette of the furthest mountain range. Keep the edge crisp but the fill translucent to make it look far away. -
Layer the middle mountains:
Once the first range is dry, mix a slightly darker, more opaque blue-grey. Paint a second mountain range in front of the first, slightly overlapping. This creates atmospheric perspective. -
Create the foreground hill:
For the closest landmass, use a darker mix of Payne’s Grey and Burnt Umber. Paint a gentle slope at the bottom of the paper, using horizontal strokes to suggest a grassy texture.
Level Up: Galaxy Glow
Before the sky wash dries, drop tiny hints of purple or magenta into the wet indigo paint. It adds a subtle, magical cosmic depth to the night sky.
Step 4: Forest Details
-
Start the background trees:
Using a medium grey-blue mix, paint small, vertical lines along the ridge of the middle mountain range to suggest a distant forest line. Keep these loose and not too detailed. -
Paint the main pine tree:
Using your darkest, thickest mix of Payne’s Grey and Indigo, paint a vertical trunk line for the large foreground tree. Use the tip of your round brush to dab foliage branches extending outward, getting wider toward the bottom. -
Add the surrounding forest:
Fill in the lower mid-ground with varied heights of pine trees. I like to make some darker and some lighter to show density in the forest. -
Final touches:
Peel off the tape carefully at a 45-degree angle to reveal your crisp white borders.
Now you have a peaceful, star-filled landscape that serves as a visual reminder of stillness and direction.

PENCIL GUIDE
Understanding Pencil Grades from H to B
From first sketch to finished drawing — learn pencil grades, line control, and shading techniques.
Explore the Full Guide
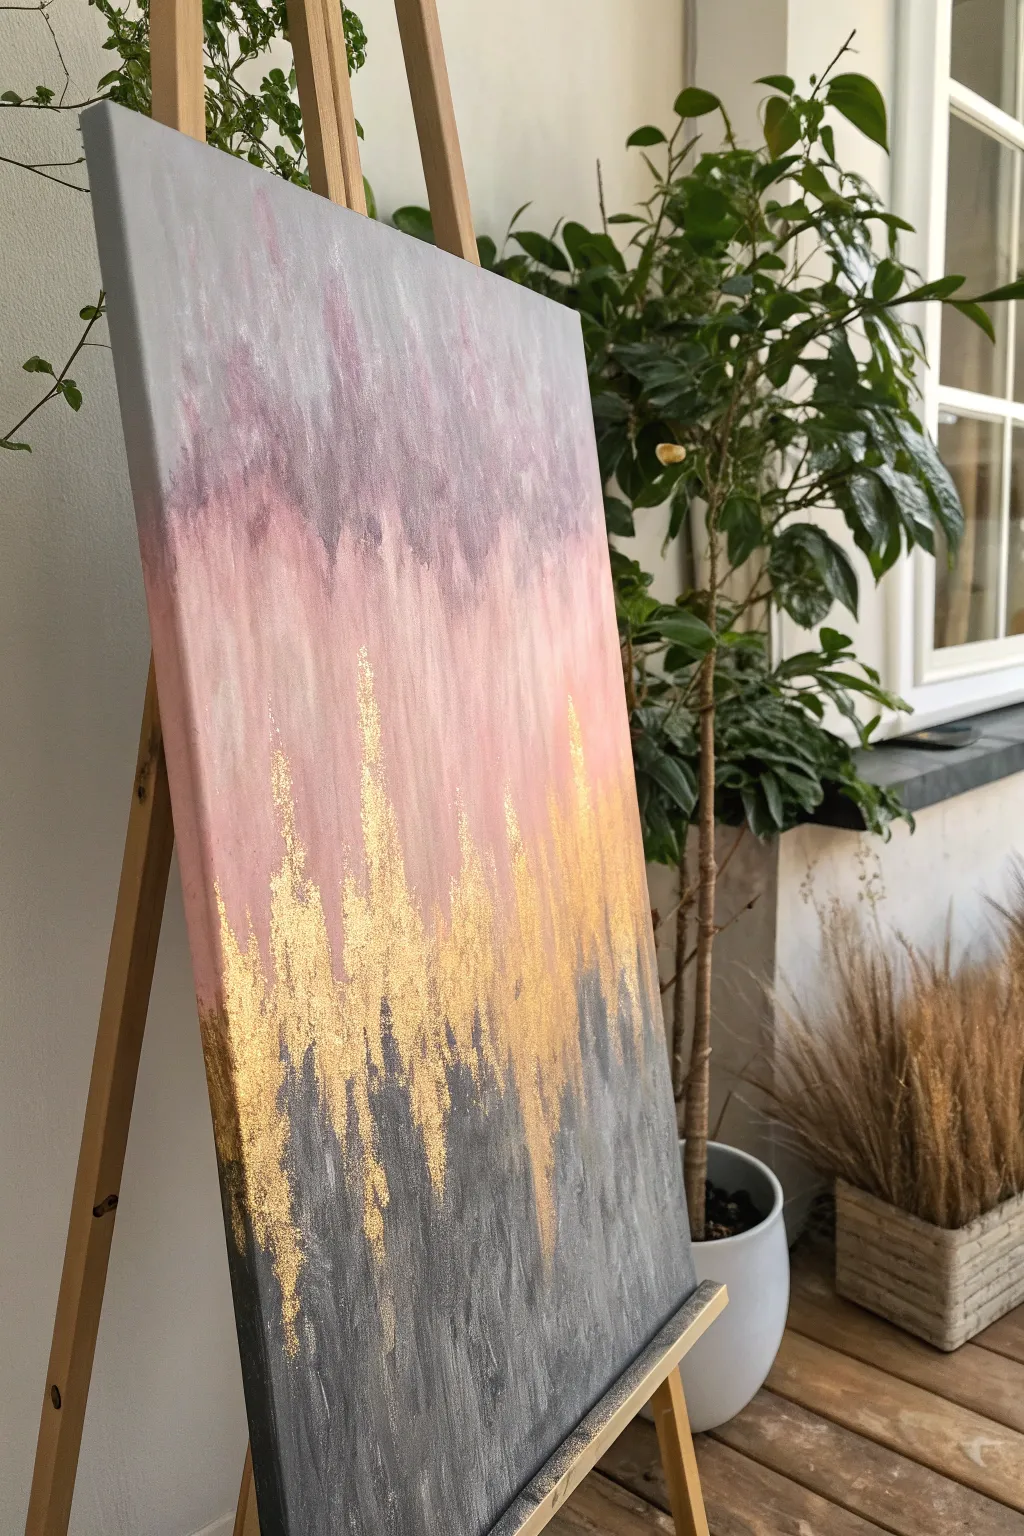
Abstract Gradient From Charcoal to Gold

This abstract piece utilizes a strong verticality to suggest rising hope, transitioning from earthy charcoal grays into soft blush pinks and misty lavenders. The striking centerline of gold leaf creates a shimmering focal point that mimics light breaking through a storm.
Step-by-Step
Materials
- Rectangular stretched canvas (e.g., 18×24 inches)
- Acrylic paints: Charcoal Gray, Titanium White, Mars Black, Blush Pink, Lavender (or Violet)
- Gold leaf sheets (imitation or real)
- Gold leaf adhesive size
- Gold leaf sealer
- Soft synthetic brushes (large flat brush, medium filbert)
- Palette knife
- Clean dry brush (for gold leaf)
- Water cup and paper towels
- Optional: Texture paste or modeling paste
Step 1: Setting the Background Gradient
-
Prepare the canvas:
Ensure your canvas is clean and taut. If you want extra texture underneath the paint, you can apply a thin, uneven layer of texture paste with a palette knife now and let it dry completely, though smooth canvas works beautifully too. -
Mix the base gray:
On your palette, mix Charcoal Gray with a touch of Mars Black. You want a deep, stormy slate color. Use a large flat brush to apply this to the bottom third of the canvas. -
Create vertical strokes:
Apply the dark gray paint using vertical, upward strokes. Don’t worry about perfect coverage; the visible brushstrokes add to the raw, organic feel of the piece. -
Blend into lighter gray:
Without cleaning your brush fully, pick up some Titanium White to create a mid-tone gray. Paint the middle section of the canvas, overlapping slightly with the dark bottom layer. -
Introduce the pink:
Clean your brush thoroughly. Load it with Blush Pink and a tiny bit of white. Start painting from the upper third down into the wet mid-tone gray. -
Feather the transition:
Where the pink meets the gray, use long, light vertical strokes to feather the colors together. Avoid over-blending; you want to see distinct streaks of color rather than a muddy mix. -
Add the lavender top:
Mix Lavender with a generous amount of Titanium White for a hazy, soft purple. Apply this to the very top edge of the canvas, blending it downwards into the pink section. -
Refine the streaks:
While the paint is still tacky, use a clean, dry brush to drag vertically from the bottom to the top in a few areas. I like to do this to unify the gradient and create that rainfall effect. -
Dry completely:
Let the entire background layer dry fully. This is crucial because applying gold leaf adhesive to wet paint will ruin the surface.
Sticky Situation
Gold leaf won’t stick? You likely applied the leaf too soon while the glue was wet, or waited too long until it was dry. The adhesive must be tacky—sticky like tape—not wet.
Step 2: Applying the Gilded Center
-
Plan the gold placement:
Visualize where the ‘break’ in the painting should be. In the reference, it’s an irregular vertical band rising from the dark gray into the pink. -
Apply adhesive size:
Using a smaller brush, apply the gold leaf adhesive size in rugged, vertical strokes. Focus the heaviest application near the transition line between the gray and pink. -
Create scattered edges:
Feather the adhesive outwards at the top and bottom so the gold will look like it’s dissipating or scattering, rather than a solid block. -
Wait for tackiness:
Allow the adhesive size to sit until it becomes clear and tacky. Refer to your bottle’s instructions, but this usually takes 15-30 minutes. -
Lay the gold leaf:
Gently press sheets of gold leaf over the tacky areas. Don’t worry about breaks or wrinkles; the texture is desirable here. -
Burnish the leaf:
Use a soft, dry brush to gently rub over the backside of the gold leaf sheet or the backing paper to ensure it adheres firmly to the canvas. -
Remove excess gold:
Once adhered, take a stiff, dry brush and vigorously brush away the loose flakes. This will reveal the jagged, organic edges of your gold section. -
Reintegrate the background:
Sometimes the gold looks too ‘stuck on.’ Mix a translucent glaze of the dark charcoal color (water it down significantly) and lightly dry-brush over the bottom edges of the gold to nestle it into the dark base. -
Seal the artwork:
Apply a specific sealant over the gold leaf to prevent tarnishing. Once that is dry, you can varnish the whole painting if you wish.
Metallic Splatter
For a magical finish, mix loose gold pigment with varnish and flick it off a toothbrush onto the upper pink section to create a subtle ‘gold dust’ effect.
Step back and admire how the metallic elements catch the light differently from every angle

Have a question or want to share your own experience? I'd love to hear from you in the comments below!