If you’ve been craving fresh horse drawing ideas, you’re in the perfect headspace to play with gesture, anatomy, and texture all in one subject. I pulled together a mix of classic go-to sketches and more creative twists so you can find a horse concept that fits your mood today.
Simple Horse Outline From Basic Shapes
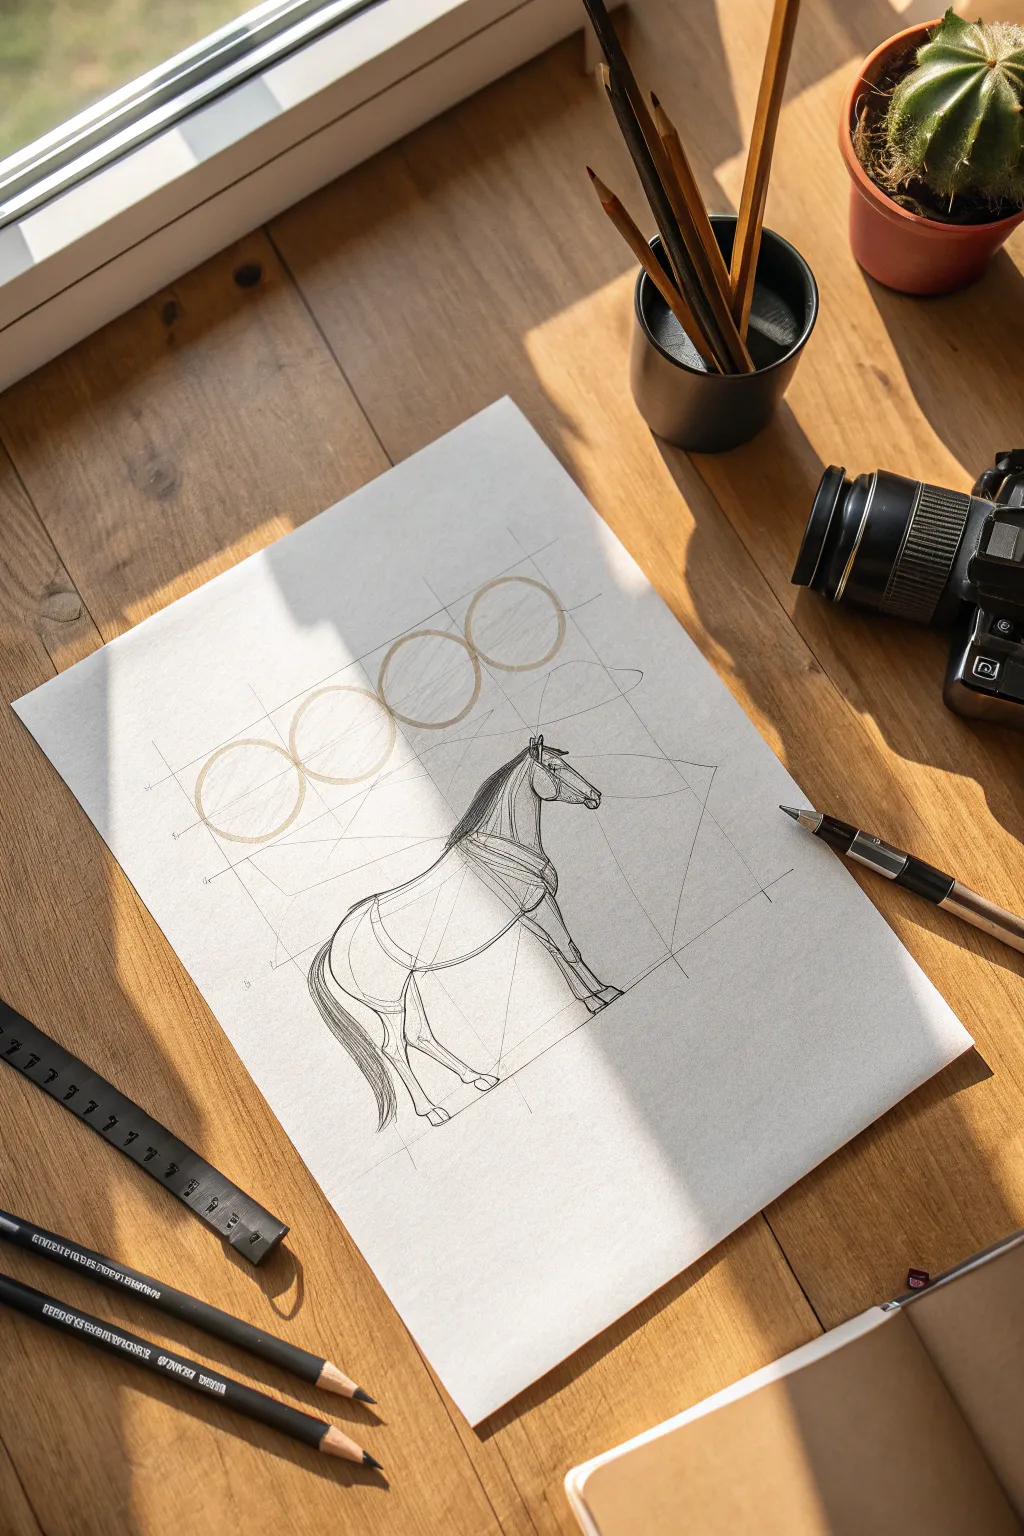

This tutorial breaks down the majestic form of a horse into a series of achievable geometric steps, resulting in a clean, professional-looking sketch. By starting with simple circles and guidelines, you’ll build accurate proportions before adding the refined final details.
Step-by-Step Guide
Materials
- Quality sketch paper or drawing pad
- Graphite pencils (HB for sketching, 2B or 4B for outlining)
- Ruler or straight edge
- Compass or circular object (optional, for tracing)
- Fine-liner pen (black, 0.5mm)
- Eraser
Step 1: Setting the Guidelines
-
Establish the horizon:
Begin by using your ruler to draw a very faint horizontal line across the lower third of your paper. This will serve as the ground line where the hooves will eventually rest. -
The upper boundary:
Draw another parallel horizontal line about 4-5 inches above the ground line. This marks the top of the horse’s back. -
Create the structural box:
Connect these horizontal lines with two vertical lines to create a large rectangle. Inside this, sketch a large diagonal line rising from the bottom left to the upper right corner to help check your angles later. -
Draw the three circles:
Directly on the top horizontal line, draw three circles of equal size in a row. They should be touching or slightly overlapping. These represent the hindquarters, the barrel (ribcage), and the shoulder area.
Leg Angles
If the horse looks unstable, check your vertical guidelines against the leg positions. The front legs should generally align under the shoulder circle.
Step 2: Building the Skeleton
-
Connect the neck:
From the right-most circle (the shoulder), draw a straight line extending diagonally upward. At the end of this line, sketch a smaller oval for the horse’s cheek and jaw. -
Form the muzzle:
Attach a small, boxy shape to the bottom of that cheek oval to create the snout. Keep your pencil pressure light here, as these are still construction lines. -
Sketch the spine:
Draw a smooth, sweeping curve that connects the tops of your three main circles. Dip slightly between the shoulder and the hindquarters to suggest the natural curve of the horse’s back. -
Map the legs:
Use straight lines to map out the legs. Draw lines extending down from the shoulder circle for the front legs and from the hindquarter circle for the back legs. Mark the joints (knees and hocks) with small circles.
Step 3: Refining the Form
-
Outline the body:
Using your guide circles, darken the lines to create the actual contour of the body. Connect the underbelly with a gentle curve, smoothing out the transition between the ribcage and flank. -
Define the legs:
Flesh out the stick-figure legs by adding thickness. Taper the legs as they go down toward the hooves, paying attention to the fetlock joints just above the feet. -
Shape the head:
Refine the head shape, adding triangular ears at the top of the poll. Define the jawline and add a nostril and eye placement. -
Draw the mane and tail:
Sketch long, flowing strokes for the mane along the neck. For the tail, draw a sweeping shape originating from the top of the rump, letting it hang down naturally.
Action Pose
Once comfortable with standing, try tilting the three body circles and changing leg angles to create a trotting or galloping pose using the same method.
Step 4: Inking and Details
-
Start the ink work:
Switch to your fine-liner pen or a sharper, darker pencil (like a 4B). Carefully trace over your finalized sketch lines, using confident, continuous strokes. -
Add muscle definition:
Don’t just outline the perimeter; add small internal lines to suggest muscle groups, particularly on the shoulder and hip. I like to keep these lines slightly broken to keep the drawing feeling alive. -
Texture the hair:
Use quick, fine hatching lines inside the mane and tail to give them volume and texture. This differentiates the hair from the smooth coat of the body. -
Detail the hooves:
Draw the hooves clearly, adding a small line near the coronet band where the hair meets the hard hoof wall. -
Clean up:
Once your ink is completely dry (give it a few minutes to be safe), gently erase all the initial graphite circles, boxes, and guidelines, leaving only your crisp horse illustration.
You have constructed a proportionate horse from the ground up that looks ready to walk off the page


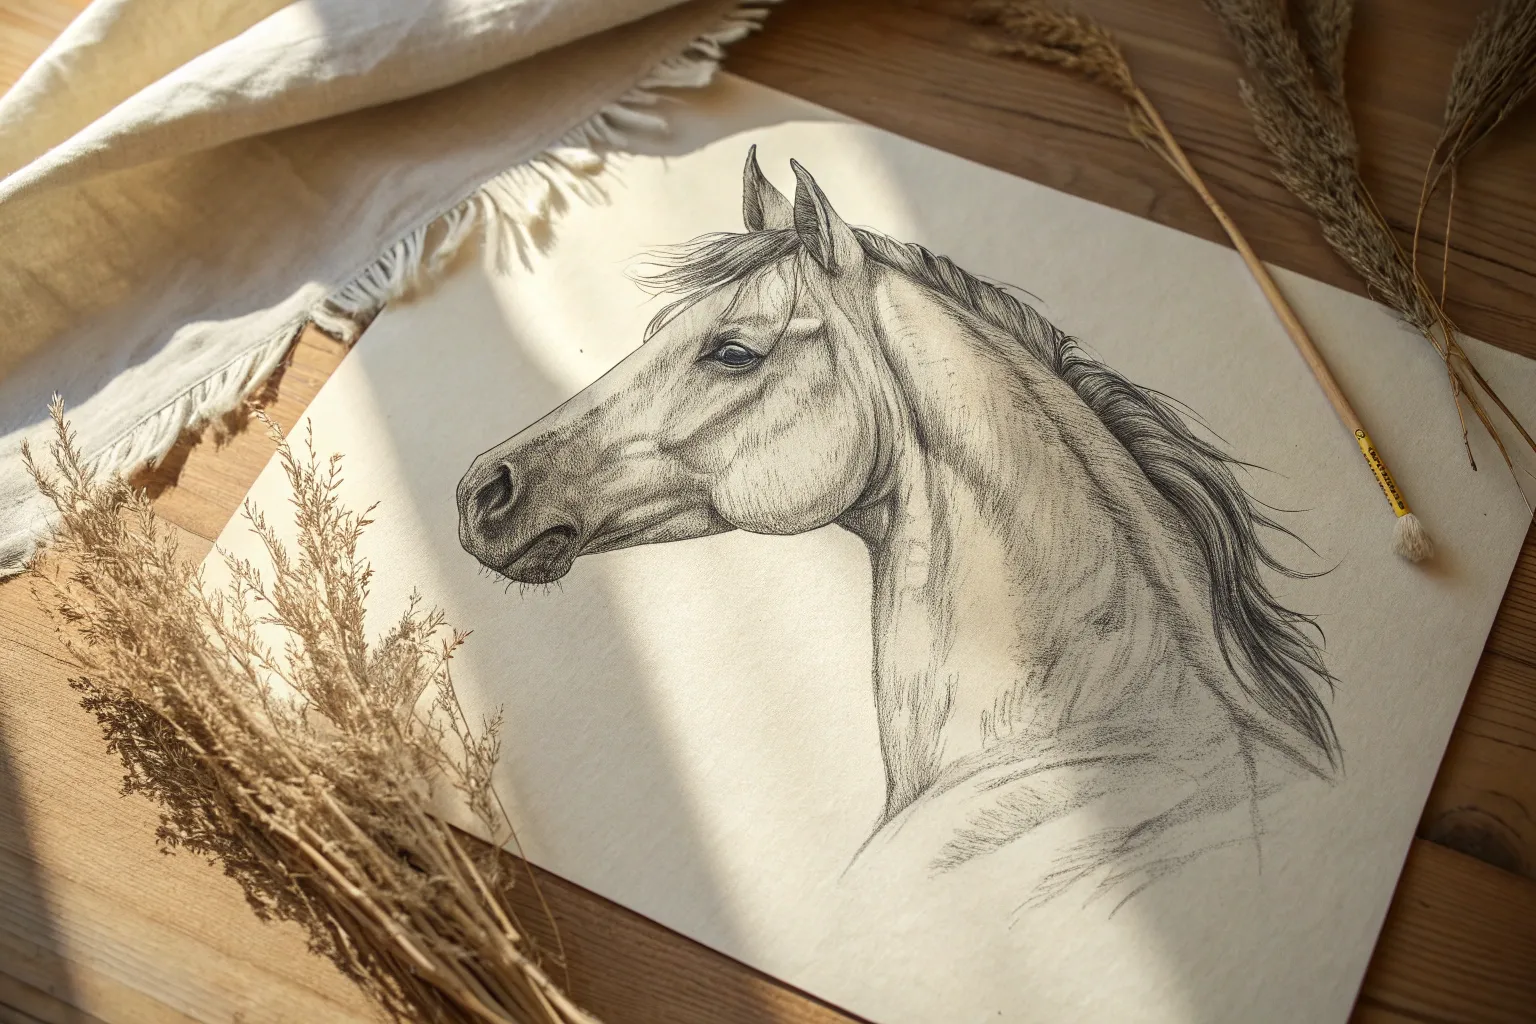
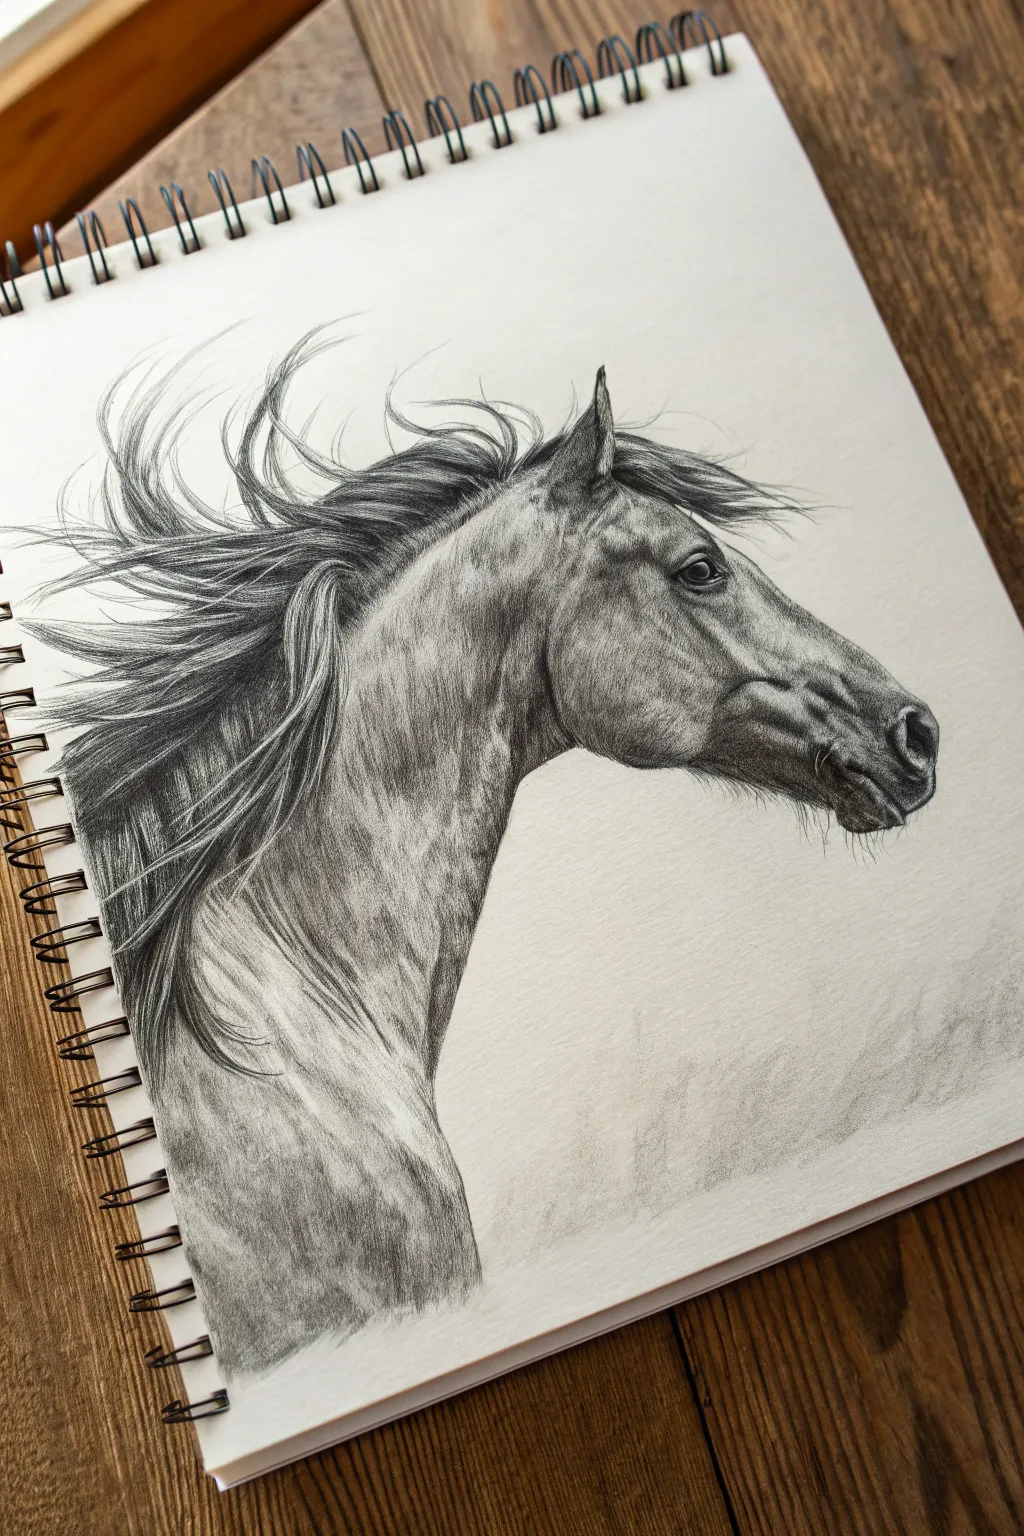
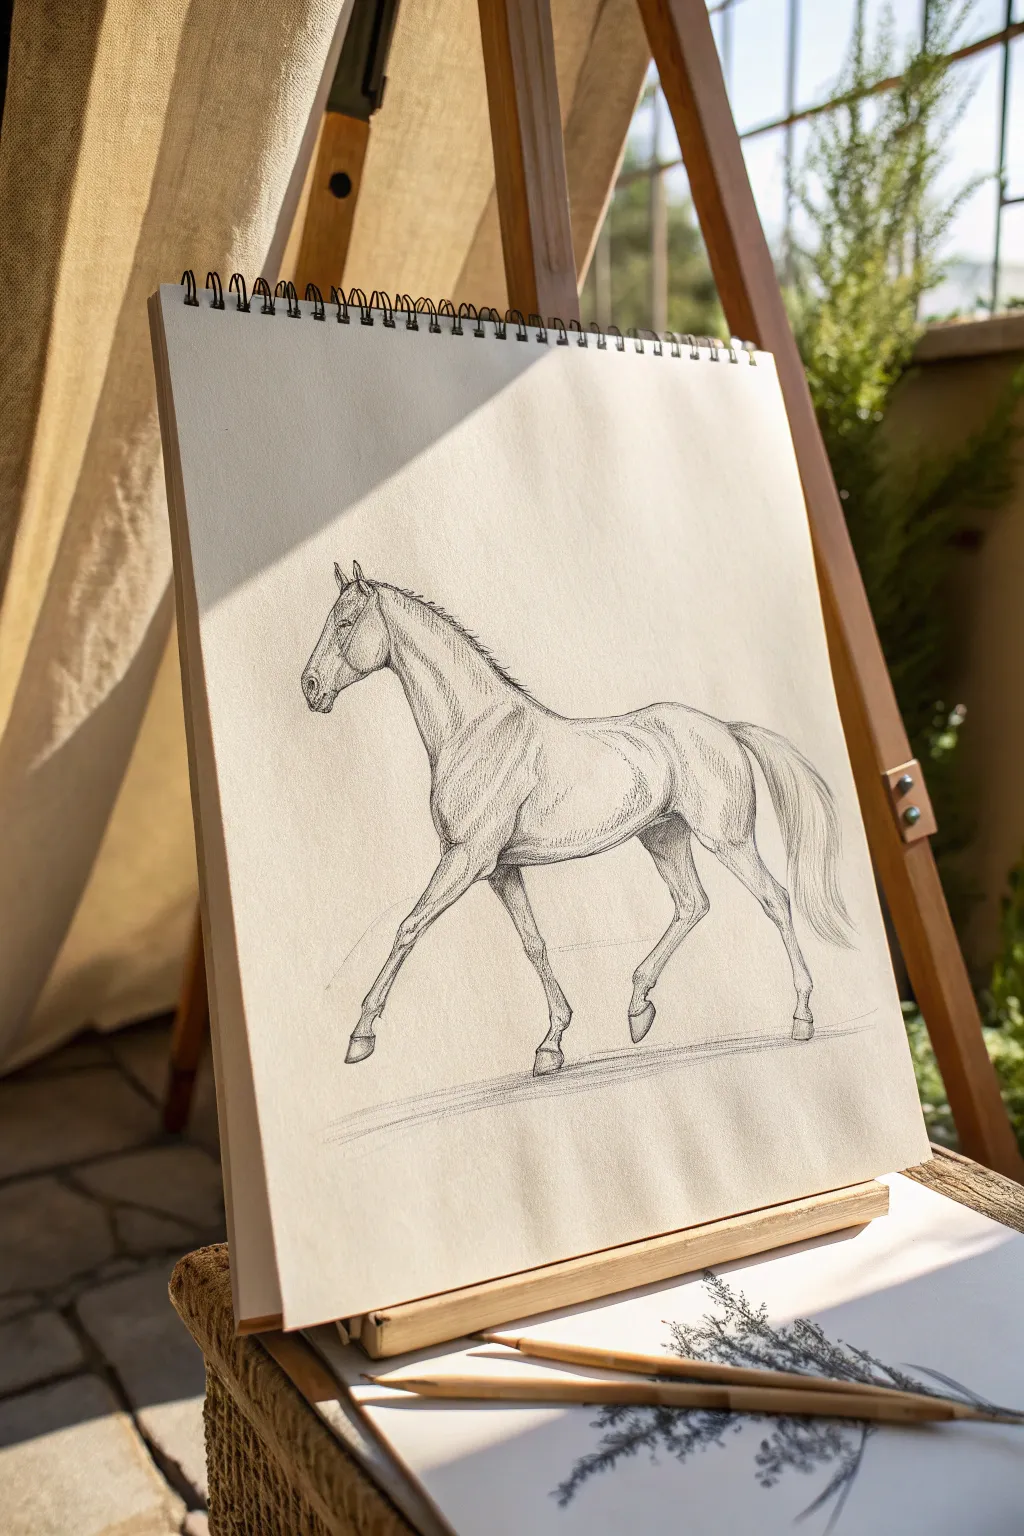
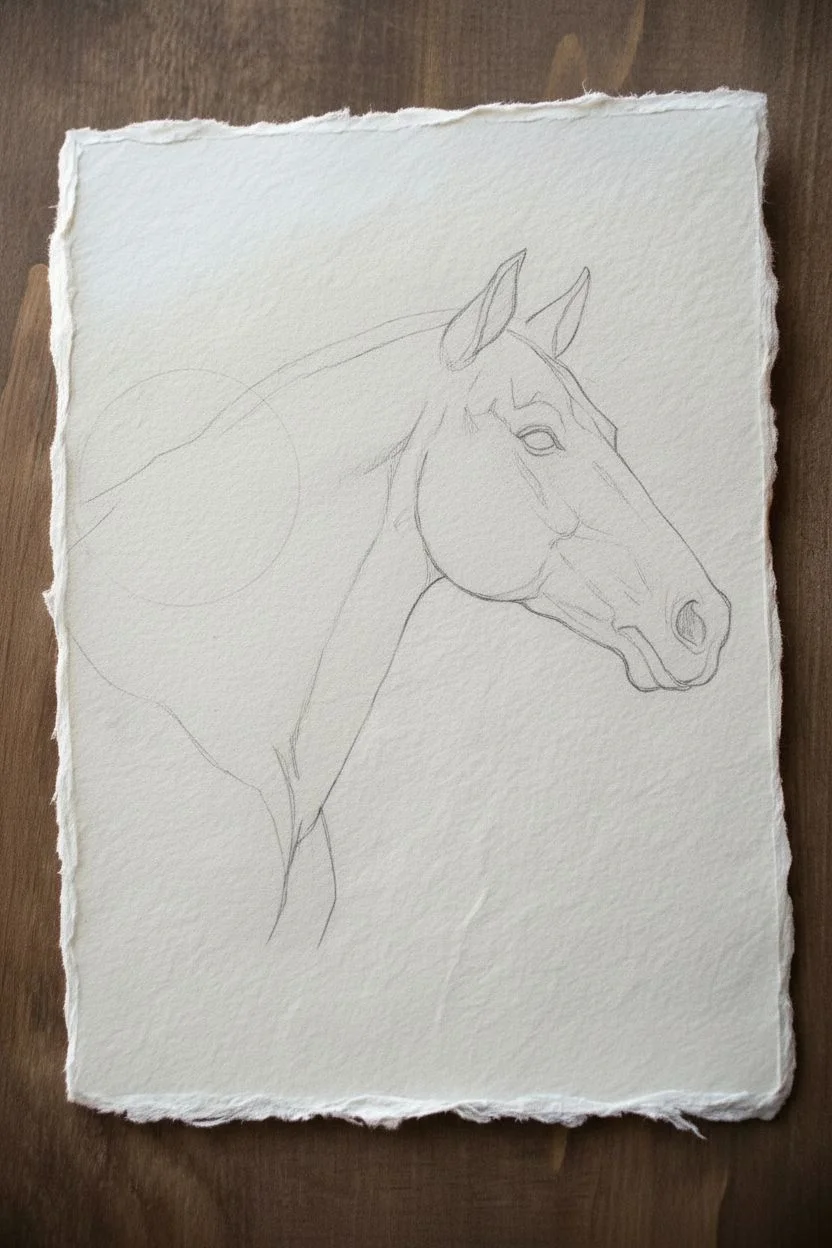
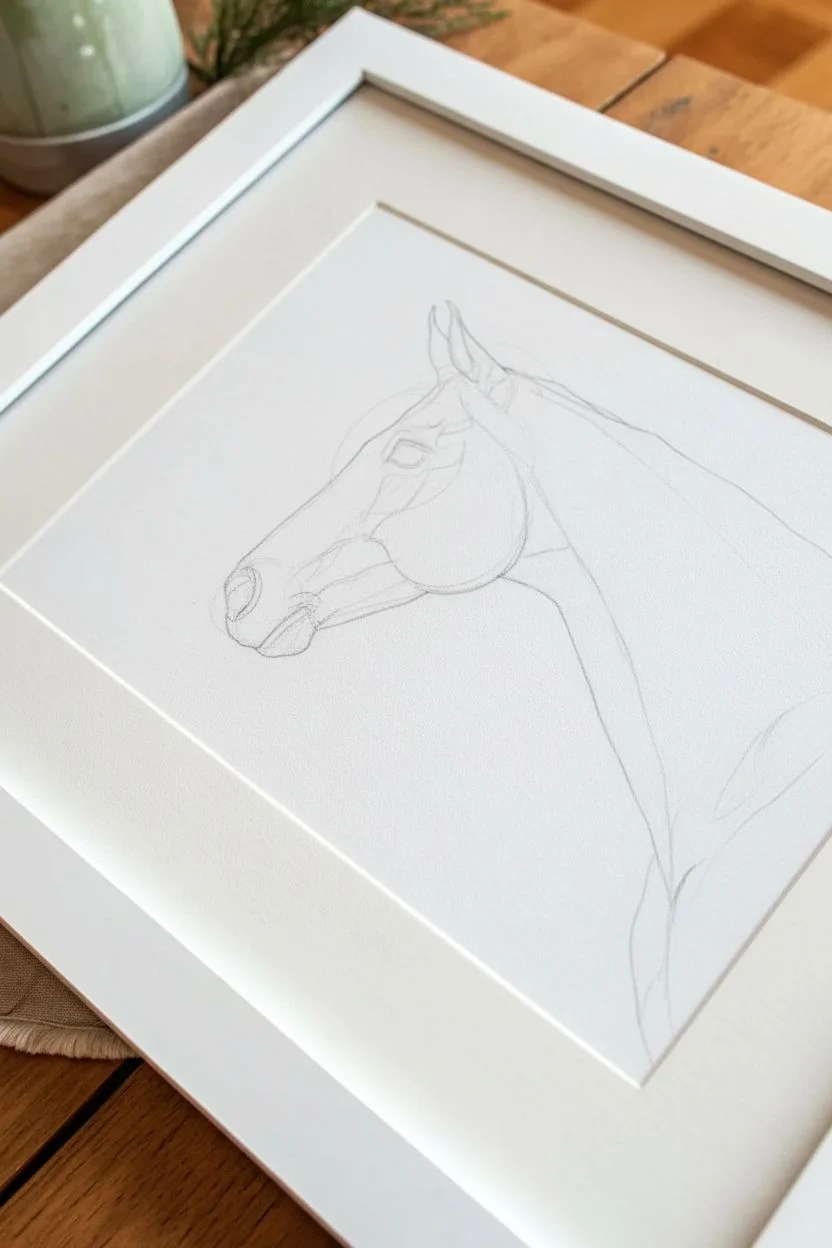
Side Profile Horse Head Study
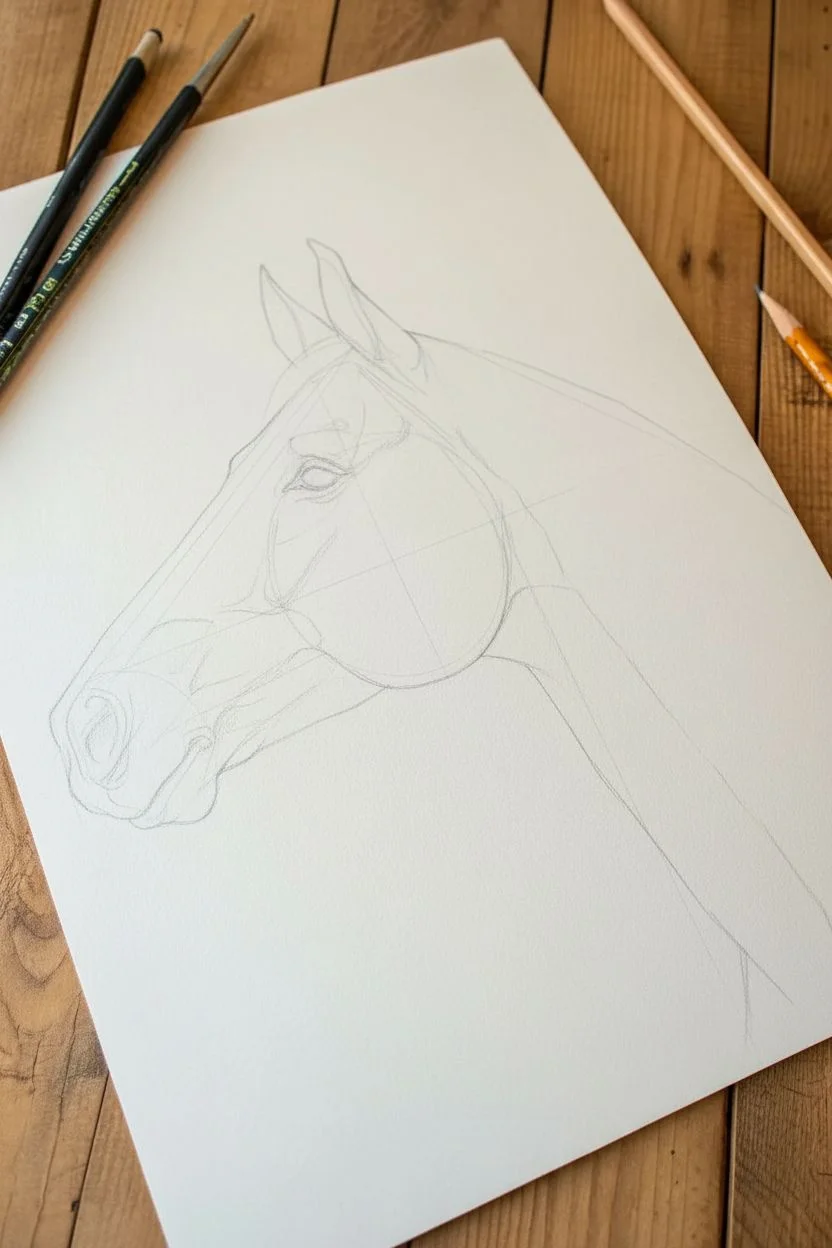
This elegant graphite study captures the strength and grace of a horse in a classic side profile. The drawing focuses on realistic muscle definition and soft shading, fading gently into sketched grass at the base for an artistic, unfinished look.
Step-by-Step
Materials
- Heavyweight drawing paper (smooth or vellum finish)
- Graphite pencils (HB, 2B, 4B, and 6B)
- Mechanical pencil (0.5mm HB for fine details)
- Kneaded eraser
- Blending stump or tortillon
- Soft tissue or cotton swab
- Pencil sharpener
Step 1: Structural Layout
-
Establish the Basic Shapes:
Begin with a light HB pencil. Draw a large circle for the cheek/jaw area and a smaller circle for the muzzle. Connect them with straight lines to form the bridge of the nose and the jawline. -
Define the Outline:
Refine the perimeter of the head. Pay close attention to the slope of the nose and the distinctive curve of the nostril. Sketch the triangular shapes of the ears, placing one slightly behind the other to show depth. -
Place the Features:
Mark the position of the eye about halfway down the head, just below the ear line. Sketch the nostrils and the mouth line. Keep these lines very faint so they can be easily adjusted. -
Map the Mane:
Lightly sketch the flow of the mane. Don’t draw individual hairs yet; instead, outline large clumps or ribbons of hair falling down the neck to serve as a guide for later.
Step 2: Shading and Form
-
Detail the Eye:
Switch to a 4B pencil to darken the pupil and upper eyelid. Leave a tiny white highlight in the eye to bring it to life. Use an HB pencil to shade the iris, darkening the outer edges. -
Sculpt the Muzzle:
Using a 2B pencil, begin shading the nose and mouth area. Press firmer near the nostril and lips to create deep shadows. Use a blending stump to smooth out the transitions on the soft skin of the nose. -
Define Facial Muscles:
Use the side of your lead to shade the large cheek muscle (masseter). Observe the reference to see where the light hits—specifically on the cheekbone and above the eye—and keep those areas lighter. -
Build Neck Veins and Muscles:
Move down the neck. Use broad, sweeping strokes with a 2B or 4B pencil to denote the powerful neck muscles. Blending is key here; use a tissue to wipe across the graphite for a smooth, skin-like texture. -
Add Texture Spots:
If you want a dappled look like the example, use a kneaded eraser to lift small, irregular patches of graphite from the shaded neck area. Soften the edges of these spots with your stump so they look like natural coat patterns.
Muddy Shading?
If your shadows look smudgey or dirty, your blending stump might be overloaded with graphite. Sand it down or switch to a clean tortillon to regain crisp, clean grays.
Step 3: Refining Details
-
Render the Mane:
Sharpen your 4B or 6B pencil. Draw long, confident strokes following the clumps you mapped earlier. Vary the pressure to create thick and thin lines, suggesting individual strands within the mass of hair. -
Deepen the Darks:
Revisit the darkest areas—inside the ears, the nostril, the corner of the mouth, and the shadows under the jawline. Layering 6B graphite here will increase the contrast and make the drawing pop. -
Enhance the Highlights:
Take a clean edge of your kneaded eraser and firmly wipe it across the bridge of the nose and the top of the cheekbone. This ‘subtractive drawing’ creates the shiny highlights typical of a horse’s coat. -
Add Fine Whiskers:
With a very sharp mechanical pencil or HB, add tiny, erratic lines around the muzzle and chin for whiskers. Use very little pressure; these should be barely visible. -
Create the Grass Base:
At the bottom of the neck, instead of a hard line, feather your pencil strokes downward. Sketch quick, vertical flicking motions to mimic tall grass covering the bottom of the portrait, fading out into the white of the paper.
Add Drama
Try tinting the paper beforehand with a wash of tea or coffee for an antique look, or use white charcoal on gray paper to make the highlights really stand out.
Step back and admire drawings subtle textures and powerful profile you have created


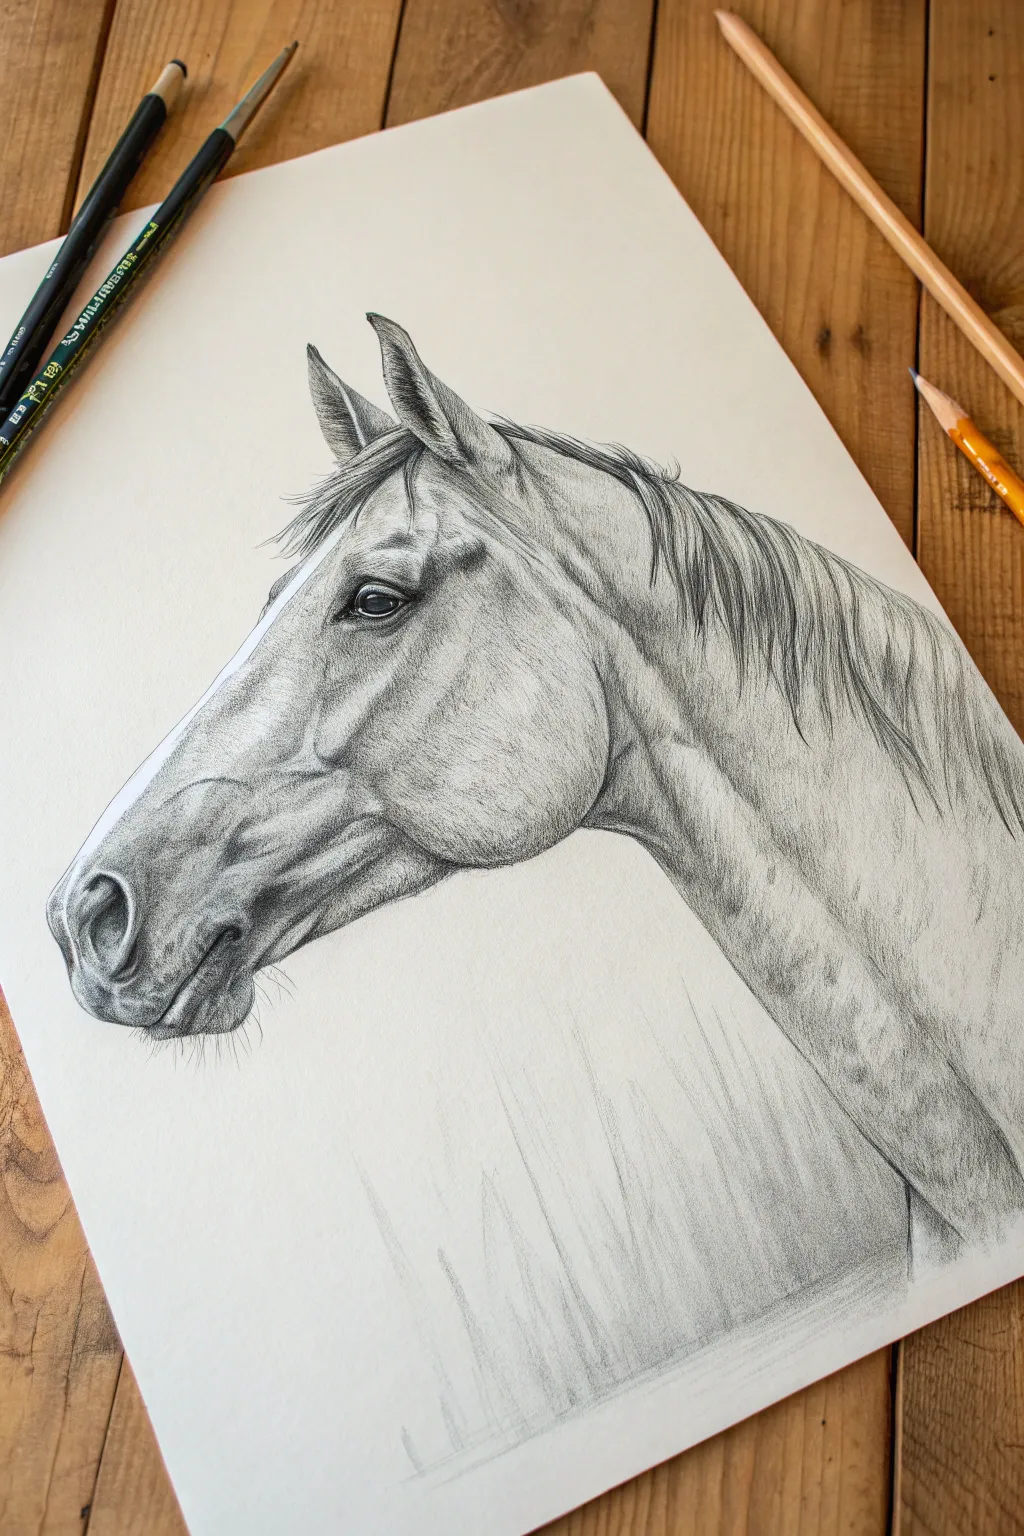
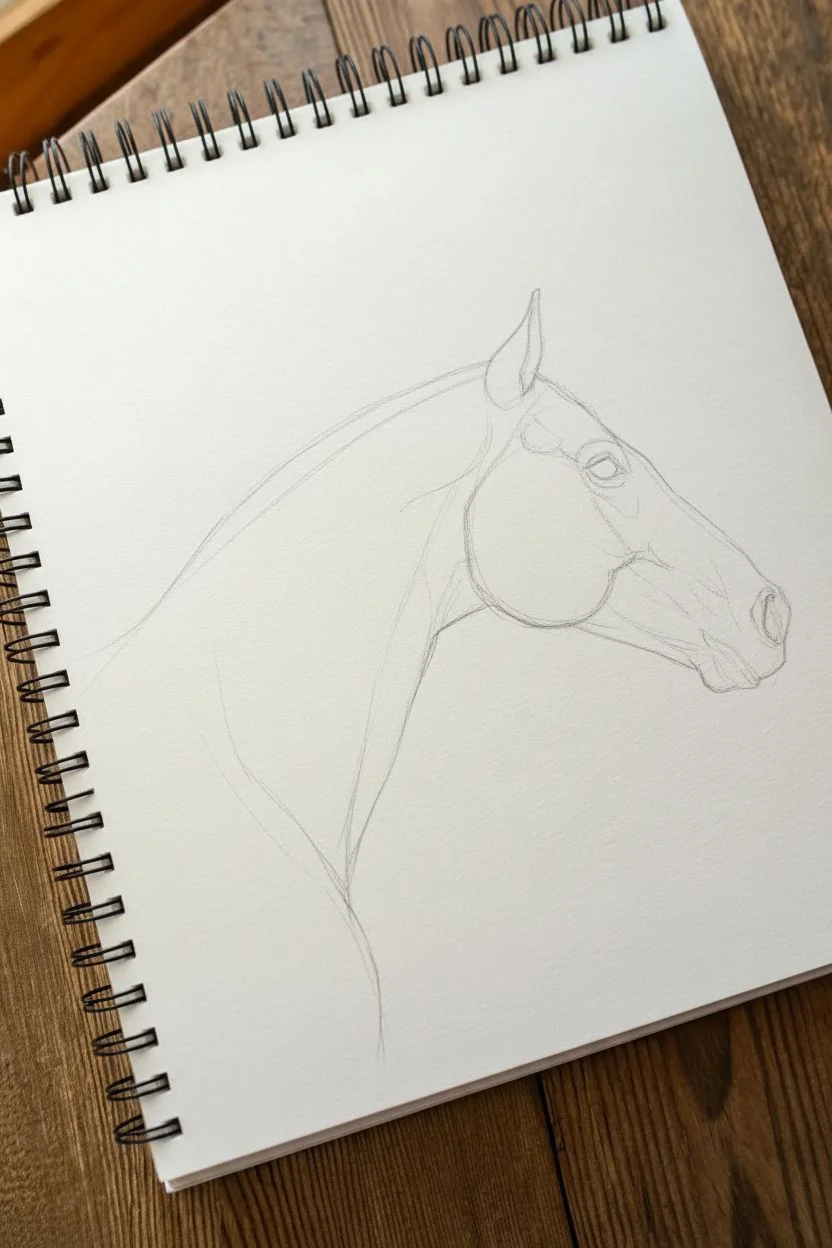
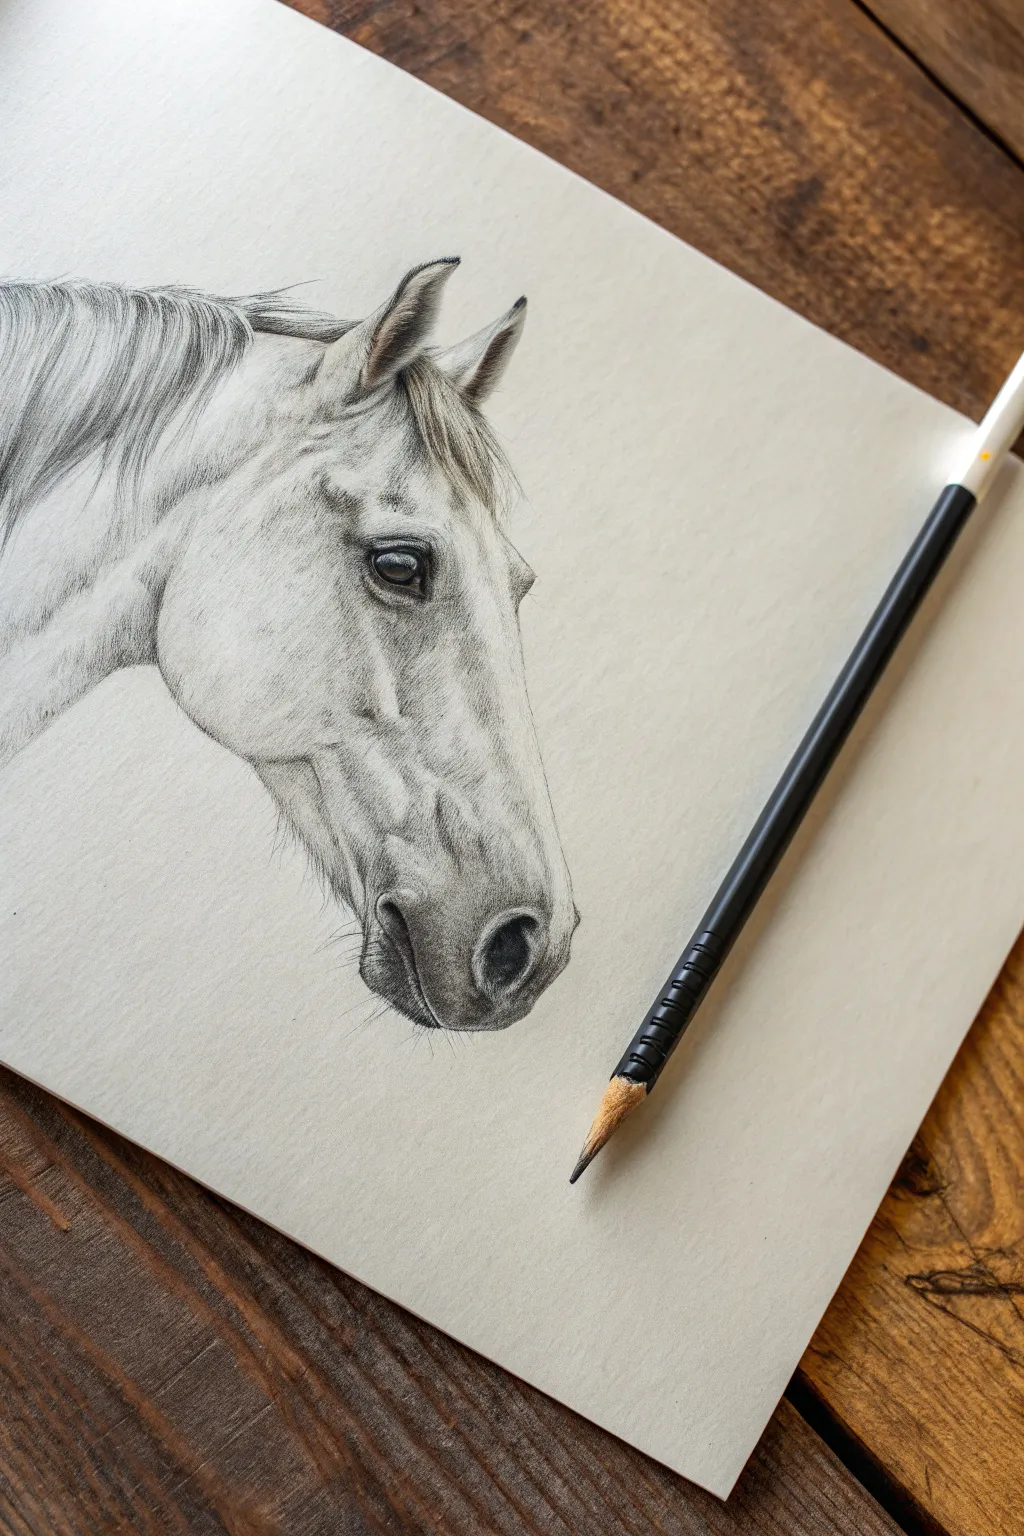
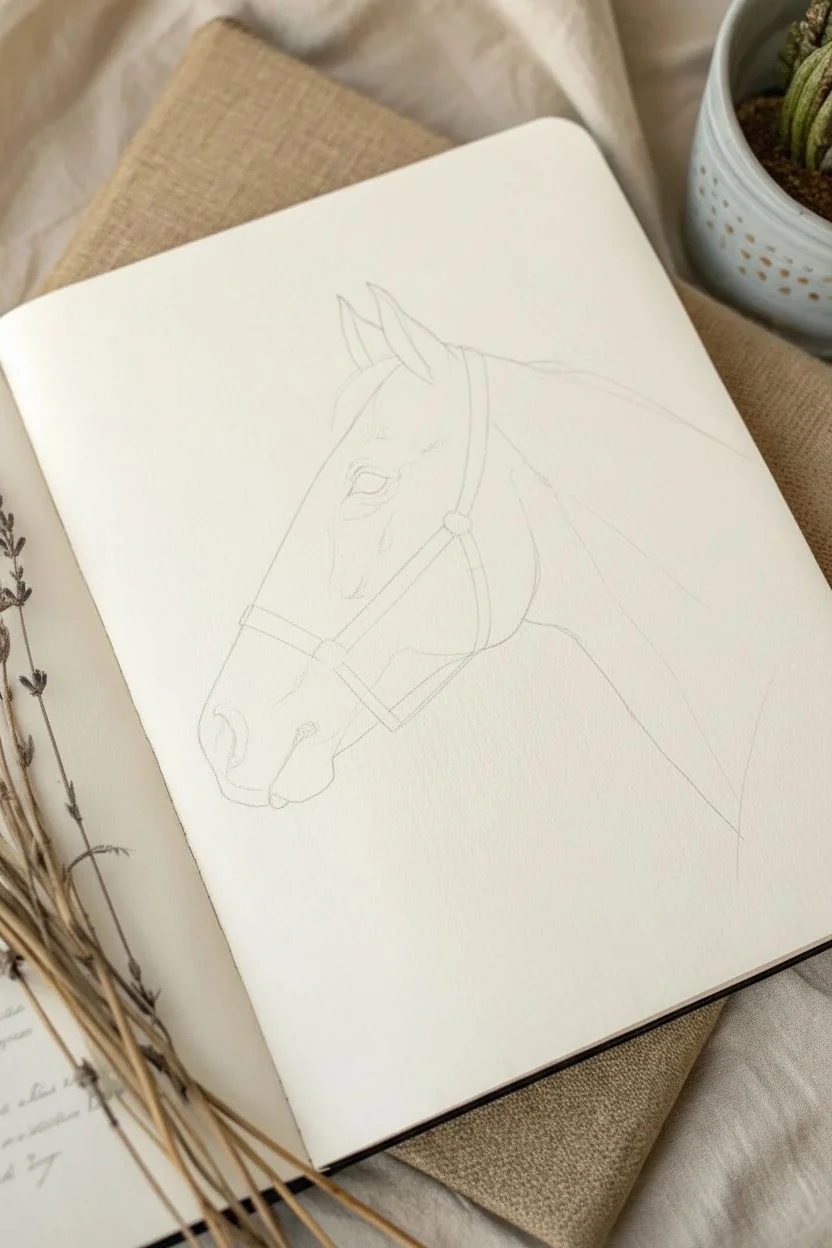
Three-Quarter View Horse Portrait
Capture the gentle spirit of a white horse with this detailed graphite pencil portrait. By focusing on subtle shading and precise texture work, you’ll create a lifelike rendering that emphasizes the animal’s powerful structure and soft coat.
Step-by-Step Guide
Materials
- High-quality drawing paper (smooth or vellum finish, heavyweight)
- Graphite pencils (H range for light lines, HB, 2B, 4B for darks)
- Mechanical pencil (0.5mm or 0.3mm) for fine details
- Kneaded eraser
- Precision eraser (stick or mono zero)
- Blending stumps (tortillons) or soft tissue
- Artist tape (to secure paper to board)
- Drawing board or easel
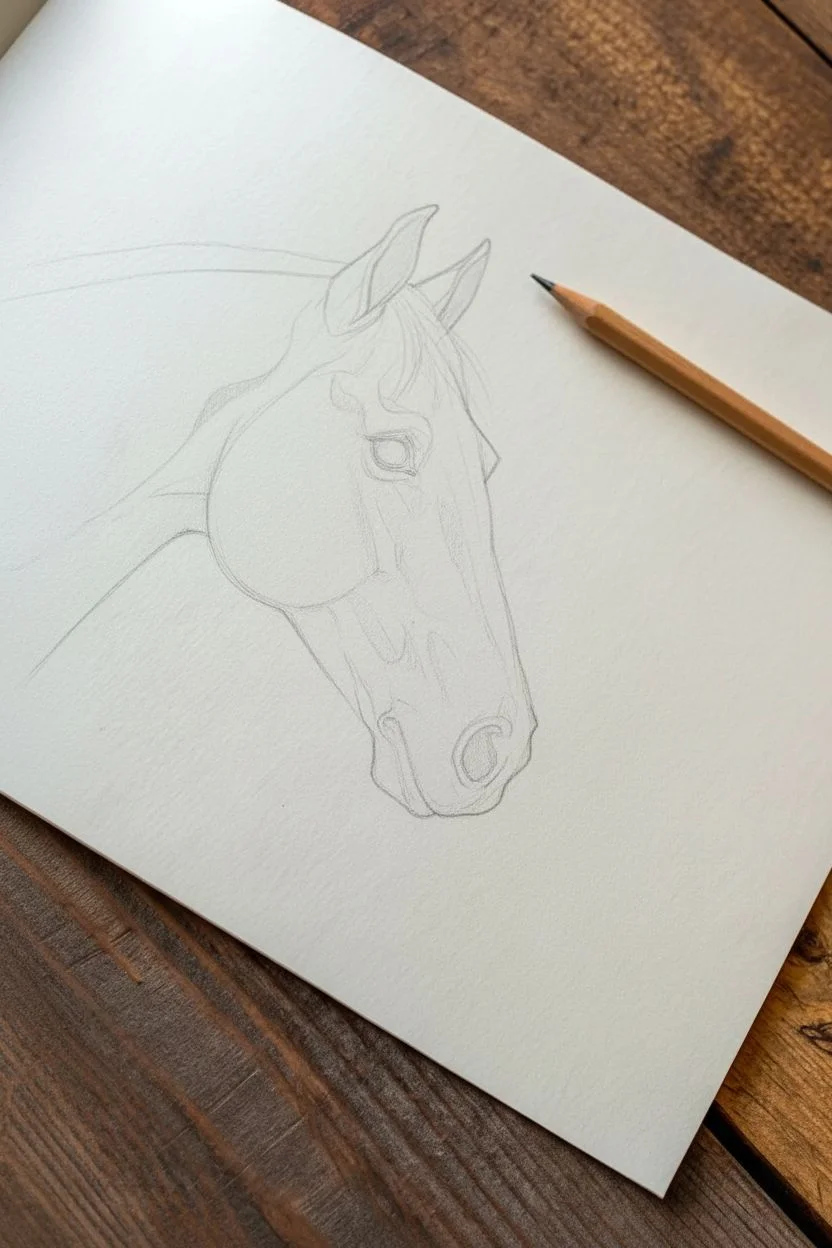
Step 1: Structural Outline
-
Establish the proportions:
Begin with a light H pencil to sketch the basic geometric shapes. Draw a large circle for the cheek/jaw area and a smaller circle for the muzzle, connecting them with straight lines to form the bridge of the nose. -
Refine the profile:
Trace the flowing contour of the face. Pay close attention to the slight dip in the nose bridge and the muscular curve of the cheek. -
Position the features:
Place the eye roughly one-third of the way down the head, ensuring it sits deep within the skull structure. Sketch the triangular shape of the ear, keeping the lines loose and gestural. -
Draft the tack:
Lightly sketch the placement of the leather halter. Only draw the center lines of the straps first to get the angles right before adding width and hardware details like rings and buckles.
Clean Edges
Place a piece of clean scrap paper under your drawing hand as you work. This prevents the oils in your skin from smudging your graphite and keeps the white background pristine.
Step 2: Shading and Texture
-
Base layer shading:
Using an HB pencil, apply a very light, even layer of graphite over the shadowed areas—under the jaw, the neck muscles, and inside the ear. Keep your pencil strokes directional, following the way the hair grows. -
Define the eye:
Focus on the eye early to give the horse life. Use a 4B pencil for the pupil, leaving a crisp white highlight. Build the iris with radiating lines, and shade the skin folds around the eye softly. -
Develop muscle tone:
Switch to a 2B pencil to deepen the shadows in the hollow of the cheek and the neck grooves. Use a blending stump to soften these transitions, creating the look of muscle beneath skin. -
Create fur texture:
For a white horse, less is more. Use a sharp mechanical pencil to draw short, fine strokes in the darker areas. I find it effective to ‘draw’ the shadows between the white hairs rather than the hairs themselves. -
Detail the mane:
Draw the forelock and mane with long, sweeping strokes. Don’t draw every hair; instead, group them into prominent locks, shading the negative space between clumps to create depth. -
Render the muzzle:
The nose area often has shorter, velvety hair. Use soft, tight circular shading here. Darken the nostril significantly with a 4B pencil, blending it out gently towards the rim.
Too Grey?
If your white horse looks too dark or grey, you’ve likely over-shaded. Use a clean kneaded eraser to lift significant amounts of graphite, leaving only the deepest crevices dark.
Step 3: The Leather Tack
-
Fill the leather straps:
Fill in the halter straps with a solid, dark tone (2B or 4B). Leave very thin white lines along the edges of the leather to simulate thickness and light hitting the edge. -
Add stitching details:
With a sharp H pencil, impress small, rhythmic indentations along the edges of the straps to suggest stitching without making it too distracting. -
Metallic hardware:
For the metal rings and buckles, use high contrast. Leave the metal mostly white paper, adding sharp black reflections on the shadowed sides to create a chrome-like shine.
Step 4: Foreground and Final Polish
-
Ground the subject:
At the bottom of the paper, sketch a patch of wild grass and weeds. Use quick, upward flicking motions with varying pencil pressures to create a natural, organic messy look. -
Lift highlights:
Take your kneaded eraser and mold it into a point. Tap or drag it through the lighter areas of the coat to lift graphite and create bright, clean highlights on the cheekbone and neck. -
Refine the whiskers:
Use a very sharp pencil or a fine mono eraser to add the delicate whiskers on the muzzle and chin. These should be spontaneous and slightly irregular. -
Final assessment:
Step back from your drawing. Deepen your darkest darks (the eye, nostril, and shadows under the tack) one last time to ensure the full tonal range pops.
Step back and admire the gentle strength you have captured in this portrait


Flowing Mane and Forelock Texture Practice
Capture the raw energy and dynamic movement of a horse in profile with this detailed graphite study. Focusing heavily on texture, this project emphasizes the contrast between short, sleek coat fur and long, flowing strands of mane.
Step-by-Step
Materials
- High-quality drawing paper (smooth or medium tooth)
- Graphite pencils (ranging from 2H for sketches to 6B or 8B for deep shadows)
- Kneaded eraser
- Precision eraser (pencil style or mono zero)
- Blending stump or tortillon
- Tissue or soft cloth for smoothing
Step 1: Laying the Foundation
-
Establish the main shapes:
Begin with a light 2H pencil to outline the basic geometric forms. Draw a large oval for the cheek, a smaller circle for the muzzle, and connect them with sweeping lines to form the jaw and nose bridge. -
Map the neck and shoulder:
Extend a long, curved line downwards from behind the ear to indicate the crest of the neck. Add a counter-curve for the throat latch and windpipe to establish the horse’s powerful neck structure. -
Refine the profile:
Carefully draw the contour of the face, paying attention to the bump of the eye socket, the dip of the nose bridge, and the flare of the nostril. Keep your lines faint so they can be adjusted or erased later. -
Position the features:
Place the eye high on the head, roughly one-third down from the ear. Sketch the triangular shape of the ear itself, pointing it attentively forward.
Keep it Clean
Place a scrap sheet of paper under your drawing hand. This prevents your palm from smudging your work or transferring oils to the paper as you move across the drawing.
Step 2: Developing Form and Muscle
-
Initial shading layer:
Switch to an HB or B pencil. Apply a soft, overall tone to the neck and face, avoiding the brightest highlight areas like the cheekbone and above the eye. -
Define the facial muscles:
Using a 2B pencil, start sculpting the anatomy. Darken the area behind the jawbone (the jowl), the hollow above the eye, and the deep creases around the muzzle and nostril. -
Build neck contours:
Shade along the bottom of the neck and the groove where the windpipe sits. Use directional strokes that follow the curve of the muscle to suggest volume. -
Blend for smoothness:
Take a blending stump and gently soften your graphite layers. This creates a base skin tone before you add the detailed fur texture on top.
Step 3: Constructing the Mane
-
Block in hair masses:
Identify the major clumps of hair blown back by the wind. Sketch these large shapes first rather than individual strands, creating a rhythmic flow that moves away from the face. -
Darken the roots:
Using a 4B pencil, press firmly at the base of the mane along the neck crest. This anchors the hair and creates depth where the strands overlap. -
Create flow lines:
Draw long, sweeping strokes extending from the dark roots to the tips. Vary your pressure—press hard at the start of the stroke and flick your wrist at the end for a tapered, natural look. -
Add the forelock:
Sketch the hair between the ears (the forelock) blowing similarly backward. Ensure these strands interact naturally with the ear, appearing to flow around it.
Add Drama
To make the wind effect more convincing, erase a faint ‘dust’ effect near the bottom or add blurred background streaks to suggest speed and environment.
Step 4: Texture and Final Details
-
Detail the eye:
Use a 6B or 8B pencil to make the pupil pitch black. Leave a tiny, crisp white speck for the catchlight to give the horse life. -
Render short fur:
With a sharp HB or 2B pencil, create tiny, hatching strokes all over the neck and face. Follow the direction of hair growth—generally downwards and backwards—layering these over your blended base. -
Refine the mane strands:
Go back into the mane with your darkest pencil to separate individual clumps. Use a precision eraser to lift out thin, bright flyaway hairs that catch the light. -
Deepen the shadows:
Reinforce the darkest values under the jaw, inside the nostril, and in the deep folds of the neck to maximize contrast. -
Whisker details:
Lightly sketch a few fine hairs on the chin and muzzle. These should be delicate and sparse. -
Final cleanup:
Erase any smudges on the white background and reinforce the outer contour lines in key areas to make the drawing pop off the page.
Step back and admire the powerful movement you have captured in your drawing
BRUSH GUIDE
The Right Brush for Every Stroke
From clean lines to bold texture — master brush choice, stroke control, and essential techniques.
Explore the Full Guide
Horse Muzzle and Nostrils Shading Study
Capture the gentle strength of a horse in profile with this detailed graphite study. This project focuses on realistic textures, subtle shading gradients, and the expressive anatomy of the equine eye and muzzle.
Step-by-Step Tutorial
Materials
- Smooth heavyweight drawing paper or bristol board
- Set of graphite pencils (HB, 2B, 4B, 6B)
- Kneaded eraser
- Precision mechanical eraser (optional)
- Blending stump or tortillon
- Pencil sharpener
Step 1: Framework & Contours
-
Sketch the basic shapes:
Begin with a light HB pencil to block in the fundamental shapes. Draw a large oval for the cheek, a circle for the muzzle, and connect them with slightly curved lines to form the bridge of the nose. Keep these initial lines very faint so they can be erased later. -
Refine the outline:
Using your reference, refine the silhouette of the head. Pay close attention to the slope of the nose, the dip under the jaw, and the placement of the ears. The ears should be pricked forward with distinctive curves. -
Place the features:
Mark the position of the eye, sitting about one-third of the way down the head. Sketch the teardrop shape of the nostril near the bottom of the muzzle. Ensure the mouth line curves gently upward, giving the horse a relaxed expression.
Look Less Flat?
If the muzzle looks 2D, verify your value range. You need deep blacks (6B) in the nostril and pure white paper highlights to create true volume.
Step 2: The Eye & Ears
-
Detail the eye:
Switch to a 4B pencil to darken the pupil. Leave a small, crisp white highlight near the top to simulate wetness and life. Shade the iris with radial strokes, keeping the top third slightly darker where the eyelid casts a shadow. -
Define the eyelids:
Use an HB pencil to draw the intricate folds of skin around the eye. Add tiny, directional strokes to suggest eyelashes and the fine hair surrounding the orbital bone. -
Shape the ears:
Outline the inner ear structure with a 2B pencil. Use quick, flicking strokes to create the tufts of fur inside the ear, ensuring the strokes follow the natural growth direction of the hair. Darken the deep recesses of the inner ear for depth.
Pro Tip: Paper Protection
Place a clean sheet of scrap paper under your drawing hand. This prevents your palm from smudging your work or transferring skin oils to the paper.
Step 3: Shading the Face
-
Establish the cheekbone:
Using a 2B pencil held at a low angle, lay down a base layer of shading on the large cheek muscle (the masseter). Leave the center of the cheek lighter to show the rounded form. -
Bridge of the nose and forehead:
Add light shading down the bridge of the nose. Observe where the bone structure sits beneath the skin; usually, there is a subtle highlight running down the center, with shadows falling away on the sides. -
Developing the mane:
For the mane and forelock, use long, sweeping strokes with a 4B or 6B pencil. Don’t draw every single hair; instead, group them into locks. Vary your pressure to create dark crevices between the clumps of hair and lighter areas on the top curves. -
Texturizing the coat:
Throughout the face, use very short, controlled hatching marks with an HB pencil to mimic the texture of short fur. I find that changing the direction of these marks to follow the underlying muscle structure dramatically improves realism.
Step 4: Muzzle & Final Details
-
Darken the nostril:
Use your 6B pencil to make the interior of the nostril the darkest point on the muzzle. Soften the edge where the nostril meets the skin to show the soft, velvety texture of the nose. -
Sculpt the muzzle:
Shade around the mouth and chin. The skin here is often softer and darker than the cheek. Use a blending stump to smooth out the transition from dark to light on the fleshy tip of the nose. -
Add whiskers:
With a very sharp pencil or a fine mechanical eraser, add the sensory whiskers on the muzzle and chin. These should be thin, slightly irregular lines. -
Refine contrast:
Look over the entire drawing. Deepen the shadows under the jawline (the throatlatch area) to separate the head from the neck. This contrast pops the head forward in space. -
Clean up highlights:
Use your kneaded eraser to lift out graphite in key highlight areas: the top of the cheekbone, the rim of the nostril, and the bulge of the eye socket. This ‘subtractive drawing’ brings the light back in.
Step back and admire the soulful expression you have captured in your equine portrait
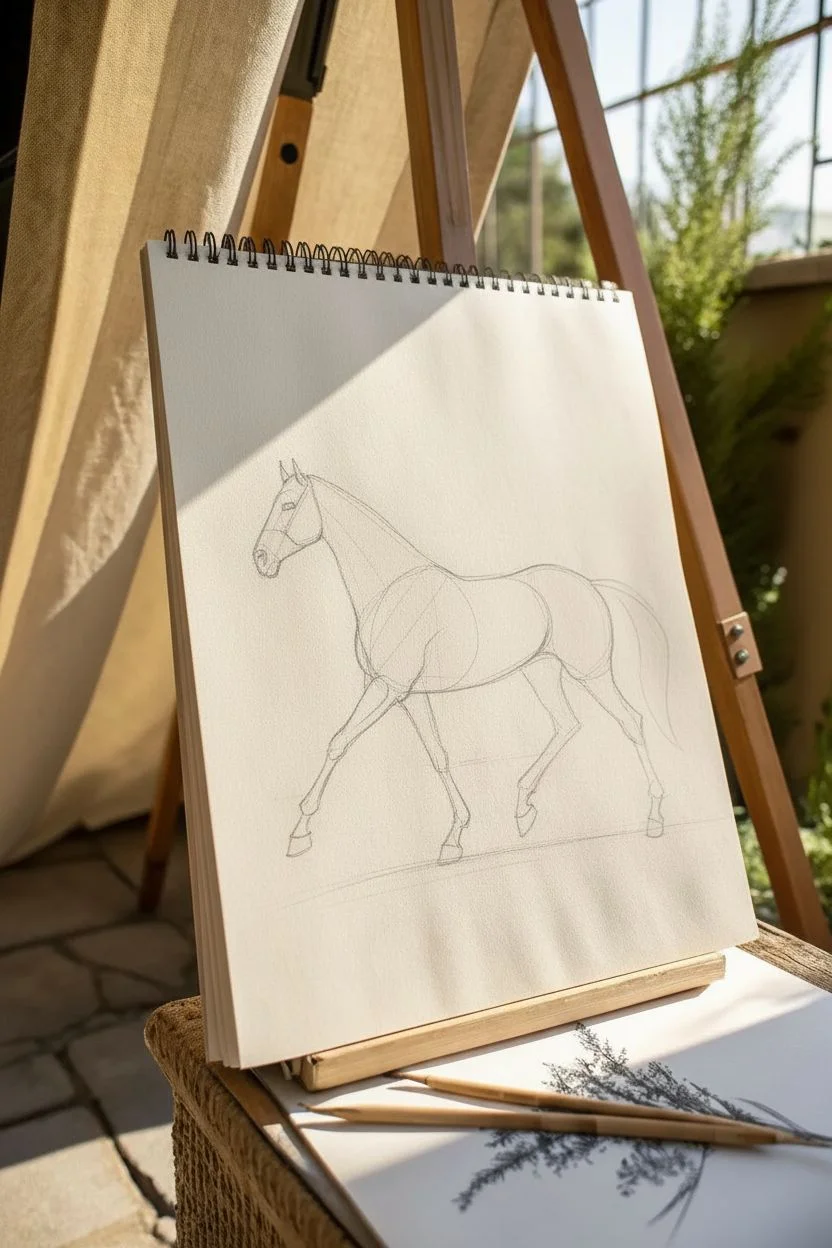
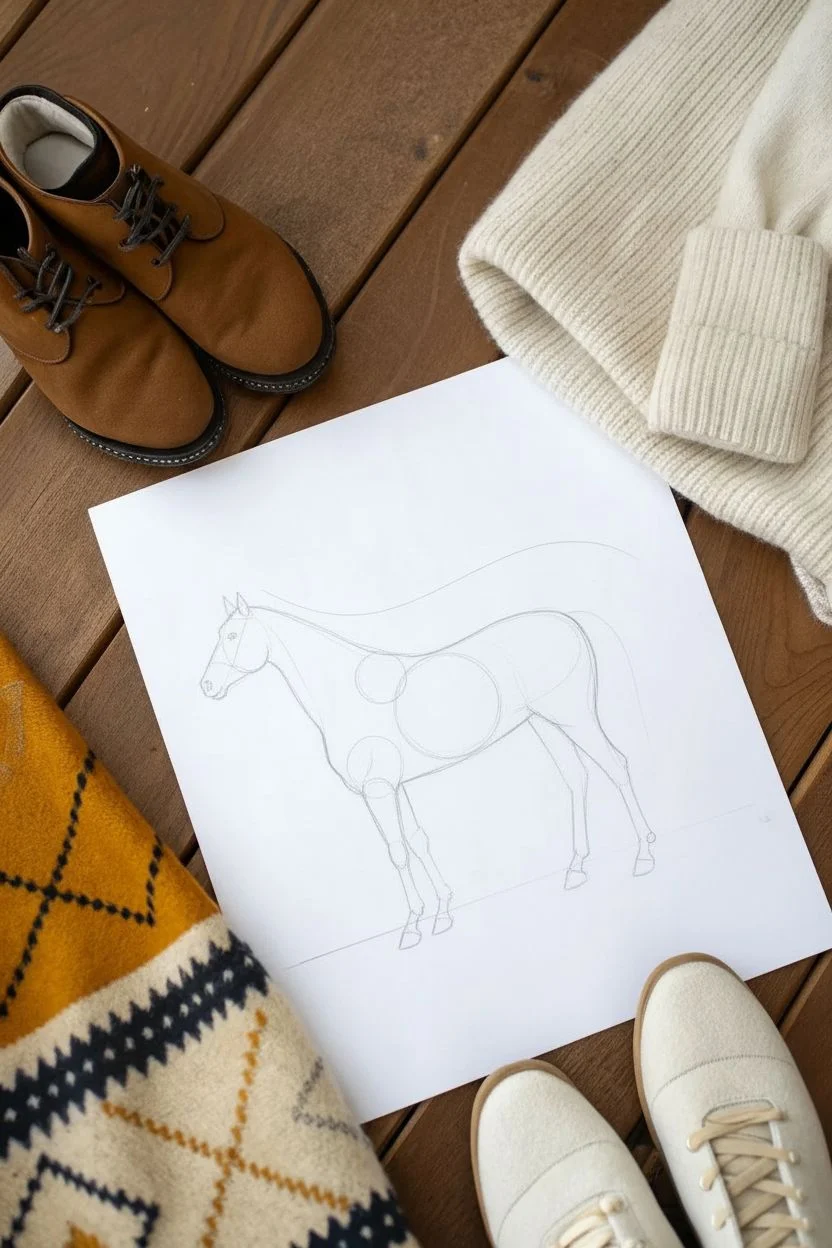
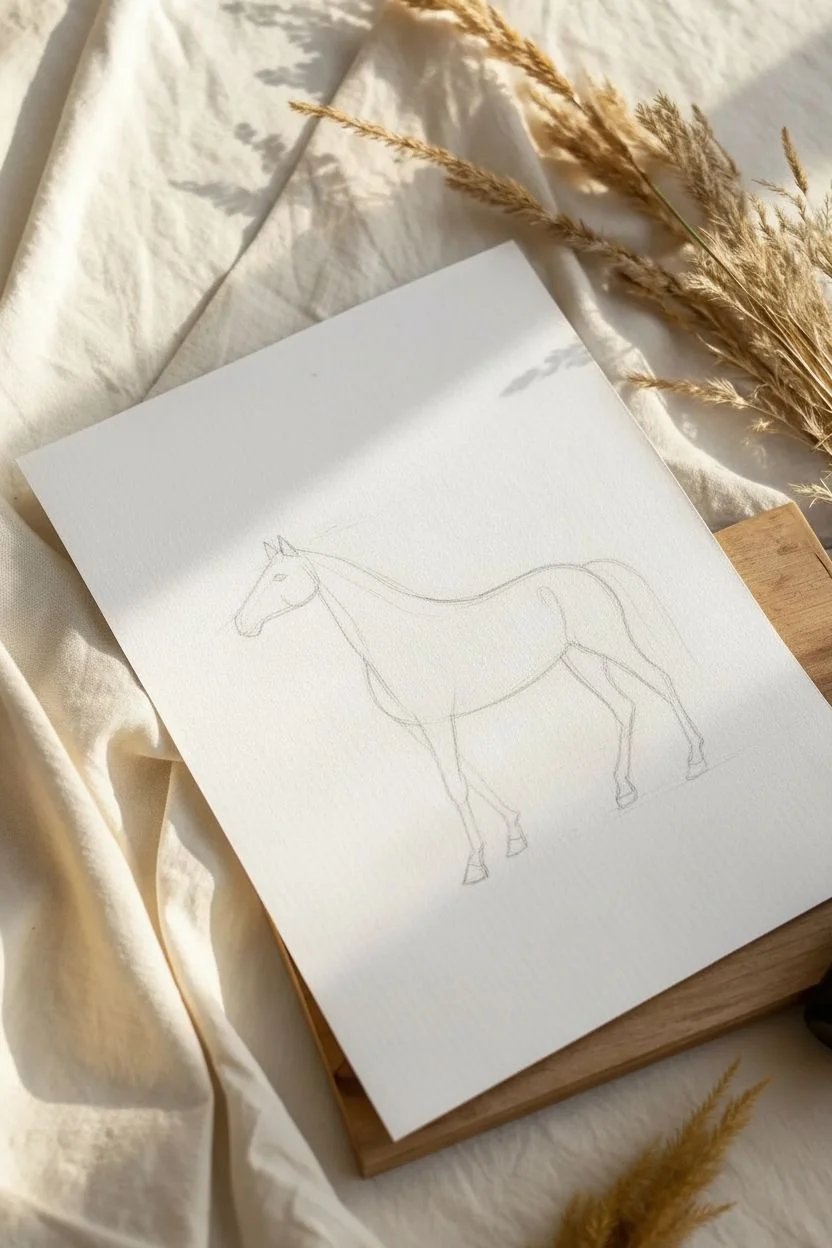
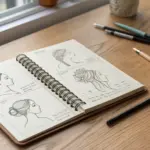
Full-Body Standing Horse Proportions
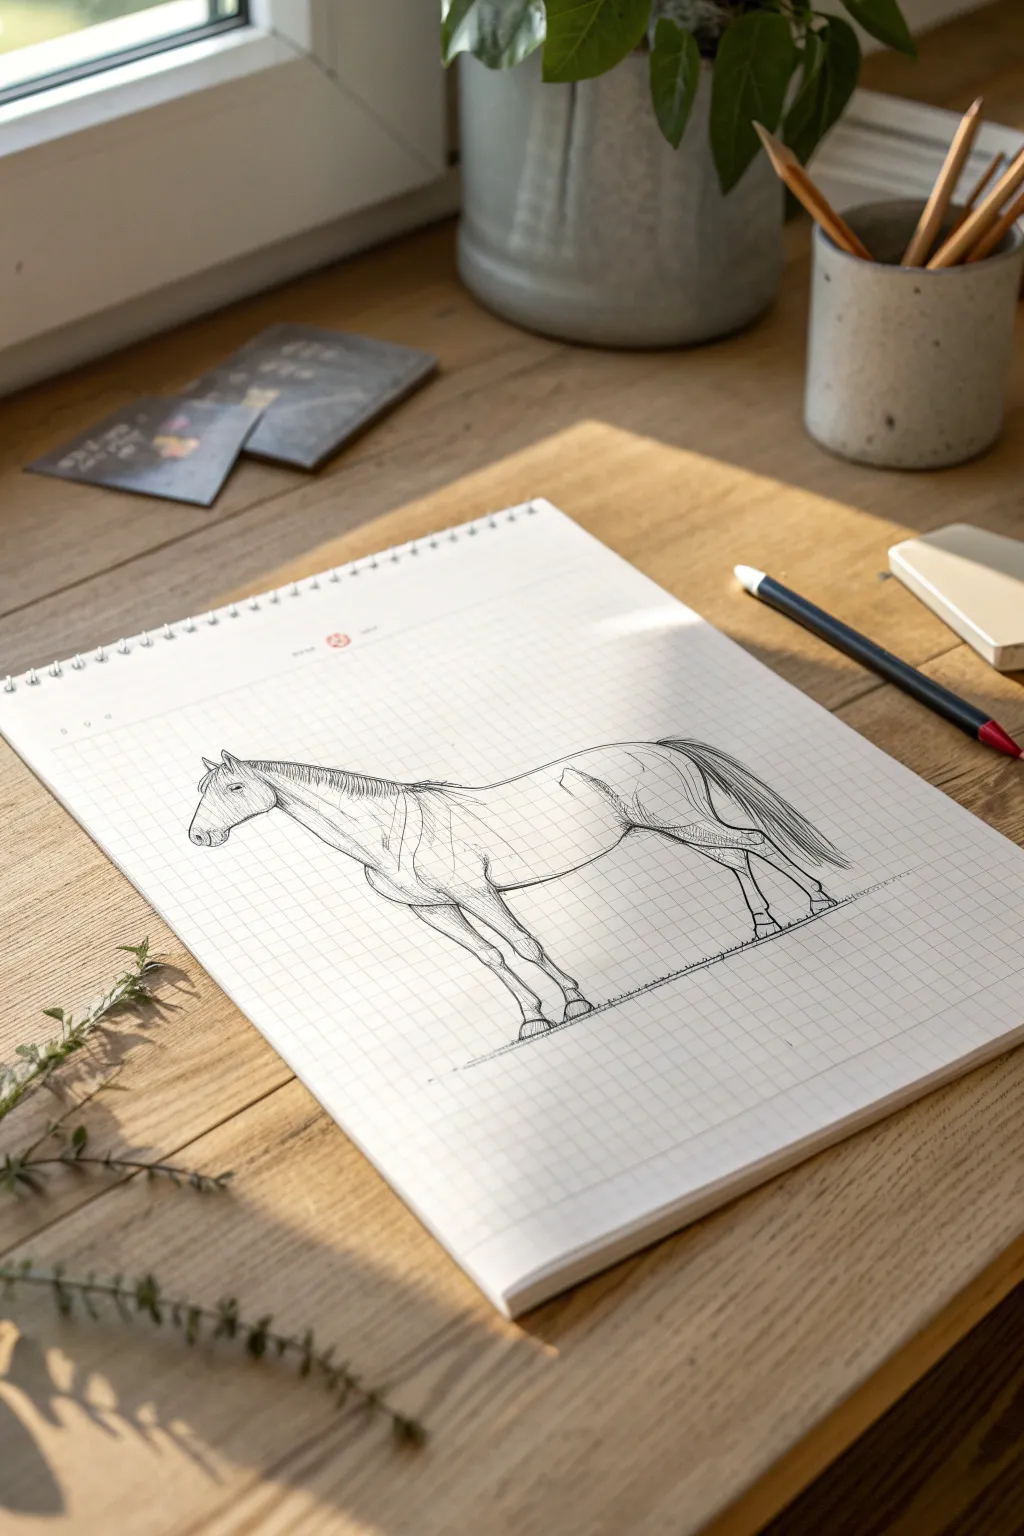
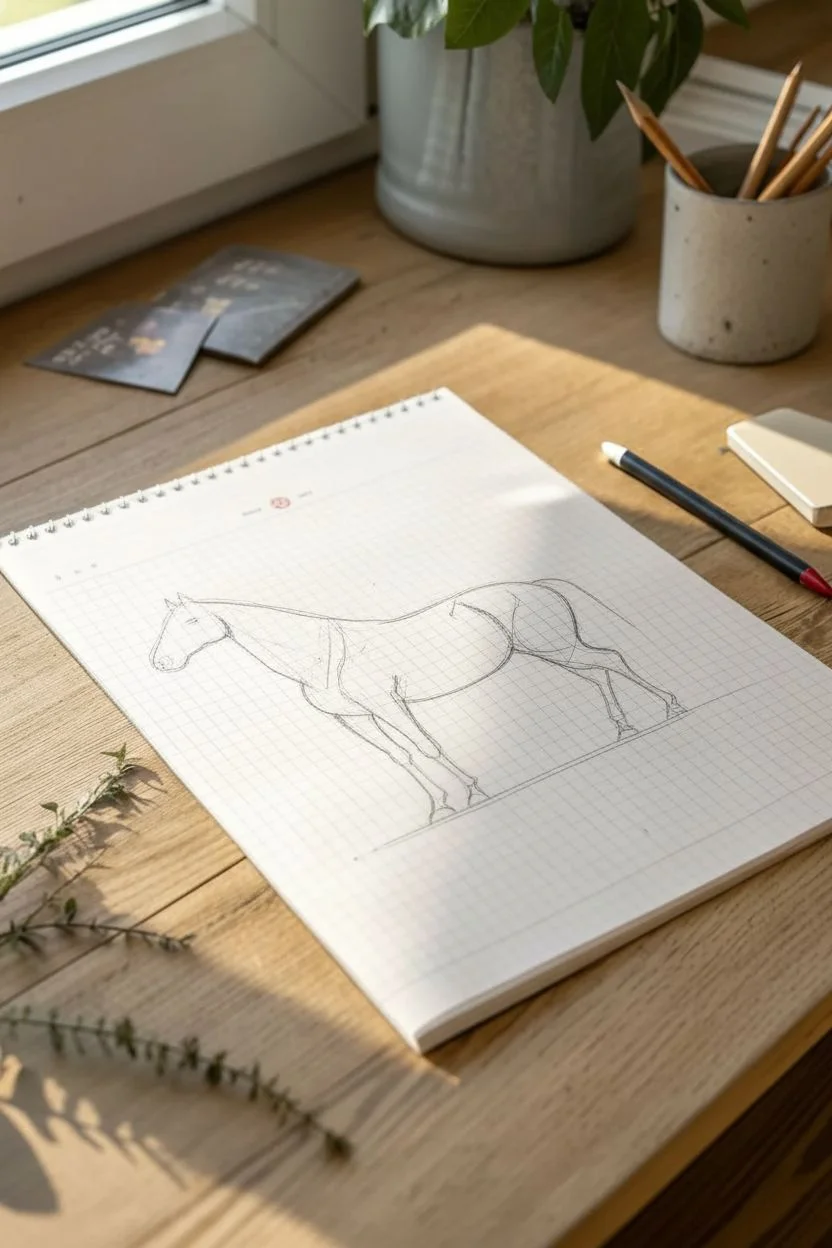
Learn to sketch a proportional, full-body horse standing in profile using the helpful structure of grid paper. The grid serves as an excellent guide for spacing and anatomy, resulting in a clean, architectural-style study.
Step-by-Step Guide
Materials
- Spiral-bound sketchbook with grid/graph paper
- HB pencil for initial sketching
- Black fine liner pen (0.3mm or 0.5mm)
- Eraser
- Ruler (optional)
Step 1: Planning Proportions
-
Establish the ground line:
Start by lightly drawing a horizontal line near the bottom of your page using your pencil. This will ensure all four hooves land on level ground. -
Mark major anatomical points:
Using the grid squares as measuring units, mark the height of the shoulder (wither) and the top of the rump. The horse’s body is roughly rectangular, so visualize a box shape between the front and back legs. -
Block in the torso:
Sketch a large oval for the ribcage area and a slightly smaller, overlapping circle for the hindquarters. Connect these shapes with sweeping lines to form the belly and back. -
Sketch the neck and head alignment:
Extend a line upwards from the shoulder for the neck. Place a small, elongated wedge shape for the head at the end of this line, ensuring the muzzle points slightly downward.
Wonky Proportions?
Count the grid squares! If the legs look short, compare the height of the legs to the depth of the body—they should be roughly equal.
Step 2: Refining the Form
-
Draw the front legs:
Sketch the front legs dropping down from the shoulder. Note the slight forward angle of the pasterns (the area just above the hoof) and define the knobby knee joints. -
Shape the hind legs:
The back legs have a distinct backward curve at the hock joint. Follow the curve of the hamstrings down to the hock, then straight down to the fetlock and hoof. -
Detail the head and mane:
Refine the profile of the face, adding a small eye, nostril, and ear. Sketch the mane lying flat against the neck, using short strokes to suggest hair texture. -
Add the tail:
Draw the tail flowing down from the top of the rump. Keep the lines fluid and loose to represent long hair strands.
Step 3: Inking and Detailing
-
Outline the main silhouette:
Switch to your fine liner pen. Carefully trace over your pencil lines, using a confident, continuous stroke for the outer contours of the horse’s body. -
Define the muscles:
Use lighter, broken lines to suggest interior muscle definition, particularly around the shoulder, flank, and thigh areas. -
Ink the facial features:
Use very delicate touches for the eye and nostril. Darken the eye pupil but leave a tiny white spec for a highlight to bring the horse to life. -
Texture the mane and tail:
Draw long, sweeping ink lines for the tail and shorter, repetitive lines for the mane. Vary the line weight slightly to add depth to the hair. -
Add shading with hatching:
I like to use simple diagonal hatching lines to add shadow. Focus on the underside of the belly, the neck, and the inside of the legs to give the drawing volume. -
Ground the figure:
Draw small, scribbly grass textures around the hooves along your original ground line so the horse doesn’t look like it’s floating. -
Clean up:
Once the ink is completely dry, gently erase all underlying pencil sketches and guided lines to reveal the crisp grid paper background.
Add Dimension
Use a thicker pen (0.8mm) for the main outline and a thinner pen (0.1mm) for internal muscle details to create dynamic line weight.
Now you have a technically precise horse study that looks professional and clean

PENCIL GUIDE
Understanding Pencil Grades from H to B
From first sketch to finished drawing — learn pencil grades, line control, and shading techniques.
Explore the Full Guide
Walking Horse Gesture Sketch
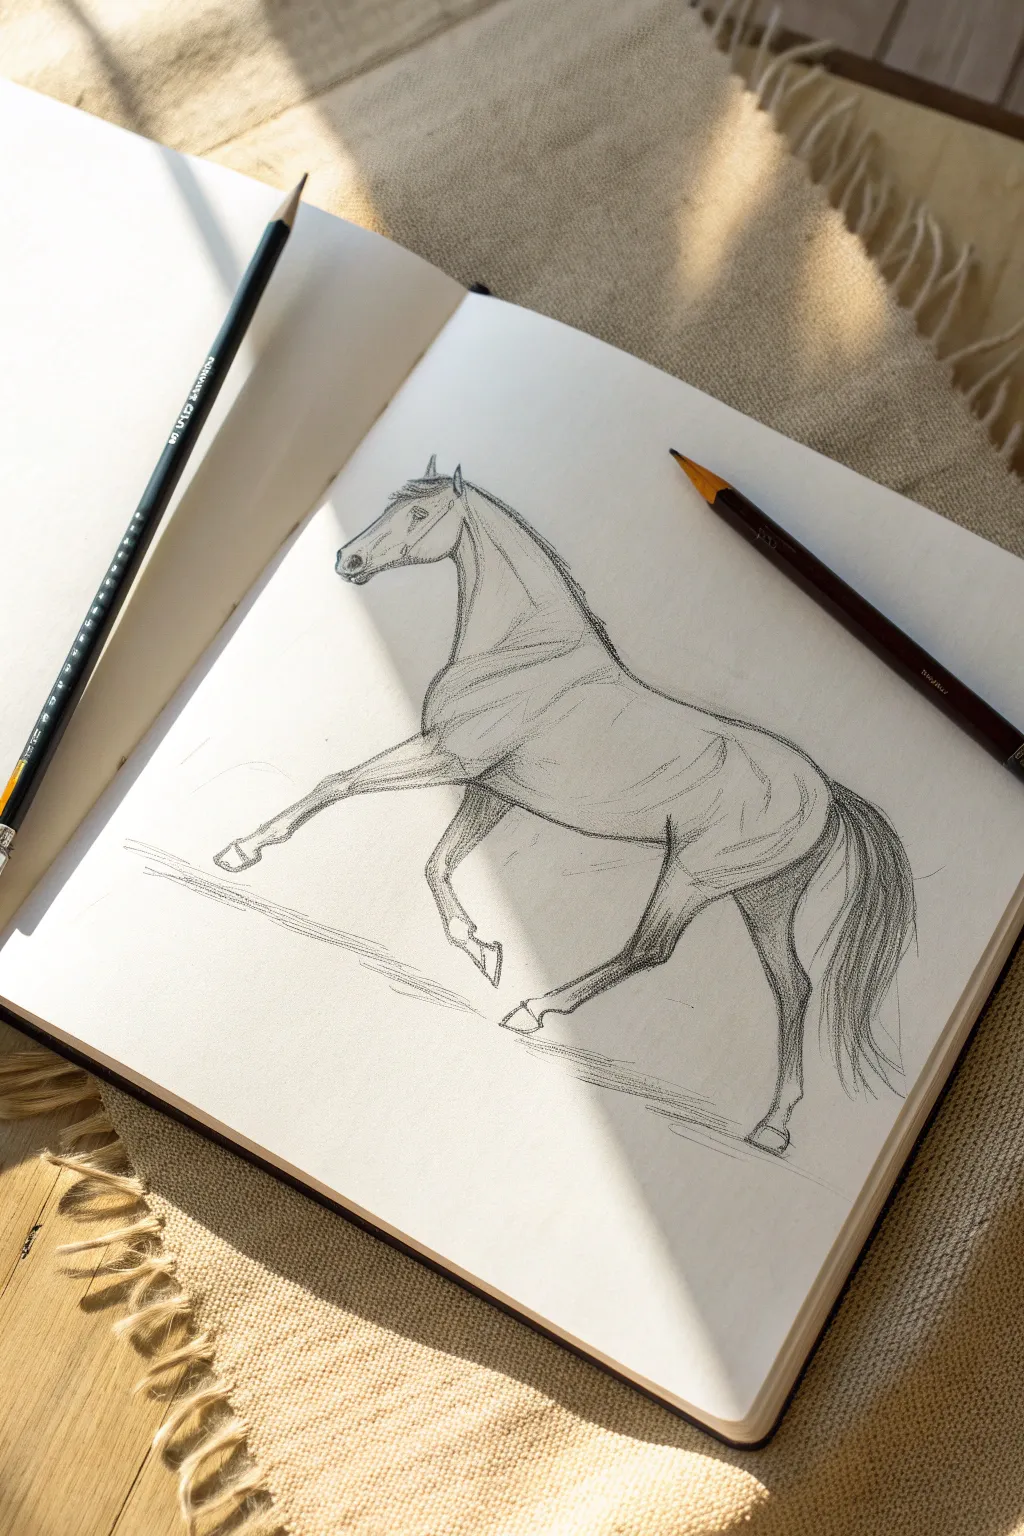
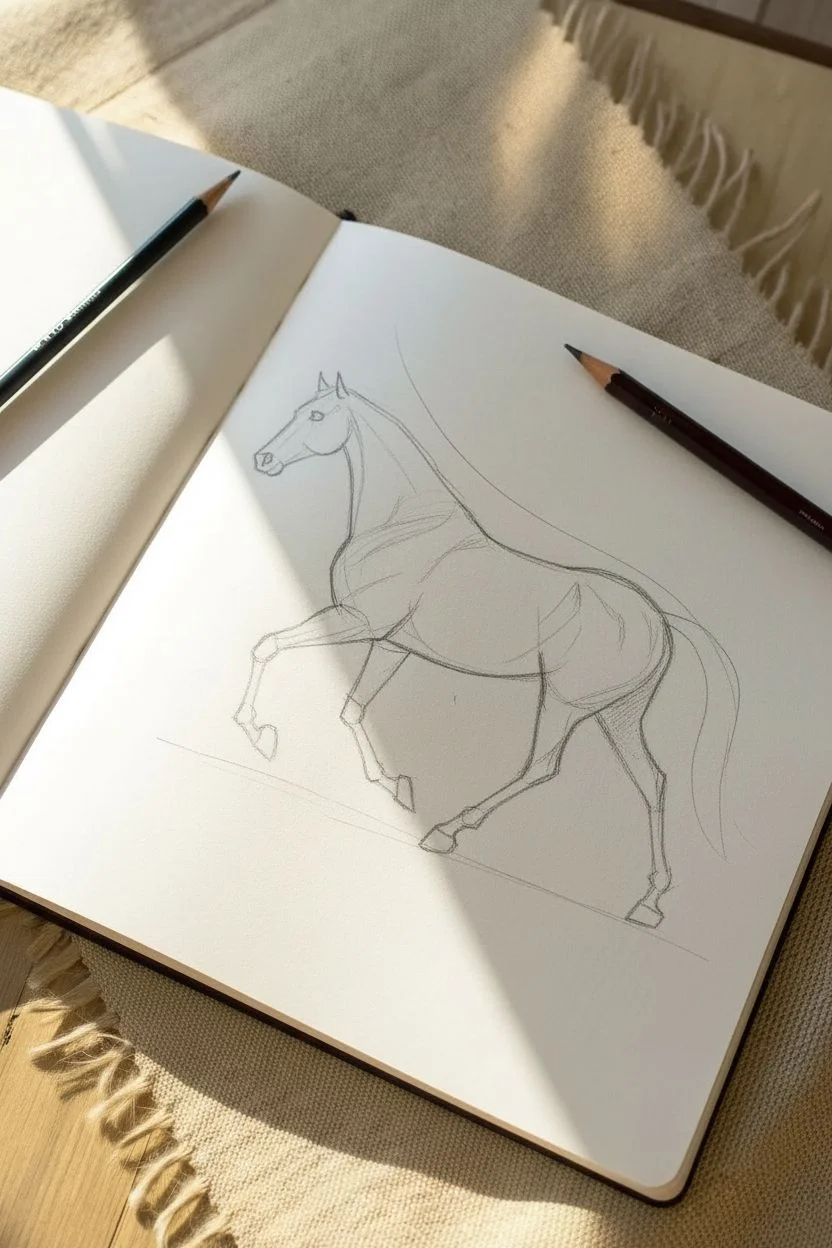
Capture the graceful movement of a horse mid-stride with this graphite gesture study. Using simple linework and gentle shading, you’ll create a lively sketch that emphasizes the animal’s elegant anatomy and forward momentum.
Detailed Instructions
Materials
- Grapehite pencils (HB for initial lines, 2B or 4B for shading)
- Sketchbook or drawing paper (medium tooth)
- Kneaded eraser
- Pencil sharpener
Step 1: Establishing the Gesture
-
Map the spine:
Begin with a very light, sweeping line to define the curve of the horse’s back. This ‘line of action’ should flow from the top of the neck down to the tail. -
Block in body masses:
Lightly sketch an oval for the ribcage and a slightly smaller oval for the hindquarters. Connect these to your spine line. -
Position the neck and head:
Draw an elongated triangle shape extending upwards for the neck. At the top, place a smaller wedge shape to represent the head, tilting it slightly downward. -
Sketch leg guidelines:
Draw simple stick lines to indicate the position of the legs. The front left leg should be raised and reaching forward, while the back legs push the body along.
Step 2: Refining the Form
-
Outline the head features:
Refine the wedge shape into a horse’s profile. Add the small curve of the ear at the top and a soft notch for the nose and mouth. -
Thicken the neck:
Connect the head to the body with two sweeping lines. Add a slight arch on the top line to suggest the muscle crest. -
Define the front legs:
Flesh out the stick figures. For the raised front leg, ensure the knee joint is distinct and the hoof points downward. The planted leg should look weight-bearing. -
Shape the hindquarters:
Draw the curve of the rump and thigh muscles. The back right leg should be extended backward, showing the propulsion of the walk. -
Add the belly line:
Connect the front and back sections with a smooth curve for the underbelly, pulling it slightly upward near the back legs.
Keep it Loose
Hold your pencil further back on the barrel, not near the tip. This forces you to draw with your shoulder rather than your wrist for fluid lines.
Step 3: Contouring and Texture
-
Suggest muscle tone:
Use light, curved strokes inside the shoulder and thigh areas to hint at the muscles beneath the skin. Don’t outline every muscle; just suggest the volume. -
Detail the hooves:
Draw the geometric shape of the hooves. Add a tiny line just above them to indicate the coronet band. -
Draw the mane:
Using short, flicking strokes, draw the mane lying somewhat flat against the neck, suggesting a trimmed or naturally short style. -
Sketch the tail:
Draw long, flowing lines cascading from the rump. Keep the strokes loose to mimic hair texture. -
Clean up guidelines:
Take your kneaded eraser and gently lift away the initial ovals and stick lines, leaving only your refined contour.
Add a Gradient
Use the side of your pencil lead to create a soft gray background wash behind the horse, making the white of the paper pop on the highlights.
Step 4: Shading and Final Touches
-
Shade the underside:
Switch to a darker pencil (like a 2B). Add hatching shadow along the belly and the inside of the legs to give the horse three-dimensional form. -
Darken key joints:
Add extra pressure to the knees, hocks, and fetlocks. This emphasizes the bony landmarks of the horse’s anatomy. -
Enhance the eye and nostril:
Place a small, dark dot for the eye and a soft shadow for the nostril to bring the face to life. -
Add ground movement:
Sketch a few horizontal, scratchy lines underneath the hooves. This grounds the drawing and emphasizes the walking motion. -
Final contour variation:
Look over the whole drawing. Darken lines where there are shadows or heavy muscle overlaps, and leave top edges lighter to suggest sunlight hitting the back.
Now you have a dynamic sketch that perfectly captures the rhythm of a walking horse
Trotting Horse With Diagonal Energy Lines
Capture the grace of an equine subject with this realistic pencil study of a horse in mid-trot. The drawing balances crisp contour lines with soft, thoughtful shading to emphasize the animal’s musculature and natural gait.
Step-by-Step Guide
Materials
- Heavyweight drawing paper or sketchbook (smooth or vellum finish)
- Graphite pencils (HB for sketching, 2B and 4B for shading)
- Kneaded eraser
- Precision vinyl eraser
- Blending stump or tortillon
- Pencil sharpener
Step 1: Establishing the Proportions
-
Create the framework:
Begin with an HB pencil using very light pressure. Draw a slanted oval for the chest area and a slightly smaller oval for the hindquarters. Connect these with a curved line for the spine, visualizing the body slightly angled upward to the left. -
Position the head and neck:
Sketch a long, tapering triangle shape for the neck extending from the front oval. Add a smaller, elongated rectangle at the end for the head, tilting it slightly downward to give the horse a focused look. -
Map the leg joints:
Draw simple stick lines to indicate the leg positions. For a trot, diagonals move together: the front left and back right legs should be lifted and bent, while the front right and back left legs are planted or just leaving the ground.
Step 2: Developing the Contour
-
Outline the head features:
Refine the head shape, adding the subtle curve of the cheek (jowl) and the brow bone. Sketch the ear perked forward and place the eye high on the side of the head. -
Shape the neck and chest:
Connect the head to the body with strong strokes, emphasizing the dip of the throat latch and the muscular curve of the neck. Define the shoulder blade area where it meets the chest. -
Flesh out the front legs:
Draw the contours of the front legs around your stick guides. Pay attention to the knobby knees and the fetlock joints just above the hooves. The lifted front leg should have a sharp bend at the knee. -
Define the body and hindquarters:
Trace the sweeping line of the back, dipping slightly before rising to the croup. Flesh out the powerful hind leg muscles, ensuring the thigh area looks sturdy and round. -
Sketch the back legs:
Complete the rear legs. The lifted back leg acts in unison with the front diagonal leg. Ensure the hock joint (the backward-bending knee on the rear leg) is clearly defined. -
Draw the hooves:
Add the hooves at the end of each leg. They should be angled to match the ground plane, with the lifted hooves showing a bit of the underside or frog.
Anatomy Hack
Look for the “W” shape in the legs. The joints of a horse’s legs create a zigzag pattern similar to a W or M depending on the angle. This helps keep leg lengths correct.
Step 3: Shading and Texture
-
Clean up the sketch:
Take your kneaded eraser and gently dab away the initial construction ovals and stick lines, leaving only your refined outline. -
Add the mane and tail:
Using short, flicking strokes, draw a short, cropped mane along the neck ridge. For the tail, use long, flowing S-curves that drape downward, suggesting the hair is relaxed but moving. -
Start shading the musculature:
Switch to a 2B pencil. Lightly shade the underside of the neck and the belly to create volume. Follow the direction of the muscles, particularly around the shoulder and flank. -
Deepen the contrast:
Use a 4B pencil to darken the deepest shadows: under the jaw, behind the elbow, between the hind legs, and inside the ears. I find this really helps pop the figure off the page. -
Refine the legs:
Add shading down the sides of the legs to make them look cylindrical rather than flat. Darken the hooves, leaving a tiny sliver of white at the top for a highlight. -
Detail the head:
Darken the eye, leaving a tiny white dot for the reflection. Add shading to the nostril and the cheekbone to give the face structure. -
Create movement lines:
Lightly sketch some horizontal, scratchy lines under the hooves to represent the ground. This anchors the drawing and enhances the feeling of forward motion. -
Blend for smoothness:
Use a blending stump to gently soften the transition between your shaded areas and the highlights, particularly on the rounded parts of the body.
Make It Move
To increase the sense of speed, smudge the ground lines slightly horizontally with your finger, or add faint ‘wind’ lines streaming from the mane and tail.
Now you have a dynamic equine study that captures both strength and grace on the page


Foal Drawing With Soft Proportions
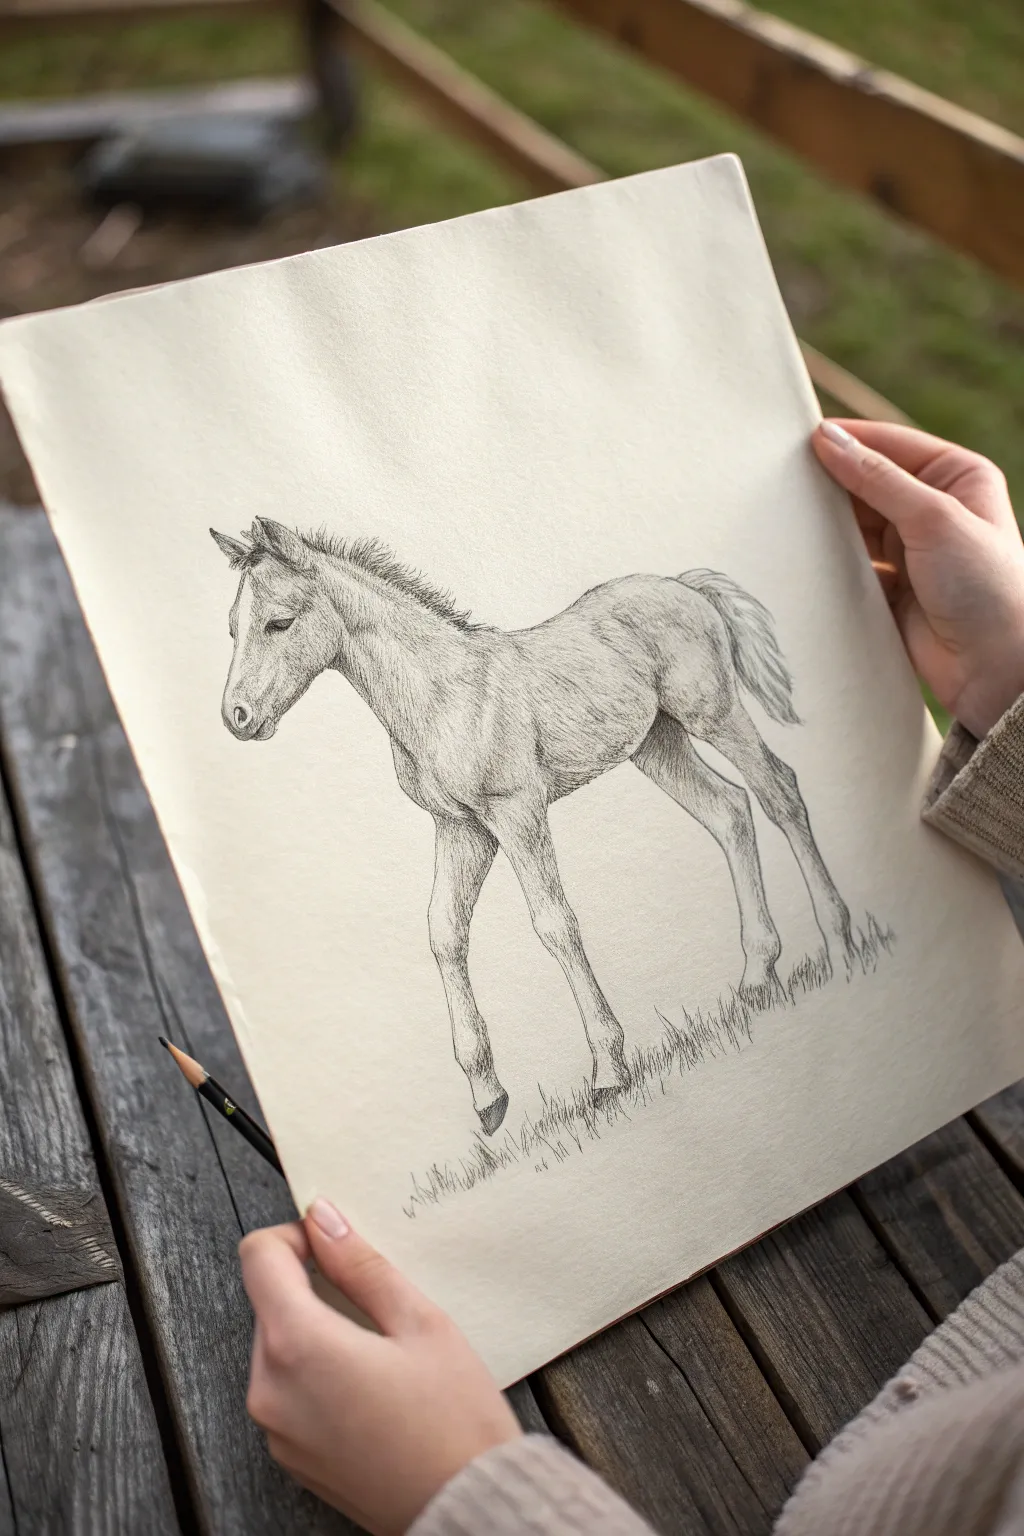
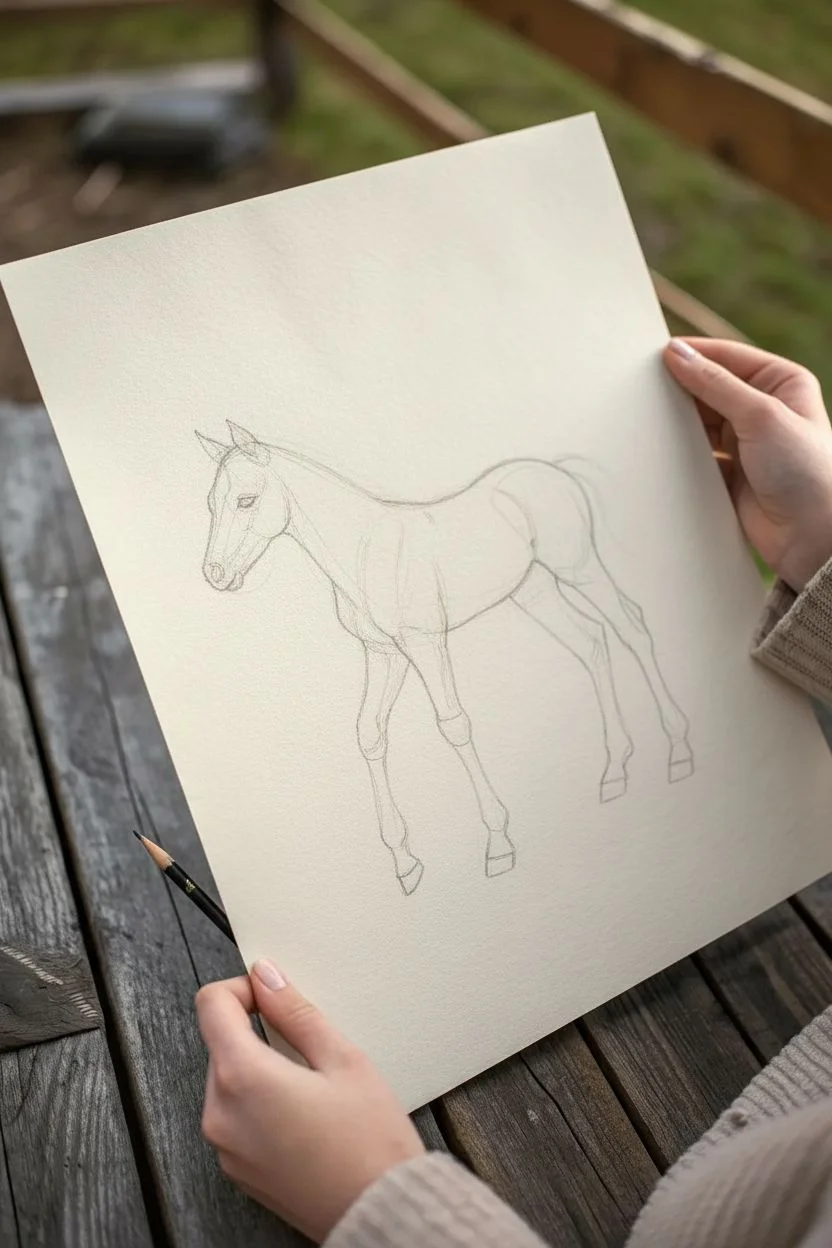
Capture the delicate charm of a young horse with this pencil study, focusing on soft textures and the slightly awkward, long-legged grace of a foal. Using simple hatching techniques, you’ll build up a realistic form that feels alive on the page.
How-To Guide
Materials
- Smooth or medium-tooth drawing paper (cream or off-white recommended)
- H or HB pencil (for initial sketching)
- 2B and 4B pencils (for shading and details)
- Kneaded eraser
- Pencil sharpener
- Blending stump (optional)
Step 1: Constructing the Framework
-
Establish the main masses:
Begin lightly with your HB pencil. draw a medium oval for the chest area and a slightly smaller oval for the hindquarters. Connect them with a gentle curve, keeping the body relatively short compared to an adult horse. -
Map out the head and neck:
Sketch a smaller circle for the jaw and a tapered cylinder for the muzzle pointing downwards. Connect the head to the chest with a neck that is slender but widens as it meets the shoulders. -
Position the legs:
Draw the legs using long, straight lines to establish the length. Foals have very long legs in proportion to their bodies. Mark the joints (knees and hocks) with small circles; keep the knees slightly knobby to emphasize its youth. -
Refine the outline:
Go over your structural shapes to create a cohesive outline. Give the back a slight dip, define the shoulder muscles, and shape the hooves to look small and boxy. Erase your internal construction lines gently with the kneaded eraser until only a faint guide remains.
Step 2: Developing Form and Texture
-
Begin the facial features:
Switch to a sharp 2B pencil. define the eye, keeping it dark and glistening with a tiny highlight left white. softly shape the nostril and the curve of the mouth, giving the foal a gentle expression. -
Add the mane and ears:
Sketch the ears, making them look alert. For the mane, use short, upright strokes to create a fuzzy, ‘mohawk’ texture typical of foals, rather than long flowing hair. -
Start shading the head:
Using light hatching strokes, shade the cheekbones and under the jaw. Follow the direction of the underlying bone structure to create volume. -
Define the neck muscles:
Continue your hatching down the neck. I find it helpful to curve my strokes slightly around the neck form to make it look cylindrical rather than flat. -
Shade the shoulder and chest:
Darken the area behind the shoulder blade and under the chest. This cast shadow adds immediate depth and separates the front leg from the body. -
Texture the body coat:
Use short, consistent parallel drawing strokes across the flank and belly. Foals have soft, fuzzy coats, so avoid harsh, long lines. Keep the belly slightly lighter to reflect ambient light from the ground. -
Sculpt the hindquarters:
Add shading to the roundness of the rump and the thigh. create a shadow where the back leg meets the belly to tuck it underneath the body visually.
Joint Emphasis
Foals have exaggerated, knobby knees compared to adult horses. Slightly over-emphasizing the size of the joints helps capture that clumsy, youthful look perfectly.
Step 3: Legs and Finishing Touches
-
Sketch the tail:
Draw the tail short and brushy using loose, flowing lines. Keep it relatively high on the rump to suggest movement or alertness. -
Detail the front legs:
Refine the knees and fetlocks (ankles). Shade the inside of the legs more heavily than the outside. The legs should look slender but bony. -
Detail the back legs:
Ensure the hock joint (the backward ‘knee’ on the rear leg) is defined. Shade the far rear leg darker than the near one to push it into the background. -
Ground the figure:
At the hooves, draw uneven, upward strokes to simulate grass. Some grass blades should overlap the hooves to show that the foal is standing in the field, not floating above it. -
Final contrast adjustments:
Switch to your 4B pencil. Deepen the darkest shadows—under the belly, inside the ears, and in the deep muscle creases. leaving the highlighted areas on the shoulder and hip clean creates a lovely contrast.
Soften the Look
Try using a tortillon or blending stump to gently smudge the graphite on the foal’s flank and neck. This mimics the soft, velvet-like texture of a foal’s baby coat.
Step back and admire the sweet character you’ve captured in your drawing
Two Horses Interacting Nose-to-Nose
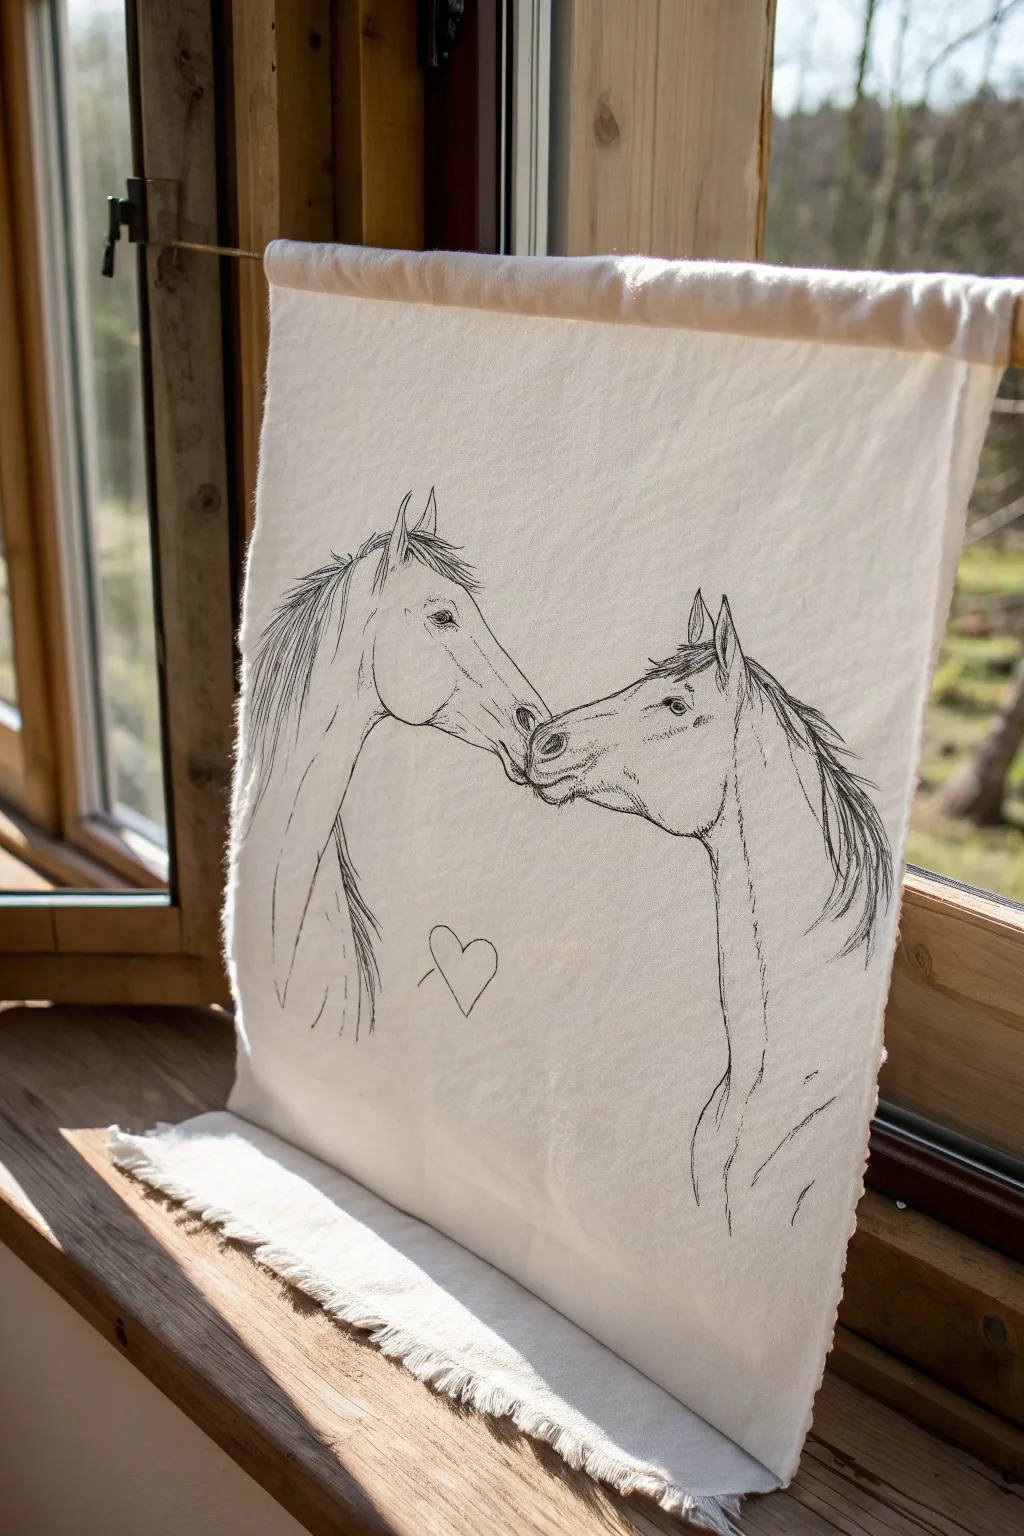

This charming fabric banner captures a tender moment between two horses in a simple yet expressive line drawing style. The raw, frayed edges and natural cotton texture give the finished piece a lovely rustic farmhouse aesthetic.
Step-by-Step Guide
Materials
- Heavyweight cotton or linen fabric (white or off-white)
- Black fabric marker or fine-tip black fabric paint pen
- Pencil (HB or lighter)
- Eraser
- Wooden dowel (approx. 1/4 inch diameter)
- Measuring tape
- Fabric scissors
- Sewing machine or needle and white thread
- Iron and ironing board
- Optional: Lightbox or window for tracing
Step 1: Preparation and Sketching
-
Prepare the fabric canvas:
Cut a rectangle of your cotton or linen fabric to your desired size, adding about 2 inches to the top for the casing. Don’t worry about perfect edges yet, as we will fray them later. -
Smooth the surface:
Iron the fabric completely flat. Any wrinkles or creases will make drawing clean lines much more difficult later on. -
Establish the composition:
Lightly sketch a vertical centerline to help balance the two horses. The point where their noses touch should be slightly above the center of the fabric. -
Outline the left horse:
Using a pencil, lightly sketch the profile of the left horse. Start with the forehead, bringing the line down to the soft curve of the nose. Add the large, messy mane flowing down the left side. -
Outline the right horse:
Sketch the right horse’s profile mirroring the first. Ensure their muzzles meet gently. Draw the ears perked forward and add the mane flowing down the right side of the neck. -
Refine the details:
Add the eyes on both horses, placing them roughly parallel to one another. Sketch a small, simple heart floating in the negative space between their necks.
Bleeding Lines?
If the ink bleeds into the fabric fibers, try stiffening the fabric with spray starch before drawing. Iron it dry, draw your design, and then wash out the starch later.
Step 2: Inking the Drawing
-
Test your pen:
Before touching the final piece, test your fabric marker on a scrap piece of the same fabric to check for bleeding. If it spreads too much, move the pen faster. -
Ink the main contours:
Start tracing over your pencil lines with the black fabric marker. Use long, confident strokes for the necks and faces to keep the lines smooth. -
Detail the manes:
When outlining the hair, use quicker, flicking motions with the pen. This creates tapered lines that mimic the texture of horsehair better than a solid, heavy line. -
Add facial features:
Carefully ink the eyes and nostrils. You can add tiny hatching lines or stippling near the jawline and muzzle to suggest shadow and muscle structure without overcrowding the drawing. -
Ink the heart:
Trace the small heart between them. Keep this line slightly thinner or lighter if possible to maintain the focus on the horses. -
Erase pencil guides:
Allow the ink to dry completely (check your pen’s instructions, usually 1-2 hours). Gently erase any visible pencil marks, holding the fabric taut so it doesn’t bunch up.
Step 3: Assembly and Finishing
-
Create the rod pocket:
Fold the top edge of the fabric over by about 1.5 inches to the back side. Press this fold with an iron to create a crisp crease. -
Sew the casing:
Stitch a straight line across the fabric, about 1 inch down from the top fold. You can use a machine or a simple running stitch by hand. This creates the channel for your dowel. -
Fray the edges:
For that rustic look, pull loose vertical and horizontal threads from the bottom and side edges of the banner. I usually pull threads until I have a fringe about 0.5 inches deep. -
Insert the dowel:
Slide your wooden dowel through the top casing. Since the casing is open on both ends, center the dowel so an equal amount of wood pokes out on either side. -
Heat set the ink:
Most fabric markers require heat setting to become permanent. Iron the reverse side of the drawing (or use a pressing cloth over the front) on a cotton setting for 3-5 minutes.
Add Rustic Charm
Dip the bottom frayed edges in strong black tea or diluted coffee for a weathered, antique gradient effect. Let it hang dry completely before displaying.
Hang your beautiful equestrian banner in a window or cozy corner to enjoy its warm, handmade appeal.
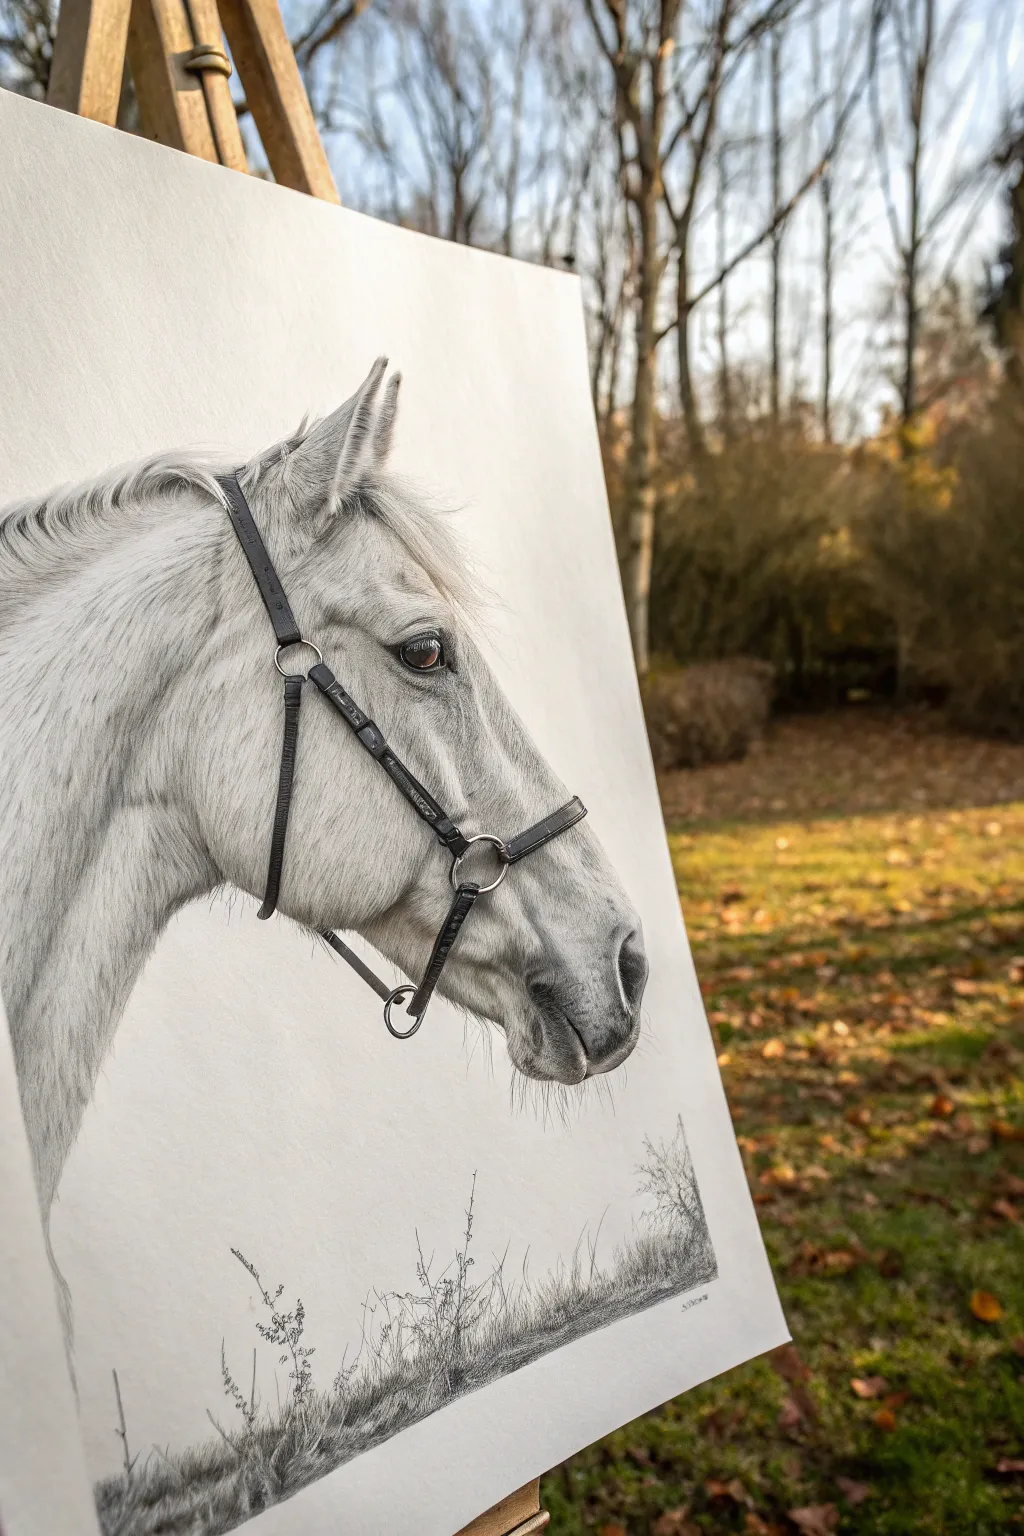
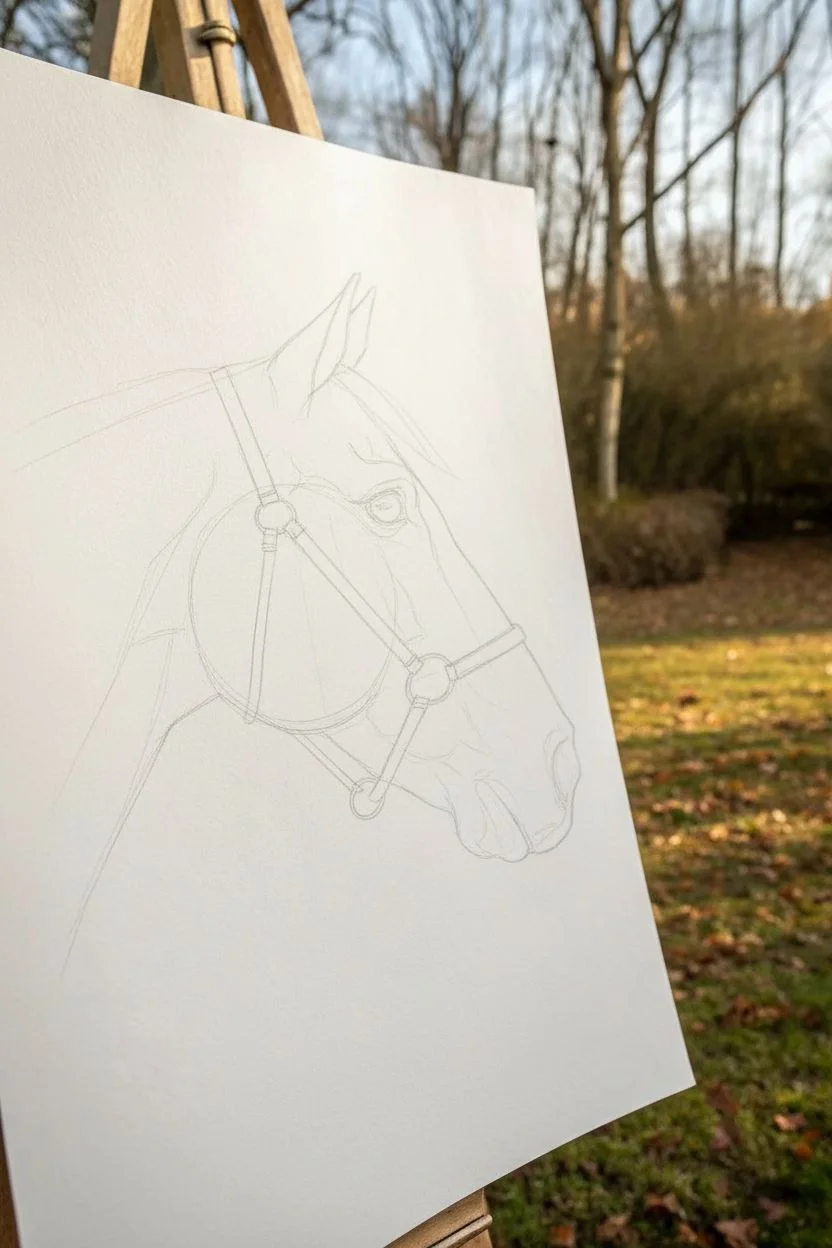
Horse Portrait With Bridle Details
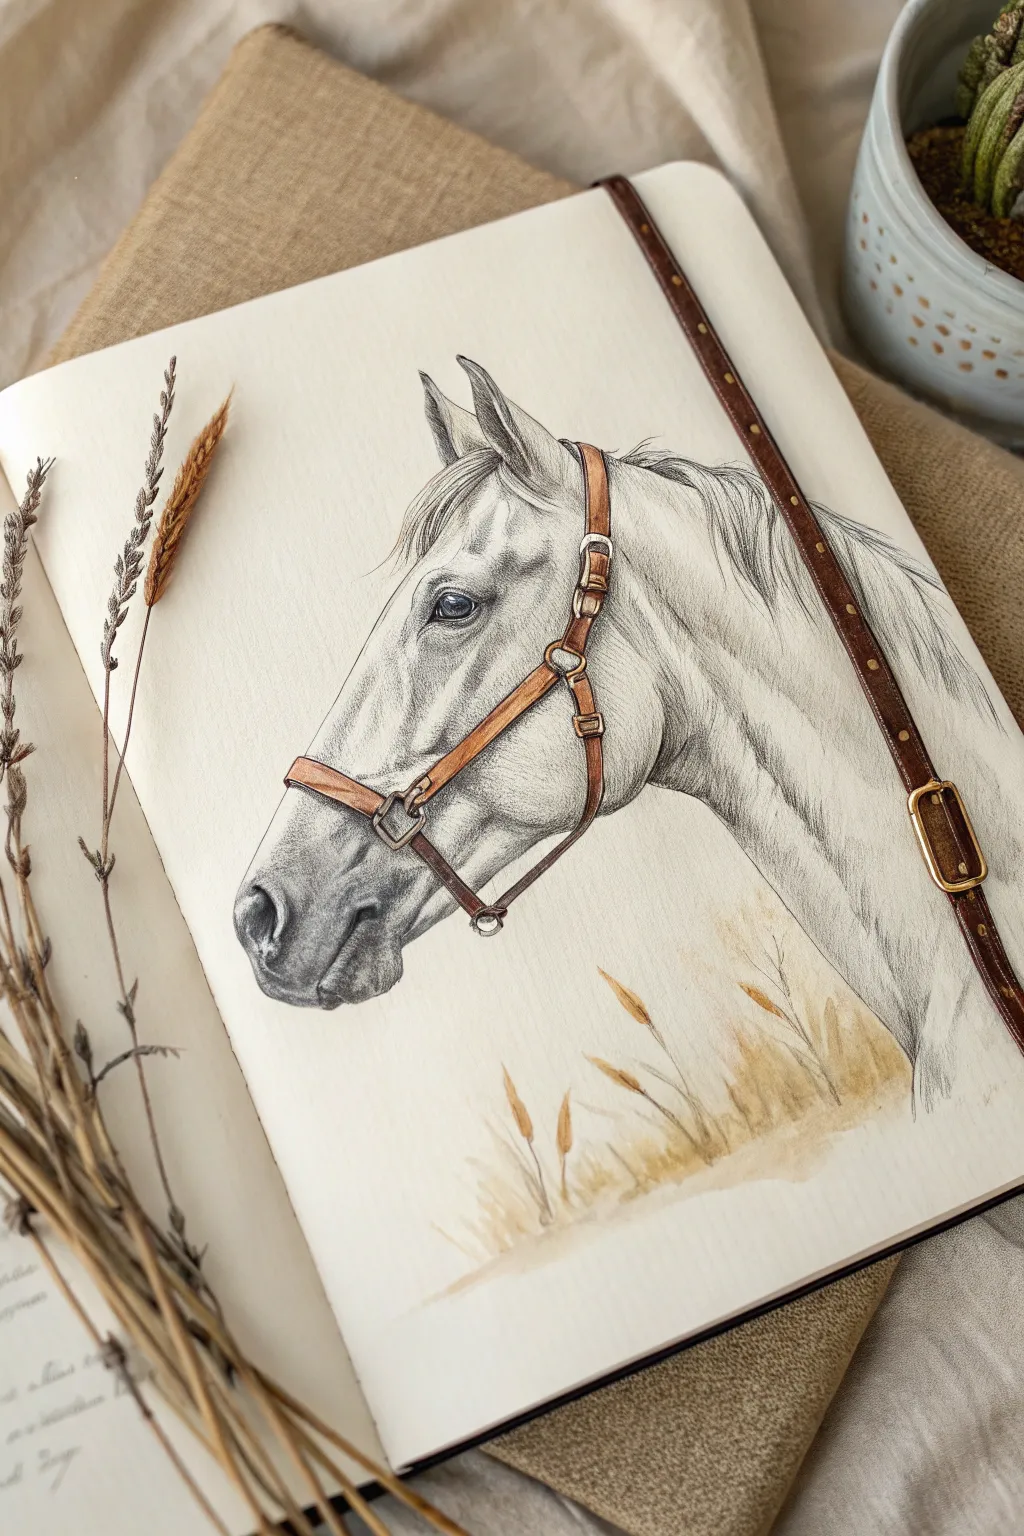
Capture the quiet elegance of a horse in profile with this mixed-media sketch that emphasizes realistic textures. By combining graphite detailing with warm colored pencil accents, you’ll create a striking contrast between the soft grey coat and the rich leather bridle.
Detailed Instructions
Materials
- Smooth heavyweight sketchbook paper (cream or off-white)
- Graphite pencils (HB, 2B, 4B)
- Colored pencils (Burnt Sienna, Yellow Ochre, Dark Brown, White)
- Fine liner pen (brown or sepia, ultra-fine)
- Kneaded eraser
- Blending stump (tortillon)
Step 1: Drafting the Profile
-
Establish the main shapes:
Start with a light HB pencil to block out the basic geometry of the horse’s head. Use a large circle for the cheek/jaw area and a smaller circle for the muzzle, connecting them with sloping lines to form the nose bridge. -
Refine the outline:
Smooth out your geometric shapes into a continuous contour line. Pay special attention to the subtle dip in the nose profile and the strong curve of the cheekbone. -
Position the features:
Mark the placement of the eye (crucial for expression), the nostril, and the ears. The ears should be perked forward, indicating alertness. -
Sketch the bridle placement:
Lightly draw the straps of the bridle over the face. Don’t press hard yet; just map out where the leather bands cross the nose, cheek, and go behind the ears.
Step 2: Graphite Shading & Fur Texture
-
Shade the darks:
Switch to a 2B pencil to deepen the darkest areas: the pupil of the eye, the inside of the ear, and the depth of the nostril. Leave a tiny speck of white paper in the eye for a highlight. -
Develop facial structure:
Using the side of your pencil, gently shade the hollows of the face—under the cheekbone and along the jawline. Use a blending stump to soften these shadows into the paper for a smooth coat look. -
Add hair strokes:
With a sharp HB pencil, add directional strokes to mimic short hair. Follow the natural growth pattern of the horse’s coat, especially around the muzzle and eyes. -
Draw the mane:
Create the mane using longer, flowing strokes. Don’t draw every single hair; instead, group them into locks that drape over the forehead and down the neck. -
Refine the muzzle:
Add extra shading around the mouth and nose to give it a soft, velvety appearance. I prefer a 4B pencil here for richer darkness without scratching the paper.
Muzzle looking flat?
Focus on the nostril. It isn’t just a black hole; it has a soft rim. Shade lightly around the opening and ensure the jawline shadow is darker than the neck to create separation.
Step 3: Bridle & Finishing Accents
-
Color the leather base:
Take your Burnt Sienna colored pencil and fill in the bridle straps. Apply an even layer of pressure, leaving the metal buckles uncolored for now. -
Add leather depth:
Layer Dark Brown colored pencil on the edges of the straps to create a 3D rounded effect. Add shadow underneath the straps where they rest against the horse’s fur. -
Detail the hardware:
Use a sharp graphite pencil or a dark grey color to outline the metal buckles and rings. Add a touch of Yellow Ochre to simulate brass, keeping the highlights bright white. -
Create the stitching:
With a very sharp white colored pencil or a gel pen, add tiny tick marks along the edges of the leather straps to simulate stitching. -
Sketch the foreground grass:
At the bottom of the neck, use loose, upward flicks of Yellow Ochre and Sienna to suggest dried field grass. Keep this area loose and painterly to contrast with the detailed face. -
Final contrast check:
Step back and assess your values. Darken the lash line and the deepest shadows of the bridle one last time to make the portrait pop off the page.
Add a Vintage Vibe
To mimic the aesthetic in the photo, stick a real pressed flower or wheat stalk onto the page next to your drawing using a dab of matte craft glue.
Now you have a stunning, rustic horse portrait that captures strength and softness on a single page
Wild Horse With Windblown Hair
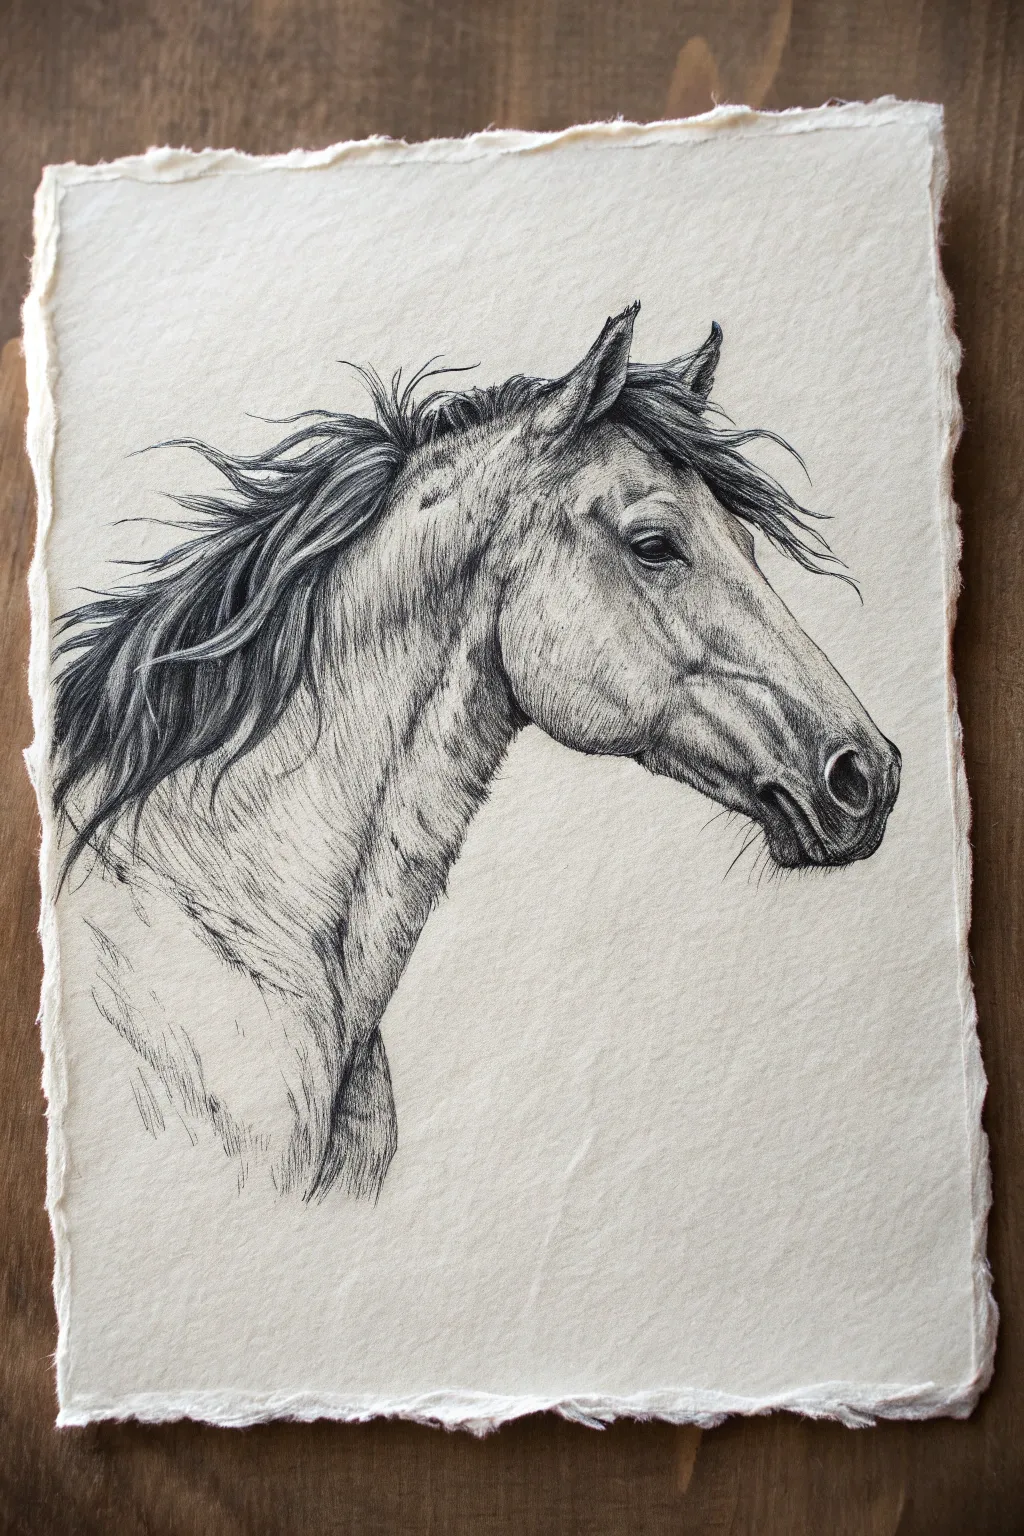
Capture the untamed spirit of a mustang with this detailed profile sketch that emphasizes texture and movement. Using simple graphite tools on beautiful handmade paper creates a rustic, timeless piece perfect for framing.
Step-by-Step Guide
Materials
- Textured, deckle-edge paper (heavyweight cotton rag)
- H or HB pencil (for initial layout)
- 2B and 4B graphite pencils (for shading)
- Fine tip felt pen or 6B pencil (for darkest mane details)
- Kneaded eraser
- Blending stump or tortillon
- Fixative spray
Step 1: Laying the Foundation
-
Map the head shape:
Start lightly with your H pencil. Draw a long, sloping wedge shape for the snout and a larger circle for the cheek/jaw area to establish the basic skull structure. -
Refine the profile:
Connect your shapes to form the bridge of the nose, dipping slightly before the forehead. Sketch the triangular shape of the ear, keeping it alert and forward-facing. -
Place features:
Mark the position of the eye about one-third of the way down the head. Draw a small almond shape. Place the nostril near the tip of the muzzle, indicating a flared ‘comma’ shape. -
Outline the neck:
Extend a strong, curved line down from behind the ear to create the neck’s crest. Add the throat latch and the underside of the neck, suggesting a powerful, muscular build.
Flat Looking Face?
If the head looks 2D, check your values. The darkest darks beside the lightest lights create volume. Ensure the cheekbone casts a shadow.
Step 2: Developing the Mane
-
Mark hair direction:
Using the 2B pencil, draw sweeping, curved lines flowing backward from the crest of the neck. This establishes the ‘windblown’ direction before you add detail. -
Group hair strands:
Instead of drawing individual hairs, group the mane into thick, twisting locks. Darken the spaces between these locks to create depth and separation. -
Add forelock details:
Sketch wisps of hair falling over the forehead and around the ears. Keep these lines loose and erratic to mimic the movement of wind.
Step 3: Shading and Texture
-
Define the eye:
Switch to your 4B pencil. Darken the pupil completely, leaving a tiny, bright white speck for the catchlight. Shade the area around the eye to create the bony socket structure. -
Sculpt the face:
Lightly shade the cheekbone and the bridge of the nose. Use the side of your pencil lead to create soft transitions, indicating muscle beneath the skin. -
Detail the muzzle:
Darken the nostril significantly. Add subtle shading around the mouth and chin, using short, tiny strokes to suggest velvety short hair. -
Create fur texture:
I find it helpful to follow the natural growth pattern of the horse’s coat. Use short, flicking strokes with the H pencil along the neck and jawline to build up a hairy texture. -
Deepen the shadows:
Use the 4B pencil or fine tip pen to deepen the darkest areas: inside the ear, the underside of the jaw, and the deepest crevices of the mane. -
Refine the mane:
Go back into the mane with sharp, dark strokes. Add flyaway hairs that cross over the main clumps to make the hair look wilder and less manicured.
Paper Choice Matters
For this exact look, don’t use smooth printer paper. Buy ‘deckle edge’ cotton rag paper. The rough tooth grabs the graphite for amazing texture.
Step 4: Final Touches
-
Enhance muscle definition:
Add shading along the neck muscles (the splenius and brachiocephalicus) to show tension and power. Blend slightly with a stump if the lines look too harsh. -
Clean up edges:
Use your kneaded eraser to lift off any smudges on the background paper. The contrast between the clean paper and the textured drawing is key. -
Add final contrast:
Review the drawing from a distance. Strengthen the darkest blacks one last time to ensure the image pops against the cream-colored paper.
Now you have a stunning, rustic piece of equine art ready to be displayed
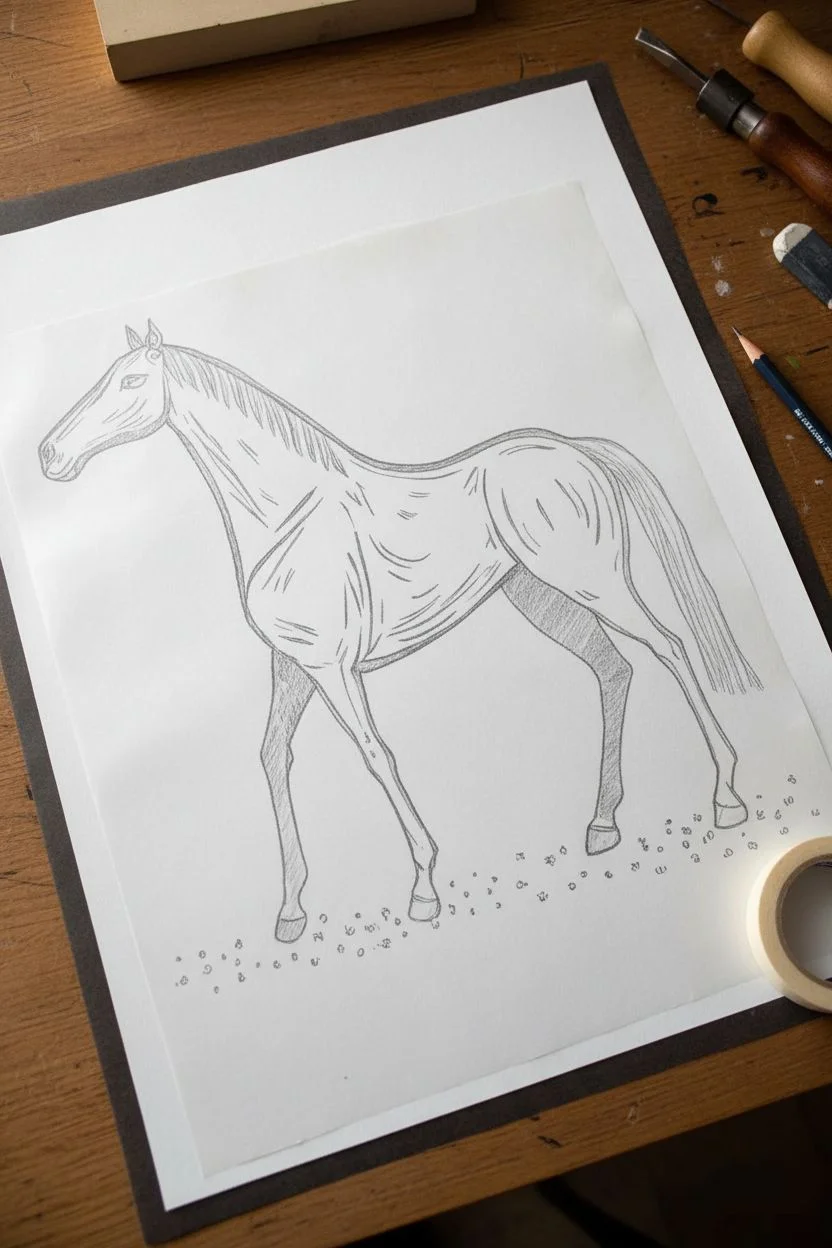
Horse Coat Patterns: Spots, Stripes, and Socks
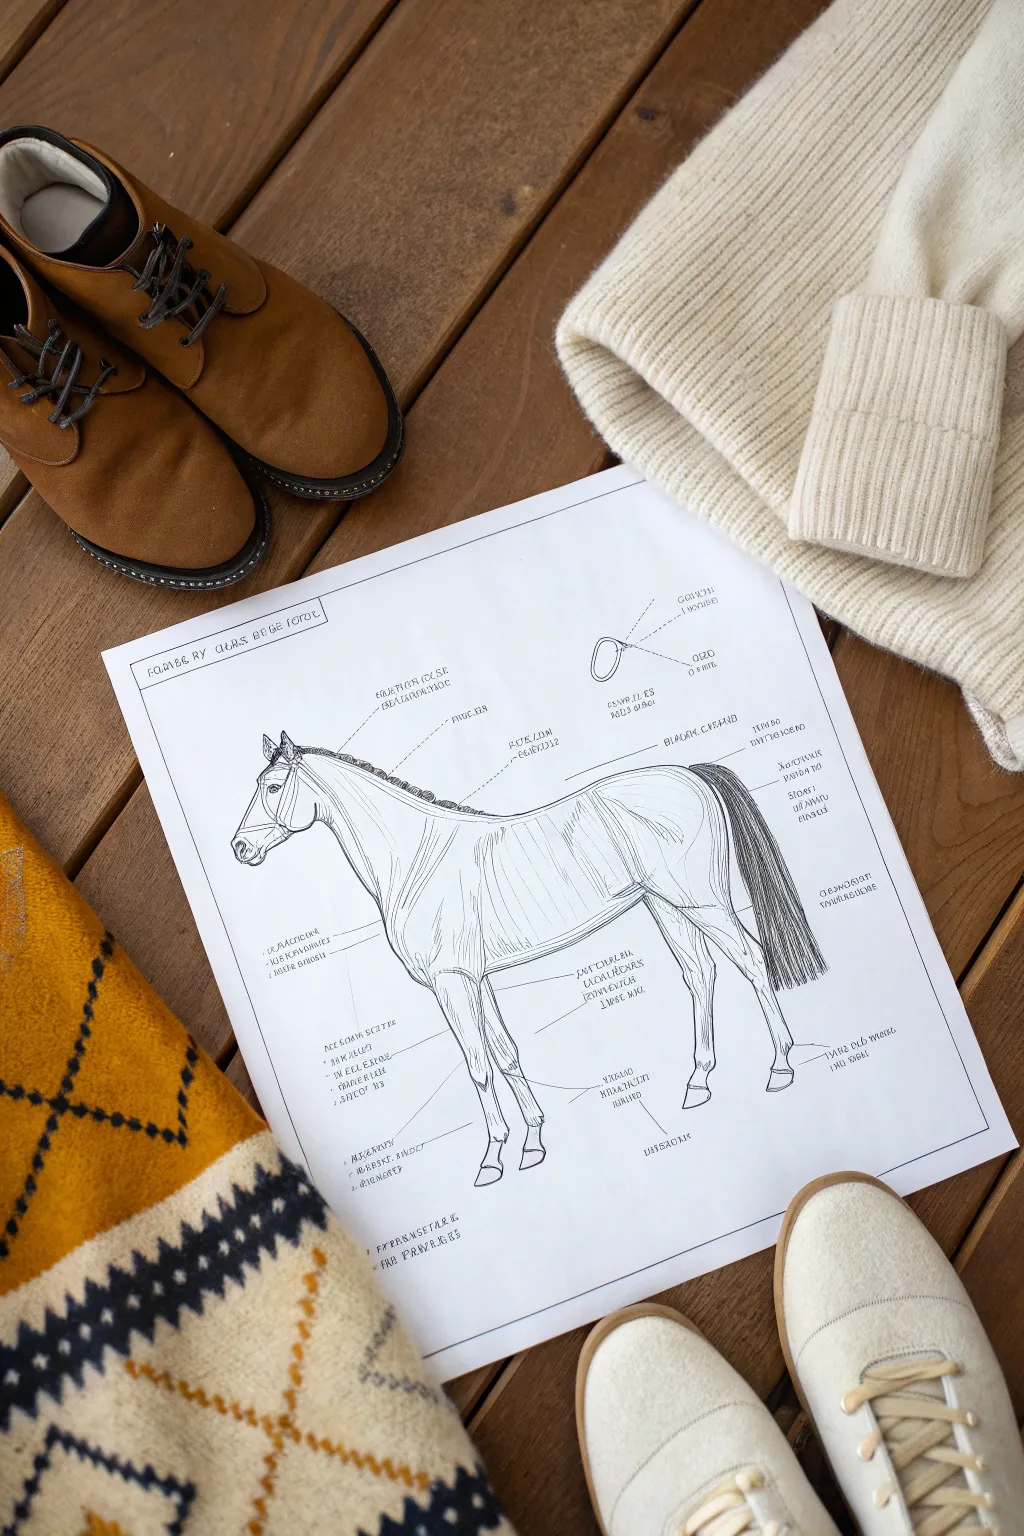
Capture the elegance of equine anatomy with this clean, technical-style line drawing. This project focuses on precise proportions and detailed muscle definition, perfect for understanding the underlying structure before adding coat patterns.
Step-by-Step Tutorial
Materials
- Smooth heavyweight drawing paper (A3 or 11×17 inch)
- H or 2H pencil for initial sketching
- HB mechanical pencil (0.5mm) for detailing
- Fine liner pens (0.1mm and 0.3mm, black)
- Quality eraser (kneaded and plastic)
- Ruler or straight edge
- Anatomy reference photos
Step 1: Constructing the Framework
-
Establish the ground line:
Begin by lightly drawing a faint horizontal line near the bottom of your paper to ensure the hooves are level. -
Map the main masses:
Using your H pencil, sketch three primary circles: one for the cheek, a large oval for the shoulder/chest area, and a large circle for the hindquarters. -
Connect the spine:
Draw a sweeping, gentle curve connecting the top of the neck, dipping slightly at the back, and rounding over the rump. -
Blocking the legs:
Sketch vertical lines for the legs, marking the joints (knees and hocks) with small circles to establish correct articulation points. -
Refine the outline:
Still using light pressure, connect your shapes to create the continuous contour of the horse’s body, paying attention to the arch of the neck and the tuck of the belly.
Step 2: Refining Anatomy
-
Detail the head:
Zoom in on the head. Define the muzzle, the distinct cheekbone (zygomatic ridge), and position the eye just below the forehead line. -
Shoulder definition:
Draw the scapula ridge and the muscle separation where the neck meets the shoulder. These lines should curve slightly to show volume. -
Body contours:
Add the ribcage definition with faint, curved vertical strokes. I like to keep these lines very subtle so the horse doesn’t look emaciated. -
Leg precision:
Tighten the drawing of the legs. Define the tendons running down the cannon bones and the fetlock joints just above the hooves. -
Tail flow:
Sketch the tail bone first, then drape the hair lines downwards. Keep the strokes long and fluid to mimic the texture of hair.
Use Reference Points
Measure head lengths to check proportions. A horse is typically about 2.5 head-lengths tall at the withers.
Step 3: Inking and Labeling
-
Initial inking:
Switch to your 0.3mm fine liner. carefully trace your final outline. Use confident, single strokes rather than ‘petting’ the line. -
Internal details:
Use the finer 0.1mm pen for the muscle striations, rib lines, and facial details. These lines should be thinner to suggest form without overriding the silhouette. -
Leader lines:
Place your ruler against key anatomical points (like the stifle, withers, or poll) and draw straight, crisp lines extending outward into the negative space. -
Add text labels:
At the end of each leader line, write the anatomical names in a small, neat serif or block font. Keep the text height consistent. -
Final erase:
Wait at least 15 minutes to stick the ink is bone dry. Gently erase all underlying pencil sketch marks with the plastic eraser. -
Add the border:
Frame your diagram by drawing a single or double line border around the entire composition to give it a finished, scientific plate look. -
Header box:
Create a small rectangular box in the top left corner and add a title, such as ‘Equine Conformation’ or the breed name.
Wobbly Ink Lines?
If your hand shakes, pull the pen toward you rather than pushing it away, and rotate the paper to find the most comfortable angle.
Now you have a professional-looking anatomical study ready for display or further color work
Charcoal Horse Portrait With Bold Values
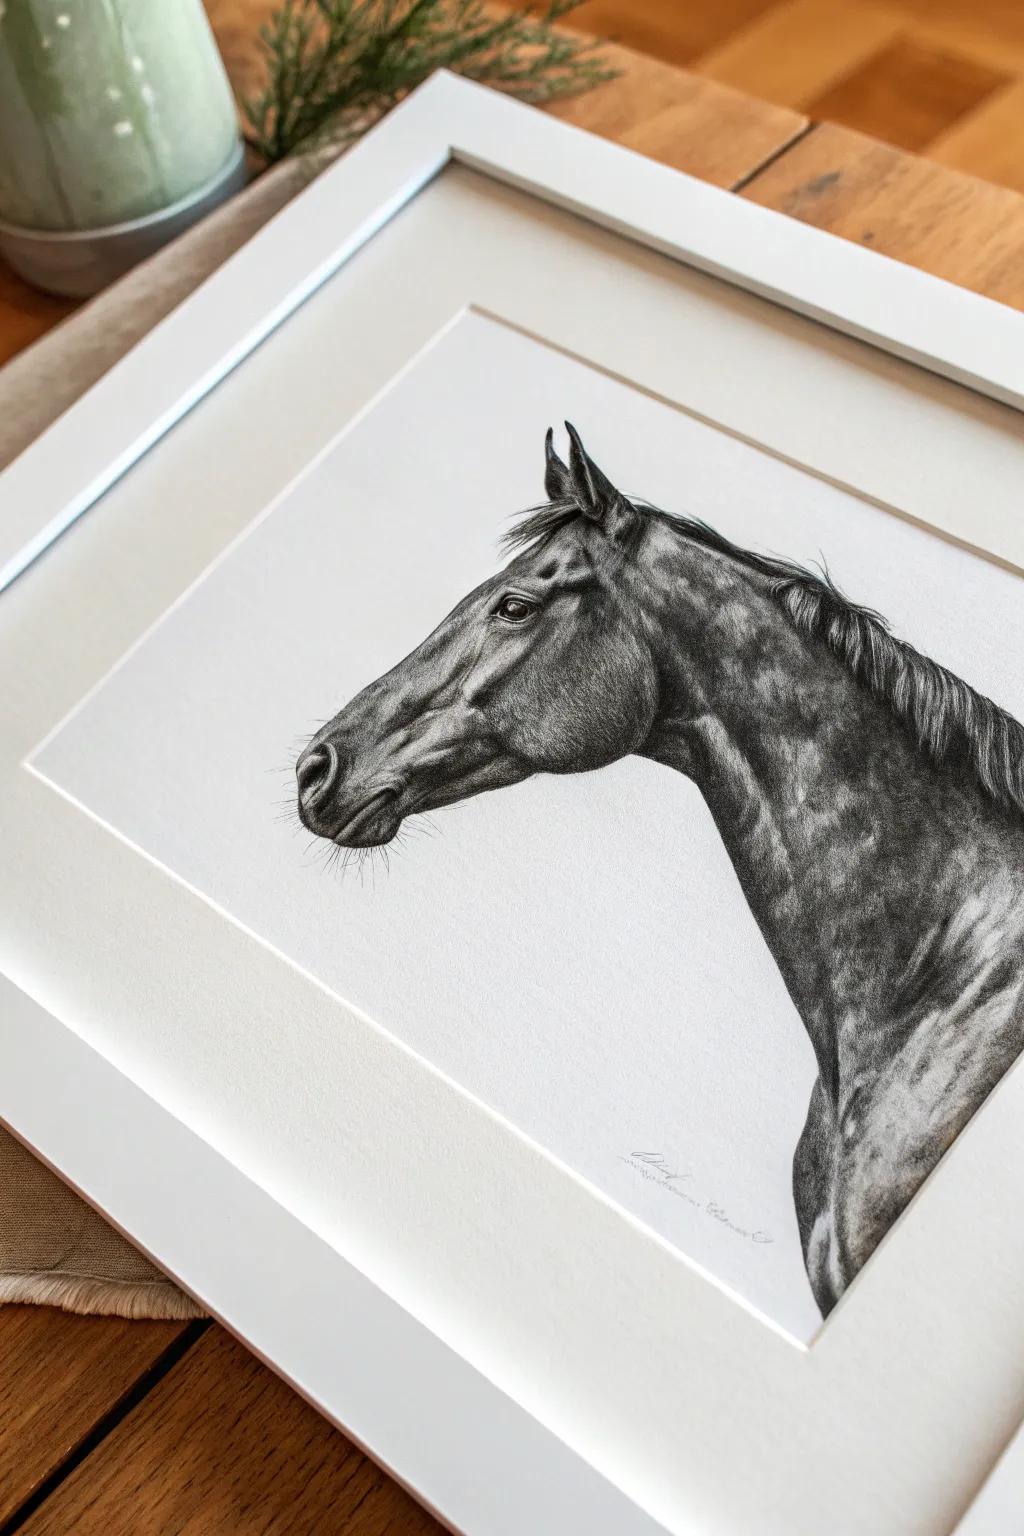
Capture the majestic elegance of a horse in profile with this high-contrast charcoal study. The focus here is on bold value shifts between deep blacks and subtle highlights to create a sense of muscle and form.
Step-by-Step
Materials
- Smooth bristol board or heavyweight drawing paper (bright white)
- Compressed charcoal sticks (for deepest blacks)
- Charcoal pencils (HB, 2B, 4B, 6B)
- Kneaded eraser
- Tombow Mono Zero eraser (or precision eraser pen)
- Blending stumps (tortillons)
- Soft tissue or chamois cloth
- Workable fixative spray
Step 1: Laying the Foundation
-
Map the proportions:
Begin with a very light HB charcoal pencil sketch. Use geometric shapes—circles for the cheek and muzzle, and a long triangle for the neck—to establish the profile. Keep your lines incredibly faint. -
Refine the outline:
Connect your shapes to define the contour of the horse’s face, jawline, and the graceful curve of the neck. Pay close attention to the placement of the eye relative to the nostril. -
Mark major shadows:
Lightly shade the areas that will become your darkest shadows: under the jaw, the inside of the ear, and the shadowed side of the neck muscles. This acts as your value map.
Keep it Clean
Place a piece of scrap paper under your drawing hand as you work. Charcoal is notorious for smudging, and this barrier protects your pristine white background.
Step 2: Building the Head
-
Draw the eye:
Start with the eye using a sharp 4B pencil. Leave a tiny speck of white paper for the catchlight to bring it to life immediately. Darken the pupil and shade the iris. -
Sculpt the muzzle:
Using a 2B pencil, shade the area around the nostril. Use firm pressure inside the nostril for a deep black, fading out gently to velvety grey on the lip. -
Define the cheekbone:
Apply tonal layers to the cheek area. Use a blending stump to smooth the graphite, creating the rounded, muscular feel of the jaw. Ensure the transition from the cheekbone to the neck is distinct. -
Add texture to the coat:
Instead of smooth shading everywhere, use short, directional strokes with your 2B and 4B pencils to mimic the lay of the short hair on the face.
Dapple Effect
To add dappling (spots) to the coat, press a clean kneaded eraser firmly onto shaded areas and lift straight up. Soften the edges with a stump.
Step 3: Developing the Neck and Details
-
Deepen neck shadows:
Use compressed charcoal or a 6B pencil for the darkest parts of the neck. This heavy contrast is what gives the drawing its dramatic ‘bold values’ look. -
Create muscle definition:
I find it helpful to squint at the reference image to see the big shapes; replicate these by leaving lighter patches of paper showing through the mid-tone greys on the neck. -
Blend for realism:
Take a soft tissue or a chamois and gently sweep over the larger neck areas to unify the charcoal. Don’t worry if you lose some detail; we will pull it back out. -
Lift out highlights:
Using your kneaded eraser, dab (don’t rub) the paper to lift charcoal off the high points of the muscles and the bridge of the nose. This creates the ‘shine’ of the coat. -
Draw the mane:
Using a sharp charcoal pencil, draw the mane in clumps rather than individual hairs. Start from the root and flick outward for tapered ends. -
Refine the ears:
Detail the ears, ensuring the inside remains dark while the rim catches the light. Add wispy hairs coming from inside the ear for a realistic touch. -
Whiskers and final details:
With your sharpest pencil (HB or hard charcoal), add the delicate whiskers on the muzzle and chin. Use quick, confident flicks. -
Clean up:
Use a precision eraser to clean up the white background around the profile, ensuring a crisp silhouette. -
Protect the work:
Spray with a workable fixative in a well-ventilated area to prevent smudging while framing.
Now step back and admire the powerful form you have created on the page
Minimalist One-Line Horse Drawing

Capture the elegance of an equine form with this understated line drawing that emphasizes fluidity and negative space. This project focuses on clean, deliberate strokes to create a modern, minimalist piece perfect for framing.
How-To Guide
Materials
- High-quality white drawing paper or cardstock (A4 or similar)
- HB pencil for initial sketching
- Soft eraser
- Fine liner pen (0.3mm or 0.5mm, black ink)
- A smooth, flat surface to draw on
- Optional: Ruler for alignment checks
Step 1: Drafting the Basic Form
-
Establish the Head:
Begin lightly with your HB pencil on the left side of the paper. Sketch a small, angled wedge shape for the horse’s head, keeping the muzzle slightly squared off and the jawline visible. -
Map the Neck Curve:
Draw a sweeping, gentle curve extending from the top of the head to the right, forming the crest of the neck. Mirror this with a shorter, steeper line underneath for the throat latch. -
Outline the Trunk:
Connect the neck line into a long, slightly dipping horizontal curve for the back. For the belly, draw a subtle upward curve that suggests a lean torso, leaving space for the legs. -
Position the Legs:
Sketch simple stick-figure guides for the legs first to get the proportions right. The front legs should stand relatively straight, while the back legs should angle slightly backward to show a relaxed stance.
Step 2: Defining the Contours
-
Refine the Profile:
Go back to the head and add detail to the muzzle, tracing the nostril and the mouth line. Soften the angle of the jaw to make it look organic rather than geometric. -
Form the Ears and Mane:
Sketch two small, pointed triangles for ears at the poll. Then, lay down the basic shape of the mane falling along the neck; keep it contained rather than wild. -
Flesh Out the Limbs:
Thicken your leg guides. Pay attention to the joints—the knees on the front legs and hocks on the back legs need slight knobby protrusions to look anatomical. -
Add the Tail:
Draw the tail flowing down from the hindquarters. Keep the lines simple, suggesting hair without drawing every single strand.
Uneven Ink Flow?
If your pen skips or creates jagged lines, increase your speed slightly. Faster strokes are often smoother than slow, hesitant ones.
Step 3: Inking the Final Lines
-
Start the Ink Work:
Take your fine liner pen. Beginning at the nose, trace your pencil lines with confident, smooth strokes. Try to keep your hand steady to maintain that clean, minimalist look. -
Detail the Mane:
When inking the mane, use quick, tapered flicks of the pen to suggest texture. Don’t outline the entire mass; let the ends of the lines hang freely to show hair movement. -
Ink the Body and Legs:
Follow the contours of the back and belly. I find it helpful to ink the long lines of the legs in single clear motions rather than sketchy, feathery strokes to ensure sleekness. -
Ground the Hooves:
Carefully outline the hooves, giving them a flat bottom. Add a tiny vertical line at the back of the fetlock (the ankle area) to define the joint. -
Emphasize Muscles:
Add a few sparing interior lines—one small curve at the shoulder and a small line near the flank—to suggest muscle structure without cluttering the drawing. -
Sketch the Grass:
Around the hooves, add a few scattered, jagged squiggles to represent grass tufts. This grounds the figure so the horse isn’t floating in empty space.
Level Up: Watercolor Wash
Add a very faint, diluted wash of watercolor (like pale grey or beige) loosely over the horse’s body, intentionally letting the color bleed outside the lines.
Step 4: Finishing Touches
-
Dry and Erase:
Wait at least 5-10 minutes for the ink to dry completely. Gently erase all underlying pencil marks, careful not to smudge the fresh ink. -
Review Line Weight:
Inspect your lines. If any main contour feels too thin, go over it once more to subtly thicken it, adding weight where shadows might naturally fall, like under the belly.
Frame your minimalist horse drawing with a simple wood frame to complement the organic lines and natural theme
Stylized Horse With Exaggerated Anatomy
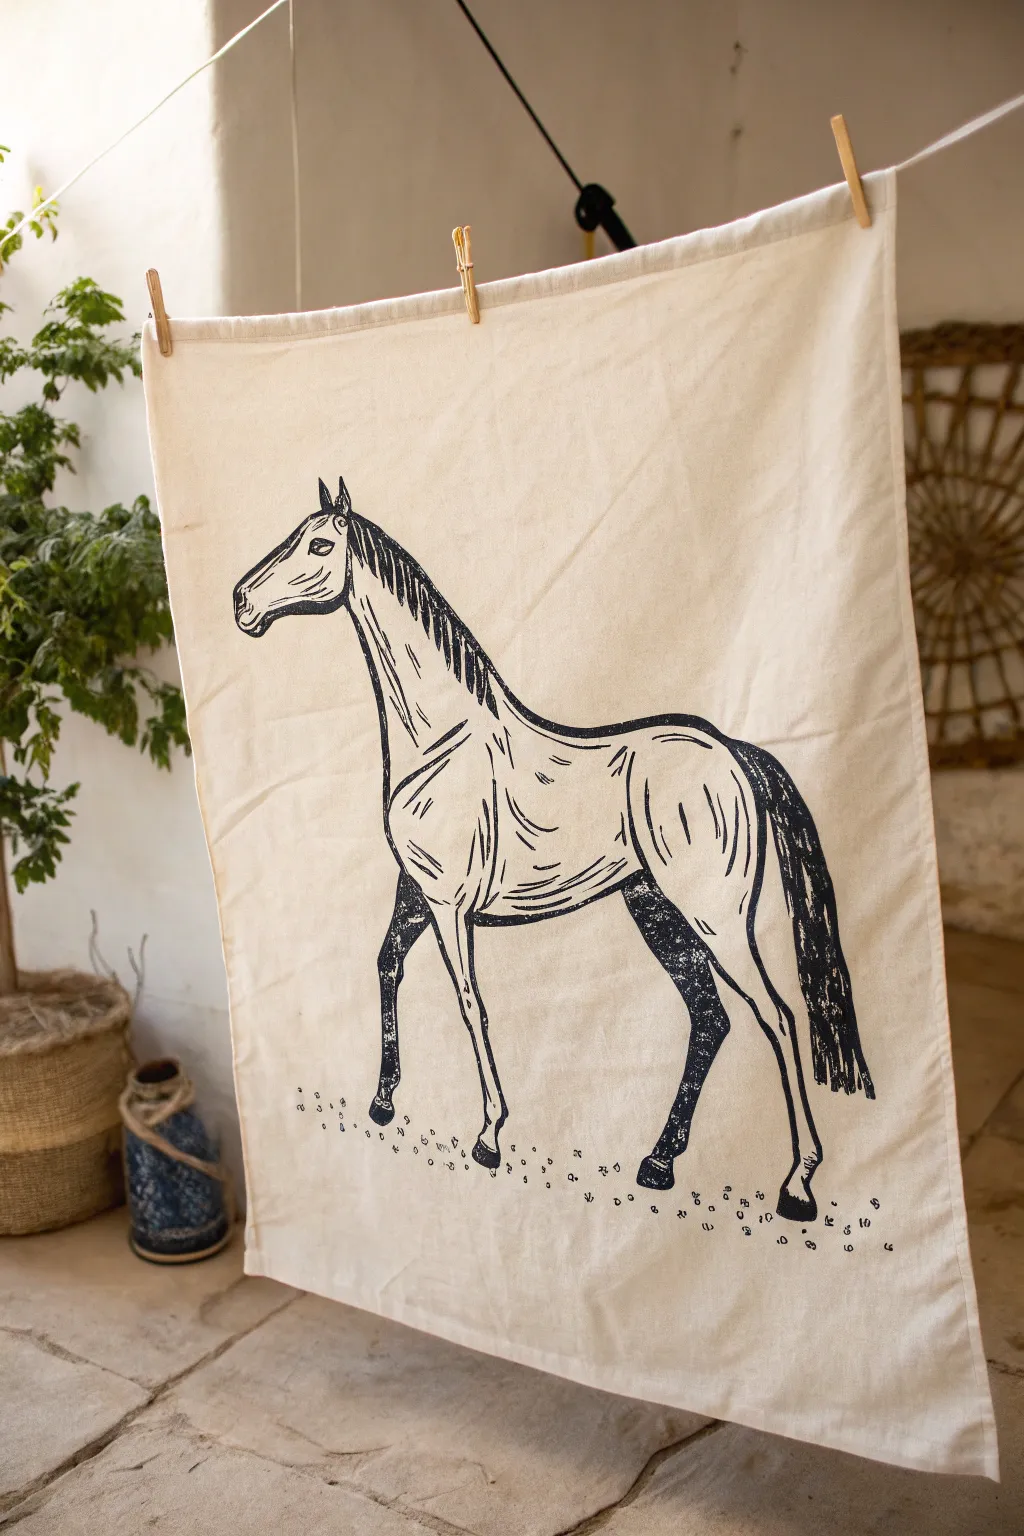
Bring a touch of rustic charm to your home with this stylized block-printed horse textiles project. The elongated lines and bold, textured shading create a timeless look perfect for tea towels or wall hangings.
Step-by-Step Guide
Materials
- White or beige cotton/linen tea towel (pre-washed)
- Soft linoleum block (at least 8×10 inches)
- Linoleum carving tools (V-gouge and U-gouge)
- Fabric ink (black or dark navy)
- Brayer (rubber roller)
- Pencil and tracing paper
- Carbon transfer paper
- Iron (for heat setting)
- Newsprint or scrap paper
- Flat, clean surface or glass slab for inking
Step 1: Design and Transfer
-
Sketch the outline:
Begin by sketching your horse design on paper. Focus on the exaggerated anatomy seen in the reference: elongate the neck significantly, slim down the legs, and give the body a sweeping, curved posture. -
Refine the details:
Add interior lines to define muscle groups. Notice how the shoulder and hip utilize hatched markings to suggest shadow and form without solid coloring. -
Prepare for transfer:
Since block printing reverses the image, if your horse needs to face a specific direction, you must flip your drawing now. Trace your final design onto tracing paper. -
Transfer to lino:
Place carbon paper face down on your linoleum block, then tape your tracing paper on top. Firmly retrace every line to transfer the design onto the soft lino surface.
Patchy Ink?
If the black areas look too faded or speckled, use a slightly softer surface under your fabric, like an old towel or foam mat, to help the block make better contact.
Step 2: Carving the Block
-
Outline the main shape:
Using a fine V-gouge tool, carve along the very outer edge of your pencil lines. This ‘outline cut’ creates a safety barrier for the rest of your carving. -
Clear the negative space:
Switch to a wider U-gouge to clear away the large background areas. You don’t need to go too deep, just enough so the fabric won’t touch these areas. -
Carve the details:
Return to your fine V-gouge for the interior details. For the mane, use short, flicking strokes to mimic hair texture. -
Create texture shading:
For the shaded areas on the legs and tail, don’t remove all the material. Instead, create a ‘noise’ texture by pecking at the lino with small gouges, leaving raised spots that will pick up ink for a gritty look. -
Add ground elements:
Carve small, irregular dots and pebbles near the hooves to ground the figure, ensuring they look scattered and organic.
Level Up: Repeating Pattern
Instead of a single large print, carve a smaller version of this horse and repeat it across a tablecloth or curtain panel to create a custom toile-style fabric.
Step 3: Printing on Fabric
-
Prepare the workspace:
Lay your fabric flat on a smooth table. I find it helpful to tape the corners down slightly so the fabric doesn’t shift when the block is lifted. -
Ink the brayer:
Squeeze a line of fabric block printing ink onto your glass slab or tray. Roll the brayer back and forth until the ink sounds ‘sticky’ and has a velvety texture. -
Ink the block:
Roll the brayer over your carved block. Apply a consistent, thin layer. Roll in multiple directions to ensure the raised details are fully coated but not flooded. -
Position the block:
Carefully hover the block over the center of your fabric (or wherever you want the design). Lower it straight down without sliding. -
Apply pressure:
Press down firmly on the back of the block. You can use a clean brayer, a baren, or even a wooden spoon to rub the back in circular motions to transfer the ink heavily. -
Reveal the print:
Hold one corner of the fabric down with one hand and slowly peel the block up with the other. This moment is always the most exciting part of the process. -
Dry and heat set:
Let the ink dry completely (usually 24 hours). Once dry, heat set the ink according to the manufacturer’s instructions, typically by ironing on the reverse side for a few minutes.
Now you have a stunning, artisanal piece of home decor ready to display or gift


Have a question or want to share your own experience? I'd love to hear from you in the comments below!