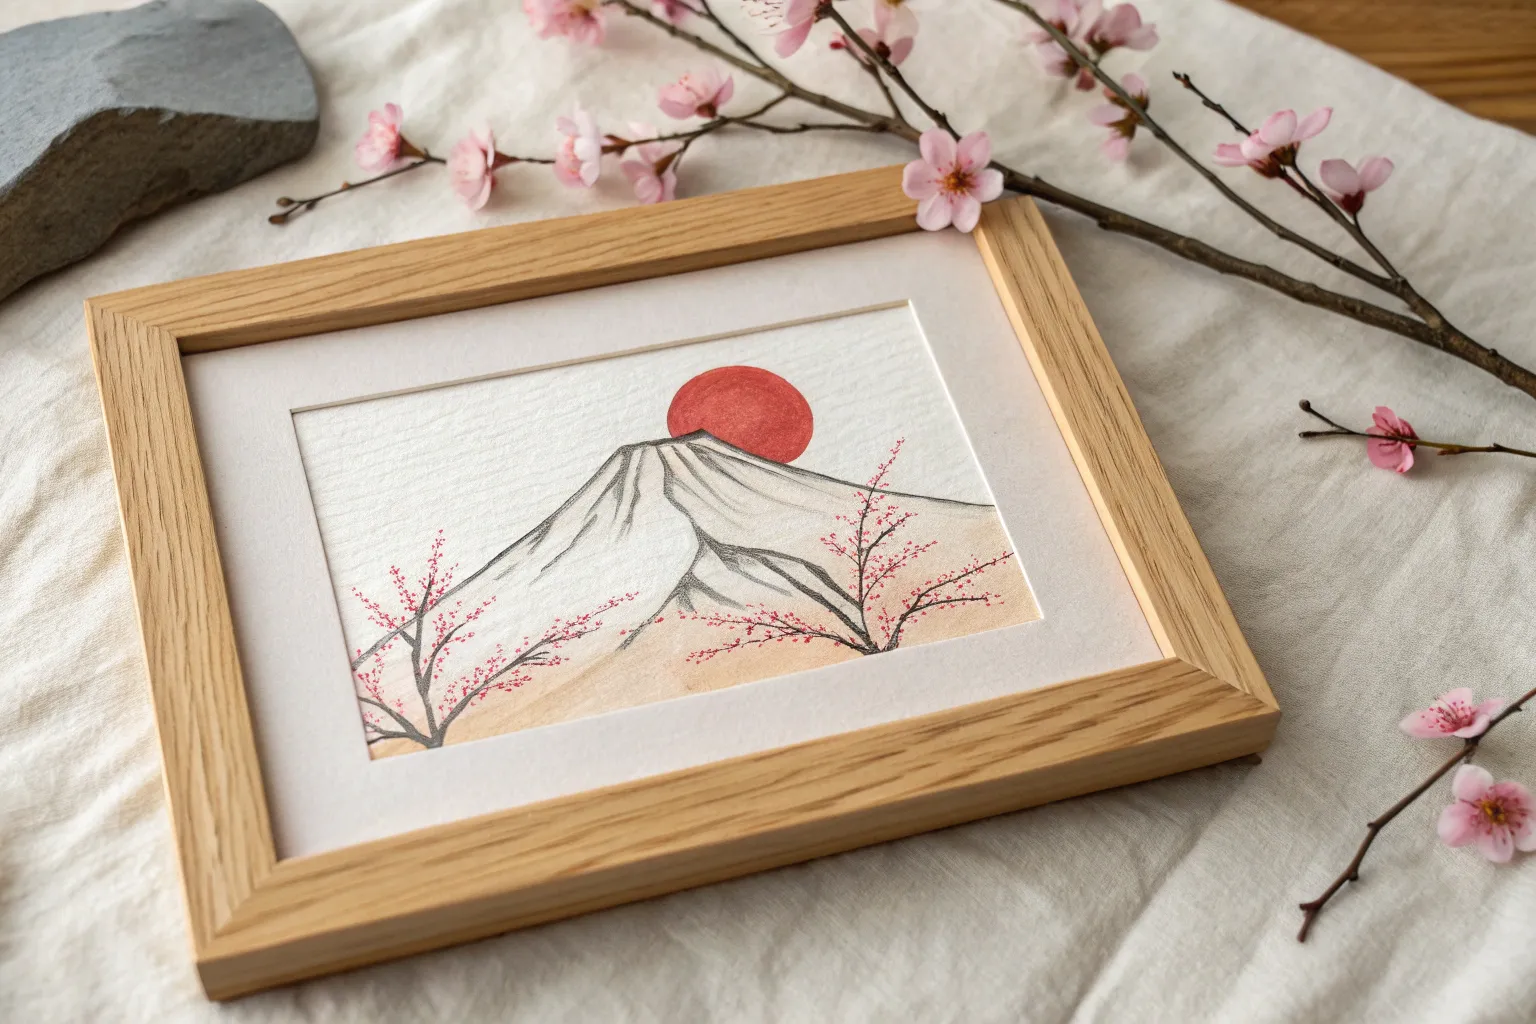
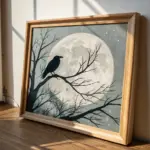
When I’m craving a painting session that feels both calming and visually bold, I always circle back to Japanese motifs—they’re timeless, graphic, and surprisingly beginner-friendly. Here are some of my favorite Japanese painting ideas you can make your own, whether you’re working in watercolor, acrylic, or ink-inspired washes.
Floating Torii Gate in Water
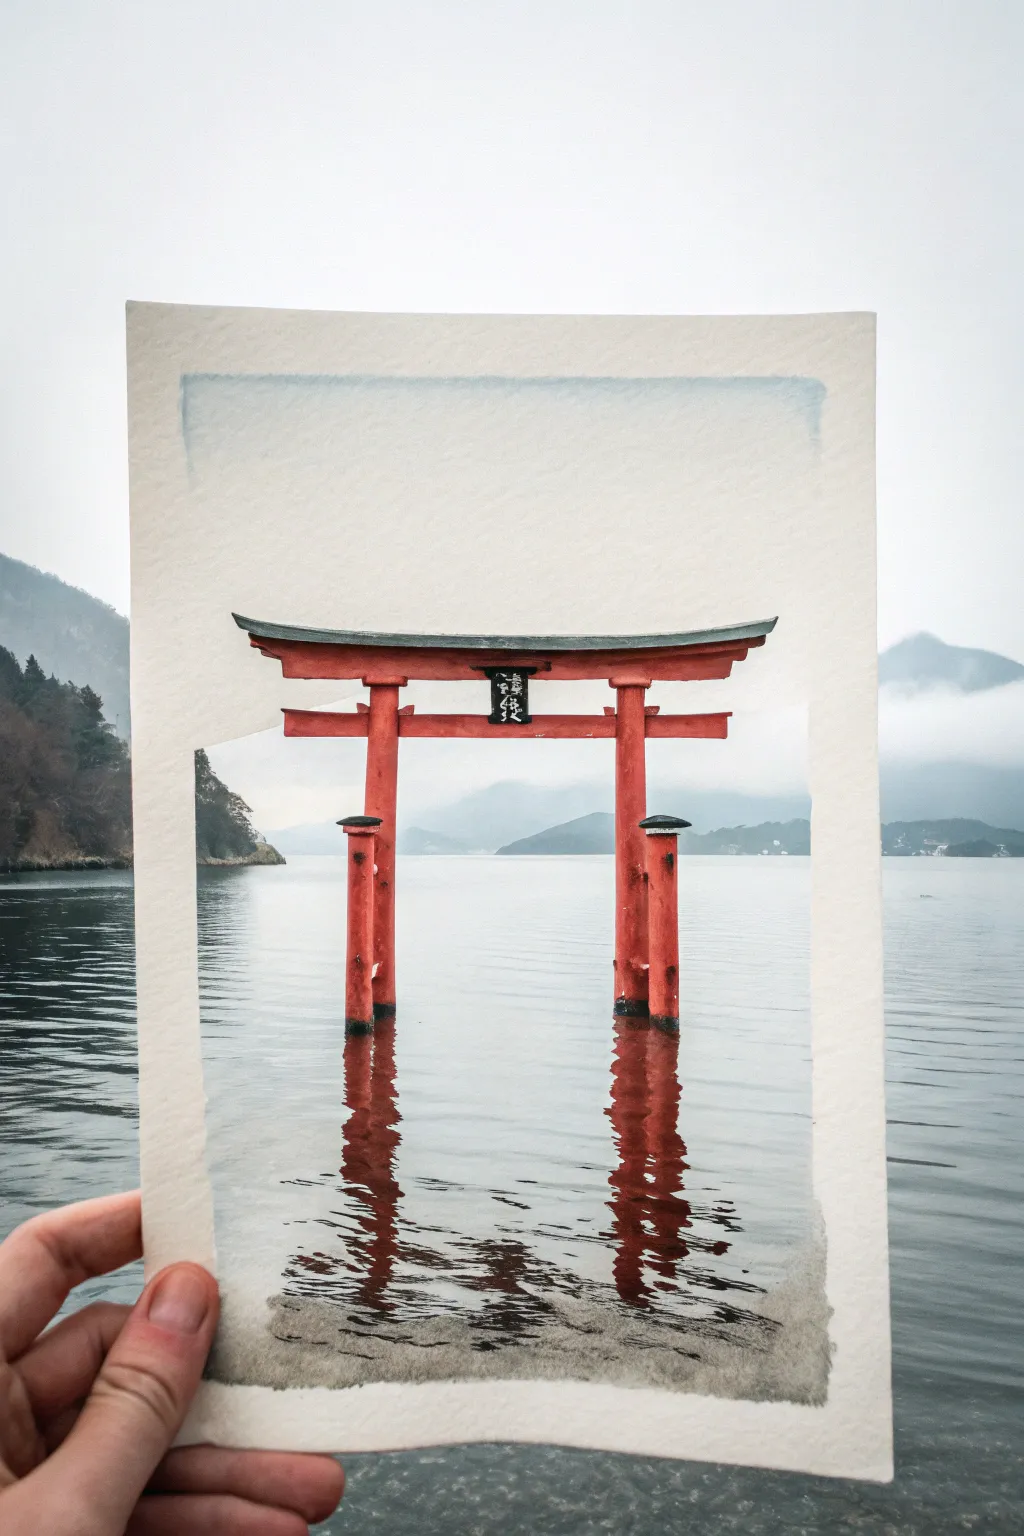
Capture the serene beauty of the iconic Japanese torii gate standing in water with this focused watercolor tutorial. You will learn to balance the vibrant red architecture against soft, misty water and distant mountains.
How-To Guide
Materials
- Cold press watercolor paper (300 gsm)
- Pencil (HB) and kneadable eraser
- Masking tape
- Watercolor paints (Vermilion, Alizarin Crimson, Payne’s Grey, Indigo, Burnt Umber, Yellow Ochre)
- Round brushes (size 4, size 8)
- Flat shader brush (1/2 inch)
- Fine liner brush (size 0 or 00)
- Jar of clean water
- Paper towel or rag
Step 1: Sketching and Preparation
-
Secure the paper:
Tape down all four edges of your watercolor paper to a board. This prevents buckling and creates that crisp white border seen in the reference photo. -
Draft the horizon:
Using your HB pencil, lightly draw a straight horizon line about a third of the way up the page. Keep this line faint as it will be covered by misty washes later. -
Outline the Torii:
Sketch the torii gate structure centrally. Start with the two main vertical pillars, ensuring they extend below the ‘water line’ for the reflection. Add the curved upper lintel (kasagi) and the lower crossbar (nuki). -
Refine the details:
Add thickness to the pillars and sketch the small rooflets on the supporting legs if you are drawing the Itsukushima style, or the simple bases for the Hakone style. Sketch the central plaque on the upper beam.
Step 2: Painting the Background
-
Wet-on-wet sky:
Wet the sky area with clean water, avoiding the gate. Drop in a very dilute mix of Indigo and Payne’s Grey along the top edge, letting it fade to white as it moves down. -
Distant mountains:
While the sky is still slightly damp but not soaking, paint the silhouette of distant mountains using a watery grey-blue mix. The damp paper will soften the edges, creating a misty atmospheric perspective. -
Base water layer:
Mix a light wash of Indigo and a touch of Green using plenty of water. Paint horizontal strokes across the water area, leaving some white paper showing for sparkle and ripples. -
Deepening the water:
While the water layer is damp, add slightly darker horizontal streaks near the bottom of the page to suggest depth and movement.
Uneven Wash?
If you get ‘cauliflowers’ or blooms in the sky, don’t panic. Gently lift the excess water with a thirsty brush or let it dry and embrace the texture as clouds.
Step 3: The Torii Gate
-
Base red layer:
Once the paper is bone dry, mix Vermilion with a touch of Yellow Ochre for a warm, bright red. Paint the entire gate structure, avoiding the black roof tops and the central plaque. -
Adding shadows:
Mix Alizarin Crimson with a tiny bit of Burnt Umber. Glaze this darker red onto the right side of the pillars and under the crossbars to create three-dimensional form. -
Roof details:
Use a thick mixture of Payne’s Grey to paint the curved roof lintel and the caps on the sub-pillars. Use the tip of your round brush to keep the edges sharp. -
The plaque:
Fill in the small central plaque with black. Once dry, you can use white gouache or a gel pen to suggest the kanji characters, or simply leave small negative spaces.
Level Up: Texture
Sprinkle a tiny pinch of salt onto the wet mountain area while it dries. This creates a speckled texture that mimics distant trees or rocky surfaces perfectly.
Step 4: Reflections and Finishing
-
Primary reflection:
Rehydrate your red mix. Beneath each pillar, paint a vertical reflection into the water. Instead of a solid line, use a zig-zag motion with your brush to mimic the distortion of ripples. -
Darkening the reflection:
Add darker crimson tones into the center of the reflection. I find this helps anchor the gate into the water so it doesn’t look like it’s hovering. -
Water interaction:
Use a damp, clean brush to gently lift a little color right where the pillars meet the water line, creating a soft ‘meniscus’ effect. -
Foreground ripples:
With your fine liner and a dark grey mix, add thin, broken horizontal lines across the reflections to show waves cutting through the image. -
Final touches:
Paint the dark, mossy texture at the very waterline of the pillars using a mix of Green and Burnt Umber. Remove the tape carefully to reveal the frame.
Enjoy the peaceful atmosphere your new painting brings to the room
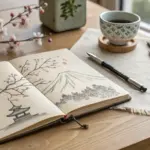

Pagoda Silhouette With Misty Hills
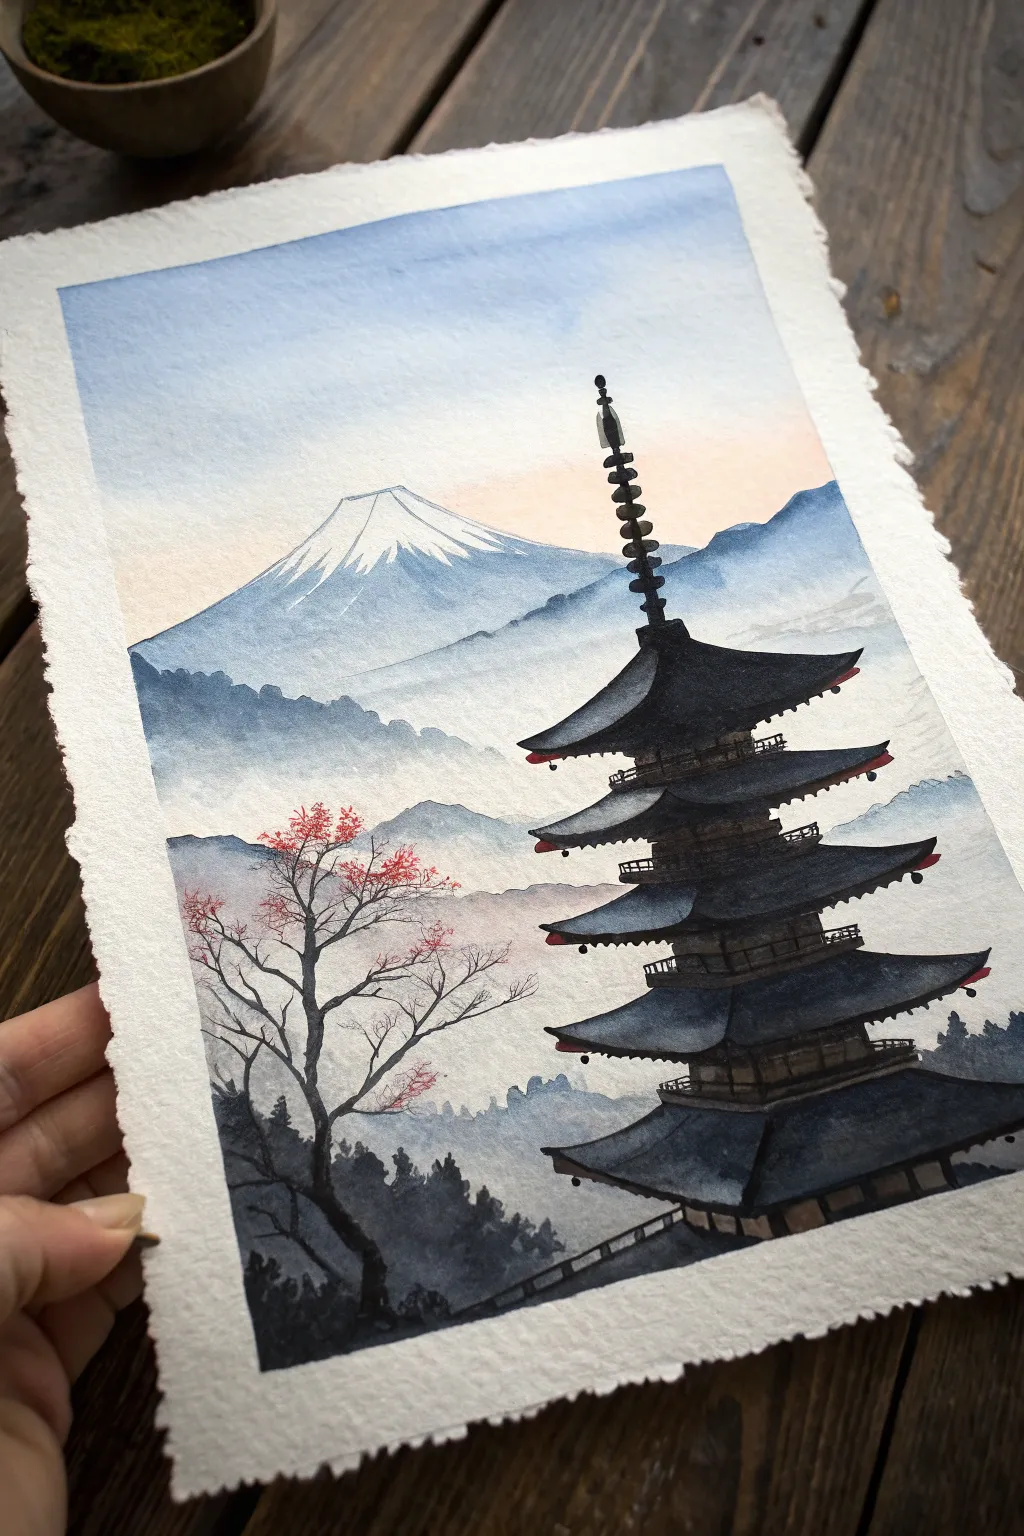
Capture the serene beauty of a Japanese landscape with this atmospheric watercolor painting defined by misty layers and sharp silhouettes. You will learn to build depth using value changes, from the faint, snowy peak of Mount Fuji to the bold, dark pagoda in the foreground.
Step-by-Step Tutorial
Materials
- Cold press watercolor paper (deckled edge optional)
- Watercolor paints (Indigo, Payne’s Gray, Ultramarine Blue, Burnt Sienna, Alizarin Crimson)
- Round watercolor brushes (sizes 4, 8, and a fine liner)
- Flat wash brush (1 inch)
- Masking fluid (optional)
- Pencil and eraser
- Paper towels
- Two jars of water
- Painter’s tape or a board
Step 1: Sketching & Sky Wash
-
Lightly Sketch the Scene:
Begin with a very faint pencil sketch. Outline the triangular shape of Mount Fuji in the upper third, slightly off-center. Sketch the rough zigzag rooflines of the pagoda on the right side, extending from the bottom up past the mountain’s horizon. Add a simple line for the main tree branch on the left. -
Prepare the Sky Gradient:
Mix a very watery wash of Ultramarine Blue. On your palette, also prepare a faint mix of Burnt Sienna or a pale orange for the horizon light. Wet the sky area of your paper with clean water, stopping just above the mountain line. -
Paint the Sky:
Apply the blue wash at the very top, letting it fade as you move down. While the paper is still damp, drop in the pale orange near the horizon line to create a soft sunset glow. Let this layer dry completely.
Pro Tip: Atmospheric Perspective
Remember: Things get lighter and bluer the further away they are. Keep your mountain pale and cool, and make your pagoda dark and warm to push it forward.
Step 2: Painting the Mountain & Mist
-
Paint Mount Fuji’s Peak:
Mix a cool, light blue using Ultramarine and a touch of Indigo. Paint the body of the mountain, carefully leaving the jagged, snow-capped peak white (use the white of the paper). Soften the bottom edge of the mountain with a clean, damp brush to make it fade into mist. -
Create the First Range of Hills:
Mix a slightly darker blue-grey value. Paint the silhouette of the farthest hills just below the mountain. As you paint downwards, add more water to your brush to fade the color out, creating that misty ‘fog’ effect at the bottom of the hills. -
Layering Closer Hills:
Once the previous layer is dry, mix an even darker value—perhaps adding a touch of Payne’s Gray. Paint the next range of hills closer to the foreground. Again, keep the top edge sharp and distinct, but fade the bottom edge out with water to maintain the misty atmosphere. -
Establish the Foreground Terrain:
For the closest hills at the very bottom, use a strong mix of Payne’s Gray and Indigo. Paint these shapes with undulating tops to suggest trees or rolling land, letting them anchor the bottom of the composition.
Step 3: The Pagoda Structure
-
Base Color for Roofs:
The pagoda is the darkest element. Mix a dense, dark grey (almost black) using Indigo and Burnt Sienna or straight Payne’s Gray. Using a size 4 brush, carefully paint the sweeping roof shapes, curving the corners upward slightly. -
Adding Architectural Details:
Switch to your fine liner brush. Connect the roof layers with vertical lines for the walls and central pillar. Keep these lines fairly straight but allow for small gaps to suggest wooden construction. -
The Spire (Sorin):
Paint the decorative spire at the very top of the pagoda. Use the tip of your smallest brush to create the stacked, ring-like shapes, ensuring the vertical alignment stays straight. -
Adding Depth to the Roofs:
I like to go back in while the paint is just damp and drop darker pigment into the underside of the eaves. This enhances the 3D form and makes the shadows look deeper. -
Small Accents:
Use a tiny touch of red (Alizarin Crimson) to add subtle hanging decorations or bells under the corners of the eaves if desired, mimicking the reference style.
Troubleshooting: Cauliflowers
If you see blooming textures in your smooth sky, you likely added water while the paper was semi-drying. Wait for layers to be 100% dry before re-wetting.
Step 4: Foreground Tree & Details
-
Paint the Tree Trunk:
Using your dark grey mix, paint the gnarly tree trunk on the left side. Start thicker at the base and taper the branches as they reach upward and outward. Use a shaky hand motion to make the branches look organic. -
Add Fine Branches:
Switch to your liner brush (rigger brush) to pull out very thin, wispy twigs from the main branches. Let them reach into the misty areas of the background. -
Blossom Splatter:
Mix a concentrated red-orange. You can paint individual dot clusters for leaves, or for a looser look, tab a loaded brush against your finger to splatter tiny droplets onto the tree branches. -
Final Balcony Railing:
At the very bottom right, paint the diagonal railing or stairs leading up to the pagoda. Keep this silhouette sharp against the misty background. -
Review and Refine:
Check your values. If the mountains faded too much when drying, add a gentle glaze of blue over them. Ensure your darks (pagoda and tree) are truly dark to create contrast with the mist.
Peel off your tape to reveal the crisp edges or enjoy the natural look of your deckled paper edge.


Zen Enso With Minimal Landscape
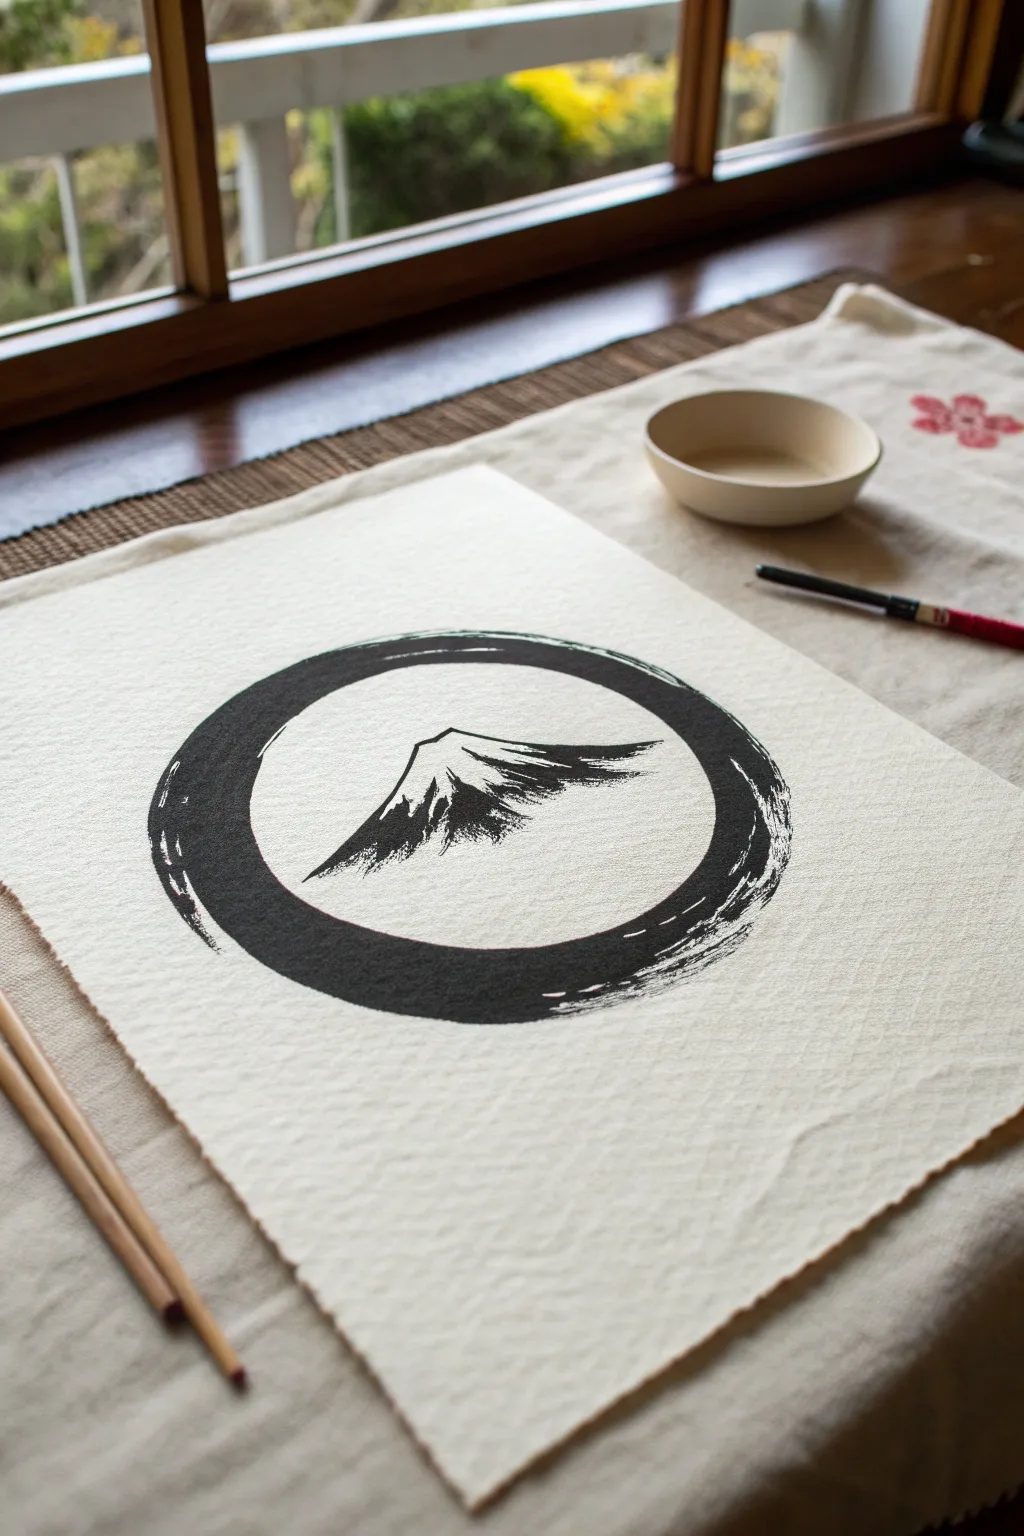
Capture the serenity of a Japanese landscape by combining the profound simplicity of an Enso circle with a minimalist mountain peak. This monochrome ink wash painting uses negative space to bold effect, creating a striking centerpiece for any meditation corner.
How-To Guide
Materials
- High-quality Washi paper or cold-press watercolor paper with deckled edges
- Sumi ink (liquid or stick)
- Medium-sized bamboo calligraphy brush
- Small Fine-point liner brush
- Ink stone or small ceramic dish
- Water container for rinsing
- Paper towels for blotting
- Pencil (optional for light sketching)
Step 1: Preparation and Practice
-
Prepare your ink:
Pour a small amount of Sumi ink into your ceramic dish. If you are using an ink stick, take the time to grind it against the stone with a little water until you achieve a deep, rich black consistency. -
Test your brush strokes:
Before touching your final paper, practice on a scrap sheet. Load your bamboo brush and experiment with pressure—press down for thick lines and lift up for trailing, dry-brush effects. This practice is crucial for the Enso circle. -
Center your composition:
Ideally, you want the Enso to float in the center of the page with ample white space. You can lightly mark the center point with a pencil if you don’t trust your eye, but keep it very faint.
Master the ‘Flying White’
Move your brush faster during the Enso stroke to create ‘hakuhaku’—streaks where the paper shows through the ink, adding instant energy and texture.
Step 2: Painting the Enso Circle
-
Load the brush:
Fully saturate your medium bamboo brush with ink. Wipe the excess slightly on the rim of the dish so it isn’t dripping wet; you want enough ink for a long stroke but control over the flow. -
Position the brush:
Hold the brush vertically (perpendicular to the paper) a few inches above your starting point, usually at the bottom or left side of where the circle will be. -
The breath:
Take a deep breath in. As you begin to exhale, lower the brush to the paper. -
Execute the stroke:
In one fluid, continuous motion, paint the circle. Don’t worry about closing it perfectly. Allow the bristles to splay slightly for texture, and let the ink run naturally dry toward the end of the stroke (flying white effect). -
Review the shape:
The beauty of an Enso is its imperfection. Avoid the temptation to fix or touch up the circle once the stroke is made. Let the ink settle and dry completely before moving to the center.
Step 3: Creating the Mountain
-
Switch brushes:
For the mountain detail, switch to your finer brush. You can still use the larger one if it has a very sharp point, but a smaller brush offers more control for the peak. -
Dilute the ink slightly:
For the mountain shading, I prefer to add a drop of water to a corner of my ink dish to create a slightly lighter grey tone, reserving the pitch black for the sharpest shadows. -
Outline the peak:
Start near the center of your Enso circle. Using the tip of the brush, paint the jagged, triangular outline of the mountain summit. Keep the top line crisp to define the snow cap. -
Add the shadows:
Using the side of the brush, drag ink downwards from the peak outline. Use a ‘dry brush’ technique here—blot the brush on a towel first—to create the rough texture of rock breaking through snow. -
Deepen the contrast:
Dip just the very tip of the brush into undiluted black ink. Add varied, jagged strokes into the shadow side of the mountain to create depth and drama. -
Fade the base:
Do not paint a bottom line for the mountain. Instead, let your downward strokes fade out into the white of the paper. This suggests mist or clouds and integrates the mountain seamlessly into the void of the circle. -
Final drying:
Let the artwork dry flat. Sumi ink can buckle paper if it’s too wet, so patience is key here to maintain a flat surface.
Add a Red Seal
Finish the piece by carving a simple eraser stamp of your initial. Stamp it in red ink near the bottom corner for an authentic signature chop.
Once dry, display your painting in a simple frame to maintain the meditative atmosphere you’ve created


Seigaiha Wave Pattern Background
This serene mixed-media piece combines the traditional repeating Seigaiha wave pattern with a watercolor landscape. By using negative space to imply the majestic Mount Fuji, you create a striking balance between rigid geometry and soft, organic washes.
Detailed Instructions
Materials
- Cold press watercolor paper (deckle edge preferred)
- Indigo or Prussian Blue watercolor paint
- Cadmium Red or Crimson watercolor paint
- Burnt Umber or Sepia watercolor paint
- Fine liner brush (size 0 or 00)
- Round watercolor brush (size 4 or 6)
- Pencil and eraser
- Compass or circle template (optional)
- Ruler
- Masking fluid (optional)
Step 1: Planning and Composition
-
Lightly sketch the layout:
Begin by lightly sketching the outline of Mount Fuji in the center of your page. You don’t need detailed lines, just the iconic sloping shape to serve as a boundary. -
Define the wave zone:
Mark the area above the mountain where your wave pattern will live. This box or section shouldn’t touch the mountain’s peak but should fade out just before it. -
Sketch the Torii gate:
In the lower third, draw the Torii gate. Place it off-center or centered depending on your preference, ensuring the posts extend down into where the misty foothills will be.
Steady Hands
For the concentric waves, try rotating the paper 90 degrees if you find drawing curves easier in a specific direction.
Step 2: Creating the Seigaiha Pattern
-
Establish the grid:
For the wave pattern, use a pencil to draw very faint horizontal guidelines across the top section. Space them evenly, perhaps half an inch apart. -
Mark arch centers:
Along these lines, mark dots where the center of each semi-circle arch will sit. Remember that Seigaiha waves are staggered, like bricks in a wall. -
Paint the first arches:
Mix a strong consistency of Indigo or Prussian Blue. Using your fine liner brush, paint the concentric arches. Start with the outermost curve of each wave and work inward. -
Maintain brush control:
Keep your hand steady. Variations in line thickness add character, so don’t worry about machine-like perfection. -
Fade the pattern:
As you paint rows closer to the Mount Fuji outline, lift your brush pressure and perhaps dilute the paint slightly. Stop the pattern abruptly to create the ‘white’ shape of the mountain using the negative space.
Step 3: Painting the Foreground
-
Paint the Torii gate:
Switch to your red paint. Carefully fill in the Torii gate sketch. Use a highly pigmented mix for the top lintel and posts to make it pop against the white paper. -
Add gate details:
Once the red layer is dry, mix a tiny amount of dark blue or black to outline the roof ridge and the small central plaque on the gate. -
Anchor the gate:
Use a touch of Burnt Umber mixed with a little blue to paint the stone bases (kamebara) at the foot of each post. -
Create the misty mountains:
Wet the bottom area of the paper with clean water, avoiding the red gate posts. Drop in diluted blue paint (the same shade used for the waves) to create soft, misty foothills. -
Layer the foliage:
While the wash is still damp but not soaking, dab in more concentrated blue pigment to suggest trees and bushes at the very bottom edge. Let these bloom slightly for a soft focus effect. -
Connect the elements:
Ensure the darker blue foliage sits behind the stone bases of the Torii gate, grounding the structure in the landscape.
Metallic Touch
Trace the outermost curve of random waves with gold watercolor or a metallic pen for an elegant, gilded finish.
Enjoy the calm accomplishment of seeing your landscape emerge from simple repeated lines
BRUSH GUIDE
The Right Brush for Every Stroke
From clean lines to bold texture — master brush choice, stroke control, and essential techniques.
Explore the Full Guide
Mini Folding Screen Landscape Pair
Capture the serenity of traditional Japanese art with this exquisite miniature folding screen. Combining gentle watercolor washes with precise ink details, you will create a tranquil diptych featuring a misty mountain view and a classic pagoda architecture.
How-To Guide
Materials
- Two 4×8 inch wooden panels or heavy illustration board
- Cream-colored silk or high-quality rice paper (washi)
- Watercolor paints (Payne’s Grey, Sap Green, Burnt Umber, Yellow Ochre, Indigo)
- Sumi ink or black waterproof fineliner pens (01 & 03 sizes)
- Gold metallic paint or gold leafing pen
- Self-adhesive textured gold trim or washi tape
- Two small brass hinges and screws
- Matte medium or acid-free glue
- Soft wash brushes and fine detail brushes (000 size)
- Pencil and eraser
Step 1: Preparing the Base
-
Surface Prep:
Cut your silk or rice paper slightly larger than your two wooden panels. If using silk, mount it to the backing board using matte medium, smoothing out any air bubbles gently from the center outward. -
Initial Sketch:
Lightly sketch the horizon lines on both panels. On the left panel, mark the position of the sloping hill and the large pine tree. On the right, outline the vertical pagoda structure and foreground grasses. Keep lines very faint.
Uneven Watercolors?
If your mist looks blotchy, re-wet the area with clean water and lift excess pigment with a paper towel, then re-apply a lighter wash.
Step 2: Painting the Landscape – Left Panel
-
Distant Mountains:
Mix a very watery wash of Indigo and Payne’s Grey. Paint the distant mountain peak (resembling Mt. Fuji) at the top, letting the color fade into nothingness as you move down to create a misty effect. -
Middle Ground Mist:
Using a wet-on-wet technique, dab soft gray-green clouds in the middle section to suggest distant forests shrouded in fog. Allow this layer to dry completely. -
The Pine Tree Trunk:
With fine brush and Burnt Umber, paint the gnarled trunk of the pine tree. Add texture to the bark with touches of black ink, keeping the lines crooked and organic. -
Pine Needles:
Stipple clusters of Sap Green mixed with a touch of black for the pine needles. Use a dry brush technique here to keep the foliage looking airy and separated. -
Foreground Slopes:
Wash the bottom slope with Yellow Ochre and muted brown. While damp, drop in darker pigment near the bottom edge to create weight and shadow.
Step 3: Painting the Landscape – Right Panel
-
Pagoda Architecture:
Use your 01 fineliner or smallest brush with ink to draw the pagoda roofs. Focus on the upward sweep of the corners. Fill the roof sections with a dark grey wash. -
Structural Details:
Carefully draw the horizontal beams and vertical posts of the pagoda in reddish-brown. I find using a ruler for the main vertical axis helps keep the structure straight before adding freehand details. -
Hanging Branches:
At the top right, paint delicate, weeping branches coming down into the frame. Use quick, confident strokes with diluted red-brown ink to create the feathery leaves. -
Foreground Grasses:
Paint tall, thin stalks of grass rising from the bottom right corner using Yellow Ochre. Add tiny ‘v’ shapes for the seed heads. -
Atmosphere:
Add a very faint wash of grey behind the pagoda to suggest distant hills, mirroring the style of the left panel for continuity.
Antique Aesthetic
Lightly sponge tea or diluted coffee over the dried paper before painting to give the background an aged, vintage parchment look.
Step 4: Assembly and Framing
-
Sealing the Art:
Once the paint is fully dry, trim any excess paper or silk flush with the edges of your wooden panels. Apply a protective spray fixative if you used watercolors. -
Gilded Edges:
Paint the thin outer edges of the wooden panels with metallic gold paint for a luxurious finish. -
Applying Trim:
Measure and cut your textured gold trim. Adhere it to the front face borders of both panels to frame the artwork, creating mitered corners at 45-degree angles for a professional look. -
Hinoe Installation:
Place the two panels side-by-side with a tiny gap between them (about 1-2mm). Mark the hinge positions. -
Final Assembly:
Screw the small brass hinges into place, connecting the two panels. Test the folding mechanism gently to ensure it stands open on its own.
Now you have a serene, self-standing landscape piece that brings a quiet moment of nature to your shelf
Fan-Shaped Summer Scene
Transform a plain paper fan into a serene evening landscape inspired by traditional Japanese aesthetics. This project focuses on capturing the ethereal transition from a starry twilight blue to a soft peach horizon, framed by delicate silhouettes of architecture and cherry blossoms.
Step-by-Step
Materials
- Blank paper folding fan (Sensu) – white or cream
- Watercolor paints (Indigo, Prussian Blue, Peach/Coral, Black)
- White gouache or acrylic ink
- Soft round watercolor brushes (sizes 4 and 8)
- Fine liner brush or detail brush (size 0 or 00)
- Palette for mixing
- Clean water jars
- Painter’s tape or stencil tape (low tack)
- Paper towels
Step 1: Preparing the Canvas
-
Flatten the fan:
Begin by carefully opening your blank fan on a flat surface. Because the ridges can make painting difficult, gently press it down. Tape the wooden outer guards to your work surface with low-tack tape to keep the fan fully extended and stable while you work. -
Moisten the paper:
Using a clean, wide brush, apply a very light wash of clean water across the entire paper surface. You want the paper damp but not soaking wet; this helps the colors blend seamlessly for the gradient sky.
Step 2: Painting the Gradient Sky
-
Apply the peach horizon:
Mix a watery consistency of Peach or Coral paint. Start painting from the bottom edge of the fan (near the wooden ribs) and work your way up about one-third of the fan’s height. Keep the stroke edges soft and irregular. -
Introduce the deep blue:
Mix a rich Indigo or Prussian Blue. Start painting from the very top curved edge of the fan, bringing the color downwards. The ribs of the fan will create natural texture, which is lovely, so don’t try to fight it too much. -
Blend the transition:
Where the blue meets the peach, clean your brush and use slightly damp strokes to blend the two hues. Allow them to bleed into each other to create a misty, twilight transition color. -
Deepen the night sky:
While the paper is still slightly damp, add a second, more concentrated layer of Indigo to the top left section to create depth and emphasis on that side of the composition. -
Let it dry completely:
This is crucial. The paper must be bone dry before you add crisp details on top. If you rush this, the black ink will bleed into the background.
Paint Soaking Through?
Fan paper is absorbent. If paint bleeds through to the wooden ribs, slide a piece of wax paper between the paper and the ribs before painting, or simply use less water (dry brush).
Step 3: Adding the Silhouette Details
-
Draft the pagoda placement:
Using a very light pencil or a pale wash of paint, roughly mark where the pagoda will sit on the right side. It should be positioned in the lower third, nestling into the landscape. -
Paint the pagoda roof:
Switch to your fine liner brush and black watercolor (or ink). Start with the distinctive curved roof of the pagoda. Use the tip of the brush to flick the corners upward slightly. -
Fill the structure:
Paint the body of the pagoda below the roof. Leave tiny negative spaces (unpainted spots) to suggest windows or architectural details, rather than painting a solid black block. -
Anchor the building:
Extend the black paint downwards to create a rocky, uneven ground beneath the pagoda. Use a scumbling technique (scrubbing the brush) to create texture that looks like bushes or rocks. -
Add the right-side tree:
From the rocky base on the right, draw a thin, branching tree trunk reaching up towards the peach sky. Keep the branches delicate and spindly. -
Create the left-side foliage:
On the far left side of the fan, paint thin black branches reaching in from the edge. This frames the scene and balances the visual weight of the pagoda.
Level Up: Gold Accents
Use metallic gold watercolor for the stars or to tint the edges of the cherry blossoms. It catches the light beautifully when the fan is in motion during use.
Step 4: Finishing Touches
-
Stipple the blossoms:
Mix a reddish-pink color. Using an old or slightly splayed brush, gently stipple (dab) color around the tree branches on both the left and right sides to create soft clusters of cherry blossoms. -
Layer the blossoms:
Once the pink is dry, add a few tiny dots of darker red or white gouache within the flower clusters to add dimension and mimic light hitting the petals. -
Add the stars:
Using opaque white gouache or a white gel pen, add tiny dots to the dark blue section of the sky. Vary the sizes slightly, making some faint and others bright. -
Seal the fan (optional):
If you plan to use the fan frequently, apply a very light coat of matte creative fixative spray to protect the pigments from moisture. -
Remove tape and fold:
Gently peel off the painter’s tape. Before closing the fan, re-crease the folds carefully by hand, as the paint stiffens the paper slightly. Work slowly fold by fold to reshape it.
Your personalized fan is now ready to keep you cool with a touch of artistic elegance


Have a question or want to share your own experience? I'd love to hear from you in the comments below!