If you’ve been craving fresh Jesus painting ideas, I’ve got you covered with options that range from classic and reverent to modern and boldly expressive. Think of this as a cozy studio brainstorm where you can pick a style that matches your skill level and the feeling you want your Jesus artwork to carry.
Classic White Robe and Red Sash
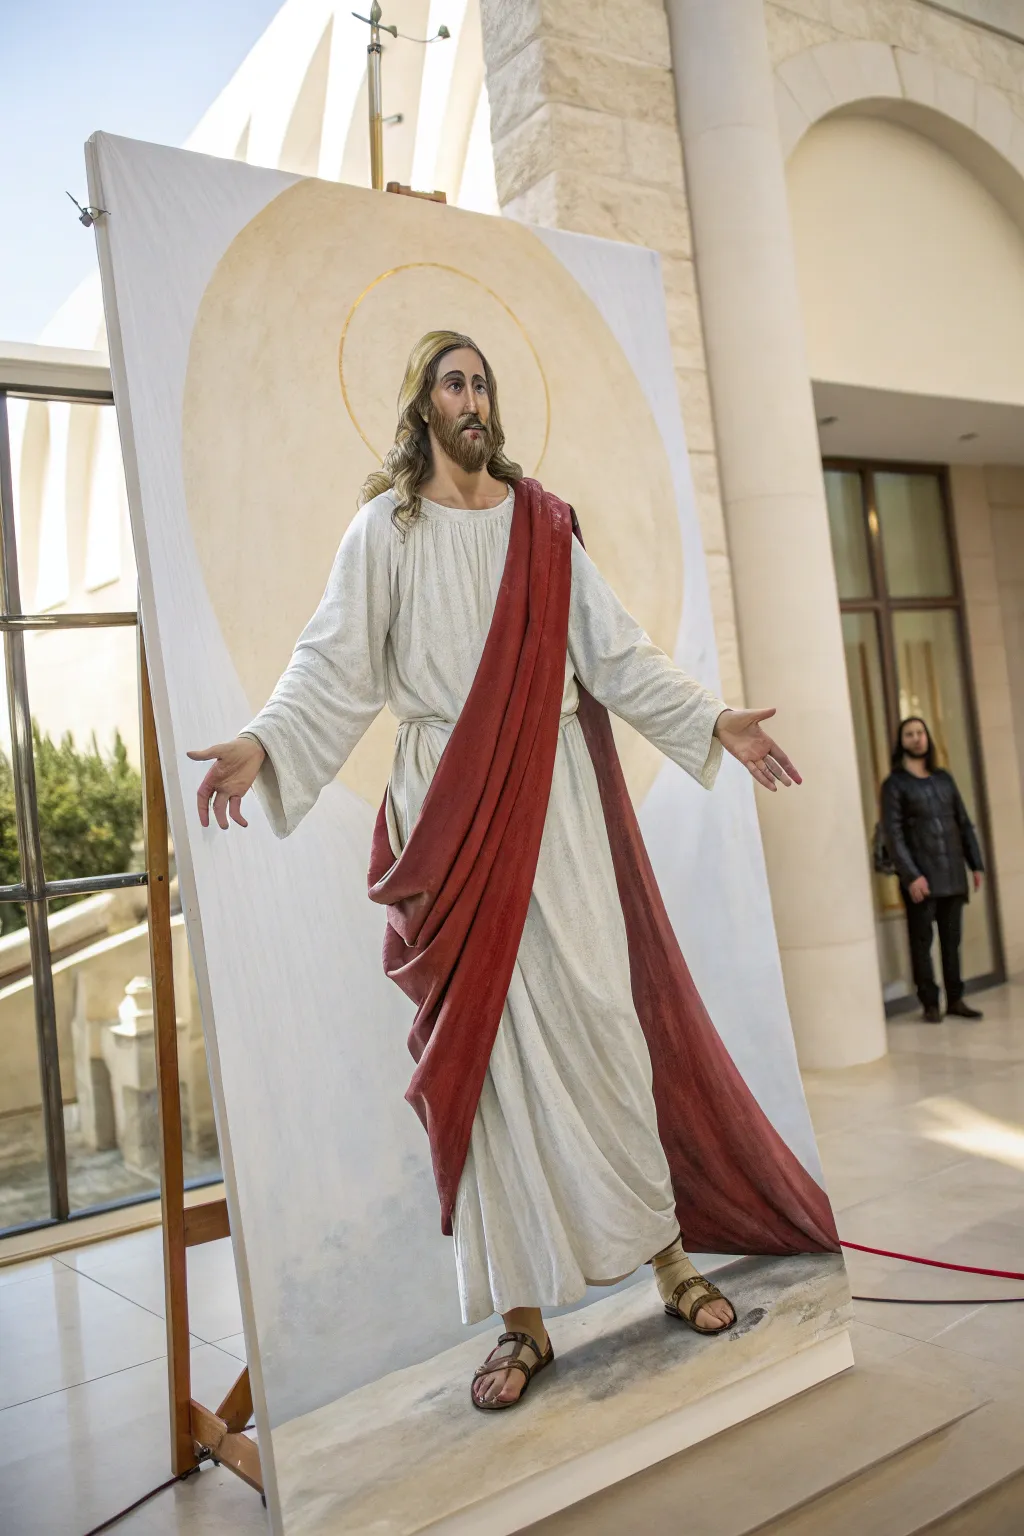
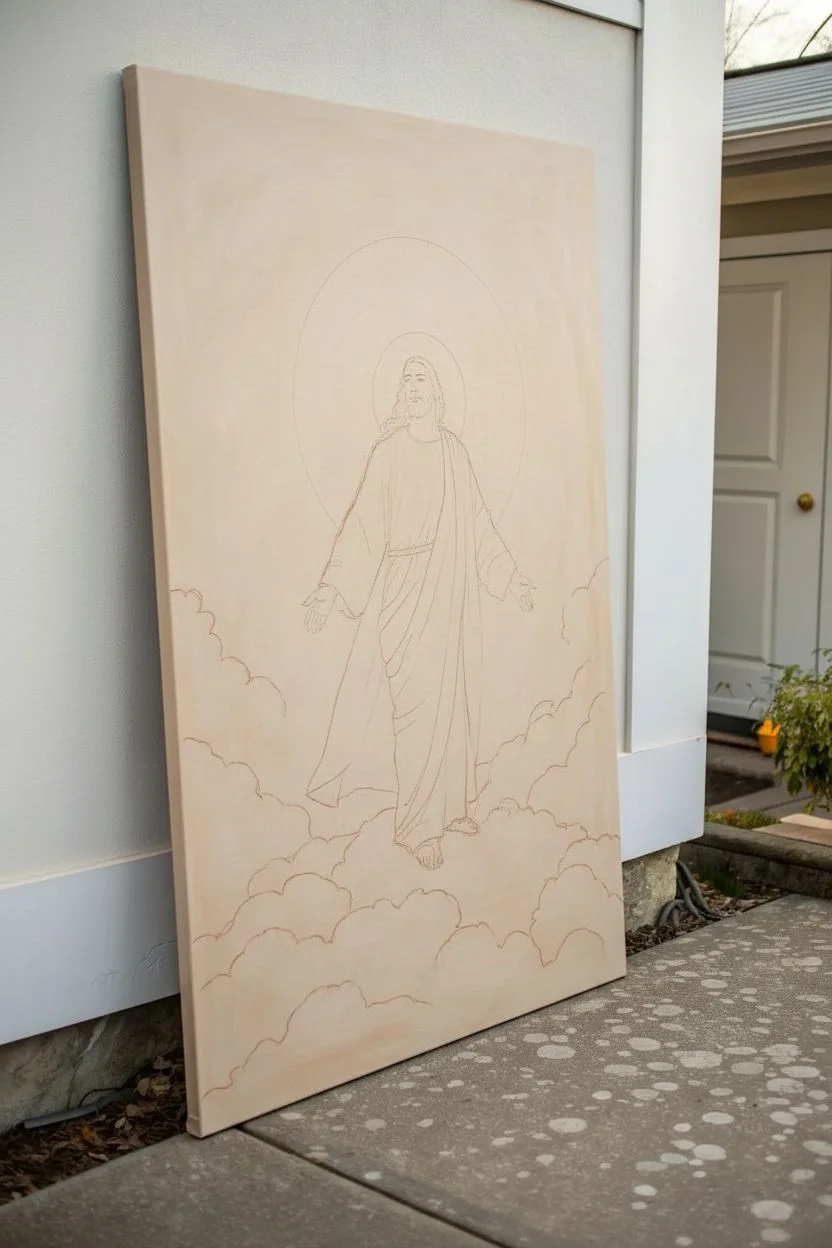
This ambitious project combines a large-scale backdrop painting with a high-relief dimensional figure to create a striking, life-sized representation of Jesus in the classic white robe and red sash. The result is a museum-quality display piece that plays with depth and light to bring the sacred subject into three-dimensional reality.
Step-by-Step Tutorial
Materials
- Large wooden panel (MDF or plywood, approx. 4×8 ft)
- Wooden easel or supporting frame
- High-density foam or polystyrene blocks (for sculpting)
- Foam cutter or serrated carving knife
- Paper clay or sculpting epoxy
- Gesso primer
- Acrylic paints (Titanium White, Burnt Umber, Crimson Red, Yellow Ochre, Gold)
- Fine grit sandpaper
- Canvas fabric or muslin (for drapery)
- Fabric stiffener or PVA glue
- Heavy-duty construction adhesive
- Various paintbrushes (large flats for background, rounds for details)
- Gold leaf or metallic paint pen
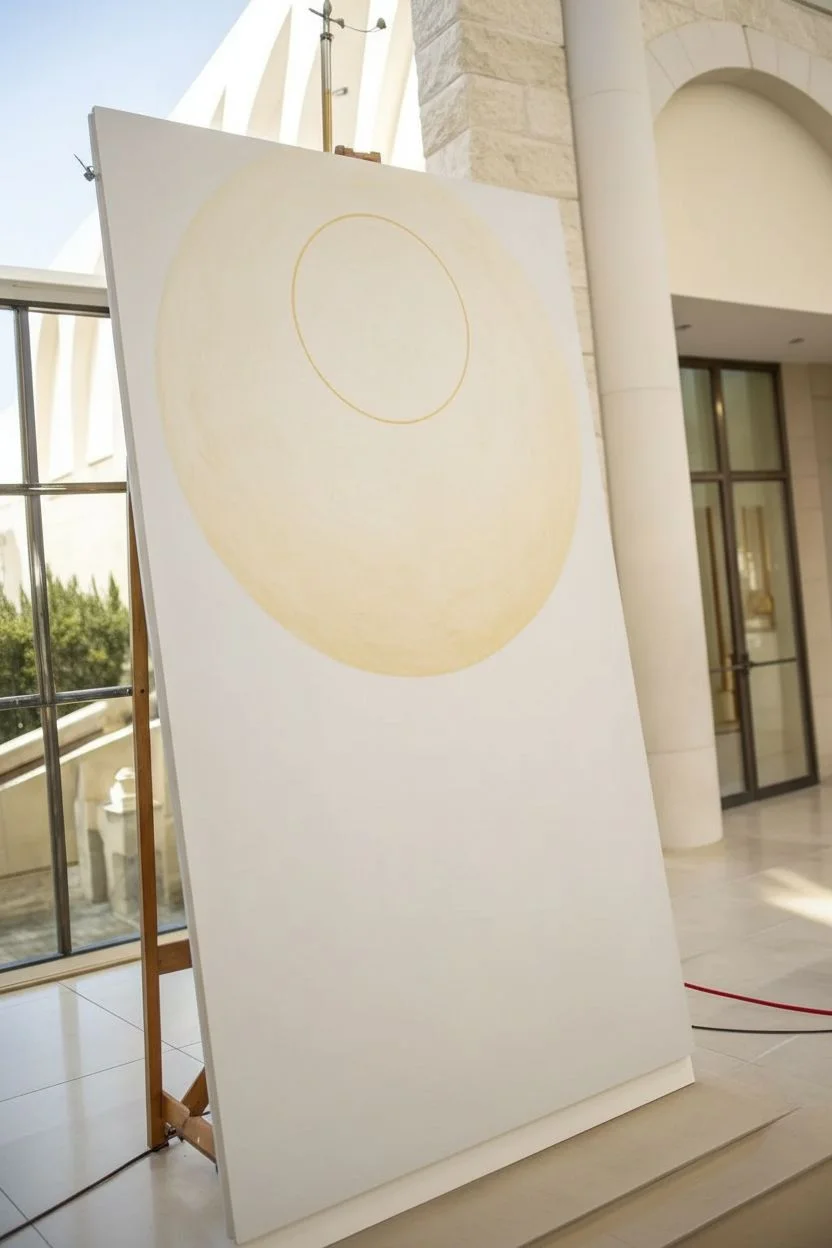
Step 1: Preparing the Backdrop
-
Prime the Surface:
Begin by coating your large wooden panel with two layers of white gesso. Sand lightly between coats to ensure a smooth surface for painting. -
Draft the Halo:
Locate the upper center of your board where the figure’s head will be positioned. Use a large compass or string-and-pencil method to draw a large, perfect circle for the halo. -
Paint the Halo:
Mix Titanium White with a touch of Yellow Ochre and Gold to create a pale, luminous celestial color. Fill in the large circle, keeping the paint application fairly flat but allowing some subtle brush texture for visual interest. -
Add the Inner Ring:
Once the base halo is dry, carefully paint a thin, distinct gold line inside the larger circle to frame where the head will eventually be placed. This acts as a secondary nimbus. -
Background Values:
Paint the remaining area of the board outside the halo with a very pale, cool grey or off-white. This subtle contrast will make the warm tones of the halo pop forward.
Sculpting Tip
To get realistic fabric folds without rushing, drape dry fabric first to test the look. Take a photo for reference, then dip in glue and recreate it.
Step 2: Sculpting the Figure Base
-
Carve the Form:
Using high-density foam blocks, carve the basic anatomical forms for the head, torso, outstretched arms, and feet. You don’t need fine detail yet, just accurate proportions and pose. -
Refine Features:
Apply a layer of paper clay or sculpting epoxy over the foam head, hands, and feet. While wet, sculpt the facial features, beard texture, and fingers. I find using a small loop tool helps carve out the deep waves in the hair. -
Mounting the Core:
Secure the foam core of the figure to the painted wooden panel using heavy-duty construction adhesive. Ensure the head aligns perfectly with the center of your painted halo.
Level Up: Realism
Instead of sculpting sandals, use real leather strips and miniature buckles on the statue’s feet for an incredible mixed-media touch.
Step 3: Drapery and Fabric
-
Prepare the Robe:
Cut your muslin or canvas fabric into large sections. Dip them thoroughly into a mixture of fabric stiffener or diluted PVA glue until saturated. -
Drape the White Tunic:
Arrange the wet fabric over the foam body to form the white tunic. Create realistic folds by pinching and gathering the material at the waist and allowing it to fall naturally towards the feet. Let this dry completely until hard. -
Add the Red Sash:
Repeat the process with another length of fabric for the sash. Drape it over the left shoulder and across the body, creating deep, heavy folds that sweep down the side. This adds the critical diagonal movement to the composition.
Step 4: Painting the Dimensional Figure
-
Base Coat the Figure:
Paint the hardened fabric tunic with Titanium White, mixing in a tiny drop of grey for the shadowed recesses of the folds to emphasize depth. -
Color the Sash:
Paint the sash a deep Crimson Red. Use a darker maroon mix for the deepest crevices of the fabric folds and a dry-brushed lighter red for the high points to simulate velvet or heavy wool. -
Skin Tones and Details:
Paint the face, hands, and feet using flesh tones mixed from White, Ochre, and a touch of Burnt Sienna. carefully paint the eyes and beard using fine brushes. -
Add Sandals:
Paint the straps of the sandals on the feet using a dark leather brown. If you sculpted physical straps, highlight their edges; otherwise, paint them carefully onto the foot form. -
Final Assembly:
Attach the sandals (if separate items) and double-check the stability of the entire piece on its easel. Ensure the background panel is firmly screwed into the support frame.
Step back and admire how the lighting in the room interacts with the dimensional folds of your reverent creation


Resurrection Light From the Tomb
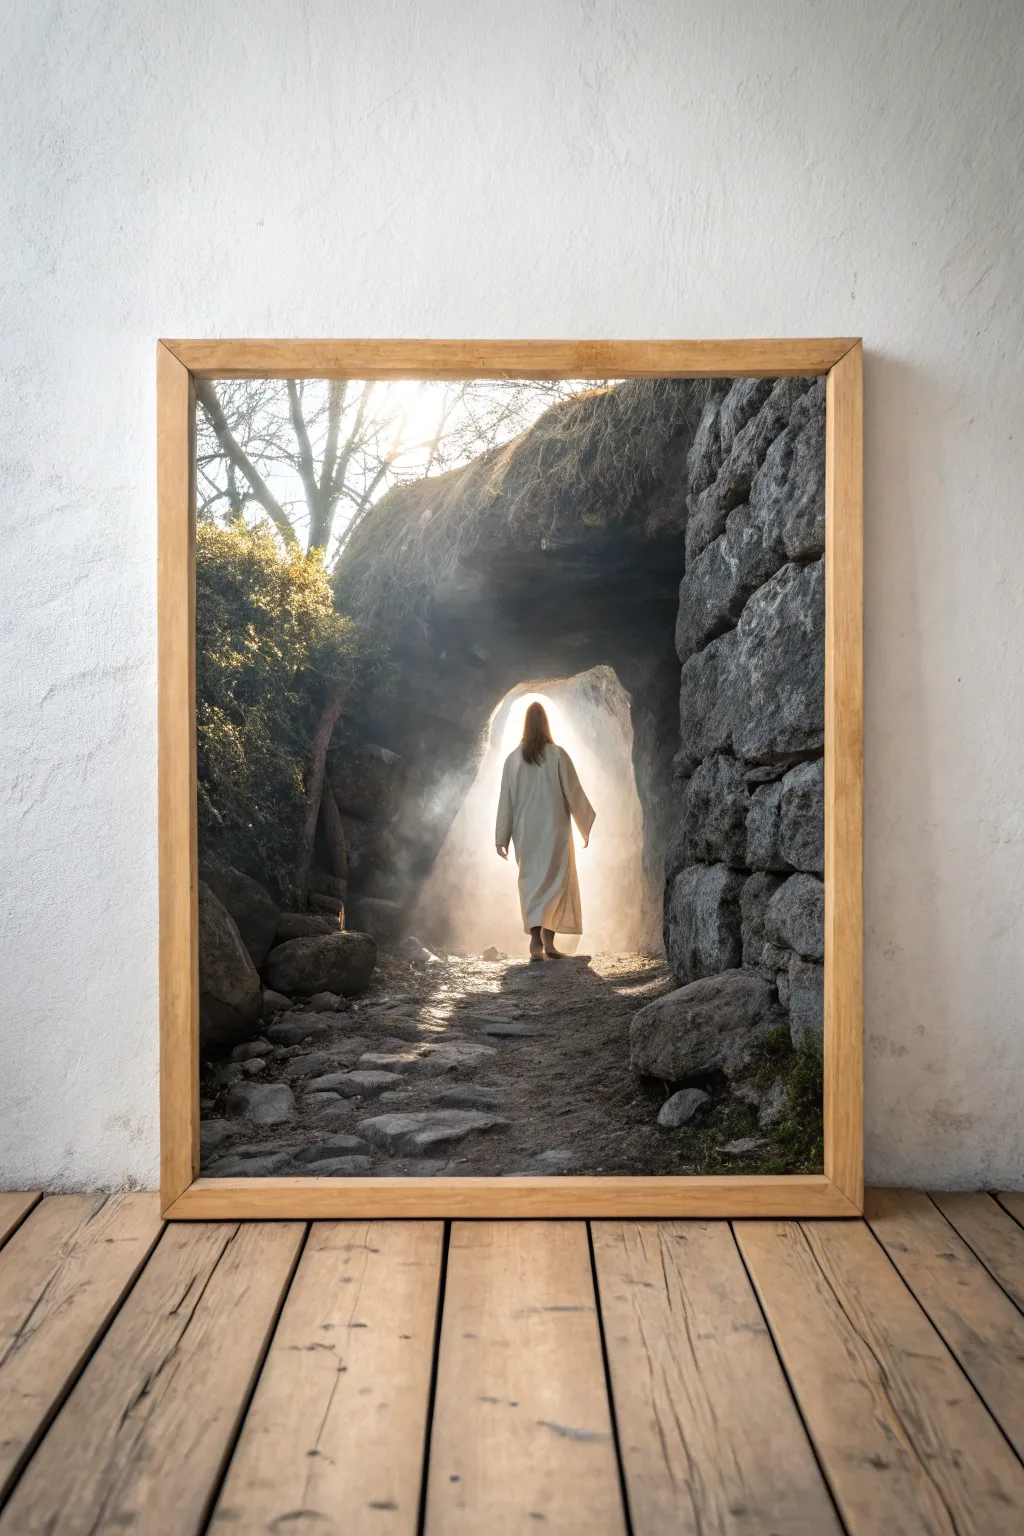
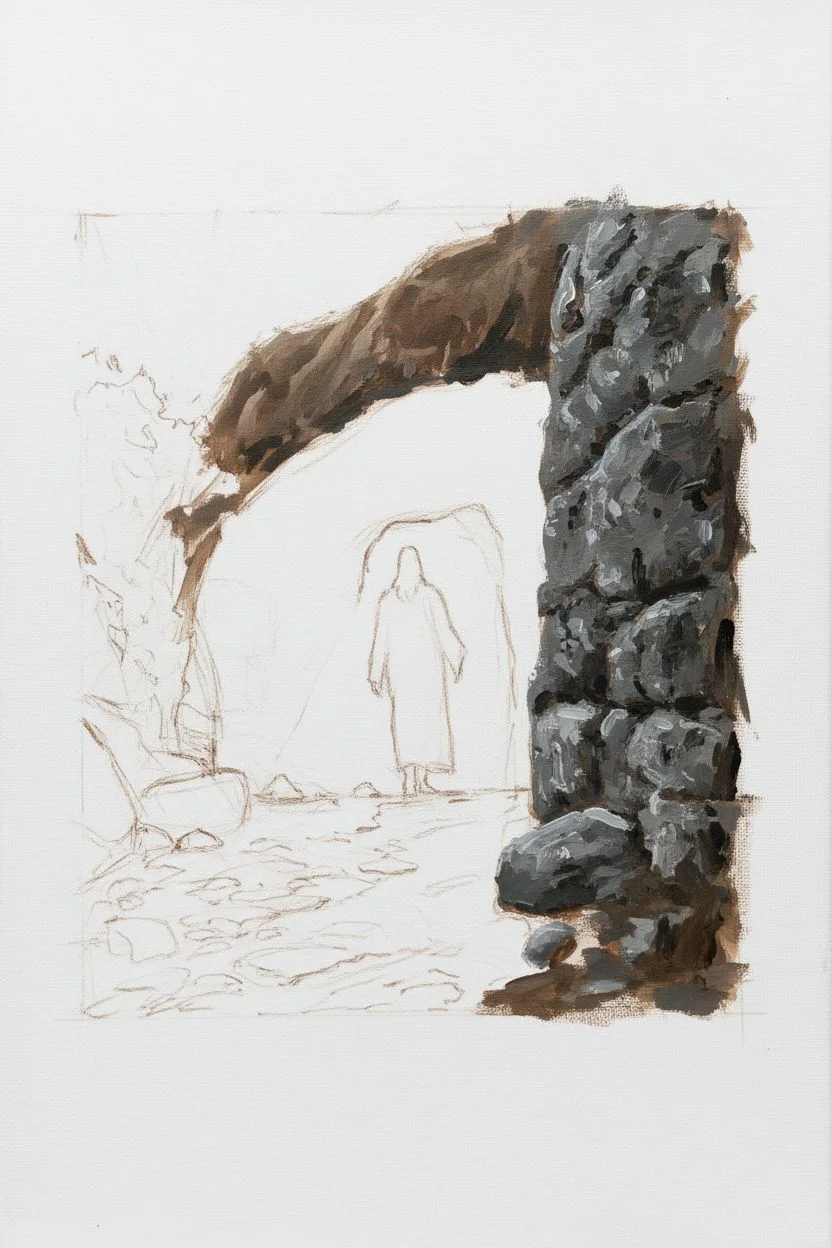
Capture the breathtaking moment of emerging from darkness into blinding light with this dramatic scene of the Resurrection. This painting project focuses on high contrast and atmospheric lighting to create a spiritual and impactful piece of art for your home.
Detailed Instructions
Materials
- Canvas (16×20 inches or larger recommended)
- Acrylic paints: Titanium White, Lamp Black, Burnt Umber, Yellow Ochre, Raw Sienna, Paynes Grey, Sap Green
- Gesso (white)
- Variety of brushes: Large flat brush, medium filbert, script liner, fan brush
- Palette knife
- Glazing medium
- Sea sponge (natural or synthetic)
- Water container and paper towels
- Wooden float frame (optional, for finishing)
Step 1: Setting the Scene
-
Prepare the canvas:
Start by priming your canvas with a solid coat of white gesso if it isn’t pre-primed. Let this dry completely to ensure a smooth, receptive surface for your acrylics. -
Sketch the composition:
Using a diluted wash of Burnt Umber and a thin round brush, lightly sketch the main elements: the rough archway of the tomb entrance, the rocky walls on the right, and the central silhouette of the figure. Don’t worry about details yet; just focus on placement. -
Block in the darkest darks:
Mix Lamp Black with a touch of Burnt Umber. Using a large flat brush, fill in the deep shadows inside the cave ceiling and the shadowed side of the right-hand rock wall. This establishes your highest contrast point immediately. -
Establish the stone texture:
For the rough cave walls, mix varying shades of grey using White, Black, and a tiny bit of Burnt Umber. I like to apply this with a palette knife or a scrunched-up paper towel to create natural, unpredictable rock textures rather than smooth brushstrokes.
Glow Not Glowing?
If your light looks dull, wait for it to dry completely, then apply a thin glaze of pure white mixed with gloss medium over the center area to boost luminosity.
Step 2: Creating the Atmosphere
-
Paint the background light:
While the darks are drying, turn your attention to the opening. Mix Titanium White with the smallest touch of Yellow Ochre. Paint the center of the opening, radiating outward. The paint should be brightest and whitest right behind the figure. -
Blend the light transition:
While the paint is still wet, blend the edges of the light outward into the cave walls using a dry, soft filbert brush. This creates the hazy, atmospheric glow effect essential to the scene. -
Detail the foreground rocks:
Use Paynes Grey and white to paint the individual stones on the right wall. Keep the light source in mind; the edges facing the opening should have thin highlights of white, while the sides facing you remain in shadow. -
Create the rocky floor:
Using a mixture of Raw Sienna and Grey, dab in the uneven cobblestone path. Use horizontal strokes that get smaller as they recede toward the light to create depth and perspective.
Step 3: The Central Figure
-
Base coat the robe:
Mix a warm, creamy off-white using White and a dot of Raw Sienna. Fill in the shape of the robe. It will look flat at first, but we will add dimension next. -
Add folds and shadows:
Using a watered-down Grey, paint vertical, flowing lines to suggest the folds of the fabric. Focus the shadows on the sides of the figure away from the direct light source. -
Backlight the figure:
This is crucial: Take pure Titanium White and paint a thin, intense outline around the shoulders, head, and arms of the figure. This ‘rim lighting’ separates the subject from the bright background. -
Soften the edges:
Use a dry brush to slightly blur the edges of the robe where it meets the blinding light. This makes the figure look like it is emerging from the intense brightness.
Golden Hour Touch
For a warmer feel, use a very thin glaze of transparent gold or yellow ochre over the white light source to give it a sunrise quality.
Step 4: Finishing Details
-
Add atmospheric mist:
Mix a very translucent glaze of white and glazing medium. Lightly scumble this over the darker rock areas near the entrance to simulate mist or dust motes catching the light. -
Introduce foliage:
On the left side, stipple in some bushes using Sap Green mixed with black for the shadows. Then, stipple pure Sap Green and finally Yellow Ochre on the tips to show where the light hits the leaves. -
Refine the path highlights:
Take a small round brush and add sharp, white highlights to the tops of the stones on the path, specifically creating a trail of light leading from the figure toward the viewer. -
Final contrast check:
Step back and view your work. If the cave interior looks too grey, glaze over it with thin black to deepen the gloom, making the central light pop even more. -
Frame the piece:
Once fully dry, mount the canvas into a simple wooden float frame to match the rustic, earthy tones of the painting.
Hang your finished piece where the natural light in your room can complement the painted illumination within the canvas


Jesus as the Good Shepherd

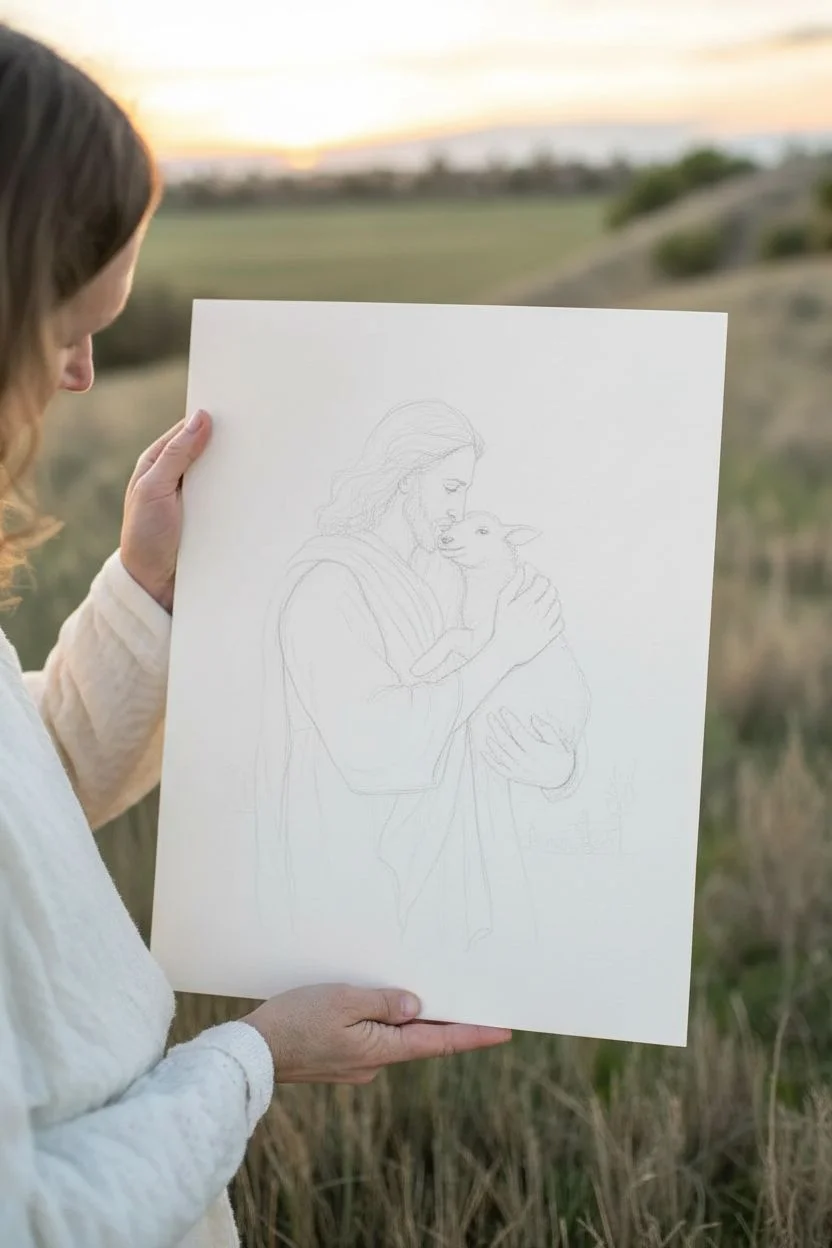
Capture a moment of profound tenderness with this watercolor study of the Good Shepherd embracing a lamb. The soft, diffused lighting and warm sunset tones create an atmosphere of peace, while realistic details in the hair and facial features ground the spiritual subject in deep humanity.
Step-by-Step Tutorial
Materials
- Cold press watercolor paper (140 lb/300 gsm or heavier)
- Watercolor paints (Alizarin Crimson, Burnt Sienna, Yellow Ochre, Ultramarine Blue, Lamp Black, Titanium White)
- Round brushes (sizes 2, 6, and 10)
- Flat brush (1 inch for washes)
- Masking fluid (optional)
- HB or 2B pencil for sketching
- Kneaded eraser
- Palettes and water containers
Step 1: Initial Sketch and Preparation
-
Establish the composition:
Begin by lightly sketching the central figures on your paper. Place Jesus slightly off-center to the left, gazing down toward the right where the lamb rests in his arms. -
Refine the anatomy:
Pay careful attention to the hands and face. The hands should look strong yet gentle, wrapping securely around the lamb. Sketch the flowing lines of the robe and the hair with loose, organic strokes. -
Outline the background:
Indicate a very low horizon line with hints of distant trees or hills, but keep these lines extremely faint as they will be painted softly.
Step 2: The Background Wash
-
Wet-on-wet sky technique:
Wet the entire background area around the figures with clean water. While shiny, drop in a very pale wash of Ultramarine Blue at the top, fading into clear water as you move down. -
Add sunset warmth:
While the paper is still damp near the horizon line, introduce a soft mix of Alizarin Crimson and Yellow Ochre to create a gentle, warm glow behind the figure’s back. -
Paint distant foliage:
Using a diluted mix of Sap Green and Burnt Sienna, dab in the distant trees along the bottom edge. Let the colors bleed slightly into the damp paper for an out-of-focus effect.
Soft Edges Tip
To get that ethereal, backlit look on the hair, pre-wet the background paper just along the hairline before painting the brown strands, letting the color bleed outward.
Step 3: Painting the Figures
-
Base skin tones:
Mix a light flesh tone using watery Burnt Sienna and a touch of red. Apply a flat, pale wash to the face and hands, leaving the paper white for the brightest highlights on the nose and forehead. -
Define facial features:
Once the base is dry, use a size 2 brush with a darker mix of Burnt Sienna and blue to carefully paint the shadows around the eyes, nose, and jawline. This creates the three-dimensional form. -
Render the hair and beard:
Layer strokes of Burnt Sienna followed by darker browns to build up the texture of the hair. Keep the edges soft where the hair meets the background light to suggest a halo effect or backlight. -
Paint the robe:
I like to start with the shadows on fabric. Use a mix of Yellow Ochre and brown to paint the folds of the outer sash, and a cool grey (blue mixed with brown) for the shadows of the white inner tunic. -
Soften the robe edges:
Blend the shadow edges with a clean, damp brush to make the fabric look soft and flowing rather than stiff.
Troubleshooting Skin Tones
If skin tones look too orange or ‘sunburned,’ neutralize the mix by adding a tiny touch of Ultramarine Blue or green. It creates a more realistic, dusky complexion.
Step 4: The Lamb and Final Details
-
Texture the lamb’s wool:
Instead of painting the wool white, paint the shadows within the wool using a very pale grey. Use small, circular scrubbing motions with a damp brush to create a fluffy texture. -
Detail the lamb’s face:
Use a fine brush to paint the lamb’s eye nose and ear with dark grey or brown, ensuring the expression looks content and peaceful. -
Final highlights:
Use small touches of opaque white gouache or undiluted white watercolor to add catchlights to the eyes and bright highlights on the hair where the sun hits it. -
Assess values:
Step back and look at the painting from a distance. Darken the deepest shadows in the robe folds and hair to increase contrast and make the gentle lighting pop.
Once dry, frame your piece to highlight the serene connection between the shepherd and the lamb


Jesus Walking on Water
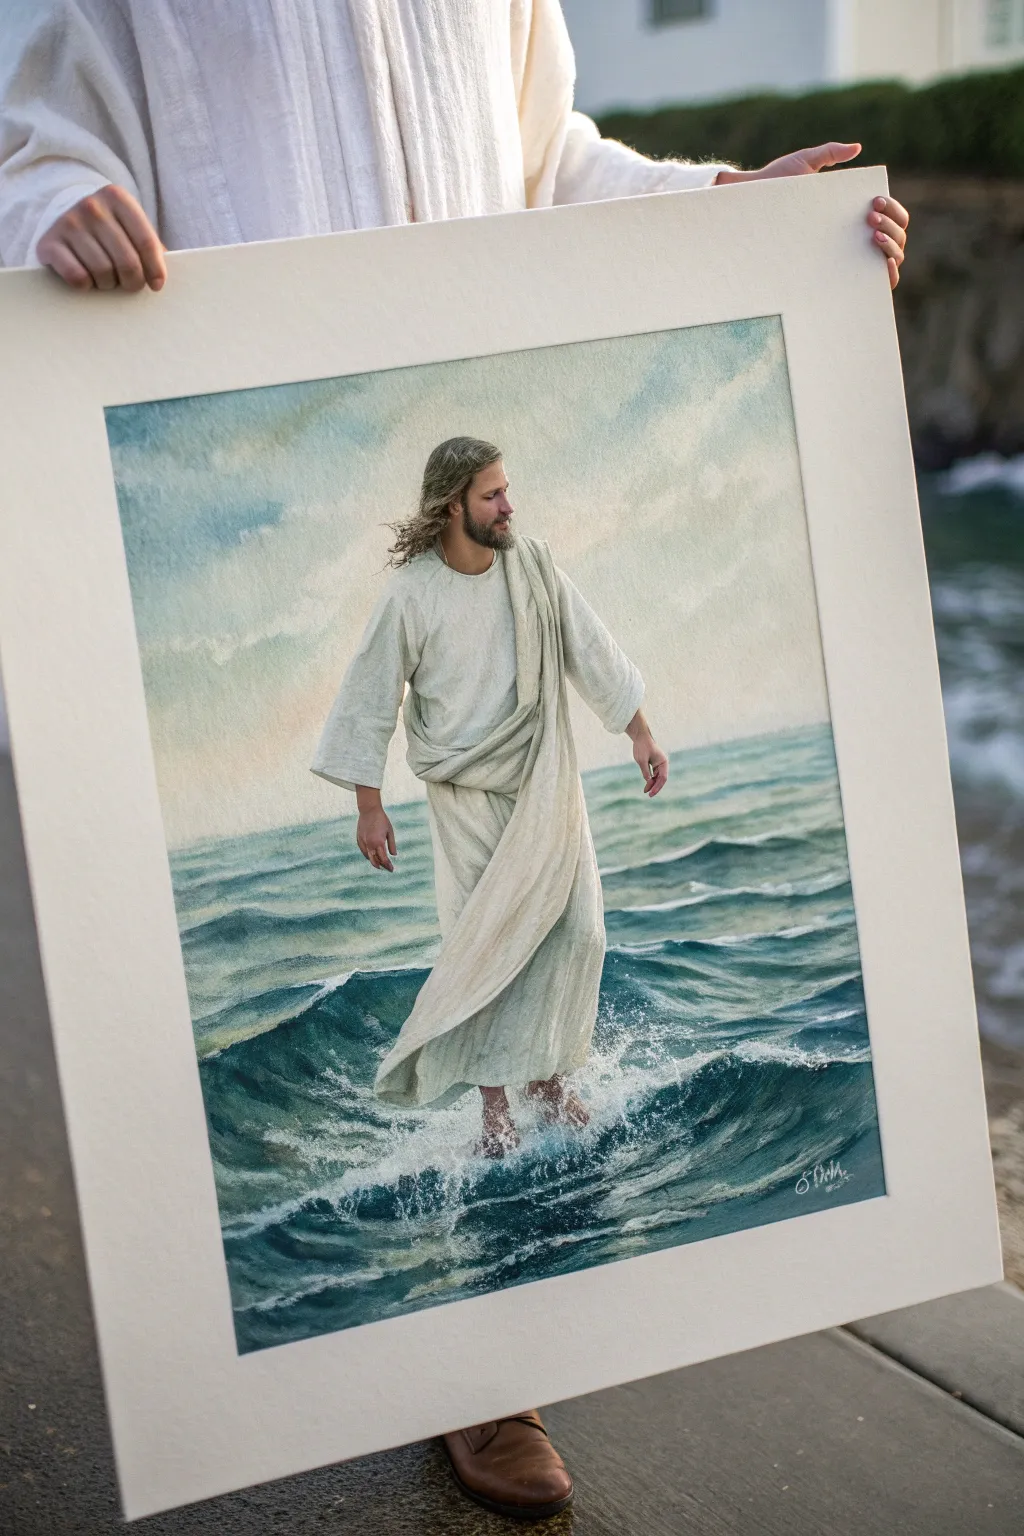
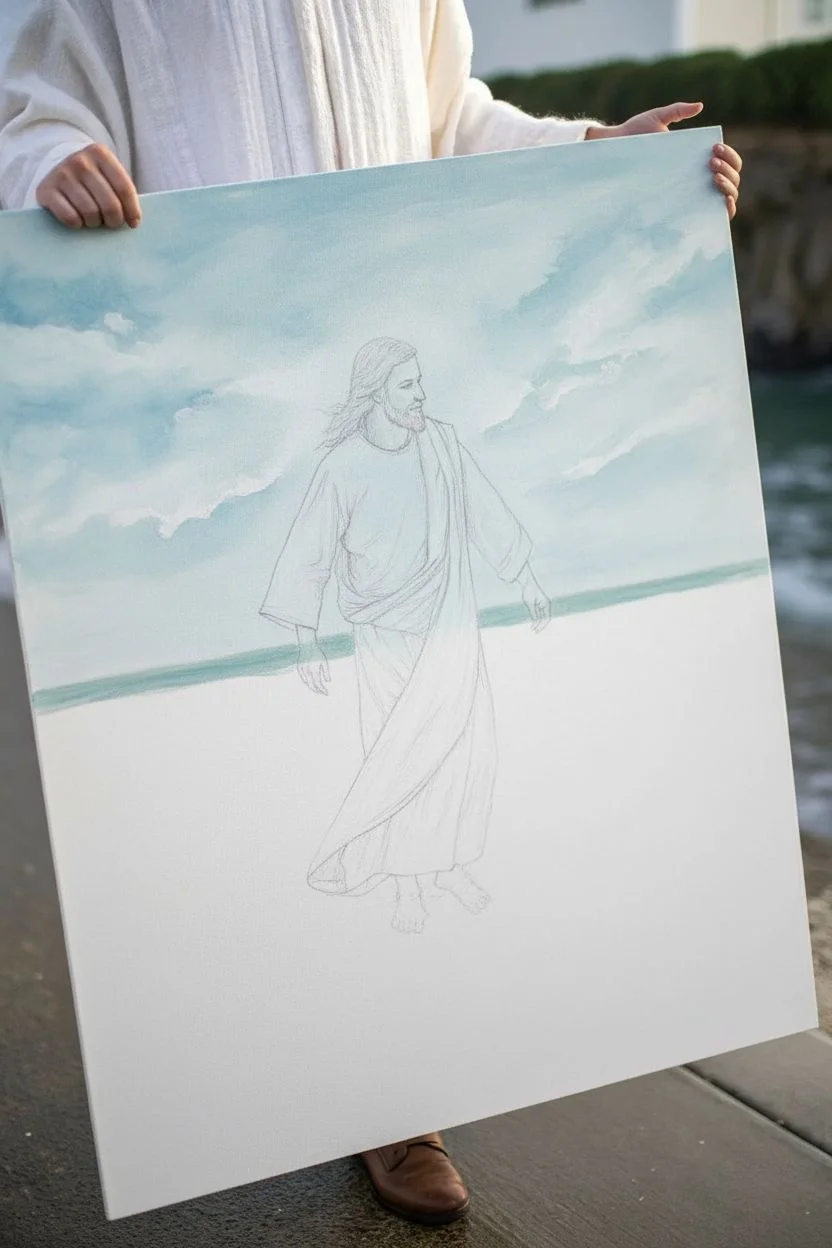
Capture the miraculous moment of Jesus walking on water with this serene and realistic acrylic painting project. You will focus on creating convincing water textures, draped fabric, and a peaceful, light-filled atmosphere.
How-To Guide
Materials
- Canvas board or stretched canvas (16×20 inches recommended)
- Acrylic paints (Titanium White, Phthalo Blue, Ultramarine Blue, Burnt Umber, Yellow Ochre, Cadmium Red, Hooker’s Green)
- Set of synthetic brushes (large flat wash, filbert sizes 4 & 6, round detail sizes 0 & 2)
- Palette knife
- Water container and paper towels
- Pencil and eraser
- Reference photo of water waves
Step 1: Sketching and Sky
-
Outline the composition:
Begin by lightly sketching the horizon line about two-thirds down the canvas. Sketch the figure of Jesus in the center, focusing on the flow of the robes rather than tiny details. Mark the placement of the major waves around his feet. -
Mix the sky colors:
Create a pale, airy mix using Titanium White with a tiny touch of Phthalo Blue and Yellow Ochre. You want a soft, almost cloud-white blue. -
Paint the background sky:
Using a large flat brush, paint the entire sky area. Use horizontal strokes to create a smooth gradient, getting slightly darker and bluer as you move toward the top corners. -
Add soft clouds:
While the sky is still slightly damp, mix a hint more white and scumble in soft cloud shapes. Keep the edges blurry so they recede into the distance. -
Paint the distant horizon:
Mix a hazy blue-green using Phthalo Blue, White, and a dot of Hooker’s Green. Paint the horizon line with a flat brush, ensuring it’s perfectly straight but slightly soft to show atmospheric perspective.
Water Wisdom
Don’t overmix your water colors on the palette. Leaving streaks of blue and white on your brush creates natural variation in the waves with a single stroke.
Step 2: Painting the Waters
-
Block in the ocean base:
Mix a deep teal using Phthalo Blue, Hooker’s Green, and Burnt Umber. Fill in the entire water area below the horizon, working around the figure. -
Establish wave forms:
Using a filbert brush and a medium turquoise mix (add White to your base color), start defining the shapes of the waves. Focus on horizontal strokes in the distance and choppier, curve-shaped strokes near the foreground. -
Deepen the shadows:
Take your darkest blue-green mix and paint the troughs of the waves, specifically under the white crests and near Jesus’s feet to ground the figure. -
Highlight wave crests:
Mix Titanium White with a tiny bit of blue. Use a rigger or small round brush to paint the tops of the waves where they catch the light. Keep the lines irregular. -
Create the splash effect:
At the feet, use an old, dry brush or a fan brush with pure White paint. Stipple (tap essentially up and down) around the ankles to create the look of splashing foam and disturbed water.
Level Up: Glazing
Once the painting is fully dry, apply a gloss varnish. This mimics the wet look of water and deepens the dark colors of the ocean depths significantly.
Step 3: The Figure and Robes
-
Base coat the skin:
Mix a flesh tone using White, Yellow Ochre, and a touch of Cadmium Red. Paint the face, hands, and feet in flat color. -
Block in the robes:
Mix a warm off-white using Titanium White and a tiny speck of Burnt Umber. Fill in the entire robe area. -
Define fabric folds:
Mix a shadow color for the robes using gray (White + Black) or a cool violet-gray. Using a filbert brush, paint the shadows in the folds of the fabric. follow the curve of the body underneath. -
Add robe highlights:
I like to use pure Titanium White here on the highest ridges of the fabric folds especially on the shoulder and thigh where the sunlight hits most directly. -
Detail face and hair:
Switch to your smallest round brush (0 or 00). Paint the hair and beard with strokes of Burnt Umber and lighter Ochre highlights. Carefully add facial features, keeping them soft. -
Feet interaction:
Paint the feet slightly submerged by glazing a very thin, watery layer of the ocean blue over the toes. This sells the illusion of him standing *on* and slightly *in* the water.
Step 4: Final Touches
-
Enhance water translucency:
Glaze a thin layer of bright Viridian or Phthalo Green over the middle section of the waves to make the water look tropical and translucent. -
Final highlights:
Add the brightest sparkles of white to the water droplets near the feet and the highest points of the waves.
Step back and admire the peaceful movement and spiritual atmosphere you have captured on canvas
BRUSH GUIDE
The Right Brush for Every Stroke
From clean lines to bold texture — master brush choice, stroke control, and essential techniques.
Explore the Full Guide
Calming Storm-at-Sea Scene With Jesus
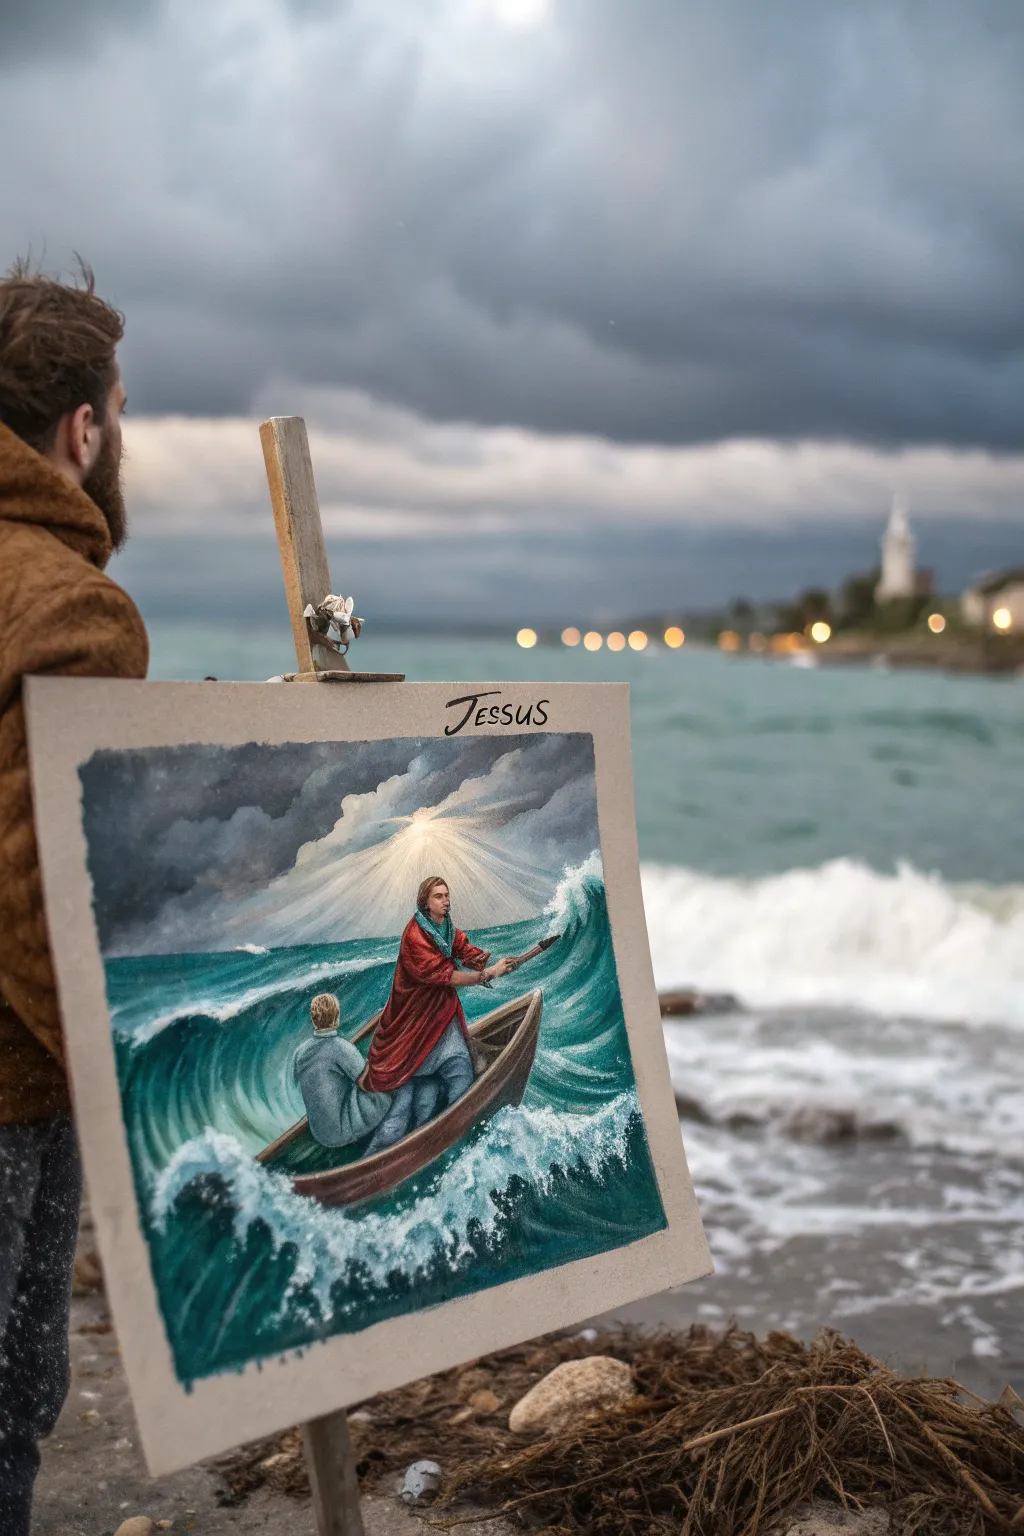
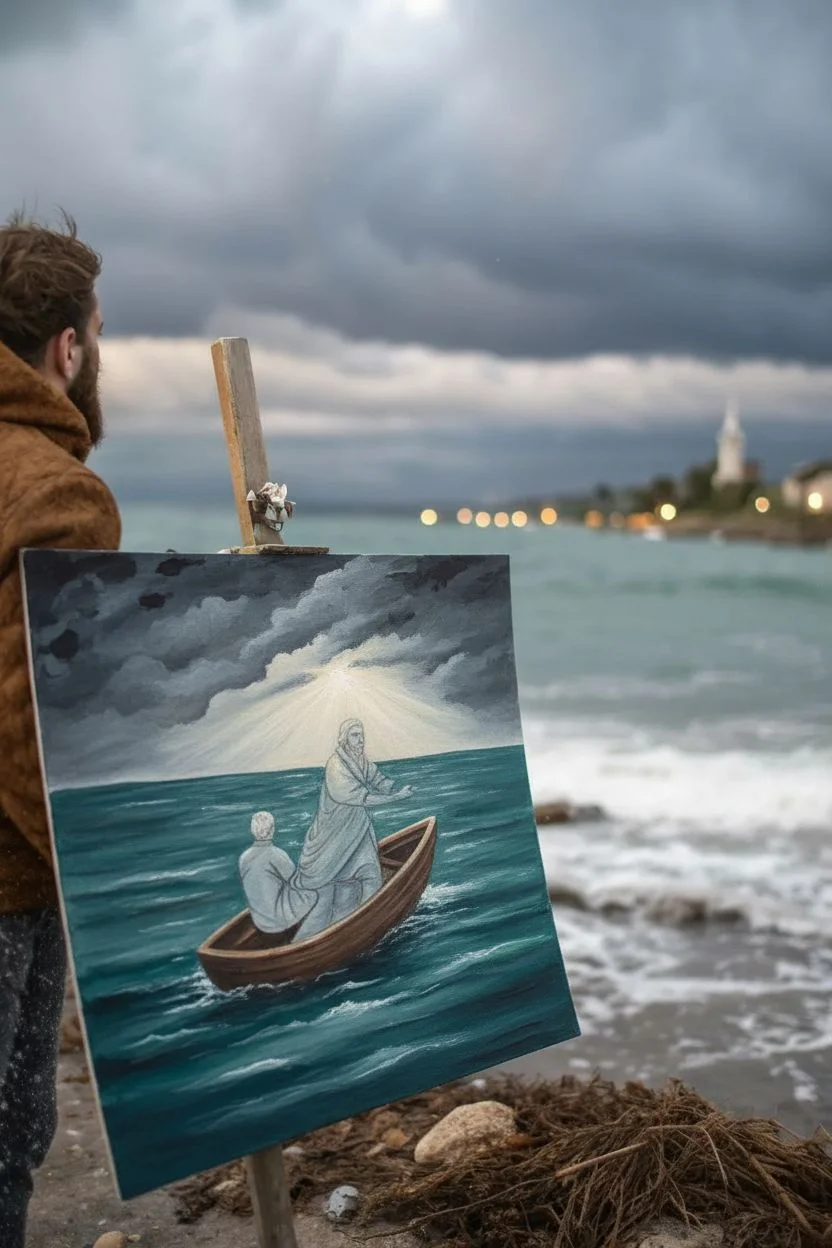
Capture the dramatic power of the biblical story with this stormy seascape painting, featuring crashing waves and a serene moment of divine intervention. The interplay of dark storm clouds and piercing light rays creates a dynamic focal point that truly brings this scene to life.
Step-by-Step Guide
Materials
- Canvas board or stretched canvas (16×20 inches recommended)
- Acrylic paints (Phthalo Blue, Ultramarine Blue, Titanium White, Burnt Umber, Yellow Ochre, Cadmium Red, Black)
- Set of brushes (1-inch flat, medium filbert, shimmering round, fine liner)
- Palette knife
- Water cup and paper towels
- Easel
- Pencil for sketching
- Mixing palette
Step 1: Setting the Scene
-
Sketch the composition:
Begin by lightly sketching the horizon line about one-third of the way up from the bottom. Outline the shape of the wooden boat angled diagonally across the waves, and sketch the two figures inside—one standing and one seated. -
Block in the sky:
Mix a dark, stormy grey using Phthalo Blue, Black, and a touch of Burnt Umber. Use your 1-inch flat brush to paint the upper corners and edges of the sky, leaving the center area unpainted for the light source. -
Create the light burst:
In the center unpainted area, blend Titanium White with a tiny dot of Yellow Ochre. Paint this outwards in a radial burst, blending slightly into the darker grey edges to create a soft, glowing transition where the clouds break. -
Paint the distant water:
For the ocean background, mix Phthalo Blue with a little Titanium White and a hint of green if desired. Paint horizontal strokes below the horizon line, creating a deep teal color that gets slightly darker as it approaches the foreground waves.
Step 2: Developing the Waves
-
Form the main wave:
Using a filbert brush, paint the large, curving wave shape behind the boat. Use a mix of Phthalo Blue and a touch of Black for the deepest shadows under the curl of the wave. -
Add wave highlights:
Mix a lighter teal (Phthalo Blue + White). Apply this to the top curve of the wave to show translucency. Use curving brushstrokes to follow the shape of the water. -
Paint the foreground chop:
In the immediate foreground, use choppy, short strokes of dark blue and teal to create turbulent water texture. Leave space for the white sea foam that will be added later.
Pro Tip: Glowing Light
To make the central light really pop, glaze a thin layer of transparent yellow over the white burst once it’s fully dry. This adds warmth without losing brightness.
Step 3: Painting the Figures and Boat
-
Base coat the boat:
Fill in the boat shape with a solid coat of Burnt Umber. Once dry, add wood grain details using a liner brush and a mix of Burnt Umber and Black. -
Highlight the boat:
Mix Burnt Umber with White to create a highlight color. Paint the rim of the boat and the side facing the light source to give it dimension and form. -
Paint Jesus’s robe:
For the standing figure, use Cadmium Red mixed with a little Burnt Umber for the shadowed folds of the robe. Use pure Cadmium Red and then Red + White for the areas hit by the light rays. -
Add the disciple:
Paint the seated figure in muted cool tones, like a grey-blue, using Ultramarine and White. This helps push him visually into the background compared to the bright red robe. -
Detail faces and hands:
Use a mix of White, Yellow Ochre, and a tiny touch of Red for skin tones. With a fine liner brush, carefully dab in the faces and hands. Keep features simple; the distance suggests you don’t need photorealism.
Level Up: Texture Gel
Mix heavy structure gel with your white paint for the sea foam. Apply with a palette knife to create real 3D texture on the crashing waves.
Step 4: Atmosphere and Final Details
-
Create the sea spray:
Load an old, scruffy brush or a sponge with thick Titanium White. Stipple along the crest of the waves and around the base of the boat to create foamy, crashing water. -
Refine the light rays:
I like to take a clean, dry brush with a very small amount of watered-down White and dry-brush distinct rays coming from the central light source down towards the figures. -
Add the halo effect:
Paint a very subtle, glowing white outline around the standing figure’s head to emphasize divinity, blending it softly into the stormy sky behind. -
Painting the title:
If you wish to replicate the reference exactly, use a liner brush with black paint to write ‘JESUS’ in a stylized script at the top center of the canvas. -
Final adjustments:
Step back and assess the contrast. Strengthen the darkest darks in the wave shadows and the brightest whites in the foam to ensure the painting has dramatic impact.
This powerful piece captures a moment of peace amidst chaos and will start conversations wherever you display it
Sermon on a Hillside Composition
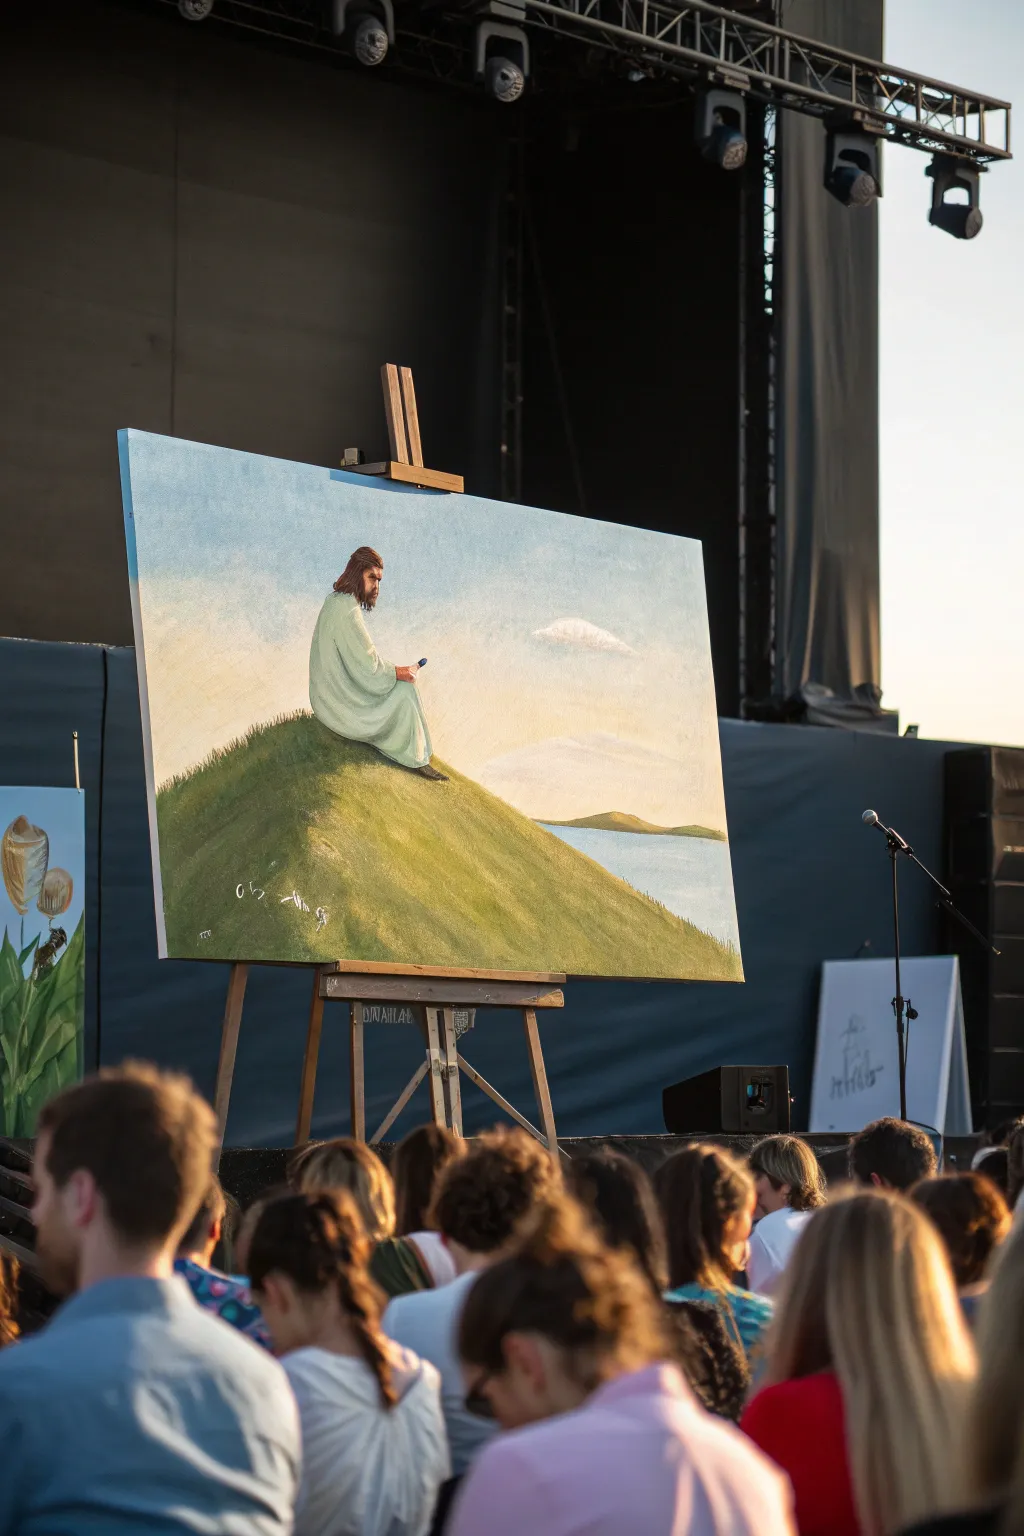
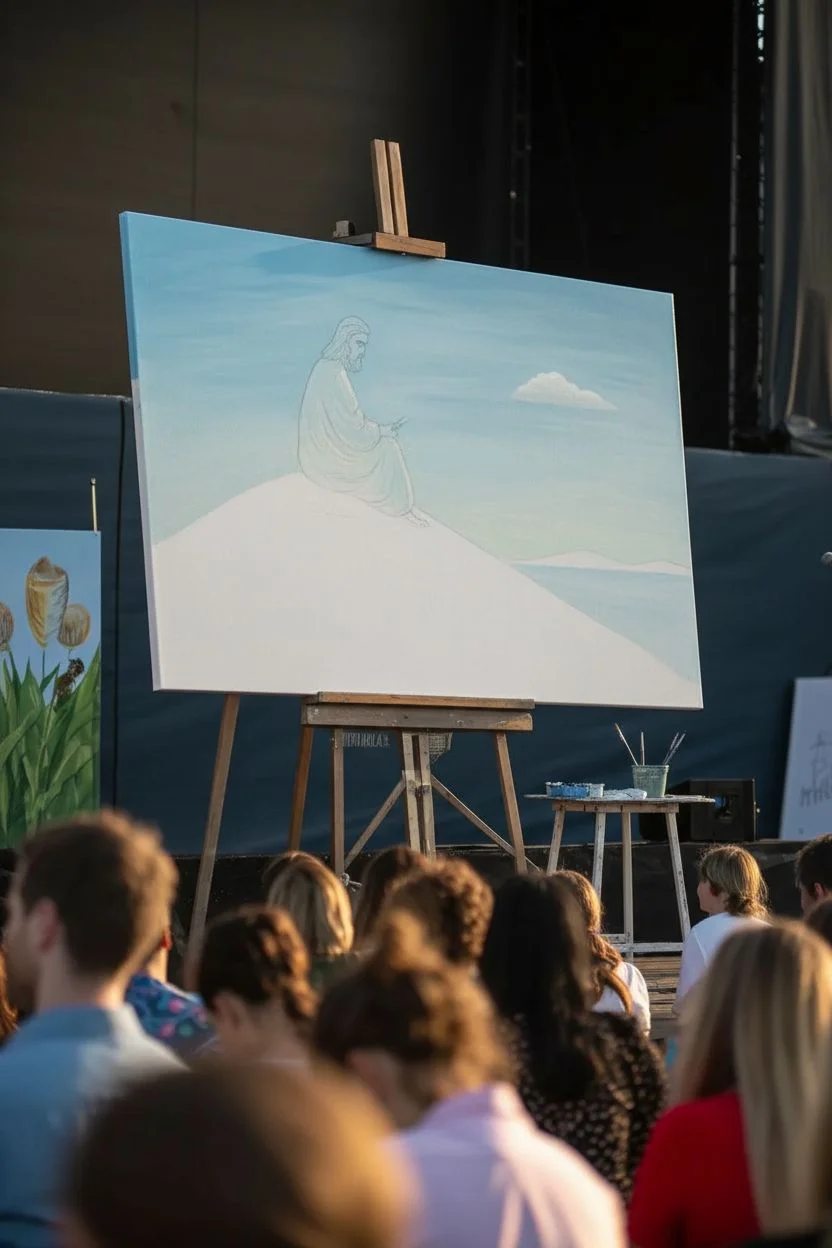
Capture a moment of quiet reflection with this serene composition of Jesus seated on a grassy hillside. The soft, pastoral color palette and minimalist layout create a peaceful atmosphere perfect for contemplation.
Step-by-Step Tutorial
Materials
- Large rectangular canvas (approx. 24×36 or larger)
- Acrylic paints (Titanium White, Phthalo Blue, Sap Green, Yellow Ochre, Burnt Sienna, Burnt Umber)
- Set of flat brushes (1-inch, 1/2-inch)
- Round detail brushes (size 2 and 4)
- Fan brush (optional, for grass texture)
- Easel
- Palette and water container
- Pencil for sketching
Step 1: Planning and Sky
-
Map the Composition:
Begin by lightly sketching the main horizon line. This is a diagonal slope starting from the bottom left and rising towards the center, then dropping off towards the right side. -
Sketch the Figure:
Outline the figure of Jesus seated near the peak of the hill. Focus on the triangular shape of the robed form rather than anatomical details at this stage. -
Mix the Sky Gradient:
Prepare a large amount of sky blue by mixing Titanium White with a tiny touch of Phthalo Blue. You want a very pale, airy blue. -
Paint the Upper Sky:
Starting at the top of the canvas, apply the blue mix with a large flat brush, using horizontal strokes. -
Blend the Horizon:
Gradually add more white to your brush as you move down the canvas towards the horizon line, creating a soft fade. Let the sky color come slightly below the hill line to ensure no gaps later. -
Add Soft Clouds:
While the sky is still slightly tacky, use a dry brush with pure white to scumble in a singular, distant cloud puff on the right side for balance.
Natural Texture Tip
Don’t over-blend the grass. Let the brush strokes remain visible and directional (flowing down the hill) to create the feeling of wind blowing through the scene.
Step 2: The Landscape
-
Block in the Hill Color:
Mix Sap Green with a touch of Yellow Ochre and White to create a soft, sunlit grass color. Paint the entire hill shape with this base tone. -
Establish the Water:
For the water peeking out on the right, mix a darker, slightly grayish blue. Paint horizontal strokes to suggest the flat surface of a lake or sea. -
Paint Distant Land:
Add the small sliver of distant land across the water using a muted grey-green mix to push it into the background. -
Add Grass Texture:
Once the hill base coat is dry, take a fan brush or an old bristle brush. Mix a slightly darker green and flick upward strokes along the spine of the hill to simulate tall grass. -
Highlight the Slope:
Mix a lighter lime green (Green + plenty of Yellow + White) and dry-brush the left side of the hill where the light hits the strongest.
Change the Mood
Modify the lighting for a different time of day. Use pinks and purples in the sky and warm oranges on the grass to transform this into a sunset sermon scene.
Step 3: The Figure
-
Base Coat the Robe:
Paint the robe using a very pale, almost minty green-white. I find mixing White with the tiniest dot of Phthalo Blue and Yellow gives that specific spiritual glow. -
Define the Folds:
Use a mix of the robe color and a tiny bit of grey-blue to paint the shadows in the fabric. Focus on the folds where the knees bend and under the arm. -
Paint the Hair and Beard:
Using a small round brush and Burnt Umber, fill in the hair and beard shape. Add highlights with Burnt Sienna to show texture. -
Flesh Tones:
Mix White, Burnt Sienna, and a speck of Yellow for the skin tone. Carefully paint the profile of the face and the hands resting on the lap. -
The Book Details:
With your smallest brush, paint the small blue book or object in his hands. It’s a focal point, so keep the edges crisp. -
Cast Shadow:
Mix a transparent dark green glaze and apply it directly under the figure on the grass to ground him to the hill. -
Final White Highlights:
Add pure white highlights on the shoulders of the robe and the top of the head where the sun hits directly.
Step back and appreciate the quiet tranquility your brushstrokes have created

PENCIL GUIDE
Understanding Pencil Grades from H to B
From first sketch to finished drawing — learn pencil grades, line control, and shading techniques.
Explore the Full Guide
The Transfiguration Glow Effect
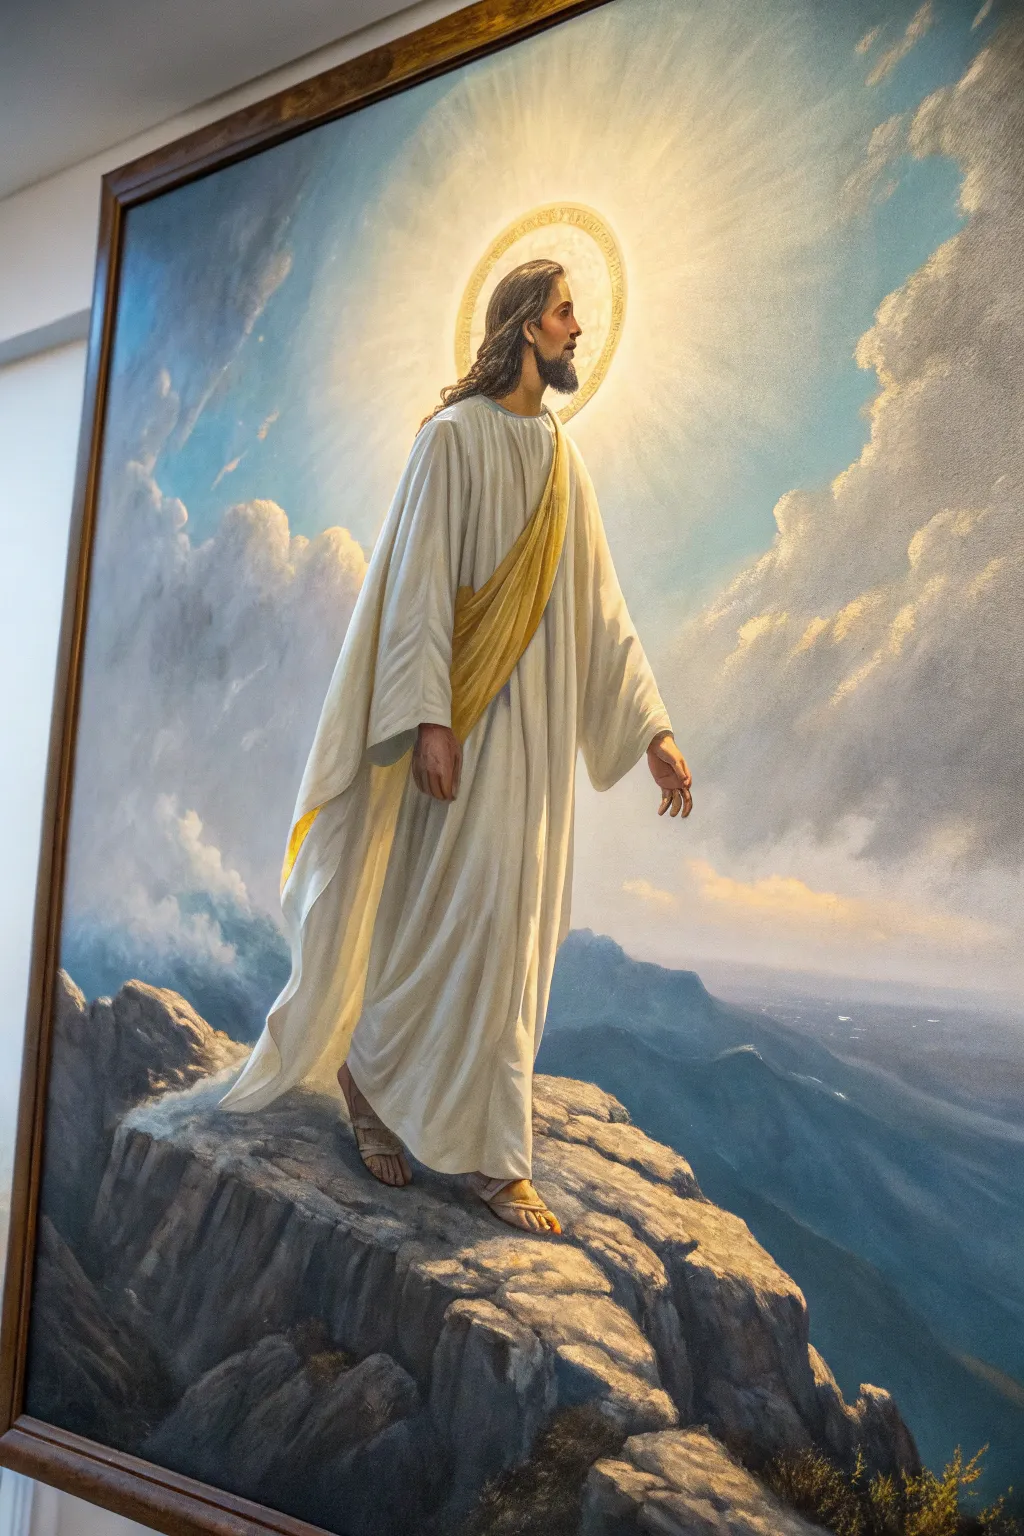
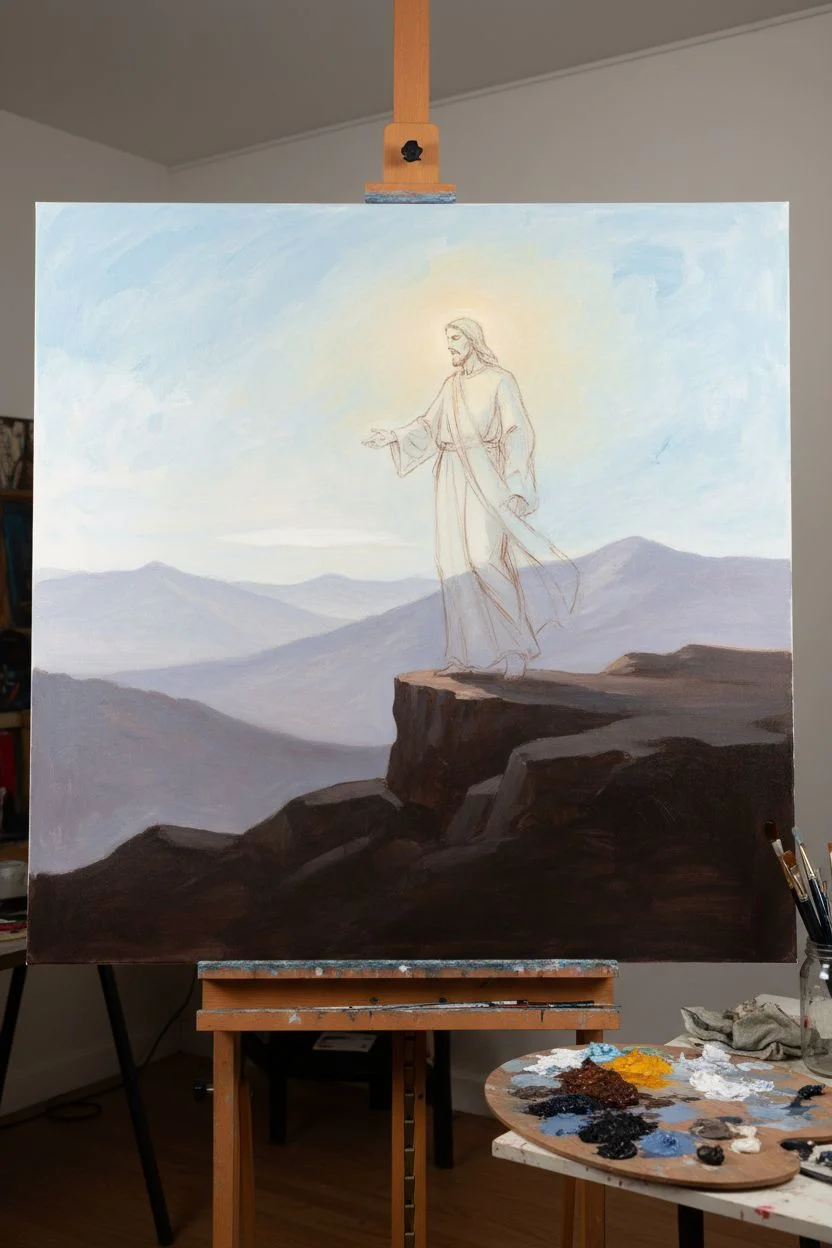
Capture the serene majesty of this neoclassical-inspired portrait, focusing on the dramatic interplay of light and shadow. This project guides you through building a luminous background and crisp foreground to create a breathtaking sense of divinity and scale.
Detailed Instructions
Materials
- Large stretched canvas (at least 18×24 inches)
- Oil paints (Titanium White, Yellow Ochre, Burnt Umber, Ultramarine Blue, Alizarin Crimson, Ivory Black)
- Acrylic gesso for priming
- Assorted flat and filbert brushes (sizes 2, 6, 10, and a large blending brush)
- Fine detail liner brush (size 00)
- Palette knife
- Odorless mineral spirits or turpentine
- Linseed oil medium
- Clean rags or paper towels
- Easel
Step 1: Setting the Scene
-
Prime and Sketch:
Begin by applying two coats of acrylic gesso to your canvas to ensure a smooth texture. Once dry, lightly sketch the composition using a thinned wash of Burnt Umber. Outline the figure of Jesus, the rocky cliff, and the horizon line, paying special attention to the posture and the flow of the robes. -
Underpainting the Sky:
Mix a soft, pale blue using Ultramarine Blue and plenty of Titanium White. Apply this to the upper sky area, keeping the strokes loose. As you move closer to where the head will be, gradually introduce Yellow Ochre and White to create a warm, glowing underlayer for the halo effect. -
Blocking the Landscape:
For the distant mountains, mix Ultramarine Blue with a touch of Alizarin Crimson and White to create a hazy purple-grey. Paint the distant peaks with soft edges to imply atmospheric perspective. The mountains should get darker and more defined as they move closer to the foreground. -
Foreground Foundation:
Use a mixture of Burnt Umber and Ivory Black to block in the rocky cliff in the foreground. Don’t worry about details yet; focus on establishing the dark mass that will anchor the figure.
Mastering the Glow
For the brightest halo effect, let the background dry completely, then glaze pure white in the center. Light travels through the layers, reflecting off the canvas for luminosity.
Step 2: The Divine Figure
-
Blocking the Robes:
Mix a generous amount of Titanium White with a tiny hint of Yellow Ochre for the main robe. Block in the shape of the clothing, leaving darker gaps where the deep folds will be. For the sash, use a base of Yellow Ochre mixed with a little Burnt Umber. -
Modeling the Folds:
To create the realistic drape of the fabric, mix a shadow tone using White, a touch of Blue, and Umber. Apply this into the folds of the white robe, blending the edges softly into the highlighted areas. I find using a dry filbert brush helps smooth out these transitions perfectly. -
Painting the Sash:
Add depth to the yellow sash by glazing a mixture of Burnt Sienna over the shadows. Highlight the peaks of the folds with pure Yellow Ochre and White to make the fabric look silky and textured. -
Skin Tones and Hands:
Mix a base skin tone using White, Yellow Ochre, and a touch of Alizarin Crimson. Paint the hands and feet, paying close attention to the light source coming from behind. The palms and inner fingers should be shadowed, while the edges catch the rim light. -
The Face and Hair:
Using your smallest filbert brush, paint the facial features. Keep the contrast gentle; the face is in profile and partially shadowed. Use dark browns for the hair and beard, adding lighter brown strokes on the crown of the head where the halo light hits.
Step 3: Illumination and Atmosphere
-
Creating the Halo:
Mix a translucent glaze of Zinc White and Yellow Ochre. Paint a circular glow behind the head, radiating outward. Unlike a solid ring, this should feel like concentrated light rays. Use a clean, dry brush to soften the outer edges into the blue sky. -
Adding the Gold Ring:
With a steady hand and a liner brush, paint the faint, defined golden ring within the glow. Use pure Yellow Ochre mixed with a tiny drop of medium for flow. Keep it subtle so it doesn’t look like a solid object, but rather a manifestation of light. -
Cloud Drama:
Using a large brush, add cumulus clouds around the figure. Use pure white for the tops of the clouds catching the divine light, and a grey-violet mix for the undersides. Scumble the paint to create that fluffy, airy texture. -
Backlighting the Figure:
This is a crucial step. Use pure Titanium White to paint a very thin, sharp line along the shoulders, hair, and the side of the robe facing the light. This ‘rim light’ separates the figure from the background and creates the glowing effect.
Muddy Robe Shadows?
If your white robe shadows look dirty, you’re using too much black. Mix complementary colors like orange and blue to create rich chromatic greys instead.
Step 4: Final Details
-
Detailing the Rocks:
Return to the foreground cliff. Use a palette knife to scrape on highlights of light grey and tan. This creates the rough, jagged texture of stone. Add deep shadows in the crevices with Burnt Umber and Blue. -
Sandal Details:
Using the liner brush, carefully paint the straps of the sandals. Add a tiny highlight on the leather where the light hits to give it dimension. -
Atmospheric Glazing:
Once the sky layers are dry to the touch, apply a very thin glaze of white over the distant mountains. This pushes them further back into the distance, enhancing the scale of the scene. -
Review and Refine:
Step back from your easel. Check the balance of light and dark. Strengthen the rim lighting on the figure if needed, or deepen the shadows on the cliff face to ensure high contrast.
Allow your painting to dry thoroughly before varnishing, preserving the ethereal light for years to come
Ascension in Soft Clouds
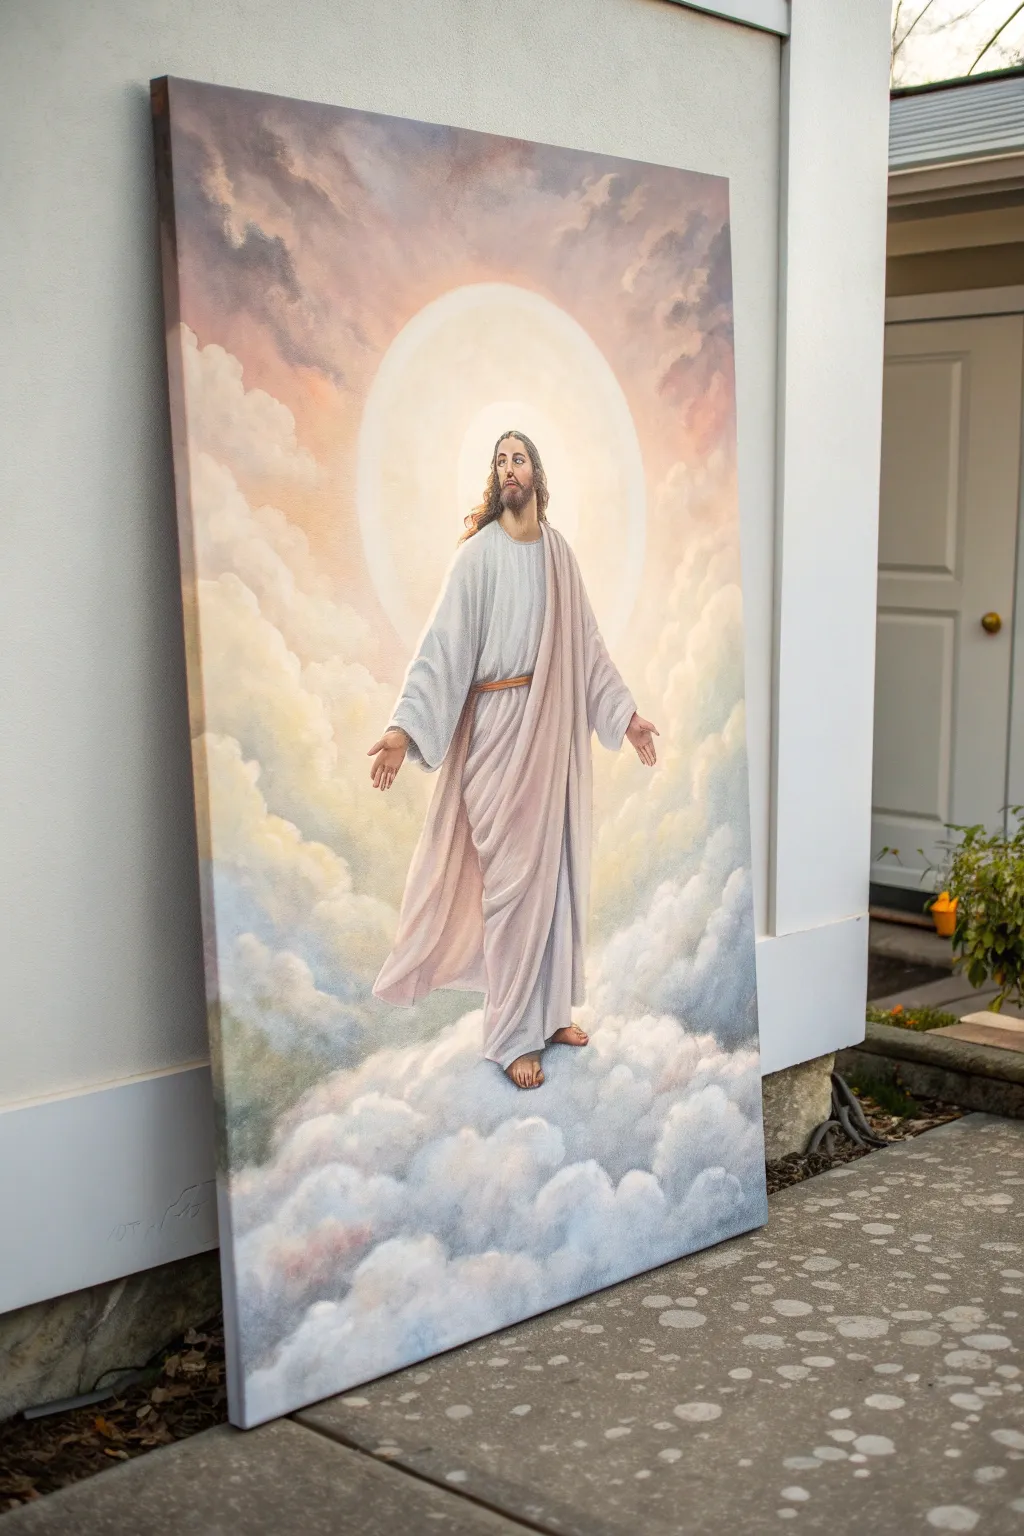
Capture the ethereal moment of the Ascension with this soft, radiantly lit painting that centers on a figure rising through a cloudscape. Using a gentle palette of pastels and whites, you’ll learn to build up layers of acrylics to create a glowing halo effect and weightless, fluffy clouds.
Step-by-Step
Materials
- Large stretched canvas (24×36 inches or similar)
- Acrylic paints: Titanium White, Unbleached Titanium, Burnt Umber, Yellow Ochre, Alizarin Crimson, Ultramarine Blue, Payne’s Grey
- Large filbert brush (size 10-12)
- Medium round brush (size 6)
- Fine detail liner brush (size 1)
- Large flat blending brush or soft mop brush
- Slow-drying medium or retarder
- Palette knife
- Water container and paper towels
- Easel
Step 1: Setting the Scene
-
Prime the background:
Begin by covering the entire canvas with a thin wash of Unbleached Titanium and a touch of Burnt Umber. This creates a warm, neutral base that will help the heavenly light pop later on. Let this layer dry completely. -
Sketch the composition:
Using a diluted mix of Burnt Umber and a small round brush, lightly outline the central figure. Mark the position of the head, the sweep of the arms, and the long, flowing lines of the robes. Draw a large circle behind the head to act as the guide for the radiant sun-halo. -
Map the cloud masses:
Loosely sketch organic, billowing shapes around the feet and sides of the canvas. Don’t worry about detail yet; just establish where the heavy banks of clouds will sit versus the open sky.
Cloud Edges Too Sharp?
If your clouds look like rocks, your paint is drying too fast. Mist the canvas with water or dip your brush in slow-drying medium, then circular-blend the edges again while wet.
Step 2: Painting the Light and Halo
-
Establish the light source:
Mix Titanium White with a tiny speck of Yellow Ochre. Start in the very center of your halo circle and paint outwards. As you move away from the head, blend in a little more warmth using the tiniest amount of Alizarin Crimson to create a soft, peachy glow. -
Blend the halo edge:
While the paint is still wet (using retarder helps here), use a clean, dry mop brush to soften the outer edge of the circle into the background sky. The transition should be seamless, fading from bright white-gold to the neutral background tone.
Step 3: The Figure and Robes
-
Base coat the skin:
Mix a skin tone using White, Yellow Ochre, and a touch of Burnt Umber. Block in the face, hands, and feet. Keep the values fairly flat for now; we just need to cover the canvas. -
Underpaint the robes:
For the robes, mix a soft, muted mauve-grey using White, a little Alizarin Crimson, and a dot of Payne’s Grey. Paint the entire robe area with this mid-tone shadow color. -
Add high-key highlights:
Load your filbert brush with pure Titanium White. Paint the areas of the robe that are facing the light source (the chest, shoulders, and the tops of the folds). Use long, sweeping vertical strokes to mimic the drape of fabric. -
Deepen the folds:
Mix a darker shadow tone by adding more Payne’s Grey and Burnt Umber to your mauve mix. I like to carefully paint the deep recesses of the folds, particularly under the sash and between the legs, to give the figure dimension. -
Detail the face and hair:
Switch to your fine liner brush. Darken the hair and beard with Burnt Umber. Add facial features gently—soft shadows for eye sockets and a touch of pink for the lips. Avoid harsh black lines; keep features soft to match the painting’s mood.
Pro Tip: The Sash Pop
Paint the sash around the waist with a slightly more saturated Burnt Sienna or Ochre. This small band of earthy color acts as a visual anchor among all the pastel tones.
Step 4: Creating the Cloudscape
-
Block in shadow shapes:
Mix a cool grey-blue using White, Ultramarine Blue, and a touch of Payne’s Grey. Paint the bottom and shadowed sides of the cloud clumps. Use a scumbling motion (scrubbing the brush in circles) to keep the edges fuzzy. -
Add sun-touched warmth:
Mix a warm pinkish-white. Paint the tops of the clouds where the divine light hits them. Overlap these lighter shapes onto the darker grey bases you just painted. -
Blend for fluffiness:
Use a large, dry blending brush to gently tap the boundary between the light and shadow on the clouds. This melts the colors together, creating that soft, cotton-like texture. -
Refine the foreground clouds:
The clouds at the very bottom should be the most distinct. Add pure white highlights to the tips of these clouds to bring them forward visually.
Step 5: Final Touches
-
Reinforce the glow:
Once everything is dry, you can glaze a very thin, watery layer of Yellow Ochre over the central halo area to boost the luminosity. -
Clean up edges:
Check the silhouette of the figure. If the background or halo has encroached too much, use your liner brush to re-establish the sharp edge of the shoulder or arm.
Step back to admire how the layers of light and shadow bring a sense of peace and upward movement to your canvas


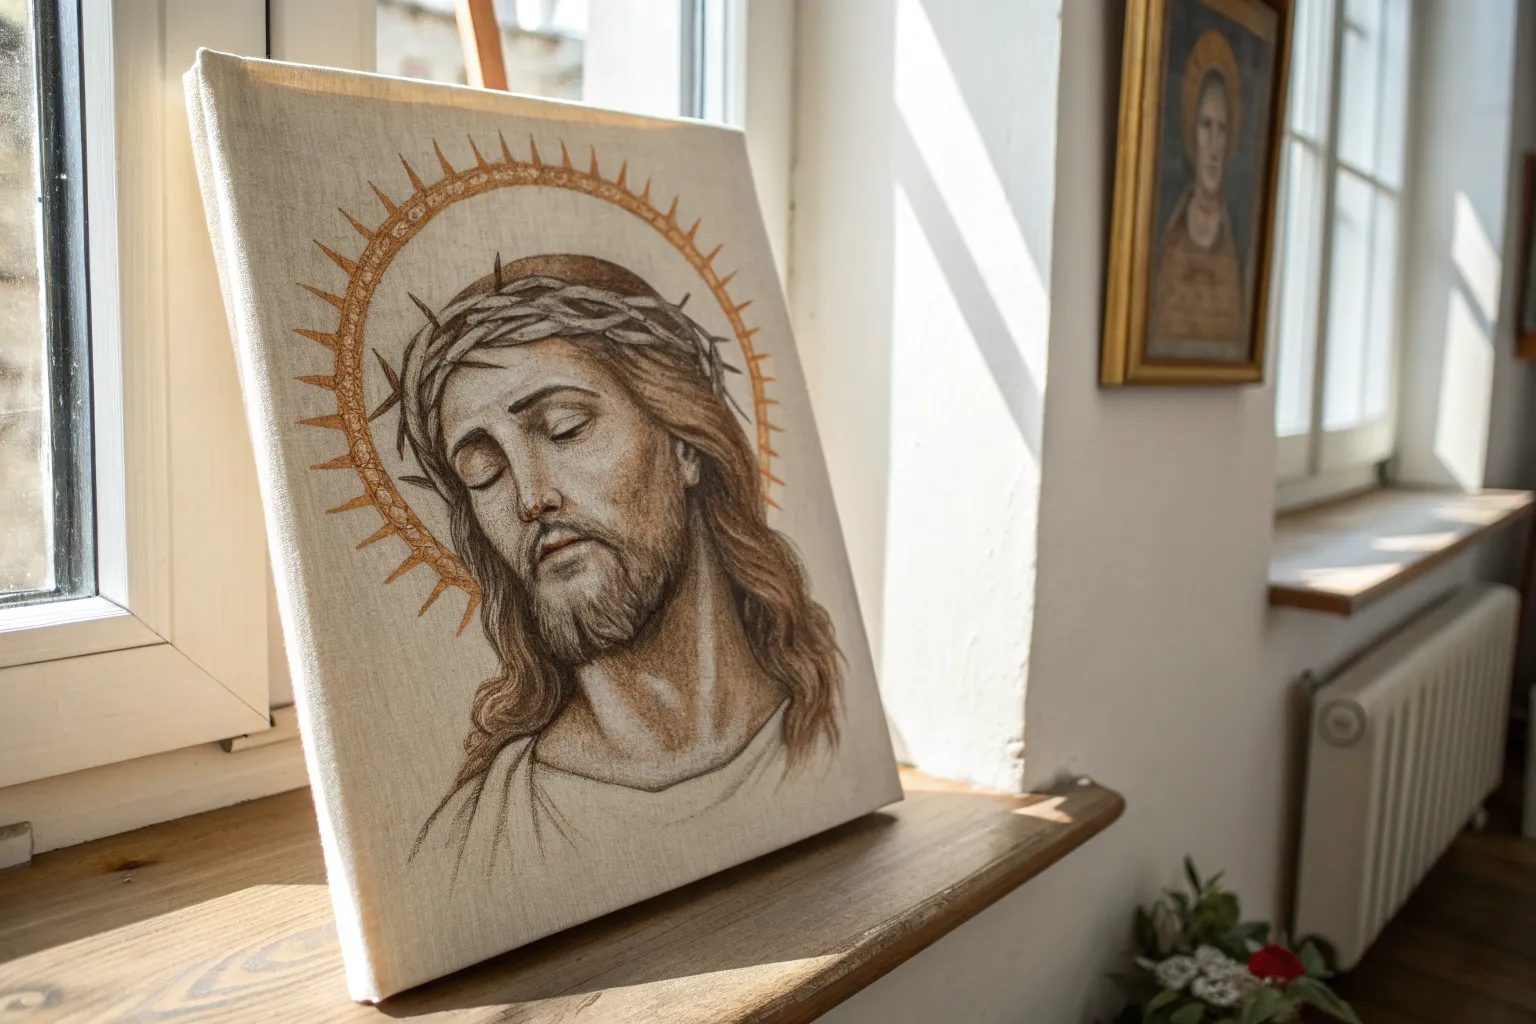
Faceless Minimal Jesus With Key Details
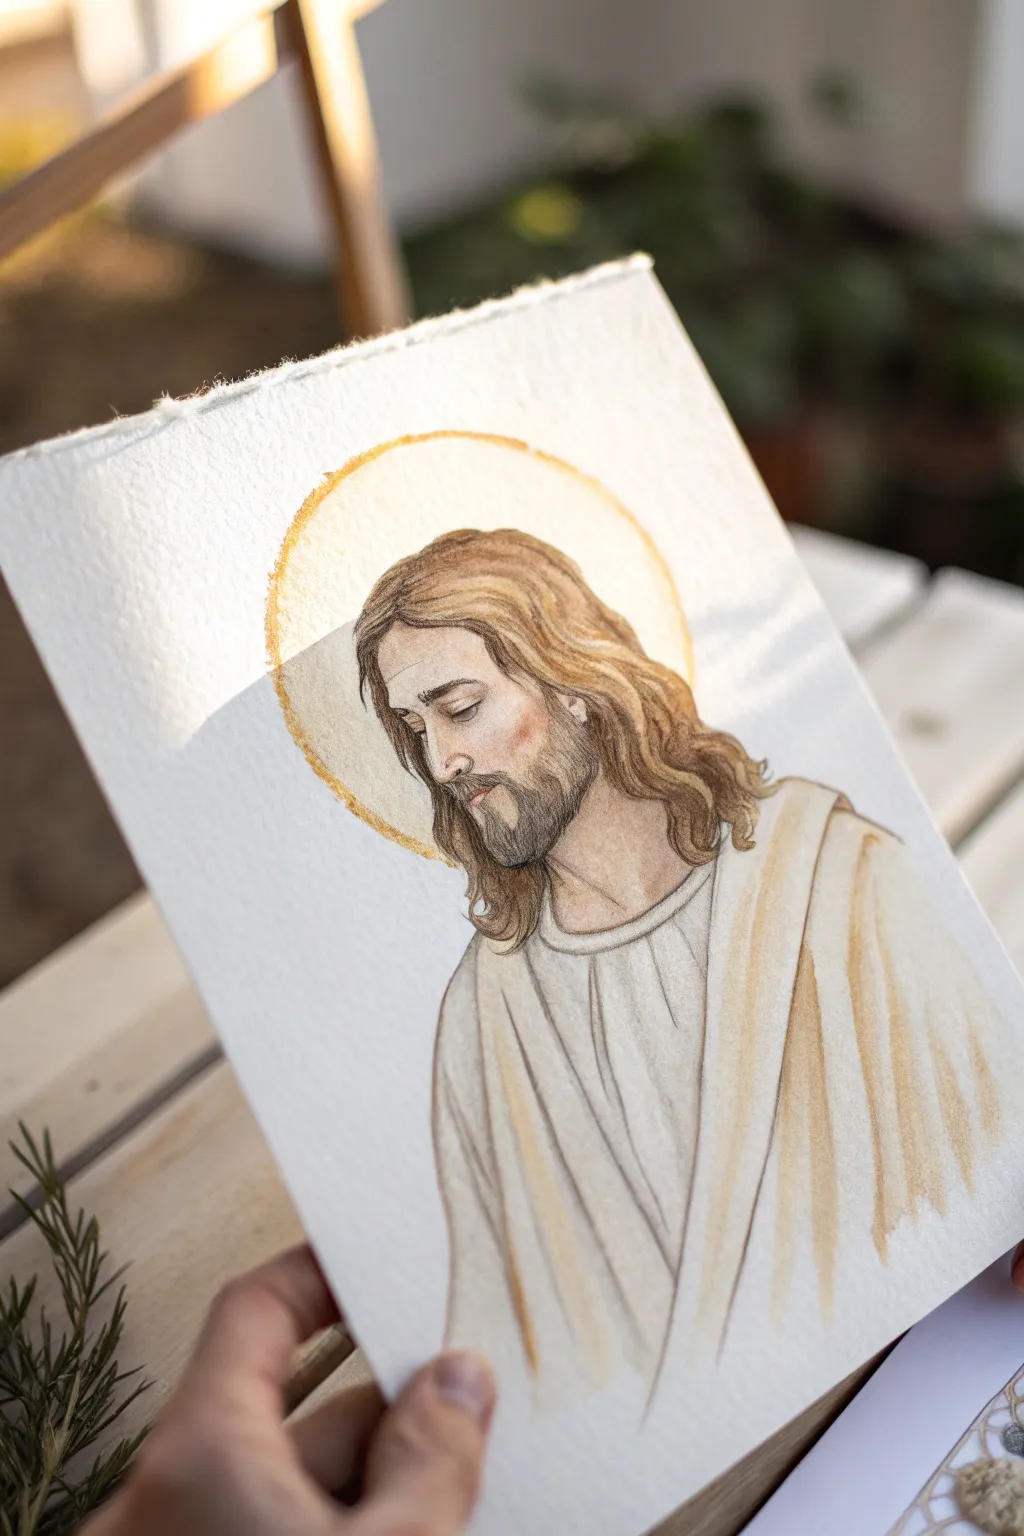
Capture a serene and reverent moment with this delicate watercolor portrait featuring soft earth tones and a striking golden halo. The textured paper adds a timeless, vintage quality to the artwork, perfect for a spiritual focal point in your home.
Step-by-Step
Materials
- Cold-pressed watercolor paper (300 gsm or heavier for texture)
- Watercolor paints (Burnt Umber, Yellow Ochre, Naples Yellow, subtle flesh tones)
- Gold watercolor paint or gouache for the halo
- Fine liner brushes (sizes 0 and 2) for details
- Round watercolor brush (size 6) for washes
- HB pencil for initial sketching
- Kneadable eraser
- Jar of clean water
- Paper towels
Step 1: Sketching the Foundation
-
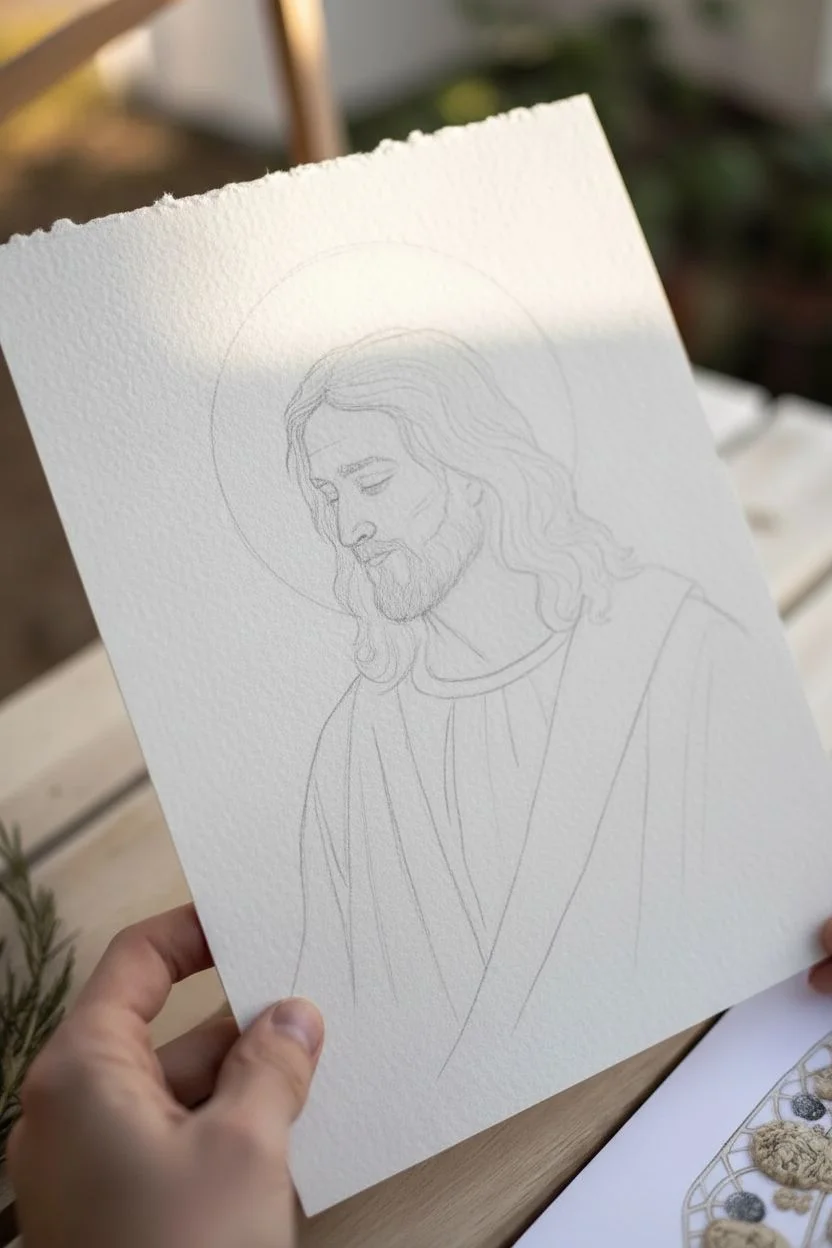
Draft the facial profile:
Begin with a very light HB pencil sketch. Focus on a three-quarter profile looking downward. Outline the brow bone, the nose’s gentle slope, and the closed eyelid to establish a contemplative mood. -
Map the hair and beard:
Lightly sketch the flow of the hair. Instead of drawing every strand, outline the major clumps of wavy hair falling over the shoulders. Mark the beard line along the jaw, keeping the lines loose. -
Outline the robes:
Sketch the clothing with long, sweeping vertical lines to suggest heavy fabric draping. Keep the collar simple and round. Don’t over-detail this area; simpler is better for the final look. -
Define the halo:
Draw a large circle behind the head. It doesn’t need to be geometrically perfect; a slightly organic circle feels more artistic. Ensure it frames the head comfortably without touching the shoulders. -
Clean up the sketch:
Use your kneadable eraser to lift off excess graphite. You want ‘ghost lines’ that are barely visible so they don’t muddy the watercolor later.
Step 2: Painting the Portrait
-
Apply the first skin wash:
Mix a very dilute wash of a flesh tone (like Naples Yellow with a touch of red or brown). Apply this to the face and neck, leaving tiny paper white areas on the nose and forehead for highlights. -
Build facial shadows:
While the first layer is still slightly damp, drop in a slightly darker mix (add a tiny bit of Burnt Umber) around the eye socket, under the nose, and beneath the jawline to create dimension. -
Base layer for hair:
Using a size 6 brush, apply a light wash of Yellow Ochre mixed with light brown over the entire hair and beard area. Let this dry completely before moving forward. -
Detailing the hair strands:
Switch to your finer brush. Use a darker brown (Burnt Umber) to paint individual wavy lines within the hair clumps. Concentrate the darkest strokes near the neck and roots where shadows naturally fall. -
Painting the beard:
Use short, controlled strokes with the fine brush to create the beard texture. I like to keep the edges slightly soft so it doesn’t look pasted on. Darken the mustache area slightly for contrast. -
Refining facial features:
Carefully define the closed eyelid with a fine line of dark brown. Add subtle shading to the side of the cheek to emphasize the cheekbone structure.
Edge Control
Don’t outline the entire face. Let the paint edge define the highlight on the forehead against the white paper for a glowing effect.
Step 3: The Robe and Halo
-
Wash the robe:
Mix a very watery beige or cream color. Apply this to the robe, using vertical strokes that follow your pencil lines. Let the paint pool slightly at the bottom of the sketch for a natural gradient. -
Add fabric folds:
While the robe is damp, add a slightly darker beige into the wet areas where the folds would be deepest. This wet-on-wet technique creates soft, realistic shadows. -
Paint the golden halo:
Using gold watercolor or a mix of Yellow Ochre and bright yellow, paint the halo ring. Keep the pigment concentrated on the outer rim for a defined edge, fading slightly inward. -
Add halo texture:
Dab the outer edge of the wet halo paint with a dry brush or paper towel to create that textured, slightly rough perimeter seen in the reference image. -
Final outlines:
Once everything is bone dry, use your finest brush with a dark sepia or brown mix to selectively outline key areas—the collar, the edge of the hair, and the main fold of the robe—to bring crispness to the soft painting.
Deckle It Up
For that authentic old-world feel, tear the edges of your watercolor paper against a ruler instead of cutting them with scissors.
Place your finished piece in a floating frame to show off those beautiful textured edges
Abstract Color Splash Jesus Energy
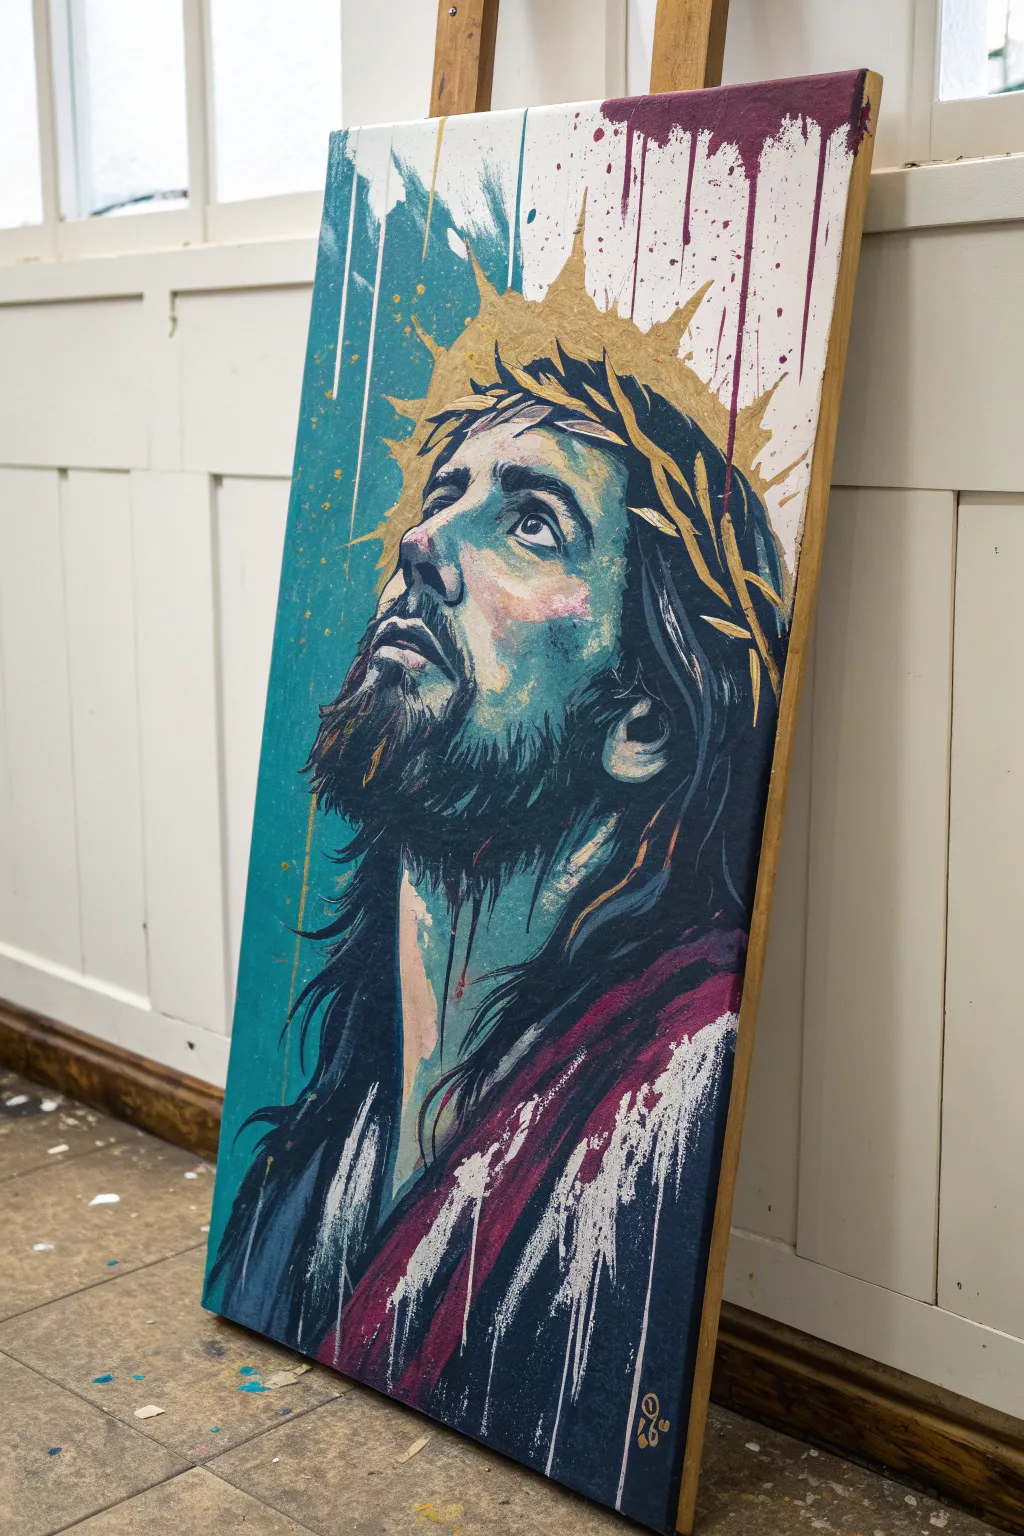
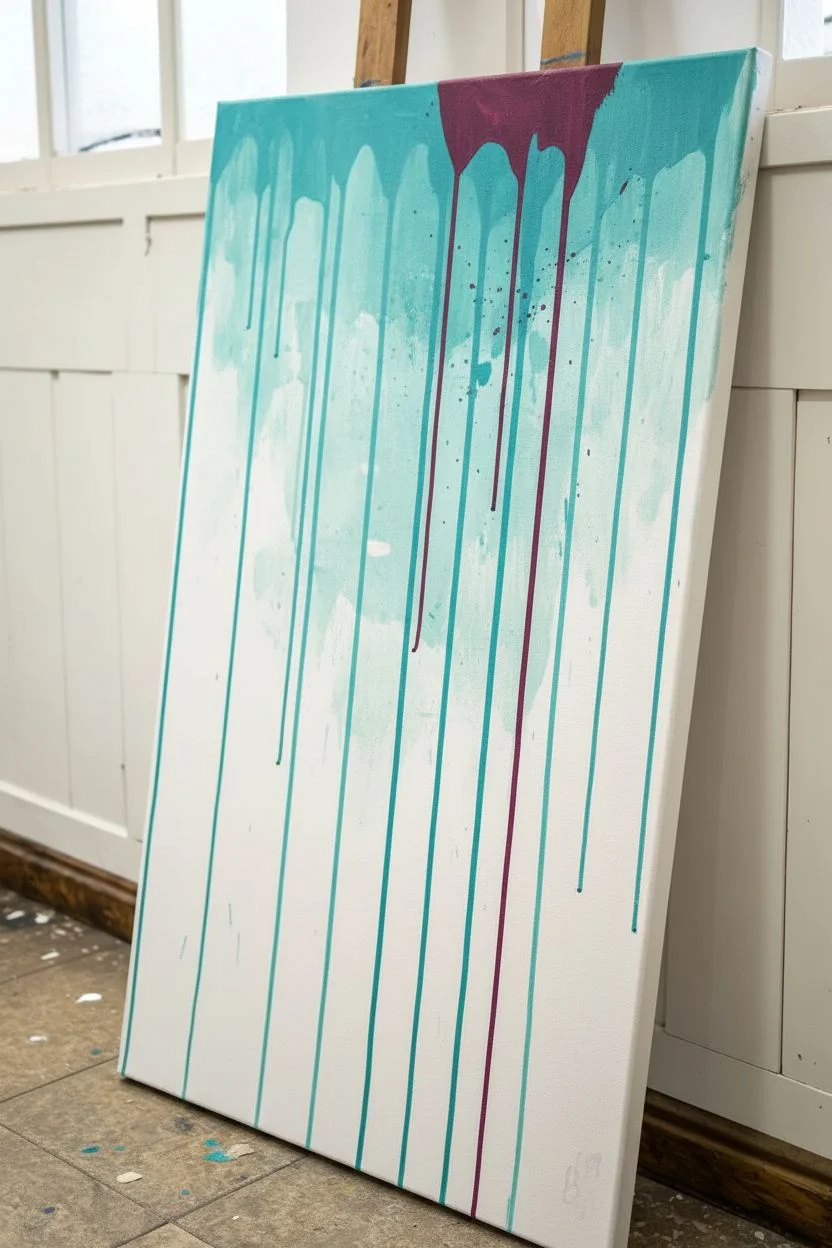
This striking project combines traditional portraiture with modern, abstract energy through bold drips and metallic accents. By layering cool teal tones with warm golds and deep magentas, you’ll create a reverent yet contemporary depiction of Jesus looking heavenward.
Step-by-Step Guide
Materials
- Large rectangular canvas (approx. 24×36 inches)
- Acrylic paints: Teal/Turquoise, Deep Navy/Black, Maroon/Magenta, Titanium White, Raw Sienna, Burnt Umber, Flesh Tint
- Gold leaf sheets or metallic gold paint
- Gilding adhesive (size) if using leaf
- Assorted brushes: 1-inch flat brush, medium filbert, fine round detail brush
- Palette knife
- Spray bottle with water
- Pencil or charcoal for sketching
- Painter’s tape or easel
Step 1: Preparation and Abstract Background
-
Prime the background:
Start by loosely painting the upper left and top sections with touches of teal and plenty of white to keep it airy. Don’t worry about perfect coverage; let the canvas texture show through slightly. -
Create the drips:
Mix a fluid consistency of teal and maroon separately with water. Load your brush heavily at the top edge of the canvas and press it against the surface, allowing natural drips to run down the length of the canvas. You can mist these with your spray bottle to encourage longer, thinner runs. -
Dry completely:
This background layer needs to be fully dry before you start the portrait to prevent muddying your crisp drip lines at the top.
Gravity is Your Friend
For natural-looking drips, tilt your canvas vertically while the paint is wet. Don’t force the brush down; let gravity pull the bead of paint.
Step 2: Sketching and Blocking In
-
Sketch the composition:
Using a light pencil or charcoal, outline the profile of Jesus. Focus on the upward gaze, the tilt of the head, and the flowing lines of the hair and beard. -
Block in shadow shapes:
Using your deep navy or black paint, fill in the darkest areas: the bulk of the hair, the deep shadows under the chin, and the back of the neck. -
Establish the robe:
Paint the diagonal swoop of the robe in the lower right using deep maroon. Keep the edges nearest the bottom right slightly rough or dry-brushed to blend with the background texture.
Step 3: Developing the Portrait
-
Base skin tones:
Mix a mid-tone flesh color using flesh tint, raw sienna, and a touch of teal to harmonize with the background. Apply this to the face, leaving space for highlights. -
Add abstract shadows:
Instead of traditional brown shadows, use a watered-down teal mix to shade the side of the face and neck. This integrates the subject into the abstract environment. -
Define facial features:
Switch to a smaller round brush. Carefully paint the eye looking upward, the nostril, and the mouth. Use deep umber rather than black for the features to keep them warm. -
Highlighting the face:
Mix white with a tiny dot of flesh tint. Apply bold highlights to the cheekbone, the bridge of the nose, and the forehead to emphasize the light source coming from above.
Metallic Depth
Mix a tiny amount of copper or bronze paint into your gold halo area. The slight color variation adds old-world richness to the modern style.
Step 4: Hair and Texture
-
Layering the beard:
Over your dark base, flick lighter strands of grey and teal-tinted white using a fine liner brush to create the texture of the beard and hair. -
Robe details:
Add white and light pink abstract strokes over the maroon robe. Drag the paint downwards to mimic the vertical drip aesthetic of the background.
Step 5: The Crown and Final Touches
-
Outline the thorns:
Paint the basic shape of the crown of thorns using yellow ochre as a base coat. Ensure the thorns overlap the hair and forehead naturally. -
Apply gold leaf adhesive:
Carefully paint the gilding adhesive (size) over the yellow ochre crown area. Let it tack up until it feels sticky but not wet. -
Gild the crown:
Press the gold leaf sheets onto the adhesive. Use a stiff, dry brush to rub away the excess flake, revealing a brilliant, texture-rich metallic crown. -
Add the halo effect:
Using metallic gold paint or diluted yellow ochre, paint loose, expressive spikes radiating outward from the crown behind the head. -
Final drip accents:
I like to add a few final, deliberate splatters of teal or white over the lower dark sections of the painting to unify the piece. -
Seal:
Once fully cured (wait at least 24 hours), apply a varnish. Be careful brushing over the gold leaf; a spray varnish is often safer to preserve the metallic shine.
Hang your finished canvas where natural light can catch the gold leaf and bring the expression to life


Have a question or want to share your own experience? I'd love to hear from you in the comments below!