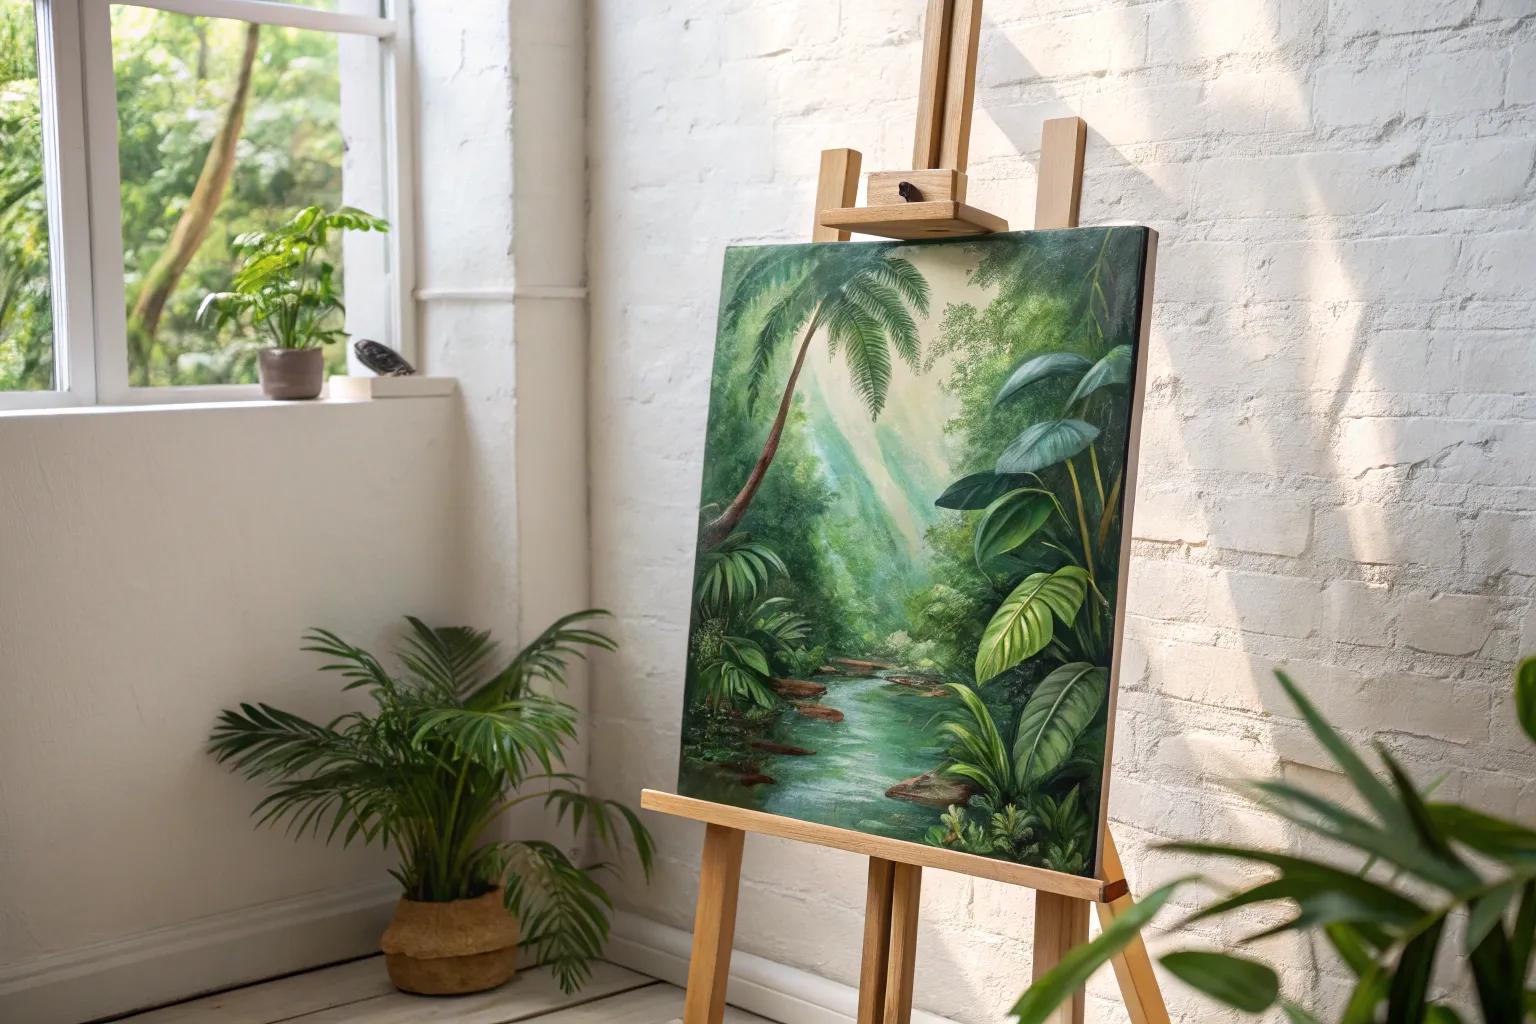
Whenever I’m stuck, a jungle painting pulls me right back into play—big shapes, wild color, and that steamy, layered depth. Here are some jungle painting ideas I love using in the studio, from classic rainforest vibes to more unexpected, magical twists.
Sun-Dappled Canopy Light Rays
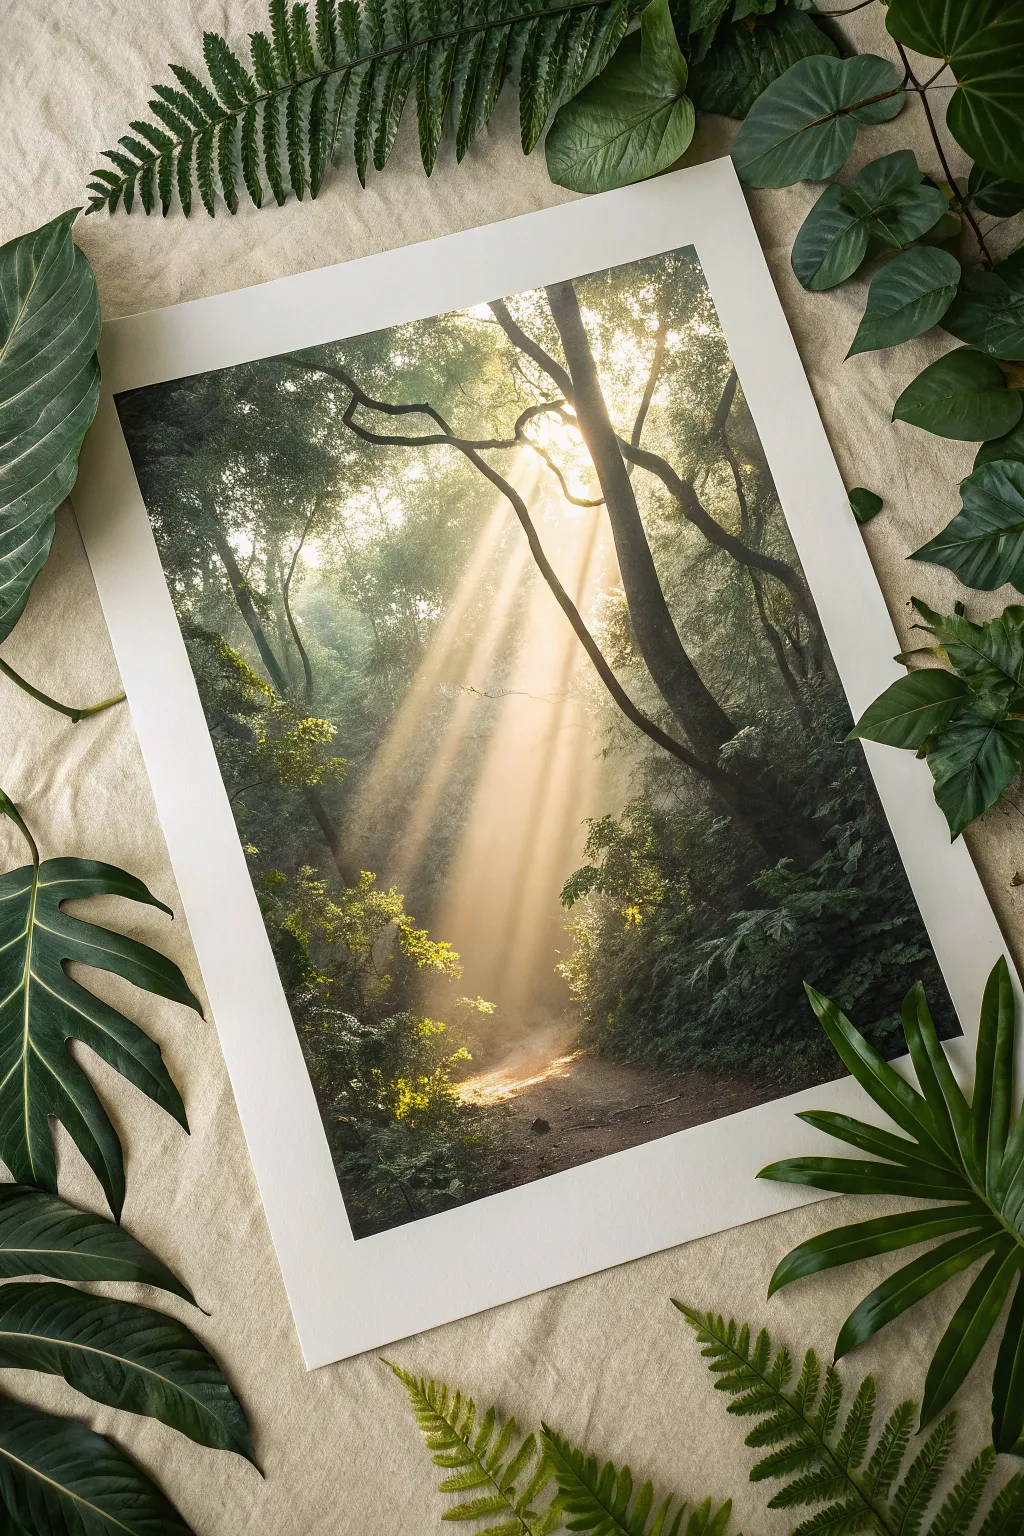
Recreate the ethereal beauty of morning light filtering through a dense canopy with this atmospheric painting tutorial. You will learn to use glazing techniques to build depth and capture the precise moment sunbeams pierce through the forest mist.
Detailed Instructions
Materials
- High-quality watercolor paper (300gsm, cold press)
- Watercolor paints (Sap Green, Hooker’s Green, Indigo, Burnt Umber, Payne’s Gray, Lemon Yellow)
- White Gouache or White Acrylic ink
- Masking fluid
- Large flat brush (1-inch)
- Round brushes (sizes 4, 8, and 12)
- Detail liner brush
- Painter’s tape
- Paper towels
- Two water jars
Step 1: Preparation and Background
-
Secure the Paper:
Tape your watercolor paper down firmly to a board on all four sides. This ensures a crisp white border like the one in the reference image and prevents buckling during heavy washes. -
Sketch the Composition:
Lightly sketch the main tree trunks using a hard pencil (H or 2H). Focus particularly on the large, curving tree in the foreground and the faint path leading into the light. -
Protect the Highlights:
Apply masking fluid to the brightest area where the sun source is hidden behind the branches. Use an old brush for this, as masking fluid ruins bristles. -
Initial Wash:
Wet the entire paper with clean water. While wet, drop in a very pale wash of Lemon Yellow concentrated in the upper center, fading out to white. -
Establish Atmosphere:
While the paper is still damp but not soaking, add soft touches of diluted Sap Green and a tiny bit of Indigo to the outer edges to start framing the light source.
Step 2: Building the Forest Depth
-
Distant Trees:
Mix a pale, cool grey-green using Hooker’s Green and Payne’s Gray. Paint faint, vertical shapes in the background to suggest distant tree trunks, keeping edges soft. -
Mid-Ground Foliage:
Once the previous layer is dry, mix a slightly stronger green. Stipple lush foliage textures on the left and right sides, leaving the center path area clear and bright. -
Create the Path:
Using a mix of Burnt Umber and a touch of purple, paint the forest floor. Keep the paint thin near the light source and darker as it comes toward the bottom edge. -
Foreground Giants:
Mix a dark, rich brown-black using Burnt Umber and Indigo. With your size 8 round brush, paint the prominent, curving tree trunk on the right and the darker trunk on the left. -
Adding Texture:
While the trunk paint is wet, lift out a tiny bit of color on the right side of the trunk to suggest reflected light hitting the bark.
Pro Tip: Softening Edges
For mistier rays, use a damp ‘thirsty brush’ to soften the hard edges of your sunbeams while they are still slightly wet. This mimics the diffusion of light through humidity.
Step 3: The Light Rays and Finishing Touches
-
Painting the Rays:
This is the crucial step. Make sure the painting is 100% dry. Take a flat brush with clean water and create diagonal streaks starting from the light source downwards. -
Lifting Color:
Gently blot the wet streaks with a clean paper towel to lift the pigment, revealing the lighter paper underneath. This creates the soft, negative-space sunbeams. -
Enhancing the Beams:
For sharper rays, I like to mix a very translucent glaze of white gouache and Lemon Yellow, painting thin, diagonal lines following your lifted areas. -
Foreground Foliage:
Using your smallest detail brush and pure Sap Green mixed with yellow, add sharp, detailed leaves in the immediate foreground corners to create a sense of scale. -
Darkest Darks:
add final touches of pure Indigo or Payne’s Gray to the deepest shadows at the base of the trees to maximize contrast against the light. -
Remove Masking:
Gently rub away the masking fluid from step 3 to reveal the pure white core of the light source. -
Final Glaze:
To unify the warmth, wash a very watery glaze of yellow ochre over the sunlit path area only. -
Reveal:
Wait for everything to be completely bone dry, then carefully peel away the painter’s tape at a 45-degree angle to reveal your crisp white border.
Troubleshooting: Muddy Greens?
If your forest looks dull, let the layers dry completely between glazes. Wet-on-wet mixing of too many green tones creates brown mud. Patience is key for vibrancy.
Framing this piece with a wide white mat will emphasize the delicacy of the light you’ve captured
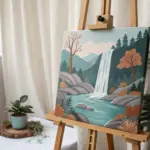
A Hidden Jungle Waterfall
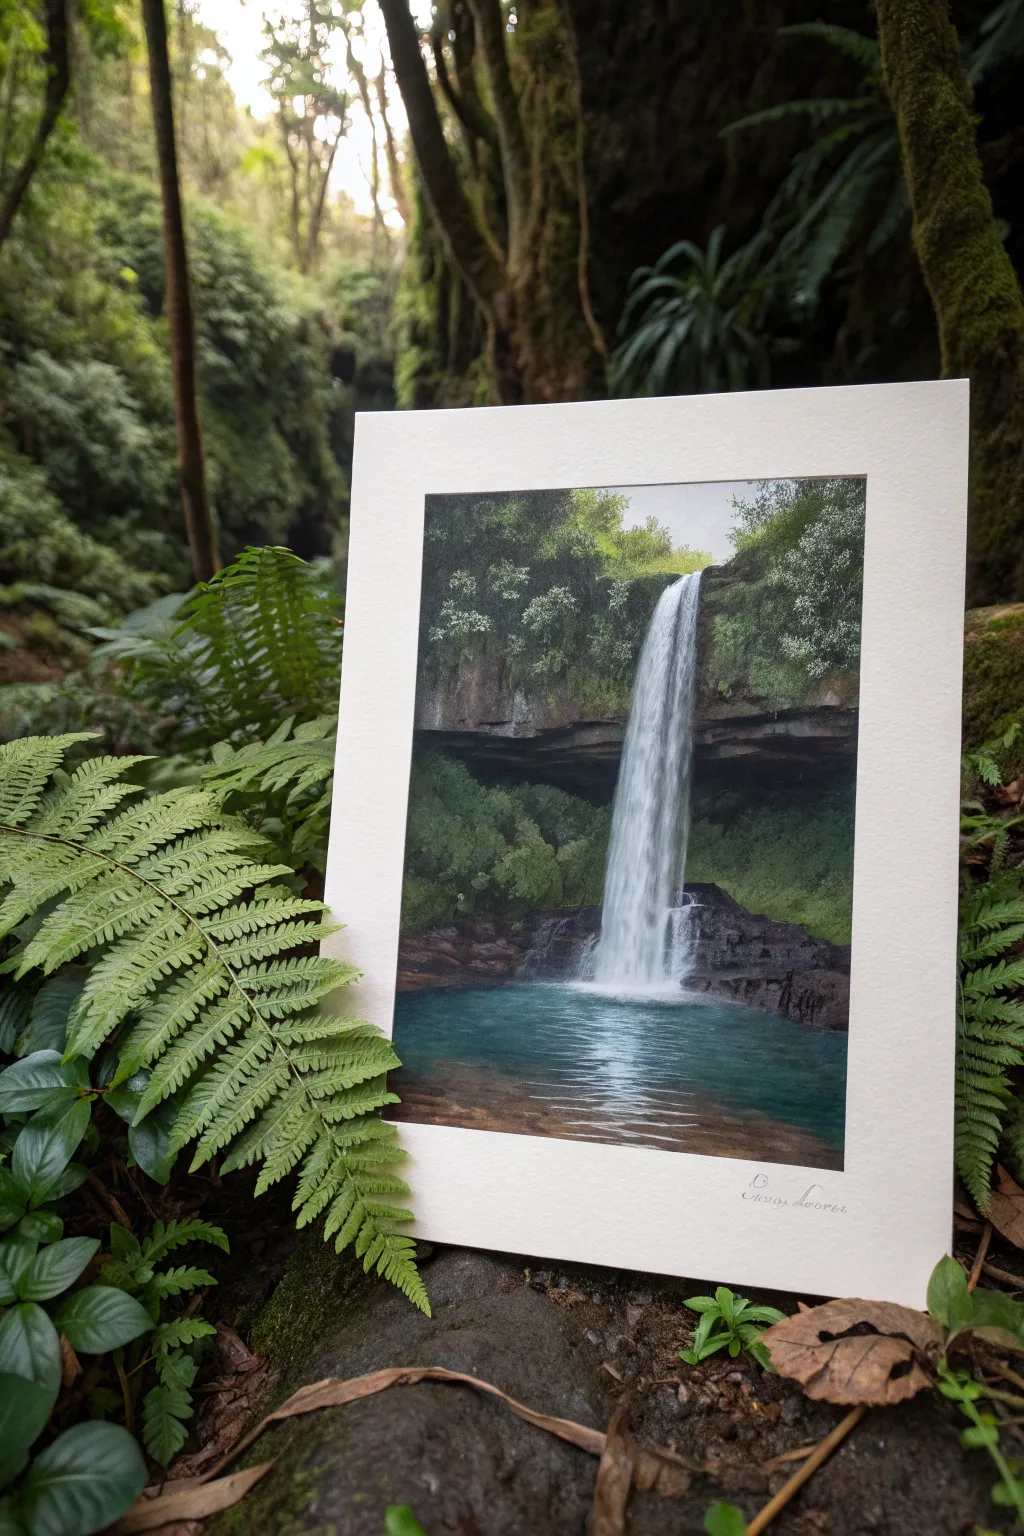
Transport yourself deep into a verdant rainforest with this realistic acrylic painting tutorial featuring a serene waterfall cascading into a crystal-clear pool. You will learn to balance heavy texture in the rock faces with the delicate, misty motion of falling water.
How-To Guide
Materials
- Heavy body acrylic paints
- Stretched canvas or canvas board (11×14 or similar)
- Set of synthetic brushes (flat shader, filbert, detail round)
- Palette knife
- Water cups and paper towels
- Gesso (optional, for priming)
- Slow-drying medium or retarder
- White mat board for framing
Step 1: Setting the Scene
-
Prime and sketch:
Begin by ensuring your surface is smooth; apply a coat of gesso if needed. Using a very diluted burnt umber and a small round brush, lightly sketch the main composition. Mark the horizon line for the pool, the vertical column where the waterfall will be, and the horizontal shelf of the cliff face. -
Block in dark values:
Mix a deep, dark green using hooker’s green, burnt umber, and a touch of payne’s gray. Apply this dark mixture to the shadow areas under the cliff shelf and the deep recesses of the foliage on the left and right. This establishes your deepest shadows early on. -
Establish the cliff face:
Using a palette knife or a flat brush, block in the rock shelf with a mix of burnt sienna, raw umber, and a touch of unbleached titanium. Don’t worry about detail yet; focus on the horizontal structure that the water falls from. -
Underpaint the pool:
For the water basin, mix a deep turquoise using phthalo blue, phthalo green, and white. Paint the entire pool area with horizontal strokes, keeping the color darker near the rocks and slightly lighter towards the foreground.
Dry Brushing Magic
For the falling water, apply paint with a ‘dry brush’ (very little paint). This naturally creates the streaky, broken lines that look like moving water.
Step 2: Building Foliage and Rocks
-
Layering the background greens:
Mix a mid-tone olive green. Using a filbert brush, stipple in the general shapes of the bushes and trees above the cliff. Keep the edges soft where the foliage meets the sky area. -
Adding rock texture:
Go back to the cliff face with a smaller flat brush. Mix a dark grey-brown and add vertical cracks and crevices. Highlight the top edges of these rocks with a lighter grey-brown to simulate light catching the wet stone. -
Developing the side banks:
On the left and right banks, stipple lighter greens (sap green mixed with yellow ochre) to bring the foliage forward. Use a tapping motion to mimic leaf clusters rather than painting individual leaves. -
Detailing the dark wet rocks:
At the base of the falls where the water hits, paint the rocks very dark, almost black-brown. Add sharp, small highlights of white mixed with a tiny bit of blue to make them look slick and wet.
Level Up: Gloss Varnish
Once cured, apply a high-gloss varnish only to the wet areas (waterfall and pool) and a matte varnish to the rocks/foliage for incredible realistic contrast.
Step 3: The Waterfall and Pool
-
Painting the falling water base:
Mix titanium white with a very small amount of the water color (turquoise). Using a flat brush, pull paint vertically from the top lip of the falls down to the pool. Use one continuous stroke if possible for a smooth look. -
Adding brightness to the falls:
Load a clean flat brush with pure titanium white. Lay it gently over the previous layer, focusing on the center of the waterfall where the water is thickest and brightest. Keep the edges slightly translucent. -
Creating the mist:
At the bottom of the falls, use a dry brush with a tiny amount of white paint. Scrub in a circular motion to create the misty spray where the water crashes into the pool. -
Ripples and reflections:
I like to use a small rigger or detail brush here. Paint thin, horizontal lines of white and pale turquoise across the pool surface. Concentrate these ripples directly under the waterfall, spacing them out as you move toward the viewer. -
Deepening the water:
Glaze a thin layer of transparent phthalo blue over the bottom corners of the pool to add depth, ensuring the bright reflections in the center remain untouched.
Step 4: Final Flourishes
-
Sky highlights:
If any sky is visible above the trees, paint it a soft, muted grey-white to suggest an overcast, humid jungle day. This high contrast helps the green foliage pop. -
Foreground details:
Enhance the closest rocks in the water’s edge with reddish-brown glazes to show the submerged stones. Add final bright specs of white to the most turbulent water areas. -
Matting the artwork:
Once fully dry, center a white mat board over your painting. This clean border instantly elevates the piece and focuses the viewer’s eye on the composition.
Step back and admire the tranquil, thunderous beauty of your own private jungle escape

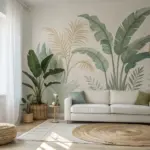
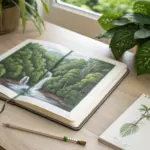
Layered Foliage for Instant Depth
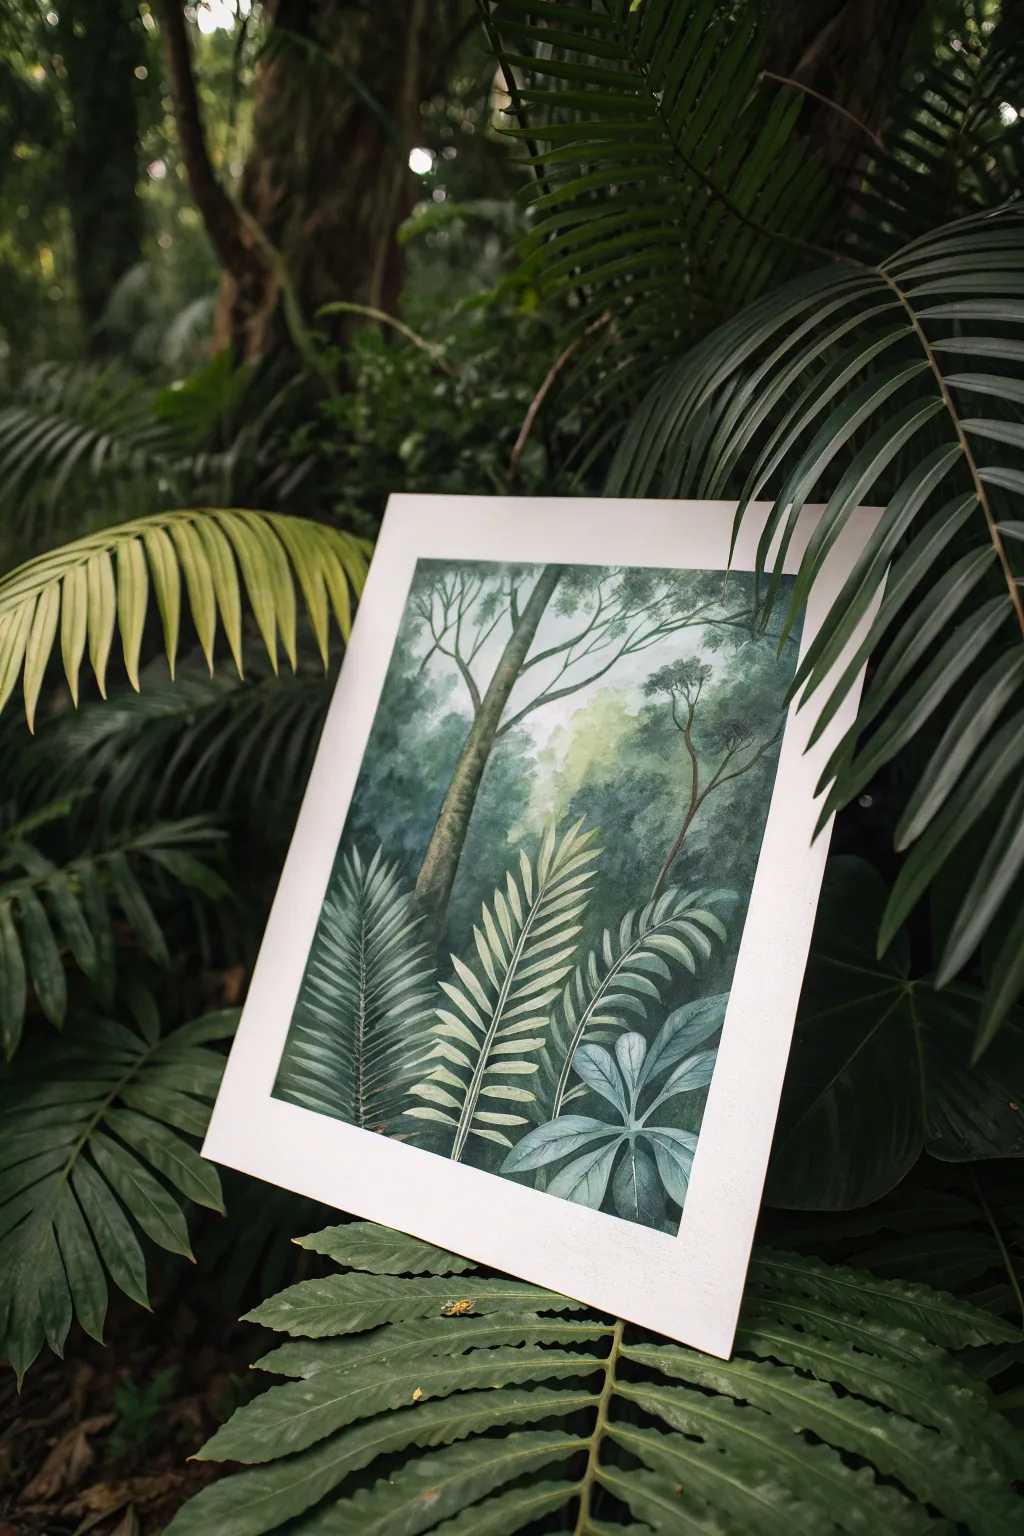
Create an atmospheric jungle scene that draws the viewer deep into the rainforest with distinct planes of foliage. By mastering the transition from hazy, distant trees to crisp, detailed foreground leaves, you’ll achieve a striking sense of three-dimensional space.
Step-by-Step Guide
Materials
- Heavyweight watercolor paper (300gsm, cold press)
- Watercolor paints (Sap Green, Hooker’s Green, Indigo, Yellow Ochre, Burnt Umber, White Gouache)
- Masking tape
- Large flat brush (1 inch)
- Medium round brush (size 6 or 8)
- Fine liner brush (size 0 or 1)
- Palette for mixing
- Included reference photo
Step 1: Setting the Atmosphere
-
Prep the surface:
Begin by taping down all four edges of your watercolor paper to a rigid board. This creates the crisp white border seen in the final piece and prevents the paper from buckling during heavy washes. -
Mix the background mist:
Create a very dilute, milky wash using a mix of Sap Green and a touch of Indigo. If you want the mist to be opaque like the example, mix in a small amount of White Gouache to create a soft pastel sage color. -
Paint the distant canopy:
Apply this pale wash to the upper two-thirds of the paper. While it’s still wet, drop in slightly darker values of the same mix to suggest distant tree shapes without defining them clearly. Let this layer dry completely. -
Define the light source:
Mix a watery Yellow Ochre wash. Gently glaze the center of the background where the light breaks through the canopy, blending the edges softly into the surrounding green mist.
Mist Master Tips
To get that foggy loom, keep background layers wet-on-wet. If edges get too hard, soften them immediately with a clean, damp brush.
Step 2: Constructing the Mid-Ground
-
Establish the main tree lines:
Using your medium round brush and a mix of Hooker\u2019s Green and Burnt Umber, paint the slender, angled tree trunks. Keep the paint somewhat translucent so they recede slightly into the mist rather than jumping too far forward. -
Add secondary tree shapes:
Paint thinner, branching limbs extending from the main trunks. Vaping the pressure on your brush will create natural, tapering branches that reach toward the light. -
Create mid-ground foliage masses:
Switch to a darker green mix. Using a stippling or dabbing motion, add clusters of leaves to the tops of the mid-ground trees. Keep edges somewhat soft to maintain the feeling of depth. -
Darken the lower forest:
Apply a wash of deep green (Hooker\u2019s Green + Indigo) to the bottom third of the painting behind where the main ferns will go. This creates a dark backdrop that will make the foreground pop.
Step 3: Detailed Foreground Foliage
-
Sketch the foreground layout:
Once the underlayers are bone dry, lightly pencil in the shapes of the large fern and broad-leaf plants at the bottom. This ensures you have a balanced composition before committing with dark paint. -
Paint the central fern stem:
Using a creamy consistency of Yellow Ochre mixed with a little White Gouache, paint the central spine of the large fern. This light color is crucial for contrast against the dark background. -
add fern leaflets:
With the same opaque light green mix, carefully paint the individual leaflets extending from the spine. Use the tip of your round brush to get sharp, pointed tips on each leaf. -
Create the broad-leaf plant:
On the bottom right, paint the large, palm-like leaves. Use a cool, blue-green mix (Indigo + White Gouache + a touch of Green) to differentiate it from the warm fern. Paint the veins first with a darker tone, then fill in the leaf sections. -
Layer side ferns:
On the left side, paint the darker fern fronds using a mix of Hooker\u2019s Green and Indigo. Overlap these slightly with the central light fern to create a sense of density. -
Refine with highlights:
Using your fine liner brush and pure White Gouache mixed with a tiny bit of yellow, add thin highlight lines on the edges of the foreground leaves where the light would catch them. -
Deepen shadows:
I like to go back in one last time with a concentrated dark mix (Indigo + Burnt Umber) to execute ‘negative painting’ between the foreground leaves, really pushing the shadows so the foliage leaps forward.
Level Up: Texture
Sprinkle a tiny pinch of salt onto the damp mid-ground foliage while it dries. This creates unique organic blooms that look like distant leaf clusters.
Now stepping back, you can admire how your deliberate layering has built a deep, breathing jungle world right on the page

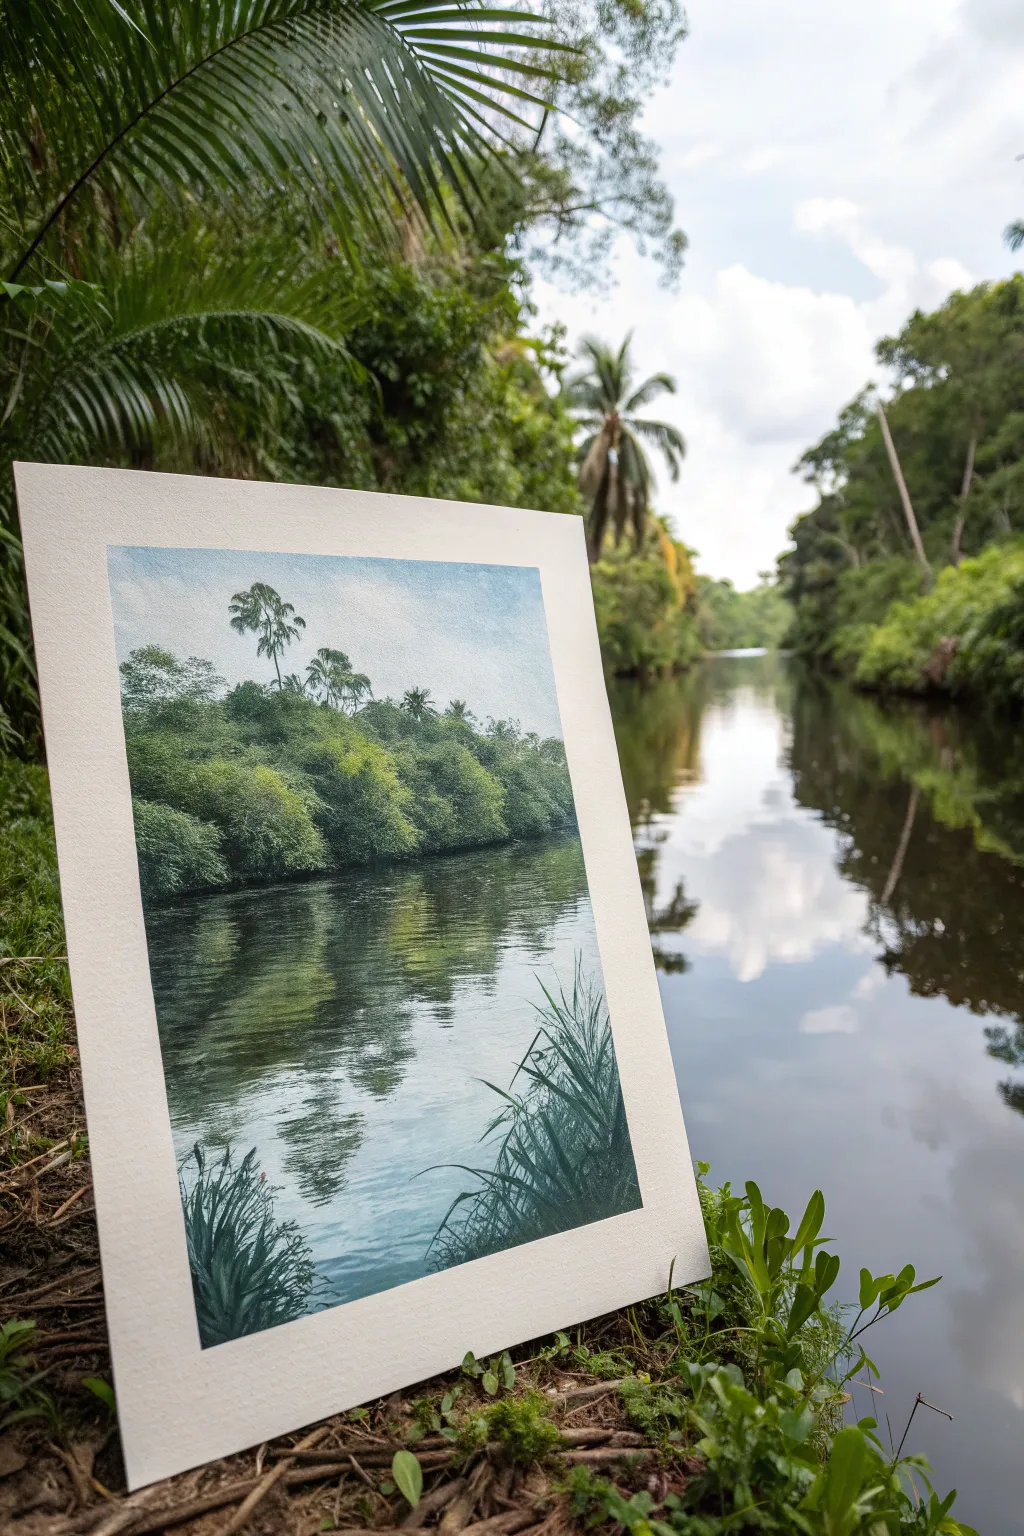
A Jungle Pathway Into the Green
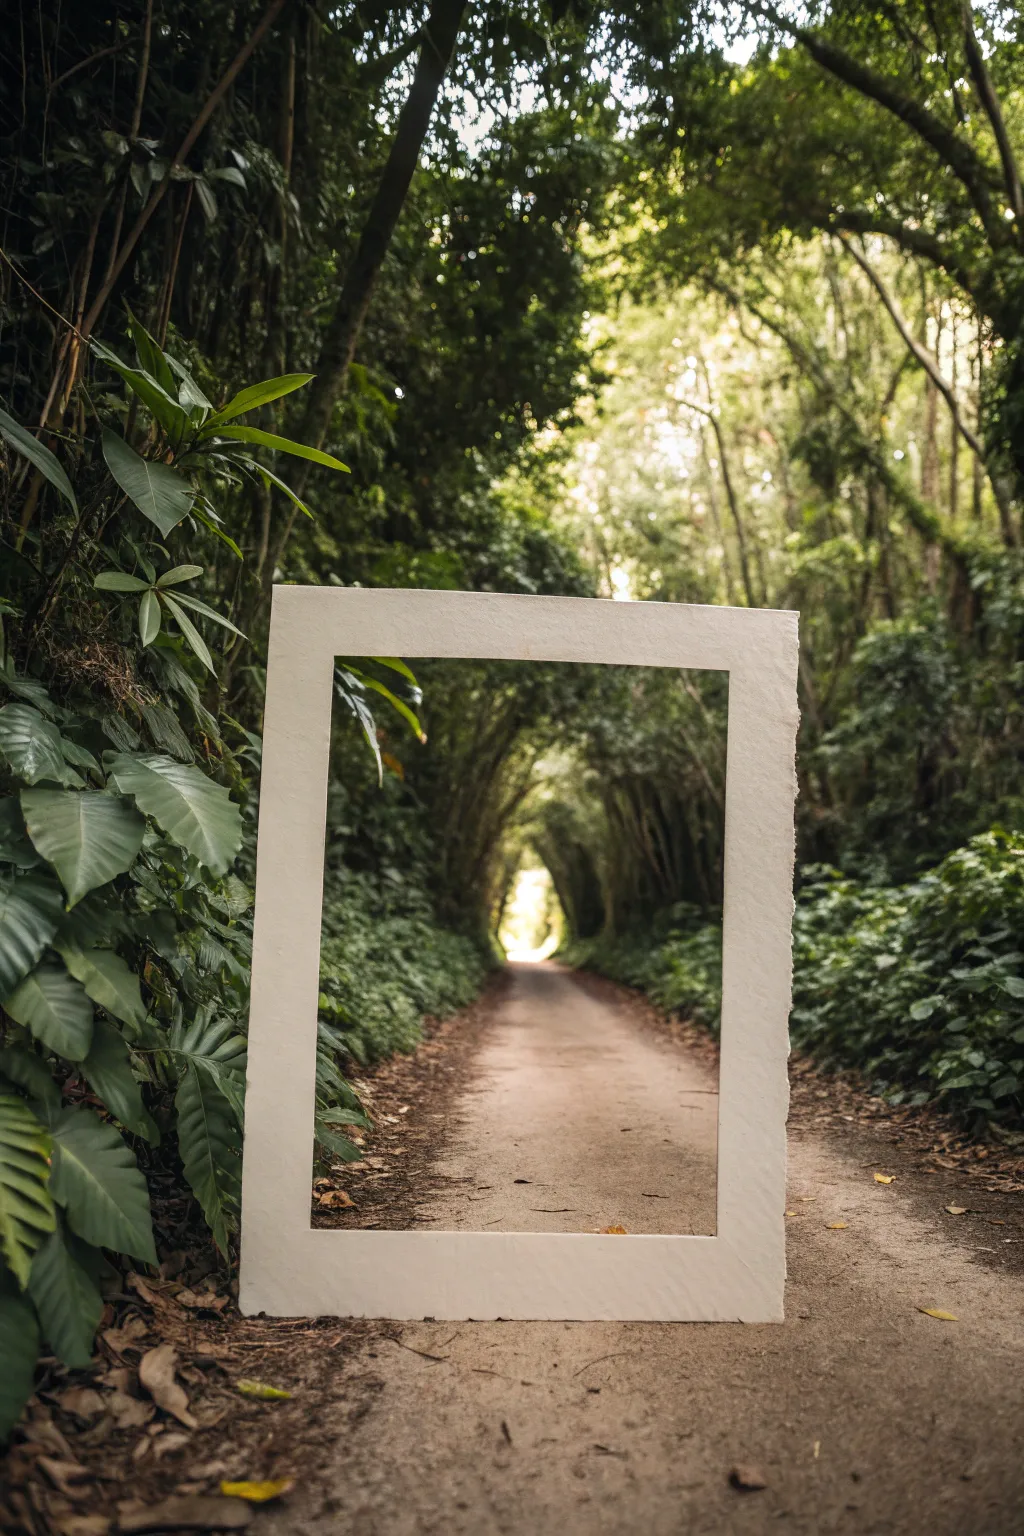
This clever optical illusion combines photography and paper crafting to create a surreal ‘portal’ effect within a natural setting. By placing a simple, textured frame into the landscape, you capture a living painting that draws the viewer deep into the jungle tunnel.
Step-by-Step Guide
Materials
- Heavyweight watercolor paper or textured cardstock (white)
- Craft knife (X-Acto)
- Metal ruler
- Cutting mat
- Pencil
- Camera (DSLR or smartphone with portrait mode)
- A scenic location with a defined path (forest, garden, or park)
Step 1: Crafting the Frame
-
Select your paper:
Choose a thick, textured paper for the frame. I prefer cold-press watercolor paper because its rough grain catches the natural light beautifully and contrasts with the smooth blurring of the background. -
Measure the dimensions:
Decide on the size of your frame. For a handheld shot like the reference, a total size of about 8×10 inches works well. Mark a border thickness of roughly 1.5 to 2 inches on all sides using your pencil and metal ruler. -
Cut the outer edge:
Place the paper on your cutting mat. Use the metal ruler as a guide and carefully slice the outer dimensions of the rectangle with your craft knife to ensure crisp, straight edges. -
Cut the inner window:
Line up your ruler with the inner pencil marks you made earlier. Press down firmly on the ruler to prevent slipping and cut out the center rectangle. Keep your corners sharp by not overcutting; you can gently snip the very corners with small scissors if they are still attached. -
Create a deckled edge (optional):
For a more artistic, handmade look, you can tear the outer edges against the ruler instead of cutting them, or use specialty deckle-edge scissors. This mimics the look of high-end art paper.
Uneven Frame?
If your frame looks trapezoidal or warped in the photo, your camera lens isn’t parallel to the paper. shift your angle until the vertical sides of the frame appear perfectly straight up and down.
Step 2: Setting the Scene
-
Scout the location:
Find a location where the natural lines of the environment converge. A straight dirt path, a tunnel of trees, or a row of hedges works best to create depth. -
Align the perspective:
Stand in the middle of the path. Hold the frame up at arm’s length. Adjust your position until the ‘vanishing point’ of the path (the light at the end of the tunnel) sits perfectly in the center of your paper window. -
Check the lighting:
Aim for a time of day with soft, diffused light, like early morning or late afternoon. Harsh midday sun might cast hard shadows on the white frame, ruining the illusion of it being a flat canvas.
Pro Tip: Floating Effect
Use a clear fishing line to suspend the frame from a branch above. This removes your hand or the ground from the shot entirely, making the ‘portal’ look like it’s hovering in mid-air.
Step 3: Capturing the Shot
-
Compose the foreground:
Position the frame so it rests on or just above the ground. If the ground is uneven, you can prop it up with small unseen stones or twigs behind the bottom edge. -
Set your focus:
This is the most critical step. Focus your camera on the paper frame itself, not the background. You want the texture of the paper to be sharp, while the jungle path inside and around the frame falls slightly out of focus. -
Adjust aperture:
If using a DSLR, use a wide aperture (low f-stop number like f/2.8 or f/4). If using a phone, switch to ‘Portrait Mode’. This creates that creamy bokeh effect that separates the crisp frame from the dreamy background. -
Shoot from a low angle:
Get down low. The camera lens should be level with the center of the frame. This emphasizes the height of the trees and makes the path look endless. -
Review and refine:
Check your image. Ensure the frame looks straight and not warped. If the white paper looks too blue (common in shade), adjust your white balance to warm it up slightly.
Now you have a stunning piece of photographic art that turns nature itself into a framed masterpiece
BRUSH GUIDE
The Right Brush for Every Stroke
From clean lines to bold texture — master brush choice, stroke control, and essential techniques.
Explore the Full Guide
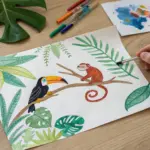
Macaw as a Color Focal Point
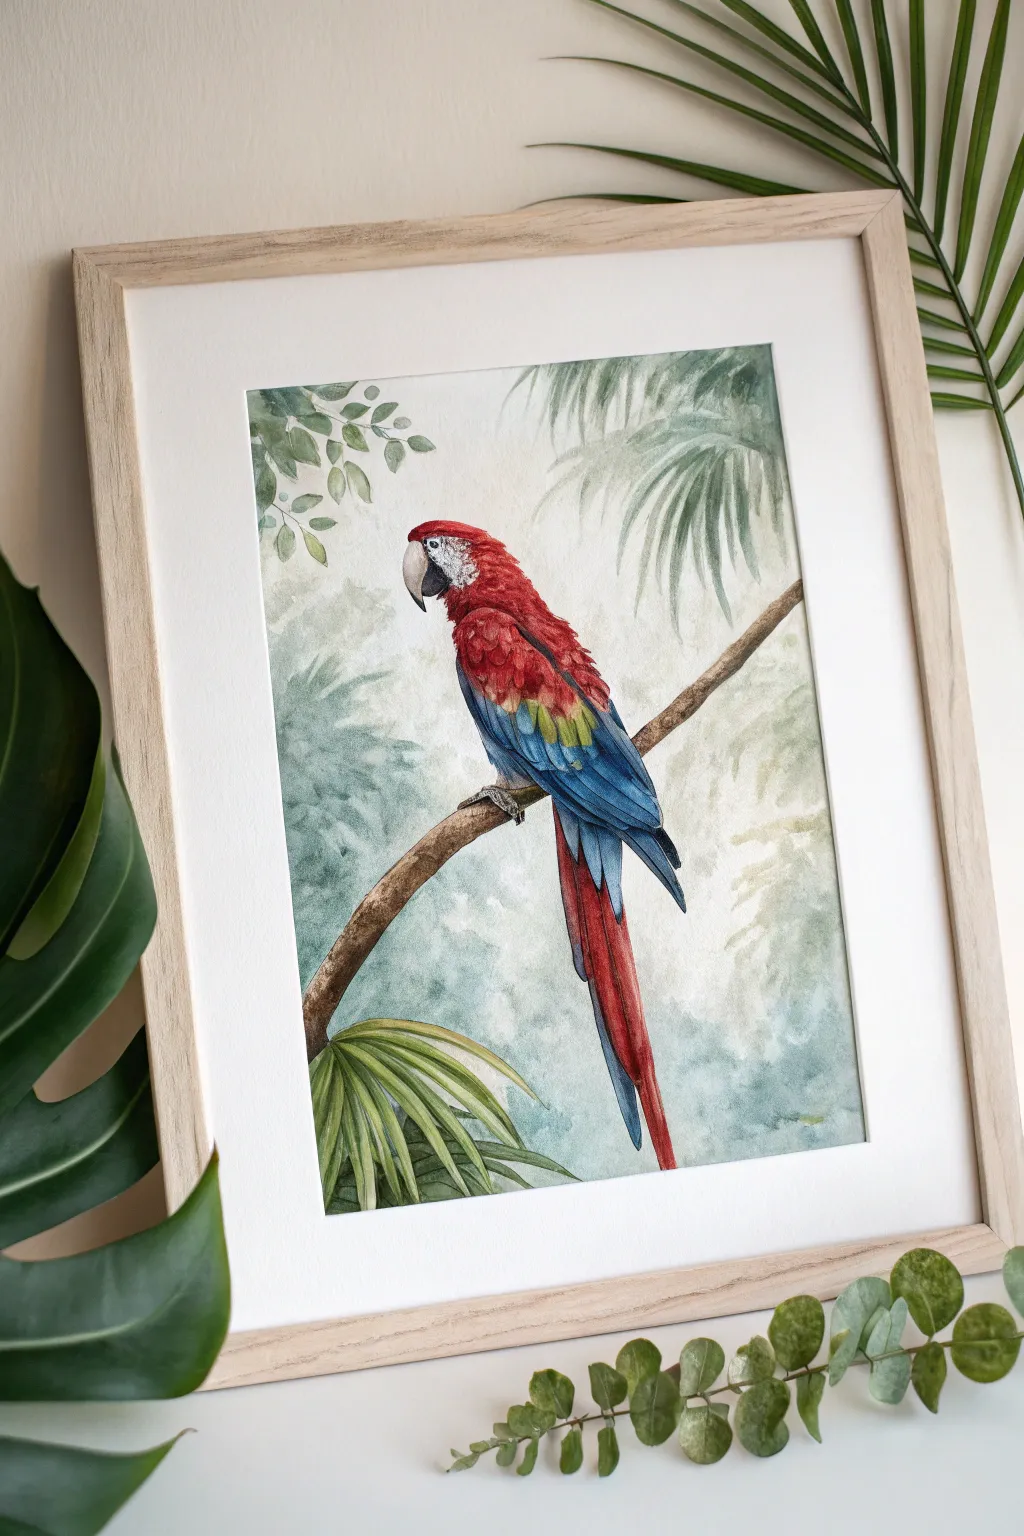
Capture the brilliant plumage of the tropics with this beginner-friendly watercolor tutorial featuring a scarlet macaw. By focusing on a single, colorful subject against a muted background, you’ll learn how to create a striking focal point with soft, atmospheric surroundings.
Step-by-Step Guide
Materials
- Cold press watercolor paper (300 gsm)
- Watercolor paints (Scarlet Red, Cadmium Yellow, Cobalt Blue, Indigo, Burnt Umber, Sap Green, Payne’s Grey)
- Round watercolor brushes (Size 2, 6, and 10)
- Pencil (HB or H) and kneadable eraser
- Two jars of water
- Paper towels
- Masking fluid (optional)
Step 1: Sketch and Background
-
Light Outline:
Begin by lightly sketching the macaw’s posture using an HB pencil. Focus on the curve of the back and the long tail feathers. Draw the diagonal branch the bird is perching on, ensuring it crosses the page visually to anchor the composition. -
Leaf Placement:
Sketch vague outlines of foliage in the background. Keep these shapes loose—you want hints of palm fronds and hanging vines, not detailed botanical drawings, as they need to recede visually. -
Atmospheric Wash:
Wet the entire background area with clean water, avoiding the bird and the branch. While wet, drop in very watered-down Sap Green and Payne’s Grey. Let the colors bleed and bloom to create a soft, out-of-focus jungle atmosphere. -
Ghost Leaves:
While the background is still damp but not soaking, use your size 10 brush to lift out some pigment or paint faint ghost leaves using a slightly more concentrated green mix. This creates depth without distraction. -
Initial Drying:
Allow the background layer to dry completely before touching the main subject. This prevents the vibrant red of the bird from bleeding into your soft green backdrop.
Step 2: The Macaw
-
Face and Beak:
Start with the face. Paint the beak using a pale grey wash, darkening the lower curve for volume. For the iconic white patch around the eye, leave the paper bare or use a tiny amount of diluted grey to suggest wrinkles. -
Base Red Layer:
Load your number 6 brush with Scarlet Red. Paint the head and upper body, following the direction of the feathers. Apply the paint somewhat loosely, allowing for slight variations in tone to suggest light hitting the curve of the bird’s head. -
Wing Transition:
As you move down the wing, introduce Cadmium Yellow into the wet red edge to create a natural orange transition. Then, blend Cobalt Blue below the yellow. This tri-color gradient is signature to the macaw. -
Blue Feathers:
For the lower wing and tail feathers, switch to a mix of Cobalt Blue and Indigo. Paint these shapes with sharp strokes to mimic stiff flight feathers, letting the layers overlap slightly. -
Tail Extension:
Extend the long red tail feathers downward. I like to use a sweeping motion here to capture the elegance of the tail. Darken the undersides of these feathers with a touch of Burnt Umber mixed into the red for shadow.
Muddiness Prevention
If your red and green areas touch while wet, they will turn brown. Ensure the background is bone-dry before starting the red feathers to keep the colors crisp.
Step 3: Details and Branch
-
Texture on Red:
Once the red base is dry, use your smallest brush (size 2) and a slightly darker red mix to paint small ‘U’ or ‘V’ shapes on the chest and neck. This mimics the texture of individual contour feathers. -
Defining the Wing:
Sharpen the edges of the blue wing feathers with Indigo. Add separators between the feathers to clarify the anatomy of the wing. -
Painting the Branch:
Mix Burnt Umber with a touch of blue to get a cool brown. Paint the branch with rough strokes. While wet, drop in darker brown on the bottom edge for shadow and leave the top lighter for highlights. -
Feet Grip:
Paint the feet specifically with a dark grey mixture. Ensure the claws look like they are firmly gripping the wood, curling around the cylinder of the branch rather than just sitting on top. -
Foreground Foliage:
Add the palm fronds in the bottom left corner using a stronger, more saturated Sap Green. These should be sharper than the background leaves but less detailed than the bird. -
Final Touches:
Add a tiny glint of white gouache or gel pen to the bird’s eye to bring it to life. Check your contrast and deepen the darkest shadows under the wing if necessary.
Add Texture
Sprinkle a tiny pinch of salt onto the wet branch or the background wash. As it dries, the salt pushes pigment away, creating organic, moss-like textures.
Frame your finished piece in light wood to complement the natural tones and hang it where it can catch the light
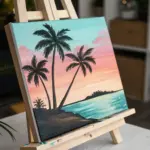
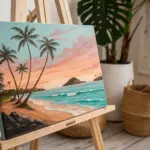
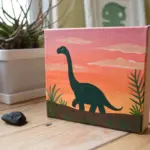
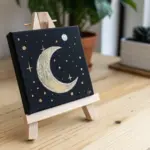
Twilight Jungle in Blues and Purples
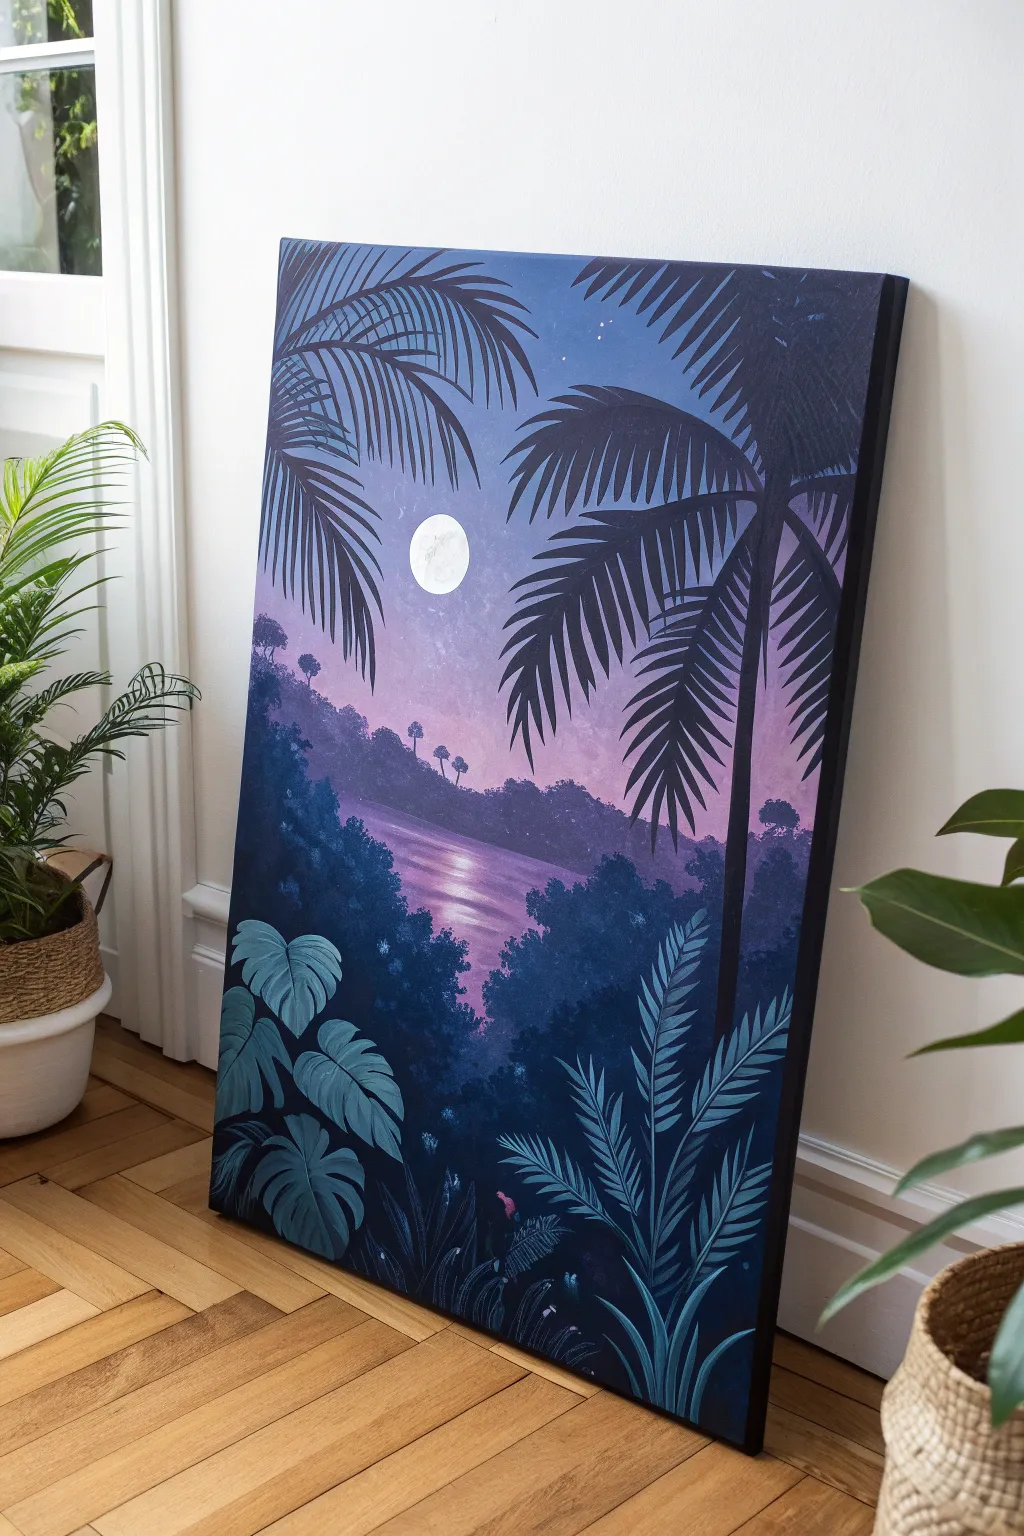
Capture the serene mystery of a jungle at twilight with this stunning acrylic painting. Using a soothing palette of indigo, violet, and soft pinks, you’ll learn to layer silhouettes against a glowing moonlit sky for a piece that adds calm to any room.
Detailed Instructions
Materials
- Stretched canvas (vertical orientation, approx. 18×24 inches or larger)
- Acrylic paints: Titanium White, Mars Black, Ultramarine Blue, Dioxazine Purple, Phthalo Blue, Magenta/Rose
- Large flat brush (2-inch)
- Medium flat brush (1-inch)
- Small round brush (size 2 or 4)
- Fine liner brush (size 0 or 00)
- Palette and water cup
- Paper towels
- Pencil for sketching
- Circular object or compass (for the moon)
Step 1: Setting the Atmospheric Sky
-
Establish the horizon:
Begin by lightly sketching a horizon line about one-third of the way up from the bottom of the canvas. This will separate your water from the distant hills. -
Block in the sky gradient:
Mix a dark mixture of Ultramarine Blue and a touch of Black. Apply this to the very top corners of the canvas using your large flat brush. -
Transition to purple:
As you move down the canvas, blend in Dioxazine Purple. Keep your brush strokes horizontal to ensure a smooth transition from the deep midnight blue to the rich violet. -
Add the twilight glow:
Near the center and lower part of the sky (just above the hill line), mix Magenta with a generous amount of Titanium White to create a soft, dusty pink. Blend this upwards into the purple while the paint is still wet for a seamless gradient. -
Create the moon:
Once the sky is dry to the touch, trace a circular object (like a masking tape roll) in the upper center-left area. Paint the circle pure Titanium White. -
Moon texture:
While the white is still slightly damp, use a very small amount of watered-down grey (white + tiny dot of black) to dab subtle craters onto the moon’s surface. -
Stars:
Dilute white paint with water until it’s inky. Load a brush and tap it against another handle to splatter tiny stars near the top of the canvas.
Step 2: Middle Ground and Water
-
Paint the distant hills:
Mix a hazy purple-grey color. Paint the silhouette of the distant hills along your horizon line. The edges should be slightly soft to suggest atmospheric distance. -
Tiny tree details:
Using a small round brush, add tiny vertical sticks and poofs on top of the hills to suggest distant palm trees. Keep them very small to enhance the scale. -
Reflective water base:
For the water, mirror the sky colors upside down. Start with the dusty pink near the horizon line and transition into deep purple and blue as you move closer to the bottom edge. -
Adding the moon’s reflection:
With a clean flat brush, take a mix of white and pink. Use horizontal back-and-forth strokes directly under the moon to create a shimmering light path on the water.
Smooth Gradients
Work quickly while acrylics are wet! If the paint drags a brush loaded with just water across the boundary line to re-wet and blend the colors.
Step 3: The Foreground Jungle
-
Mix your shadow color:
Create a very dark, rich color using Phthalo Blue and Black. Avoid using pure black; the blue undertone gives the shadows depth and richness. -
Paint the main palm silhouette:
On the right side, paint a tall, slender trunk curving slightly inward. Use your medium flat brush for the trunk. -
Drafting palm fronds:
Switch to a liner brush to map out the ‘spines’ of the palm leaves arching out from the top of the trunk. -
Filling in the leaves:
Use a small round brush or dagger striper to pull downward strokes from each spine, creating the feathery iconic palm leaf shape. Let the leaves overlap the moon slightly for depth. -
Add secondary palms:
On the left side, paint shallower palm fronds entering the frame. Since these are closer, make the individual leaf segments slightly larger. -
Bottom foliage base:
Fill the bottom third of the canvas with your dark blue-black mix to block out the dense jungle floor, covering the bottom edge of the water. -
Detailed Monsteras:
Mix a slightly lighter blue-green (add a touch of white and green to your dark mix). Paint large Monstera leaf shapes in the bottom left corner. Add their characteristic Swiss-cheese holes. -
Ferns and grasses:
On the bottom right, use a liner brush to flick upwards, creating long, sharp grass blades and fern structures. I like to vary the angles here so it looks wild and organic. -
Final highlights:
Mix a pale blue-grey shade. Gently highlight the top edges of the Monstera leaves and some of the palm fronds where the moonlight would naturally hit them.
Glow Up
Mix a tiny drop of fluorescent pink into your horizon line color or use metallic pearl white for the moon’s reflection to make the painting shimmer.
Step back and admire your tranquil nighttime oasis, ready to hang on the wall

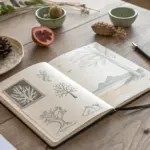
PENCIL GUIDE
Understanding Pencil Grades from H to B
From first sketch to finished drawing — learn pencil grades, line control, and shading techniques.
Explore the Full Guide
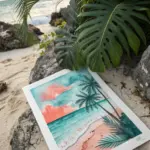
Tropical Flowers as Bright Accents
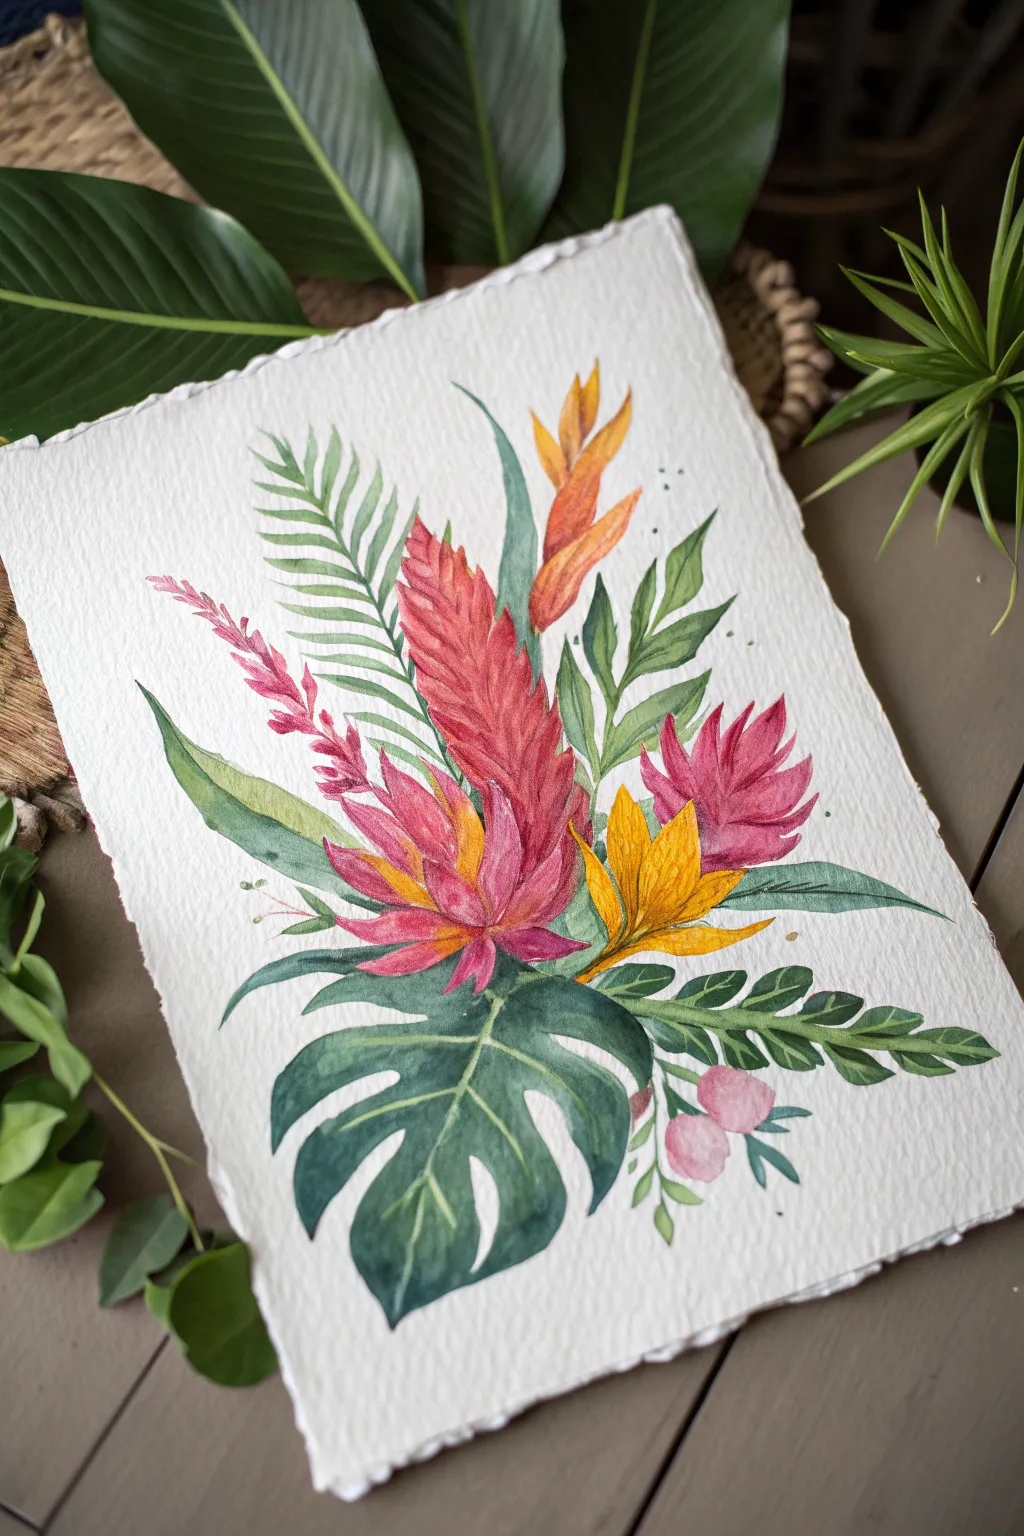
Capture the vibrant spirit of the jungle with this striking watercolor composition. Featuring bold monstera leaves, fiery red gingers, and delicate palms, this piece balances lush greenery with electrifying floral accents on textured paper.
Step-by-Step Guide
Materials
- Cold press watercolor paper (300 gsm or heavier for texture)
- Watercolor paints (Sap Green, Hooker’s Green, Alizarin Crimson, Cadmium Red, Cadmium Yellow, Payne’s Gray)
- Round watercolor brushes (Size 2, 6, and 10)
- Pencil (HB) and kneaded eraser
- Two jars of water
- Paper towels
- Masking tape (optional)
Step 1: Planning and Sketching
-
Loose Outline:
Begin by lightly sketching the main shapes with your HB pencil. Start with the large monstera leaf at the bottom center as your anchor point, then sketch the tall, vertical cone shapes for the red ginger flowers rising from the center. -
Adding Foliage:
Draw the elongated curves of the palm fern on the left and the smaller, pointed leaves on the right. Keep your pencil lines very faint so they won’t show through the transparent watercolor layers later. -
Refining Shapes:
Define the jagged edges of the tall red plume and the distinctive splits in the monstera leaf. Ensure the composition feels balanced, with elements fanning out naturally from the central point.
Muddy Greens?
If your greens look dull, stop mixing too many colors. Stick to two pigments max (like blue + yellow) or use a tube green and modify it slightly with red to deepen it without graying.
Step 2: Painting the Greenery
-
Monstera Base Layer:
Mix a deep, cool green using Hooker’s Green and a touch of Payne’s Gray. Using your size 10 brush, lay down a wash over the large monstera leaf. While it’s still wet, drop in a slightly concentrated dark green near the center vein for depth. -
Palm Texture:
Switch to a size 6 brush for the fern on the left. Use a lighter Sap Green mix. Paint the central stem first, then flick your brush outwards to create the thin, individual fronds, leaving tiny gaps of white paper between them for airiness. -
Darker Foliage:
For the leaves on the right side and the one tucking behind the flowers, use a darker, more saturated green mix. Paint these shapes carefully, ensuring distinct, crisp edges where they meet the lighter elements. -
Leaf Details:
Once the monstera leaf is dry, use your size 2 brush and a very dark green mix to paint fine veins radiating from the center. Keep these subtle so they don’t overpower the leaf’s form.
Step 3: Painting the Blooms
-
Ginger Torch Base:
Prepare a watery wash of Alizarin Crimson. Paint the tall central flower shape. While wet, charge the tip of the shape with a bit more pigment to create a gradient from light to dark. -
Adding Warmth:
For the lower, more open flower, mix Cadmium Red with a touch of yellow. Paint the petals with confident strokes, letting the color bleed slightly at the base where the petals meet. -
Yellow Accents:
Using clean water and a clean brush, mix a bright Cadmium Yellow. Paint the star-shaped flower on the right side of the bouquet. Add a tiny touch of orange near the center while it’s damp to give it dimension. -
Heliconia Spikes:
Paint the tall, orange-yellow spike flower at the top right. Use short, angular strokes to mimic the bracts, transitioning from yellow at the bottom to orange at the tips. -
Texture on the Red Ginger:
Once the tall red flower is dry, take a slightly drier brush with concentrated Alizarin Crimson. Make small, downward dabs to create the scale-like texture characteristic of red ginger flowers.
Level Up: Metallic Pop
Once the painting is fully bone-dry, add extremely fine veins to the monstera leaf using a gold gel pen or metallic watercolor for a glamorous, modern twist.
Step 4: Final Touches
-
Connecting Stems:
Use a mix of green and brown to paint the stems that connect all the floral elements to the bunch. Ensure they disappear naturally behind the foreground leaves. -
Pink Buds:
Paint the small, round berry-like buds at the bottom right with a soft pink wash. Keep them delicate to contrast with the heavy monstera leaf nearby. -
Splatter Effect:
I like to finish with a bit of spontaneity. Load a brush with watery green paint and tap it against another brush handle to create tiny splatters around the bouquet, adding energy to the piece. -
Deckled Edge (Optional):
If you want to mimic the paper look in the photo, gently tear the edges of your paper using a ruler as a guide to create a rough, handmade deckled edge.
Step back and admire your lush, botanical creation as it dries
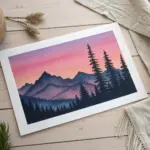
Jungle River Reflections and Ripples
Capture the tranquil beauty of a tropical river with this realistic landscape painting, focusing on the interplay between lush foliage and calm water. You’ll learn to master soft reflections and vibrant greens to create a window into the rainforest.
Step-by-Step
Materials
- Heavyweight watercolor paper or mixed media board (minimum 300gsm)
- Masking tape
- Acrylic gouache or matte acrylic paints (Forest Green, Sap Green, Ultramarine Blue, Burnt Umber, Titanium White, Sky Blue, Lemon Yellow)
- Flat shader brushes (medium and large)
- Round detail brushes (sizes 0, 2, and 4)
- Fan brush (optional)
- Palette for mixing
- Two jars of water
- Paper towels
Step 1: Setting the Scene
-
Prepare the surface:
Begin by taping down all four edges of your paper to a rigid board. This creates the crisp white border seen in the final piece and prevents the paper from buckling under wet paint. -
Sketch the horizon:
Lightly sketch the horizon line about one-third of the way up from the bottom. Outline the mass of trees on the left bank, ensuring the treeline is uneven and organic, not a straight wall. -
Paint the sky:
Mix a pale Sky Blue with plenty of Titanium White. Using a large flat brush, paint the sky area with horizontal strokes, blending slightly darker blue at the very top and fading almost to white near the treeline.
Muddy Reflections?
If your water reflections look too messy, wait for the paint to dry completely. Then, re-apply a thin glaze of the water base color horizontally to push the reflection ‘back’ under the surface.
Step 2: Foliage and Depth
-
Block in dark masses:
Mix a dark base green using Forest Green and a touch of Burnt Umber. Fill in the main shapes of the trees on the left bank, ignoring details for now. This establishes the deepest shadows. -
Add mid-tone texture:
Create a mid-tone green by adding Sap Green to your base mix. Using a stippling motion with an old or stiff brush, tap this color over the dark base, focusing on the tops and outer edges of the tree shapes. -
Highlight the canopy:
Mix Lemon Yellow with Sap Green for a bright, sunlit hue. Dab this sparingly on the very tops of the tree clusters to imply sunlight hitting the leaves. -
Paint distant palms:
Using a size 2 round brush and a dark grey-green mix, carefully paint the slender trunks and feathery fronds of the palm trees rising above the main canopy.
Step 3: Reflections and Water
-
Base water layer:
For the water, mix the sky colors again but slightly darker. Paint the entire water area with smooth, horizontal strokes. -
Mirror the trees:
While the water layer is tacky but not soaking wet, paint the reflection of the green tree mass upside down in the water. Use vertical, downward strokes to pull the color into the ‘water’. -
Soften the reflections:
Clean your flat brush and leave it slightly damp. Gently drag it horizontally across the painted reflections to blur the edges and simulate the movement of water. -
Add ripples:
Mix a very pale blue-white. Using a fine round brush, paint thin, broken horizontal lines across the top specific areas of the reflection to suggest surface ripples breaking the image. -
Deepen the shadows:
The water closest to the bank should be darkest. Glaze a thin layer of watered-down black or dark green right at the waterline to ground the trees.
Make It Glossy
Once the painting is fully dry, apply a coat of gloss varnish only to the water area. This creates a physical contrast with the matte trees, making the water look genuinely wet.
Step 4: Foreground Details
-
Establish foreground grasses:
In the bottom right corner, use a size 0 or 2 liner brush with dark green paint to flick upward, creating tall, sharp blades of grass. -
Layer grass colors:
Paint a second layer of grass blades using a lighter, yellow-green mix. Let these cross over the dark ones to create depth and volume. -
Add bottom left details:
Repeat the grass process on the bottom left corner, perhaps adding slightly broader leaves to vary the texture from the right side. -
Final highlights:
Add tiny touches of almost pure white to the tips of the foreground grass and the brightest ripples in the water for sparkle. -
Remove the tape:
Wait until the painting is completely bone dry. Slowly peel the masking tape away at a 45-degree angle to reveal your crisp, clean edges.
Now you have a tranquil piece of the jungle captured on paper to bring a sense of calm to any room


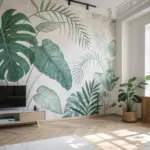
Abstract Jungle Color-Block Layers
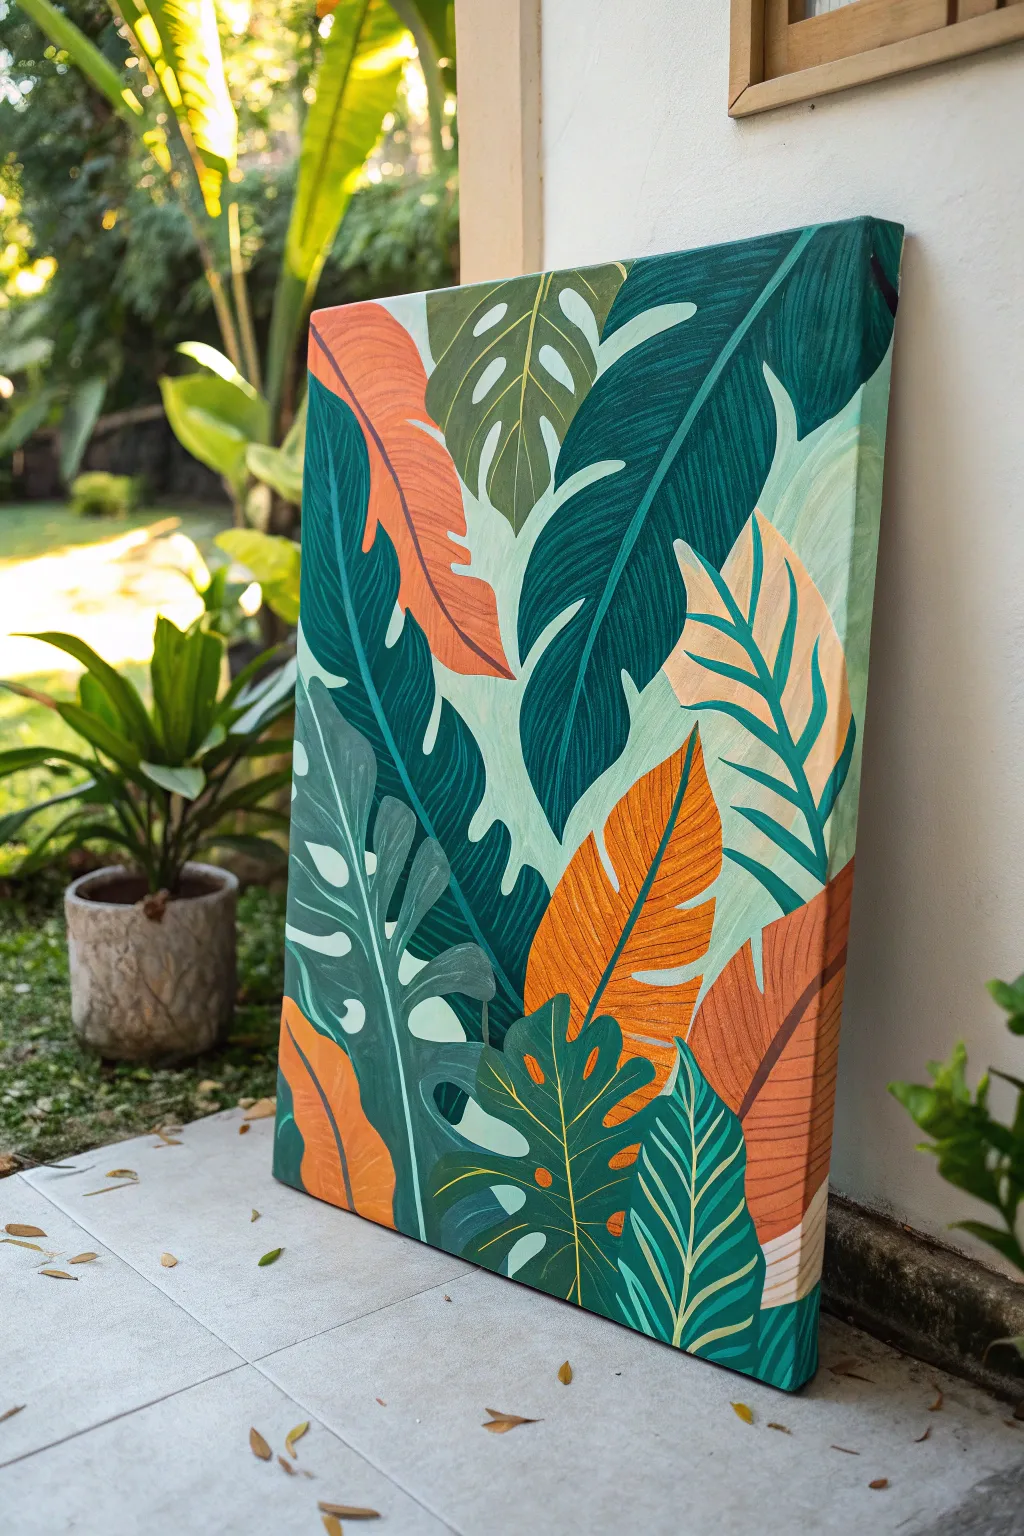
Transform a blank canvas into a lush, stylized jungle canopy using bold shapes and a soothing earth-tone palette. This project focuses on layering opaque forms to create depth without needing complex shading techniques.
Step-by-Step
Materials
- Rectangular stretched canvas (e.g., 18×24 inches)
- Acrylic paints (Dark hunter green, teal, mint green, sage, burnt orange, terracotta, cream)
- Flat synthetic brushes (various sizes: 1 inch, 1/2 inch, 1/4 inch)
- Round detail brush (size 2 or 4)
- Pencil for sketching
- Palette for mixing
- Jar of water and paper towels
Step 1: Planning and Underpainting
-
Base coat:
Start by painting the entire canvas with a very pale, creamy mint color. This will act as the background sky and peek through the leaves later. Let this layer dry completely. -
Sketch the composition:
Using a light pencil, draw large, sweeping leaf shapes. Start with the biggest leaves first—plan two or three large banana-style leaves extending from the edges inward. -
Fill the gaps:
Draw medium-sized Monstera leaves and fan palms in the negative spaces. Don’t worry about overlapping yet; just map out where the major forms will sit.
Step 2: Blocking in Color
-
Paint the darkest leaves:
Mix a deep hunter green with a touch of teal. Using your 1-inch flat brush, paint the largest, rearmost leaves. These dark tones will anchor your composition. -
Add the warm tones:
Select two or three leaf shapes to be your accent colors. Fill them in with burnt orange and terracotta. These warm pops contrast beautifully with the cool greens. -
Layer the mid-tones:
Mix various shades of sage, olive, and teal. Paint the remaining leaves, ensuring you have a good balance of dark, medium, and light values across the canvas. -
Refine the edges:
Once the first coat is dry, go back over the edges with a smaller flat brush to make the leaf silhouettes crisp and sharp against the background.
Fixing Opacity
If your lighter colors (like the orange or mint) look streaky or transparent over darker areas, don’t pile on thick paint. Instead, let the first layer dry completely, then apply a second thin coat.
Step 3: Detailing and Texture
-
Create vein lines:
For the dark green leaves, mix a slightly lighter teal-green. Use a thin round brush or the edge of a flat brush to paint the central vein running down the leaf spine. -
Add secondary veins:
Paint diagonal lines extending from the center spine to the leaf edges. Keep these lines steady but slightly curved to mimic natural growth. -
Detail the orange leaves:
On the terracotta leaves, use a lighter peach or cream color to paint the vein details. This inverse contrast makes them stand out. -
Add texture with dry brushing:
Take a fairly dry brush with a lighter shade of your leaf color. Gently sweep it over the surface of the leaves in the direction of the veins to create a subtle, fibrous texture. -
Paint the bottom foliage:
If your composition has smaller fern-like plants at the bottom, paint these now using a vibrant emerald or viridian green to bring them forward visually. -
Highlight the Monstera:
For the iconic Monstera leaves, define the holes and splits clearly. You can outline them faintly with a lighter shade of the leaf color to make them pop.
Go Metallic
For a luxe touch, trace the veins of just one or two leaves with gold leaf or metallic gold paint. It adds a subtle shimmer that catches the light beautifully.
Step 4: Finishing Touches
-
Lighten the background:
If the background feels too dark or messy from overpainting, carefully cut back in with your original pale cream color around the leaves to clean up the negative space. -
Paint the sides:
Don’t forget the edges of the canvas. Extend the leaf shapes and colors around the sides for a professional, gallery-wrap finish. -
Seal the work:
Once the painting is fully dry (give it at least 24 hours), apply a satin or matte varnish to protect the colors and unify the sheen.
Hang your new botanical masterpiece in a bright room to bring a permanent touch of nature indoors


Have a question or want to share your own experience? I'd love to hear from you in the comments below!