
Sometimes the best drawings aren’t the fanciest ones—they’re the ones that make someone feel seen. These kindness drawing ideas are simple, meaningful, and totally doable, whether you’re sketching alone or making art with kids in a group.
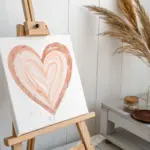
Handprints Forming a Heart of Kindness
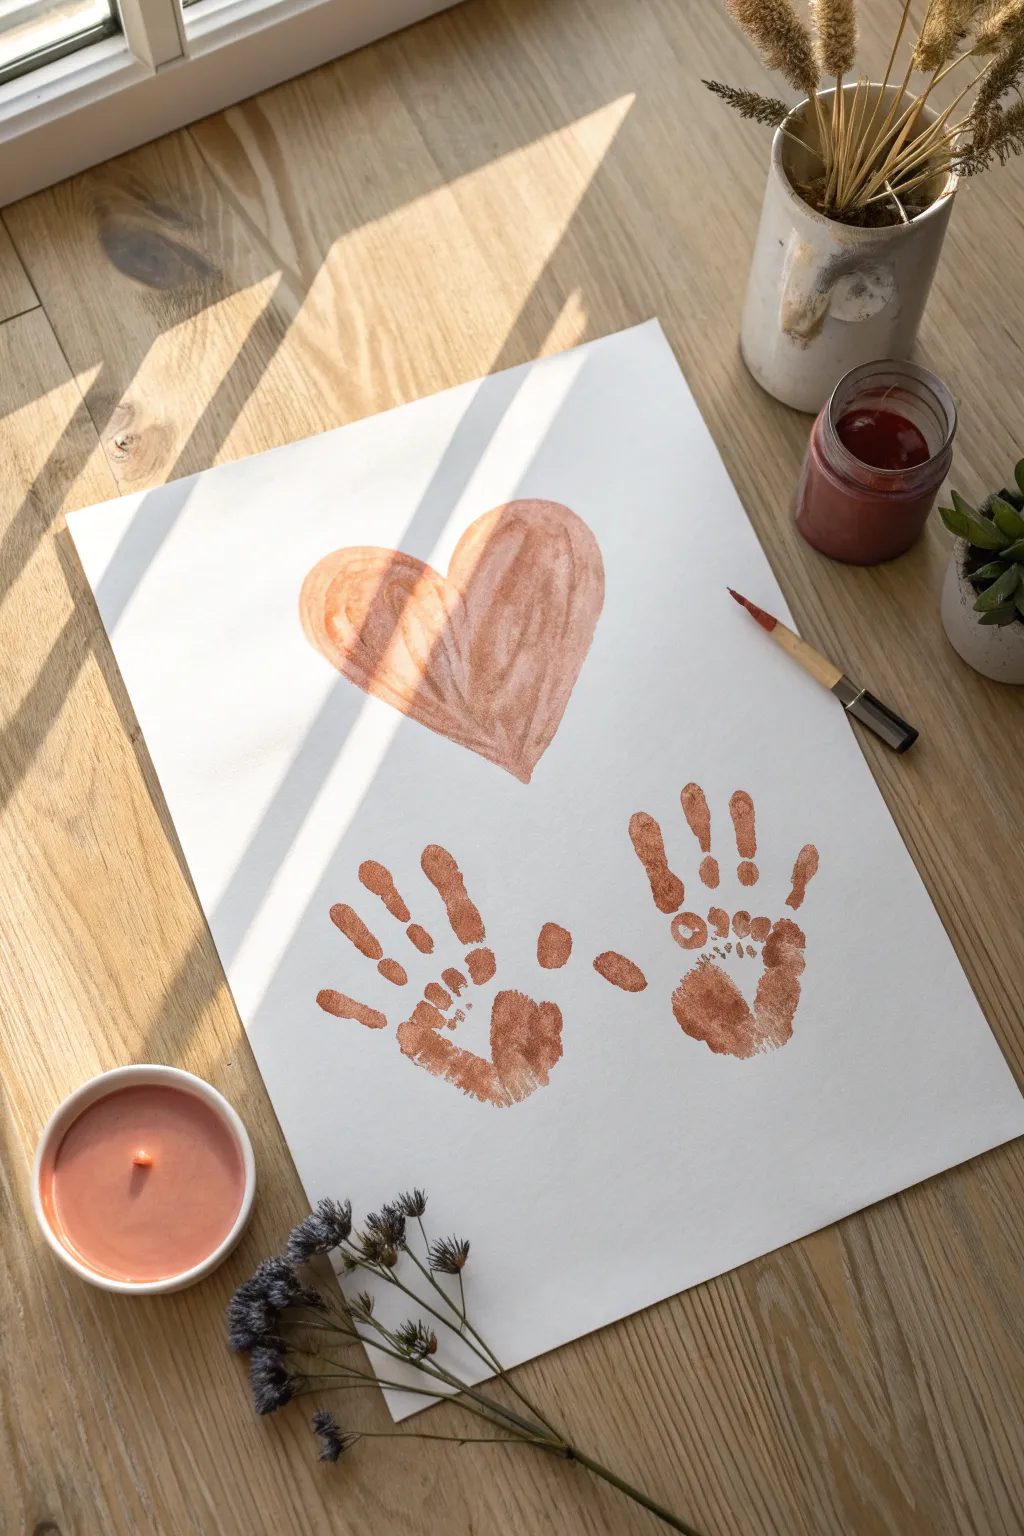
Capture a moment in time with this rustic and heartwarming art project that combines simple painting with personal keepsakes. The warm terracotta tones create a vintage, earthy aesthetic that turns simple handprints into a piece of decor worthy of display.
Step-by-Step Guide
Materials
- Heavyweight white drawing paper or watercolor paper (A3 or similar size)
- Reddish-brown acrylic paint or gouache (terracotta/burnt sienna shade)
- Flat paintbrush (medium size, around 1/2 inch)
- Small jar or palette for paint
- Paper towels or wet wipes (essential for clean-up)
- Pencil (optional for sketching)
- Protective table covering
Step 1: Preparation & Setup
-
Protect your surface:
Before you begin, lay down a protective covering on your table or workspace. Acrylic paint can stain wood finishes, so this step is crucial for peace of mind. -
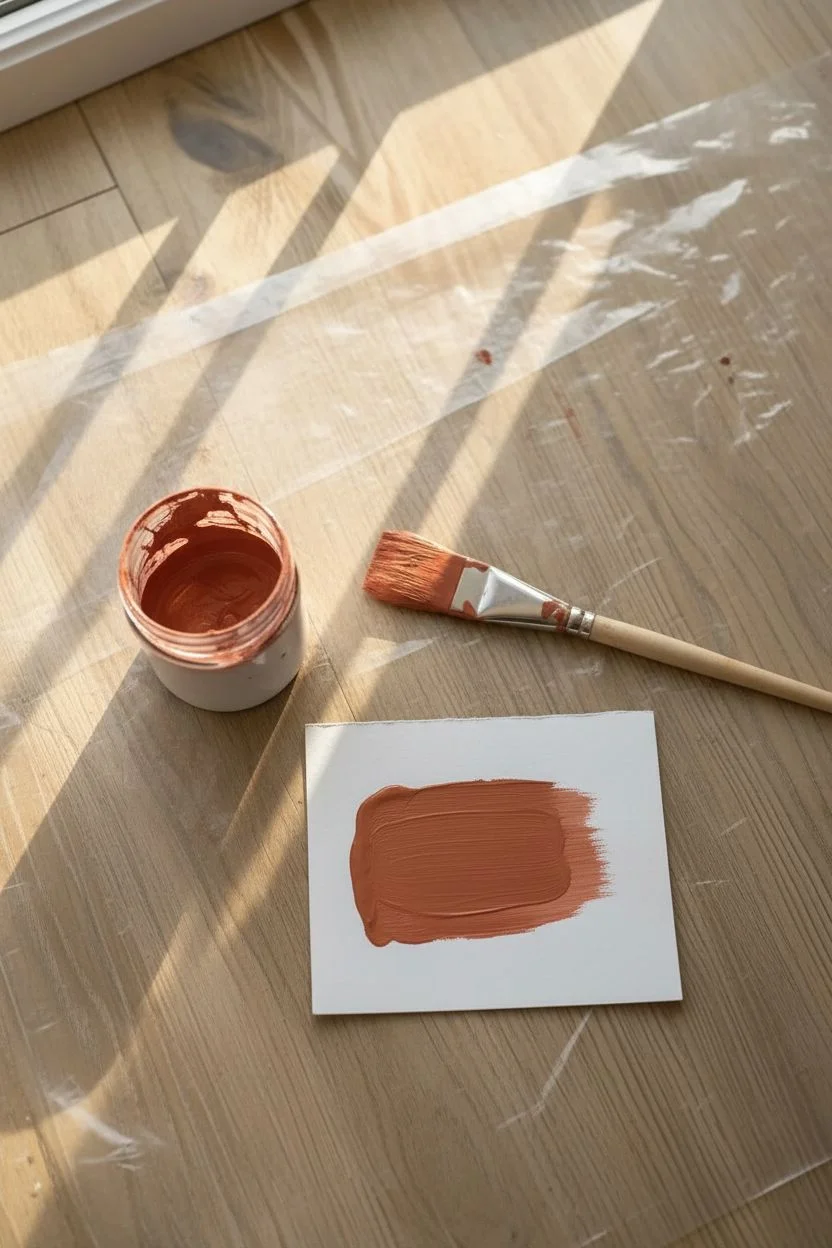
Prepare the paint:
Squeeze a generous amount of your reddish-brown paint into a small jar or palette. You want a creamy consistency that spreads easily but isn’t watery. -
Test the consistency:
I like to do a quick swatch on a scrap piece of paper. The color should be opaque but slightly translucent in thinner areas to mimic the watercolor look seen in the example.
Smudged Prints?
If a hand slides and smears, turn it into art! Use a damp brush to feather the edges of the smudge outward, transforming the mistake into a soft, abstract shadow around the handprint.
Step 2: Painting the Heart
-
Outline the shape:
Using your flat paintbrush, gently outline a large, symmetrical heart in the upper center of your paper. Keep the lines loose and relaxed; perfection isn’t the goal here. -
Fill with broad strokes:
Load your brush with paint and fill in the heart shape using long, sweeping vertical strokes. Start from the top curve and pull down toward the point. -
Create texture:
Don’t try to make the color perfectly solid. Allow the brush bristles to leave visible streak marks, which adds a lovely organic, hand-painted texture to the final piece. -
Refine the edges:
Go back over the outer edges of the heart to smooth out any unintentional bumps, ensuring the classic heart silhouette is clearly defined. -
Let it dry completely:
Wait for this heart section to dry fully before moving on to the hands. This prevents any accidental smudging while you position the hands.
Color Harmony
To get that exact vintage look, mix a tiny dot of black or dark green into standard orange paint. This dulls the brightness and creates a rich, earthy terracotta hue.
Step 3: Creating the Handprints
-
Coat the first hand:
Using the paintbrush, apply a generous, even layer of paint to the palm and fingers of the left hand. Ensure the paint covers every crease but isn’t dripping. -
Position the left hand:
Hover the painted hand over the bottom left side of the paper, angling the fingers slightly outward to the left. -
Press firmly:
Press the hand down onto the paper. Apply gentle pressure to each finger and the center of the palm to ensure a clear transfer. -
Lift carefully:
Lift the hand straight up, perpendicular to the paper, to avoid smearing the print. Have a wipe ready immediately. -
Clean and repeat:
Thoroughly clean the left hand or switch to the right hand. Apply paint to the right hand in the same manner. -
Position the right hand:
Place the right hand on the bottom right side of the paper. Mirror the angle of the first print so the thumbs face inward towards each other. -
Press and lift:
Press down firmly on the fingers and palm, then lift straight up to reveal the second print. -
Touch up if needed:
If a finger didn’t print clearly, you can use a tiny bit of paint on your brush to verify the shape, but keeping the raw texture is often more charming. -
Final drying time:
Ablot the painting to dry undisturbed for at least an hour to ensure the thicker paint on the handprints sets completely.
Once dry, frame this beautiful keepsake to remind everyone of the kindness we hold in our hands


Kindness Begins With Me Self-Portrait Badge
This charming button badge serves as a gentle reminder to spread positivity, featuring a sweet, hand-drawn self-portrait and inspiring text. With its clean lines, delicate pastel accents, and soft floral details, it creates a personal keepsake that is both meaningful and stylish.
Step-by-Step Tutorial
Materials
- Blank white button badge (approx. 2.25 or 3 inches)
- Fine-point black permanent marker or archival ink pen (005 or 01 size)
- Colored pencils (pink, dusty rose, sage green)
- Pencil and eraser for sketching
- Paper (for practice sketch)
- Clear matte spray sealer (optional)
Step 1: Planning and Sketching
-
Draft on paper:
Before working on the actual badge, trace a circle the same size as your button onto a piece of scratch paper. -
Map out the design:
Within your practice circle, lightly sketch a horizon line just above the center for your text placement. -
Sketch the face:
Draw a simple U-shape for the face in the lower half, leaving room for hair. Keep the features minimalist: two dots for eyes and a small curve for a smile. -
Add hair details:
Draw the hair framing the face. For the look in the photo, create a bob style with lines curving inward at the chin and simple bangs that sweep across the forehead. -
Incorporate the floral frame:
Sketch two curved leafy branches rising from the sides of the head, almost meeting at the top but leaving a gap. Add a small flower tucked into the hair on one side. -
Place the text:
Above the head, sketch the words ‘KINDNESS BEGINS WITH ME’ in a tall, narrow sans-serif style. Above the text, mark spots for three small stars.
Use a Template
Cut a circle from paper the exact size of your badge to practice spacing. Using the center point as a guide helps keep the text symmetrical.
Step 2: Inking the Design
-
Transfer to badge:
Once you are happy with your paper draft, lightly pencil the design onto the actual white button badge surface. -
Ink the text:
Using your fine-point black pen, carefully trace over the lettering. Keep your hand steady to ensure the lines remain crisp and thin. -
Outline the portrait:
Ink the girl’s face, hair, and the flower. Use smooth, continuous strokes for the hair strands to give them a natural flow. -
Draw the wreath:
Go over the leafy branches. Add small veins to the leaves if you want extra detail, or keep them as open loops for a simpler look. -
Add decorative elements:
In the open spaces between the text and the wreath, draw small, simple heart outlines and outline the three stars at the top. -
Erase pencil lines:
Allow the ink to dry completely to avoid smudging. I usually wait at least five minutes before gently erasing the underlying pencil sketch.
Mix Media Textures
Try using watercolor pencils for the blush and leaves. After coloring, lightly touch with a damp fine brush for a soft, painted effect.
Step 3: Adding Color
-
Color the cheeks:
Take a pink colored pencil and lightly swirl circular rosy cheeks onto the face. Press very softly to build up a delicate blush rather than a harsh circle. -
Tint the flower:
Color the flower in the hair with a slightly deeper dusty rose or pink pencil to make it stand out. -
Highlight the stars:
Use the pink pencil to fill in the center star and the outline of some surrounding stars, alternating colors if desired. -
Connect the hearts:
Fill in the scattered hearts with a very light touch of pink. -
Shade the leaves:
Using a sage green pencil, lightly color inside the leaves on the wreath. You don’t need to fill them perfectly; a rough, sketchy fill adds charm. -
Detail the rim:
For a finishing touch seen in the image, add tiny patterned dots or hearts along the very edge/rim of the button using your colored markers or pencils. -
Seal the artwork:
To protect your drawing from rubbing off, take the badge to a well-ventilated area and apply a light mist of clear matte spray sealer.
Pin your finished badge to a jacket or bag to share your message of kindness with the world


Earth Hug Drawing for Global Kindness
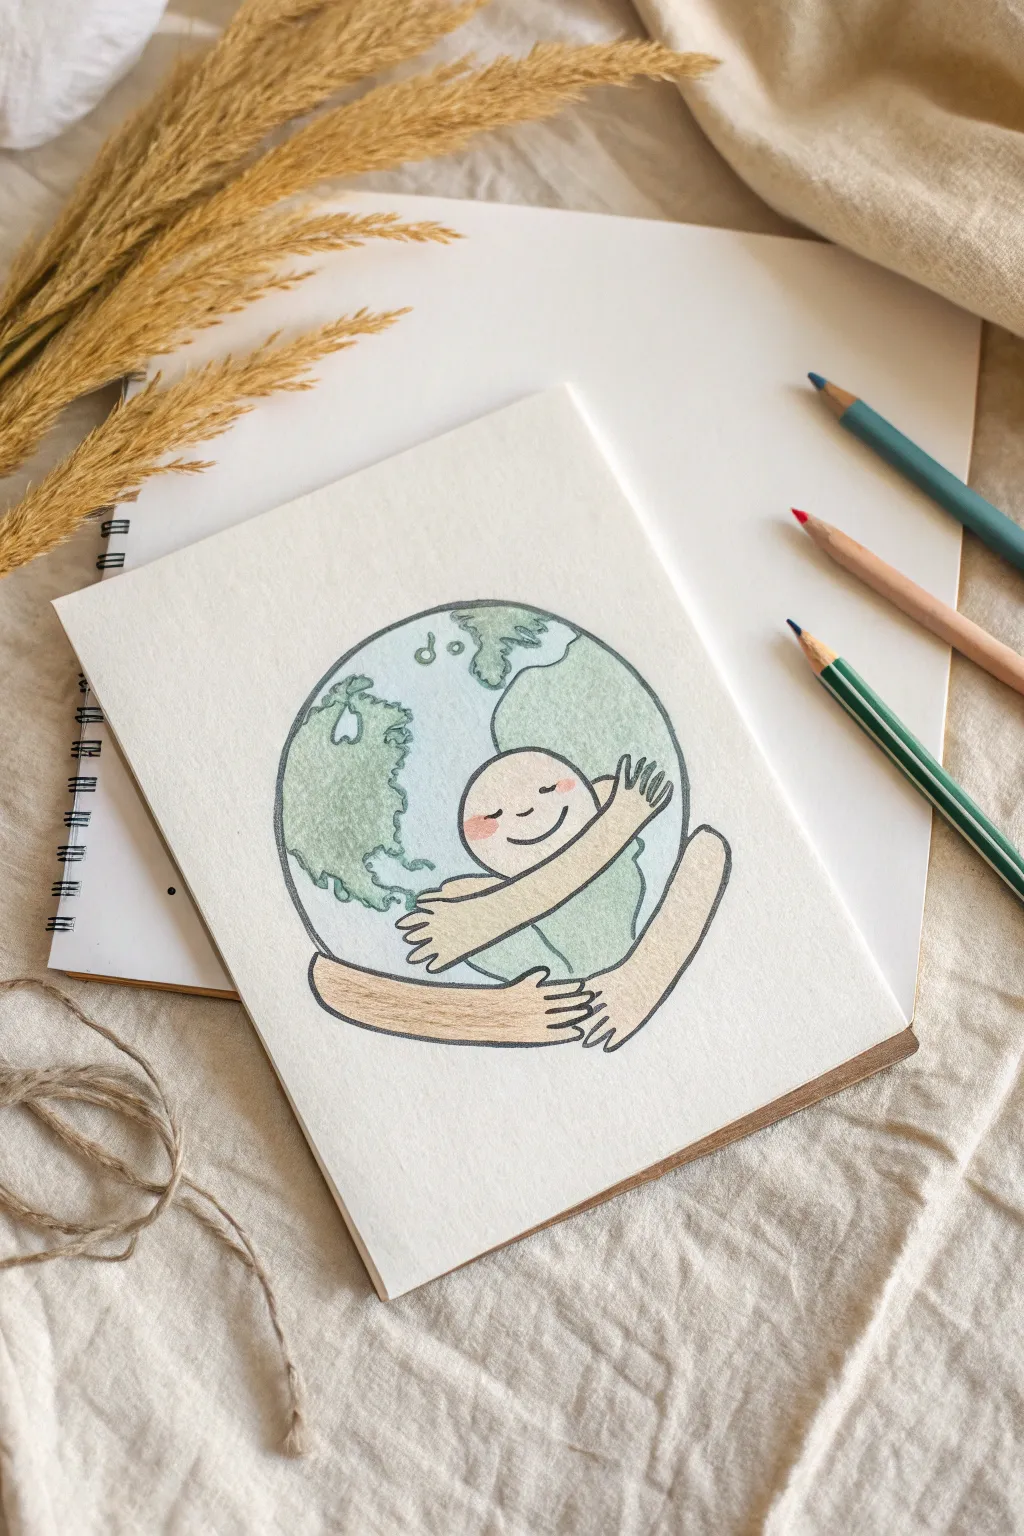
This heartwarming illustration features a personified Earth giving itself a loving embrace, symbolizing global kindness and self-care. Using gentle watercolors and clean ink lines, you’ll create a simple yet poignant piece that perfectly captures the spirit of compassion.
How-To Guide
Materials
- Thick watercolor paper or mixed media sketchbook
- Pencil (HB or H)
- Eraser
- Fine liner pen (black, 0.3mm or 0.5mm)
- Watercolor pencils or pan watercolors (Teal/Green, Blue, Beige/Skin tone, Pink)
- Soft round paintbrush (size 4 or 6)
- Cup of water
- Paper towel
Step 1: Sketching the Base Shapes
-
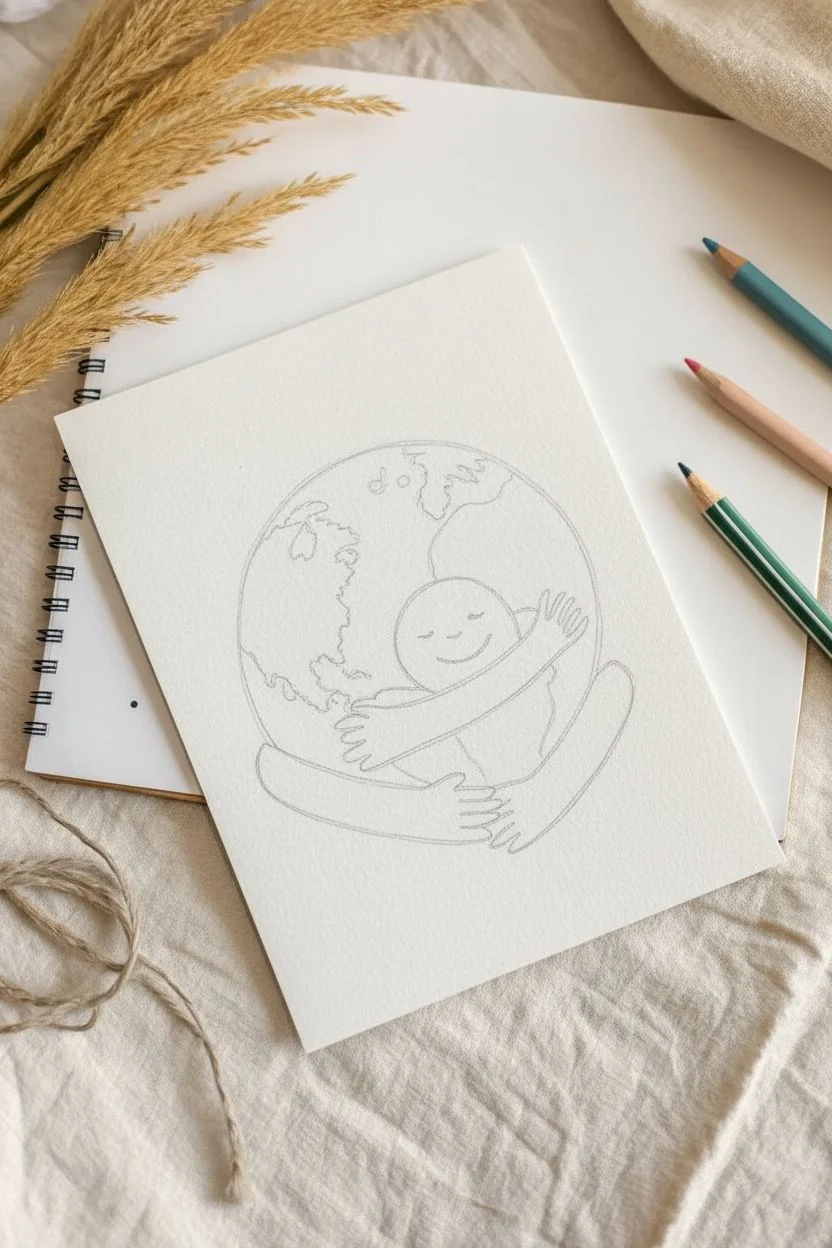
Draw the main circle:
Start by drawing a large, clean circle in the center of your page. A compass or tracing around a bowl can help you get a perfect shape, though a freehand circle adds a nice organic touch. -
Position the face:
Slightly right of the center, draw a smaller, oval-like shape that overlaps with the main circle. This will become the character’s head resting against the Earth. -
Outline the arms:
Sketch two long, curving shapes for the arms wrapping around the globe. The top arm should come from the right shoulder area and curve across the middle; the bottom arm should curve up from below to hold the bottom of the sphere. -
Add hands and details:
Refine the ends of the arms into simple, mitten-like hands or distinct fingers clasping the globe tightly. -
Sketch the continents:
Lightly draw irregular wavy lines inside the main circle to represent landmasses. Don’t worry about geographical accuracy; focusing on general shapes like the Americas/Africa creates the suggestion of a map.
Keep it Clean
Place a scrap piece of paper under your drawing hand while coloring. This prevents skin oils or loose pigment from smudging the clean white space around your globe.
Step 2: Inking the Lines
-
Trace the main outlines:
Using your fine liner pen, carefully go over your pencil lines. Start with the character’s head and arms, as these are in the foreground. -
Outline the globe:
Ink the circular outline of the Earth, making sure to stop where the arms obscure the line. -
Add facial features:
Draw two small, curved lines for closed, happy eyes and a simple U-shape for a smile on the character’s face. -
Texture the continents:
Trace your continent lines with a slightly wiggly, uneven stroke to give them a natural coastline appearance. -
Erase pencil marks:
Wait a moment for the ink to dry completely to avoid smudging, then gently erase all visible graphite lines.
Step 3: Adding Soft Color
-
Color the land:
Using a soft green watercolor pencil or diluted paint, fill in the continent shapes. Keep the application somewhat scribbly or textured for an artistic feel. -
Fill the oceans:
Color the rest of the globe with a light blue shade. I like to keep this layer quite pale so the black ink lines remain crisp and visible. -
Color the skin:
Use a beige or light brown tone to color the arms, hands, and face. Apply the color evenly to distinguish the character from the planet. -
Add rosy cheeks:
Take a pink pencil or a tiny dab of paint and add two gentle ovals on the character’s cheeks for a warm, blushing effect. -
Activate the watercolor pencil (Optional):
If you used watercolor pencils, dip your brush in water and lightly wash over your coloring to blend the pigment and create a smooth, painted look. -
Final drying time:
Let the paper dry completely before handling or closing your sketchbook.
Make it Shine
Add tiny white gel pen dots or small stars in the background space to make it look like the Earth is floating in space, or add heart doodles around the hug.
Now you have a gentle reminder of kindness captured in your sketchbook


Holding Hands Circle Around the World
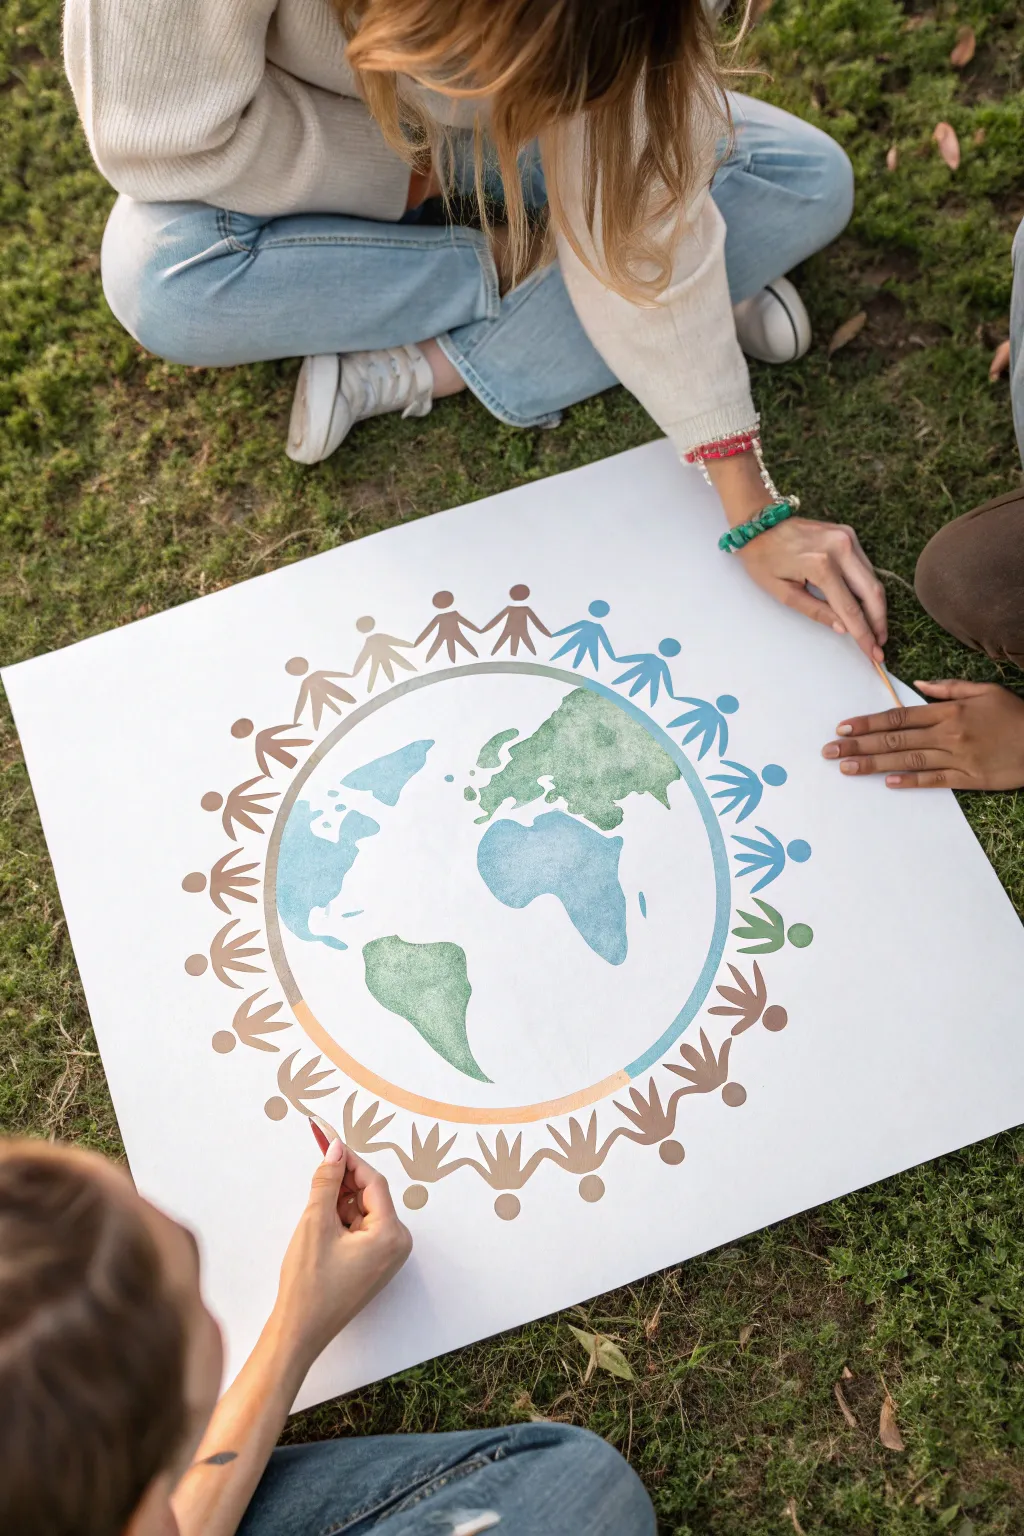
Celebrate togetherness with this large-scale art project featuring a watercolor world surrounded by a diverse chain of figures holding hands. The soft, earthy palette and fluid watercolor textures give the piece a gentle, harmonious feel perfect for a classroom or community display.
Step-by-Step Tutorial
Materials
- Large sheet of thick white poster board or watercolor paper (A1 or similar size)
- Pencil for sketching
- Large circular object (like a mixing bowl or bucket lid) for tracing
- Watercolor paints (pan set or tubes)
- Small jars of water
- Medium round watercolor brush (size 6-8)
- Small detail brush (size 2-4)
- Paper towels
- Eraser
- Masking tape (optional, to secure paper)
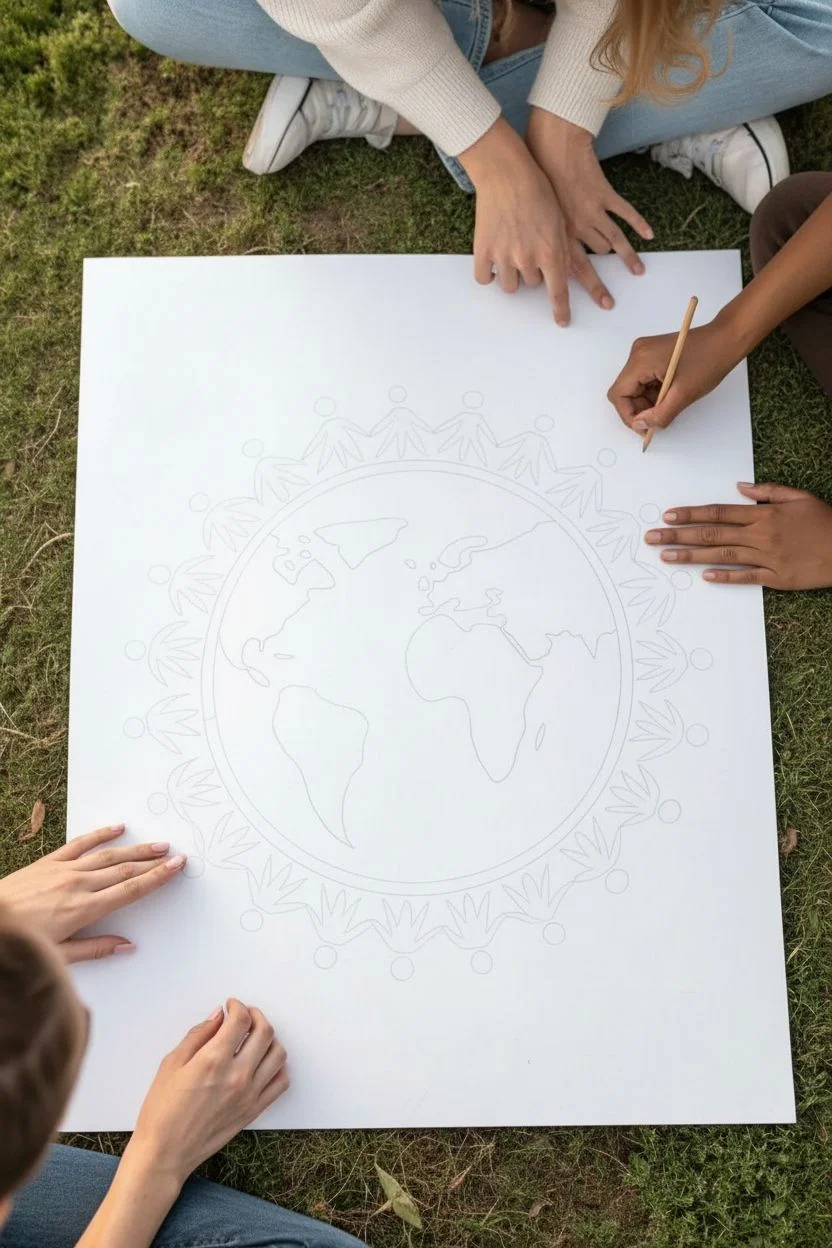
Step 1: Drafting the Design
-
Prepare your canvas:
Lay your large paper on a flat surface. If you are working outside or on an uneven surface, you might want to tape the corners down to keeping it from shifting. -
Trace the central circle:
Place your large circular object directly in the center of the poster board. Lightly trace around it with a pencil to create the outline of the Earth. -
Sketch the continents:
Inside the circle, lightly sketch the shapes of the continents. They don’t need to be geographically perfect; aim for recognizable shapes to represent the landmasses. -
Draft the first figure:
Choose a spot just outside the circle’s outline to draw your first person. Sketch a simple stick-figure style with a round head, triangular body, and arms extended outward. -
Create the chain:
Continue drawing identical figures around the entire circumference of the globe. Ensure their hands touch or overlap slightly to create the ‘holding hands’ effect. -
Refine the outlines:
Go back over your pencil sketches to define the shapes clearly. Make sure the figures’ feet are pointing toward the center of the earth.
Pro Tip: Stencil Aid
Cut one ‘person’ shape out of cardstock first. Trace this template repeatedly around the circle. This guarantees all your figures are the exact same size and shape.
Step 2: Painting the Earth
-
Mix your ocean blue:
In your palette, mix a watery light blue. Watercolors work best when built up in layers, so start with a very transparent wash. -
Paint the water:
Fill in the ocean areas around the continents with your light blue wash. Keep the edges damp to avoid harsh lines forming where you don’t want them. -
Add depth to the oceans:
While the first layer is still slightly damp, drop in a slightly pigment-richer blue in certain areas to create texture and depth within the water. -
Paint the landmasses:
Switch to a green tone for the continents. I prefer mixing a sap green with a touch of blue for a natural look. Paint the land shapes carefully. -
Blend land colors:
For variety, drop small amounts of brown or yellow-green into the wet green paint on the continents to suggest different terrains. -
Let the center dry:
Pause here and allow the Earth section to dry completely before your hand touches it while working on the outer ring.
Step 3: Painting the People
-
Select your palette:
Prepare three or four distinct colors for the figures. The example uses earthy browns, soft teals, and muted greens to maintain a unified color scheme. -
Paint the first group:
Using your medium brush, fill in the first 3-4 figures with a warm brown tone. Focus on filling the triangular body shapes solidly. -
Transition colors:
Switch to a teal or blue for the next set of figures. Clean your brush thoroughly between color changes to keep the hues distinct. -
Continue the pattern:
Proceed around the circle, painting groups of figures in alternating colors—brown, teal, green, then back to brown. -
Connect the hands:
Use the small detail brush to carefully paint the arms and hands where the figures connect. This is crucial for the symbolism of the piece. -
Add the heads:
Paint the circular heads for each figure in the corresponding color. Leave a tiny gap between the head and body if you want them to feel distinct, or connect them for a solid silhouette. -
Final touches:
Once everything is dry, erase any visible pencil marks that weren’t covered by paint to give the artwork a clean, professional finish.
Troubleshooting: Warping
If the paper starts buckling from the water, tape the edges down securely with masking tape. Let it dry completely while taped down to help flatten it back out.
Step back and admire your beautiful representation of worldwide connection and peace

PENCIL GUIDE
Understanding Pencil Grades from H to B
From first sketch to finished drawing — learn pencil grades, line control, and shading techniques.
Explore the Full Guide
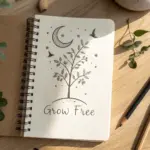
World Kindness Day Poster With Bold Lettering
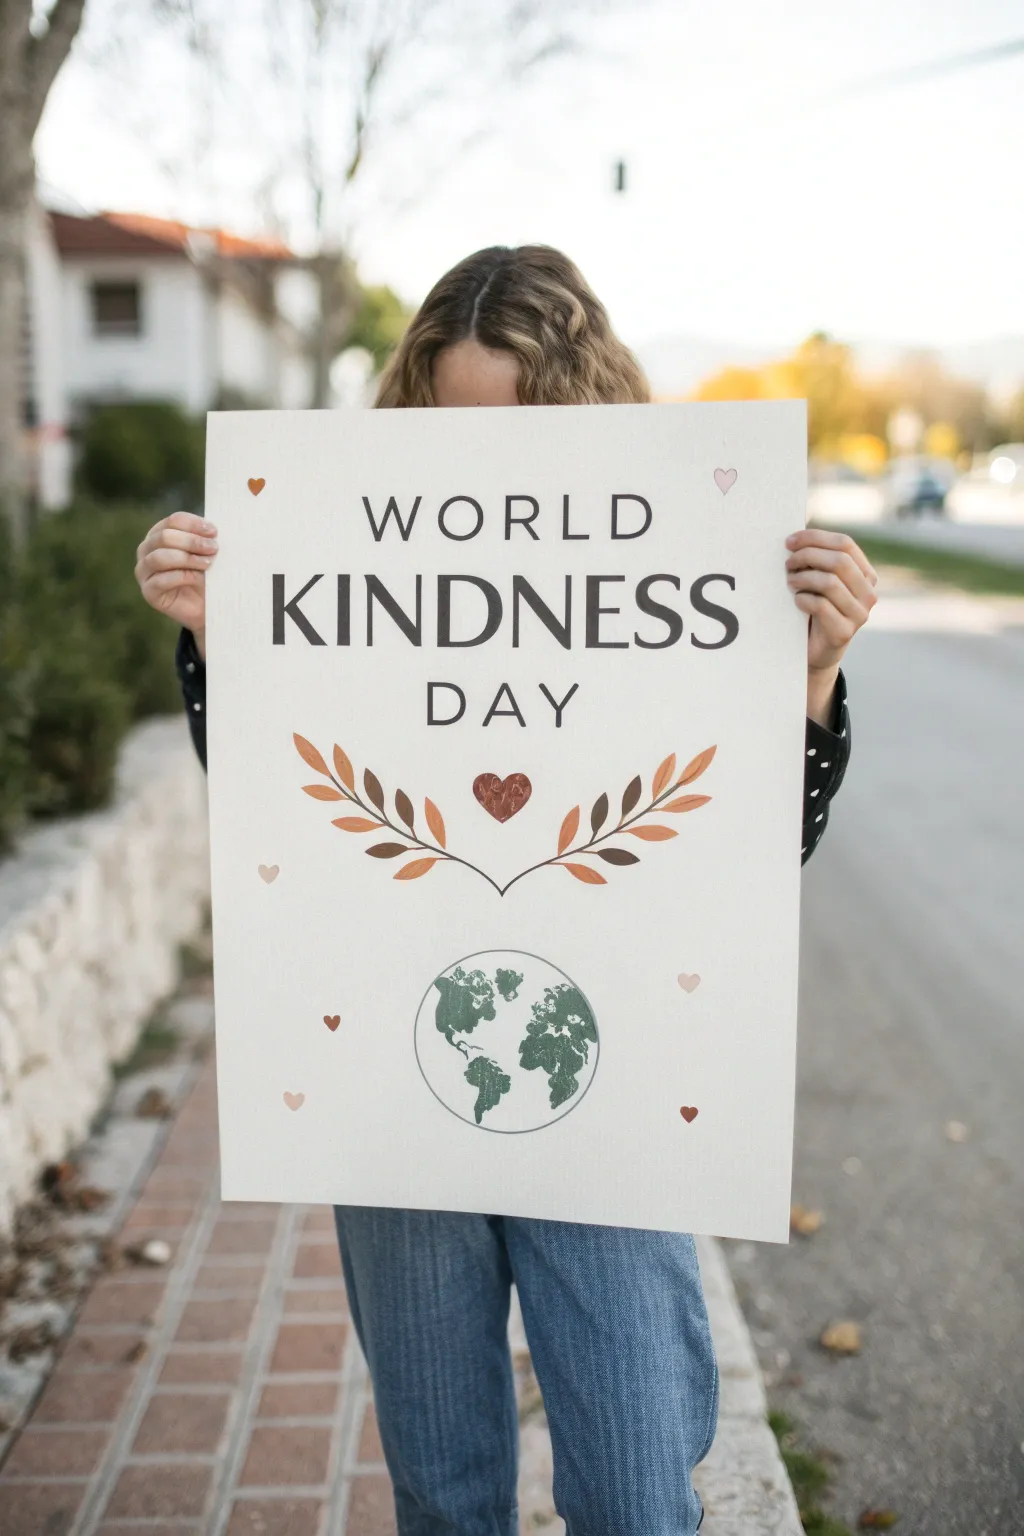
Spread a message of global compassion with this minimalist yet striking poster design. Featuring crisp typography and warm, earthy watercolor accents, this piece balances a modern aesthetic with a heartfelt sentiment.
Detailed Instructions
Materials
- Large sheet of heavyweight watercolor paper or bristol board (18×24 inches or similar)
- Graphite pencil (HB)
- Large eraser
- Ruler or T-square
- Compass or circular object (for tracing)
- Black brush pen or fine-tip permanent marker (various sizes)
- Watercolor paints (Earth tones: sienna, ochre, umber, and muted green)
- Round watercolor brush (size 6 or 8)
- Palette for mixing
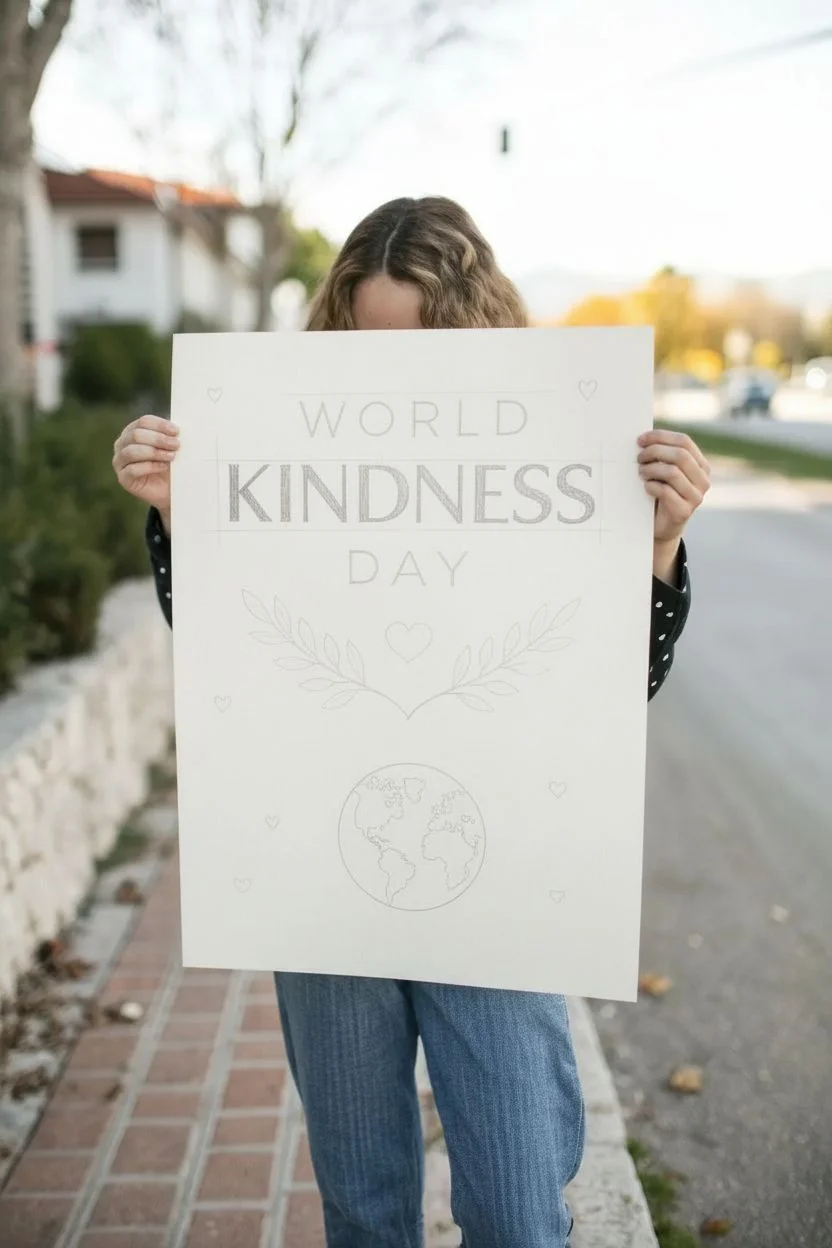
Step 1: Planning and Layout
-
Establish the margins:
Begin by lightly marking a uniform margin around your paper with a ruler to ensure your design stays centered; about 2 inches from the edge usually works well. -
Draft the text guidelines:
Using your T-square, draw three horizontal guidelines for the text. ‘WORLD’ should be near the top, followed by a larger space for ‘KINDNESS’, and a smaller space for ‘DAY’ below that. -
Sketch the letters:
Lightly sketch the words in all-caps. Focus on wide kerning (spacing between letters) for ‘WORLD’ and ‘DAY’, while allowing ‘KINDNESS’ to be the largest, dominant focus. -
Prepare the central motif:
Below the text, find the visual center for the leaf embellishment. Sketch a small heart shape first, then draw two curved lines extending outward like wings to serve as the stems. -
Outline the leaves:
Along those curved stems, sketch alternating leaf shapes. Keep them simple and almond-shaped, tapering off as they reach the ends of the stems. -
Draw the globe:
In the lower third of the paper, use a compass to draw a perfect circle. Sketch rough, abstract approximations of the continents inside, focusing on the Atlantic view (Americas on the left, Africa/Europe on the right). -
Add floating hearts:
Scatter 5-6 small heart shapes randomly around the empty spaces of the poster to balance the composition.
Step 2: Inking the Typography
-
Select your marker:
Choose a high-quality black brush pen or a bold permanent marker. I find a chisel tip can also work well for the straight lines of the letters. -
Trace the main text:
Carefully ink over your pencil sketches for the words. Use slow, deliberate strokes to keep the lines crisp. If you want a thicker effect, go over the downstrokes a second time. -
Clean up the text:
Once the ink is completely dry to the touch, gently erase the pencil guidelines from the text area so you have a clean slate for the painting phase.
Use a Lightbox
Compose your text on a computer first, print it out, and hold it behind your paper against a window to trace the perfect font.
Step 3: Adding Color
-
Mix your leaf colors:
Prepare a palette of warm autumn tones. Mix burnt sienna and yellow ochre. You want a variation, so don’t mix them perfectly uniform. -
Paint the leaves:
Paint the leaves on your vine motif. Alternate between a lighter ochre and a darker reddish-brown for visual interest. Use the tip of your round brush to get sharp points on the leaves. -
Paint the central heart:
Fill in the small heart between the vines with a deep terracotta or rusty red shade. -
Color the globe:
Mix a muted, sage green watercolor. Carefully fill in the continent shapes on your globe sketch. Keep the water areas unpainted (white paper) for a clean look. -
Outline the globe:
Once the paint is dry, use a very fine black pen to trace the circle of the globe so it looks polished. -
Fill the scattered hearts:
Paint the tiny floating hearts using very watered-down versions of your red and brown mixes. Some can be barely pink, while others are darker.
Wobbly Lines?
If your hand shakes while inking the long letters, try moving your whole arm from the shoulder rather than just pivoting your wrist.
Now you have a beautiful, hand-lettered poster ready to inspire kindness wherever you display it


Have a question or want to share your own experience? I'd love to hear from you in the comments below!