When I’m stuck staring at a blank canvas, a good landscape oil painting idea is the fastest way to get my brush moving. Here are my favorite prompts—starting with classic, can’t-miss scenes and drifting into more playful, unexpected oil painting landscapes you can really make your own.
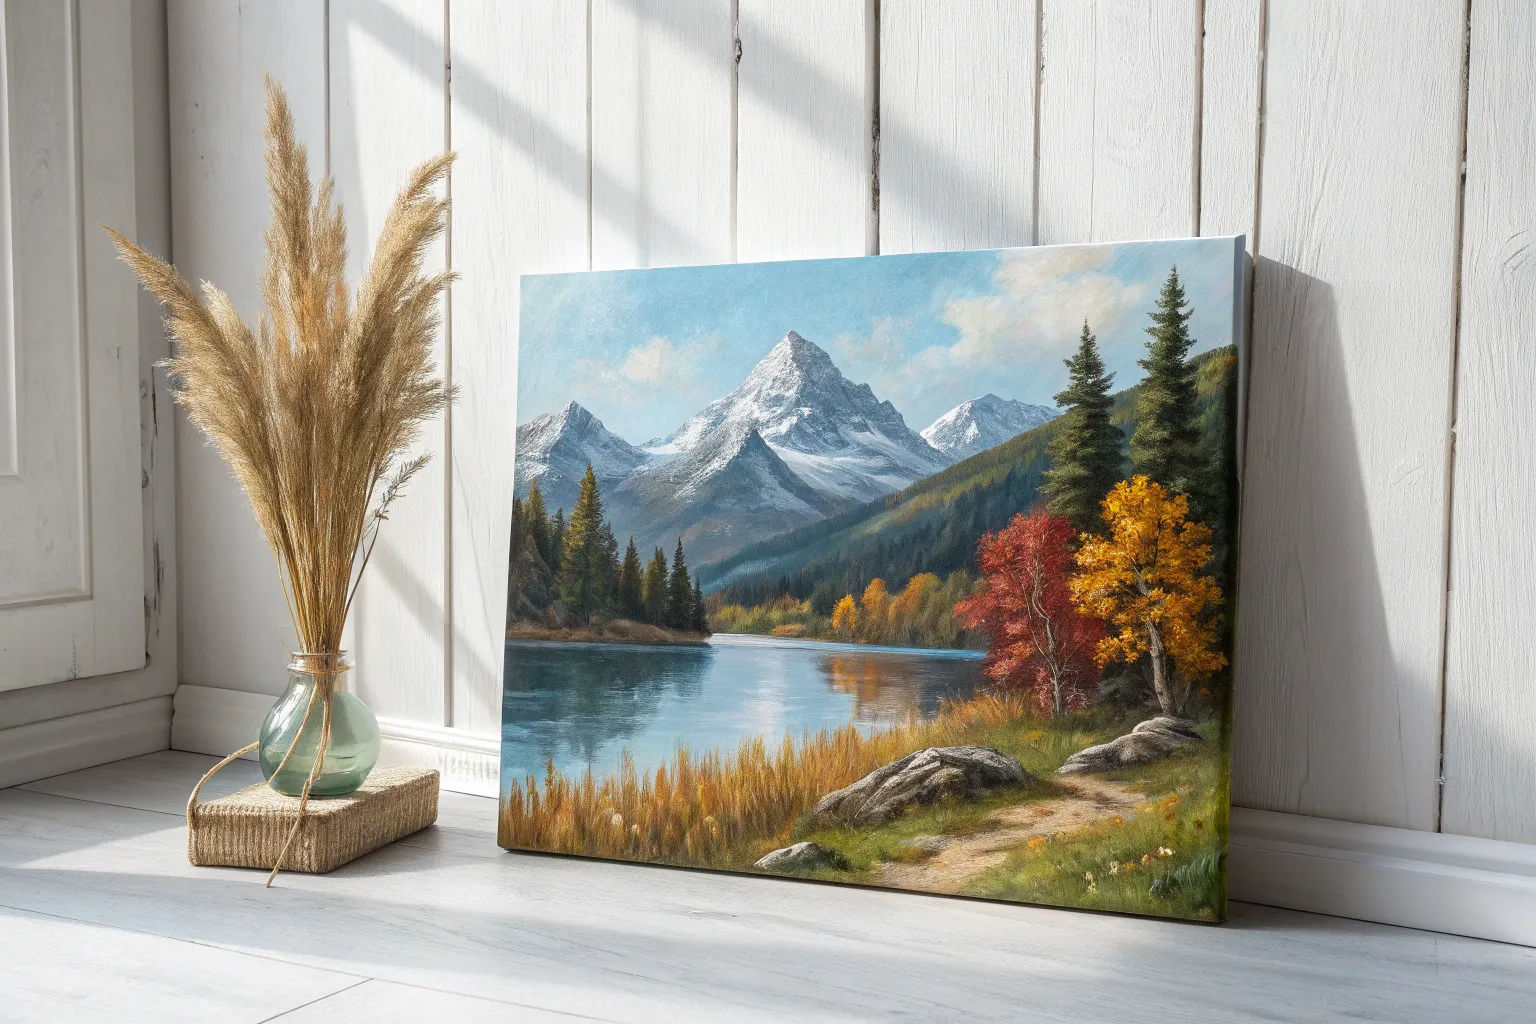
Classic Mountain Vista With Snowy Peaks
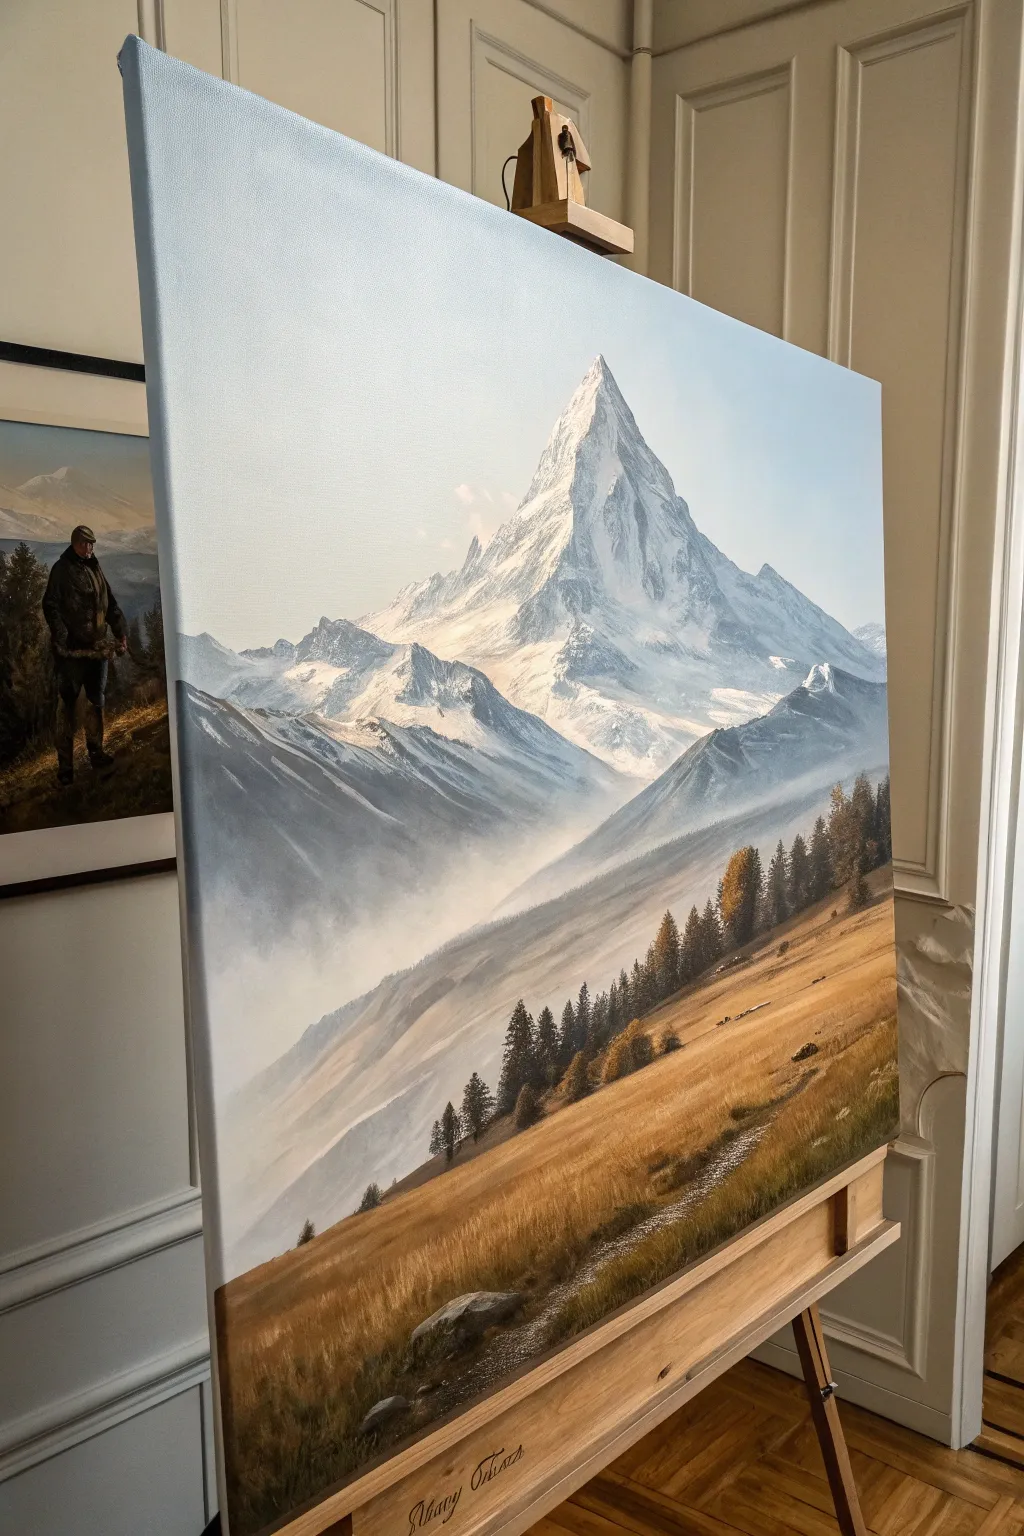
Capture the breathtaking scale of alpine scenery with this comprehensive oil painting guide. You will learn to balance the crisp, cold grandeur of a snow-capped peak with the warm, inviting tones of a grassy foreground slope.
How-To Guide
Materials
- Large stretched canvas (24×36 inches or similar)
- Oil paints: Titanium White, Ultramarine Blue, Cerulean Blue, Burnt Sienna, Yellow Ochre, Alizarin Crimson, Ivory Black
- Brushes: Large flat bristle brush, medium filbert, small round liner brush, fan brush
- Palette knife
- Odorless mineral spirits or turpentine
- Linseed oil or painting medium
- Wooden palette
- Easle (sturdy enough for a large canvas)
Step 1: Setting the Composition
-
Prime and tint:
Begin with a primed canvas. Apply a very thin wash of Burnt Sienna mixed with mineral spirits over the entire surface to kill the white. Wipe it down with a rag so it’s a glowing, warm undertone, and let it dry completely. -
Sketch the major forms:
Using a small round brush and thinned Ultramarine Blue, loosely sketch the triangular shape of the mountain peak. Place the horizon line low to emphasize the height of the mountain, and sketch the diagonal line of the foreground slope moving from bottom-left to mid-right.
Atmospheric Depth Tip
Make distant colors cooler and bluer, and foreground colors warmer and richer. This temperature shift forces the eye to perceive vast distance instantly.
Step 2: Painting the Sky and Distance
-
Establish the sky gradient:
Mix Titanium White with a touch of Cerulean Blue. Start at the very top of the canvas with a deeper blue mixture, adding more white as you move downwards towards the mountain peak to create atmospheric perspective. -
Refine the horizon atmosphere:
Near the base of the mountain, blend a very pale, misty blue-grey into the sky color to suggest distance and hazy air. -
Block in mountain shadows:
Mix Ultramarine Blue, a touch of Alizarin Crimson, and White to create a cool shadow tone. Paint the shadowed side of the mountain (the left face in this reference), using rough, vertical strokes to mimic rocky texture.
Step 3: Sculpting the Mountain
-
High-key highlights:
Load a palette knife with thick Titanium White. Apply it to the sunlit side of the mountain peak (the right face), literally dragging the paint down to create the ‘break’ texture of snow clinging to rock. -
Define the ridges:
Where the light meets the shadow, sharpen the ridge line. Use your medium filbert brush to pull some of the white into the shadow side slightly to suggest reflected light and craggy outcrops. -
Create the mid-ground peaks:
Paint the lower mountain ranges using slightly warmer greys and blues than the main peak. This pushes the main peak further back while connecting it to the valley.
Scale It Up
Add a tiny, silhouetted hiker or a small mountain cabin in the mid-ground. This instantly gives the viewer a reference point for the massive size of the mountain.
Step 4: Creating Atmosphere and Valley
-
Mist and fog:
Using a clean, dry large brush or a soft blending brush, scumble a mixture of White and unbleached Titanium into the valley floor essentially glazing over the bottom of the mountains to create the ‘rising mist’ effect. -
Valley floor shadows:
Establish the deep valley on the left side with dark blues and purples, keeping edges soft where they meet the mist to maintain that dreamlike quality.
Step 5: The Golden Foreground
-
Underpainting the slope:
Mix Yellow Ochre, Burnt Sienna, and a touch of Olive Green. Block in the large diagonal slope in the foreground, using long sweeping strokes that follow the angle of the hill. -
Adding texture to the grass:
Once the underlayer is tacky, use a fan brush with lighter mixtures of Yellow Ochre and White to flick upward and diagonal strokes, simulating tall, dry alpine grass. -
Planting the trees:
Mix a dark evergreen color using Ultramarine Blue, Ivory Black, and a tiny bit of Yellow Ochre. Using the edge of a flat brush or a fan brush turned vertically, tap in the pine trees along the ridge line, varying their heights for realism. -
Tree highlights:
Add subtle highlights to the sunlit side of the trees (the right side) with a warmer olive green, but keep the shadows deep to anchor the painting.
Step 6: Final Details
-
The hiking path:
Scrape away a narrow, winding path through the grass using a palette knife, or paint it in with a grey-brown mixture. Add small rocks and pebbles along the path for scale. -
Foreground rocks:
Paint the large boulders in the immediate foreground using greys and browns. Highlight the top edges where the light hits them and deepen the crevices. -
Final light check:
Step back from the easel. Add one final pass of pure white highlights to the very tip of the mountain and the brightest patches of grass to maximize contrast.
Allow your masterpiece to dry in a dust-free area for several weeks before varnishing to protect that luminous finish


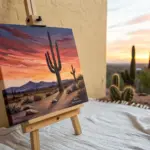
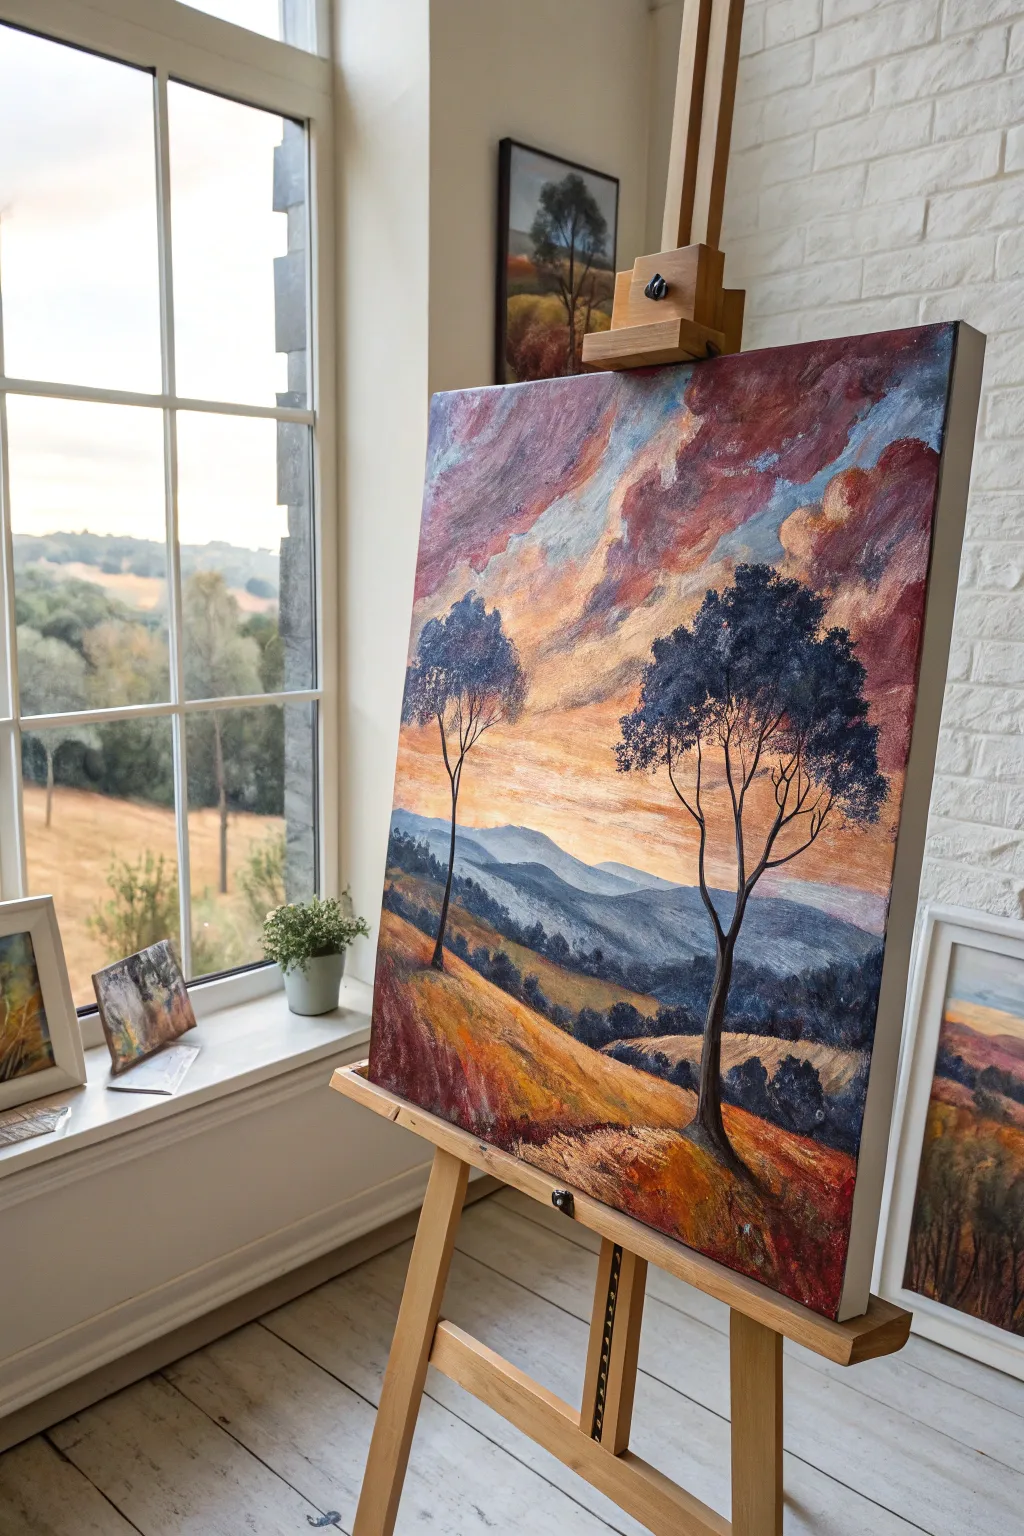
Golden Sunset Over Rolling Hills
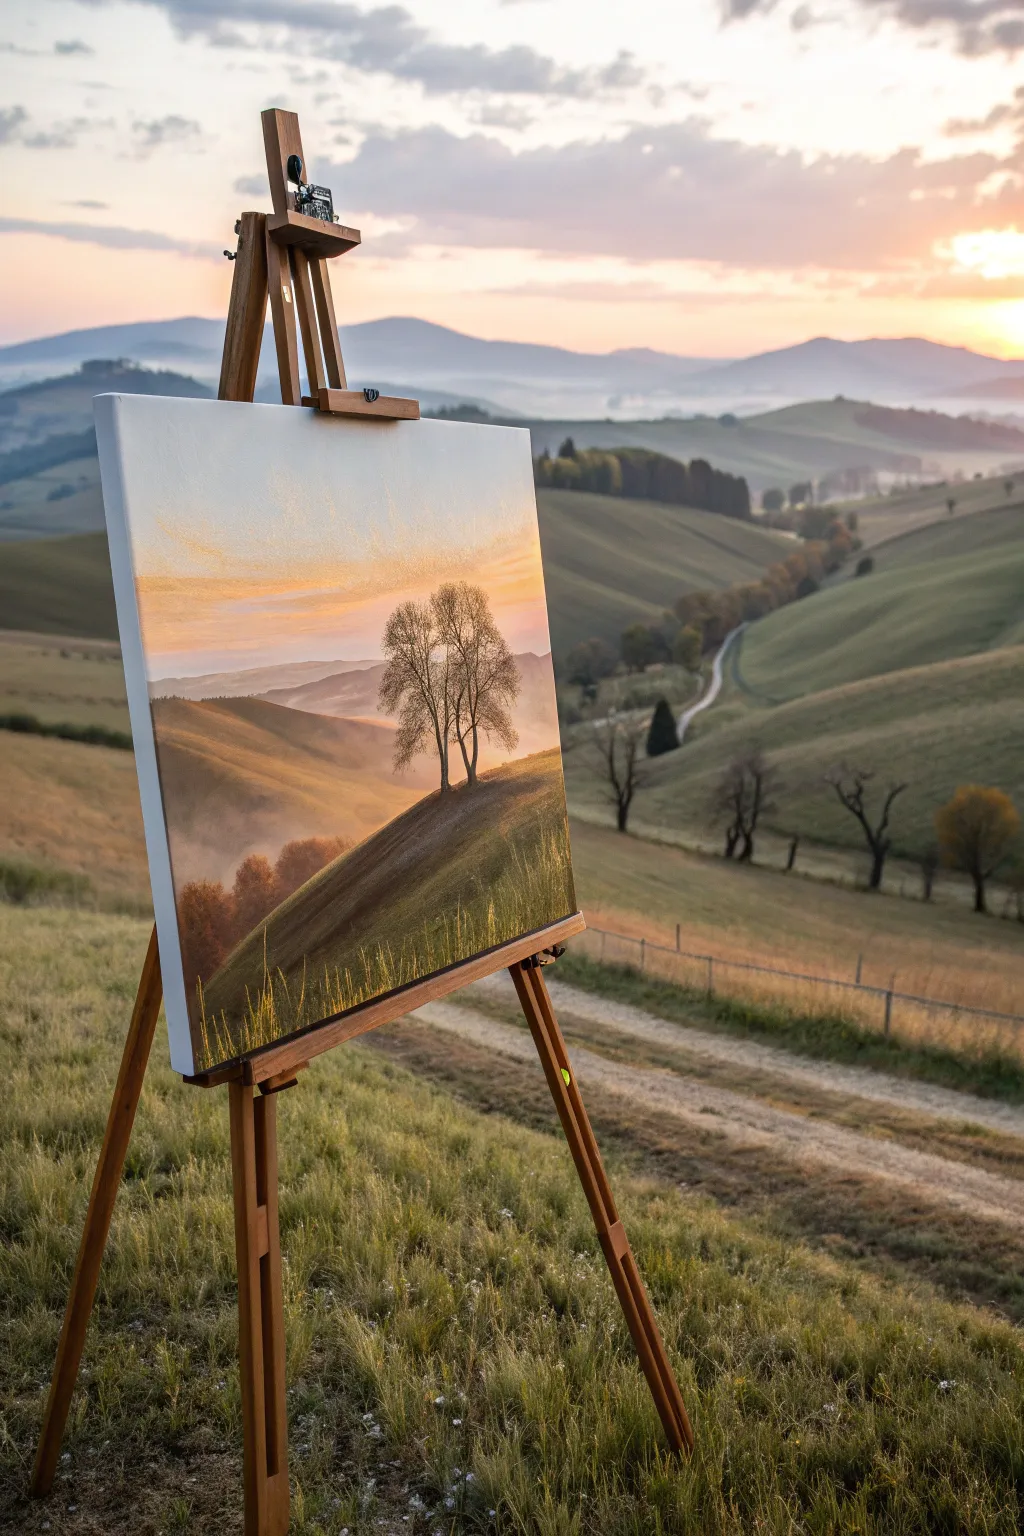
Capture the serene warmth of the golden hour with this landscape oil painting tutorial. This project focuses on atmospheric perspective, blending soft sunset gradients, and depicting the gentle, rhythmic rolling hills of a countryside scene.
Step-by-Step Tutorial
Materials
- Stretched canvas (16×20 inches or similar)
- Oil paints: Titanium White, Cadmium Yellow Medium, Yellow Ochre, Burnt Sienna, Alizarin Crimson, Sap Green, Ultramarine Blue, Burnt Umber
- Brushes: Large flat brush (size 10 or 12), medium filbert (size 6), small round brush (size 2), liner brush
- Palette knife for mixing
- Odorless mineral spirits or turpentine
- Linseed oil or painting medium
- Wooden palette
- Paper towels or rags
- Easel
Step 1: Preparation and Sky Gradient
-
Prime the Surface:
Apply a thin wash of Burnt Sienna diluted with mineral spirits across the entire canvas to kill the white. Wipe away excess with a rag and let it dry until tacky; this warm undertone will help our sunset glow. -
Sketch the Composition:
Using a small round brush and thinned Burnt Umber, lightly sketch the horizon line about one-third up from the bottom. Outline the major shapes of the rolling hills and the placement of the central tree group. -
Mix Sky Colors:
Prepare three piles for the sky: a pale blue-grey (White + touch of Ultramarine + tiny bit of Burnt Sienna), a soft golden yellow (White + Cadmium Yellow + Yellow Ochre), and a warm peach (White + Yellow Ochre + Alizarin Crimson). -
Apply the Upper Sky:
Start at the very top of the canvas with your blue-grey mix using the large flat brush. Paint horizontal strokes, keeping the layer relatively thin but opaque. -
Blend the Horizon Glow:
Move downwards, blending the peach tone into the blue-grey while the paint is still wet. Finally, paint the golden yellow mix just above the distant mountain line, blending upwards to create a smooth, seamless transition.
Soft Edges are Key
For distant hills, use a clean, dry blending brush to gently blur the ridge lines into the sky. Hard edges kill the illusion of distance in atmospheric landscapes.
Step 2: Painting the Distant Landscape
-
Paint Distant Mountains:
Mix a hazy purple-grey using White, Ultramarine, and Alizarin Crimson. Paint the furthest mountain range with soft edges to push it into the distance, ensuring it isn’t too dark. -
Layer the Mid-Ground Hills:
For the hills closer to the viewer but still in the background, mix Yellow Ochre, Sap Green, and a little White. Paint the rolling shapes, keeping the values lighter than you think they should be to maintain depth. -
Add Atmospheric Mist:
While the hill layers are wet, I like to take a clean, dry filbert brush and lightly scumble the valley floors between hills to create the look of settling mist.
Step 3: The Foreground and Trees
-
Block in the Main Hill:
For the prominent sloping hill in the foreground, mix Sap Green, Burnt Sienna, and a touch of Ultramarine Blue for a richer, darker value. Apply this with directional strokes that follow the slope of the land. -
Add Warm Highlights:
Mix Yellow Ochre and Cadmium Yellow. Apply this to the top crest of the foreground hill where the sunset light hits the grass, blending it gently into the shadow side. -
Structure the Trees:
Using Burnt Umber and a small round brush, paint the trunks of the central tree cluster. Make the trunks slightly thicker at the base and taper them naturally as they reach up. -
Paint the Foliage:
Mix Sap Green with Burnt Umber for the shadow leaves, and Yellow Ochre with Sap Green for the lit leaves. Use the medium filbert brush to stipple the foliage, leaving gaps so the sky shows through. -
Detail the Branches:
Switch to your liner brush with thinned Burnt Umber ink-like consistency. Add fine, delicate branches extending out from the main trunks and through the foliage gaps.
Add a Human Element
Make the scene narrative by painting a tiny, simplified silhouette of a person or a small country cottage on the distant winding path.
Step 4: Final Details and Refinement
-
Create Foreground Grasses:
Using the liner brush or the edge of a small flat brush, flick upward strokes of yellow-green along the bottom edge of the canvas to suggest tall grasses catching the lingering light. -
Enhance the Sunset Glow:
If the sky has dried slightly, you can glaze a very thin transparent layer of Cadmium Yellow over the area near the sun to boost the luminosity. -
Deepen Shadows:
Look for the darkest points on the hill—usually at the base of the tree trunks. Add touches of deep green-brown to anchor the trees to the ground. -
Final Assessment:
Step back from the easel. Soften any edges that look too sharp (except for the foreground trees) to maintain the dreamy, atmospheric quality.
Allow your painting to dry in a dust-free area for several days before varnishing, enjoying the peaceful landscape you’ve created.


Forest Path Leading to the Horizon
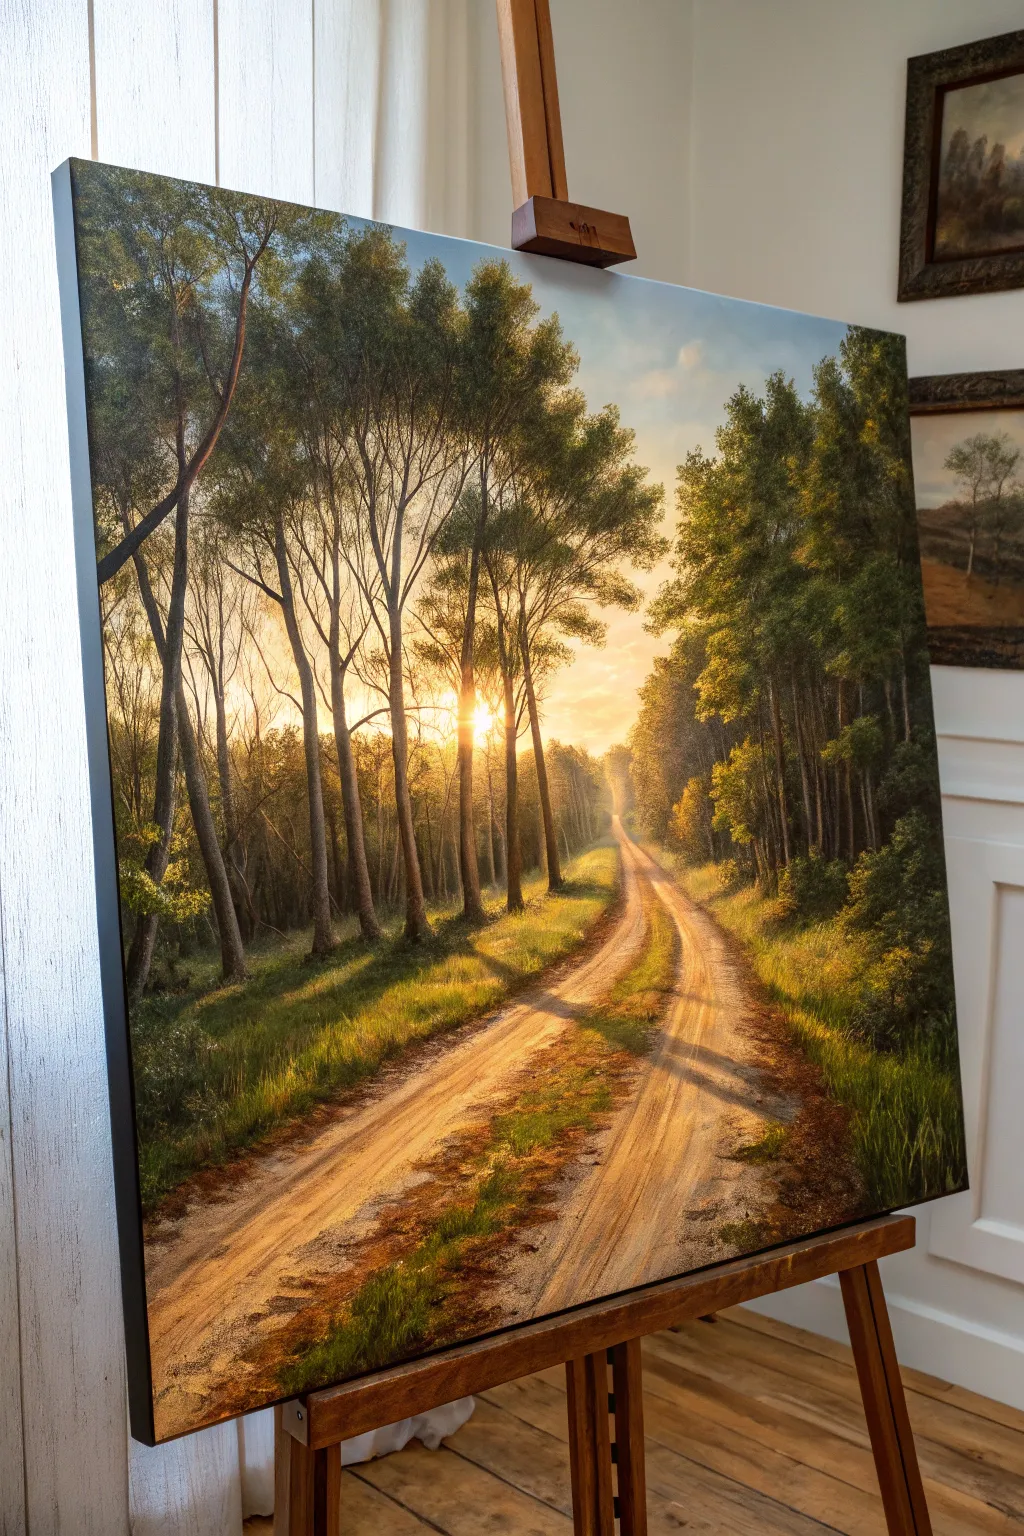
Capture the serene warmth of a sunset breaking through a forest with this detailed landscape oil painting. You’ll learn how to build luminous depth, paint convincing foliage textures, and create a dirt path that draws the viewer’s eye straight toward the horizon.
How-To Guide
Materials
- Large stretched canvas (e.g., 24×30 inches or larger)
- Oil paints: Titanium White, Cadmium Yellow Light, Yellow Ochre, Burnt Sienna, Burnt Umber, Alizarin Crimson, Sap Green, Viridian, Ultramarine Blue, Lamp Black
- Gesso and large priming brush
- Assorted bristle brushes: Large flat (for sky), filbert sizes 4-8 (for foliage), smaller rounds (for details)
- Palette knife
- Odorless mineral spirits or turpentine
- Linseed oil or painting medium
- Clean rags or paper towels
- Easel
- Palette
Step 1: Preparation and Underpainting
-
Prime the Surface:
Ensure your canvas is ready by applying an even coat of gesso if it isn’t pre-primed. Let this dry completely until it’s smooth to the touch. -
Sketch the Composition:
Using a thin wash of Burnt Sienna focusing on the horizon line and the vanishing point. Sketch the converging lines of the path and the vertical placement of the major tree trunks. -
Block in Values:
Dilute your paint with mineral spirits to create a lean underpainting. Use dark browns and greens for the shadowed tree areas on the left and subtle grays for the distant path. -
Establish the Light Source:
Wipe away paint with a rag where the sun sits just above the horizon to preserve the luminosity of the canvas, marking the brightest spot in the composition.
Step 2: Building the Sky and Background
-
Paint the Sky Gradient:
Mix Titanium White with a touch of Cadmium Yellow near the horizon. As you move upward, blend in faint blues and greys. Use a large flat brush and criss-cross strokes to create a seamless, soft gradient. -
Create the Sunburst:
Right at the focal point, apply pure Titanium White mixed with a tiny bit of Cadmium Yellow. Feather the edges outwards into the surrounding sky to create a glowing haze rather than a hard circle. -
Paint Distant Trees:
Using a cool mixture of Viridian, Ultramarine, and White, paint the hazy tree line at the furthest point of the path. Keep edges soft to suggest atmospheric perspective.
Pro Tip: Light Wrap
To make the sun look blindingly bright, allow the sky color to slightly ‘eat’ into the silhouettes of the tree trunks. This halation effect mimics how our eyes perceive intense light.
Step 3: Trees and Foliage
-
Structure the Trunks:
Mix Burnt Umber and Lamp Black for the main tree trunks. Paint the ones on the left darker and thicker, tapering them as they reach upwards. Remember that trees are rarely perfectly straight. -
Apply Shadowed Foliage:
Load a filbert brush with a dark mix of Sap Green and Burnt Umber. Stipple the brush against the canvas to create the dense, shadowed masses of leaves high up in the canopy. -
add Highlights to Leaves:
Mix Sap Green with Cadmium Yellow and a touch of White. Lightly tap this onto the edges of the tree canopies facing the sun, particularly on the right side of the path where the light hits directly. -
Refine Branch Details:
Use a rigger brush or a fine round brush with thinned dark paint to draw the fine, spindly branches that connect the leaf masses to the trunks. -
Backlight the Trees:
Where the trunks cross in front of the sun, take a dry brush and gently drag a little of the sky color over the edges of the trunk. This ‘light wrap’ effect makes the light look intense.
Troubleshooting: Muddy Greens?
If your greens look dull, avoid mixing them with too much white, which makes them chalky. Instead, lighten greens with yellow or use transparent glazes to keep foliage vibrant.
Step 4: The Path and Foreground
-
Base Color for the Road:
Mix Yellow Ochre, Burnt Sienna, and White to lay down the sandy base color of the dirt road. Use long, horizontal strokes that curve slightly to follow the perspective. -
Add Shadows on the Path:
Use a glaze of Burnt Umber and Purple to paint the long, stretching shadows cast by the trees across the road. Ensure these shadows align with the angle of the sun source. -
Paint Grass Verges:
Along the edges of the road, use upward flicks of Sap Green and Yellow Ochre to create grassy textures. I find blending the bottom of the grass into the dirt softens the transition nicely. -
Enhance Texture:
Use a palette knife to scrape a little thick, light-colored paint over the sunlit parts of the road. This creates the texture of rocks and dry earth catching the light. -
Final Glazes:
Once the painting is dry to the touch (usually several days), apply a very thin glaze of golden yellow over the sunlit areas to unify the warmth of the scene.
Step back and admire how the light leads your eye all the way down the path into the distance


River Bend With Soft Atmospheric Distance
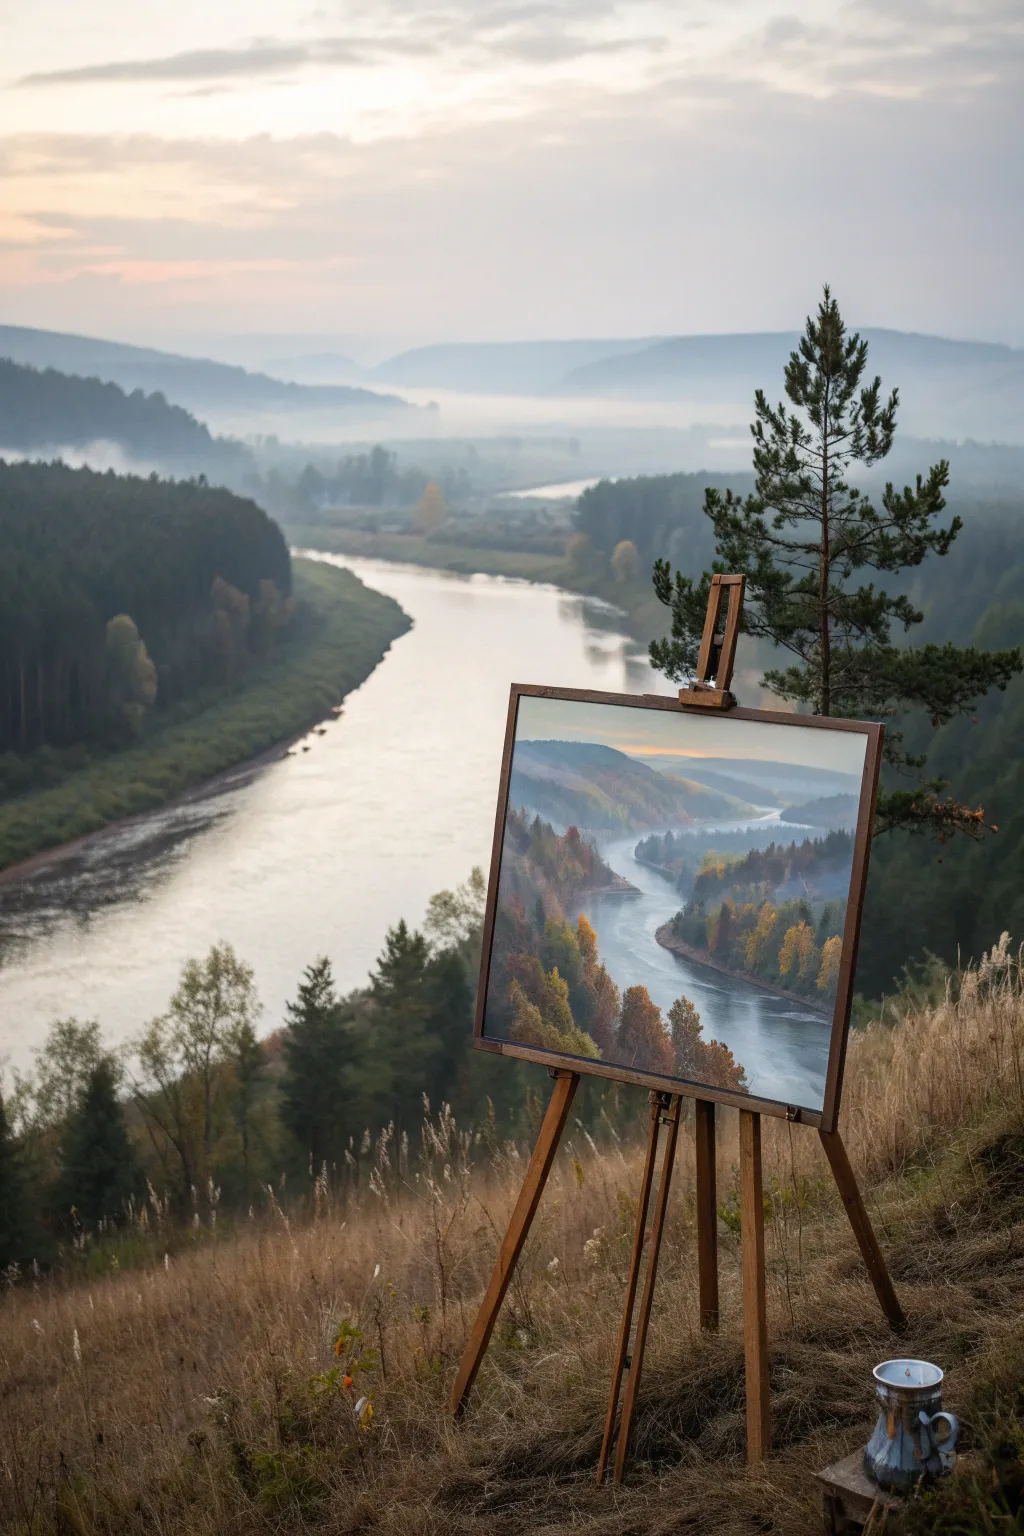
Capture the serene beauty of a winding river cutting through hazy, rolling hills in this atmospheric oil painting project. You will learn to balance soft, distant fading colors with crisp, vibrant foreground foliage to create a stunning sense of depth.
Step-by-Step
Materials
- Stretched canvas (16×20 inches or similar)
- Oil paints: Titanium White, Ultramarine Blue, Burnt Sienna, Yellow Ochre, Cadmium Yellow, Alizarin Crimson, Sap Green, Payne’s Gray
- Brushes: Large flat brush (2″), medium filbert (size 6-8), small round (size 2), palette knife
- Odorless mineral spirits or turpentine
- Linseed oil medium
- Wooden palette
- Paper towels or rag
- Easel
Step 1: Setting the Atmosphere
-
Priming the canvas:
Begin by toning your white canvas with a very thin wash of Burnt Sienna and odorless mineral spirits. Wipe it down with a rag so it’s a warm, glowing tan color. This kills the stark white and adds warmth to the final landscape. -
Sketching the composition:
With a small round brush and thinned Ultramarine Blue, sketch the main shapes. Mark the horizon line high on the canvas, draw the S-curve of the river, and outline the sloping hills on either side. -
Painting the sky:
Mix Titanium White with a tiny touch of Burnt Sienna and Yellow Ochre for the glow near the horizon. Above that, blend in a soft grey-blue using White, a touch of Payne’s Gray, and Ultramarine. Use the large flat brush to blend these horizontally for a smooth gradient. -
Creating the distant hills:
For the furthest hills, mix a pale, cool grey-blue. Environmental perspective is key here; use mostly White and Blue with a hint of Alizarin Crimson, keeping values very light to push them back in space. -
Adding the middle ground fog:
As you move forward to the middle hills, add slightly more pigment but keep it hazy. Scumble a mix of White and Blue into the valleys to mimic the rising mist seen in the reference.
Step 2: The River and Hills
-
Blocking in the water base:
Paint the river surface using a reflection of the sky colors. The water furthest away should represent the bright sky—almost pure white with a touch of blue—while the foreground water becomes slightly darker and clearer. -
Defining the riverbanks:
Use a darker mix of Sap Green and Burnt Sienna to carve out the edges of the river. This dark outline separates the land from the water and guides the viewer’s eye along the bend. -
Layering the hill slopes:
On the left sloping hill, block in a base of muted greens and browns. Don’t worry about individual trees yet; just establish the form of the land mass. -
Adding reflections:
Drag some of the dark land color vertically down into the water while the paint is still wet to create soft reflections near the riverbanks. Gently brush across them horizontally to blur them.
Muddy Color Fix
If your autumn oranges turn brown when mixing with the greens, let the green layer dry to the touch before applying the warm highlights on top.
Step 3: Foreground and Details
-
Mixing autumn greens:
Transitioning to the foreground trees on the right and left banks, mix richer, warmer greens using Sap Green and Cadillac Yellow. These should be much darker and more saturated than the background. -
Stippling foliage texture:
Using the corner of your medium filbert brush or an old hog bristle brush, tap in the tree shapes. Vary the pressure to create airy, leafy textures rather than solid blobs. -
Adding autumn accents:
I like to mix Cadmium Yellow with a touch of Burnt Sienna to create brilliant gold and orange highlights. Apply these sparingly to the tops of the trees where the light would hit. -
Deepening the shadows:
Mix Sap Green with Payne’s Gray and Alizarin Crimson for the deepest shadows at the base of the trees. Strong contrast here brings the foreground forward. -
Refining the water flow:
Use a clean, dry brush to horizontally sweep across the river surface one last time. Add a few pure white streaks near the bends to suggest current or light catching ripples. -
Final atmospheric touches:
If the distant trees look too sharp, glaze a very thin veil of zinc white or linseed oil over them to soften edges and enhance the misty effect.
Depth Perception
Cool colors recede; warm colors advance. Keep the distant hills very blue/grey and reserve your warmest yellows and browns strictly for the foreground.
Step back and enjoy how the soft mist contrasts with the crisp autumn foliage in your finished landscape.
BRUSH GUIDE
The Right Brush for Every Stroke
From clean lines to bold texture — master brush choice, stroke control, and essential techniques.
Explore the Full Guide
Rocky Coast Painted With Bold Impasto
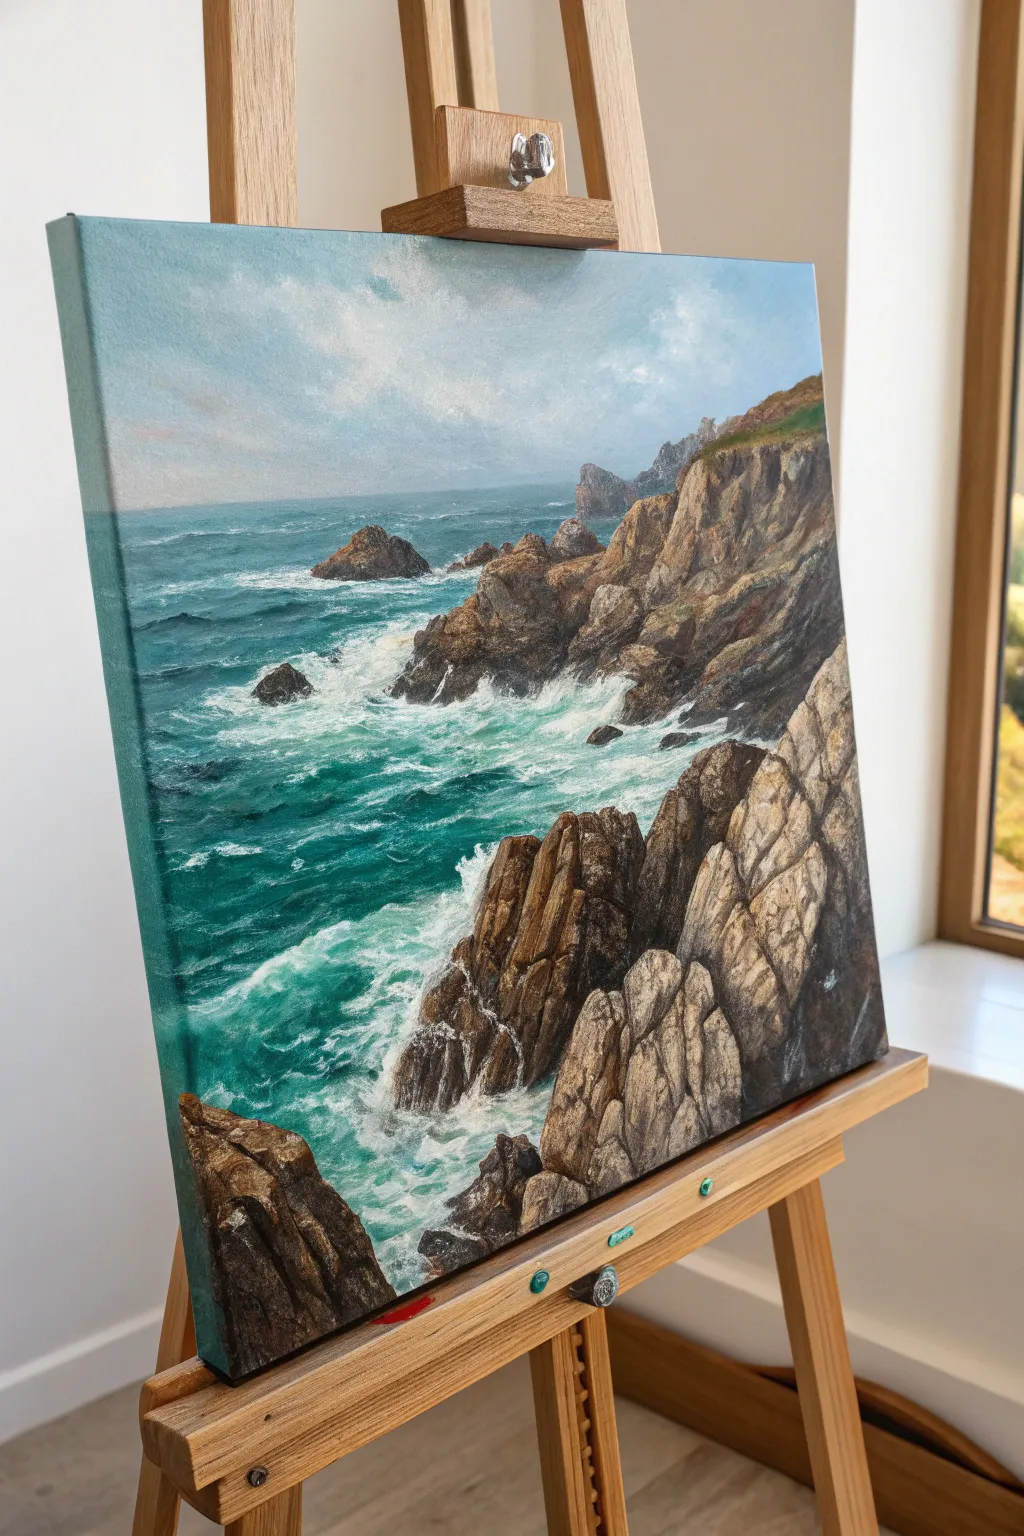
Capture the raw energy of the ocean crashing against rugged cliffs with this dynamic oil painting project. You will use bold, textural brushwork and lively palette knife applications to contrast the smooth, flowing water against the jagged, solid rock formations.
Detailed Instructions
Materials
- Stretched canvas (approx. 16×20 inches or similar)
- Oil paints: Titanium White, Ultramarine Blue, Phthalo Blue, Phthalo Green, Burnt Umber, Yellow Ochre, Burnt Sienna, Payne’s Grey
- Flat bristle brushes (various sizes: large #10, medium #6, small #2)
- Filbert brushes (sizes #4 and #8)
- Rigger or liner brush
- Palette knife (diamond or teardrop shape)
- Wooden palette
- Odorless mineral spirits or turpentine
- Liquin Impasto or similar thickening medium (optional)
- Paper towels or lint-free rags
- Easel
Step 1: Preparation & Sky
-
Tone the canvas:
Begin by washing the entire canvas with a thin mixture of Burnt Sienna and solvent. This warm underpainting will peek through later, adding vibrance to the cool blue waters and earthy rocks. Wipe away excess with a rag and let it dry. -
Sketch the composition:
Using a small round brush and thin Burnt Umber, roughly sketch the coastline. Place the horizon line about two-thirds up the canvas, and map out the large diagonal mass of the cliff on the right, ensuring it dominates the foreground. -
Block in the sky gradient:
Mix Titanium White with a tiny touch of Ultramarine Blue and Phthalo Green for a very pale, airy teal. Paint the upper sky, gradually adding a little more blue as you move toward the horizon line, but keep the value light and hazy. -
Add cloud suggestions:
While the sky paint is wet, scumble in soft white clouds using a dry filbert brush. Blend the bottom edges into the sky color to make them recede into the distance.
Muddy Waters?
If your white foam is turning muddy or green when painting over the blue water, stop blending. Lay the thick white paint on top and leave it alone, or wait for the blue layer to dry first.
Step 2: The Ocean
-
Establish the deep water:
Mix Phthalo Blue, a touch of Phthalo Green, and Payne’s Grey for the deepest ocean sections on the left. Apply this color horizontally, allowing the brushstrokes to mimic the movement of the swells. -
Transition to turquoise:
As you move closer to the rocky shore where the water is shallower and aerated, mix Phthalo Green, Titanium White, and a hint of Yellow Ochre. Paint this vibrant turquoise around the base of the rocks. -
Create wave movement:
Use a medium flat brush to blend the deep blue into the turquoise areas. Don’t over-blend; let the strokes remain visible to suggest choppy water texture. -
Paint the foam base:
With a mix of Titanium White and a tiny drop of blue (so it isn’t pure white yet), block in the areas where waves are crashing. Focus on the base of the cliffs and the frothy trails leading out to sea.
Level Up: Glazing
Once the painting is fully dry (after a week), apply a transparent glaze of yellow ochre over the sunlit rocks to unify the lighting and make them glow warmly.
Step 3: Structure of the Rocks
-
Block in dark shadows:
This is crucial for volume. Mix a dark, rich shadow color using Burnt Umber and Ultramarine Blue. Paint the shadowed crevices, the base of the cliffs, and the dark sides of the foreground rocks. -
Add mid-tone browns:
Mix Burnt Sienna, Yellow Ochre, and a touch of White. Apply this to the main faces of the rocks. Use a chunky, decisive stroke to mimic the faceted nature of stone. -
Introduce distant rocks:
For the smaller rocks further back near the horizon, mix your rock color with a little of the sky blue color. This ‘atmospheric perspective’ makes them look further away.
Step 4: Texture & Impasto Details
-
Apply palette knife highlights:
Mix a thick highlight color using Titanium White, Yellow Ochre, and a tiny bit of Burnt Sienna. Load your palette knife and drag it lightly over the sunlit edges of the foreground rocks. The paint should break, leaving a rugged texture. -
Refine rock fissures:
Switch to a small round brush or rigger. Re-emphasize the deepest cracks in the rocks with your dark shadow mix, ensuring the separation between the boulders is clear. -
Brightest sea foam:
Use pure Titanium White (mixed with a little impasto medium if desired) and a clean brush. Dab thick, heavily textured highlights onto the crashing waves and sea spray. I find stippling with an old, splayed brush works perfectly here. -
Add interaction:
Paint small ‘spills’ of water running off or over the lower rocks using the turquoise mix. This connects the solid land to the fluid ocean. -
Final touches:
Check the horizon line to ensure it’s straight. Add a few touches of green on the very top of the cliff for coastal grass, using Yellow Ochre and a touch of Phthalo Green.
Step back and admire the energetic contrast between the fluid ocean and the solid stone you have created
Winter Landscape With Long Blue Shadows
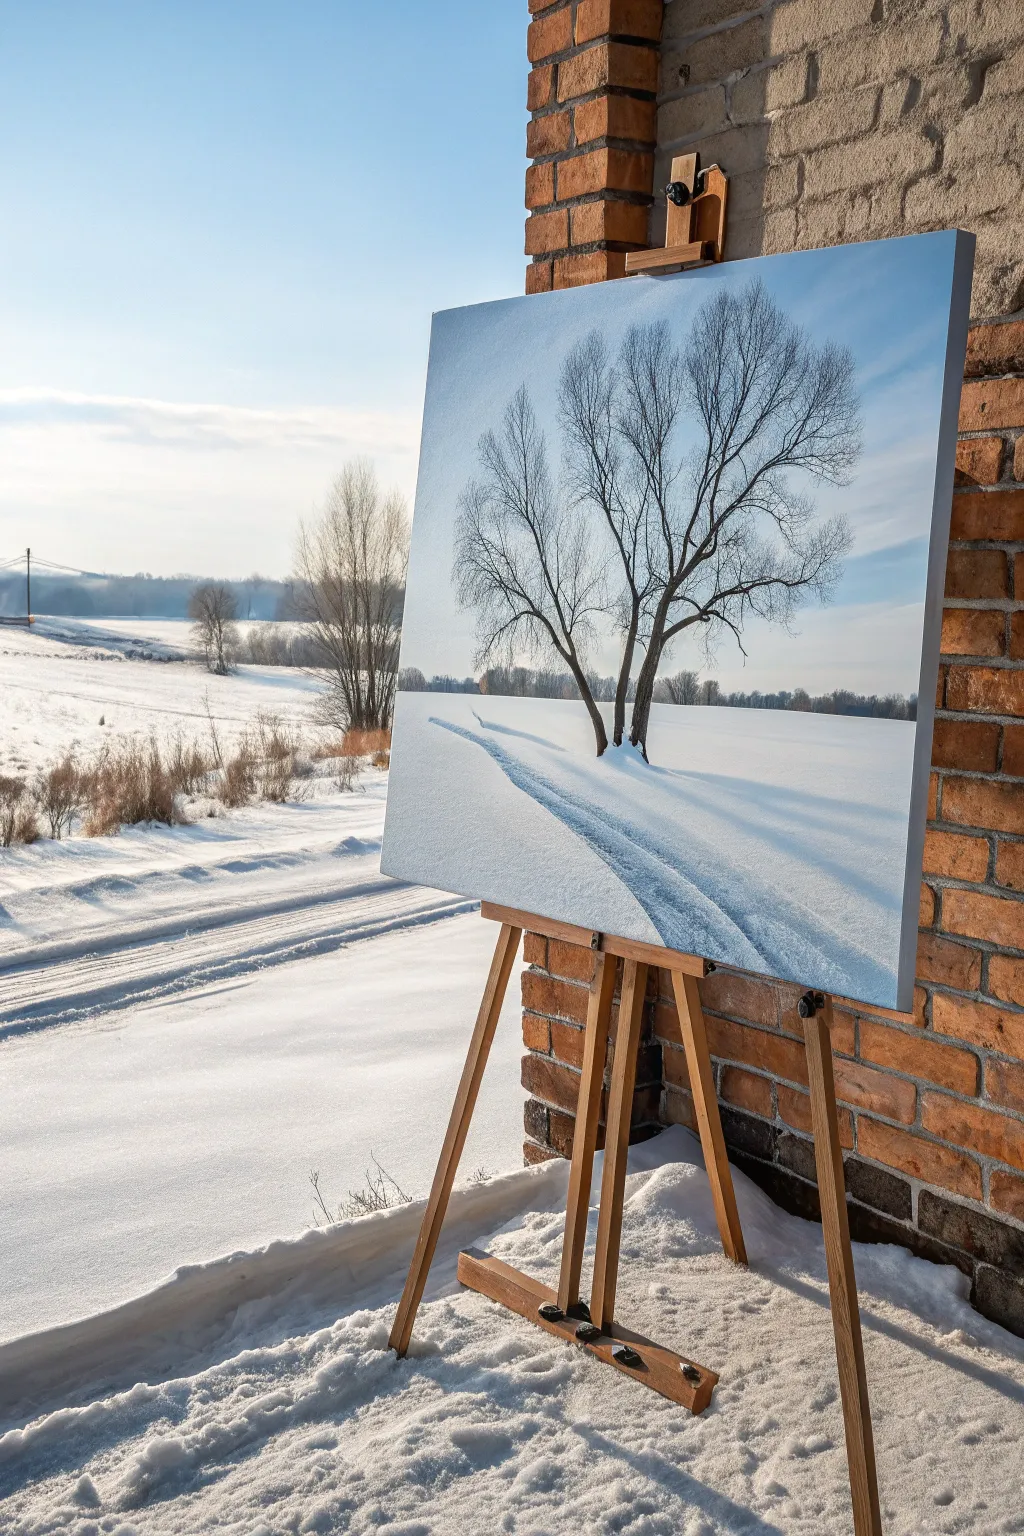
This project captures the quiet solitude of a winter afternoon, focusing on the stark contrast between bright snow and deep, elongated blue shadows. You will learn to render bare branches with precision and mix subtle variations of white to create a realistic sense of cold light.
Step-by-Step Guide
Materials
- Canvas (stretched on frame)
- Oil paints: Titanium White, Ultramarine Blue, Burnt Umber, Ivory Black, Cerulean Blue, Raw Sienna
- Brushes: Large flat brush, medium filbert, fine liner (rigger) brush
- Palette knife
- Odorless mineral spirits or turpentine
- Linseed oil medium
- Wooden easel (optional, for working outdoors)
- Palette
- Paper towels or rag
Step 1: Setting the Scene
-
Sky gradient:
Begin by blocking in the sky. Mix Titanium White with a touch of Cerulean Blue for the upper corners, fading into pure white near the horizon line. Use your large flat brush with broad, horizontal strokes to create a seamless, soft atmosphere. -
Light clouds:
While the sky is still wet, add faint, sweeping wisps of white using a clean, dry brush. These should be barely visible, suggesting high-altitude cirrus clouds. -
Horizon line:
Mix a distant tree line color using White, a speck of Ultramarine, and a tiny bit of Burnt Umber to create a cool, desaturated grey-blue. Paint a low, soft strip across the horizon, keeping the edges slightly blurred to push it into the background. -
Foreground Snow Base:
Cover the bottom two-thirds of the canvas with a thick layer of Titanium White. Don’t worry about details yet; just establish the bright snow-covered ground.
Muddy Shadows?
Keep your brushes pristine! If brown tree paint mixes with blue shadow paint, the snow will look dirty. Clean brushes thoroughly before switching back to white areas.
Step 2: Sculpting the Snow
-
Shadow mixing:
The key to snow is that it isn’t just white. Prepare a “shadow blue” by mixing Ultramarine Blue with White and a tiny drop of Alizarin Crimson or Burnt Umber to dull it slightly. -
The central track:
Using your medium filbert brush and the shadow mix, paint a curving diagonal line starting from the bottom right, narrowing as it recedes toward the tree. This suggests a path or ski track cut into the snow. -
Highlighting the ridge:
On the upper edge of the shadow track you just painted, apply a stroke of pure, thick Titanium White. This creates the ‘lip’ of the snow where the light hits the edge of the depression. -
Field variations:
Add subtle, very pale blue glazes to the flat areas of the snow to suggest uneven terrain. The snow shouldn’t look like a flat white wall, but undulating ground.
Step 3: The Bare Tree
-
Trunk placement:
Mix Burnt Umber with a little Ivory Black. Using the edge of a flat brush or a filbert, plant the main trunk in the center-right of the composition. Ensure the base of the tree sits firmly *in* the snow, not floating on top. -
Branch structure:
Switch to a smaller round brush. Extend two or three main heavy branches upward and outward. I like to twist the brush slightly as I pull the stroke to create the gnarled, organic look of old wood. -
Fine twigs:
Pour a little mineral spirits into your dark paint mix to make it inky and thin. Use a liner or rigger brush to flick hundreds of tiny twigs upward. These should be very delicate and overlap significantly to create that dense ‘crown’ look. -
Tree highlights:
Mix a warm grey (White + Raw Sienna + Black). Paint thin lines on the left side of the trunk and major branches to indicate where the winter sun is striking the bark.
Sparkle Effect
Use a palette knife to tap tiny dots of pure, thick Impasto white on the highest snow ridges. This mimics the sun glinting off ice crystals.
Step 4: The Long Shadows
-
Mapping the cast shadow:
Identify the light source (coming from the left). Using your blue shadow mix from earlier, paint the cast shadow of the tree stretching long and diagonal toward the right side of the canvas. -
Softening edges:
Shadows on snow are rarely hard-edged. Use a clean, dry brush to gently feather the edges of the tree shadow so it blends softly into the surrounding white snow. -
Final atmosphere:
Assess the values. If the background trees look too dark, glaze over them with a very thin layer of white to push them further back into the misty distance.
Step back and feel the chill radiating from your finished winter masterpiece

PENCIL GUIDE
Understanding Pencil Grades from H to B
From first sketch to finished drawing — learn pencil grades, line control, and shading techniques.
Explore the Full Guide
Spring Meadow With Wildflowers and Sky
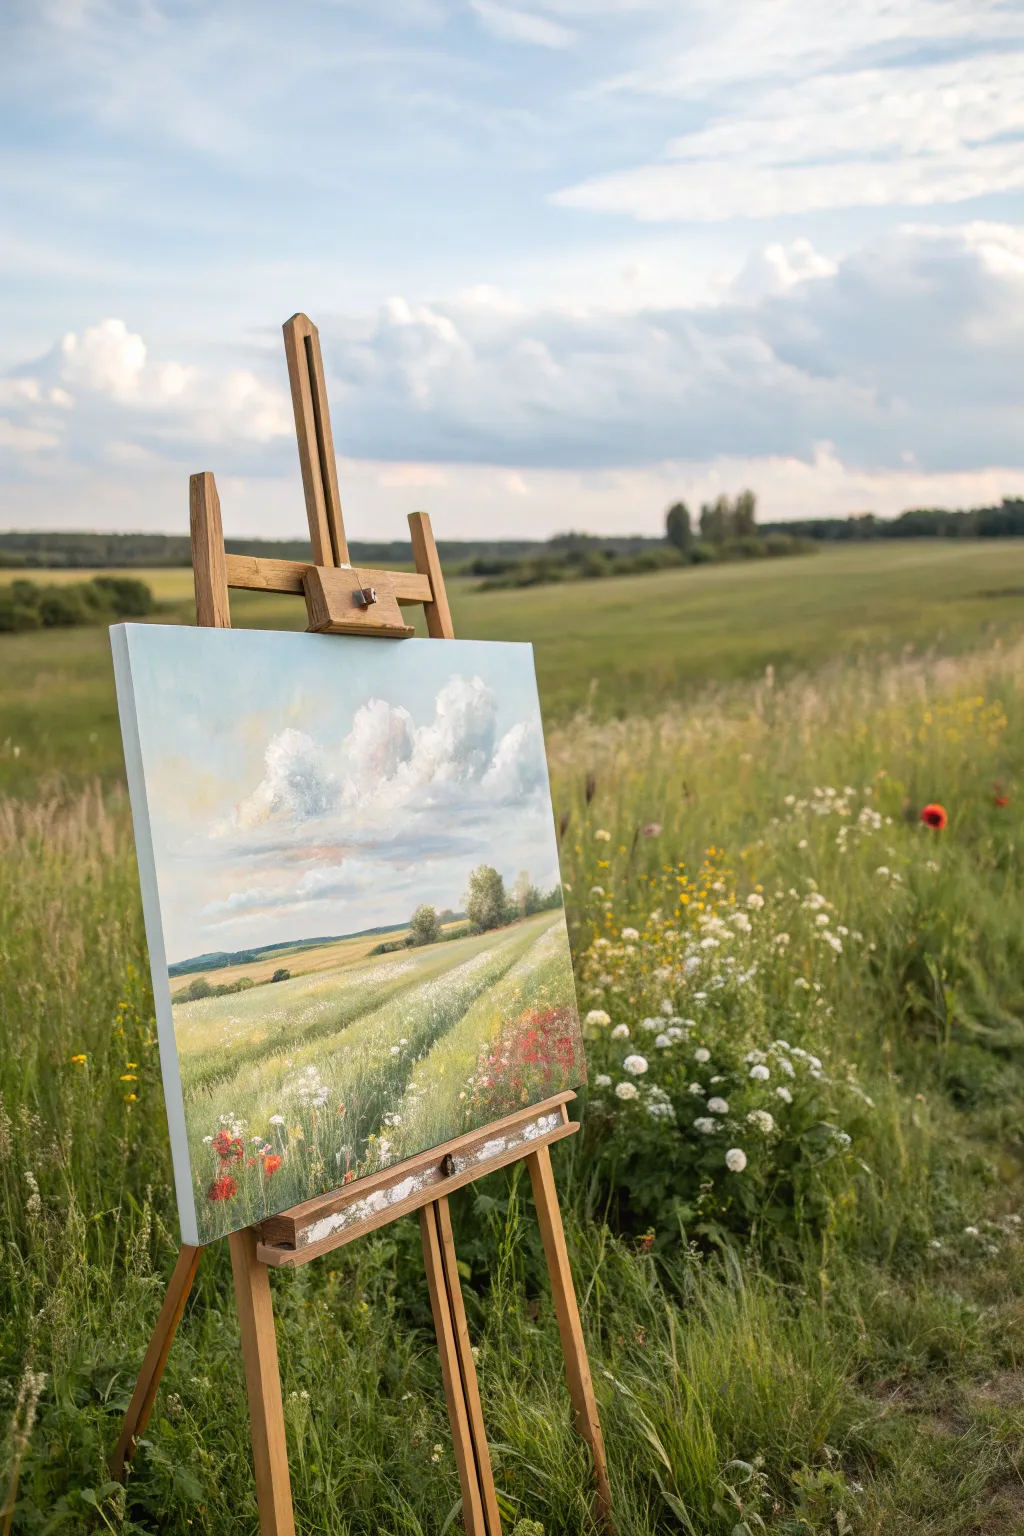
Embrace the freshness of spring with this vibrant oil landscape, balancing a sweeping, cloud-filled sky against a textured, flower-dotted field. This project focuses on atmospheric perspective and loose, expressive brushwork to capture the feeling of a breezy afternoon outdoors.
Step-by-Step Tutorial
Materials
- Stretched canvas or canvas board (approx. 16×20 inches)
- Oil paints (Titanium White, Ultramarine Blue, Cerulean Blue, Sap Green, Cadmium Yellow, Yellow Ochre, Alizarin Crimson, Cadmium Red)
- Hog bristle brushes (large filbert, medium flat, small round)
- Palette knife
- Odorless mineral spirits or turpentine
- Linseed oil or painting medium
- Wooden palette
- Easel (optional but recommended for perspective)
- Paper towels or rags
Step 1: Sky and Atmosphere
-
Tone the canvas:
Begin by applying a very thin wash of diluted Burnt Sienna or Yellow Ochre over the entire canvas. Wipe it back with a rag so it’s merely a warm, glowing undertone, not a thick layer of paint. -
Establish the horizon:
Using a small round brush and thinned paint, sketch a low horizon line about one-third of the way up the canvas. This composition emphasizes the dramatic sky. -
Mix sky gradients:
Prepare a gradient of blues on your palette. Mix Ultramarine Blue with White for the upper sky, transitioning to a lighter, warmer Cerulean Blue mixed with a touch of White and Alizarin Crimson near the horizon. -
Paint the upper sky:
With a large filbert brush, apply the deeper blue mix to the top corners, using crisscross strokes to keep the layer thin and airy. -
Blend the lower sky:
Work the lighter blue mixture towards the horizon, blending it softly into the upper blue while the paint is still wet. Keep the color palest right above the land to suggest atmospheric depth. -
Form the clouds:
Load a medium filbert brush with generous amounts of Titanium White and a tiny touch of Yellow Ochre. Scumble in the large, billowy cloud shapes, twisting the brush to create irregular, fluffy edges. -
Shadow the clouds:
Mix a soft grey-purple using Ultramarine, Alizarin Crimson, and White. Apply this to the bottom edges of the clouds to give them volume and weight, softening perfectly into the blue sky below.
Step 2: The Landscape Foundation
-
Block in distant hills:
Mix a cool, muted green using Sap Green, Ultramarine Blue, and White. Paint the distant tree line and rolling hills along the horizon, keeping edges soft to push them into the distance. -
Base layer for the field:
Use a large flat brush to lay in the main field color. Mix Sap Green with Yellow Ochre and White for a warm, sunlit grass tone. Apply this loosely, following the slope of the land. -
Add directional flow:
While the base green is wet, add slight variations of lighter yellow-green in diagonal strokes moving from the bottom right toward the center left. This suggests the wind blowing through the tall grass. -
Define mid-ground trees:
Using a darker mix of Sap Green and a touch of Burnt Sienna, dab in the small clusters of trees and bushes in the middle distance. Keep these shapes organic and slightly roughly textured.
Palette Knife Punch
Use a palette knife to apply the pure white highlights on the clouds and the foreground flowers. The thick impasto paint will catch the light and add 3D texture.
Step 3: Foreground Details and Flowers
-
Texture the foreground:
Switch to a smaller brush or even use the side of a palette knife. Mix a vibrant, darker green for the immediate foreground at the bottom of the canvas to anchor the viewer. -
Suggest grass blades:
With a rigger brush or the edge of a flat brush, flick upward strokes of pale yellow-green and white in the foreground to create individual blades of tall grass catching the light. -
Paint white wildflowers:
Using thick Titanium White straight from the tube, dot clusters of white flowers in the lower-left warmth. Vary the size of the dots—larger at the bottom, tiny specks as they recede into the field. -
Add poppy accents:
Mix Cadmium Red with a bit of Orange. Place scattered red accents in the lower right and left corners. Keep these loose; just a few dabs suggest poppies without needing petal-perfect detail. -
Final highlights:
Take a clean, dry brush and very lightly soften any harsh edges in the clouds or distant trees. Add a final highlight of pure white to the tops of the cloud formations for maximum brightness.
Muddy Greens?
If your greens look dull, stop adding black to darken them. Instead, mix Alizarin Crimson into your Sap Green. This creates a rich, natural shadow tone.
Step back and admire how your brushwork has captured the breezy, open feeling of a perfect spring day
Dramatic Cloud Study Over Open Land

This oil painting project focuses on the raw power of a towering cumulonimbus cloud dominating a sweeping prairie landscape. You will learn to balance soft, billowing cloud forms with structural perspective in the foreground grasses and dirt road.
How-To Guide
Materials
- Large stretched canvas (square or slightly vertical format)
- Oil paints: Titanium White, Ultramarine Blue, Cerulean Blue, Burnt Umber, Yellow Ochre, Alizarin Crimson, Sap Green, Ivory Black
- Brushes: Large flats (size 10-12) for sky, medium filberts (size 6-8) for clouds, small rounds and riggers for grass details
- Odorless mineral spirits
- Liquin or painting medium of choice
- Palette knife
- Easel
- Lint-free rags
Step 1: Setting the Scene
-
Establish the Horizon:
Begin by toning your canvas with a thin wash of Burnt Umber and mineral spirits. Once tacky, use a rag to wipe out the horizon line about one-third of the way up the canvas. This low horizon emphasizes the massive scale of the sky. -
Sketch the Composition:
Using a small round brush and thinned Burnt Umber, lightly sketch the dominant cloud shape. It should look like an explosion or cauliflower shape, occupying the center and right upper portions. Mark the winding path of the dirt road starting wide at the bottom right and narrowing toward the horizon. -
Block in the Sky Base:
Mix Cerulean Blue with a touch of Titanium White and apply it to the upper left corner and the spaces peeking through the clouds. Keep this blue deeper at the top and let it fade slightly as it nears the horizon line.
Cloud Softening Secret
Use a clean, dry fan brush to very lightly sweep over wet cloud paint. This blurs harsh strokes just enough to make the vapor look realistic without losing the shape.
Step 2: Sculpting the Clouds
-
Establish Cloud Shadows:
Mix a cool grey using Ultramarine Blue, a tiny bit of Alizarin Crimson, and White. Paint the shadowed undersides of the massive cloud structure first. This defines volume immediately. -
Create the Rain Curtain:
Under the darkest part of the cloud base, drag your brush vertically downward with a dark grey-blue wash. Soften the edges with a clean, dry brush to simulate the hazy look of distant rain falling on the hills. -
Apply Mid-tones:
Mix a lighter grey-white and scumble it into the transition areas between the deep shadows and the bright highlights. Use a circular scrubbing motion to fluff up the edges of the cloud forms. -
Highlight the Billows:
Load a large filbert brush with thick Titanium White and a tiny touch of Yellow Ochre to warm it. Apply this impasto-style to the tops of the cloud formations where the sunlight hits, creating those crisp, bright edges. -
Refine Edges:
Go back with your sky blue mix to carve into the white cloud shapes, creating interesting negative spaces. Soften some edges with a blending brush while keeping outside edges sharp to show atmospheric perspective.
Step 3: Painting the Prairie
-
Distant Hills:
Paint the distant hills using a muted blue-green (Ultramarine + Sap Green + White). These should be flat and lack detail to push them into the background. -
Golden Fields Base:
For the middle ground fields, mix Yellow Ochre with White and a touch of Burnt Umber. Apply this in horizontal strokes, lightening the value as the field recedes toward the horizon. -
Foreground Grasses:
In the immediate foreground, use strokes of Sap Green mixed with Burnt Umber. Use upward flicking motions with a flat brush to suggest the texture of tall prairie grass without painting individual blades yet. -
The Dirt Road:
Paint the road using a mix of Titanium White, Burnt Umber, and a hint of Alizarin Crimson for a sandy pink-beige tone. Ensure the road gets lighter and cooler in color as it moves away from the viewer. -
Road Texture:
While the road paint is wet, drag a dry brush gently along the path’s direction to simulate tire tracks and dust. Add slightly darker brown tones to the edges where the dirt meets the grass.
Add Movement
Paint the taller foreground grasses leaning slightly to the right or left. This implies a strong wind blowing across the plains, matching the dramatic energy of the storm.
Step 4: Final Details
-
Sagebrush and Shrubs:
Using a grey-green mix, stipple in small bushes along the roadside. I like to keep the bottoms of these bushes dark to ground them. -
Detailed Grass Blades:
Switch to a rigger brush with thinned paint (Yellow Ochre and Light Green). Add specific blades of grass in the bottom corners catching the light. -
Unify the Atmosphere:
Check the transition between the rain curtain and the ground. Glaze a very thin layer of the rain color over the distant hills to make them look like they are behind the weather.
Step back and admire the depth you have created in your prairie storm scene


Night Sky Landscape With Stars and Silhouettes
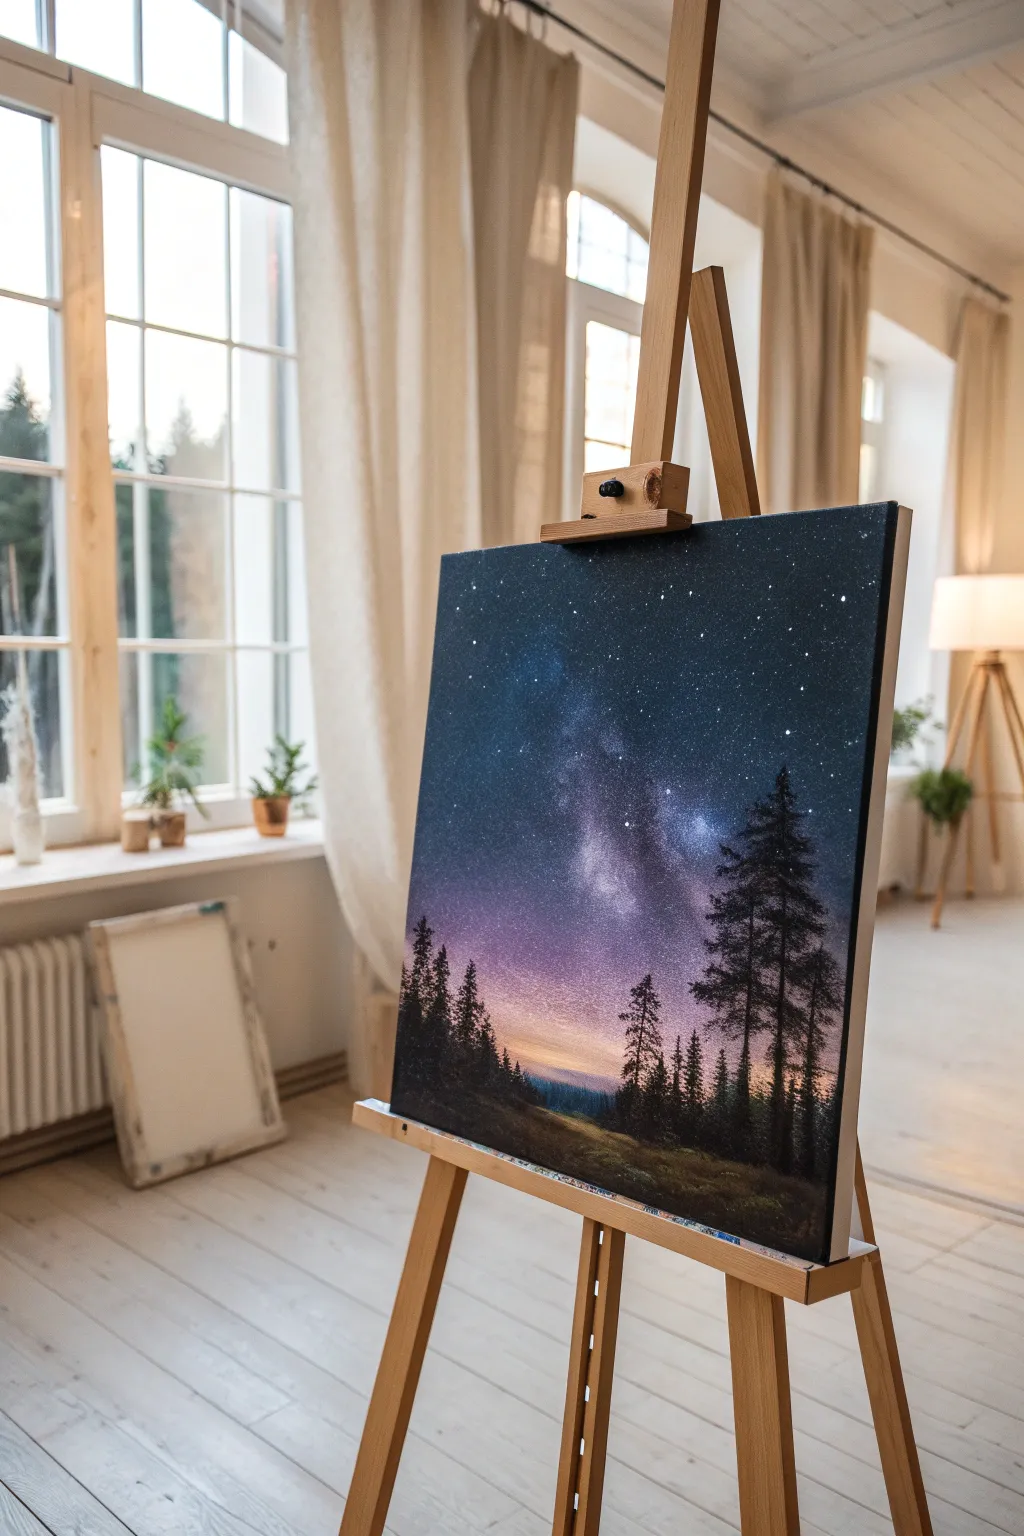
Capture the breathtaking magic of a clear night sky with this oil painting project that blends cosmic wonder with grounded nature. You’ll master smooth gradient blending to create a glowing horizon and learn to speckle stars for a realistic galaxy effect sitting above serene pine silhouettes.
Detailed Instructions
Materials
- Stretched canvas (e.g., 16×20 inches)
- Oil paints (Phthalo Blue, Dioxazine Purple, Alizarin Crimson, Cadmium Yellow, Titanium White, Lamp Black, Sap Green)
- Odorless mineral spirits or turpentine
- Linseed oil medium
- Large flat brush (1-2 inch) for blending
- Medium filbert brush
- Small round brush or rigger brush
- Fan brush (optional for trees)
- Palette knife
- Old toothbrush (for stars)
- Palette for mixing
Step 1: Setting the Sky Foundation
-
Prime the horizon:
Begin by determining your horizon line, placing it about a quarter of the way up from the bottom. Mix a warm glow color using Titanium White with a tiny touch of Cadmium Yellow and Alizarin Crimson to create a soft peach tone, applying this horizontally right above your horizon line. -
Introduce the sunset fade:
Immediately above the peach tone, blend in a mixture of Alizarin Crimson and Dioxazine Purple to create a vibrant magenta transition band. -
Establish the deep sky:
For the upper two-thirds of the canvas, mix Phthalo Blue with a touch of Lamp Black and Dioxazine Purple for a deep, rich midnight blue. Cover the top section thoroughly. -
Blend the gradients:
Using a clean, dry large flat brush, gently sweep back and forth horizontally where the colors meet. Wipe your brush frequently on a rag to keep the blend smooth and avoid muddying the colors. -
Create the Milky Way base:
While the blue paint is still wet, mix Titanium White with a small amount of blue to make a misty light blue. Use a medium filbert brush to scrub in a diagonal, cloudy band across the center of the dark sky.
Wet-on-Wet Blending Pro Tip
For the smoothest sky gradients, ensure your canvas is evenly coated with a very thin layer of liquid white or linseed oil before applying color. This helps the paint glide and merge effortlessly.
Step 2: Crafting the Galaxy
-
Soften the galaxy clouds:
Use a clean, dry soft brush to tap and swirl the edges of your white cloud band, blending it softly into the dark blue background so there are no hard edges. -
Add color depth:
Glaze very thin amounts of magenta or purple into the darker pockets of your Milky Way cloud to give it a gaseous, nebular feel. -
Intensify the core:
Add touches of pure Titanium White to the brightest centers of the Milky Way clusters to create glowing focal points. -
Speckle the stars:
Thin down Titanium White with mineral spirits until it is inky. Dip an old toothbrush into this mixture and flick the bristles with your thumb to spray fine stars across the sky, concentrating heavily on the Milky Way band. -
Add hero stars:
Use a small round brush or the tip of a palette knife to dot in a few larger, brighter stars to add variation and depth to the star field.
Step 3: Painting the Foreground
-
Block in the ground:
Mix Lamp Black with Sap Green and a touch of Dioxazine Purple to create a very dark, near-black silhouette color. Fill in the bottom section below the horizon line, creating a gently sloping hill. -
Sketch tree placements:
With a thin round brush and thinner paint, mark vertical lines to indicate where your tallest pine trees will stand, varying their heights for a natural look. -
Form the tree details:
Using a fan brush or a small flat brush turned vertically, tap in the pine branches. Start narrow at the top and tap wider as you move down the trunk. -
Create background trees:
Mix a slightly lighter version of your dark green-black color. Paint smaller, less detailed tree shapes along the horizon line to push them into the distance. -
Add subtle highlights:
I like to mix a tiny bit of the horizon’s peach color into my dark green and lightly touch the tips of the grass and tree tops on one side, mimicking the faint glow of the twilight.
Level Up: Reflection
Add a small lake at the bottom instead of just hills. Pull the dark tree colors straight down into the water area, then gently brush across horizontally to create a mirror-like night water reflection.
Step back and admire your celestial creation, letting the oil paint cure fully before framing or varnishing
Barn or Cabin Tucked Into a Landscape
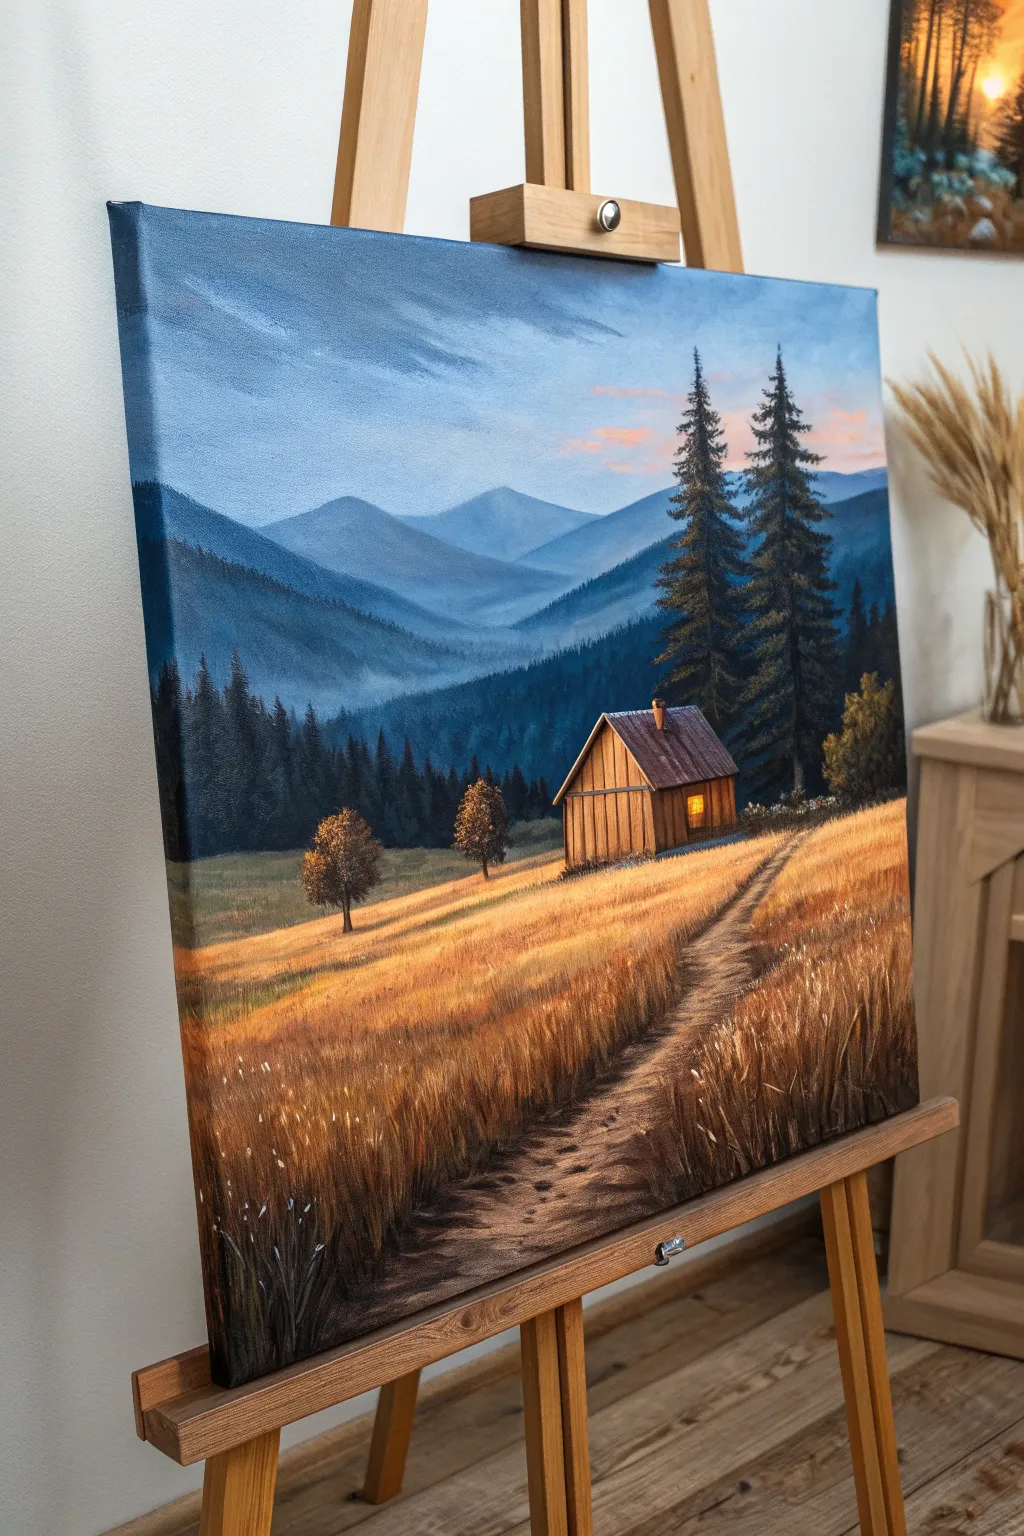
Capture the serene beauty of a mountain twilight with this atmospheric landscape painting, featuring cozy cabin lights and rolling golden fields. You’ll master the art of depth perception using cool blue tones for distant peaks and warm, earthy hues for the textured foreground.
Step-by-Step
Materials
- Stretched canvas (e.g., 16×20 inches)
- Oil paints (Titanium White, Ultramarine Blue, Phthalo Blue, Burnt Umber, Yellow Ochre, Cadmium Yellow, Burnt Sienna, Alizarin Crimson)
- Odorless mineral spirits or turpentine
- Linseed oil medium
- Large flat brush (1 inch)
- Medium filbert brush
- Small round brush for details
- Fan brush (optional for trees)
- Palette knife
- Easel
Step 1: Setting the Scene
-
Sky Gradient:
Begin with the sky. Mix Titanium White with a touch of Phthalo Blue for the upper corners, transitioning into a soft mix of White, Alizarin Crimson, and a tiny bit of Yellow Ochre near the horizon to mimic that gentle sunset glow. Use a large flat brush and blend wet-on-wet for a smooth, cloud-streaked effect. -
Distant Mountains:
For the furthest mountain range, mix Ultramarine Blue with White to create a pale, misty blue. Paint the silhouette of the peaks, keeping edges soft to suggest atmospheric distance. As you move to the closer ranges, add slightly more blue and a touch of Alizarin Crimson to darken the value. -
Mid-Ground Hills:
Mix Phthalo Blue with a small amount of Burnt Umber to create a deep, cool green-blue for the forested hills in the middle distance. Block in these overlapping shapes, ensuring the values are darker than the mountains behind them but lighter than the foreground trees.
Step 2: Forest and Cabin Structure
-
Background Forest Texture:
Using the same deep green-blue mix, use a smaller brush or the tip of a fan brush to tap in vertical textures along the ridges of the mid-ground. This suggests dense pine forests without needing to paint individual trees. -
Twin Pines:
On the right side, establish the two prominent pine trees. Mix a dark value using Phthalo Blue and Burnt Umber (almost black). Use the corner of a flat brush or a fan brush to stamp in the foliage, starting narrow at the top and widening as you descend. -
Cabin Sketch:
Switch to a small round brush with thinned Burnt Umber. Outline the simple perspective of the cabin, placing it slightly off-center to the right. Ensure the roofline angles correctly match the horizon. -
Cabin Values:
Block in the shadow side of the cabin with a mix of Burnt Umber and Phthalo Blue. For the illuminated side, mix Burnt Sienna with Yellow Ochre. Paint the roof with a grey-brown mix to suggest weathered wood or metal. -
The Glowing Window:
This is the focal point. Paint the window pane with pure Cadmium Yellow mixed with a touch of White. Glaze a tiny bit of orange around the edges of the light to make it look warm and inviting.
Muddy colors?
If your golden field gets muddy next to the blue mountains, let the mountain layer dry completely before painting the grass that overlaps it.
Step 3: Golden Foreground
-
Underpainting the Field:
For the grassy field, lay down a base coat of Yellow Ochre and Burnt Sienna. Keep your strokes horizontal to follow the lay of the land. -
Creating the Path:
Scrub in a winding path leading from the bottom center toward the cabin. Use a mix of Burnt Umber and Titanium White to create a dusty, dirt-road color that contrasts with the golden grass. -
Adding Grass Texture:
Once the underpainting is tacky, take a medium filbert brush loaded with Yellow Ochre and Cadmium Yellow. Use quick, upward flicking strokes to create individual stalks of bright grass catching the light. -
Shadows and Depth:
Mix a darker brown-orange using Burnt Sienna and a touch of purple. Glaze this into the bottom left corner and along the dips in the field to give the ground volume and undulating shape. -
Small Trees:
Paint the two smaller deciduous trees to the left of the cabin. Use a dabbing motion with a round brush, mixing Burnt Sienna and Olive Green tones, highlighting only the sides facing the light source. -
Path Details:
Refine the path by adding small shadows inside footprints or ruts using a small detail brush. This makes the path look walked-on and uneven.
Make it yours
Try changing the season by adding patches of white to the field and roof for late autumn snow, or turn the trees bright orange for peak fall foliage.
Step 4: Final Touches
-
Foreground Grass Highlights:
I like to save the brightest highlights for last. Mix Titanium White with Lemon Yellow and use a rigger brush or the edge of a palette knife to add sharp, crisp blades of grass in the immediate foreground. -
Tree Highlights:
Add subtle highlights to the large pine trees on the right. Mix a touch of the sky color into your green mix and gently tap the tips of the branches that would catch the ambient light. -
Chimney Smoke:
If desired, dry-brush a very faint, translucent whisper of smoke coming from the chimney with a mix of White and grey, blending it softly into the background mountains.
Step back and admire the peaceful solitude you have created on canvas
Rainy Landscape With Soft Reflections
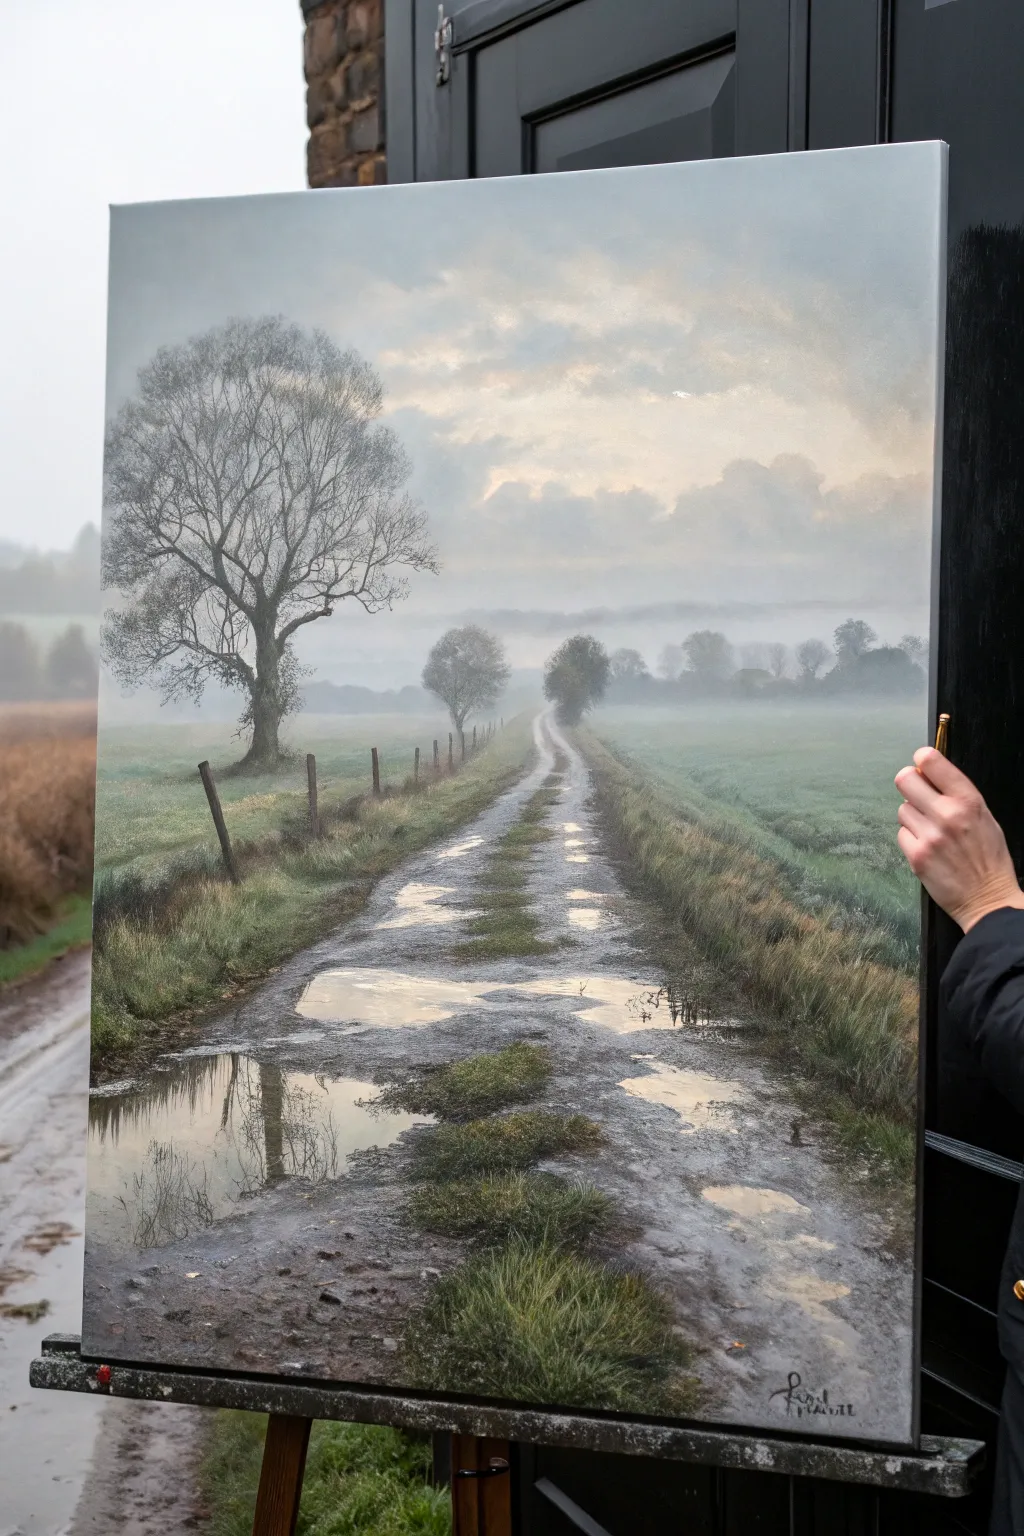
Capture the quiet solitude of a rain-soaked country lane with this atmospheric oil painting project. You’ll learn to master soft, diffused lighting and create hyper-realistic puddles that reflect the moody sky above.
Step-by-Step Tutorial
Materials
- Stretched canvas (approx. 24×30 inches)
- Oil paints: Titanium White, Ivory Black, Burnt Umber, Yellow Ochre, Ultramarine Blue, Sap Green, Alizarin Crimson
- Brushes: Large flat wash brush, medium filbert, small round detail brush, rigger brush
- Palette knife
- Odorless mineral spirits
- Linseed oil or painting medium
- Palette for mixing
- Lint-free rags
Step 1: Planning and Underpainting
-
Prime with a Tone:
Begin by toning your white canvas with a thin wash of burnt umber mixed with plenty of mineral spirits. Wipe it back with a rag to create a warm, light-mid-tone base. This prevents white specks from showing through later. -
Sketch the Composition:
Using a small round brush and thinned burnt umber, sketch the horizon line slightly below the center. Mark the vanishing point for the road and lightly outline the large tree on the left and the distant treeline. -
Block in Darks:
Identify your darkest values—the trunk of the main tree, the shadow side of the distant bushes, and the deep ruts in the road. Paint these loosely with a mix of burnt umber and ultramarine blue to establish your value structure early.
Step 2: The Atmospheric Sky
-
Mix Sky Gradients:
Prepare a gradient of greys on your palette. Mix Titanium White with a touches of Ivory Black and a speck of Yellow Ochre for the warmth near the horizon. Create a cooler, slightly darker grey for the upper corners. -
Apply the Sky:
Starting at the top with your darker cooler grey, paint downwards using a large flat brush. As you approach the horizon, blend in the warmer, lighter grey mixture. Use horizontal strokes to keep the sky calm. -
Create Soft Clouds:
While the sky paint is still wet (wet-on-wet), use a clean filbert brush to gently scumble in soft cloud shapes. Keep edges undefined to suggest heavy moisture in the air. -
Paint the Distant Fog:
Mix a pale, milky grey-blue. Paint the distant tree line, keeping the bottom edges disappearing into the mist. I find that blurring these edges with a clean, dry brush really sells the illusion of fog.
Mastering the Fog
To push trees further back into the distance, glaze a very thin layer of your sky color over the dried distant trees. This ‘veiling’ mimics atmospheric perspective effortlessly.
Step 3: Middle Ground and Trees
-
Develop the Fields:
Mix Sap Green with Yellow Ochre and a significant amount of white to create a dull, atmospheric green. Paint the fields on either side of the road, making the color more vibrant and darker as it gets closer to the foreground. -
Detail the Main Tree:
Moving to the large tree on the left, use a rigger brush with dark brownish-black paint. Paint the trunk first, then pull the branches outward, tapering them to thin points. Remember that winter trees have erratic, jagged growth patterns. -
Add Fence Posts:
Place the fence posts along the left side of the road. Make the ones in the distance smaller and lighter in value, and the foreground posts darker and sharper. Add slight tilts to make them look weathered.
Level Up: Ripple Effects
Use a fine liner brush to add barely-there concentric rings in one puddle, suggesting a single raindrop has just disturbed the calm surface.
Step 4: The Road and Reflections
-
Base the Road Surface:
Paint the dry parts of the road using a mix of greys and browns. Use vertical strokes to follow the direction of the path, creating the texture of dirt and gravel. -
Establish Puddle Shapes:
Block in the shapes of the puddles with a dark, neutral tone. The water needs to look like it’s sitting in depressions, so ensure the edges are irregular. -
Paint Reflections:
This is the crucial step. In the puddles, paint a mirror image of what is directly above them. Use the same light grey-ochre mix from the sky for the water’s surface, keeping the values slightly darker than the sky itself. -
Add Vertical Reflections:
For the reflection of the tree trunk or posts in the puddles, drag your brush vertically downwards through the wet paint. This distorts the reflection just enough to look like water. -
Define Muddy Edges:
Using a small brush, add dark ridges of mud around the edges of the puddles. Add highlights to the tops of these ridges to show wet, slick mud catching the diffuse light.
Step 5: Foreground Textures
-
Grass Tuft Structure:
Use a fan brush or an old, splayed bristle brush to tap in the grassy textures along the road verge. Use darker greens at the roots. -
Grass Highlights:
Mix a lighter olive green and flick upward strokes over the dark grass base to simulate individual blades catching the overcast light. -
Final Adjustments:
Step back and check your values. If the road looks too clean, scumble a little dry light brown over parts of it to suggest dirt. Add a few tiny, sharp highlights with pure white on the very edge of the deepest water to make it glisten.
Allow your painting to dry thoroughly in a dust-free area before varnishing to protect that subtle, misty finish
Palette Knife Landscape With Abstracted Shapes
Capture the magic of nature with this vibrant, textured landscape painting that balances dramatic skies with serene rolling hills. Using heavy body acrylics or oils and palette knives, you’ll build layers of rich color to create a scene that feels both energetic and peaceful.
Step-by-Step
Materials
- Canvas (16×20 or 18×24 inches recommended)
- Oil paints (Titanium White, Cadmium Yellow, Orange, Alizarin Crimson, Ultramarine Blue, Burnt Umber, Yellow Ochre, Paynes Grey)
- Palette knives (assorted sizes, including a medium diamond shape)
- Flat bristle brushes (large and medium)
- Fine liner brush
- Palette for mixing
- Canvas easel
- Paper towels or rags
- Odorless mineral spirits (for cleanup and thinning)
Step 1: Setting the Scene
-
Prime the background:
Begin by covering the upper two-thirds of the canvas with a thin wash of pale yellow and peach. Use a large flat brush with plenty of solvent to keep it transparent, establishing the glow behind the clouds. Let this tack up slightly. -
Map the horizon:
Using a thinned mixture of Ultramarine Blue and a touch of Paynes Grey, roughly sketch horizontal lines to mark where the distant mountains will sit. Keep these about a third of the way up from the bottom edge. -
Block in the foreground:
With a mix of Yellow Ochre and Burnt Umber, block in the sloping hill in the bottom foreground. Don’t worry about texture yet; just get the basic shapes of the land masses established.
Step 2: Building the Sky
-
Create the cloud base:
Load a medium palette knife with a mixture of Alizarin Crimson, Titanium White, and a dot of Blue to create a dusty purple. Apply this to the upper corners of the canvas using sweeping, diagonal distinct strokes. -
Add warmth:
Mix a vibrant coral color using Orange and Alizarin Crimson. Apply this aggressively near the purple sections, letting the colors drag over each other slightly but avoiding over-blending to keep the separation distinct. -
Highlight the clouds:
With a clean knife, pick up pure Titanium White mixed with a tiny bit of Cadmium Yellow. Scrape this onto the edges of the purple clouds where they meet the central light source, suggesting sunlight catching the vapor. -
Refine the sky texture:
Work back into the sky with clean, dry knives to drag the paint slightly, creating that windswept, diagonal movement visible in the reference. I find that leaving some underlying canvas texture adds to the rough, organic feel.
Keep it Clean
Wipe your palette knife completely clean between every color change in the sky. This prevents the vibrant oranges and purples from turning into muddy brown tones.
Step 3: Defining the Land
-
Paint distance mountains:
Mix a cool, hazy blue-grey using Ultramarine Blue, White, and a touch of Alizarin Crimson. Paint the furthest mountain range with smooth, horizontal strokes to imply distance and atmospheric perspective. -
Layer the middle ground:
Create a slightly darker, greener mix for the closer hills using your blue mix plus a little Yellow Ochre. Apply this in overlapping mounds below the distant mountains. -
Texturize the foreground hill:
Using your palette knife, apply thick swipes of Yellow Ochre, Burnt Orange, and heavy dabs of Red to the foreground hill. Mimic the slope of the land by angling your knife strokes downward from left to right. -
Add foreground shadows:
Mix Burnt Umber with Purple. While the ochre paint is still wet, slice in some deep shadows at the bottom of the foreground hill to give it weight and dimension.
Add Sparkle
For a magical touch, mix a tiny bit of iridescent medium or gold paint into the foreground grasses. It will catch the light just like a real sunset.
Step 4: The Focal Trees
-
Sketch the trunks:
Thin down your Paynes Grey or black paint to an ink-like consistency. Using a liner brush, paint two slender, slightly wavering vertical lines for the main trunks. One should be distinctively taller and on the right. -
Branch out:
Extend branches upward from the top third of the trunks. Keep them fine and reaching toward the sky in a ‘V’ or ‘Y’ pattern rather than horizontal spreading. -
Stipple the foliage:
Mix a dark, heavy color using Paynes Grey and Ultramarine Blue. Using the tip of a stiff brush or the edge of a small knife, stipple dense clusters of leaves at the tops of the branches. -
Shape the canopy:
Ensure the foliage isn’t a perfect circle; concentrate the bulk of the leaves near the top, leaving some gaps in the canopy to let the colorful sky peek through. -
Ground the trees:
At the base of the trunks, add small vertical flicks of dark paint and ochre to simulate grass growing up around the roots, settling the trees into the landscape. -
Final highlights:
Add tiny touches of light blue or lavender to the shadow side of the tree canopies to reflect the cool ambient light of the sky.
Step back and admire how the bold textures and contrasting colors bring a sense of drama to your painted view
Color-Shift Landscape With an Unnatural Sky
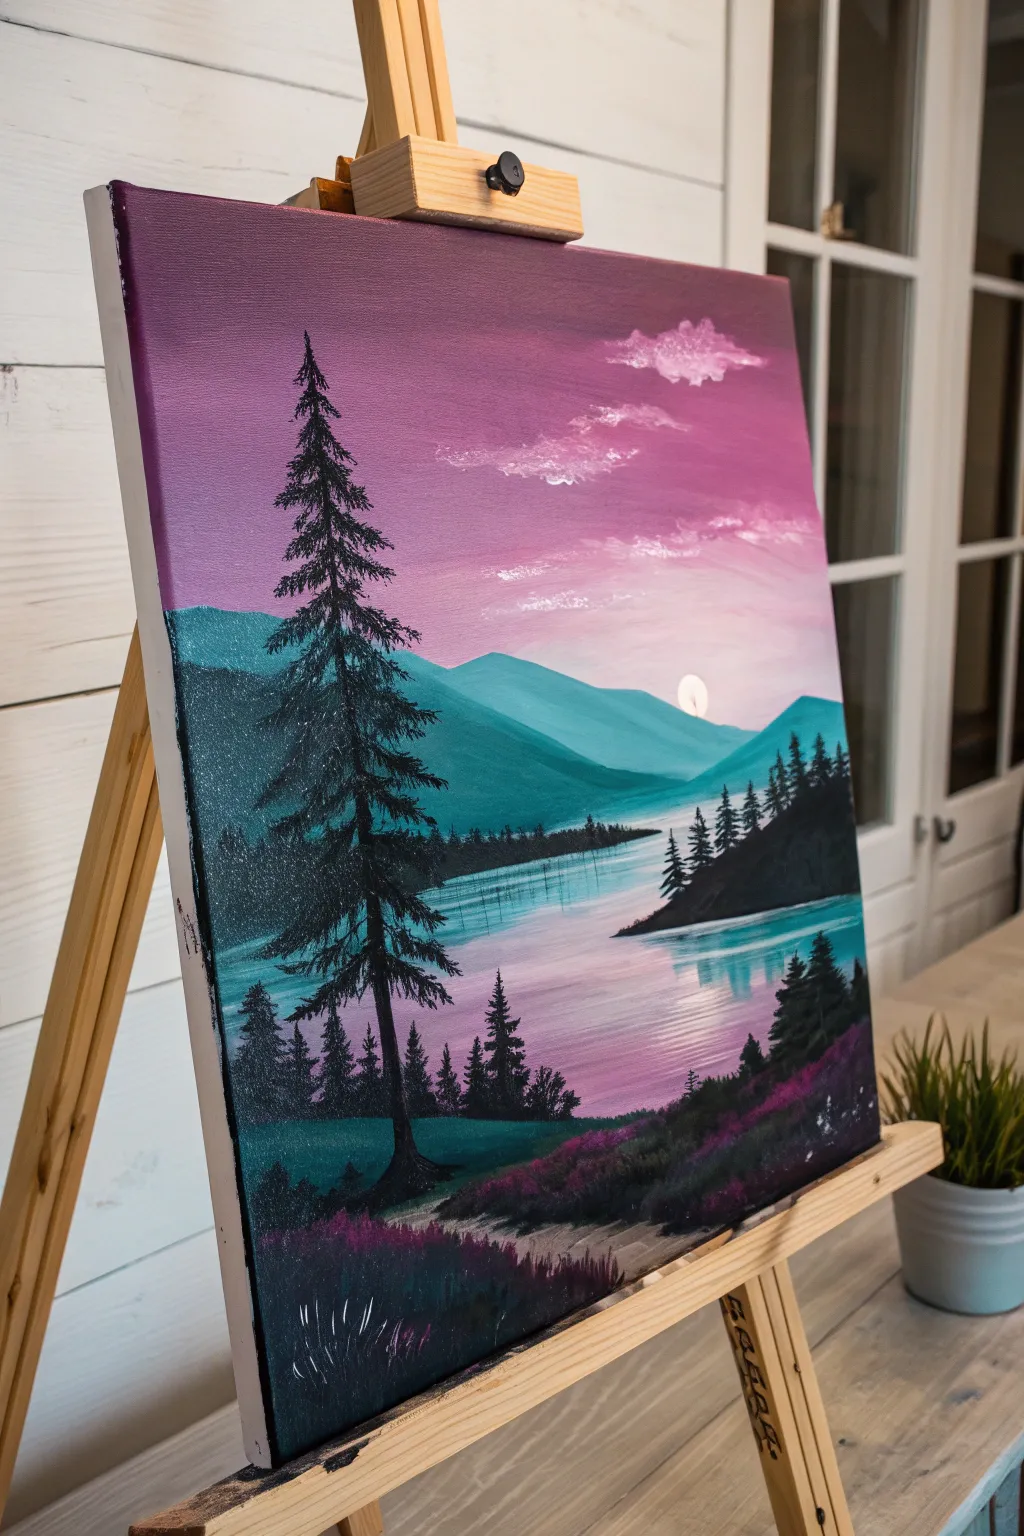
Step outside reality with this striking landscape that pairs a vibrant magenta and violet sky with contrasting teal mountains. This step-by-step guide will help you build atmospheric depth and capture the serene stillness of a twilight lake scene.
Detailed Instructions
Materials
- Stretched canvas (vertical orientation)
- Acrylic or Oil paints (Titanium White, Magenta, Violet, Phthalo Blue, Teal/Turquoise, Mars Black)
- Flat brushes (1-inch, 1/2-inch)
- Detailed fan brush or script liner brush
- Palette knife (optional for mixing)
- Cup of water or paint thinner
- Paper towels
Step 1: Setting the Scene
-
Prime the sky gradient:
Begin at the very top of your canvas with a deep violet mix. As you work your way down towards the horizon line (just below the center), gradually blend in magenta and then Titanium White to create a soft, glowing transition. The sky should be lightest where the sun will sit. -
Establish the horizon:
While the sky paint is still slightly wet, define your horizon line roughly one-third of the way up from the bottom. Keep this line soft for now, as distant mountains don’t have hard edges. -
Paint the distant mountains:
Mix a soft teal using Phthalo Blue, a touch of green, and plenty of white. Paint in the distant mountain range on the left and right, ensuring the tops are undulating and natural. These should be paler than the foreground elements to simulate atmospheric perspective.
Muddy Colors?
If your pink sky and teal mountains are turning gray where they meet, let the sky layer dry completely before painting the mountains over it to keep the colors distinct.
Step 2: Creating the Water and Mid-Ground
-
Lay down the water base:
Mirror the colors of your sky into the bottom third of the canvas to create the water. Start with the light pinkish-white near the horizon and blend into darker violet tones towards the bottom corners. -
Add water reflections:
Using a clean, dry brush, gently pull the paint horizontally across the water area to blur the colors and create the look of a flat, calm lake surface. Add touches of the mountain’s teal color into the water directly below the peaks. -
Paint the sun:
Place a small, crisp circle of Titanium White just above the mountain ridge on the right side. Add a subtle vertical streak of white running down the water below it to represent the sun’s reflection. -
Create mid-ground hills:
Mix a darker version of your teal (add less white, maybe a touch of black). Paint a sloping hill coming in from the right side, overlapping the distant mountains. This creates a sense of receding space. -
Add distant trees:
Using a small flat brush or fan brush, tap in a line of very small, dark trees along the shoreline of your mid-ground hill and the distant teal shore. Keep these undefined and shadowy.
Step 3: The Foreground Elements
-
Build the foreground bank:
At the very bottom of the canvas, paint a dark, uneven landmass using a mix of black and deep violet. This will be the ground your main trees stand on. -
Start the hero tree:
Load a liner brush with black paint thinned slightly with water or medium. Paint a straight vertical line on the left side of the canvas, extending from the bottom almost to the top. This is the trunk of your main pine tree. -
Foliage for the hero tree:
Switch to a fan brush or small flat brush loaded with thick black paint. Starting at the top of the trunk, tap downward in a zigzag motion, getting wider as you go down, to create the pine branches. Leave gaps so the sky shows through. -
Add supporting trees:
Paint smaller silhouetted pine trees on the right-side hill and various sizes of smaller trees along the bottom foreground bank. Varying their heights makes the forest look natural. -
Highlight the water:
With a very fine brush and pure white, add thin, sharp horizontal lines across the water surface, specifically concentrating them near the shoreline and the sun’s reflection to suggest ripples.
Level Up: Starry Night
Once the sky is fully dry, flick a stiff toothbrush loaded with watered-down white paint across the upper corners to add a field of faint stars.
Step 4: Final Details
-
Add cloud wisps:
Using a dry brush with a tiny amount of white and pink, gently scumble in a few soft, horizontal clouds in the upper right sky. Keep them transparent and dreamy. -
Paint the heather:
Mix a vibrant magenta-purple. Using a stippling motion (tapping the brush tip), add clusters of wildflowers or heather along the dark foreground bank at the bottom. This connects the ground to the sky color. -
Refine the foreground:
Add a few vertical strokes of lighter green or white in the bottom corners to suggest blades of grass catching the moonlight. -
Final check:
Step back and check your contrast. If the main tree isn’t dark enough against the sky, add another coat of black to ensure a crisp silhouette.
Enjoy the peaceful atmosphere of your new surreal landscape painting


Have a question or want to share your own experience? I'd love to hear from you in the comments below!