If your laptop lid feels like it looks exactly like everyone else’s, painting it can turn it into something that actually feels like you. Here are my favorite laptop painting ideas—starting with simple, classic looks and ending with the fun, studio-party-level stuff.
Solid Color Laptop Lid with Micro-Icon
Transform your tech into a soft, serene statement piece with this elegant dusty rose finish. Featuring a crisp, white botanical icon as the centerpiece, this project balances warmth with minimalist sophistication for a look that feels both modern and organic.
Step-by-Step Tutorial
Materials
- Laptop (or practice surface)
- Fine-grit sandpaper (400 to 600 grit)
- Painter’s tape (high quality)
- Adhesive vinyl stencil (botanical leaf shape)
- Spray primer suitable for plastic/metal
- Dusty Pink or Rose Gold spray paint (satin or matte finish)
- White acrylic paint or a white paint pen
- Clear matte sealant spray
- Microfiber cloth
- Isopropyl alcohol
- Small fine-detail brush (if painting the icon by hand)
- X-acto knife or craft blade
- Cardboard or drop cloth for workspace protection
Step 1: Preparation & Masking
-
Clean surface:
Begin by thoroughly cleaning the laptop lid with a microfiber cloth and isopropyl alcohol to remove any oils, fingerprints, or adhesive residue. -
Protect ports:
Carefully apply painter’s tape over all ports, the screen hinge, the sides, and the apple logo (if you don’t want to paint over it, though this design covers everything). -
Cover the screen:
Tape off the entire screen area and keyboard if you aren’t disassembling the housing. Ensure the tape edges are firmly pressed down to prevent bleed-through. -
Light sanding:
Gently scuff the top surface of the lid with fine-grit sandpaper. You just want to remove the sheen to help the paint grip, not scratch deep gouges. -
Final wipe:
Wipe away all sanding dust with a tack cloth or a clean cloth dampened with a little more alcohol. The surface must be perfectly dust-free.
Step 2: Base Coat Application
-
Setup:
Place your laptop on a large piece of cardboard or drop cloth in a well-ventilated area, preferably outdoors or near an open window. -
Prime the surface:
Apply a thin, even coat of primer. Hold the can about 8-12 inches away and use sweeping motions. Let this dry completely according to the can’s instructions. -
First color coat:
Apply your first layer of dusty pink spray paint. Keep it light; a mist coat is better than a heavy wet coat that might drip. -
Dry and inspect:
Allow the first coat to dry fo 15-20 minutes. Check for any uneven spots, but don’t touch wet paint. -
Second color coat:
Apply a second coat to build opacity. I find that multiple thin layers create that factory-finish look much better than one thick one. -
Third coat (optional):
If transparency remains, add a third light coat. Let the final color layer cure for at least few hours, or overnight for best results.
Smooth Operator
Warm your spray paint can in a bowl of warm water for 5 minutes before spraying. This thins the paint slightly for a much smoother, mist-like application without spatter.
Step 3: The Micro-Icon Detail
-
Prepare the stencil:
Using a vinyl cutter or an X-acto knife, create a small botanical leaf stencil. Weed out the leaf shape so you have a negative space stencil. -
Position the design:
Place the stencil precisely in the center of the lid. Measure from the edges to ensure it is perfectly centered before pressing it down firmly. -
Seal stencil edges:
To prevent paint bleed, lightly dab a tiny amount of the base pink color over the stencil edges first. This seals any microscopic gaps. -
Paint the icon:
Using white acrylic paint or a white paint pen, fill in the leaf shape. Use thin layers to avoid a raised ridge of paint. -
Remove stencil:
Once the white paint is tacky but not fully dry, carefully peel away the vinyl stencil at a sharp angle to reveal crisp lines.
Go Metallic
Swap the white paint for a metallic gold or copper leafing pen for the icon. The shimmer against the matte rose background creates a stunning, luxe contrast.
Step 4: Sealing & Finishing
-
Cure time:
Allow the icon paint to fully harden for several hours before moving to the final step. -
Seal coating:
Spray the entire lid with a clear matte sealant. This protects your hand-painted icon and gives the whole surface a uniform, soft-touch finish. -
Remove tape:
While the sealant is still slightly fresh (about 30 mins later), very gently remove all masking tape from the sides and ports. -
Final cure:
Let the laptop sit untouched for 24 hours to ensure the paint and sealant bond fully to the metal casing.
Enjoy the calm vibe every time you open your beautifully customized device


Ombre Gradient Across the Laptop Lid
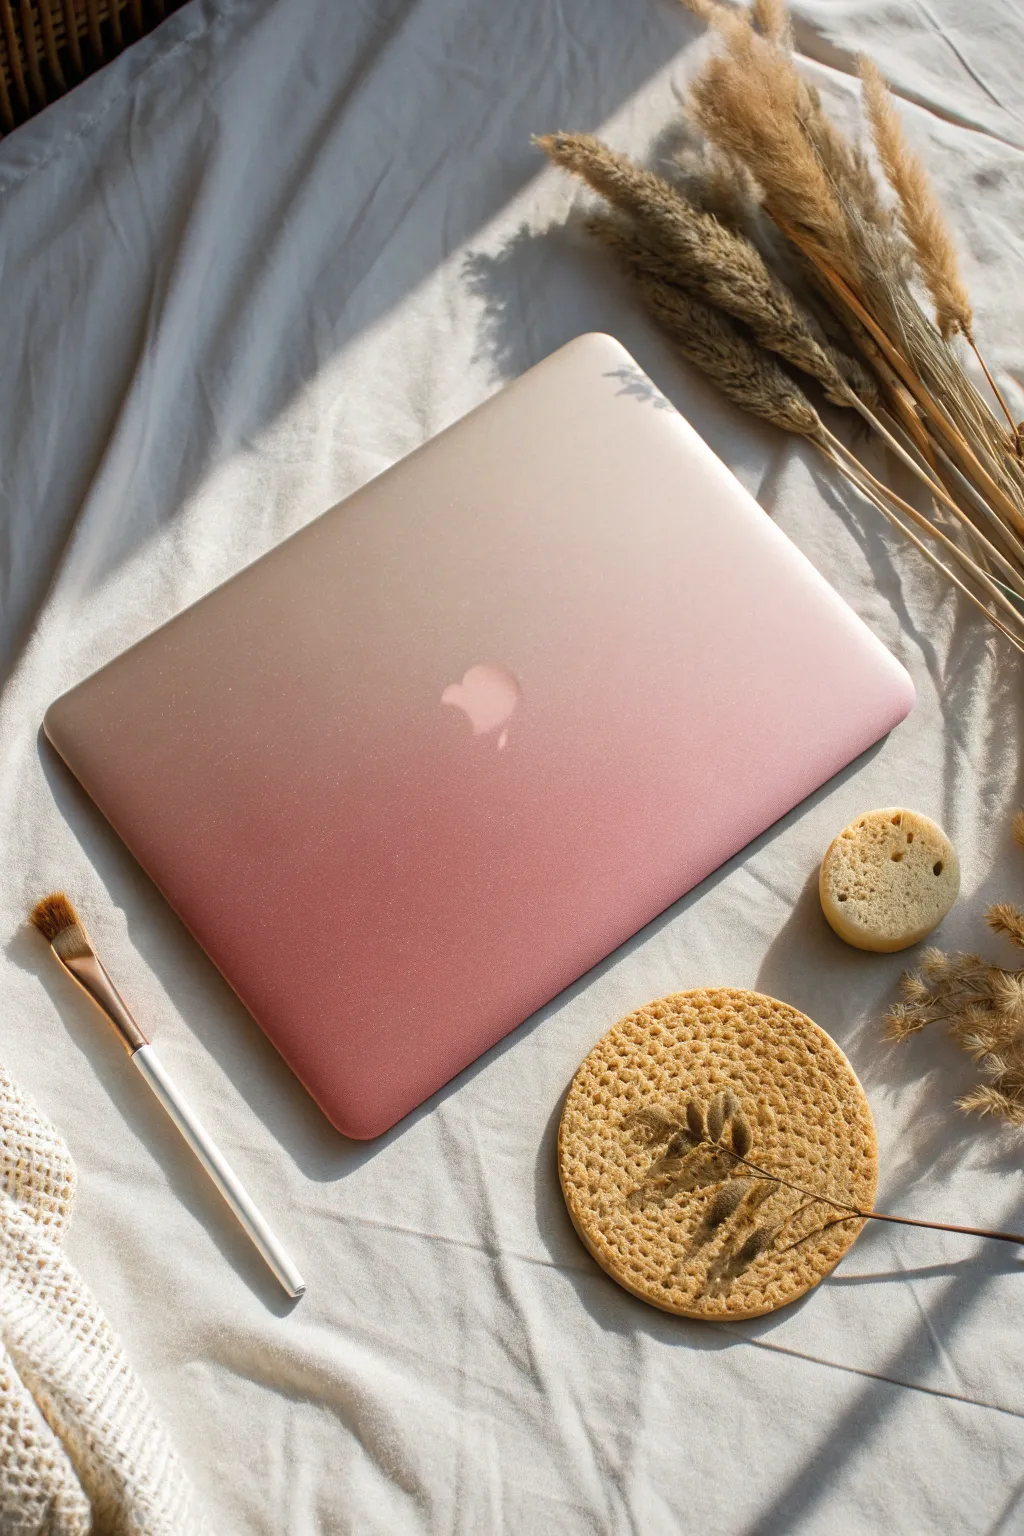
Transform your tech into a calming piece of art with this sophisticated ombre design that fades from deep rose to pale champagne. This gradient effect adds a touch of luxury and warmth to your laptop, creating a serene, sunset-inspired aesthetic.
Step-by-Step Guide
Materials
- Laptop (or laptop hard shell case)
- Sandpaper (400 and 800 grit)
- Painter’s tape
- X-Acto knife
- Surface primer spray (white or light grey)
- Spray paint (Deep Rose/Mauve)
- Spray paint (Pale Champagne or Cream)
- Clear glitter topcoat spray (fine shimmer)
- Matte or Satin clear sealant spray
- Microfiber cloth
- Isopropyl alcohol
Step 1: Preparation
-
Clean the Surface:
Begin by thoroughly cleaning the top of your laptop or hard shell case with a microfiber cloth and isopropyl alcohol to remove any oils, fingerprints, or dust. -
Protect the Logo (Optional):
If you want the Apple logo (or brand logo) to remain original, carefully cover it with painter’s tape. Use an X-Acto knife to gently trace around the edge of the logo and peel away the excess tape for a perfect mask. -
Mask the Edges:
Tape off the sides, ports, screen, and bottom of the laptop completely if you are painting directly on the device. If using a case, just mask the inside to keep it clean. -
Scuff the Surface:
Lightly sand the lid with 400-grit sandpaper. You aren’t trying to remove material, just creating a ‘tooth’ for the paint to grip. Wipe away all dust with a damp cloth afterwards. -
Apply Primer:
In a well-ventilated area, apply a thin, even coat of white primer. Start spraying off the edge of the laptop and sweep across. Let it dry according to the can’s instructions, usually about 15-20 minutes.
Fixing Paint Spatter
If the spray nozzle spits a large drop, wait for it to fully dry. Gently sand the spot with 800-grit paper until flush, then mist over the area again to blend.
Step 2: Creating the Gradient
-
Base Color Application:
Start with your lighter color (Pale Champagne). Spray the entire lid with a light coat. It doesn’t need to be opaque yet; multiple thin layers are better than one heavy drip-prone one. -
Build Opacity:
Apply a second and possibly third coat of the champagne color until you have solid, even coverage across the whole surface. Let this dry for at least 30 minutes. -
Start the Gradient:
Take your darker Rose/Mauve spray paint. Hold the can about 12 inches away and aim at the bottom left corner. Spray in short bursts, allowing the mist to naturally fall onto the center, creating a soft transition. -
Feathering the Edge:
I like to angle the spray can slightly away from the center of the laptop when doing the fade. This ensures only the finest mist lands in the middle, avoiding harsh lines. -
Deepen the Contrast:
Apply another concentrated layer of the dark rose only to the very bottom left corner to intensify the color saturation there, leaving the top right completely untouched. -
Check Transition:
Step back and look at the blend. If the transition line looks too stark, create a ‘mist bridge’ by holding the lighter champagne can very far back and dusting the middle area lightly.
Step 3: Finishing Touches
-
Add Shimmer:
Once the color gradient is dry to the touch, apply a very light coat of fine clear glitter spray. Keep this layer minimal; you want a subtle sparkle, not a disco ball texture. -
Remove Masking:
While the paint is completely dry, very carefully satisfyingly peel off the tape over the logo. Use the tip of your craft knife to lift the edge if needed. -
Seal the Work:
Apply 2-3 coats of a matte or satin clear sealant spray. This is crucial for protecting your paint job from scratches during daily use. -
Final Cure:
Let the laptop or case sit undisturbed for at least 24 hours to allow the paint and sealant to fully cure and harden before sliding it into a bag.
Celestial Additions
Use a white paint pen to flick tiny ‘stars’ onto the darker section before sealing, turning your sunset gradient into a twilight sky scene.
Now you have a stunning, custom-painted device that feels personal and looks professionally finished


Minimal Line Art Centerpiece
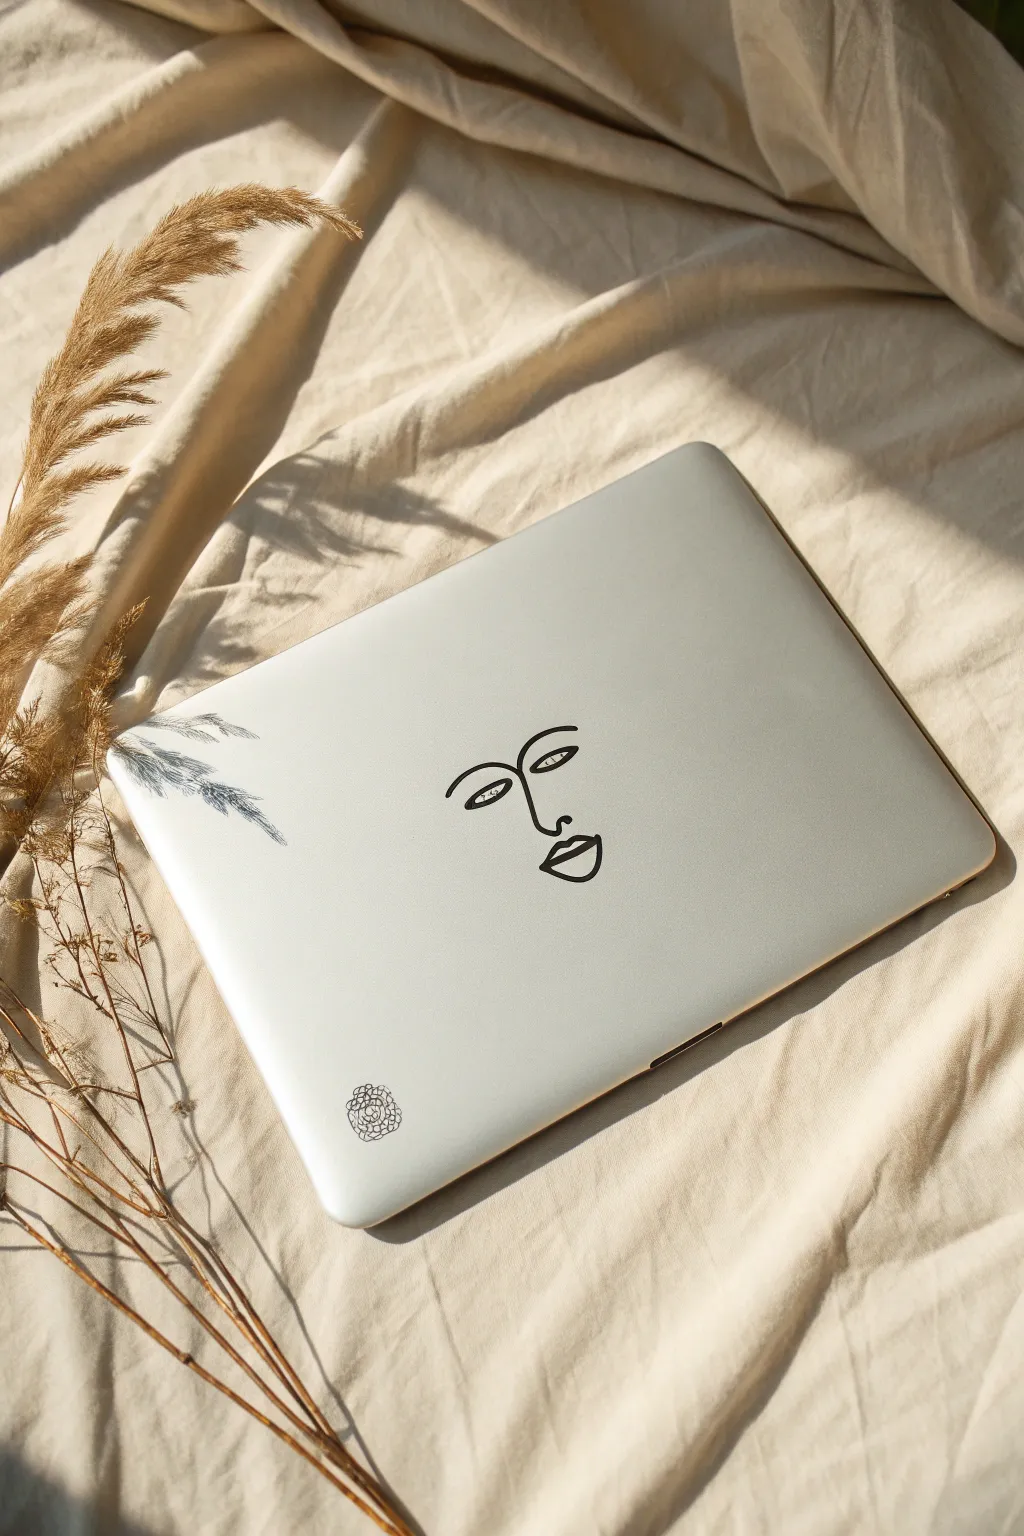
Transform your device into a piece of modern art with this sleek, minimalist line drawing. Using the negative space of a silver laptop lid creates a striking contrast that is both sophisticated and surprisingly simple to achieve.
Step-by-Step Tutorial
Materials
- Laptop (clean, dry surface)
- Black permanent vinyl sheet OR black POSCA paint marker (fine tip, 0.7mm)
- Transfer tape (if using vinyl)
- Cricut machine or scissors/craft knife (if using vinyl)
- Pencil and paper for sketching
- Rubbing alcohol
- Lint-free cloth
- Masking tape or painter’s tape
- Graphite transfer paper (optional for marker method)
Step 1: Preparation and Design
-
Clean the surface:
Before you begin any design work, thoroughly clean your laptop lid using a lint-free cloth dampened with rubbing alcohol. This removes oils and fingerprints that could prevent paint or vinyl from adhering properly. -
Sketch your concept:
Grab a sheet of paper and a pencil to practice the continuous line style. The goal is to create a face using a single, flowing stroke for the nose and brow, with separate simple shapes for the eyes and lips. -
Refine the lines:
Simplicity is key here. Focus on the ‘T zone’ of the face. Draw a vertical line for the nose that loops up into an eyebrow, and add disconnected almond shapes for the eyes. -
Finalize the scale:
Hold your paper sketch against your laptop lid to ensure the size feels right. The design should sit comfortably in the center, leaving plenty of breathing room around the edges.
Steady Hands
Rest your wrist heavily on a clean towel placed on the laptop while painting. This stabilizes your hand for smoother curves.
Step 2: Option A: Paint Marker Stencil Method
-
Create a guide:
If you aren’t confident freehanding directly onto the metal, lightly tape your paper sketch onto the laptop. Slip a piece of graphite transfer paper underneath it, darker side down. -
Transfer the design:
Trace over your sketch lines with a pencil, applying firm pressure. When you lift the paper, you should see faint graphite lines on the laptop surface. -
Prime the marker:
Shake your black fine-tip POSCA marker well and depress the nib on a scrap piece of paper until the ink flows smoothly and consistently. -
Outline the nose and brow:
Start with the central feature. Draw the nose line upward, curving smoothly into the right eyebrow. Maintain a steady hand and consistent speed to avoid ink puddling. -
Draw the eyes:
Add the almond-shaped eyes on either side of the nose line. I find it helpful to draw the upper arch first, then the lower curve, adding a simple circle for the iris if desired. -
Add the lips:
Below the nose line, draw the lips. Keep them abstract—a simple upper lip line and a fuller lower lip shape work best for this style. -
Clean up edges:
If you make a mistake while the paint is wet, quickly wipe it away with a damp Q-tip. Once dry, you can scrape away tinier imperfections gently with a fingernail. -
Seal the design (Optional):
For longevity, you can apply a clear laptop skin over the top, or carefully brush a thin layer of matte clear varnish over just the painted lines.
Add a Accent
Add a tiny pop of color, like a red lip or a blue eye, using a second paint marker for a modern twist on the monochrome look.
Step 3: Option B: Vinyl Decal Method
-
Digitize or cut:
If using a cutting machine, upload your line art SVG. If cutting by hand, draw the design on the paper backing of the vinyl sheet. -
Weed the design:
Carefully remove the excess vinyl around the face lines using a weeding tool or tweezers. You want only the black lines to remain on the backing paper. -
Apply transfer tape:
Cut a piece of transfer tape slightly larger than your design. Place it over the vinyl decal and burnish it firmly with a credit card to ensure the vinyl sticks to the tape. -
Position the decal:
Hover the design over the center of the laptop lid to find the perfect placement. Use a ruler to measure from the edges if you want precise centering. -
Transfer to laptop:
Press the transfer tape down onto the laptop surface. Start from the center and smooth it outwards to prevent air bubbles. -
Burnish for adhesion:
Rub over the design firmly again with your scraper tool or credit card. This pressure activates the adhesive on the vinyl. -
Peel away tape:
Slowly peel back the transfer tape at a sharp 45-degree angle. If the vinyl lifts with the tape, lay it back down and burnish that spot again before trying to peel.
Your laptop now sports a custom gallery-worthy look that reflects your personal style


Geometric Tape-Resist Pattern

Transform a plain laptop cover into a personalized statement piece using simple masking techniques. This geometric design combines bold teal triangles and elegant zigzags for a clean, modern aesthetic that looks professionally done.
Step-by-Step Guide
Materials
- White laptop skin or white contact paper (base)
- Teal spray paint or multi-surface acrylic paint
- Painter’s tape (blue or green)
- Fine-line masking tape (1/8 inch)
- Washi tape (patterned or solid, for the resist)
- Craft knife (X-Acto)
- Cutting mat
- Ruler
- Clear matte sealant spray (optional)
- Isopropyl alcohol and lint-free cloth
- Pencil
Step 1: Preparation
-
Clean surface:
Before anything else, thoroughly clean the top of your laptop or the white skin you plan to apply. Use isopropyl alcohol and a lint-free cloth to remove any oils, dust, or fingerprints. -
Apply base layer:
If you aren’t painting directly on the laptop casing (which I highly recommend for safety and reversibility), apply a white vinyl laptop skin or contact paper now. Smooth out any bubbles with a credit card. -
Plan placement:
Visualizing the design is crucial. Lightly mark with a pencil where you want your zigzag border on the left and the two geometric shapes on the right. Keep the central apple logo in mind if you want to leave it visible.
Bleeding Edges?
If paint bleeds under the tape, don’t panic. Dampen a cotton swab with a tiny amount of rubbing alcohol and gently rub the excess paint away for a clean line.
Step 2: Creating the Zigzag Border
-
Lay the vertical strip:
Place a long strip of wide painter’s tape vertically along the left edge of the laptop, leaving about an inch or two of exposed white space where the pattern will go. -
Create the triangles:
Cut several shorter strips of painter’s tape. Apply them diagonally to create a series of triangles pointing inward coming from the left edge. -
Define the zigzag:
Apply matching diagonal strips coming from the right side of the border area, intersecting with the first set to form a continuous zigzag path of exposed white space between the tape pieces. -
Seal edges:
Run your fingernail or a burnishing tool firmly along every tape edge. This prevents paint bleed and ensures sharp, crisp lines later.
Step 3: Forming the Geometric Diamonds
-
Outline the shapes:
On the right side of the laptop, use painter’s tape to tape off two large diamond or square shapes. You are taping *around* the shape, leaving the diamond area exposed. -
Bisect the shapes:
Place a strip of medium-width tape horizontally (or slightly angled) through the center of each diamond, effectively splitting each one into two distinct triangles. -
Apply thin resist lines:
Cut very small, thin strips of washi tape or painter’s tape. Place them randomly within the exposed triangle areas to create the thin negative-space lines seen in the teal sections. -
Mask the logo:
If your design overlaps the central logo and you want to keep it pristine, carefully cut a piece of tape to the exact shape of the logo and place it oven the center.
Metallic Accent
For a luxe touch, use gold or copper leafing pens to outline the teal triangles or fill in the thin negative-space lines after the paint dries.
Step 4: Painting and Finishing
-
Mask the rest:
Cover every single part of the laptop that you do not want painted with paper and tape. This includes the side ports, the screen edges, and the large white areas surrounding your geometric designs. -
First coat:
Apply a light, even coat of teal paint. If using spray paint, hold the can 8-10 inches away and use sweeping motions. If brushing, use a foam brush to minimize stroke marks. -
Dry and repeat:
Let the first coat dry to the touch (usually 15-20 minutes). Apply a second thin coat to ensure full opacity and rich color saturation. -
Remove tape:
This is the satisfying part. while the paint is still slightly tacky (but not wet), carefully peel off all the tape. Pulling at a 45-degree angle helps keep the lines sharp. -
Clean up details:
If any paint bled under the tape, gently scrape it away with the tip of your craft knife or a toothpick while the paint is still relatively fresh. -
Seal the design:
Once the teal paint is fully cured (give it 24 hours to be safe), lightly mist the entire cover with a clear matte sealant to protect your handiwork from scratches.
Enjoy using your custom-designed laptop that now reflects your personal style
BRUSH GUIDE
The Right Brush for Every Stroke
From clean lines to bold texture — master brush choice, stroke control, and essential techniques.
Explore the Full Guide
Two-Tone Stencil Silhouettes
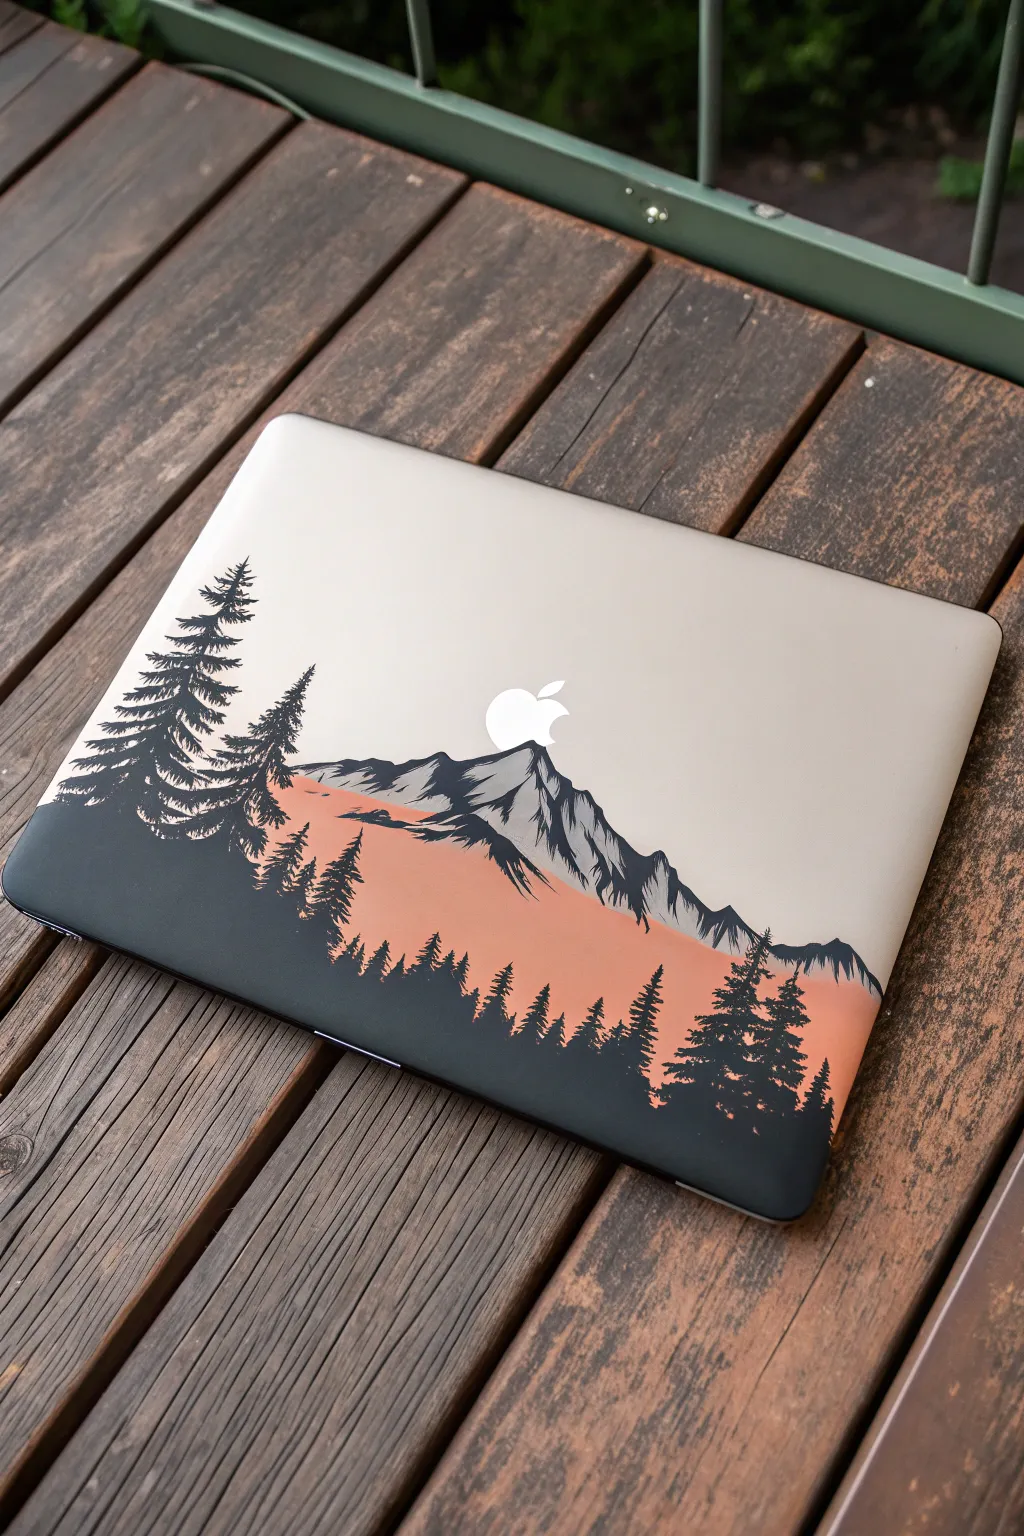
Transform your laptop lid into a serene alpine vista using a clever combination of negative space and layered stenciling. By letting the device’s original metallic finish serve as the sky, you create a sophisticated three-tone look that feels integrated rather than just applied.
Detailed Instructions
Materials
- Laptop skins or removable vinyl sheets (clear/matte)
- Painter’s tape (low tack)
- Peachy-orange spray paint (satin finish) or acrylic with sponge
- Dark charcoal or matte black spray paint/acrylic
- X-Acto knife with fresh #11 blades
- Cutting mat
- Rubbing alcohol and lint-free cloth
- Computer paper and pencil for sketching
- Transfer tape (optional but helpful)
Step 1: Preparation & Base Design
-
Clean surface:
Begin by thoroughly cleaning the laptop lid with rubbing alcohol and a lint-free cloth. Oils from your hands will prevent the paint or vinyl from adhering properly, so take your time here. -
Mask the logo:
Carefully cut a small piece of painter’s tape or vinyl to exactly cover the Apple logo. This is crucial as the logo acts as the ‘moon’ or ‘sun’ rising over your mountain peak. -
Establish the horizon:
Decide where your mountain range will start. Since we are keeping the top silver as the sky, mask off everything *above* your intended mountain line with painter’s tape and paper to protect the top half of the laptop.
Paint Bleeding?
If paint seeps under your stencil, don’t panic. Wait for it to dry fully, then gently scratch the excess away with a toothpick. Alternatively, use a black paint pen to crisp up the edges.
Step 2: Layer 1: The Sunset Glow
-
Apply base color:
For the peachy-orange band that represents the sunset hitting the mountains, apply your first layer of paint to the lower exposed section. If using spray paint, do light, even passes. If using acrylics, sponge it on for a texture-free finish. -
Dry thoroughly:
Let this orange layer cure completely. It needs to be dry enough to accept adhesive stencils without peeling up. -
Draft the mountain range:
On a separate piece of paper, sketch your mountain range. Ensure the highest peak aligns with the masked Apple logo to create that perfect silhouette effect. -
Cut the stencil:
Place a sheet of adhesive vinyl or masking tape over your sketch on a cutting mat. Use your X-Acto knife to cut out the jagged mountain edge. You want the ‘negative’ part of the stencil—the part that covers the sky and leaves the mountains exposed.
Step 3: Layer 2: The Shadows
-
Apply mountain mask:
Now, careful placement is key. Apply your stencil over the orange layer. The goal is to cover the parts you want to remain orange (the sun-hit slopes) while leaving the areas for the dark shadows exposed. -
Refining the peak:
Pay special attention to the central peak under the logo. I find it helps to add jagged ‘snowy’ details by using small pieces of torn tape to mask off intricate highlights on the mountain face. -
Paint the shadows:
Apply the dark charcoal or black paint over the stencil. This creates the deep shadows of the mountain range and the darker foreground trees. -
Dry and peel:
Once the dark paint is tacky but not fully hard, carefully peel away your stencils. Removing them too late can cause the paint to crack along the edges.
Level Up: Glow Mode
Use translucent glass paint for the sunset layer. When the laptop screen is on, the Apple logo’s light will subtly bleed through the orange areas, making the sunset actually glow.
Step 4: The Forest Foreground
-
Prepare tree stencils:
While the mountains cure, create tree silhouettes. You can freehand these with a small brush if you’re confident, or cut tree shapes out of vinyl for a sharper, graphic look. -
Place the trees:
Position your tree shapes along the bottom edge and the sides, layering them over the orange and grey mountains. The largest trees should be in the foreground at the corners to frame the view. -
Paint the forest:
Fill in the tree silhouettes with your darkest black paint. Ensure these are opaque to stand out against the colored background. -
Add texture:
Use a very fine brush to flick small evergreen details outward from the main tree trunks, giving them a natural, organic feel.
Step 5: Refinement & Protection
-
Remove logo mask:
With steady hands or tweezers, lift the masking tape off the Apple logo. This reveals the bright white/silver ‘moon’ rising perfectly over your painted peak. -
Clean edges:
If any paint bled under your tape, gently scrape it away with a damp toothpick or a cotton swab dipped in a tiny amount of alcohol. -
Seal the deal:
To protect your artwork from scratches in your bag, apply a clear coat spray over the entire lid. A matte clear coat works best to seamlessly blend the painted areas with the aluminum finish.
Enjoy the view of your personal mountain range every time you sit down to work
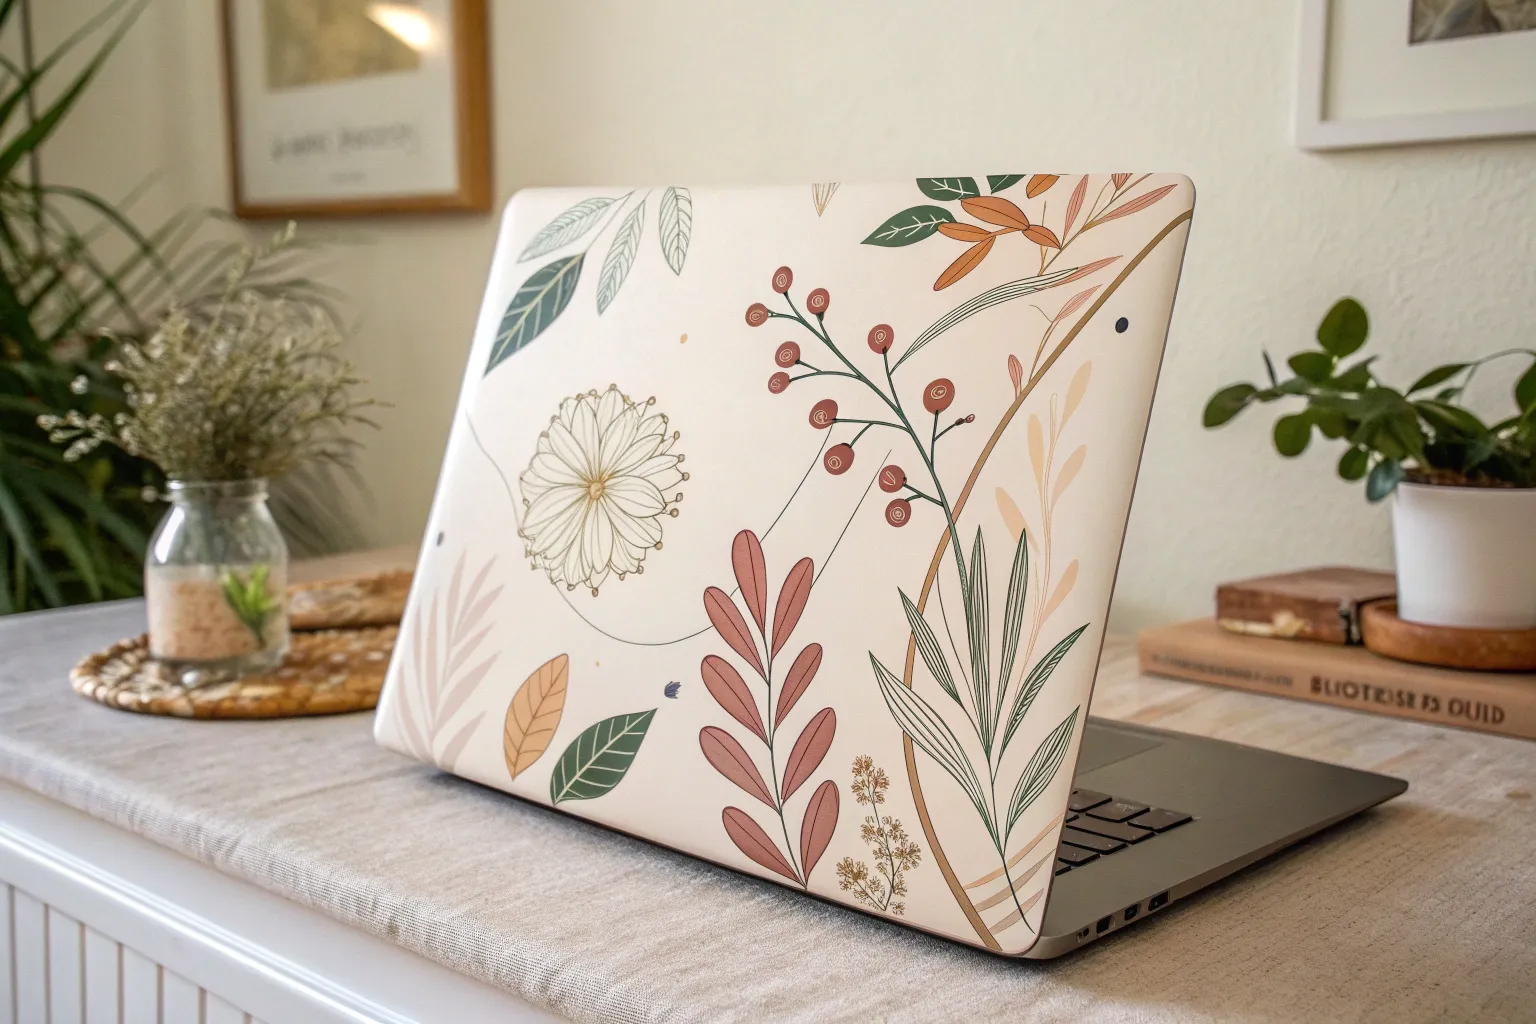
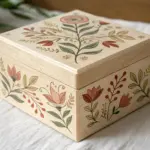
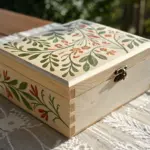
Botanical Corners and Edge Vines
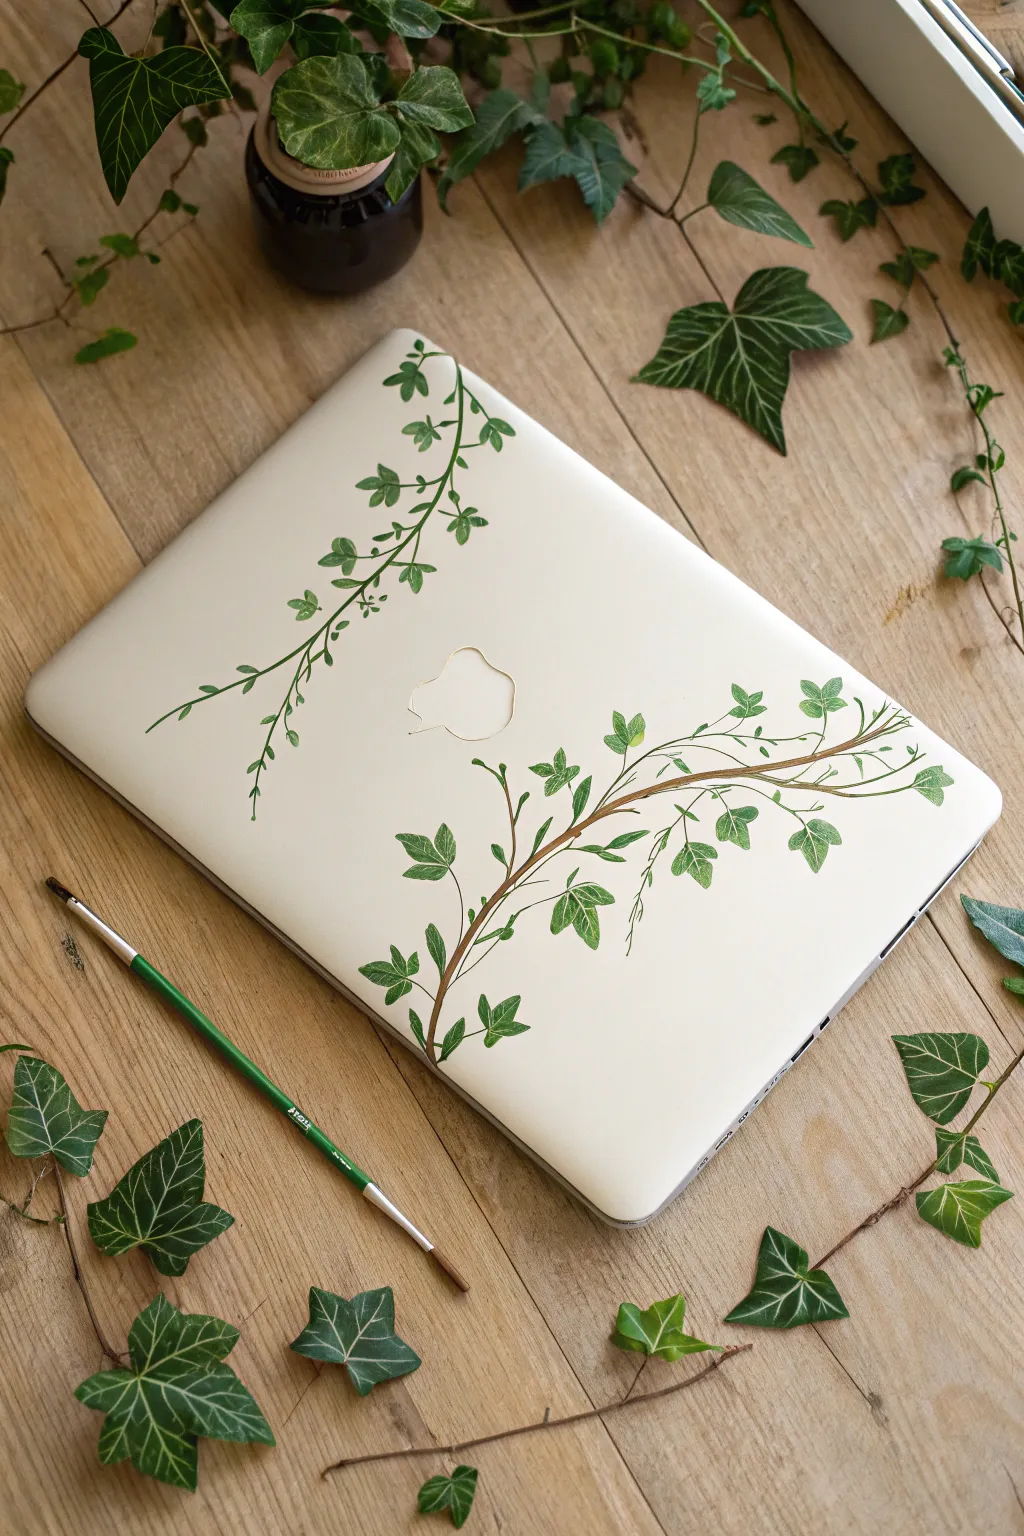
Bring a touch of nature to your tech with these delicate, hand-painted ivy strands that creep across your laptop lid. This design frames the surface beautifully with organic curves and vibrant greens, creating a serene botanical look.
Step-by-Step Guide
Materials
- Laptop with a clean, hard-shell case (white or light-colored works best)
- Rubbing alcohol and a cotton pad
- High-quality acrylic paints (Sap Green, Phthalo Green, Yellow, White, Brown)
- Small round synthetic brushes (sizes 0 and 2)
- Liner brush (size 00 or 000)
- Small palette or mixing plate
- Water cup and paper towels
- Pencil (optional)
- Clear matte or satin varnish spray
Step 1: Preparation and Planning
-
Clean the surface:
Before you even pick up a brush, wipe down your laptop case thoroughly with rubbing alcohol and a cotton pad. This removes invisible oils and fingerprints that could prevent the acrylic paint from adhering properly. -
Visualize the flow:
Look at the composition: you want one vine cascading from the top-left corner downwards, and a larger, thicker vine growing from the bottom-right corner upwards. -
Sketch lightly:
If you are nervous about freehanding, use a pencil to very faintly sketch the main S-curves of the stems. Keep these lines minimal, as they can be hard to erase later.
Pro Tip: Leaf Shapes
Real ivy leaves vary wildly. Make older bottom leaves broader with 5 points, and newer tip leaves narrow with just 3 points.
Step 2: Painting the Main Stems
-
Mix your brown:
On your palette, mix brown with a tiny touch of green to create an organic woody color. You want it fluid but opaque. -
Draft the bottom stem:
Using your size 2 brush, paint the primary stem starting from the bottom-right edge. Make the base slightly thicker, tapering it as it curves toward the center of the laptop lid. -
Add secondary branches:
Branch off from the main bottom stem with thinner lines, aiming towards the middle right. Think about how real plants reach for light. -
Paint the top stem:
Switching to a slightly lighter green-brown mix, paint the thinner vine starting from the top-left corner. This one should be more delicate, suggesting new growth.
Step 3: Adding the Leaves
-
Mix leaf shades:
Create three piles of green on your palette: a dark base green (Phthalo + Brown), a mid-tone true green (Sap Green), and a light highlight green (Sap Green + Yellow + White). -
Paint the bottom leaves:
Using the size 0 brush, start painting the iconic three-to-five pointed ivy leaf shapes on the bottom right vine. Use your mid-tone green for the general shape. -
Paint the top leaves:
The leaves on the top-left vine should be smaller and simpler. Use the same mid-tone green but keep the shapes more petite and less detailed than the bottom ones. -
Vary direction:
I always try to make sure not all leaves are facing the same way. Tilt some upwards, some downwards, and overlap a few over the stems for a natural look. -
Let the base dry:
Allow the green leaf shapes to dry completely before adding any details. Acrylics dry fast, so a few minutes should suffice.
Level Up: Glossy finish
After the matte sealer dries, use a tiny brush to apply high-gloss varnish JUST on the leaves to simulate that waxy, real-plant shine.
Step 4: Detailing and Veining
-
Add shadows:
Take your darkest green and paint slight shading at the base of each leaf where it meets the stem. This adds anchor and depth. -
Highlight the edges:
Clean your brush and pick up the light green mix. Gently dry-brush or stipple the outer tips and edges of the leaves to make them pop against the white background. -
Paint the veins:
Switch to your finest liner brush (00 or 000). Use the lightest yellow-white mixture to paint extremely thin veins inside the leaves. Start from the leaf base and flick outward lightly. -
Refine the stems:
Go back over the brown stems with the liner brush, adding tiny tendrils or curly offshoots that wrap around the imaginary space. -
Final check:
Step back and look at the whole piece. If any leaf looks too flat, add a tiny dot of white highlight to simulate a glossy texture.
Step 5: Sealing
-
Cure time:
Ideally, let the paint cure for at least 24 hours to ensure it is fully hardened. -
Apply varnish:
Takes the laptop case off your device if possible. In a well-ventilated area, spray a thin, even coat of clear matte or satin varnish over the entire lid to protect your artwork from scratches.
Once sealed, your laptop will carry a fresh, permanent garden wherever you go

PENCIL GUIDE
Understanding Pencil Grades from H to B
From first sketch to finished drawing — learn pencil grades, line control, and shading techniques.
Explore the Full Guide
Bold Color-Block Stripes
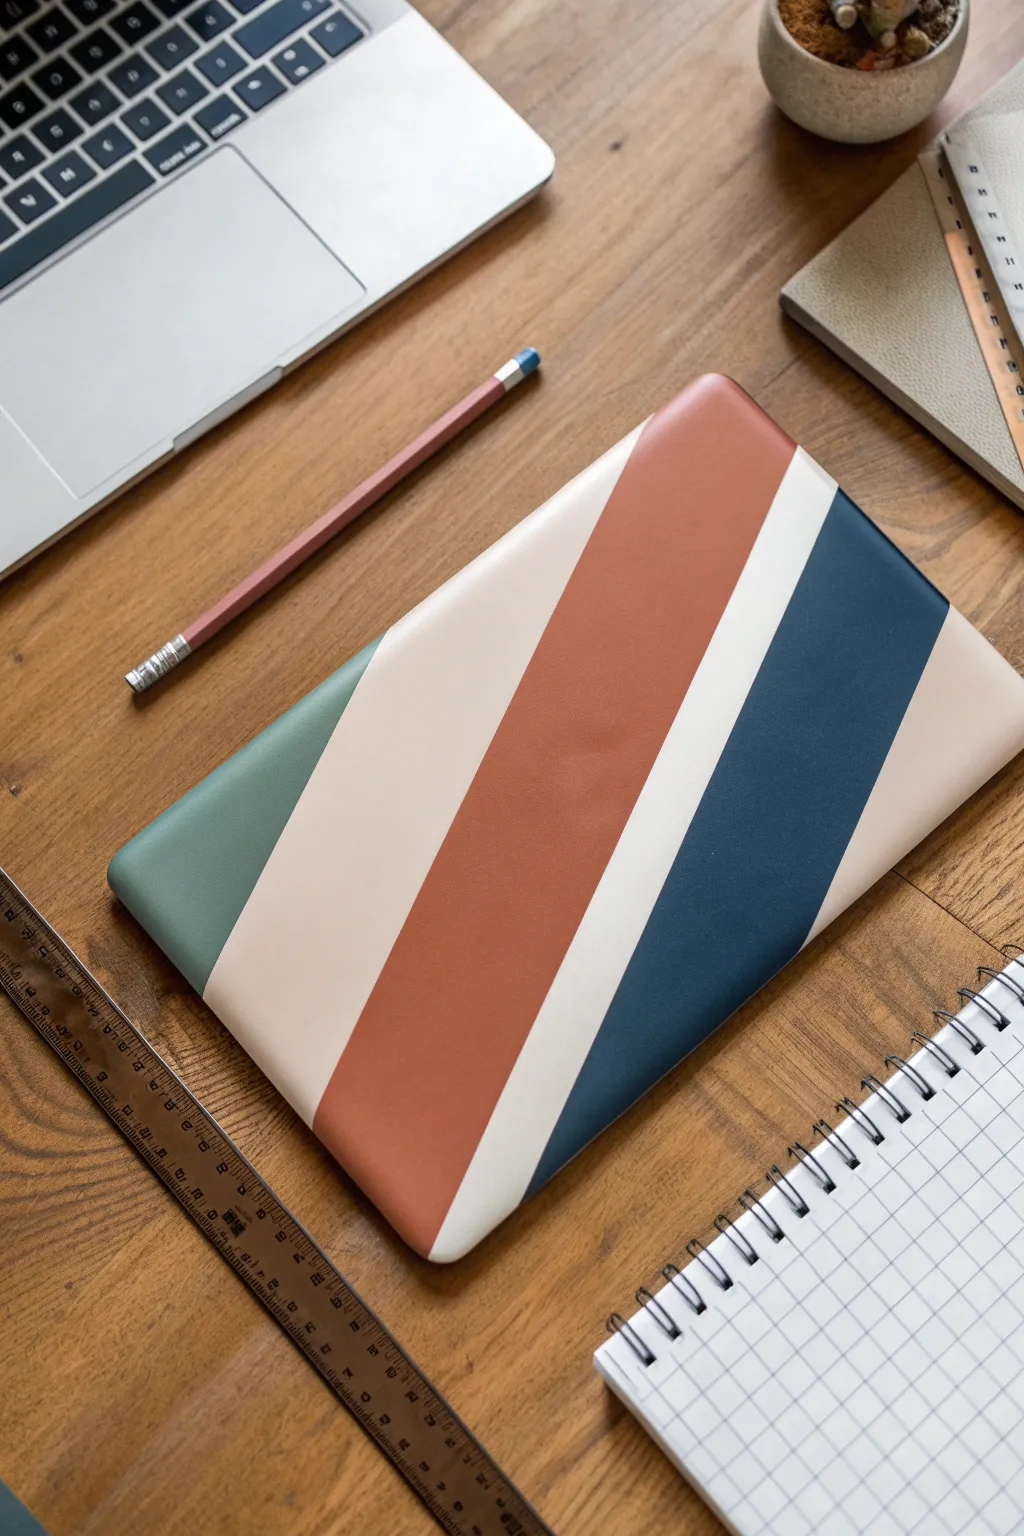
Transform your laptop into a sleek, customized accessory with this bold color-blocking technique. The diagonal stripes in muted, earthy tones create a modern aesthetic that feels both professional and artistic.
Detailed Instructions
Materials
- Laptop (or clear laptop case)
- Fine-grit sandpaper (400-600 grit)
- Isopropyl alcohol and microfiber cloth
- Painter’s tape (high quality, low-tack)
- Spray primer (suitable for plastic)
- Acrylic paints (Sage Green, Rust, Navy Blue, Cream, White)
- Flat synthetic brushes (various widths)
- Clear matte sealant spray
- Ruler or straight edge
- Pencil
Step 1: Preparation
-
Surface Prep:
Before anything else, ensure your laptop or case is clean. If painting directly on the device, double-check that all ports are taped off perfectly. I prefer removing a snap-on case and painting that instead for zero risk. -
Light Sanding:
Gently scuff the surface with fine-grit sandpaper. You aren’t trying to remove material, just creating enough ‘tooth’ for the primer to grip onto the slick plastic. -
Degreasing:
Wipe the entire surface down with isopropyl alcohol and a microfiber cloth to remove any sanding dust and oils from your hands. -
Priming:
Apply a thin, even coat of spray primer. Hold the can about 8-10 inches away and use sweeping motions. Let this dry completely according to the can’s instructions, usually at least an hour.
Clean Lines Secret
To get perfectly sharp stripes, paint a thin layer of the *background* color (or clear matte medium) over the tape edge first. This seals the gap so your colored paint can’t bleed under.
Step 2: Mapping the Design
-
Marking Diagonal Guidelines:
Place a ruler diagonally across the laptop surface. Using a pencil, lightly mark where your stripes will go. You want varied widths for visual interest—make the central bands wider and the outer accents thinner. -
Taping the First Section:
Apply painter’s tape along the pencil lines to mask off the areas you *don’t* want to paint first. Focus on the sage green corner and the navy blue stripe for this first pass. -
Sealing the Tape Edge:
Run your fingernail or a credit card firmly along the edge of the tape to prevent bleed-through. For extra crisp lines, paint a tiny amount of the base primer over the tape edge first.
Add Texture
Mix a small amount of baking soda into your acrylic paint before applying the rust or stone-colored stripes. This creates a trendy, faux-ceramic texture that feels great to the touch.
Step 3: Painting
-
Applying the Green:
Paint the bottom-left corner with your sage green acrylic. Use a flat brush and long, smooth strokes in the direction of the stripe to minimize texture. -
Applying the Navy:
Simultaneously paint the navy blue section. Apply two to three thin coats rather than one thick one, letting each layer dry to the touch in between. -
Remove Initial Tape:
Carefully peel back the tape while the paint is still slightly tacky (not fully cured) to avoid pulling up chips of paint. Pull the tape away at a sharp 45-degree angle. -
Curing Time:
Let these first colors dry fully. I usually give it a good 2-3 hours just to be safe, as you’ll need to tape over them next. -
Taping the Second Round:
Place fresh tape directly over the dried green and navy edges. This exposes the remaining unpainted strips in the middle and top. -
Painting the Rust Stripe:
Apply the rust/terracotta color in the wide central band. Be careful near the edges where it meets the other colors. -
Detailing White and Cream:
Fill in the thin stripe with bright white and the remaining blocks with cream paint. A smaller flat brush helps control the paint flow in these narrower sections. -
Final Tape Removal:
Once the final coats have set slightly, slowly remove all remaining tape to reveal your sharp, clean lines.
Step 4: Finishing
-
Touch Ups:
Inspect your lines. If any paint bled under the tape, use a tiny detailed brush and the correct color to crisp up the edges. -
Sealing:
Move to a well-ventilated area and apply a clear matte sealant spray. This is crucial for durability since laptops go in and out of bags constantly. -
Second Coat:
Apply a second light coat of sealant for extra protection and let the project cure for 24 hours before handling.
Enjoy using your beautifully personalized tech during your next work session
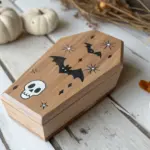
Painted Patchwork That Mimics Stickers
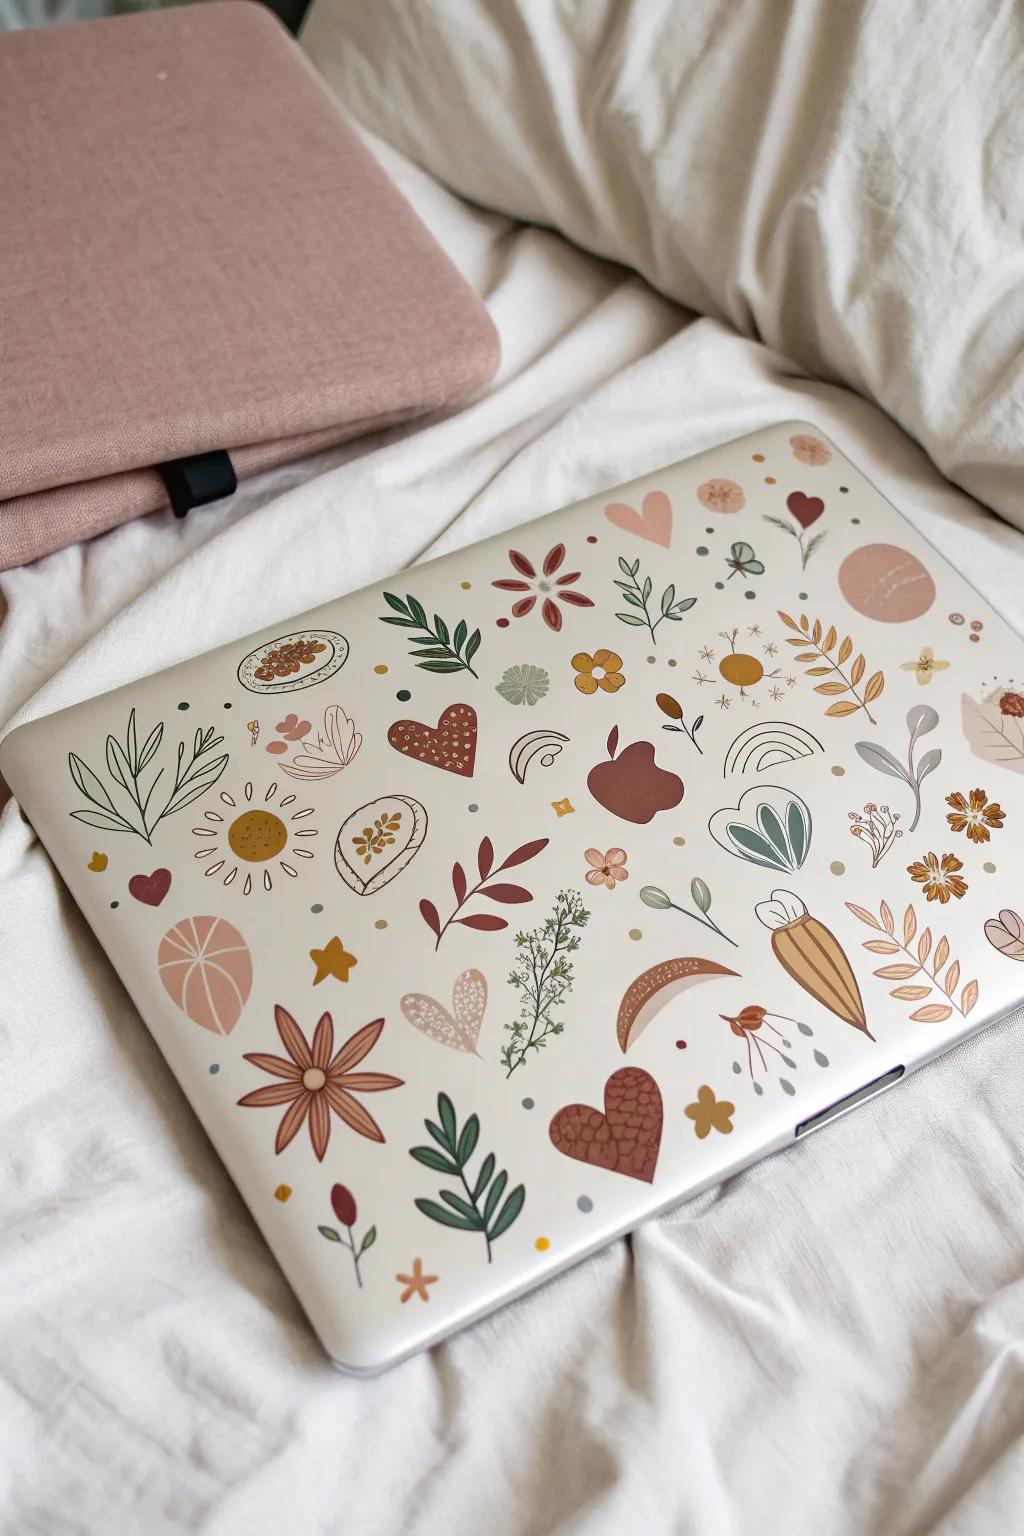
Transform your laptop lid into a canvas of scattered bohemian charms without the commitment of actual adhesives. This project uses acrylic paints to create a faux-sticker aesthetic, featuring warm, earthy botanicals, hearts, and celestial moons that look like a curated collection of decals.
Step-by-Step
Materials
- Laptop case (clear or solid color hard shell)
- Fine-grit sandpaper (optional, for grip)
- Acrylic paints (terracotta, sage green, mustard yellow, cream, dusty rose, maroon)
- Fine liner brushes (sizes 0 and 00)
- Small round brush (size 2)
- White or cream Posca paint pen (0.7mm)
- Black or dark brown fine-tip paint pen
- Clear matte varnish or sealant spray
- Rubbing alcohol and lint-free cloth
- Pencil and eraser
Step 1: Preparation & Layout
-
Clean surface:
Begin by thoroughly cleaning the laptop case with rubbing alcohol and a lint-free cloth to remove any oils or fingerprints. This is crucial for paint adhesion. -
Rough it up (Optional):
If your case is very glossy, lightly scuff the surface with fine-grit sandpaper. This gives the paint ‘teeth’ to grab onto, though it will make a clear case frosty. -
Plan placement:
Sketch your design lightly directly onto the case with a pencil. Aim for a scattered ‘tossed’ pattern, altering the orientation of each element so there is no distinct up or down. -
Balance the spacing:
Leave varying amounts of negative space between your sketches. Genuine sticker layouts are rarely perfect grids, so allow some items to sit closer together while others float freely.
Fixing Smudges
If you smudge wet acrylic, don’t wipe it immediately! Let it dry completely, then gently scrape the mistake off with a toothpick or craft knife before repainting.
Step 2: Painting the Base Shapes
-
Mix your palette:
Prepare your acrylics. You want a warm, earthy palette: mix burnt sienna with a touch of white for terracotta, and soften any bright greens with a drop of red to make them sage. -
Block in solid shapes:
Using the size 2 round brush, paint the base silhouettes of the larger heart and moon shapes. I like to start with the darkest colors, like the maroon apple logo cover and the deep red hearts. -
Paint botanical leaves:
Switch to your sage and forest greens. Paint simple leaf sprigs and fern shapes using a single stroke for each leaf, pressing down and lifting the brush to create a tapered point. -
Add floral elements:
Create the flowers using the mustard yellow and dusty rose paints. Keep the shapes simplified—think five-petal daisies or simple tulip shapes—rather than hyper-realistic blooms. -
Fill in quirky objects:
Paint the more unique shapes like the crystals, rainbows, and abstract blobs. Use cream or beige for lighter elements to ensure they pop against the laptop surface. -
Second coats:
Acrylics can be translucent. Once the first layer is dry to the touch, apply a second coat to any shapes that look streaky to get that solid, opaque ‘vinyl sticker’ look.
Step 3: Detailing & Outlining
-
Add fine florals:
Use your smallest liner brush (00) to carefully paint delicate stems or tiny filler flowers like baby’s breath using cream or white paint. -
Draw internal details:
Once the base shapes are completely dry, use a contrasting paint color or a fine paint pen to add veins to leaves or centers to flowers. For example, add white dots inside the maroon hearts. -
Create texture patterns:
Add visual interest to flat shapes by painting simple patterns. I often add tiny stripes to the rainbows or speckles to the moon crescents. -
Outline selected shapes:
To enhance the illustrative style, use a dark brown or black fine paint pen to loosely outline only some of the shapes, like the crystals or the sun rays. -
Integrate the logo:
If you painted over the manufacturer’s logo (like the apple), refine its edges now to ensure the silhouette is crisp and recognizable within the pattern. -
Fill the gaps:
Step back and look for empty voids. Fill these small spaces with tiny dots, stars, or mini-hearts to make the composition feel dense and cohesive.
Faux White Borders
To really sell the sticker illusion, use a white paint pen to draw a consistent, thick border around every single painted element, leaving a tiny gap between color and outline.
Step 4: Sealing the Artwork
-
Cleanup:
If any paint went astray or you have visible pencil marks, carefully clean them up with a damp cotton swab or an eraser, being careful not to smudge the paint. -
Initial seal:
In a well-ventilated area, apply a light coat of clear matte varnish spray. Hold the can about 12 inches away to avoid drips. -
Final protection:
Apply 1-2 more coats of sealant, allowing full drying time between each. This protects your hand-painted ‘stickers’ from scratching off in your bag.
Enjoy your beautifully customized tech accessory that combines the charm of a sticker collection with the durability of paint


Negative Space Around the Existing Logo
Transform your laptop into a serene piece of nature-inspired art with this delicate sage green makeover. By using the device’s original color as negative space for the logo, you create a seamless, professional-looking design that perfectly frames the iconic apple.
Detailed Instructions
Materials
- Isopropyl alcohol and lint-free cloth
- Adhesive sanding paper (fine grit, 400-600)
- Painter’s tape or masking tape (high quality)
- Craft knife (X-Acto or similar)
- Sage green acrylic spray paint (matte finish)
- White or light cream acrylic paint pen (fine tip)
- Detail brush (size 0 or 00)
- Clear matte sealer spray
- Pencil and eraser
- Scrap paper for sketching
Step 1: Preparation & Base Coat
-
Clean the surface:
Begin by thoroughly cleaning the top of your laptop with isopropyl alcohol and a lint-free cloth. This removes oils and dirt that could prevent the paint from adhering properly. -
Mask key areas:
Carefully apply painter’s tape over the central Apple logo. Use your craft knife to trace around the edge of the logo gently, removing the excess tape so only the apple shape is covered. -
Protect the edges:
Tape off the sides of the laptop lid and cover the keyboard/bottom half with a plastic bag or paper to protect it from overspray. -
Light scuffing:
Using fine-grit sandpaper, very lightly scuff the surface of the lid. You don’t want deep scratches, just enough texture for the paint to grip. -
Wipe down again:
Remove all sanding dust with a microfiber cloth or tack cloth. Any dust left behind will create bumps in your finish. -
Apply the first coat:
In a well-ventilated area, spray a thin, even layer of sage green matte paint. Keep the can moving to avoid drips. -
Dry and repeat:
Let the first coat dry completely according to the can’s instructions. Adding a second or third thin coat ensures solid, opaque coverage without thickness. -
Reveal the logo:
Once the final coat is touch-dry but not fully cured, carefully peel away the tape covering the Apple logo to reveal the original sleek surface underneath.
Clean Lines Secret
When peeling the tape off the logo, pull it away at a 45-degree angle while the paint is still slightly tacky. This prevents the dried paint from cracking or lifting at the edges.
Step 2: Hand-Painting the Botanicals
-
Plan your placement:
On scrap paper, sketch out curved vine shapes that mirror the corners of the laptop. You want them to reach inward toward the logo without touching it. -
Lightly sketch on the lid:
Using a pencil very lightly, draw the main stems of your vines starting from the bottom right and top left corners. Keep the lines faint so they don’t show through the white paint later. -
Draw the main stems:
Shake your white acrylic paint pen well. Trace over your pencil lines to establish the primary structure of the botanical design. -
Add first leaves:
Start adding simple, elongated leaves along the stems. Alter the angle of each leaf to create a natural, organic flow rather than a rigid pattern. -
Incorporate smaller branches:
Branch off from the main stem with thinner lines. I find that varying the pressure on the pen tip helps create tapered, elegant lines. -
Add delicate details:
Switch to your fine detail brush and a small amount of white acrylic paint if the pen feels too thick. Add tiny buds or berries at the tips of the smaller branches for texture. -
Balance the composition:
Step back and look at the laptop from a distance. If one side looks heavier, add a few floating leaves or small dots to balance the visual weight. -
Seal the work:
Once the white paint is bone dry (give it at least 24 hours to be safe), apply two light coats of clear matte sealer spray to distinctively protect your handiwork from scratches.
Add Metallic Flair
Trace the edges of your white leaves with a very fine gold or silver metallic marker. This subtle outline catches the light and adds a luxury feel to the design.
Enjoy working on your custom tech accessory that combines style with personal artistic flair
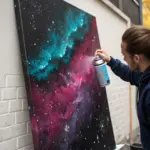
Glow-Style Details Over a Minimal Base
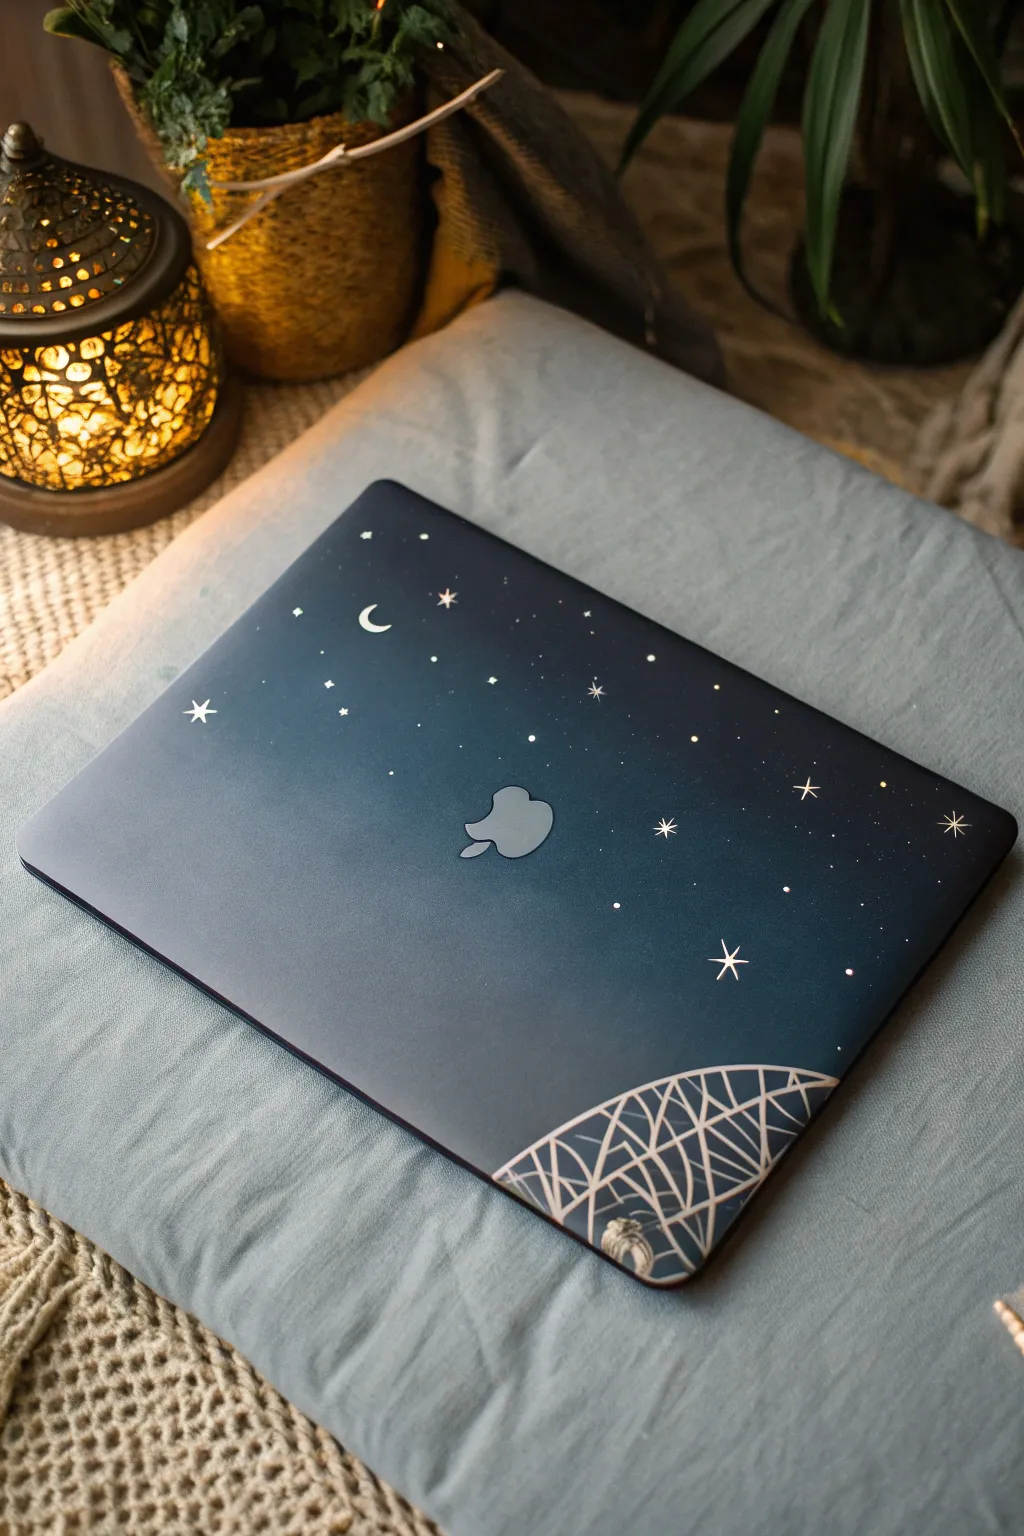
Transform your laptop into a window to the cosmos with this serene night sky design. Featuring a deep navy gradient, delicate constellations, and geometric foreground details, this project adds a touch of dreaminess to your daily tech.
Detailed Instructions
Materials
- Laptop skin or clear hard case (essential for protection)
- Deep navy blue acrylic paint
- Black acrylic paint
- Titanium white acrylic paint
- Metallic silver or gold paint pen (fine tip)
- Metallic silver acrylic paint
- Sponge applicator or makeup sponge
- Fine detail brush (size 0 or 00)
- Medium flat brush
- Matte spray sealant or lush varnish
- Painter’s tape or masking tape
- Washi tape (optional for geometric lines)
- Isopropyl alcohol and lint-free cloth
Step 1: Preparation and Base Coat
-
Prepare the Surface:
Before you begin painting, clean your laptop case or skin thoroughly with isopropyl alcohol and a lint-free cloth. This removes any oils or fingerprints that could prevent the paint from adhering properly. -
Mask the Logo:
To keep the Apple logo crisp and glowing, carefully cover it with masking tape. You can trace the logo shape onto tape with a pencil first, cut it out with an X-Acto knife, and apply it precisely over the light. -
Create the Gradient Mix:
Squeeze out your deep navy blue and a small amount of black acrylic paint. I like to mix these to create a very dark, midnight blue that isn’t quite pure black but has depth. -
Apply the Base Layer:
Using a sponge applicator, dab the midnight blue mixture across the entire surface. Sponging creates a stippled texture that looks more like a natural sky than brush strokes would. Let this first layer dry completely for 15-20 minutes. -
Add Depth with a Second Coat:
Once the first layer is dry, sponge on a second coat. Focus a slightly lighter navy tone (mix a tiny drop of white into your blue) towards the center to create a subtle glow effect, keeping the edges darker.
Star splatter mess?
If your paint flicking technique created blobs that are too big, simply dab them up quickly with a corner of a damp paper towel and tap the base color back over the spot.
Step 2: Painting the Galaxy
-
Map Out the Moon:
With your fine detail brush and titanium white paint, gently paint a small, sharp crescent moon shape in the upper left quadrant. Keep the paint thin so it lays flat. -
Create Distant Stars:
For the furthest stars, dip an old toothbrush or stiff brush into watered-down white paint. Run your thumb across the bristles to flick tiny speckles across the upper two-thirds of the laptop. Practice on paper first to control the spray. -
Paint Major Stars:
Switch back to your fine detail brush. Dot larger stars randomly among the mist. Vary the sizes slightly to create a sense of distance and dimension. -
Add Twinkling Details:
Select a few of the larger white dots and turn them into twinkling stars. Using the very tip of your brush, pull four thin lines outward from the center—up, down, left, right. For a few special ones, you can add diagonal points as well. -
Highlight with Silver:
Take your metallic silver paint and add tiny highlights to the center of your largest stars. This makes them catch the light when you move the laptop.
Pro Tip: Glowing Stars
Mix a tiny amount of glow-in-the-dark medium into your white paint for the stars. They will look normal in daylight but subtly illuminate when the lights go out.
Step 3: The Geometric Foreground
-
Plan the Dome Shape:
In the bottom right corner, you will create a stylized geometric ‘hill’ or dome. Lightly sketch a curved horizon line with a white watercolor pencil or chalk so it can be erased later. -
Draw the Grid:
Using a metallic paint pen (silver or gold), draw the curved outline of the dome. Then, begin filling it with intersecting lines. Start with vertical curved lines that follow the shape of the dome. -
Complete the Pattern:
Cross those lines with horizontal curves to create a web-like or tiled grid pattern. The lines don’t need to be mathematically perfect; a hand-drawn look adds charm. -
Add a Small Detail:
At the base of your geometric grid, you can sketch a small, abstract shape—like a sleeping creature or a small rock—to ground the design.
Step 4: Finishing Touches
-
Remove the Masking:
Once all paint is dry to the touch, very carefully peel away the masking tape from the Apple logo. Use the tip of a craft knife to lift the edge if needed. -
Clean Up Edges:
If any paint bled under the tape, use a toothpick or a damp Q-tip to gently scrape or wipe it away while the paint is still relatively fresh. -
Seal the Artwork:
To protect your work from scratches and wear, apply two coats of clear matte spray sealant. This is crucial for a laptop that gets handled often. Allow full drying time (usually 24 hours) before snapping the case onto your computer.
Enjoy the calming view of your personal galaxy every time you open your computer to work or play


Have a question or want to share your own experience? I'd love to hear from you in the comments below!