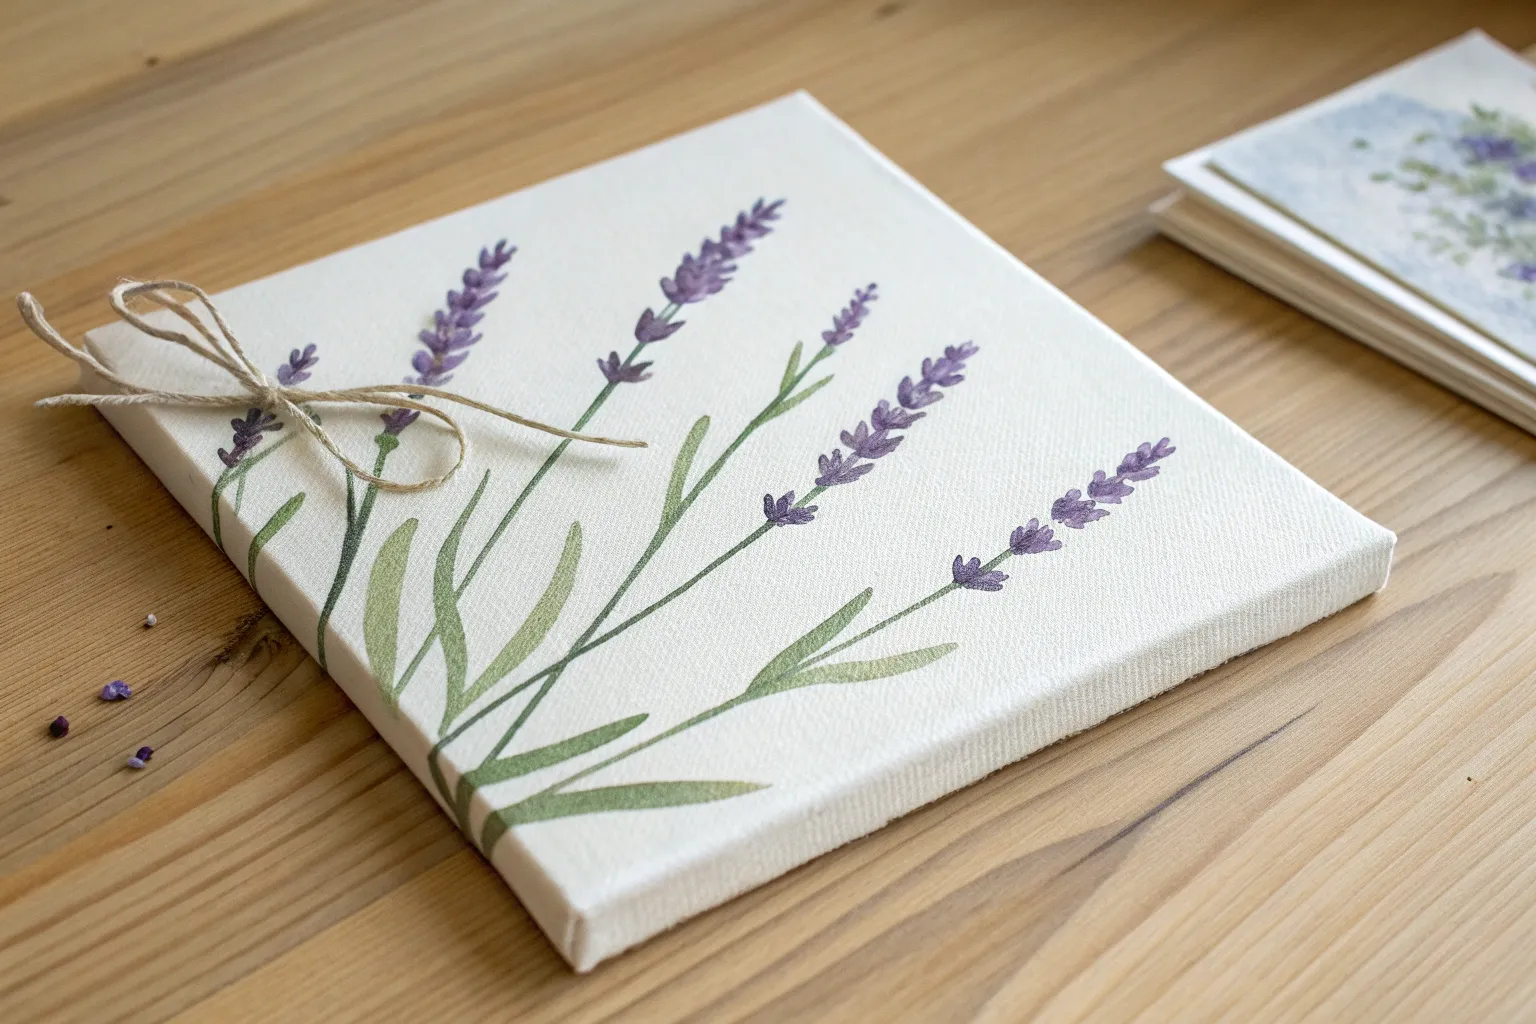
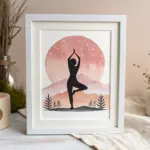
If you’ve ever wanted to paint lavender without getting stuck in fussy details, you’re in the right place. I’m sharing my favorite lavender painting ideas that range from classic fields to playful, texture-heavy experiments you can totally make your own.
Classic Lavender Field at Sunset
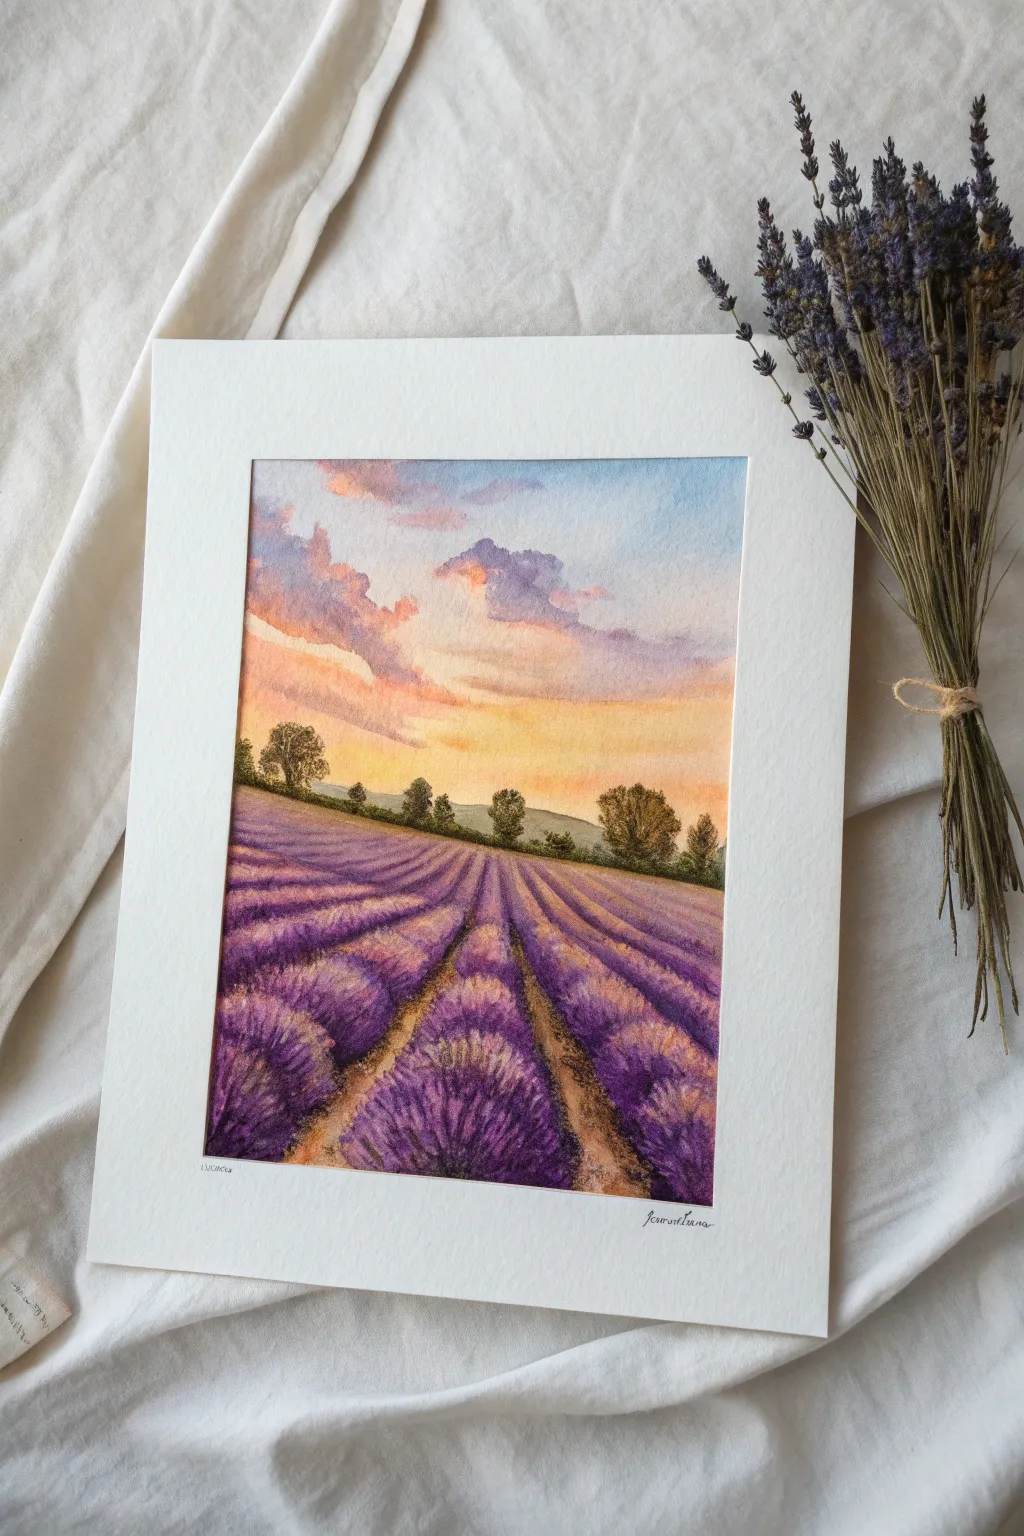
Capture the warmth of a setting sun over rolling hills of fragrant lavender in this vibrant watercolor piece. You will learn to balance the soft, wet-into-wet blending of the sky with the textured, rhythmic strokes needed for the flower rows.
Step-by-Step
Materials
- Cold press watercolor paper (300 gsm)
- Watercolor paints (Ultramarine Blue, Alizarin Crimson, Cadmium Yellow, Burnt Sienna, Sap Green)
- Round brushes (size 8 for washes, size 4 for details)
- Flat brush (1/2 inch)
- Masking tape
- Clean water jar
- Paper towels
- Pencil and eraser
Step 1: Preparation and Sketching
-
Tape down the paper:
Secure your watercolor paper to a board using masking tape on all four sides. This creates a crisp clean border and prevents buckling when the paper gets wet. -
Sketch the horizon:
Lightly draw a horizon line about one-third of the way up the paper. It doesn’t need to be perfectly straight; a slight hill adds interest. -
Outline the rows:
Draw vanishing point guidelines for your lavender rows. All lines should converge toward a single point on or near the horizon line to create depth. -
Mark the trees:
Faintly sketch the shapes of the trees along the horizon line, varying their sizes for a natural look.
Muddy Purple?
If your purples look dull, avoid mixing all three primary colors. Stick strictly to mixing Blue and Red, or use a pre-mixed tube violet to keep the color vibrant and clean.
Step 2: Painting the Sunset Sky
-
Wet the sky area:
Use your large flat brush to apply clean water to the entire sky area above the horizon line. The paper should be glistening but not pooling. -
Apply the yellow glow:
Drop in a dilute wash of Cadmium Yellow near the horizon line, letting it bleed upwards. Keep this area bright to mimic the setting sun. -
Add warmth:
While the yellow is still damp, blend in a soft orange by mixing yellow with a touch of Alizarin Crimson. Apply this above the yellow band. -
Paint the upper sky:
Mix a light wash of Ultramarine Blue and bring it down from the top edge of the paper, softening the edge as it meets the warm colors. -
Create cloud shadows:
Mix a gentle purple using blue and crimson. While the paper is still slightly damp, dab in cloud shapes, softening the bottom edges so they float naturally.
Distance Trick
Make the lavender rows much paler and bluer as they get closer to the horizon. This ‘atmospheric perspective’ makes the field look huge and deep.
Step 3: Painting the Landscape
-
Paint the distant hills:
Once the sky is dry, mix a pale, muted green. Paint a low range of hills along the horizon line. Keep this value light to push it into the distance. -
Base layer for lavender:
Mix a watery purple. Paint the lavender rows broadly, following your pencil guides. Leave the spaces between the rows (the dirt paths) unpainted for now. -
Add the earth tones:
Mix Burnt Sienna with a little yellow. Carefully paint the dirt paths between the purple rows. I find it helpful to let the purple and brown touch slightly in places for a softer transition. -
Deepen the lavender color:
Mix a stronger, less watery purple (Ultramarine + Alizarin). Use a size 8 round brush to dab texture onto the purple rows, concentrating the darkest pigment at the bottom of the page (foreground). -
Create texture details:
Switch to your size 4 brush. Use short, upward flicking strokes on the foreground lavender mounds to suggest individual stems and flowers.
Step 4: Details and Finishing Touches
-
Paint the horizon trees:
Mix a dark, rich green (Sap Green + a touch of blue/brown). Paint the trees along the horizon line using a stippling motion to suggest leaves. -
Shadows in the rows:
Add a deep violet shadow to the right side of each lavender row to indicate the light source coming from the left/center sunset. -
Enhance the foreground:
Add a few touches of very concentrated purple and even a tiny bit of dark green at the very bottom of the page to ground the closest plants. -
Review and refine:
Step back and check your values. If the sunset needs more punch, you can glaze a thin layer of yellow over the dried sky near the horizon. -
Reveal the border:
Wait until the painting is completely bone dry. Carefully peel away the masking tape at a 45-degree angle to reveal your clean white border.
Frame your new landscape in a simple white mat to let those sunset colors truly shine


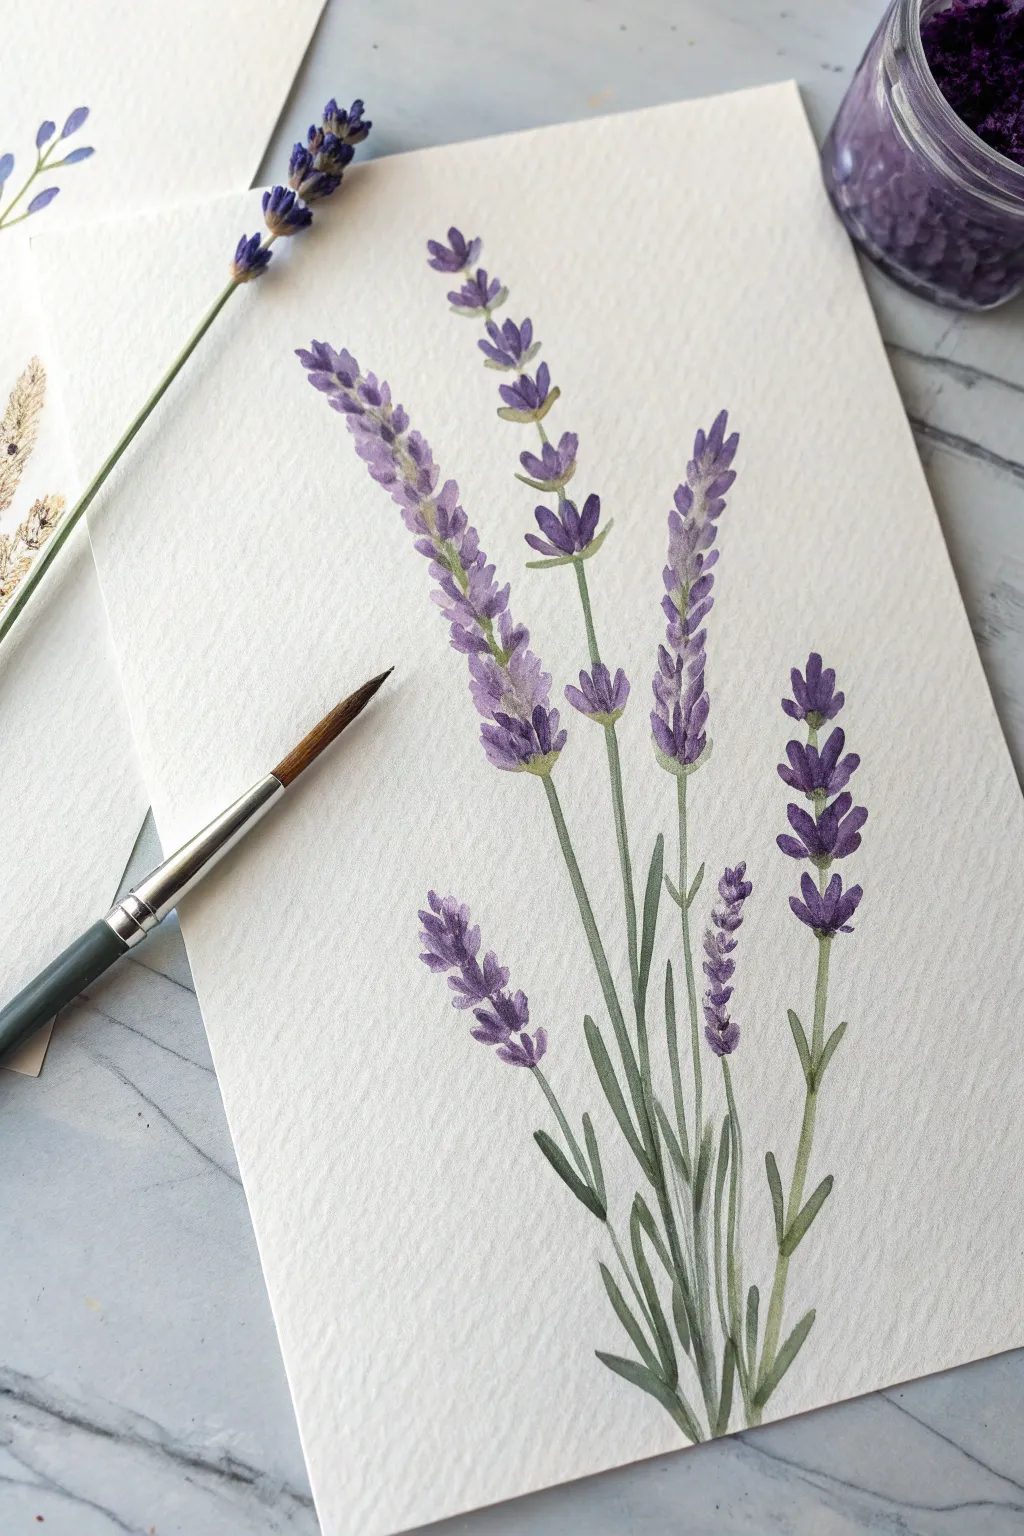
Minimalist Single Lavender Sprig
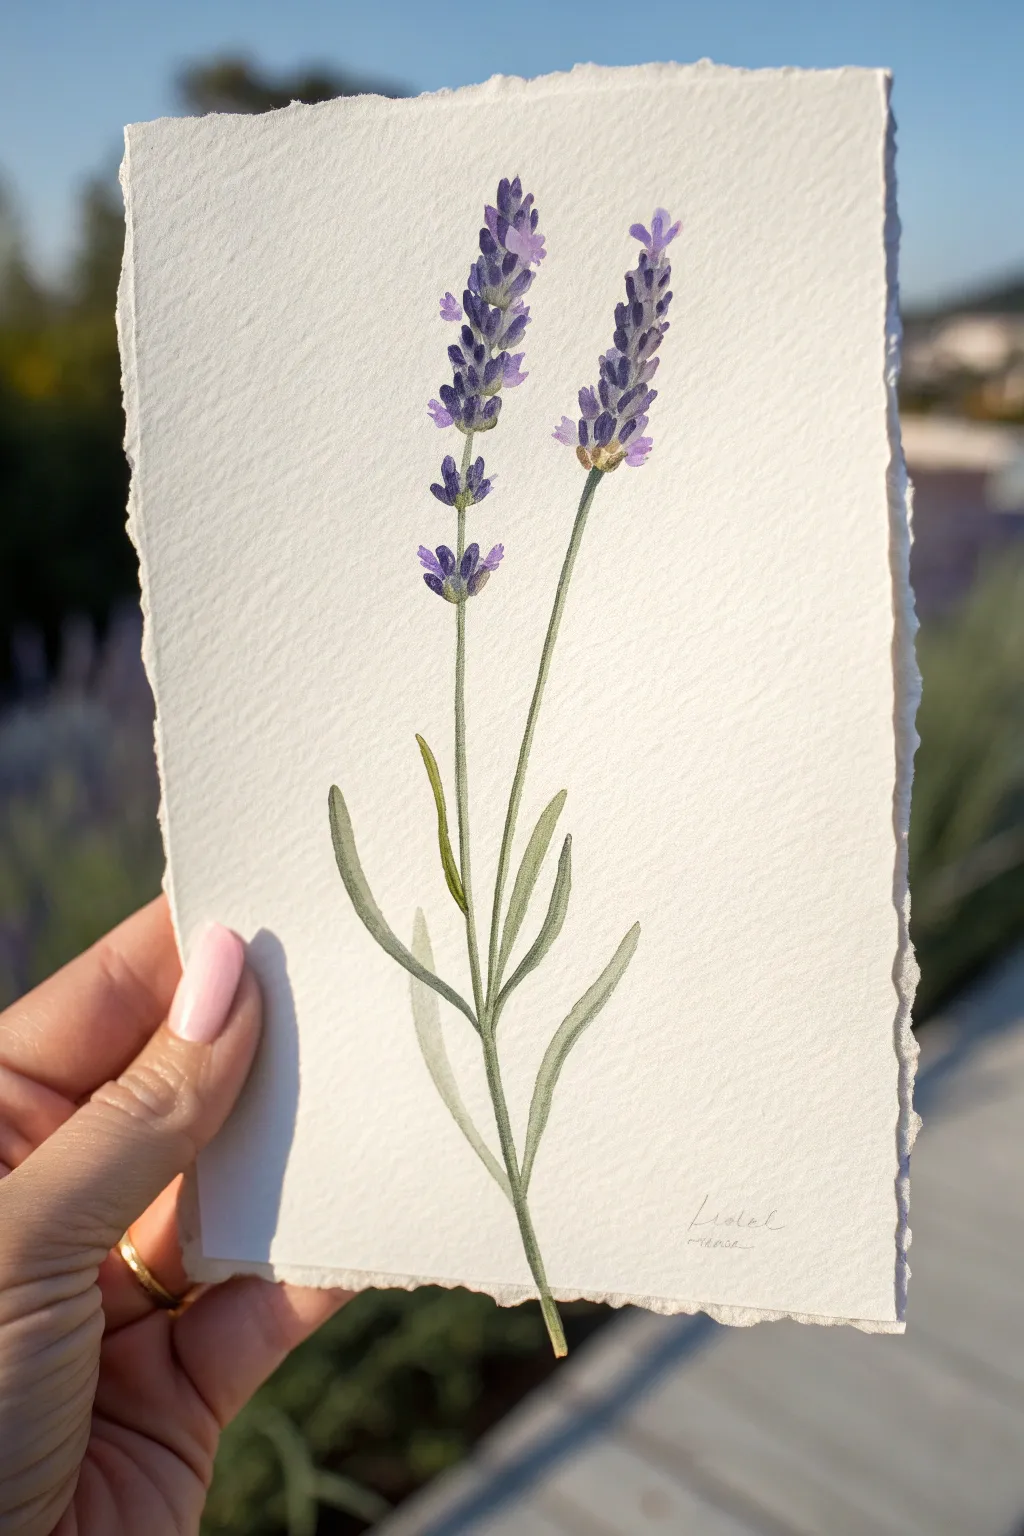
Capture the graceful simplicity of lavender with this minimalist watercolor tutorial. By focusing on two slender stems and soft, layered blooms, you’ll create a serene botanical study on beautiful textured paper.
Step-by-Step
Materials
- Cold press watercolor paper (300 gsm or heavier), preferably with deckled edges
- Watercolor paints: Ultramarine Blue, Alizarin Crimson (or a cool Violet), Sap Green, and Burnt Umber
- Round watercolor brushes: Size 4 for stems and Size 2 for details
- Pencil (HB or H) for light sketching
- Kneaded eraser
- Two jars of water
- Paper towel
- Mixing palette
Step 1: Preparation and Sketching
-
Paper Selection:
Choose a high-quality, textured watercolor paper. If you have a sheet with torn or deckled edges, use that to mimic the rustic, organic look of the reference image. -
Light Outline:
Using an H or HB pencil, very lightly sketch the main lines of the two stems. Draw one long, slightly curved central stem and a second, shorter stem branching off or standing beside it to the right. -
Placement of Leaves:
Mark the positions for the leaves near the base of the stems. Keep these lines faint—just enough to guide your brush later. -
Flower Clusters:
Sketch the general elongated oval shapes where the flower heads will be. Avoid drawing individual petals; just indicate the top and bottom of the flowering sections. -
Softening the Sketch:
Roll your kneaded eraser gently over the drawing to lift most of the graphite. You want the guidelines to be barely visible so they disappear under the pale watercolor washes.
Step 2: Painting the Stems and Leaves
-
Mixing Greens:
Mix a natural, muted green using Sap Green and a tiny touch of Burnt Umber or Alizarin Crimson to desaturate it. You want a soft, sage-like hue, not a bright grass green. -
Base Stem Stroke:
Load your Size 4 brush with a watery mix of this green. Starting from the bottom, paint the main stem with a single, confident stroke, tapering it as you move upward toward the flower head. -
Second Stem:
Paint the second, shorter stem to the right. Ensure it looks connected to the base or originates from the same root area, keeping the line slender and elegant. -
Adding Leaves:
While the stems are still slightly damp or just after they dry, paint the long, slender leaves at the base. Use a ‘press and lift’ motion: touch the tip to the paper, press down to widen the belly of the brush, and lift up to create a fine point. -
Varying Values:
To create depth, paint one or two leaves with a slightly more concentrated green mix. This variation mimics the way light hits different parts of the plant.
Pro Tip: Lost and Found Edges
Don’t outline every petal. Let some purple shapes bleed into the white paper or fade out. These ‘lost edges’ make the flowers look soft and delicate.
Step 3: Creating the Lavender Blooms
-
Mixing Purple:
Create a lovely lavender hue by mixing Ultramarine Blue and Alizarin Crimson. Prepare a puddle of a very pale, watery wash and a separate puddle of a slightly more saturated, darker mix. -
First Layer of Buds:
Using your Size 2 brush and the pale wash, dab small, irregular teardrop shapes along the top of the main stem. Keep them clustered but leave tiny white spaces between them for airiness. -
Building the Shape:
Continue dappling these small shapes upward. Lavender grows in whorls, so try to group small clusters of buds with gaps in between as you move up the stem. -
Painting the Second Flower:
Repeat the process for the right-hand flower sprig. I like to make the second flower slightly different in height or shape to keep the composition dynamic. -
Adding Definition:
While the first layer is barely dry, pick up the darker, more saturated purple mix. Dot in smaller, more defined petal shapes on top of the pale wash, focusing on the bottom of each flower cluster to suggest shadow. -
Tiny Details:
Add a few tiny stray buds or petals breaking away from the main cluster at the very top. These ‘flyaway’ petals give the flower a natural, unstudied look.
Troubleshooting: Muddy Purple?
If your purple looks brown or muddy, you likely mixed a yellow-based red or green into it. Ensure your mixing brush is clean and stick to cool blues and reds.
Step 4: Refining and Finishing
-
Connecting Stems to Flowers:
Use a very fine tip of green to draw tiny connections between the main stem and the individual flower whorls if they look like they are floating too much. -
Shadow Accents:
Mix a darker green-gray and add a thin line of shadow along one side of the lower stems. This simple touch adds roundness and dimension to the stalks. -
Final Assessment:
Step back and look at your composition. If the purple looks too flat, add a tiny dot of concentrated violet into the center of a few wet buds for a ‘wet-on-wet’ bloom effect. -
Dry and Sign:
Let the paper dry completely flat to prevent buckling. Once dry, sign your name lightly in pencil near the bottom stem for that classic botanical artist touch.
Now you have a serene piece of botanical art ready to be framed or gifted.


Cotton Swab Dabbing for Lavender Buds
Capture the breezy elegance of a lavender field with this soft watercolor study featuring varying purple hues and slender green stems. The finished piece has a lovely vertical flow, perfect for a calming art display or a handmade greeting card.
Step-by-Step Guide
Materials
- Cold press watercolor paper (300 gsm)
- Round watercolor brush (size 4 or 6)
- Small detail brush (size 0 or 2)
- Cotton swabs (Q-tips)
- Watercolor paints (Violet, Ultramarine Blue, Sap Green, Olive Green)
- Palette for mixing
- Jar of clean water
- Paper towel
Step 1: Preparation & Color Mixing
-
Prepare your palette:
Begin by activating your violet and blue paints with a drop of water. You’ll want a few puddles of purple: one pure violet, one mixed with a touch of blue for a cooler tone, and one very watered-down pale lavender. -
Mix your greens:
Create a natural green by mixing Sap Green with a tiny bit of red or brown to desaturate it slightly. Prepare a second, darker green puddle (Olive Green mixed with a hint of blue) for shadows.
Blobby Buds?
If your cotton swab dabs look like perfect circles, pull the paint slightly outward with a damp detail brush to shape them into petal-like ovals while wet.
Step 2: Painting the Buds (Cotton Swab Technique)
-
Load the cotton swab:
Dip the tip of a cotton swab into your medium-strength purple mixture. Dab off excess paint on a paper towel so it isn’t dripping. -
Create the first flower spike:
Choose a spot on the paper for your tallest stem. Gently dab the cotton swab in a vertical, tapered cluster. Start narrow at the top, widen slightly in the middle, and taper off at the bottom. -
Build softness:
While the first dabs are still damp, take a clean, slightly wet cotton swab and dab the edges of the flower spike. This softens the pigment and creates that misty watercolor look. -
Add dark accents:
Dip a fresh swab (or a small brush) into your darkest purple-blue mix. Add tiny, concentrated dots near the center and base of the flower spike to create depth and volume. -
Repeat for other stems:
Create 3-4 more flower spikes at varying heights. I like to make some curved slightly to the left or right to make the composition feel organic and less stiff. -
Refine the shapes:
Use your small detail brush to add tiny, stray petals at the very top of each spike, flicking the brush upward to mimic the delicate tips of real lavender.
Step 3: Stems & Greenery
-
Paint the main stems:
Using your round brush loaded with the lighter green mix, draw a thin, confident line from the base of each flower spike down to the bottom of the paper. -
Add segments:
Lavender stems often have small breaks or nodes. Lift your brush occasionally or vary the pressure to create a natural, segmented look rather than a perfect ruler-straight line. -
Connect the buds:
Where the flower spike has gaps between clusters of purple, use the very tip of your green brush to paint a tiny connecting stem peeking through. -
Paint base leaves:
At the bottom of the composition, paint long, slender leaves. Press the belly of the brush down and lift up quickly to create a tapered point. -
Add leaf variety:
Paint some leaves crossing over the stems and others curving away. Varying the direction adds movement to the bouquet. -
Deepen the shadows:
While the green is still slightly damp, drop darker green pigment into the bottom of the leaves and the shadowed side of the stems. -
Final leaf details:
Use your smallest brush to pull out tiny, thin leaves higher up on the stems, just below the flower heads. -
Review and balance:
Step back and look at your composition. If any area looks too empty, add a faint, watery purple bud or a simple ghost leaf in the background.
Pro Tip: Lost and Found edges
Don’t outline everything. Let some purple buds bleed slightly into the wet paper or fade out completely. These ‘lost edges’ make watercolor look magical.
Allow your painting to dry completely flat before framing or sharing your floral creation


Wispy Stem Strokes and Loose Greenery
Capture the elegance of a summer garden with this delicate watercolor study, featuring slender lavender stems and soft, wispy leaves. The composition balances three distinct flower spikes against flowing greenery for a classic botanical illustration feel.
Step-by-Step Guide
Materials
- Cold-pressed watercolor paper (300 gsm)
- Watercolor paints (Violet, Ultramarine Blue, Sap Green, Olive Green, Burnt Umber)
- Round brushes (sizes 2, 4, and 6)
- Pencil (HB or H)
- Kneaded eraser
- Clean water jar
- Paper towel
Step 1: Planning the Composition
-
Lightly sketch the main stems:
Begin by using your HB pencil to draw three main curved lines for the stems. Position the central stem slightly higher than the flanking ones to create a dynamic hierarchy. Keep the lines faint and graceful. -
Outline the flower spikes:
Sketch the general shape of the flower heads at the top of each stem. Instead of drawing individual petals, just mark the elongated cone shapes where the blooms will go. Observe how the central spike is denser, while the left one is more sparse. -
Add leaf guidelines:
Draw long, slender leaves extending from the base of the stems. Make sure they curve outwards and upwards, intersecting slightly to create a natural, gathered look. Use the reference image to place the leaves specifically near the bottom third.
Pro Tip: Lost and Found Edges
Don’t outline every single petal. Let some purple strokes fade into the white paper. These “lost edges” mimic how our eyes naturally focus and make the flowers look softer.
Step 2: Painting the Greenery
-
Mix your base green:
Combine Sap Green with a touch of Olive Green and plenty of water to create a translucent, pale sage color. This will be the base for your stems and leaves. -
Paint the main stems:
Using a size 4 brush, carefully paint over your pencil lines for the stems. Keep the pressure consistent for a thin, even line, but allow the color to pool slightly at the junctions for natural variation. -
Fill in the leaves:
Switch to a size 6 brush for the leaves. Start at the base of a leaf with light pressure, press down to widen the stroke in the middle, and lift off slowly to create a tapered, sharp point. -
Add depth to the greenery:
While the first layer is still slightly damp (but not soaking), drop in a darker mix of Olive Green and a tiny bit of Burnt Umber into the shadows where leaves overlap or join the stem. -
Define the bracts:
Using the tip of your size 2 brush, paint small, leafy bracts just under the flower spikes. Use a yellow-green mix here to suggest new growth capturing the light.
Troubleshooting: Muddy Colors
If your purple and green touch while wet, they turn brown. Ensure the green stem is 100% dry before painting the purple flowers near it, or leave a tiny white gap as a barrier.
Step 3: Creating the Blooms
-
Mix your lavender hues:
Prepare two puddles of paint: a light, watery violet for the base and a deeper blue-violet (add Ultramarine) for the shadows. I like to keep these separate on the palette initially. -
Paint the central spike base:
On the tall center stem, dab small spots of the light violet mix. Use a stippling motion with the size 4 brush, leaving white gaps between the color to represent light hitting the petals. -
Build the bloom shape:
Continue dabbing color upwards, tapering the shape as you reach the tip. The bottom of the flower spike should act as a foundation for the smaller florets above. -
Paint the side sprigs:
Repeat the stippling process for the left and right stems. For the left stem, leave larger gaps between the flower clusters to show a less mature bloom structure. -
Add contrast and definition:
Once the initial purple layer is dry, use the size 2 brush and your darker blue-violet mix to paint tiny V-shapes or dots within the clusters. Focus these darker marks near the bottom of individual florets. -
Connect blooms to stems:
Using a very fine brush and pale green, ensure the flower clusters are visibly connected to the main stem. You can paint tiny green stems peeking through the purple clusters.
Step 4: Refining Details
-
Enhance leaf shadows:
Mix a darker green-grey. Glaze this over the underside of the curving leaves to give them a three-dimensional form, making them look like they are twisting. -
Final stem touches:
Check the very bottom of the stems where they intertwine. Darken this area slightly to ground the plant and show that the stems are gathered together. -
Softening edges:
If any flower edges look too hard, take a clean, damp brush and gently soften the outer perimeter of the purple spikes to give them a fuzzy, soft texture. -
Erase guidelines:
Wait until the painting is completely bone dry. Gently use your kneaded eraser to lift any visible pencil marks that weren’t covered by paint.
Now you have a serene botanical piece ready to be framed or gifted to a garden lover
BRUSH GUIDE
The Right Brush for Every Stroke
From clean lines to bold texture — master brush choice, stroke control, and essential techniques.
Explore the Full Guide
Impressionist Lavender Rows With Bold Strokes
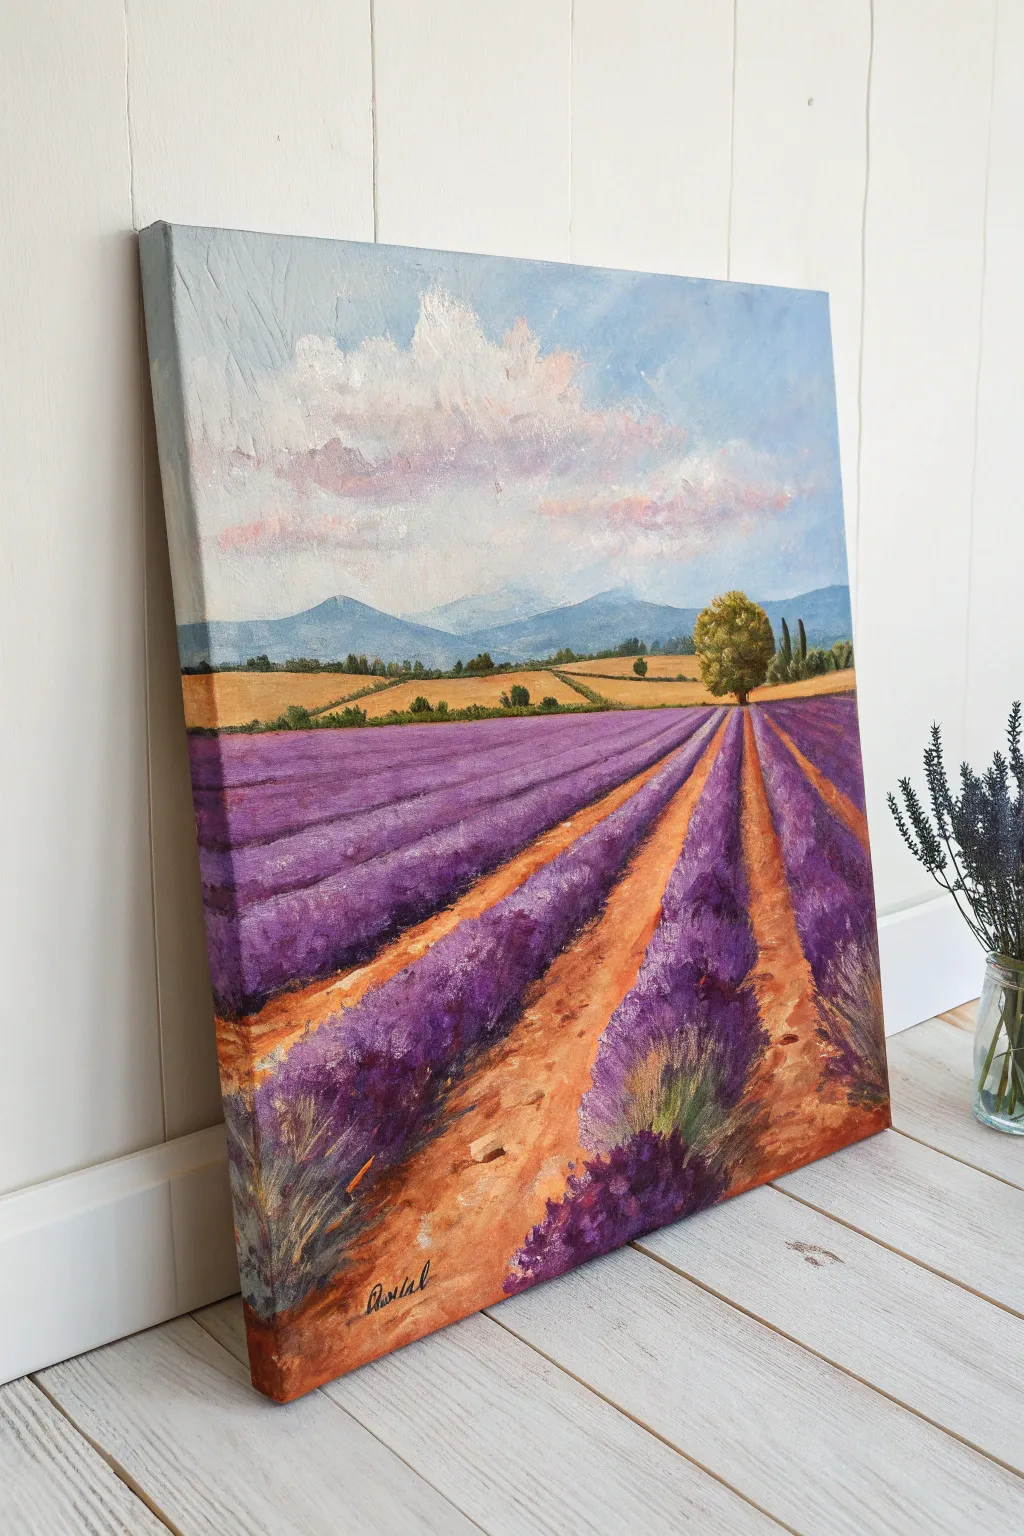
Capture the warmth of Provence with this vibrant acrylic landscape featuring sweeping rows of lavender leading to distant mountains. This project focuses on perspective and bold textural strokes to create a sense of depth and movement on your canvas.
Step-by-Step Guide
Materials
- Square stretched canvas (approx. 16×16 or 20×20 inches)
- Acrylic paints (Titanium White, Ultramarine Blue, Dioxazine Purple, Cadmium Yellow, Yellow Ochre, Burnt Sienna, Sap Green, Magenta)
- Flat brushes (Large 1-inch, Medium 1/2-inch)
- Round brushes (Size 4 and 8)
- Fan brush (optional for texture)
- Palette knife
- Water cup and paper towels
- Pencil for sketching
Step 1: Planning and Sky
-
Establish the Horizon:
Lightly sketch a horizon line about one-third of the way down from the top of the canvas. This prevents the painting from feeling split perfectly in half. -
Map the Perspective:
Draw a vanishing point near the right third of the horizon line. Sketch 4-5 diagonal lines radiating from the bottom edge of the canvas toward that point to define your lavender rows. -
Block in the Sky:
Mix Titanium White with a tiny touch of Ultramarine Blue. Paint the upper sky area, keeping it very light and airy. -
Add Cloud Structures:
While the sky is still damp, mix a soft pinkish-lilac using White, a dot of Magenta, and a whisper of Purple. Scumble this into the lower sky area to create fluffy, warm cloud bases. -
Define the Mountains:
Mix Ultramarine Blue with a touch of White and a tiny bit of Burnt Sienna to dull the color. Paint the distant mountain peaks along the horizon, making them paler at the bottom to simulate atmospheric haze.
Brush Direction Pro-Tip
Follow the perspective! Paint your dirt, lavender base, and highlight strokes in the direction of the row. This naturally leads the viewer’s eye toward the focal point.
Step 2: Middle Ground and Fields
-
Paint the Golden Fields:
Mix Yellow Ochre with Titanium White and a touch of Cadmium Yellow. Fill in the band of land just below the mountains. -
Add Distance Details:
Using a small round brush and dark green (Sap Green mixed with a little Blue), dab in tiny tree lines and bushes along the edge of the golden fields. -
The Focal Tree:
Paint the main tree on the right side using a mix of Sap Green and Burnt Sienna for the foliage. Use a small brush to add a dark brown trunk, anchoring it firmly in the middle ground.
Trouble with Muddy Colors?
If your purples and yellows seem brown where they meet, let the first color dry completely before painting the neighbor. Complementary colors mix into grey/brown when wet.
Step 3: Lavender Rows and Foreground
-
Base the Dirt Paths:
Mix Burnt Sienna, Yellow Ochre, and White to create a warm, sandy earth tone. Paint the triangular spaces between your sketched lavender rows, making the paths wider at the bottom and narrower near the tree. -
Base the Lavender:
Using a medium flat brush, fill in the lavender strips with a dark mix of Dioxazine Purple and Ultramarine Blue. Don’t worry about texture yet; just get the dark value down. -
Create Depth in the Rows:
Add a slightly lighter purple (mix in a little White) to the top half of the lavender rows closer to the horizon, as colors fade in the distance. -
Texture the Left Rows:
On the horizontal rows on the left side, use horizontal distinct strokes ensuring the purple meets the golden field cleanly.
Step 4: Highligts and Details
-
Highlight the Lavender:
Mix a vibrant light violet using Purple, Magenta, and White. Using a dry brush or the edge of a flat brush, dab texture onto the tops and sunlit sides of the lavender mounds. -
Add Sunlight to the Earth:
Mix a bright peach tone using White, Yellow Ochre, and a tiny bit of Magenta. Brush this onto the dirt paths, particularly on the right side of the paths to suggest sunlight hitting the ground. -
Foreground Grasses:
With a small round brush, flick upward strokes of Sap Green and Yellow at the very bottom edge of the canvas to create tufty grasses peeking through the lavender. -
Enhancing the Tree:
Dab highlights of pure Yellow mixed with Sap Green onto the sunlit side (left side) of your focal tree to give it volume. -
Final Touches:
I like to take a step back here to check the contrast. If the foreground needs pop, add a few touches of nearly pure Dioxazine Purple in the deepest shadows of the front rows.
Sign your masterpiece in the bottom corner and enjoy your permanent window into summer
Lavender and Bees in a Loose Botanical Scene
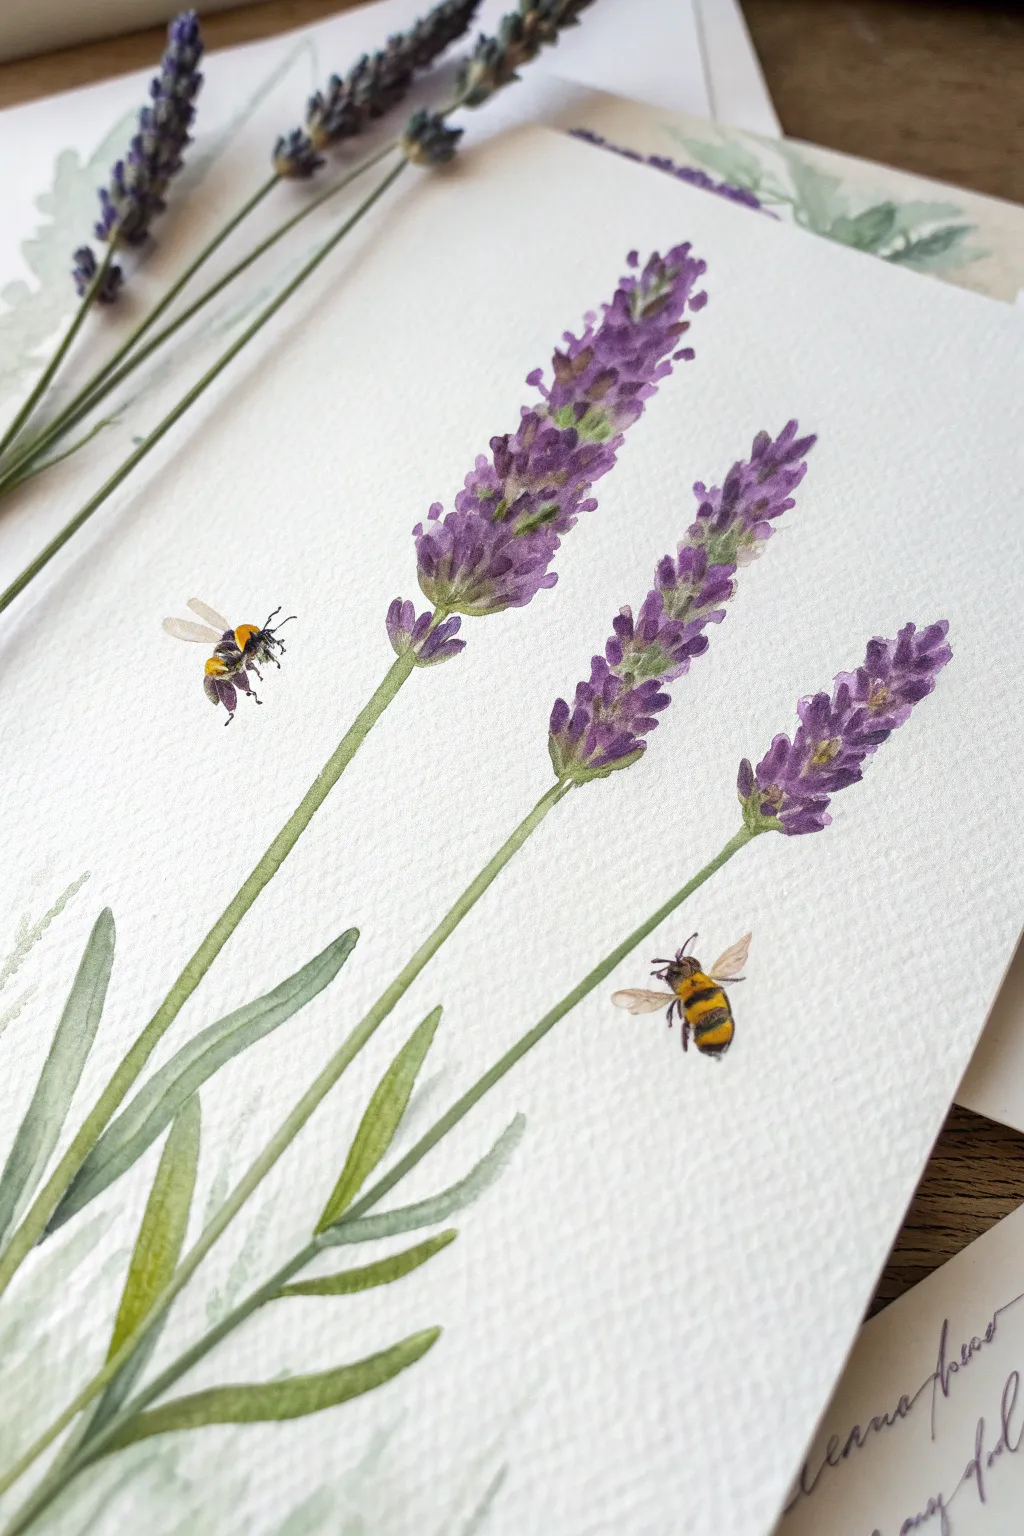
Capture the delicate beauty of a summer garden with this watercolor project featuring vibrant purple blooms and busy bees. The soft, textured paper and layered washes create a lively yet gentle botanical scene perfect for greeting cards or framing.
Step-by-Step Tutorial
Materials
- Cold press watercolor paper (300 gsm)
- Round watercolor brushes (size 2, 4, and 6)
- Watercolor paints: Violet, Ultramarine Blue, Sap Green, Olive Green, Yellow Ochre, Burnt Sienna, Lamp Black
- Pencil (HB or H)
- Kneaded eraser
- Clean water jar
- Paper towels
- Painter’s tape or masking tape
Step 1: Planning and Sketching
-
Prepare the workspace:
Begin by taping down your cold press watercolor paper to a board or table to prevent buckling. Ensure your surface is clean and your brushes are ready. -
Lightly sketch the composition:
Using an HB pencil, very faintly draw the three main stems of the lavender. Curve them slightly to the right for a natural flow. -
Outline the blooms and bees:
Sketch the general elongated oval shapes for the flower heads at the top of the stems. Add simple outlines for the two bees—one flying on the left and one lower on the right. -
Add leaf guidelines:
Draw long, slender leaves emerging from the bottom left corner, fanning out casually behind and between the stems. Keep pencil lines minimal so they don’t show later.
Muddy colors?
If your purple and green mix into brown on the paper, let the flower buds dry completely before painting the green stems and bracts underneath.
Step 2: Painting the Lavender
-
Mix your purples:
On your palette, create two purple mixtures: a bright violet and a deeper, cooler purple by adding a touch of Ultramarine Blue. -
Start the flower buds:
Using the size 4 brush and the lighter violet, dab small, irregular spots along the top of your first stem sketch. Leave tiny white gaps between dabs to represent light. -
Add depth to the blooms:
While the first layer is still damp (not soaking), drop in the darker purple mix near the base of the individual flower clusters to create shadow and volume. -
Intertwine the green bits:
Mix a watery Sap Green. Using a size 2 brush, carefully paint tiny green bracts peeking out from under the purple flower clusters, letting the colors bleed slightly where they touch. -
Paint the stems:
Load your brush with an Olive Green mix. Start from under the flower head and pull the brush down in a steady, confident stroke to create the stem. Vary the pressure slightly for a natural look. -
Repeat for all stems:
Continue this process for the other two stems, perhaps making the center one tallest and the right one slightly shorter.
Step 3: Leaves and Bees
-
Base layer for leaves:
Mix a cool, soft green using Sap Green and a tiny touch of Blue. Paint the long, spear-like leaves starting from the bottom, lifting the brush at the tip for a sharp point. -
Layering the foliage:
Once the first leaves are dry, paint a second layer of leaves using a slightly darker or warmer green to create depth in the foliage bunch. -
Painting the bee bodies:
For the bees, start with the yellow sections. Use Yellow Ochre for the thorax and parts of the abdomen. Let this dry completely before moving to the black stripes. -
Adding bee details:
Using your smallest brush (size 2) and Lamp Black (or a dark grey mix), carefully paint the head and the stripes over the dry yellow. Use the very tip of the brush for legs and antennae. -
Creating translucent wings:
Mix a very watery, pale grey or dirty water wash. Paint the wing shapes with a single swoop. While wet, you can touch a tiny bit of darker grey to the base of the wing for dimension. -
Final assessment:
Step back and look at the whole piece. If the lavender looks too flat, you can add tiny dots of very dark purple to the shadowed sides of the blooms for extra contrast.
Add sparkle
Once fully dry, use a white gel pen to add tiny highlights to the bees’ eyes or the tops of the lavender buds for extra shimmer.
Carefully remove the tape to reveal your clean edges and enjoy your vibrant botanical study

PENCIL GUIDE
Understanding Pencil Grades from H to B
From first sketch to finished drawing — learn pencil grades, line control, and shading techniques.
Explore the Full Guide
Night Sky Lavender Field With Silhouettes
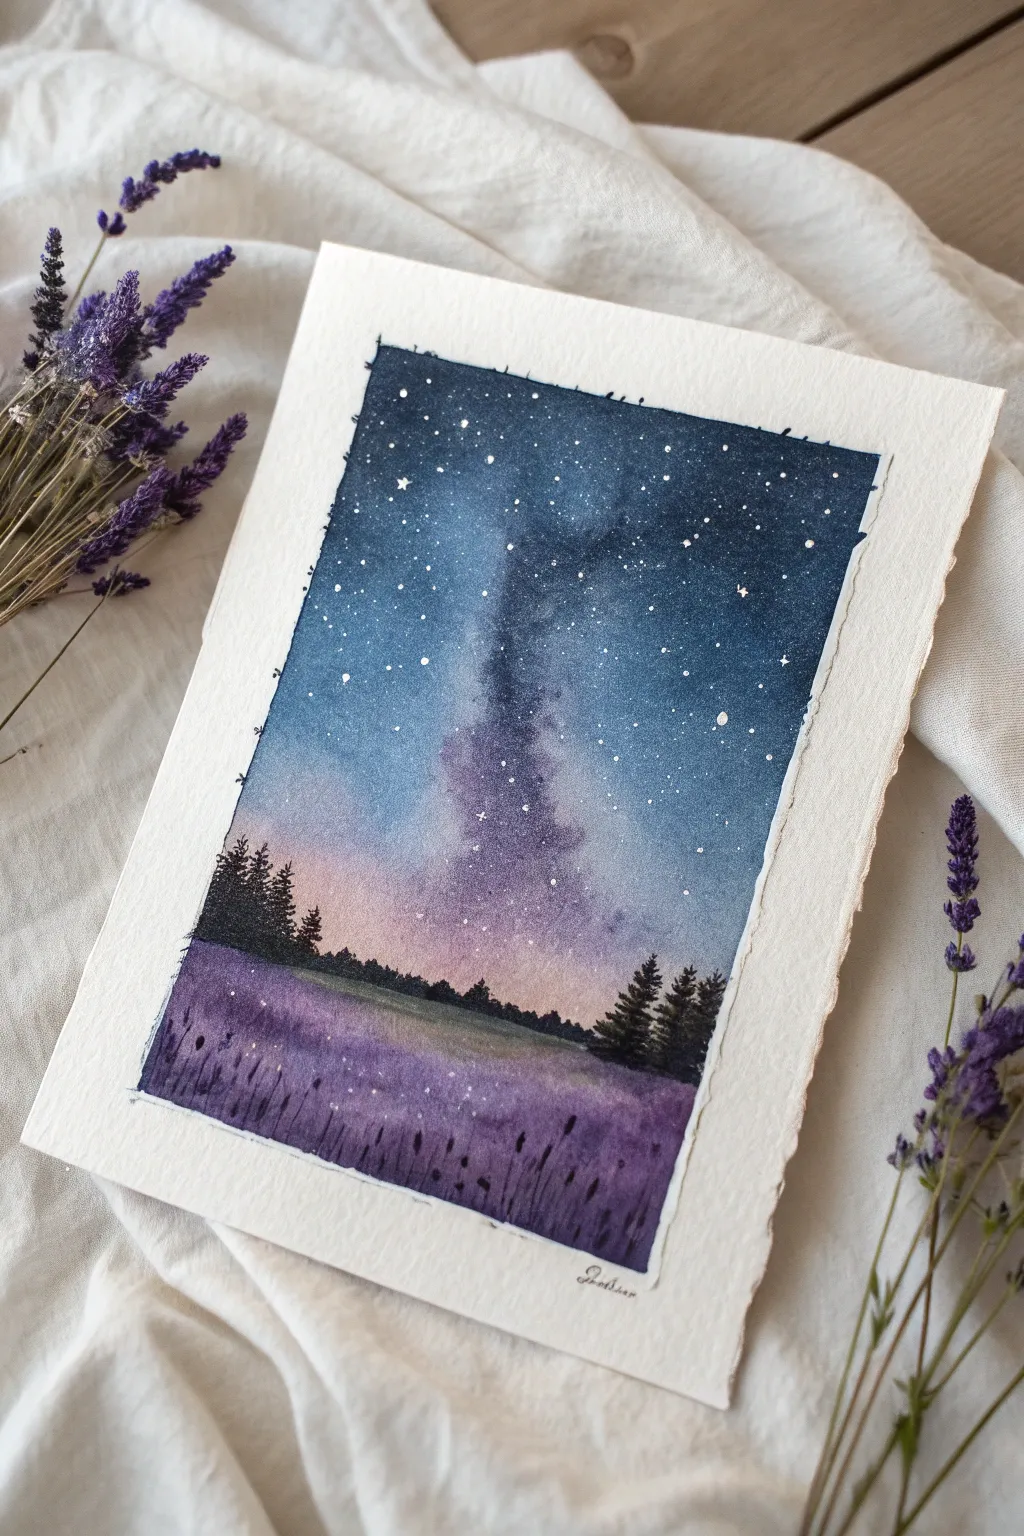
Capture the magic of a starlit night over a blooming field with this dreamy watercolor project. Combining galaxy techniques with landscape silhouettes creates a stunning contrast between the infinite sky and earthly flowers.
Step-by-Step
Materials
- Cold press watercolor paper (300 gsm)
- Masking tape (washi or painter’s tape)
- Watercolor paints: Indigo, Prussian Blue, Violet/Purple, Magenta, Black
- White gouache or white ink
- Round brushes (sizes 8, 4, and 0)
- Clean water jars
- Paper towels
- Old toothbrush (optional for stars)
Step 1: Setting the Sky
-
Prepare the borders:
Tape down your watercolor paper firmly to a board. Press the edges of the tape down well to ensure clean, crisp lines later, but don’t worry if a little paint bleeds under for that rustic look. -
Wet-on-wet base:
Using your largest brush, apply a generous layer of clean water to the upper two-thirds of the paper where the sky will be. It should glisten but not have standing puddles. -
Milky Way spine:
While the paper is wet, drop in a diagonal streak of diluted Violet mixed with a touch of Indigo across the center. Keep this area lighter than the rest to represent the galactic core. -
Deepening the night:
Load your brush with rich Indigo and Prussian Blue. Paint the outer corners and edges of the sky, letting the dark blue bleed naturally toward the lighter purple streak in the middle. -
Creating the horizon glow:
Rinse your brush and pick up a soft Magenta or warm pink. Blend this gently at the bottom edge of the sky area, right where the horizon will be, allowing it to fade up into the blues.
Starry Control
Make your white gouache the consistency of heavy cream before splattering. Too watery, and you get blobs; too thick, and it won’t spray.
Step 2: Field and Trees
-
Lavender wash:
While the sky is drying (or after it’s dry if you want a hard horizon line), wet the bottom third of the paper. Apply a wash of Violet, making it darker near the bottom edge and lighter as it approaches the horizon. -
Adding texture:
While the lavender field is still damp, drop in concentrated purple pigment in small vertical dashes to suggest rows of flowers fading into the distance. -
Dry completely:
This is crucial. Let the entire painting dry completely. You can use a hairdryer on a low setting to speed this up, but ensure the paper is bone dry before proceeding. -
Tree silhouettes:
Mix a dense black or very dark Payne’s Grey. Using a size 4 brush, paint the distant tree line along the horizon. vary the heights to keep it looking natural. -
Pine details:
Switch to your smaller brush to paint distinct pine trees on the sides. Use a stippling motion to create the texture of pine needles against the twilight sky.
Bleeding Horizon?
If your black trees bleed into the sky, the background wasn’t dry enough. Wait longer, or use a hairdryer to ensure the paper is warm to the touch before painting details.
Step 3: The Final Details
-
Foreground flowers:
Using the dark purple or a dark blue-violet mix, paint vertical stems and small flower clusters in the immediate foreground to create depth. -
Splatter stars:
Cover the bottom landscape with a piece of scrap paper. Load an old toothbrush or stiff brush with white gouache and flick the bristles to spray fine stars across the sky. -
Specific stars:
Use a size 0 brush or a white gel pen to add a few larger, brighter stars. I like to add tiny cross shapes to make them twinkle. -
Galactic dust:
Add a few tiny white dots clustered along the Milky Way band to accentuate the density of stars in the galaxy. -
The reveal:
Wait until every drop of paint is dry. Peel the tape away slowly at a 45-degree angle, away from the painting, to reveal your crisp white border.
Enjoy the peaceful atmosphere your new cosmic landscape brings to the room
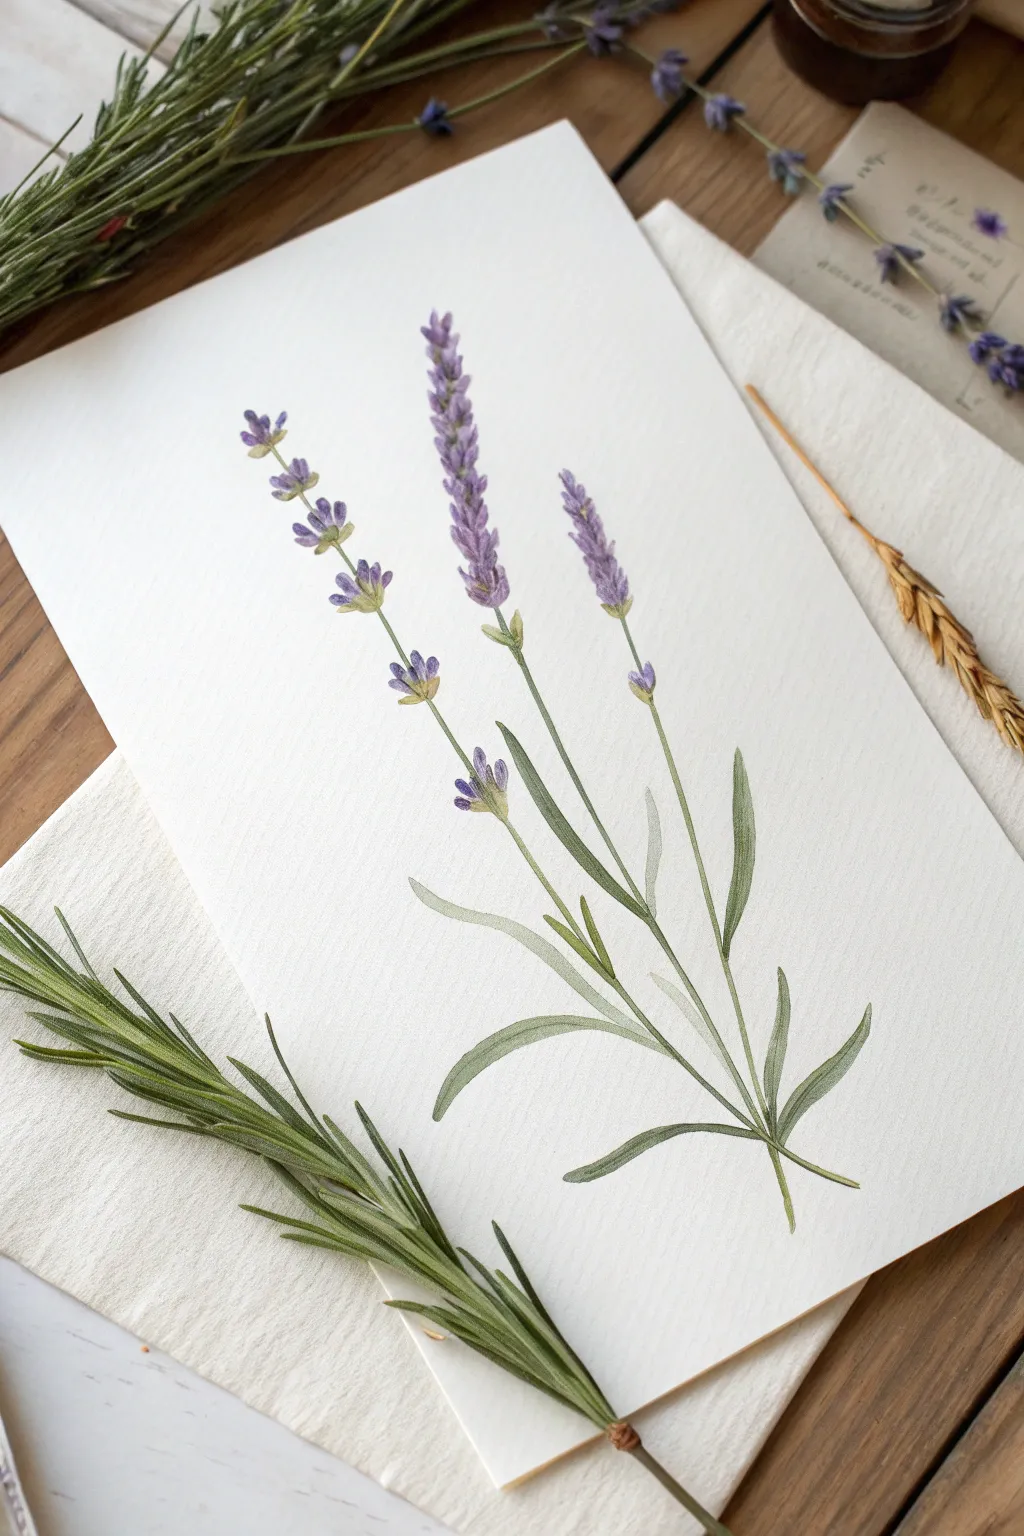
Abstract Geometric Lavender Composition
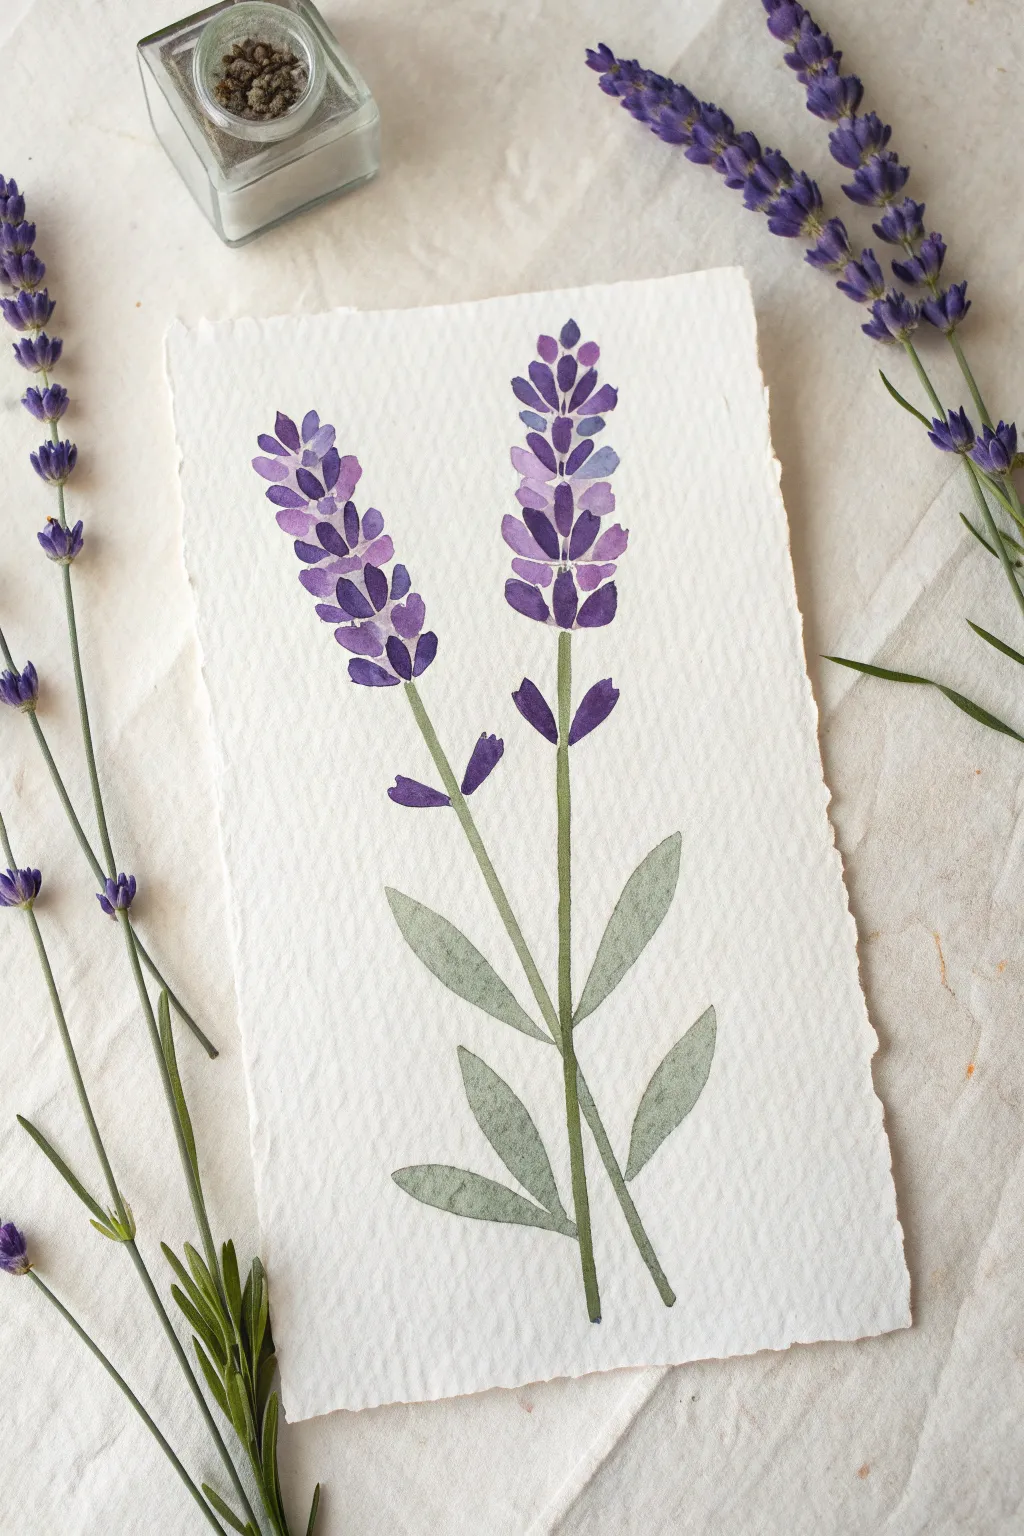
This project captures the delicate charm of lavender using loose, shape-building watercolor strokes on beautiful textured paper. The result is a simple yet elegant botanical illustration that emphasizes the plant’s distinctive vertical growth and soft purple hues.
Detailed Instructions
Materials
- Cold press watercolor paper (deckle-edged or rough texture preferred)
- Watercolor paints (Purple, Violet, Ultramarine Blue, Sap Green, Olive Green)
- Round watercolor brushes (sizes 2 and 6)
- Jar of water
- Paper towels
- Pencil (optional)
- Palette for mixing
Step 1: Setting the Composition
-
Prepare your paper:
Start with a piece of high-quality watercolor paper. If your paper doesn’t have a natural deckle edge, you can gently tear the edges against a ruler to create that rustic, handcrafted look shown in the example. -
Mix your purples:
On your palette, prepare two distinct shades of purple to give depth to the flowers. Create a lighter, warmer lavender by mixing purple with plenty of water and a touch of red or pink. Then, mix a deeper, darker violet for the shadowed petals. -
Mix your greens:
Similarly, prepare two green shades. A pale, sage-like green (Sap Green with water and a tiny bit of red to dull it) will serve for the leaves, and a slightly darker olive mix will be used for the stems. -
Plan the stems:
Visualize where your two main stems will go. One should be slightly taller/higher than the other to create natural asymmetry. You can lightly dot the start and end points with a pencil if you need a guide, but freehand is best for a natural look.
Wet-on-Dry Precision
Work on dry paper for this project. Wet-on-wet will diffuse the shapes too much. You want crisp edges on those teardrop petals to maintain the geometric feel.
Step 2: Painting the Flower Heads
-
Start the top bud:
Using your smaller round brush (size 2), paint the very tip of the taller lavender stalk. Make small, teardrop-shaped marks that point upward. Use your lighter purple mix for these top buds. -
Build the flower shape:
Work your way down the stem in clusters. Lavender flowers grow in whorls, so paint small groups of 3-4 petal shapes separated by tiny gaps of white space. -
Vary the colors:
As you move down the flower spike, alternate between your light lavender mix and the darker violet. Paint some petals with more pigment and others with more water to create a sense of dimension. -
Add floating petals:
Don’t connect every single petal perfectly. Abstract the shape slightly by leaving open spaces and placing some petal marks just slightly detached from the main cluster, implying movement or looseness. -
Repeat for the second stem:
Replicate this process for the second, lower lavender stalk on the left. Ensure this flower head is slightly shorter or thinner than the first one to keep the composition interesting. -
Finalize flower details:
While the paint is still damp but not soaking, drop tiny dots of the darkest purple into the base of a few petals. The color will bleed slightly, creating natural-looking shadows.
Step 3: Stems and Foliage
-
Draw the stems:
Switch to your green mix. With a steady hand and the tip of your size 2 brush, draw a thin line connecting the flower clusters down to the bottom of the page. It’s okay if the line breaks slightly; it adds character. -
Connect the gaps:
Where you left gaps in the purple flower clusters, paint very tiny green connections, suggesting the central stem peeking through the blooms. -
Paint the lower leaves:
Switch to the larger brush (size 6) for the leaves. Starting near the bottom of the stems, press the belly of the brush down to create a wider shape, then lift as you pull away to create a tapered point. -
Layering leaves:
Paint leaves in pairs growing opposite each other. Make the lower leaves larger and sage-colored. As you move up the stem, paint smaller, narrower leaves. -
Add detail leaves:
Add two small, darker purple petal-like leaves just below the main flower head on the stems, as seen in the reference image. This mimics the bracts often seen on lavender plants.
Scented Art
Mix a drop of real lavender essential oil into your water jar before painting. As you work and the water evaporates, you’ll get a subtle scent experience.
Allow your painting to dry completely flat before framing or displaying your botanical study

Have a question or want to share your own experience? I'd love to hear from you in the comments below!