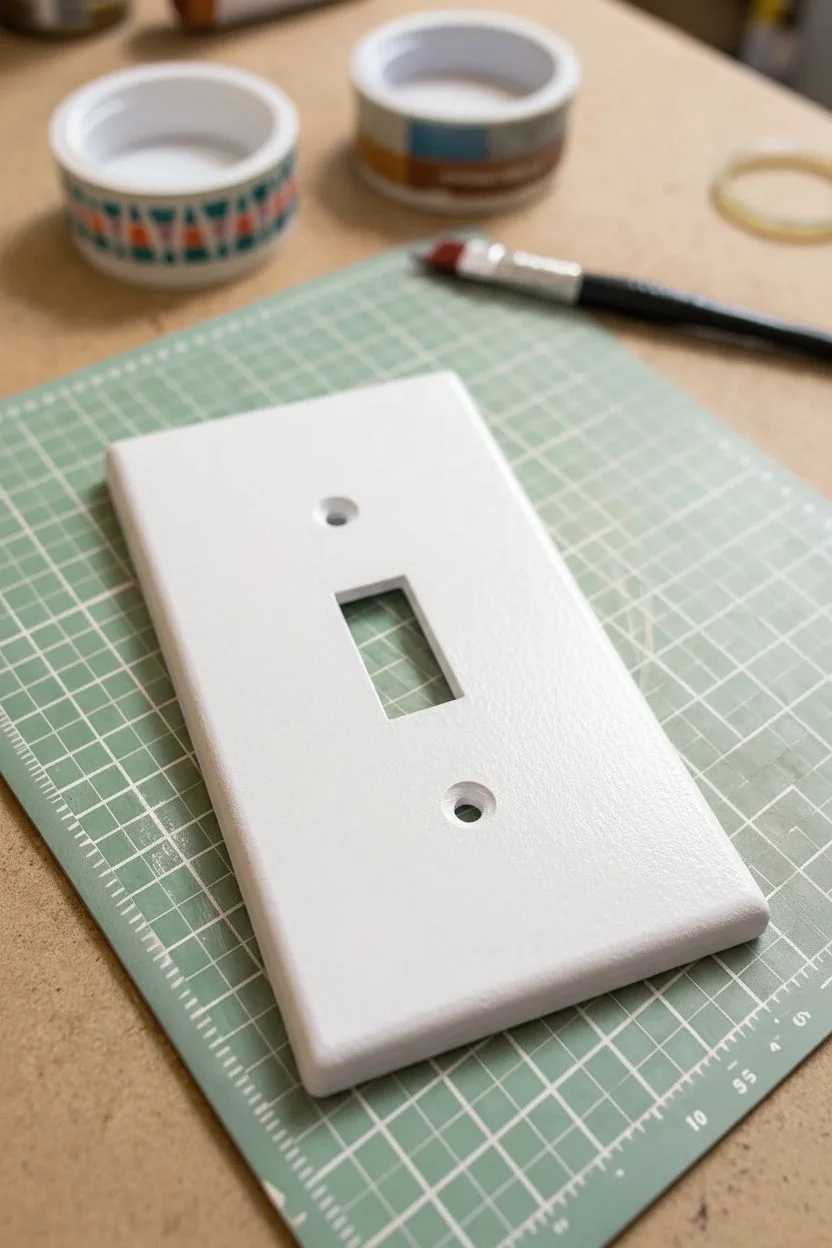
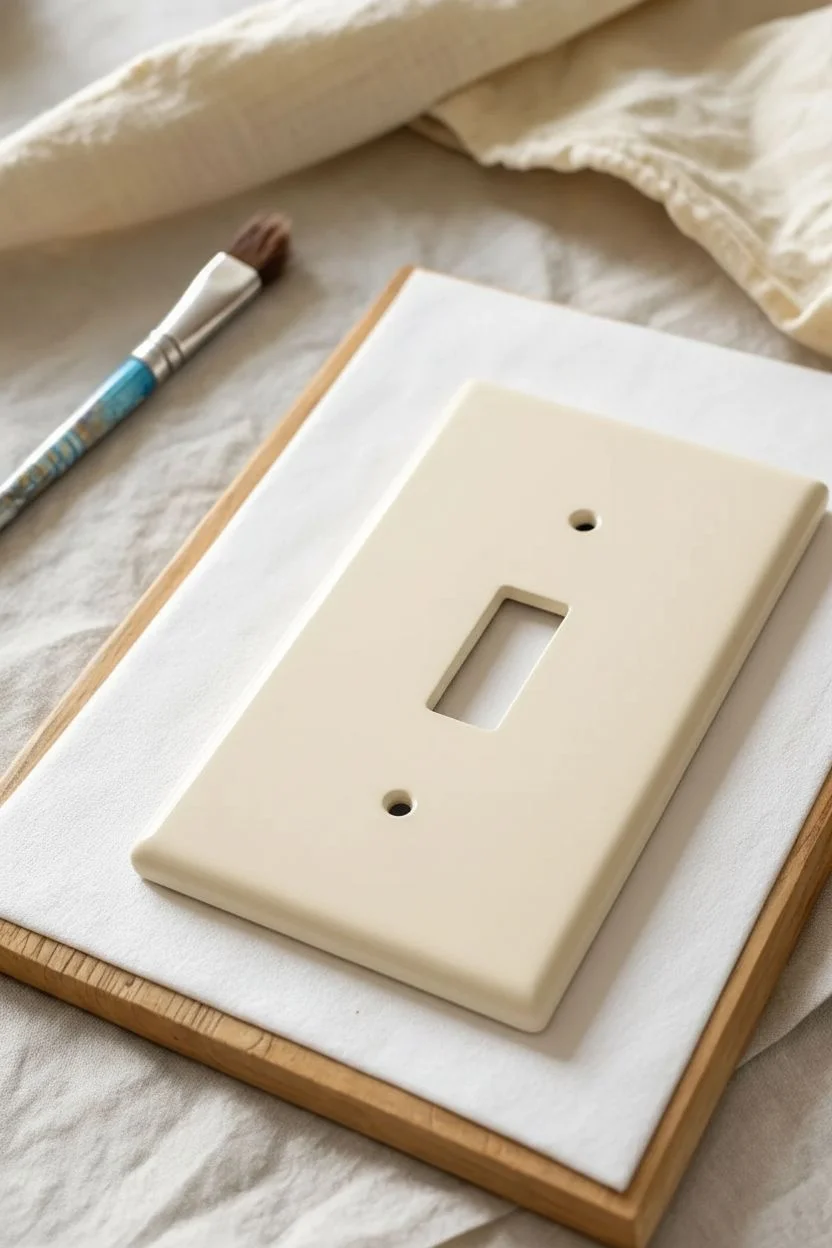
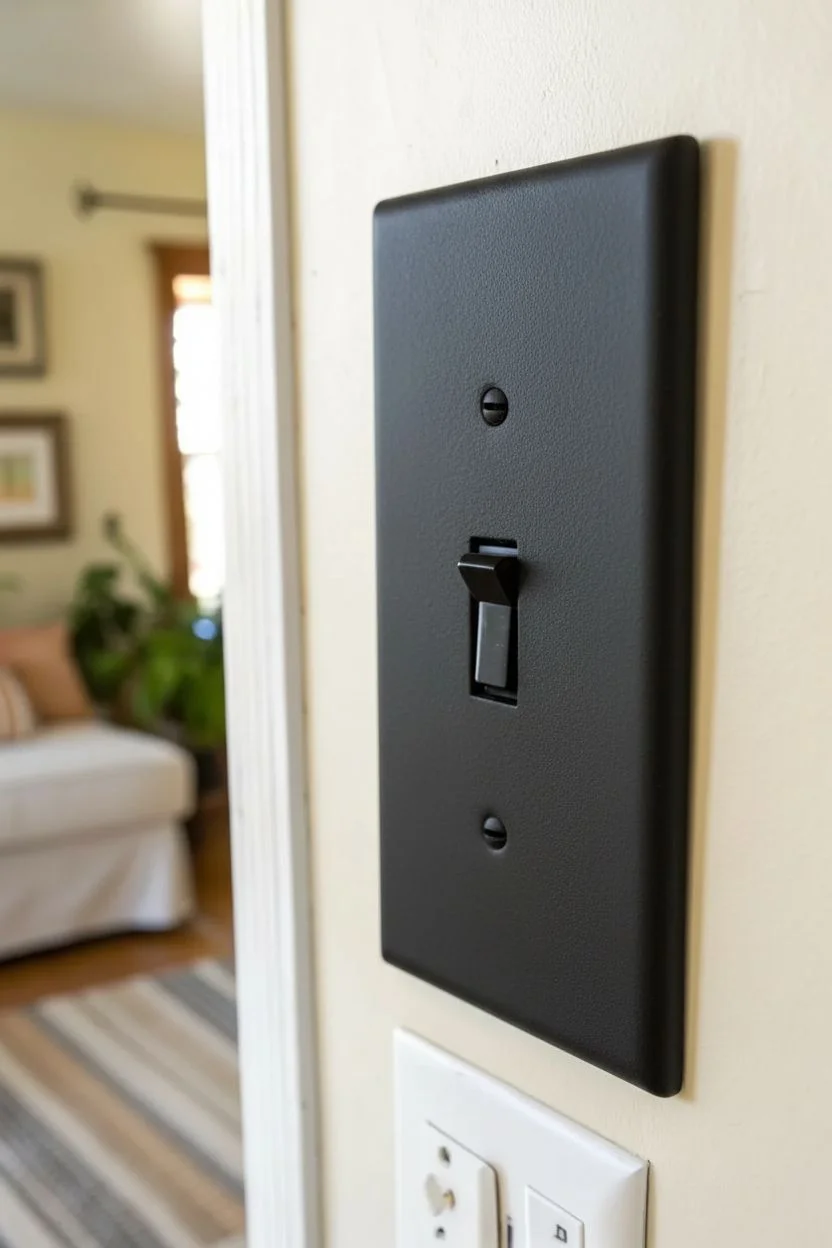
A plain light switch plate is basically a tiny canvas you get to see (and touch) every day, so it’s the perfect spot for a quick burst of personality. I love how these little light switch painting ideas can make a room feel intentional without needing a whole weekend or a huge skill jump.
Classic Solid Color With a Clean Finish
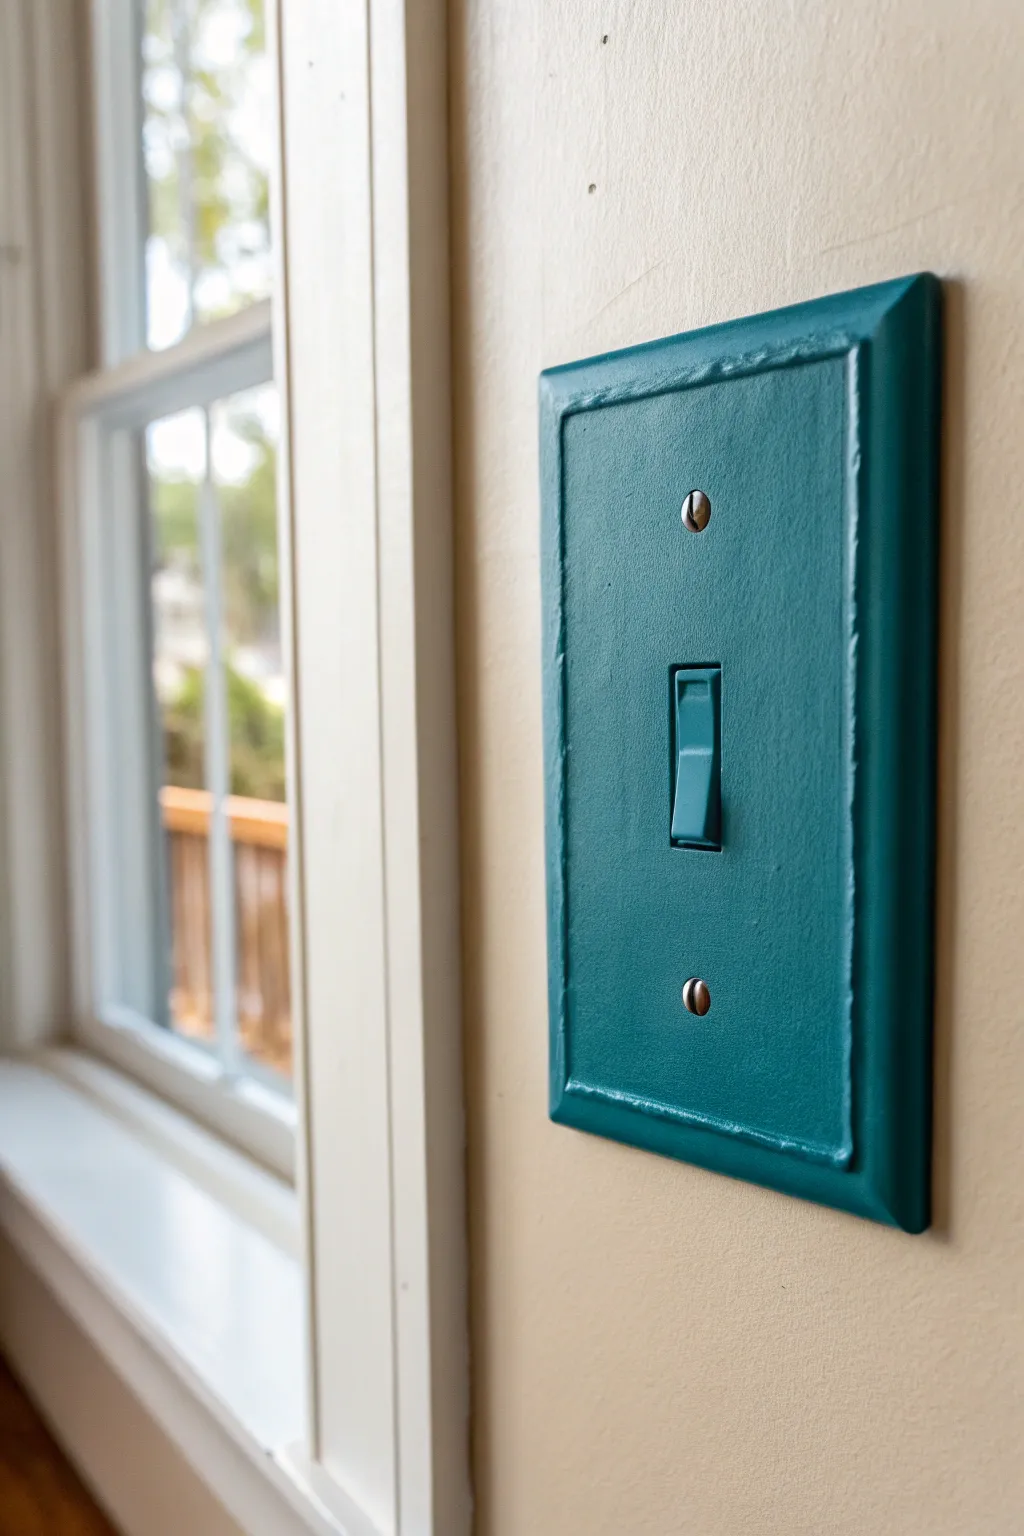
Transform a standard, builder-grade light switch into a colorful statement piece with a coat of rich, matte teal paint. This project creates a uniform, monochromatic look by covering both the faceplate and the toggle switch for a bold pop of color.
Step-by-Step
Materials
- Plastic switch plate cover
- Toggle light switch (or existing installed switch)
- Medium-grit sandpaper (120-150 grit)
- Painter’s tape
- Liquid deglosser or TSP substitute
- High-quality bonding primer (spray or brush-on)
- Matte or eggshell acrylic paint (Teal/Turquoise)
- Small flat artist’s brush
- Medium angled sash brush (optional)
- Small foam roller (optional for smoother finish)
- Clear matte polyurethane sealer
- Screwdriver
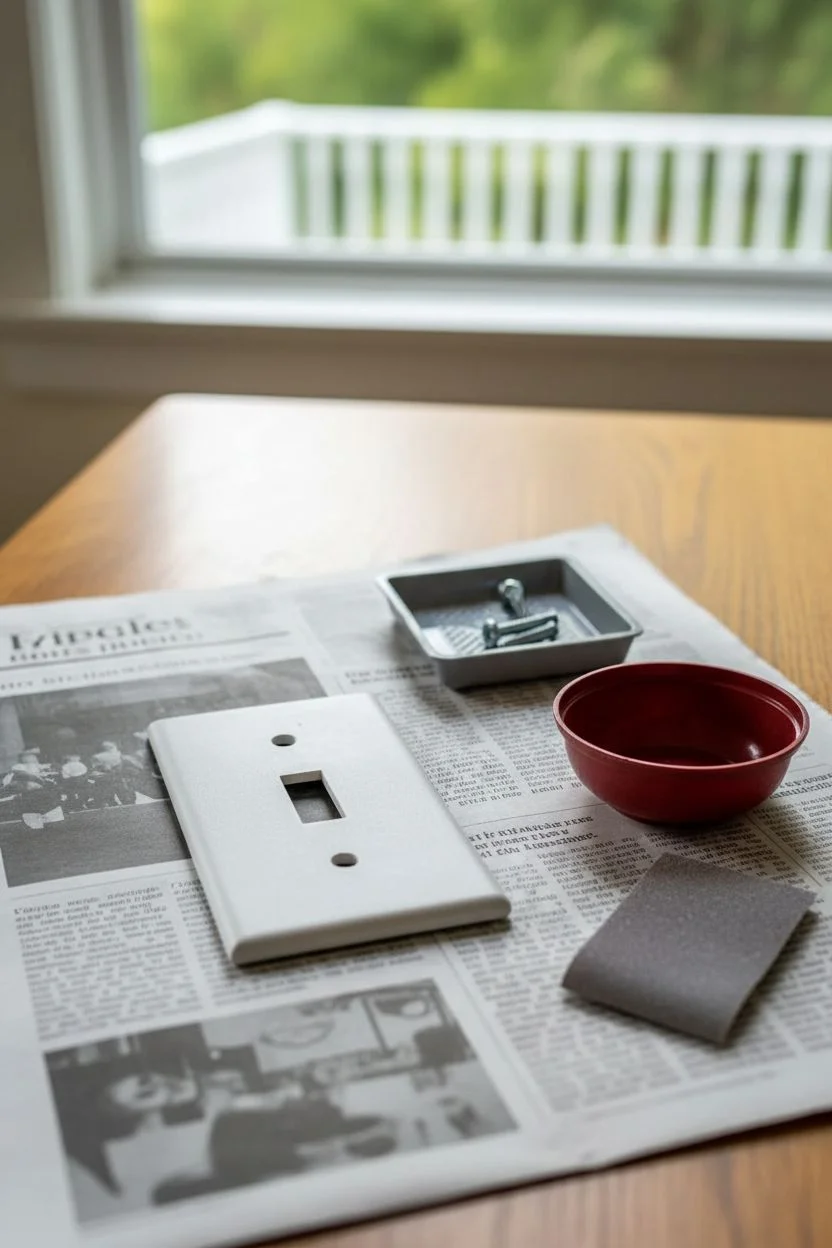
Step 1: Preparation and Safety
-
Safety First:
Before touching any electrical components, go to your breaker box and turn off the power to the room where you are working. Verify it’s off by flipping the switch. -
Remove Hardware:
Using your screwdriver, carefully remove the existing faceplate screws and set them aside. Gently pry the plate off the wall. -
Clean Components:
Wipe down the plastic faceplate thoroughly with a liquid deglosser or TSP substitute to remove years of finger oils and grime. This step is crucial for paint adhesion. -
Scuff Sanding:
Lightly sand the glossy surface of the faceplate using medium-grit sandpaper to give the primer something to ‘bite’ into. Wipe away the dust with a tack cloth. -
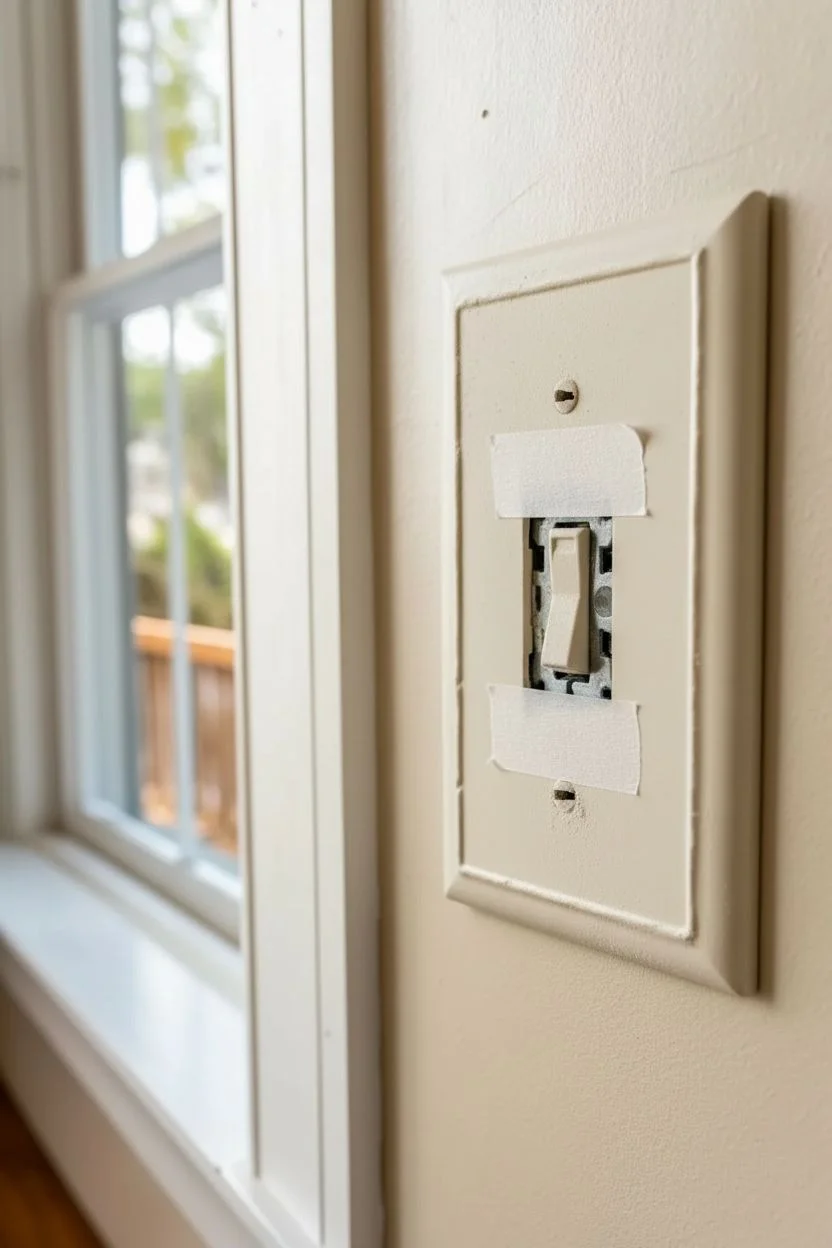
Masking the Switch:
Since we are painting the toggle itself, carefully tape off the metal box and wires inside the wall cavity, leaving only the plastic toggle exposed. I like to be extra precise here to ensure no paint drips into the electrical mechanism.
Step 2: Painting Process
-
Priming the Plate:
Apply a thin coat of bonding primer to the faceplate. A spray primer works best for a smooth finish, but a brush-on bonding primer works well too. -
Priming the Toggle:
Using a small artist’s brush, apply the bonding primer to the exposed plastic toggle switch. Let everything dry according to the manufacturer’s instructions. -
First Coat on Plate:
Load your brush or small foam roller with the teal acrylic paint. Apply the first coat to the faceplate using long, even strokes to minimize brush marks. -
Painting the Toggle:
Carefully paint the toggle switch with the small artist’s brush. Ensure you get the sides of the toggle, but avoid gumming up the pivot point where it enters the wall. -
Drying Time:
Allow the first coat to dry completely. It might look streaky at this stage, but resist the urge to retouch wet paint. -
Second Coat Application:
Apply a second coat of teal paint to both the plate and the toggle. This layer should provide full, opaque coverage and a rich depth of color. -
Check for Imperfections:
Inspect the pieces under good lighting. If you see any holidays (skipped spots) or thin areas, a light third coat might be necessary.
Don’t gum up the works
When painting the toggle, keep the paint layer thin near the base. Thick paint can seep into the mechanism causing the switch to stick or crack.
Step 3: Sealing and Assembly
-
Apply Sealer:
To protect the switch from constant handling, brush on two thin coats of clear matte polyurethane sealer. This prevents the paint from chipping or rubbing off over time. -
Curing Period:
Let the sealer cure for at least 24 hours before reassembly. The paint needs to harden fully so it doesn’t peel when you tighten the screws. -
Reinstall Plate:
Place the painted faceplate back over the switch mechanism. Hand-tighten the original screws (leaving them silver adds a nice metallic contrast). -
Alignment Check:
Adjust the plate so it sits straight and flush against the wall. The teal color should now sit boldly against the neutral wall tone. -
Power On:
Return to your breaker box and restore power to the room.
Add Subtle Texture
For a vintage look, mix a tsp of baking soda into your paint. It creates a chalk-style, textured finish that hides plastic imperfections beautifully.
Enjoy the surprising burst of color every time you walk into the room with this simple yet impactful update


Tape-Blocked Geometric Color Blocks
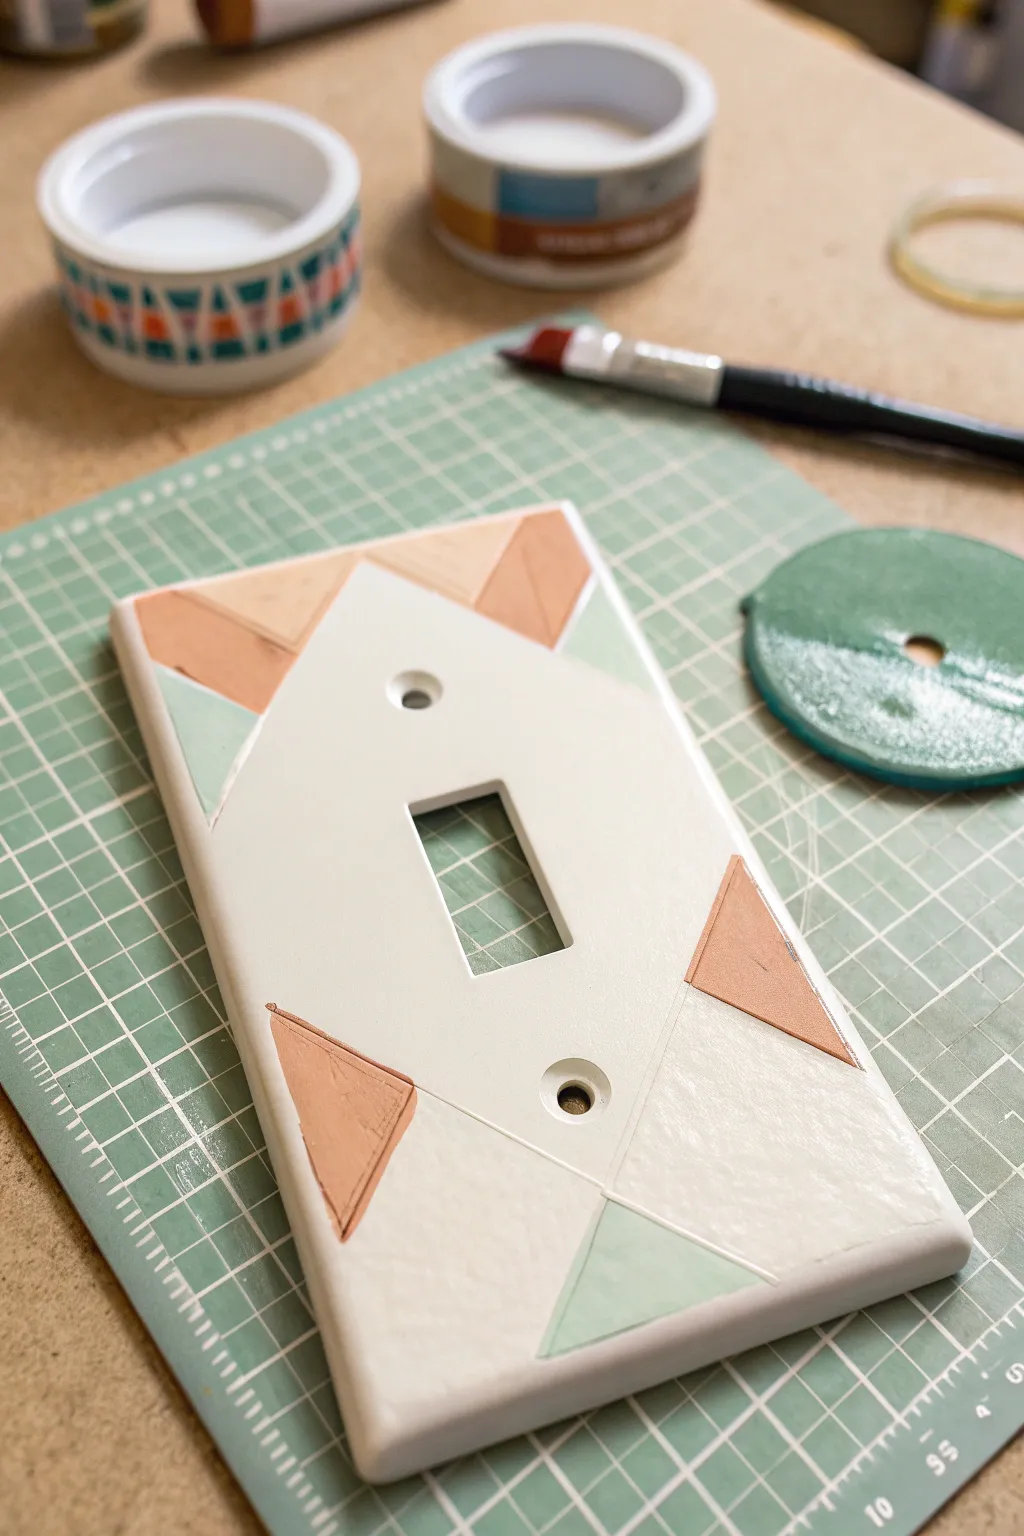
Transform a plain white switch plate into a modern art piece using nothing but painter’s tape and a little patience. This low-cost upgrade features crisp peach and mint triangles set against a clean white background for a fresh, Scandinavian-inspired look.
Step-by-Step Guide
Materials
- Standard plastic light switch cover
- Fine-grit sandpaper (220-grit)
- Painter’s tape or washi tape
- Masking fluid (optional but helpful)
- Acrylic craft paint (peach, mint green, white)
- Flat artist brush (small)
- Small detail brush
- Clear sealant or Mod Podge
- Self-healing cutting mat
Step 1: Preparation
-
Clean the surface:
Remove the switch plate from the wall and wash it thoroughly with soap and water to remove oils. Dry it completely. -
Scuff sand:
Lightly sand the glossy surface of the plastic with 220-grit sandpaper. This creates ‘tooth’ for the paint to grip so it doesn’t peel off later. -
Base coat application:
Paint the entire switch plate with white acrylic paint. You may need 2-3 thin coats for full coverage, letting each coat dry for about 20 minutes in between.
Bleeding Lines?
If paint bleeds under the tape, simple scrape the excess away gently with a toothpick while the paint is still damp, or touch up with the base color later.
Step 2: Designing the Pattern
-
Map out the large V:
Cut two long strips of painter’s tape. Place them to form a large ‘V’ shape starting from the bottom corners and meeting below the top screw hole. -
Create the top chevron:
Add two more pieces of tape near the top edge to create an inverted ‘V’ or chevron shape that mirrors the top edge of the plate. -
Refine the triangles:
Use smaller bits of tape to section off the corners of your main geometric shapes. The goal is to create isolated triangles for your color blocks. -
Seal edges:
Press down firmly on all tape edges with your fingernail or a credit card to prevent paint bleed.
Step 3: Adding Color
-
Paint the peach accents:
Select the triangles at the outer edges and the top corners. Fill these in with your peach acrylic paint using a small flat brush. -
Layer the color:
Apply a second coat of peach paint once the first is dry to ensure the color is opaque and solid. -
Paint the mint accents:
Identify the remaining small triangular sections, usually near the bottom point or nestled next to the peach areas. Fill these with mint green paint. -
Check for coverage:
I usually hold the plate up to the light to check for thin spots; apply touch-ups to the mint sections as needed. -
Remove the tape:
Carefully peel away the tape while the final coat of paint is still slightly tacky. Pull at a 45-degree angle away from the painted area for the cleanest line.
Seal Prior to Color
Brush a tiny bit of the base white paint over your tape edges first. This seals the gap, so any bleeding is invisible white paint, keeping your color lines crisp.
Step 4: Finishing Touches
-
Touch up lines:
If any paint seeped under the tape, use a very fine detail brush and white paint to clean up the edges and sharpen the geometric forms. -
Let it cure:
Allow the painted design to dry completely, ideally overnight, to ensure the acrylic hardens fully. -
Apply sealant:
Brush on a coat of clear sealant or Mod Podge. This protects your artwork from dirty fingerprints and daily use. -
Reinstall:
Screw the cover back onto the wall switch, being careful not to overtighten and crack your new art piece.
Now you have a custom piece of functional decor that adds a pop of geometric personality to your room


Simple Stripes That Feel Intentional
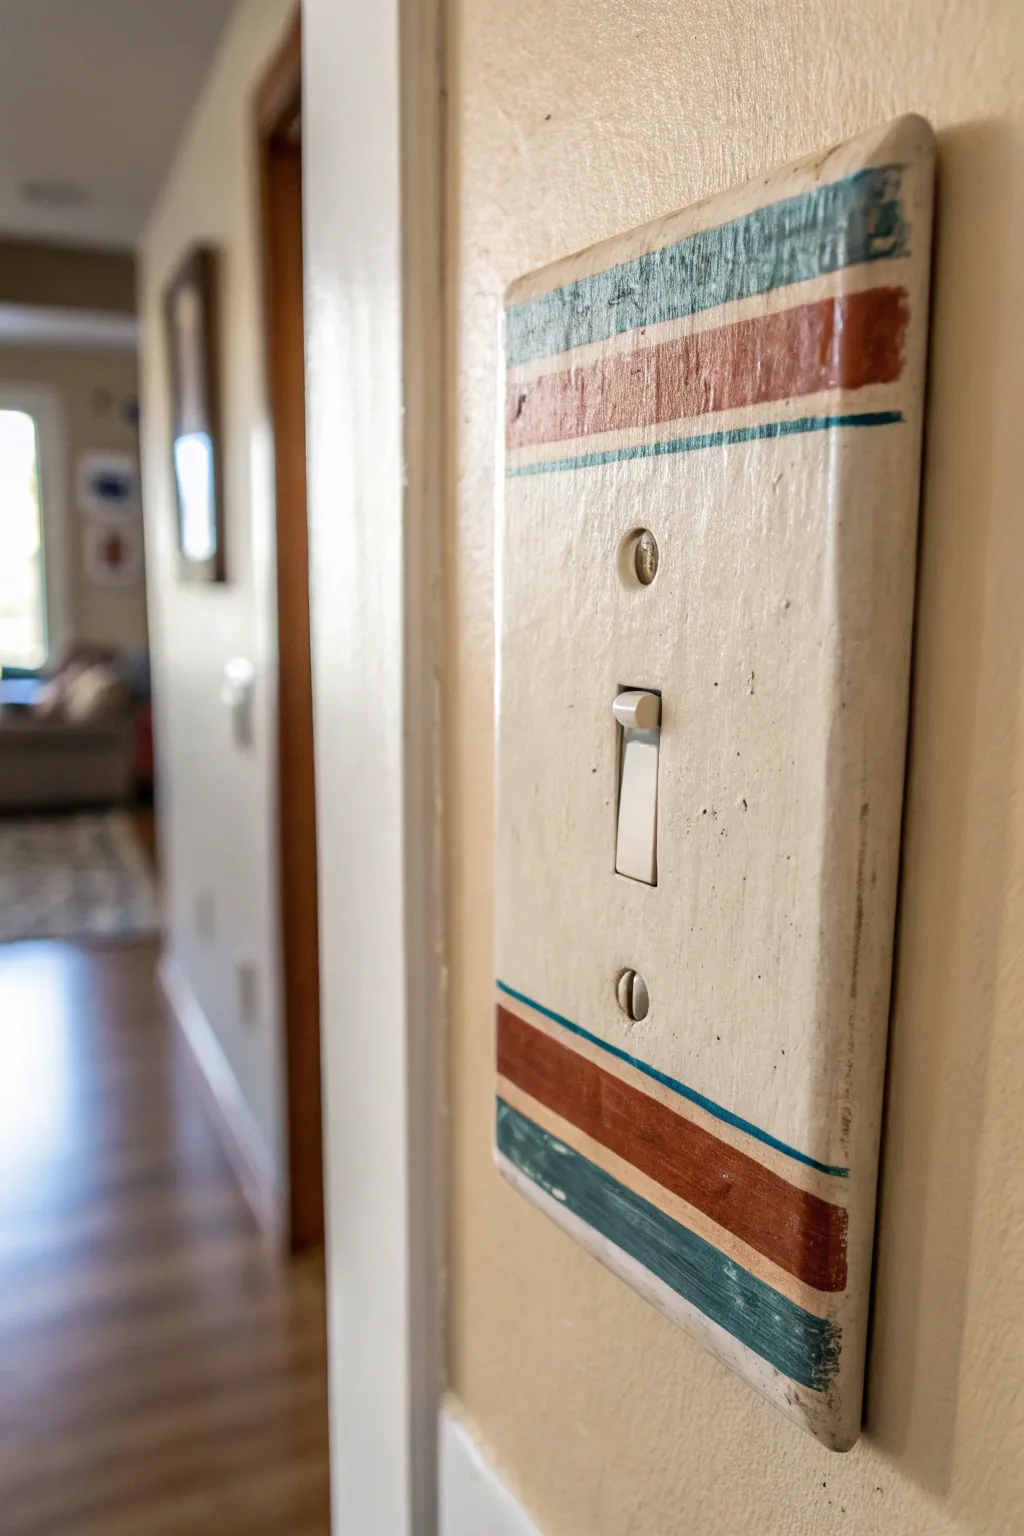
Transform a standard plastic switch plate into a custom piece of home decor with this simple striped design. The combination of rust and teal against a creamy background creates a relaxed, intentional look that adds character to any room without overwhelming it.
Step-by-Step Tutorial
Materials
- Standard plastic toggle light switch cover
- Sandpaper (medium grit, around 120-150)
- Primer spray paint suitable for plastic
- Cream or off-white acrylic craft paint
- Rust/burnt orange acrylic craft paint
- Teal/blue-green acrylic craft paint
- Small flat paint brush (approx. 1/4 inch width)
- Small round detail brush
- Clear matte or satin sealant spray
- Screwdriver
Step 1: Preparation & Base Coat
-
Remove hardware:
Using your screwdriver, carefully remove the existing switch plate from the wall. Keep the screws safe, as you’ll need to paint the heads of them later to match the finish. -
Clean thoroughly:
Wash the plate with warm soapy water to remove any finger oils, dust, or grime. Dry completely with a lint-free cloth. -
Scuff the surface:
Lightly sand the entire front surface of the plastic plate using medium-grit sandpaper. This step is crucial because plastic is non-porous; roughing it up gives the primer something to grip onto. -
Apply primer:
In a well-ventilated area, spray a thin, even coat of primer over the switch plate and the heads of the screws. Let this dry completely according to the can’s instructions. -
Paint the background:
Apply your cream or off-white acrylic paint to the entire face of the plate using the flat brush. Don’t forget the edges. -
Add a second coat:
Once the first layer is dry to the touch, apply a second coat of the cream background color to ensure full coverage and a solid, opaque finish. Let this cure fully before starting the stripes.
Wobbly Lines?
If you struggle with freehand stripes, use low-tack painter’s tape (or washi tape) to mask off your lines. Press the edges down firmly to prevent bleed-through.
Step 2: Painting the Design
-
Start the top teal band:
Load your flat brush with teal paint. Paint a horizontal band across the very top edge of the plate. It doesn’t need to be perfectly straight; a slightly organic line adds to the charm. -
Add the bottom teal band:
Repeat this process at the very bottom edge of the plate, mirroring the width of the top band. -
Paint the rust stripes:
Switch to a clean flat brush or wash yours thoroughly. Pick up the rust-colored paint and paint a slightly wider stripe just below the top teal and above the bottom teal bands. Leave a small gap of cream showing between the colors. -
Create the heavy thin lines:
Using a very small amount of teal paint on your detail brush, carefully drag a thin line right below the top rust stripe and right above the bottom rust stripe. These act as borders for the design. -
Distress the edges (optional):
If I want a more vintage feel, I like to take a nearly dry brush with a tiny bit of the cream base color and lightly feather it over parts of the colored stripes to soften them. -
Paint the screw heads:
Don’t forget to paint the tops of the screws cream so they blend in perfectly once reinstalled.
Mix It Up
Try reversing the pattern on different switches in the same room, or swap the rust color for a mustard yellow or sage green for a different earthy palette.
Step 3: Sealing & Installation
-
Let paint cure:
Allow the detailed painting to dry for at least an hour. The paint should feel dry and not tacky. -
Seal surface:
Spray the entire plate with a clear matte or satin sealant. Apply two light coats rather than one heavy one to prevent drips. -
Dry overnight:
For the best durability, let the sealant cure overnight before handling the plate too much. -
Reinstall:
Screw the plate back onto the wall using your newly painted screws. Be gentle with the screwdriver to avoid scratching the new paint job.
Enjoy the subtle pop of color and artistic flair this small project adds to your wall


Confetti Speckle for Easy Texture
Transform a plain, builder-grade switch plate into a trendy statement piece with this easy confetti speckle technique. The finished look mimics the high-end appearance of terrazzo stone or handmade ceramic, adding a playful pop of color to your walls.
Detailed Instructions
Materials
- Standard plastic light switch plate
- Sandpaper (medium grit, around 120-150)
- Primer (spray primer formulated for plastic works best)
- Acrylic craft paints (Cream/Beige base, plus Red, Blue, Yellow, Green)
- Small flat brush
- Old toothbrush or stiff-bristled brush
- Matte or satin clear sealant spray
- Cardboard box or drop cloth
- Painter’s tape or scrap paper
- Paper plate or palette
Step 1: Preparation & Base Coat
-
Clean and scuff:
Remove the switch plate from the wall and give it a good wash with soap and water to remove oils. Once dry, lightly scuff the entire surface with medium-grit sandpaper to help the paint adhere better. -
Wipe down:
Thoroughly wipe away all sanding dust with a damp cloth or tack cloth. A clean surface is crucial for a smooth finish. -
Create a spray station:
Set up your workspace inside a cardboard box or on a drop cloth to contain any overspray. Place the switch plate on top of a small object (like a can or cup) to elevate it, which prevents the edges from sticking to the paper below. -
Prime the surface:
Apply a thin, even coat of primer to the switch plate. While skipping this is tempting, primer is essential for durability on plastic surfaces. Let it dry completely according to the can’s instructions. -
Apply base color:
Paint the switch plate with your cream or beige acrylic paint. Use a soft, flat brush and apply in long, even strokes to minimize brush marks. -
Add a second coat:
Once the first coat is dry to the touch, apply a second coat of the base color to ensure full, opaque coverage. Let this dry completely before starting the speckling process.
Step 2: Adding the Speckles
-
Prepare the splatter paint:
Squeeze a small amount of your first accent color (e.g., blue) onto a paper plate. You need to thin the paint slightly with a drop or two of water until it has an ink-like consistency. -
Test your technique:
Dip your old toothbrush into the thinned paint. Before moving to the switch plate, do a test run on a scrap piece of paper. Run your thumb across the bristles to flick the paint forward. -
Splatter the first color:
Hold the toothbrush about 6-10 inches above the switch plate and flick the bristles to create fine speckles. Move your hand around the plate to ensure random, organic distribution. -
Clean and switch colors:
Rinse the toothbrush thoroughly and dry it, or switch to a clean brush. Repeat the thinning and flicking process with your next color (e.g., red). -
Layer the remaining colors:
Continue adding layers of speckles with yellow and green. I like to let the paint dry for just a minute or two between colors so the dots don’t bleed into each other. -
Add larger flecks (optional):
To mimic the look of terrazzo chips, dip a fine-tipped paintbrush into the un-thinned paint and manually dab on a few larger, irregular shapes here and there. -
Check density:
Step back and look at the overall pattern. If some areas look too empty, add a few more targeted flicks or dots to balance the composition.
Control the spray
Running your thumb faster creates fine mist, while a slower drag creates larger blobs. Vary your speed for a natural texture.
Step 3: Sealing & Protection
-
Dry completely:
Allow the speckled paint to dry fully. This usually takes at least an hour, but check your paint bottle for specific cure times. -
Apply sealant:
To protect your artwork from fingerprints and scratches, spray a thin coat of clear matte or satin sealant over the entire plate. This locks in the design. -
Apply final coat:
Once the first seal coat is dry, add one final quick coat for extra durability, paying attention to the edges. -
Reinstall:
Wait for the sealant to cure completely (overnight is best to avoid tackiness) before screwing the plate back onto the wall.
Blobs happen!
If a large drip lands on your plate, don’t wipe it! Let it dry, then carefully paint over just that spot with your base cream color.
Enjoy the unique texture this quick DIY adds to your room decor
BRUSH GUIDE
The Right Brush for Every Stroke
From clean lines to bold texture — master brush choice, stroke control, and essential techniques.
Explore the Full Guide
Soft Ombre Fade Top to Bottom
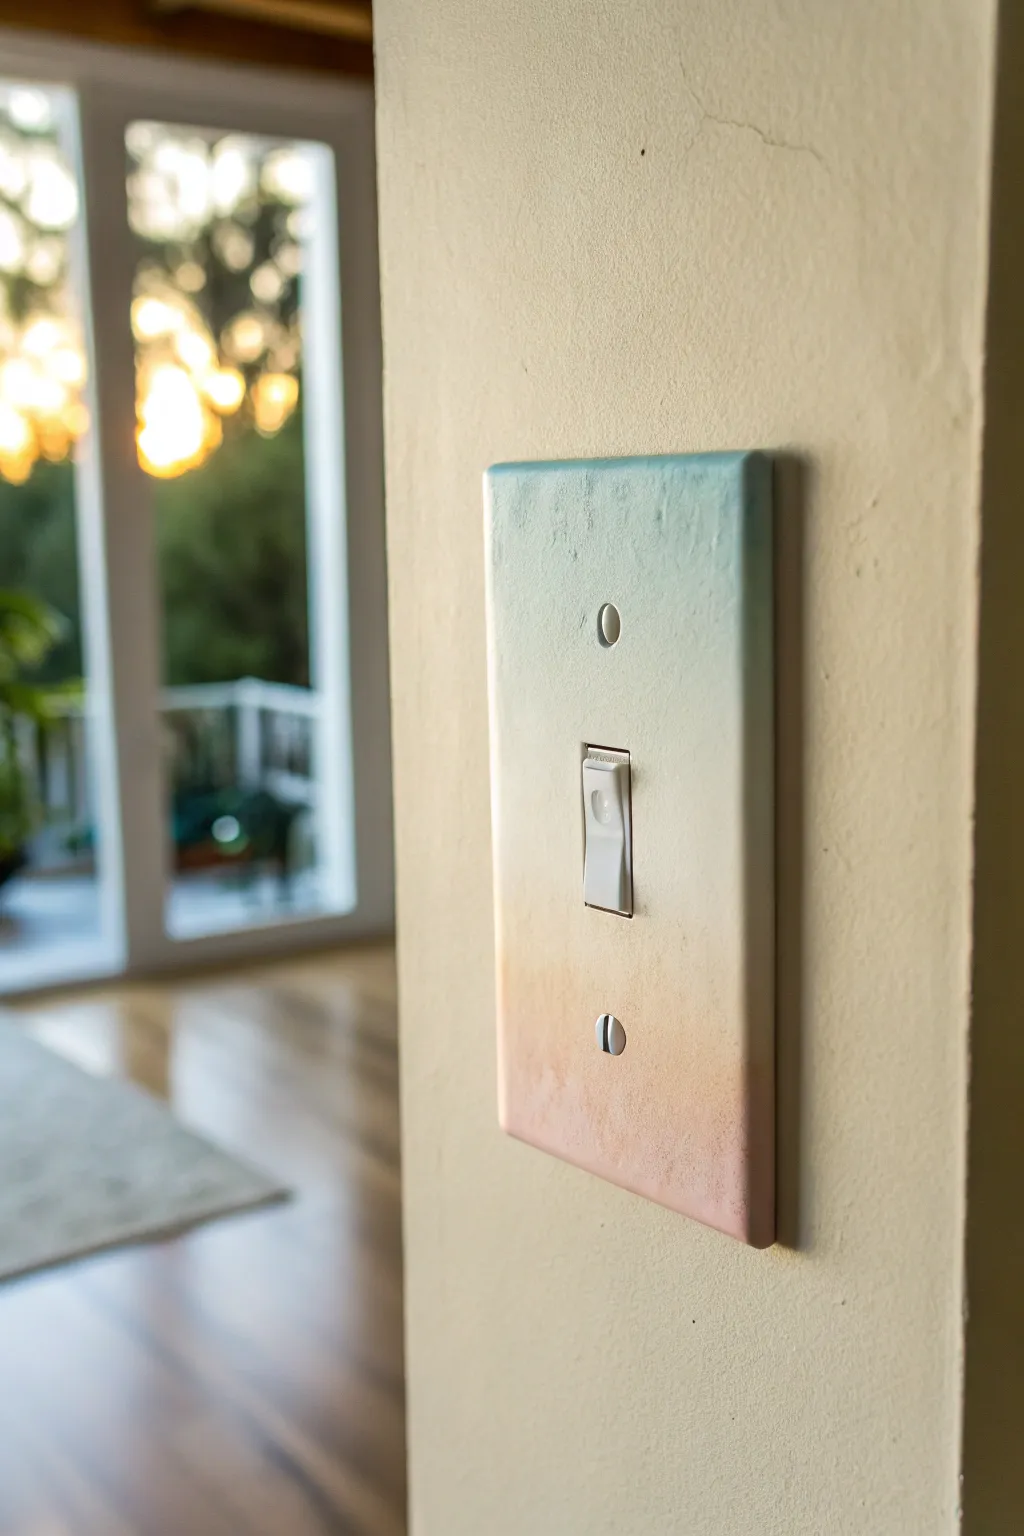
Transform a standard plastic switch plate into a piece of functional art with this gentle, sunset-inspired gradient. The soft transition from cool teal to warm peach mimics a dreamy horizon, adding a subtle pop of color to any neutral wall.
Step-by-Step Guide
Materials
- Standard plastic light switch plate
- Sandpaper (medium grit, around 120-150)
- Primer spray paint (white, suitable for plastic)
- Acrylic paints (teal/aqua, peach/coral, plain white)
- Mixing palette or paper plate
- Makeup sponges or small foam pouncers
- Clear matte acrylic sealer spray
- Screwdriver
- Painter’s tape (optional)
- drop cloth or newspaper
Step 1: Preparation
-
Remove the Hardware:
Using your screwdriver, carefully take the switch plate off the wall. Keep the screws in a distinct small bowl or baggie so they don’t get lost during the painting process. -
Clean and Degrease:
Wash the plate thoroughly with warm soapy water to remove years of fingerprints and oils. Dry it completely with a lint-free cloth. -
Scuff Sanding:
Lightly sand the entire front surface of the plastic plate. You don’t need to gouge it, just scuff up the glossy finish so the primer has something to grip onto. -
Priming Stage:
Place the plate on your drop cloth in a well-ventilated area. Apply a thin, even coat of white primer designed for plastic. Let this dry fully according to the can’s instructions—usually about an hour.
Step 2: Painting the Gradient
-
Prepare Your Palette:
Pour out three puddles of paint: your teal, your peach, and a generous amount of white in the middle. We will be mixing on the palette as well as the plate. -
Create Intermediate Shades:
Mix a little white into the teal to soften it, and do the same for the peach. This ensures the colors are pastel and airy rather than stark and bold. -
Top Application:
Dip a makeup sponge into the soft teal mixture. Lightly dab it onto the top third of the switch plate, ensuring full coverage at the very top edge. -
Bottom Application:
Using a fresh sponge, apply the soft peach mixture to the bottom third of the plate. Don’t worry about the middle just yet. -
Middle Ground:
Take a clean sponge and dab pure white paint into the center section. Bring the white up to meet the teal and down to meet the peach. -
Blending Downward:
Now for the magic. While the paint is still wet, lightly tap your white sponge over the line where the teal meets the white to blur the transition. -
Blending Upward:
Repeat the process at the bottom, tapping the white sponge over the peach-to-white border. Use a very light hand—think of it as stippling rather than wiping. -
Refining the Ombre:
If the transition looks too harsh, add a tiny dot of color to your white sponge and dab it back into the fade area. Keep working until the gradient looks seamless. -
Paint the Screws:
To make the look cohesive, stick the screws into a piece of cardboard or foam so they stand upright. Sponge paint the heads to match: paint the top screw teal and the bottom screw peach. -
Drying Time:
Let the acrylic paint dry completely. This usually takes about 20-30 minutes, but check that it feels dry to the touch and isn’t tacky.
Sponge Tactics
Use makeup wedges! Their fine texture creates a smoother, airbrushed look compared to standard kitchen sponges, which can leave large bubble marks.
Step 3: Finishing Up
-
Seal the Deal:
In the same ventilated area used for priming, spray the plate and screw heads with a clear matte sealer. This is crucial for durability since switch plates get touched constantly. -
Second Coat:
I always recommend a second light coat of sealer for extra protection against oils and dirt. Let it cure for at least a few hours, or ideally overnight. -
Reinstallation:
Once fully cured, screw the plate back onto the wall. Be gentle with the screwdriver to avoid scratching your new paint job on the screw heads.
Texture Twist
Before sealing, flick a toothbrush with thinned white paint over the surface to add tiny ‘stars’ for a subtle galaxy aesthetic.
Enjoy the calming atmosphere your new custom switch plate brings to the room
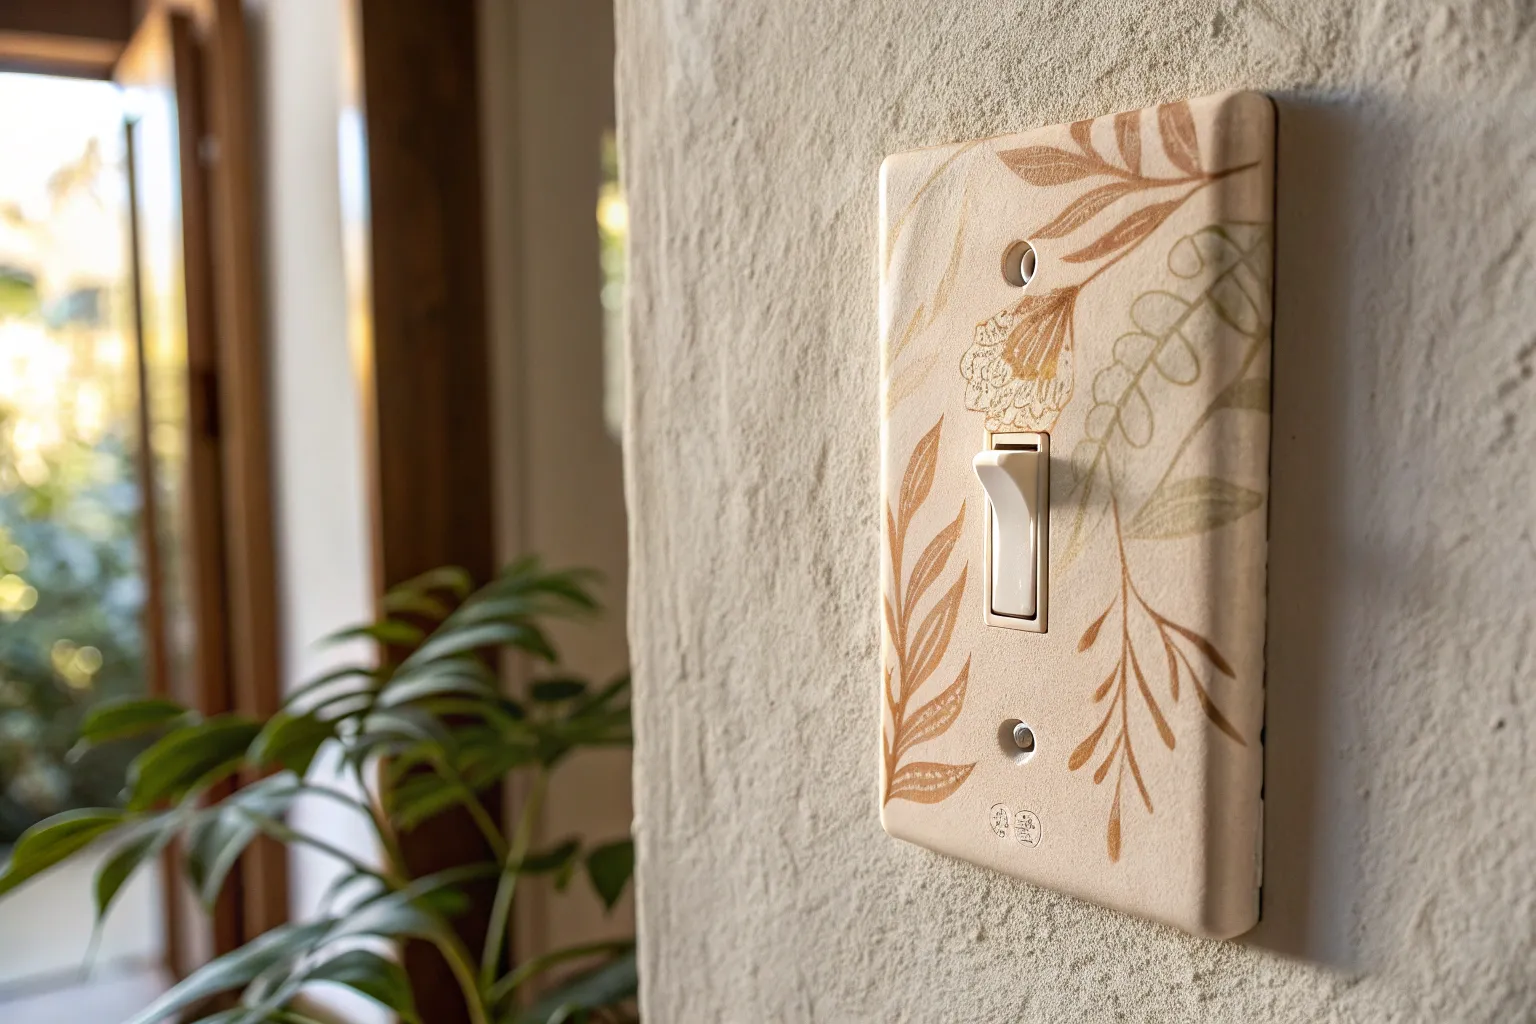
Mini Floral Corner Bouquet
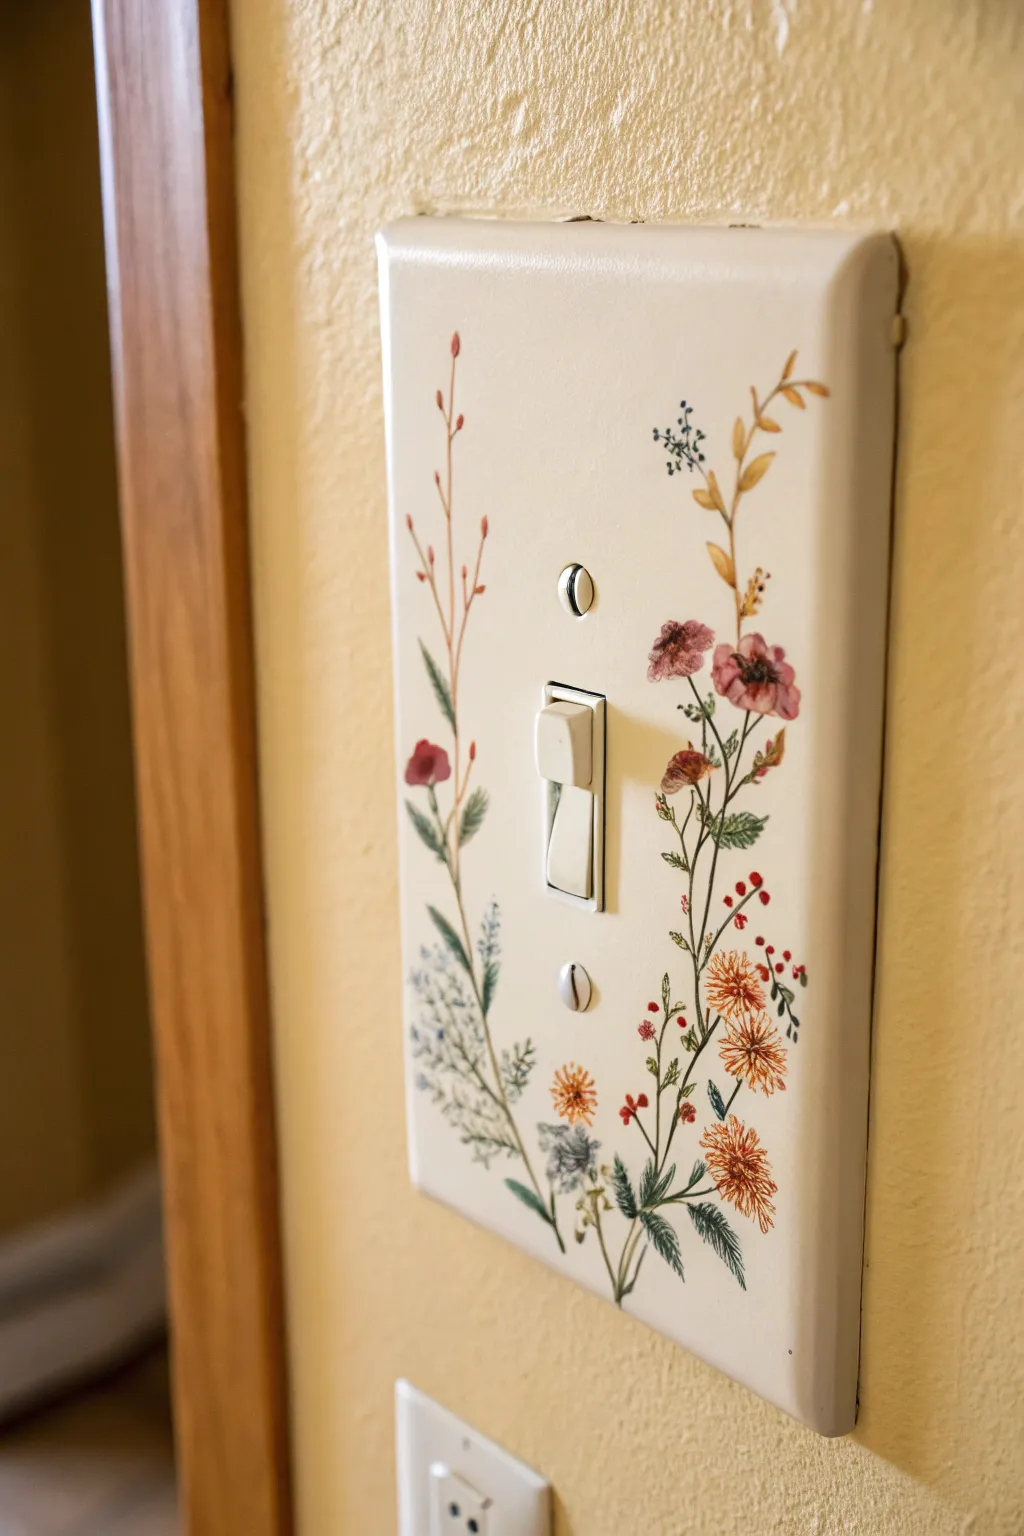
Transform a plain light switch cover into a botanical accent piece with this delicate wildflower design. Using fine lines and muted floral tones, you’ll create an elegant climbing garden that frames your everyday lighting controls.
Detailed Instructions
Materials
- Plastic or metal light switch plate
- Sandpaper (fine grit, 220-400)
- Primer spray paint (white or cream)
- Acrylic craft paints (cream/off-white, sage green, forest green, dusty pink, terracotta, maroon, mustard yellow, light blue)
- Fine detail brushes (sizes 0, 00, and 000)
- Pencil for sketching
- Clean cloth or isopropyl alcohol
- Clear acrylic sealer (matte or satin finish)
- Palette or paper plate
- Cup of water
Step 1: Preparation and Base Coat
-
Clean the surface:
Remove the switch plate from the wall and wash it thoroughly with soap and water or wipe it down with isopropyl alcohol to remove any oils or grime. -
Sand for adhesion:
Lightly scuff the entire surface of the plate with fine-grit sandpaper. This creates a rougher texture that helps the primer stick better than smooth plastic. -
Apply the primer:
Spray a thin, even coat of primer over the plate. Let this dry completely according to the can’s instructions before proceeding. -
Paint the background:
Apply two coats of a cream or warm off-white acrylic paint to the face of the plate to create a neutral canvas. Allow the first coat to dry fully before adding the second.
Brush Control Pro-Tip
Add a drop of water to your acrylics to reach an ink-like consistency. This helps the paint flow smoothly off the liner brush for those ultra-thin stems without breaking.
Step 2: Drafting the Design
-
Plan the composition:
Visualize two main stems rising from the bottom corners, curving slightly inward. The design should frame the toggle switch without crowding it excessively. -
Lightly sketch stems:
Using a very sharp pencil and a light hand, draw the main stem lines. Sketch a tall, thin stalk on the left side reaching near the top screw, and a fuller, multi-branched arrangement on the right side.
Garden Variety Level-Up
Personalize the bouquet by swapping these species for your local regional wildflowers or your birth month flower to add hidden meaning to the decor.
Step 3: Painting the Foliage
-
Paint base stems:
Mix a small amount of forest green with a touch of brown. Using your thinnest liner brush (000), carefully trace over your pencil stem lines. Keep the pressure light to maintain thin, delicate lines. -
Add leafy details:
Switch to a sage green tone. On the lower left stem, paint small, elongated leaves that hug the stem. I find that lifting the brush quickly at the end of the stroke creates a nice tapered leaf point. -
Create fern-like fronds:
On the bottom left, add a fern element using a light blue-grey mix. Use tiny, feathery strokes branching out from a central vein to create a soft texture. -
Paint the right-side foliage:
On the main right stem, add varying leaf shapes. Use a darker green for the lower leaves near the base to ground the design.
Step 4: Adding the Blooms
-
Paint the pink blossoms:
Using dusty pink, paint small, open-faced flowers on the right stem. Start with five small petals meeting in the center. Add a darker maroon center dot once the pink is dry. -
Add spherical blooms:
Mix a terracotta orange color. Create the pom-pom looking flowers on the lower right stem by stippling tiny dots in a circular cluster. Vary the density, keeping the center tighter. -
Detail the tall buds:
On the upper left stem, paint tiny reddish-brown buds at the tips of the thin branches. These should be barely more than small dashes or dots. -
Paint yellow accents:
Using mustard yellow, add small accent leaves or buds near the top of the right-hand stem to bring warmth to the upper corner. -
Layer in berries:
Between the main flowers on the right, use a fine dotting tool or the back of your brush to add clusters of tiny red berries.
Step 5: Finishing Touches
-
Refine the lines:
Look closely at your work. If any stems look disconnected or too faint, carefully retrace them with your thinnest brush and the dark green mix. -
Paint the screw heads:
Don’t forget the screws! Ideally, paint the heads of the screws to match the background cream color so they disappear into the artwork once installed. -
Apply sealer:
Once the artwork is completely bone dry (wait at least a few hours), spray the entire plate with a clear acrylic sealer. This protects your hand-painted details from daily wear and tear. -
Reinstall:
After the sealer has cured (usually 24 hours), screw the plate back onto the wall.
Enjoy the subtle charm this tiny garden brings to your room every time you turn on the lights

PENCIL GUIDE
Understanding Pencil Grades from H to B
From first sketch to finished drawing — learn pencil grades, line control, and shading techniques.
Explore the Full Guide
Botanical Silhouette in Two Tones
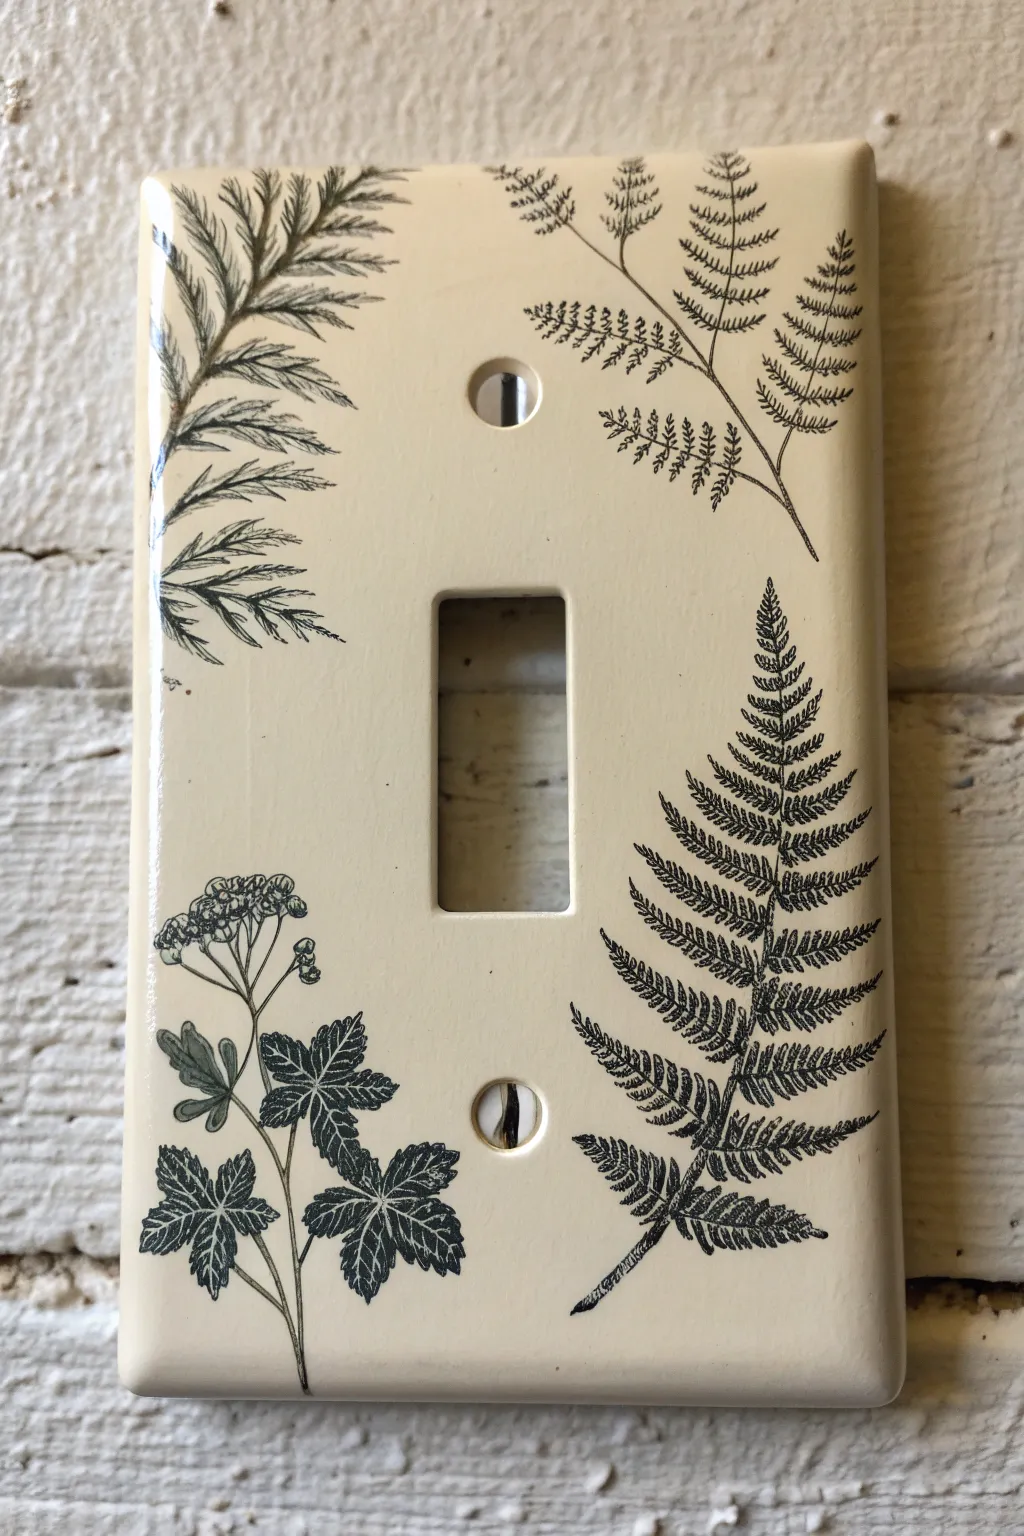
Transform a plain plastic switch plate into a piece of botanical art with delicate fern silhouettes and vintage-style flora. This project creates an elegant, naturalist aesthetic using simple transfer or decal techniques on a creamy beige background.
Step-by-Step
Materials
- Plastic toggle switch plate
- Cream or almond spray paint (satin finish)
- Sandpaper (fine grit, approx. 220)
- Rub-on transfers or botanical waterslide decals (fern & herb designs)
- Clear sealant spray (matte or satin)
- Small bowl of water (if using waterslides)
- Microfiber cloth
- Small scissors
- Tweezers
- Screwdriver
Step 1: Base Preparation
-
Clean the plate:
Remove your switch plate from the wall and wash it thoroughly with warm soapy water to remove oils and fingerprints. Dry completely with a lint-free cloth. -
Scuff the surface:
Lightly sand the glossy plastic surface using 220-grit sandpaper. This creates a ‘tooth’ that helps the paint adhere better without peeling later. -
Wipe down:
Use a tack cloth or a damp microfiber rag to remove all sanding dust. The surface must be perfectly clean for a smooth finish. -
Prime and paint:
Place the plate on a drop cloth in a well-ventilated area. Apply a light coat of primer designed for plastic. Once dry, spray several thin coats of cream or almond-colored satin paint, allowing about 15-20 minutes of drying time between layers. -
Full cure:
Let the painted plate cure for at least 24 hours. I like to be extra patient here because applying decals to tacky paint can ruin the smoothness.
Step 2: Designing the Composition
-
Select your botanicals:
Choose ferns and leafy herbs from your rub-on transfer or waterslide decal sheets. Look for designs with fine black lines that mimic vintage scientific illustrations. -
Rough cutting:
Cut out the general shapes of the designs you want to use with small scissors, leaving a small margin around the edges for easier handling. -
Dry fitting:
Lay the cutouts on top of the dry switch plate to plan your arrangement. Try placing a large fern ascending from the bottom right and smaller sprigs cascading from the top left corners.
Wrinkle Rescue
If a waterslide decal wrinkles, apply a tiny drop of water immediately to re-float it. Use a soft, wet brush to gently smooth the wrinkle out from the center.
Step 3: Applying the Imagery
-
Prepare the decal:
If using waterslide decals, submerge your first cutout in a small bowl of room temperature water for 30-60 seconds until the film begins to loosen from the backing paper. -
Position the first element:
Start with the largest fern. Slide the decal slightly off the backing paper and place the exposed edge onto the switch plate surface. -
Slide and settle:
Gently pull the paper backing away from underneath while holding the decal in place. Use tweezers for tiny adjustments if your fingers feel too clumsy. -
Smooth it out:
If using rub-on transfers instead, place the sheet face down and rub firmly with the included wooden tool until the image transfers completely. For decals, gently pat with a damp cloth to remove water and air bubbles. -
Repeat for corners:
Apply the remaining botanical elements to the other corners. Ensure no important parts of the design are obscured by the screw holes. -
Trim overhangs:
If any leaves hang off the edge of the plate, wait until the decal is semi-dry, then carefully trim the excess with a crafting knife or wrap it around to the back for a seamless look. -
Dry time:
Allow the decals to dry completely for several hours so all moisture evaporates.
Antique Effect
For an aged look, lightly sponge a diluted brown glaze or tea stain around the edges of the plate before sealing to mimic old parchment paper.
Step 4: Sealing and Finishing
-
Clear coat application:
To protect your delicate work from finger oils and daily use, apply a thin layer of clear matte or satin sealant spray. -
Second coat:
Once the first coat is dry to the touch, apply a second light coat for extra durability. -
Reinstallation:
Wait until the sealant is fully hardened (check the can’s instructions) before screwing the plate back onto your wall.
Now you have a charming, vintage-inspired accent that brings a touch of nature to your everyday routine
Tiny Mountain Landscape Scene
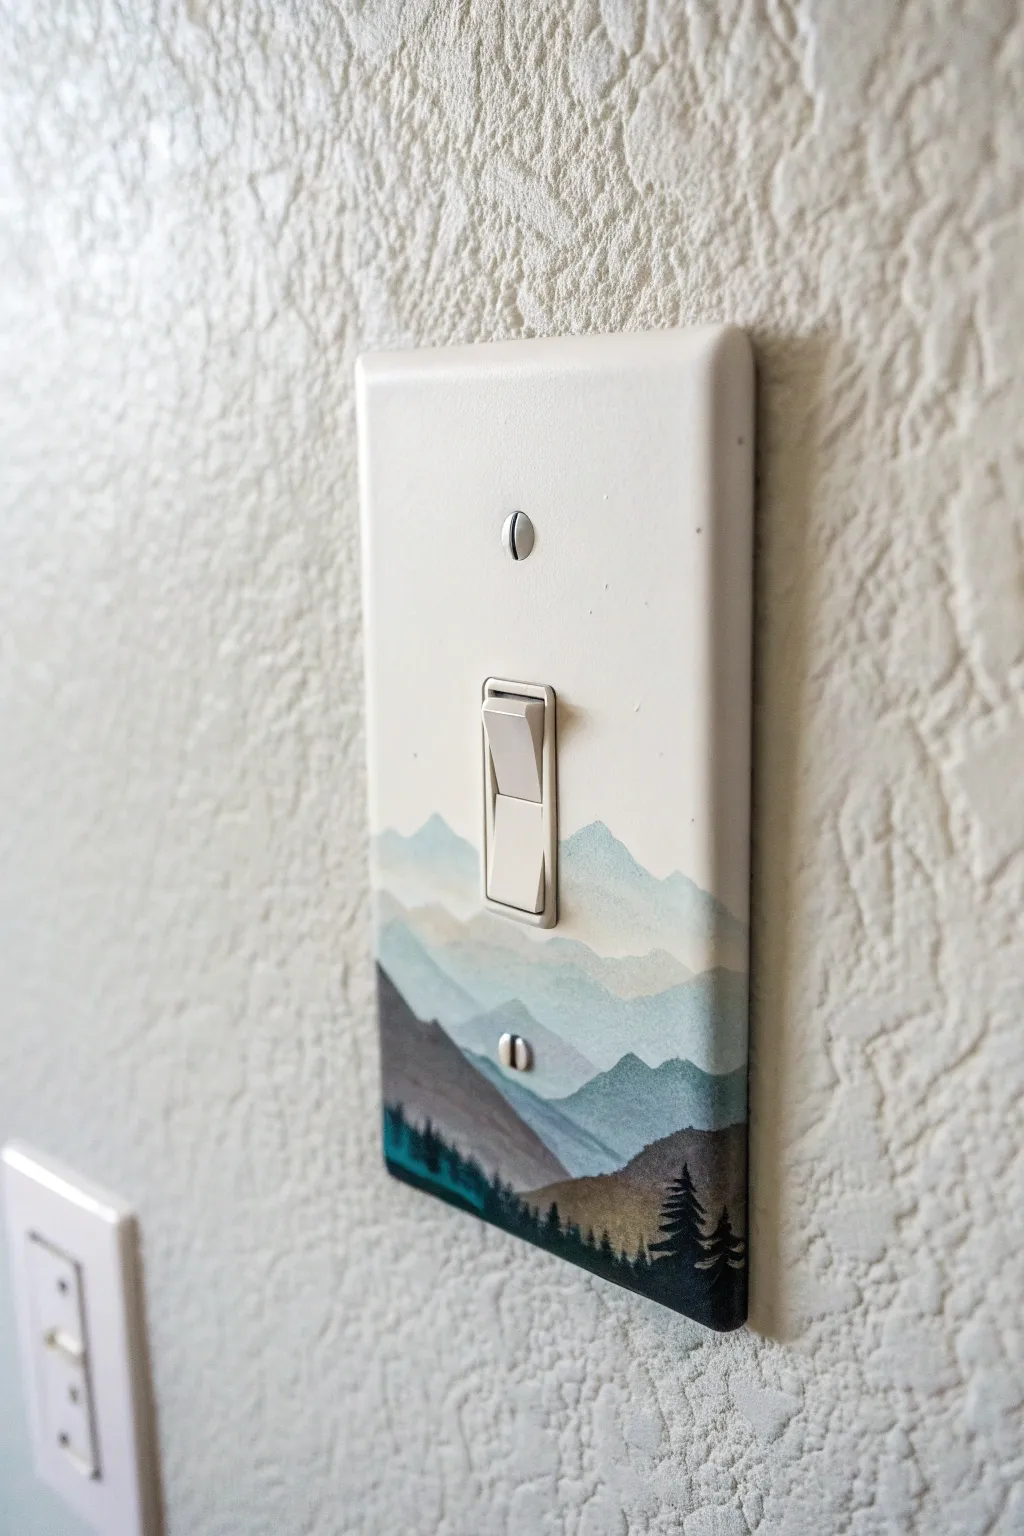
Transform a standard household object into a tiny window to the wilderness with this layered mountain painting. The soft gradients and silhouette details give this switch plate a serene, high-end feel that looks far more intricate than the simple steps required to create it.
Step-by-Step Tutorial
Materials
- Plastic light switch cover plate
- Screwdriver
- Sandpaper (fine grit, 220-400)
- Primer (spray or brush-on suitable for plastic)
- Acrylic paints (White, Teal/Turquoise, Navy Blue, Black)
- Flat shader brushes (small and medium)
- Small round detail brush or liner brush
- Palette or paper plate
- Clear sealant (matte or satin finish)
Step 1: Preparation
-
Remove the plate:
Use a flathead or Phillips screwdriver to carefully unscrew the existing switch plate from the wall. Keep the screws safe, as we will be painting the heads later to match the design. -
Clean and scuff:
Wash the plate thoroughly with warm soapy tea water to remove oils and dirt. Once dry, lightly sand the entire front surface with fine-grit sandpaper. This creates a ‘tooth’ for the primer to grip onto. -
Prime the surface:
Apply a thin, even coat of primer to the switch plate. If you are using a spray primer, do this in a well-ventilated area. I find that a spray primer often gives a smoother finish than brush-on types for plastic.
Clean Lines Hack
Don’t stress if your hand shakes. Mountains are naturally rugged! Use the flat edge of your shader brush to ‘stamp’ the slopes rather than dragging the brush for sharper peaks.
Step 2: Painting the Sky and Background
-
Base coat:
Paint the entire switch plate a solid white. This ensures your colors pop and provides a neutral sky background at the very top. Let this dry completely. -
Mix first mountain color:
On your palette, mix a very large amount of white with a tiny dot of teal. You want an extremely pale, barely-there blue shade for the furthest mountains. -
Paint the distant range:
Using a flat brush, paint a jagged, undulating line about 1/3 down from the top. Fill in the area below this line with your pale mix. The top edge should look like distant peaks. -
Mix the second layer:
Add just a bit more teal and perhaps a touch of navy to your previous mix. This color should be slightly darker and richer than the first. -
Paint the mid-ground peaks:
Paint a new mountain line slightly lower than the first one. Let the shapes overlap naturally. Fill the area below this new line with the new color.
Level Up: Moonlit Night
Add a tiny crescent moon in white to the top sky area, or dip a toothbrush in diluted white paint and flick it over the dried sky to create a field of stars.
Step 3: Foreground and Details
-
Deepen the palette:
Continue this process, adding more navy and teal to your mix for each subsequent layer as you move down the plate. You want about 4-5 distinct layers of mountains total. -
Paint the primary mountain:
For the large mountain shape on the left, mix a darker slate blue using navy, a touch of black, and a little white. Paint a steep slope coming in from the left side. -
Create the darkest foreground:
Mix your darkest color yet—mostly navy and black with a hint of teal. Paint the bottom-most rolling hills along the bottom edge of the plate. -
Allow to dry:
Let all your paint layers dry completely before starting the fine details. If the paint is wet, the crisp lines of the trees will bleed. -
Paint the tree line:
Switch to your smallest detail brush or liner brush. Using straight black paint, create tiny vertical strokes along the bottom edge to represent tree trunks. -
Add evergreen branches:
Using the very tip of the brush, dab small horizontal lines getting wider as you go down each trunk to create the triangle shape of pine trees. Vary the heights for a natural look. -
Camouflage the screws:
Take the screws you set aside and stick them into a piece of cardboard to hold them upright. Paint the heads to match the section of the mountain they will sit in (white/pale teal for the top, dark slate for the bottom).
Step 4: Finishing Up
-
Seal the artwork:
Once absolutely everything is dry, apply two coats of clear sealant. A spray sealant creates a nice even coat without brush strokes. This is crucial for protecting the art from dirty fingers. -
Reinstall:
Screw the plate back onto the wall, matching your painted screws to their corresponding holes to complete the seamless image.
Now every time you flip the switch, you get a momentary escape to the mountains


Calm Ocean Horizon With a Simple Motif
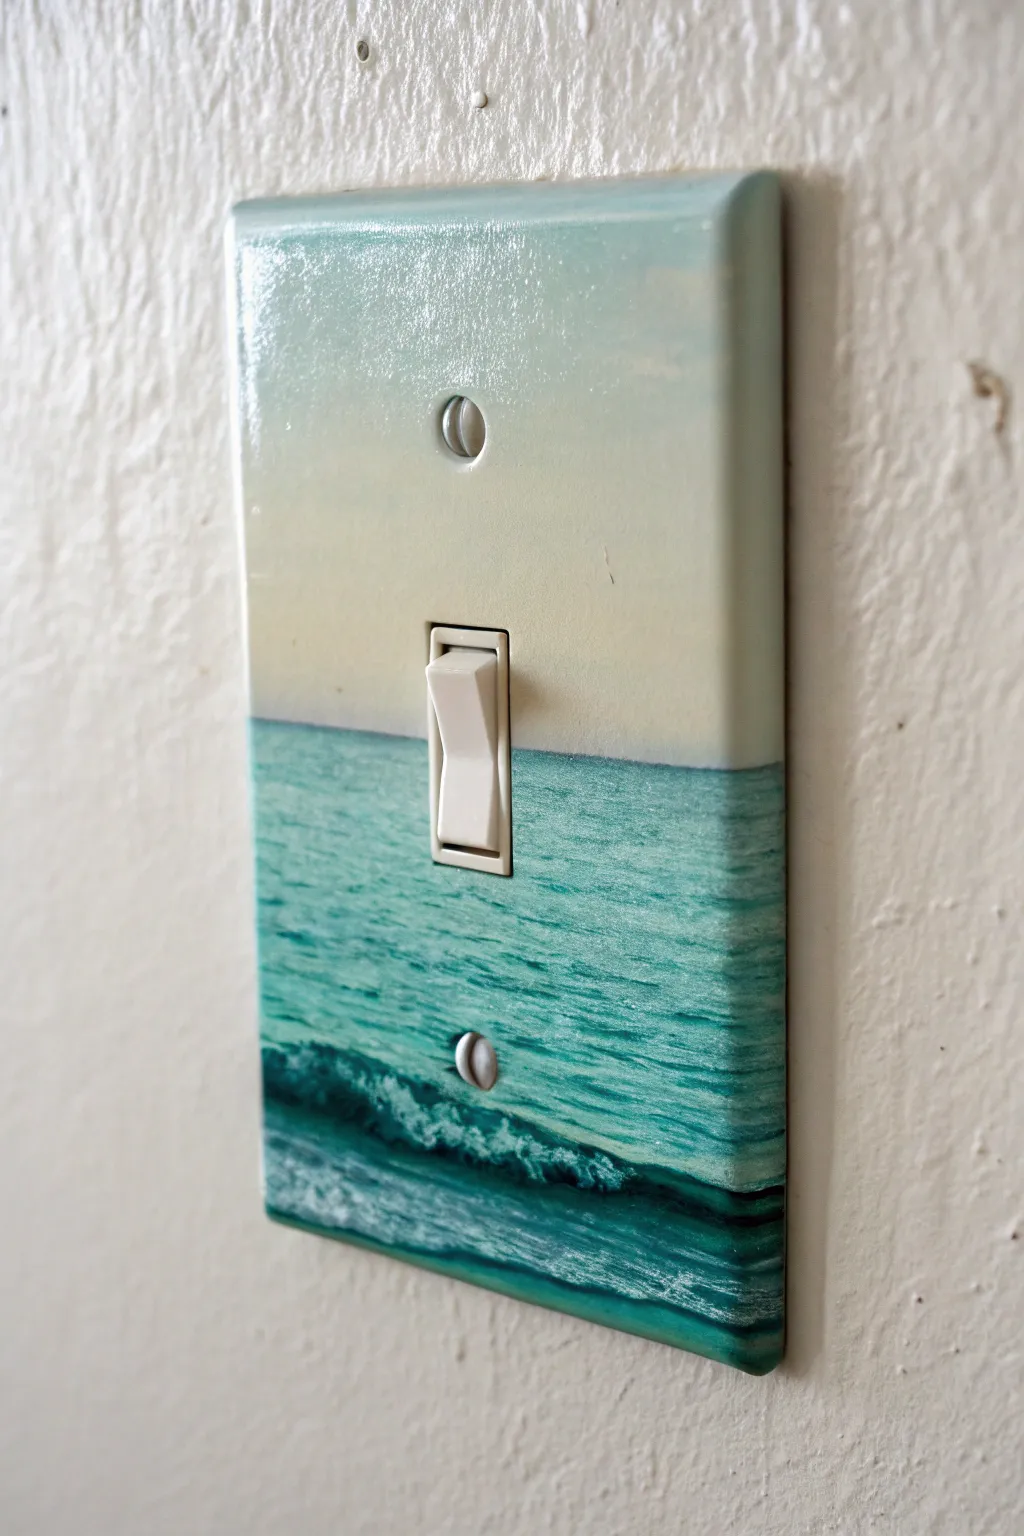
Bring the calming rhythm of the ocean into your room with this peaceful horizon painting. By blending soft sky tones with textured turquoise waters, you can transform a standard plastic switch plate into a miniature coastal escape.
How-To Guide
Materials
- Standard plastic light switch plate
- Screwdriver
- Fine-grit sandpaper (220 grit)
- Primer suitable for plastic (spray or brush-on)
- Acrylic paints: Titanium White, Cream/Off-White, Pale Blue, Turquoise, Phthalo Green, Navy Blue
- Flat shader brushes (medium and small)
- Small fan brush or stiff bristle brush
- Detail liner brush
- Gloss varnish or clear sealant spray
- Palette for mixing paint
- Cup of water and paper towels
Step 1: Preparation
-
Remove hardware:
Using your screwdriver, take the switch plate off the wall. Keep the screws safe, as you’ll want to paint the heads to match the design later. -
Clean surface:
Wash the plate thoroughly with soap and water to remove oils and dirt. Dry completely with a lint-free cloth. -
Sand for adhesion:
Lightly scuff the shiny surface of the plastic with fine-grit sandpaper. You don’t need to gouge it; just create a bit of ‘tooth’ so the paint sticks. -
Apply primer:
Coat the front and sides of the plate with a primer designed for plastic. If you are painting the screw heads, stick them into a piece of cardboard and prime them too. Let this dry completely according to the manufacturer’s instructions.
Horizon Line Hack
To get a perfectly straight horizon line across the uneven surface, place a piece of painter’s tape horizontally where you want the sky to end before painting the water.
Step 2: Painting the Sky
-
Mix sky colors:
On your palette, prepare a very pale blue (mostly white with a tiny dot of blue) and a warm cream or off-white color. -
Apply top gradient:
Using a flat shader brush, paint the top third of the plate with the pale blue mixture. Ensure your strokes are horizontal and smooth. -
Create the fade:
While the blue is still slightly wet, pick up the cream color and paint the middle section, blending upwards into the blue. The goal is a seamless ombré effect where the sky meets the horizon. -
Establish the horizon line:
Decide where your water will start—in the reference image, it’s just below the switch opening. Paint a straight, solid line of cream/white here to mark the separation.
Blending Trouble?
If acrylics are drying too fast to blend the sky, mix in a drop of acrylic retarder or glazing medium. This keeps the paint wet longer for smoother gradients.
Step 3: Painting the Ocean
-
Base ocean layer:
Mix a light turquoise shade. Using horizontal strokes, fill in the area from the horizon line down to the bottom edge. Don’t worry about texture yet; just get solid coverage. -
Add depth:
Mix a slightly darker teal by adding a touch of Phthalo Green to your turquoise. With a small flat brush, enhance the water by adding thin horizontal streaks, concentrating deeply colored areas towards the bottom. -
Create surface texture:
I like to use a dry brushing technique here. Wipe most of the paint off your brush and lightly drag a mix of white and pale turquoise horizontally across the water to simulate ripples catching the light. -
Paint the deep wave:
Near the bottom quarter of the plate, paint a darker, undulating band using Navy Blue mixed with a little green. This represents the shadow of the crashing wave. -
Detail the foam:
Using a small fan brush or a stiff bristle brush, tap pure Titanium White paint along the top edge of your dark wave band. Use a stippling motion to create the look of foamy, crashing water. -
Foreground movement:
Add sweeping, diagonal white strokes below the main wave to show the water rushing toward the sand.
Step 4: Finishing Touches
-
Camouflage the screws:
Paint the heads of the screws to match the area they will sit in. One will likely be sky-colored and the other ocean-colored. -
Seal the artwork:
Once the acrylic paint is fully dry (give it at least an hour), apply two coats of gloss varnish or clear sealant spray. This protects the art from daily touching and gives it that polished, wet look. -
Reinstall:
Carefully screw the plate back onto the wall once the varnish has cured completely, ensuring the painted screw heads align with the design.
Now you have a durable piece of functional art that captures the coast perfectly
Faux Marble Veining for a Luxe Look
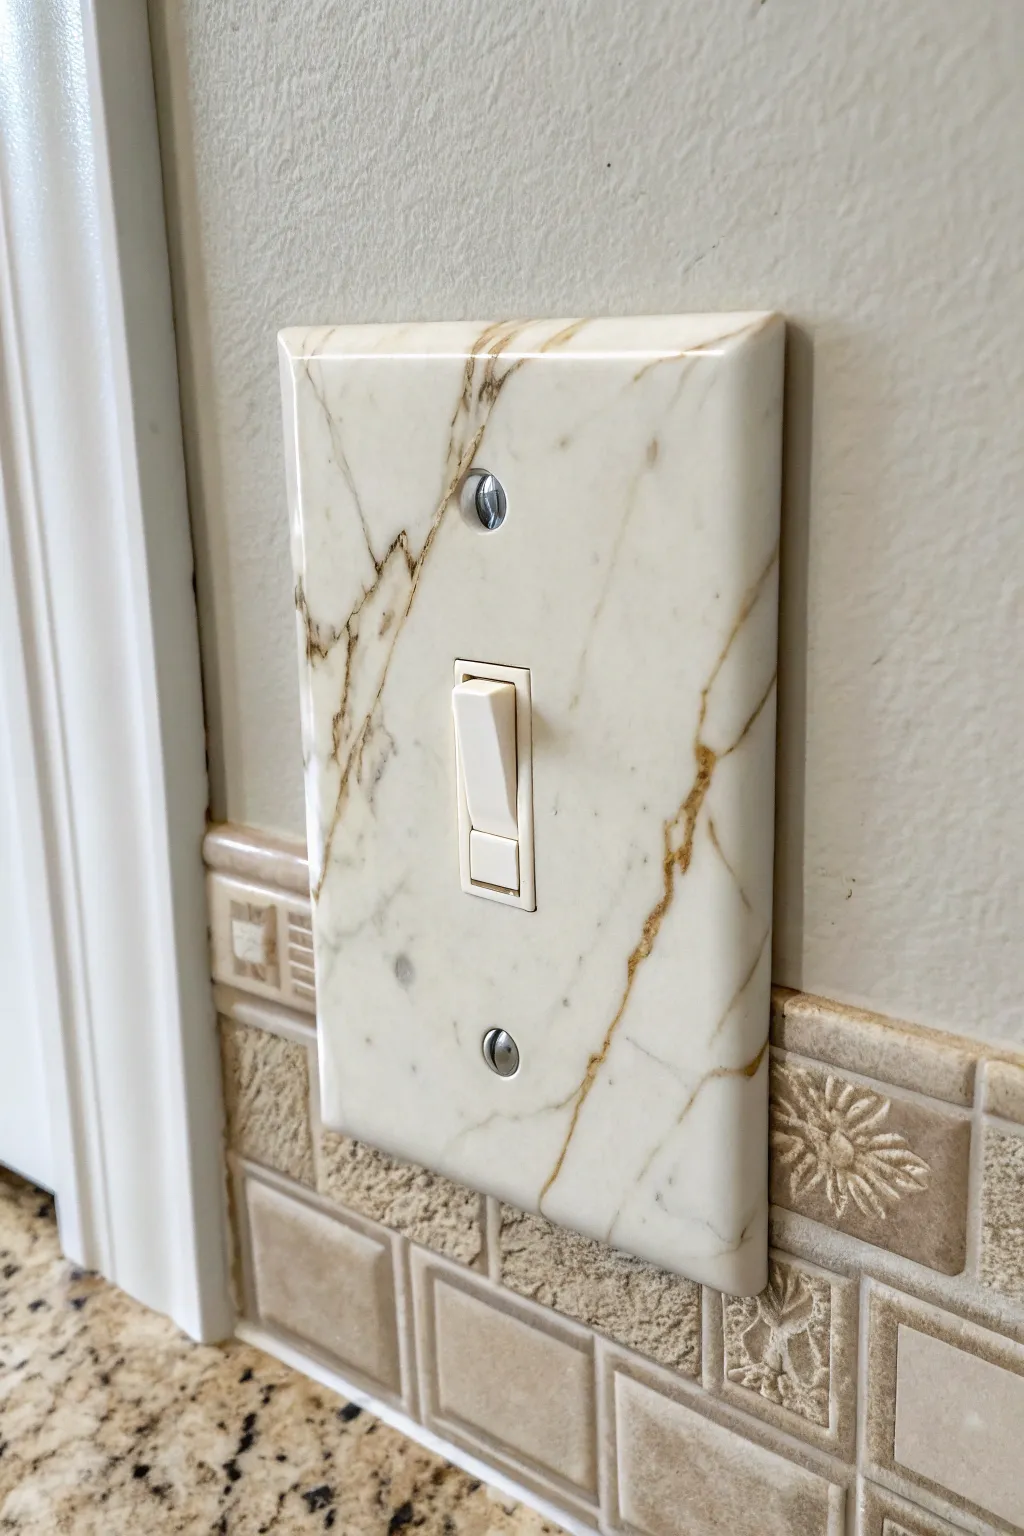
Transform a plain plastic switch plate into an elegant accent that mimics high-end stone. Using simple feathering techniques and metallic paints, you can achieve this sophisticated, glossy marble look for a fraction of the cost.
Step-by-Step Tutorial
Materials
- Standard plastic light switch plate
- Sandpaper (220-grit)
- Primer (spray or brush-on suitable for plastic)
- Cream or off-white acrylic base paint
- Metallic gold acrylic paint
- Dark brown or bronze acrylic paint
- Glaze medium or water (for thinning)
- Small sea sponge
- Fine liner brush (size 0 or 00)
- Feather or fan brush (optional)
- High-gloss polyurethane sealer or clear coat spray
- Painter’s tape
- Paper plate or palette
Step 1: Preparation and Base Coat
-
Clean and prep:
Remove the switch plate from the wall and wash it thoroughly with warm soapy water to remove oils and dirt. Dry completely. -
Sand for adhesion:
Lightly scuff the entire surface of the plastic plate using 220-grit sandpaper. This creates ‘tooth’ for the primer to grab onto, preventing peeling later. -
Wipe down:
Wipe away all sanding dust with a damp cloth or tack cloth. Any leftover dust will create bumpy textures in your faux finish. -
Apply primer:
Apply a thin, even coat of primer suitable for plastics. I prefer a spray primer for the smoothest finish, but a brush-on version works if you sand between coats. Let dry completely. -
Paint the base color:
Apply two coats of your cream or off-white acrylic paint. Allow the first coat to dry fully before adding the second to ensure opaque coverage.
Veins Look Like Lightning?
If your lines are too jagged or stark, lightly sponge a thin layer of the cream base color over them. This ‘buries’ the vein, making it look softer and more realistic.
Step 2: Creating the Marble Veins
-
Mix the vein color:
On your palette, mix a small amount of dark brown paint with the metallic gold. Add a few drops of glaze medium or water to thin it to an ink-like consistency. -
Map out main veins:
Dip your fine liner brush into the mixture. Holding the brush loosely near the end of the handle, drag it diagonally across the plate with a shaky hand to create natural, jagged lines. -
Soften the lines:
immediately after painting a vein, take a dry, soft brush or a slightly damp sea sponge and gently blot parts of the line to blur it. Marble veins are rarely perfect hard lines. -
Add secondary veins:
Create smaller, branching veins that shoot off from your main diagonal lines. These should be thinner and fainter than the primary veins. -
Layer with glaze:
Make a very watery wash of just the cream base color mixed with glaze. Lightly sponge this over some areas of the veining to push them into the background, creating depth. -
Highlight with gold:
Dip your fine liner brush into pure metallic gold paint. Carefully re-trace specifically the darkest parts of your veins to make them pop and catch the light. -
Add subtle texturing:
Dip a sea sponge lightly into a grey-tinted glaze (mix white with a tiny dot of black) and dab off most of the paint. Gently press onto open white spaces for nuanced stone texture. -
Feather the edges:
Use a dry feather brush or makeup brush to lightly sweep across the wet veins if they look too harsh. This mimics the soft diffusion of real mineral deposits.
Step 3: Finishing and Sealing
-
Complete drying time:
Allow your artistic work to dry for at least 24 hours. The paint needs to be fully cured before sealing so you don’t smear the delicate veins. -
Check the screw heads:
Don’t forget the screws! Stick them into a piece of cardboard and paint their heads to match the pattern, primarily using the base cream color. -
Apply the first seal:
Apply a thin coat of high-gloss polyurethane or clear acrylic spray. Real polished marble is shiny, so a matte finish won’t look as convincing. -
Sand and re-seal:
Once dry, very lightly sand with a high-grit paper (like 400) to remove brush strokes, wipe clean, and apply a final heavy gloss coat for a glass-like finish. -
Reinstall:
Once the sealer is rock hard (usually 24-48 hours), screw the plate back onto the wall.
Natural Variation
Use reference photos of real Calacatta or Carrara marble while painting. Following nature’s chaotic patterns prevents your design from looking too repetitive.
Now you have a custom, high-end decor detail that adds instant elegance to your room
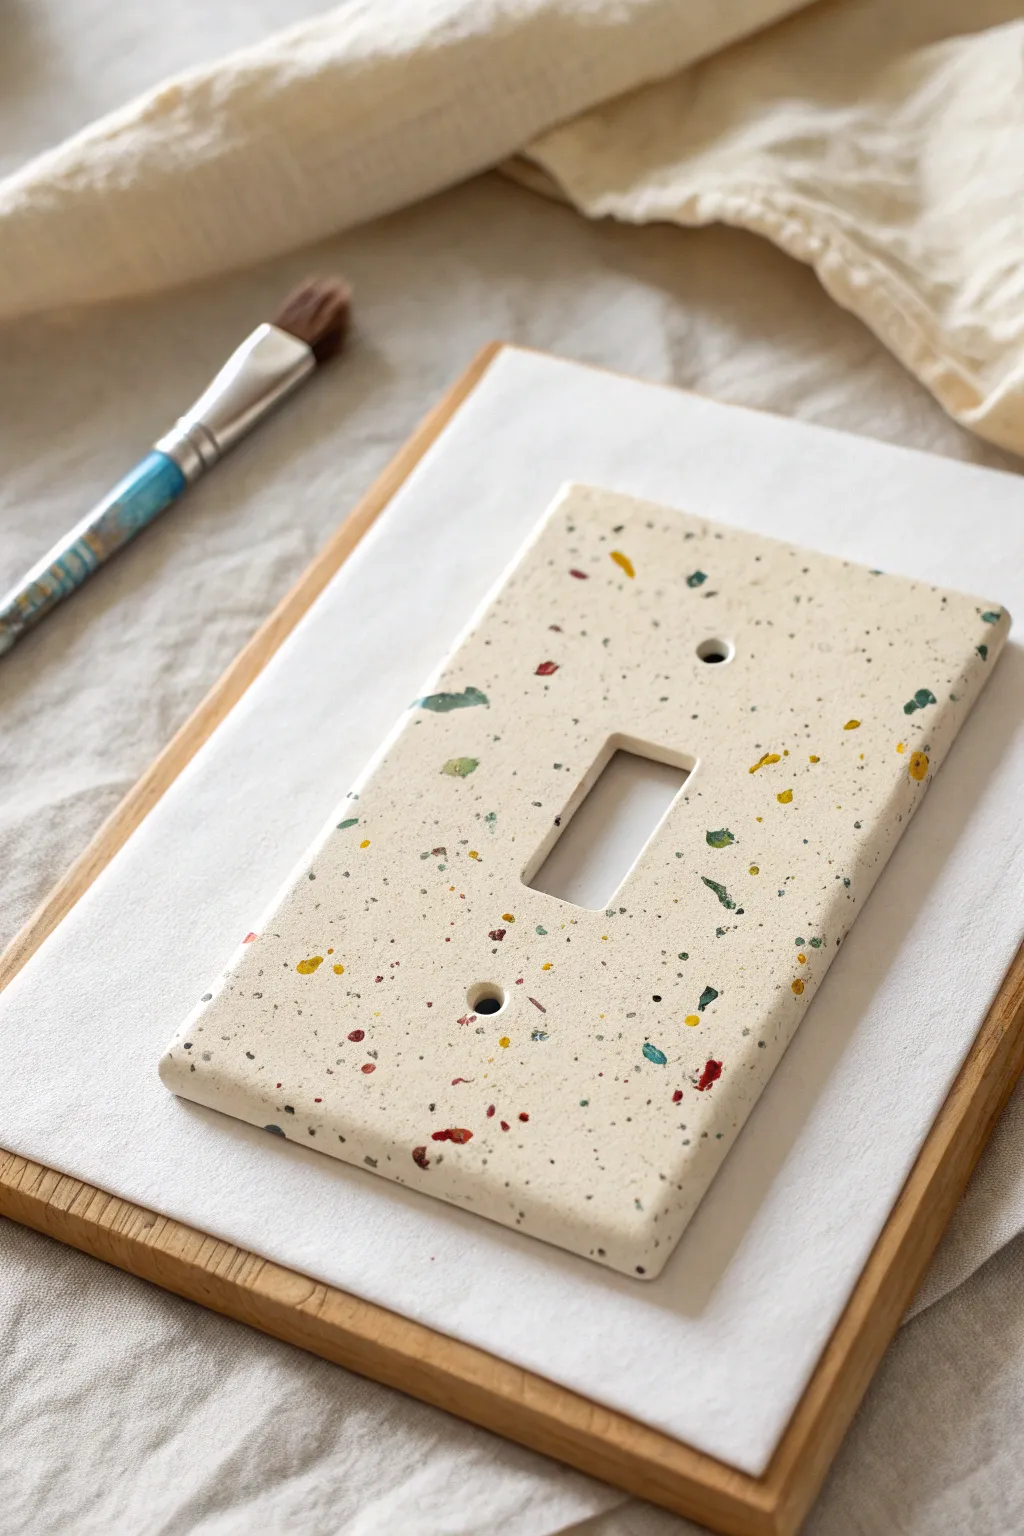
Terrazzo-Inspired Flecks and Chips
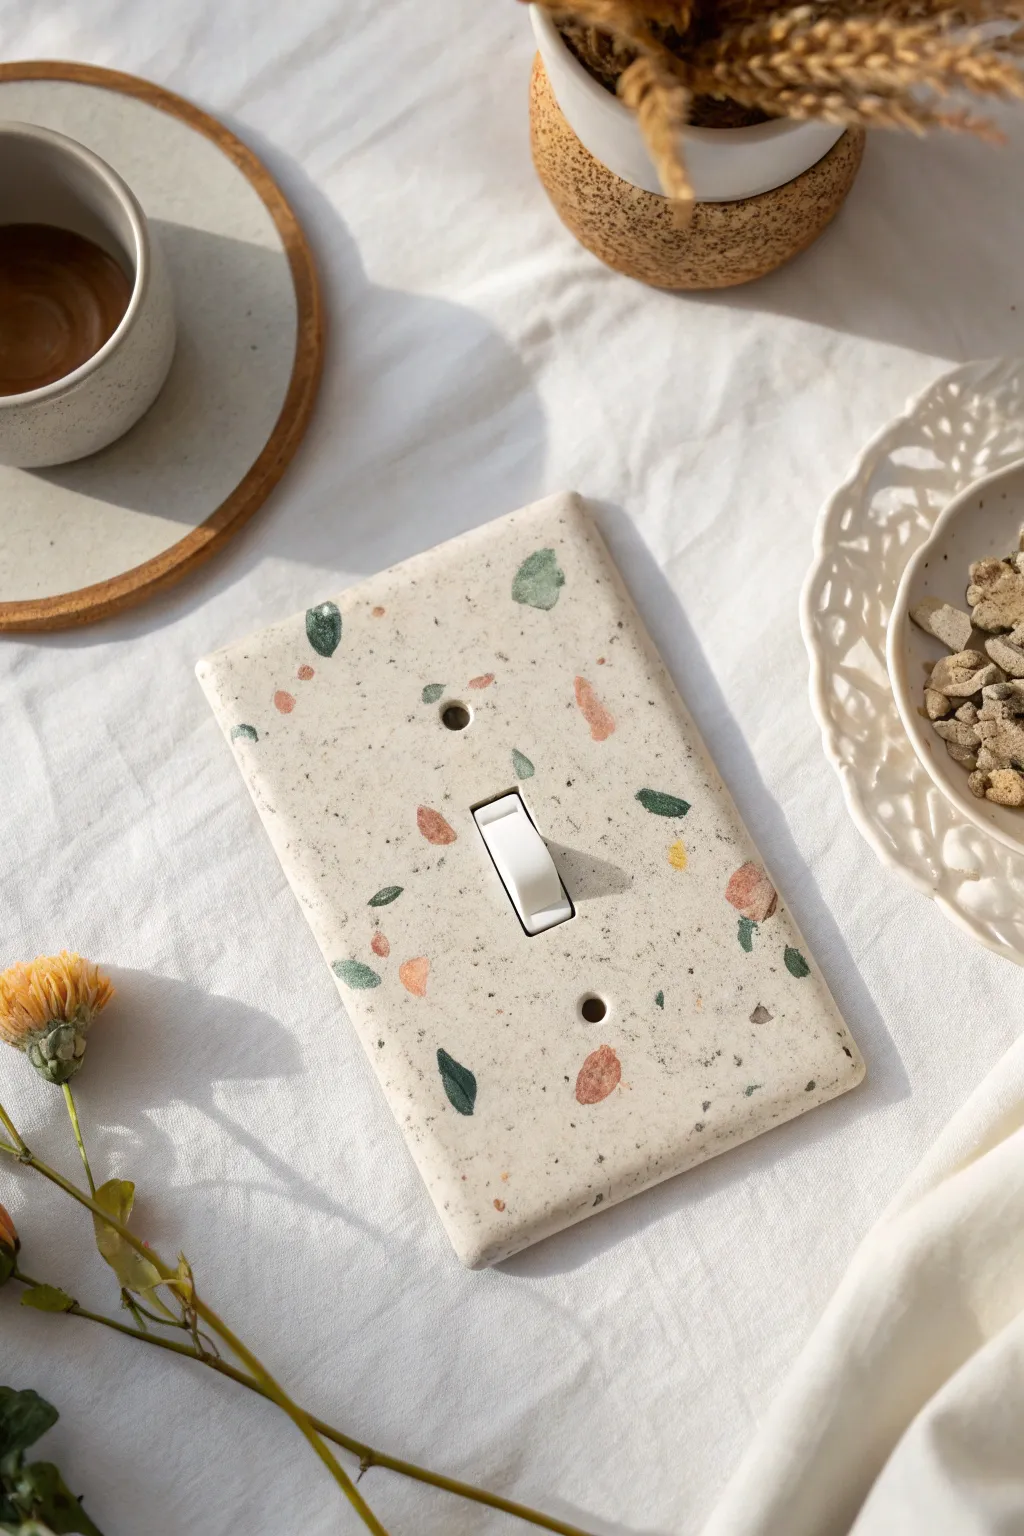

Transform a boring plastic switch plate into a piece of modern art with this convincing faux terrazzo technique. By layering speckles and hand-painted shards over a creamy base, you’ll achieve the sophisticated look of stone without the heavy price tag.
Step-by-Step Guide
Materials
- Plastic light switch plate
- Sandpaper (220-grit)
- Primer (spray or brush-on)
- Cream or off-white acrylic paint (base color)
- Fine bristle paintbrush (detail size)
- Old toothbrush
- Acrylic paints in earthy tones (terracotta, slate green, charcoal grey, mustard yellow)
- Clear matte or satin sealant spray
Step 1: Preparation
-
Clean the surface:
Remove the switch plate from the wall and wash it thoroughly with warm, soapy water to remove any grease or oils. -
Sand for adhesion:
Lightly scuff the shiny plastic surface with 220-grit sandpaper. This creates a rougher texture for the primer to grip onto. -
Prime the plate:
Apply a thin, even coat of primer. If you are using a dark plastic plate, you might need two coats to ensure full coverage. Let this dry completely according to the manufacturer’s instructions.
Uneven Splatter?
If you accidentally drop a large glob of paint during the splatter phase, don’t wipe it! Let it dry, then paint over it with your cream base color to ‘erase’ it before trying again.
Step 2: Base Coat
-
Apply the background color:
Paint the entire switch plate with your chosen cream or off-white acrylic paint. Use long, smooth strokes to minimize brush marks. -
Check for coverage:
Let the first coat dry. I usually hold it up to the light to check for thin spots; apply a second coat if the primer is showing through. Allow this to dry fully before moving on.
Add Metallic Flair
For a luxe touch, mix a little gold or copper leafing paint into your color palette. Paint a few small, jagged ‘chips’ in metallic to catch the light.
Step 3: Creating the Terrazzo Pattern
-
Mix your ‘chips’ colors:
Prepare your palette with small varying amounts of earthy tones. Think terracotta orange, sage green, and muted yellows. -
Paint the large chips:
Using a fine detail brush, paint irregular geometric shapes onto the plate. These mimic the large stone chips in real terrazzo. Avoid perfect circles or squares; go for jagged, organic blobs. -
Vary the sizes:
Paint a mix of medium and large shapes, leaving plenty of empty cream space between them. Don’t overcrowd the design at this stage. -
Rotate your work:
Turn the switch plate periodically as you paint to ensure the pattern looks random and balanced from all angles. -
Add darker accents:
Dip your fine brush into a charcoal or dark grey paint. Add smaller, sharper flecks near some of the larger colored chips to create contrast.
Step 4: Splatter and Texture
-
Prepare the splatter paint:
Water down a small amount of dark grey or black acrylic paint until it has the consistency of ink or thin cream. -
Load the toothbrush:
Dip just the tips of an old toothbrush into the thinned paint. -
Test the spray:
Run your thumb across the bristles over a piece of scrap paper first to test the splatter size. You want fine mist-like dots, not huge globs. -
Apply fine speckles:
Gently flick the bristles over the switch plate to create a dusting of fine specks. This mimics the sandy aggregate found in real terrazzo and ties the distinct shapes together. -
Let the art dry:
Allow the painted design to dry completely, preferably overnight, to ensure the detailed flecks are hard set.
Step 5: Sealing and Finish
-
Apply sealant:
In a well-ventilated area, spray the plate with a clear matte or satin sealant. This is crucial for a switch plate that will be touched frequently. -
Add a second coat:
Once dry, apply a second light coat of sealant for extra durability. -
Reinstall:
Screw the finished plate back onto the wall. Be careful not to overtighten the screws, which could crack your new finish.
Now you have a custom decor accent that adds a subtle artistic touch to your room
Faux Picture Frame Painted Border

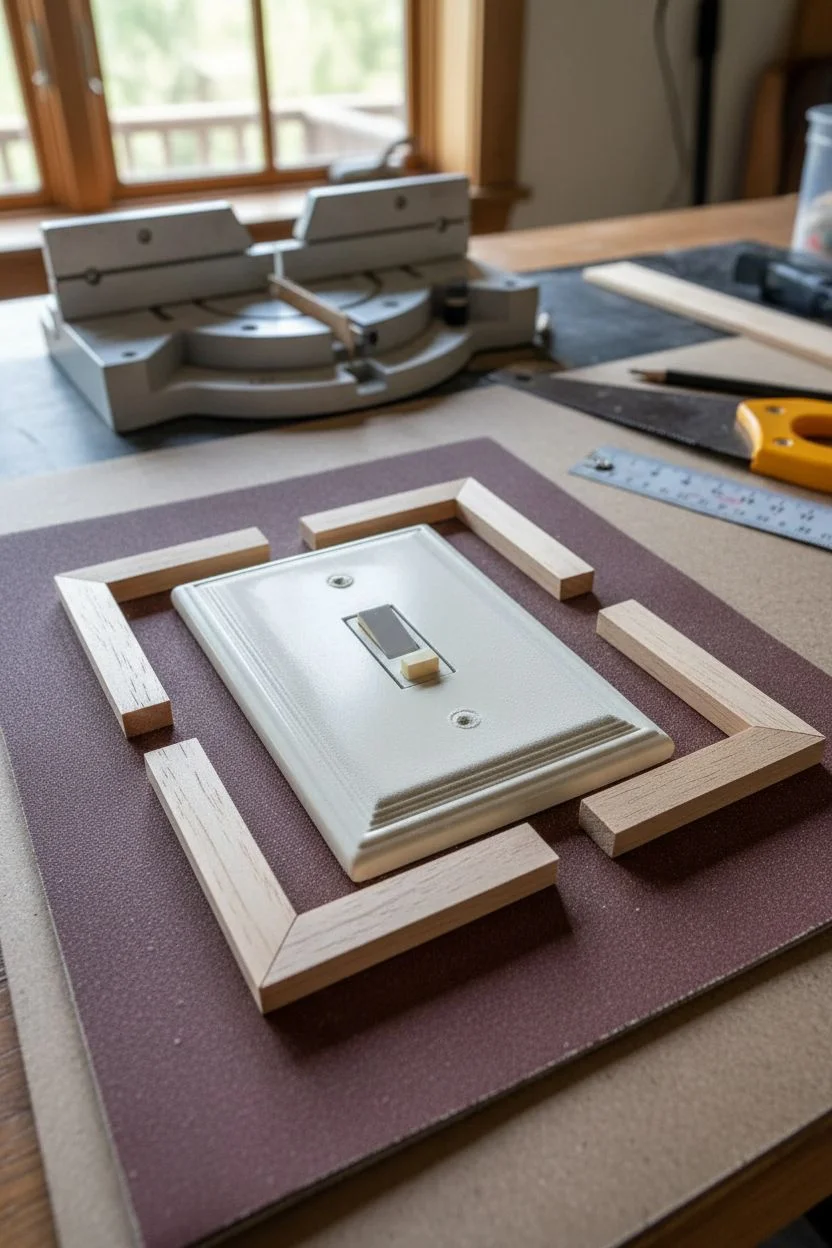
Transform a plain plastic switch plate into an architectural detail that mimics the look of high-end millwork. By adding wood trim and painting the entire assembly to match or subtly contrast your walls, you create a sophisticated, built-in appearance that blends seamlessly with traditional decor.
Step-by-Step Tutorial
Materials
- Standard plastic or metal switch plate cover
- Small wood trim molding (picture frame molding or thin cove molding)
- Miter box and hand saw
- Strong construction adhesive (like Liquid Nails or E6000)
- Wood filler or spackling paste
- Fine-grit sandpaper (220-grit)
- Primer suitable for plastic and wood
- Paint (color of your choice to match wall or trim)
- Small paintbrush or foam brush
- Painter’s tape
- Clamps or heavy books
Step 1: Preparation and Cutting
-
Clean the plate:
Remove the switch plate from the wall and scrub it thoroughly with soapy water to remove oils and dirt. Let it dry completely. -
Sand the surface:
Lightly scuff the plastic surface with 220-grit sandpaper. This creates a ‘tooth’ for the primer and adhesive to grip onto better. -
Measure the trim:
Hold your molding against the edge of the switch plate to gauge the length. You want the inner edge of the molding to sit flush against the outer edge of the plate. -
Cut the first miter:
Using your miter box, cut a 45-degree angle at the end of your molding strip. -
Mark and cut length:
Place the cut end against the corner of the plate. Mark the exact spot for the next cut on the molding, ensuring the inner edge matches the plate’s length. Cut the opposing 45-degree angle. -
Finish the frame pieces:
Repeat the measuring and cutting process for the remaining three sides. Dry fit them around the plate to ensure the corners meet perfectly.
Seamless Transitions
For a truly built-in look, caulk the outer edge where the frame meets the wall after installation, then touch up with wall paint.
Step 2: Assembly and Refining
-
Apply adhesive:
Run a thin bead of strong construction adhesive along the back of your molding pieces. I find it helpful to also dab a tiny amount on the plastic plate edges. -
Secure the frame:
Press the molding pieces firmly onto the outer perimeter of the switch plate. Check that corners align squarely. -
Clamp and cure:
Use small clamps to hold the pieces in place, or lay the plate flat and weigh down the trim with heavy books. Allow the adhesive to cure according to the manufacturer’s instructions. -
Fill the gaps:
Once dry, use wood filler to fill any small gaps in the mitered corners. If you want a seamless look between the plate and the trim, run a thin line of filler along that seam as well. -
Sand until smooth:
After the filler hardens, gently sand the corners and seams with fine-grit sandpaper until the transition feels completely smooth to the touch.
Gap Issues?
If miter cuts aren’t meeting perfectly, don’t force them. Use a little extra wood filler on the outer corner; paint hides imperfections well.
Step 3: Painting and Installation
-
Prime the assembly:
Apply a coat of high-quality primer over the entire piece—both the plastic center and the wood frame. This ensures an even finish texture. -
Apply the first coat:
Paint the switch plate with your chosen color. Use long, vertical strokes to mimic the grain direction if you are aiming for a wood look, or smooth strokes for a plaster look. -
Sand lightly between coats:
If any dust settled or brushstrokes are too visible, give it a very light sanding once dry. -
Apply final coat:
Add a second coat of paint for full coverage and durability. -
Paint the screw heads:
Don’t forget to stick the mounting screws into a piece of cardboard and paint their heads to match the new frame. -
Reinstall:
Once fully cured (give it at least 24 hours to avoid tackiness), screw the new framed plate back onto the wall.
Now your functional hardware serves as a customized architectural detail that subtly elevates the entire room
Chalkboard-Style Plate With Hand Lettering

Transform a standard light switch cover into a functional piece of customizable decor with this simple chalkboard paint makeover. The matte black finish provides a perfect high-contrast canvas for whimsical hand-lettered designs that you can change with the seasons or your mood.
How-To Guide
Materials
- Standard plastic toggle switch plate
- Medium-grit sandpaper (around 120-150 grit)
- Black chalkboard spray paint or brush-on chalkboard paint
- Primer spray suitable for plastic
- White liquid chalk marker (fine or extra-fine tip)
- Damp cloth or tack cloth
- Drop cloth or cardboard
- Screwdriver
Step 1: Preparation & Painting
-
Remove the plate:
Use a screwdriver to carefully remove your existing light switch plate from the wall. Keep the screws safe, as you will need them later, or plan to paint the screw heads to match. -
Clean thoroughly:
Wash the plate with warm soapy water to remove any finger oils, dust, or grime. Dry completely with a lint-free towel. -
Scuff the surface:
Lightly sand the entire front surface and edges of the plastic plate using medium-grit sandpaper. This creates ‘tooth’ for the paint to adhere to so it doesn’t peel later. -
Wipe away dust:
Use a damp cloth or tack cloth to remove every speck of sanding dust. A clean surface is crucial for a smooth chalkboard finish. -
Prime the plastic:
Place the switch plate on a drop cloth in a well-ventilated area. Apply a thin, even coat of primer designed for plastic. Let this dry according to the can’s instructions, usually about 30 minutes to an hour. -
Apply chalkboard paint:
Shake your chalkboard spray paint vigorously. Hold the can 10-12 inches away and apply a light mist coat. Don’t try to cover it fully yet. -
Add subsequent coats:
Wait about 15-20 minutes between coats—or whatever your specific paint brand recommends—and apply 2-3 more thin layers until you have solid, opaque black coverage. I find that multiple thin coats prevent drips better than one heavy one. -
Don’t forget the screws:
If you want the screws to match, push them through a piece of cardboard so they stand upright and give the heads a quick spray of the chalkboard paint. -
Cure the paint:
Let the final coat of paint dry completely. Ideally, let it cure for 24 hours before moving to the next step to ensure the surface is hard enough to write on. -
Season the chalkboard:
Before writing, condition the surface by rubbing the side of a piece of regular chalk over the entire plate, then wiping it off with a dry cloth. This prevents your first design from being permanently ‘burned’ into the surface.
Sharpen Your look
If you make a mistake with the chalk marker, a slightly damp Q-tip works perfectly as a precision eraser to clean up small smudges without ruining the whole design.
Step 2: Designing & Lettering
-
Plan your layout:
Identify the top and bottom words you want to feature. The example uses ‘light’ (or similar cursive text) at the top and ‘bright’ or ‘night’ at the bottom. Visualize where the loops will go. -
Start the top lettering:
Using a fine-tip liquid chalk marker, shake it well to get the ink flowing. Carefully script your chosen word across the top section, extending the last letter’s tail downward along the right side. -
Draw side flourishes:
Create loose, curly loops trailing down the sides of the plate. The example shows a casual, wavy line with occasional loops (like a cursive ‘e’ shape) to connect the top and bottom text areas visually. -
Letter the bottom word:
Write your bottom word (like ‘bright’) in a matching cursive style. Connect the starting letter to the flourish coming down from the left side if possible. -
Review and refine:
Check your line thickness. If some parts look too faint, carefully trace over them a second time once the first layer is dry to make the white pop against the black background. -
Let ink dry:
Allow the chalk marker to dry fully so it doesn’t smudge during reinstallation. -
Reinstall the plate:
Place the plate back over the switch and secure it with your painted screws. Be gentle with the screwdriver so you don’t scratch the fresh paint on the screw heads.
Switch It Up
For a kid’s room, skip the words and draw simple borders like stars, vines, or LEGO bricks. You can even let them draw their own design with regular chalk.
Enjoy your customized, hand-lettered switch plate that adds a charming personal touch to any room
Switch-as-Art Optical Illusion Design
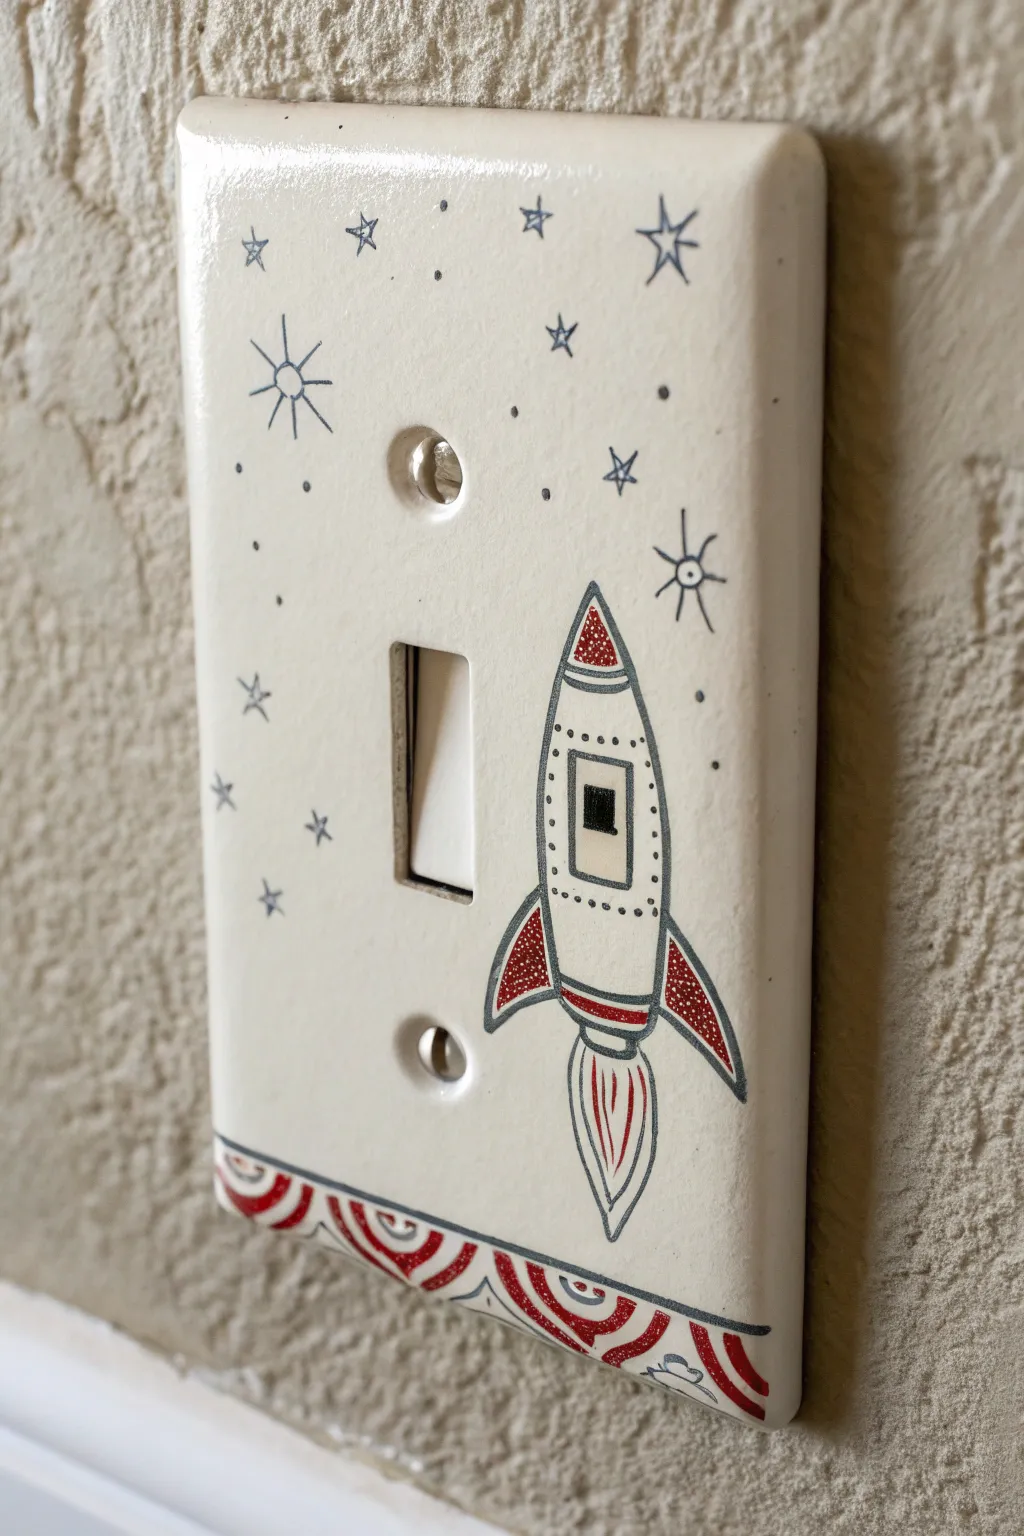
Transform a mundane household object into an interstellar adventure with this charming hand-painted design. Featuring a classic retro-style rocket ship launching into a starry sky, this project adds a whimsical touch to any monochromatic wall.
Step-by-Step Tutorial
Materials
- Standard toggle light switch faceplate (plastic or ceramic)
- Sandpaper (fine grit, 220 or higher)
- Primer (spray or brush-on suitable for plastic)
- Acrylic paints (Cream/Off-white base, Red, Grey)
- Fine point detail paintbrush (size 0 or 00)
- Permanent fineliner pens (Black and Red/Maroon, ultra-fine tip)
- Rubbing alcohol
- Clear sealant/varnish (matte or satin finish)
- Pencil for sketching
Step 1: Preparation
-
Clean the surface:
Before you start art-making, remove the switch plate from the wall and wipe it down thoroughly with rubbing alcohol. This removes finger oils and grime that can prevent paint adhesion. -
Light sanding:
Gently scuff the surface of the plastic plate using your fine-grit sandpaper. You don’t want deep scratches, just enough texture or ‘tooth’ for the primer to grab onto. -
Prime the plate:
Apply a thin, even coat of primer. If using a spray primer, hold the can about 8-10 inches away and use sweeping motions. Let this dry completely according to the manufacturer’s instructions. -
Apply the base coat:
Paint the entire faceplate with your cream or off-white acrylic paint. This gives it that vintage ceramic look. I usually find two thin coats work better than one thick one to avoid brush strokes.
Ink Smearing?
If your pen ink runs when applying the clear coat, try spraying the first coat very lightly rather than brushing it on to lock the ink in place.
Step 2: Drawing the Design
-
Sketch the rocket:
Using a pencil very lightly, sketch the rocket shape on the right side of the toggle opening. Draw a tall, curved triangle for the body, fin shapes near the bottom, and a flame exhaust underneath. -
Outline in ink:
Carefully trace your pencil lines with a black ultra-fine permanent pen or a very steady hand with black paint. Create the bullet shape of the fuselage and add the side fins. -
Add rocket details:
Draw a small rectangle window in the center of the rocket body. Add a horizontal band near the top nose cone and another band near the bottom tail section. -
Detail the rivets:
Use your pen to make tiny dots along the inner edge of the rocket’s outline. These simulate the riveted metal look of classic sci-fi spaceships. -
Draw the flame:
Below the rocket, draw a teardrop shape for the main exhaust flame, adding internal lines to suggest movement and heat.
Step 3: Adding Color & Cosmos
-
Paint the accents:
Using your smallest brush and red paint, fill in the nose cone tip, the side fins, and the band near the bottom. The red pops beautifully against the cream background. -
Fill the window:
Paint or color the small rectangular window black to give it depth. -
Create the decorative border:
At the very bottom edge of the plate, draw a series of scalloped semi-circles. Fill the space between the scallops with alternating curved red strokes to create a patterned border. -
Draw the stars:
Switch back to your black pen to add stars. Draw diverse shapes: simple five-point stars, some as just small dots, and a few distinctive eight-point ‘burst’ stars for variety. -
Scatter the galaxy:
Place your stars randomly around the empty space, varying their sizes. Keep the area immediately around the rocket slightly clearer to emphasize its movement. -
Add texture to the red:
Once the red paint is fully dry, you can use a white gel pen or a very fine tool to add tiny stippling dots over the red fins for a textured, retro comic book effect.
Steady Hand Trick
Rest your pinky finger on the table or a dry part of the plate while drawing fine lines. It acts as an anchor to stabilize your hand for cleaner details.
Step 4: Finishing Up
-
Final dry time:
Let all ink and paint dry for at least an hour to prevent smearing during the sealing process. -
Seal the artwork:
Apply a clear satin or matte varnish over the entire plate. This is crucial for a switch plate since it will be touched frequently. -
Reinstall:
Once the sealer is cured (check the bottle, usually 24 hours for a full cure), screw the plate back onto the wall.
Your wall now features a little piece of the galaxy ready for daily liftoff


Have a question or want to share your own experience? I'd love to hear from you in the comments below!