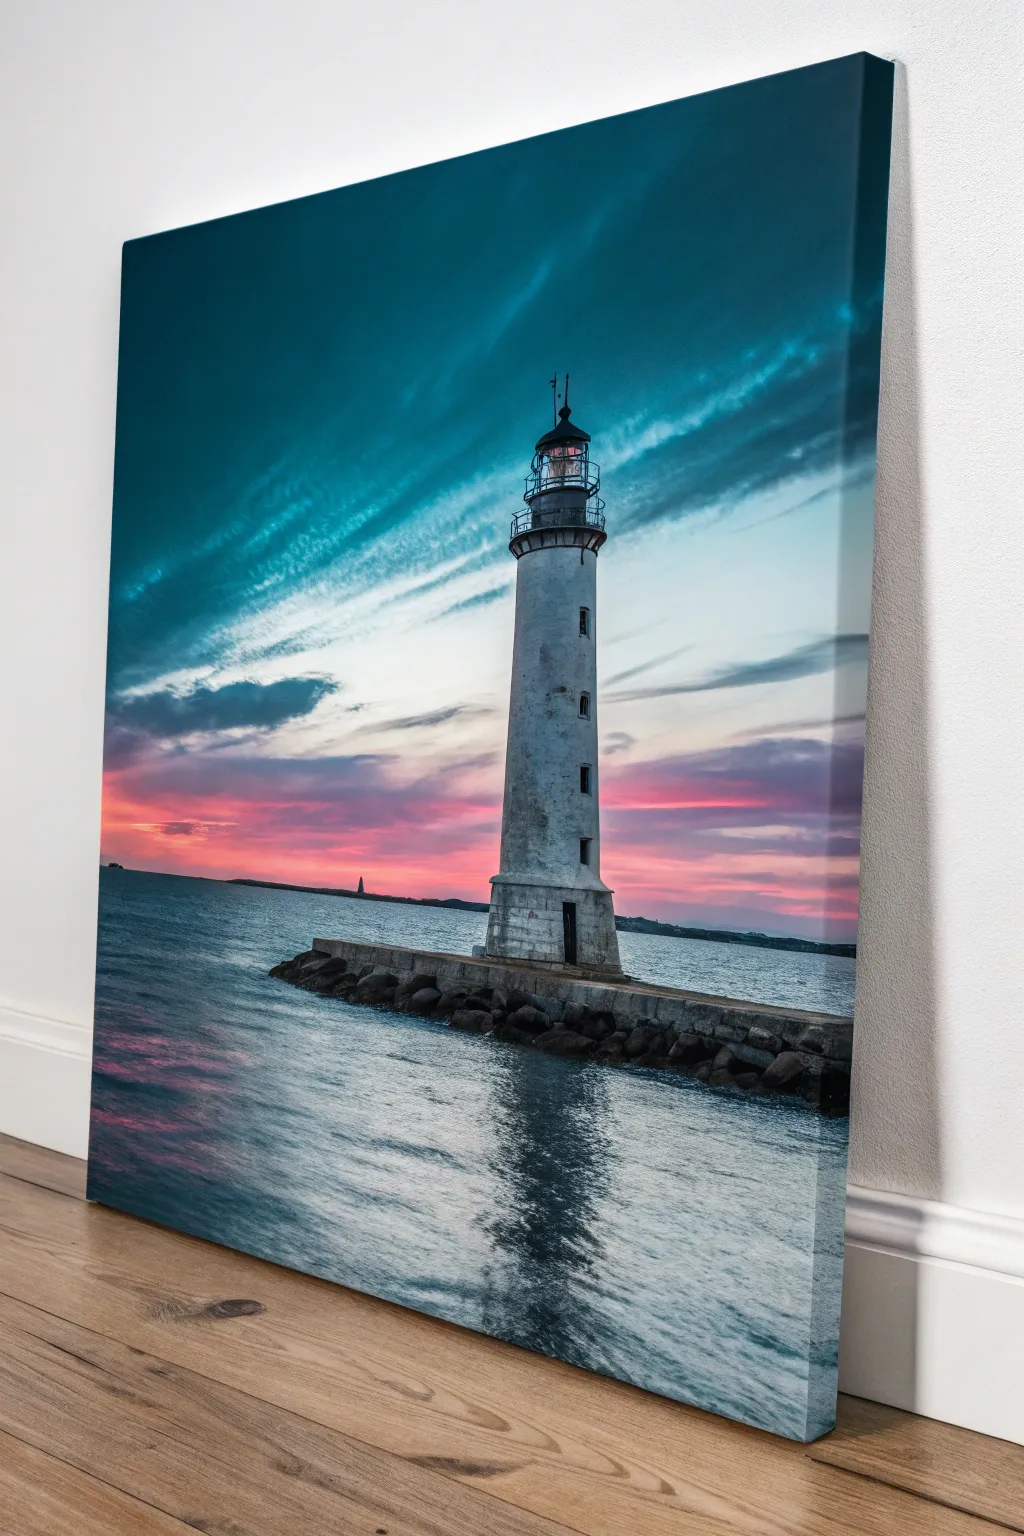
If you’re craving fresh lighthouse painting ideas, you’re in the right headspace—lighthouses practically beg for bold skies, moody water, and satisfying vertical compositions. I pulled together a mix of classic scenes and playful twists so you can paint a coastal beacon that feels totally yours.
Calm Seascape With Fluffy Clouds
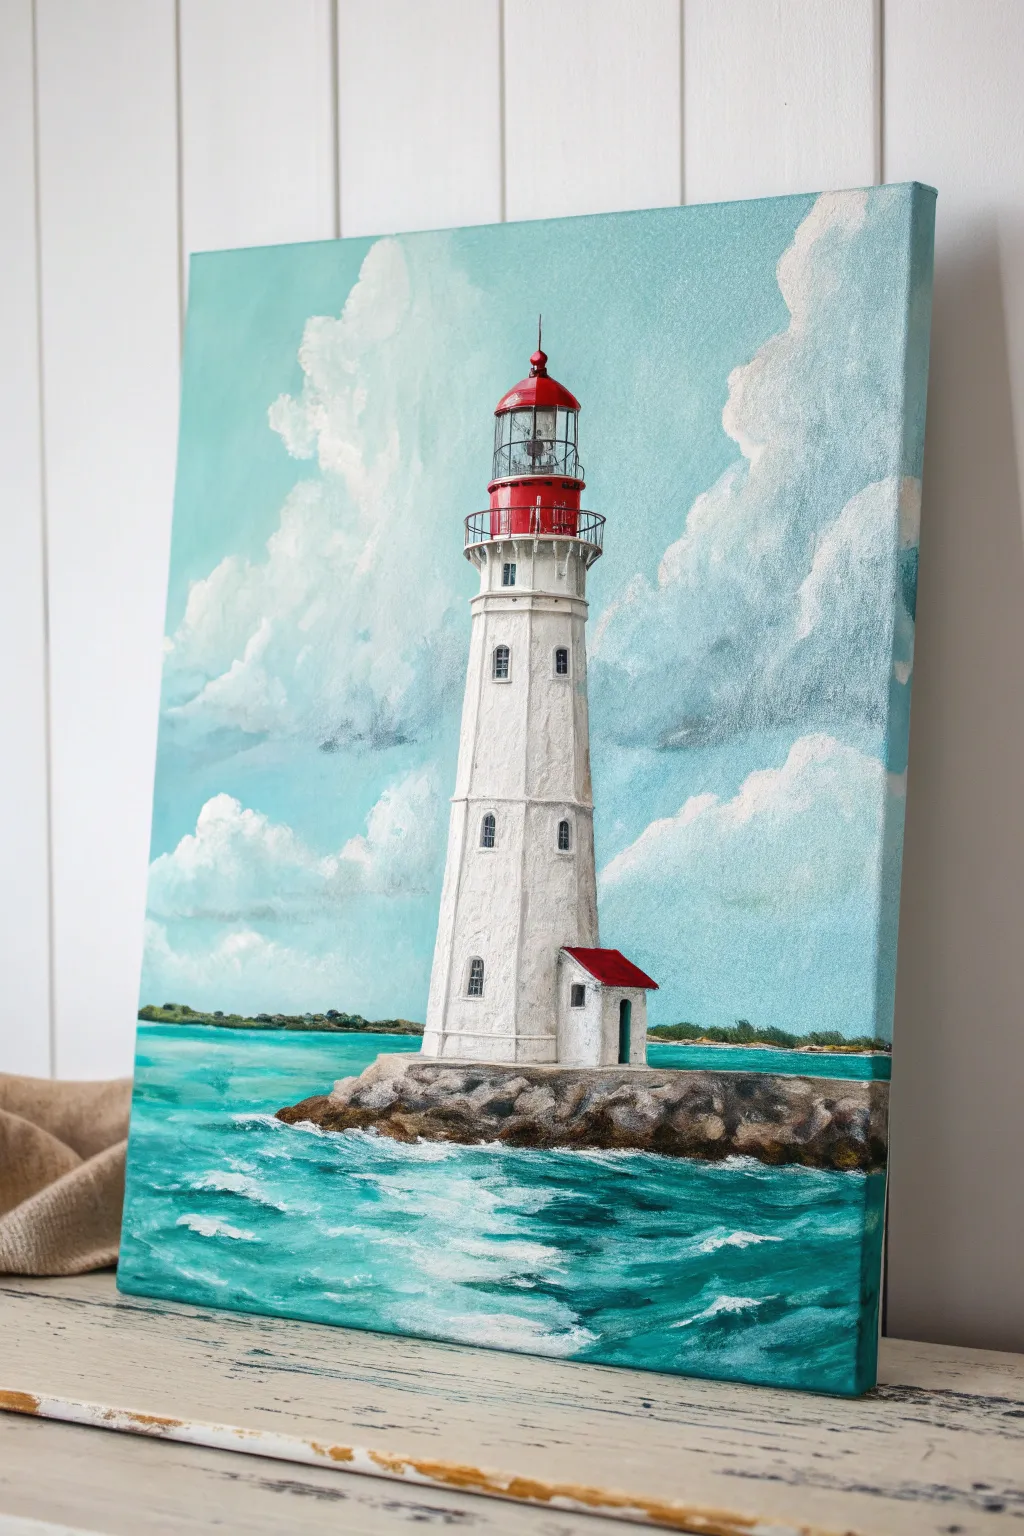
Capture the serenity of a coastal afternoon with this vibrant acrylic painting, featuring a classic white lighthouse standing tall amidst turquoise waves and billowing clouds. The composition relies on strong vertical lines contrasted with soft, organic textures in the sky and sea, making it a perfect exercise in balancing structure and flow.
Step-by-Step Guide
Materials
- Stretched canvas (12×16 or 16×20 inches recommended)
- Acrylic paints (Titanium White, Phthalo Blue, Turquoise, Burnt Umber, Cadmium Red, Black, and a medium Grey)
- Flat brushes (1-inch wash, 1/2-inch)
- Round brushes (sizes 4 and 8)
- Fine liner brush (size 0 or 00)
- Palette knife
- Water cup and paper towels
- Pencil and eraser
- Ruler
Step 1: Sketching the Structure
-
Establish the Horizon:
Begin by lightly sketching a horizontal line about one-third of the way up from the bottom of your canvas to separate the sky from the sea. Don’t worry about making it perfectly straight, as the distant land will cover it. -
Outline the Lighthouse:
Using a ruler, draw a vertical center line to guide your lighthouse placement. Sketch a tall, tapered rectangle for the tower, ensuring the base is wider than the top section. -
Add Architectural Details:
Sketch the lantern room at the top, the railing balcony just below it, and the small attached house at the base. Mark locations for the small vertical windows going up the tower. -
Define the Rock Base:
Draw an irregular, rugged shape at the very bottom of the lighthouse to represent the rocky jetty it stands on.
Clean Lines Hack
Use painter’s tape along the horizon and sides of the lighthouse tower while painting the sky. It keeps your edges crisp without needing a super steady hand.
Step 2: Painting the Sky and Clouds
-
Base Sky Color:
Mix Titanium White with a small touch of Phthalo Blue and Turquoise. Apply this pale blue gradient across the entire sky area, making it slightly darker at the very top of the canvas. -
Blocking in Cloud Shapes:
While the blue is still tacky, use a larger round brush loaded with Titanium White to dab in heavy, billowing cloud shapes on the left and right sides. Use a circular scrubbing motion to create fluffiness. -
Cloud Shadows:
Mix a tiny amount of Grey into your white. Lightly blend this shadow color into the bottom edges of the clouds to give them volume and dimension. -
Refining Cloud Edges:
Use a clean, dry brush to soften the edges where the white clouds meet the blue sky, creating that wispy, airy look.
Muddy Clouds?
If your white clouds are turning blue, let the blue sky layer dry completely before adding the white tops. Wet-on-wet encourages blending; wet-on-dry creates distinct shapes.
Step 3: The Sea and Background
-
Distant Land:
Mix Phthalo Green with a bit of Burnt Umber to create a dark, distant tree line color. Paint a thin strip along the horizon line, varying the height slightly to suggest trees. -
Ocean Base Coat:
For the water, mix Turquoise with a little Phthalo Blue and White. Paint the entire water area with horizontal strokes. -
Ocean Depth:
Add more blue to your mix for the deeper water in the foreground and near the horizon. Use horizontal streaks to imitate the movement of waves. -
Sea Foam and Waves:
Load a small flat brush with pure White. Create choppy, horizontal dashes in the foreground water to mimic whitecaps and sea foam. I find using the chisel edge of the brush works best here.
Step 4: Lighthouse and Rocks
-
Painting the Tower:
Fill in the main body of the lighthouse with Titanium White. To make it look rounded, mix a very light grey and paint a vertical shadow along the right side of the tower. -
The Red Lantern:
Use Cadmium Red to paint the top dome and the railing area. Add a darker red or brown to the shadowed side of the dome for contrast. -
Windows and Railings:
Using your fine liner brush and black (thinned slightly with water), carefully paint the balcony railings, the lantern room glass grid, and the small arched windows down the tower. -
The Little House:
Paint the attached structure white, adding the distinct red roof. Use a dark grey or black for the doorway to show depth. -
Rock Base Texture:
Mix Burnt Umber, Black, and a touch of White to get a rocky grey-brown. Fill in the base shape. -
Highlighting Rocks:
Take a palette knife or small brush with lighter grey-brown paint and dab the tops of the rocks to simulate sunlight hitting the uneven stone surfaces. -
Water Interaction:
Finally, paint small splashes of white water where the sea meets the dark rocks to ground the lighthouse in the scene.
Step back and admire how the crisp architectural lines contrast beautifully with the soft movement of your painted sea and sky


Golden Hour Glow On White Tower
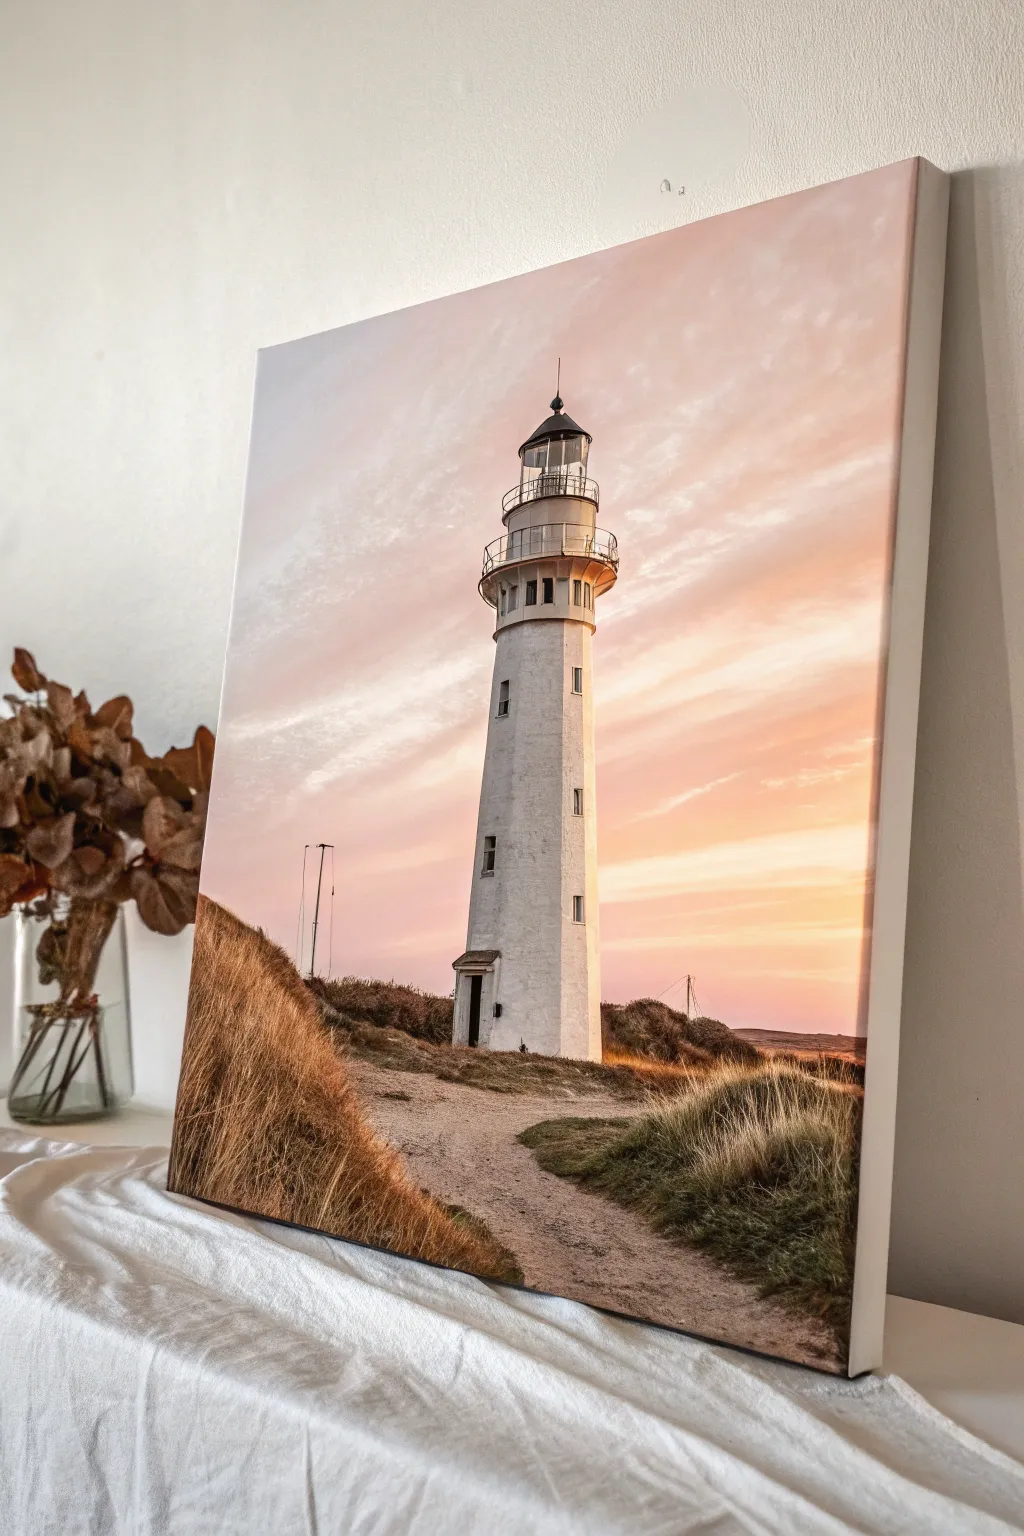
Capture the serene beauty of a coastal evening with this acrylic painting tutorial that features a majestic white lighthouse bathed in soft pastel light. You will learn to blend dreamy skies and detail architectural elements to create a peaceful seaside escape on canvas.
Step-by-Step Tutorial
Materials
- Square stretched canvas (16×16 or similar)
- Acrylic paints: Titanium White, Mars Black, Burnt Umber, Yellow Ochre, Cadmium Orange, Napthol Red Light, Cerulean Blue
- Set of acrylic brushes: 1-inch flat wash, medium filbert, small round (size 2), fine liner (size 00)
- Palette knife
- Water cup and paper towels
- Pencil for sketching
- Ruler
- Matte varnish (optional)
Step 1: Setting the Scene
-
Establish the horizon:
Lightly draw a horizon line with your pencil about one-quarter of the way up the canvas. Sketch the rough triangle shape of the lighthouse tower, placing it slightly off-center to the right for better composition. -
Sketch the terrain:
Outline the sweeping curve of the grassy dunes on the left and the smaller mounds on the right. Draw a winding path leading from the bottom center edge toward the lighthouse base. -
Detail the tower:
Use your ruler to refine the lighthouse walls, ensuring they taper slightly inward as they go up. Add the lantern room at the top, the gallery railing, and small rectangles for the windows.
Uneven Gradients?
If your sky blending looks choppy, use a clean, slightly damp brush to smooth transitions while the paint is still tacky, or use a glazing medium to extend drying time.
Step 2: Painting the Sky
-
Mix the sky gradient:
Prepare three piles of paint: a pale blue-grey (White + touch of Cerulean + tiny dot of Black), a soft peach (White + Orange + Yellow Ochre), and a light pink (White + Red). -
Apply the upper sky:
Using the large flat wash brush, paint the top left cornerts with the blue-grey mix, using horizontal strokes. While the paint is wet, begin blending downward. -
Blend the sunset colors:
Pick up the pink mixture and blend it into the blue-grey area, working diagonally across the canvas. As you reach the horizon and the right side, transition into the peach and golden tones to simulate the sun’s low angle. -
Create soft clouds:
With a clean, dry filbert brush and a tiny amount of white mixed with peach, scumble varying cloud streaks across the sky. Keep the edges soft and feathery to mimic distinct cirrus clouds.
Add Weathering
Make the lighthouse look aged by dry-brushing faint patches of grey and brown near the base and under windows to simulate peeling paint and salt stains.
Step 3: The Lighthouse Tower
-
Base coat the tower:
Fill in the lighthouse tower shape with a solid coat of Titanium White. I like to add the tiniest touch of Burnt Umber to the white so it isn’t too stark against the warm sky. -
Add lighting and shadow:
Determine your light source coming from the right. Glaze a very thin mix of white and yellow on the right side of the tower. On the left side, paint a subtle shadow using a grey-purple mix (White + Black + dot of Red). -
Paint the lantern room:
Use the small round brush and black paint to carefully fill in the lantern room structure at the top. Use thin lines to suggest the glass panes, leaving white spaces for reflections. -
Detail the windows:
Paint the small window rectangles with a dark grey. Add tiny white highlights on the edges to give them depth. -
Refine the railing:
Switch to your fine liner brush. With thinned black paint, carefully draw the delicate railing around the gallery deck. Steady your hand by resting your pinky on the dry canvas.
Step 4: Foreground and Details
-
Underpaint the ground:
Paint the path area with a mix of White, Burnt Umber, and a touch of dull pink. Paint the grassy hill areas with a dark brown underlayer. -
Texture the path:
Once the path is dry, dry-brush lighter beige tones over it to create the texture of sand and dirt. Add darker shadows where the grass meets the path. -
Create tall grass:
Using a fan brush or the side of a flat brush, flick upward strokes of Yellow Ochre mixed with Burnt Umber to create the dune grass. Vary the lengths and directions. -
Add highlights to grass:
Mix a lighter golden wheat color (Yellow Ochre + White). Add a second layer of grass strokes, focusing on the tips where the sunset light would catch them, especially on the left hill. -
Final touches:
Add the distant horizon line in a hazy purple-grey. If desired, paint the faint lines of the taller antennas to the left of the lighthouse using the liner brush.
Step back and admire how the warm glow transforms your painted tower into a welcoming beacon


Keeper’s Cottage At The Lighthouse Base
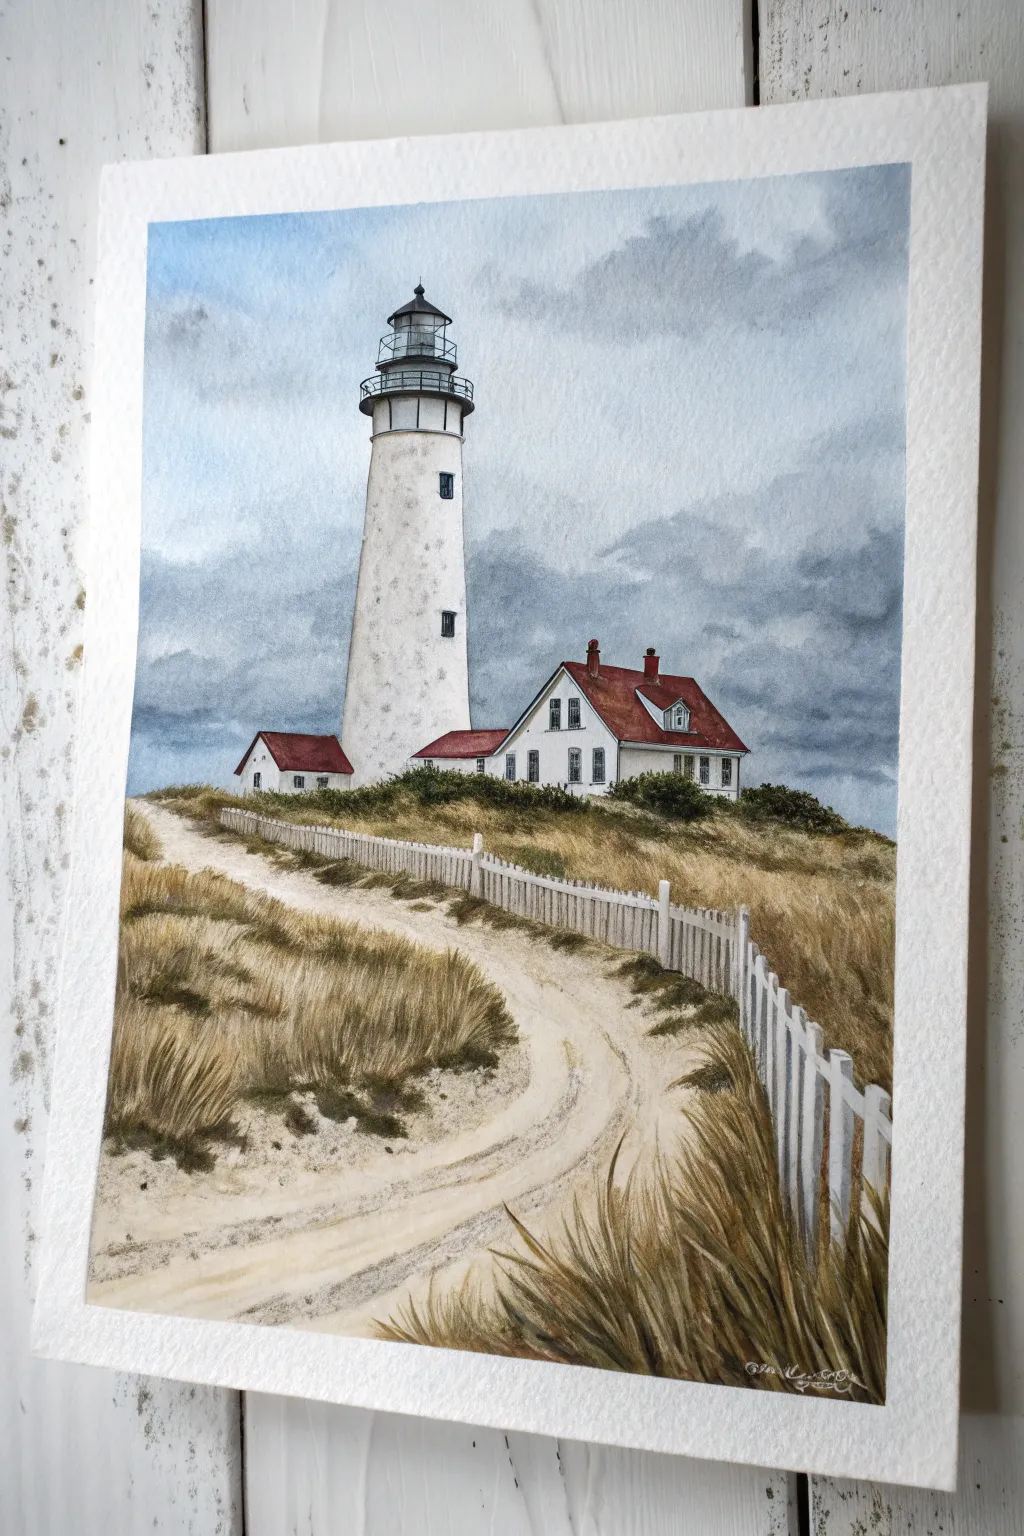
Capture the moody romance of coastal living with this detailed watercolor study featuring a classic lighthouse and red-roofed keeper’s cottage. The composition draws the eye along a sandy, fence-lined road toward the tower, set against a dramatic, cloud-filled sky.
Step-by-Step
Materials
- Cold press watercolor paper (140lb/300gsm, textured)
- Watercolor paints (Indigo, Payne’s Grey, Burnt Sienna, Yellow Ochre, Ultramarine Blue, Alizarin Crimson, Sepia)
- White gouache or white gel pen
- Masking fluid and an old brush
- Round brushes (sizes 2, 6, and 10)
- Flat shader brush (1/2 inch)
- Rigger or liner brush
- HB pencil and kneaded eraser
- painter’s tape
Step 1: Sketch and Sky
-
Tape and Trace:
Secure your paper to a board with painter’s tape to create a clean border. Lightly sketch the horizon line about 1/3 up from the bottom, then draft the lighthouse tower, the attached cottage, and the winding S-curve of the sandy path. -
Refine the Fence:
Carefully draw the picket fence posts following the curve of the road on the right side. Keep the posts closer together as they recede into the distance to establish accurate perspective. -
Masking the Whites:
Apply masking fluid to the lighthouse tower, the white trim on the cottage, and the tops of the fence posts. Let this dry completely to protect your brightest whites. -
Sky Wash Base:
Wet the sky area with clean water. Drop in a pale wash of Ultramarine Blue near the top left, fading it out as you move down. -
Building Clouds:
While the paper is still damp, mix Indigo with a touch of Payne’s Grey. Dab this darker mix into the wet sky to form heavy, looming clouds, especially on the right side and near the horizon line, softening edges for a fluffy look.
Dry Brush for Grit
For the sandy tire tracks, insure your brush is barely damp and loaded with pigment. Drag it quickly over the paper’s texture; the paint will catch only the ‘hills’ of the paper grain.
Step 2: Lighthouse and Cottage
-
Remove Masking:
Once the sky is bone dry, gently rub away the masking fluid from the lighthouse and cottage (leave the fence masked for now). -
Tower Texture:
Paint the lighthouse tower with a very watery mix of Yellow Ochre and Payne’s Grey to give it an aged, off-white look. Add a vertical shadow on the right side using a cool grey mix to create cylindrical volume. -
Roof Details:
Mix Alizarin Crimson with Burnt Sienna for the roofs. Apply this color, lifting out tiny highlights or adding a darker Sepia mix near the eaves to show texture. -
Windows and Lantern:
Use a size 2 brush and concentrated Payne’s Grey or Indigo to paint the lantern room at the top and the small windows on the cottage. Keep lines crisp. -
Building Shadows:
Add cast shadows under the eaves and on the walls using a violet-grey mixture to ground the buildings.
Weather the Wood
Make the pristine white picket fence look more realistic by lightly glazing varied shades of diluted brown or green near the bottom of the posts to mimic dampness and moss.
Step 3: Foreground Terrain
-
Grassy Underpainting:
Paint the grassy dunes on either side of the path with a wash of Yellow Ochre and a touch of Burnt Sienna. Keep the road area mostly bare paper with just a hint of dirty wash. -
Darker Foliage:
Stipple a mix of Sap Green and Sepia around the base of the cottage and lighthouse to create low-lying shrubs. This anchors the structures to the ground. -
Road Texture:
Using a dry brush technique with pale Sepia, lightly drag your brush horizontally across the sandy path to suggest tire tracks and uneven dirt.
Step 4: Final Details
-
Fence Reveal:
Remove the remaining masking fluid from the fence. Paint the shadow side of the pickets with a very light blue-grey wash, leaving the sunlit tops pure white. -
Grass Texture:
Use your rigger brush with a mix of Sepia and Ochre to flick distinct blades of tall grass in the foreground. Vary the direction of your strokes to make it look windswept. -
Foreground Grass Detail:
In the bottom right corner, paint larger, deeply colored clumps of sawgrass using Sepia and Indigo. Let these blades overlap the bottom of the fence slightly. -
Final Highlights:
Use white gouache to tidy up any lost highlights on the fence tops or to add a few sparky highlights to the lighthouse railing.
Peel off your tape to reveal crisp white borders framing your coastal masterpiece.


Wildflowers In Front Of The Lighthouse
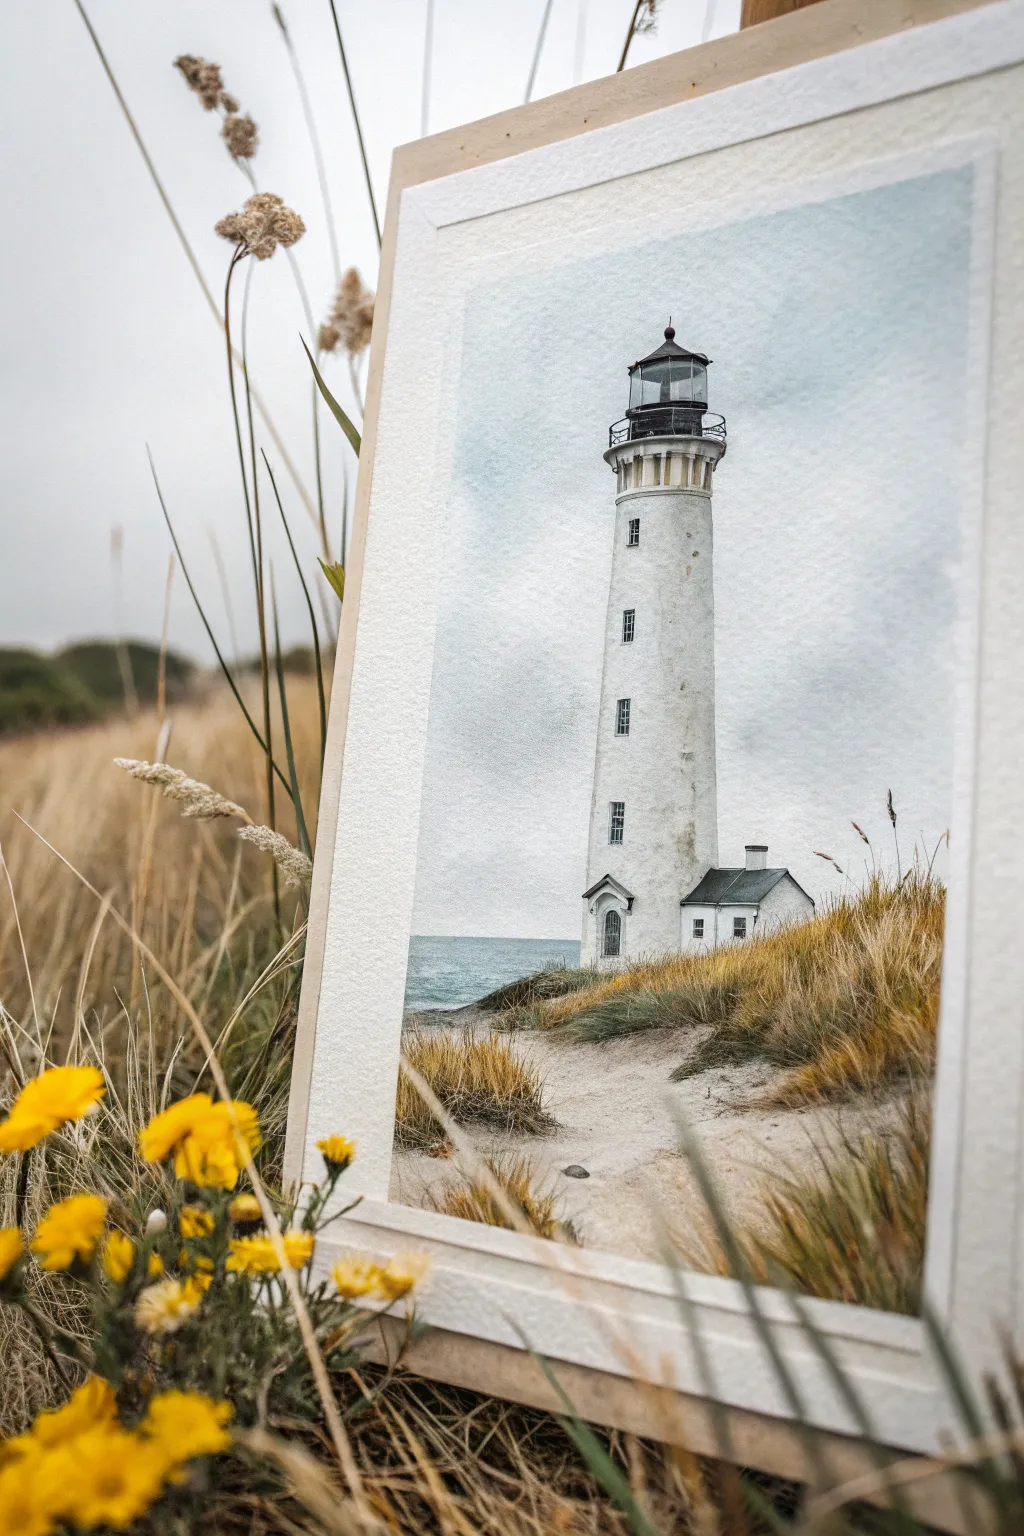
Capture the serene beauty of a towering white lighthouse overlooking windswept dunes in this detailed watercolor tutorial. The soft, overcast sky and textured grassy foreground create a realistic yet painterly scene that perfectly evokes the mood of the coast.
Detailed Instructions
Materials
- Cold press watercolor paper (300 gsm)
- Watercolor paints (Payne’s Grey, Cerulean Blue, Yellow Ochre, Burnt Sienna, Sepia, White Gouache)
- Masking fluid
- Round brushes (sizes 2, 6, and 10)
- Rigger or liner brush
- Pencil and eraser
- Board and artist tape
- Paper towels and water jars
Step 1: Preparation and Sketching
-
Tape down your paper:
Secure your watercolor paper to a board using artist tape on all four sides. This prevents buckling when we add water and creates a crisp white border for framing later. -
Sketch the lighthouse:
Lightly sketch the lighthouse structure using a pencil. Focus on getting the proportions correct—it should be tall and slender, tapering slightly towards the top. Draw the lantern room details carefully but keep the lines faint. -
Define the landscape:
Sketch the rolling dunes in the foreground and the horizon line for the sea. The horizon should be low, about a third of the way up the paper, to emphasize the height of the lighthouse. -
Protect the highlights:
Apply masking fluid to the brightest white areas of the lighthouse, particularly the sunlit side and the small white railing details. Let this dry completely before painting.
Natural Grass Motion
When painting grass with your rigger brush, hold it loosely near the end of the handle. Use quick, confident flicks rather than slow strokes to make the grass look windswept and organic.
Step 2: Painting the Sky and Sea
-
Wet-on-wet sky wash:
Brush clean water over the entire sky area. While it’s glistening, drop in a very dilute mix of Cerulean Blue and a touch of Payne’s Grey. Keep it uneven to suggest cloud cover. -
Add cloud texture:
While the paper is still damp, lift out some pigment with a clean, thirsty brush to create soft white clouds. Conversely, dab in slightly darker grey clouds for that overcast mood. -
Paint the horizon:
Once the sky is dry, paint a strip of deep blue-grey for the ocean horizon. Ensure the line is perfectly straight. -
Foreground sea texture:
As you move closer to the dunes, lighten the sea color and add small horizontal strokes to mimic waves and choppy water.
Step 3: Structure and Details
-
Base layer for the lighthouse:
Paint the shadowed side of the lighthouse with a very pale wash of Payne’s Grey. Keep the sunlit side the white of the paper. This establishes the cylindrical form. -
Lantern room details:
Using a size 2 brush and a concentrated mix of Sepia and Payne’s Grey (almost black), carefully paint the lantern room framework, the railing, and the top cap. Be precise here. -
Windows and doors:
Add the small windows going up the tower and the entryway at the bottom using the dark grey mix. Keep edges sharp. -
Attached building:
Paint the roof of the small attached house with a dark grey. Shade the walls lightly, matching the shadow direction of the main tower. -
Texture the walls:
I like to use a nearly dry brush with faint grey paint to stipple some texture onto the lighthouse walls, suggesting aged stucco or brickwork.
Muddy Skies?
If your sky colors turn muddy, you likely overworked the paper while it was drying. Wait for it to dry completely, then try lifting color with a damp sponge or glazing a clean layer over top.
Step 4: The Grassy Foreground
-
Sand base layer:
Wash a pale, watery mix of Yellow Ochre and a tiny bit of Burnt Sienna over the dune areas to create the sand color. Leave some white gaps for bright sand highlights. -
Initial grass shapes:
While the sand wash is damp, drop in darker earthy greens and browns at the base of the dunes to create volume and shadow under the grass. -
Painting individual blades:
Once the base is dry, use your rigger brush with a mix of Yellow Ochre and Burnt Sienna to flick upwards, creating individual tall grass blades. Vary the pressure to make them taper naturally. -
Depth and shadow:
Mix a darker Sepia tone and add more grass blades in the shadowed areas and near the bottom of the clumps. This layering creates realistic depth. -
Create distinct clumps:
Don’t cover the whole foreground evenly; group the grass into distinct tufts and clumps, leaving paths of sand visible between them to guide the eye.
Step 5: Final Touches
-
Remove masking fluid:
Gently rub away the dried masking fluid to reveal the crisp bright white paper underneath. -
Soften harsh edges:
If any masked edges look too sharp, soften them slightly with a clean, damp brush. -
Opaque highlights:
Use a tiny amount of White Gouache to add final bright highlights to the lantern glass or to draw a few stray light grass blades overlapping the darker areas.
Peeling off the tape reveals a crisp border that makes your coastal scene look professional and ready for display
BRUSH GUIDE
The Right Brush for Every Stroke
From clean lines to bold texture — master brush choice, stroke control, and essential techniques.
Explore the Full Guide
Minimal Line-And-Wash Lighthouse Sketch
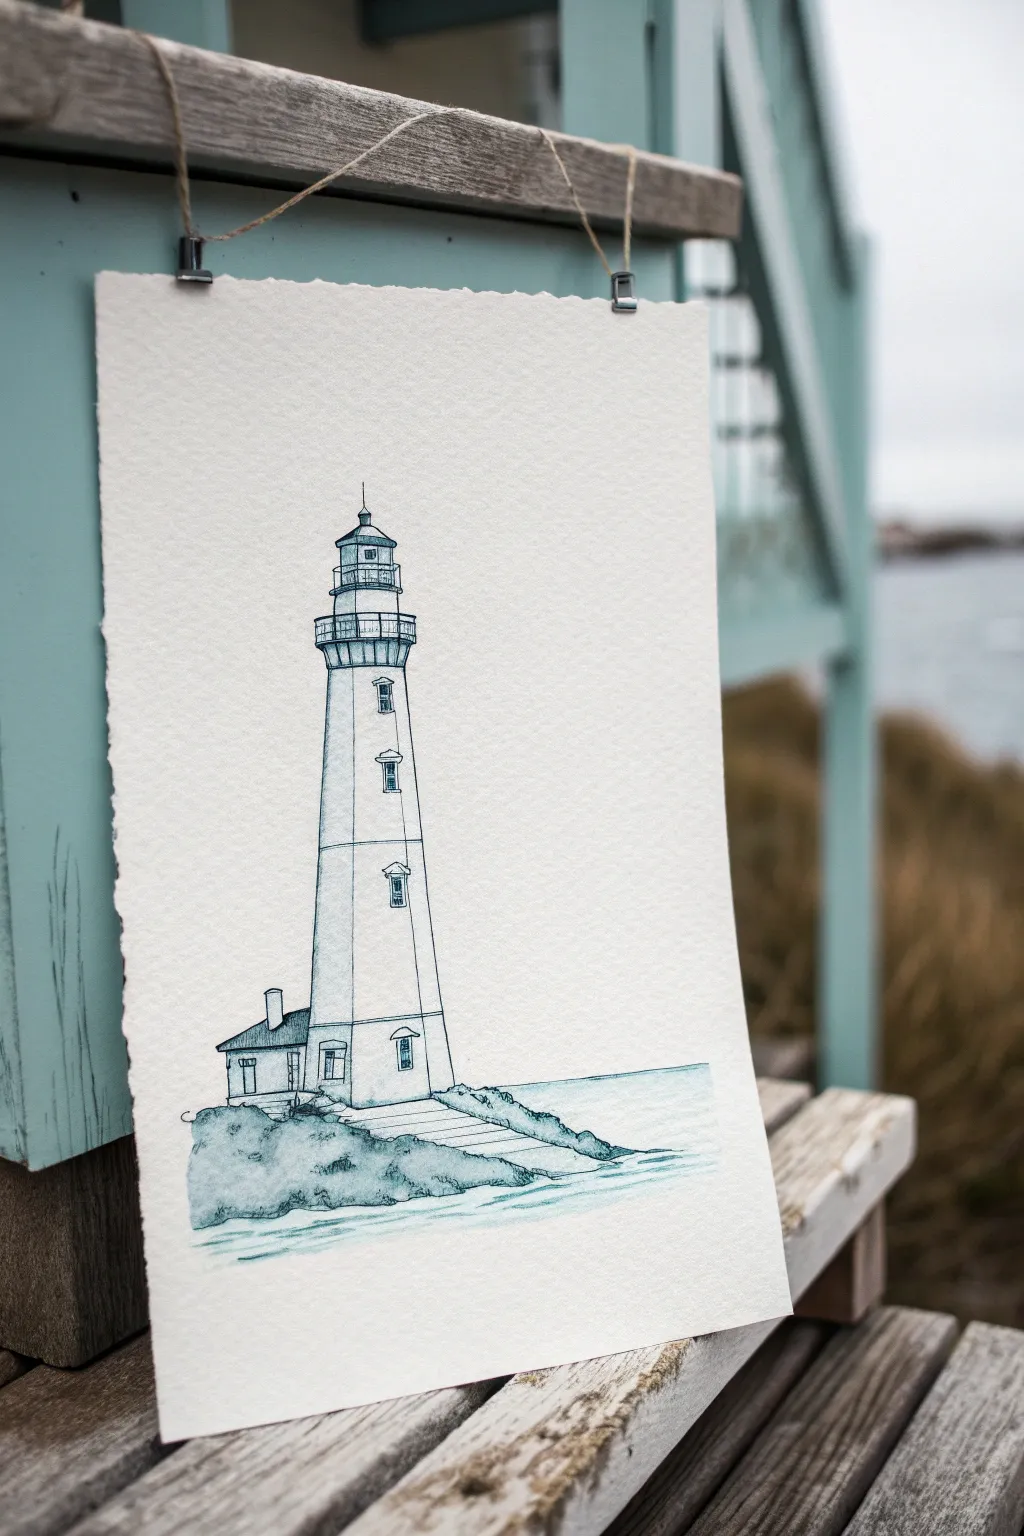
Capture the serene solitude of the coast with this delicate line-and-wash project. Using fine ink lines and a limited palette of teal blue watercolor, you’ll create a piece that feels both architectural and atmospheric, perfect for modern coastal decor.
How-To Guide
Materials
- Cold press watercolor paper (approx. 140lb/300gsm), specifically with a rough or deckled edge if possible
- B or HB pencil for initial sketching
- Fine liner pen (0.1 or 0.3mm) with waterproof ink (black or dark grey)
- Watercolor paints (Indanthrone Blue, Phthalo Blue, or a mixed Teal)
- Round watercolor brush (size 4 or 6)
- Clean water container
- Paper towels
- Kneaded eraser
- Ruler (optional, for structure lines)
Step 1: Planning and Sketching
-
Observe the Composition:
Note that the lighthouse is the solitary subject, placed slightly off-center to the left. It dominates the vertical space, leaving plenty of ‘sky’ above to emphasize height. -
Establish the Ground Line:
Lightly sketch a sloping, uneven line near the bottom quarter of your paper to represent the rocky outcropping. Keep this loose; rocks shouldn’t look perfectly manicured. -
Draft the Lighthouse Structure:
Draw a tall, tapering rectangle rising from the rocks. Use a ruler if you struggle with long straight lines, but a freehand line adds more character. This central column should narrow slightly as it goes up. -
Add the Lantern Room:
Top your tapered column with a slightly wider platform (the gallery) and sketch the cylindrical lantern room on top. Don’t forget the small triangular roof cap. -
Sketch the Windows and Keeper’s House:
Place three rectangular windows vertically down the tower. Add the small attached structure at the base on the left side, giving it a simple pitched roof.
Uneven Watercolors?
If your wash looks bloomy or uneven on the tower, you likely used too much water. Lift excess moisture with a thirst dry brush, or embrace the texture as weathering on the building.
Step 2: Inking the Details
-
Outline the Main Structure:
Switch to your waterproof fine liner. Carefully trace your pencil lines for the tower edges. A slightly shaky or broken line here can actually look lovely and aged, so don’t stress about perfection. -
Detail the Gallery and Lantern:
Draw the railing around the top platform using tiny vertical strokes. Ink the geometric panes of glass in the lantern room with precision. -
Define the Windows:
Ink the windows, adding small decorative hoods or triangular pediments above them for architectural interest. Darken the window panes slightly with hatching if you like. -
Texture the Rocks:
Use jagged, irregular lines to define the rocky base. Don’t outline every single rock; just suggest the texture with craggy shapes. -
Erase Pencil Guidelines:
Wait at least five minutes to ensure the ink is bone dry. Gently erase all visible graphite markings with your kneaded eraser to leave a clean, crisp drawing.
Step 3: Adding the Wash
-
Mix Your Signature Color:
Prepare a watery mix of a muted teal or steel blue. You want this wash to be transparent and subtle, not opaque. -
Paint the Shadow Side:
Apply a light wash of color to the left side of the lighthouse tower to suggest cylindrical volume. Soften the edge with clean water so it fades into whiteness as it moves right. -
Detail the Lantern Room:
Drop a tiny amount of pigment into the glass area of the lantern room to give it depth, but leave small white highlights to represent reflecting glass. -
Wash the Rocks:
Paint the rocky base with a slightly darker concentration of your teal mix. Let the paint pool slightly in the divots and crevices you drew earlier to create natural shadows. -
Create the Sea:
Use horizontal, sweeping strokes to paint the water to the right of the lighthouse. Start the stroke at the rocks and pull outwards, lifting your brush to let the paper texture show through. -
Add Atmospheric Depth:
While the rock wash is still damp, dab in a slightly more saturated blue in the nooks and crannies for contrast. I find this really anchors the building to the ground. -
Final Touches:
Once everything is fully dry, you can go back with your pen and add a few final dots or tiny scratches to the rocks for extra grit.
Get That Edge!
To mimic the rustic paper in the photo without buying expensive sheets, firmly hold a metal ruler against your dry paper edge and tear the paper upwards against it for a faux-deckled look.
Hang your finished piece using simple clips or twine to maintain that rustic, effortless studio aesthetic you’ve just created
Monochrome Lighthouse Value Painting
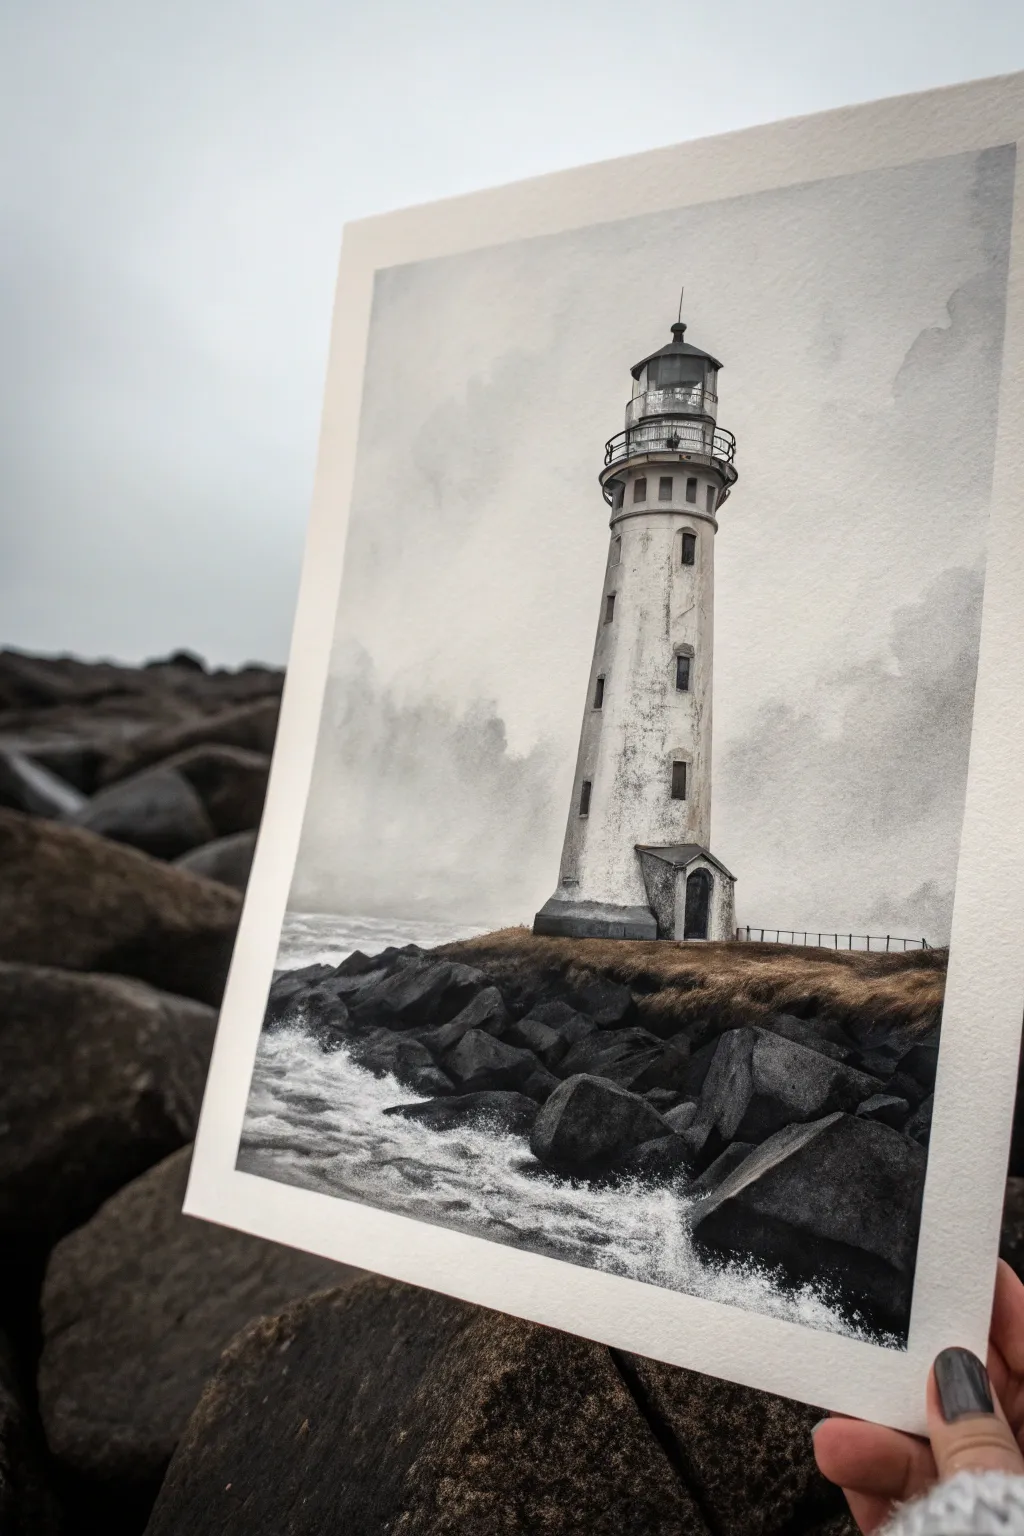
Capture the moody atmosphere of a coastal storm with this striking monochromatic watercolor painting. By focusing purely on values—from the deepest blacks of the rocks to the softest grays of the clouds—you’ll create a dramatic scene that feels both timeless and powerful.
Step-by-Step
Materials
- Cold Press Watercolor Paper (140lb/300gsm)
- Black Watercolor Paint (e.g., Lamp Black or Neutral Tint)
- Payne’s Gray Watercolor Paint
- White Gouache (for highlights)
- Round Brushes (Sizes 2, 6, and 10)
- Flat Brush (1/2 inch)
- Pencil (HB or 2H)
- Masking Tape
- Two Jars of Water
- Paper Towels
Step 1: Preparation and Sketching
-
Secure the paper:
Begin by taping down all four edges of your watercolor paper to a board. This will prevent buckling when you apply the wet washes and leaves a crisp white border around the finished piece. -
Draft the horizon:
Using a light hand and your HB pencil, draw a low horizon line about one-quarter up from the bottom of the page. This establishes the rocky foreground. -
sketch the lighthouse:
Draw the lighthouse structure vertically centered but slightly offset to the right. Focus on the gentle taper of the tower and the cylindrical lantern room at the top. Sketch the small attached entry building at the base. -
Add rocky details:
Loosely sketch the jagged shapes of the large rocks in the foreground. You don’t need to draw every individual stone, just the main clusters and angles.
Step 2: The Atmospheric Sky
-
Wet the sky area:
Using clean water and your flat brush, wet the entire sky area around the lighthouse. Be careful to paint around the lighthouse shape, keeping the paper inside the tower dry. -
Apply the first wash:
Dilute a small amount of Payne’s Gray to a very light, watery consistency. Drop this into the wet paper to create soft, diffused clouds. I like to tilt the board slightly to let the pigment drift naturally. -
Deepen the clouds:
While the paper is still damp, mix a slightly stronger gray. Dab this into the lower sky area and corners to suggest localized storm clouds, softening any hard edges with a clean, damp brush. -
Let it dry completely:
Allow the sky layer to dry fully before moving on. The paper should be flat and warm to the touch.
Muddy Grays?
If your grays look dull, you’re likely overworking the wet layers. Lay down your stroke and leave it alone. Let the water texture the pigment naturally.
Step 3: Painting the Lighthouse
-
Base tone for the tower:
Mix a very pale gray wash. Paint the entire lighthouse body, leaving small slivers of white paper for highlights depending on your light source (likely from the left). -
Weathering texture:
Once the base is dry, use a size 6 brush with a blotchy, uneven load of gray paint to gently stipple texture onto the tower. Focus on vertical streaks to mimic water stains and aging plaster. -
Define the windows:
Switch to your size 2 brush and a dark mix of Lamp Black. Carefully paint the small rectangular windows, the lantern room railing, and the dome roof. Keep lines crisp. -
Create cylindrical volume:
Glaze a transparent shadow down the right side of the tower. This gradient builds the 3D form, making the lighthouse look round rather than flat.
Add a Splash
For a ‘Level Up,’ try adding a single color. A tiny touch of rusty orange on the lantern room railing or yellow in the grass creates a stunning focal point.
Step 4: Foreground and Sea
-
Paint the ocean:
Behind the rocks on the left, paint the sea using horizontal strokes of medium gray. Leave rough, unpainted white gaps to represent the churning whitecaps of waves. -
Block in the rocks:
Mix a rich, dark value using Lamp Black and Payne’s Gray. Paint the foreground rocks, focusing on the shadow sides first. Use angular, geometric strokes to emulate the hardness of stone. -
Refine rock values:
Once the initial darks are dry, add a slightly lighter gray wash over the top faces of the rocks. This value contrast between the top (light) and side (dark) planes gives the rocks dimension. -
Add grassy texture:
Where the lighthouse meets the rocks, use a dry-brush technique with a brownish-gray mix to scrub in some sparse, windblown grass texture.
Step 5: Final Details
-
Sea spray:
Dip an old toothbrush or stiff brush into white gouache. Shield the lighthouse with a scrap of paper and gently flick specks of white over the base of the rocks to create sea spray. -
Intensify darks:
Step back and assess your values. Use your darkest black paint to deepen the deepest crevices between the rocks and the darkest shadows under the lighthouse gallery. -
White highlights:
Use a tiny brush and pure white gouache to add final sharp highlights to the lantern glass and the crests of the waves if you lost them during painting.
Peeling off the tape reveals a crisp border that makes your moody, atmospheric seascape look instantly professional

PENCIL GUIDE
Understanding Pencil Grades from H to B
From first sketch to finished drawing — learn pencil grades, line control, and shading techniques.
Explore the Full Guide
Impasto Rocks Under A Smooth Lighthouse

This striking lighthouse painting balances the serenity of a soft sunset sky with the rugged energy of crashing waves. By combining smooth blending techniques for the architecture with heavy impasto layering for the foreground rocks, you’ll create a dynamic piece full of depth and movement.
How-To Guide
Materials
- Stretched canvas (vertical orientation, approx. 18×24 inches or similar)
- Acrylic or oil paints (Titanium White, Paynes Grey, Burnt Umber, Yellow Ochre, Naples Yellow, Cerulean Blue)
- Large flat brush for the sky
- Medium filbert brush for water
- Small round brush for lighthouse details
- Palette knife
- Texture paste or heavy body gel medium (optional for extra rock dimension)
- Ruler or T-square
- Pencil
Step 1: Setting the Scene
-
Sketch the Composition:
Begin by lightly sketching your horizon line about one-third of the way up from the bottom. Use a ruler to draw the vertical center line for the lighthouse to ensure it stands straight, then sketch the tapering tower shape and the cluster of rocks in the foreground. -
Paint a Soft Gradient Sky:
Mix a large amount of Titanium White with a touch of Naples Yellow and a tiny dot of Yellow Ochre. Start painting at the horizon line and work your way up. -
Fade into Cool Tones:
As you move closer to the top of the canvas, gradually mix in the smallest amount of Paynes Grey or a very light blue to cool down the white. Blend the transition seamlessly using horizontal strokes while the paint is still wet. -
Add Subtle Clouds:
While the sky is damp, use a soft, dry brush to whisk in faint, diagonal cloud streaks using a slightly darker beige-grey mix. Keep these extremely subtle to not distract from the main subject.
Step 2: The Lighthouse Architecture
-
Block in the Tower:
Paint the main body of the lighthouse using Titanium White with just a hint of grey to kill the brightness. It shouldn’t be bright white yet. -
Shadow the Cylinder:
To make the tower look round, mix a light grey and glaze the left side of the lighthouse vertically. Keep the right side lighter where the sun hits it. -
Detail the Lantern Room:
Using a small round brush and dark grey (not pure black), carefully paint the railing, the lantern room cap, and the windows. I find steadying my hand on a mahl stick or dry part of the canvas helps with these thin lines. -
Paint the Keeper’s House:
Fill in the small house attached to the base. Use dark grey for the roof and distinct vertical strokes for the windows to suggest depth. -
Weathering Effects:
Once the tower is dry, dry-brush some faint grey uneven patches on the white surface to mimic aged stucco or concrete.
Keep it Vertical
For the lighthouse, always pull your brush strokes vertically. Even when blending shadows, horizontal strokes can make the tower look warped or bent.
Step 3: Impasto Foreground
-
Underpaint the Rocks:
Mix a dark base color using Burnt Umber and Paynes Grey. Block in the rock shapes at the bottom left and center, focusing on the overall silhouette rather than individual stones. -
Build Rock Texture:
Switch to a palette knife. Mix lighter greys and warm browns. Apply this paint thickly onto the tops of the rocks where the light would catch, leaving the crevices dark. -
Rough Stone Detailing:
Use the edge of your palette knife to scrape some texture into the wet paint, creating the look of jagged granite. Vary your pressure to create random, natural patterns. -
Establish the Sea Base:
Paint the water area with a mix of Paynes Grey, White, and a touch of Cerulean Blue. Use horizontal strokes for the distant water and choppy, angled strokes as you get closer to the shore.
Glazing for Glow
Once the sky is fully dry, apply a very thin wash of transparent orange or gold glaze over the horizon area to instantly warm up the sunset effect.
Step 4: Crashing Waves
-
Form the Splash Zone:
Load a worn bristle brush or a fan brush with pure Titanium White. Stipple (tap repeatedly) where the water meets the rocks to create the explosion of foam. -
Create Spray Mist:
Dry-brush a thin haze of white pulling away from the splash zone to simulate the fine mist hanging in the air. -
Define the Rolling Surf:
Paint curving white lines in the foreground water to show the movement of the waves rushing toward the viewer. Let these lines break and fade; they shouldn’t be solid stripes. -
Final Highlights:
Add the brightest white highlights to the sunlit side of the lighthouse and the sharpest peaks of the wet rocks to make them look slick and wet.
Step back and admire how the rough textures of the sea base beautifully contrast with the smooth, enduring strength of your lighthouse tower
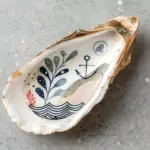
Abstract Color-Block Lighthouse Composition
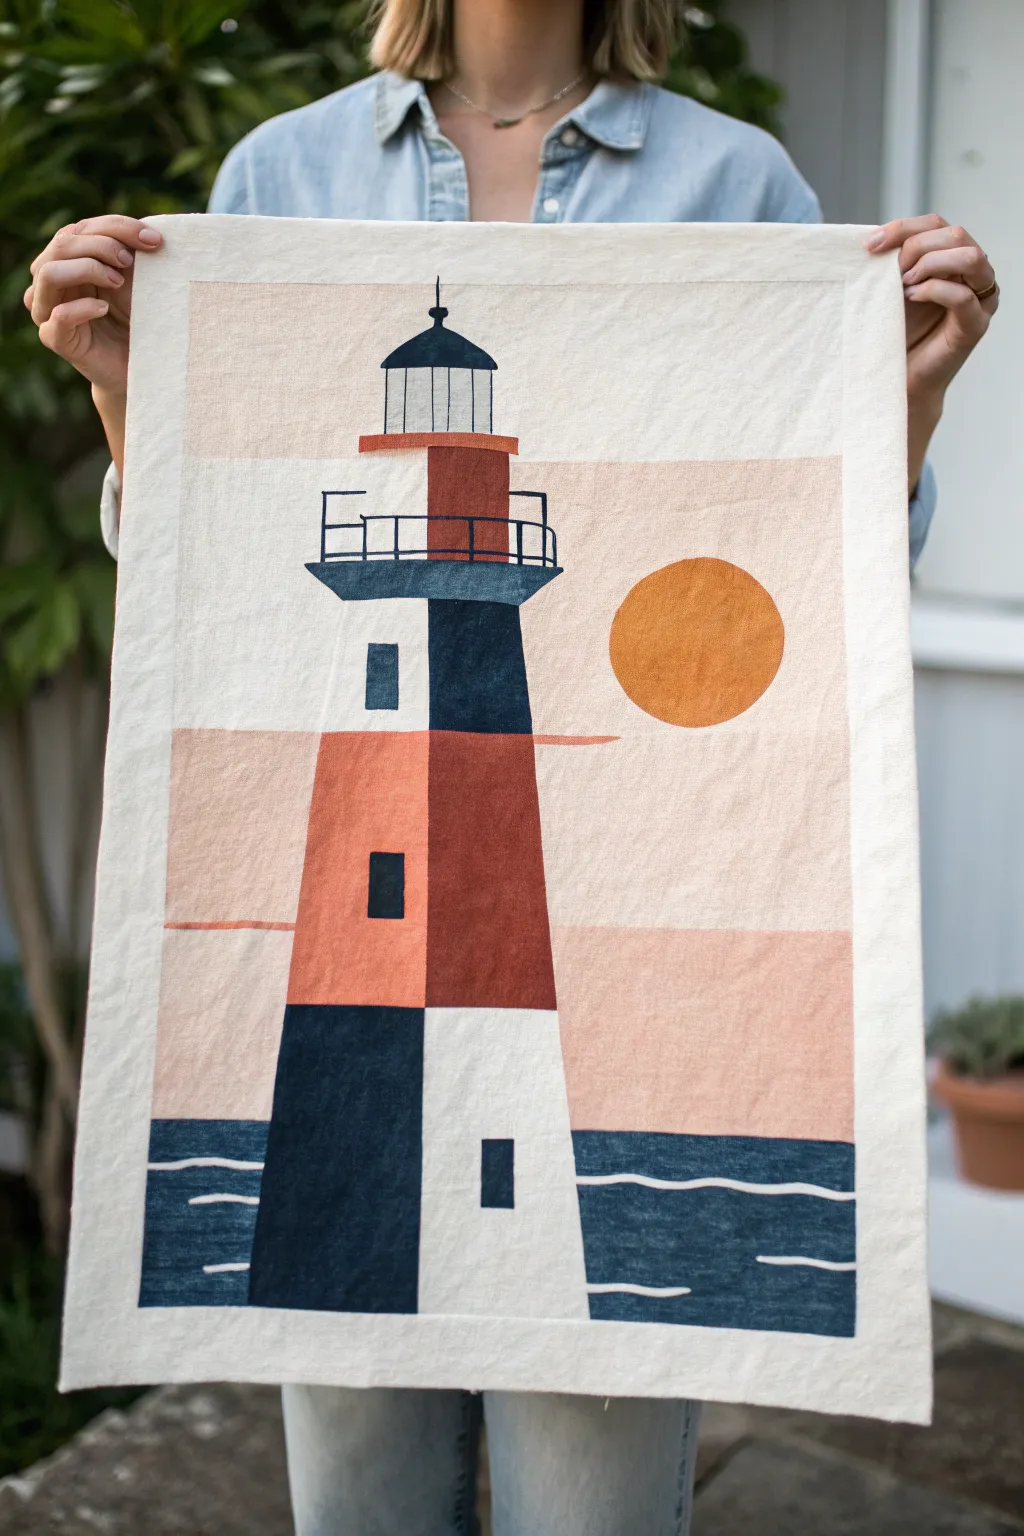
Capture the serenity of the coast with this geometric, abstract take on a classic lighthouse scene. Using bold shapes and a warm, muted palette, you’ll create a stylish piece of fabric art that feels both vintage and contemporary.
Step-by-Step
Materials
- Cotton or linen tea towel (natural or off-white)
- Fabric medium
- Acrylic paints (navy blue, terracotta/rust, dusty pink, cream, black)
- Flat shader brushes (various widths)
- Detail round brush
- Painter’s tape or masking tape
- Pencil for sketching
- Ruler or straight edge
- Cardboard or plastic sheet (to place under fabric)
Step 1: Preparation and Sketching
-
Prep your surface:
Before starting, wash and dry your fabric to remove any sizing chemicals, which ensures the paint adheres properly. Iron it completely flat. -
Protect your workspace:
Place a piece of cardboard or a heavy plastic sheet underneath your fabric layer to prevent paint from bleeding through to the other side or your table. -
Establish the horizon:
Using your ruler and a pencil, lightly draw a horizontal line across the lower third of the fabric to separate the sea from the sky. -
Sketch the lighthouse structure:
Draw the lighthouse centrally. Think of it as three stacked segments getting slightly narrower as they go up. Don’t worry about perfect realism; this style relies on simple geometry. -
Add background details:
Sketch a circle for the sun on the right side. Lightly mark out horizontal bands in the sky area where color shifts will happen, creating that abstract, layered sunset effect.
Clean Lines
For super crisp straight lines, rub the edge of your painter’s tape with a spoon or fingernail to seal it tight before painting. This stops paint from bleeding under.
Step 2: Painting the Background
-
Mix your medium:
Mix fabric medium into your acrylic paints according to the bottle instructions (usually 1:1 or 2:1). This keeps the fabric soft and washable rather than stiff. -
Tape the first section:
Apply painter’s tape along the horizon line and the edges of your first color block—let’s start with the dusty pink sky section just above the water. -
Paint the sky blocks:
Fill in the horizontal sky bands using dusty pink and lighter cream-pink mixtures. Painting right over the lighthouse outline for the lighter colors is fine, as the darker lighthouse colors will cover them later, but try to avoid the sun circle. -
Paint the sun:
Once the sky layer is dry to the touch, carefully paint the sun using a warm terracotta or marigold orange. A steady hand with a flat brush helps create a crisp edge here. -
Fill the sea:
Paint the bottom section navy blue for the ocean water. Ensure the horizon line is sharp and clean.
Wobbly Brushes?
If your hand shakes while doing the railing details, rest your pinky finger on a dry part of the fabric to anchor your hand. Breathing out while creating the stroke helps too.
Step 3: Defining the Lighthouse
-
Block in the base:
Begin painting the lighthouse segments. Notice the color-blocking logic: the left side of the lighthouse is lighter (mimicking light source), and the right side is darker (shadow). -
Paint the lower segment:
Paint the bottom-left segment navy blue and the bottom-right segment a creamy white. This creates immediate contrast against the background. -
Paint the middle segment:
Move to the middle section. Paint the left side a soft terracotta orange and the right side a deeper rust red. -
Paint the top segment:
For the segment just below the lantern room, reverse the colors or use light cream on the left and navy on the right to keep the visual rhythm interesting. -
Add the lantern room:
Paint the top lantern structure. Use black or dark navy for the roof cap and the railing base. Fill the window area with a very light blue or white.
Step 4: Final Details
-
Add windows:
Using a smaller flat brush, add the rectangular windows. Paint a dark navy window on the warm middle section, and a navy window on the white bottom section. -
Paint the railing:
Switch to your detail round brush. Carefully paint the delicate railing lines around the lantern room using dark navy or black. -
Detail the lantern:
Add vertical lines inside the lantern room glass area to suggest panes. -
Create water texture:
Finally, use the detail brush and creamy white paint to add loose, wiggly horizontal lines across the navy water and near the base of the lighthouse to represent waves. -
Set the paint:
Allow the project to dry for at least 24 hours. Once dry, heat set the paint by ironing the reverse side of the fabric for 3-5 minutes on a cotton setting (no steam).
Hang your finished textile art using a simple dowel or frame to bring a touch of nautical charm to your room


Surreal Floating Lighthouse Over The Sea

Capturing the serene mystery of this scene involves blending cool teal skies into warm sunset hues, centering on a weathered, realistic lighthouse. This large-scale vertical canvas project is perfect for practicing dramatic gradients and water reflections.
How-To Guide
Materials
- Large vertical stretched canvas (e.g., 24×36 inches)
- Acrylic paints: Phthalo Blue, Prussian Blue, Titanium White, Payne’s Grey, Magenta, Cadmium Orange, Burnt Umber
- Large flat wash brush (2-3 inch)
- Medium flat brush
- Small round detail brush (size 0 or 1)
- Fan brush (optional for clouds)
- Palette knife
- Painter’s tape or masking tape
- Water container and paper towels
- Slow-drying medium or glazing liquid
Step 1: Setting the Sky Gradient
-
Prime the horizon:
Begin by determining your horizon line about one-third up from the bottom of the canvas. Apply a strip of painter’s tape here to ensure a perfectly straight separation between water and sky. -
Deep dive into blue:
Mix Prussian Blue with a touch of Phthalo Blue and a tiny bit of Black or Payne’s Grey. Using your large wash brush, apply this dark mixture to the top third of the canvas, using broad horizontal strokes. -
Transitioning the sky:
Without cleaning the brush entirely, dip into some Titanium White and pure Phthalo Blue. Blend this into the dark section, working downwards to create a lighter teal mid-tone. -
The sunset glow:
Clean your brush thoroughly. Mix Magenta with Titanium White and a dot of Cadmium Orange. Apply this near the taped horizon line, blending upward into the teal. -
Cloud formations:
While the paint is still tacky, use a dry brush or scrunched paper towel to lift off paint or streak in soft, diagonal clouds using a mix of white and the lightest blue. Aim for a sweeping motion that draws the eye toward the center.
Step 2: Constructing the Lighthouse
-
Drafting the structure:
Once the sky is fully dry, peel off the tape. Lightly sketch the lighthouse shape with a pencil or diluted grey paint. It is a tall, tapered cylinder, centered but anchored on a stone pier. -
Base layer:
Block in the main body of the lighthouse using a light grey mix (White and a tiny touch of Payne’s Grey). Make the right side ever so slightly darker to suggest roundness, as the light source is behind it. -
Weathering effects:
I like to use a nearly dry brush for this part. Scumble patches of darker grey and hints of diluted Burnt Umber onto the lighthouse walls to create a weathered, aged concrete texture. -
Adding the lantern room:
Switch to your smallest round brush. Using black or dark grey, carefully paint the railing, the cage at the top, and the window frames. Use a touch of red and orange inside the glass area to reflect the sunset. -
Defining windows:
Paint the small vertical rectangular windows on the tower shaft using dark grey, not pure black, to keep them looking recessed rather than like stickers.
Gradient Not Blending?
Acrylics dry fast. If your sky looks streaky, mix a drop of slow-drying glazing liquid or retarder into your paints to keep them workable longer.
Step 3: The Water and Pier
-
Painting the sea base:
For the water, mirror the sky colors upside down but slightly darker. Start with the sunset pinks just below the horizon line and blend into deep teals and blues as you move to the bottom edge. -
Creating movement:
Use a medium flat brush to add horizontal ripples. Use darker blue lines for wave shadows and lighter teal or white dashes for wave crests catching the light. -
The stone pier:
Paint the horizontal pier extending from the lighthouse base. Use a mix of Burnt Umber and Grey. Use a palette knife to dab on thick paint, mimicking the rough texture of rocks and concrete blocks. -
Pier shadows:
Add deep black-brown shadows underneath the pier and along the waterline where the wet rocks meet the sea. -
Lighthouse reflection:
Directly below the lighthouse, dry-brush a vertical reflection in the water. Use the same light grey color as the tower but disrupt the lines with horizontal strokes to show the water’s movement. -
Final highlights:
Add tiny glints of pure white to the lantern room glass and the very tips of the closest waves to make the scene sparkle.
Perspective Perfection
To make the lighthouse look tall, ensure your vertical lines taper inward slightly as they go up. Parallel lines will make the tower look flat.
Step back and admire how the cool blues contrast with the warm sunset to bring your lighthouse to life


Have a question or want to share your own experience? I'd love to hear from you in the comments below!