Lined paper is basically a built-in stage for optical illusions—those steady parallel lines do half the work for you. If you’ve ever wanted your sketch to look like it’s slipping behind, popping through, or bending the page, these lined paper drawing ideas are made for that.
Bubble Letters Behind the Lines
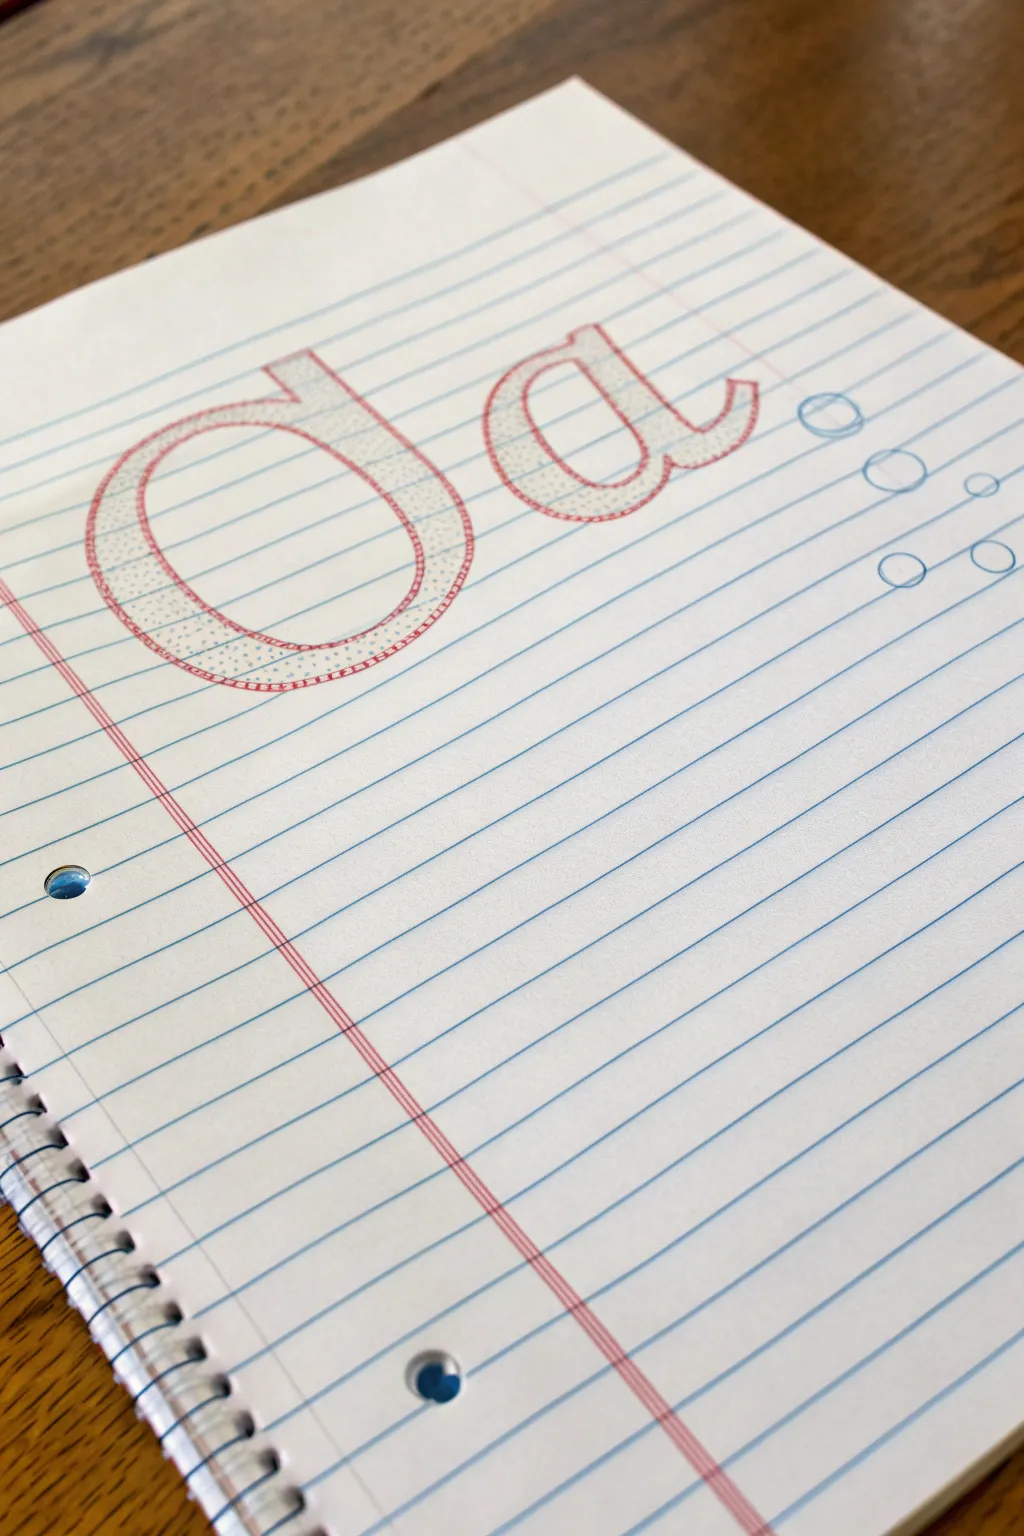
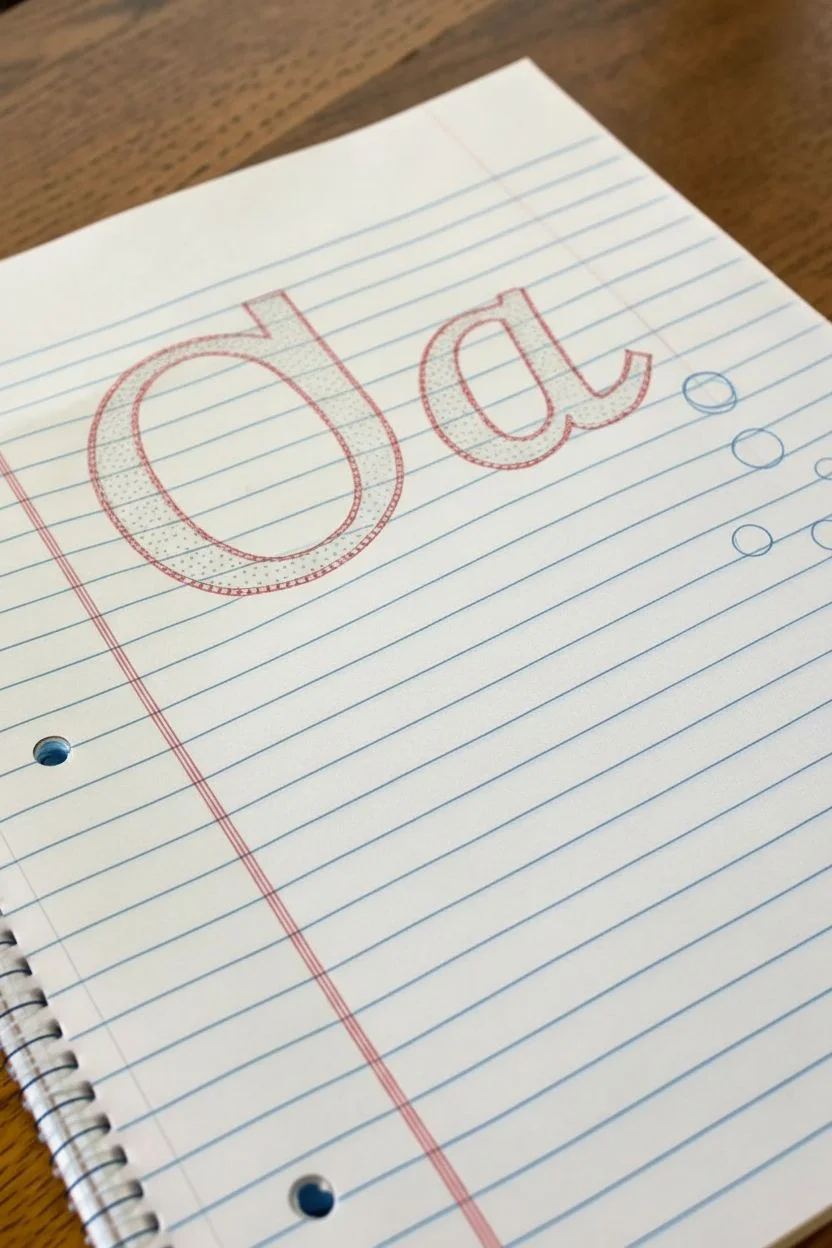
Create a mind-bending optical illusion using simple supplies by drawing letters that appear to sit behind the standard lines of notebook paper. This clever technique uses careful erasing and stippling to make your text look sandwich-layered within the page itself.
Detailed Instructions
Materials
- Lined leaf notebook paper (spiral bound)
- Red fine-liner pen (0.4mm or similar)
- Light blue fine-liner pen (to match the paper lines)
- Pencil
- Eraser
- Ruler (optional)
Step 1: Planning and Sketching
-
Choose your placement:
Begin with a fresh sheet of lined paper. Decide where you want your letters to sit; the upper third of the page works well for a heading-style look. -
Sketch the skeleton:
Using a pencil and very light pressure, write out your chosen letters (like the ‘Da’ in the example) in a basic cursive or print skeleton. Make them large enough to span at least three or four blue lines. -
Create the bubbles:
Outline around your pencil skeleton to form the bubble letter shapes. Keep your lines light because you will need to erase parts of them later. -
Thicken the outline:
Add a second, internal outline just inside your bubble shape to give the letters a thick, double-walled rim. This space will remain white later.
Ink Matching Trick
Test your blue pens on the very last page of the notebook first. Ink colors vary wildly, and finding the perfect match makes the illusion much more convincing.
Step 2: Inking the Illusion
-
Trace the outer edge:
Take your red fine-liner pen. Carefully trace the *outermost* pencil line of your bubble letters. -
Trace the inner edge:
Trace the *innermost* pencil line with the same red pen. You should now have a double red outline defining the letter shape. -
Preserve the margin:
Here is the critical step for the illusion: Identify where the notebook’s pre-printed red margin line crosses your drawing. Do *not* draw your red letter outlines over this vertical line; skip over it so the margin appears to sit on top. -
Erase pencil marks:
Once the red ink is completely dry, gently erase the original pencil sketch lines so you are left with just the red ink outlines.
Wobbly Lines?
If you are nervous about drawing the horizontal lines freehand across your letters, use a clear plastic ruler. It lets you see exactly where to connect the existing lines.
Step 3: Adding the Lines
-
Match the blue:
Select a blue pen that closely matches the shade of the notebook paper’s horizontal lines. -
Draw the ‘over’ lines:
Using a ruler or a steady hand, draw blue lines horizontally directly across your letters. Connect the existing notebook lines on the left to the ones on the right, making it look like the lines run right over your drawing. -
Double check intersections:
Ensure you draw these blue lines through both the letter fill area and the white rim area. The goal is uninterrupted horizontal lines.
Step 4: Filling and Detailing
-
Start stippling:
Using your red fine-liner again, begin stippling (making small dots) inside the main body of the letters. -
Avoid the rim:
Be careful to keep the dots contained within the inner part of the letter, leaving the ‘rim’ space between the double outlines completely white. -
Build density:
Add more dots to fill the space evenly. I find it relaxing to work from one side to the other to ensure consistency. -
Dot through the lines:
Don’t avoid the blue lines you drew earlier. Place red dots right next to or over them if needed, reinforcing the idea that the letter is a solid object sitting underneath the ruling.
Step 5: Bubbles and Final Touches
-
Sketch floating bubbles:
To enhance the theme, lightly pencil a few circular bubbles floating away from your letters to the right. -
Ink the bubbles:
Trace these circles with your blue pen. Just like the letters, if a bubble crosses a notebook line, draw the notebook line right through it. -
Erase and clean:
Erase the pencil marks from the floating bubbles. Check your main letters for any smudges and clean them up.
Now you have a cool piece of notebook art that plays with depth and perspective


Eye Peeking Between Two Lines
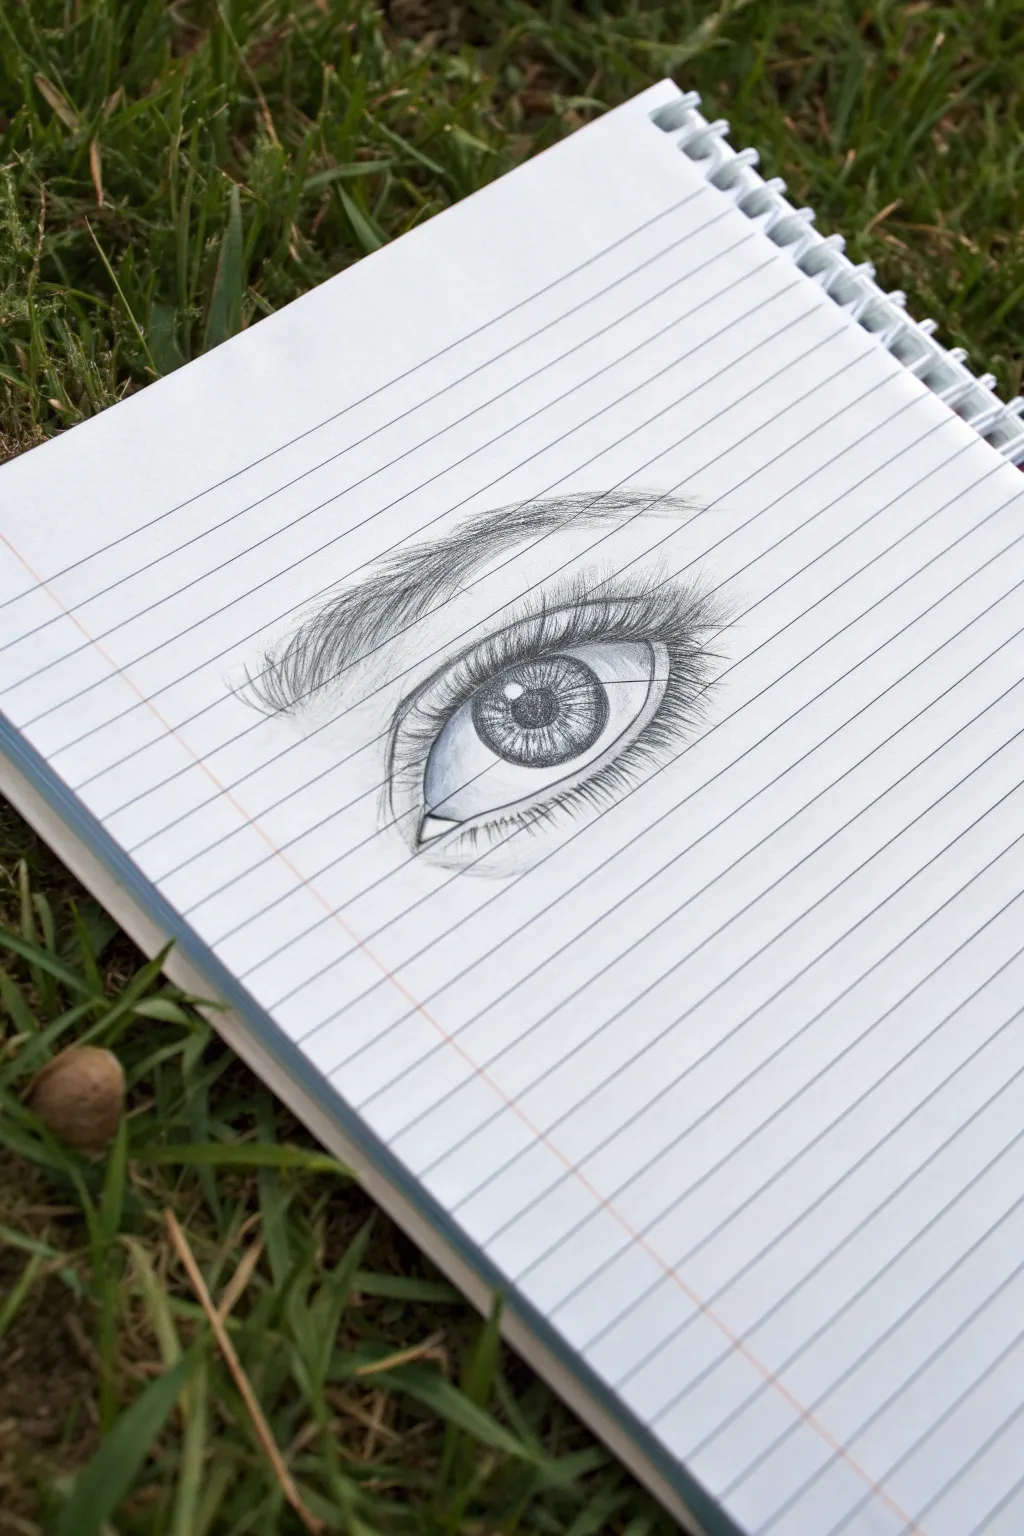
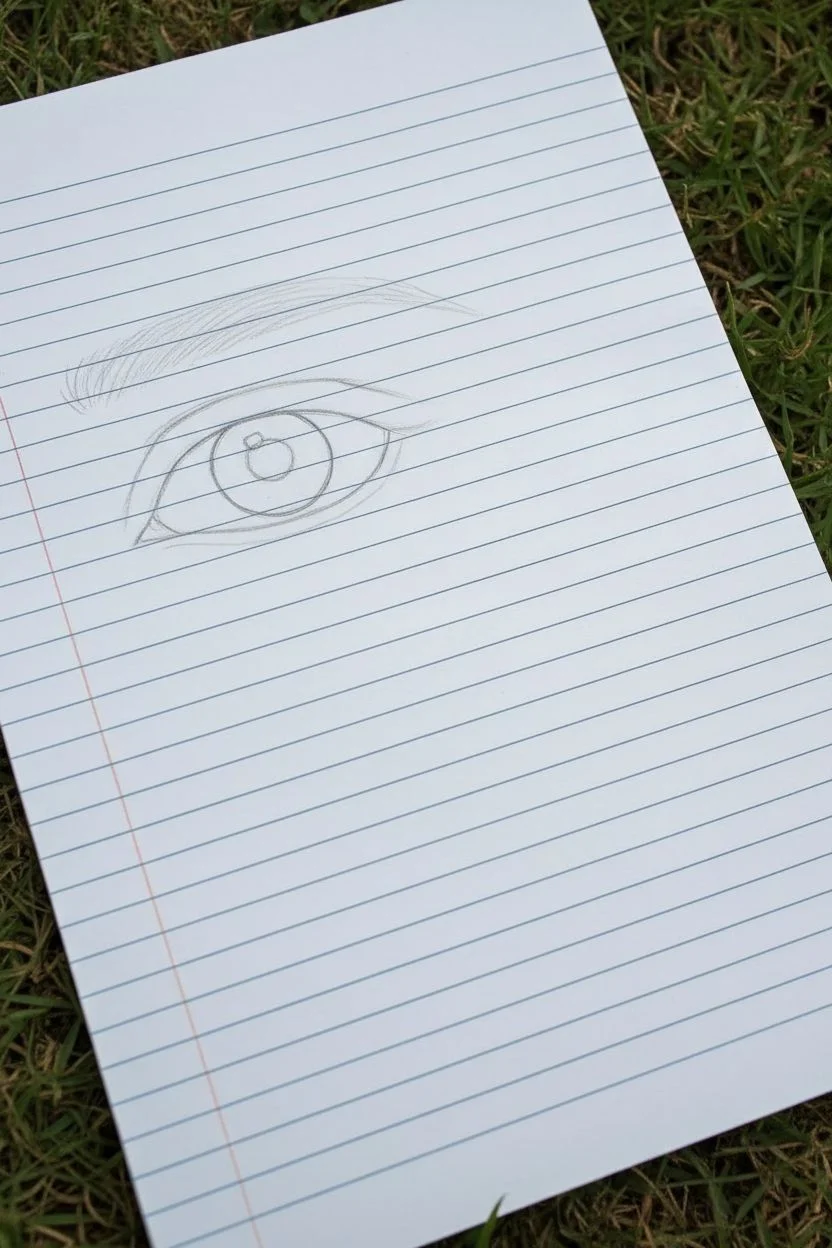
Transform a simple page of lined school paper into a canvas for startling realism with this detailed sketch. The unique placement of the eye within the ruled lines creates a structured, engaging composition that makes the drawing pop.
Step-by-Step Tutorial
Materials
- Lined notebook paper (spiral bound preferred for aesthetic)
- HB pencil (for initial sketching)
- 2B mechanical pencil (0.5mm or 0.7mm)
- 4B or 6B pencil (for darkest shading)
- Fine-tipped blending stump or tortillon
- Kneaded eraser
- Precision eraser (stick eraser)
Step 1: Framework and Outline
-
Choose your placement:
Identify two blue horizontal lines on your paper. These will serve as your guides. The iris and pupil will fit snugly between these two lines, while the eyelids will extend above and below them. -
Sketch the iris boundary:
Using your HB pencil with very light pressure, draw a perfect circle that touches both the top and bottom selected blue lines. This establishes the size of the eye. -
Draw the pupil:
Find the exact center of your iris circle and draw a smaller circle for the pupil. Keep it centered and proportionate. -
Outline the upper lid:
Sketch an arching line starting from the left, going up over the top blue line, and coming back down to form the tear duct on the right. The peak of the arch should clear the iris comfortably. -
Define the lower lid:
Draw a softer curve for the lower lid. It should dip slightly below the bottom blue line before curving back up to meet the outer corner. -
Mark the highlight:
Before shading, draw a small, rectangular or trapezoidal shape overlapping the pupil and iris. This is the reflection of light—leave this completely white.
Uneven Eyes?
If the iris looks lopsided, turn your notebook upside down. Viewing the drawing inverted stops your brain from ‘correcting’ the image and makes symmetry errors obvious.
Step 2: Shading the Eye
-
Darken the pupil:
Switch to your 4B or 6B pencil. Fill in the pupil, pressing firmly to get a deep, rich black, but be careful to preserve the sharp edges of your highlight shape. -
Spoke the iris:
With the mechanical pencil, draw fine lines radiating outward from the pupil toward the outer edge of the iris. vary the length and pressure to create texture. -
Shade the iris rim:
Darken the outer ring of the iris circle. Gently shade inward from this rim, fading as you move toward the pupil, creating depth. -
Detail the waterline:
Draw a second, parallel line just inside the lower eyelid. This creates the ‘waterline’ thickness of the lower lid. Keep this area mostly light. -
Shade the whites (sclera):
The eyeball isn’t flat white. Lightly shade the corners of the eye (left and right) and under the upper eyelid using an HB pencil to make the sphere look round.
Step 3: Lashes and Brow
-
Start the upper lashes:
Using the mechanical pencil, flick curved lines upward from the upper lash line. Use quick, confident strokes that are thicker at the base and taper to a point. -
Layering the lashes:
Make the lashes denser near the outer corner of the eye. I like to have some lashes cross over each other for a more natural, messy look rather than perfect spacing. -
Add lower lashes:
Draw shorter, thinner lashes curving downward from the outer edge of the waterline. Space them out more than the top lashes. -
Outline the eyebrow shape:
Lightly sketch the brow shape about two or three lines above the eye, following the arch of the upper lid. -
Fill the brow with hair strokes:
Fill in the brow using short hair-like strokes. Angle them upward at the start of the brow, and gradually angle them sideways and downward as you move to the tail. -
Deepen the crease:
Add a shaded line above the upper eye to represent the eyelid crease. Soften it with your blending stump.
Pro Tip: Lash Flick
Practice your lash strokes on a scrap paper first. Plant your pencil firmly, then flick your wrist quickly as you lift off the page to get that perfect tapered point.
Step 4: Final Polish
-
Blend for smoothness:
Use the fine-tipped blending stump to gently smooth the shading in the iris and the corners of the eyeball. Be careful not to smudge your crisp lash lines. -
Clean up highlights:
Use your precision eraser or a pinched edge of the kneaded eraser to pick out tiny highlights in the tear duct and on the waterline to make it look wet. -
Reinforce blacks:
Do one final pass with your darkest pencil to re-blacken the pupil and the roots of the upper lashes if they got faded during blending.
Now you have a striking, realistic eye that looks like it’s watching you right from the page


Cat Climbing Through the Line “Slats”
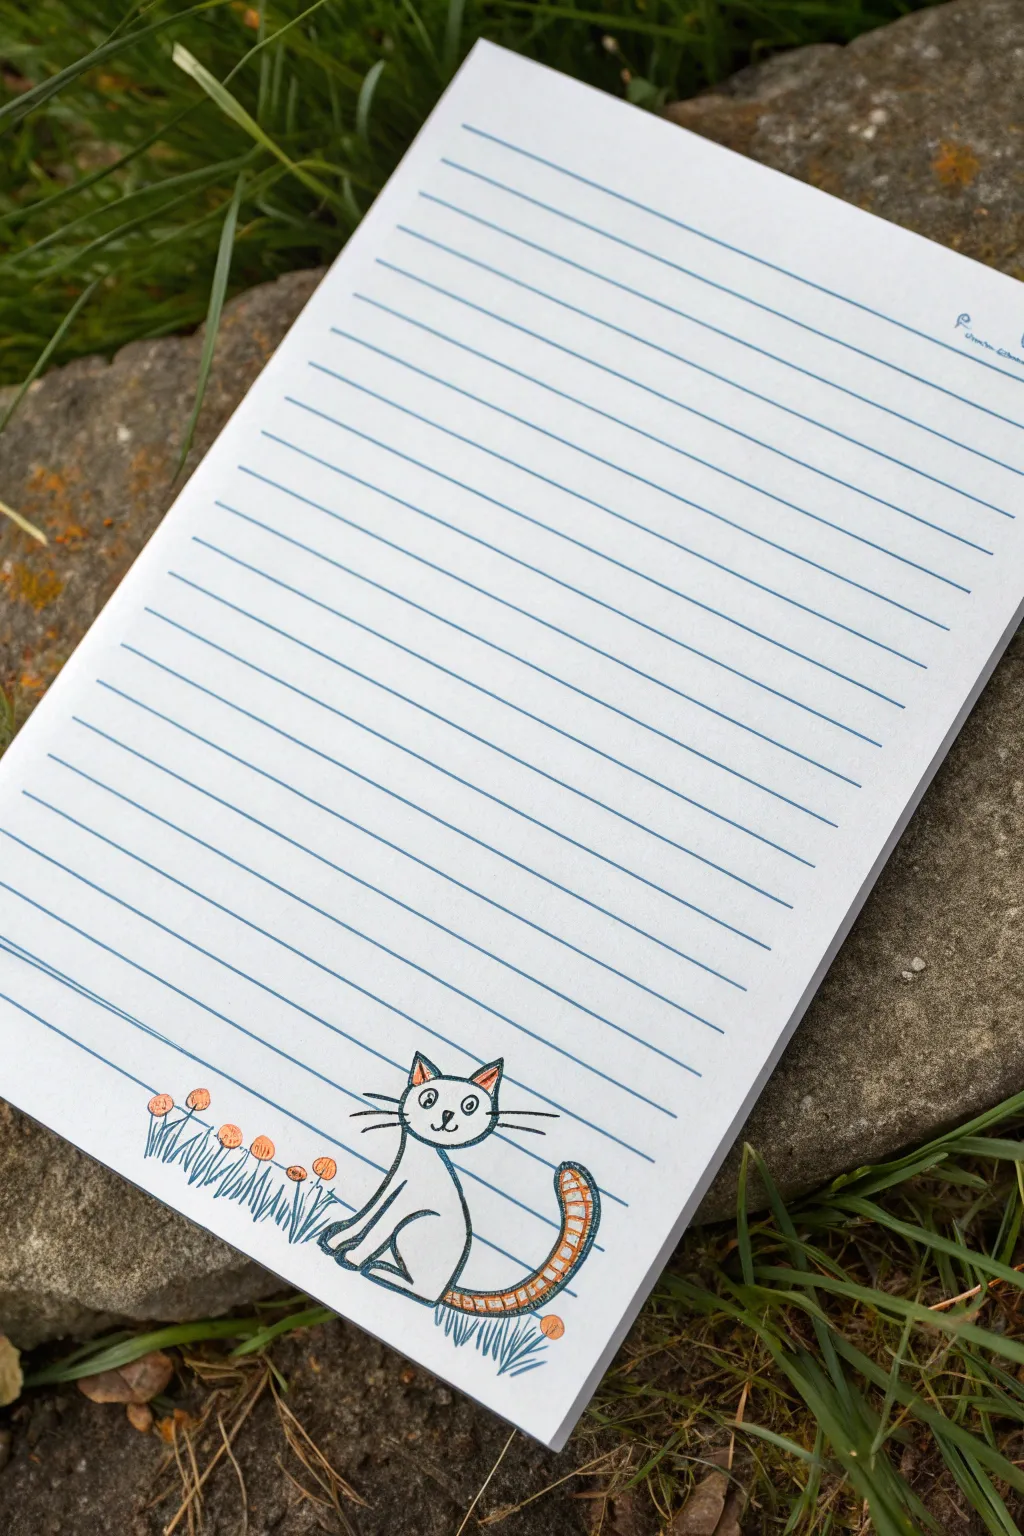
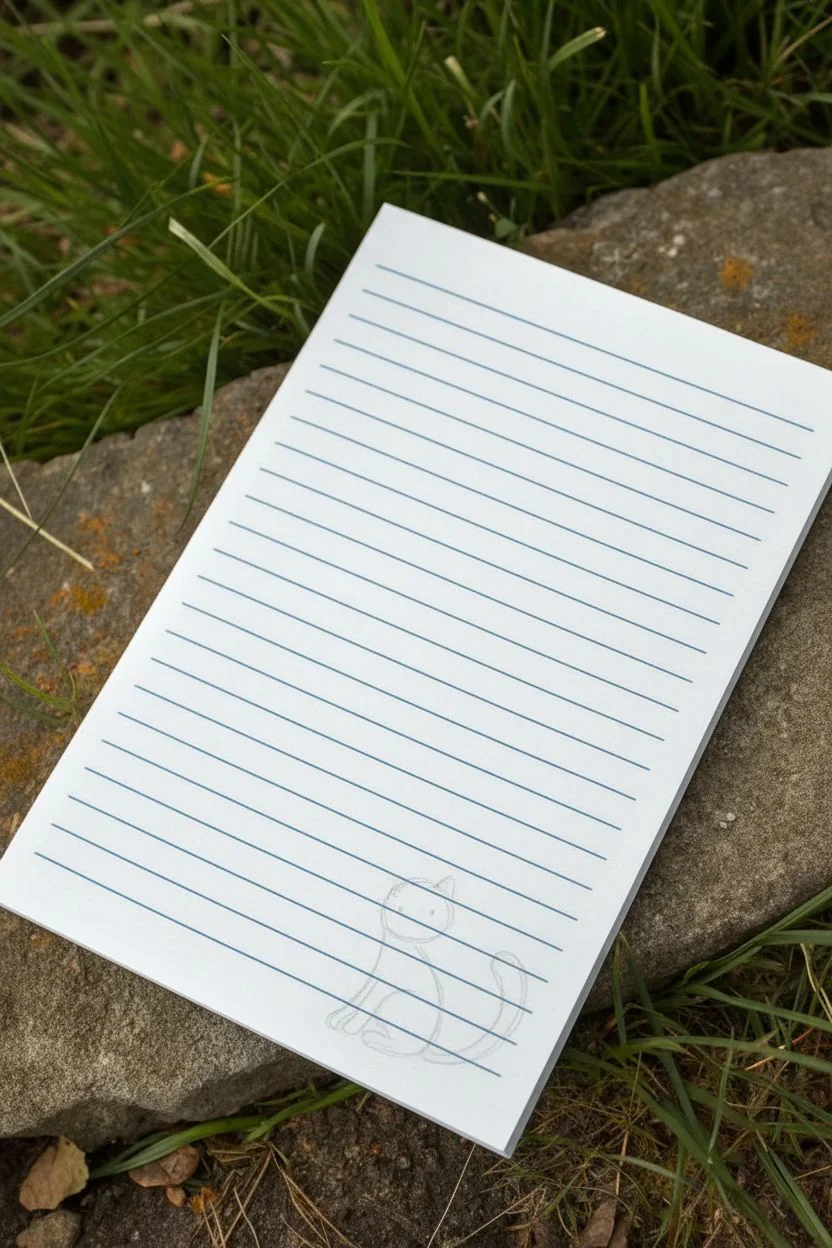
Transform a simple notepad into a charming piece of stationery with this adorable feline doodle. Using the existing blue lines of the paper as a backdrop creates a neat, organized look that contrasts perfectly with the organic shapes of the cat and wildflowers.
Step-by-Step Guide
Materials
- Lined notepad or loose-leaf paper
- Fine-point black ink pen (e.g., Micron 03 or standard ballpoint)
- Orange colored pencil or marker
- Blue colored pencil or marker (matching the paper lines)
- Pale grey colored pencil (optional for shading)
- Pencil and eraser for sketching
Step 1: Planning the Composition
-
Positioning:
Start by identifying the bottom right corner of your lined paper. This is where your cat character will sit, anchoring the design. -
Rough Sketch:
Using a light pencil, sketch a simple pear shape for the cat’s body, letting the bottom rest on one of the lower blue lines. Draw a circle on top for the head.
Step 2: Drawing the Cat
-
Refining the Head:
With your black ink pen, trace over your pencil sketch for the head. Add two triangular ears on top. Inside the ears, draw smaller triangles for detail. -
Facial Features:
Draw two ovals for eyes, filling in small black pupils while leaving tiny white highlights. Add a small triangular nose and a ‘W’ shape for the mouth. Finish the face with three long whiskers on each cheek. -
Body Outline:
Ink the body shape, drawing a smooth curve down from the neck. Instead of a solid base, define the legs by drawing a vertical line roughly in the center of the body mass. -
Paws and Legs:
Create the front paws by drawing rounded shapes at the bottom of your vertical leg line. Sketch a curve for the haunch of the back leg sitting behind. -
The Tail:
Draw a long, curving tail extending to the right side of the cat. Make it slightly thicker at the base and rounded at the tip. Add stripes along the length of the tail with small curved lines.
Ink Confidence
Use waterproof ink if you plan to use markers for coloring. This prevents the black outlines from bleeding or smudging when the color is applied.
Step 3: Adding the Scenery
-
Drawing Grass:
To the left and right of the cat, draw clusters of grass blades. Use quick, upward strokes with your pen to create a spiky texture that mimics natural growth. -
Flower Stems:
Intersperse a few longer stems among the grass blades on the left side. These should be thin, single lines rising slightly higher than the grass. -
Flower Heads:
Top the stems with small circular or oval shapes to represent simple wildflowers.
Interactive Lines
Try making the cat interact with the lined paper more by having its paws ‘hold’ onto the blue line above it or wrapping its tail around a line.
Step 4: Coloring and Details
-
Adding Orange Accents:
Take your orange colored pencil or marker. Carefully color the stripes on the tail, alternating between orange and white. -
Coloring the Ears:
Use the same orange shade to fill in the inner triangles of the ears. -
Floral Pops:
Dab small spots of orange onto the flower heads to tie the color scheme together. -
Matching the Lines:
Grab a blue pencil or marker that closely matches the shade of the notepad’s printed ruling lines. Color the blades of grass with this blue to make the drawing feel integrated with the paper. -
Final Touches:
If you have a pale grey pencil, add very subtle shading to the left side of the cat’s white body to give it a little dimension. Once all ink is completely dry, gently erase any visible pencil sketch lines.
Now you have a custom stationery sheet perfect for writing special notes to cat-loving friends


Octopus Tentacles Tangled in the Lines
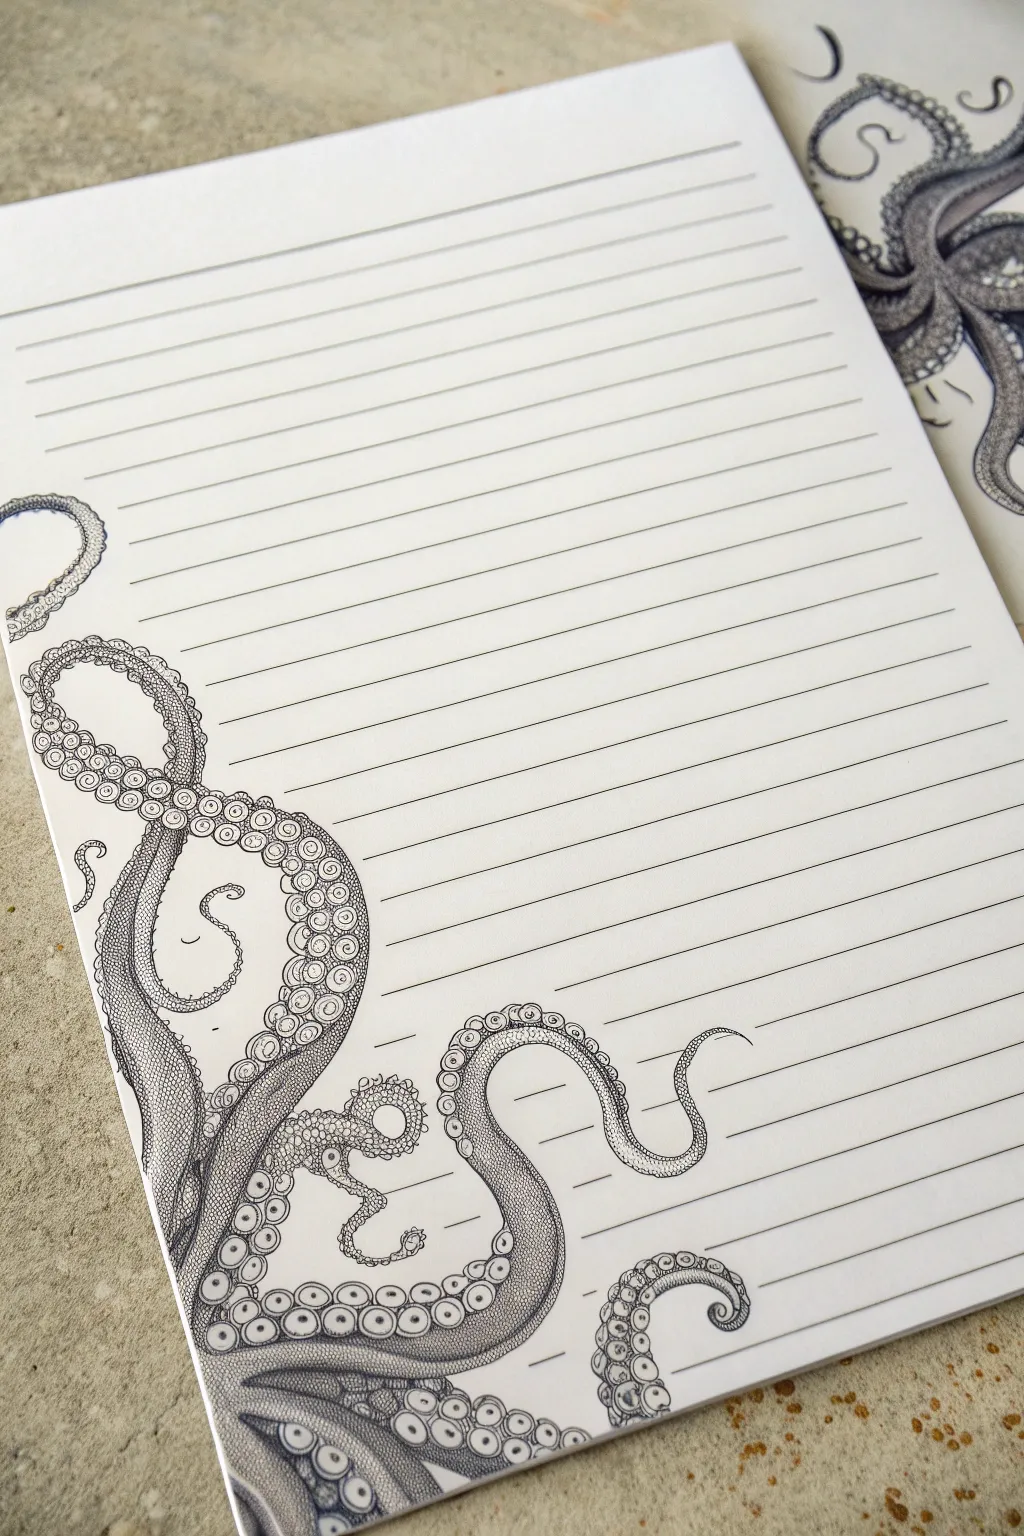
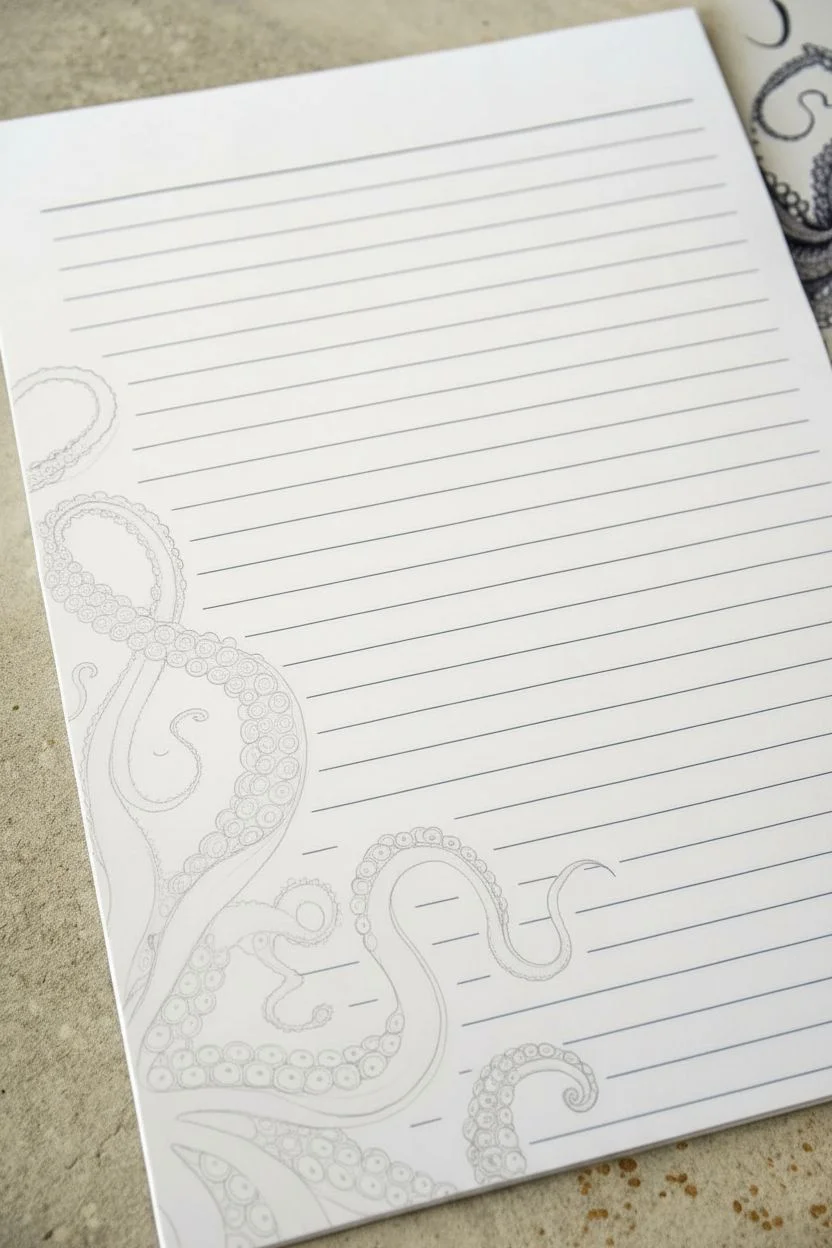
Transform a simple sheet of lined paper into a deep-sea scene with this clever octopus illustration. By weaving detailed tentacles through the rigid blue lines, you create a captivating 3D effect where the creature seems to be grasping the page itself.
Step-by-Step
Materials
- Lined notepad or loose-leaf paper
- Pencil (HB or lighter)
- Eraser (kneaded preferred)
- Fine-liner pens (0.1mm, 0.3mm, and 0.5mm)
- White gel pen (optional for highlights)
Step 1: Sketching the Composition
-
Anchor the base:
Start by lightly sketching a cluster of thick tentacle bases in the bottom left corner of the page. This will be the point of origin for all the limbs. -
Draft the main tentacles:
Draw three to four main tentacles extending upward and diagonally across the page. Keep your lines loose and curved to suggest movement. -
Add secondary curls:
Sketch smaller, thinner tentacle tips curling off the main ones. Have some curl tightly like fiddleheads and others wave openly. -
Identify overlap points:
Look closely at where your sketched tentacles cross the printed blue lines of the paper. Decide which segments will go ‘over’ the lines and which will go ‘under’ or sit behind them. -
Refine the shapes:
Go back over your pencil sketch to define the undulating sides of the tentacles, ensuring they thicken at the base and taper elegantly to a point. -
Place the suckers:
Lightly sketch circles along the underside of each tentacle curve. Remember that suckers are larger near the base and become tiny dots near the tips.
Ink Smearing?
Work from top-left to bottom-right (if right-handed) to avoid dragging your hand through wet ink. If unsure, place a scrap paper under your drawing hand.
Step 2: Inking the Outline
-
Outline the main forms:
Using a 0.3mm fine-liner, carefully trace the outer edges of the tentacles. Keep your hand steady to create smooth, organic curves. -
Ink the suckers:
Switch to a 0.1mm pen to ink the circular suckers. Draw a small inner circle within the larger ones to give them depth and a rimmed appearance. -
Erase pencil guides:
Once the ink is completely dry to the touch, gently erase all visible pencil marks so only the clean black lines remain. -
Review the interaction on the lines:
At this stage, your drawing sits on top of the blue lines. We will integrate them in the shading phase, but visualizing the depth now is helpful.
Step 3: Shading and Texturing
-
Stipple the skin:
With the 0.1mm pen, add tiny dots (stippling) along the top, non-sucker side of the tentacles. Cluster the dots densely near the edges to create a rounded, cylindrical form. -
Add cross-hatching shadows:
Use fine hatching lines in the deepest crevices where tentacles overlap each other. This creates separation and volume. -
Detail the suckers:
Add tiny shading marks on the curve of each sucker cup, generally on the side furthest from your imaginative light source. -
Create skin texture:
Draw very faint, small circles and irregular shapes along the main body of the tentacles, in between your shading, to mimic the rough texture of octopus skin. -
Darken the deepest areas:
I like to take a 0.5mm pen and darken the small triangular gaps between the tentacle clusters at the very bottom corner to add weight to the drawing. -
Integrate the blue lines:
This is the trickiest part: identify where a tentacle is supposed to produce a shadow on the paper. Carefully deepen the shading right next to the artwork to make it pop off the page. -
Final touches:
Inspect your work for any gaps in texture. If you have a white gel pen, add tiny highlights to the tops of the wet-looking suckers for extra realism.
Pro Tip: Line Interaction
To make the tentacles look like they are truly behind the paper’s lines, carefully skip inking over the blue line in specific spots, breaking the drawing slightly.
Now you have a striking piece of stationery art that looks ready to crawl right off the desk

PENCIL GUIDE
Understanding Pencil Grades from H to B
From first sketch to finished drawing — learn pencil grades, line control, and shading techniques.
Explore the Full Guide
Fish Swimming Behind the Lines
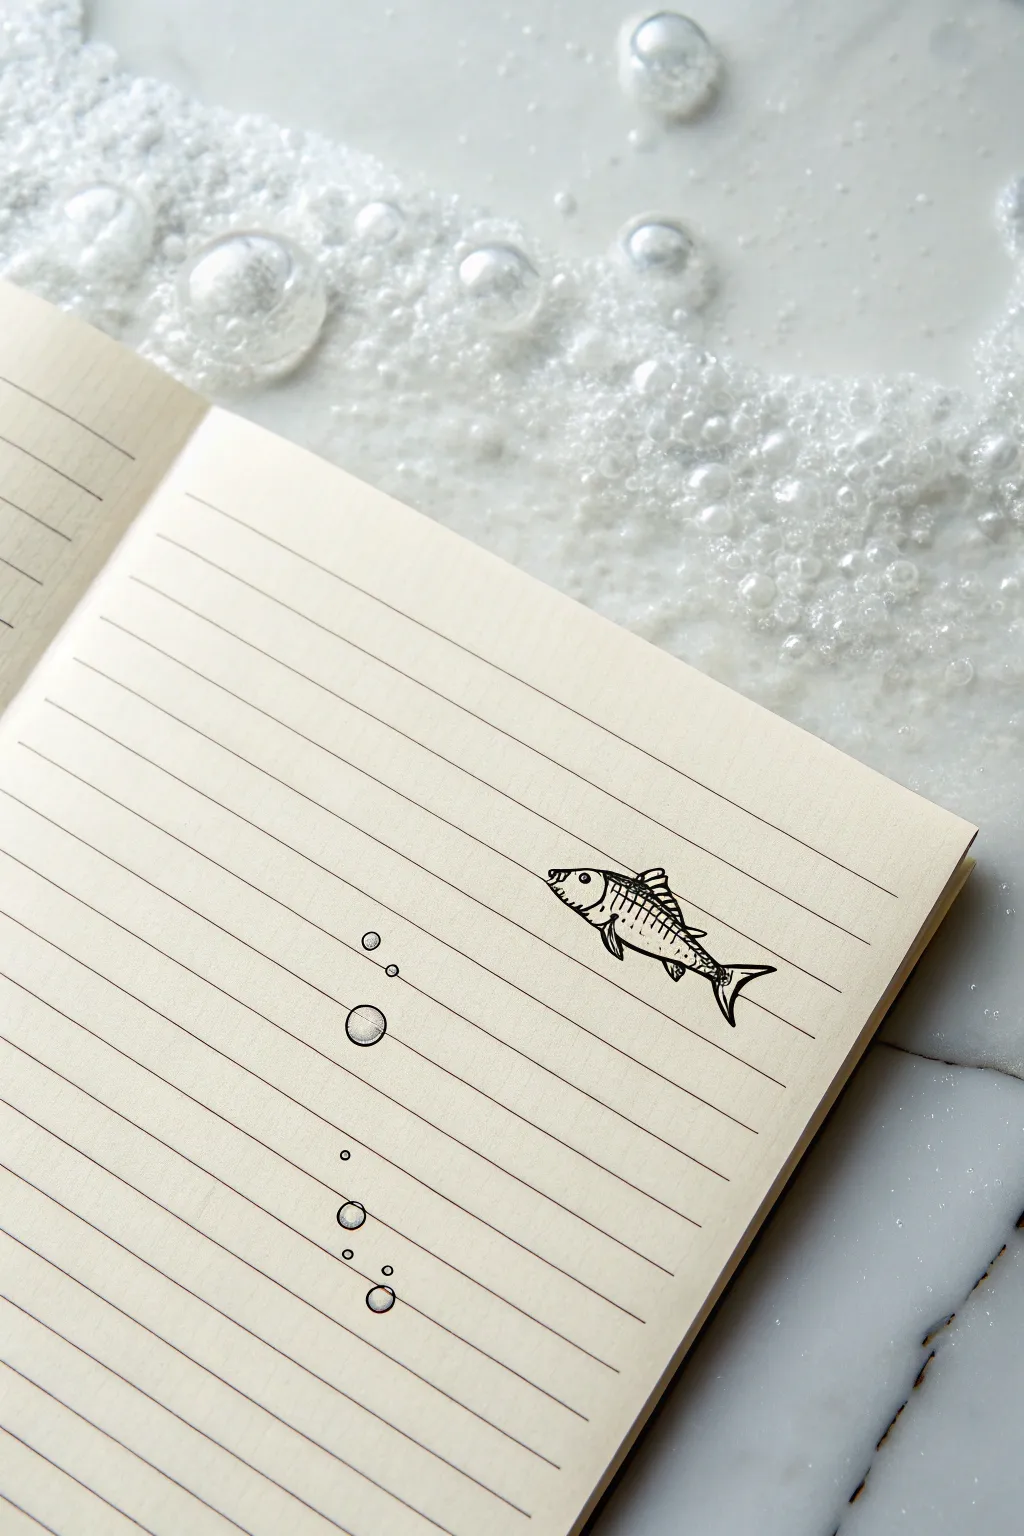
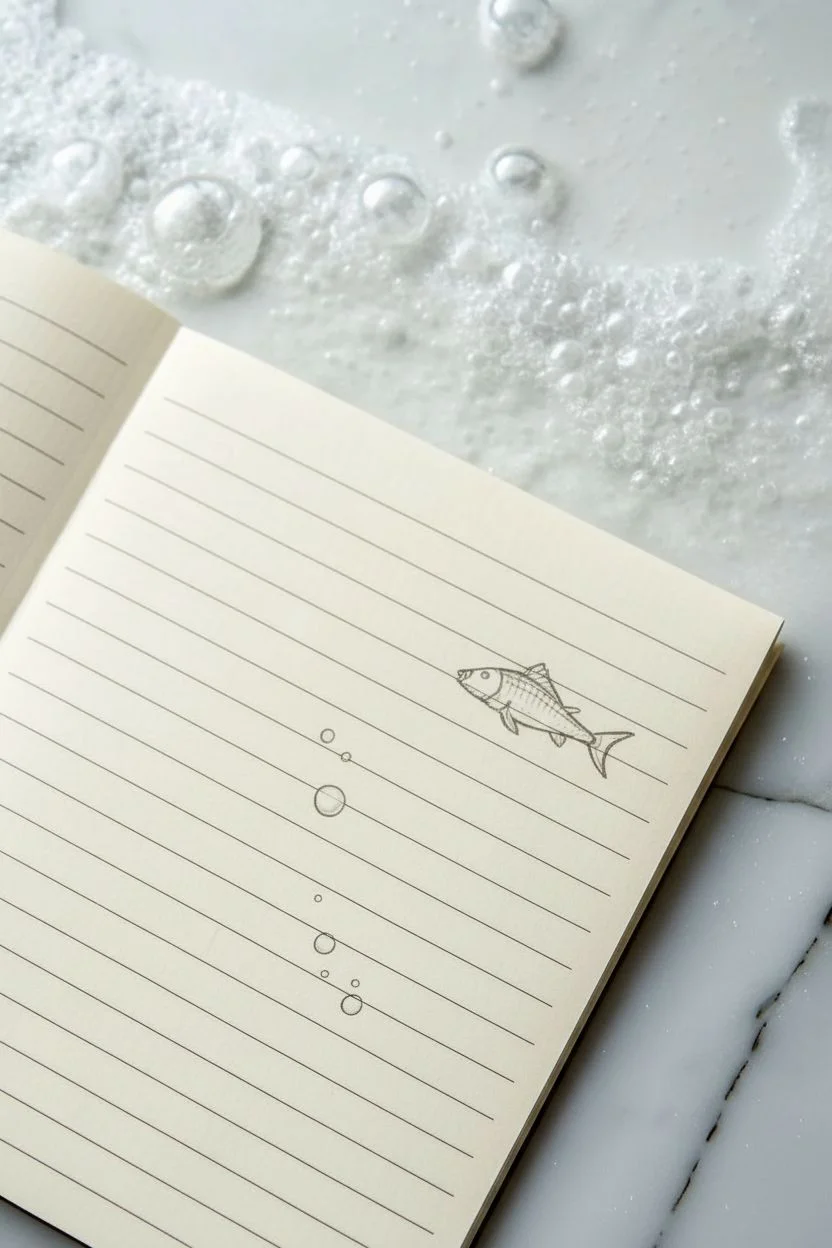
Play with negative space and perspective in this clever doodle where a lined notebook page becomes an underwater scene. By carefully interrupting the lines of the fish with the pre-printed notebook rules, you create a convincing illusion that the fish is swimming just below the paper’s surface.
Detailed Instructions
Materials
- Lined notebook or journal (off-white or cream paper works well)
- Fine-liner pen (black, 0.3mm or 0.5mm)
- Pencil (HB)
- Eraser
Step 1: Planning the Composition
-
Sketch the outline:
Start lightly with your pencil. Draw a simple fish shape—more like a sardine or oblong trout—positioned at a slight diagonal across the page. -
Position the fish:
Ensure the fish’s body spans across 2-3 lines of the notebook paper. The illusion relies on the fish interacting with multiple printed lines. -
Add detail lightly:
Sketch in the triangular dorsal fin on top, the pectoral fin on the side, and the forked tail. Don’t worry about the notebook lines yet; just get the fish shape right. -
Sketch bubbles:
Draw three or four small circles of varying sizes rising from the lower left towards the fish to simulate air bubbles.
Clean Lines Tip
When skipping the blue lines, try to stop your pen just a hair *before* the line and restart just *after* it. A tiny bit of white space prevents the ink from bleeding onto the printed rule.
Step 2: Inking the Illusion
-
Start the outline:
Switch to your fine-liner pen. Begin tracing your pencil lines for the fish’s upper back and head. -
The crucial gap technique:
This is the most important step: Whenever your pen line is about to cross a printed blue notebook line, stop. Lift your pen, skip over the blue line, and continue drawing on the other side. -
Ink the fins:
Outline the dorsal fin and tail using the same skipping technique. If a fin crosses a line measure, leave that tiny gap to push the fish ‘behind’ the rule. -
Draw the scales:
Add vertical, slightly curved lines along the fish’s body to suggest texture or ribs. Remember to break these lines every time they intersect a notebook rule. -
Add facial details:
Draw a small solid circle for the eye and a simple curved line for the gill plate. These usually sit between lines, but if they touch one, apply the skipping rule. -
Detail the bubbles:
Trace your bubble circles with the pen. Just like the fish, if a bubble sits on top of a line, break the circle outline. This makes the bubble look like it’s floating behind the grid. -
Refine the bubbles:
Add a tiny crescent or dot highlight inside each bubble to give them a spherical, wet look.
Level It Up
Add depth by drawing a second, smaller fish further down the page using a thinner pen nib (like a 0.1mm). This atmospheric perspective makes the first fish feel closer to the viewer.
Step 3: Finishing Touches
-
Let ink dry:
Give the ink a minute or two to set completely so you don’t smudge your crisp lines. -
Erase pencil marks:
Gently erase the underlying pencil sketch. Be thorough, as removing the continuous pencil lines will instantly make the ‘behind the lines’ illusion pop. -
Assess the contrast:
If the drawing feels too light, I sometimes go back and thicken the outer contour of the fish slightly, which separates it from the delicate inner details.
Now you have a whimsical little swimmer navigating the depths of your daily notes
Spiral-Hole Creature Hanging On
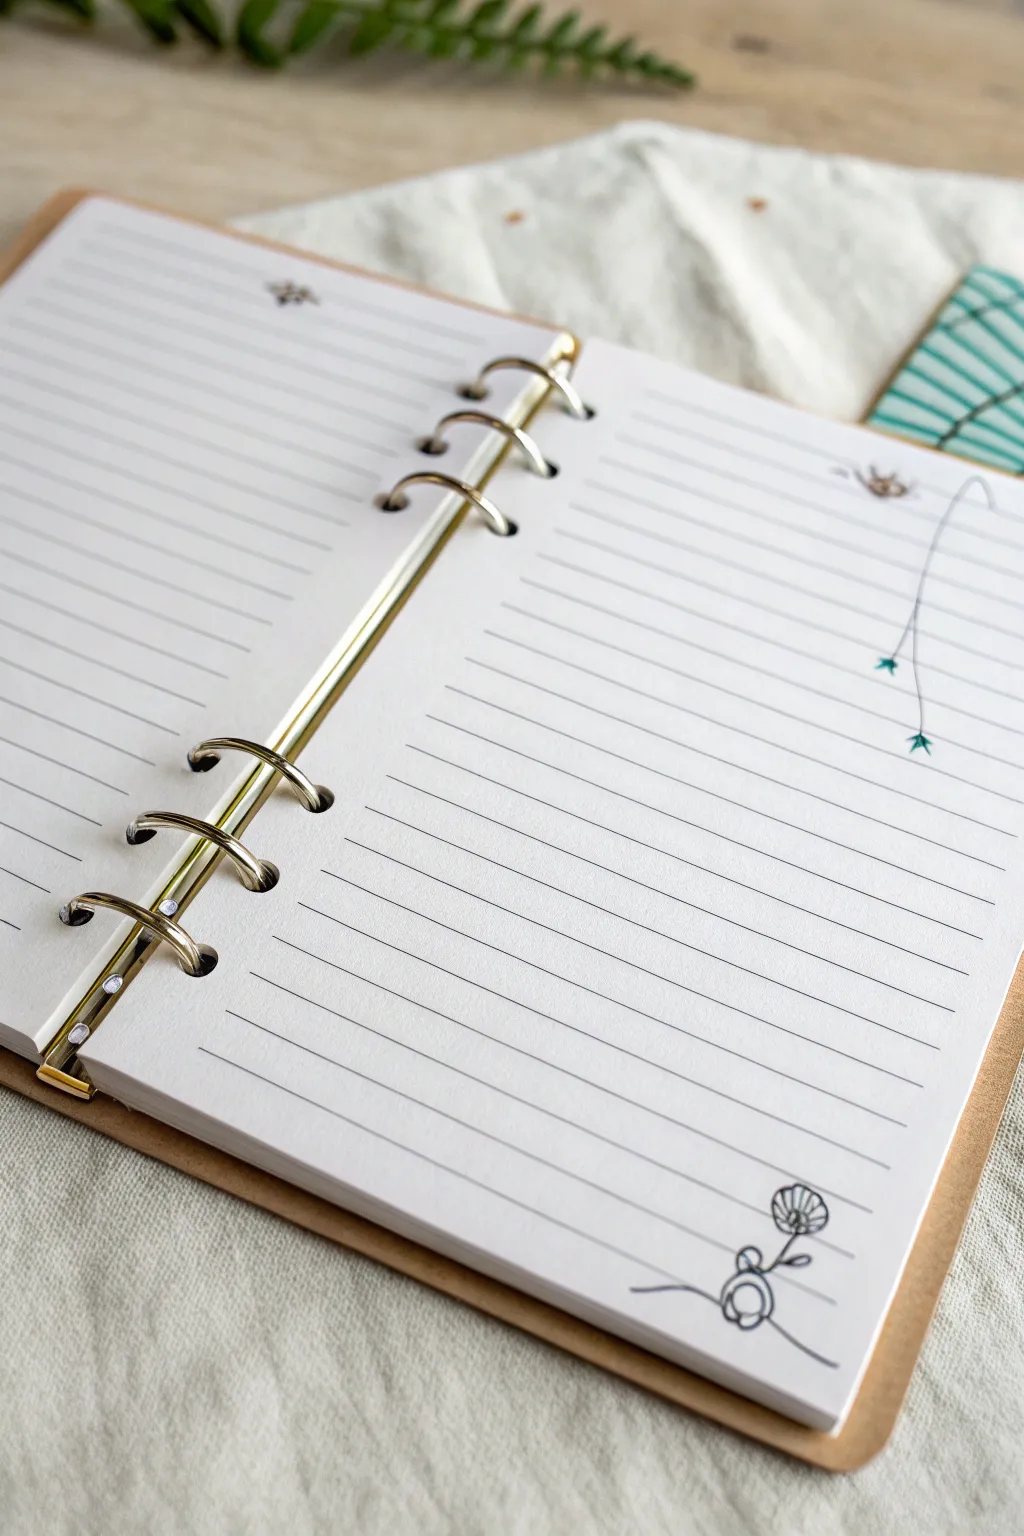
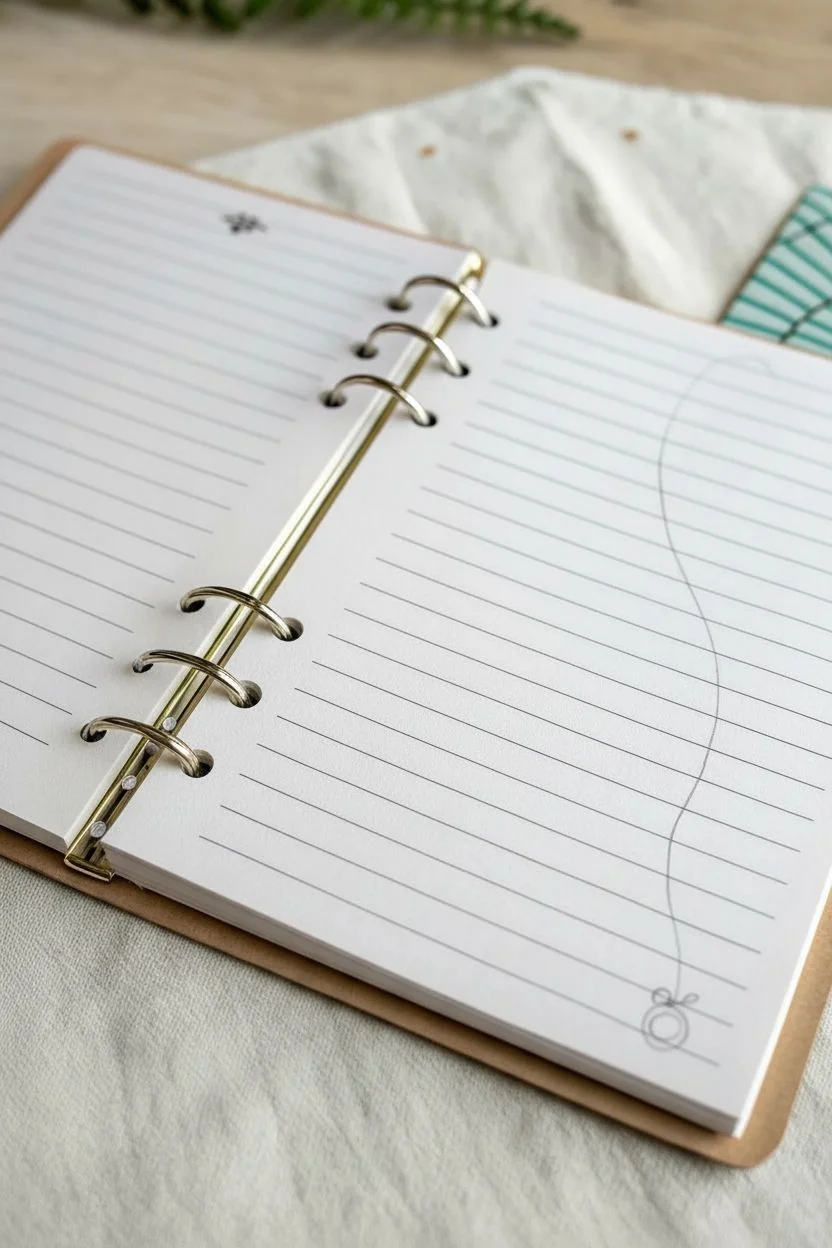
Transform the mundane landscape of a ring binder into a playground for tiny sketched characters. This minimalist project uses the structural elements of your notebook—the binding rings and lines—as integral parts of a playful scene where a creature swings or hangs precariously.
Step-by-Step Guide
Materials
- Ring-bound notebook or planner with lined paper
- Fine-liner pen (0.3mm or 0.5mm, black)
- Green fine-liner or gel pen (for leaf accents)
- Pencil (for sketching)
- Eraser
Step 1: Conceptualizing the Scene
-
Identify the anchor point:
Choose a spot on the right-hand page to start your drawing. While you can draw near the actual metal rings, this design works brilliantly by pretending there is an invisible attachment point or a hole near the top right corner of the page. -
Sketch the hanging line:
Using your pencil, lightly draw a long, sweeping organic line that starts from the top right area and curves gently downward towards the bottom center of the page. This will act as the ‘vine’ or rope. -
Position the character:
At the very bottom of your curved line, lightly sketch a small circle for a head and a slightly larger oval for a body to mark where your creature will dangle.
Step 2: Inking the Hanging Vine
-
Trace the main stem:
Take your black fine-liner and carefully trace over your pencil line. I find that pulling the pen toward you creates a smoother curve than pushing it away. -
Add upper anchor details:
At the very top of the line, drawn a small, messy knot or a tiny loop to suggest it is tied to something off-page or attached to a small drawn ‘hook’. -
Draw the attachment point:
Just above the creature’s head, thicken the line slightly to show tension where the ‘rope’ meets the character.
Use existing lines
Make your doodle interact with the notebook’s printed lines. Let the character sit exactly on a blue line, or have the vine wind specifically around them for a 3D effect.
Step 3: Creating the Character
-
Outline the head:
Ink the small circle at the bottom of the line. You can give it a flower-like appearance by drawing a semi-circle with vertical lines inside, resembling a seed pod or a stylized tulip head. -
Draw the body:
Below the head, draw a small, rounded shape for the body. -
Add limbs:
Draw simple, stick-figure style arms reaching up to hold the stem, and legs dangling down. Keep the lines loose and sketchy for a charming, hand-drawn aesthetic. -
Ground the character:
Draw a horizontal, slightly wavy line intersecting the character’s feet to represent the ‘ground’ or a specific line on the paper they have landed on.
Ink smearing?
If your notebook paper is glossy or ‘coated,’ standard gel pens might sit on top and smear. Use a ballpoint or permanent felt-tip pen instead for instant drying.
Step 4: Adding Decorative Accents
-
sketch leaf nodes:
Along the long vertical vine, identify two or three spots to add details. These break up the long line and add visual interest. -
Ink the leaves:
Using your green fine-liner, draw tiny, star-shaped spurts or small leaves at the nodes you identified. Use quick, flicking motions to keep them sharp. -
Add a top element:
Near the top right, drawn a small floating element, like a tiny bird, insect, or a detached seed pod, to balance the composition. -
Erase guidelines:
Once the ink is completely dry (give it a full minute so it doesn’t smear), gently erase all your pencil marks.
Now you have a whimsical little companion to keep you company while you take notes
BRUSH GUIDE
The Right Brush for Every Stroke
From clean lines to bold texture — master brush choice, stroke control, and essential techniques.
Explore the Full Guide
Staircase Built From Line Spacing
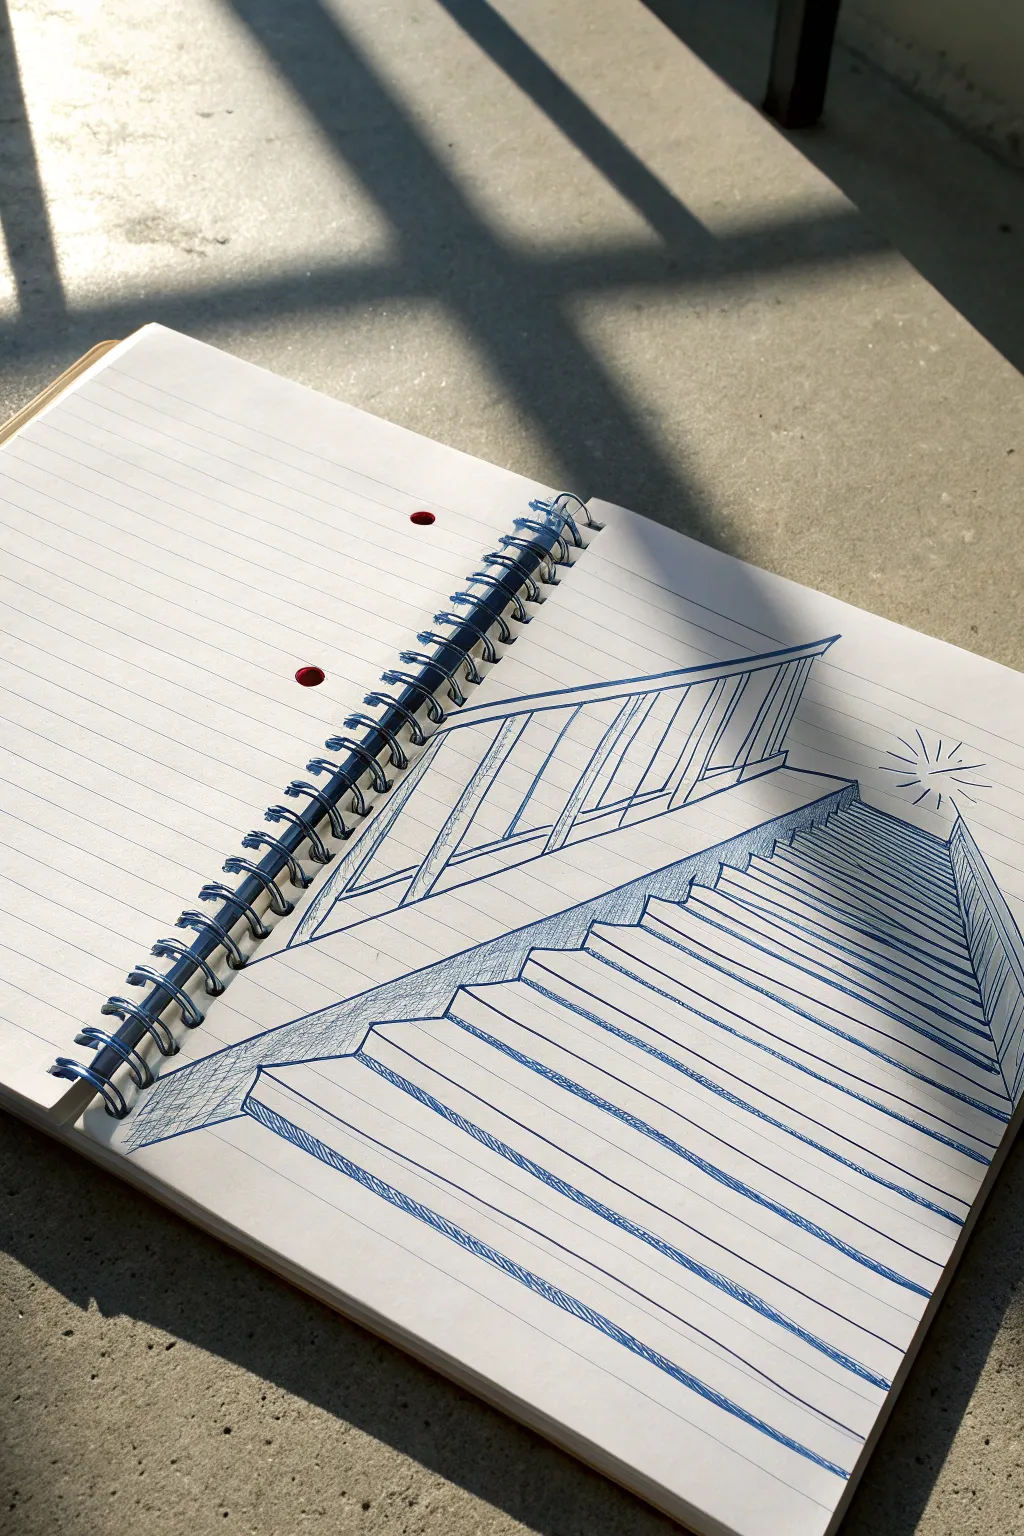
Transform a simple sheet of lined paper into a mesmerizing piece of architectural art with nothing more than a blue pen. This clever drawing uses the existing lines of the page to create a convincing 3D perspective of a staircase disappearing into the distance. It’s a fantastic exercise in perspective and shading that looks far more complex than it actually is.
Step-by-Step
Materials
- Spiral-bound lined notebook (standard rule)
- Blue ballpoint or fine-liner pen (matching the line color helps)
- Ruler or straight edge
- Pencil (optional, for sketching)
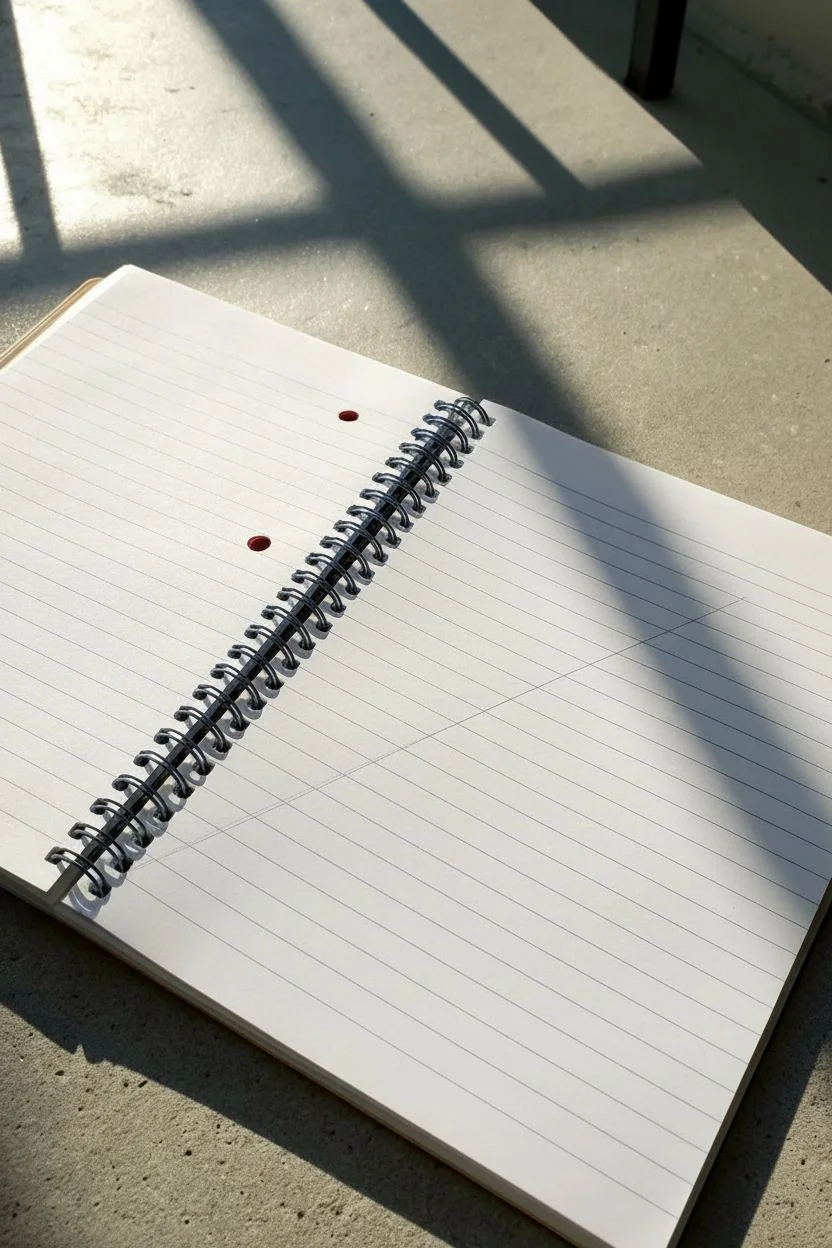
Step 1: Planning the Perspective
-
Observe the lines:
Before making a mark, look closely at your notebook paper. The pre-printed blue horizontal lines will serve as the front edge of each step. This is the secret to the illusion. -
Establish the horizon:
Imagine a vanishing point near the right edge of the page, about halfway up. You can mark this lightly with a pencil if you wish, though you won’t draw lines all the way to it. -
Mark the staircase width:
Decide how wide your stairs will be. The stairs will angle upwards from left to right. Visualize a diagonal corridor moving from the bottom left corner up towards the middle right.
Vanishing Point Trick
Place a small sticky note on your desk to the right of your notebook to serve as a physical vanishing point. Use a ruler to align all diagonal lines to that single spot.
Step 2: Drawing the Steps
-
Draw the first riser:
Start near the bottom left. Draw a short vertical line connecting two blue notebook lines. This is the vertical face (riser) of your lowest step. -
Create the step depth:
From the top of that vertical line, draw a diagonal line angling up and to the right until it hits the next blue notebook line above. This creates the ‘tread’ or flat part of the step. -
Define the far edge:
Where your diagonal line meets the blue line, draw a horizontal line along that blue line to define the width of the step. Then, draw another diagonal line connecting back down to finish the side perspective of the step. -
Repeat the pattern upward:
Use the zig-zag pattern: vertical up (riser), diagonal back (depth), horizontal across (width). Repeat this process, moving up the page. As you go higher, the steps should appear to get slightly smaller to enhance the perspective. -
Extend the treads:
For the main body of the staircase, use the notebook’s printed blue lines. Bold them slightly with your pen to make them feel like part of your drawing rather than just the background.
Surreal Twist
Draw a tiny stick figure climbing the stairs, or make a door at the very top step that is slightly open, hinting at a hidden world beyond the notebook page.
Step 3: Building the Structure
-
Add the railing wall:
On the left side of your stairs, draw a diagonal line that follows the slope of the steps. This will be the top edge of the solid wall or railing. -
Draw the wall thickness:
Draw a second parallel diagonal line slightly above the first one to give the wall thickness. Connect these at the ends. -
Create the upper railing:
Above the solid wall, draw a railing structure. Sketch vertical posts spaced evenly apart, which get closer together as they recede into the distance. -
Connect the railing top:
Draw the top handrail connecting your vertical posts. Ensure this line converges toward the same imaginary vanishing point as your stairs. -
Add cross-bracing:
Draw diagonal cross-braces between your railing posts. This adds architectural detail and reinforces the perspective angles.
Step 4: Shading and Details
-
Shade the risers:
Using vertical hatching lines, shade the vertical front face of each step. I find that keeping these lines close together creates a dark value that contrasts nicely with the bright ‘tops’ of the steps. -
Deepen the shadows:
Go over the riser shading again to make it darker, especially where the riser meets the tread below it. This separation is crucial for the 3D effect. -
Shade the side wall:
Add light shading to the side of the staircase structure on the right. This suggests the stairs are a solid block sitting on the paper. -
Shadow the railing wall:
Fill in the thickness of the left-hand wall with dense hatching to make it look solid and distinct from the airy railing above. -
Add a light source:
Draw a stylized sun or light burst near the top right of the stairs. This explains your shadows and adds a playful doodle element. -
Final heavy outlines:
Take your pen and trace over the main structural lines one last time. A slightly thicker outline on the outer edges helps ‘pop’ the drawing off the page.
Now step back and admire how a flat page has transformed into a deep architectural space
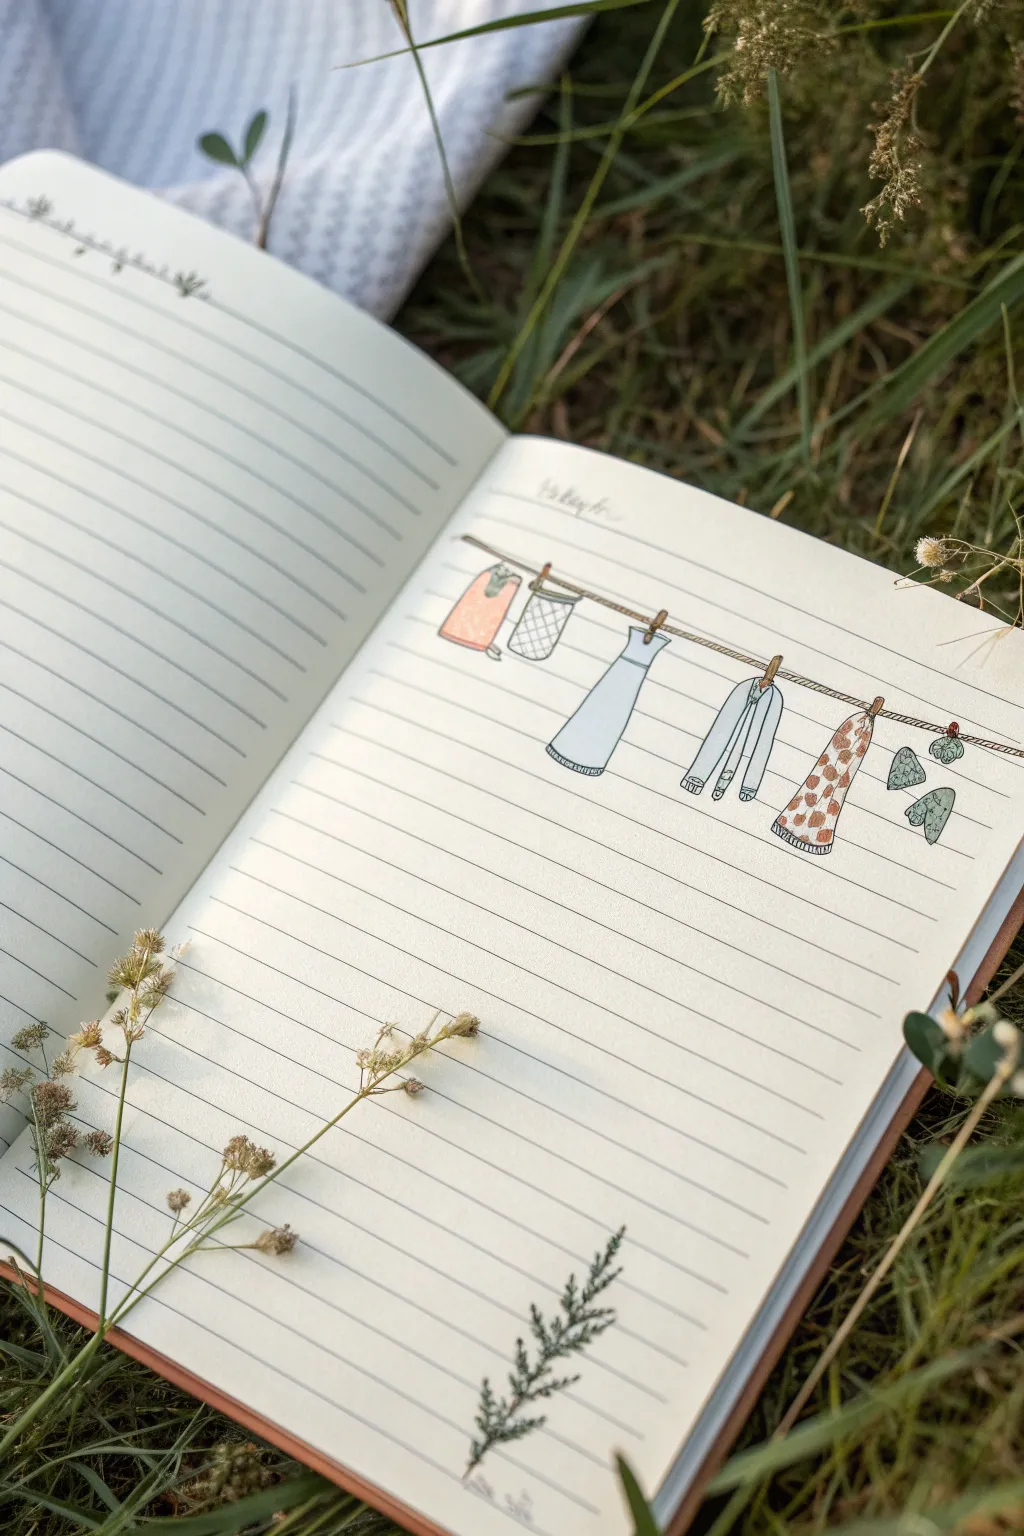
Tiny World on Each Line (Micro Scenes)

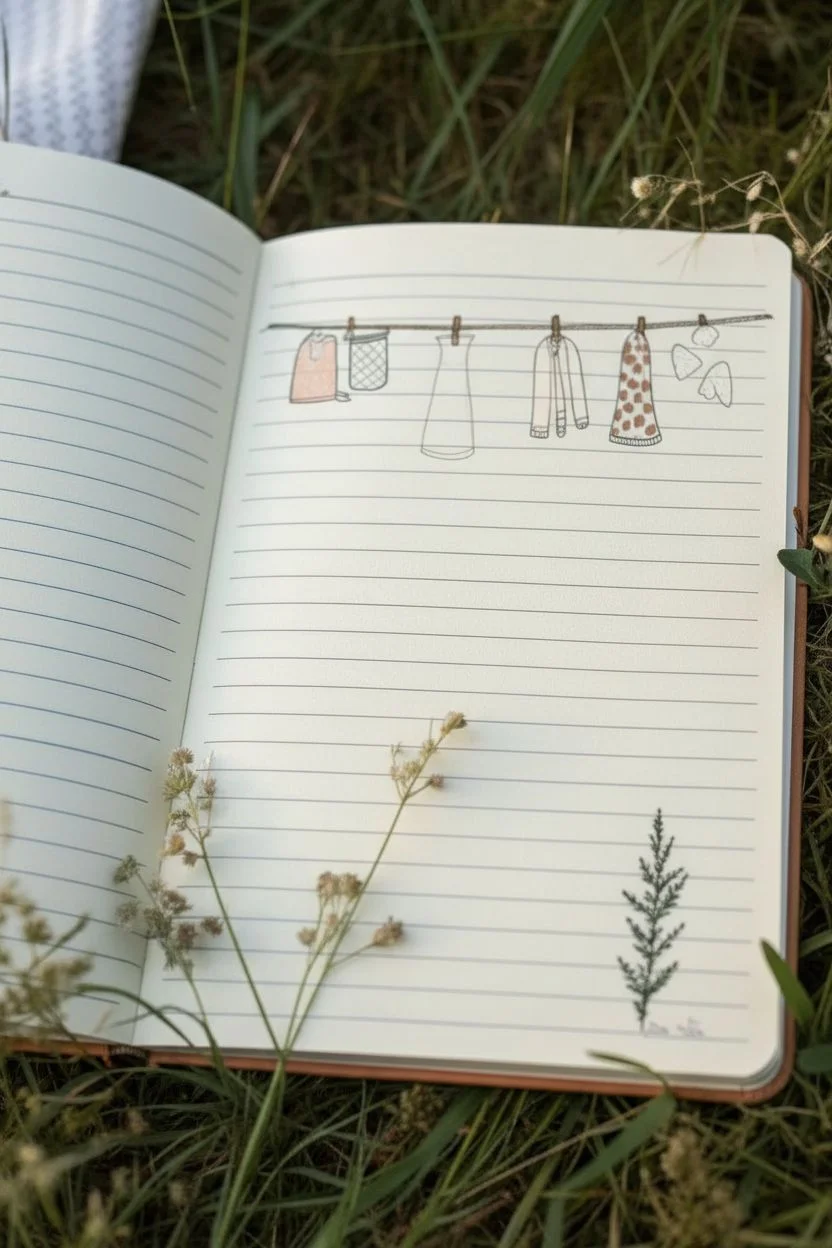
Transform a simple page of lined paper into a whimsical scene by turning the rule lines into a functional part of your drawing. This sweet illustration features a tiny clothesline strung with drying garments, creating a clean and minimalist aesthetic perfect for journaling.
Detailed Instructions
Materials
- Lined notebook or journal
- Fine liner pen (black, 0.1mm or 0.3mm)
- Colored pencils or mild markers (pastel pink, blue, grey, orange/brown)
- Ruler (optional)
- Pencil and eraser for sketching
Step 1: Setting the Scene
-
Select your line:
Open your notebook to a fresh page. Choose a horizontal line about one-third of the way down the page to serve as your clothesline rope. It helps to pick a line that gives you enough vertical space below it for longer hanging items. -
Draw the rope:
Using your black fine liner, carefully trace over the existing blue notebook line to make it distinct. You can add a tiny bit of texture by making the line slightly twisted or adding small knots at the ends, though a straight line works perfectly for a clean look. -
Add the clothespins:
Sketch small, vertical or slightly angled rectangles directly on the rope where you plan to hang each garment. These will be your clothespins. Space them out evenly so your clothes don’t look cluttered.
Natural Drapes
Draw the bottom hems of the clothes with a slight curve rather than a straight line. This makes the fabric look like it is hanging naturally in the breeze.
Step 2: Hanging the Garments
-
Outline the first shirt:
Starting from the left, draw a small t-shirt or tank top hanging from the rope. Keep the lines simple, letting the fabric drape naturally downwards. -
Draw the basket:
Next to the shirt, sketch a small wire basket or bag hanging by a handle. Use a cross-hatch pattern to suggest a mesh or woven texture. -
Create the long dress:
In the center, draw a long, sleeveless dress. Let the skirt widen slightly as it goes down, extending over several notebook lines below. This vertical length adds nice visual interest. -
Sketch the cardigan:
Draw a long-sleeved shirt or cardigan next. Angle the sleeves slightly inward as if they are limp and drying. Add a vertical line down the center for the button placket. -
Add patterned pants:
Draw a pair of wide-leg trousers or a long skirt next. This will be a great spot to add a fun pattern later. -
Finish with socks:
On the far right end of the line, doodle a tiny pair of socks clipped together. They should look small and cute compared to the other items.
Step 3: Bringing it to Life
-
Ink the outlines:
Once you are happy with your pencil sketches, go over everything with your fine liner pen. Use a steady hand and precise strokes. -
Erase guidelines:
Wait a moment for the ink to dry completely, then gently erase any visible pencil marks to keep the page tidy. -
Color the first shirt:
Use a soft peach or pastel pink pencil to fill in the first shirt. Keep the coloring light and airy. -
Color the dress:
Color the long dress in a solid, pale blue. I find that shading vertically helps mimic the drape of fabric. -
Shade the cardigan:
Use a cool grey or very light blue for the cardigan. You can leave the cuffs or collar white for contrast. -
Pattern the pants:
For the trousers, draw small connecting shapes (like a giraffe or hex pattern) using a light brown or orange pencil. Fill the shapes in gently. -
Add final details:
Color the socks in a soft green or teal. If you like, you can add a tiny botanical sprig drawing at the bottom corner of the page to balance the composition.
Smudge Alert
Notebook paper is often less absorbent than drawing paper. Let your ink lines dry for at least 60 seconds before erasing pencil marks to avoid smearing.
Enjoy your charming little laundry scene every time you turn the page


Have a question or want to share your own experience? I'd love to hear from you in the comments below!