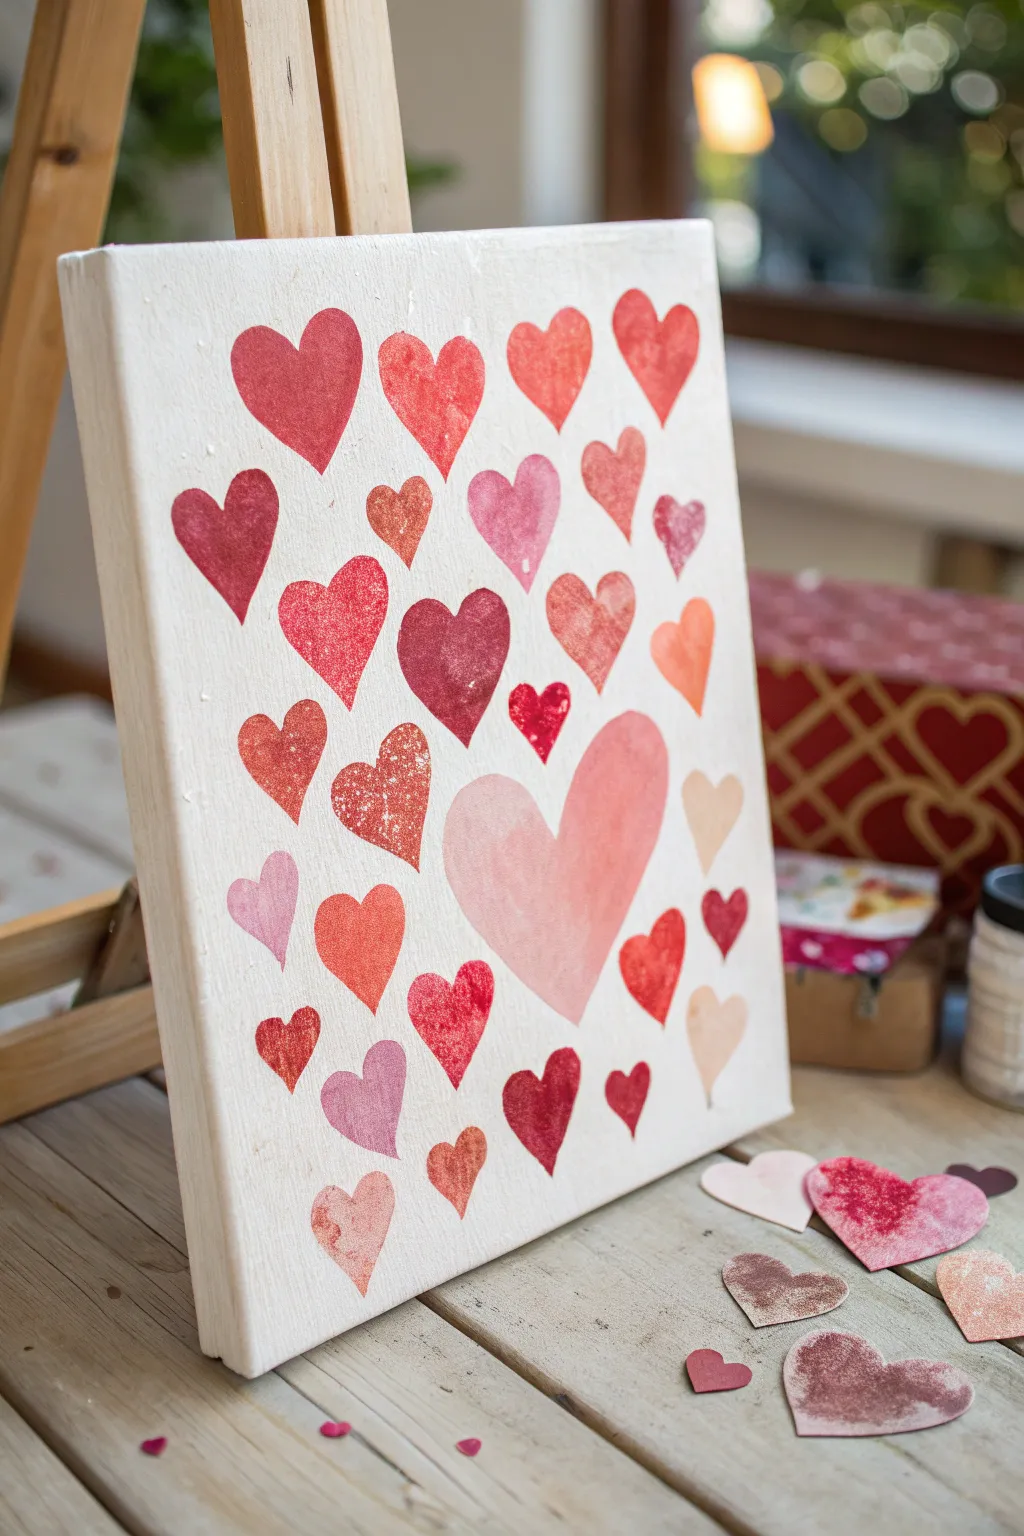
If you’re craving a sweet, sentimental painting that feels like a little love note for your wall, a love-themed canvas is such a satisfying place to start. I’m sharing a mix of classic romantic favorites and more unexpected twists, all centered on love you can actually paint.
Classic Red Heart on a Soft Gradient Background
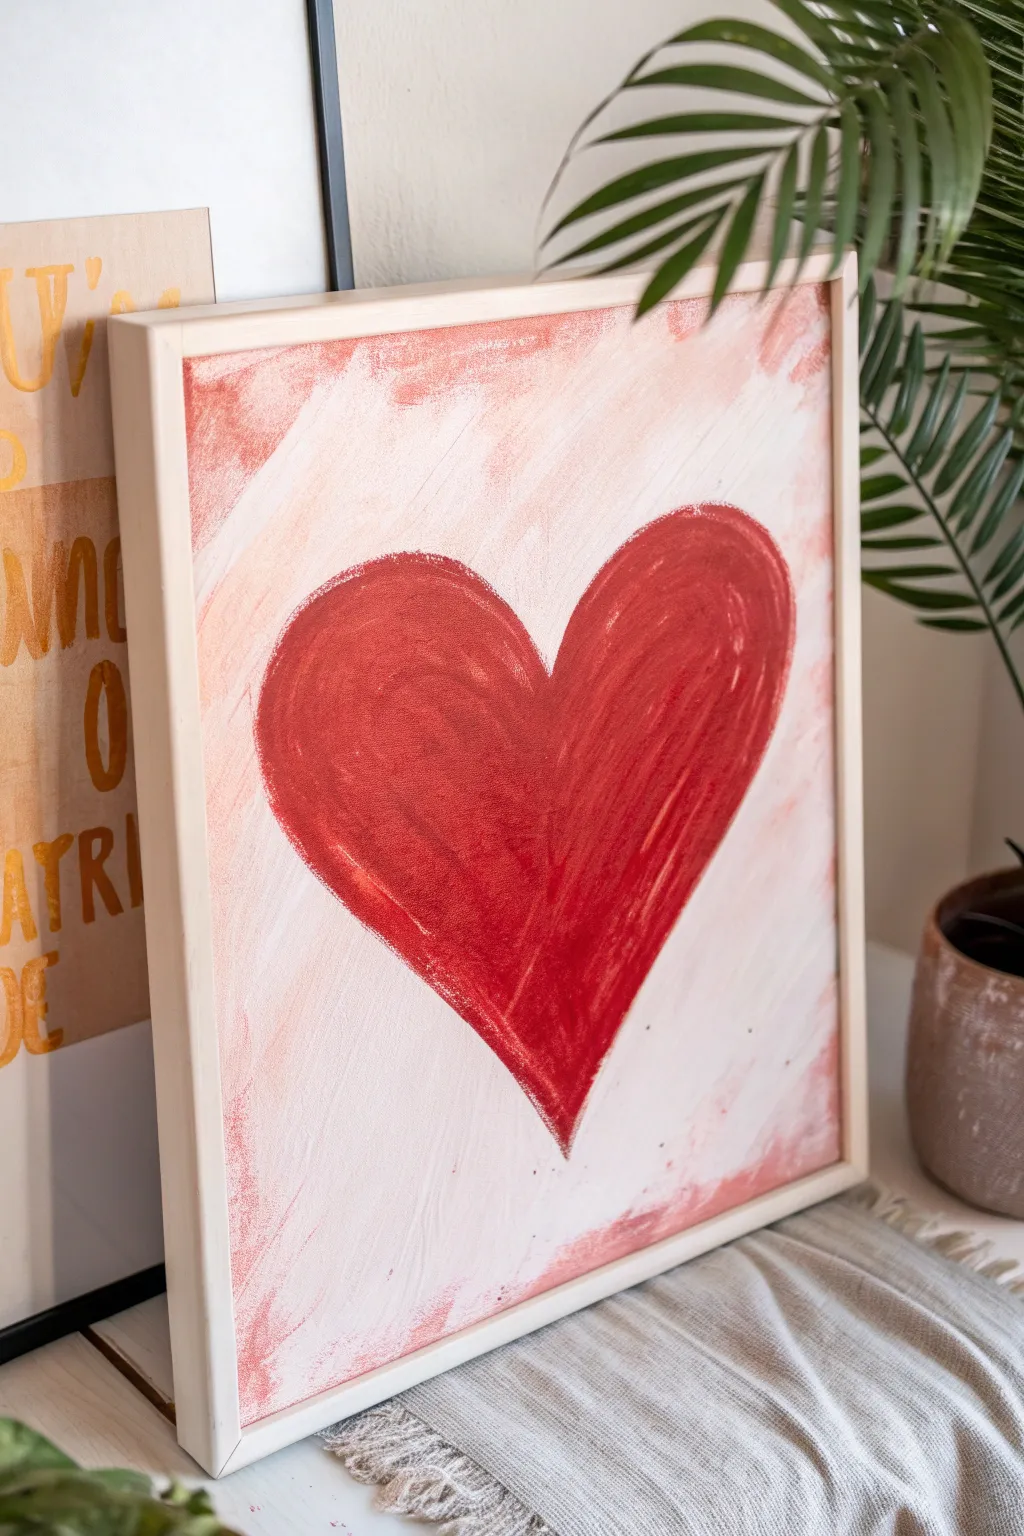
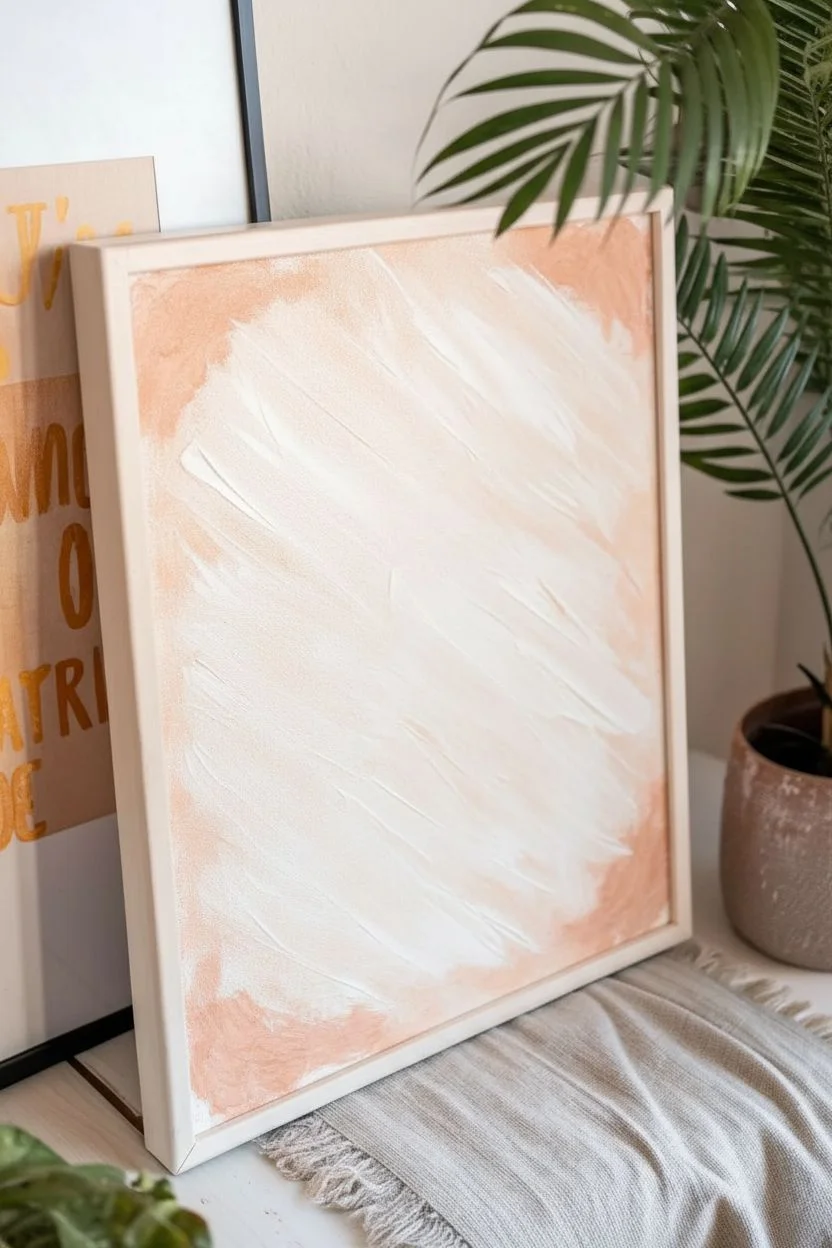
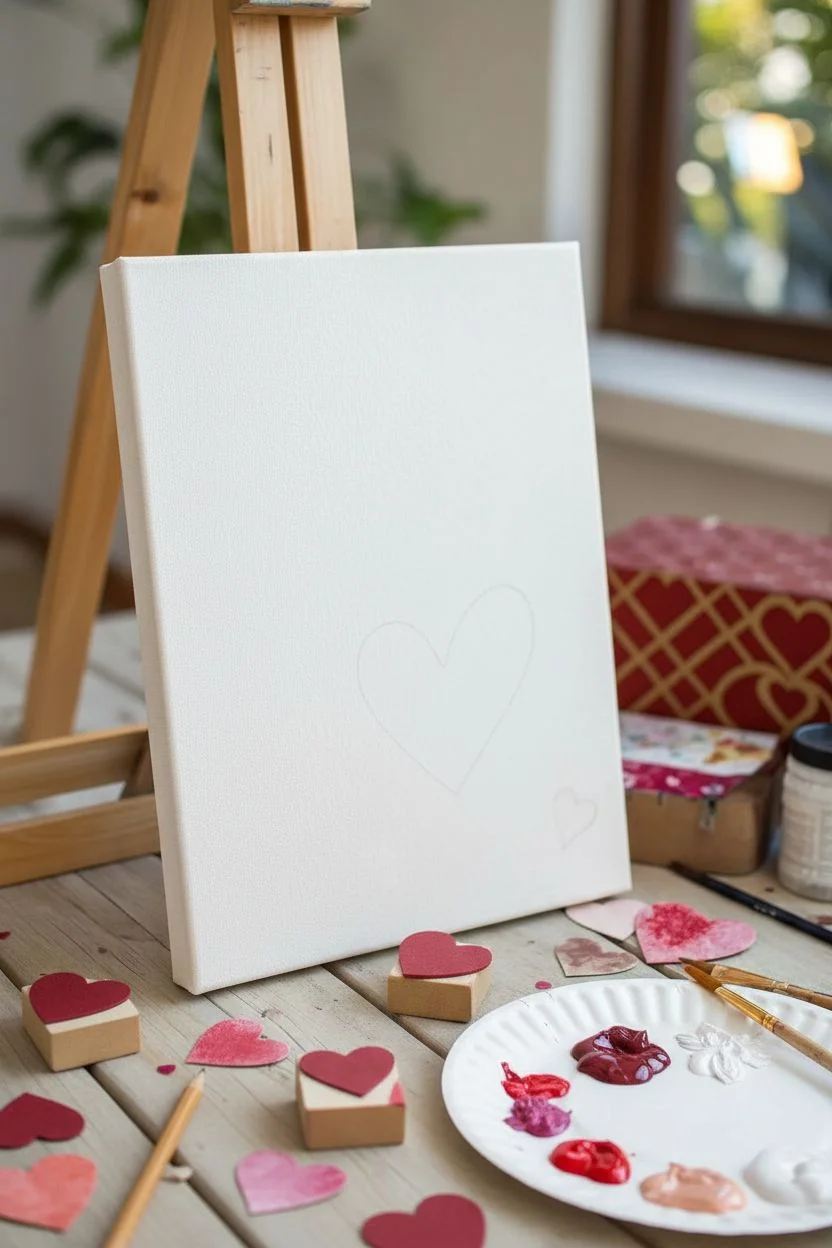
This project captures the essence of classic romance with a charmingly distressed finish that feels both modern and timeless. A bold red heart takes center stage against a textured, creamy background with subtle peachy undertones, making it a perfect piece for Valentine’s Day or year-round décor.
How-To Guide
Materials
- Square stretched canvas (approx. 12×12 or 16×16 inches)
- Acrylic paints: Bright red, deep crimson, titanium white, cream/off-white, and a touch of peach or coral
- Wide flat brush (1-2 inches) for background
- Medium round brush for outlining
- Medium filbert brush for filling the heart
- Paper towels or a rag
- Palette or paper plate
- Pencil
- Light wooden float frame (optional, for finishing)
Step 1: Creating the Textured Backdrop
-
Base layer:
Begin by squeezing out generous amounts of titanium white and cream paint onto your palette. Mix them slightly but leave some separation to create natural tonal variations. -
Apply the background:
Using your wide flat brush, cover the entire canvas with the white-cream mixture. Use long, diagonal strokes running from the top left to bottom right to establish a directional texture. -
Add warmth:
While the white base is still slightly tacky, dip the very tip of your dirty brush into a tiny amount of peach or coral paint. -
Blend the undertones:
Streaky is good here. Lightly drag this warmer color through the wet background using the same diagonal motion. You want faint hints of color, not solid pink stripes. -
Distress edges:
Dab a little extra of the peach tone around the corners and edges of the canvas, scrubbing it in a circular motion to create a worn, vintage vignette effect. -
Dry completely:
Let the background dry fully before moving on. This is crucial so your red heart doesn’t turn pink by mixing with wet white paint.
Oops! Paint Too blended?
If your background colors turned muddy, let the layer dry completely. Then, dry brush a thin layer of pure white over the top to reset the texture before trying again.
Step 2: Painting the Heart
-
Sketch the shape:
Use a pencil to lightly sketch a large heart in the center of the canvas. Don’t worry about perfect symmetry; a slightly organic shape adds to the rustic charm. -
Prepare your reds:
Mix your bright red with a small dot of deep crimson. This creates a rich, sophisticated red rather than a flat primary color. -
Outline the form:
Load a medium round brush with your red mix and carefully trace over your pencil outline. Keep the paint relatively thick here for a crisp edge. -
Fill the center:
Switch to the filbert brush. Paint the inside of the heart, following the curve of the shape with your brushstrokes. Imagine you are wrapping the paint around the rounded lobes of the heart. -
Create texture:
Do not aim for a perfectly flat red fill. Allow some brushstrokes to be thicker than others, and let the bristles create visible lines that follow the heart’s contour. -
Add highlights:
Dip your red brush—without cleaning it—into a tiny bit of white or light pink. Gently streak this lighter mix onto the upper left curve of the heart to simulate a soft highlight. -
Deepen shadows:
similarly, pick up a tiny bit of the pure crimson or even a speck of brown. Blend this into the bottom point and right side of the heart for depth. -
Final dry brush:
Once the heart is dry to the touch, use a clean, dry brush with a tiny amount of off-white paint. Lightly whisk it over the red paint in a few spots to enhance the weathered, chalky look.
Step 3: Framing and Finishing
-
Check for gaps:
Step back and look at your painting. If the background feels too plain, you can dry brush a little more texture around the heart to integrate it better. -
Frame it:
To recreate the exact look in the photo, place your canvas into a light wood float frame. This separates the artwork from the wall and gives it a polished, gallery feel.
Make It 3D
For actual texture, mix a tablespoon of baking soda into your red paint. It creates a gritty, stone-like finish that looks incredible on rustic pieces like this.
Hang your new masterpiece in a cozy corner to add a permanent touch of warmth to your home


Couple Silhouette Holding Hands at Sunset
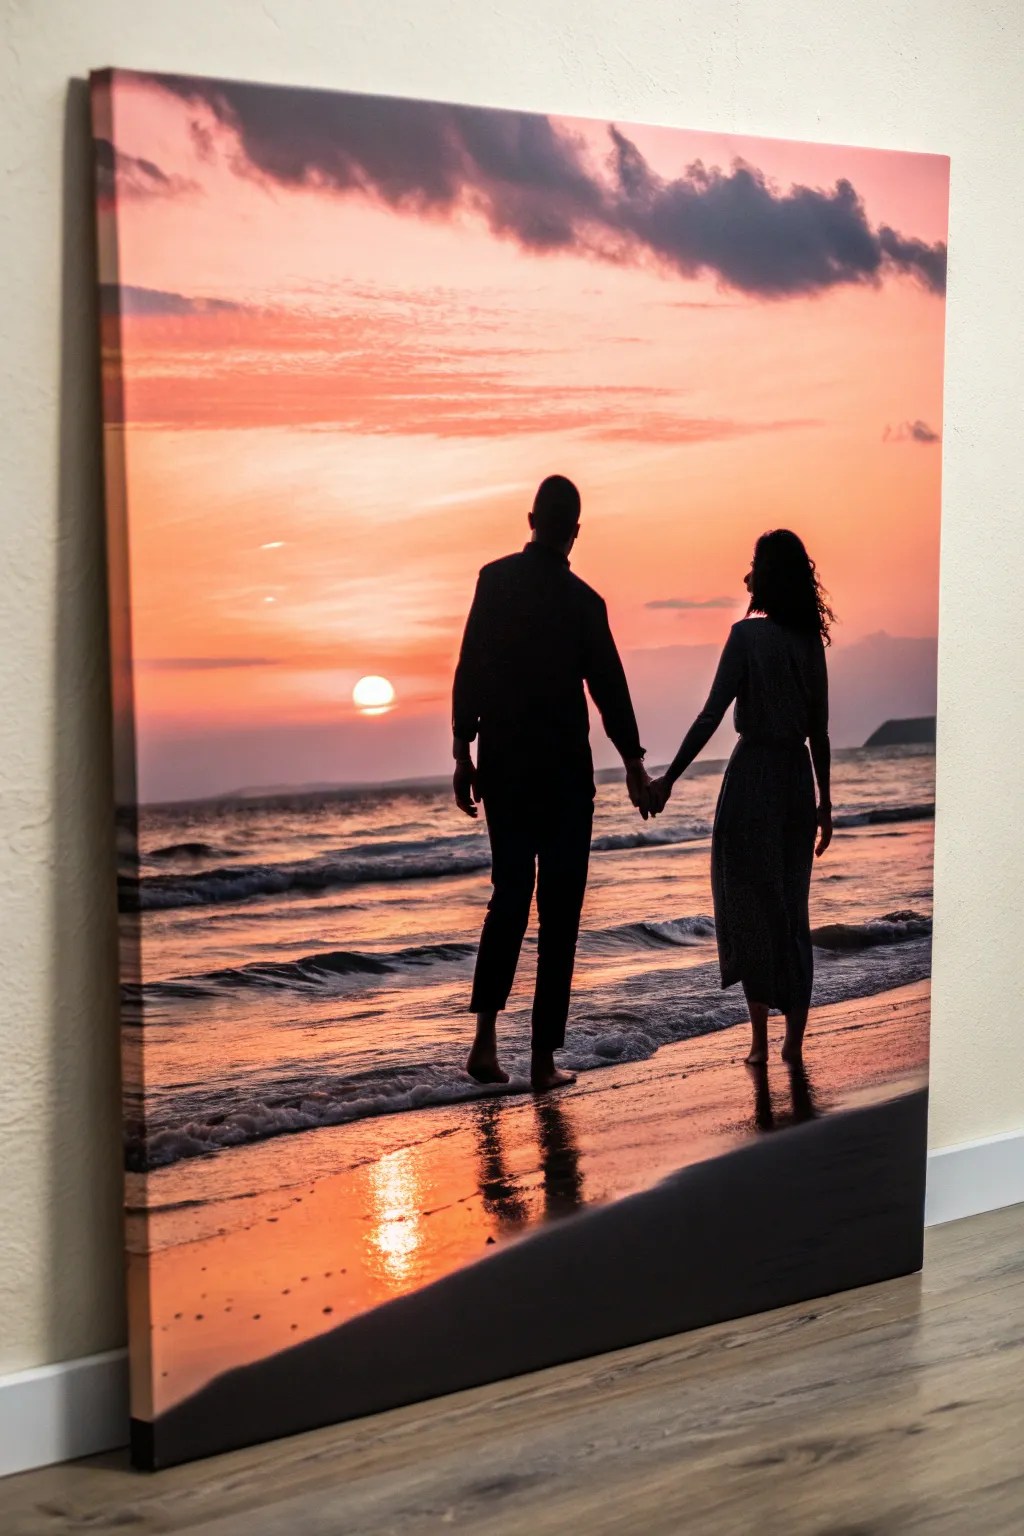
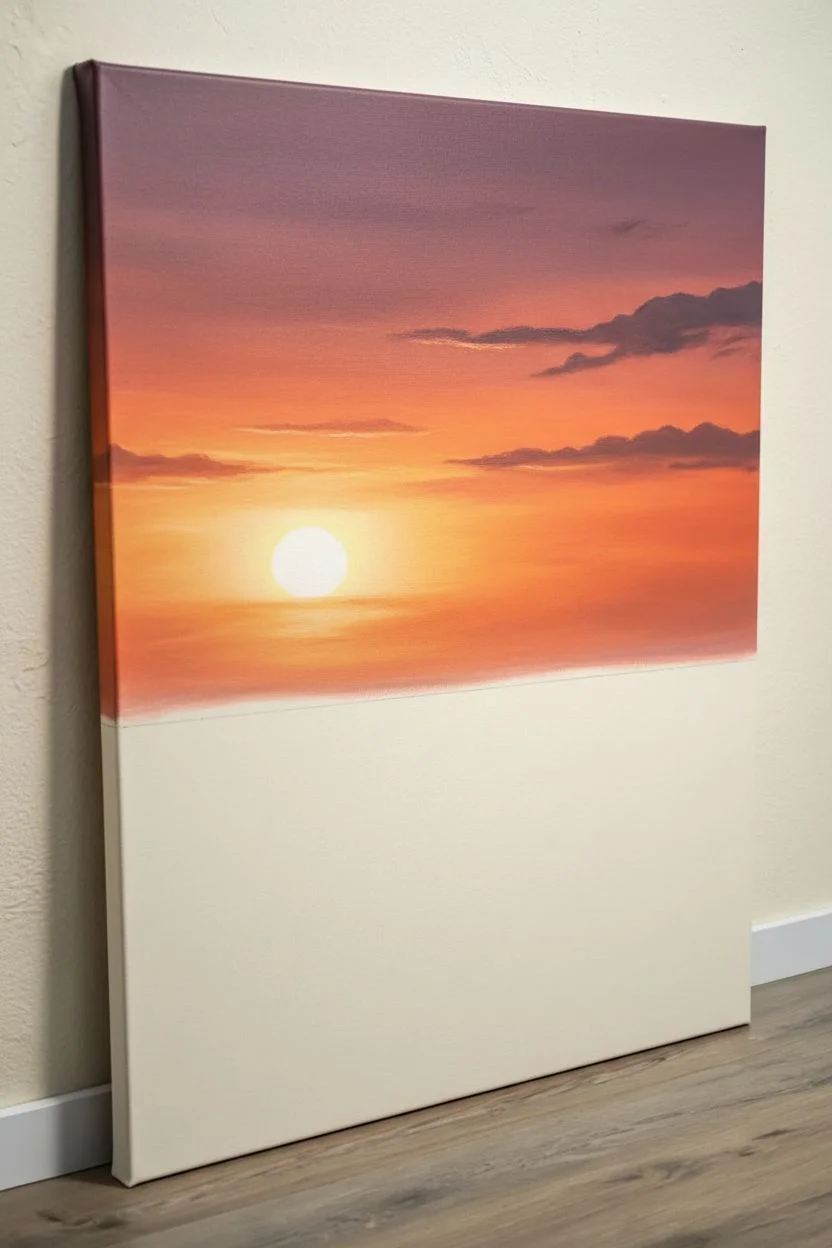
Capture the romantic glow of golden hour with this stunning canvas painting featuring a couple walking hand-in-hand along the shore. By blending warm acrylics for the sky and using sharp blacks for the silhouette, you can create a professional-looking scene that radiates warmth and intimacy.
Step-by-Step Tutorial
Materials
- Large stretched canvas (24×36 inches or similar)
- Acrylic paints: Titanium White, Cadmium Yellow, Orange, Alizarin Crimson, Burnt Umber, Mars Black
- Large blending brush (2-inch flat)
- Medium filbert brush
- Small round detail brush (size 0 or 1)
- Pencil and eraser
- Ruler or painter’s tape (optional for horizon)
- Cup of water and paper towels
- Palette or paper plate
Step 1: Painting the Sky Gradient
-
Set the horizon:
Visualize where your ocean meets the sky. Lightly mark a horizontal line with a pencil about one-third of the way up from the bottom of the canvas to establish your horizon line. -
Start with the darkest sky tones:
At the very top of the canvas, mix a touch of Burnt Umber into your Alizarin Crimson to make a dusty purple-red. Apply this in broad, horizontal strokes across the top edge. -
Blend downward into orange:
While the top strip is still wet, pick up pure orange on your large brush. Brush this directly below the purple-red, overlapping the edges slightly to create a soft transition. -
Transition to yellow:
Clean your brush thoroughly. Load it with Cadmium Yellow and apply it below the orange section. Blend upward into the orange while the paint is wet to create a fiery sunset gradient. -
Create the sun glow:
Near the horizon line on the left side, mix a generous amount of Titanium White with a tiny dot of yellow. Paint a soft, circular area where the sun will sit, blending the edges outward so it glows rather than looks like a sticker. -
Add cloud textures:
Using a dry filbert brush with a small amount of the dark purple-red mix, scumble in some horizontal cloud shapes across the top third of the sky. Keep the edges soft and feathery.
Smooth Blending
Work quickly while acrylics are wet for perfect gradients. If paint dries too fast, mist the canvas lightly with a spray bottle of water to keep it workable.
Step 2: Creating the Ocean & Reflection
-
Block in the water:
For the ocean water up to the horizon, repeat your sky colors but in reverse order and darker. Use horizontal strokes of dark purple-blue near the horizon, fading into warm oranges closer to the foreground sand. -
Paint the wet sand:
The bottom third of the canvas represents wet sand. Mix Burnt Umber with Orange and a touch of White. Paint this entire lower section, using long horizontal strokes to mimic the sheen of wet beach. -
Add sunlight reflection:
Directly under your sun, use your white-yellow mix to paint vertical, dashes on the water and wet sand. These jagged horizontal lines create the shimmering path of light on the waves. -
Create wave movement:
With a smaller brush and dark umber, paint thin, undulating horizontal lines in the water section to suggest incoming gentle waves.
Make It Personal
Customize the silhouette to match you and your partner. Add details like a baseball cap, a long skirt, or even a small dog walking alongside the couple.
Step 3: Painting the Silhouettes
-
Sketch the figures:
Once the background is completely dry, lightly sketch the outline of the couple. Focus on their posture—he is slightly taller, leading the way; she follows, looking toward him. -
Fill the main shapes:
Load your medium brush with pure Mars Black. Carefully fill in the bodies of the figures. I find it helpful to start in the center of the body and push the paint outward toward the edges for cleaner lines. -
Refine the edges:
Switch to your smallest detail brush to paint the tricky areas: the clasped hands, the shape of the feet, and the delicate profile of their faces. -
Add hair texture:
For the woman’s hair, use the very tip of your detail brush to flick tiny strands outward, giving it a windblown, natural look. -
Ground the figures:
Beneath their feet, establish a shadow. Mix black with a little bit of your sand color to make a translucent dark brown. Paint a vertical, wavy reflection directly under their feet on the wet sand. -
Final highlights:
To make the water look wettest near the shore, add a few crisp, pure white highlights on the sand near the bottom edge of the canvas.
Step back and admire how the dark figures pop against that beautifully blended sunset for a romantic finish


Love Letter Typography With a Painted Background Wash

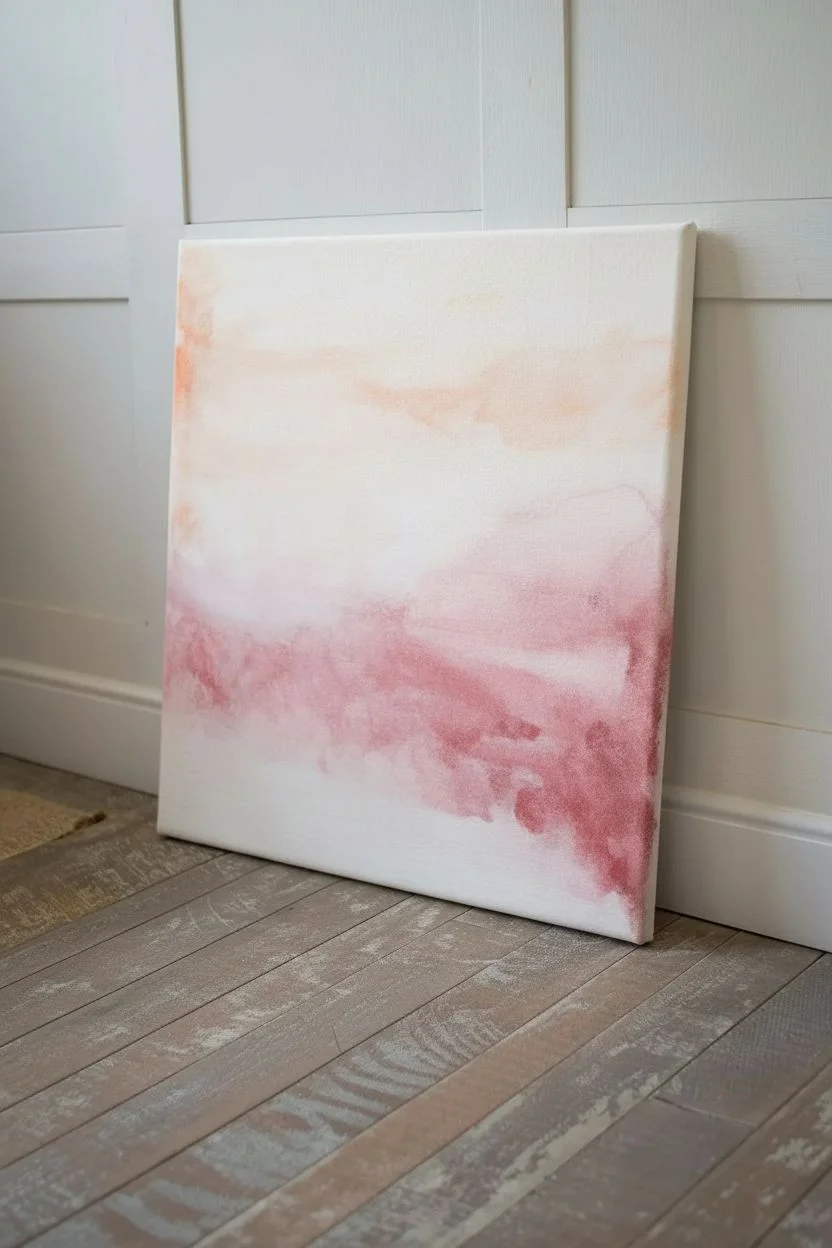
This elegant project combines the soft, bleeding beauty of a watercolor-style wash with the crisp definition of deep red typography. The result is a romantic, modern piece of art that looks professionally printed but is easily achieved with acrylics and a glazing medium.
Step-by-Step
Materials
- Stretched canvas (square format, e.g., 12×12 or 16×16)
- Acrylic paints: White, Peach, Pink, Deep Red/Maroon
- Acrylic glazing liquid or flow improver
- Water cup and paper towels
- Large flat wash brush (1-2 inch)
- Small round detail brush (size 0 or 1)
- Pencil
- Stencil or printed text transfer (optional)
- Ruler or level
Step 1: Creating the Background Wash
-
Prepare the canvas:
If your canvas isn’t pre-primed, apply a coat of gesso. Even on pre-primed canvases, a fresh coat of white acrylic paint creates a smoother surface for the wash to glide over. -
Mix the glazing medium:
To achieve that watercolor look with acrylics, you need transparency. Mix a generous amount of glazing liquid or water into your peach and pink paints on your palette until they are thin and fluid. -
Wet the surface:
Using your large wash brush, dampen the canvas slightly with clean water. You don’t want puddles, just a slick surface to help the colors bleed. -
Apply the top gradient:
Start at the top right corner with the diluted peach color. Create loose, horizontal strokes, letting the brush dance a bit to avoid perfect straight lines. -
Transition the color:
As you move down towards the middle, rinse your brush and pick up the diluted pink. Blend it softly into the bottom edge of the peach section, leaving the center of the canvas mostly white or very pale. -
Build the bottom intensity:
Load your brush with a slightly more saturated pink/red mix. Attack the bottom third of the canvas, using scumbling motions to create that cloudy, textured look seen in the reference. -
Add water drips:
While the paint is wet, flick a tiny bit of clean water onto the bottom section to encourage the pigment to separate and create blooming textures. I find this creates the most authentic watercolor effect. -
Soften the edges:
Use a clean, damp brush to feather out any harsh lines where the paint meets the white space in the middle. The goal is a dreamy, ethereal transition. -
Dry completely:
This step is crucial. The background must be bone dry before you start the lettering. Use a hair dryer on a cool setting if you’re impatient.
Bleeding Lines?
If your letter edges bleed into the background, the wash wasn’t dry enough. Let it dry fully, then sharpen the edge with a bit of white paint before reapplying the maroon.
Step 2: Painting the Typography
-
Plan the layout:
Measure the center of your canvas. Decide on the size of your text—it should dominate the middle white space but overlap slightly with the color washes. -
Transfer the text:
Lightly sketch the word ‘love’ in a serif font using a pencil. If freehand isn’t your strength, print the word, rub pencil on the back of the paper, tape it to the canvas, and trace over the letters to transfer the graphite. -
Refine the outline:
Go over your faint pencil lines to ensure the serifs (the little feet on the letters) are sharp and the curves are smooth. -
Mix the typography color:
Mix a deep maroon or burgundy shade. You want this paint to be opaque, so don’t dilute it too much; it needs to stand out boldly against the background. -
Outline the letters:
Switch to your small round detail brush. Carefully paint the outline of the ‘l’ first, keeping your hand steady. Resting your pinky finger on a dry part of the canvas helps stabilize your stroke. -
Fill in the letters:
Once outlined, fill in the body of the letter. Repeat this process for ‘o’, ‘v’, and ‘e’, taking care to maintain crisp edges. -
Check opacity:
Let the first coat of the letters dry. Acrylics often dry darker and slightly transparent. If you can see the background wash through the letters, apply a second coat for solid coverage. -
Clean up edges:
If you made any small slips, use a tiny bit of white paint (or the background color mix) to carefully touch up the outside edges of the letters once the maroon is dry. -
Seal the artwork:
Once everything is cured (usually 24 hours), apply a spray varnish to protect the painting and unify the sheen of the wash and the typography.
Add Some Sparkle
Mix a tiny amount of gold mica powder or metallic medium into the maroon paint for the lettering. It catches the light beautifully without overpowering the design.
Now you have a stunning, personalized piece of art ready to hang or gift to someone special


Heart Tree With Blossoms Made of Tiny Hearts
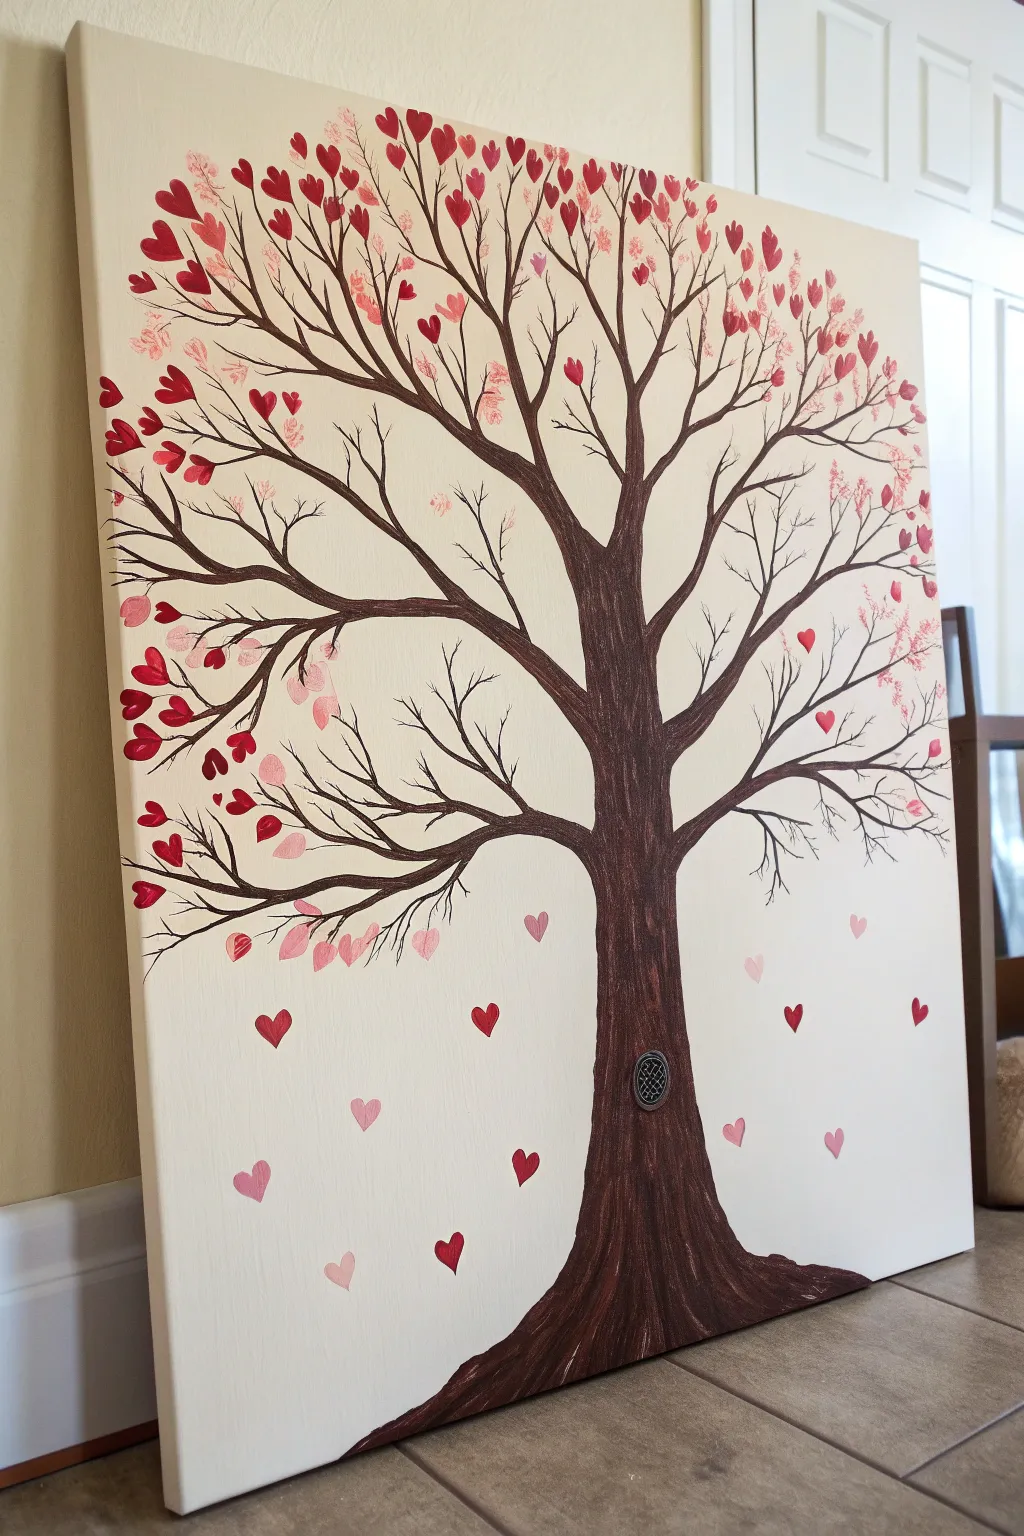
This romantic and whimsical painting features a sturdy tree trunk stretching its branches across the canvas, but instead of leaves, it bursts with tiny heart-shaped blossoms. The varying shades of pink and red create a lively, fluttering effect that looks beautiful in a bedroom or nursery.
How-To Guide
Materials
- Large rectangular canvas (approx. 18×24 or 24×36 inches)
- Acrylic paints: Burnt Umber (dark brown), Titanium White, Mars Black, Crimson Red, Pink
- Paintbrushes: Large flat brush, medium round brush, fine liner brush
- Small heart-shaped sponge stamp (optional, for uniform hearts)
- Pencil and eraser
- Paper plate or palette
- Water cup and paper towels
- Small embellishment (like a vintage button or charm) for the trunk
- Super glue or heavy gel medium
Step 1: Painting the Background and Trunk
-
Prepare the canvas:
Start by painting the entire canvas with a mix of Titanium White and the tiniest drop of Burnt Umber or a warm cream color to create an off-white, vintage-style background. Let this base coat dry completely. -
Sketch the tree structure:
Lightly sketch the tree trunk and main branches with a pencil. Start the trunk at the bottom center, making it wide at the base and tapering as it moves upward. Branch it out widely to fill the upper two-thirds of the canvas. -
Paint the trunk base color:
Mix Burnt Umber with a small touch of black to get a deep, rich brown. Use a medium round brush or flat brush to fill in the entire trunk and the thickest parts of the branches. -
Add texture to the bark:
While the brown paint is still slightly tacky, mix a lighter brown shade (add a little white to your Burnt Umber). Use a detailed brush to stroke vertical, uneven lines up the trunk to mimic the texture of bark. -
Extend the branches:
Switch to your fine liner brush. Extend the main branches outward, letting them split into smaller and smaller twigs known as ‘Y’ shapes. These thin twigs should reach all the way to the canvas edges. -
Refine the canopy:
Ensure you have plenty of empty space between the branches. The beauty of this tree is in its open, airy structure which leaves room for the heart leaves to show clearly.
Stamp Shortcut
Make your own stamp by carving a small heart into a wine cork or the eraser of a pencil. This keeps your heart shapes consistent and speeds up the process significantly.
Step 2: Adding the Heart ‘Leaves’
-
Mix your palette:
Prepare several shades of red and pink on your palette. You’ll want a deep crimson, a bright red, a medium bubblegum pink, and a very pale pastel pink. -
Start with the darkest hearts:
Using a small flat brush or a heart stamp, begin adding the darkest red hearts. Place them sporadically on the ends of the branches. If painting by hand, simply press the brush down twice in a V-shape to form the heart. -
Layer in medium tones:
Next, add the bright red and medium pink hearts. Cluster some together near the branch tips to look like full blooms, but leave others floating singly. -
Add the lightest hearts:
Fill in the gaps with your palest pink hearts. I like to overlap a few of these over the branches slightly to add depth and make the tree look integrated with the foliage. -
Vary the sizes:
Ensure not all hearts are the exact same size. Make some tiny ‘buds’ near the very tips of the thinnest twigs and larger full hearts on thicker branches. -
Create the falling effect:
Paint a few hearts ‘falling’ through the air below the branches. Use different shades here as well to show movement. -
Add floating hearts:
Continue painting hearts lower down the canvas, creating a scattered effect as if they are drifting toward the ground. Keep the density much lower here than in the tree canopy.
Step 3: Final Details
-
Ground the tree:
Use your dark brown paint to anchor the tree at the bottom. Create a small mound or root system that extends horizontally along the bottom edge of the canvas so the tree doesn’t look like it’s floating. -
Attach the charm:
Once all paint is perfectly dry, take your vintage button, coin, or charm. Apply a dot of super glue or heavy gel medium to the back. -
Position the focal point:
Press the charm onto the trunk, roughly a third of the way up from the bottom. This adds a unique mixed-media element that makes the piece special. -
Final inspection:
Step back and look at the balance of colors. If one area looks too heavy with red, balance it out with a few pale pink hearts in that section.
Fixing Wonky Hearts
If a painted heart looks misshapen, don’t wipe it! Let it dry, paint over it with the background cream color, dry again, and then repaint the heart freshly on top.
Your heart-filled tree is now ready to spread love from its place on your wall
BRUSH GUIDE
The Right Brush for Every Stroke
From clean lines to bold texture — master brush choice, stroke control, and essential techniques.
Explore the Full Guide
Moonlit Couple Under a Starry Sky
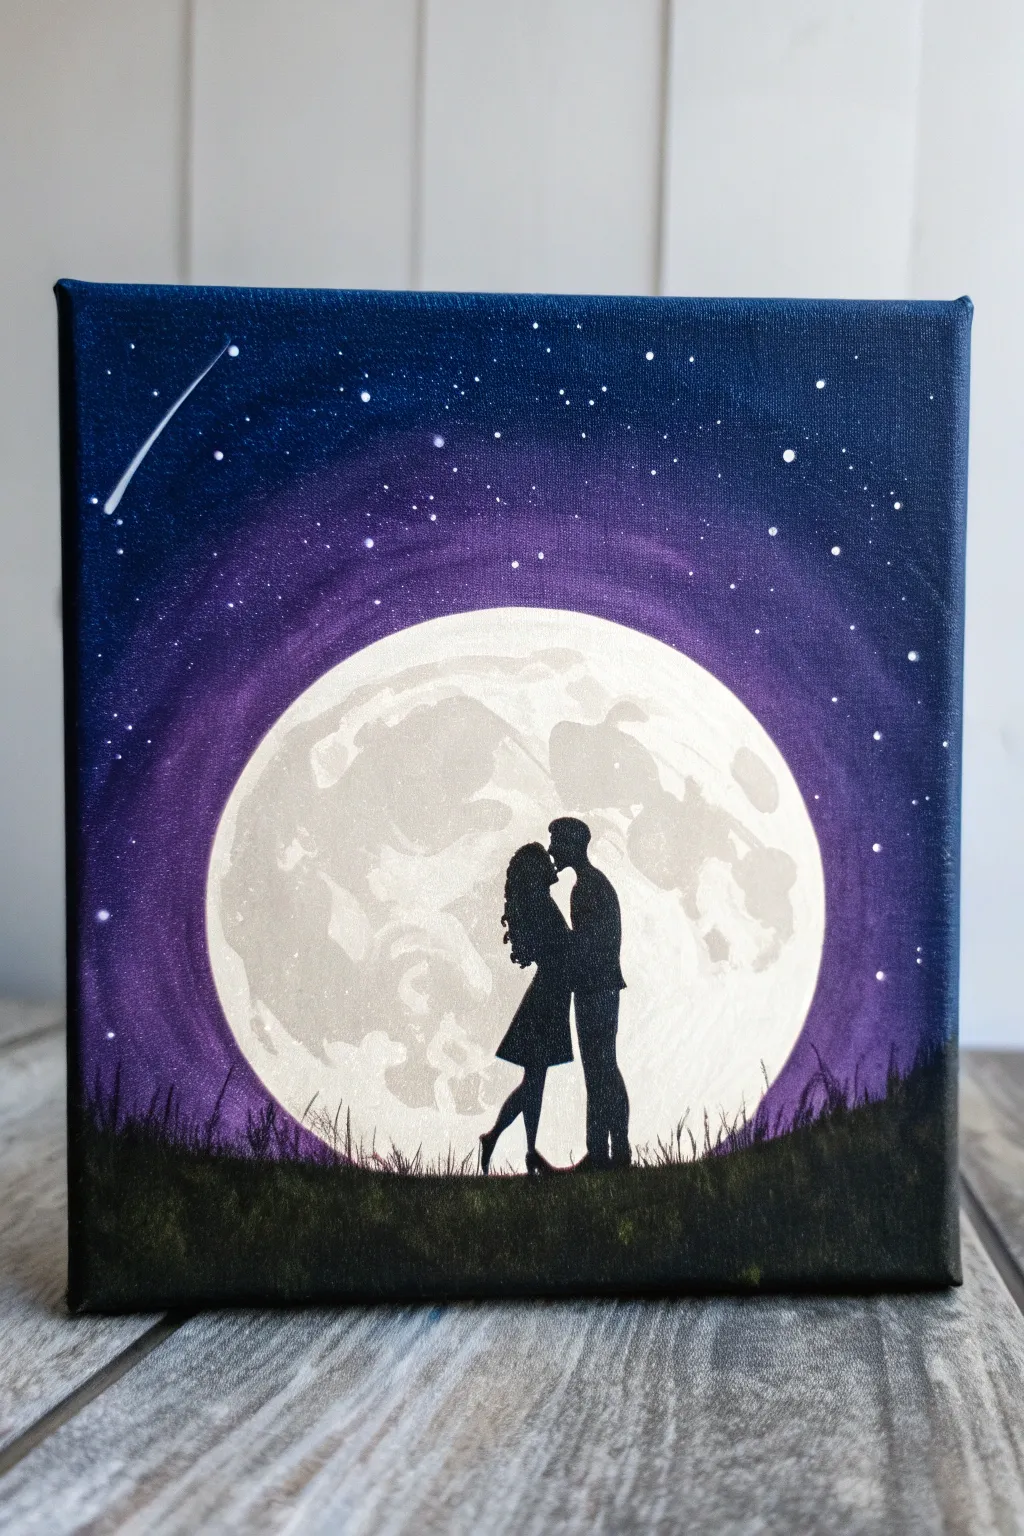
Capture the magic of a romantic evening with this striking silhouette painting that places a couple front and center against a glowing, giant moon. By blending deep blues into dreamy purples, you’ll create an atmospheric backdrop perfect for beginners and seasoned painters alike.
Step-by-Step
Materials
- Square canvas (e.g., 8×8 or 10×10 inches)
- Acrylic paints: Titanium White, Mars Black, Violet/Purple, Phthalo Blue (or Navy Blue)
- Medium flat brush (3/4 inch)
- Small round detail brush
- Large round object to trace (like a bowl or lid)
- pencil
- Palette for mixing paint
- Cup of water and paper towels
- Old toothbrush (optional for stars)
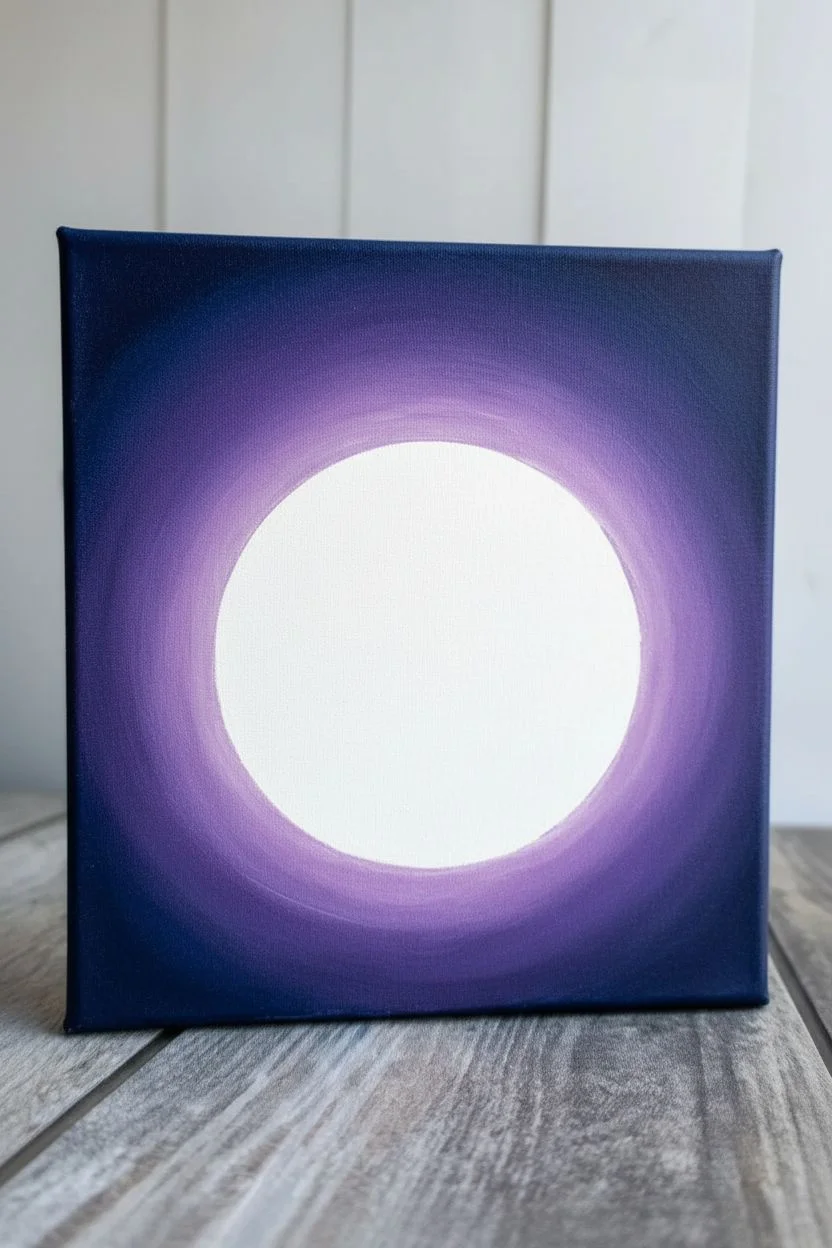
Step 1: Setting the Scene
-
Trace the moon:
Place your circular object in the center of the canvas. It should take up a significant portion of the space. Lightly trace around it with a pencil to mark your moon’s position. -
Block in the moon:
Using a flat brush, paint the entire circle with Titanium White. It doesn’t need to be perfect yet, just bright and solid. Create a solid base so the background colors won’t show through later. -
Paint the glow:
Mix a small amount of white with a touch of violet. Paint a ring immediately around your white moon, blending it slightly outward. This creates the ‘halo’ effect. -
Deepen the purple:
Switch to pure violet paint. Continue the circular motion outward from the halo, blending the edges while the paint is still wet to avoid harsh lines. -
Add the night sky:
Mix violet with Phthalo Blue or Navy Blue. Paint the corners and the top edges of the canvas with this darker shade, blending it inward into the purple ring. The darkest parts should be the furthest corners.
Hazy Moon?
If your craters look too dark or harsh, wait for them to dry, then dry-brush a very thin layer of pure white over the top to knock them back.
Step 2: Textures and Stars
-
Create moon craters:
Mix a very light grey using a tiny dot of black with plenty of white. With a clean brush, dab random patches onto your white moon to suggest craters and shadows. -
Soften the craters:
Before the grey dries completely, use a clean, dry brush to gently swirl and soften these patches so they look like distant textures rather than hard blobs. -
Make the stars:
Thin down some white paint with a little water until it’s fluid. Dip a small brush or an old toothbrush into it and flick the bristles to spray tiny white specks across the purple and blue sections. -
Paint a shooting star:
With your fine liner brush and pure white paint, draw a small dot in the corner and drag a thin, fading tail behind it to create movement. -
Dry completely:
Allow the entire background and moon to dry completely before starting the silhouette. This is crucial to keep your black paint crisp.
Step 3: The Silhouette
-
Draft the couple:
Lightly sketch the outline of the couple inside the moon with a pencil. Focus on the pose—heads close together, simple clothing shapes—keeping their feet near the bottom edge. -
Fill the silhouette:
Using your smallest detail brush and Mars Black, carefully fill in the sketched figures. Take your time near the edges to keep the profile sharp against the bright moon. -
Establish the ground:
Use the black paint to create a low, uneven horizon line at the bottom of the canvas, covering the couple’s feet. This anchors them to the ground. -
Add grass texture:
I like to use a small brush and flick upward strokes along the horizon line using black paint mixed with a tiny touch of dark green or just plain black to simulate tall grass. -
Refine the edges:
Check the silhouette for any transparent spots. Apply a second coat of black if needed to make the couple completely opaque and bold. -
Final touches:
Add a few taller blades of grass overlapping the bottom of the moon to push the celestial body into the background and add depth.
Personalize It
Change the silhouette to match your reality! Swap the couple for a pet, a solo figure on a swing, or hold hands instead of embracing.
Hang your moonlit masterpiece somewhere cozy to remind you of quiet, romantic nights
Couple Dancing in Moonlight
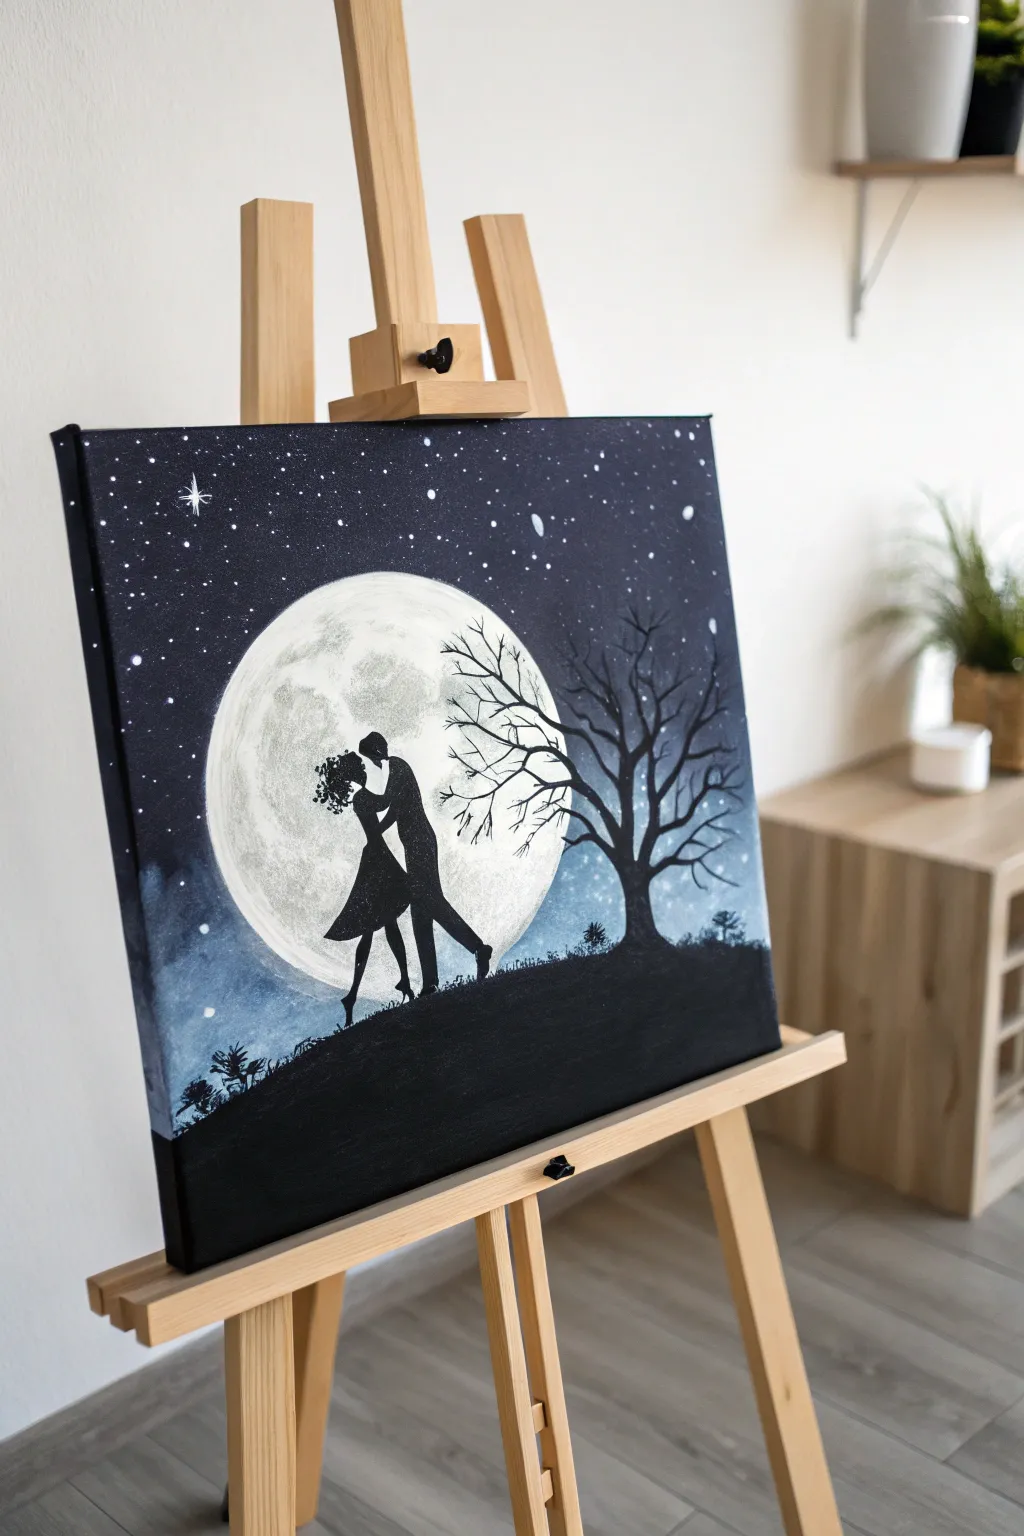
Capture the magic of a quiet night with this stunning acrylic painting featuring a couple dancing in the moonlight. This project combines simple blending techniques with bold silhouette work to create a romantic and striking piece of art.
Step-by-Step Tutorial
Materials
- Stretched canvas (e.g., 16 x 20 inches)
- Acrylic paints: Black, Titanium White, Phthalo Blue (or Prussian Blue), Purple
- Large flat brush (1 inch or larger)
- Medium round brush
- Small liner brush or detail brush
- Old toothbrush (optional for stars)
- Circular object for tracing (plate or bowl) or a compass
- Pencil
- Palette or paper plate
- Cup of water and paper towels
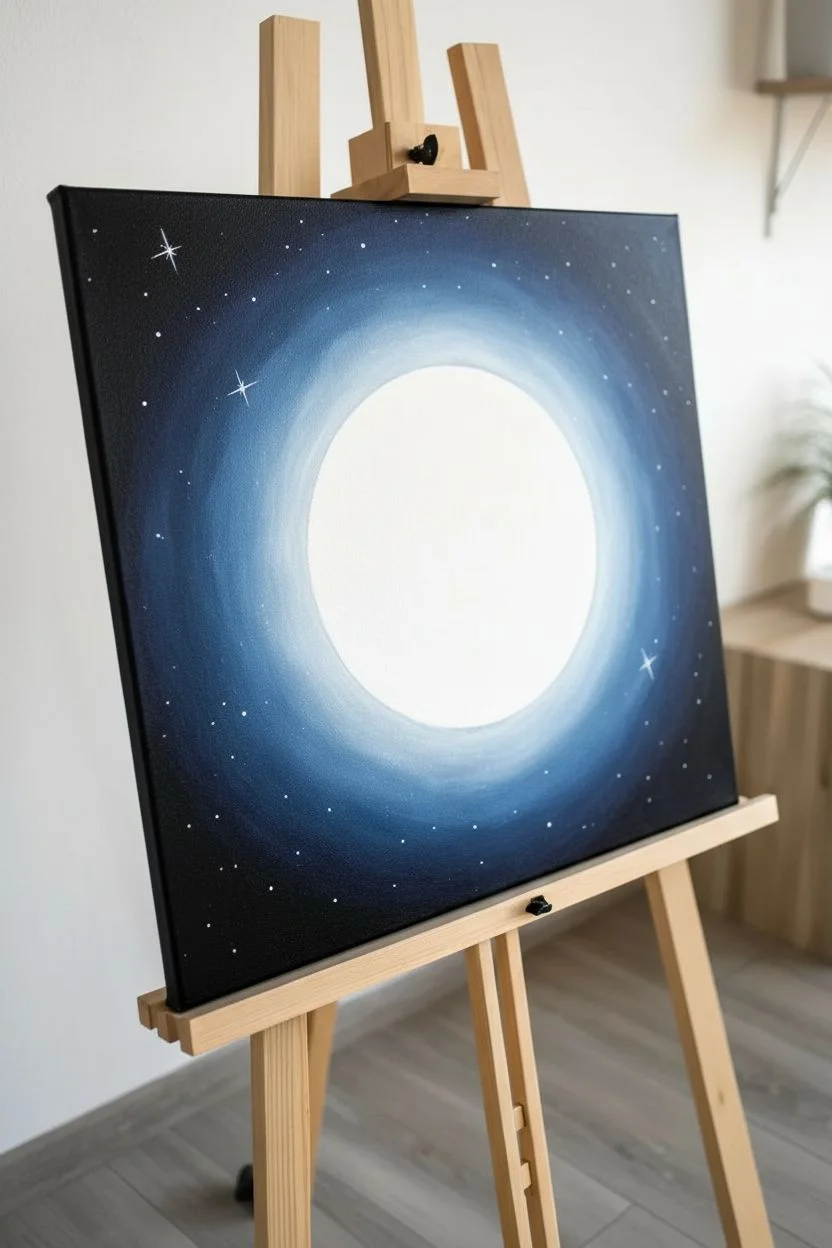
Step 1: Preparing the Sky and Moon
-
Outline the Moon:
Decide where you want your moon to sit. Place a large circular object (like a dinner plate) slightly off-center on your canvas and trace around it lightly with a pencil. -
Paint the Night Sky Base:
Using your large flat brush, mix a very dark blue using Phthalo Blue and a touch of Black. Paint the corners and edges of the canvas, ensuring you paint the sides of the canvas too for a finished look. -
blend the Gradient:
While the dark paint is still wet, add a little Purple and White to your mixture to lighten it slightly. Paint closer to the moon outline, blending outward into the dark edges. Keep your brush strokes loose and multidirectional. -
Create the Moon’s Glow:
Mix a light blue-white shade. Carefully paint the area immediately surrounding your pencil circle, blending it outwards into the darker sky to create a soft, hazy atmospheric glow. -
Fill in the Moon:
Clean your brush thoroughly. Paint the inside of the moon circle with pure Titanium White. It doesn’t need to be perfectly opaque yet, as we will add texture later. -
Add Stars:
Once the sky is dry to the touch, mix a watery white paint. Dip an old toothbrush into it and run your thumb across the bristles to flick tiny specks of stars across the darker parts of the sky. Use a small liner brush to add a few larger, cross-shaped twinkling stars.
Pro Tip: Sharp Edges
For the crispest silhouette lines, thin your black paint slightly with a drop of water. This helps the paint flow smoothly off the liner brush for sharp details like fingers or hair.
Step 2: Adding Texture and Terrain
-
Texture the Moon:
Mix a very light grey using White and a tiny dot of Black. Using a dry, scruffy brush or a crumpled paper towel, lightly dab this grey onto surface of the white moon to create craters and shadows. Focus on the edges to make it look spherical. -
Refine the Moon Highlights:
Add patches of pure white back over the grey areas to heighten the contrast. I find that less is often more here—you just want subtle variations to mimic the lunar surface. -
Paint the Ground:
Switch to pure Black paint. About a quarter of the way up from the bottom, paint a rolling hill that spans the width of the canvas. The line doesn’t need to be straight; a slight curve adds natural movement. -
Fill the silhouette Base:
Fill in everything below that hill line with solid black paint. Apply a second coat if necessary to ensure no canvas shows through.
Level Up: Metallic Touch
Mix a tiny amount of iridescent or silver medium into the white paint used for the moon or the larger stars. It gives the artwork a magical shimmer when the light hits it.
Step 3: Painting the Silhouettes
-
Sketch the Figures:
Wait for the moon to be completely dry. Lightly sketch the outline of the couple inside the moon area using a pencil. If you aren’t confident drawing freehand, you can print a silhouette and transfer it using transfer paper. -
Paint the Couple:
Using a small round brush and black paint, carefully fill in your sketch. Focus on sharp edges, especially for the facial profiles and the woman’s dress flare, as these details define the image. -
Add the Tree Trunk:
On the right side of the canvas, paint a thick, twisting line for the tree trunk rising from the ground. Make the base wider and taper it as it goes up. -
Branch Out:
Using your liner brush, pull branches out from the main trunk. Use a ‘shakey hand’ technique to make the branches look jagged and organic rather than perfectly straight. -
Overlap the Moon:
Extend the smaller, finer twigs so they reach over the face of the moon. This creates depth by placing the tree clearly in the foreground. -
Add Ground Foliage:
Use the tip of your brush to dab small, grassy textures along the horizon line of the hill. A few small fern shapes or tufts of grass break up the smooth line.
Step back and admire the contrasting beauty of your moonlit masterpiece

PENCIL GUIDE
Understanding Pencil Grades from H to B
From first sketch to finished drawing — learn pencil grades, line control, and shading techniques.
Explore the Full Guide
Split Canvas Heart That Completes Across Two Panels
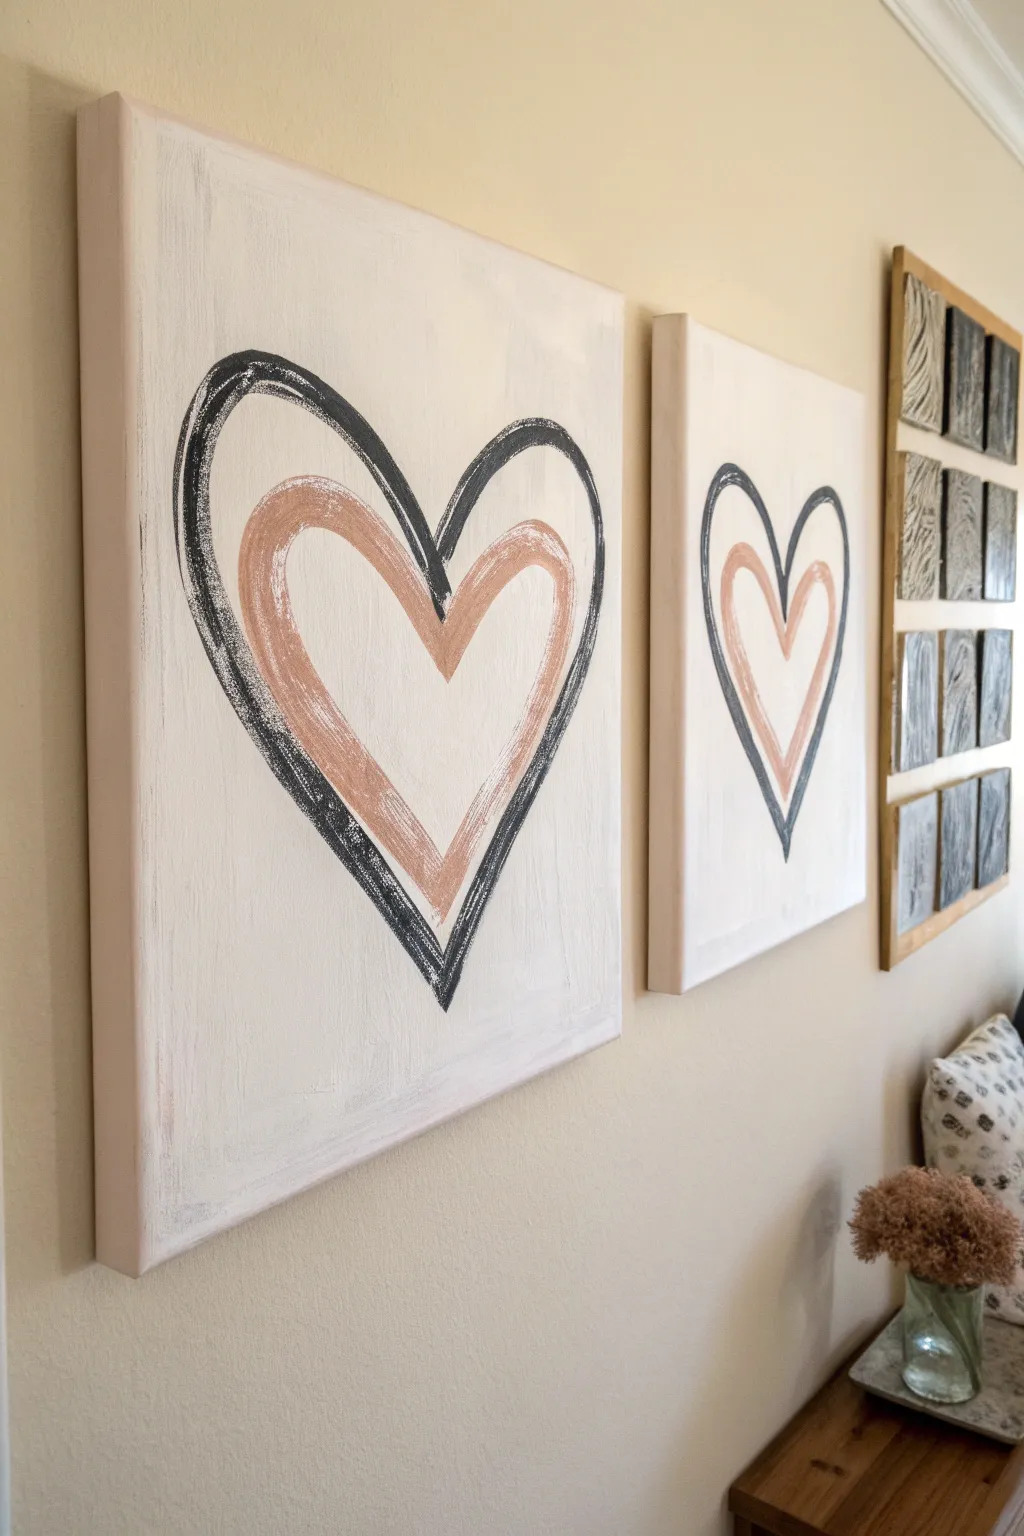

Create a charming, farmhouse-style art display with this pair of canvases featuring nested heart designs. The textured, dry-brush technique gives the hearts a lovely weathered look that feels both modern and handmade.
Step-by-Step Guide
Materials
- Two gallery-wrapped canvases (16×20 or similar size)
- White acrylic paint (for background)
- Black acrylic paint
- Metallic rose gold or copper acrylic paint
- Wide flat brush (2-3 inch) for background
- Medium flat brush (1/2 inch to 1 inch) for hearts
- Pale pink or cream acrylic paint (subtle tint)
- Pencil and eraser
- Paper plate or palette
- Paper towels
- Cardboard or large paper (for sketching templates)
Step 1: Preparing the Base
-
Mix the background color:
Start by squeezing a generous amount of white acrylic paint onto your palette. Mix in just a tiny drop of pale pink or cream to warm it up slightly, avoiding a stark, sterile white. -
Paint the first coat:
Using your wide flat brush, cover the entire surface of both canvases with your background mixture. Don’t forget to paint the sides of the canvas for a finished, professional look. -
Add texture:
Apply a second coat once the first is dry. For this layer, use visible, slightly messy vertical strokes to create a subtle texture that mimics painted wood or plaster. -
Dry completely:
Let the canvases sit until they are completely dry to the touch. This usually takes about an hour, but you can speed it up with a hair dryer.
Paint Too Heavy?
If you applied too much paint and lost the rustic texture, let it dry, then dry-brush a layer of your background white color over the mistake to fade it back.
Step 2: Sketching the Design
-
Create a template:
To ensure your hearts look similar on both canvases, draw half a heart shape on a folded piece of paper or cardboard. Cut it out to create a symmetrical heart stencil. -
Trace the outer heart:
Center your stencil on the first canvas and lightly trace around it with a pencil. Repeat this step for the second canvas so they match perfectly. -
Sketch the inner heart:
Freehand a smaller, inner heart inside your traced shape, or cut a smaller stencil if you prefer precision. Leave about an inch and a half of space between the two heart outlines.
Pro Tip: Cardboard Test
Before touching the canvas, practice your dry-brush pressure on a piece of scrap cardboard. It helps you get the feel for exactly how much paint to wipe off.
Step 3: Painting the Hearts
-
Load the brush for dry brushing:
Dip your medium flat brush into the black paint, then wipe most of it off onto a paper towel. The brush should be almost dry—this is key for that rustic texture. -
Paint the outer heart:
Using the dry brush, follow the outer pencil line. Drag the brush in long, sweeping motion. Don’t try to make it solid opaque; let the background show through the streaks. -
Refine the black outline:
Go over the curve at the top of the heart again if needed, keeping the stroke loose. The top center divot and the bottom point should be distinct but not perfectly sharp. -
Prepare the metallic color:
Clean your brush thoroughly or switch to a fresh one. Squeeze out your metallic rose gold or copper paint. -
Paint the inner heart:
Apply the metallic paint to the inner heart sketch using the same dry-brush technique. Start from the top curve and sweep down to the point. -
Feather the edges:
I like to gently feather the metallic paint slightly outward, softening the gap between the inner heart and outer black heart. -
Add highlights:
If the metallic paint looks too flat, dab a tiny bit of white paint onto your dirty brush and add a few very faint streaks into the damp rose gold for dimension. -
Final touches:
Review both canvases side-by-side. If one heart looks significantly heavier, add a few light strokes to the other to balance them out. -
Erase pencil marks:
Once the paint is fully cured (give it a few hours), gently erase any visible pencil lines that weren’t covered by the paint.
Hang your matching canvases side by side to create a warm, loving focal point in your room
Couple Under an Umbrella in the Rain
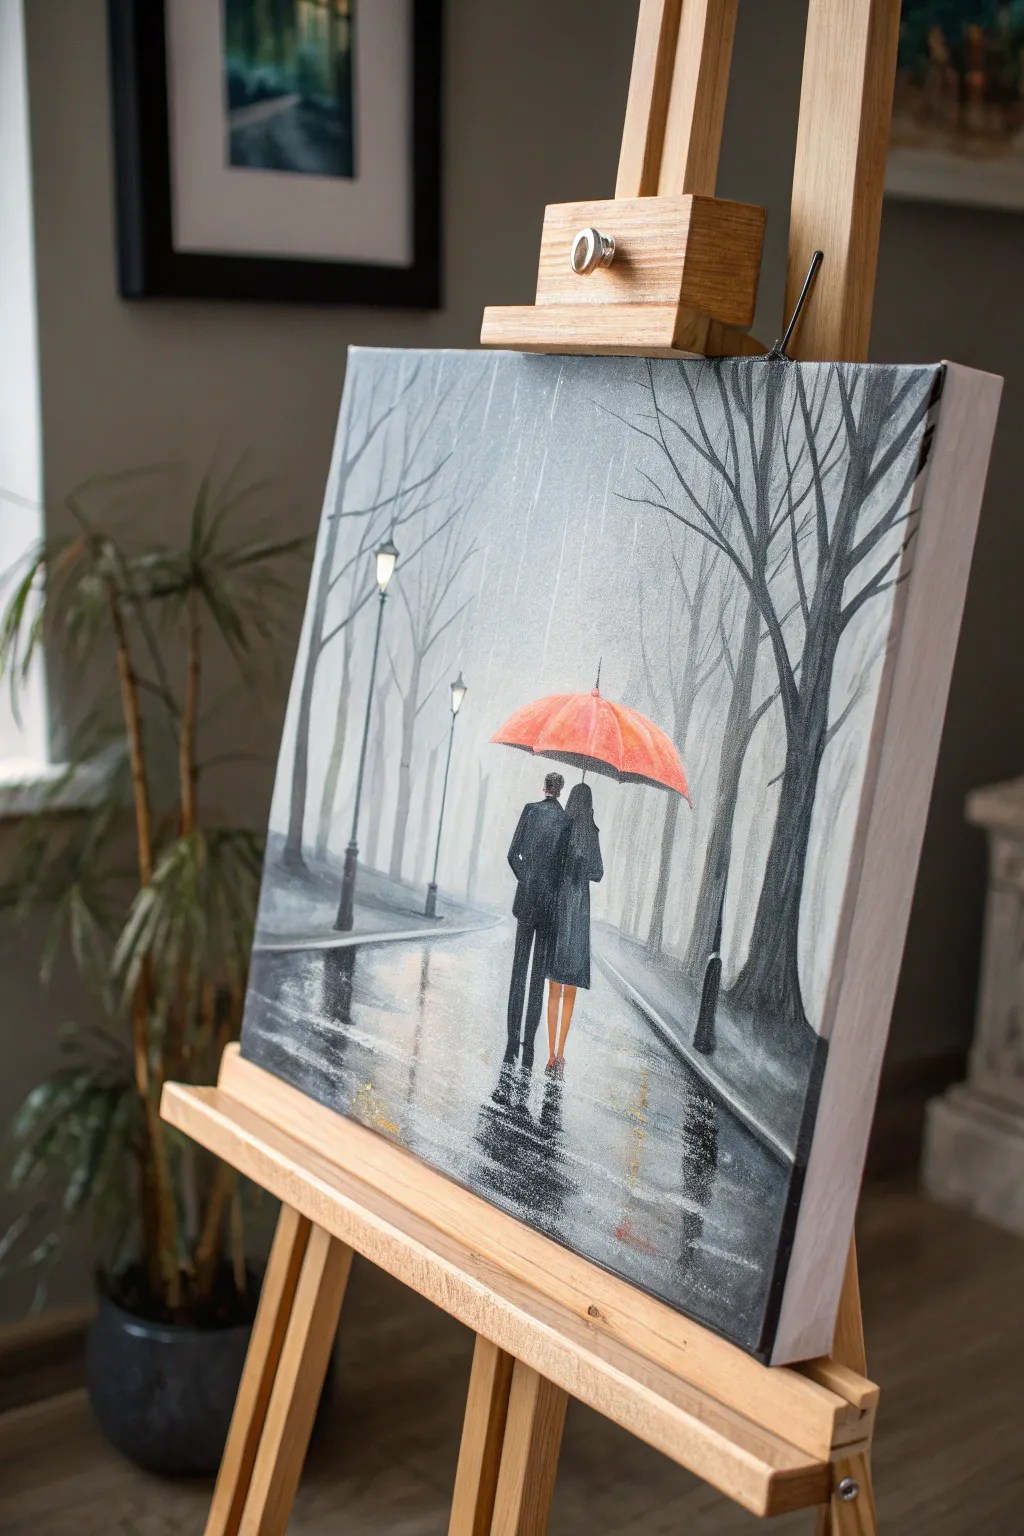
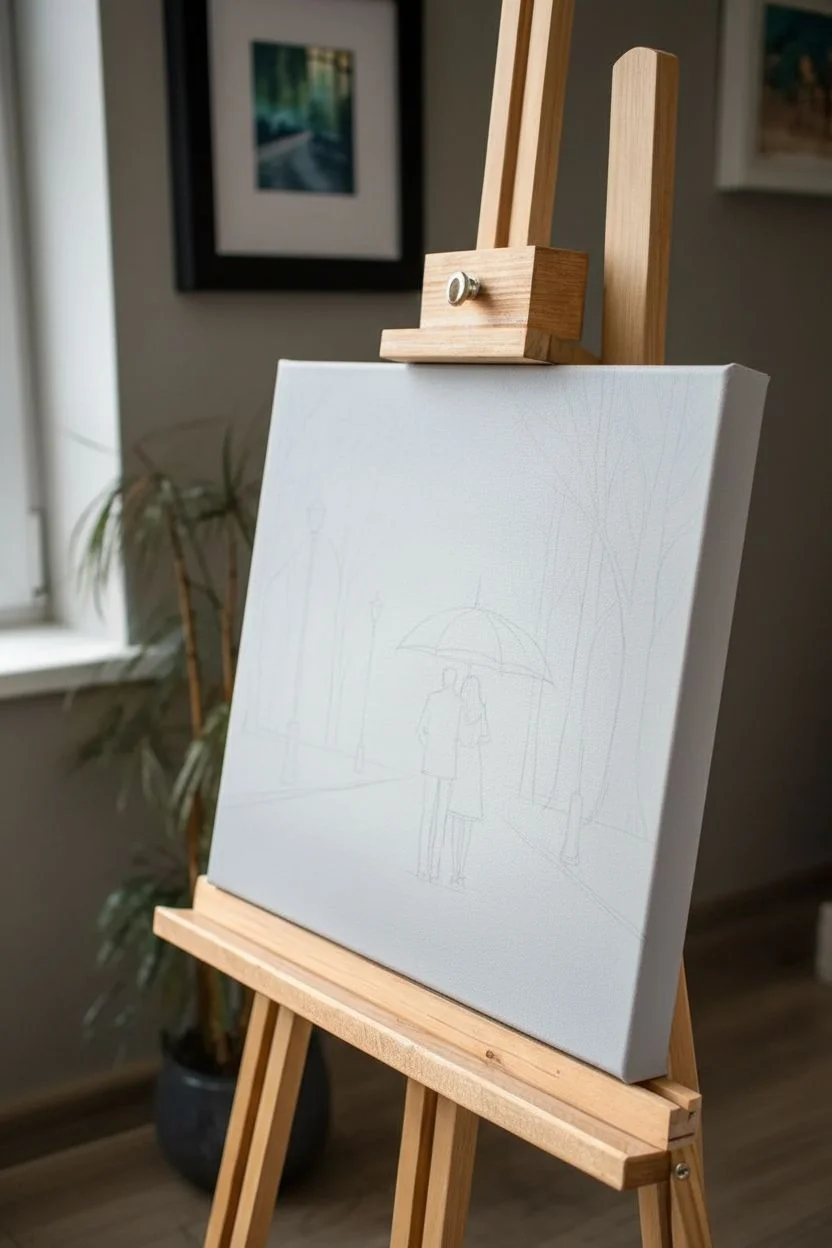
Capture a tender moment amidst a grey, rainy day with this atmospheric acrylic painting. The striking contrast between the vibrant red umbrella and the monochromatic background creates a timeless, romantic scene perfect for any couple.
Step-by-Step Tutorial
Materials
- Stretched canvas (rectangular format)
- Acrylic paints (Titanium White, Mars Black, Cadmium Red, Orange, Payne’s Grey, Burnt Umber)
- Flat shader brushes (various sizes)
- Small round detail brush
- Palette knife (optional for texture)
- Cup of water and paper towels
- Ruler or straight edge
- Easel
Step 1: Setting the Scene
-
Sketch the Composition:
Begin by lightly sketching the vanishing point perspective. Draw a horizon line about a third of the way up the canvas. Sketch lines radiating from a central vanishing point to define the path and the tree lines. -
Outline the Couple:
Place the couple slightly off-center in the foreground. Sketch simple silhouettes for their bodies and a large, domed shape for the umbrella above them. Keep the figures relatively tall to match the vertical feel of the trees. -
Paint the Background Sky:
Mix a very pale grey using White and a tiny dot of Black. Apply this to the top portion of the canvas using vertical strokes, letting it fade into a slightly darker grey as you move toward the horizon line to suggest fog and distance.
Step 2: Creating the Atmosphere
-
Block in Distant Trees:
Mix a light, misty grey (darker than the sky). Using a medium flat brush, paint vertical stripes for the distant tree trunks. These should be faint and blurry, as if seen through heavy rain. -
Paint the Foreground Trees:
Mix a darker charcoal grey (Black + White + splash of Payne’s Grey). Paint the larger, clearer trees in the foreground on the right and left. Add branches that reach upward and interlace at the top. -
Establish the Ground:
Paint the pathway using horizontal strokes. Use a mid-tone grey for the base, but while the paint is wet, blend in vertical streaks of white and light grey directly under the figures and trees to create ‘reflections’ on the wet pavement. -
Add Street Lamps:
Paint thin black posts along the left side of the path, getting smaller as they recede. Add a small blob of white on top for the light, blurring the edges slightly to make them glow.
Pro Tip: Instant Rain
Instead of painting every rain drop, use an old toothbrush with watered-down white paint. Run your thumb over the bristles to fleck tiny droplets over the background for a misty effect.
Step 3: The Focal Point
-
Underpaint the Umbrella:
Fill in the umbrella shape with a mix of Red and a little White to create a base coat. This ensures the final red pops against the grey background. -
Add Umbrella Ribs:
once dry, use pure Cadmium Red mixed with a touch of Orange for the highlights on the umbrella sections. Use a darker red (mixed with a tiny bit of Black) to paint the lines between the ribs, giving the fabric volume. -
Paint the Figures:
Paint the man’s suit in very dark navy or black. Paint the woman’s coat in a similar dark tone. Use a small brush to paint the woman’s legs in a flesh tone (White + Orange + tiny bit of Brown). -
Refine the Bodies:
Add subtle highlights to the shoulders and creases of the coats using a lighter grey-blue to show where the light hits the wet fabric.
Level Up: Glossy Finish
Once fully dry, apply a high-gloss varnish specifically to the umbrella and the wet pavement area. This makes the water look realistic while keeping the foggy background matte.
Step 4: Rain and Reflections
-
Strengthen Reflections:
Using a clean, wide brush, dry-brush vertical lines of dark grey and white on the pavement directly beneath the couple and the trees. This mirrors the vertical lines of the world above. -
Add Texture to the Road:
Dab a little black and dark grey horizontally across the path to break up the reflections and make the ground look like asphalt. I find tapping a dry brush creates great gritty texture here. -
Paint the Rain:
Load a liner brush with watered-down white paint. Paint long, swift, vertical lines across the entire canvas (except the figures). Vary the pressure to make some lines faint and others distinct. -
Final Highlights:
Add touches of pure white to the tops of the street lamps, the top of the umbrella, and the brightest parts of the wet pavement reflections. -
Darkest Darks:
Finalize the painting by adding pure Mars Black to the closest tree trunk and the deepest shadows of the figures to maximize contrast.
Step back and admire the cozy, romantic atmosphere you have built on the canvas


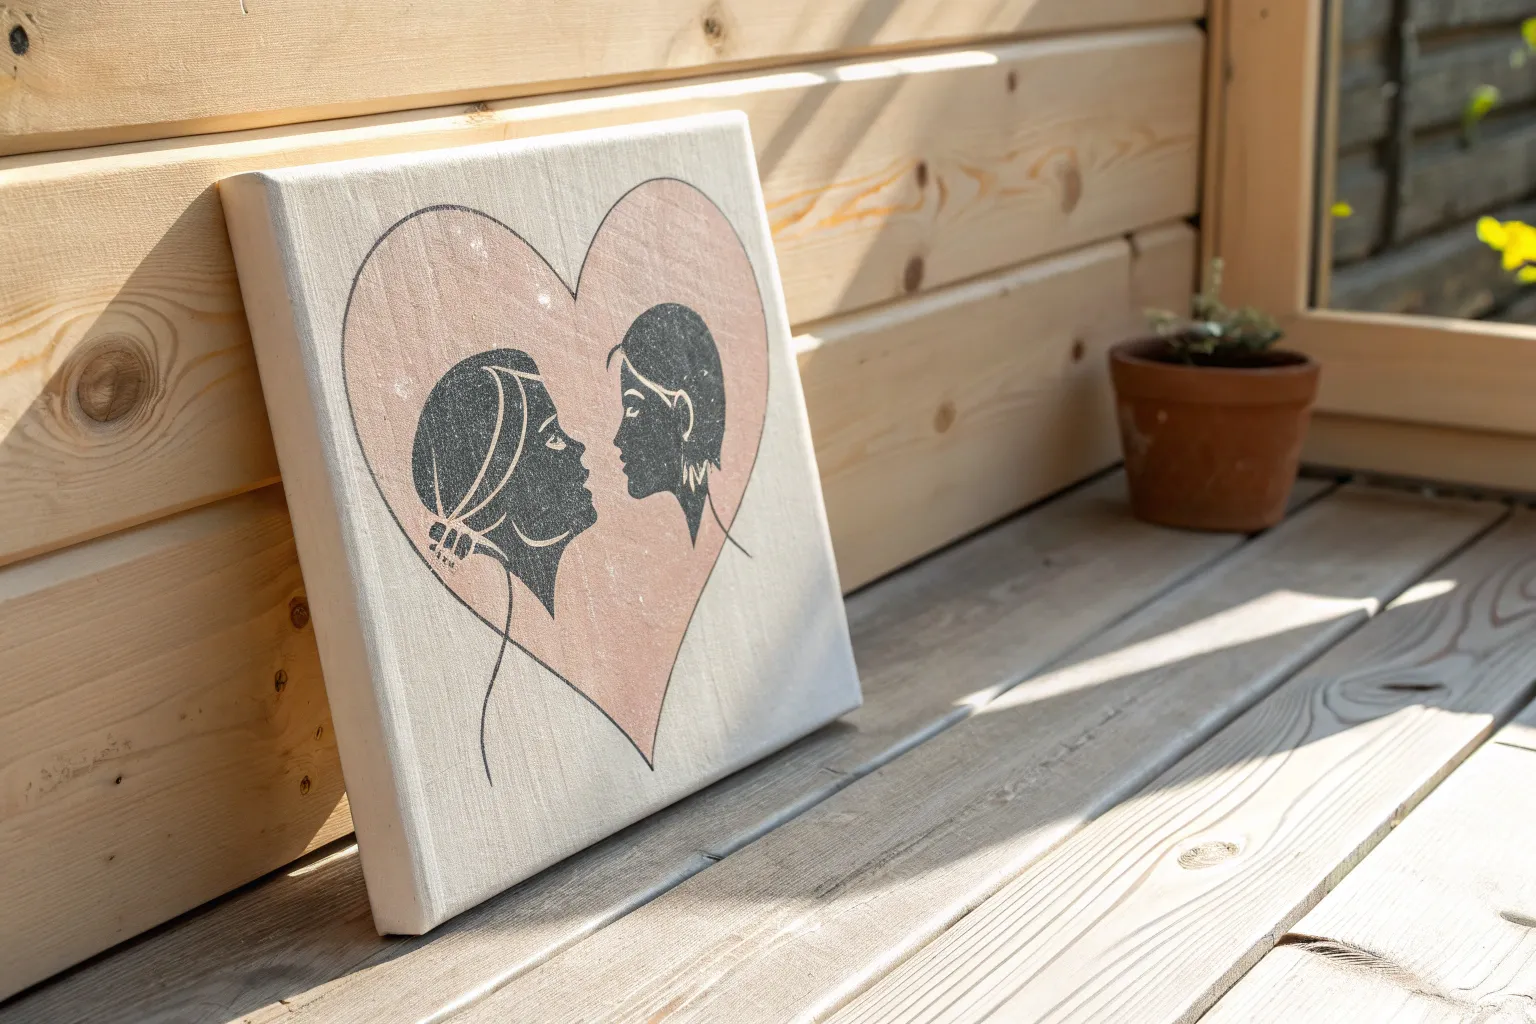
Minimal Line Art Faces With a Single Heart Accent

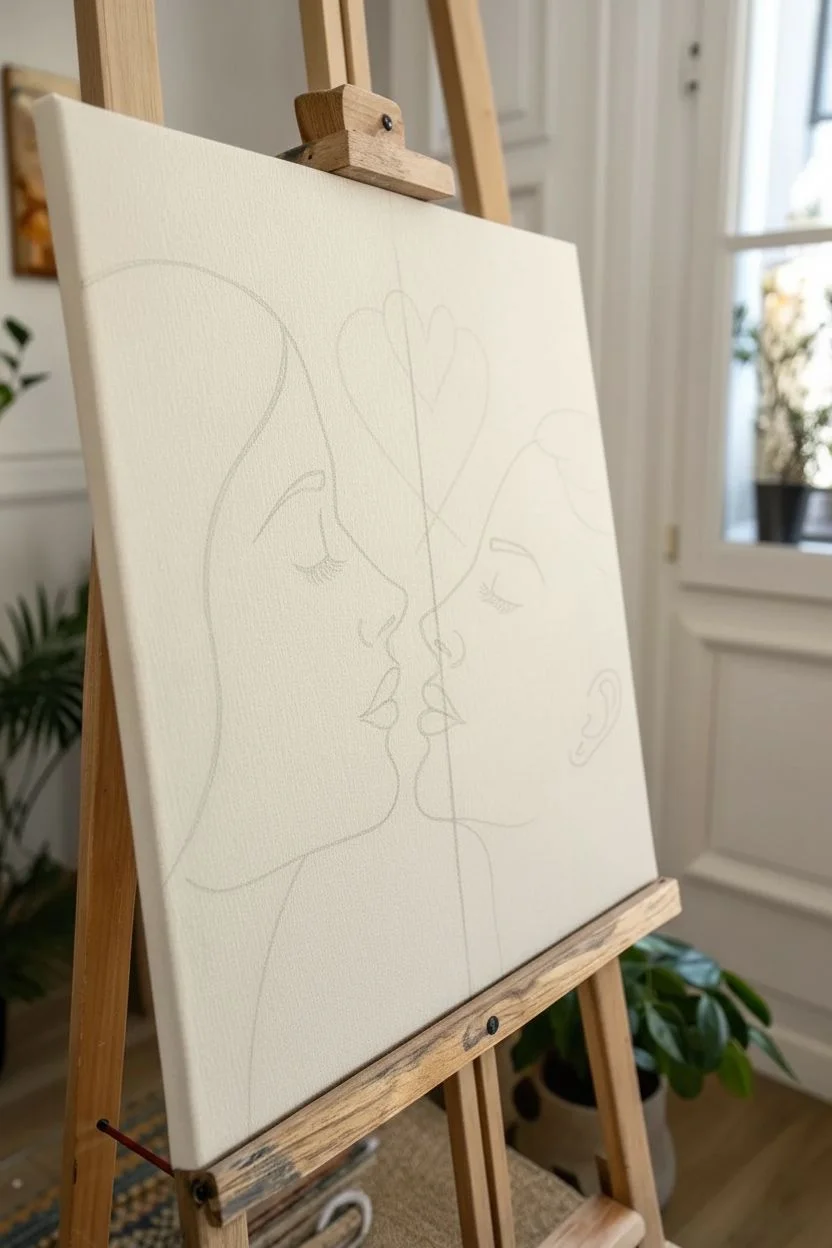
This elegant canvas captures the intimacy of a moment with striking simplicity, using bold black contours and touches of vibrant red. The clean lines and negative space create a modern, sophisticated look that fits beautifully into contemporary decor.
Step-by-Step
Materials
- Stretched cotton canvas (medium grain, roughly 16×20 inches)
- Black acrylic paint (flow formula) or a broad point paint marker
- Red acrylic paint (bright crimson or scarlet)
- Round synthetic brushes (sizes 2 and 4)
- Pencil and eraser for sketching
- Palette or small dish for mixing
- Ruler (optional for finding center)
- Easel or flat work surface
Step 1: Planning the Composition
-
Prepare the canvas:
Begin with a clean canvas. If you prefer a smoother surface than raw canvas texture, apply a layer of gesso, but the piece in the example uses the natural canvas texture for warmth. Ensure it is dust-free. -
Locate the center:
Lightly mark the vertical center of your canvas with a pencil. This will serve as the gap between the two faces, ensuring your composition is symmetrical and balanced. -
Sketch the profiles:
Using a light pencil grip, draft the left face first. Start with the curve of the forehead, dip into the eye socket, project the nose, and curve the lips. Repeat this on the right side, mirroring the height and proximity. -
Refine the features:
Add details like the closed eyelids with lashes, the definition of the ear on the right profile, and the sweeping hair lines. The goal is fluid, confident curves rather than anatomical perfection. -
Sketch the heart motif:
Above the space between the foreheads, draw two intersecting curved lines forming an open heart shape. In the upper center of this shape, sketch a smaller, solid heart.
Step 2: Painting the Line Work
-
Prepare black paint:
Load a size 2 or 4 round brush with black acrylic paint. You want a ‘flow’ consistency—add a drop of water if the paint feels too thick, so the brush glides smoothly without dragging. -
Outline the left face:
Starting from the top hair line, paint over your pencil sketches with a steady hand. Apply consistent pressure to keep the line width uniform. I like to stabilize my hand by resting my pinky on a dry part of the canvas. -
Outline the right face:
Repeat the outlining process for the right profile. Pay special attention to the nose and chin curves, as these define the character of the face. -
Detail the eyes:
Switch to a smaller brush tip or use very light pressure to paint the eyelashes. These should be delicate wisps rather than thick lines. -
Paint the ear detail:
On the right profile, carefully paint the C-shape of the ear and the small inner cartilage line. Keep this line slightly thinner than the main profile silhouette. -
Check for consistency:
Step back and look at your black lines. If any areas look too thin or shaky, carefully go over them once more to thicken and smooth them out.
Shaky Hands?
If brush control is difficult, swap the paint and brush for a broad-tip acrylic paint marker. It offers the stability of a pen with the look of paint.
Step 3: Adding the Color Accents
-
Mix the red tone:
Prepare your red acrylic. A bright, semi-opaque scarlet works best. You want it punchy enough to stand out against the raw canvas. -
Fill the lips:
Carefully paint the lips on both faces. Use small, controlled strokes to stay within the implied lip shape. You might need two coats here to cover the canvas grain completely. -
Paint the floating heart:
Paint the solid heart shape floating at the very top center. This is a focal point, so ensure the edges are crisp and sharp. -
Create the heart outline:
Using a thin brush, paint the two thin red lines that swoop down and cross between the foreheads. This should look like a delicate ribbon or thread.
Add Texture
For a 3D effect, mix modeling paste into your red acrylic before painting the heart. This raises the heart off the canvas for a tactile finish.
Step 4: Finishing Touches
-
Erase guidelines:
Allow the paint to dry completely (at least 30-60 minutes). Once dry, gently erase any visible pencil marks, being careful not to rub over the painted areas. -
Final inspection:
Check for any white spots in your black lines or transparency in the red areas. Touch up as needed. -
Seal the work:
To protect your line art from dust and fading, apply a coat of matte varnish spray over the entire canvas.
Hang your new romantic artwork in a space where its simple elegance can be admired daily
Abstract Love Painting With Layered Heart Stamps
Create a charming display of love with this textured canvas project that combines soft, painterly strokes with crisp stamped shapes. By layering different sizes and shades of red, pink, and coral, you’ll achieve a rich, dimensional look that feels both modern and handmade.
Step-by-Step Guide
Materials
- Rectangular stretched canvas (e.g., 11×14 or 16×20 inches)
- Acrylic paints (various shades of red, pink, coral, burgundy, and white)
- Small heart-shaped rubber stamps (various sizes)
- Dense foam sheet or thick cardboard (to make custom stamps)
- Scissors and pencil
- Paintbrushes (flat shader brush and a round detail brush)
- Paper plate or palette
- Pencil
- Glue (optional, for mounting stamp cutouts)
Step 1: Preparation and Stamp Making
-
Prepare the canvas background:
Start with a clean white canvas. If your canvas isn’t primed, apply a coat of white acrylic paint or gesso to create a smooth surface. Let this dry completely before moving on. -
Create custom stamps:
While existing rubber stamps work well, creating your own allows for size variety. Draw several heart shapes in different sizes (ranging from 1 inch to 3 inches) onto a sheet of dense craft foam or thick cardboard. -
Cut out the shapes:
Carefully cut out your foam hearts. To make stamping easier, you can glue these foam shapes onto small blocks of wood or stiff cardboard scraps to create a handle, though simply holding the foam works too. -
Organize your palette:
Squeeze out your acrylic colors. Don’t just use straight tube colors; mix a little white into your reds to make pinks, or a touch of orange to create coral. I like to have about 5-6 distinct shades ready to ensure variety.
Clean Edges Trick
For crisper hearts, place a piece of scrap paper over the canvas with a heart shape cut out (a negative stencil) and sponge paint through it instead of traditional stamping.
Step 2: Painting the Central Feature
-
Sketch the large heart:
Locate a spot slightly off-center on the lower right quadrant of your canvas. Lightly sketch a large, swooping heart shape with a pencil. This will be the focal point of the composition. -
Mix a soft pink wash:
For this large heart, you want a semi-translucent, watercolor-like effect. Mix a small amount of pale pink paint with a drop of water or glazing medium to thin it out. -
Fill in the shape:
Using a flat brush, gently fill in your large heart sketch. Keep the strokes visible and slightly uneven to mimic the texture of the smaller stamped hearts, but keep the color light enough that it doesn’t dominate the canvas.
Step 3: Stamping and Layering
-
Load your first stamp:
Take one of your medium-sized foam hearts or rubber stamps. Instead of dipping it into the paint puddle, use a brush to apply a thin, even layer of red paint directly onto the stamp face. This prevents globs and ensures a crisp print. -
Begin the layout:
Press the stamp firmly onto the canvas near the top corner. Lift it straight up to avoid smearing. The texture of the foam or the canvas weave should show through slightly, giving it that rustic, stamped look. -
Add variety with rotation:
Continue stamping hearts across the canvas. Avoid a perfect grid; slightly rotate some hearts left or right to give the impression they are floating or fluttering. -
Switch colors and sizes:
Wipe off your stamp or switch to a different size. Pick a contrasting color, like a deep burgundy or a bright coral, and stamp these in the gaps between your first set of hearts. -
Overlap carefully:
Once the first set of hearts is dry to the touch, you can stamp new hearts closely next to them. If you want a layered look, you can let them slightly overlap, but be careful not to create a muddy color mix. -
Incorporate specialty hearts:
If you have a stamp with a specific texture (like a sponge texture or a pattern), use it sparingly for visual interest. In the image, some hearts have a speckled ‘glitter’ look which can be achieved by dabbing paint with a sponge stencil. -
Fill the small gaps:
Use your smallest heart stamp or a fine paintbrush to add tiny hearts in the empty spaces. These small accents help balance the composition and make the canvas look full. -
Review the balance:
Step back and look at your canvas. Ensure there is a good distribution of dark values (deep reds) and light values (pale pinks). If an area looks too empty, add a small heart there. -
Final drying time:
Allow the entire canvas to dry completely. Since acrylics dry darker, the colors will settle into their rich final hues.
Add Subtle Sparkle
Mix a tiny amount of iridescent mixing medium or fine glitter into the paint for just a few of the hearts to catch the light without looking overly crafty.
Hang your lovely new creation on an easel or wall to bring a warm, affectionate atmosphere to any room
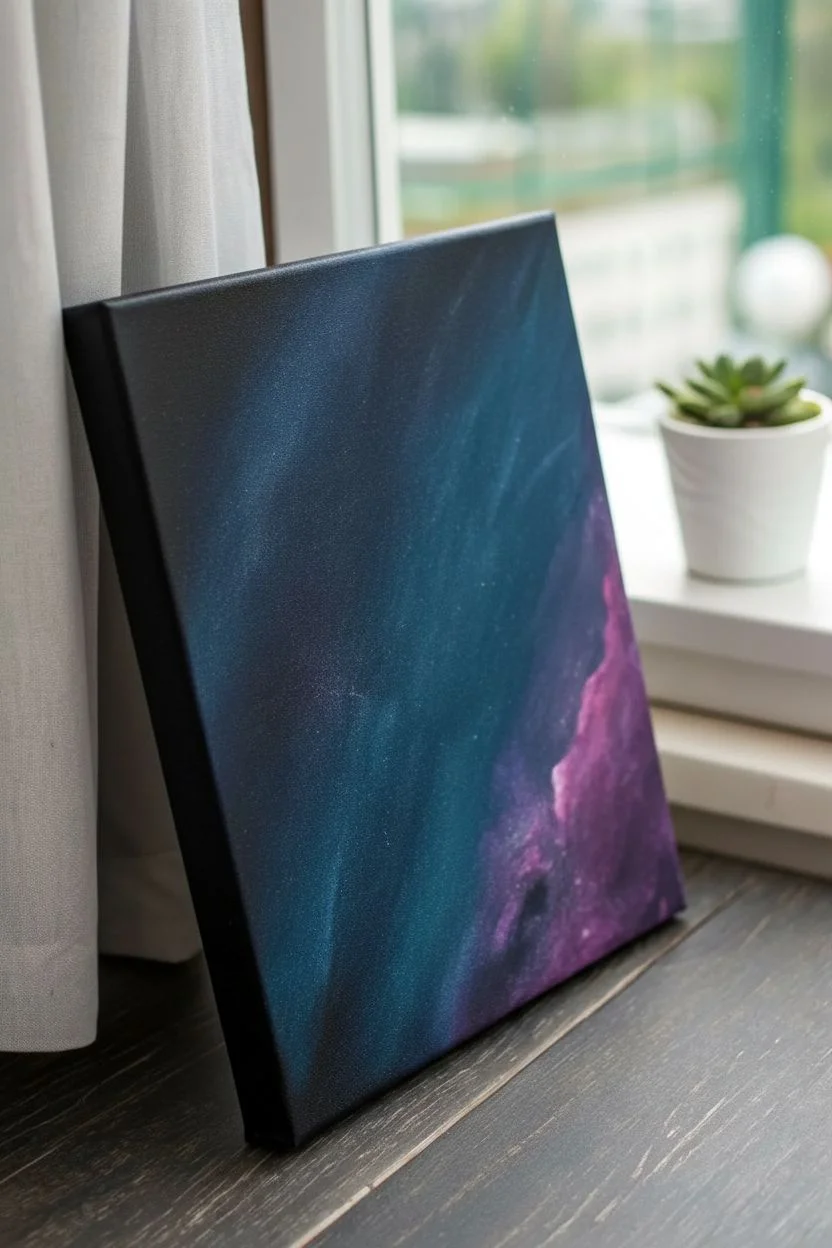
Constellation Heart in a Night Sky Galaxy
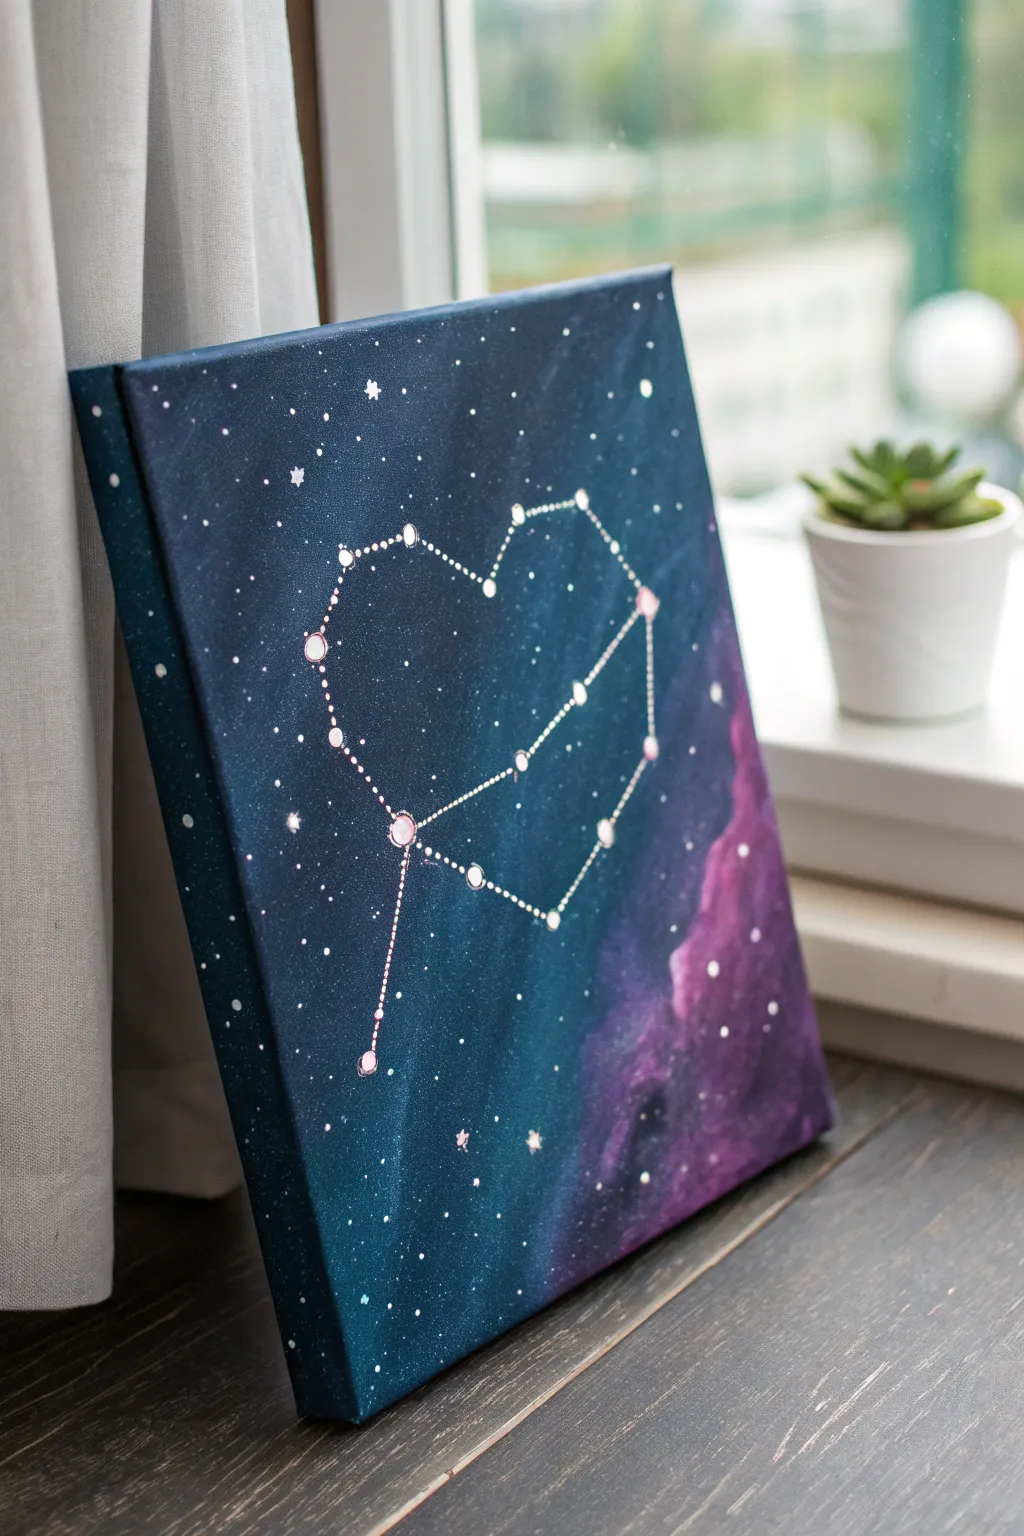
Looking for a romance that’s written in the stars? This painting combines the deep, mesmerizing blues of a galaxy night sky with a fictional heart-shaped constellation, creating a dreamy piece perfect for a bedroom or a gift.
Step-by-Step
Materials
- Rectangular stretched canvas (e.g., 10×12 inches)
- Acrylic paints: Navy Blue, Phthalo Blue (or Teal), Black, White, Purple, Magenta
- Large flat brush or sponge applicator
- Medium round brush
- Fine liner brush (size 0 or 00) or silver/white paint pen
- Old toothbrush (for spattering stars)
- Water cup and paper towels
- Chalk or pencil
Step 1: Creating the Galaxy Background
-
Prime the dark base:
Begin by covering the entire canvas in a deep Navy Blue mixed with a tiny drop of Black. Ensure you paint the sides of the canvas as well for a polished, frameless look. -
Create the teal nebula:
While the base is still slightly tacky or just dry, pick up some Phthalo Blue or Teal on a sponge or large brush. Gently dab it diagonally across the center, creating a soft, cloudy wash rather than a hard line. -
Add the purple depths:
On the bottom right corner, blend in your Purple paint. Use a circular scrubbing motion to work the color into the navy background, letting the edges fade out softly. -
Highlight with magenta:
Add touches of Magenta right into the wet purple area. Don’t overmix; you want to see distinct swirls of bright pink against the deep purple to mimic gas clouds. -
Deepen the contrast:
Once the color layers are dry, go back in with your Black paint. Glaze the very corners (especially top left and bottom left) to create a vignette effect, pushing the focus toward the center.
Nebula Nuances
Work wet-on-wet for the galaxy clouds. If paint dries too fast, mist the canvas with water to help blend the teal and purple seamlessly.
Step 2: Mapping the Stars
-
Prepare the splatter:
Dilute a small amount of White paint with water until it has the consistency of fluid ink or milk. -
Create the starfield:
Dip an old toothbrush into the thinned white paint. Point the bristles toward the canvas and run your thumb across them to spray a fine mist of stars over the background. -
Add distant stars:
Using your smallest round brush or the tip of a toothpick, dot random tiny white specks in areas that need more density, varying the size slightly for depth. -
Dry completely:
Let the entire background dry thoroughly. If the paint is wet, your constellation lines might bleed into the background colors.
Step 3: Painting the Constellation
-
Sketch the heart:
Use a piece of chalk to very lightly draw a geometric heart shape. Instead of curves, use straight lines connecting points, like a connect-the-dots puzzle. -
Mark the major stars:
Paint larger white circles at every ‘joint’ or corner of your heart sketch. These represent the main stars of the constellation. -
Connect the lines:
Using a fine liner brush and thinned white paint (or a white paint pen), draw straight, crisp lines connecting the major star points. -
Add detail to major stars:
To make the main stars glow, dry brush a tiny, faint halo of white around the largest points. You can also add a tiny pinkish dot in the center of the largest stars for variety. -
Dotted connectors:
Along the connecting lines, dab extremely small white dots. This gives the illusion of fainter stars making up the connection, rather than just solid white lines. -
The tail extension:
Extend a line downwards from the bottom point of the heart, adding two or three more ‘stars’ to create a tail, making it look like a kite or distinct celestial formation. -
Final twinkle:
Select 3 or 4 stars on the canvas (outside the heart) and use your liner brush to drag a tiny cross-shape over them, creating a twinkling lens flare effect. -
Clean up:
Wipe away any visible chalk marks with a damp Q-tip once the white paint is fully dry.
Uneven Lines?
If your brush hands are shaky, use a ruler and a white gel pen or paint marker for the constellation lines instead of a brush.
Hang this celestial masterpiece where it can remind you that love is a universal force


Have a question or want to share your own experience? I'd love to hear from you in the comments below!