A plain mailbox is basically a tiny outdoor canvas just waiting for your color and personality. Here are mailbox painting ideas I’d totally do in my own studio—ranging from classic crowd-pleasers to the kind of artsy surprises that make you smile every time you grab the mail.
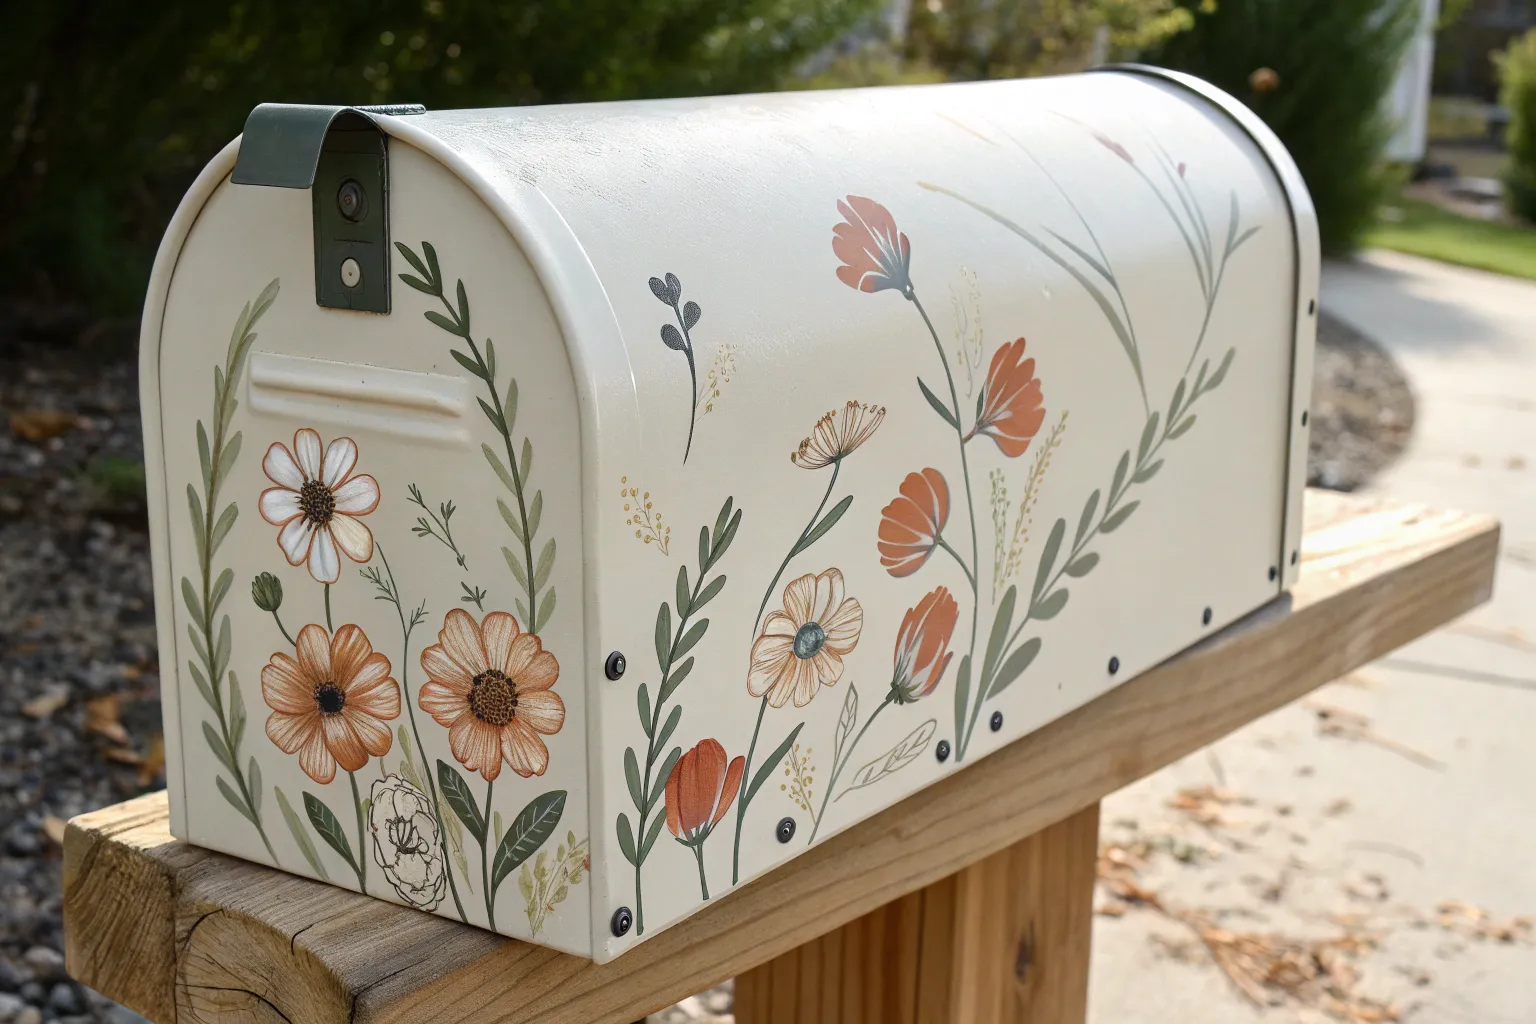
Classic Wrap-Around Wildflower Meadow
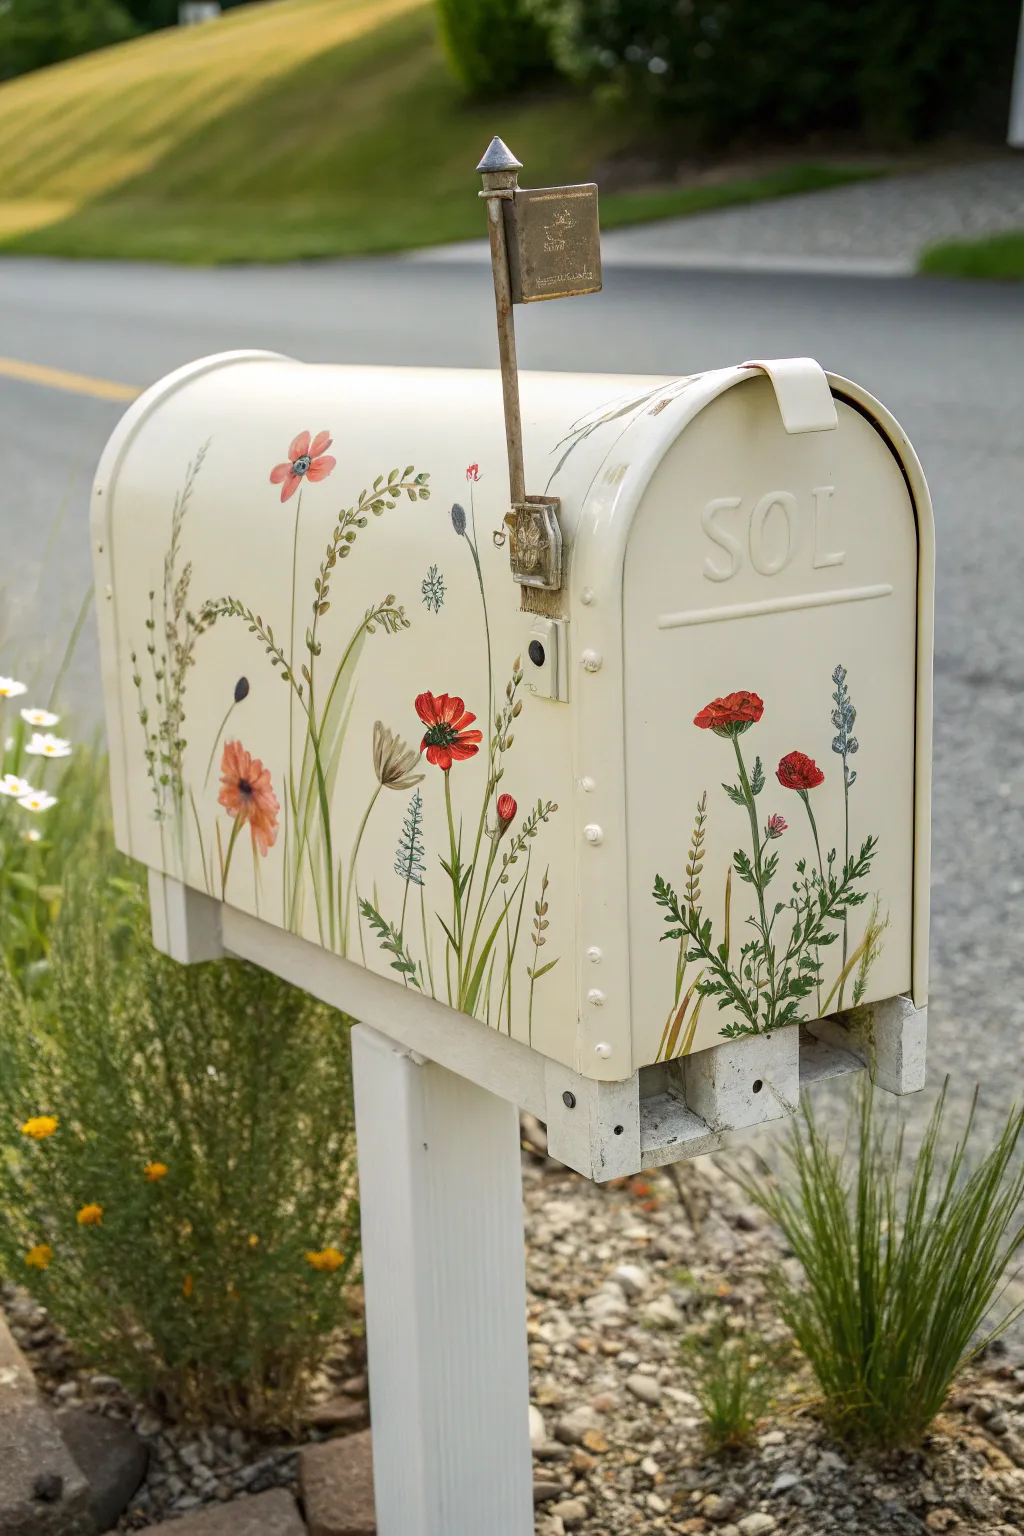
Transform a standard metal mailbox into a charming roadside meadow with this wrap-around wildflower design. The soft cream base provides a perfect vintage-inspired canvas for delicate poppies, tall grasses, and whimsical bluebells.
How-To Guide
Materials
- Standard metal mailbox (clean and rust-free)
- Spray primer (metal-bonding, white or grey)
- Spray paint (satin or matte finish, cream/off-white)
- Acrylic craft paints (red, coral, deep green, sage green, dark blue, white, yellow, black)
- Outdoor acrylic sealer or polyurethane (UV-resistant, clear satin)
- Assorted paintbrushes (fine liner, small round, and angled shader)
- Sandpaper (fine grit)
- Painter’s tape
- Paper plate or palette
- Pencil
Step 1: Preparation & Base Coat
-
Clean surface:
Begin by thoroughly cleaning the mailbox with soapy water or a degreaser to remove any road grime or oils. If you are repainting an old box, sand down any glossy spots or rust patches until smooth. -
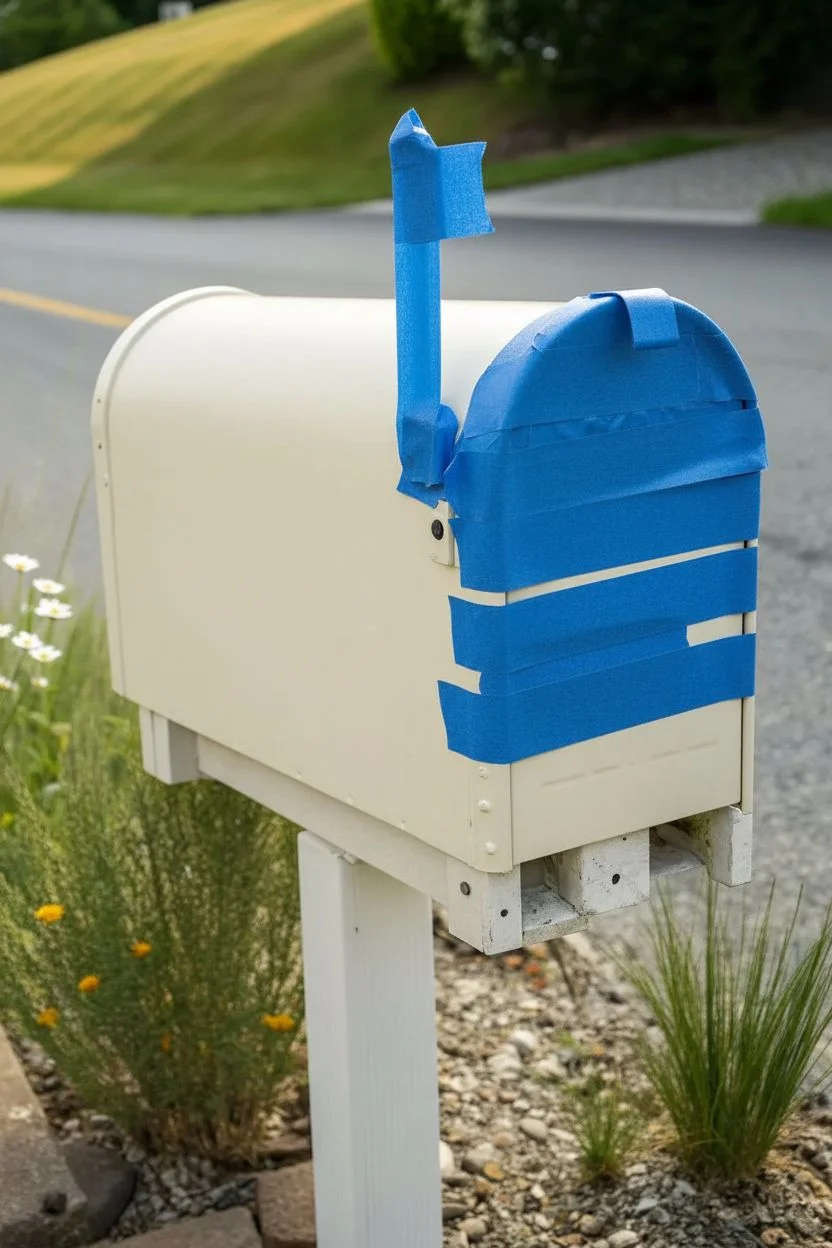
Protect hardware:
Use painter’s tape to meticulously cover the flag mechanism, the flag itself, and any handles or latches you want to remain unpainted. This ensures a professional finish. -
Prime the metal:
Apply a coat of metal-bonding primer. Use even sweeping motions to avoid drips. This step is crucial for ensuring your artwork doesn’t peel off after a season of rain. -
Apply base color:
Once the primer is dry, spray the entire mailbox with your cream or off-white satin spray paint. Apply 2-3 light coats rather than one heavy one, allowing proper drying time between each layer.
Step 2: Painting the Greenery
-
Plan the layout:
Lightly sketch the main stems with a pencil directly on the dry cream paint. Focus on varying the heights—some grasses should reach near the top, while others fill the bottom section. -
Paint tall grasses:
Using a liner brush and sage green paint, create long, sweeping strokes from the bottom edge upward. Let your hand flick at the end of the stroke to create tapering, natural-looking grass blades. -
Add deep foliage:
Mix a darker green and use a small round brush to add thicker, more substantial leaves near the base. I find that layering these darker tones behind the lighter grasses adds nice depth. -
Create seed heads:
On some of the taller grass stems, dab small dots of tan or light brown in a cluster to mimic seed heads or wheat shafts. Keep these loose and organic.
Pro Tip: Long Lasting Blooms
Mix a tiny amount of the outdoor sealer medium directly into your acrylic paints on the palette. This bonds the pigment stronger to the metal right from the start.
Step 3: Adding the Blooms
-
Paint red poppies:
Load a round brush with bright red paint. Make 3-4 separate, irregular petal shapes for each poppy, leaving a tiny gap in the center. Vary the angles so some flowers look up, while others droop. -
Add coral accents:
Use a coral or soft orange shade to paint a secondary flower type, like the one seen on the side. Use broader, wetter strokes to make these petals look translucent and soft. -
Detail the bluebells:
With a fine brush and dark blue paint, add small vertical stalks that have tiny bell-shaped flowers hanging off them. I like to add a touch of white to the blue to create a highlight on each bell. -
Poppy centers:
Once the red paint is dry, use black or dark brown to dot the centers of the poppies. Add tiny white specks within the dark center to represent pollen catching the light. -
Highlighting stems:
Go back over your green stems with a very pale green or yellow-white mix on the illuminated side of the stems (where the sun would hit) to make them look dimensional.
Level Up: 3D Texture
For the seed heads and poppy centers, mix baking soda into your paint to create a gritty texture that physically stands off the surface of the mailbox.
Step 4: Finishing Touches
-
Emphasize embossing:
If your mailbox has embossed lettering like the ‘SOL’ shown, use a very dry brush with a slightly lighter cream or white paint to brush over the raised letters, making them pop without fully painting them. -
Remove tape:
Carefully peel away the painter’s tape from the flag and hardware. If any paint seeped under, scratch it off gently with a fingernail before it cures completely. -
Seal the artwork:
This acts as armor against the elements. Spray the entire mailbox with 2-3 coats of UV-resistant clear acrylic sealer. Ensure you cover the hand-painted areas thoroughly to prevent fading. -
Install:
Allow the sealer to cure for at least 24 hours in a dry place before mounting the mailbox back onto its post.
Your new vibrant mailbox will greet you with a burst of color every time you check the post


Sunny Sunflower Corner Bloom
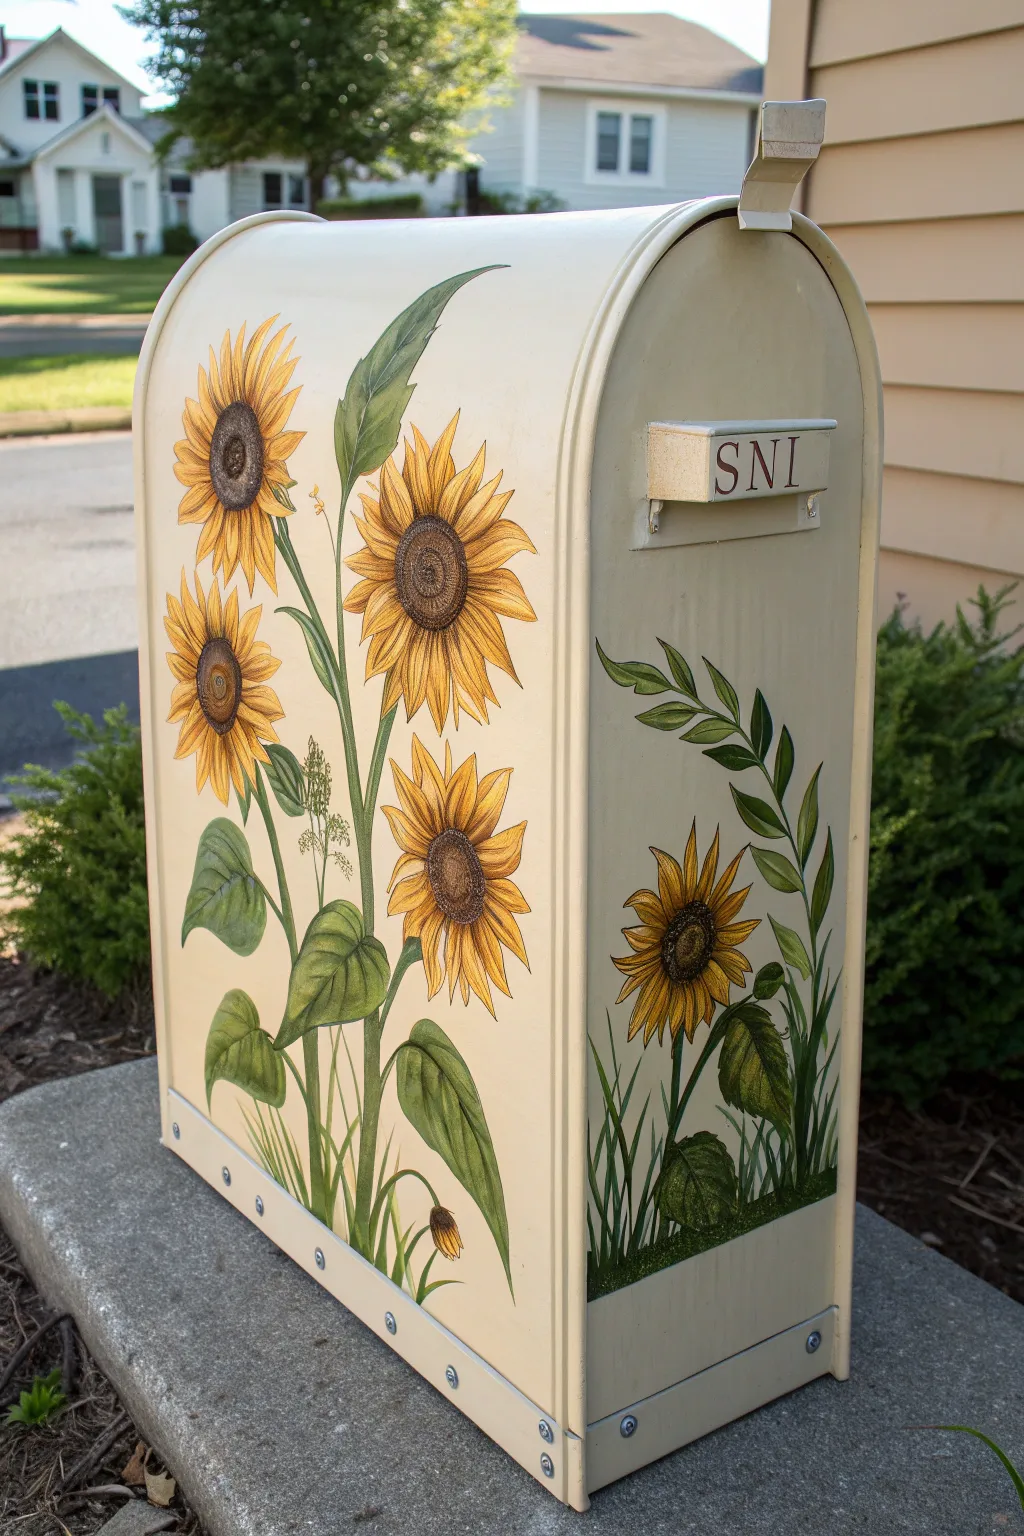
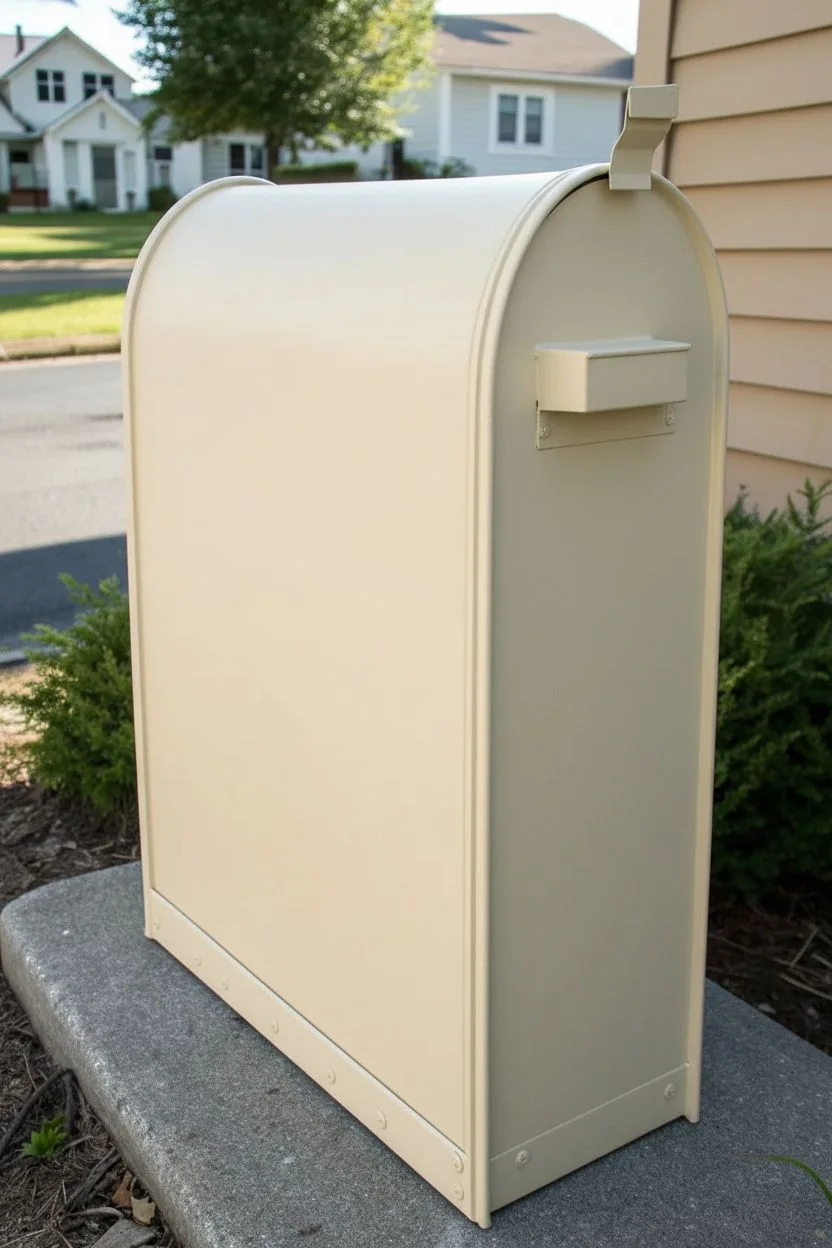
Transform a standard metal mailbox into a cheerful garden accent with this detailed sunflower design. The creamy background pairs perfectly with the vibrant yellows and deep greens, giving your curb appeal a warm, hand-painted country charm.
Step-by-Step Tutorial
Materials
- Standard metal mailbox (cleaned and prepped)
- Metal primer (spray or brush-on)
- Exterior acrylic paints usually in: Cream/Off-White (base), Golden Yellow, Deep Ochre, Burnt Sienna, Raw Umber, Sap Green, Olive Green, White
- Assorted brushes: 1-inch flat basecoating brush, #8 and #10 filbert brushes, #2 liner brush
- Pencil and transfer paper (optional)
- Exterior high-gloss or satin polyurethane sealer
Step 1: Preparation & Base Coat
-
Clean surface:
Thoroughly wash the mailbox with warm soapy water to remove any grease, dirt, or residues. If the mailbox is old, sand down any rust spots and wipe clean with a tack cloth. -
Prime metal:
Apply a coat of high-quality metal primer. This is crucial for adhesion. follow the manufacturer’s drying time before moving on. -
Apply base color:
Paint the entire mailbox with your chosen Cream/Off-White shade using a wide flat brush or a spray can for smoothness. Apply two to three coats to ensure solid, opaque coverage, letting each layer dry completely.
Paint Peeling?
If paint lifts during base-coating, the metal was likely too slick or oily. Sand the area gently, clean with rubbing alcohol to remove oils, re-prime, and try again.
Step 2: Drafting the Design
-
Sketch placement:
Lightly sketch your design onto the mailbox with a pencil. I usually start by placing three large circles for the main flower heads on the front face—one high, one middle-right, and one lower-left—to establish balance. -
Add stems and buds:
Draw the curving stems connecting your flower heads. Add a few smaller oval shapes for buds near the bottom and sketched outlines for the large leaves. -
Side composition:
On the side panel, sketch a single flower lower down, with tall grasses and a leafy branch sweeping upward toward the back curved edge.
Step 3: Painting the Sunflowers
-
Base the petals:
Using a filbert brush, block in the sunflower petals using your Golden Yellow. Paint from the center outward, lifting the brush at the tip to create a tapered point for each petal. -
Add petal depth:
While the yellow is still slightly tacky, mix a little Deep Ochre or orange into your brush and stroke the base of the petals near the center to add shadow and depth. -
Highlight tips:
Load a clean brush with a touch of White mixed with Yellow. Gently highlight the tips of the upper petals where the sun would hit. -
Paint the centers:
Fill the circular centers with a dark brown or Raw Umber. Stipple the paint (dab repeatedly with the brush tip vertical) to create a fuzzy, seeded texture. -
Detail the seeds:
Once the brown is dry, stipple a lighter tan orochre in a ring shape inside the dark center to make the seed head look three-dimensional.
Add a Visitor
Make the scene livelier by painting a tiny bee or ladybug landing on one of the petals. Use a fine liner brush for delicate wings and tiny black dots.
Step 4: Foliage & Finishing
-
Paint stems:
Use a liner brush and Olive Green to trace over your pencil lines for the stems. Keep the paint flow smooth by adding a drop of water if needed. -
Leaf base layers:
Fill in the large leaves with Sap Green. Let this dry, then dry-brush a lighter green on the raised areas of the leaf to suggest veins and curvature. -
Side grasses:
On the side panel, use the liner brush to flick upward strokes of various greens at the bottom, creating a grassy bed for the side flower. -
Add decorative branch:
Paint the sweeping branch on the side panel. Paint small, paired leaves along the stem, twisting your brush slightly to make them look natural. -
Final leaf details:
Use a mix of dark green and brown to paint the vein lines on the large leaves. Keep these lines thin and subtle. -
Sealing:
Allow the paint to cure for at least 24 hours. Apply 2-3 coats of exterior-grade polyurethane sealer to protect your artwork from rain and UV fading.
Once installed, your radiant new mailbox will be the brightest spot on the block.


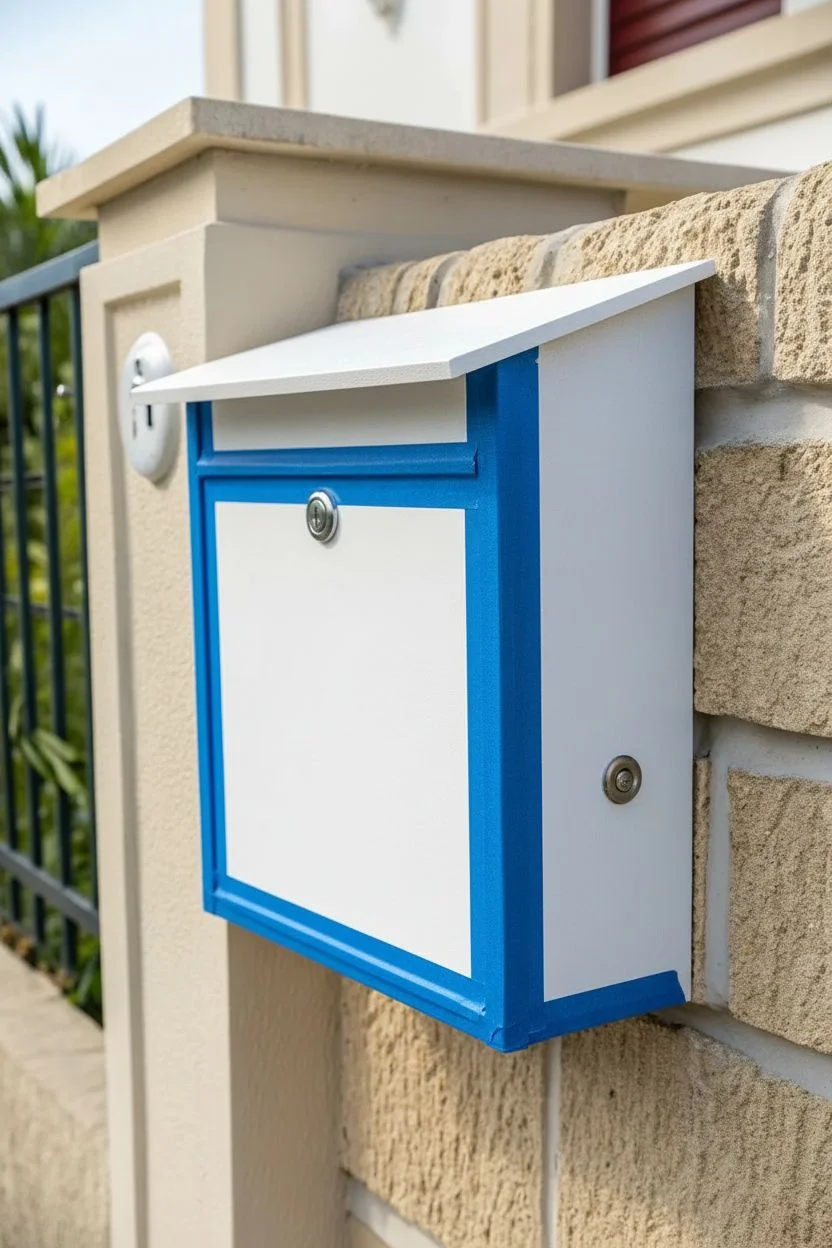
Coastal Blues With Simple Shell Details

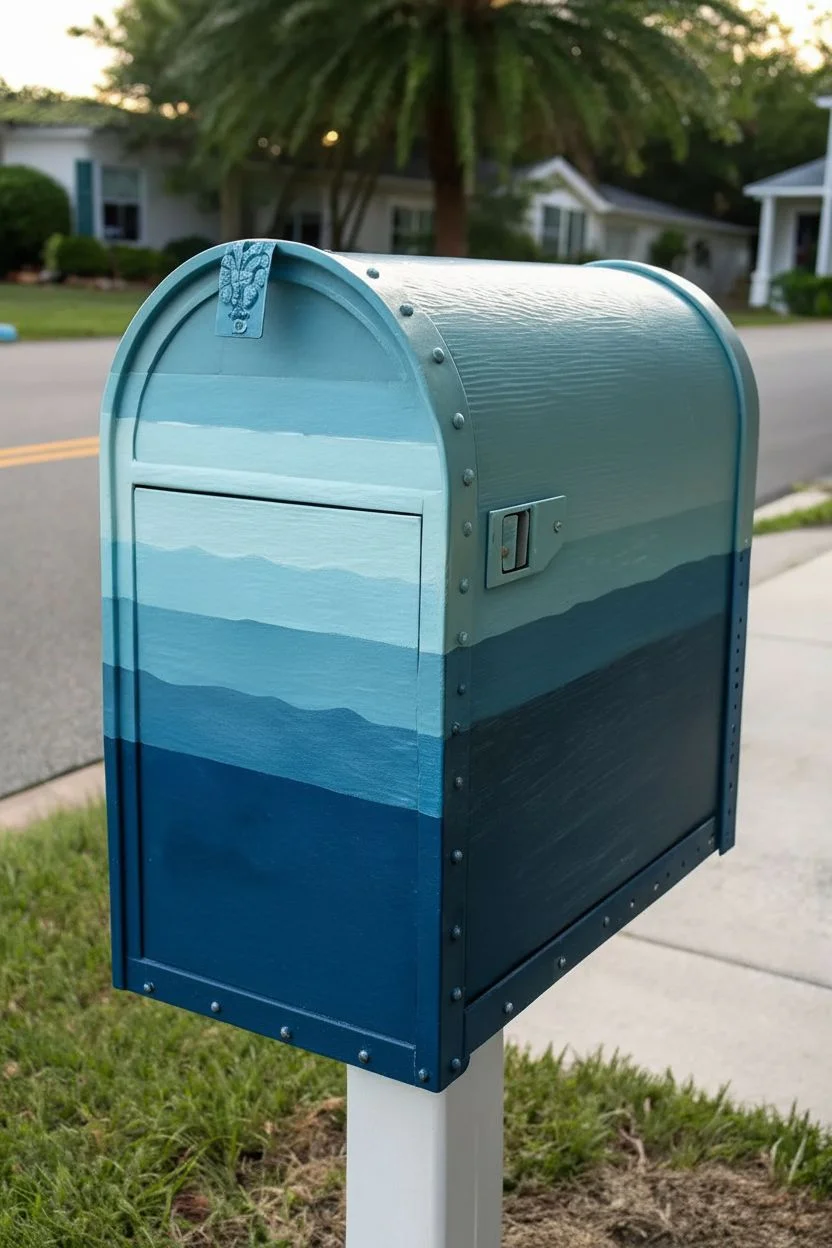
Transform a standard metal mailbox into a calming coastal statement piece using layers of oceanic blues and crisp white detailing. This project features an ombré-style background that transitions from a pale sky to the deep sea, adorned with whimsical line art of shells and sea grass.
How-To Guide
Materials
- Metal mailbox (primed white or light grey)
- Acrylic outdoor artisan paints (colors: navy blue, teal, sky blue, white)
- Set of paintbrushes (1-inch flat brush, fine liner brush, medium round brush)
- Sanding block (fine grit)
- Painter’s tape
- Outdoor UV-resistant clear sealer (spray or brush-on)
- Pencil or chalk for sketching
- Paper plate or palette
- Cup of water and paper towels
Step 1: Preparation & Gradient Base
-
Clean and sand:
Begin by thoroughly cleaning the mailbox surface to remove any dirt or grease. If the surface is glossy, lightly scuff it with a fine-grit sanding block to help the paint adhere better, then wipe away the dust. -
Mix your palette:
Prepare your palette with three distinct shades of blue: a deep navy for the bottom, a medium teal or denim blue for the middle, and a very pale sky blue for the top. -
Paint the deep ocean:
Using a 1-inch flat brush, paint the bottom third of the mailbox with your darkest navy blue. Extend this color around the sides and the lower front door panel. Don’t worry about a perfect straight line at the top edge just yet. -
Apply the mid-tones:
Clean your brush and apply the medium teal blue to the middle section of the mailbox. While the navy paint is still slightly wet at the border, gently blend the two colors where they meet to create a soft transition rather than a hard stripe. -
Paint the sky:
Finish the base coat by painting the top curved section and upper door with the pale sky blue. Blend the bottom edge of this color into the medium blue section below it. -
Apply a second coat:
Allow the first layer to dry completely (about 20-30 minutes). I find that a second coat really saturates the colors and hides brushstrokes, so repeat the gradient process once more.
Smooth Gradients
To get a seamless blend between blue sections, keep a damp brush handy. Lightly brush over the meeting point of wet paint colors to soften the line.
Step 2: Adding the Wave Layers
-
Define the horizon:
Once the base is fully dry, mix a slightly lighter version of your teal paint. Use a medium round brush to paint a playful, wavy horizontal band across the middle section to represent distant waves. -
Paint the upper waves:
Switch to your pale sky blue (or mix it with a touch of white) and paint varying wavy bands on the upper section of the door and sides. These should look like soft, rolling water. -
Add detail lines:
Using a fine liner brush and pure white paint, trace the top edges of your painted waves. You can add small loops or scallops to mimic the foam of breaking waves.
Shaky Lines?
If your white lines look shaky, thin your acrylic paint slightly with water until it has an ink-like consistency. It will flow much smoother from the liner brush.
Step 3: Painting the Foreground Details
-
Sketch the layout:
Lightly sketch the placement of the large shells and sea grass clumps along the bottom navy section using a piece of chalk. This helps you get the proportions right before committing with paint. -
Outline the shells:
With your fine liner brush and white paint, carefully outline the large fan shapes for the seashells on the lower front and sides. Keep your hand steady and use only the tip of the bristles. -
Fill the shell segments:
Inside the shell outlines, paint radiating lines from the base to the outer edge to create the ribbed texture of a scallop shell. Leave the background navy showing through for contrast. -
Paint the sea grass:
Using long, flowing strokes, paint curved lines extending upward from the bottom edge to create sea grass. Vary the thickness of the lines by pressing harder at the base and lifting off at the tip. -
Add texture to the grass:
To give the sea grass dimension, add tiny dots or stippling along some of the grass blades. This mimics the texture of underwater flora. -
Paint the moon and bubbles:
On the front left side, paint a small white crescent moon. Add tiny clusters of white dots throughout the blue sections to represent bubbles or stylized sea foam.
Step 4: Finishing Touches
-
Clean up stray marks:
If you have any visible chalk lines left over from your sketch, wipe them away gently with a damp cloth once the white paint is completely dry. -
Seal the artwork:
Protect your masterpiece from the elements by applying 2-3 coats of an outdoor UV-resistant clear sealer. Let each coat dry according to the can’s instructions before applying the next. -
Re-install hardware:
If you removed the flag or latch during painting, reattach them now carefully to avoid scratching your fresh clear coat.
Your curb appeal is now beautifully upgraded with a custom piece of coastal art that welcomes you home every day


Cheerful Sky Scene With Floating Balloon Shapes
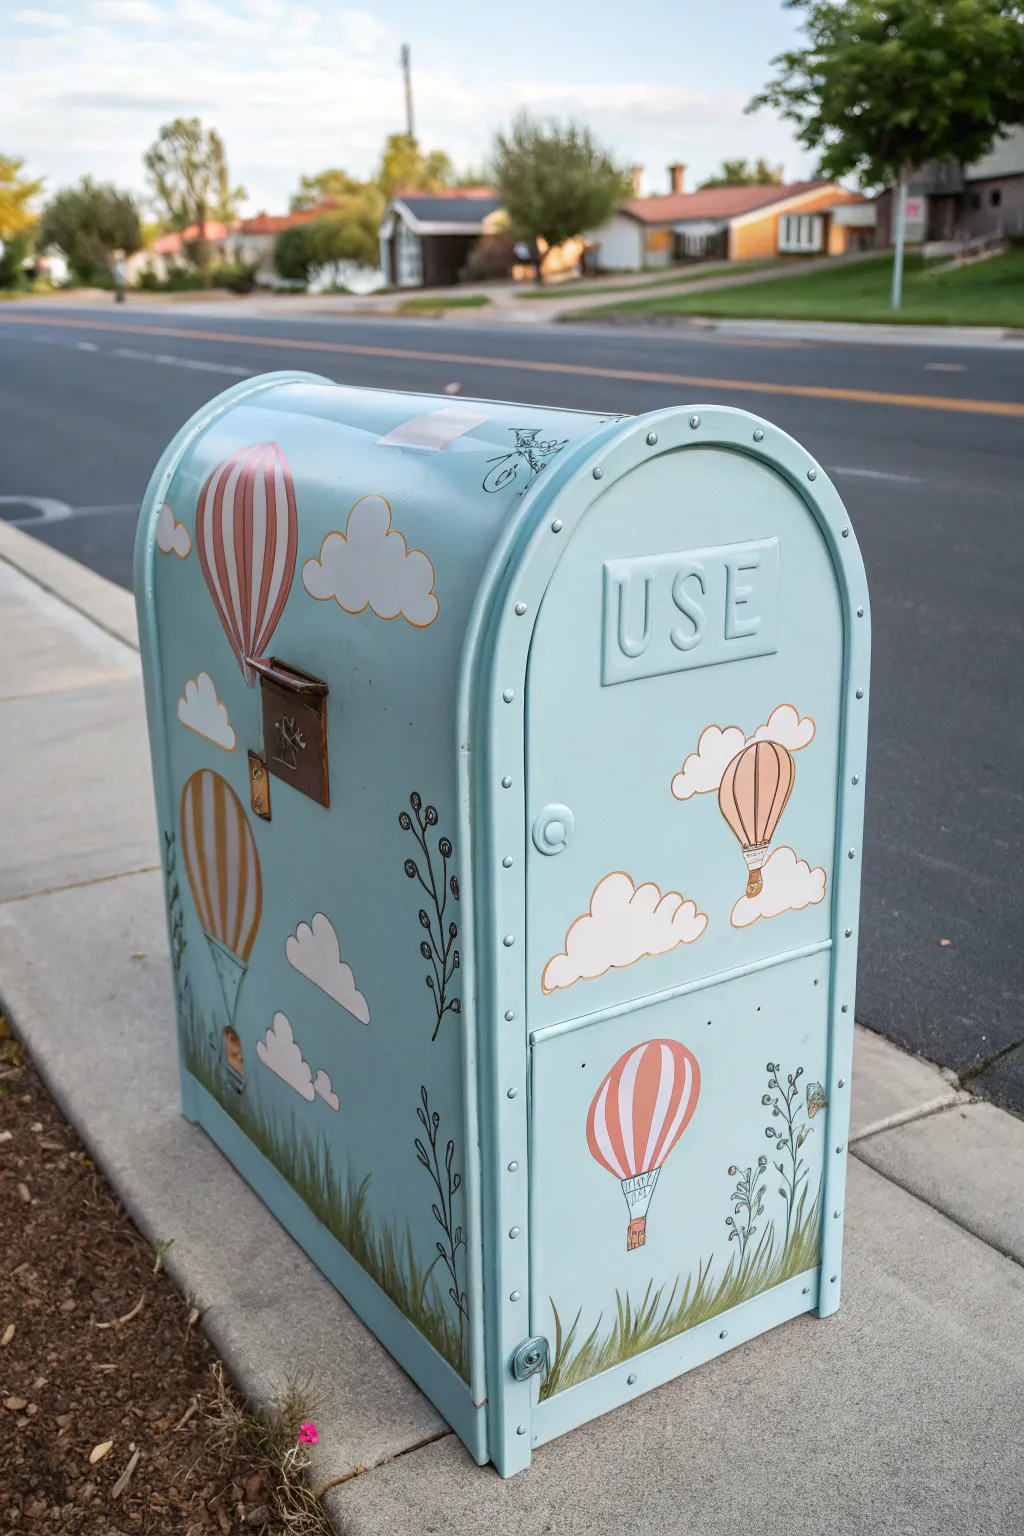
Transform a plain curbside utility box or mailbox into a dreamy skyscape featuring floating hot air balloons and fluffy clouds. This project uses soft pastels and simple organic shapes to create a cheerful, uplifting piece of street art.
Detailed Instructions
Materials
- Metal utility box or standard mailbox
- Sandpaper (medium grit)
- Metal primer spray (white or grey)
- Exterior acrylic latex paint (Light Robin’s Egg Blue for base)
- Acrylic paints (White, Salmon Pink, Mustard Yellow, Dark Green, Lime Green, Grey)
- Assorted brushes (2-inch flat brush, #4 round brush, fine liner brush)
- Painter’s tape
- Clear UV-resistant sealant spray or varnish
- Chalk or pastel pencil for sketching
Step 1: Preparation and Base Coat
-
Clean surface:
Begin by thoroughly cleaning the metal surface with soapy water to remove any dirt, grease, or road grime. Let it dry completely. -
Sand for adhesion:
Lightly scuff the entire exterior with medium-grit sandpaper. This creates a ‘tooth’ for the primer to grab onto, ensuring your artwork lasts through the seasons. -
Apply primer:
Spray a generous coat of metal primer over the entire box. I like to do two light coats rather than one heavy one to prevent drips. -
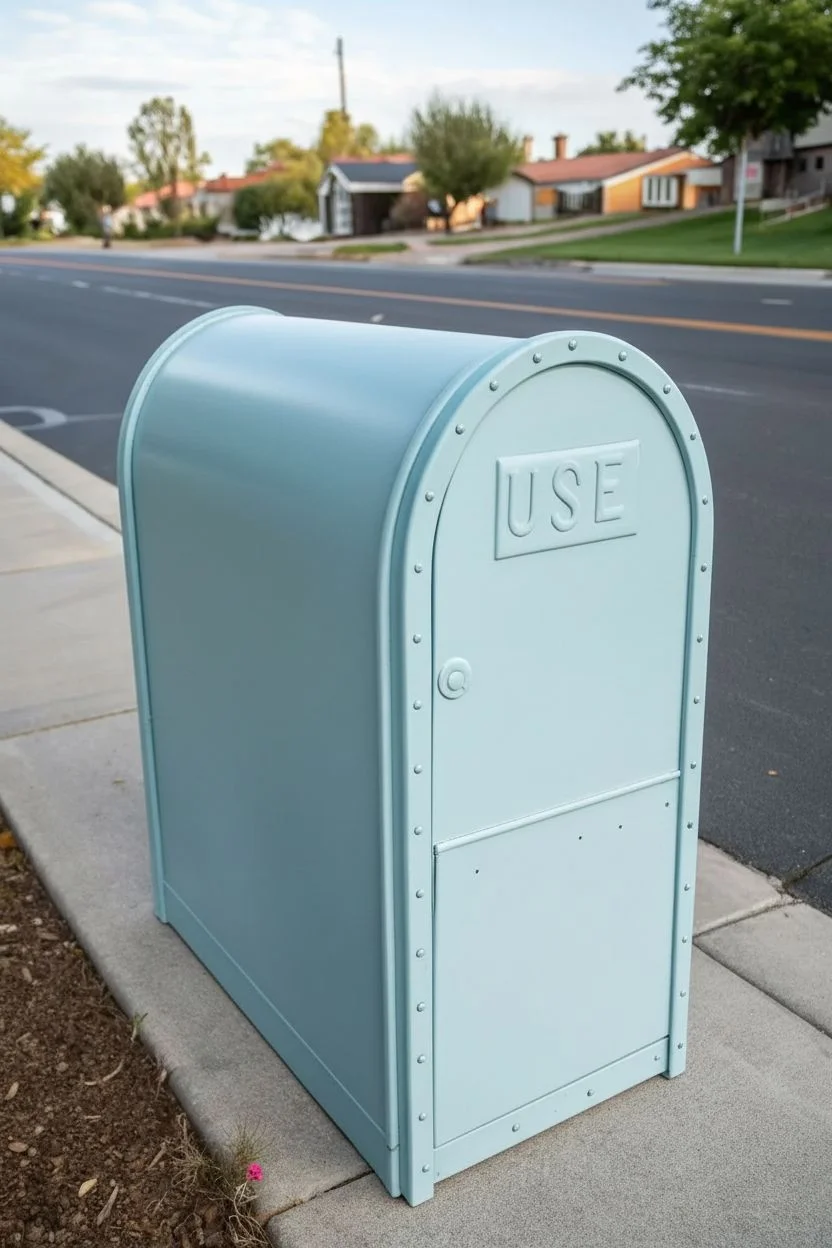
Paint the sky:
Using a 2-inch flat brush, cover the entire box with your Light Robin’s Egg Blue exterior paint. This will serve as your sky background. -
Second coat:
Allow the first coat to dry to the touch, then apply a second coat of blue to ensure solid, opaque coverage without streaks.
Smooth Operator
Use a foam roller for the initial blue sky base coat instead of a brush. This eliminates brush strokes and gives you a factory-smooth finish.
Step 2: Drafting the Design
-
Sketch layout:
Once the blue base is fully cured, use a white chalk pencil to lightly sketch the placement of your balloons. Draw large inverted teardrop shapes staggered at different heights. -
Add baskets:
Draw small squares or rectangles hanging below each balloon shape to represent the baskets. -
Cloud placement:
Sketch puffy cloud outlines around the balloons. Keep the shapes organic and fluffy, varying the sizes for visual interest. -
Mark the grass:
Along the very bottom edge of the box, sketch a jagged, uneven line where the tall grass will grow.
Step 3: Painting the details
-
Fill clouds:
Using a round brush and white acrylic paint, fill in your cloud shapes. You may need two coats here to make the white really pop against the blue. -
Base color for balloons:
Paint the main body of the balloons with white first. This acts as a localized primer so your pink and yellow stripes will look vibrant. -
Stripe the balloons:
Once the white balloon base is dry, carefully paint vertical curved stripes using your Salmon Pink and Mustard Yellow paints. Follow the curve of the ‘balloon’ to give it a 3D volume. -
Paint baskets:
Fill in the basket squares with a light brown or tan color. Use a fine liner brush to add tiny cross-hatch marks for a wicker texture. -
Outline details:
Mix a small amount of grey paint with water to make it fluid. Use a liner brush to outline the clouds and balloons loosely. Don’t worry about perfect lines; a sketchy look adds charm. -
Add highlights:
Add small white highlights to the top left of the balloons to suggest a light source.
Cloud Depth
Mix a tiny drop of the blue sky paint into your white cloud paint for the bottom edge of the clouds. This subtle shadow gives them instant 3D volume.
Step 4: Grounding and Finishing
-
Paint grass blades:
Using your Dark Green paint and a thin round brush, paint long, upward strokes starting from the bottom edge. Flick your wrist at the end of the stroke to taper the grass blades. -
Add grass variation:
Layer in some lighter Lime Green strokes amongst the dark grass to create depth and texture. -
Botanical details:
Paint simple tall stems with small leaves or seed pods rising out of the grass using a dark grey or black fine line paint. -
Clean hardware:
If you accidentally got paint on the handles, hinges, or the ‘USE’ stamped lettering, carefully wipe it away or paint over those specific hardware elements with a metallic color if desired. -
Seal the work:
After the paint has cured for at least 24 hours, apply two coats of clear UV-resistant sealant to protect your masterpiece from sun and rain.
Step back and admire how a simple coat of paint has turned a utilitarian object into a playful neighborhood landmark
BRUSH GUIDE
The Right Brush for Every Stroke
From clean lines to bold texture — master brush choice, stroke control, and essential techniques.
Explore the Full Guide
Black-and-White Stripes for Instant Modern Style
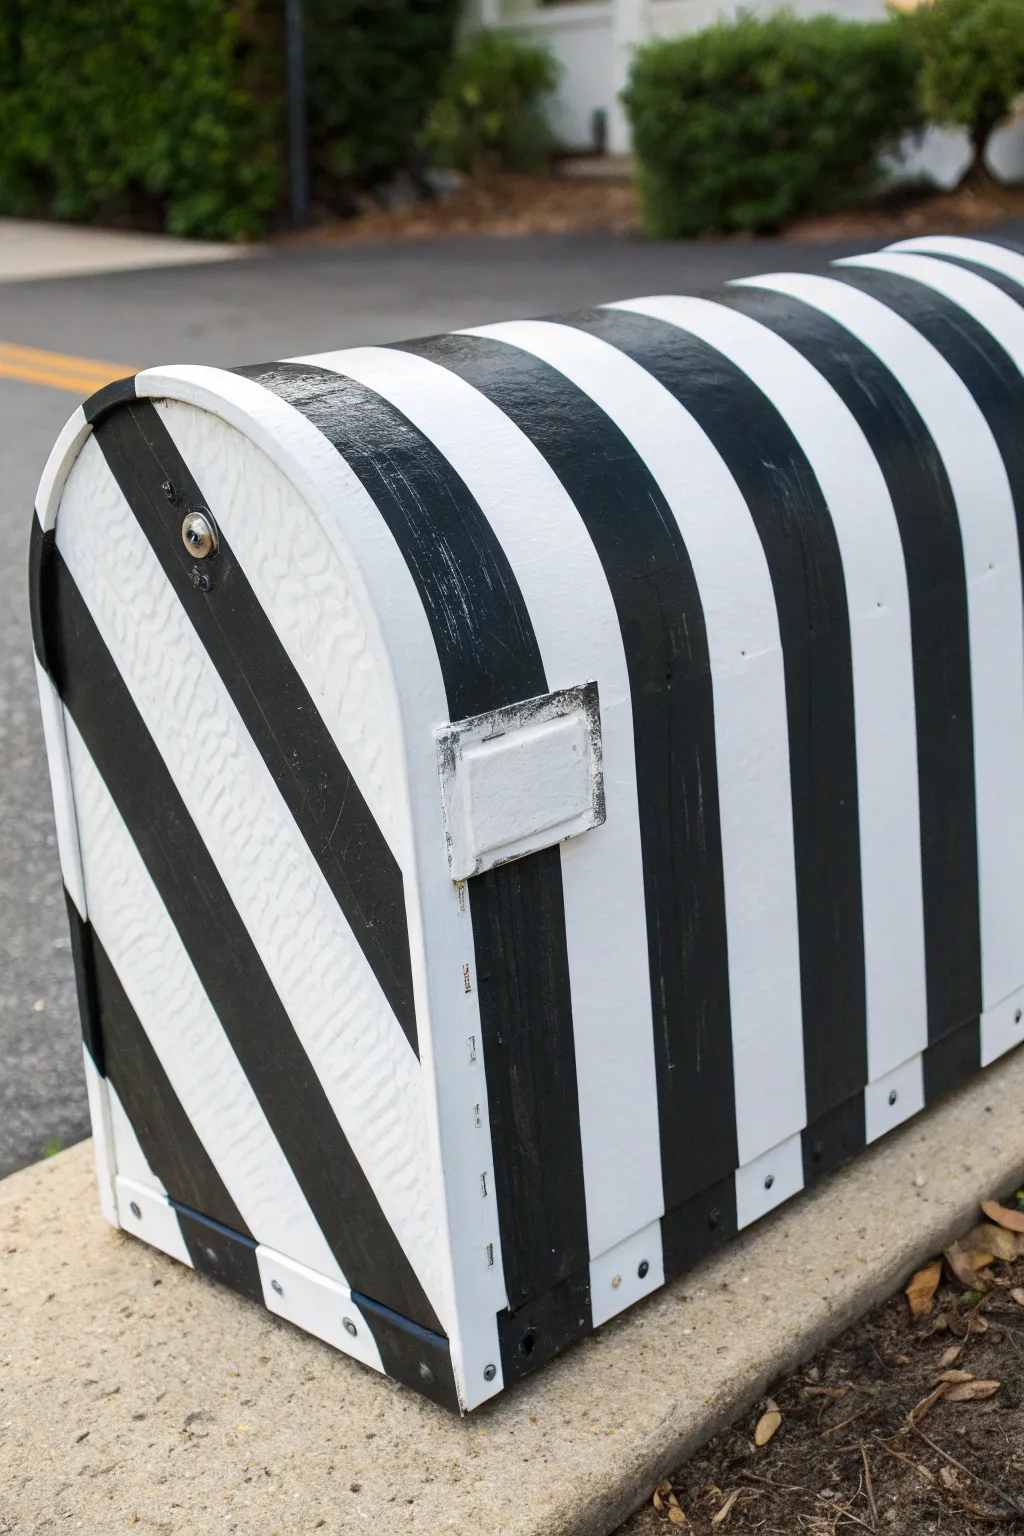
Transform a standard metal mailbox into a bold roadside statement with this high-contrast striped design. The mix of vertical lines on the body and diagonal stripes on the door creates a modern optical effect that is surprisingly simple to achieve.
Step-by-Step
Materials
- Metal mailbox (cleaned and prepped)
- White exterior spray paint + primer (satin or gloss)
- Black exterior paint (acrylic enamel or latex)
- Painter’s tape (1-inch width)
- Painter’s tape (2-inch width, optional)
- Medium flat paintbrush
- Small detail brush
- Fine-grit sandpaper (220 grit)
- Cleaning cloth and degreaser
Step 1: Preparation and Base Coat
-
Clean surface:
Begin by thoroughly cleaning your mailbox with a degreaser to remove any road grime, dirt, or old residue. This step is crucial for paint adhesion. -
Sand lightly:
Scuff the surface gently with 220-grit sandpaper to give the metal some ‘tooth’. Wipe away all sanding dust with a damp cloth or tack cloth. -
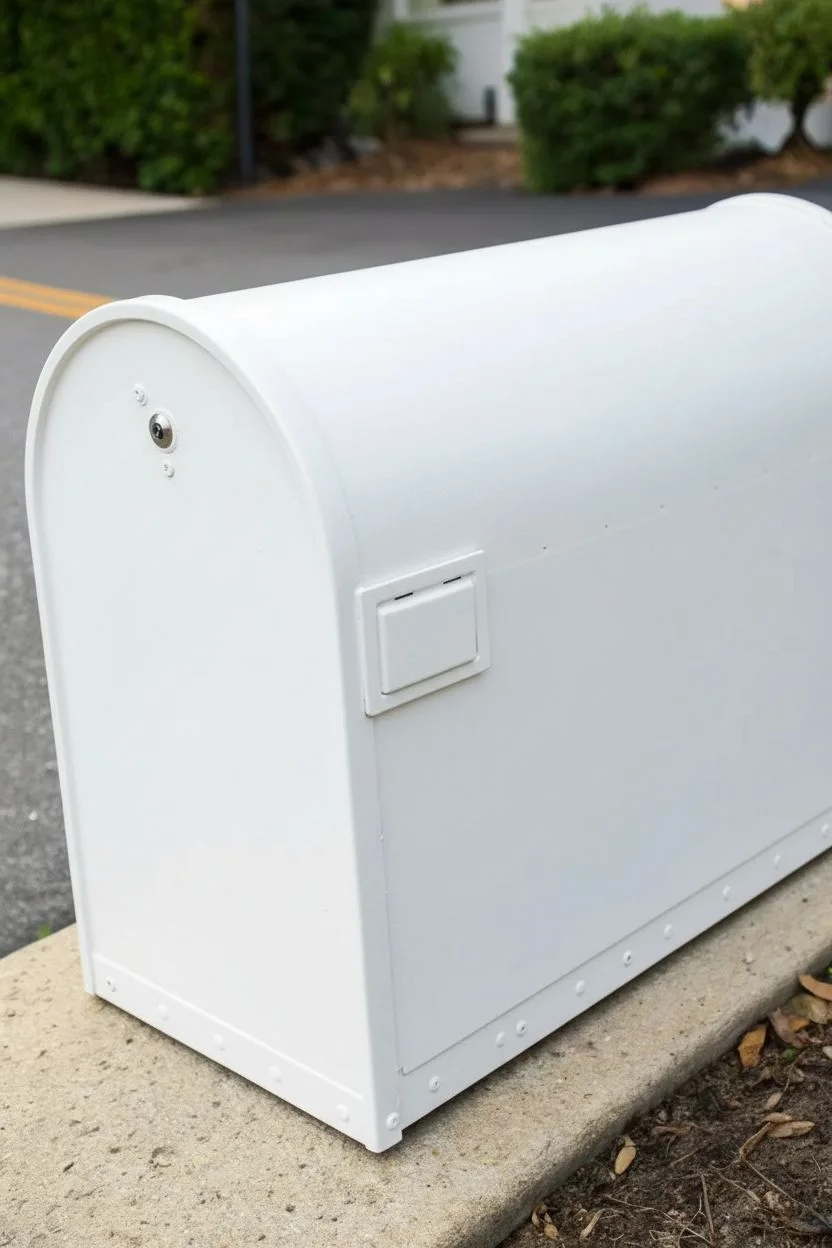
Prime and paint white:
Spray the entire mailbox with your white paint-and-primer combo. Hold the can about 8-10 inches away and use sweeping motions to avoid drips. -
Apply second coat:
Once the first coat is dry to the touch, apply a second coat of white to ensure full, opaque coverage. Let this base layer cure completely, preferably overnight, before applying tape.
Bleed-Through Blues?
If paint seeps under the tape, wait for it to dry fully. Then, place tape over the good area and use a small brush to touch up the line with the original base color.
Step 2: Taping the Design
-
Tape the main body:
Start applying 1-inch painter’s tape across the rounded top of the mailbox. Place strips perpendicular to the length of the box to create vertical rings. -
Space the stripes:
Use a spare piece of your tape as a spacing guide between strips to ensure your black and white stripes will be equal in width. -
Tape the door:
For the front door, switch the orientation. Apply the tape diagonally from corner to corner to create a dynamic contrast against the vertical body stripes. -
Seal edges:
Run your fingernail or a credit card firmly along the edges of every piece of tape. This prevents paint from bleeding under and ensures crisp lines.
Add a Pop of Color
For a fun twist, paint the handle or the mailbox flag a bright neon color like lime green or hot pink to contrast with the monochrome stripes.
Step 3: Painting the Stripes
-
Paint black sections:
Using your medium flat brush and black exterior paint, carefully fill in the exposed white areas between the tape strips. -
Watch your brushstrokes:
Brush in the direction of the stripes (vertically on the body, diagonally on the door) to keep the texture uniform. -
Handle the hardware:
Use a small detail brush to carefully paint around the handle, flag bracket, or any rivets. I find it easier to take my time here rather than taping off tiny hardware pieces. -
Apply second black coat:
Allow the first coat of black to dry slightly, then apply a second coat for a deep, rich finish that covers any brush marks.
Step 4: Finishing Up
-
Remove tape:
While the black paint is still slightly tacky (not fully dry), slowly peel off the painter’s tape at a 45-degree angle. This prevents the dried paint from cracking or pulling up. -
Touch up:
Inspect your lines. If any paint bled through, use a tiny artist’s brush and a bit of white paint to clean up the edges. -
Address the rivets:
Check the bottom edge where the metal is riveted. Ensure the stripe pattern continues neatly over this lip for a professional look. -
Seal (Optional):
If you live in a harsh climate, you might want to spray a clear UV-resistant topcoat over the entire box once fully cured (usually 24-48 hours).
Enjoy the sleek, modern welcome your new mailbox gives to every visitor
Stencil-Style Damask Pattern on a Deep Base Color
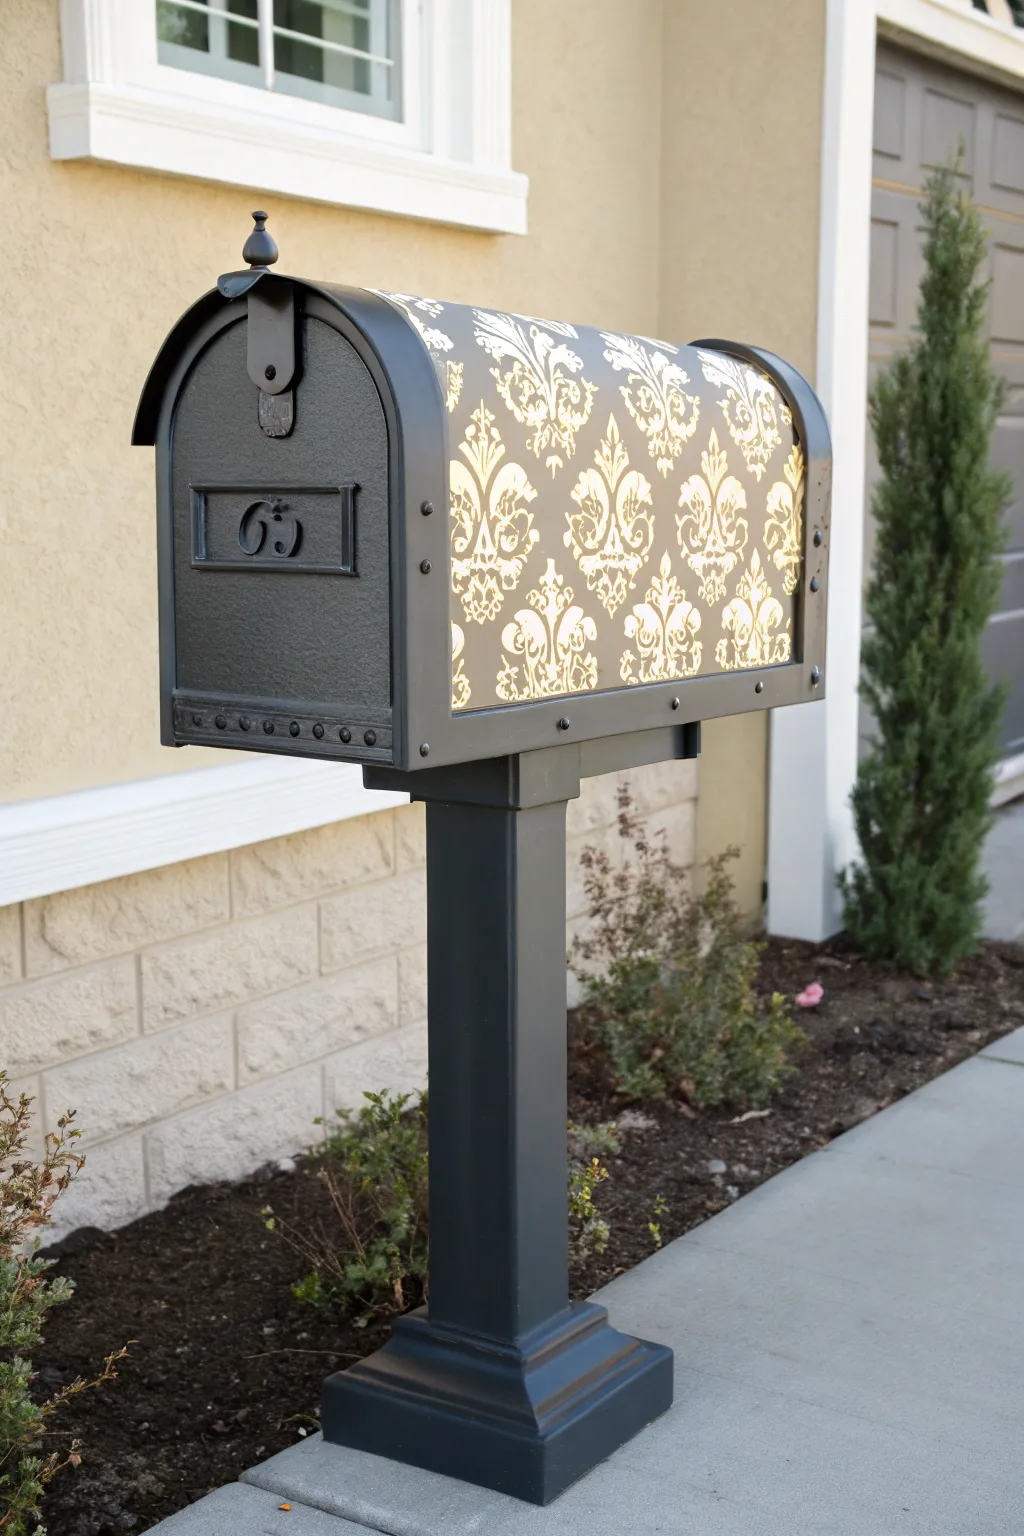
Transform a plain curbside mailbox into an elegant statement piece featuring a striking contrast between matte black hardware and a shimmering damask pattern. This project combines classic stencil work with durable outdoor finishes to create a sophisticated look that boosts your home’s curb appeal instantly.
Step-by-Step Guide
Materials
- Standard metal mailbox
- Square wooden mailbox post with decorative base trim
- Sandpaper (120 and 220 grit)
- Clean rags and tack cloth
- Painter’s tape (blue or green)
- Spray primer (metal-appropriate, grey or white)
- Matte black outdoor spray paint
- Cream or off-white outdoor spray paint (base color)
- Damask pattern stencil
- Metallic gold craft paint (outdoor acrylic)
- Stencil brush or high-density foam roller
- Spray adhesive (repositionable)
- UV-resistant clear coat sealer (matte or satin)
- Screwdriver (for disassembling mailbox parts)
Step 1: Preparation and Base Coat
-
Disassemble the Mailbox:
Before doing anything else, remove the mailbox from its post if possible. Use your screwdriver to take off the flag and any removable latch hardware. Set these small pieces aside in a baggie so you don’t lose the screws. -
Sand the surfaces:
Scuff sand the entire metal surface of the mailbox using 120-grit sandpaper to remove any loose old paint or rust and to help the new paint adhere. If you are painting a new wooden post, sand it smooth with 220-grit paper. -
Clean thoroughly:
Wipe down the mailbox with a damp rag to remove sanding dust. Follow up with a tack cloth to ensure the surface is perfectly clean and dry. -
Prime the metal:
Apply a coat of metal primer to the entire mailbox. Use steady, sweeping motions to avoid drips. Let this dry completely according to the can’s instructions. -
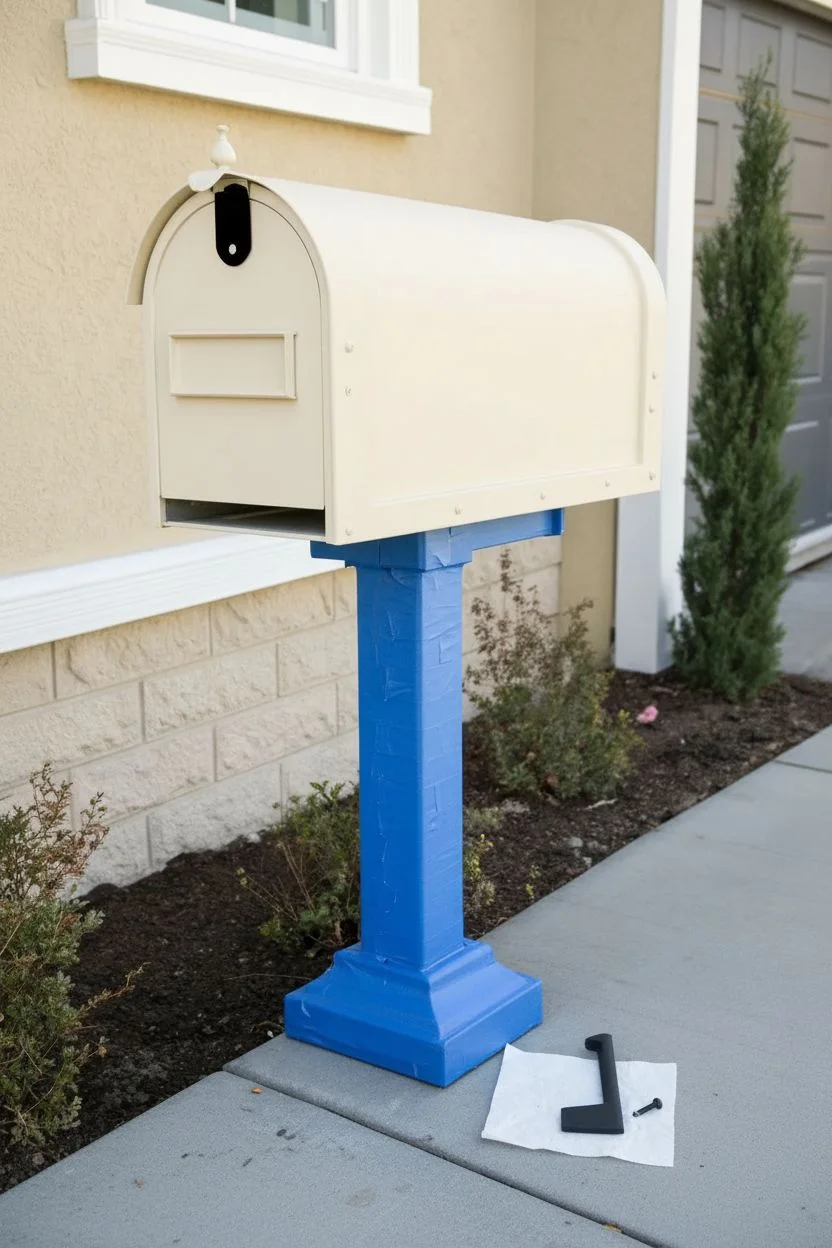
Apply the contrasting cream base:
Spray the main body of the mailbox—specifically the curved top and sides where the pattern will go—with your cream or off-white paint. Don’t worry about overspray on the front door or bottom trim yet; just ensure the pattern area has solid, opaque coverage. -
Let it cure:
Allow this cream base coat to dry thoroughly, preferably overnight. Stencil tape can peel up fresh paint if it hasn’t fully hardened.
Step 2: Stenciling the Pattern
-
Mask off the black areas:
Once the cream paint is cured, carefully use painter’s tape to mask off the large rectangular area intended for the pattern. You are covering the cream paint you want to keep safe while spraying the rest black later. Be precise at the edges. -
Paint the frame and hardware:
Spray the front door, the back, the bottom trim, the flag, and the post with the matte black outdoor paint. Apply 2-3 light coats rather than one heavy one to prevent drips. -
Adhere the stencil:
Focusing back on the cream section, lightly mist the back of your damask stencil with repositionable spray adhesive. Wait 60 seconds for it to become tacky, then press it firmly onto the curved side of the mailbox. -
Apply the gold pattern:
Dip your stencil brush into the metallic gold paint, then offload most of it onto a paper towel until the brush is almost dry. I find this ‘dry brush’ technique is crucial for crisp lines. -
Stipple the paint:
Use a vertical up-and-down stippling motion to apply the gold paint through the stencil openings. Work in small sections. -
Move the stencil:
Carefully peel up the stencil and reposition it to continue the pattern across the length of the mailbox. Align the registration marks on the stencil with your previously painted design to keep it straight. -
Detail and touch-ups:
Once the entire pattern is stenciled and dry, remove any masking tape. Use a small artist’s brush to touch up any cream areas where the black might have bled under the tape, or vice versa, for a crisp dividing line.
Secret to Crisp Lines
When stenciling a curved surface like a mailbox top, use extra tape on the outer edges of the stencil to hold it flush against the curve, preventing paint bleed.
Step 3: Assembly and Installation
-
Reattach hardware:
Screw the flag and latch mechanism back onto the painted mailbox. The black flag against the black door creates a sleek, monochromatic look on the front. -
Seal the work:
Protect your artwork from the elements by spraying the entire mailbox with two coats of UV-resistant clear sealer. This prevents the gold from fading and the black from chipping. -
Prepare the post:
Ensure your wooden post is painted with the same durable matte black paint. If installing a new post, secure the decorative base trim at the bottom. -
Mount the mailbox:
Secure the finished mailbox onto the mounting board of the post. Double-check that it is level before fully tightening the screws.
Add Address Numbers
For a raised, luxury look, glue painted wooden numbers inside the front door’s recessed panel, or use gold vinyl decals to match the damask pattern.
Now you have a stunning, custom piece of curbside decor that welcomes guests with unmatched elegance.

PENCIL GUIDE
Understanding Pencil Grades from H to B
From first sketch to finished drawing — learn pencil grades, line control, and shading techniques.
Explore the Full Guide
Vintage Distressed Layers for Time-Worn Charm
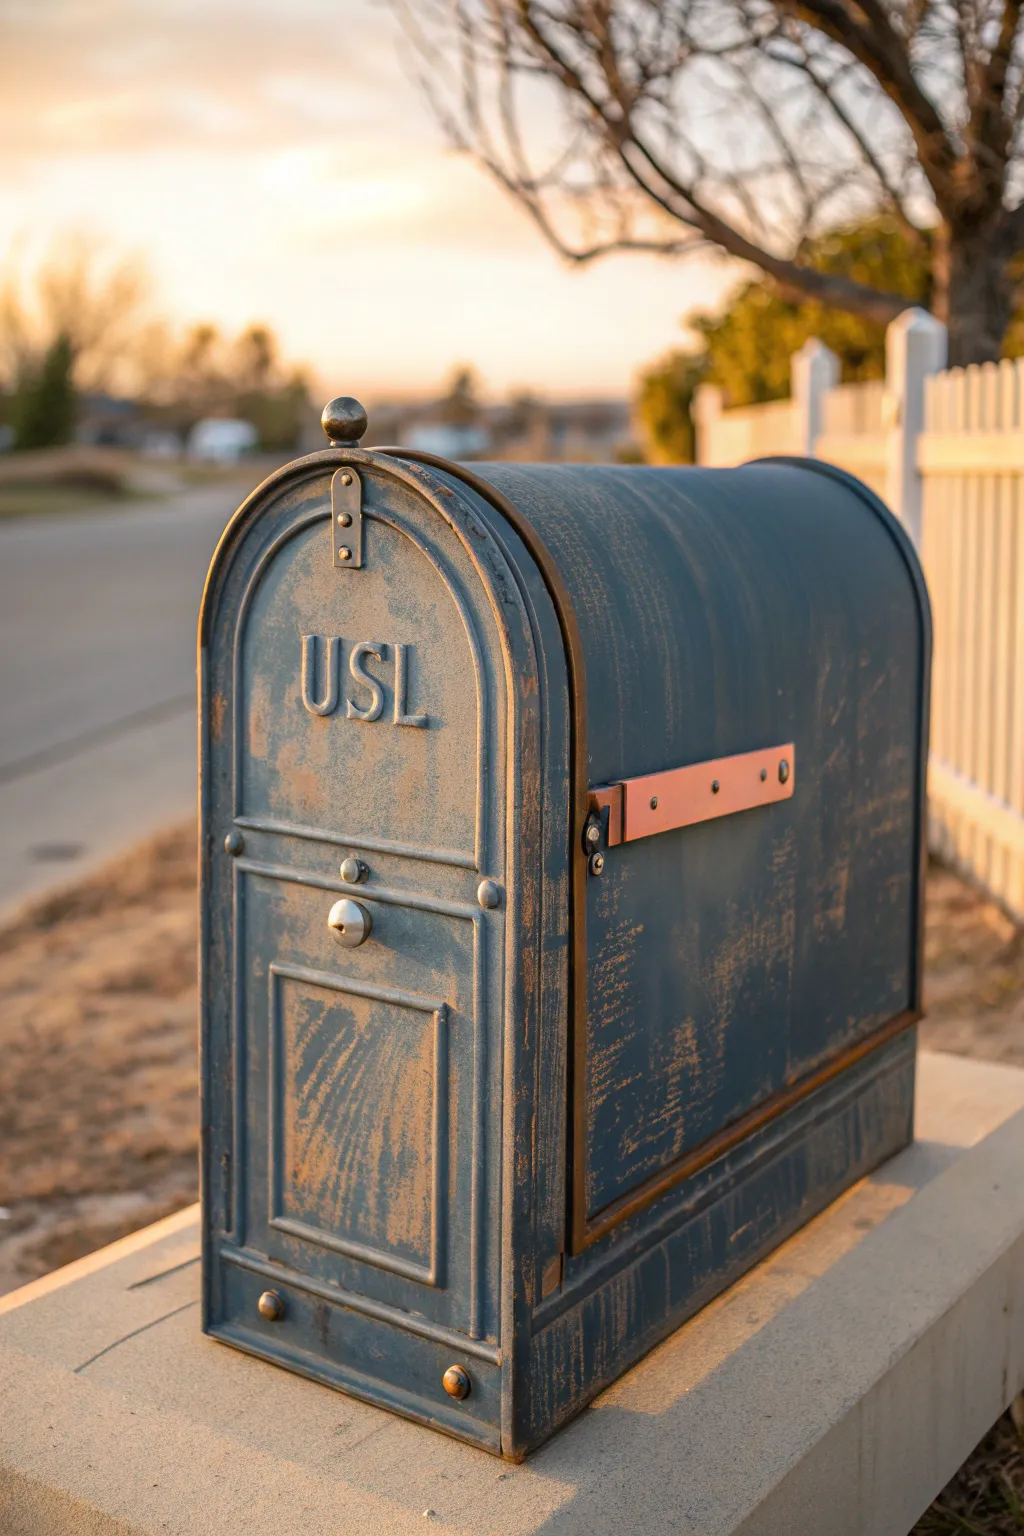
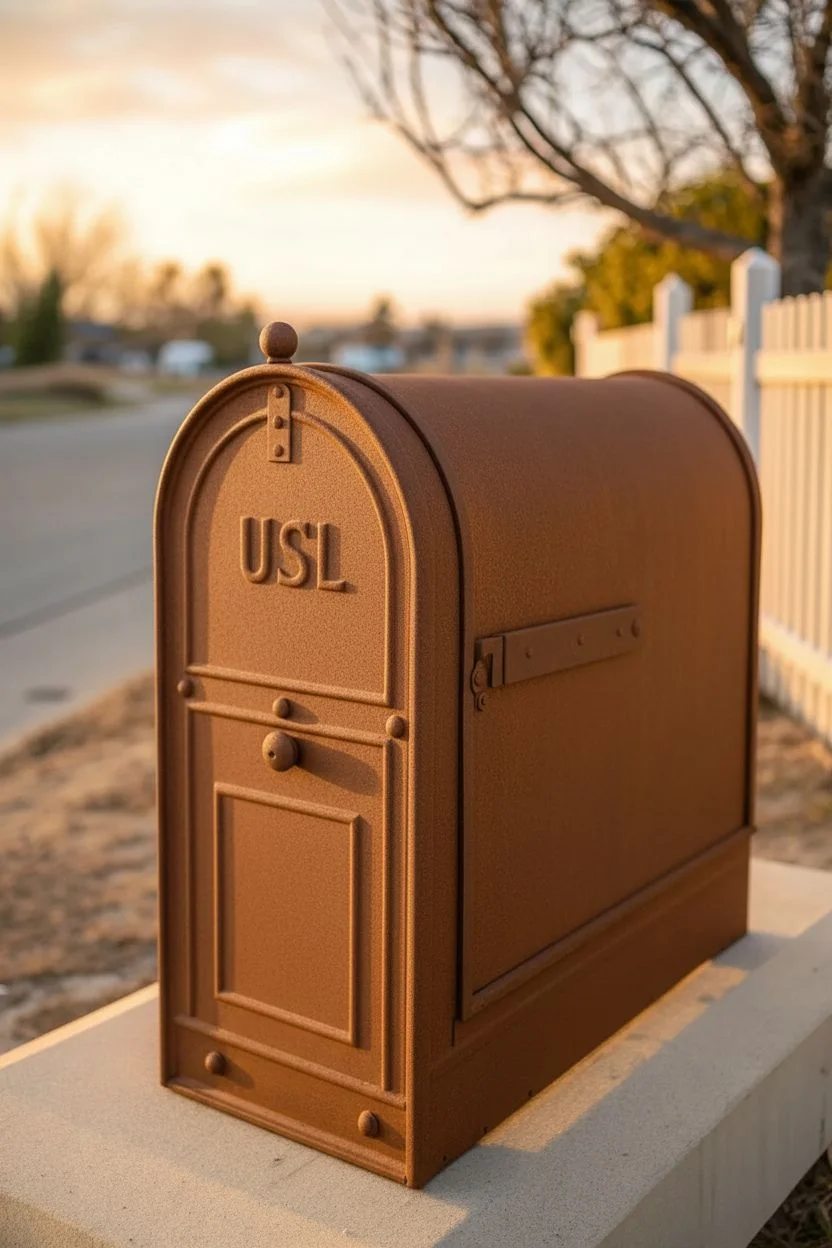
Capture the elegance of a bygone era with this vintage-inspired mailbox makeover that uses layering techniques to create authentic-looking wear and patina. The result is a charmingly rugged slate blue finish with warm rust undertones peeking through, perfect for adding curb appeal with a story.
Detailed Instructions
Materials
- Metal mailbox (vintage style arched top preferred)
- Sandpaper (120 and 220 grit)
- Metal primer spray (red oxide or rust colored)
- Slate blue chalk-style paint or exterior latex (matte finish)
- Dark antique wax or glazing medium
- Copper or bronze metallic paint (small amount)
- Clean rags or lint-free cloths
- Chip brushes (for texture)
- Small detail brush
- Clear matte exterior sealer (spray or brush-on)
- Vaseline (optional for resist technique)
- Painter’s tape
Step 1: Preparation and Base Layer
-
Clean the Surface:
Begin by thoroughly cleaning your mailbox to remove any dirt, grease, or existing loose paint. A mixture of warm water and heavy-duty degreaser works best here to ensure your new layers adhere properly. -
Scuff Sanding:
Take your 120-grit sandpaper and give the entire exterior a good scuff. You aren’t trying to strip it to bare metal, but rather creating ‘tooth’ for the primer to grab onto. Wipe away all dust with a damp cloth. -
Apply the Rust Base:
Spray the entire mailbox with a red oxide or rust-colored metal primer. This is crucial because this color will serve as the ‘exposed metal’ layer later when we distress the finish. Apply two thin coats rather than one heavy one to avoid drips. -
Let it Cure:
Allow the primer to dry completely according to the can’s instructions—usually overnight is best for a durable foundation. -
Wax Resist Method (Optional):
For easier distressing later, dab small amounts of Vaseline or run a candle over high points, edges, and raised lettering where natural wear would occur. This prevents the top coat from sticking in these specific spots.
Step 2: Painting and Distressing
-
Apply the Blue Coat:
Using a chip brush, apply your slate blue chalk or matte paint over the primer. Don’t worry about perfect smoothness; brushstrokes add to the vintage character. Cover the entire surface, including the recessed panels. -
Dry and Repeat:
Let the first coat dry to the touch. Depending on the opacity of your paint, apply a second coat if needed, but remember that some transparency adds depth to the final look. -
Initial Distressing:
Once the blue paint is dry but not fully cured (about 1-2 hours), take a damp rag or fine 220-grit sandpaper and gently rub the areas where you applied the wax resist. The blue paint should lift easily, revealing the rust primer underneath. -
Heavy Wear Areas:
Focus your sanding on the arched top, the edges of the door, and the raised ‘USL’ lettering. Sand a bit more aggressively here to simulate years of handling and weather exposure. -
Create Scratches:
Use the edge of a coarse sandpaper block to drag vertical scratches down the sides, mimicking rain wear and physical abrasion over time.
Natural Distress Pattern
Look at where your hands naturally touch the handle or where rain would drip. Focus your sanding on these high-traffic spots for the most realistic weathering effect.
Step 3: Detailing and Sealing
-
Metallic Accents:
Dip a small detail brush into your copper or bronze metallic paint. Paint the hinge mechanism, the decorative latch handle, and any rivets to make them pop against the muted blue. -
Dry Brushing Highlights:
Wipe almost all the metallic paint off your brush onto a paper towel (dry brushing technique) and lightly whisk it over the very top of the raised letters and architectural ridges for a subtle metal glint. -
Antiquing Glaze:
Mix a little dark brown paint with a glazing medium or water (or use a dark wax). Brush this into the corners, recessed panels, and around the letters. -
Wipe Back:
Immediately wipe the glaze back with a clean lint-free cloth. I like to leave the pigment sitting in the deep crevices to create shadows, which makes the piece look genuinely old rather than just painted. -
Final Inspection:
Step back and look at the mailbox as a whole. Does the distressing look balanced? If an area looks too new, hit it with the sandpaper again. -
Protective Coat:
Since this will live outside, seal your work with at least three thin coats of a clear, matte exterior sealer. A glossy finish would ruin the antique effect, so stick to matte or satin.
Add Faux Dirt
For extreme realism, mix a pinch of real garden soil into your clear wax or sealer on the very bottom edge. It mimics ground splash and adds gritty texture.
Mount your newly aged masterpiece on a post and enjoy the instant history it adds to your front yard
Rustic Farm Scene With Barn and Rolling Hills
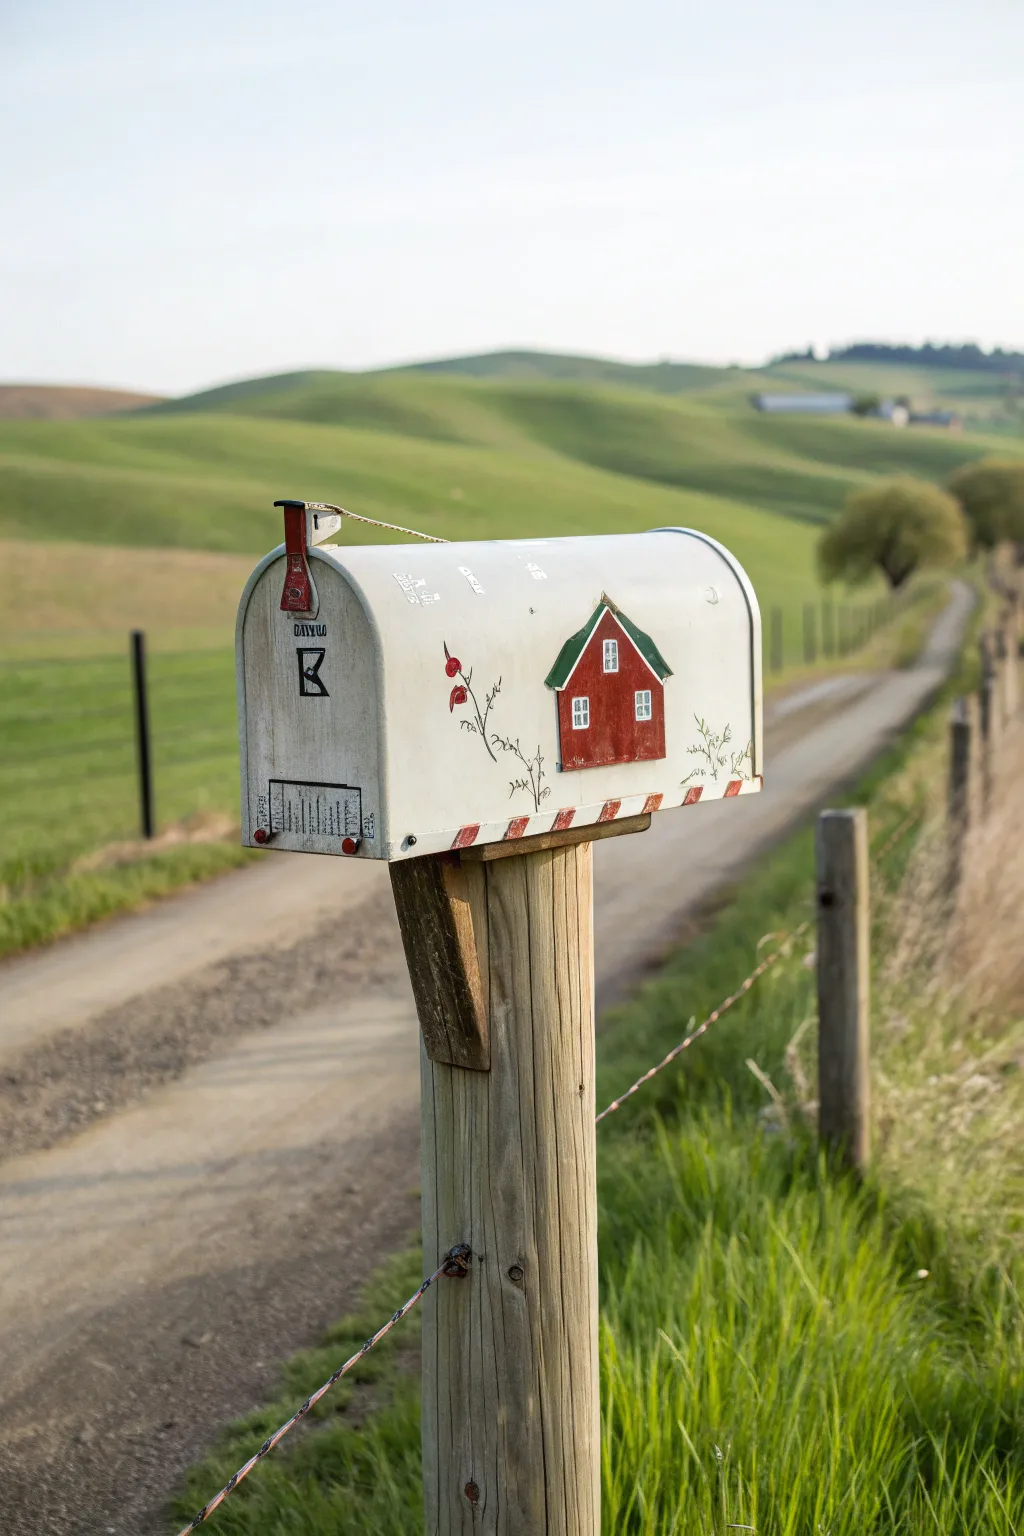
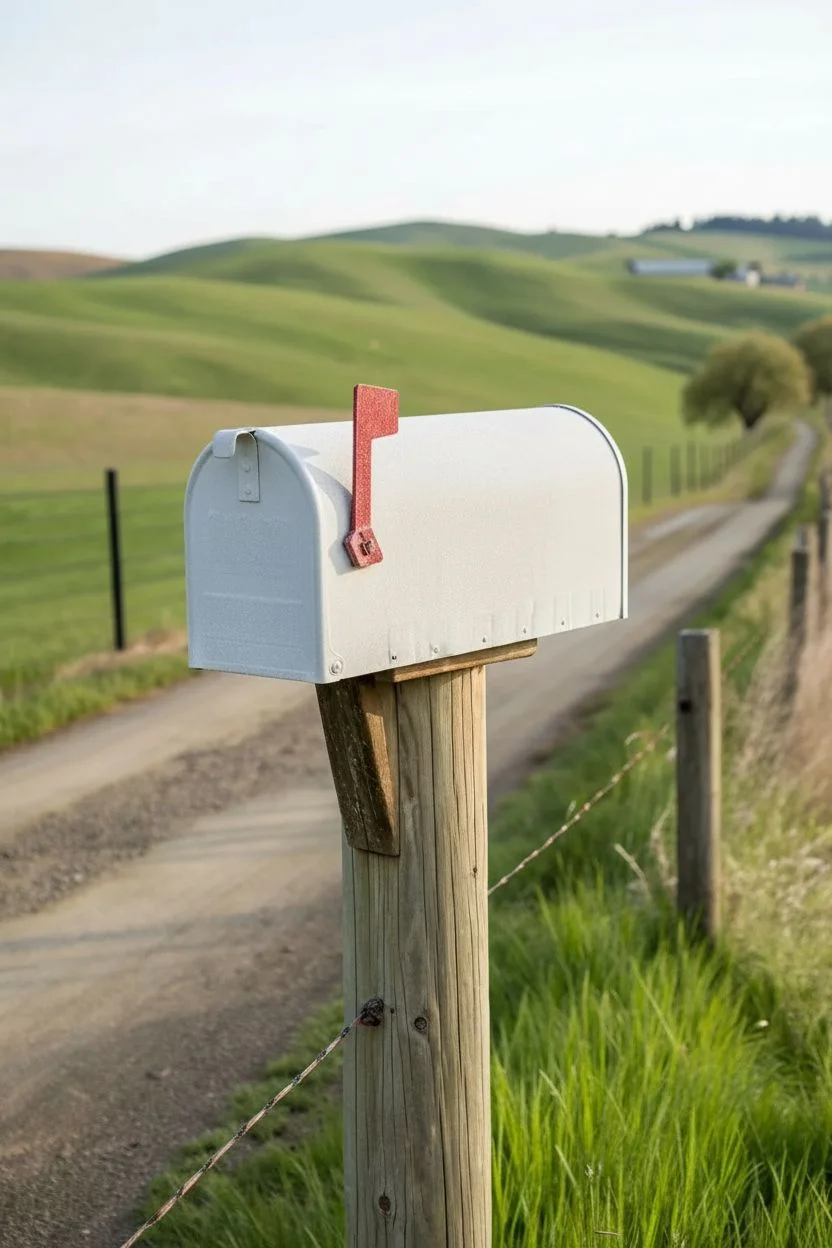
Bring the serene beauty of the countryside to your curbside with this charming, hand-painted mailbox design. This project features a classic red barn motif and delicate floral vines on a crisp white background that perfectly frames the rural landscape.
How-To Guide
Materials
- Standard metal mailbox (white)
- Sandpaper (fine-grit)
- Outdoor acrylic craft paints (Barn Red, Deep Green, Pure White, Brown, Black)
- Painter’s tape or masking tape
- Small flat brush (for the barn structure)
- Fine liner brush (for vines and details)
- Clear outdoor sealant spray (gloss or satin)
- Pencil for sketching
- Ruler
Step 1: Preparation & Base
-
Clean and Prep:
Begin by thoroughly cleaning your mailbox to remove any dirt, grease, or road grime. Wiping it down with rubbing alcohol works wonders for adhesion. -
Light Sanding:
Scuff the surface lightly with fine-grit sandpaper, focusing on the areas where you plan to paint the barn and vines. This gives the metal ‘tooth’ so the paint sticks better. -
Wipe Down:
Wipe away all the sanding dust with a damp cloth or tack cloth. Ensure the surface is completely dry before moving to the next step.
Step 2: Painting the Barn
-
Mark the Placement:
Using a ruler and pencil, lightly sketch the outline of the barn on the side of the mailbox. Position it slightly right of center to leave room for the vines. -
Tape the Shape:
To get those crisp, straight edges like in the photo, apply painter’s tape along the outside lines of your barn sketch. -
Paint the Siding:
Fill in the main body of the barn with Barn Red using a small flat brush. Apply thin, even coats; I usually find two coats are necessary for solid coverage. -
Add the Roof:
Once the red paint is dry to the touch, carefully paint the roof section using your Deep Green. The tape will help keep the roofline sharp against the red siding. -
Remove Tape:
Peel off the tape gently while the paint is still slightly tacky to avoid pulling up any dry chips. -
Detail the Windows:
Use your finest liner brush and Pure White paint to draw small rectangular windows. Add the cross-pane dividers carefully. -
Add Roof Trim:
Outline the green roof with a very thin line of white or light grey to define the eaves and separate it from the red wall.
Uneven Edges?
If paint bleeds under your tape, let it dry completely. Then, use a flat brush with the background color (white) to carefully ‘erase’ and straighten the line.
Step 3: Adding Flora & Accents
-
Sketch the Vines:
Lightly pencil in a curving vine stem originating near the bottom left of the barn and flowing upward. -
Paint the Stems:
Using thin black or dark brown paint and your liner brush, trace over your pencil lines to create dainty, spindly stems. -
Add Red Berries/Buds:
Dip the tip of a small brush or a dotting tool into the Barn Red paint. Add small oval shapes along the vine to represent rose hips or flower buds. -
Details on the Vines:
Add tiny, wispy leaves or thorns along the black stems using quick, short strokes for a rustic look. -
Bottom Border:
Create a candy-cane style border along the bottom edge of the mailbox side. Use tape to mark off diagonal stripes and fill them with red paint. -
Personalization:
If desired, paint your house number or a monogram (like the ‘K’ shown) on the mailbox door using black paint and a steady hand.
Level Up: Depth
Mix a tiny drop of black into your red paint creating a burgundy shade. Use this to paint a thin shadow line under the roof eaves for a 3D effect.
Step 4: Sealing
-
Dry Time:
Allow the entire design to cure for at least 24 hours. This ensures no moisture is trapped under the sealant. -
Apply Clear Coat:
Spray the entire mailbox with a clear outdoor sealant. Several light coats are better than one heavy one to prevent drips and ensure long-lasting weather protection.
Enjoy your beautiful new custom mailbox that perfectly captures the charm of rural living


Garden Pollinators: Bees and Butterflies in Motion
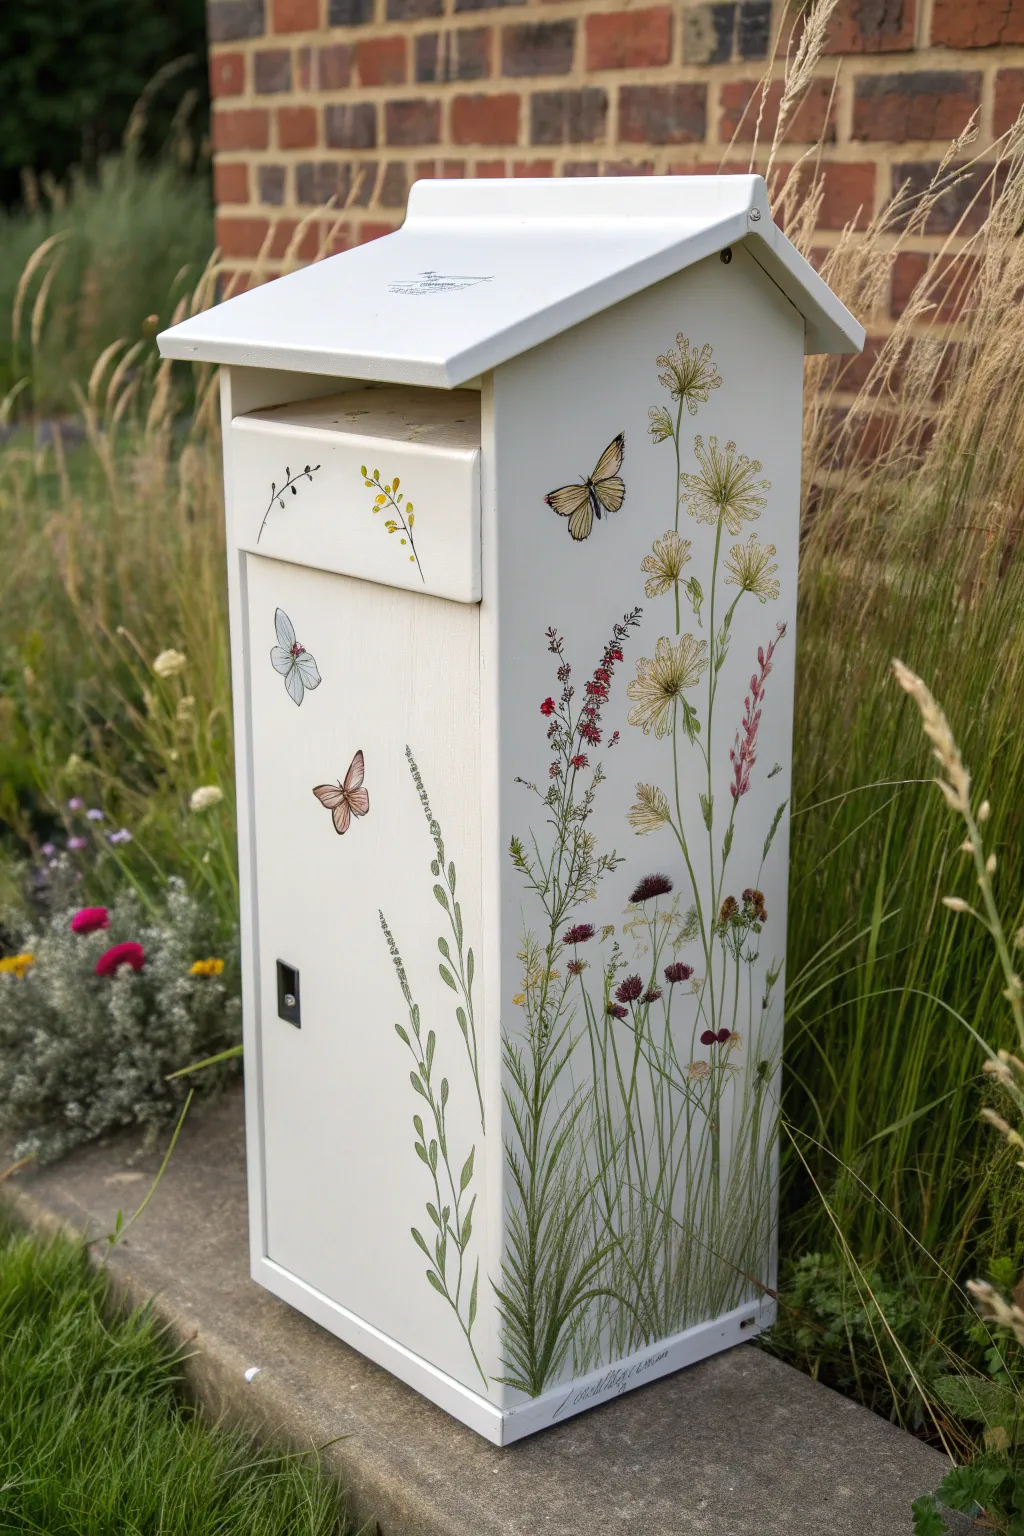
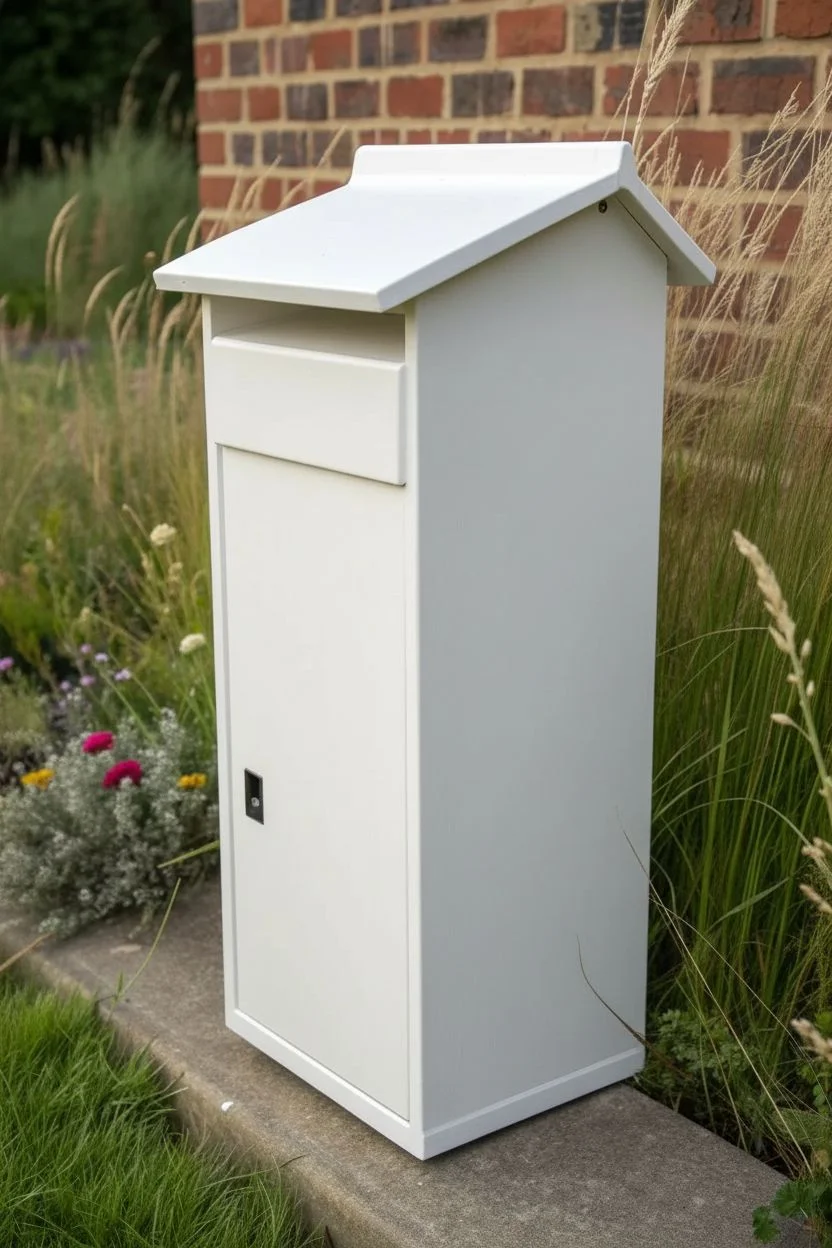
Transform a plain mailbox into a dreamy garden focal point with this botanical-inspired design. Featuring delicate wildflowers, swaying grasses, and fluttering butterflies on a crisp white background, this project brings the quiet beauty of a pollinator garden to your curb.
Step-by-Step
Materials
- Wooden or metal mailbox (cleaned and prepped)
- White exterior primer (spray or brush-on)
- White outdoor acrylic paint (satin or eggshell finish)
- Botanical transfer stickers or decoupage napkins (wildflowers, grasses, butterflies)
- Fine-grit sandpaper (220-grit)
- Mod Podge Outdoor or exterior decoupage medium
- Small scissors (for detailed cutting)
- Wide foam brush
- Soft detail brush
- Clear UV-resistant acrylic sealer (matte or satin spray)
- Clean lint-free cloths
- Water basin
Step 1: Preparation & Base Coat
-
Clean the surface:
Begin by thoroughly cleaning your mailbox to remove any dirt, grease, or old adhesive residue. If you are using a metal box, wipe it down with vinegar or rubbing alcohol to ensure perfect adhesion. -
Sand for texture:
Lightly scuff the entire surface with 220-grit sandpaper. This creates a ‘tooth’ for the primer to grab onto, which is essential for outdoor durability. -
Prime the box:
Apply a coat of high-quality exterior primer. Since we are aiming for a pristine white finish, a white primer is non-negotiable here to prevent dark underlying materials from shadowing through. -
Apply base color:
Once the primer is fully dry, paint the mailbox with two to three thin coats of white outdoor acrylic paint. Let each layer dry completely before adding the next to avoid dragging the paint.
Wrinkle Rescue
If your decoupage paper wrinkles while wet, don’t panic. Dip your finger in water and very gently smooth it. If it dries with a bubble, prick it with a pin and press down flat with glue.
Step 2: Designing the Meadow
-
Plan your composition:
Before committing, lay out your decals or cut-out decoupage papers on a flat surface. Arrange the tall grasses and seed heads so they will ‘grow’ from the bottom edge of the mailbox side panels. -
Prepare the flora:
If using decoupage napkins or papers, carefully cut around the flower stems and leaves with small scissors, getting as close to the design as possible to minimize visible edges. If using rub-on transfers, cut the sheets into manageable individual plants. -
Anchor the bottom:
Start applying the tallest grass and red clover elements along the bottom right corner of the side panel. Apply a thin layer of decoupage medium to the box, press the paper down gently, and smooth it outwards. -
Build height:
Layer taller Queen Anne’s Lace and wispy seed heads above the grasses. I like to let these stems reach almost to the roofline to emphasize the vertical shape of the mailbox. -
Add detail to the door:
Place smaller, simpler sprigs—like a single yellow stem or a small leafy branch—on the front door and the flap. Keep this area less crowded so it doesn’t look cluttered.
Artist’s Signature
Use a very fine-point green or brown permanent marker to hand-draw tiny extra stems or blades of grass at the very bottom, blending the stickers seamlessly into the painted base.
Step 3: Adding Life & Sealing
-
Position the pollinators:
Place butterfly decals in the negative spaces, angling them as if they are mid-flight. Put a large butterfly near the top center of the side panel and a couple of smaller ones on the front door. -
Smooth air bubbles:
Use a damp sponge or your fingers (wrapped in plastic wrap) to gently press out any trapped air bubbles from the center of each design toward the edges. Be gentle to avoid tearing delicate papers. -
Seal the designs:
Apply a coat of outdoor decoupage medium directly over the artwork. Extend this layer slightly past the edges of the designs to seal them well against the white background. -
Apply the final varnish:
Once the decoupage glue is cured, spray the entire mailbox with three coats of UV-resistant clear acrylic sealer. This is the most crucial step to prevent yellowing and water damage.
Enjoy watching your beautiful new mailbox brighten up the neighborhood every time you check the post
Full Wrap Story Mural Across the Curved Top
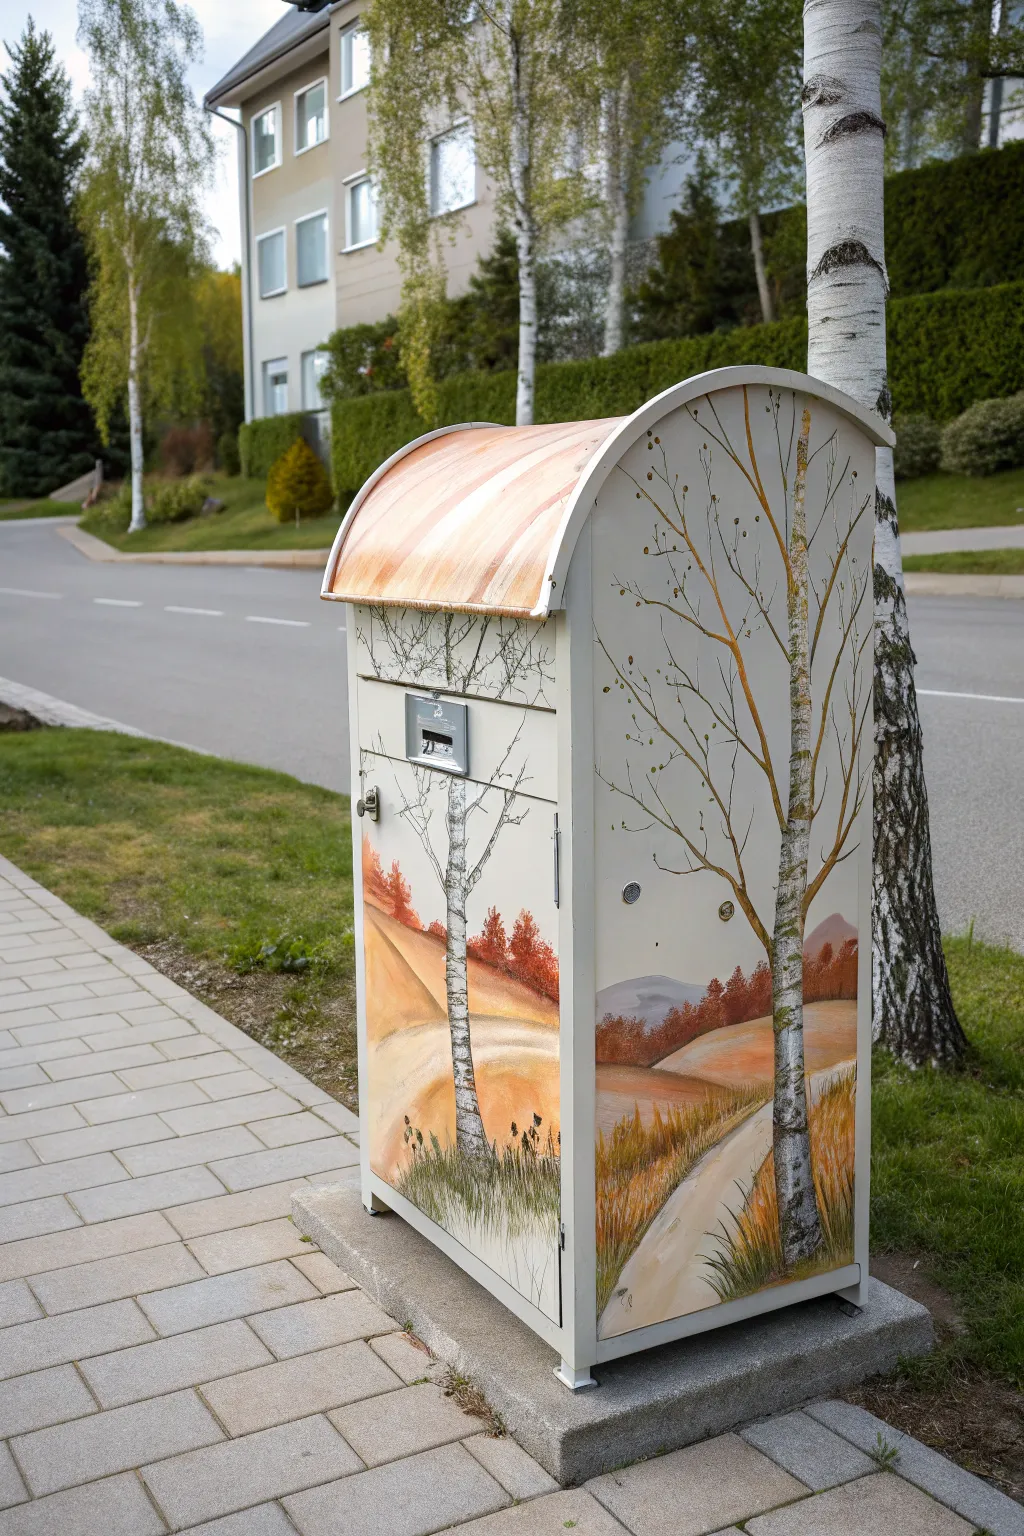

Transform a plain metal utility box or large mailbox into a scenic autumn landscape with this seamless mural technique. The design cleverly uses the curved structure to create a panoramic view of rolling hills and realistic birch trees that wraps around the corners.
Step-by-Step Tutorial
Materials
- Outdoor metal primer (white or light grey)
- Exterior acrylic latex paints (white, black, burnt sienna, yellow ochre, raw umber, moss green, sky blue)
- Set of synthetic brushes (2-inch flat, 1-inch angled, filbert, and fine liner)
- Sandpaper (220-grit)
- Painter’s tape
- UV-resistant clear sealant (matte or satin finish)
- Mixing palette or disposable plates
- Clean rags and water cup
Step 1: Preparation and Base Layer
-
Prepare the surface:
Begin by thoroughly cleaning the metal surface to remove dirt and grease. Lightly scuff the original finish with 220-grit sandpaper to help the new paint adhere, then wipe away all dust with a damp rag. -
Prime the metal:
Apply a coat of high-quality outdoor metal primer over the entire box. I find a small roller works best for the large flat areas to minimize brushstrokes, while a brush is needed for the hinges and corners. Let this dry completely according to the manufacturer’s instructions. -
Establish the horizon line:
Using a pencil, lightly sketch a low horizon line about one-third of the way up the box. Draw rolling hills that connect from the front panel to the side panel ensuring continuity. -
Paint the background sky:
Mix a very pale grey-white. Paint the entire upper section (sky area) and the curved roof. For the roof, consider adding subtle streaks of warm ochre to mimic sunlight hitting the curve.
Fixing drips
If paint drips on the vertical surface, don’t wipe it while wet, as it creates a smear. Wait for the drip to dry completely, sand it smooth gently, and repaint that small area.
Step 2: Painting the Landscape
-
Block in the hills:
Paint the distant hills using a muted purple-grey to create atmospheric depth. For the closer rolling hills, use a mix of yellow ochre, burnt sienna, and white to create soft, autumnal earth tones. -
Add the winding path:
Paint a curving path on the side panel using a pale beige (white mixed with a touch of raw umber). Make the path wider at the bottom and narrower as it recedes toward the horizon line to fake perspective. -
Create mid-ground foliage:
Stipple burnt sienna and deep orange along the horizon line to simulate distant autumn tree lines. Keep these edges somewhat soft so they blend into the background. -
Add grassy textures:
Using a fan brush or an old, splayed flat brush, flick upward strokes of yellow ochre and moss green at the bottom of the panels to create tall grasses along the foreground.
Seasonal shift
Change the season by altering your palette. Use vibrant greens for spring vitality, or skip the leaves entirely and add white ‘snow’ on the branches and ground for a stark winter scene.
Step 3: Detailing the Birch Trees
-
Outline the trunks:
Sketch the main birch trees vertically. Place a prominent one on the side panel and a thinner one on the front. Ensure the side tree extends all the way up into the curved roof section. -
Fill the trunks:
Paint the tree trunks a solid off-white. Don’t worry about shading yet; just get the basic silhouette opaque and clean. -
Add the characteristic markings:
Mix black with a tiny bit of brown. Using a flat brush turned sideways, create the horizontal lenticels (the dark dashes) on the birch bark. vary the length and spacing, making them denser near the base. -
Shade the trunks:
Glaze the right side of the trunks with a very watered-down grey to give them roundness. I like to keep this subtle so the white bark remains the focal point. -
Paint the branches:
Switch to a fine liner brush. Using a mix of raw umber and grey, pull thin, spindly branches extending outward and upward from the main trunks. Let them cross over each other naturally. -
Add leaves:
Dip a small filbert brush in varied greens and muted yellows. Dab small clusters of leaves sparodically along the thinnest branches, keeping them airy to show the sky through the canopy.
Step 4: Curved Roof and Sealant
-
Extend the design upward:
Continue the tree branches from the side panel up onto the curved roof. This integration makes the box look like a single canvas rather than separate sides. -
Enhance the roof curve:
On the very top curved section, paint broad, soft streaks of light copper or peach tone running front-to-back. This highlights the architectural shape and adds warmth. -
Final inspection:
Check the seams where the door opens. Ensure the painting continues logically across any gaps or handles so the image isn’t broken when the box is closed. -
Seal the artwork:
Once the paint has cured for at least 24 hours, apply two coats of UV-resistant clear sealant. This step is crucial to prevent fading from the sun and chipping from the weather.
Now your utility box blends naturally into the environment while adding a touch of artistic flair to the streetscape
Abstract Brushstroke Party in a Limited Palette
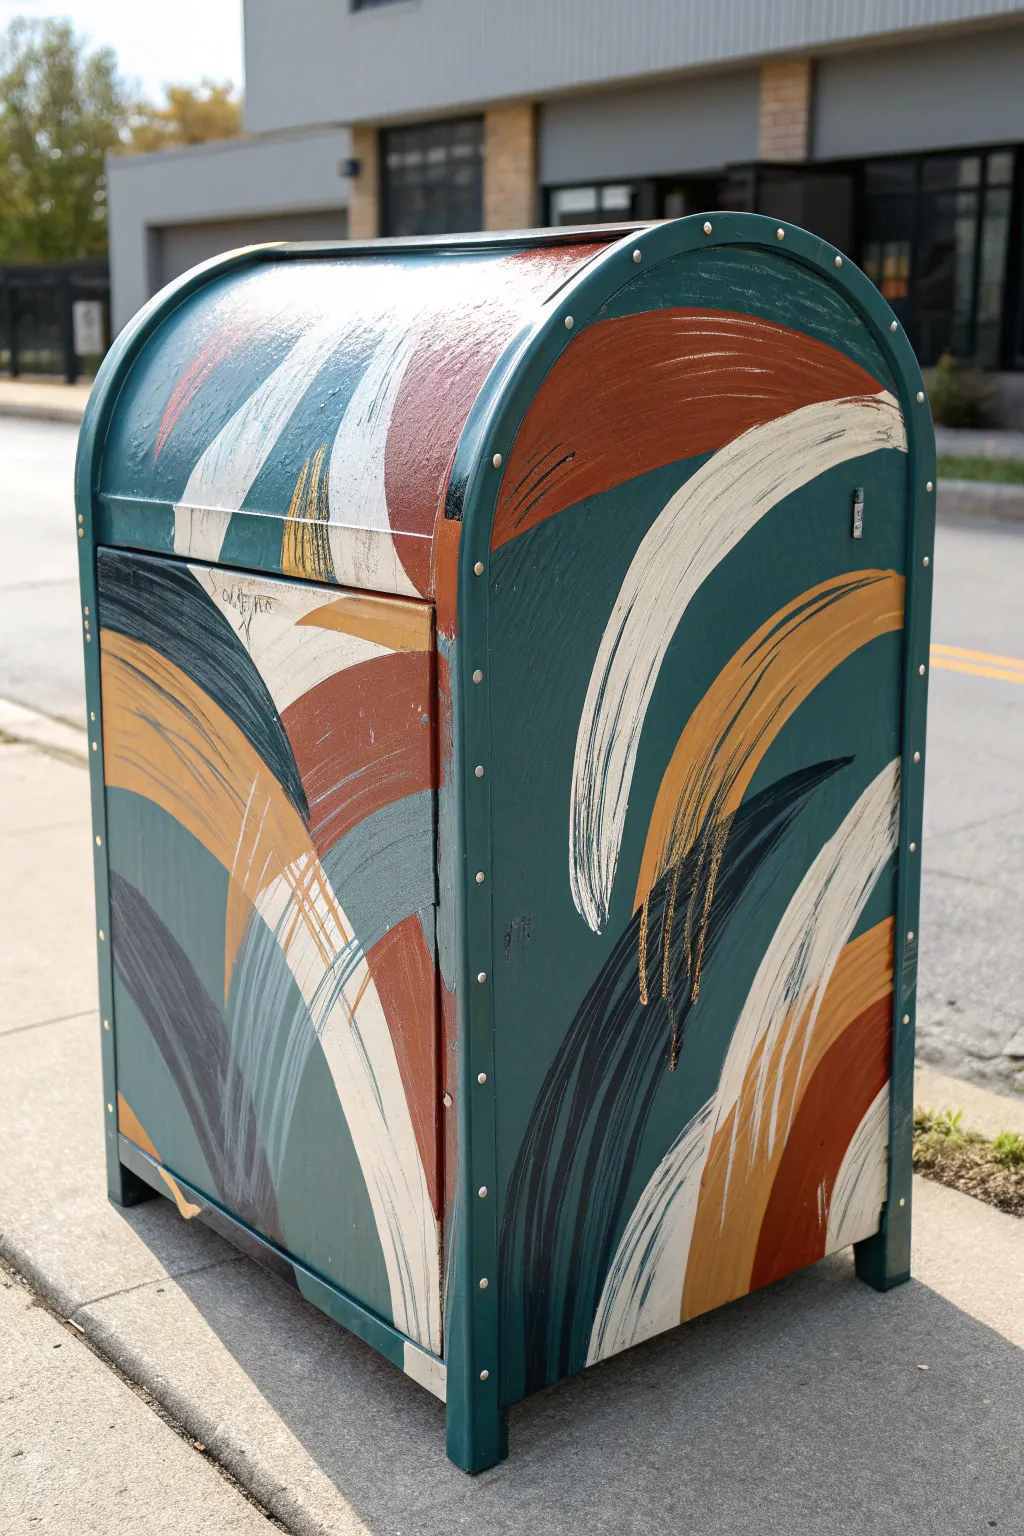
Turn a utilitarian metal mailbox into an artistic statement piece using a limited color palette and sweeping, gestural marks. This project embraces imperfection, allowing the natural bristle texture to create dynamism against a moody, teal background.
Detailed Instructions
Materials
- Metal mailbox (cleaned and prepped)
- Metal primer (spray or brush-on)
- Exterior-grade acrylic latex paint (Deep Teal for base)
- Exterior-grade acrylic latex paints (Colors: Cream/Off-White, Burnt Orange/Terracotta, Mustard Yellow, Dark Navy)
- Assorted flat paintbrushes (sizes 1-inch to 3-inch)
- Fine grit sandpaper
- Painter’s tape
- Drop cloth
- Clear UV-resistant sealant (matte or satin finish)
Step 1: Prep and Base Coat
-
Clean the Surface:
Begin by thoroughly cleaning the mailbox to remove dirt, grease, and any loose paint. A degreaser or soapy water works well. Let it dry completely. -
Sand for Adhesion:
Lightly sand the entire exterior surface with fine-grit sandpaper. You aren’t trying to strip it bare, just scuffing up the gloss so the new paint grips effectively. -
Prime the Metal:
Apply a coat of metal primer. If you’re using a spray primer, work in even sweeps to avoid drips; for brush-on primer, keep layers thin. Allow this to cure according to the can’s instructions. -
Tape Off Hardware:
Use painter’s tape to protect any handles, locks, or hinges you don’t want painted. I prefer to take extra time here, as crisp hardware makes the final product look much more professional. -
Apply the Base Color:
Paint the entire mailbox with your Deep Teal color. Use a medium-sized brush or a small roller for a smooth finish. You will likely need two coats for full opacity, letting the first dry before applying the second.
Sticky Situation?
If the door sticks after painting, lightly sand the edges where the metal touches. Applying a tiny bit of petroleum jelly or clear wax to the contact points can prevent future sticking.
Step 2: Creating the Abstract Strokes
-
Plan Your Palette:
Pour small amounts of your accent colors (Cream, Burnt Orange, Mustard, Dark Navy) onto a palette or paper plate. Having them ready allows you to work fluidly. -
Practice the Motion:
Before touching the mailbox, practice the swooping motion on a piece of cardboard. The goal is a confident, curving stroke that starts thick and tapers off. -
Start with Cream Moving Upward:
Dip a 2-inch flat brush into the Cream paint. Don’t overload it; you want the texture of the bristles to show through. Create comprehensive, arching strokes starting from the bottom right, curving up towards the top left. -
Layer in Burnt Orange:
Switch to a clean brush and pick up the Burnt Orange. Add large arches parallel to or intersecting the cream ones. Focus on the top curved dome of the mailbox, letting the strokes wrap over the rounded edge. -
Add Depth with Dark Navy:
Use the Dark Navy to add contrast. Place these strokes deeper in the composition, perhaps near the bottom or tucked behind the lighter colors. These dark marks ground the design. -
Highlight with Mustard Yellow:
Introduce the Mustard Yellow sparingly. Use these strokes to bridge the gap between the dark orange and the light cream. A slightly narrower brush (1-inch) works well here for variety. -
Embrace the Dry Brush Effect:
As you paint, allow the brush to run out of paint naturally at the end of the stroke. This ‘dry brush’ look adds that lovely, scratchy texture visible in the reference image. -
Cross the Door Gap:
When painting over the seam where the door meets the body, just paint right over it as if it’s one solid surface. Once dry, you can carefully slice the paint with a utility knife to ensure the door opens freely. -
Check for Balance:
Step back about five feet to view the composition. You want the curves to feel like they are flowing in a general direction (mostly diagonal) but not too uniform. Add small filler strokes if a spot looks too empty.
Step 3: Finishing Up
-
Detail Work:
If you want extra texture, you can lightly drag a brush with very little gold or lighter yellow paint over existing dark strokes to create subtle highlights. -
Seal the Deal:
Once the artwork is completely dry (give it at least 24 hours), apply two coats of clear, UV-resistant exterior sealer. This prevents fading from the sun and protects against rain. -
Remove Tape:
Carefully peel off your painter’s tape. If paint has bridged over the tape, score the edge with a craft knife first to prevent peeling your new design.
Metallic Pop
Mix a small amount of metallic bronze or gold paint into your mustard yellow color. It adds a subtle shimmer that catches the sunlight beautifully outdoors.
Now you have a striking, personalized mailbox that brings a gallery-worthy vibe to the sidewalk.
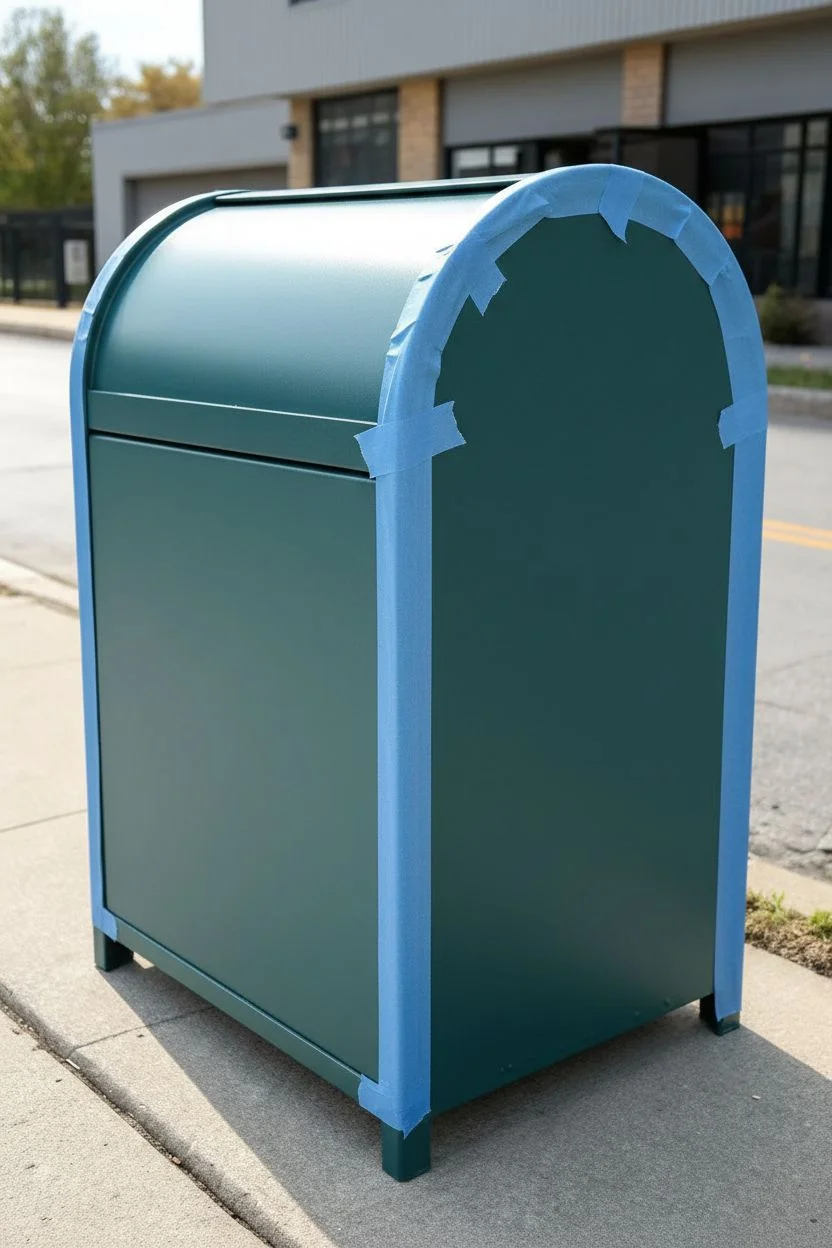
Geometric Shapes That Wrap Cleanly Around Corners
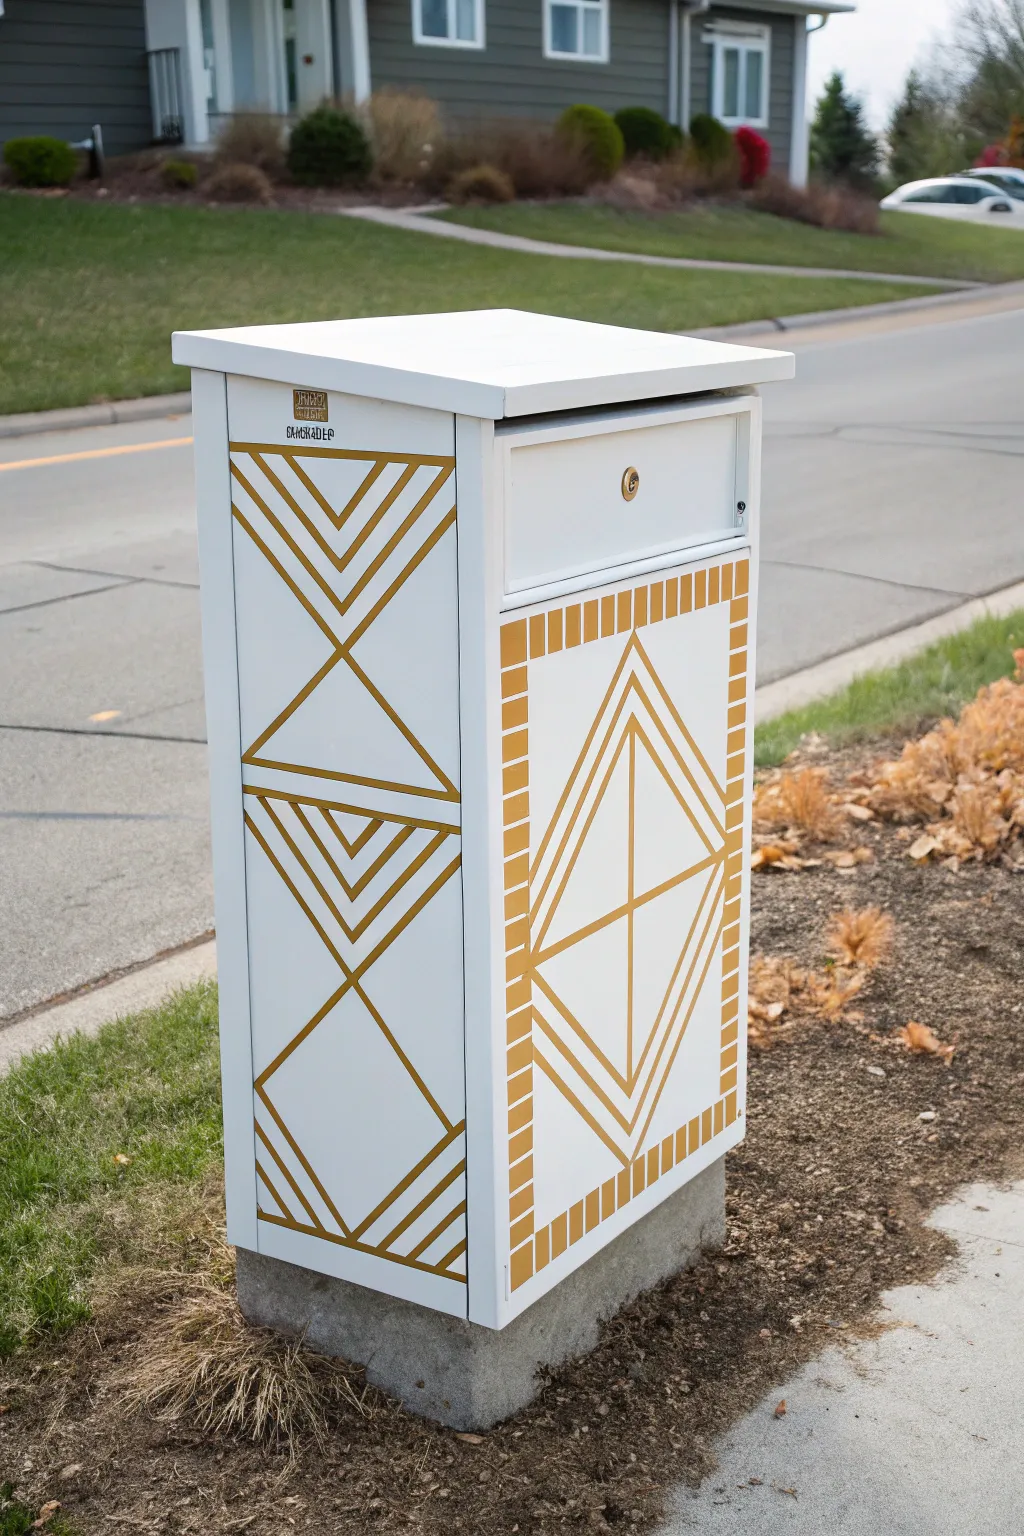
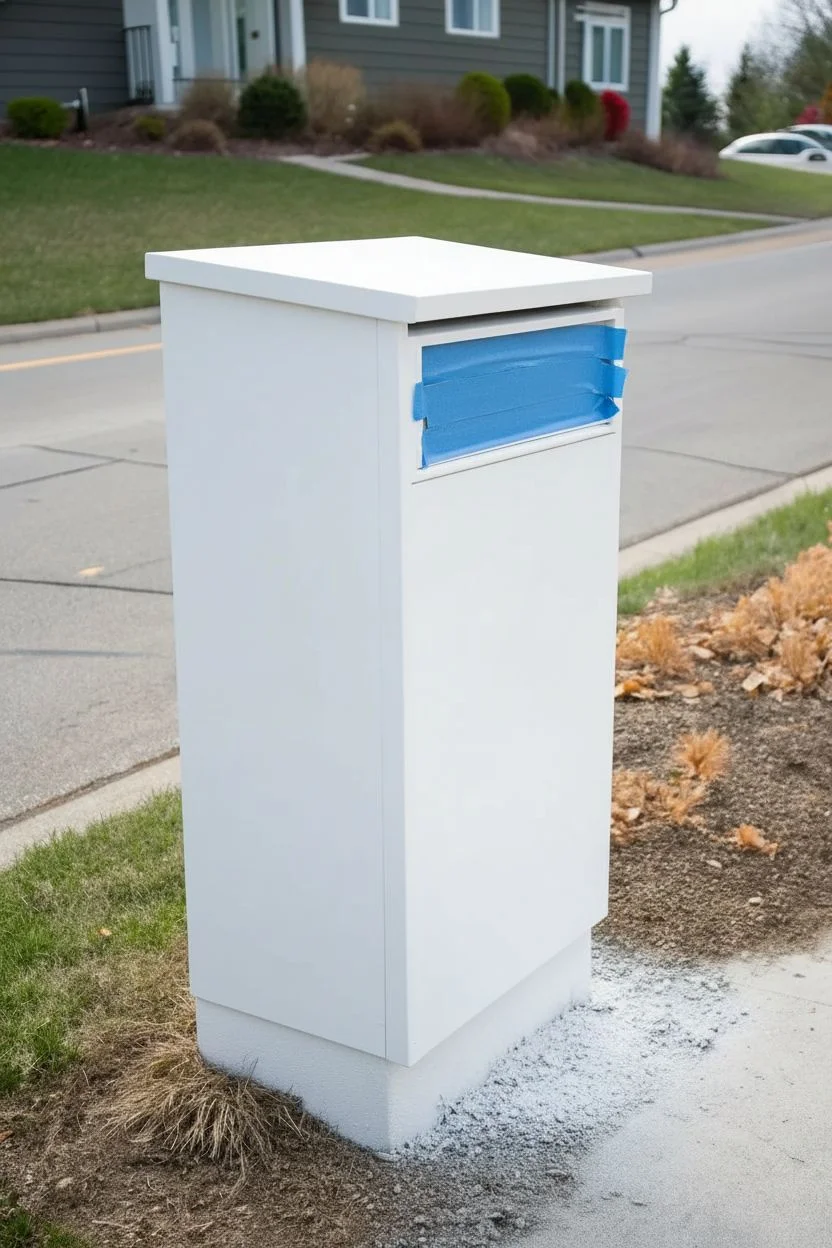
Transform a standard utility mailbox into a sophisticated lawn ornament with a crisp, Art Deco-inspired design. This project uses high-contrast gold metallic paint against a clean white background to create optical illusions with simple geometric lines that wrap elegantly around the structure’s corners.
How-To Guide
Materials
- Outdoor spray paint (Matte White)
- Metallic outdoor craft paint (Gold or Brass)
- Painter’s tape (various widths: 1-inch and 1/4-inch detailing tape)
- Small foam roller
- Fine-grit sandpaper (220-grit)
- All-purpose cleaner and rags
- Ruler or framing square
- Pencil
- Utility knife or craft knife
- Clear outdoor sealant spray (UV resistant)
Step 1: Preparation & Base Coat
-
Clean the surface:
Begin by thoroughly scrubbing the entire mailbox, including the concrete base if visible, using an all-purpose cleaner. Remove any dirt, bird droppings, or old adhesive residue, then rinse and dry completely. -
Light sanding:
Scuff the surfaces lightly with 220-grit sandpaper. This doesn’t need to strip the old finish entirely; you just want to create a ‘tooth’ for the new paint to adhere to. -
Mask hardware:
Use painter’s tape to cover the lock mechanism and any hinges you don’t want painted. I prefer to be extra careful here to avoid gumming up the keyhole. -
Apply primer/base coat:
Spray the entire box with matte white outdoor paint. Hold the can 8-10 inches away and use sweeping motions. Apply 2-3 light coats rather than one heavy one to prevent drips. Let this cure for at least 24 hours before taping.
Bleed-Through Blues?
If paint seeps under the tape, let it dry fully. Then, place a fresh piece of tape over the gold line (to protect it) and paint the white correction over the bleed.
Step 2: Mapping the Geometry
-
Measure the center lines:
On the side panel, find the vertical center point and draw a faint pencil line from top to bottom. Do the same for the horizontal center to create your anchor points for the diamonds and chevrons. -
Draw the main shapes:
Using a ruler, lightly sketch the large diamond shape on the front panel and the stacked chevron/hourglass design on the side panel. Precision is key here, so double-check your symmetry. -
Tape the chevron outlines:
Use your painter’s tape to mask off the lines for the side panel design. Remember that the area *under* the tape will stay white. Place tape strips to define the negative space between the gold lines. -
Create the border grid:
For the front panel, lay down a strip of wide tape around the perimeter. To create the gold ‘bricks’ along the border, place small vertical pieces of 1/4-inch tape at regular intervals over the perimeter masking area to block out white grout lines.
Step 3: Painting the Design
-
Seal the tape edges:
Lightly brush a very thin layer of the base white paint over the edges of your tape. This brilliant trick seals the tape edge and prevents the gold paint from bleeding underneath. -
Apply the gold paint:
Using a small foam roller or high-quality brush, apply the metallic gold paint to the exposed areas. Metallic paints are often semi-transparent, so plan on doing 3-4 thin coats. -
Check for coverage:
Allow the gold to dry to the touch between coats. Ensure the coverage is opaque and consistent, especially on the vertical surfaces where gravity might cause sagging. -
Remove tape while damp:
Carefully peel off the painter’s tape while the final coat of gold is still slightly tacky. Pull the tape away at a 45-degree angle to get the crispest lines.
Add Dimension
Use two shades of gold—a darker bronze for outer lines and a bright yellow-gold for inner shapes—to give the geometric pattern a subtle 3D effect.
Step 4: Finishing Touches
-
Touch-ups:
Inspect your lines. If any gold bled through, use a tiny artist’s brush and a dab of white paint to clean it up. If you pulled up any white paint, touch that up carefully now. -
Clean the lock:
Remove the masking tape from the lock and hardware. Ensure the key still turns smoothly; wipe away any paint dust. -
Seal the project:
Once the gold is fully cured (give it 48 hours to be safe), spray the entire mailbox with a clear, UV-resistant non-yellowing sealant. This protects your hard work from rain and sun fading. -
Detailing the logo:
If you wish to add small text or a logo like the one in the reference (top left), use a stencil or a gold leaf pen for precise application after the main sealing is done.
Now you have a stunning, modern entryway feature that rivals custom architectural installations.
Metallic Accents for a Shimmering Highlight Effect
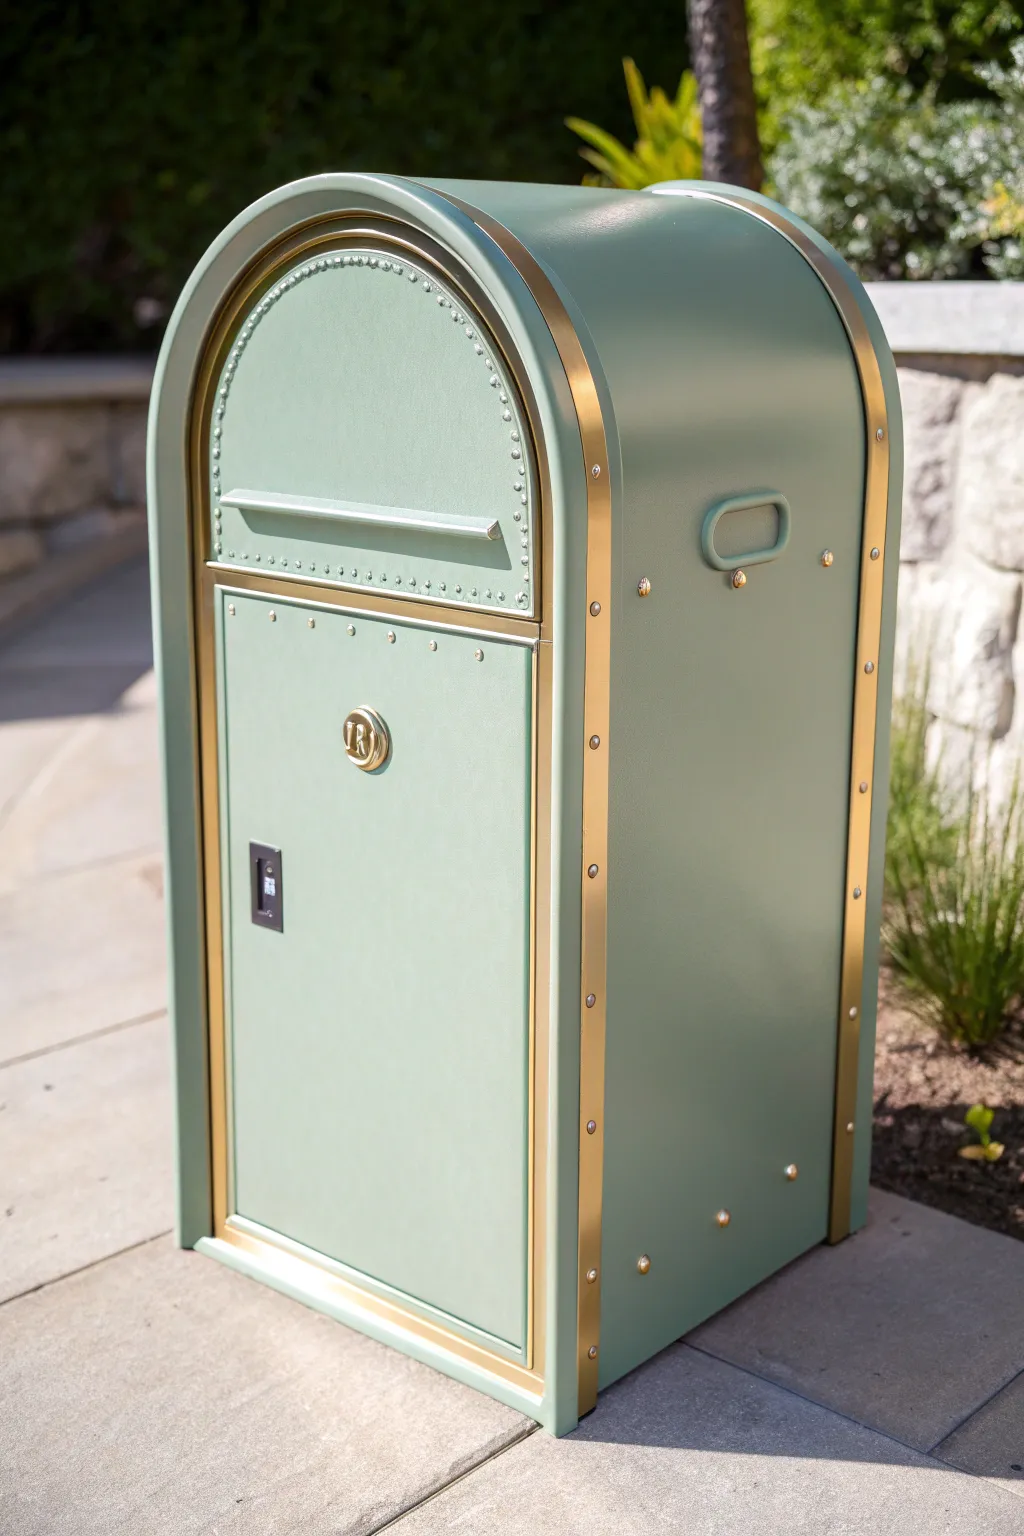
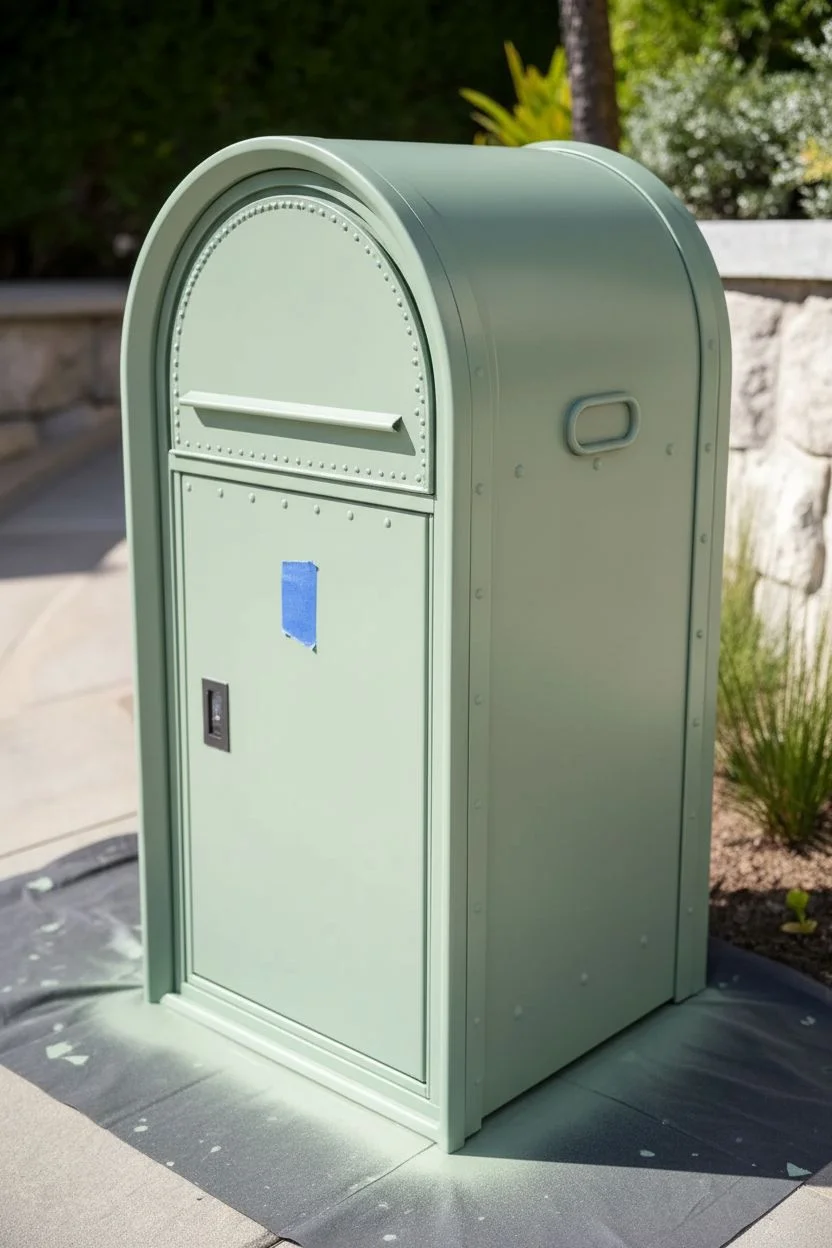
Transform a standard metal parcel drop box into a luxurious statement piece for your front porch using a sophisticated sage green base and striking gold metallic highlights. This project relies on careful masking and metallic paint application to create the illusion of expensive brass hardware.
Step-by-Step
Materials
- Metal parcel drop box (clean and primed)
- Sage green exterior spray paint (satin finish)
- Metallic gold or brass liquid gilding paint
- Small flat artist brushes (size 4 and size 8)
- Detail round brush (size 0 or 1)
- Painter’s tape (high quality)
- Cleaning cloth and degreaser
- Drop cloth
- Clear UV-resistant sealant spray (matte or satin)
- Fine-grit sandpaper (400 grit)
- Cardboard scraps for shielding
Step 1: Preparation & Base Coat
-
Clean the surface:
Begin by thoroughly wiping down the entire mailbox with a degreaser and a lint-free cloth. Any oils or dirt will prevent the paint from adhering properly, so take your time here. -
Light sanding:
Scuff the existing finish lightly with 400-grit sandpaper. You don’t need to strip it bare, just create a ‘tooth’ for the new paint to grab onto. -
Protect the lock:
Use small pieces of painter’s tape to completely cover the lock mechanism and keyhole. Use a fingernail or credit card to press the tape into the crevices for a tight seal. -
Apply the sage green:
Set up your drop cloth in a well-ventilated area. Apply the sage green spray paint in long, even sweeping motions. Keep the can about 8-10 inches away to avoid drips. -
Second coat application:
Wait about 20 minutes (or as directed on the can) for the first coat to become tacky but dry to the touch. Apply a second coat to ensure full, opaque coverage, then let it cure overnight.
Fixing Wobbly Lines
Smudged gold onto the green? Don’t wipe it! Let it dry completely, then use a tiny brush with a bit of the original sage green spray paint (sprayed into a cap) to paint over the error.
Step 2: The Metallic Framework
-
Identify accent areas:
Study the mailbox structure. You want to highlight structural lines: the arched trim around the door, the vertical side rails, the horizontal letter slot, and the handle. -
Tape the vertical borders:
Applying tape on curved surfaces can be tricky. For the long vertical gold strips on the sides, apply painter’s tape to the main body of the box, leaving the raised metal edge exposed. -
Paint the side rails:
Using the flat size 8 brush and your liquid gilding, carefully paint the exposed vertical rails. Liquid gilding is potent, so a little goes a long way. -
Detailing the arch:
Move to the arched trim around the mail door. I find it easier to freehand this curve with a steady hand rather than taping, but you can use flexible detailing tape if you prefer extra security. -
Inner arch precision:
Switch to your smaller flat brush to paint the inner gold rim of the door arch. Paint slowly to keep a crisp line between the green and the gold.
Add Vintage Patina
For an aged look, mix a tiny drop of brown or black acrylic paint into a glazing medium and lightly brush it over the gold rivets and corners, wiping off the excess immediately.
Step 3: Hardware & Embellishment Details
-
Highlighting rivets:
This step makes a huge difference. Use your smallest round detail brush (size 0) to dab a dot of gold paint onto every rivet head along the trim and the door panel. -
Letter slot handle:
Paint the small handle or lip on the letter slot. Ensure you paint the underside of the lip as well, since this will be visible when looking up at the box. -
Side handles:
Carefully paint the rectangular side handles. If these are recessed, use the small flat brush to get into the corners without smudging paint onto the flat green panels. -
Center emblem:
If your box has a logo or emblem like the one shown, gently brush gold over the raised design, leaving the background sage green if possible for depth, or paint it solid gold for impact. -
Remove tape:
Carefully peel away the painter’s tape while the gold paint is still slightly tacky to prevent it from chipping the edge.
Step 4: Sealing & Protection
-
Cure time:
Allow the metallic accents to dry completely. Liquid gilding can take longer than standard acrylics, so give it at least 24 hours to fully harden. -
Inspect and touch up:
Walk around the box in natural sunlight to check for any missed spots or green paint showing through the gold. Touch up with your smallest brush. -
Final clear coat:
To prevent the metallic finish from tarnishing outdoors, spray the entire box with a UV-resistant clear coat. Apply two thin layers for maximum weatherproofing.
This elegant upgrade gives your home instant curb appeal with a custom, high-end finish that looks professionally manufactured
Night-Sky Design With Glow-Like Star Details
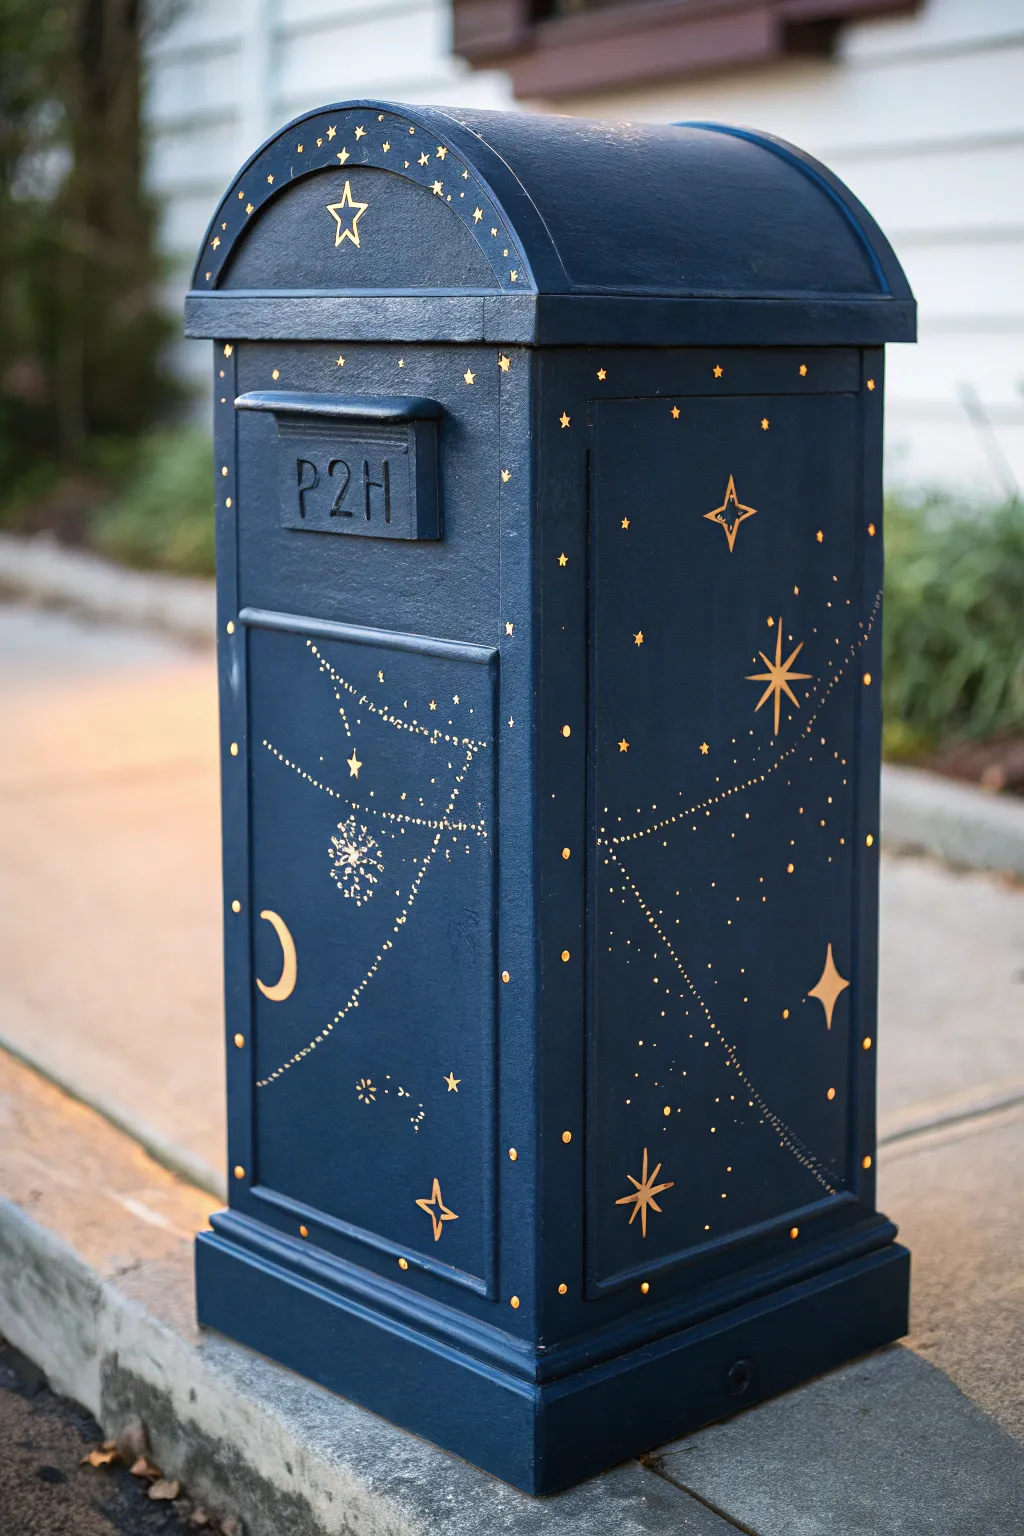
Transform a standard curbside mailbox into a midnight masterpiece featuring a deep navy base and shimmering gold constellations. This project uses metallic accents and carefully placed dots to mimic the magic of a starry night sky right on your front lawn.
Step-by-Step Guide
Materials
- Metal or wood mailbox (clean and prepped)
- Exterior primer (spray or brush-on)
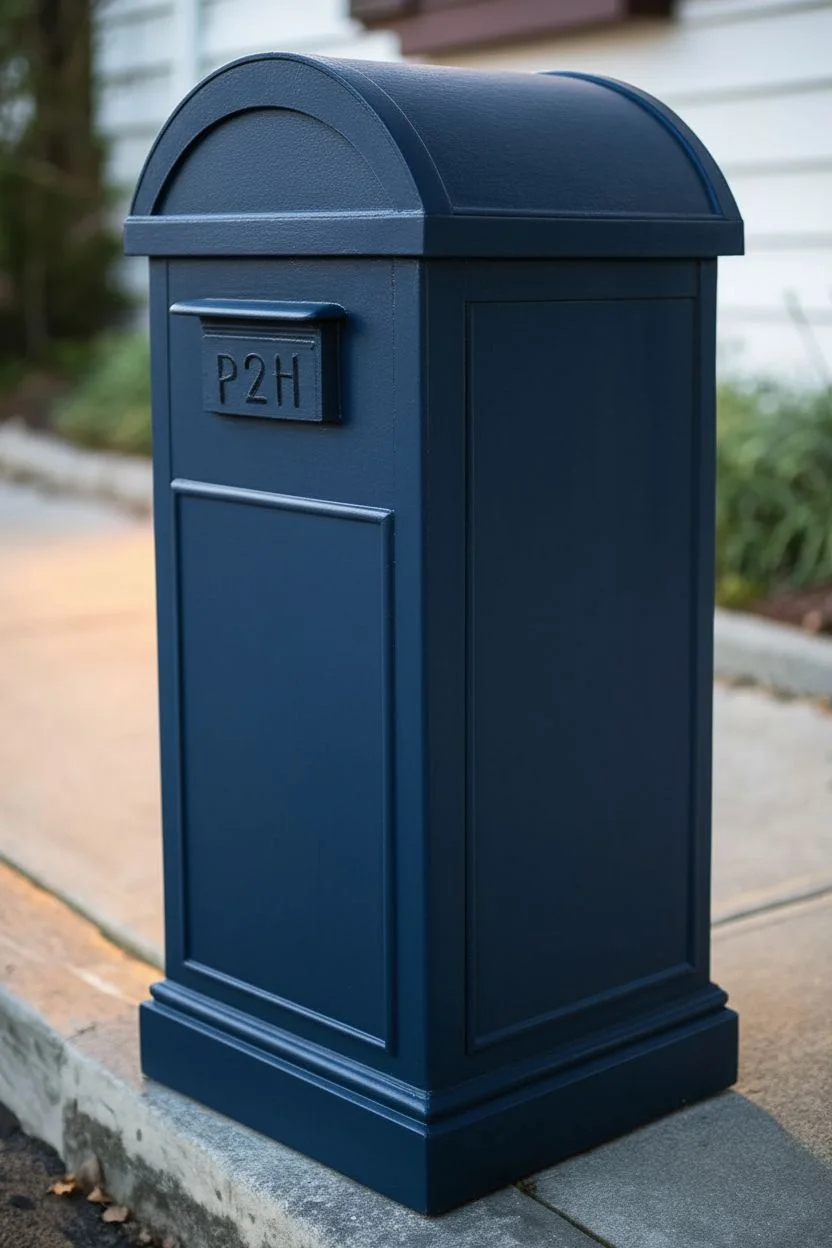
- Deep navy blue exterior paint (satin or semi-gloss)
- Metallic gold paint for exterior use
- Glow-in-the-dark acrylic paint (optional topcoat)
- Synthetic bristle paintbrush (2-inch)
- Fine detail brushes (sizes 0 and 1)
- Stencil tape or painter’s tape
- Pencil or white chalk pencil
- Small dotting tool or toothpick
- Exterior clear sealant spray (satin or matte)
Step 1: Preparation & Base Coat
-
Clean surface:
Begin by thoroughly cleaning the mailbox with soapy water to remove dirt and oils. If there is old, flaking paint, sand it down until the surface is smooth to the touch. -
Apply primer:
Coat the entire mailbox with an exterior-grade primer. This step is crucial for ensuring your dark blue base coat adheres properly and lasts through weather changes. Let the primer dry completely according to the can’s instructions. -
First navy coat:
Using your 2-inch synthetic brush, apply the first layer of deep navy blue paint. Use long, even strokes to minimize brush marks. -
Dry and repeat:
Allow the first coat to dry to the touch. Apply a second coat of navy blue to achieve a rich, opaque color that hides the primer completely. Let this base cure for at least 4-6 hours or overnight.
Starry precision
Don’t have a steady hand for stars? Use small star-shaped stickers as stencils. Apply the sticker, paint over it with gold, and peel it off while wet.
Step 2: Mapping the Cosmos
-
Highlight the embossed text:
If your mailbox has embossed letters or numbers (like the ‘P2H’ in the example), carefully paint the raised surfaces with the metallic gold paint using a small flat brush. I find distinct numbering helps the design look intentional. -
Sketch placement:
Use a white chalk pencil to lightly sketch where you want your major celestial bodies to go. Mark spots for the large North Star, the crescent moon, and the swooping constellation lines. -
Paint the Crescent Moon:
Using a small round brush and metallic gold paint, fill in the crescent moon shape. You may need two thin coats of gold to get a solid shine against the dark background. -
Create the North Star:
Paint a large four-pointed star. Start with a vertical line, cross it with a horizontal line, and then curve the inner corners inward to create a sharp, twinkling effect. -
Add secondary stars:
Scatter a few medium-sized four-pointed stars around the other panels. Vary their sizes slightly to create a sense of depth. -
Paint smaller five-point stars:
Fill in some gaps with classic five-point open star shapes. Keep these smaller than your main ‘North Star’ features.
Cosmic depth
Before painting stars, sponge overly diluted black or purple paint in random clouds over the navy base to create a realistic nebula effect.
Step 3: Constellations & Details
-
Create constellation lines:
Dip a dotting tool or the fine tip of a paintbrush handle into the gold paint. Gently dot along the swooping lines you sketched earlier to create star trails or constellation connectors. -
Add star clusters:
Group tiny dots together in random clusters to mimic distant galaxies or the Milky Way effect. These should be less organized than your constellation lines. -
Detail the arch:
If your mailbox has an arched top or architectural details, use the dotting tool to add a row of evenly spaced gold dots along the rim to frame the design. -
Let the gold cure:
Allow all gold paint applications to dry fully. Metallic paints can sometimes take a bit longer to set than standard acrylics. -
Add the glow (optional):
For a magical night effect, re-trace the stars and some of the dots with a transparent glow-in-the-dark acrylic paint. It will look clear in daylight but illuminate at night. -
Seal the artwork:
Finish the project by spraying the entire mailbox with an exterior clear sealant. This protects your handiwork from rain, UV rays, and snow.
Now your curb appeal has a touch of celestial wonder that shines day and night
Surprise Interior Pattern When the Door Opens
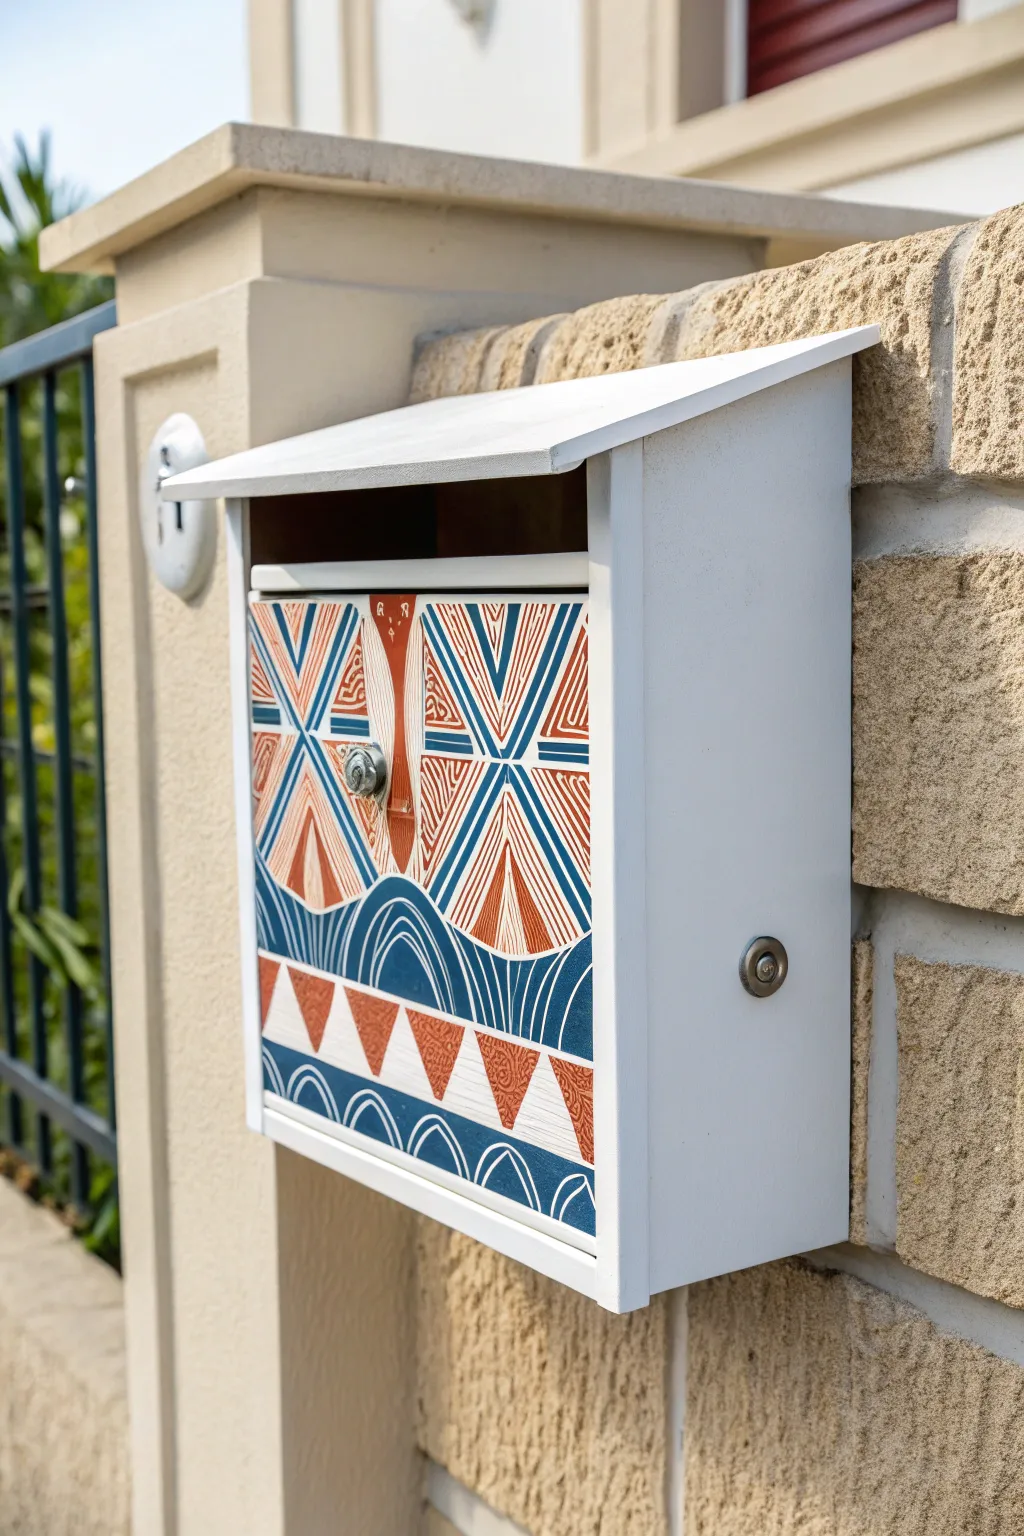
Transform a standard white mailbox into a piece of modern art with this striking geometric design. Hints of burnt orange and slate blue weave together in a pattern that feels both tribal and structured, adding immediate curb appeal to your entryway.
Step-by-Step Tutorial
Materials
- Wooden or metal wall-mounted mailbox (white base)
- Sandpaper (220-grit)
- Painter’s tape (various widths)
- Acrylic craft paints (Burnt Orange, Slate Blue, Navy Blue, Cream)
- Fine-point angular shader brushes
- Small round detail brush (size 1 or 2)
- Pencil and ruler
- Clear outdoor sealant spray (matte or satin finish)
- Damp cloth
- paper plate or palette
Step 1: Preparation and Base
-
Clean the surface:
Begin by thoroughly wiping down the front panel of the mailbox with a damp cloth to remove any dust or oils. If the mailbox is old, you might need a mild degreaser. -
Light scuffing:
Using 220-grit sandpaper, lightly scuff the front door panel. This helps the paint adhere better, especially if the original finish is glossy. -
Masking edges:
Apply painter’s tape around the inner edges of the door frame or the metal lock hardware to keep them clean while you paint the main pattern. -
Base coat:
If your mailbox isn’t already white, or needs a refresh, apply two coats of white outdoor spray paint or acrylic paint to create a blank canvas. Let this dry completely overnight.
Wobbly Lines?
If your hand isn’t steady, use a white paint pen instead of a brush for the final outlining. It offers much more control for cleaning up jagged edges.
Step 2: Drafting the Design
-
Mark the center:
Use your ruler to find the vertical center of the door panel. Lightly draw a vertical line down the middle with a pencil. -
Sketch the primary triangles:
Sketch two large, inverted triangles starting from the top corners and meeting near the center line. Mirror this with upright triangles below them to create the zig-zag structure. -
Add circular elements:
Towards the bottom third of the door, lightly draw sweeping semi-circles that bridge the geometric sharpness of the triangles. These will become the blue wavy sections. -
Refining the details:
Inside your main triangle shapes, sketch parallel lines to create ‘stripes’ within the forms. Don’t worry about perfection; a hand-drawn look adds character.
Go Metallic
Replace the burnt orange paint with a copper or gold metallic acrylic. It will catch the sunlight beautifully and add a luxe feel to the entrance.
Step 3: Painting the Pattern
-
Blocking in orange:
Start with your Burnt Orange paint. Fill in the large central vertical shape and the outer triangle sections. I find using an angular shader brush helps get crisp edges without tape. -
Adding the blue waves:
Switch to Navy Blue. Paint the semi-circles at the bottom of the design. Use a steady hand and a medium round brush to create the smooth curves. -
Detailing the blue stripes:
Using the same blue, paint the thin, angled stripes inside the white triangle sections. Keep the spacing relatively consistent, but don’t measure every single line. -
The triangle row:
Paint the row of small, alternating triangles near the bottom edge. Use Burnt Orange for the downward-pointing ones and leave the upward ones white (or paint them cream). -
Adding texture:
Once the base colors are dry, use your smallest detail brush to add fine white lines or tiny scribbles inside the solid orange sections for visual texture. -
White outlining:
Go back with a clean liner brush and white paint to tidy up any edges where colors might have touched. This acts as a ‘highlighter’ for the design.
Step 4: Finishing Up
-
Dry time:
Allow the entire painted design to dry for at least 24 hours. Acrylic needs to cure slightly before sealing. -
Sealing:
Spray the front panel with three thin coats of clear outdoor sealant. This is crucial for weatherproofing against rain and sun fading. -
Reassembly:
Remove any remaining masking tape carefully. If you removed the lock mechanism earlier, reinstall it now.
Step back and admire how a simple afternoon of painting has completely revitalized your home’s entrance.
Faux Brick or Stone Texture Painted by Hand
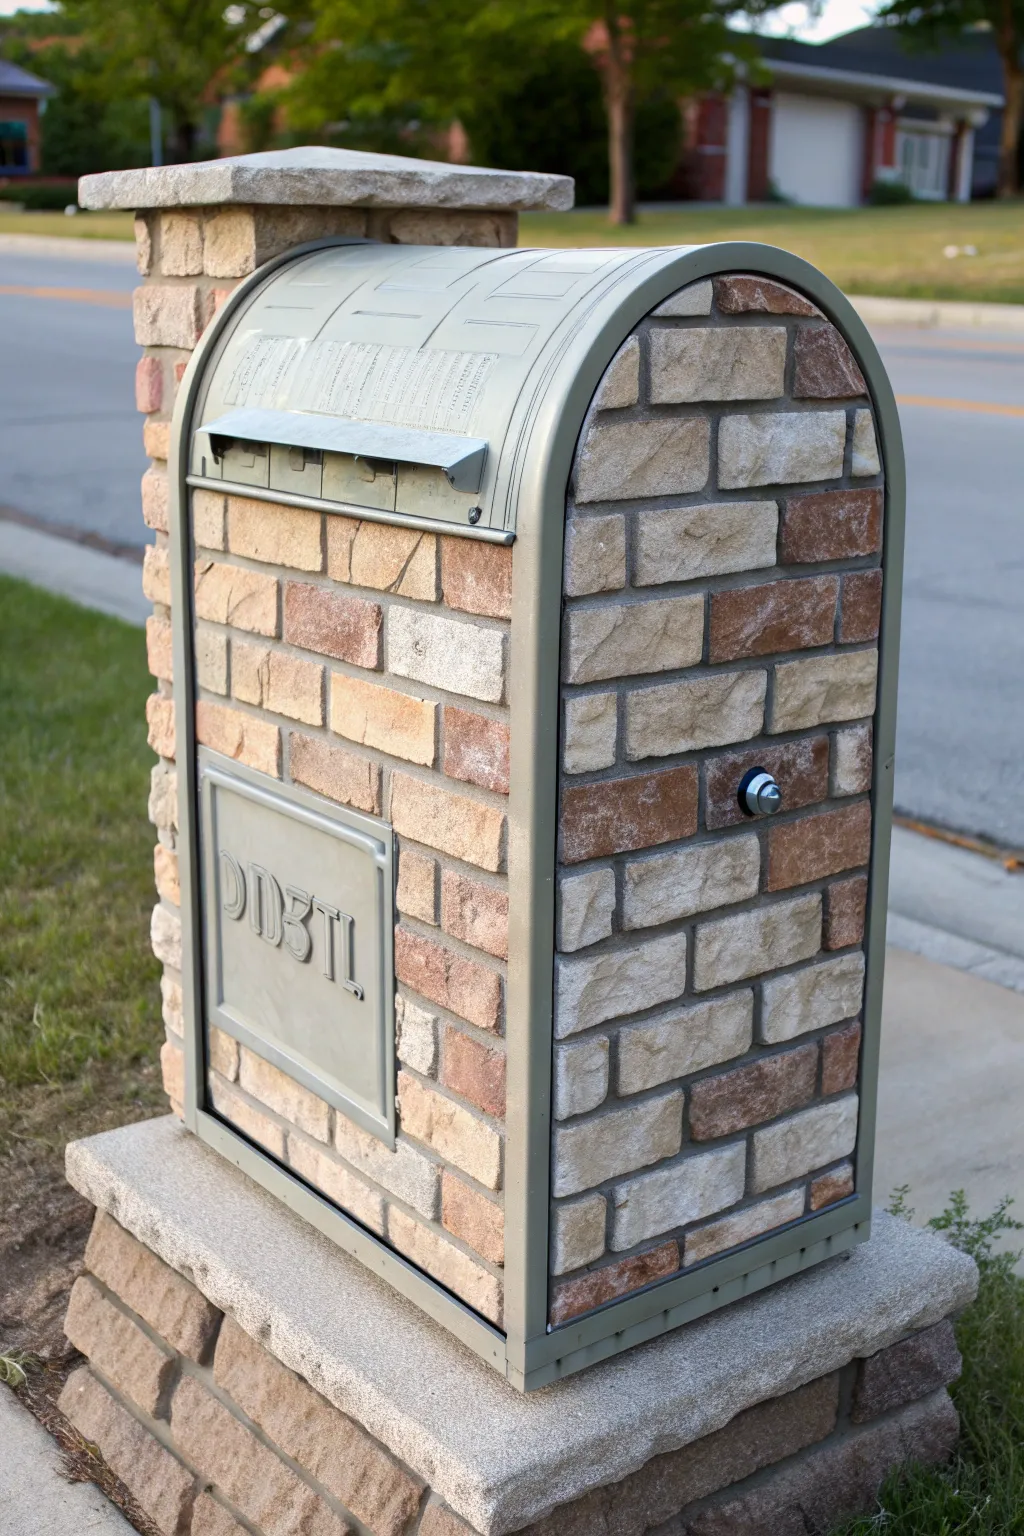
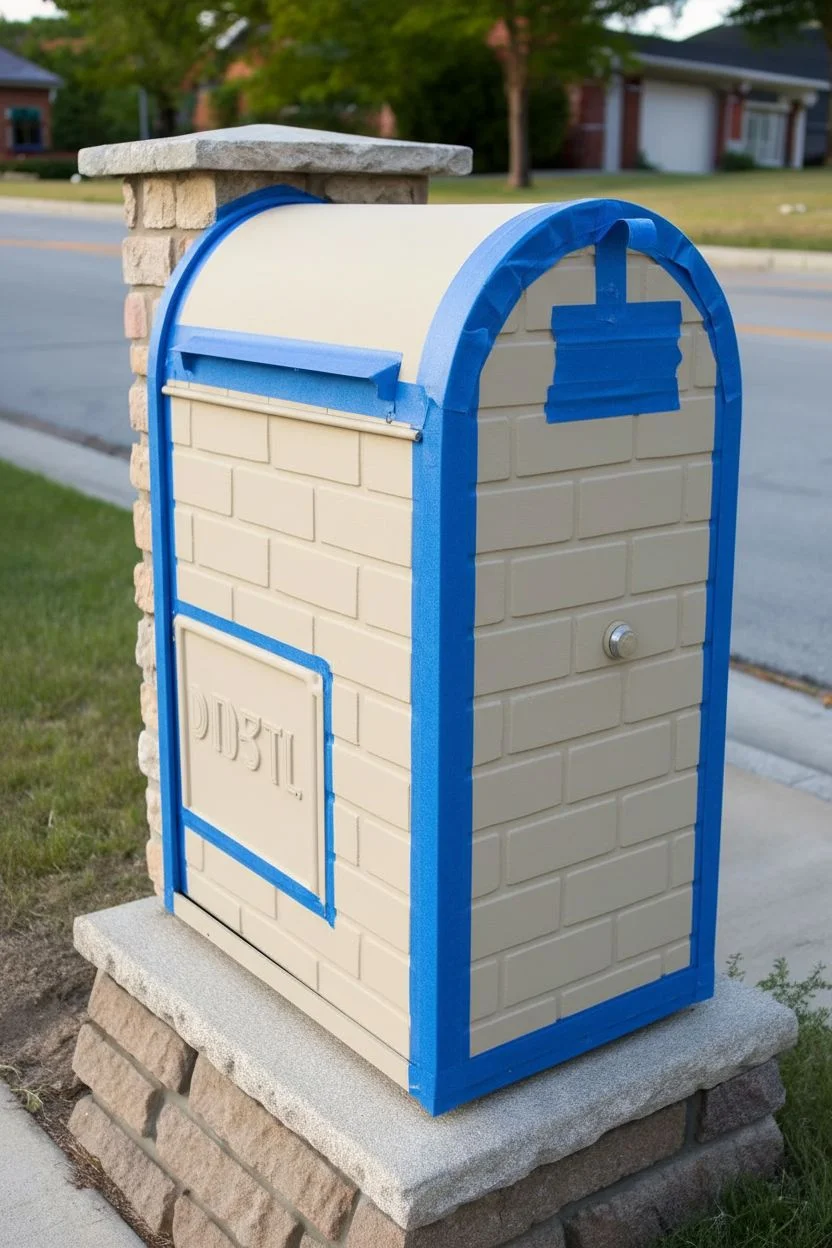
Transform a standard metal mailbox into a stately architectural feature using paint techniques that mimic rough-cut stone and brick. This faux finish creates a convincing, textured look that adds curb appeal without the heavy masonry work.
Step-by-Step Guide
Materials
- Standard metal mailbox (clean and rust-free)
- Exterior primer (spray or brush-on)
- Exterior latex or acrylic paints (base gray/tan, plus brick red, brown, cream, and charcoal)
- Assorted brushes (1-inch flat, detail liner round, old scruffy brush for stippling)
- Painter’s tape (1/4 inch or 1/2 inch width)
- Pencil and ruler
- Clear matte or satin exterior sealer
- Sea sponge or crumpled plastic bag (optional for texture)
- Cardboard palette
Step 1: Preparation and Base Coat
-
Clean surface:
Begin by thoroughly cleaning the mailbox with soapy water or a degreaser to remove road grime, dirt, and oils. Let it dry completely. -
Apply primer:
Apply a coat of high-quality exterior primer to the entire surface. If your mailbox is metal, ensure the primer is formulated for metal adhesion to prevent peeling later. -
Paint the mortar color:
Once the primer is dry, paint the entire mailbox with your chosen grout or mortar color. A light grey or sandy beige works best as a neutral background. -
Mask the hardware:
Use standard painter’s tape to mask off any metal framing, handles, the flag, or the mail slot that you want to keep as the original metal finish.
Realistic Variation
Real stone isn’t uniform. Mix a tiny bit of sand or baking soda into the paint for random bricks to create actual physical grit and varied texture.
Step 2: Creating the Layout
-
Plan the grid:
Using a pencil and ruler, lightly sketch a brick or stone pattern directly onto the dried mortar base coat. Alternate the vertical joints on each row for a realistic running bond pattern. -
Tape the grout lines:
Apply the thin painter’s tape (1/4 inch is ideal) over your pencil lines. These taped areas will become the faux mortar joints once we peel them off later. -
Seal the tape edges:
To ensure crisp lines, lightly brush a tiny bit more of your grout color over the edges of the tape. This prevents the darker stone colors from bleeding underneath.
Custom Engraving
Before the clear coat, trace your house numbers onto a large central ‘stone’ and paint them in dark grey to look like carved limestone.
Step 3: Painting the Stones
-
Mix stone colors:
Prepare your palette with three to four natural stone shades: muted red, earthy brown, cream, and a dark charcoal gray. Avoid mixing them completely; nice streaks are desirable. -
Apply base stone colors:
Working in sections, paint the exposed rectangles between the tape. Randomize the colors so no two adjacent ‘stones’ are identical. I find it helps to tackle all the red stones first, then the brown, and so on. -
Add texture with stippling:
While the paint is still tacky, use a dry, scruffy brush or a sea sponge to dab a contrasting color lightly onto the center of each brick. For example, dab a little cream onto a red brick to simulate weathering. -
Create depth with shading:
Mix a translucent glaze by watering down your charcoal paint slightly. Use a small detail brush to paint a thin shadow line along the bottom and right edge of each stone to create a 3D illusion. -
Highlight the edges:
Conversely, use a nearly dry brush with white or light cream paint to hit the top and left edges of the stones, mimicking where sunlight would naturally hit the rough surface.
Step 4: The Big Reveal and Finish
-
Remove the tape:
Wait until the paint is mostly dry but not fully cured (about an hour). Carefully peel away the tape to reveal the crisp mortar lines underneath. -
Softening the lines:
If the grout lines look too perfect and manufactured, tap them lightly with your dirty stippling brush to add a bit of ‘grunge’ and integrate them with the stones. -
Detail the hardware:
Remove the masking from the metal frame. If needed, touch up the frame with a metallic paint like hammered silver or oil-rubbed bronze to frame your new ‘masonry’ work. -
Apply clear coat:
Protect your artwork from the elements by applying two coats of clear, exterior-grade sealer. A matte finish looks most realistic for stone, while satin offers slightly more durability.
This simple paint technique gives your mailbox a high-end masonry look that will endure through the seasons
Painted Trompe L’Oeil Door or Window Illusion
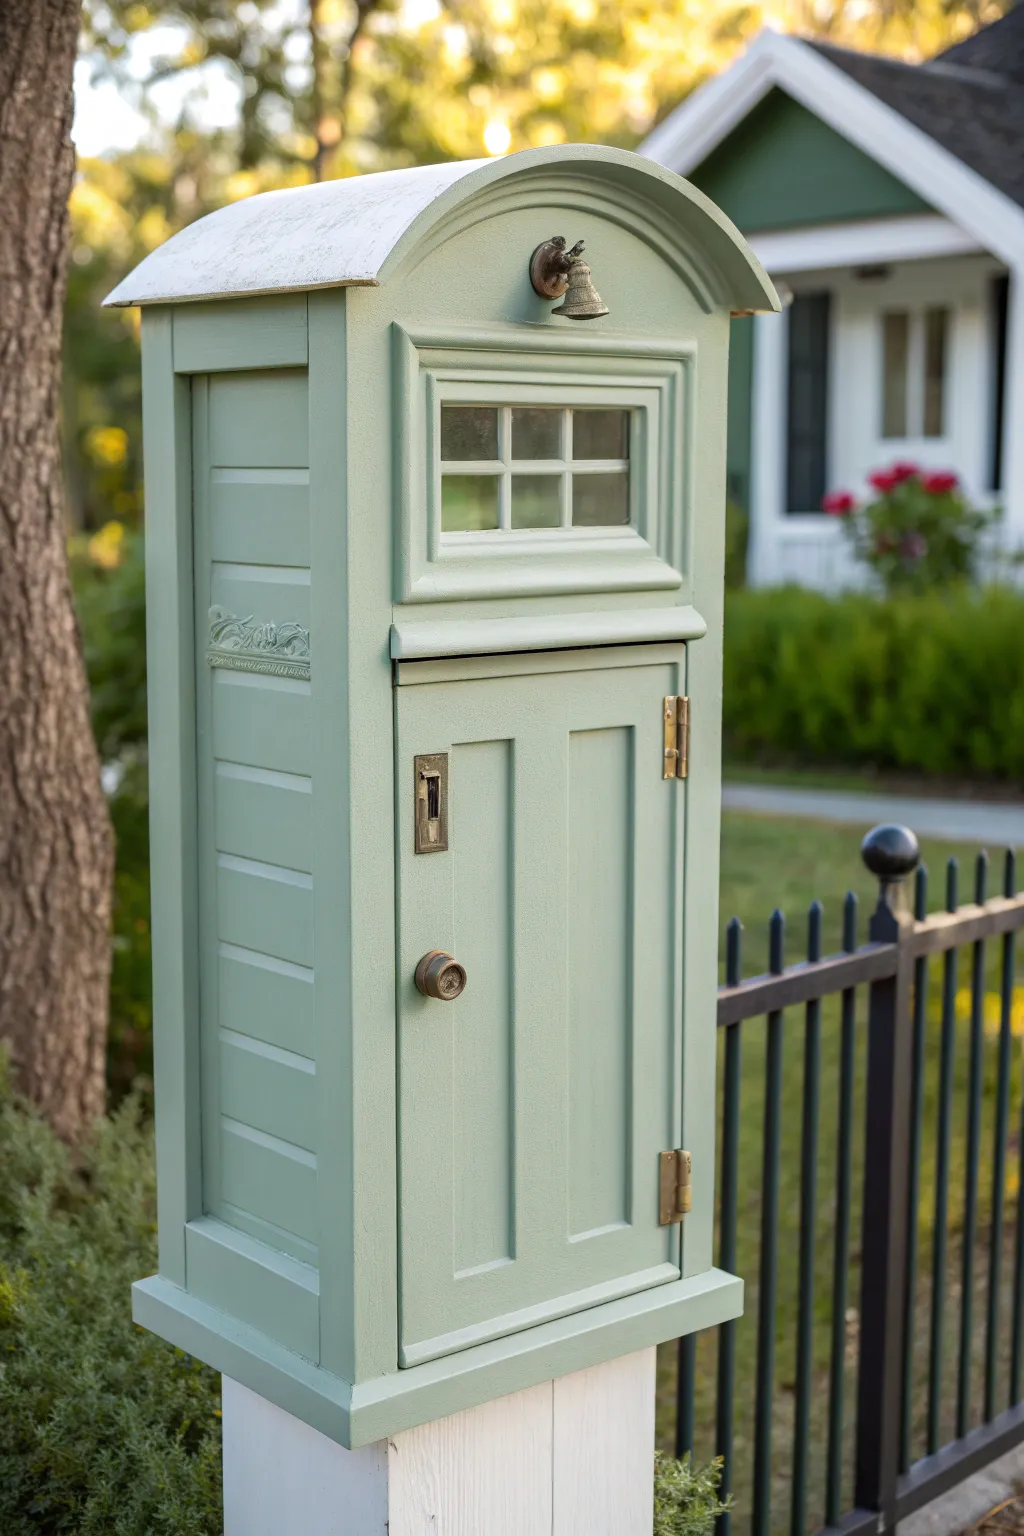
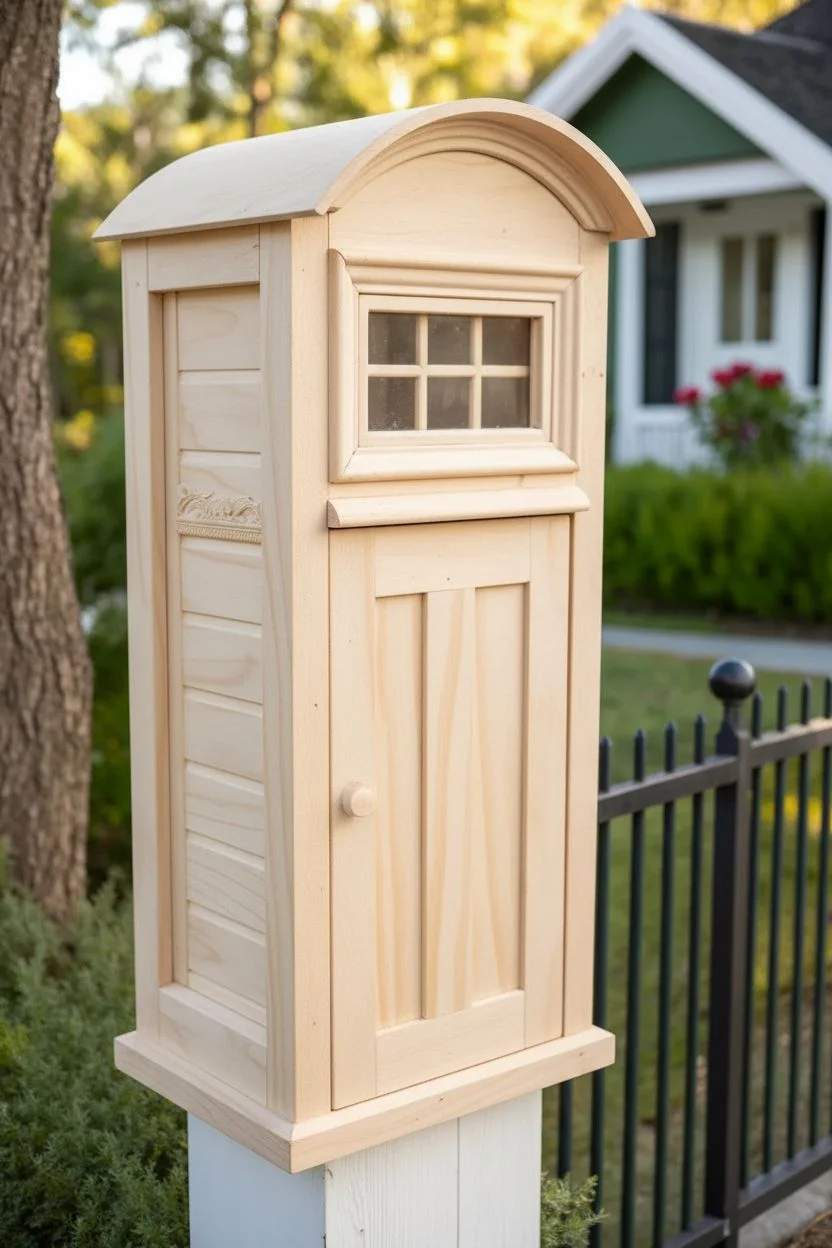
Transform a standard mailbox post into an enchanting architectural statement that mimics a miniature front door. This project relies on clever molding placement and a soft monochromatic palette to create a convincing illusion of a tiny home for your mail.
Step-by-Step Tutorial
Materials
- Existing or new wooden mailbox post
- Exterior-grade plywood or pine boards (for the box construction)
- Variety of wood trim molding (casing, cove, and flat stock)
- Wooden appliques (optional)
- Exterior wood glue
- Brad nailer and galvanized brad nails
- Wood filler
- Sandpaper (120 and 220 grit)
- Exterior primer
- Sage green exterior semi-gloss paint
- Small brass hardware (antique knob, mail slot plate, hinges, bell)
- Clear silicone caulk
- Glass or plexiglass pane (small, custom cut)
- Painters tape
Step 1: Planning and Construction
-
Design the framework:
Measure your mailbox post insert to determine the dimensions for your ‘house.’ You will be building a shell that slides over or mounts to the post. Sketch a design that mimics a tall, narrow entryway. -
Build the main box:
Construct a three-sided or four-sided box using exterior-grade plywood or pine boards. Ensure the interior dimensions are just slightly larger than your post for a snug fit. -
Add the roofline:
Cut an arched or peaked roof piece for the top. To replicate the look in the image, cut a curved arch from solid wood or layer flexible plywood to create a gentle barrel vault top. -
Create the side paneling:
On the side panels of the box, route horizontal grooves or attach thin strips of wood to mimic lap siding or beadboard. This texture adds crucial depth to the illusion.
Paint Pooling Issues?
If paint globs up in the corners of your molding, keep a dry ‘thirsty’ brush nearby. Use it to wick away excess paint from crevices immediately after application.
Step 2: Adding Architectural Details
-
Build the door frame:
Using flat stock molding, outline a rectangular ‘door’ on the front face. The bottom of this rectangle should sit several inches above the base to allow room for the bottom trim. -
Install door panels:
Inside your door frame, use thinner molding to create raised panels. The design shown uses two vertical rectangles side-by-side. Glue and brad nail these into place. -
Construct the window box:
Above the door area, build a protruding frame using mitered molding. This will house your faux window. Ensure it projects out slightly further than the door below for visual interest. -
Insert mullions and glazing:
For the window grids (mullions), cut very thin strips of wood. You can place a small piece of glass or plexiglass behind these strips, or simply paint the backing black later to simulate depth. -
Attach decorative trim:
Add a piece of horizontal molding between the door and window as a header. If desired, affix a decorative wooden applique on the side panel for a touch of Victorian flair.
Step 3: Painting and Finishing
-
Prep the surface:
Fill all nail holes and gaps with wood filler. Once dry, sand the entire structure, starting with 120 grit and finishing with 220 grit for a furniture-smooth surface. -
Seal gaps:
Apply a thin bead of paintable exterior caulk to all seams where molding meets the flat surfaces. This is critical for weatherproofing and achieving a professional, seamless look. -
Prime the structure:
Apply a high-quality exterior primer to the entire piece, including the bottom edges. I usually do two light coats rather than one heavy one to prevent drips in the detailed molding. -
Apply the color:
Paint the entire structure in a soft sage green exterior semi-gloss paint. Use a high-quality angled sash brush to get into the corners of the recessed panels and window mullions. -
Second coat:
Once the first coat is fully dry, apply a second coat for rich, opaque coverage. Check for any paint pooling in the corners of the molding.
Pro Tip: Weatherproofing
Before painting, seal the bottom-most grain of the wood with clear epoxy. This stops moisture from wicking up from the post base and rotting your beautiful work.
Step 4: Hardware Installation
-
Install the hinges:
Attach small brass recessed hinges to the side of the ‘door’ frame. Even though the door doesn’t open, these are essential for the trompe l’oeil effect. -
Add the door knob:
Drill a hole and install an antique brass door knob on the opposite side of the hinges. Position it at a realistic height relative to the faux door panels. -
Mount the mail slot:
Screw a brass mail slot plate onto the upper left panel of the door. This can be purely decorative, or functional if you cut a slot through the wood behind it. -
Attach the bell:
Screw a small brass bell into the center of the arched gable area above the window. -
Final roof treatment:
Paint the arched roof in a contrasting white or light grey to mimic a metal or canvas roof, or simply shingle it if you prefer extra texture.
Step back and admire how this charming facade brings a touch of storybook elegance or classic architecture to your curb appeal


Have a question or want to share your own experience? I'd love to hear from you in the comments below!