If you love art that feels playful and a little unpredictable, marble painting is going to be your happy place. I’m sharing my favorite marble painting ideas—from classic rolled-marble abstracts to clever resist designs and fun ways to turn those swirly trails into real keepsakes.
Bold Two-Color Marble Swirls
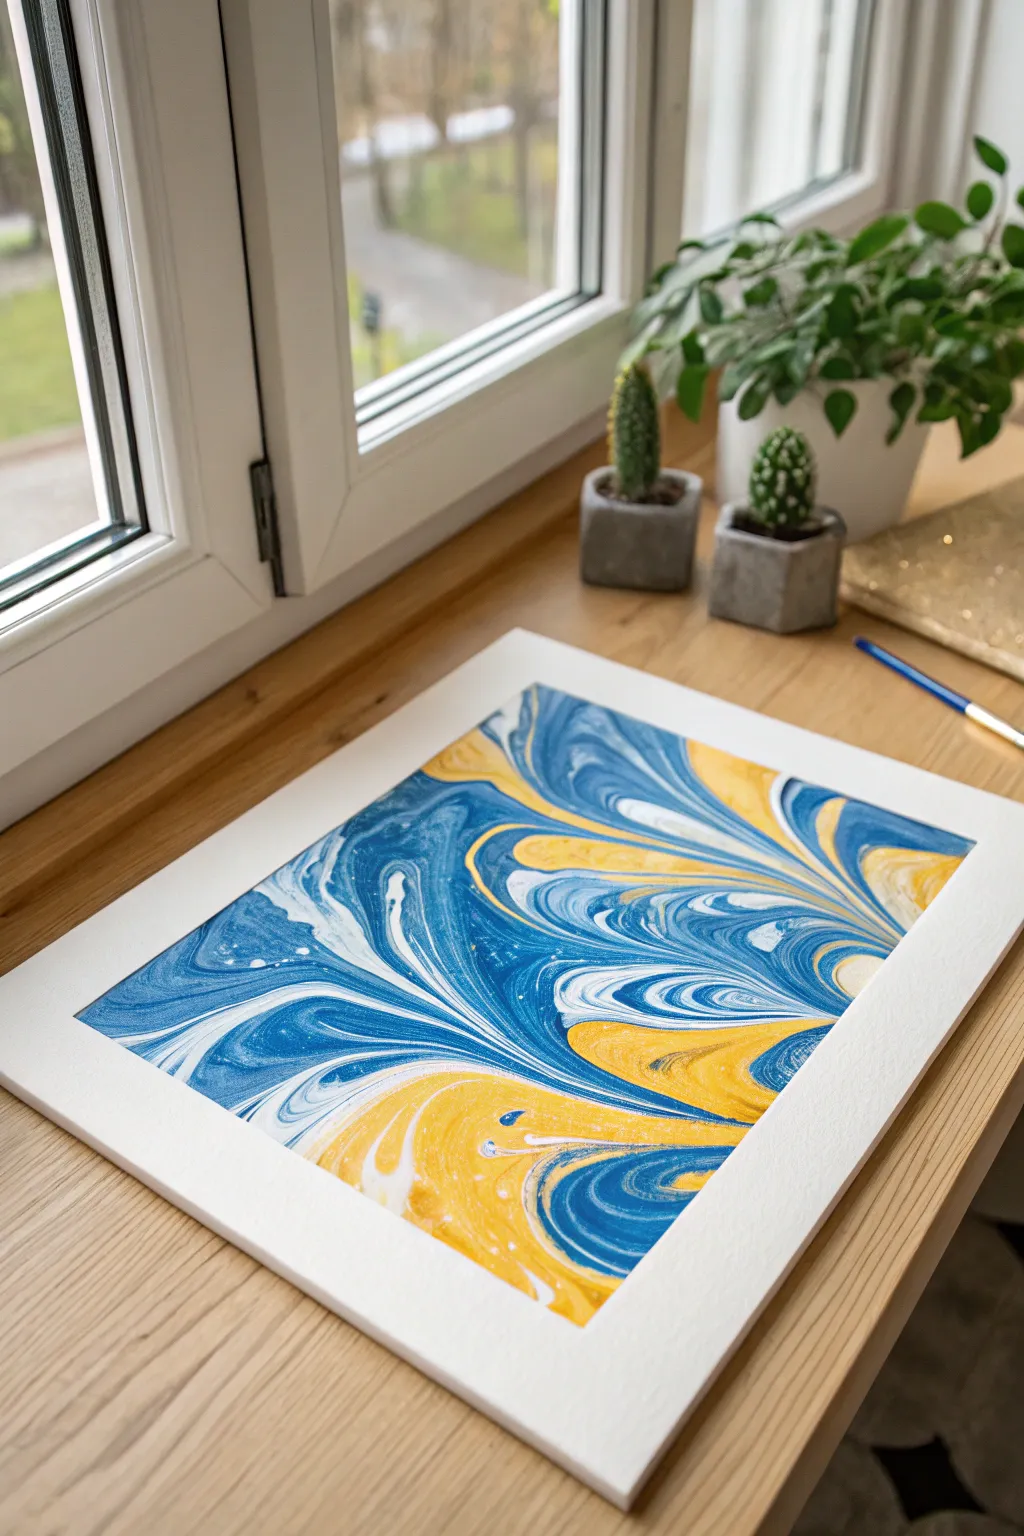

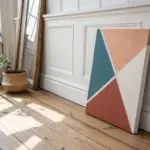
Capture the fluid elegance of water in motion with this vibrant two-color marble painting. Using bold strokes of cobalt blue and sunny yellow against negative space, you’ll create patterns that look like rippling silk.
Detailed Instructions
Materials
- Heavyweight mixed-media or watercolor paper (140lb/300gsm)
- Liquid acrylic paints or marbling inks (Cobalt Blue, Cadmium Yellow, Titanium White)
- Marbling thickener (Carrageenan or Methyl Cellulose)
- Shallow rectangular tray or baking dish (larger than your paper)
- Stylus tool, skewer, or marbling comb
- Paper towels
- Droppers or pipette bottles for paint application
- Alum mordant (optional, for better paint adhesion)
Step 1: Preparing the Size
-
Mix the thickener:
Begin by preparing your marbling ‘size’ (the thickened liquid base). Mix your carrageenan or methyl cellulose powder with warm water according to the package instructions. Use a whisk or blender to ensure there are no clumps. -
Let it rest:
Allow the mixture to sit for at least 6–12 hours. This resting period lets air bubbles escape and ensures the consistency is smooth and gelatinous. -
Prep the paper:
While the size rests, if you are using Alum, sponge a light coat onto your paper and let it dry completely. This acts as a mordant to grab the pigment clearly.
Keep Colors Pure
To prevent blue and yellow from turning green, always drop a tiny dot of clear water or white paint between them as a barrier before swirling.
Step 2: Applying the Colors
-
Pour the size:
Gently pour the thickened liquid into your shallow tray until it is about 1 to 2 inches deep. Pop any remaining surface bubbles with a piece of paper towel. -
Prepare your paints:
Dilute your acrylic paints slightly with water or a spreading medium if they are too heavy. They need to be fluid enough to spread on the surface tension but not so thin they sink. -
Drop the blue:
Using a dropper, gently squeeze drops of Cobalt Blue onto the surface of the size. Aim for the corners and edges first, letting the color expand naturally. -
Add the yellow:
Next, introduce the Cadmium Yellow in the open spaces between the blue pools. Don’t worry if they touch; the surface tension will keep them distinct initially. -
Integrate white accents:
Drop small amounts of Titanium White into the centers of your blue and yellow pools. This brightness adds the definition and ‘shimmer’ seen in the reference image.
Paint Sinking?
If your paint drops sink to the bottom, they are too heavy. Add a few more drops of water to the paint cup to thin the consistency and try again.
Step 3: Creating the Pattern
-
First stylized movements:
Take your stylus or skewer and gently draw through the floating colors. Start with long, wavy S-curves from top to bottom to break the initial circles. -
Create distinct swirls:
Focus on areas where the blue and yellow meet. Use the tip of your tool to spiral the colors into each other, creating the bold teardrop shapes seen in the example. -
Refine the lines:
I like to use a very light touch here—just grazing the surface—to stretch the white lines out, making them look like thin veins running through the bolder colors. -
Check composition:
Pause and look at your tray. Ensure you have a good balance of blue and yellow, with white acting as a separator to prevent muddy mixing.
Step 4: Printing and Drying
-
Lay the paper:
Hold your paper by opposite corners. Gently bow it in the middle and lower the center onto the surface first, rolling the edges down to avoid trapping air bubbles. -
Lift carefully:
Let the paper float for a few seconds to absorb the paint. Then, lift it off the surface in one smooth, continuous motion, dragging it slightly over the tray edge to skim off excess slime. -
Rinse gently:
If the surface feels too slimy, very gently rinse the print under a low trickle of water to remove the sizing thickener, being careful not to wash away the pigment. -
Dry flat:
Lay the print face up on a clean board or drying rack. If the paper buckles, tape the edges down or weigh it down once it is semi-dry.
Once dry, frame your artwork with a wide white mat to highlight the dynamic movement of the colors


Rainbow Marble Trail Sampler
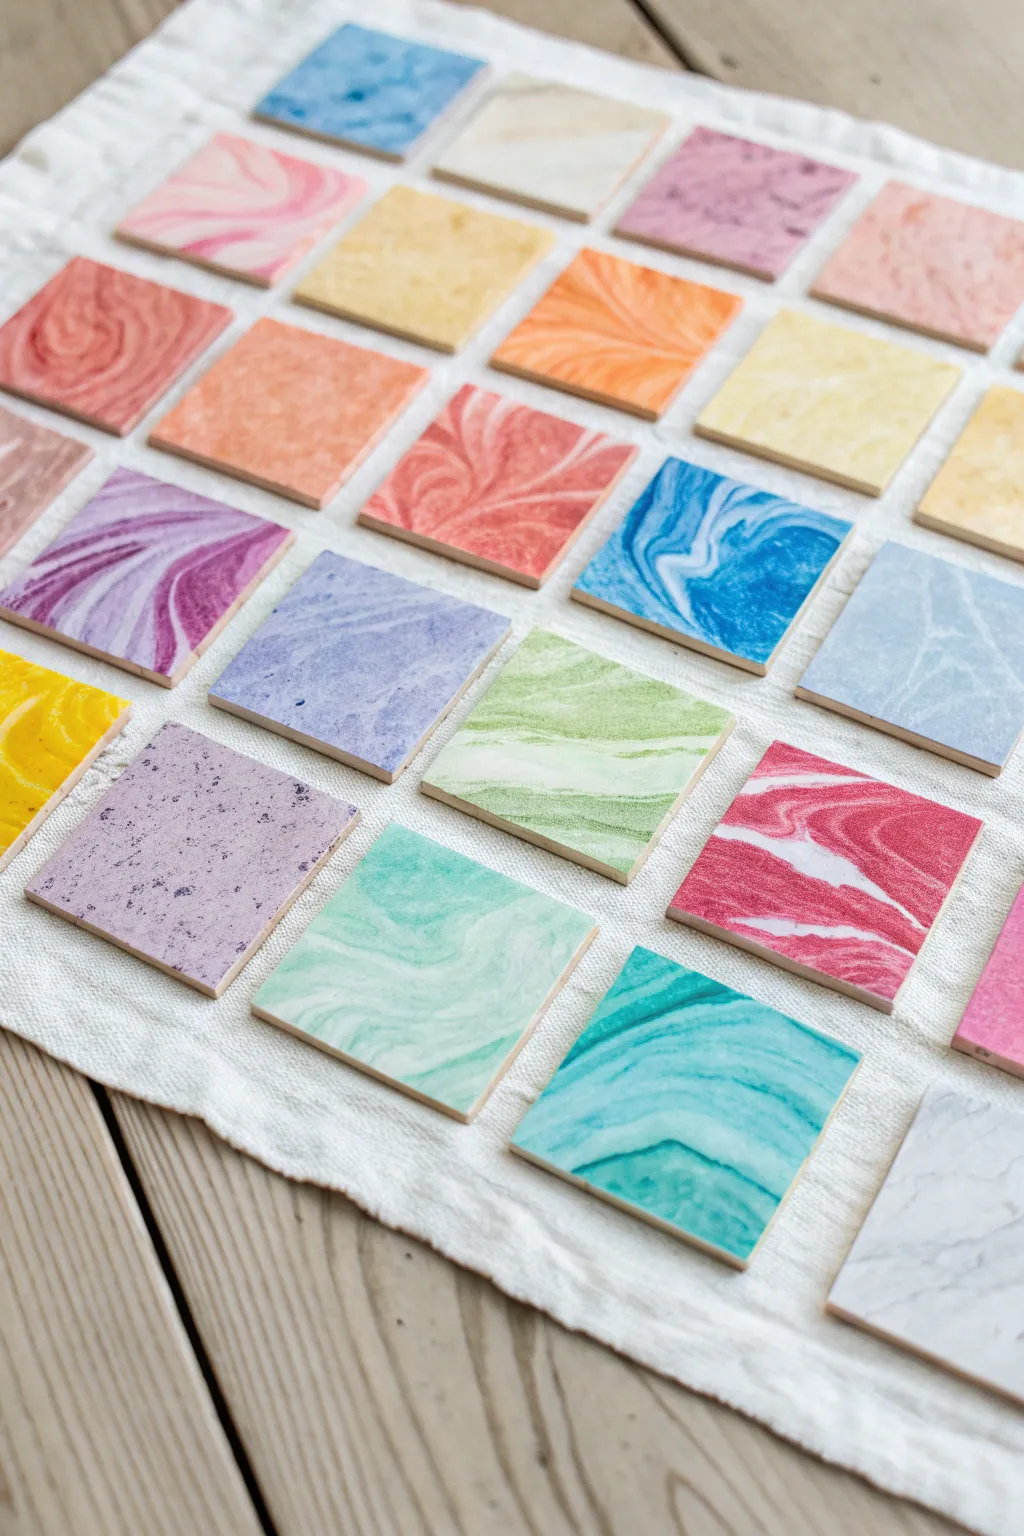
Create a stunning mosaic of color by transforming plain ceramic tiles into miniature works of art using simple marbling techniques. This project results in a vibrant collection of swirled patterns that can be used as coasters, wall art, or a decorative sampler.
Step-by-Step Tutorial
Materials
- Small white ceramic tiles (4×4 inches or similar)
- Acrylic craft paints in rainbow colors
- Marbling medium or liquid starch
- Shallow plastic bin or tray (larger than a tile)
- Toothpicks or skewers for swirling
- Cardstock or paper scraps for skimming
- Clear acrylic sealer spray (gloss or matte)
- Disposable cups for mixing
- Water
- Drop cloth or newspapers
- Gloves
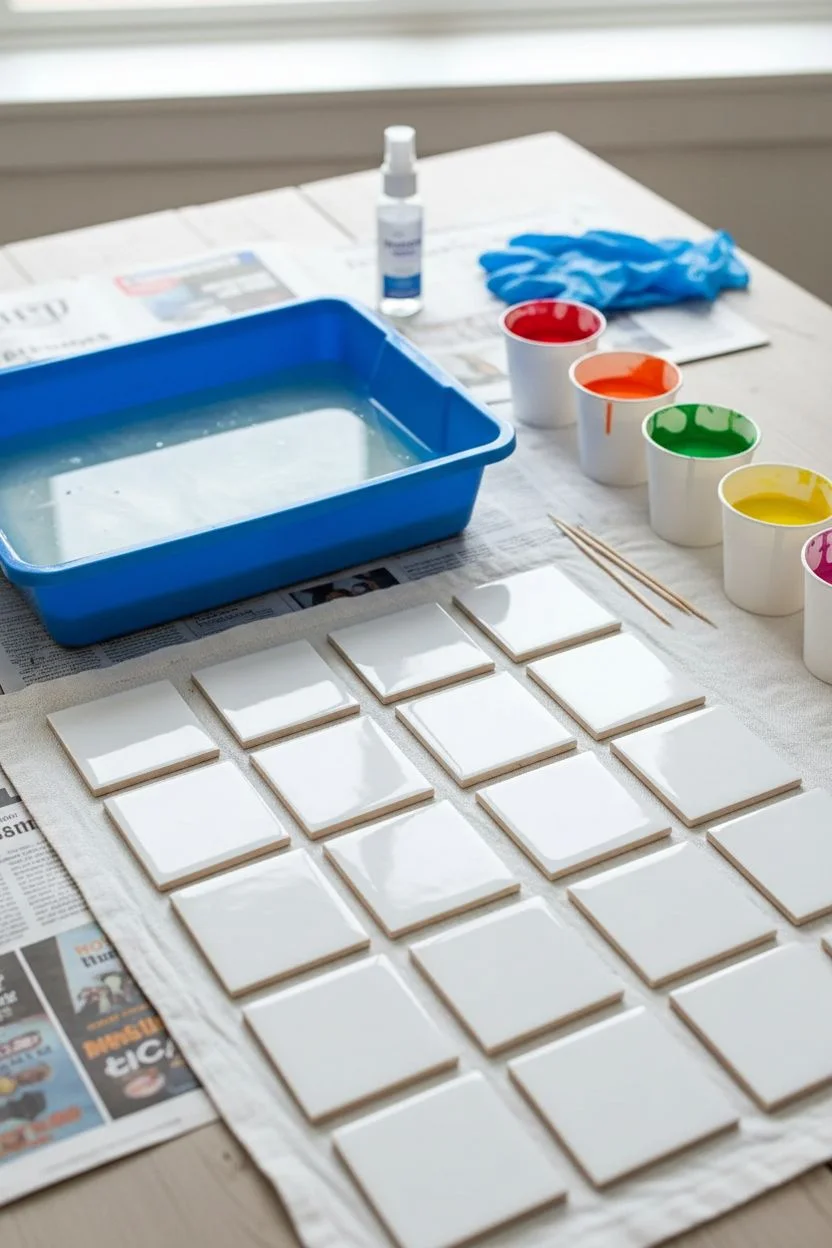
Step 1: Setting the Stage
-
Prepare your workspace:
Cover your table with a drop cloth or old newspapers to catch drips. Marbling can get messy, so having a dedicated drying area nearby lined with parchment paper is essential. -
Clean the tiles:
Wipe down all your ceramic tiles with a damp cloth or rubbing alcohol to remove dust and oils. This ensures the paint adheres properly to the surface. -
Prepare the marbling base:
Pour your marbling medium or liquid starch into the shallow plastic tray.F ill it about 1-2 inches deep so the tile can float or be dipped without hitting the bottom immediately.
Paint Sinking?
If your paint drops sink to the bottom instead of floating, your mixture is too heavy. Add a tiny bit more water to the paint cup to thin it out before trying again.
Step 2: Mixing and Swirling
-
Prepare paint mixtures:
Squeeze acrylic paints into individual cups. If using a specific marbling kit, follow the viscosity instructions; otherwise, thin your acrylics slightly with water until they are the consistency of whole milk. -
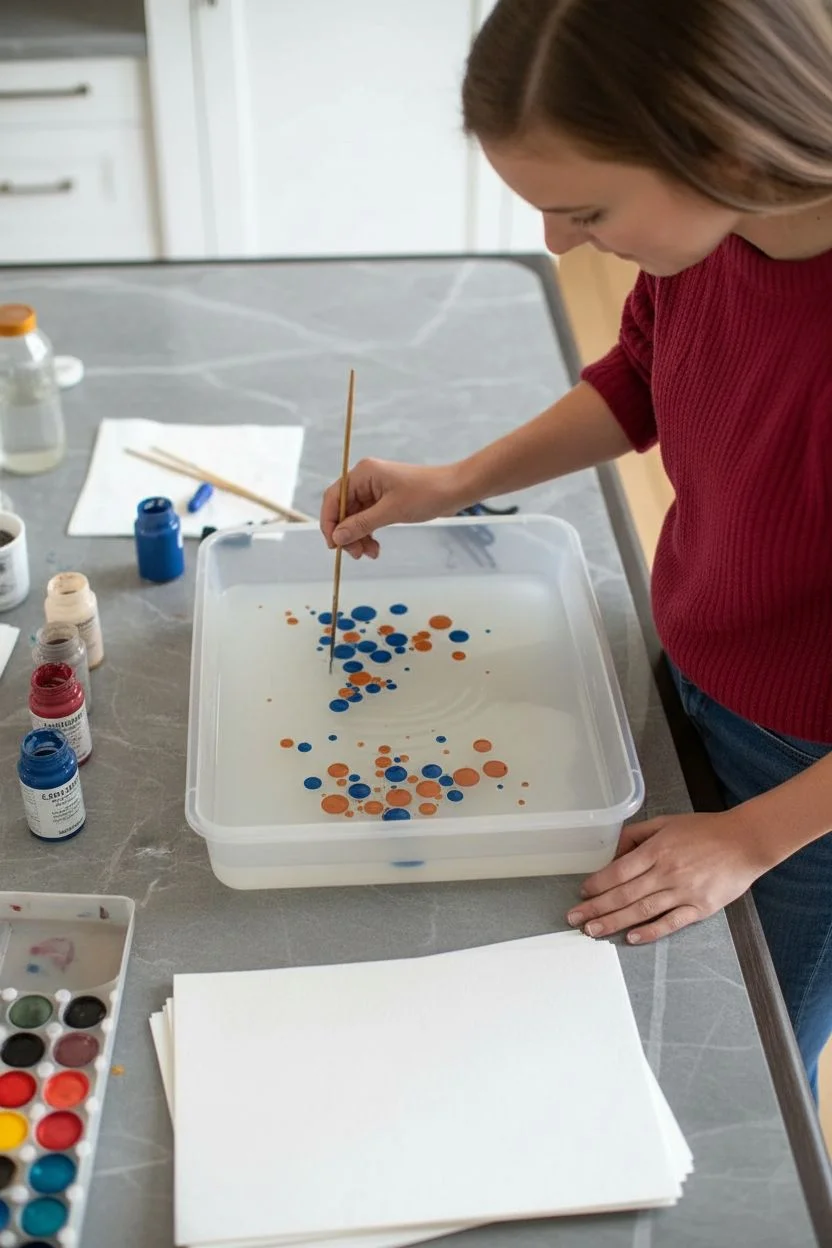
Drop the first color:
Using a dropper or gently pouring from the cup, add drops of your first color onto the surface of the marbling liquid. Watch as it spreads into a circle. -
Add contrasting colors:
Drop a second and third color into the center of the previous circles. Alternate colors to create concentric rings or scattered dots across the surface. -
Create the marble pattern:
Take a toothpick or skewer and gently drag it through the paint floating on the surface. I like to move in figure-eight motions or simple lines to create those organic, swirled effects seen in the photo. -
Avoid over-mixing:
Stop swirling before the colors become muddy. You want distinct ribbons of color rather than a blended brown.
Make it Shimmer
Add a few drops of metallic gold or silver paint into your swirl mixture. The metallics will create elegant veins throughout the marble pattern for a luxe finish.
Step 3: Dipping the Tiles
-
The dip method:
Hold a tile by the edges, face down. Gently touch the face of the tile to the paint surface. You don’t need to submerge it deeply, just ensure the face makes full contact. -
Lift and tilt:
Lift the tile straight up and quickly flip it over. Tilt it slightly to let excess medium run off the sides, being careful not to distort the pattern too much. -
Clean the bath:
Before dipping the next tile, use a piece of cardstock to skim the surface of the liquid, removing leftover paint. This ensures a clean start for your next color scheme. -
Repeat for variety:
Refill the bath with new color combinations. Try monochromatic batches (all blues) and high-contrast batches (pink and green) to build the rainbow collection shown in the artwork. -
Dry the tiles:
Lay the dipped tiles flat on your prepared drying area. Allow them to dry completely, which usually takes about 24 hours depending on humidity.
Step 4: Sealing and Finishing
-
Rinse gently:
Once fully dry, gently rinse the tiles under cold water to remove any sticky residue from the starch or marbling medium, leaving just the paint design. -
Final drying:
Pat them dry with a paper towel and let them air dry for another hour to ensure no moisture is trapped in the ceramic. -
Apply sealer:
Take the tiles to a well-ventilated area. Spray a thin, even coat of clear acrylic sealer over the surface to protect the design and make it water-resistant. -
Add backing (optional):
If using these as coasters, attach small felt pads or a cork square to the bottom of each tile to prevent scratching your furniture.
Arrange your beautiful new tiles in a grid to enjoy the full spectrum of your handiwork

High-Energy Tilt-and-Shake Abstracts

Transform a simple wooden tray into a stunning piece of functional art using the mesmerizing technique of paper marbling. This project features elegant, rhythmic patterns in blue and amber that look incredibly complex but are achieved with simple tools.
How-To Guide
Materials
- Unfinished wooden tray
- Pre-cut watercolor paper or dedicated marbling paper (sized to fit inside the tray)
- Marbling medium (Carrageenan or methyl cellulose mixture)
- Acrylic paints or marbling inks (fluid consistency)
- Small jars or cups for paint
- Eyedroppers or pipettes
- Stylus, toothpick, or marbling comb
- Shallow tub or basin (larger than your paper)
- Alum (mordant to prep paper)
- Sponge or large brush (for alum)
Step 1: Preparation
-
Prepare the size:
Mix your marbling medium (the ‘size’) according to the package instructions. This usually involves whisking carrageenan powder into specialized water and letting it rest for several hours or overnight to thicken and clear bubbles. -
Mordant the paper:
Dissolve alum in warm water. Using a sponge, coat your intricate marbling paper with this solution and let it dry completely. This crucial step ensures the paint sticks permanently to the paper fibers. -
Setup the workspace:
Pour the thickened size into your shallow basin. Skim the surface with a strip of newspaper to remove any dust or film. Arrange your paints, droppers, and stylus nearby for easy access.
Step 2: Creating the Pattern
-
Drop the first colors:
Using a dropper or pipette, gently deposit drops of dark blue paint onto the surface of the size. Allow them to spread into circles. -
Add contrasting tones:
Drop amber or orange paint directly into the center of the existing blue circles, or in the empty spaces between them. Continue adding drops until the surface is mostly covered with floating color. -
First manipulation:
Take your stylus or a thin stick. Drag it vertically through the paint circles from top to bottom in evenly spaced lines. This creates the initial ‘gelgit’ or back-and-forth base pattern. -
Create the arches:
Now, draw your stylus horizontally across the previous vertical lines. This cross-hatching will start to form a grid-like structure in the floating ink. -
Form the feather pattern:
To achieve the specific look in the photo, draw looped, rhythmic curves. Start at the top, curve down and to the left, then back up. Repeat this wave motion across the entire tray. -
Refine the details:
Look for empty spots. You can dip the very tip of your stylus into a tiny bit of blue paint and drag it through the white spaces to create thin, delicate veins connecting the larger waves.
Sinking Paint?
If your paint drops sink to the bottom instead of spreading, your paint is too thick. Thin it with a little water and a drop of ox gall (a dispersant) to help it float.
Step 3: Printing and Finishing
-
Lay the paper:
Hold your treated paper by opposite corners. Gently let the center touch the liquid surface first, then slowly lower the corners to avoid trapping air bubbles. -
Lift the print:
After a few seconds, lift the paper smoothly off the surface. You’ll see the pattern has instantly transferred from the water to your sheet. -
Rinse and dry:
Gently rinse the paper under a slow stream of water to remove excess size. Lay it flat on a clean board or hang it to dry completely. -
Prep the tray:
While the paper dries, make sure your wooden tray is clean and free of dust. You can lightly sand the interior if it’s rough. -
Measure the fit:
Once the marbled paper is bone dry, place it inside the tray to check the fit. Trim the edges precisely so it lies perfectly flat against the bottom. -
Adhere the art:
Apply a thin, even layer of craft glue or spray adhesive to the back of your marbled paper. Press it firmly into the bottom of the tray, smoothing from the center outward. -
Seal the surface:
To protect your artwork from spills, coat the paper and the interior wood sides with a clear acrylic sealer or resin. I like to do two thin coats for extra durability.
Tray Makeover
Before gluing in your paper, paint the wooden rim of the tray in a color that matches one of the marble veins—like a deep navy or metallic gold—for a cohesive look.
Now you have a sophisticated, custom tray ready to serve drinks or organize your coffee table


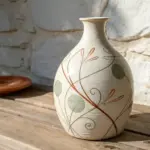

Slow Spiral Rolls for Soft Veins
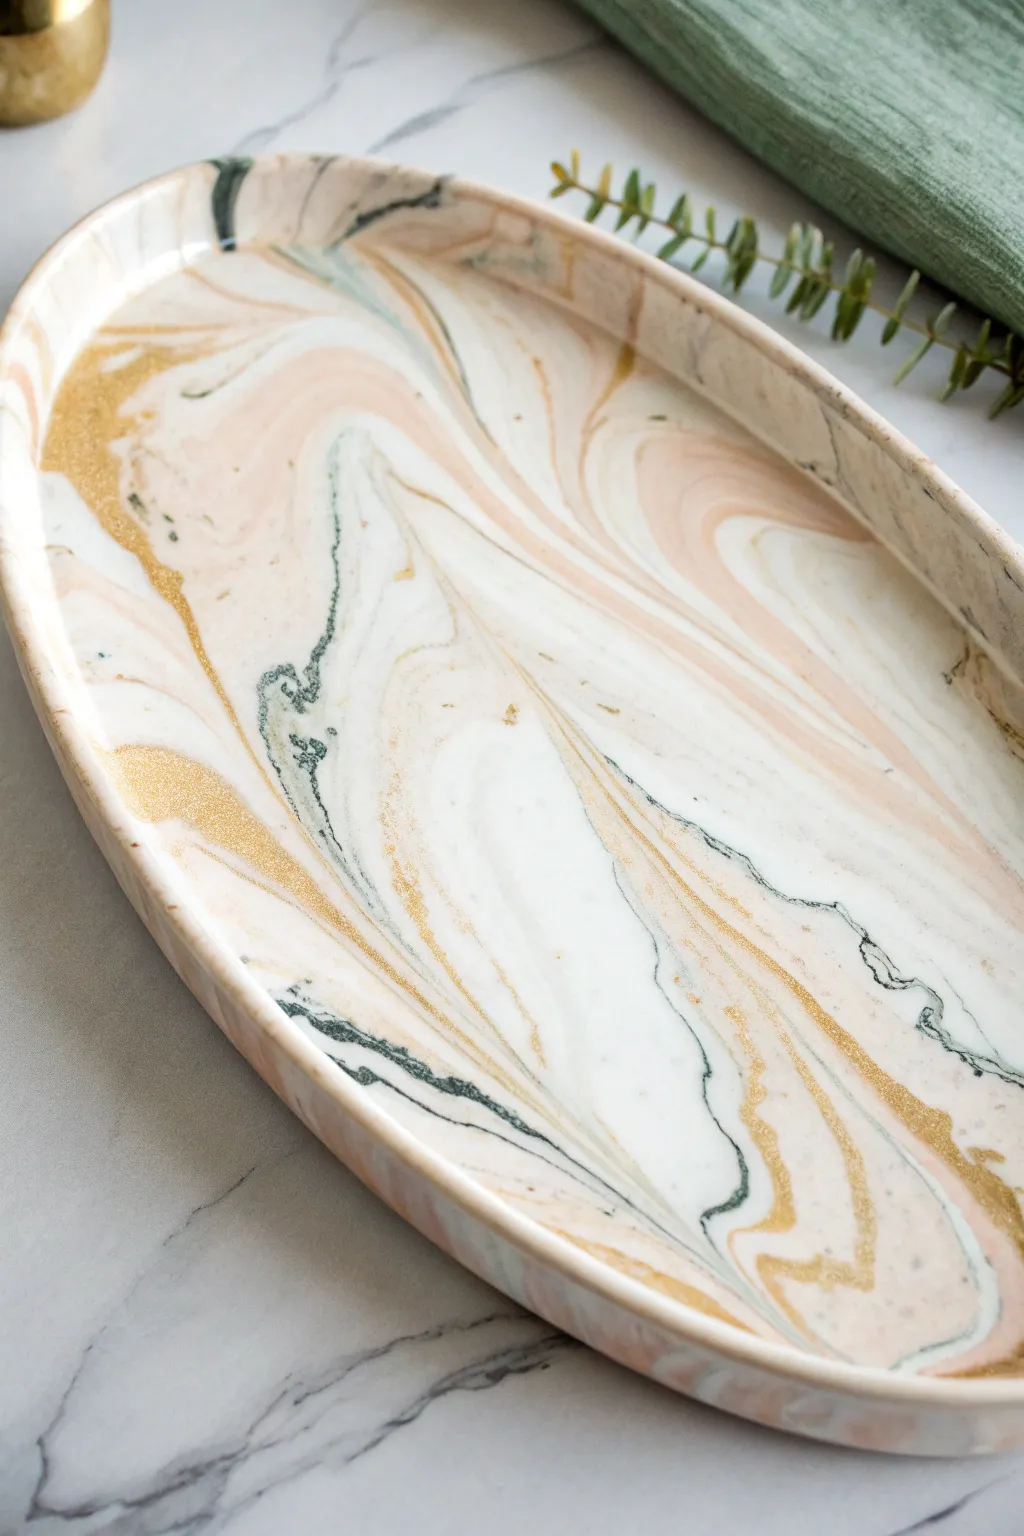
Capture the luxurious look of high-end stone with this simple yet stunning marbling project. By gently twisting soft pinks, deep greens, and shimmering gold together, you’ll create an oval tray that serves as a chic catch-all or a sophisticated decor piece.
Detailed Instructions
Materials
- White polymer clay (approx. 200g)
- Soft pink or peach polymer clay (approx. 50g)
- Dark emerald green polymer clay (approx. 20g)
- Gold polymer clay or Gold leaf flakes
- Rolling pin or pasta machine
- Oval template or large oval cutter
- Craft knife or clay blade
- Fine-grit sandpaper (400 to 1000 grit)
- Glossy polyurethane varnish or UV resin
- Oven-safe baking sheet
- Parchment paper
Step 1: Preparing the Colors
-
Condition the white base:
Begin by thoroughly kneading the white polymer clay until it is soft, pliable, and warm to the touch. This volume will form the main body of your tray. -
Roll out color logs:
Roll the pink, green, and gold clays into thin, snake-like logs of varying thicknesses. Keep the green logs quite thin to avoid overpowering the design. -
Create the main log:
Roll the conditioned white clay into a thick log, about 6 inches long and 2 inches in diameter. -
Apply the veins:
Lay the colored ‘snakes’ lengthwise along the white log. I like to alternate the placement so the gold and green don’t clump together in one spot.
Vein Variation Tip
Vary the thickness of your colored clay ‘snakes.’ Ultra-thin green strands look like realistic fractures, while thicker pink rolls create soft, cloud-like blushes.
Step 2: Creating the Marble Effect
-
Twist the clay:
Grasp both ends of the combined log and twist them in opposite directions. Keep twisting until the lines of color begin to spiral tightly around the white core. -
Fold and compress:
Fold the twisted log in half, bringing the two ends together. Squeeze it to compress the air out and roll it back into a single log shape. -
Repeat for complexity:
Repeat the twisting and folding process one or two more times. Be careful not to over-mix, or the colors will muddy into a single greyish tone rather than distinct veins. -
Form a ball:
Once you are happy with the swirl density, roll the entire log into a smooth, tight sphere.
Clay Too Soft?
If your clay feels sticky or mushy while rolling, pop it in the fridge for 10 minutes. The slight chill firms it up, making it easier to slice cleanly without drag.
Step 3: Shaping the Tray
-
Roll out the slab:
Place the ball on parchment paper and use a rolling pin to flatten it into an oval slab. Aim for a thickness of about 1/4 inch (6mm) to ensure durability. -
Cut the oval:
Place your oval template over the most attractive part of the marbled pattern. Use your craft knife to cut cleanly around the shape. -
Smooth the edges:
Dip your finger in a tiny bit of baby oil or water and run it along the cut edge to smooth out any sharpness or knife drag marks. -
Lift the rim:
Gently lift the edges of the oval slab upwards to create a shallow rim. You can prop up the edges with bits of crumpled foil or extra clay to hold the shape during baking.
Step 4: Finishing and Sealing
-
Bake the piece:
Transfer the parchment paper and tray to a baking sheet. Bake according to your clay manufacturer’s instructions, usually around 275°F (135°C) for 30 minutes. -
Cool down:
Allow the tray to cool completely in the oven with the door cracked open. This gradual cooling helps prevent cracks. -
Add gold accents (optional):
If your gold clay didn’t shine enough, use a small brush to apply gold leaf or liquid gilding along the gold veins for extra pop. -
Sand for smoothness:
Use wet fine-grit sandpaper to gently buff the surface and rim. This removes fingerprints and creates a professional, stone-like texture. -
Seal the surface:
Apply a thin, even coat of glossy polyurethane varnish or UV resin to protect the design and give it that polished ceramic shine.
Place your jewelry or trinkets inside and admire the sophisticated swirls of your handmade creation
BRUSH GUIDE
The Right Brush for Every Stroke
From clean lines to bold texture — master brush choice, stroke control, and essential techniques.
Explore the Full Guide
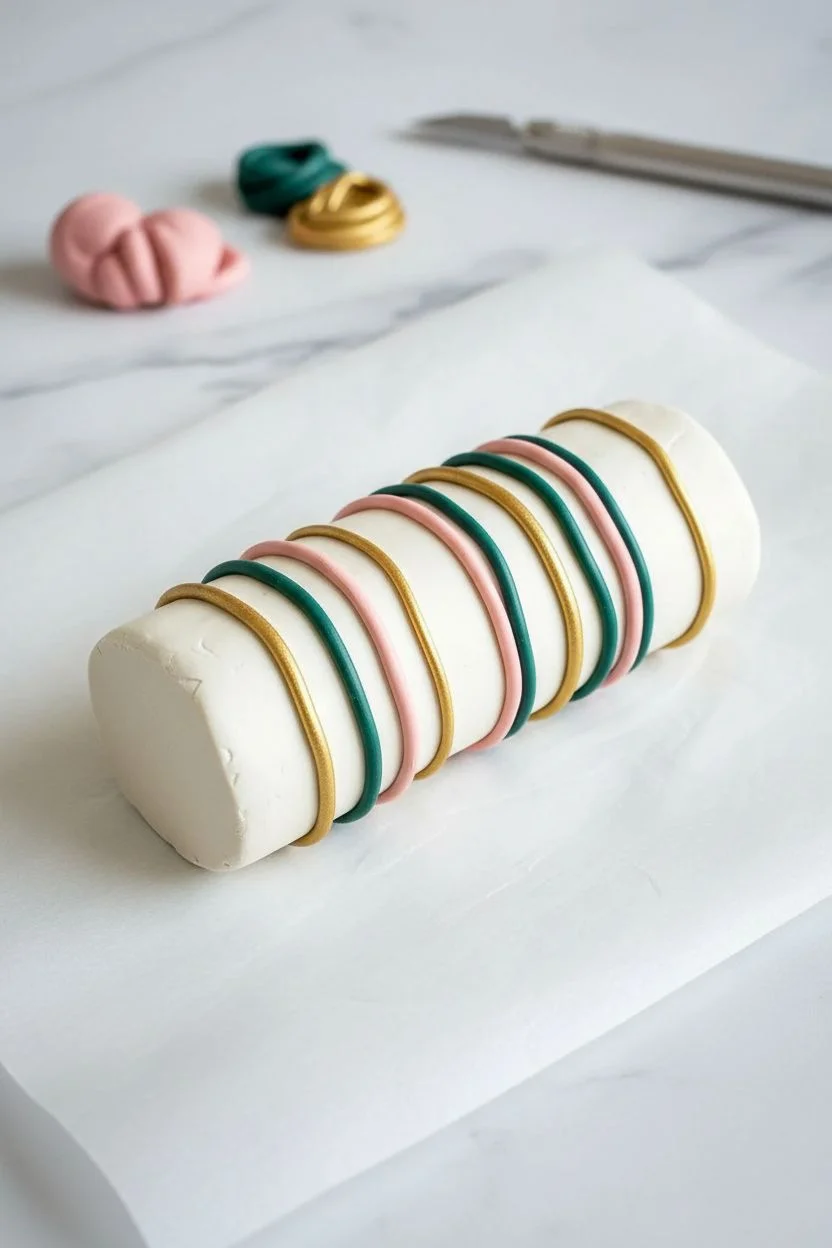
Mini Marble Painting Postcards
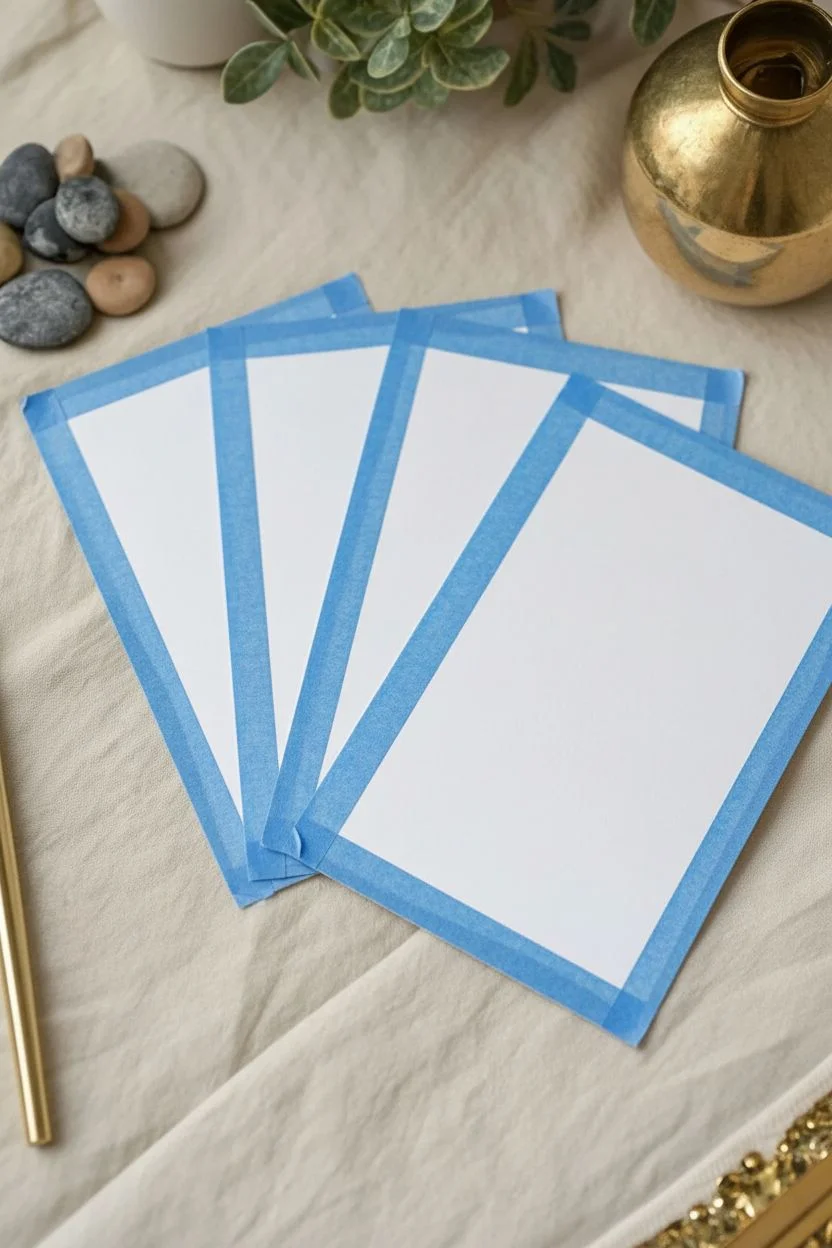
Transform simple cardstock into sophisticated stationery with this fluid art project that captures the organic beauty of natural stone. These postcards feature swirling veins of terracotta, slate grey, and ochre, creating individual works of art perfect for sending or framing.
Detailed Instructions
Materials
- Heavyweight watercolor paper or mixed media cardstock
- Fluid acrylic paints or marbling inks (terracotta, slate grey, ochre, white, black)
- Marbling medium (e.g., carrageenan powder) or shaving cream for a simpler method
- Shallow tray or baking dish (larger than postcard size)
- Painter’s tape or masking tape
- Toothpicks, skewers, or marbling combs
- Squeegee or stiff piece of cardboard (if using shaving cream)
- Paper towels
- Ruler
- Scissors or craft knife
Step 1: Preparation
-
Cut the paper:
Measure and cut your heavyweight paper into postcard sizes, typically 4×6 inches. Prepare a few extra pieces for testing your color combinations. -
Mask the borders:
To achieve the clean white frame seen in the original image, apply painter’s tape along all four edges of each postcard. Press down firmly to prevent paint seepage. -
Prepare the base:
If using a traditional water marbling method, mix your size (thickened water) according to the package instructions a few hours beforehand. For a quicker alternative, fill your shallow tray with a smooth, even layer of shaving foam.
Muddy colors?
Don’t over-swirl! Stop mixing while you can still see distinct bands of color. Too much movement blends pigments into brown sludge.
Step 2: Creating the Marble Pattern
-
Select your palette:
Choose earthy tones like burnt orange, grey, and ochre. Mix your acrylic paints with a little water if they are too thick; they need to drop easily from a brush or stick. -
Drop the colors:
Gently drop small amounts of your first color onto the surface of your medium. Repeat with subsequent colors, placing them near or inside the previous drops. -
Swirl the design:
Take a skewer or toothpicks and drag it gently through the paint drops. Move in slow, deliberate curves to mimic natural stone veins rather than mixing the colors into a muddy mess. -
Check the flow:
I like to pause here and look at the composition. If you need more contrast, add a few tiny drops of white or charcoal grey into the negative spaces. -
Create fine lines:
For the intricate veining details, dip the very tip of a clean toothpick into a contrasting color and draw thin lines through the existing swirls.
Clean borders
Run a bone folder or credit card edge firmly over your tape before painting to seal the edges perfectly and prevent bleeding.
Step 3: Printing and Finishing
-
Print the postcard:
Carefully lower your taped postcard face down onto the patterned surface. Gently press the back of the paper to ensure full contact with the paint. -
Lift and clean:
Lift the paper straight up by the corners. If you used shaving cream, lay the card flat and scrape off the excess foam with a squeegee in one smooth motion to reveal the design. -
Dry the prints:
Place the wet postcards on a flat surface protected by paper towels. Let them air dry completely, which usually takes a few hours. -
Flatten the paper:
If the paper has buckled slightly from moisture, place the dry prints under a heavy book overnight to flatten them out. -
Remove the tape:
Once fully dry and flat, slowly peel away the painter’s tape. Pull it away from the painted area at a 45-degree angle to keep the edges crisp. -
Add metallic accents:
For an optional luxe touch, use a fine gold paint pen to trace along some of the major veins in the marble pattern. -
Clean up edges:
Inspect the white borders. If any paint bled under the tape, carefully scrape it away with a craft knife or cover it with a white gel pen.
Now you have a stunning set of unique stationery ready to send to friends or display on your desk
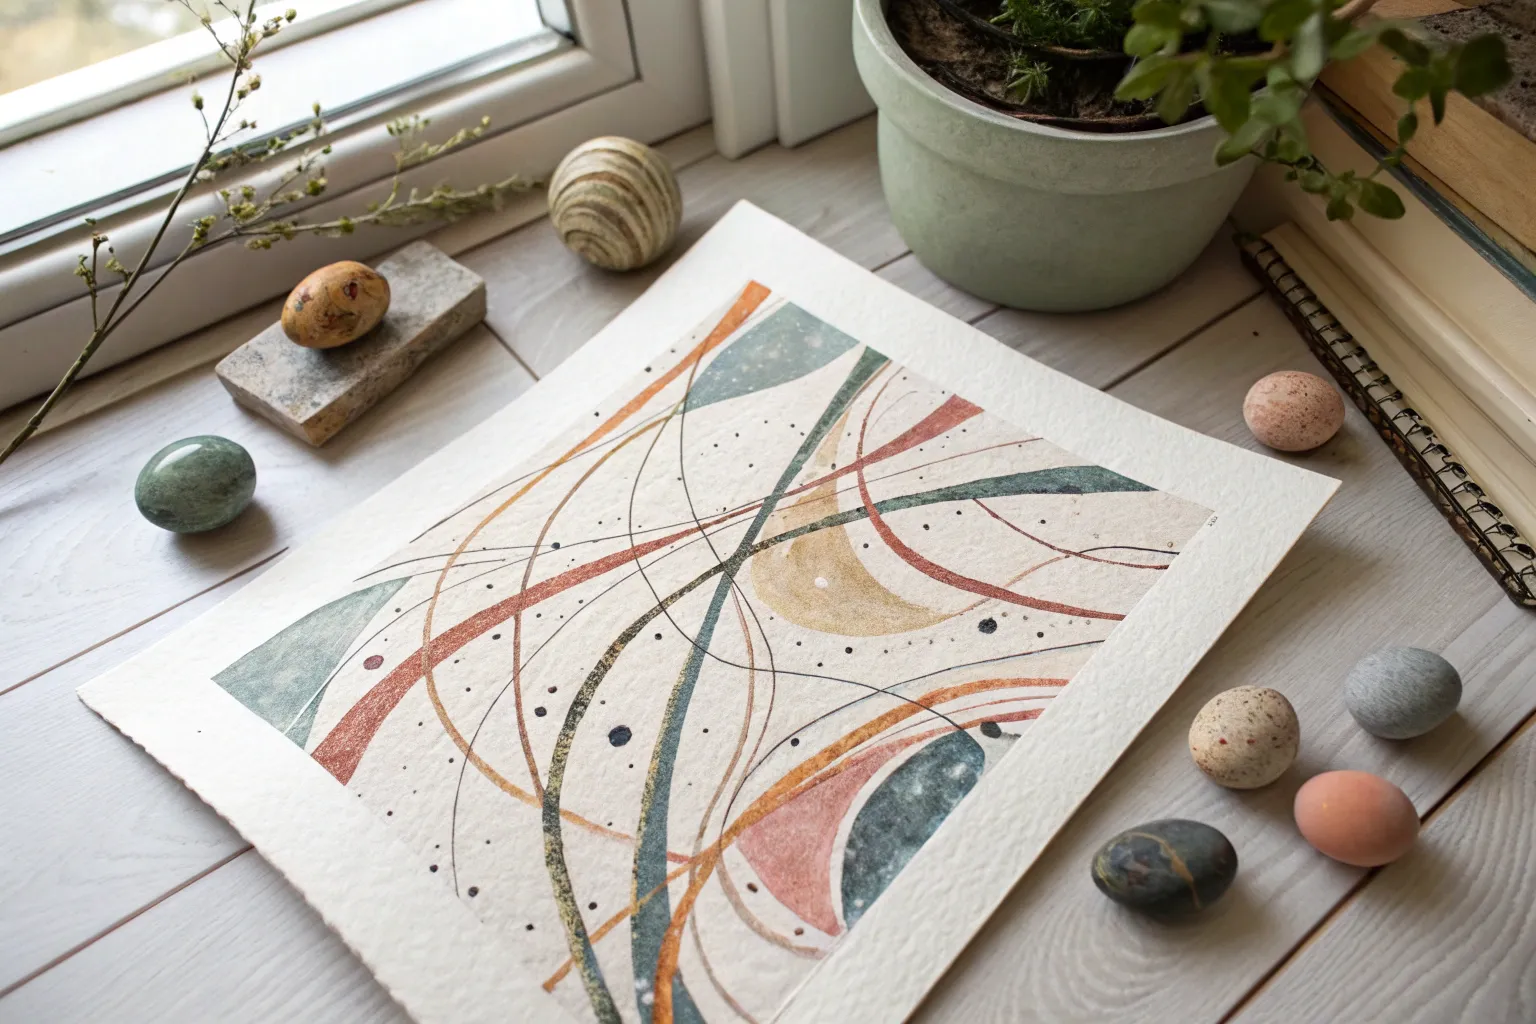
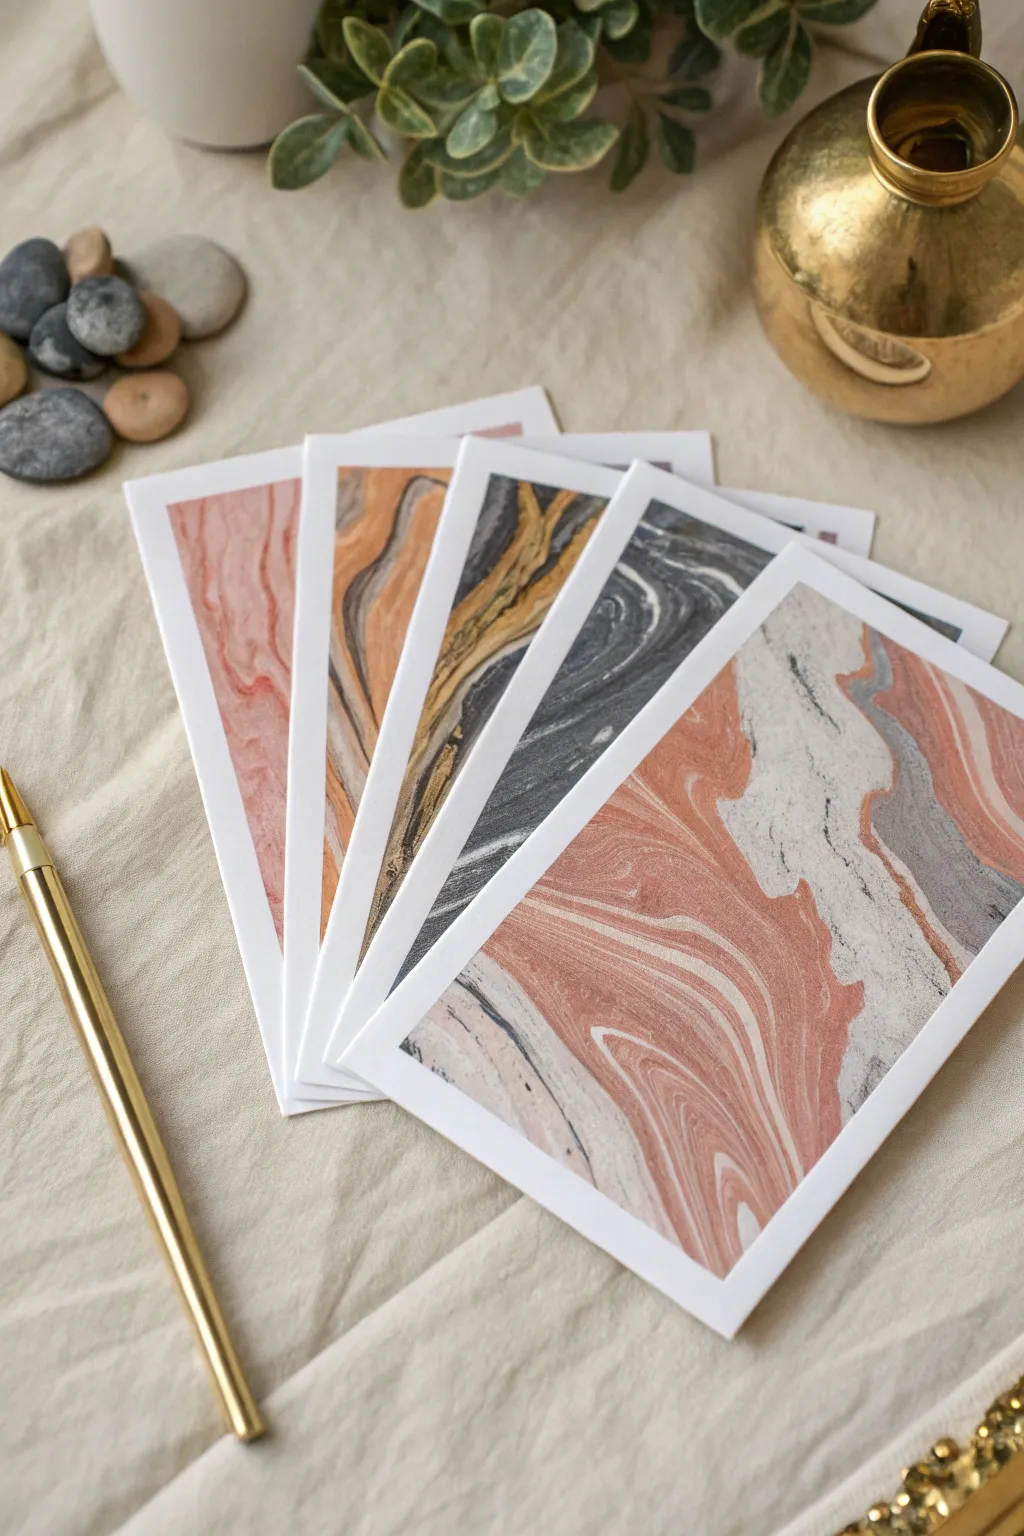
Ink Linework Over Marble Trails
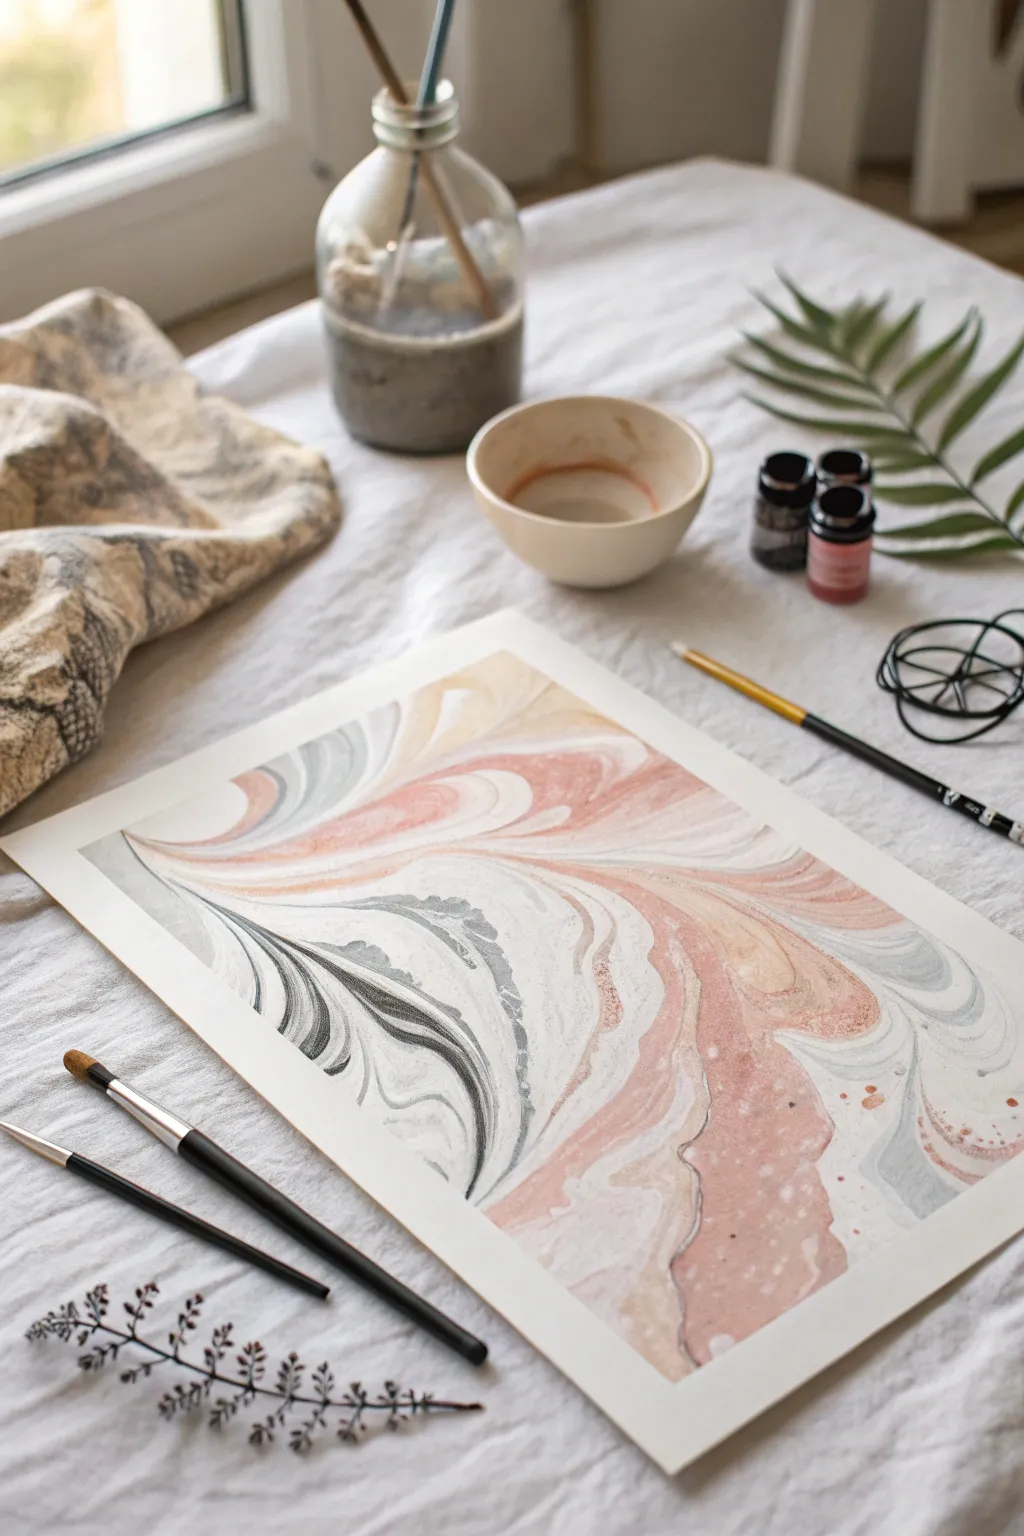
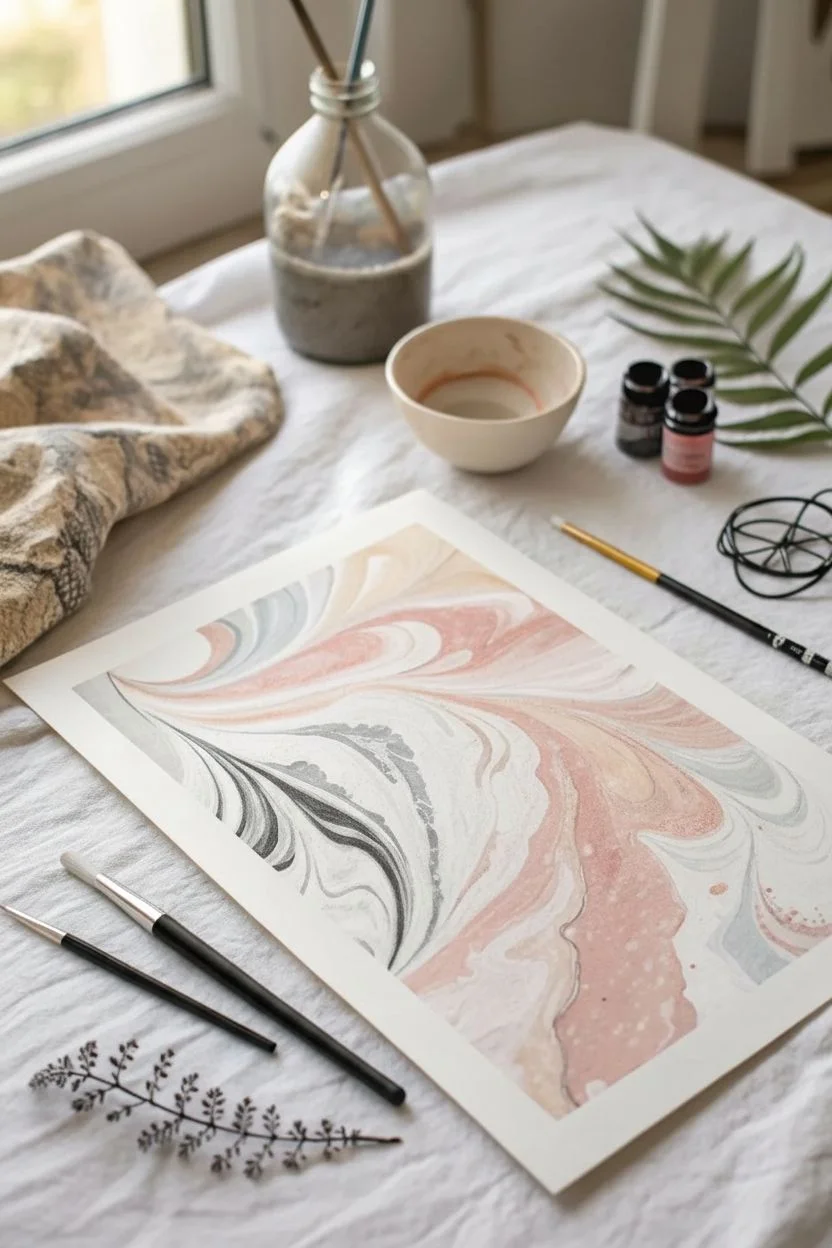
This project combines the fluid, unpredictable beauty of paper marbling with the precise control of ink linework. The result is a sophisticated abstract piece featuring soft washes of peach, blush, and slate grey, anchored by sweeping, organic lines.
Step-by-Step Tutorial
Materials
- Heavyweight watercolor paper or mixed media paper (A3 or A4)
- Marbling inks or liquid acrylics (peach, blush pink, light grey, slate blue)
- Deep black India ink or high-flow acrylic ink
- Marbling tray or shallow baking pan (larger than paper)
- Carrageenan size or water (depending on ink type)
- Fine liner brush (size 0 or 00)
- Detail round brush (size 2)
- Pipettes or droppers
- Paper towels
- Jar of clean water
Step 1: Preparing the Marble Bath
-
Set up your tray:
Fill your shallow tray with water or your prepared sizing liquid (carrageenan mixture) about 1-2 inches deep. Ensure the surface is free of bubbles by lightly skimming it with a scrap of paper. -
Prepare your palette:
If using liquid acrylics, you may need to thin them slightly with water or a flow medium so they float easily. You want soft, muted tones: peach, dusty pink, and a pale grey-blue. -
Drop the first colors:
Gently squeeze drops of the lightest colors—the peach and blush—onto the water’s surface. Let them spread naturally into wide, soft circles. -
Add contrast tones:
In the negative spaces between the pinks, drop in your pale grey-blue tones. Do not overcrowd the tray; negative space will become the white of the paper. -
Swirl the pattern:
Use the back end of a brush or a stylus to very gently drag through the floating colors. Create large, sweeping curves rather than tight, frantic swirls to mimic the calm flow seen in the example.
Flow Control
Keep your wrist loose and lift your hand off the paper when inking. Drawing from the shoulder, rather than planting your palm, creates smoother curves.
Step 2: Creating the Marble Print
-
Lay the paper:
Hold your watercolor paper by opposite corners. Gently bow it in the middle and lower the center onto the water first, then roll the sides down to avoid trapping air bubbles. -
Lift the print:
Wait just a few seconds for the paper to absorb the pattern. Carefully lift the paper by the corners in one smooth motion to pull it off the surface. -
Rinse and dry:
If using a size bath, gently rinse the slime off the paper under a slow trickle of water. Lay the paper flat or hang it to dry completely. The paper must be bone dry before the next phase. -
Flatten the paper:
Once dry, the paper might have buckled. Place it under a heavy book for a few hours or overnight to get a perfectly flat surface for line work.
Gilded Edges
For a stunning finish, use gold leaf or metallic gold ink to trace one single prominent vein in the marble pattern, making it shimmer in the light.
Step 3: Adding Ink Definition
-
Analyze the flow:
Look closely at your dried marble pattern. Identify the natural ‘rivers’ or boundaries where colors meet or where the white paper creates a channel. -
Load a fine brush:
Dip your fine liner brush into deep black India ink. You want the consistency to be fluid but opaque. -
Trace the grey currents:
Locate the darkest grey or blue swirls in your print. Using very light pressure, trace the edges of these shapes to emphasize their movement. -
Vary line weight:
As you follow a curve, press down slightly on the brush to thicken the line, then lift up to taper it off. This calligraphic variation adds elegance. -
Enhance the pink zones:
Move to the peach and pink sections. Instead of outlining everything, just add a few accent lines that follow the main direction of the flow. -
Add subtle splatters:
I find that adding texture creates cohesion. Take a brush loaded with diluted peach ink and tap it against another brush handle to create tiny, controlled speckles on the right side of the composition. -
Intensify dark areas:
If some of the grey marbling dried too light, use a very dilute wash of black ink to glaze over those specific swirls, adding depth while keeping the marble texture visible. -
Final ink pass:
Look for any disjointed areas and connect them with a few final, whisper-thin lines. Let the ink dry completely before handling.
Now you have a serene, custom artwork that beautifully bridges the gap between chaos and control


Have a question or want to share your own experience? I'd love to hear from you in the comments below!