When I’m craving pure color and movement, Mardi Gras is one of my favorite themes to paint because it practically begs for bold marks and juicy contrasts. Grab your purple, green, and gold and let’s turn classic carnival symbols into art you’ll actually want to hang up.
Fleur-de-Lis in Carnival Colors
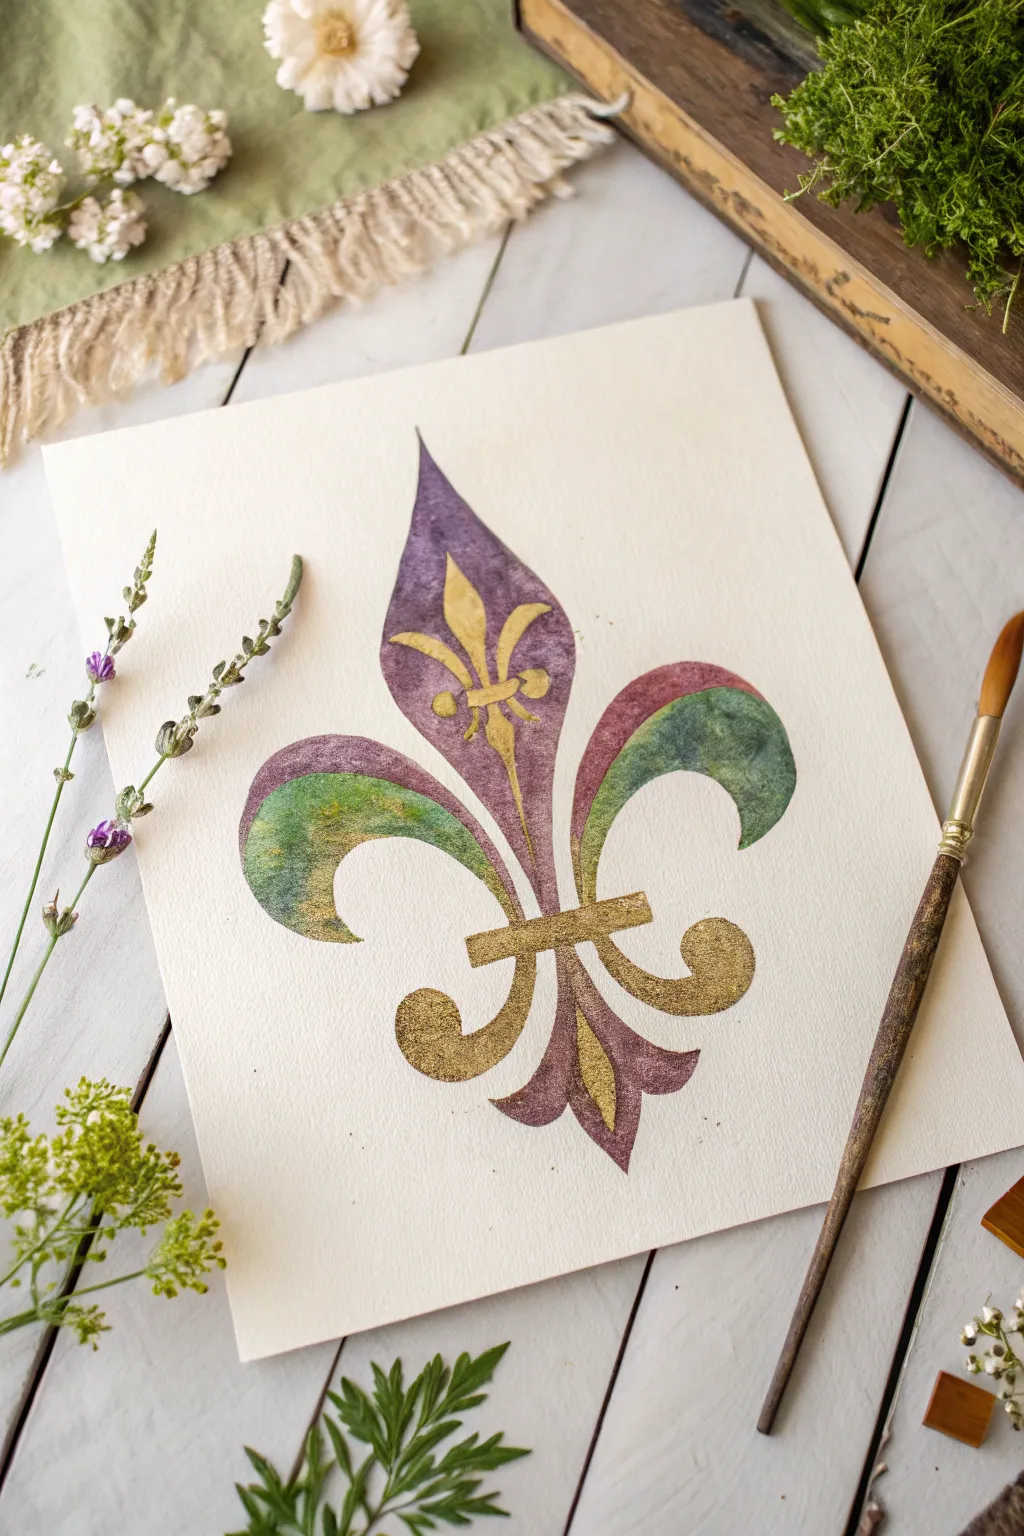
Capture the spirit of carnival with this elegant watercolor study featuring the classic Mardi Gras triad of purple, green, and gold. The finished piece balances transparent watercolor washes with striking metallic accents for a look that feels both historic and festive.
Step-by-Step Guide
Materials
- Cold press watercolor paper (heavyweight)
- Watercolor paints (purple/violet, sap green or olive green)
- Gold metallic watercolor paint or gold gouache
- Pencil (HB or lighter)
- Fleur-de-lis template or stencil
- Round watercolor brushes (size 4 and 8)
- Fine liner brush (size 0 or 1)
- Clean water jar
- Paper towels
- Palette
Step 1: Drafting the Design
-
Center assignment:
Begin by finding the visual center of your watercolor paper. The fleur-de-lis is a symmetrical symbol, so having a central vertical axis line lightly drawn in pencil can be incredibly helpful for keeping things balanced. -
Outline the shape:
Using a template, stencil, or freehand sketching, lightly draw the complete fleur-de-lis shape. Focus on the three main petals and the horizontal band that binds them. Keep your pencil pressure very light so the graphite doesn’t smudge into the paint later. -
Detail mapping:
Within the central petal, sketch a smaller, internal fleur-de-lis shape. This will be reserved for gold later. Add the small circular details near the top of the central petal.
Step 2: Applying Base Colors
-
Prepare the purple:
Mix a deep violet watercolor on your palette with a moderate amount of water. You want a concentration that is colorful but still transparent. -
Paint the central petal:
Fill in the large central petal with your violet mix, carefully painting around the internal shape you sketched. The paint should be wet enough to settle into the paper’s texture. -
Paint the base:
Apply the same violet mixture to the bottom flukes of the symbol, beneath the horizontal band. Let the color pool naturally in some areas to create texture. -
Mix the green:
Prepare a sap green or olive tone. I prefer a slightly earthy green here rather than a bright emerald to give it a vintage, aged feel. -
Paint the side petals:
Fill in the two curving side petals with the green wash. Start from the outer tips and work inward toward the center band. -
Blend the transition:
While the green is still slightly damp, drop a tiny touch of purple near the inner curves where the petals meet the center. This creates a shadowed, cohesive look between the two main colors. -
Dry completely:
Allow the base layer to dry fully. If you rush this step, the upcoming gold layer will bleed into the damp paper and lose its crisp edges.
Pro Tip: Metallic Pop
If your gold watercolor feels too dull, mix a tiny drop of yellow ochre into it. The underlying yellow pigment boosts opacity and makes the shimmer stand out more on white paper.
Step 3: Gilding the Lily
-
Activate the gold:
Add a few drops of water to your metallic gold watercolor pan or squeeze out gold gouache. You want a creamy, opaque consistency, not a watery wash. -
The central band:
Using a smaller round brush, paint the horizontal bar that ties the design together with solid gold. -
Inner details:
Carefully paint the internal decorative shape inside the top purple petal. Use the fine liner brush to get sharp points on the tips. -
Bottom accents:
Add gold curved accents to the bottom section of the fleur-de-lis, mirroring the curves of the purple base. -
Overlay texture:
Once the green petals are dry, add a sheer, watery glaze of gold over parts of the green. This gives the petals a shimmering, iridescent quality without covering the green entirely.
Level Up: Vintage Edge
Tear the edges of your watercolor paper instead of cutting them. Once dry, lightly brush the torn edges with diluted coffee or tea to create an antique parchment effect.
Step 4: Refining and Aging
-
Deepen shadows:
Mix a more concentrated purple (less water). Add thin lines of this darker color along the edges where the gold meets the purple to make the metallic elements pop. -
Textural splatters:
Load a brush with watery gold paint and tap it against another brush handle over the paper to create very fine, subtle splatters around the design. This adds to the festive atmosphere. -
Final stem line:
Draw a very thin line of gold extending straight down the center vertical axis, crossing through the band and into the bottom section, to emphasize symmetry.
Let the metallic paint shine in the light as you display this regal piece of art

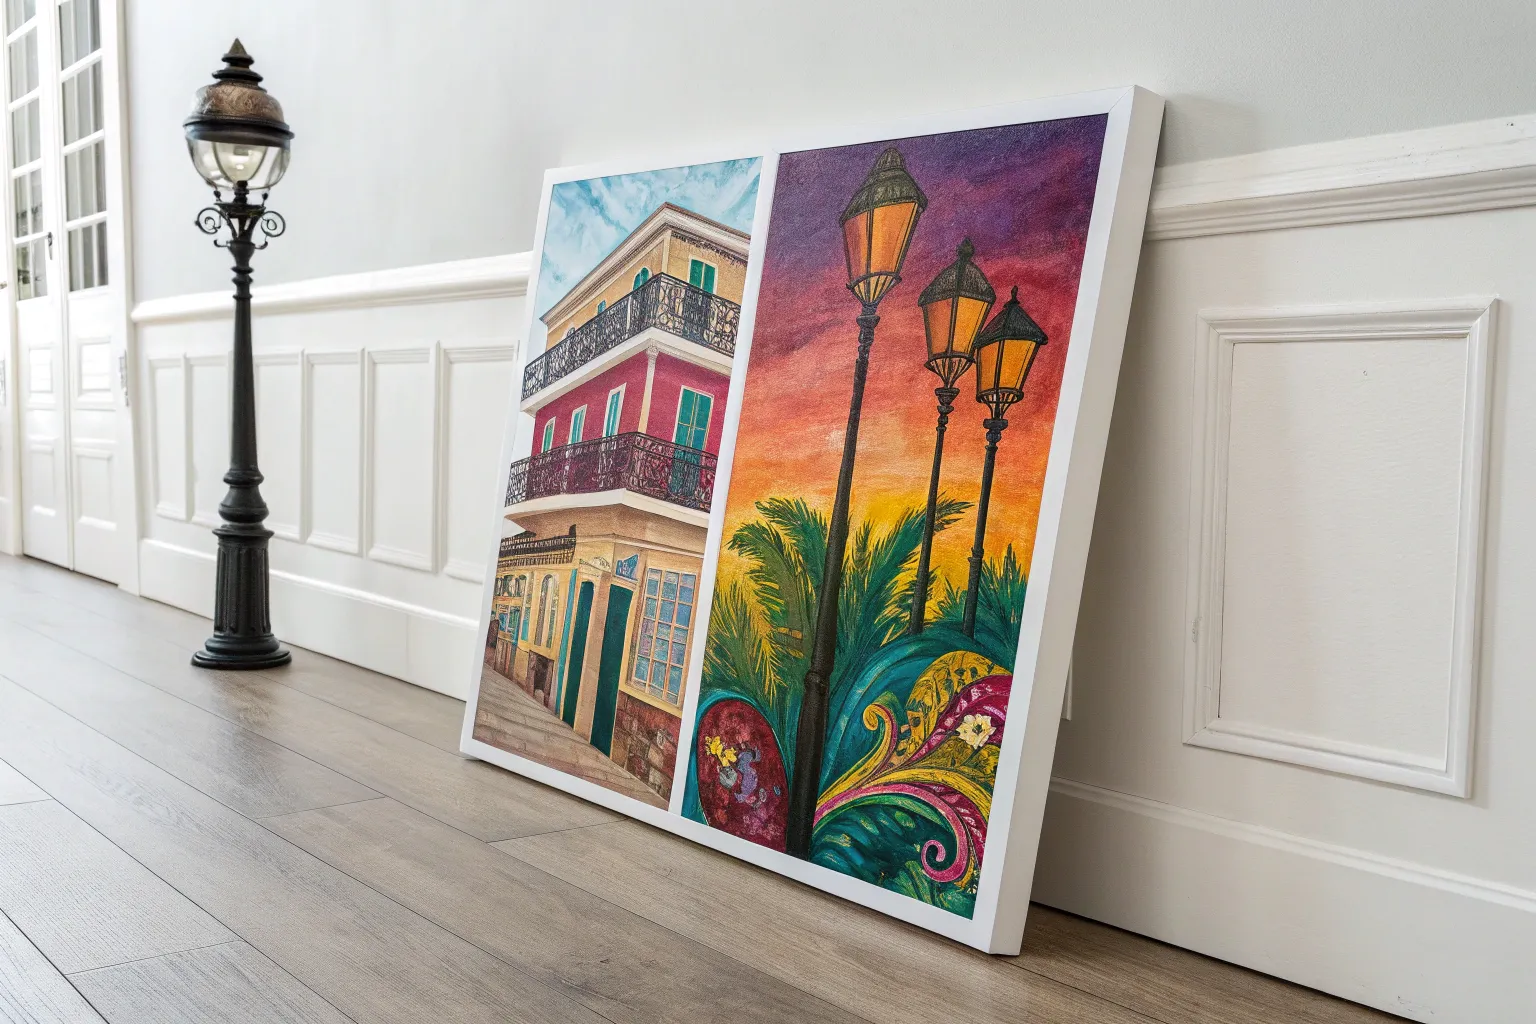
Parade Float Close-Up
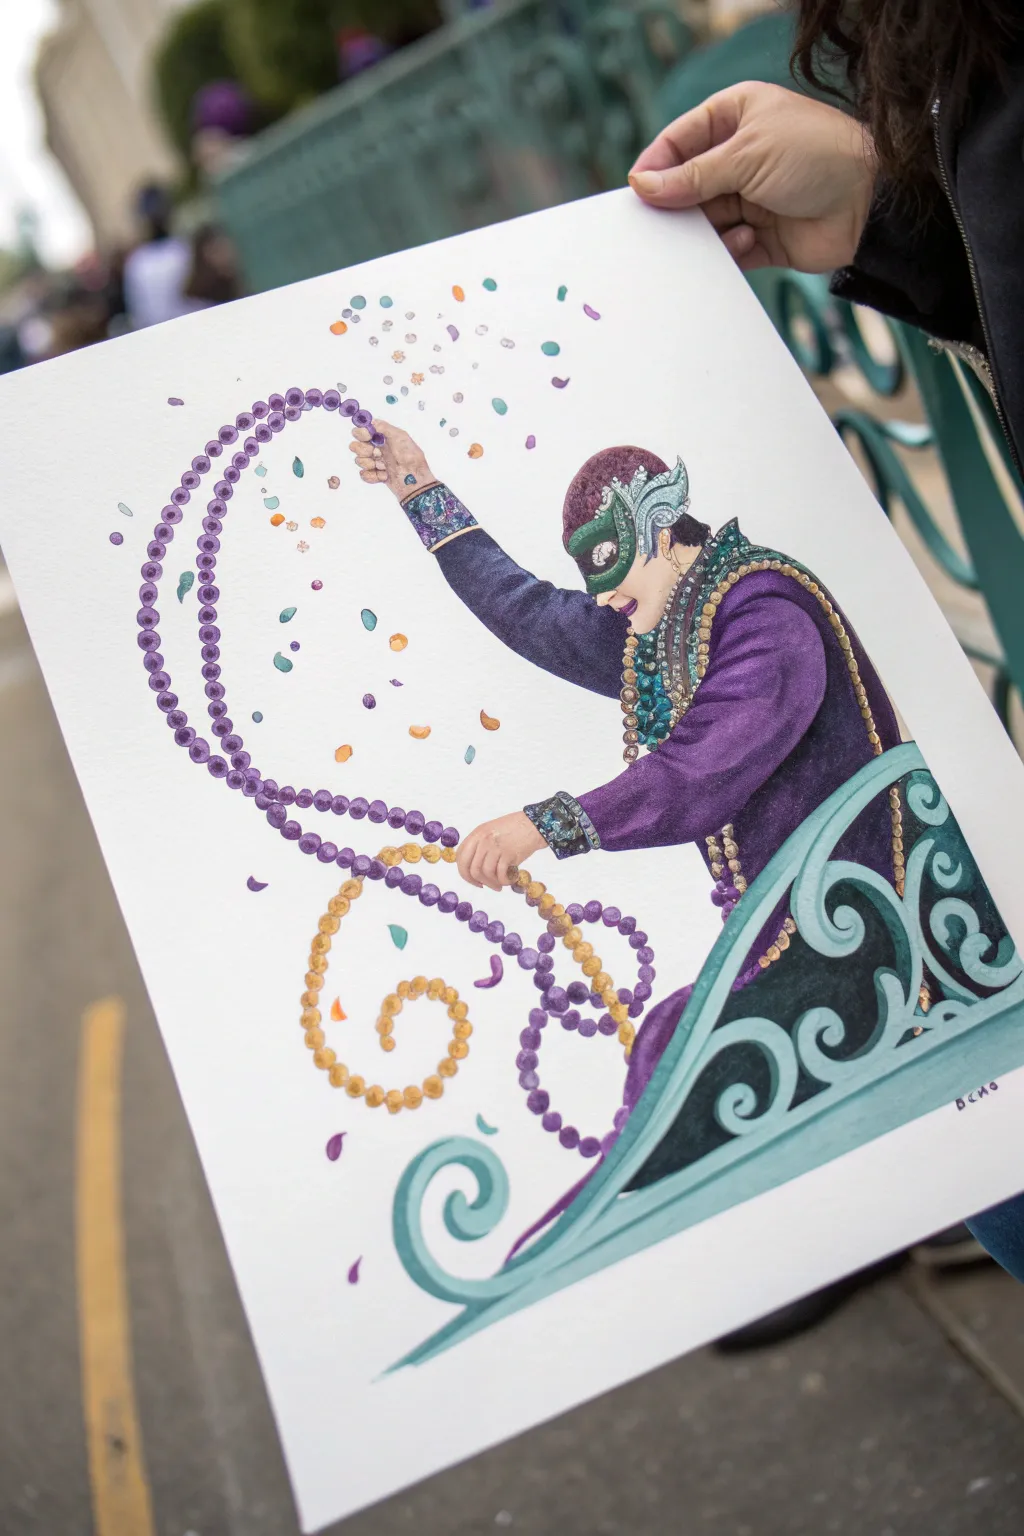
Capture the magic and motion of Mardi Gras with this vibrant illustration of a masked float rider tossing beads. Using a mix of watercolor translucency and opaque detailing, you’ll create a lively scene emphasizing the joyful chaos of a parade.
Detailed Instructions
Materials
- Hot press watercolor paper (smooth texture)
- Watercolor paints (Purple, Teal, Gold, Brown, Skin tone mix)
- Gouache or white acrylic paint (for highlights)
- Pencil (HB or 2H)
- Kneadable eraser
- Round brushes (sizes 2, 6, and 10)
- Fine liner brush or rigger brush
- Palette for mixing
- Masking fluid (optional)
- Water cups and paper towels
Step 1: Sketching the Composition
-
Map the Curve:
Begin by lightly sketching the large, scrolling structure of the parade float in the bottom right corner. This decorative railing anchors your figure and establishes the angle of the scene. -
Position the Figure:
Sketch the rider leaning over the float railing. Focus on the dynamic posture: top arm reached high to throw, torso leaning forward, and the lower hand gripping the beads resting on the rail. -
Define the Beads:
Draw the sweeping arc of the beads being thrown. Instead of drawing every individual circle right now, just draw a light guideline showing the path of the necklace flying through the air. -
Add Details:
Refine your sketch by adding the mask shape, the cap, the collar details, and the scattered confetti dots in the background. Keep pencil lines light so they don’t show through the paint later.
Clean Circles Tip
For perfectly round beads without painting hundreds of tiny circles manually, try using the end of a brush handle or a cotton swab dipped in paint as a stamp.
Step 2: Painting the Figure and Float
-
Skin Tones:
Mix a light wash for the skin tone. Apply it to the face and hands, leaving small negative spaces for highlights on the knuckles to suggest tension and grip. -
The Purple Coat:
Using a rich purple watercolor, paint the rider’s coat. Use a wet-on-dry technique to keep the edges crisp, but vary the pigment density to show folds and shadows in the fabric, particularly under the arm and along the side. -
Float Structure:
Paint the scrolling railing with a cool teal or turquoise. Apply an even flat wash first, then come back with a slightly darker shade to paint the shadow side of the scrollwork to give it a 3D effect. -
Mask and Headgear:
Paint the mask in green and the cap in brown. For the decorative feathers or trim on the cap, use a smaller brush to dab in texture.
Step 3: Beads and Confetti
-
Base Bead Layer:
Follow your pencil guidelines for the thrown necklace. Using the tip of a size 6 brush, dab small, circular dots of purple paint along the curve. Vary the spacing slightly to mimic motion. -
Gold Chains:
Repeat the dotting process for the gold and yellow beads draped over the railing and the rider’s neck. A golden ochre works well here as a base tone. -
Confetti Shower:
Scatter small dabs of various colors—blue, orange, pink—above the beads to represent confetti. Keep these shapes loose and irregular.
Bleeding Colors?
If your purple beads are bleeding into the background or each other, ensure the paper is bone dry between layers. Use a hair dryer on low heat to speed up the process.
Step 4: Detailing and Refining
-
Adding Depth to Beads:
Once the initial bead dots are dry, mix a darker, more concentrated version of each color. Paint a tiny crescent shape on the bottom right of each ‘bead’ to create a shadow, making them look spherical. -
Highlights:
I like to use a tiny touch of white gouache or acrylic here. Add a microscopic white dot to the top left of the focal beads and on the mask to make them sparkle. -
Fabric Patterns:
Use your finest brush to add the delicate embroidery patterns on the cuffs and collar. A mix of blue and gold creates a nice contrast against the purple fabric. -
Railing Shadows:
Deepen the shadows inside the teal scrollwork of the float. This high contrast helps the lighter railing pop forward. -
Final Cleanup:
Check the painting for any lost edges. If the arm needs more definition against the background, carefully deepen the purple edge. Erase any visible pencil marks that aren’t covered by paint.
Now step back and admire the energetic movement you’ve captured in your festive Mardi Gras scene

Street Musicians in the Parade Route
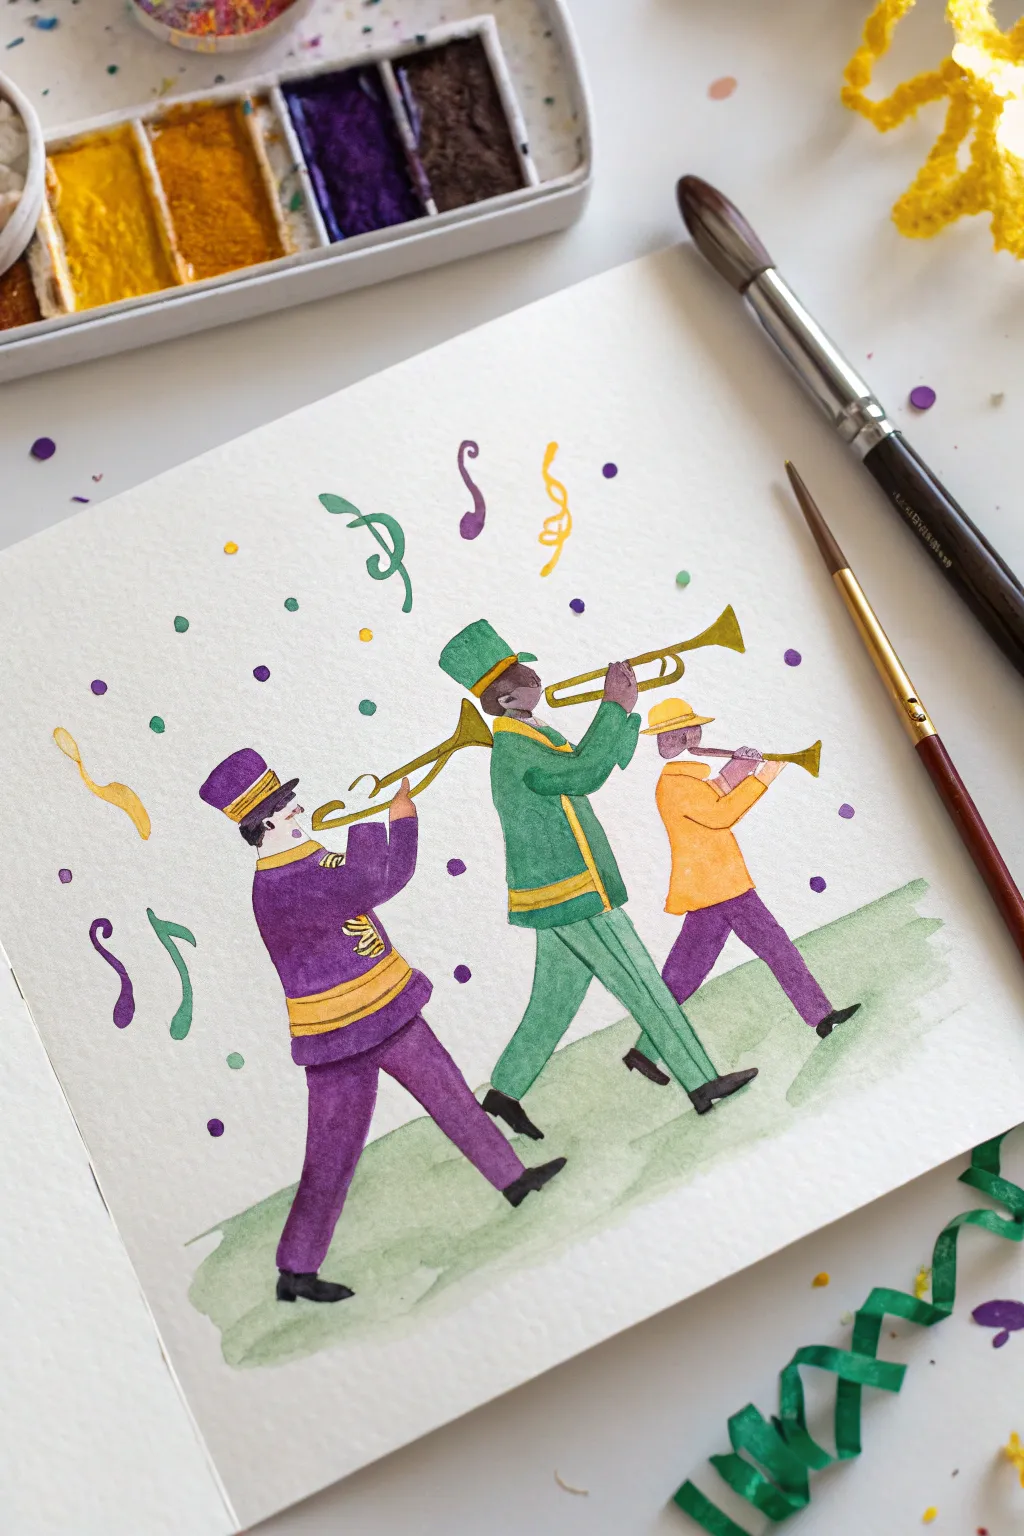
Capture the rhythm and soul of Mardi Gras with this charming watercolor trio of marching band musicians. Using the classic colors of purple, green, and gold, you’ll create a lively scene filled with musical notes and festive confetti.
How-To Guide
Materials
- Cold press watercolor paper (approx. 140lb/300gsm)
- Watercolor paint set (specifically purple, emerald green, warm yellow, gold, brown, and black)
- Round watercolor brushes (size 6 for washes, size 2 or 0 for details)
- Pencil (HB or H)
- Kneaded eraser
- Jar of clean water
- Paper towels
- Palette for mixing
Step 1: Sketching the Band
-
Draft the musician’s poses:
Start by lightly sketching the basic stick-figure skeletons of three figures marching in a diagonal line from the bottom left to the upper right. Position the front figure (left) leaning back slightly with a trombone, the middle figure centered with a trumpet, and the rear figure (right) smaller with a flute. -
Flesh out the uniforms:
Draw the shapes of their uniforms over the skeletons. Give the first musician a tall shako hat and a long coat. The middle musician wears a shorter cap and jacket, while the third wears a flat cap and short jacket. -
Add instruments and details:
Refine the shapes of the brass instruments. Sketch the trombone slide extending forward for the first player and the trumpet bell raised high for the second. Add facial profiles and hands gripping the instruments. -
Lighten the lines:
Once you are happy with the composition, gently roll a kneaded eraser over the entire sketch to lift up excess graphite, leaving only faint guidelines for painting.
Step 2: Painting the Musicians
-
Paint the purple uniform:
Load a size 6 brush with a rich violet or purple watercolor. Paint the jacket and pants of the first musician on the left, being careful to leave white gaps for the gold trim on the chest, waist, and cuffs. -
Fill in the green uniform:
Switch to an emerald green. Paint the jacket and pants of the middle musician. Similar to the first, leave narrow white strips on the sleeves, hem, and collar where the gold accents will go later. -
Color the third musician:
For the smallest figure on the right, use a warm yellow-orange for the jacket and a purple—slightly different from the first musician’s shade—for the pants. -
Add gold accents:
Mix a mustard yellow or use a metallic gold paint if you have it. Carefully fill in the reserved white spaces on the uniforms, including the buttons, sashes, and hat brims. I like to let the main colors dry completely first so the yellow doesn’t bleed. -
Paint the skin tones:
Mix a warm brown shade and carefully paint the hands and faces of the musicians. Use a fine-point brush (size 2) to keep the profiles sharp. -
Detail the instruments:
Using a diluted yellow-ochre or gold, paint the brass instruments. You can add a tiny touch of brown to the underside of the instruments to suggest shadow and dimension.
Bleeding Lines?
If your gold trim bleeds into the purple or green uniforms, your first layer wasn’t dry enough yet. Blot gently with a tissue immediately and wait longer before re-applying.
Step 3: Setting the Scene
-
Paint the boots:
Use black or very dark grey to paint the boots on all three figures. Keep the shapes simple and grounded. -
Create the grassy path:
Mix a very watery, pale green wash. Swipe a broad brush horizontally under the musicians’ feet to create a loose, abstract grassy ground. Let the edges be rough and uneven for an artistic look. -
Add musical notes:
Using your fine brush, paint whimsical musical notes and clefs floating above the musicians. Alternate between green, purple, and gold colors for these symbols. -
Sprinkle confetti dots:
Dip a small round brush into fairly concentrated paint (purple, green, yellow). Dot the tip onto the paper randomly around the figures to create confetti. -
Add streamers:
Paint a few curly, ribbon-like strokes in the air using the same Mardi Gras colors to represent falling streamers.
Make it Sparkle
For a true Mardi Gras flair, trace over the musical notes or the gold uniform braids with a metallic gold gel pen or glitter glue after the paint is fully bone-dry.
Now your festive parade is ready to march right off the page.


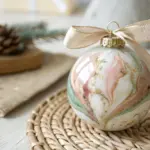
Carnival Color Gradient Background Study
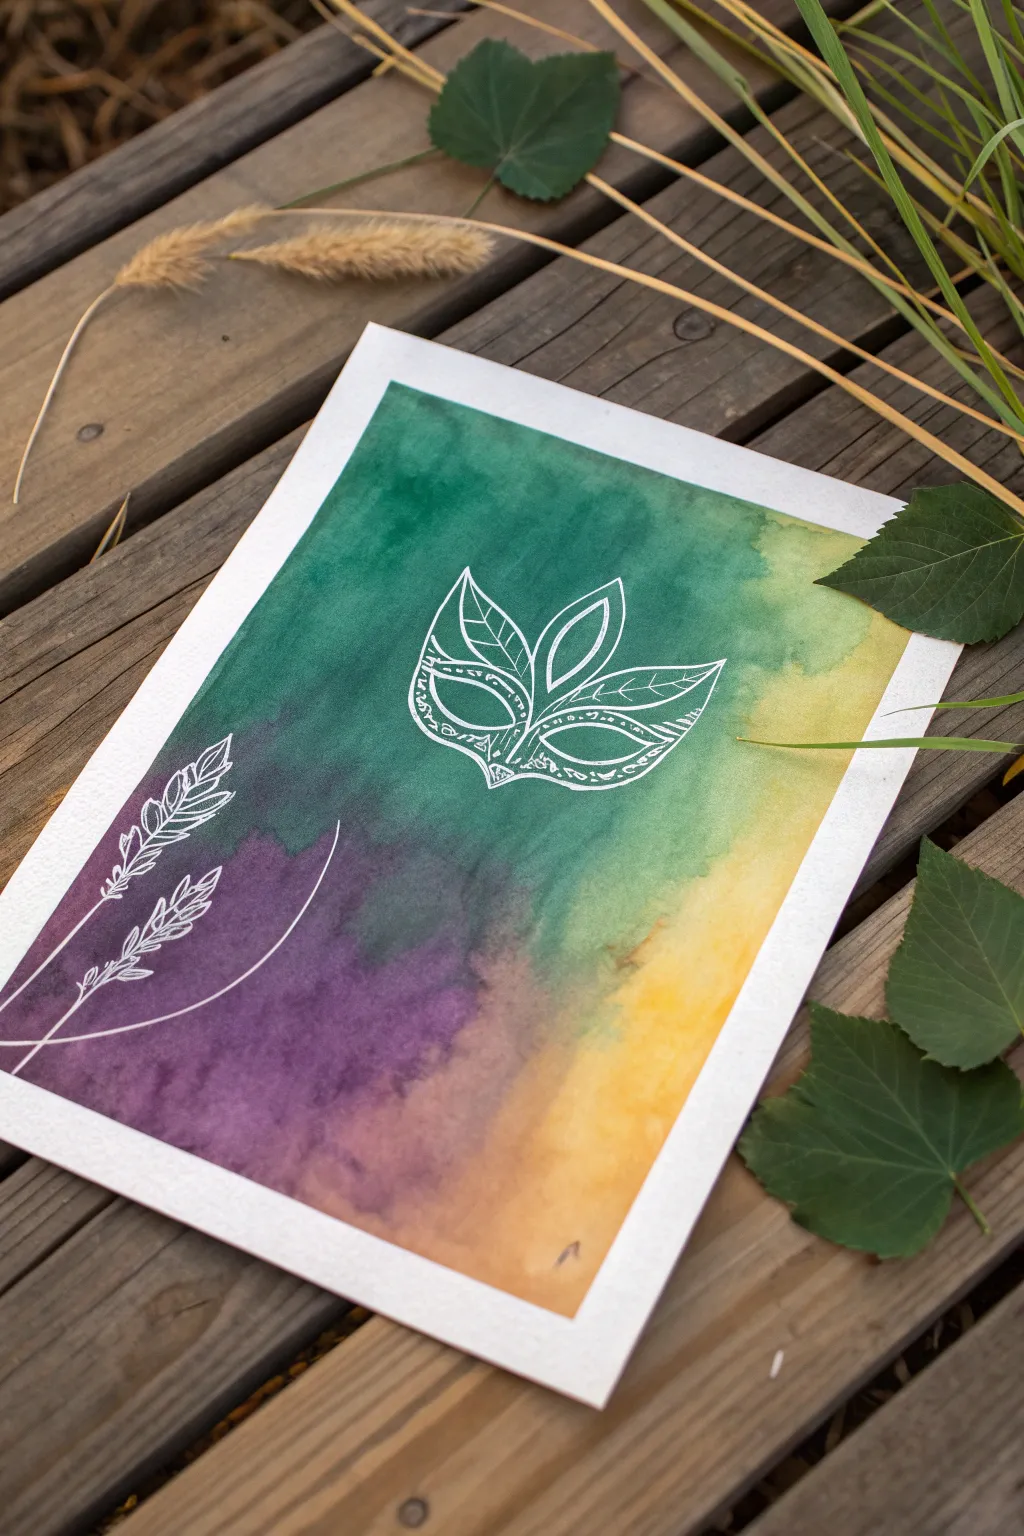
Capture the magic of Carnival with this elegant study of color blending and delicate line work. This project combines a classic Mardi Gras gradient wash with striking white ink illustrations for a modern, festive look.
Step-by-Step
Materials
- Cold-press watercolor paper (140lb/300gsm)
- Painter’s tape or masking tape
- Watercolor paints (Emerald Green, Violet/Purple, Gamboge or Golden Yellow)
- Flat wash brush (3/4 inch or 1 inch)
- White gel pen (e.g., Gelly Roll or Posca 0.7mm)
- Clean water jar
- Paper towels
- Pencil and eraser (optional for sketching)
Step 1: Setting the Stage
-
Prepare the surface:
Begin by securing your watercolor paper to a sturdy board or table using painter’s tape. Tape all four borders evenly; this not only holds the paper flat when wet but creates that professional, crisp white frame around your finished piece. -
Pre-wet the paper:
Using your large wash brush, apply a layer of clean water across the entire area inside the tape. You want the paper to be glistening and damp, but not so soaked that puddles form.
Tape Tactics
To prevent the tape from ripping your watercolor paper upon removal, stick the tape to your pants or shirt first to reduce its tackiness before applying it to the page.
Step 2: Creating the Gradient Wash
-
Apply the green:
Load your brush with a rich emerald green. Start applying it near the top left corner, sweeping diagonally downwards. Allow the paint to bloom and float in the water. -
Introduce the gold:
Rinse your brush thoroughly. Pick up your golden yellow paint and apply it to the bottom right corner, moving diagonally upward toward the center. Let the yellow occupy roughly a third of the page. -
Add the purple foundation:
Clean your brush again and load a deep violet. Apply this to the bottom left corner where the green and unpainted areas meet. -
Blend the transitions:
Gently nudge the wet edges of the colors together. Where green meets yellow, let them mix slightly on the paper to create a natural transition. Where purple touches the green, be careful not to overwork it, or it may turn muddy. -
Deepen the intensity:
While the paper is still wet, drop in more pigment into the core centers of each color zone to increase saturation. I find adding a second drop of violet right in the darkest corner makes a huge difference. -
Dry completely:
This is crucial: let the painting dry 100%. If the paper is cool to the touch, it’s still damp. Using a hairdryer on a low setting can speed this up, but patience yields the smoothest texture.
Step 3: Line Art Detailing
-
Sketch the layout (optional):
If you are nervous about freehanding with ink, very lightly sketch the mask shape in the upper center and the leaf sprigs in the bottom left using a hard pencil. -
Outline the mask:
Using your white gel pen, draw the central mask shape. Start with the two eye openings, shaped like elongated leaves, then draw the outer contour which flares up into three leaf-like points at the top. -
Add mask patterns:
Fill the interior of the mask outline with decorative patterns. Use small dots, dashed lines, and leaf-vein structures to give the mask an organic, intricate feel. -
Draw the botanical sprigs:
In the bottom left corner over the purple section, draw two simple stems curving upward. Add small, leaf-like loops along the sides of the stems to create a fern or wheat-like appearance. -
Refine the lines:
Go over your white lines a second time if the watercolor background is showing through too much. Sharp, opaque white lines pop best against the dark purple and green values.
Metallic Accent
For a true Mardi Gras shimmer, trace over the white gel pen lines with a metallic gold paint pen, or flick gold watercolor splatters over the dry background.
Step 4: Final Touches
-
Add final curves:
Draw one or two sweeping, curved lines connecting the bottom botanical elements toward the center, creating movement and flow across the composition. -
Reveal the border:
Once the white ink is fully dry, slowly peel away the painter’s tape. Pull the tape away from the center of the painting at a 45-degree angle to prevent tearing the paper surface.
Now you have a vibrant, festive piece of art ready to frame for the celebration
BRUSH GUIDE
The Right Brush for Every Stroke
From clean lines to bold texture — master brush choice, stroke control, and essential techniques.
Explore the Full Guide
Confetti Burst Abstract Celebration
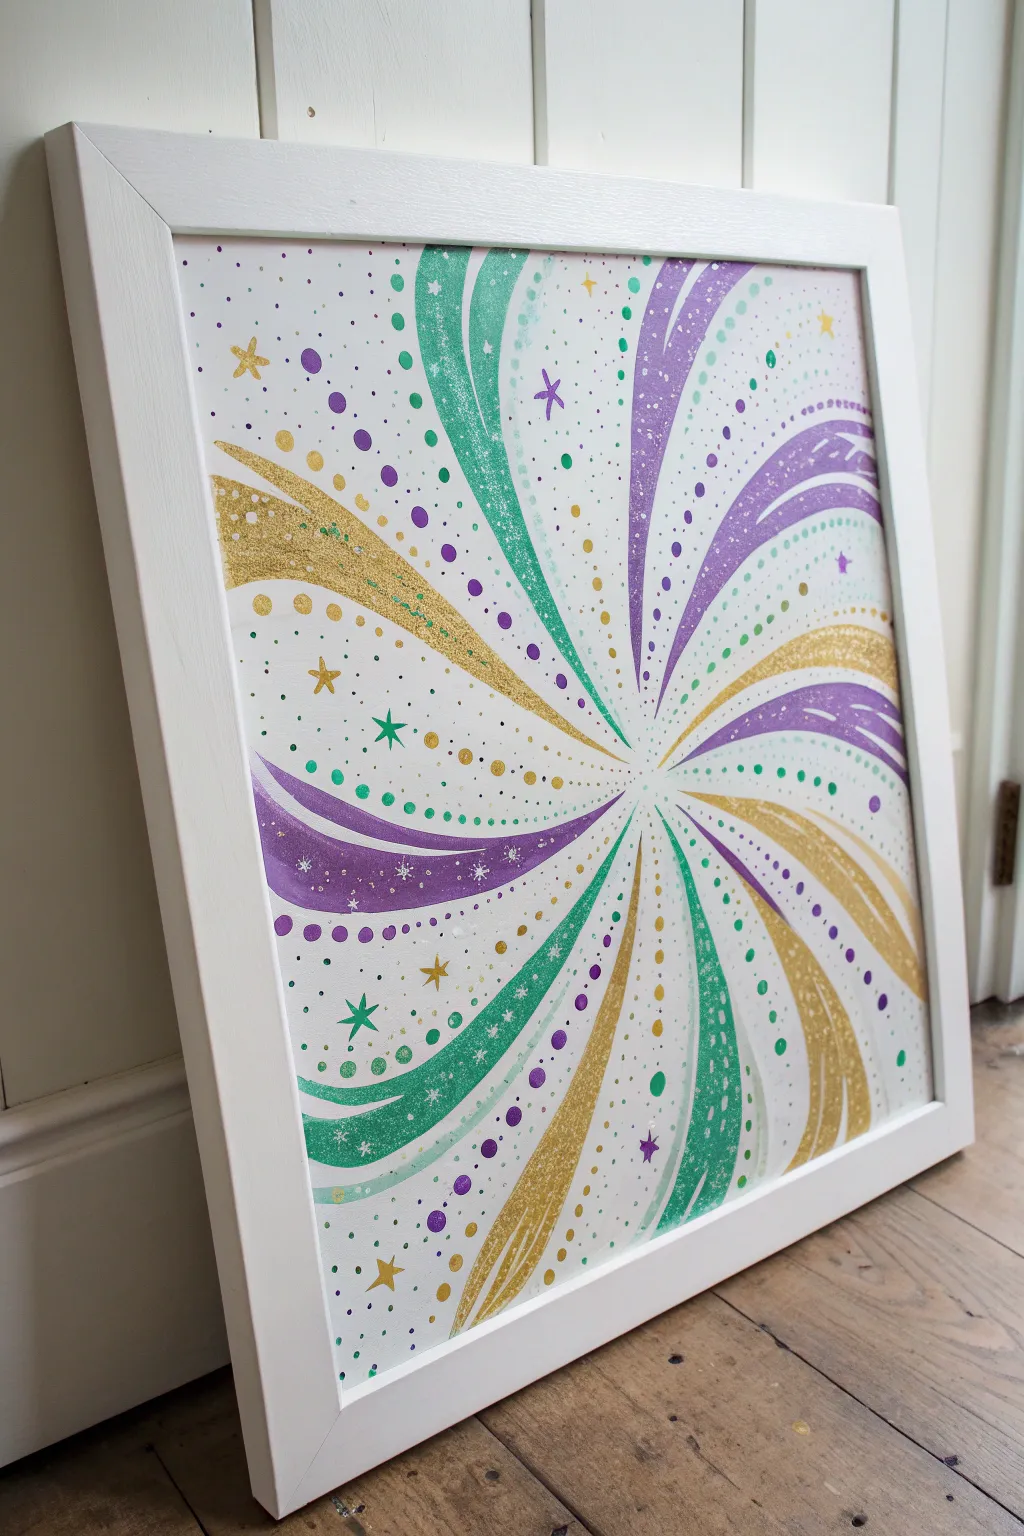
Capture the explosive energy of a Mardi Gras parade with this radiant abstract painting, featuring swirls of purple, green, and gold dancing from a central point. This design uses layered textures, varied dot sizes, and subtle starry accents to create a festive piece that feels like a confetti cannon frozen in time.
Step-by-Step Guide
Materials
- Square canvas or watercolor paper (approx. 12×12 or 16×16 inches)
- White acrylic gesso (if priming is needed)
- Acrylic paints: Bright Purple, Emerald Green, Metallic Gold, and Titanium White
- Fine glitter paint or loose extra-fine glitter (purple, green, gold)
- Assorted round brushes (sizes 2, 4, and 8)
- Pencil and eraser
- Ruler
- Dotting tools (or the back of paintbrush handles)
- Palette for mixing
Step 1: Planning the Composition
-
Find your center:
Start by lightly marking the exact center of your square canvas with a pencil. This small dot will be the origin point for all your celebratory energy. -
Map the quadrants:
Using a ruler, lightly sketch vertical, horizontal, and diagonal lines passing through the center to create 8 equal pie-slice sections. These guide lines help ensure your swirling colors stay balanced around the wheel. -
Sketch the primary swirls:
Draw curved, tapering shapes originating from the center and sweeping outward toward the edges. Imagine the motion of a pinwheel; make the curves progressively wider as they reach the frame.
Step 2: Painting the Bands
-
Start with the gold:
Select several of your sketched swirls to be gold. Using a medium round brush (size 8), paint these bands with metallic gold acrylic. Keep your strokes following the curve of the shape for a sense of flow. -
Apply the green layer:
Fill a second set of swirls with emerald green. If the paint feels opaque, try thinning it slightly with water or a glazing medium to achieve the semi-transparent, textured look seen in the original. -
Add the purple accents:
Complete the triad by painting the remaining primary swirls in bright purple. Ensure you leave plenty of white negative space between these colored bands—don’t let them touch. -
Create texture:
Once the base coats are tacky but not fully dry, lightly stipple over them with a dry brush or sponge. This breaks up the solid color and adds a weathered, vintage confetti vibe. -
Overlay with glitter:
For that essential Mardi Gras sparkle, paint a layer of glitter glaze over the corresponding colored bands. I find it works best to apply this while the base color is completely dry to prevent muddiness.
Dot Consistency Tip
Reload your dotting tool after every single dot for uniform size. If you want a tapering ‘tail’ of dots that get smaller, dot 3-4 times before reloading.
Step 3: Adding Details and Movement
-
Large dot placement:
Dip the handle end of a large paintbrush or a dotting tool into your acrylic paints. Place a series of large dots following the invisible currents between your painted bands. -
Medium and small dots:
Switch to a smaller tool and add trails of medium and fine dots. Let these trails weave in and out of the negative space, shadowing the curves of the main swirls. -
Add secondary ribbons:
Using a fine liner brush (size 2), paint very thin, whispy lines of color parallel to your thick bands. These delicate strokes act as ‘echoes’ of the main shapes. -
Paint the stars:
Scatter small 5-point stars randomly throughout the white space. Use gold for the majority, but mix in a few purple and green stars for variety. -
Highlight with white:
Using your smallest brush, add tiny specks of white or very pale yellow inside the larger colored dots to give them dimension and shine. -
Add micro-details:
Fill any large empty gaps with tiny micro-dots or ‘dust’ using the very tip of a brush. This density makes the center feel more explosive. -
Clean up edges:
If any paint went over the planned areas, touch up the white background with titanium white or gesso for a crisp finish. -
Varnish and seal:
Once fully cured, apply a glossy varnish spray to protect the glitter and unify the sheen of the different paints.
Make It 3D
Use dimensional fabric paint (puffy paint) for the dots instead of flat acrylics. This adds brilliant tactile texture that literally pops off the canvas.
Frame your vibrant artwork in simple white molding to let the spirited colors truly take center stage
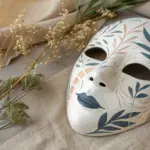
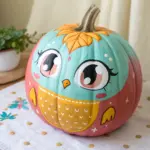
Whimsical Animal in Mask and Beads

Celebrate the festive season with a delicate watercolor sparrow donning its own Mardi Gras finery. This whimsical illustration combines realistic bird features with playful elements like a beaded necklace and colorful plumage, all rendered on textured paper.
How-To Guide
Materials
- Cold press watercolor paper (300 gsm)
- HB pencil and kneaded eraser
- Watercolors (Burnt Sienna, Yellow Ochre, Ultramarine Blue, Alizarin Crimson, Sap Green, Cobalt Violet)
- Small round brushes (size 0, 2, and 4)
- Fine liner pen (brown or sepia, optional)
- Gold metallic watercolor paint or gold ink
- Paper towels and water cup
Step 1: Sketching the Composition
-
Outline the bird:
Start with a light pencil sketch. Draw a simple oval for the body and a smaller circle for the head to get the proportions right. Add the beak’s triangular shape and mark the eye placement. -
Add festive accessories:
Above the head, sketch three distinct feather shapes flaring upward—these will be the Mardi Gras plumage. Lightly draw loops around the bird’s neck to indicate where the bead necklace will drape. -
Draw the branch:
Sketch a diagonal branch beneath the bird’s feet. Extend a few smaller twigs downwards and add small circles for the berries and teardrop shapes for the leaves. -
Refine and erase:
Refine the bird’s wing placement and tail feathers with cleaner lines. Use a kneaded eraser to lift up the darkest graphite, leaving only a faint guide for your paint.
Eye Sparkle Tip
When painting the bird’s black eye, carefully leave a tiny speck of dry white paper unpainted. This reflection makes the bird look alive and alert.
Step 2: Painting the Sparrow
-
Base layer for the feathers:
Mix a diluted wash of Burnt Sienna and a touch of Ultramarine Blue to create a soft brown. Apply this to the wings and back, letting the water create natural texture on the cold press paper. -
Detailing the head:
Using a smaller brush (size 2), paint the distinctive sparrow markings. Use a dark brown-grey around the eye and on the throat patch, but leave white space around the cheek and neck. -
Soft belly wash:
With very watery pale grey (mix a tiny dot of black with plenty of water), add shadows to the underside of the belly to give the bird volume. Keep the center of the chest mostly white. -
Defining the wings:
Once the base brown is dry, use a slightly thicker mixture of dark brown to paint the individual flight feathers on the wing and tail. Use fine strokes to mimic the texture of feathers.
Mask Up Your Bird
Make it even more carnival-ready by painting a tiny masquerade mask over the bird’s eyes using purple and gold, instead of just the natural bird markings.
Step 3: Adding Mardi Gras Colors
-
Purple plumage cap:
Paint the top of the head—the ‘cap’—with a vibrant Cobalt Violet. Let this area serve as the base for the head feathers. -
The festive feathers:
Paint the three plumes you sketched earlier. Use Sap Green for the left feather, Cobalt Violet for the center, and a warm Yellow Ochre for the right one. Paint small, flicking strokes outward from the stem of each feather to create a fluffy texture. -
Painting the necklace base:
Before adding gold, lay down a base color for the beads. Use a mix of Yellow Ochre and brown to paint small circles along the necklace line. This creates a shadow and dimension for the gold later.
Step 4: Surroundings and Final Details
-
Branch and feet:
Paint the branch with a mix of Burnt Sienna and grey. While painting the branch, carefully fill in the bird’s feet with a greyish-brown, wrapping the toes around the wood. -
Berries and leaves:
Fill the berry circles with purple. While wet, drop a tiny bit of darker purple on one side for shadow, and lift a dot of paint on the other side for a highlight. Paint the leaves with Sap Green. -
The gold touch:
I love this step—it really brings the sparkle. Take your metallic gold paint (or ink) and carefully dot it over the necklace beads. Add a few gold highlights to the yellow feather plume as well. -
Fine details:
Use a size 0 brush or a fine liner pen to add the final crisp details: the pupil of the eye, the split in the beak, and thin veins on the leaves.
Allow your festive little bird to dry completely before framing or gifting


Have a question or want to share your own experience? I'd love to hear from you in the comments below!