Masks are basically wearable canvases—one minute they’re plain, and the next they’re a whole new character staring back at you. Here are my favorite mask ideas to paint, draw, and build, starting with the classics and drifting into more experimental, artsy territory.
Classic Masquerade Mask
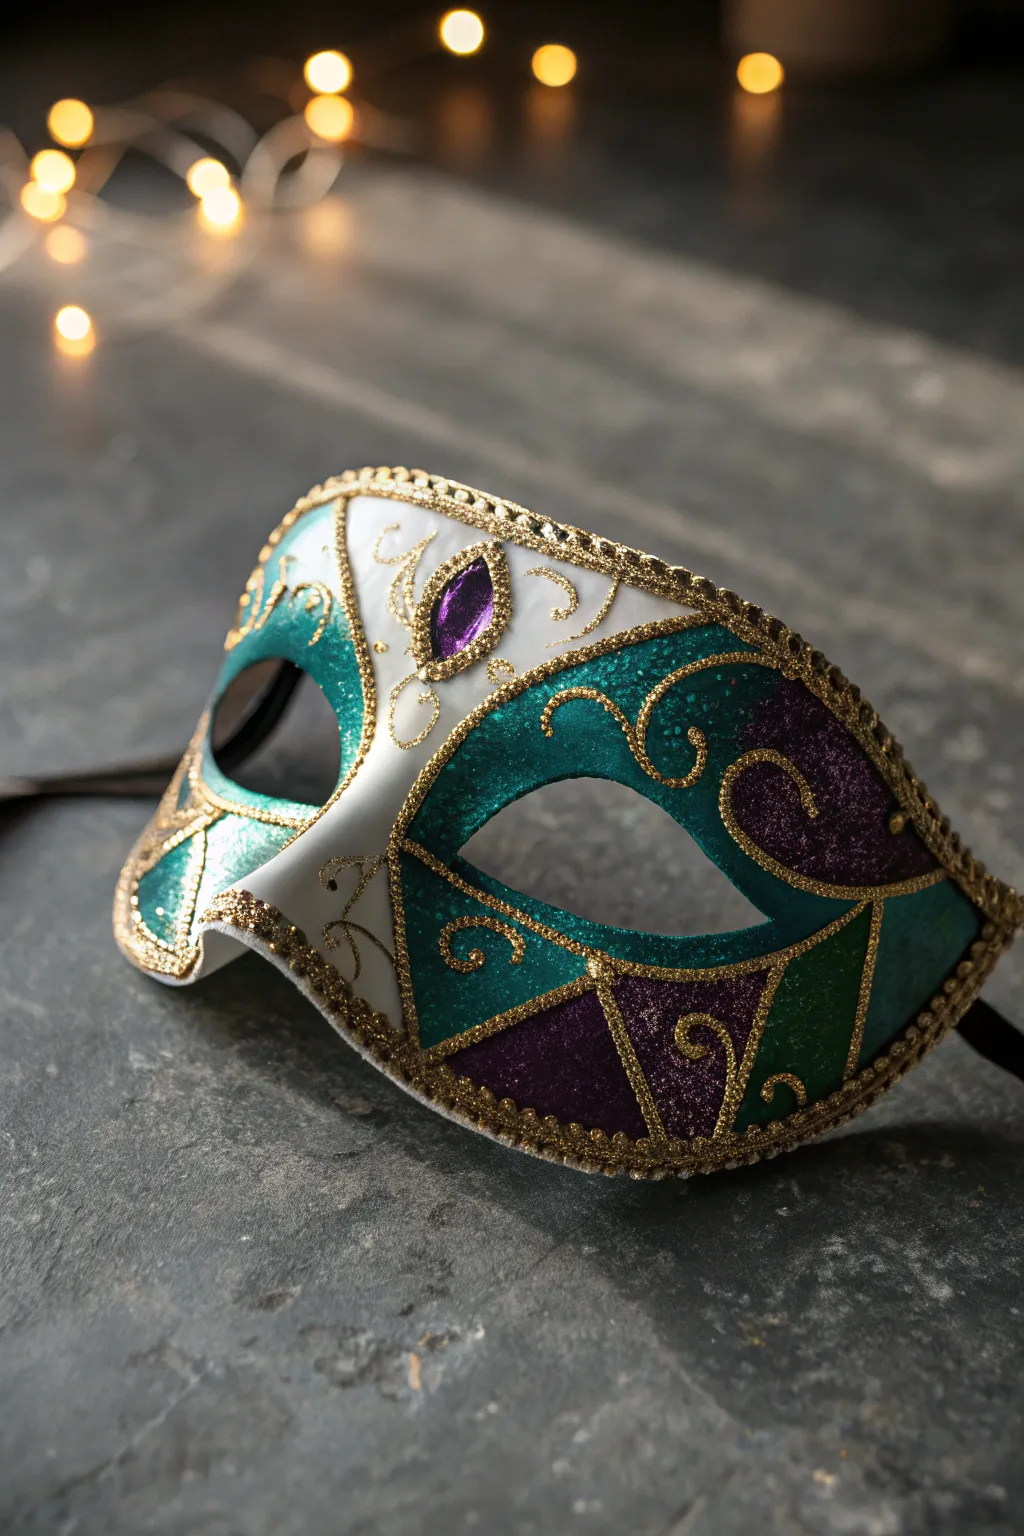
Capture the mystery of a Venetian carnival with this stunning handcrafted mask featuring a classic harlequin diamond pattern. The rich teal and royal purple design, accented with shimmering gold glitter and scrollwork, creates a sophisticated accessory perfect for your next masquerade ball.
Step-by-Step Guide
Materials
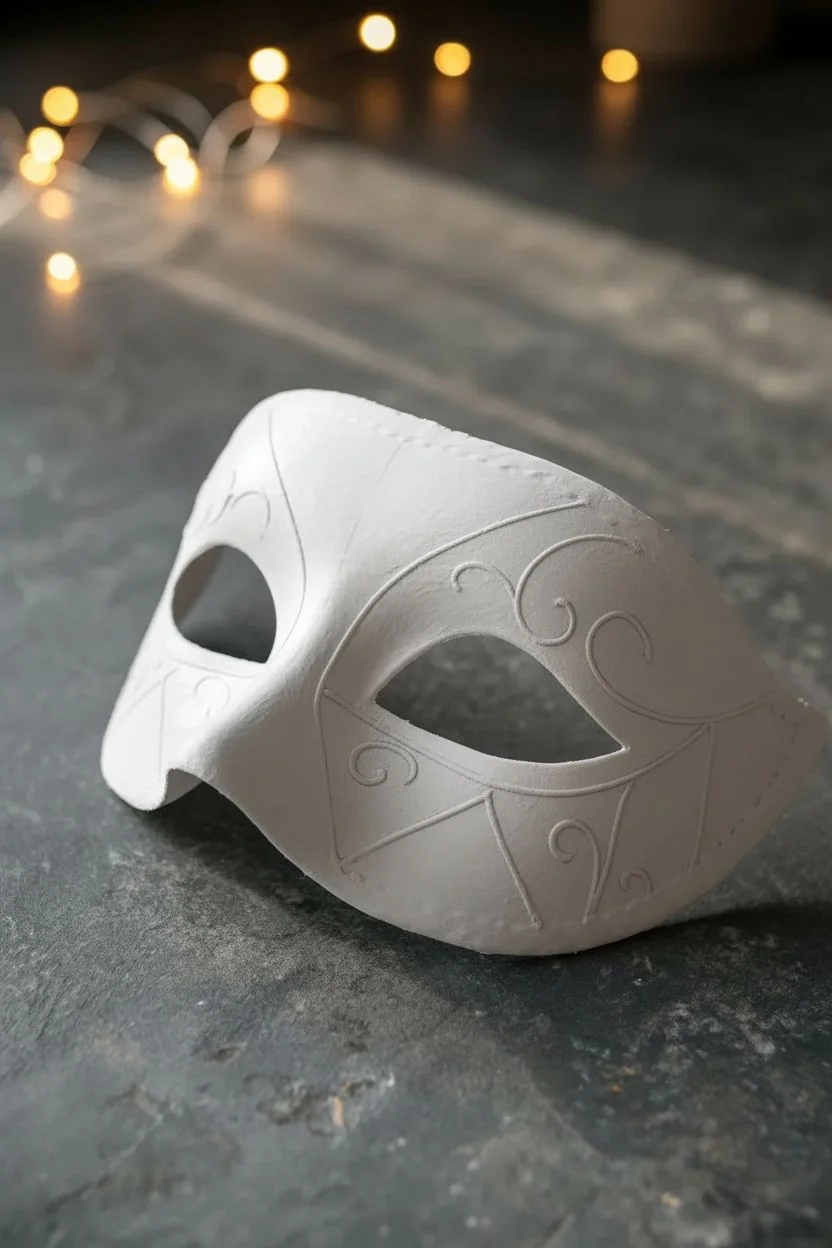
- Plain white papier-mâché or plastic half-face mask base
- Acrylic paints: White, emerald green mixed with a touch of teal, deep purple
- Gold glitter glue or loose gold glitter with fine-tip glue pen
- Gold trim or braided cord (approx. 5mm width)
- Purple faux gemstone (teardrop shape)
- Fine detail paintbrush (sizes 0 and 2)
- Medium flat paintbrush
- Gold paint marker or metallic acrylic paint
- Pencil for sketching
- Hot glue gun and glue sticks
- Clear sealant spray (gloss finish)
Step 1: Base Painting and Mapping
-
Prime the Surface:
Begin by painting the entire mask with a fresh coat of white acrylic paint, even if the base is already white. This ensures a uniform texture and gives the subsequent colors a bright foundation. Let this dry completely. -
Sketch the Center Line:
Using a pencil, lightly mark the vertical center of the mask starting from the nose bridge. This will help you balance the asymmetrical harlequin design. -
Draft the Harlequin Pattern:
On the right side of the mask (wearer’s left), sketch a large elongated diamond shape around the eye hole. Extend lines downwards to create triangular sections on the cheek area. -
Outline the Scrollwork:
On the left side (wearer’s right), sketch a sweeping curve around the eye hole, similar to a paisley shape. Add light scroll motifs on the forehead and cheek area of the white section.
Uneven Glitter Lines?
If your hand feels shaky with the glitter glue bottle, squeeze a puddle onto a palette and apply it with a fine liner brush instead. You’ll have much more control over the flow.
Step 2: Applying Color
-
Paint the Teal Sections:
Mix your emerald green with a tiny drop of teal to match the reference. Using a medium brush, fill in the large area around the left eye and specific triangular sections on the right cheek as drawn. -
Add the Royal Purple:
Use the deep purple acrylic to fill in the remaining diamond or triangle sections on the right side. Be careful to keep your edges crisp where the purple meets the teal. -
Layering for Opacity:
These darker colors may streak on the first pass. I usually apply a second coat after the first is touch-dry to get that rich, velvety finish seen in the photo. -
Clean Up:
If you painted over any lines intended to remain white, use a small brush with white paint to tidy up the edges once the colors are dry.
Step 3: Gilding and Embellishment
-
Pipe the Gold Borders:
Using a gold glitter glue pen or a fine brush with gold paint, carefully outline every boundary between the colors. The gold lines should separate the purple, teal, and white sections distinctly. -
Add Decorative Scrolls:
On the darker painted sections, paint delicate gold scrollwork or swirls directly over the teal and purple. Keep these lines fine and elegant. -
Detail the White Section:
Enhance the white left side by tracing your pencil scroll marks with gold. These should be wispy, organic swirls adding texture to the plain background. -
Attach the Braided Trim:
Starting at the outer corner, use a hot glue gun to attach the gold braided trim along the entire perimeter of the mask. Work in small sections to ensure the glue doesn’t harden before you press the trim down. -
Trim the Eye Holes:
Optionally, you can glue a thinner strand of gold cord or pipe a thick line of glitter glue around the inner edge of the eye holes for a polished look.
Pro Tip: Dimension
Mix a tiny bit of clear gloss varnish into your dark teal and purple paints before applying. It gives the colored sections a jewel-like sheen contrasting nicely with the matte white.
Step 4: Final Touches
-
Set the Gemstone:
Place a drop of hot glue or strong craft adhesive in the center of the forehead area, right where the design splits. Press the purple teardrop gemstone firmly into place. -
Add Gem Settings:
Pipe a ring of gold glitter glue around the base of the gemstone to simulate a jewelry setting and hide any glue residue. -
Check for Gaps:
Inspect your glitter lines. If any look thin or broken, go back over them with a second pass to ensure they catch the light beautifully. -
Seal the Work:
Once absolutely everything is dry (glitter glue can take hours), spray the mask with a light coat of clear gloss sealant. This protects the paint and stops glitter from flaking off. -
Attach Ties:
If your mask base didn’t come with ribbons, hot glue a length of black satin ribbon to the inside edge of each temple.
Allow the mask to dry overnight before wearing it, ensuring your exquisite handiwork is ready for the spotlight


Feather-and-Gem Statement Mask
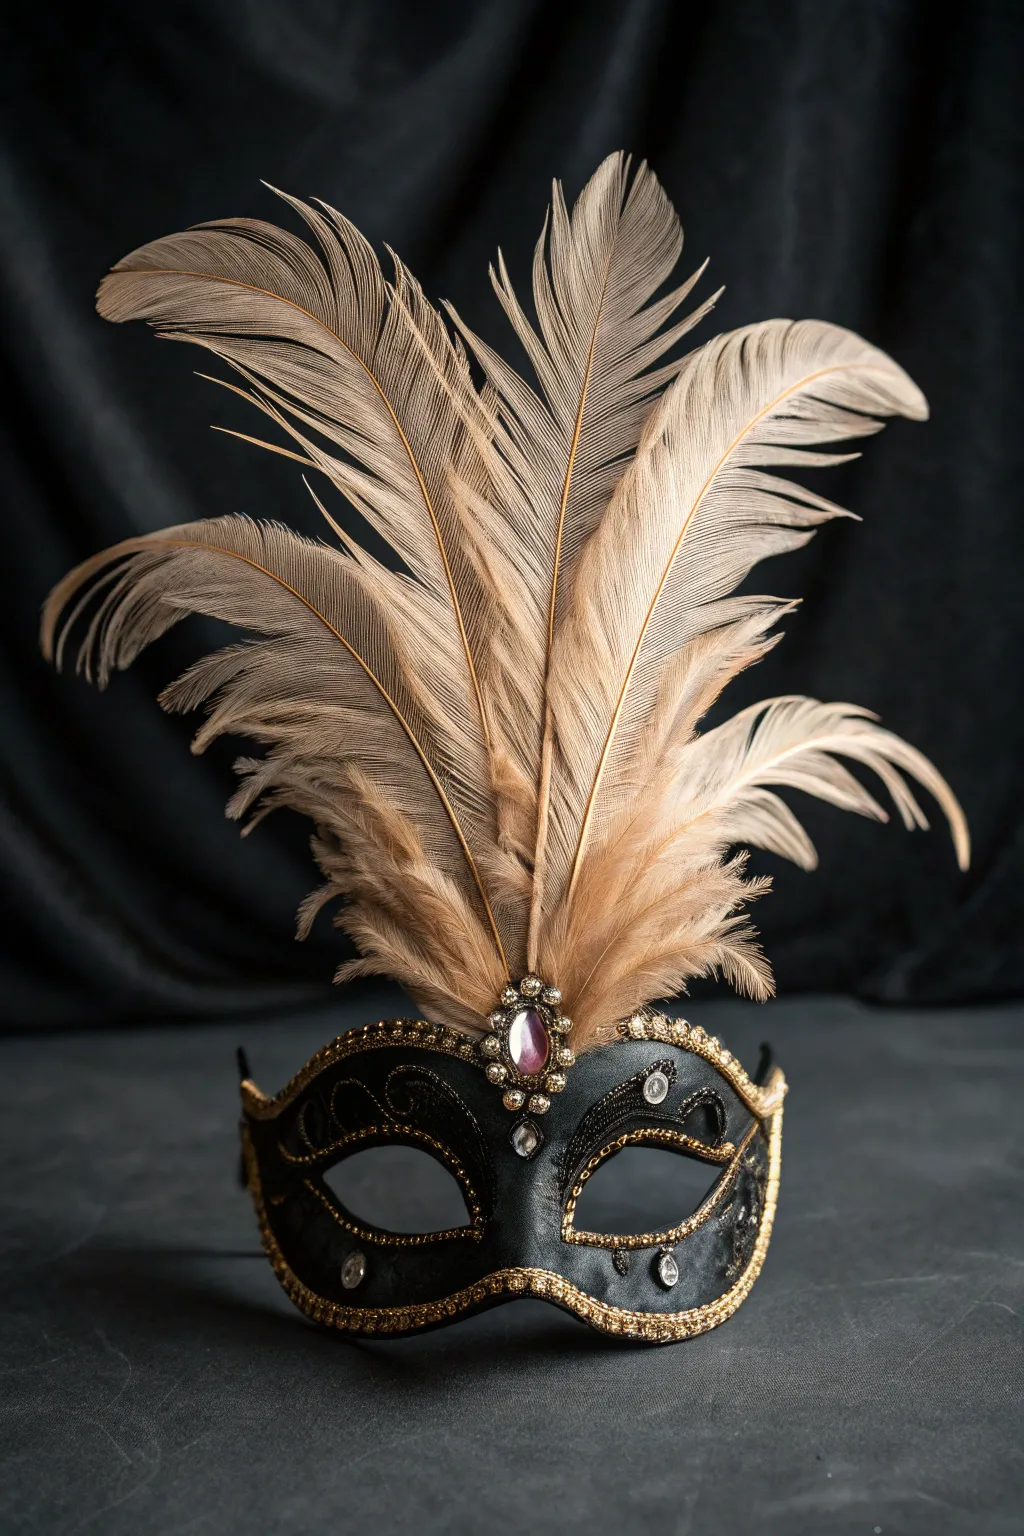
Evoke the mystery of a midnight ball with this striking mask, featuring a bold contrast of matte black against shimmering gold trim. The centerpiece is a dramatic fan of champagne feathers rising from a clustered jewel setting, creating an accessory that demands attention.
Detailed Instructions
Materials
- Black Venetian-style eye mask base (fabric or hard shell)
- Champagne or light brown ostrich feathers (8-10 inches)
- Metallic woven gold braid trim (approx. 1/4 inch wide)
- Gold sequin string or fine bead trim
- Large pink teardrop rhinestone
- Assorted clear and AB rhinestones (round)
- Gold filigree finding or rhinestone setting
- Hot glue gun and clear glue sticks
- Fabric glue (optional but recommended for precision)
- Scissors
Step 1: Preparing the Base
-
Inspect the mask base:
Start with a clean black eye mask. If you have a plain plastic mask, you may want to cover it in black velvet or satin fabric first for that rich, light-absorbing background seen in the photo. -
Map out the design:
Before gluing anything, visualize where your main gold trim will go. The design features a continuous border around the entire outer edge and outlining the eye holes.
Step 2: Applying the Gold Trim
-
Edge the eyes:
Carefully run a thin bead of hot glue around the right eye socket. Press the metallic woven gold braid into the glue, working in small sections to prevent the glue from cooling too fast. -
Complete the eye detailing:
Repeat the trimming process for the left eye socket, ensuring the ends of the trim meet neatly at the bridge of the nose or the outer corners to hide the seams. -
Border the mask:
Apply the same woven gold braid to the entire perimeter of the mask. Start gluing from the top center where the feathers will eventually go; this hides the starting and stopping point under the eventual embellishments. -
Add inner scrollwork:
Using the finer gold sequin string or bead trim, create the swirled details on the mask’s surface. Create a gentle ‘S’ curve or loop on the cheeks and forehead area, securing with small dots of glue.
Heavy Feather Fix
If the feathers flop forward, glue a vertical popsicle stick or stiff wire piece to the back of the mask, extending up behind the feather stems for invisible support.
Step 3: Creating the Feather Centerpiece
-
Arrange the feather fan:
Take 5 to 7 champagne ostrich feathers. Hold them in a fan shape in your hand, staggering the heights slightly so the central feathers are tallest and the side ones tilt outward. -
Bind the quill base:
Once you like the arrangement, wrap the base of the quills tightly together with a bit of tape or wire. This creates a single, stable unit to attach rather than gluing feathers individually. -
Attach to the mask:
Apply a generous amount of hot glue to the top center backside of the mask—or the front top edge if you plan to cover the stems entirely. Press the feather bundle firmly in place and hold until completely set. -
Conceal the stems:
Glue a small scrap of black felt or fabric over the feather stems on the back of the mask to ensure they don’t scratch your forehead when worn.
Make It Antique
Lightly dry-brush black acrylic paint over the bright gold braid trim to give it an aged, tarnished vintage look that matches historical costumes better.
Step 4: Jeweled Embellishment
-
Create the focal point:
At the very center top of the mask, right at the base of the feathers, glue down your gold filigree finding or a cluster of smaller clear rhinestones to create a base. -
Set the main gem:
Place the large pink teardrop rhinestone vertically in the center of your metallic cluster. This anchors the look and transitions the eye from the black mask to the light feathers. -
Add surrounding sparkle:
Gluing smaller clear crystals around the pink gem creates a ‘brooch’ effect. I find using tweezers helps place these tiny stones accurately. -
Accent the cheeks:
Place a few medium-sized clear rhinestones within the gold scrollwork loops you created earlier on the cheeks or near the corners of the eyes for balance. -
Final inspection:
Check for any wisps of hot glue (‘spiderwebs’) and gently pull them away. Ensure all trim ends are securely glued down so they don’t lift during wear.
You now have a sophisticated masquerade piece ready for an elegant evening out


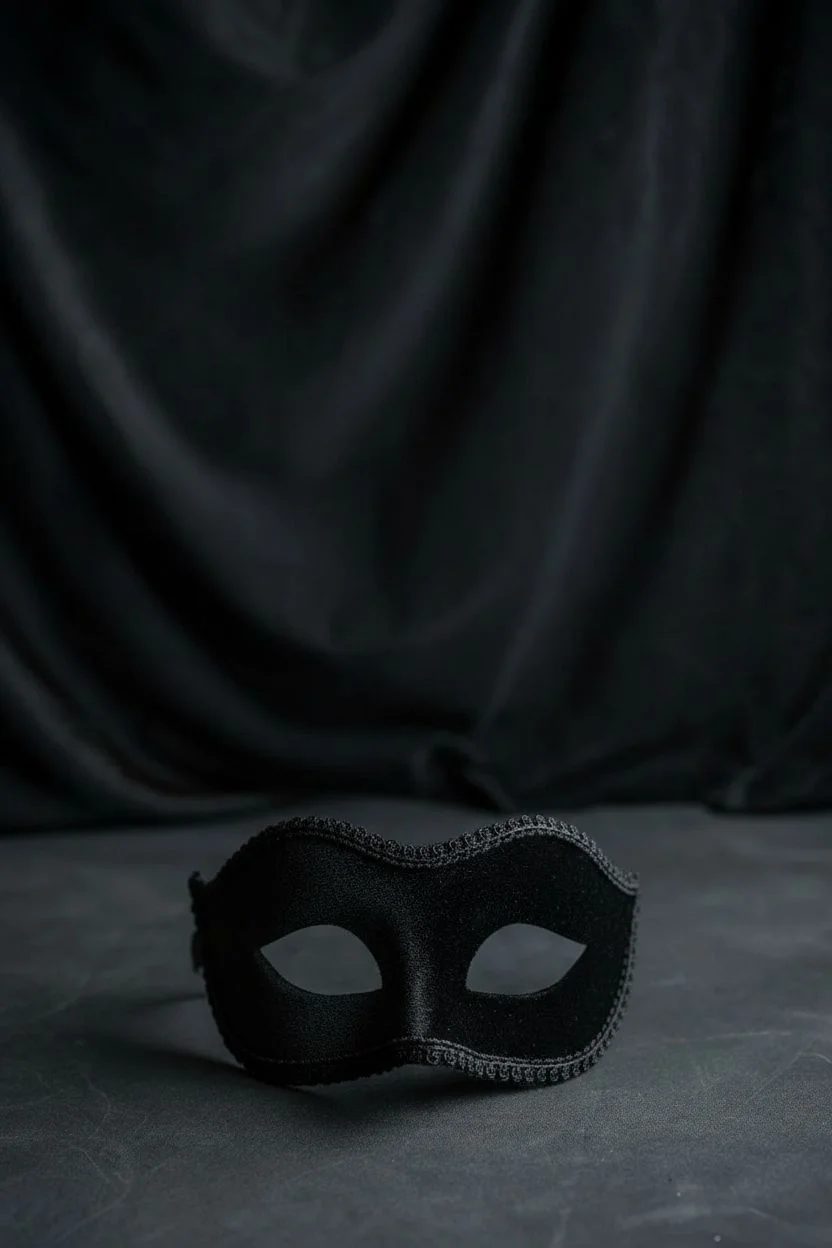
Superhero Eye Mask
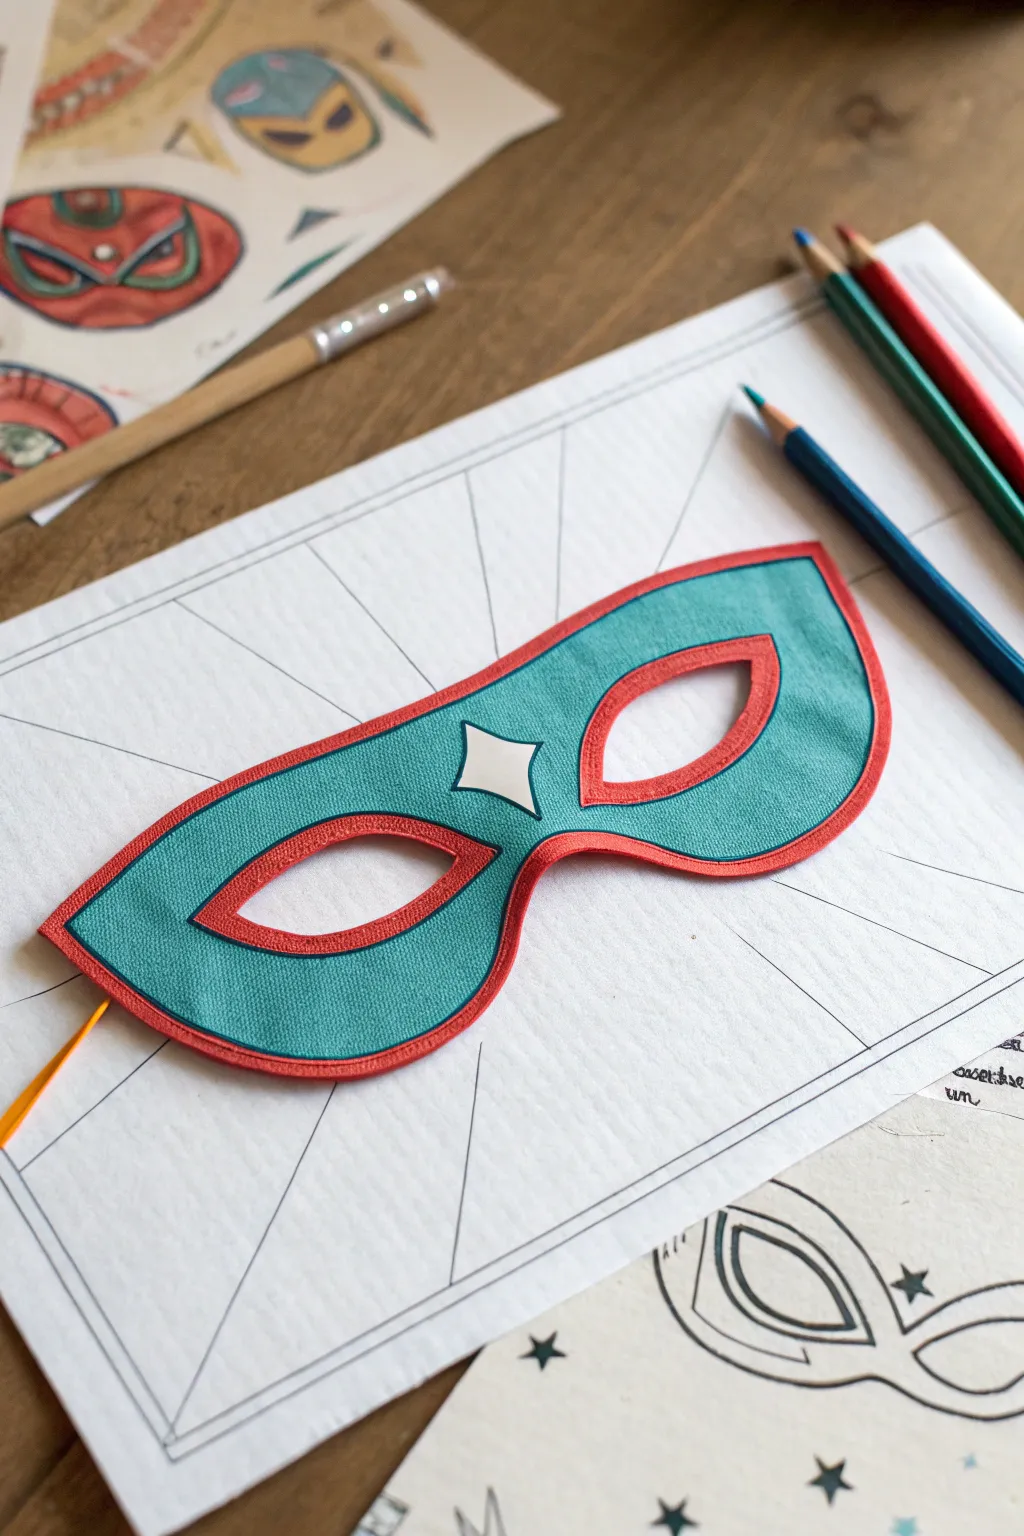
Channel your inner hero with this strikingly simple teal and red eye mask. Its clean lines and bold color contrast give it a professional comic-book look while remaining an easy afternoon papercraft project.
Step-by-Step Guide
Materials
- Heavyweight white cardstock or watercolor paper
- Pencil and eraser
- Ruler
- Teal or aqua marker (or acrylic paint)
- Red fine-tip marker or pen
- Red broad-tip marker or paint pen
- Scissors or craft knife
- Elastic string or ribbon
- Hole punch (optional)
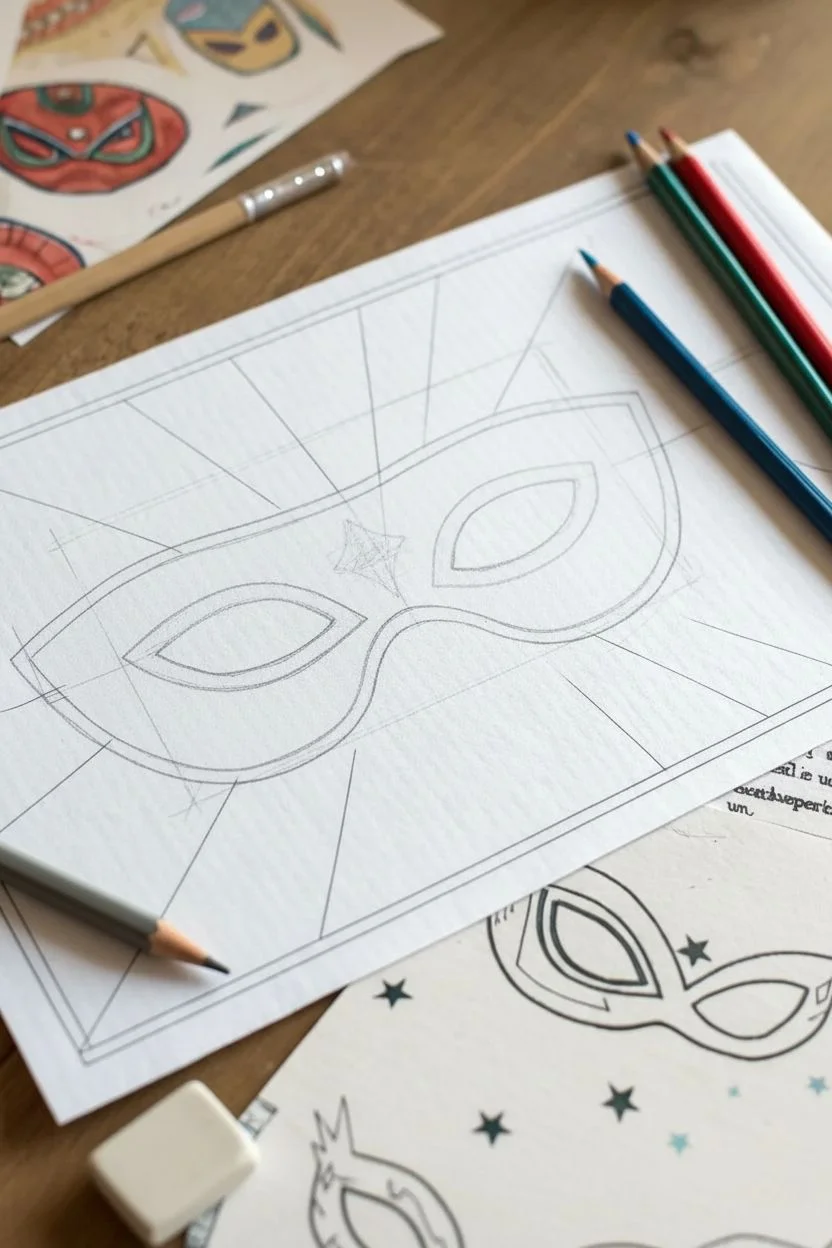
Step 1: Planning the Shape
-
Establish the width:
Start by measuring the width of the wearer’s face, specifically from temple to temple. Mark this width on your heavy cardstock to ensure the mask will fit comfortably. -
Draw the center point:
Find the exact middle of your width line and mark it lightly. This will be the center of the nose bridge where the diamond detail will go. -
Sketch the eye openings:
Draw two almond-shaped eye holes. They should be large enough to see through clearly but angled slightly upwards at the outer corners for that classic hero look. Keep them symmetrical around your center point. -
Outline the mask body:
Sketch the outer perimeter of the mask. Create a smooth curve that goes over the eyebrows and dips down around the cheeks, winging out slightly at the temples. -
Add the center diamond:
Draw a four-pointed star or diamond shape directly in the center of the forehead area, between the eye holes. This area will remain white.
Clean Lines Hack
If you struggle with steady lines, place a piece of scrap paper over the mask area you aren’t coloring to act as a shield for your hand.
Step 2: Adding Color
-
Define the borders:
Before filling in any color, use your red fine-tip marker to outline the eye holes and the entire outer edge of the mask. This creates a barrier to help you color inside the lines later. -
Create the inner red rim:
Thicken this red outline. Draw a second line parallel to the first, about 3-4mm inward from the edge. Fill the space between these lines with your broad red marker to create a solid red border. -
Outline the diamond:
Using a very steady hand or the fine-tip red pen, outline the center diamond shape. I find it helpful to rotate the paper as I draw to keep the angle comfortable. -
Fill the teal base:
Take your teal or aqua marker and begin filling in the main body of the mask. Work carefully around the red borders and the white diamond center. -
Layer for saturation:
If your marker looks streaky, let the first layer dry for a minute and then apply a second coat. Moving in small circular motions can help achieve that smooth, fabric-like finish seen in the photo.
Step 3: Finishing Touches
-
Refine the edges:
Go back over the red borders one last time to ensure they are crisp and opaque, covering any spot where the teal might have bled slightly. -
Cut it out:
Carefully cut out the mask along the outer edge. For the eye holes, poke a small hole in the center of the almond shape first, then use small pointed scissors to cut towards the red rim. -
Attach the strap:
Punch small holes on the far left and right wings of the mask. Thread your elastic string or ribbon through these holes and knot them securely on the back.
Add Fabric Texture
Glue a layer of actual teal fabric onto cardstock before cutting, then paint the red borders with puffy paint for a 3D effect.
Now you are ready to don your mask and save the day in style


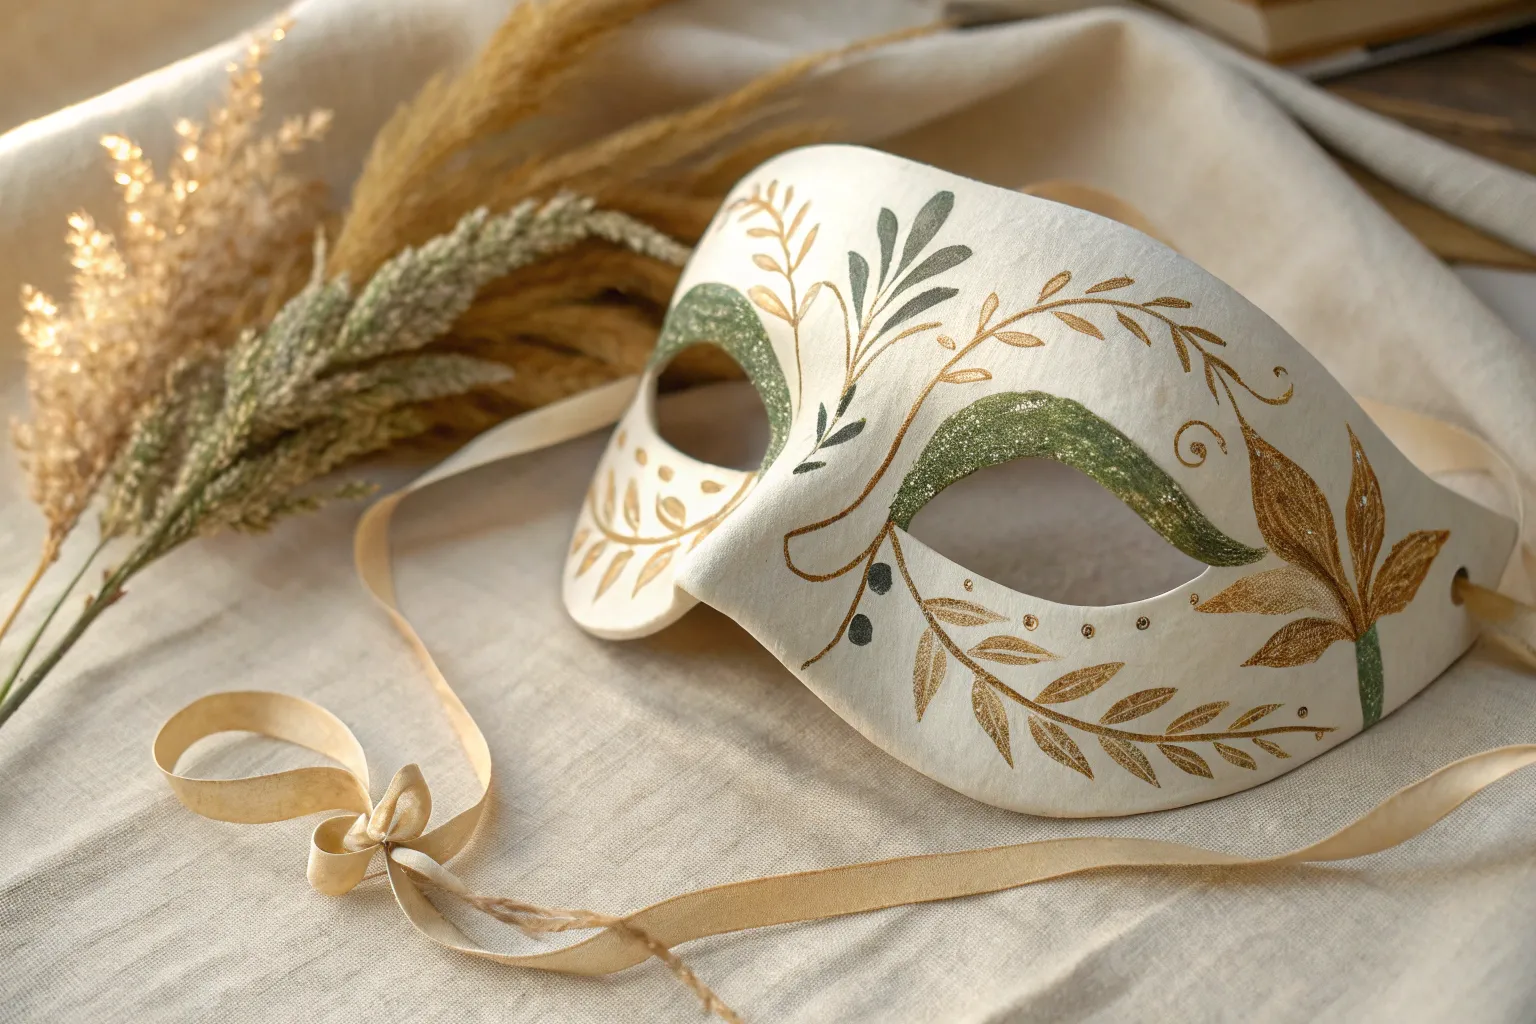
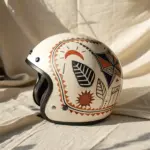
Woodland Fox Mask
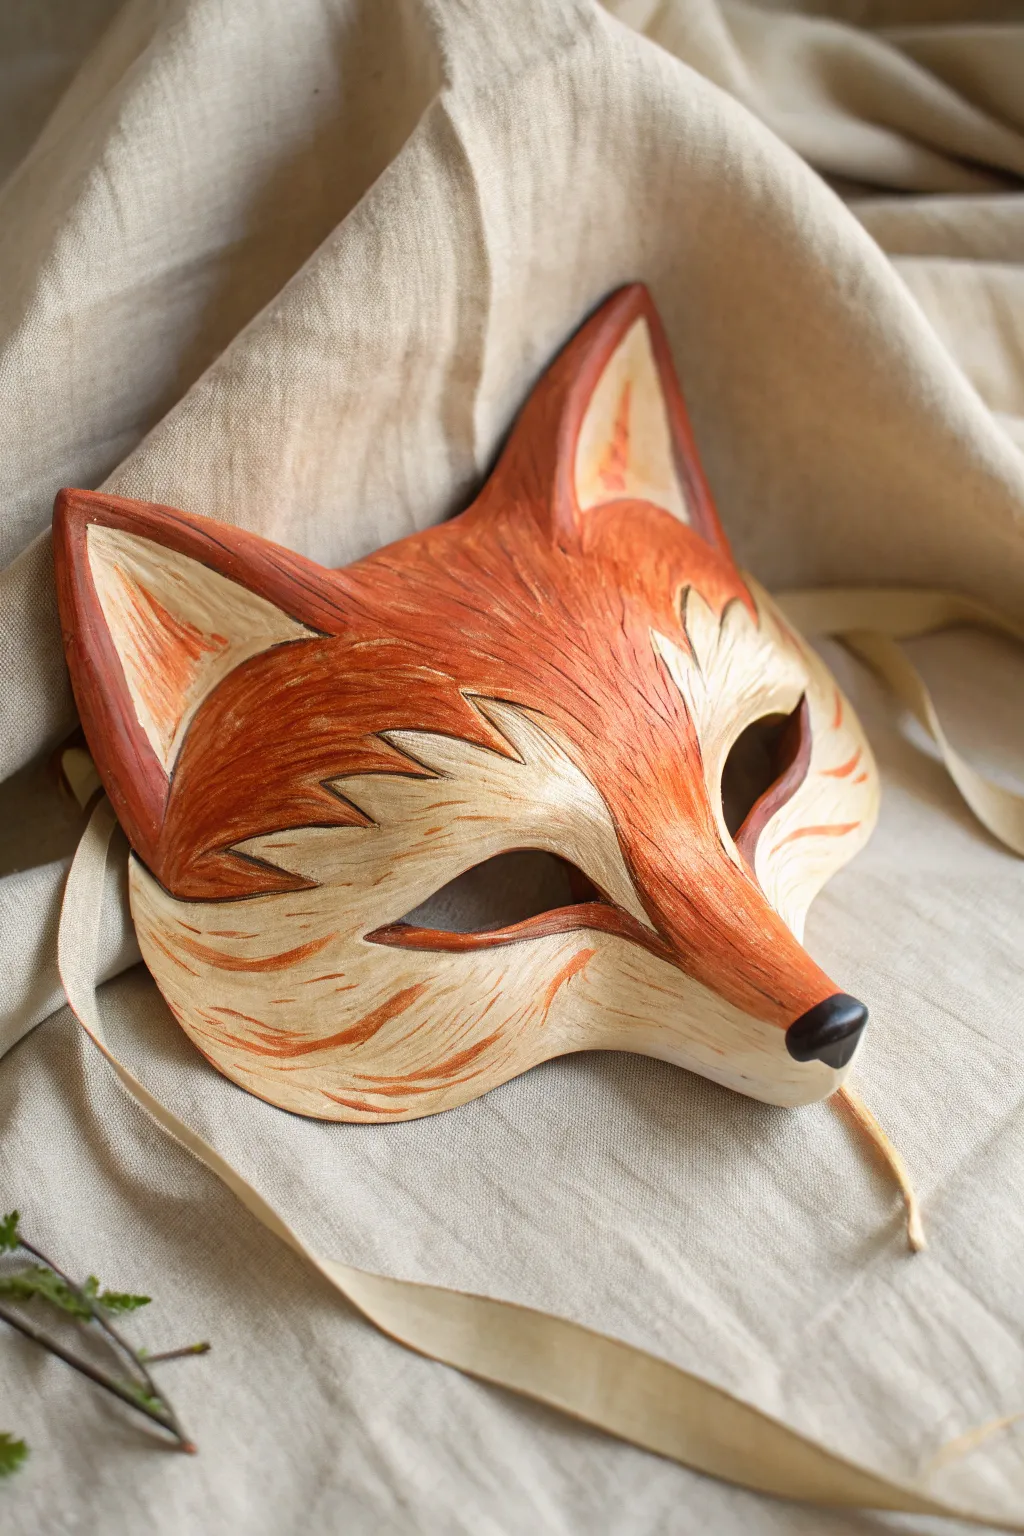
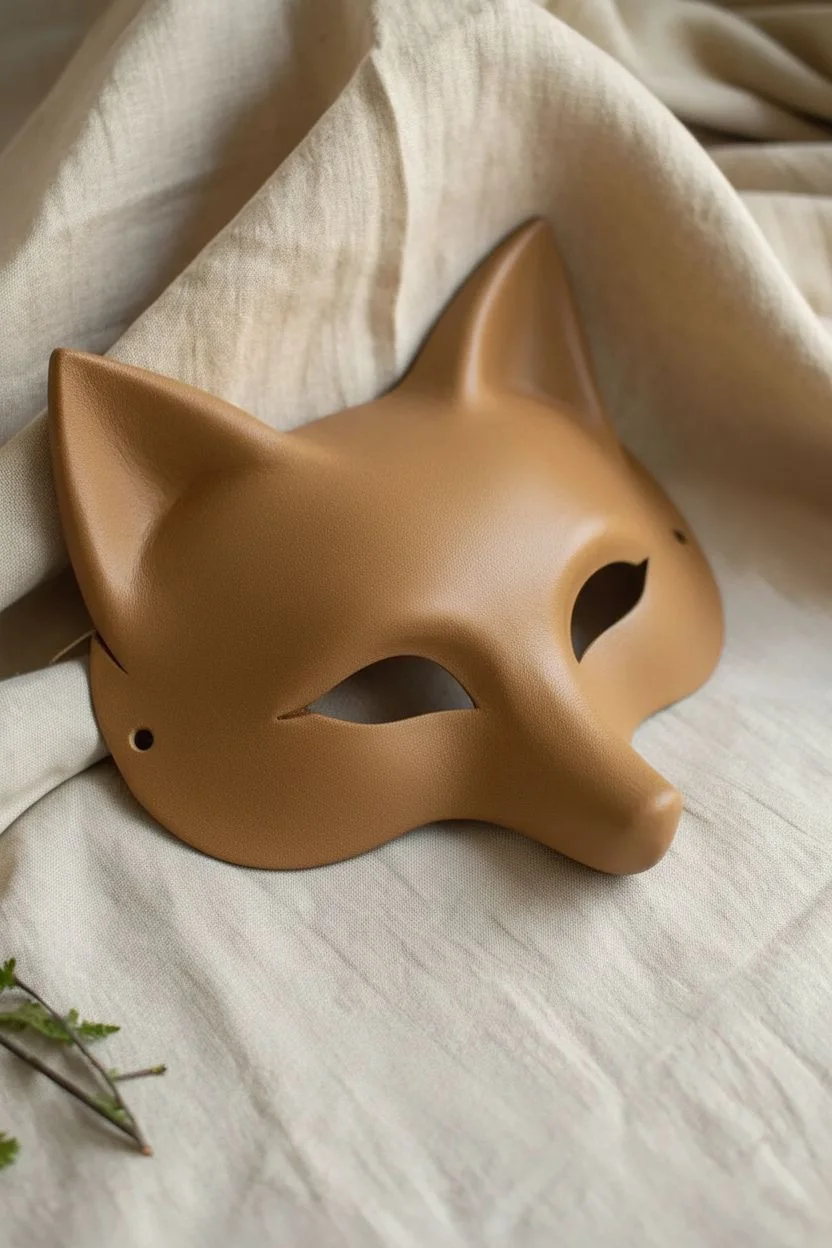
Capture the spirit of the forest with this exquisite handcrafted fox mask, featuring realistic tooled fur textures and warm, russet tones. Perfect for masquerades or cosplay, this project teaches you the art of shaping and painting leather to create a striking, lifelike accessory.
Step-by-Step Tutorial
Materials
- Vegetable-tanned leather (4-5 oz weight)
- Pattern paper and pencil
- Swivel knife
- Leather modeling spoon
- Sharp crafting knife or leather shears
- Leather hole punch
- Bowl of warm water and sponge
- Acrylic paints (burnt sienna, orange ochre, cream, dark brown, black)
- Small round and flat paintbrushes
- Matte or satin acrylic sealer
- Silk ribbon (cream or gold)
Step 1: Shaping the Foundation
-
Create the Template:
Sketch a fox face shape on cardstock, ensuring the eye holes are almond-shaped and tilted slightly upward. Include large, pointed ears that extend naturally from the forehead. Cut this template out and test the fit against your face, adjusting the eye spacing if necessary. -
Trace and Cut:
Lay your vegetable-tanned leather flat on a cutting mat. Trace the template onto the leather using a scratch awl or pencil. Carefully cut out the shape using a sharp craft knife or leather shears, keeping your edges smooth and continuous. -
Case the Leather:
Dampen the leather with a sponge using warm water until it darkens slightly but isn’t dripping wet. This process, called ‘casing,’ makes the fibers pliable for molding and tooling. -
Establish Contours:
Gently bend the mask to curve around the face. Press the nose area outward from the back to create a snout, and pinch the ears slightly at the base to give them dimension. You can let it dry over a generic mask form or a rolled towel to hold the curve.
Fixing Flatness
If the leather loses its curve while tooling, re-dampen the back side lightly and mold it over a large jar or bowl while you work to maintain the arched shape.
Step 2: Tooling the Details
-
Carve Main Lines:
While the leather is still damp (rewet slightly if needed), use a swivel knife to carve the deep outline of the inner ear, the brows, and the separation between the white cheeks and orange fur. -
Texture the Fur:
Using a modeling spoon or a hair blade tool, press hundreds of short, directional strokes into the leather surface. I find it helpful to start from the nose and work outward, mimicking the natural growth direction of animal fur. -
Deepen Shadows:
Use the edge of your modeling tool to press down the leather on the ‘outside’ of your carved lines, particularly around the brow ridges and ears. This beveling effect makes the features pop by creating permanent physical depth. -
Punch Ribbon Holes:
Before the leather dries completely, use a hole punch to create two small openings on the sides of the mask, just below the temple area, for the ribbon ties to attach later. -
Final Drying:
Set the mask aside in a dry, room-temperature area. Allow it to dry completely for at least 24 hours. The leather will stiffen and hold its shape perfectly once fully cured.
Step 3: Painting and Finishing
-
Base Coat:
Dilute a cream or off-white acrylic paint with a little water to act as a stain. Paint the entire mask with this wash, wiping away excess with a paper towel so the paint settles into the tooled fur crevices. -
Apply Shadow Tones:
Mix a dark brown wash and apply it carefully to the deepest recessed areas—inside the ear lines and under the brow ridges. This emphasizes the 3D tooling you created earlier. -
Layering the Russet:
Using a ‘dry brush’ technique with very little paint on your brush, lightly sweep burnt sienna and orange ochre over the upper face, ears, and snout. The raised areas will catch the pigment while the crevices remain lighter. -
Highlighting:
Switch to pure cream paint. Carefully paint the cheek areas, the inner ears, and the muzzle highlights. Use feathery strokes to blend the white edges into the orange sections so there are no harsh lines. -
The Nose:
Paint the very tip of the nose with solid matte black. For a realistic wet look, you can add a tiny dot of gloss varnish or white paint as a reflection point once dry. -
Sealing:
Once all paint is thoroughly dry, apply a thin coat of matte or satin acrylic sealer over the entire front of the mask. This mimics the sheen of natural fur and protects your paint job from moisture. -
Attach Ribbons:
Thread a length of cream or gold silk ribbon through the side holes. Secure them with a simple knot on the inside or loop them through themselves for a flat finish.
Add Whiskers
For extra realism, poke tiny holes in the muzzle with a needle and glue in stiff fishing line or black bristles to create lifelike whiskers.
Now you have an enchanting, durable piece of wearable art ready for your next woodland adventure.
BRUSH GUIDE
The Right Brush for Every Stroke
From clean lines to bold texture — master brush choice, stroke control, and essential techniques.
Explore the Full Guide
Owl Mask With Big Eyes
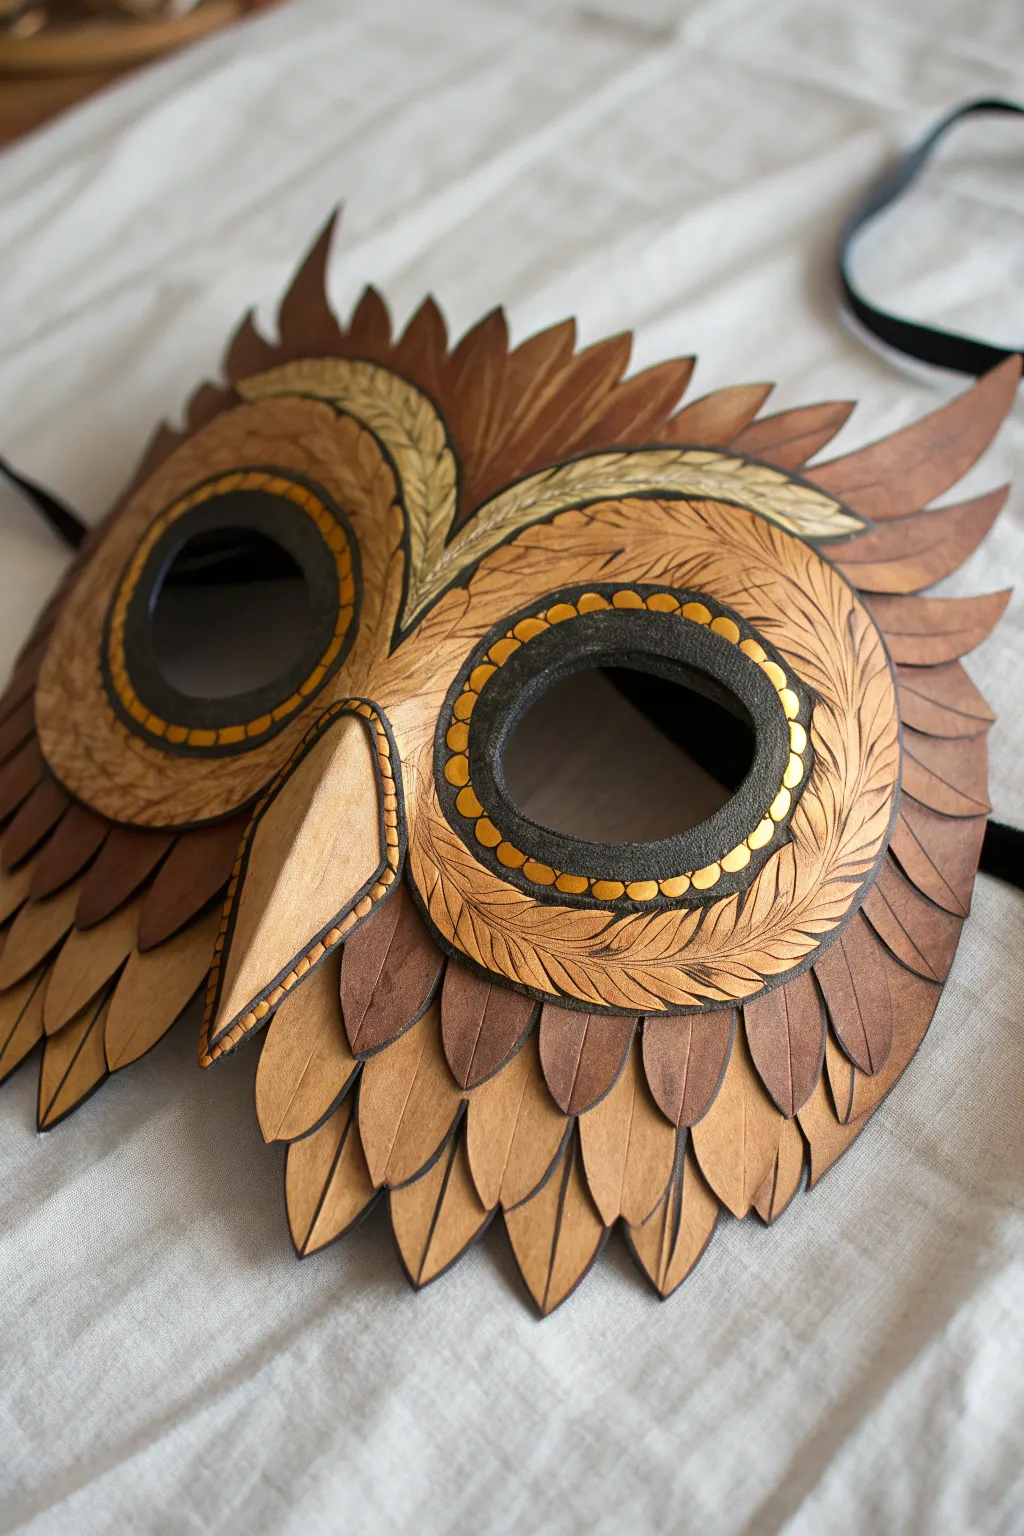

Craft a striking, artisanal owl mask using layered leather techniques and intricate tooling. This project combines natural earth tones with brilliant gold accents to create a piece that feels both rustic and regal.
How-To Guide
Materials
- Vegetable-tanned leather (4-5 oz for base, 2-3 oz for feathers)
- Swivel knife
- Leather tooling stamps (beveler, pear shader, textured backgrounder)
- Leather dyes (dark brown, medium brown, tan)
- Gold acrylic leather paint
- Leather adhesive or contact cement
- Heavy-duty scissors or leather shears
- Mallet and poly cutting board
- Leather finish/sealer
- Elastic ribbon or leather cord
- Sponge or daubers
Step 1: Conceptualizing and Cutting
-
Draft your pattern:
Start by sketching the owl’s face on paper. You’ll need a main base layer that covers the eyes and forehead, a separate beak piece, and multiple tiers of feather shapes for the sides and top. -
Transfer to leather:
Trace your paper patterns onto the vegetable-tanned leather. Use the slightly thicker 4-5 oz leather for the structural mask base and eye rings to ensure it holds its shape. -
Cut the base components:
carefully cut out the main mask body and the two large circular eye rings using shears or a sharp craft knife. Don’t forget to cut out the inner eye holes. -
Cut the feather layers:
Switch to your thinner 2-3 oz leather for the feathers. Cut out individual leaf-shaped feathers for the bottom edge and larger, connected wing-like sections for the sides and top crest.
Smooth Edges
Burnish the exposed edges of your leather with a wood slicker and a little water or gum tragacanth before gluing. This gives a professional, finished look.
Step 2: Tooling and Texturing
-
Case the leather:
Lightly dampen the leather pieces with a sponge and water. Let it sit until it returns to its natural color but feels cool to the touch—this is the perfect state for tooling. -
Carve the details:
Using your swivel knife, carve the central veins into the feather pieces and the swirling grain lines around the eye rings. I find that keeping the knife sharp is crucial for fluid curves. -
Bevel the edges:
Use a beveler stamp and mallet to depress the leather along your cut lines. This makes the carved designs pop, giving the feathers a 3D effect. -
Add fine texture:
Use a hair blade tool or a fine pointed tool to scratch many tiny, parallel lines into the feathers and the area around the eyes to mimic realistic plumage. -
Shape the beak:
Wet mold the beak piece by folding it gently down the center line to create a ridge. Let this dry completely in its folded shape so it retains that sharp, hooked profile.
Step 3: Coloring and Assembly
-
Apply base dye:
Sponge a medium tan dye over the entire surface of all pieces. This acts as a warm undertone for the darker colors to come. -
Gradient shading:
Using a dark brown dye on the edges of the feathers and the outer rim of the eye rings creates instant depth. Blend inwards with a slightly damp sponge to avoid harsh lines. -
Paint the accents:
Using a fine brush, carefully apply gold leather paint to the dotted rim inside the eye rings and the bevel cuts on the beak. This metallic contrast brings the mask to life. -
Seal the leather:
Once the dye is fully dry, buff the pieces with a clean cloth and apply a leather finisher or sealer to protect the surface and add a subtle sheen. -
Attach the feathers:
Starting from the bottom and working up, glue the individual feathers to the backing layer using leather adhesive. Overlap them slightly like shingles on a roof. -
Mount the focal points:
Glue the tooled eye rings directly over the eye openings. Adhere the shaped beak securely in the center, ensuring the flanges are hidden under the eye rings if possible. -
Final assembly:
Punch small holes on the sides of the mask near the temples. Thread your elastic ribbon or leather cord through and knot it securely.
Dimensional Eyes
Add a thin layer of gold or copper mesh behind the eye holes. It hides the wearer’s eyes while still allowing visibility and adds a magical glow.
Now you have a stunning, durable mask ready for your next costume event or display
Bird Beak 3D Mask
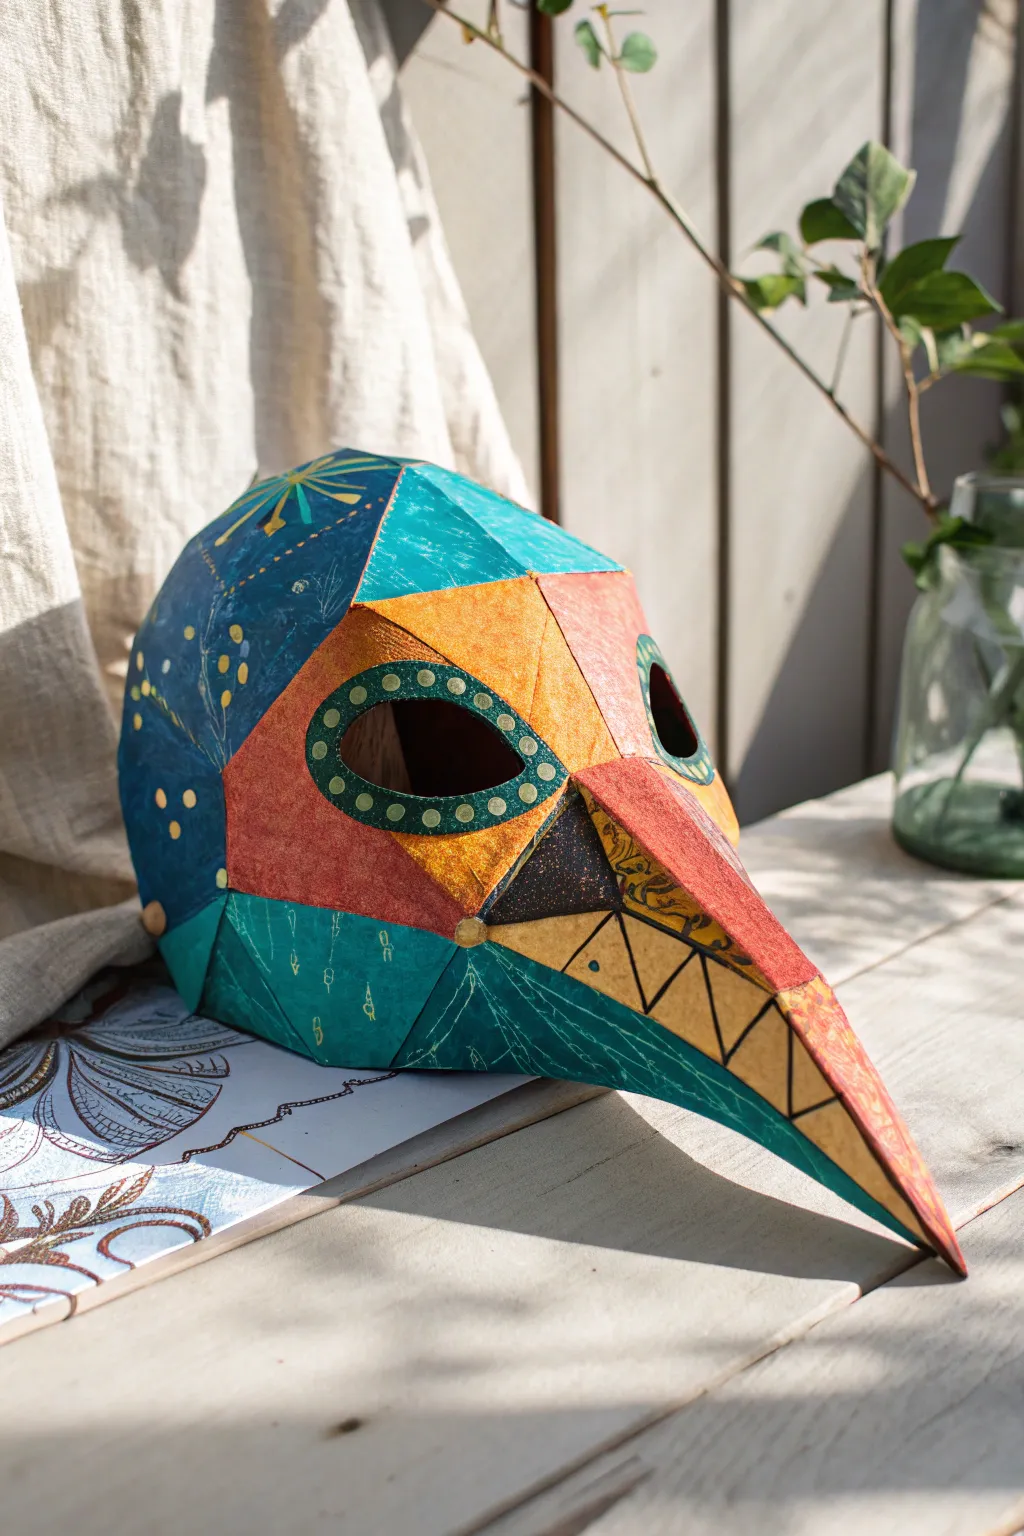
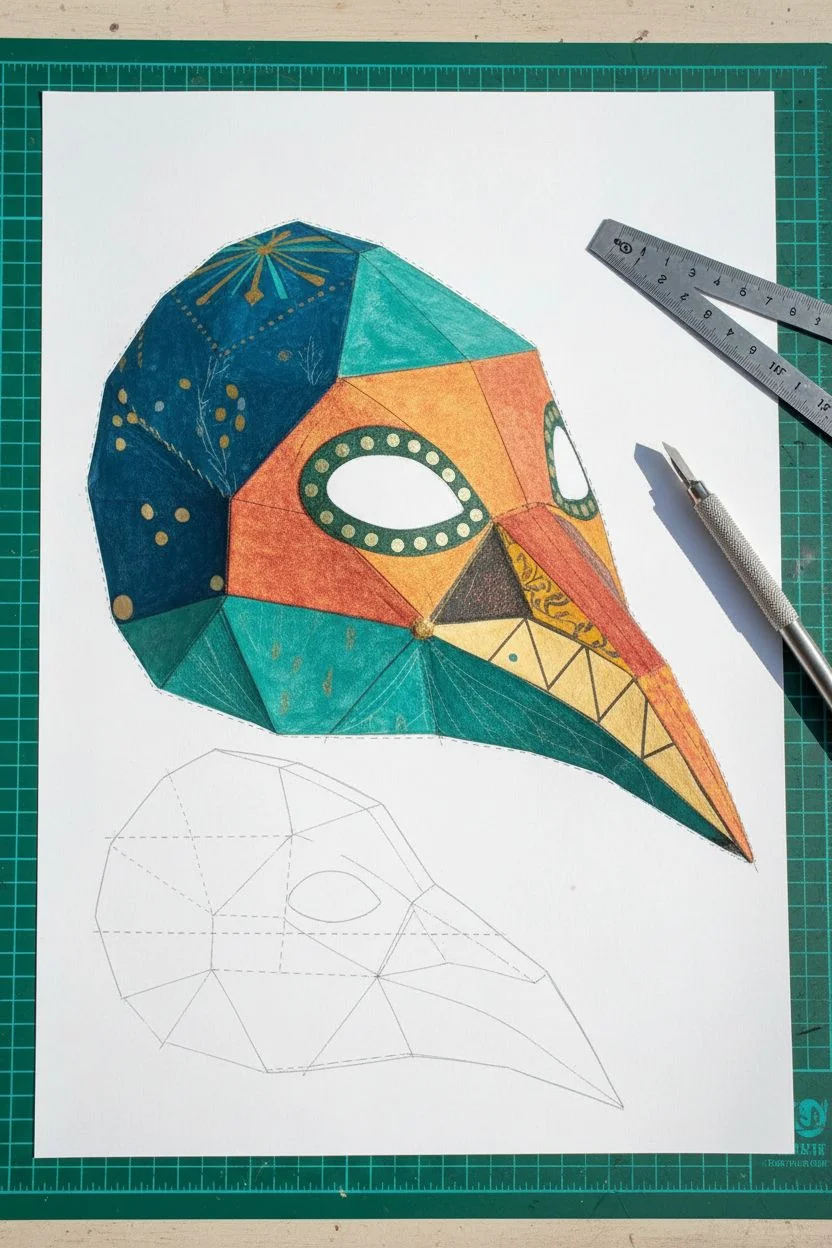
Transform simple cardstock into a stunning low-poly bird mask featuring a striking geometric beak and intricate hand-painted details. This project combines structural paper engineering with artistic surface design, resulting in a vibrant costume piece or wall hanging that feels both modern and whimsical.
How-To Guide
Materials
- Heavyweight cardstock (minimum 160gsm, preferably 220gsm+)
- Digital template for a low-poly bird mask
- Sharp craft knife or scalpel (e.g., X-Acto)
- Self-healing cutting mat
- Metal ruler
- Scoring tool or dried-up ballpoint pen
- PVA glue or strong tacky glue
- Small paintbrush for glue application
- Acrylic paints (teal, navy blue, dusty orange, red, yellow, black, gold metallic)
- Posca pens or fine paint markers (gold, light blue)
- Clear matte varnish spray (optional)
Step 1: Painting the Texture
-
Prime your paper:
Before cutting anything, lay your white cardstock flat. It is much easier to paint textures onto flat paper than a finished sculptural shape. Since this mask has distinct color blocking, lightly pencil in where the major sections will fall based on your template layout. -
Create the teal base:
Mix a deep teal using blue, green, and a touch of black acrylic. Paint the skull section of the mask paper with a sponge or wide brush to create a mottled, uneven texture rather than a flat block of color. Let it dry completely. -
Paint the warm sections:
For the eye area and upper beak, mix a dusty orange and a muted red. Apply these in geometric patches corresponding to the template pattern. Use a drier brush here to give it a slightly weathered, papery look. -
Detail the beak:
Paint the tip of the beak in a mix of yellow-ochre and light orange. Once the base colors are dry, use a fine liner brush and black paint to draw the sharp triangles along the jawline, mimicking teeth or markings. -
Add decorative motifs:
Using a gold metallic marker or paint, add the small details: dashes, dots, and the sunburst pattern on the top of the head. I like to add the teal eye-rings now too, using a darker teal paint and dotting them with gold for contrast.
Sticky Situation
Glued the wrong tab? Don’t panic. Quickly slide a craft knife blade under the tab to pop it open before the glue cures fully. If the paper tears slightly, reinforce it with tape on the inside.
Step 2: Cutting and Scoring
-
Cut the perimeter:
Once your paint is fully dry, secure the paper to your cutting mat. Use your craft knife to carefully cut along the solid outer lines of the template. A fresh blade is crucial here for crisp edges. -
Score the fold lines:
Using your ruler and a scoring tool, firmly trace all the internal dotted lines. Do not cut through! You are just breaking the paper fibers to ensure a clean, sharp fold. -
Differentiate folds:
Check your template key. Usually, dashed lines indicate ‘mountain’ folds (pointed out) and dot-dash lines indicates ‘valley’ folds (pointed in). Pre-fold all creases now to establish the shape.
Make It Wearable
Punch small holes on the side tabs near the temples and reinforce them with metal eyelets. Thread a sturdy elastic ribbon or grosgrain ribbon through to secure the mask comfortably.
Step 3: Assembly
-
Start with the beak:
The beak is the most delicate part. Apply a thin layer of PVA glue to the tabs on the very tip of the beak. Hold pieces together for 10-15 seconds until the glue tacks. -
Connect the jaw:
Work your way backward from the beak tip towards the face. Glue the underside of the beak (the jaw area) to the upper beak section, ensuring the black triangular teeth pattern aligns nicely. -
Form the eyes:
Assemble the polygons around the eye sockets next. These shapes can be tricky, so take your time aligning the corners perfectly before the glue sets. -
Build the forehead:
Attach the large teal forehead panels to the top of the eye sockets. You will start to see the roundness of the skull forming. -
Close the head:
Work your way around the sides of the head to the back. As the mask becomes a closed 3D object, it gets harder to reach inside to press tabs, so use a long handle of a paintbrush to apply pressure from within. -
Final touches:
Once assembled, check for any white paper edges showing at the seams. Touch these up with a little paint to make them invisible.
Hang your finished creation on the wall as art or wear it to your next masquerade to turn heads with your handcrafted geometry

PENCIL GUIDE
Understanding Pencil Grades from H to B
From first sketch to finished drawing — learn pencil grades, line control, and shading techniques.
Explore the Full Guide
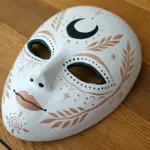
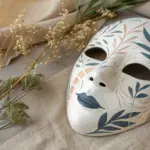
Sugar Skull-Inspired Painted Mask
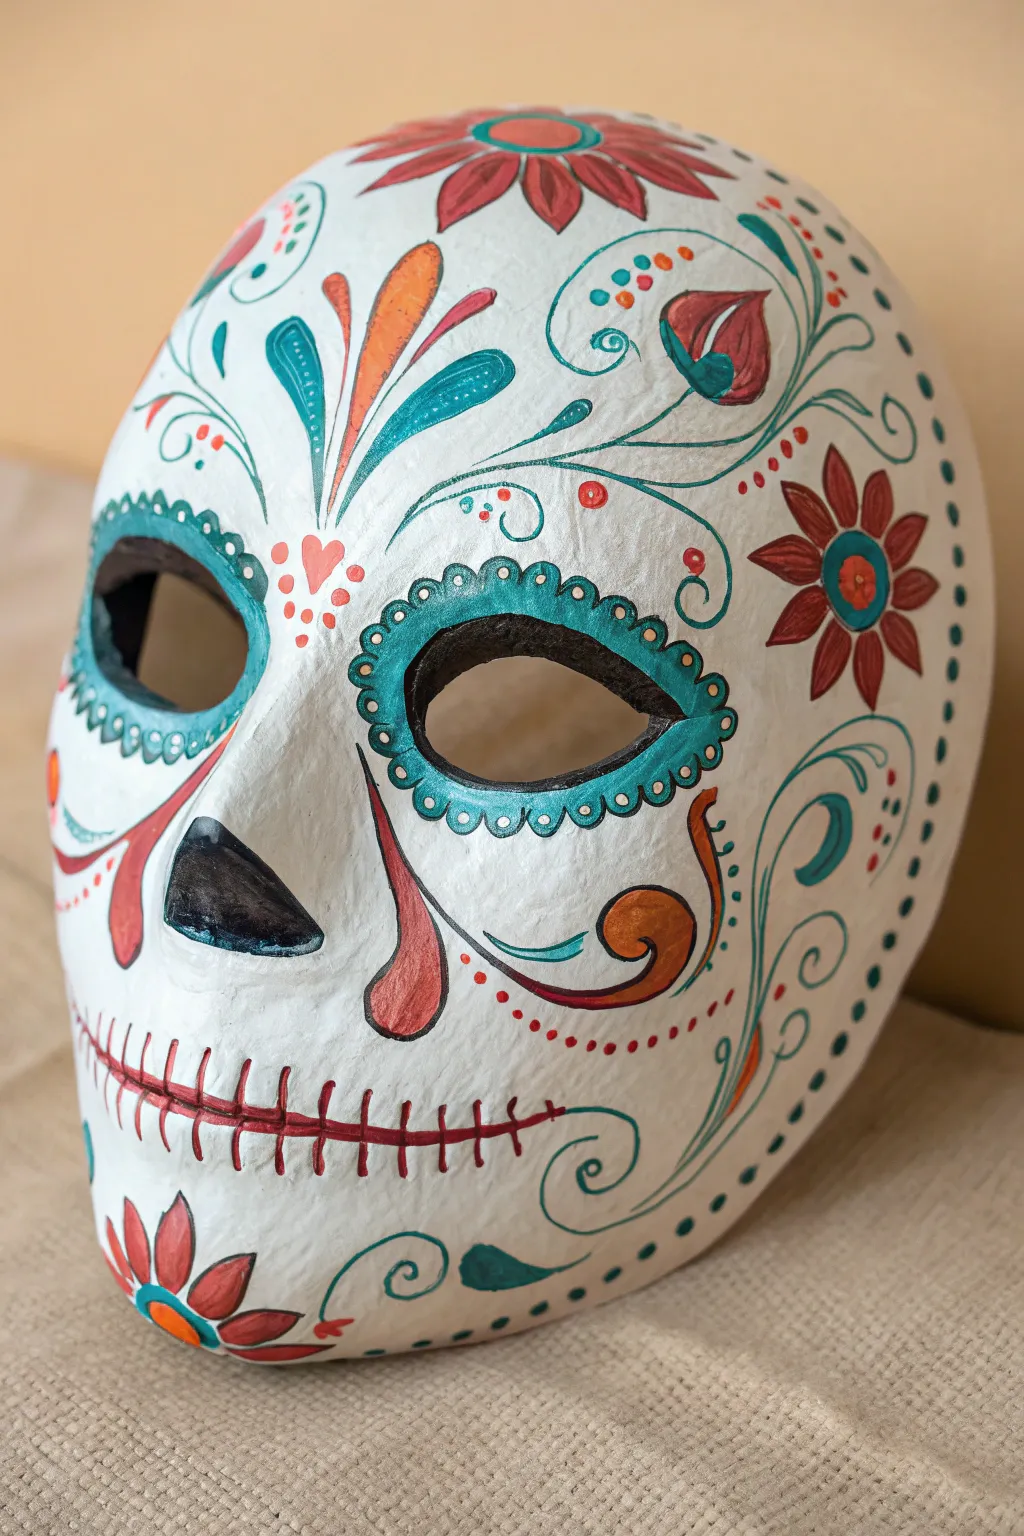
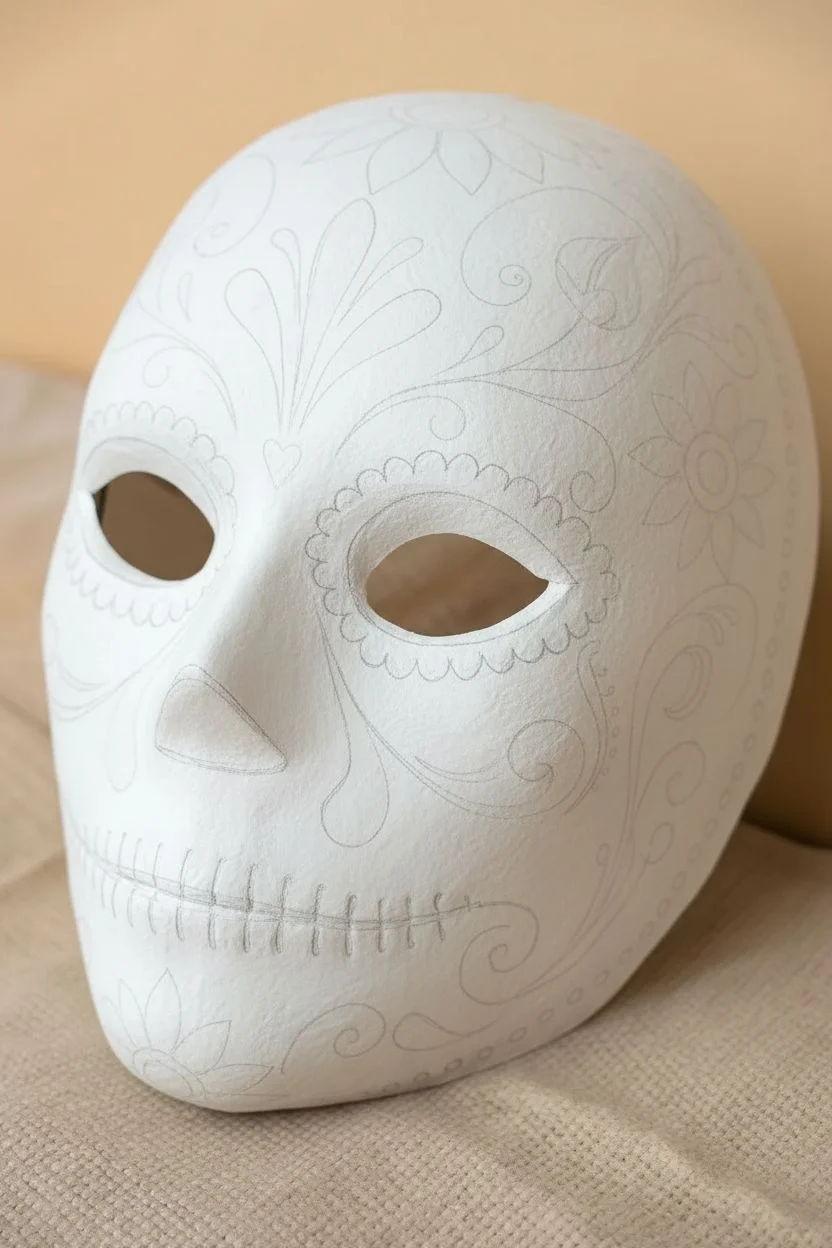
Transform a plain paper mache form into a vibrant celebration of Día de los Muertos with this detailed sugar skull design. Featuring traditional floral motifs, swirling vine work, and bold teal and red accents, this mask captures the festive spirit perfectly.
Step-by-Step Tutorial
Materials
- Plain white paper mache full-face mask foundation
- Gesso or white acrylic primer
- Acrylic paints (Teal/Turquoise, Deep Red/Maroon, Orange, Black, White)
- Pencil and eraser
- Fine round craft brushes (sizes 0, 1, and 3)
- Flat shader brush (size 6 or 8)
- Dotting tool or toothpick
- Matte or satin spray sealant
Step 1: Base Preparation
-
Prime the Surface:
Even if your mask is already white, apply a coat of white gesso or heavy-body white acrylic paint. This creates a smooth, uniform tooth for your detailed painting and covers any manufacturing imperfections. -
Map the Design:
Once fully dry, lightly sketch the symmetrical design using a pencil. Start with great big circles around the eye sockets, the nose triangle, and the vertical mouth lines. Sketch the large flower on the forehead and the side cheek swirls to ensure spacing is balanced.
Step 2: Major Color Blocking
-
Paint the Eye Sockets:
Use a flat brush and your teal paint to fill in the thick rings around the eyes. The shape isn’t a perfect circle; aim for an organic, slightly scalloped edge that follows the contour of the eye hole. -
Define the Nose:
Paint the nose cavity black. Instead of a simple triangle, give it an inverted heart shape or two teardrops joined at the top to mimic a skeletal nasal opening. -
Create the Mouth:
Using a thin liner brush and deep red paint, draw a long horizontal line across the mouth area. Add vertical cross-hatches along the line to represent teeth, extending them slightly longer in the center and shorter towards the cheeks. -
Forehead Florals:
Paint the large flower petals radiating from the center of the forehead using deep red. Use a flicking motion with your brush to get the tapered points of the petals.
Steady Your Hand
For the finest vine lines, rest your pinky finger on a dry part of the mask to act as a stabilizer/pivot point while you paint.
Step 3: Decorative Detailing
-
Add Eye Scallops:
Switch to a smaller round brush (size 1) and meticulously paint small U-shapes or scallops outlining the teal eye rings in the same teal color. This creates the lace-like border. -
Cheek Swirls:
Paint the large, sweeping teardrop shapes on the cheeks. Outline them in red, then fill the bottom bulbous part with orange, blending it slightly into the red for a gradient effect if desired. -
Leaf Accents:
Using the teal paint, add leaf sprigs above the eyes and on the chin. I find that pressing down firmly at the base of the leaf and lifting as I pull away creates the perfect tapered shape. -
Side Flowers:
paint the secondary flowers on the temples using the deep red for petals. Add a teal center circle, then a smaller orange dot in the middle of that. -
Vine Work:
With your finest liner brush or size 0, carefully paint the thin teal vines that connect the floral elements across the forehead and jawline. Keep your paint slightly thinned with water for smoother lines.
Add Texture
Make the mask pop by gluing small rhinestones or sequins over the painted dots around the eyes for a look that catches the light.
Step 4: Fine Accents & dots
-
Eye Socket Dots:
Dip a dotting tool or the back end of a small brush into white paint. Gently stamp a ring of white dots inside the teal eye circles to add contrast. -
Scallop Details:
Clean your dotting tool and dip it in white again. Place a single white dot in the center of each teal scallop around the outer eye border. -
Red Dot Accents:
Using red paint and a toothpick or small dotting tool, add trails of tiny dots following the curves of the cheek swirls and framing the forehead flower. -
Chin Flower:
Finish the bottom of the mask by painting a half-flower or fan shape on the chin using red for the petals and orange for the center, mirroring the forehead design. -
Final Sealant:
Allow the paint to cure for at least 24 hours. Once completely dry, apply a light coat of matte spray sealant to protect the intricate line work from moisture and handling.
Now you have a stunning, culturally-inspired piece of art ready for display or your next costume event
Watercolor Galaxy Mask
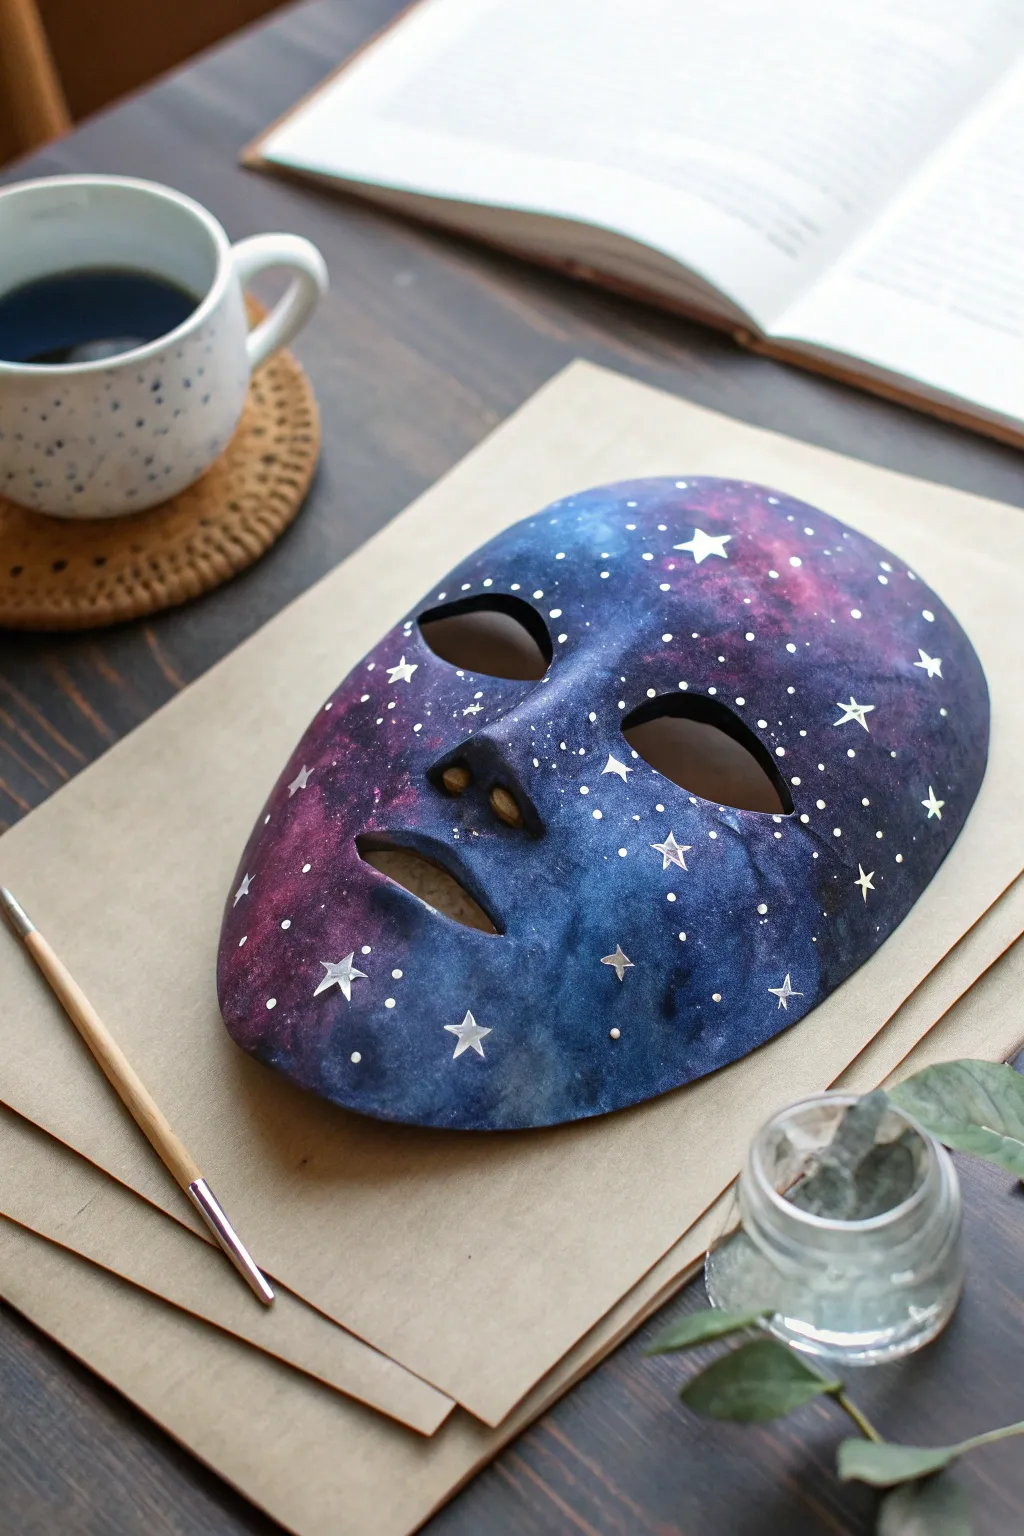
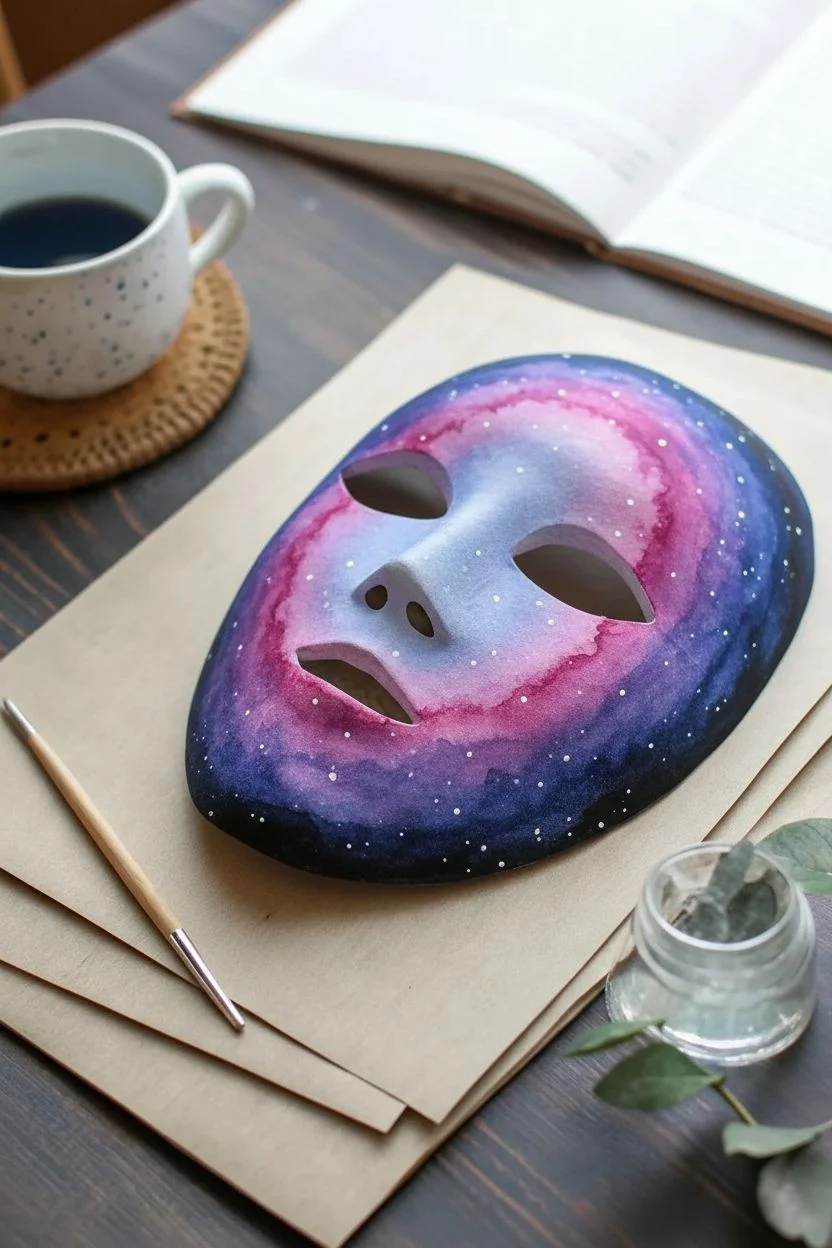
Transform a plain white mask into a wearable piece of the night sky with this ethereal watercolor project. Deep indigos and vibrant violet hues blend seamlessly to create a nebular backdrop for shimmering silver stars.
How-To Guide
Materials
- Plain white mask (paper mache or matte plastic)
- Watercolor paints (tube or pan)
- White or silver gouache paint
- Silver metallic paint pen (fine tip)
- Soft round paintbrushes (sizes 4 and 8)
- Fine detail brush (size 0 or 00)
- Jar of clean water
- Paper towels
- Spray matte varnish or fixative (optional)
Step 1: Creating the Nebula Base
-
Prepare your surface:
Ensure your mask is clean and free of dust. If you are using a glossy plastic mask, you might want to lightly sand it with fine-grit sandpaper so the watercolor adheres better, or apply a layer of watercolor ground first. -
Wet the surface:
Dip your larger round brush into clean water and lightly dampen a section of the mask, starting with the forehead area. You want the surface moist but not dripping wet. -
Apply the first wash:
Load your brush with a watery mix of light blue and lavender. Dab these colors onto the wet area, letting them bleed into each other naturally. Don’t worry about precision here; organic shapes work best. -
Deepen the colors:
While the first layer is still slightly damp, introduce darker pigments. Drop in concentrated indigo and deep violet paint into the outer edges of the mask and around the eye sockets to create depth. -
Create the galaxy swirl:
Trace a diagonal path across the face—from the top right forehead down toward the left cheek—using lighter pinks and magentas. This lighter band will act as the glowing heart of your galaxy. -
Blend the transitions:
Clean your brush, leave it slightly damp, and gently soften the edges where the dark indigo meets the lighter pinks. You want a smoky, cloud-like transition rather than harsh lines. -
Add contrast:
I find that adding touches of black watercolor mixed with blue in the very darkest corners creates a lovely contrast that makes the bright colors pop. Apply this sparingly to the mask’s perimeter. -
Let it dry completely:
Allow the mask to dry fully. Watercolor tends to fade as it dries, so you may need to repeat the localized darkening process once the first layer is set to get that rich, deep space look.
Paint Beading Up?
If the paint beads on plastic, mix a drop of dish soap into your water jar. This breaks surface tension and helps the paint stick without sanding.
Step 2: Adding Starlight Details
-
Prepare the stars:
Mix a small amount of white gouache or silver paint with a tiny drop of water. It should be the consistency of heavy cream—opaque enough to cover the dark background. -
Paint the larger stars:
Using your fine detail brush, paint five-pointed stars scattered randomly across the mask. Vary their sizes, placing a few larger ‘hero’ stars on the forehead and cheek. -
Add distant stars:
Dip the tip of the handle of a paintbrush or a toothpick into your white paint. Dot the mask gently to create tiny, perfect circles that represent distant planets and stars. -
Cluster the constellations:
Group some of your smaller dots closer together, particularly along that lighter pink nebula band we painted earlier. This mimics the density of the Milky Way. -
Draw metallic accents:
Once the painted stars are dry, use a silver metallic paint pen to outline a few of the larger stars or add cross-shaped flares to give them a twinkling effect. -
Create a splatter effect:
Load a stiff brush or an old toothbrush with thinned white paint. Hold it over the mask and flick the bristles to spray a fine mist of tiny white specks across the entire surface. -
Seal the artwork:
Because watercolor can reactivate with moisture (like sweat from wearing the mask), lightly mist the finished piece with a matte spray fixative or varnish once everything is bone dry.
Add Dimension
Glue tiny flat-backed rhinestones or Swarovski crystals onto the centers of your largest painted stars for a mask that actually sparkles in the light.
Now your celestial creation is ready to be displayed on a wall or worn to your next costume event


Bold Acrylic Color-Block Mask
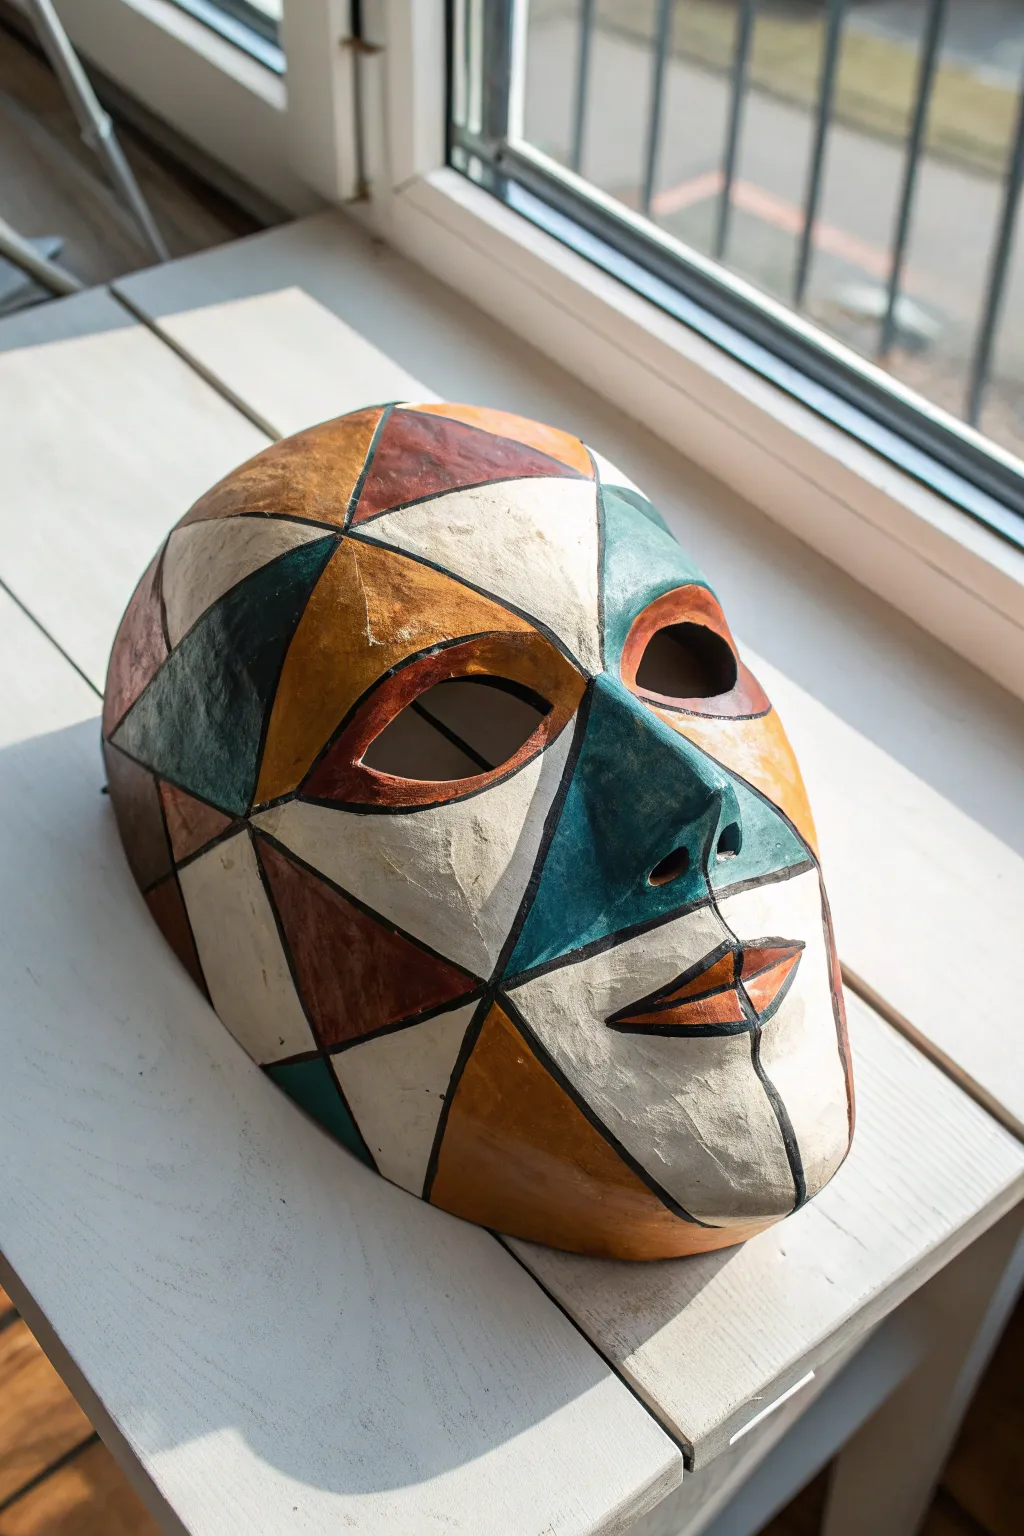
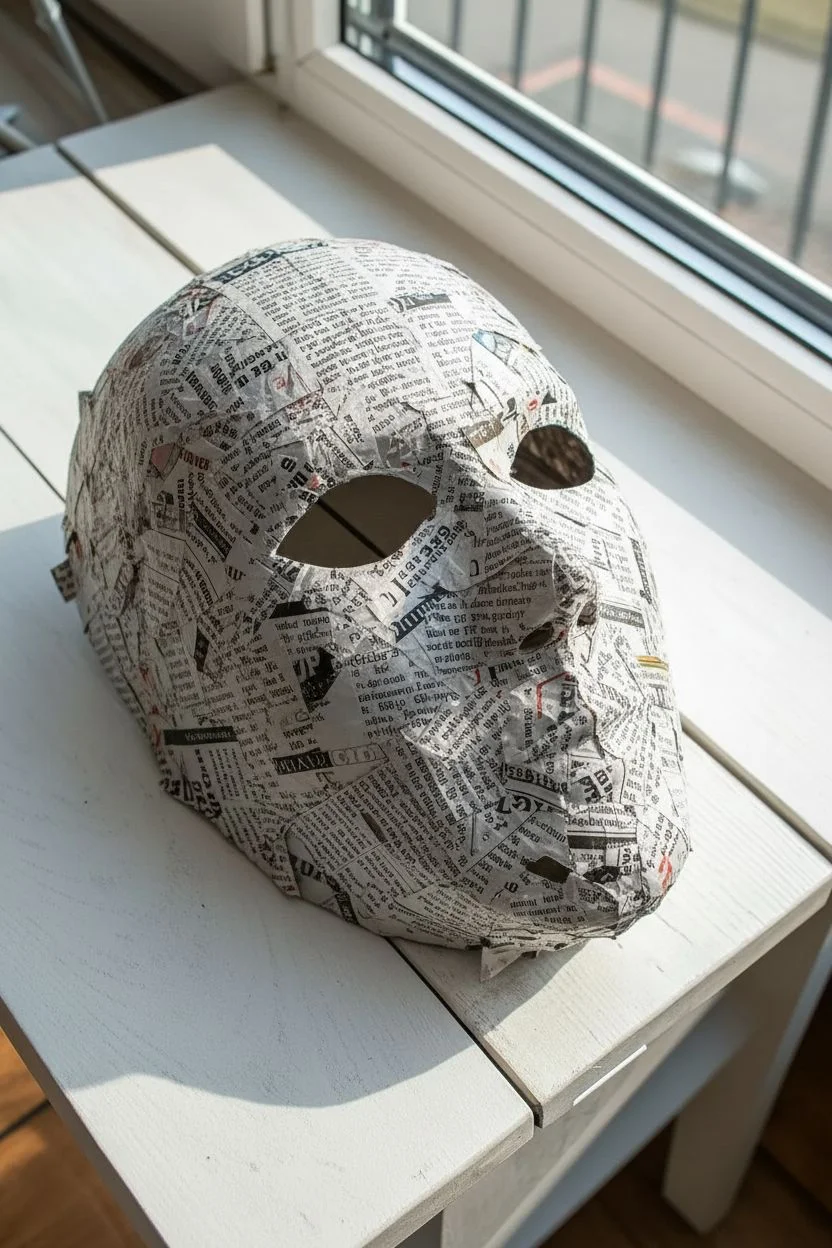
This striking mask project combines traditional paper mache techniques with a modern, cubist-inspired paint job. The finished piece features bold geometric triangles in a warm, earthy palette of ochre, teal, and rust, separated by defining black lines.
Step-by-Step Guide
Materials
- Plastic face mold or craft store mask base
- Newspaper strips
- White flour and water (for paste) or PVA glue
- Fine-grit sandpaper
- White acrylic gesso or primer
- Acrylic paints: Burnt Sienna (rust), Yellow Ochre, Teal/Dark Cyan, and Titanium White
- Black acrylic paint or a broad black paint marker
- Pencil
- Ruler (flexible)
- Flat paintbrushes (medium and small)
- Fine detail brush or liner brush
- Spray varnish (matte or satin)
Step 1: Building the Base
-
Prepare the workspace:
Cover your work area with plastic sheeting or newspaper. This process can get messy, and dried paper mache paste is tough to clean off wood surfaces. -
Mix the paste:
Create a smooth paste by mixing one part flour with one part water. I find adding a splash of PVA glue helps strengthen the mix. -
Apply the first later:
Dip strips of newspaper into the paste, squeegee off the excess with your fingers, and lay them over your plastic face mold. Make sure to overlap the edges. -
Build up thickness:
Continue adding layers of newspaper strips. Aim for at least 4-5 layers to ensure the mask is rigid enough to hold its shape once removed from the mold. -
Dry thoroughly:
Let the mask dry completely. This is crucial—it usually takes 24-48 hours depending on humidity. Don’t rush this, or mold can form inside. -
Remove and trim:
Carefully pop the papier-mâché shell off the mold. Trim any rough edges around the perimeter and the eye holes with scissors to get a clean shape.
Clean Lines
If your hand is shaky with a liner brush, use a black acrylic paint marker or even a chisel-tipped permanent marker for the outlines. It offers much more control.
Step 2: Priming and Mapping
-
Smooth the surface:
Use fine-grit sandpaper to gently buff the surface of the dry mask. You want to knock down any high ridges from the paper strips without rubbing through the layers. -
Apply gesso:
Paint the entire front of the mask with white acrylic gesso. This provides a bright, opaque base that makes the colors pop and hides the newsprint text. -
Sketch the geometry:
Using a pencil and a flexible ruler, lightly draw intersecting lines across the face. Create a network of triangles, ensuring some points interact with key features like the nose bridge and cheekbones. -
Outline facial features:
Draw specific shapes around the eyes and mouth. Notice how the design in the photo uses a distinct almond shape around the eye hole and a stylized shape for the lips.
Metallic Touch
Replace the black outlines with gold leaf paint or a metallic copper marker. This changes the vibe from rustic modern to Art Deco glamour.
Step 3: Painting the Design
-
Paint the white sections:
Start by identifying which triangles will remain white and painting them with titanium white acrylic to ensure they are crisp and clean. -
Apply the ochre tone:
Fill in selected triangles with Yellow Ochre. Use a flat brush to get close to your pencil lines, keeping the paint application smooth and flat. -
Add the rust accents:
Paint the rust-colored sections using Burnt Sienna or a mix of red and brown. I like to balance the colors so no two adjacent shapes are the same hue. -
Fill the teal shapes:
Complete the color blocking with your teal or dark cyan paint. This cool tone provides a necessary contrast to the warm earth tones. -
Paint the lips:
Carefully fill in the upper and lower lip shapes with the rust color and ochre respectively, following the geometric split shown in the reference.
Step 4: Defining and sealing
-
Paint the black outlines:
This is the most critical step. Using a very steady hand and a liner brush (or a black paint marker), go over every pencil line between the colors. -
Thicken the lines:
Go back over your black lines to ensure they have a consistent, bold thickness. The lines should act like the lead in a stained glass window. -
Detail the nose:
Paint the interior of the nostrils black to give them depth and definition. -
Seal the artwork:
Once the paint is fully cured, spray the mask with a matte or satin varnish. This protects the acrylic from chipping and unifies the surface sheen.
Mount your finished mask on a wall or a simple stand to display its abstract beauty
Sculpted Paper Mache Creature Mask
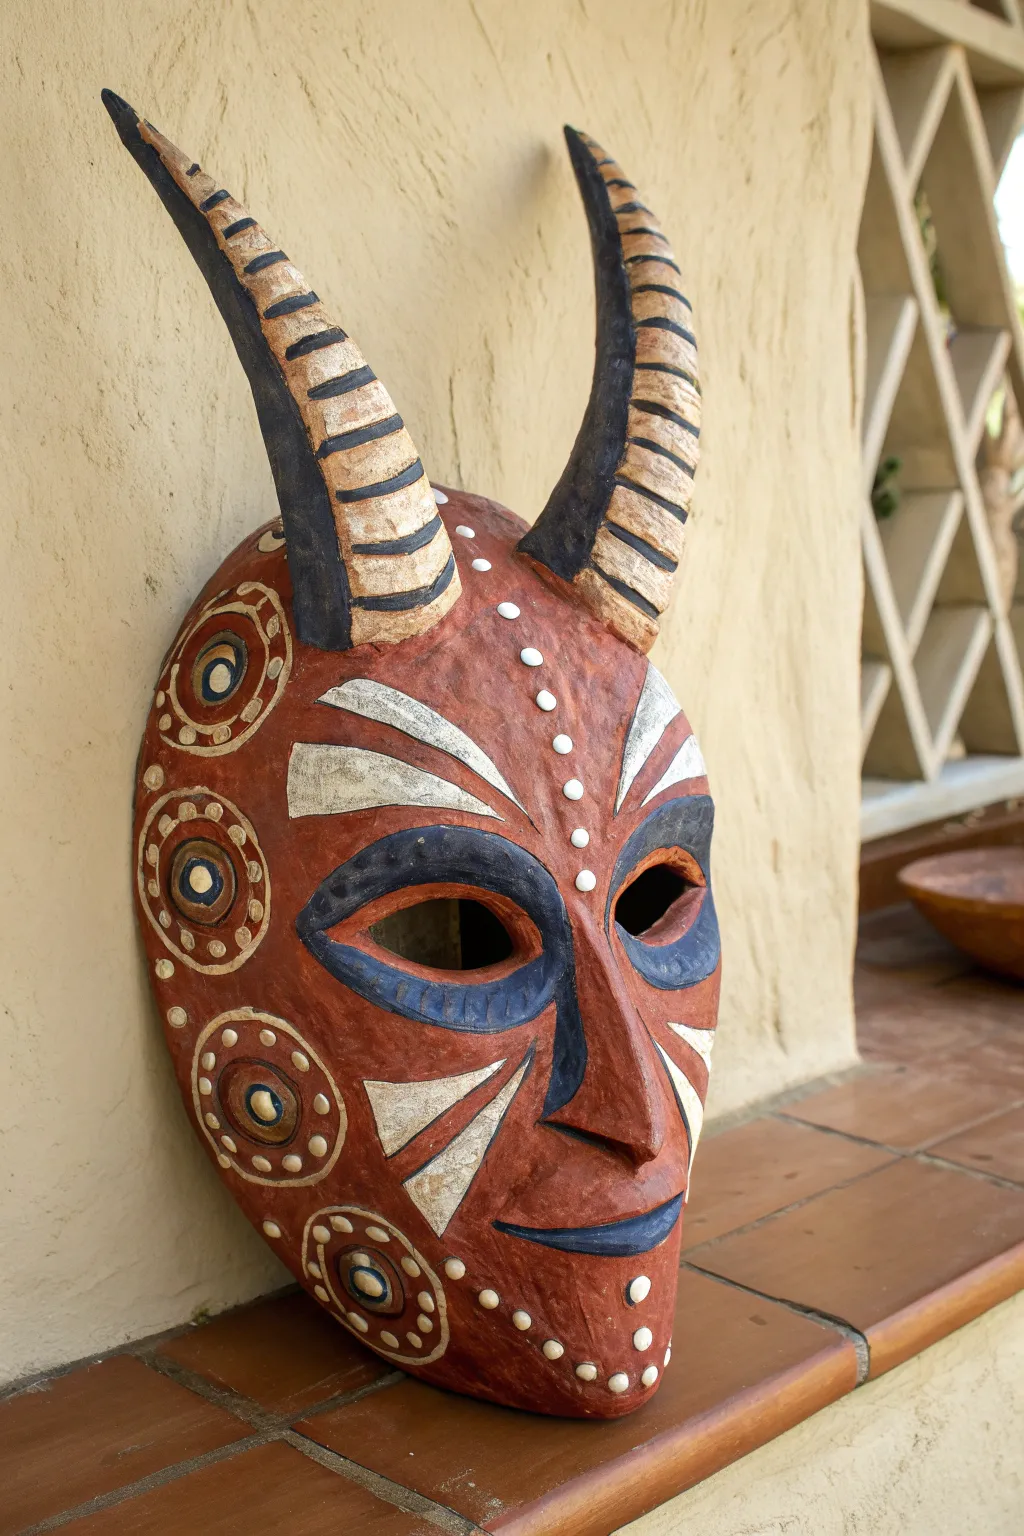
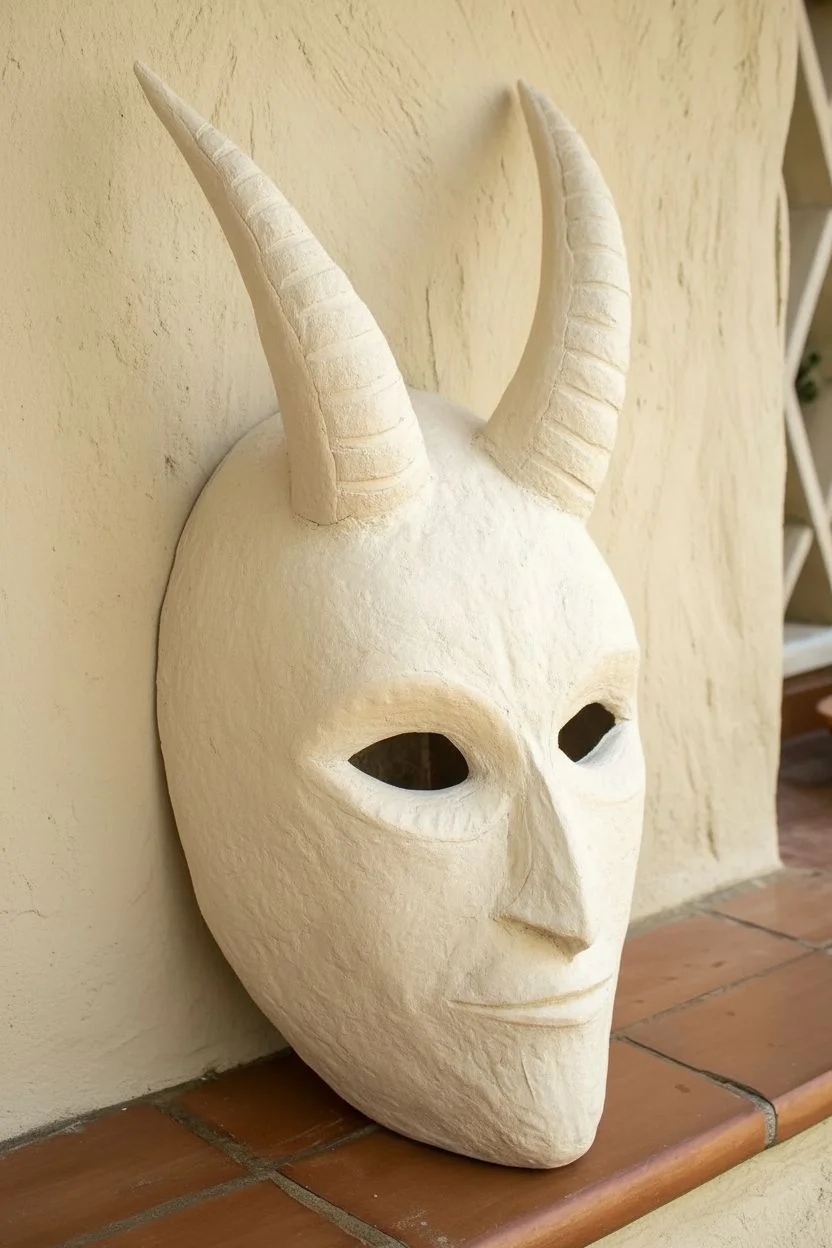
Channel ancient aesthetics with this striking horned mask, featuring deep earth tones and contrasting tribal patterns. The textured paper mache finish gives it an authentic, weathered artifact look perfect for display or costume.
How-To Guide
Materials
- Plastic face mask form (as base)
- Cardboard (for horns)
- Masking tape
- Newspaper stripes
- Paper mache paste (flour/water or glue/water)
- Paper clay or air-dry clay (for details)
- Acrylic paints: Burnt Sienna, Black, White, Navy Blue, Cream
- Mod Podge or matte varnish sealant
- Fine grit sandpaper
- Detail brushes and medium flat brush
- Hot glue gun
Step 1: Building the Structure
-
Form the horns:
Cut two long, tapering triangles from sturdy cardboard. Roll them into cones to create the horn shapes, adjusting the width at the base to fit the forehead area of your mask form. -
Attach the horns:
Use hot glue to secure the cardboard horns to the top of the plastic mask form. Angle them slightly outward for that dramatic, creature-like silhouette. -
Paper mache base layer:
Dip newspaper strips into your paste and apply them over the entire mask, including the horns. I like to do about 3-4 layers here to ensure it’s rigid and durable. -
Shape facial features:
While the base is drying slightly, build up the nose bridge and brow ridges using clumps of paper mache or folded paper tape to create the distinct, elongated nose seen in the photo. -
Smooth with paper clay:
Once the newspaper layers are dry, apply a thin, even layer of paper clay over the entire surface. This hides the paper edges and gives that smooth, sculpted texture. -
Sculpt the horn ridges:
Roll small snakes of paper clay and wrap them around the horns at regular intervals to create the segmented, ribbed texture. Blend the edges into the horn with a little water. -
Refine the surface:
Allow the clay to dry completely (this may take 24 hours). Lightly sand any rough patches, but keep some texture to maintain the handmade, artifact feel.
Step 2: Painting and Detailing
-
Base coat:
Paint the entire mask with a solid coat of Burnt Sienna or reddish-brown acrylic paint. You might need two coats for full opacity. -
Define the eyes:
Mix black with a touch of navy blue. Paint large, almond-shaped outlines around the eye holes, extending the corners into sharp points. -
Highlight the horns:
Paint the horns black, leaving the clay ridges slightly lighter if you wish, or paint the ridges cream later. To match the photo, paint the base of the horns black and create cream stripes between the black ridges. -
Add cheek patterns:
Using a fine brush and cream or off-white paint, draw the sharp, triangular geometric shapes on the cheeks and forehead. -
Paint the swirls:
Create the circular swirl motifs on the sides of the face. Paint a cream circle, then add an inner ring of the dark blue/black mix, and a central dot. -
Dot detailing:
Using a small dotting tool or the back of a paintbrush handle, apply a vertical line of white dots down the center of the forehead and around the circular swirl patterns. -
Distress the finish:
Dry brush a little dark brown paint lightly over the raised areas and edges to give the mask a weathered, aged appearance. -
Final seal:
Protect your work with a coat of matte varnish or Mod Podge. This seals the paint and prevents the clay from absorbing moisture.
Smooth Operator
To get paper clay perfectly smooth, dip your finger in water and run it over the wet clay like you’re frosting a cake. It eliminates fingerprints instantly.
Horns Too Heavy?
If the horns make the mask tip forward, stuff the insides of the cardboard cones with crumpled foil before attaching. It adds structure without much weight.
Now your mask is ready to hang on the wall or complete a unique costume
Split-Face Two-Mood Mask
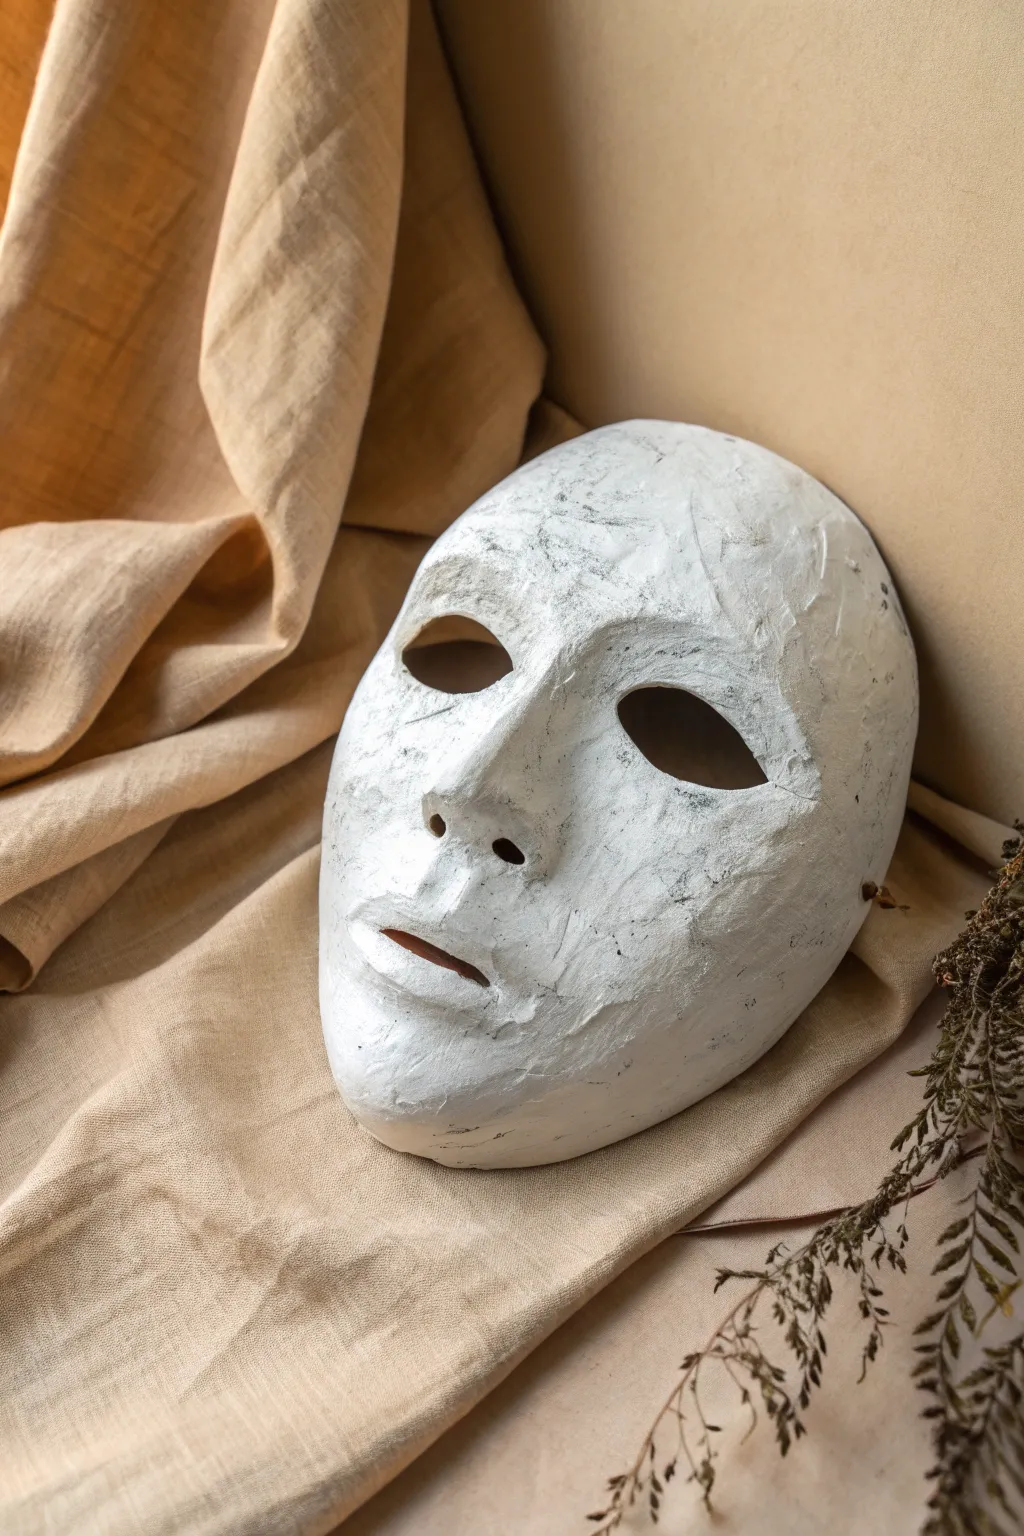
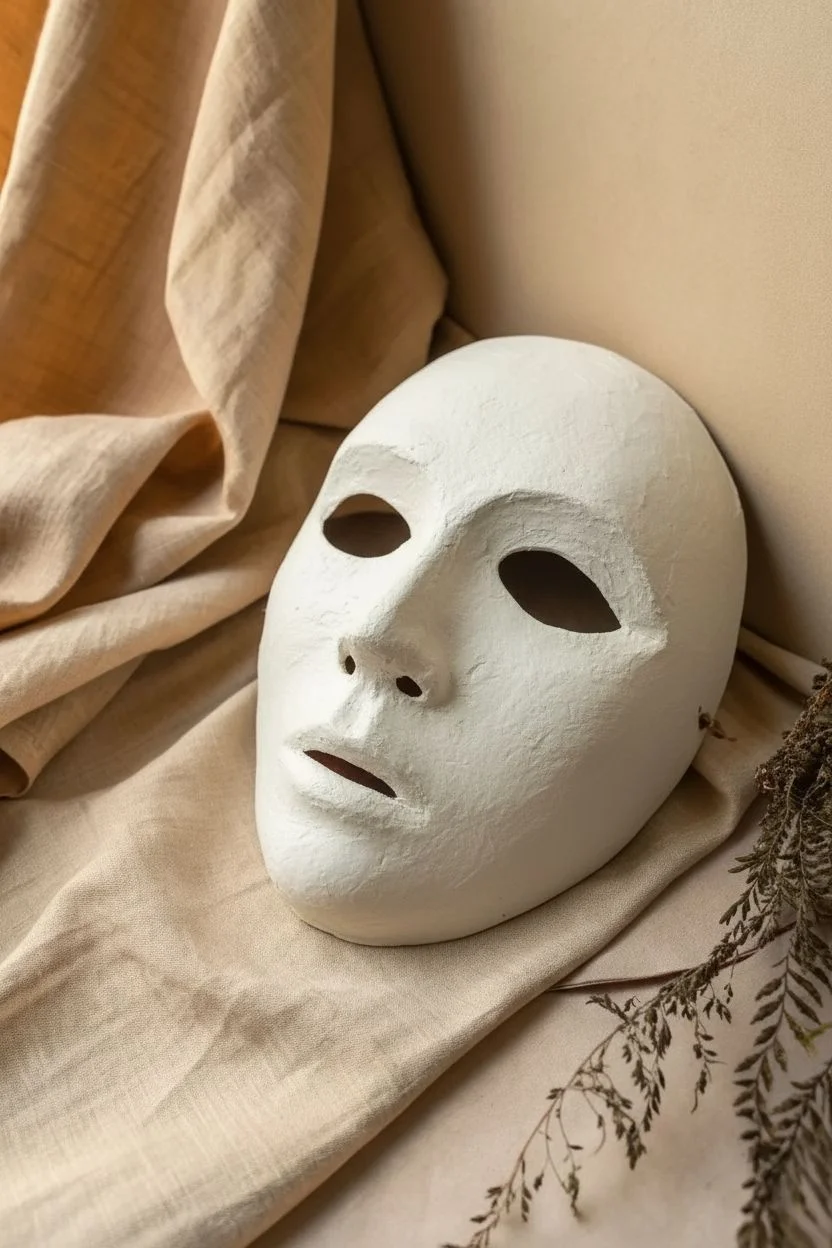
Embrace the beauty of raw texture with this sculpted full-face mask, featuring distinct, rugged grooves and a monochromatic, stony finish. The design uses layer buildup to create subtle asymmetry and character, perfect for an organic, artisanal look.
Step-by-Step
Materials
- Plastic face mask base (plain white or clear)
- Paper clay or air-dry clay (white)
- White gesso or acrylic primer
- Spackle or joint compound (optional for extra texture)
- Fine-grit sandpaper
- Sculpting tools or a butter knife
- Water bowl
- Sponge applicator
- Matte white acrylic paint
- Raw umber or grey acrylic paint (for aging)
- Matte varnish spray
Step 1: Building the Foundation
-
Prepare the Base:
Start with a standard plastic face mask form. Lightly sand the glossy surface to help your clay adhere better, then wipe away any dust with a damp cloth. -
Apply First Clay Layer:
Take a small handful of paper clay and knead it until pliable. Flatten pieces and press them firmly onto the mask base, covering the entire surface in a thin, even layer. -
Smooth the Edges:
Dip your fingers in water and smooth out the clay, wrapping it slightly around the back edges of the mask to ensure it doesn’t peel off later. -
Open the Features:
Use a sculpting tool or knife to neatly trim the clay away from the eye holes, nostrils, and mouth slit. Keep these edges distinct but slightly softened rather than razor-sharp.
Step 2: Sculpting Texture & Features
-
Build the Brow:
Roll two small snakes of clay and position them over the brow ridge. Blend the edges downward into the mask face but leave the top edge slightly more defined to create a stern, structural look. -
Define the Nose:
Add a small triangle of clay to the nose bridge. Smooth it outward, emphasizing the connection between the brow and the nose tip for a classic statuesque profile. -
Scoring the Surface:
Before the clay dries, take a flat sculpting tool and drag it across the cheeks and forehead. I like to make deliberate, uneven marks here to mimic the look of chiseled stone. -
Create the Split Effect:
Use the edge of your tool to create a subtle vertical textural difference down the center. One side can be slightly smoother, while the other remains rougher, nodding to the ‘two-mood’ concept. -
Roughing the Chin:
Dab a sponge or stiff brush onto the wet clay around the chin and jawline to create a pitted, organic texture that contrasts with the smoother nose. -
Dry Completely:
Let the mask dry for at least 24 to 48 hours. Air-dry clay shrinks slightly, so ensure it dries slowly away from direct heat to prevent major cracking.
Fixing Warp
If the mask warps while drying, re-wet the back slightly and weigh it down gently with a sandbag or bag of rice to flatten it out again.
Step 3: Finishing the Surface
-
Fill Cracks:
Inspect the dry mask for any unwanted structural cracks. Use a little spackle or fresh clay to fill deep fissures, but feel free to leave hairline cracks for aesthetic effect. -
Apply Gesso:
Coat the entire mask with a layer of white gesso. This primes the clay and adds a unified, chalky white base color. -
Create a Wash:
Mix a tiny drop of raw umber or grey paint into a cup of water. It should look like dirty water, not opaque paint. -
Lowlighting:
Brush the watery wash over the textured areas. Immediately wipe the surface with a clean rag. The dark pigment will stick in the sculpted grooves, highlighting the texture. -
Dry Brushing:
Dip a dry paintbrush into pure white paint and offload almost all of it onto a paper towel. Lightly dust the raised areas of the mask to bring back the brightness. -
Seal the Work:
Finish with a light coat of matte varnish spray. This protects the clay from moisture without adding an unnatural shine.
Faux Marble
Flick very watered-down grey paint onto the surface with an old toothbrush for a speckled, granite-like stone finish.
Now you have a striking, artifact-like mask ready to be displayed as a piece of modern sculpture


Have a question or want to share your own experience? I'd love to hear from you in the comments below!