
If you can stick down masking tape neatly, you can create a wall design that looks super polished without needing fancy brush skills. These wall paint designs with tape are all about that satisfying peel-reveal moment—clean edges, bold shapes, and instant personality.
Horizontal Stripes to Make a Room Feel Wider
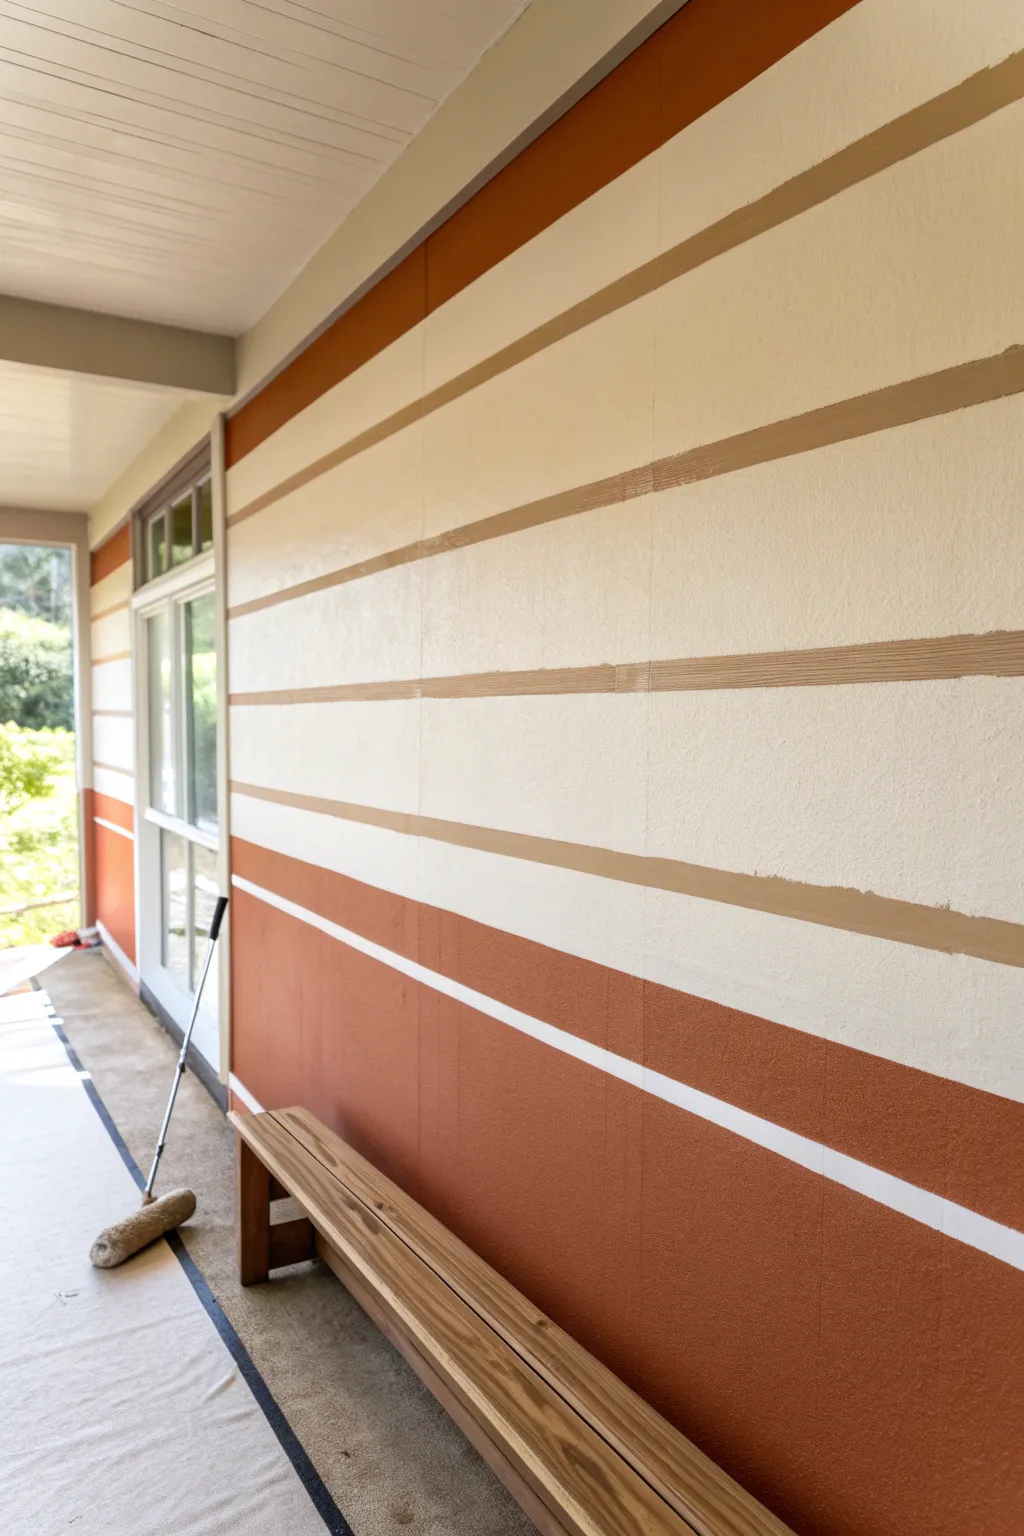
Transform a plain exterior or interior wall into a warm, expansive feature with this horizontal stripe design. Using a palette of burnt orange, creamy off-white, and tan, this project uses clever taping techniques to create clean lines that visually widen your space.
Step-by-Step Guide
Materials
- Exterior or interior latex paint (Eggshell or Satin finish recommended)
- Colors: Deep Burnt Orange, Creamy Off-White, Tan/Beige
- Painter’s tape (1-inch width)
- Painter’s tape (2-inch width for wider spacing)
- Measuring tape
- Pencil or chalk line
- Paint roller frame and roller covers (medium nap for textured walls)
- Angled sash brush (2.5 inch)
- Paint tray and liners
- Drop cloth
- Bubble level or laser level
Step 1: 1. Prep and Base Coat
-
Prepare the surface:
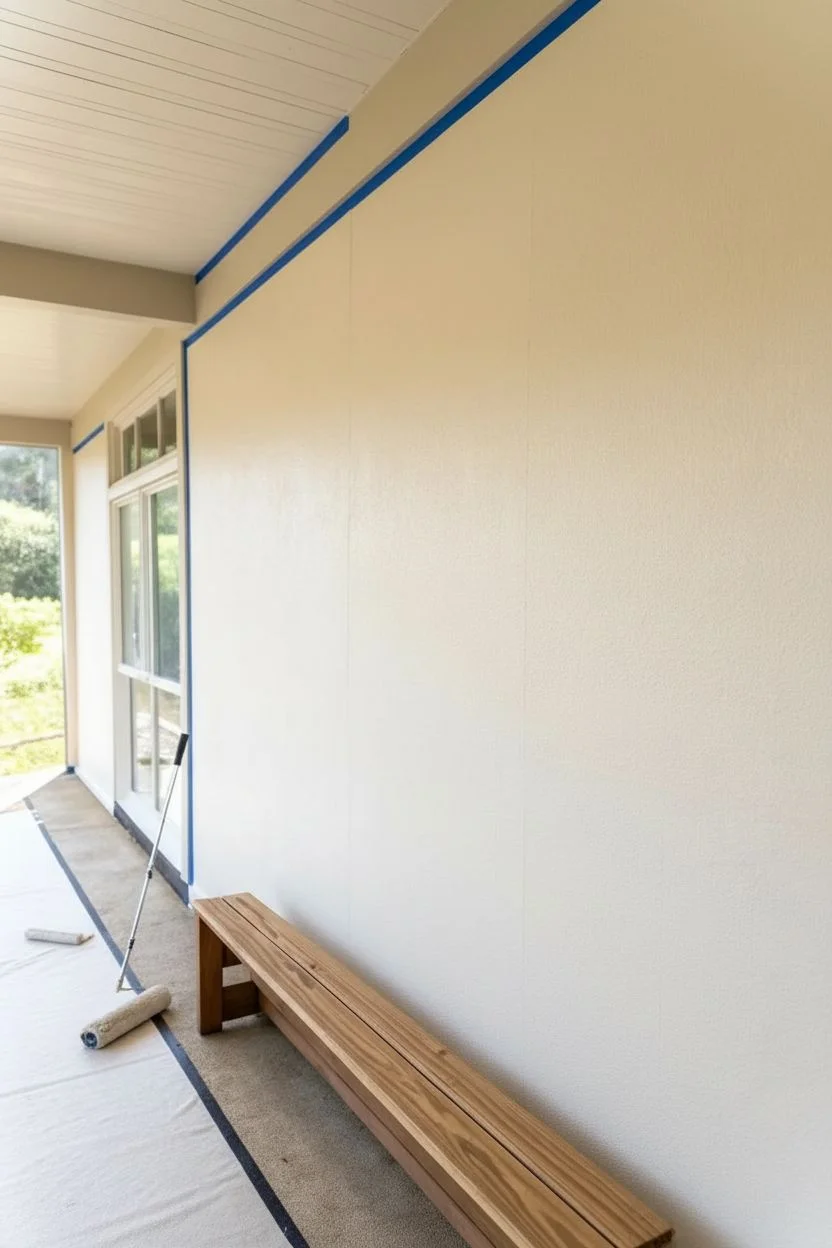
Begin by thoroughly cleaning the wall to remove dust, cobwebs, or dirt, especially if working on an exterior porch like the one shown. Ensure the surface is completely dry before proceeding. -
Protect the area:
Lay down a canvas drop cloth along the base of the wall to catch any drips. If you have adjacent trim or a ceiling line, tape these off now with standard painter’s tape to keep edges sharp. -
Apply the base color:
Roll on two coats of your lightest color—the Creamy Off-White—across the entire wall. This will serve as the background for the lighter stripes and makes taping much easier later since you won’t have to cut in perfectly between lines. -
Allow to cure:
Let this base coat dry completely. I prefer to wait at least 24 hours to ensure the tape won’t peel up any fresh paint in the next steps.
Bleeding on Texture?
On rough stucco walls, standard tape often fails. Use ‘rough surface’ tape and definitely do the step where you seal the tape edge with a layer of the base color first.
Step 2: 2. Measuring and Taping
-
Plan your layout:
Decide on the height of your stripes. Looking at our inspiration, the bottom orange section is the tallest (grounding the wall), followed by alternating cream and tan bands. Mark these heights lightly with a pencil at intervals along the wall. -
Create level guide lines:
Use a long bubble level or a laser level to connect your pencil marks. Lightly draw horizontal lines across the entire wall width where the color transitions will happen. -
Tape the separation lines:
Apply your painter’s tape to the wall. -
Tape placement strategy:
Crucial Step: Place the tape over the part of the wall that should *remain* Creamy Off-White. Remember, you are preserving the base color. For the thin tan lines, you will actually be painting *between* tape lines, so leave a gap. -
Seal the edges:
Run a credit card or a putty knife firmly along the edges of the tape to ensure a tight seal. This prevents paint bleed on textured surfaces like stucco or siding. -
The ‘Bleed-Prevention’ Trick:
Lightly brush a small amount of the *base coat color* (Cream) over the tape edges. This seals any tiny gaps with the base color so that if any paint bleeds, it matches the wall and won’t be visible.
Step 3: 3. Painting the Stripes
-
Paint the large orange sections:
Using a roller, fill in the large bottom section and the top header section with the Deep Burnt Orange paint. Work in ‘W’ shapes to distribute paint evenly, then finish with vertical strokes. -
Cut in the edges:
Use your angled sash brush to carefully paint the orange right up to the tape line and into corners where the roller couldn’t reach. -
Paint the thin accents:
Switch to a smaller brush or a mini-roller for the thin Tan/Beige stripes. Apply the paint carefully between the designated tape lines. -
Apply second coats:
Deep colors like burnt orange often need a second coat for full opacity. Wait for the first coat to be dry to the touch, then apply the second layer.
Laser Level Magic
Skip the pencil lines entirely. Set up a laser level on a tripod. Run your tape directly along the laser beam for perfectly straight lines without having to erase pencil marks later.
Step 4: 4. Revealing the Design
-
Remove tape while damp:
Don’t let the final topcoat dry completely hard. Slowly peel the tape off at a 45-degree angle while the paint is still slightly tacky/damp. This helps slice through the paint film cleanly. -
Touch ups:
Inspect your lines. If any paint managed to sneak under the tape, wait for it to dry fully, then use a tiny artist’s brush and the base cream color to correct the line. -
Clean up:
Remove your drop cloths and re-install any outlet covers or wall fixtures you removed.
Step back and enjoy the expanded feel of your newly painted porch or room


Color-Blocked Half Wall with a Razor-Sharp Divider
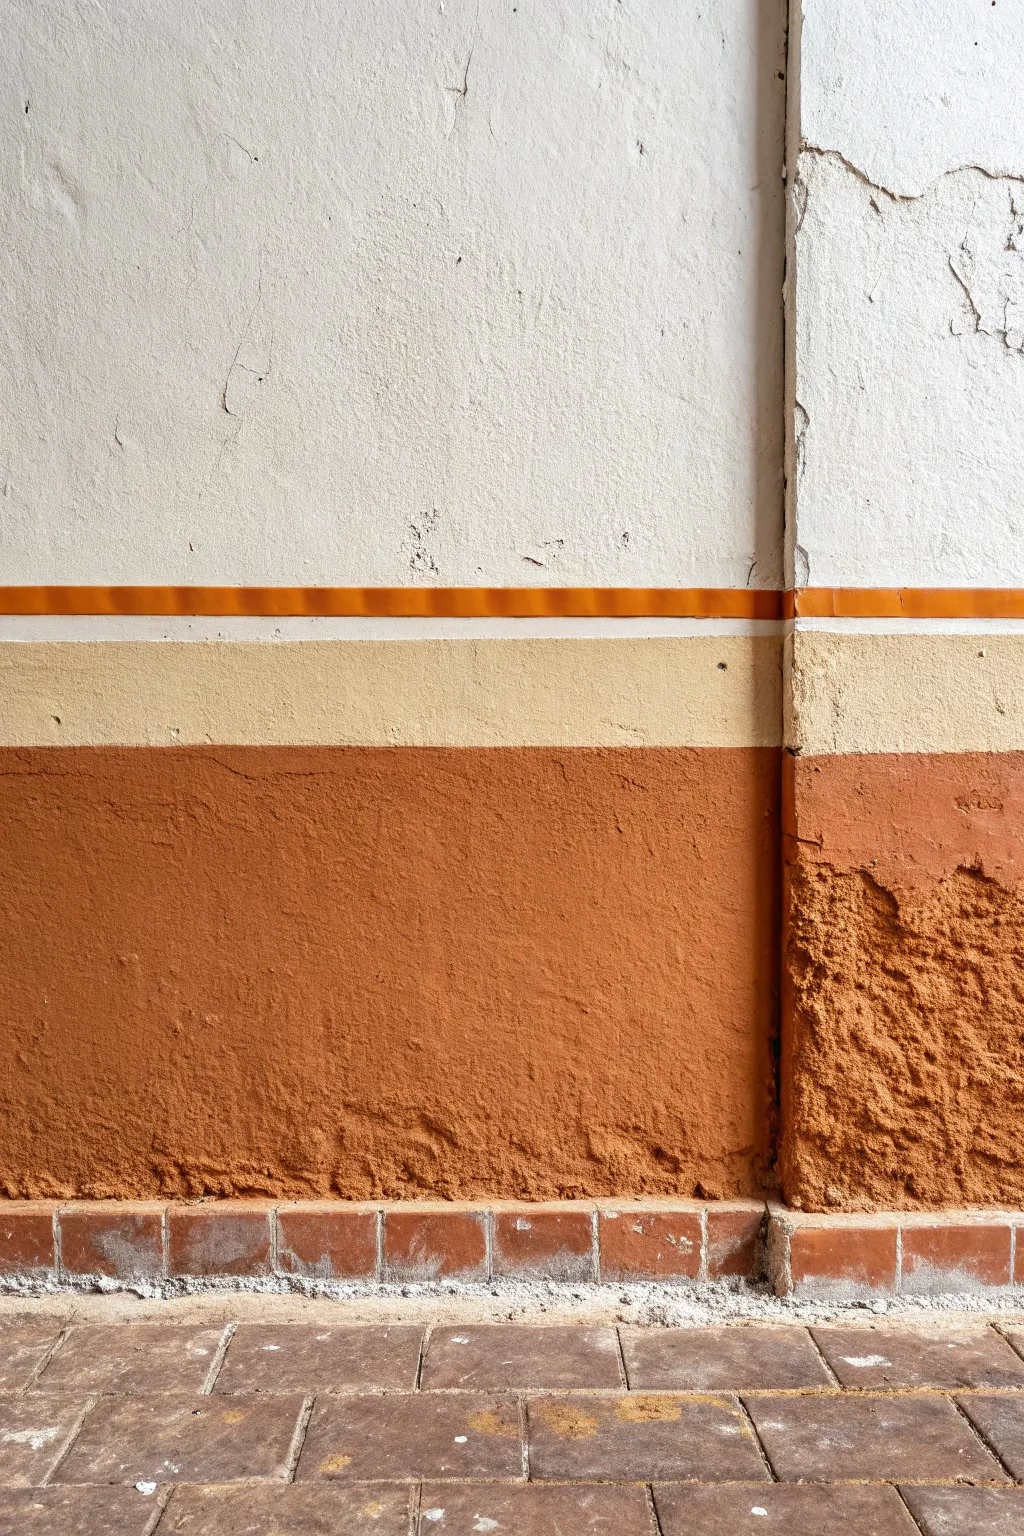
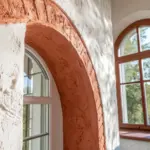
Achieve a warm, earthy aesthetic with this multi-textured wall treatment that mimics the look of aged Mediterranean stucco. By combining heavy textured plaster application with precise color blocking, you’ll create a striking visual anchor that feels both ancient and modern.
Detailed Instructions
Materials
- Latex primer suitable for masonry/drywall
- Textured stucco patch or wall texture additive
- Terracotta orange latex paint (flat finish)
- Creamy beige latex paint (eggshell finish)
- White latex paint (flat finish)
- Small square terracotta tiles (approx 4×4 or similar)
- Tile adhesive/mastic
- Grey sanded grout
- Painter’s tape (high quality)
- Laser level or spirit level
- Pencil
- Wide putty knife or trowel
- Paint rollers (medium nap for smooth areas, thick nap for texture)
- Paint brushes (angled sash brush)
- Sponge or rag (for texture aging)
Step 1: Preparation and Base Tiling
-
Clean the Surface:
Begin by thoroughly cleaning the wall surface to remove dust and grease, ensuring the new layers will adhere properly. -
Plan the Layout:
Use your laser level or a spirit level to mark horizontal lines where each transition will occur. You need a line for the top of the tiles, the transition from terracotta to beige, and the transition from beige to white. -
Install the Base Tiles:
Apply adhesive to the bottom section of the wall and press your square terracotta tiles into place, creating a single horizontal row along the floor. -
Grout the Tiles:
Once the adhesive has set according to manufacturer instructions, apply grey sanded grout between the tiles. Wipe away excess haze with a damp sponge.
Bleeding Lines?
If paint bleeds under tape on textured walls, first seal the tape edge with a thin layer of the base color (the color already on the wall) before applying the new color.
Step 2: Applying the Heavy Texture
-
Tape the Lower Divider:
Apply painter’s tape along the line marking the top of the terracotta section. This will protect the area that is destined to be smooth beige. -
Create the Rough Texture Mix:
Mix your terracotta paint with a wall texture additive, or use a pre-mixed stucco patch tinted to your terracotta color. You want a thick, mud-like consistency. -
Apply Texture to Lower Wall:
Using a trowel or wide putty knife, apply the textured mix to the area between the tiles and your tape line. Don’t smooth it out; intentionally leave divots, ridges, and heavy rough patches to mimic aged plaster. -
Add Extreme Texture Areas:
For the areas that look like exposed crumbling brick (usually near corners or edges), mound the texture thicker and dab it with a coarse sponge or crumpled rag to create deep pitting. -
Let it Cure:
Allow this heavy texture layer to dry completely. This may take 24-48 hours depending on humidity and thickness.
Step 3: Color Blocking and Painting
-
Paint the Upper Wall:
While the bottom texture dries, paint the upper portion of the wall with your flat white paint. Extend this slightly below the top tape line to ensure full coverage. -
Tape the Upper Stripe:
Once the white paint is fully dry, measure and apply a strip of painter’s tape horizontally to define the top of the beige band. -
Paint the Beige Band:
Remove the tape protecting the smooth middle section. Now, tape over the very top edge of your dry textured terracotta wall to protect it. -
Apply Beige Paint:
Using a medium nap roller, fill in the middle band with creamy beige paint. I find distinct color bands look best with two lighter coats rather than one heavy one. -
Create the Orange Accent Line:
To create the thin, bright orange line separating the white and beige, apply two strips of tape just above the beige section, leaving a 1-inch gap between them. -
Fill the Accent Line:
Paint this thin gap with a bright, saturated orange paint. Peel the tape while the paint is still slightly tacky for a crisp edge. -
Seal the Texture (Optional):
If the textured bottom wall feels too chalky, you can brush on a matte clear sealer to lock in the grit without adding shine.
Age the Texture
Mix a dark brown glaze and lightly sponge it over the roughest parts of the dried terracotta texture to create faux shadows and weathered depth.
Step back and admire how the crisp lines contrast with the rough texture to create a wall full of history and character


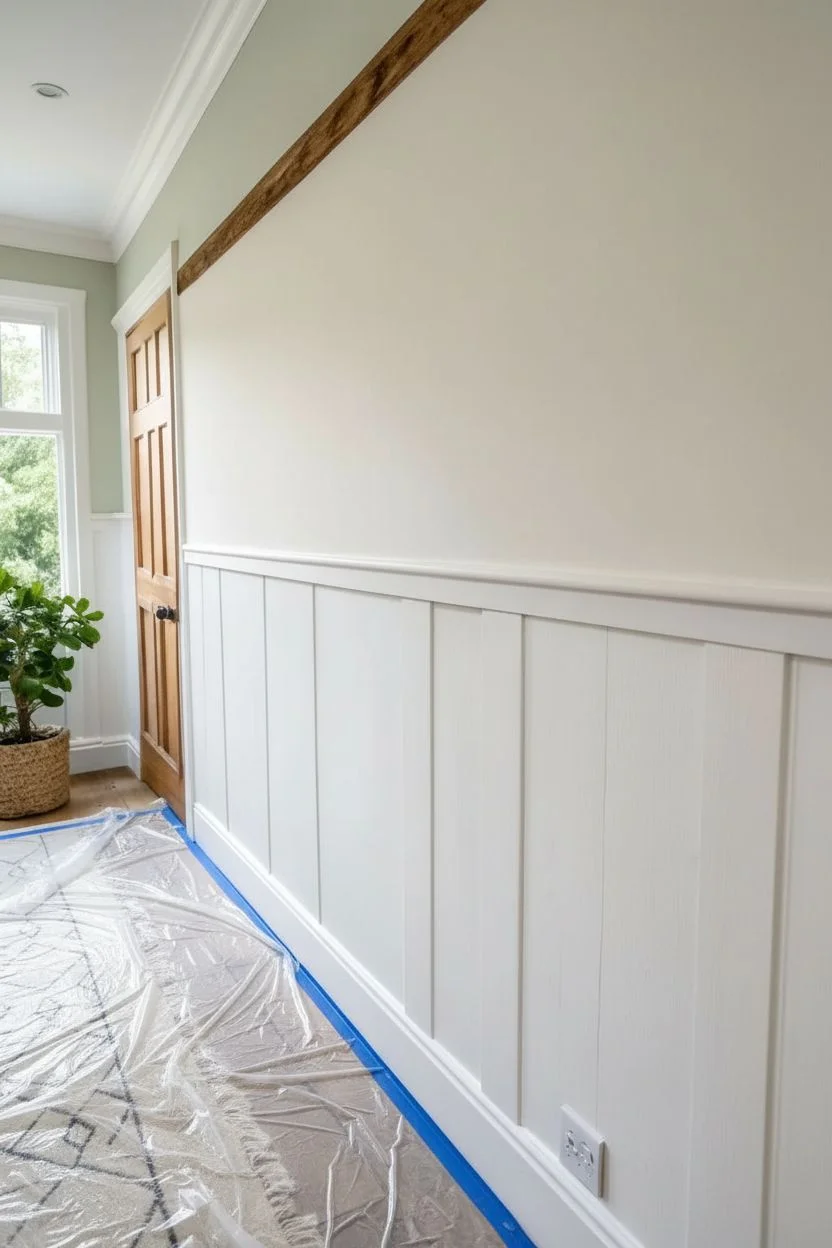
Simple Two-Tone Frame Border Accent
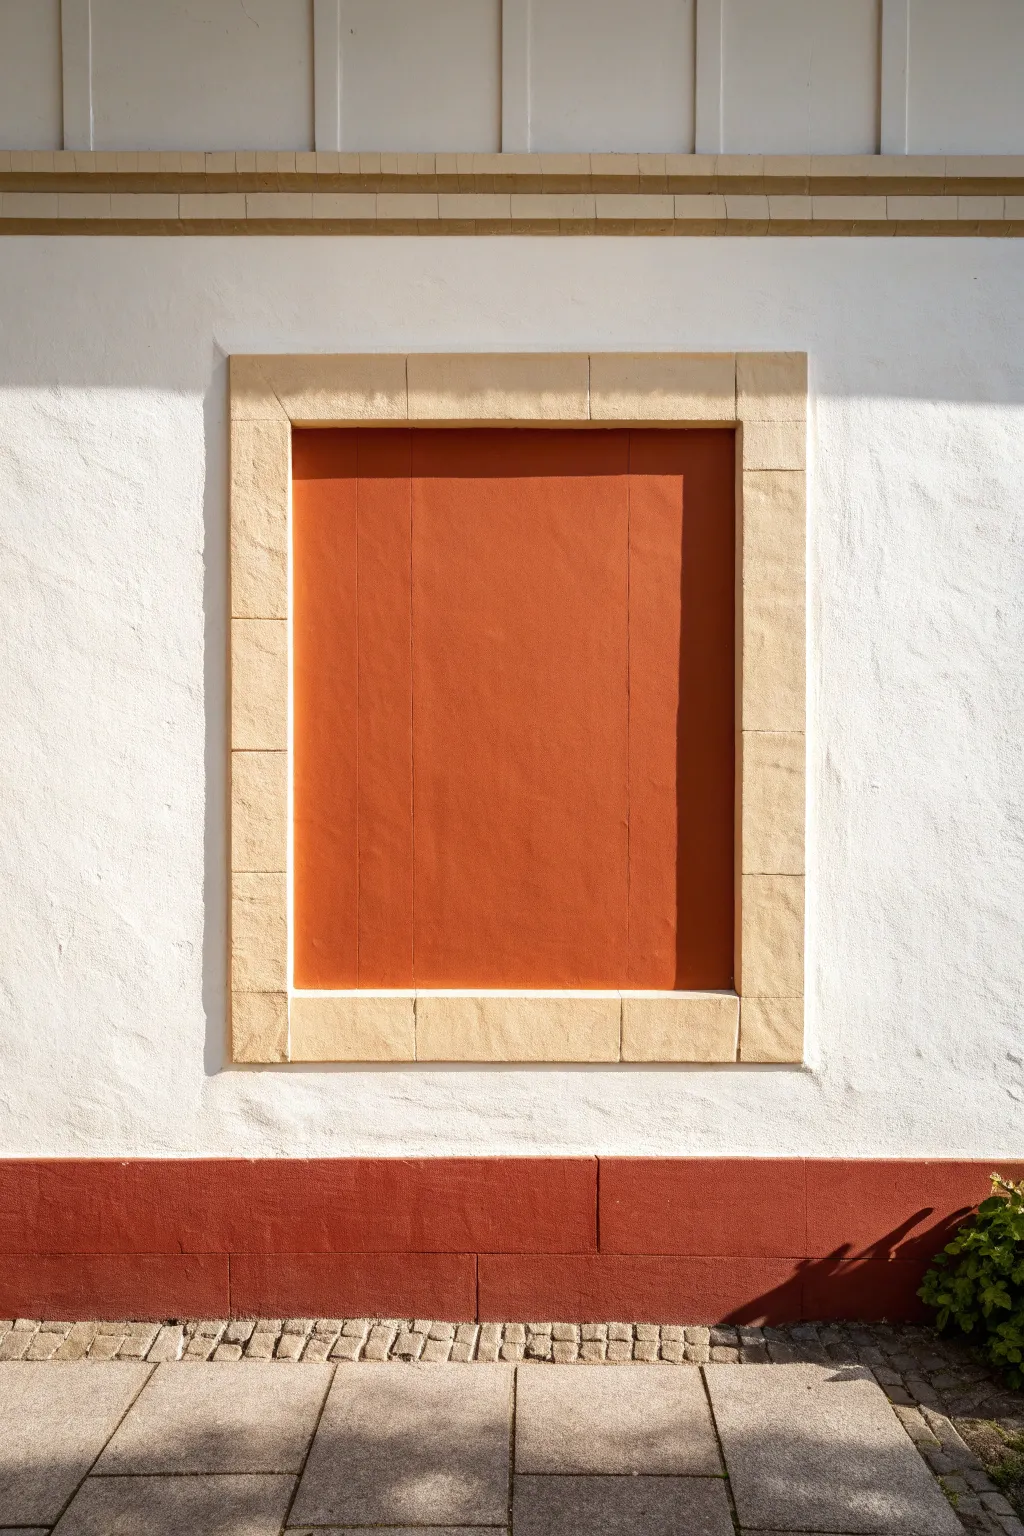
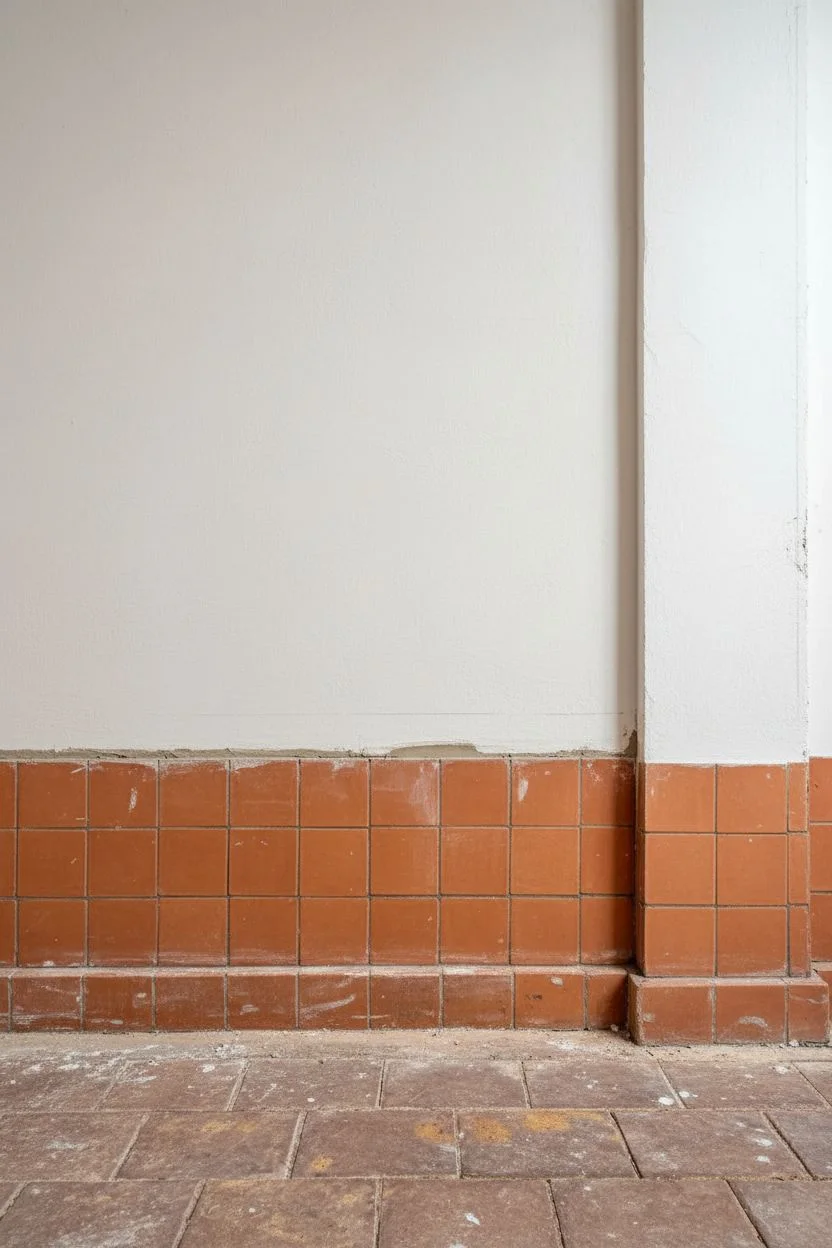
Transform a plain expanse of white wall into a charming architectural feature with this trompe-l’œil window effect. Using simple masking techniques and three paint colors, you can create the illusion of a recessed terra-cotta shutter framed by textured sandstone blocks.
Step-by-Step
Materials
- Painter’s tape (various widths: 1-inch and 2-inch)
- Terra-cotta or burnt orange interior latex paint
- Warm beige or sand-colored interior latex paint
- White or off-white base wall paint (to match existing wall)
- Paint rollers and tray
- Small angled sash brush
- Natural sea sponge or distinctively textured rag
- Measuring tape
- Pencil
- Level
- Drop cloth
Step 1: Preparation and Base
-
Mark the dimensions:
Begin by deciding on the size of your faux window. A standard size is roughly 36 by 48 inches. Use your measuring tape and pencil to mark the four outer corners of the entire frame on the white wall. -
Create the outline:
Connect your corner marks using a level to ensure perfectly straight vertical and horizontal lines. Lightly draw the full outer rectangle with your pencil. -
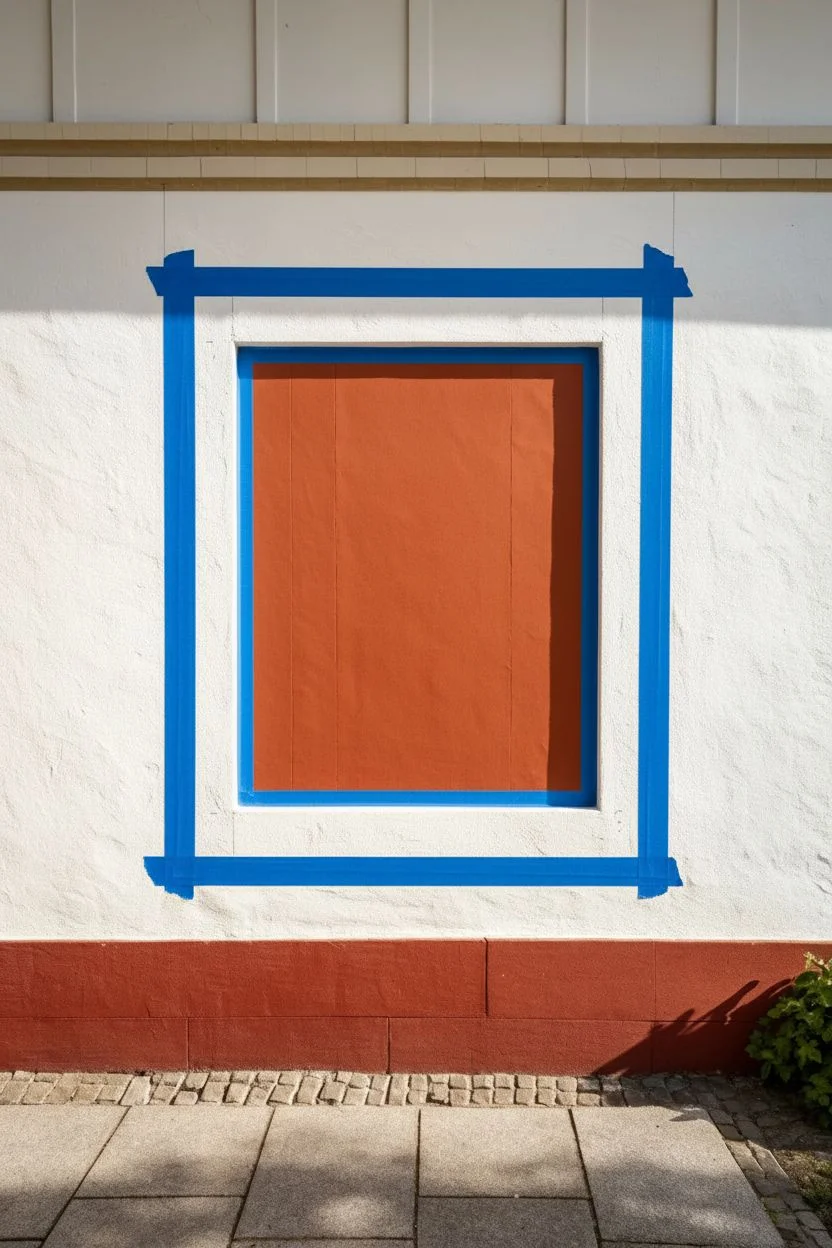
Tape the outer border:
Apply painter’s tape along the *outside* of your pencil lines. This tape acts as the boundary for the stone frame, protecting the surrounding white wall. -
Define the frame width:
Measure inward from your outer tape line by about 6 to 8 inches to establish the width of the stone frame. Mark this inner rectangle lightly with a pencil. -
Tape the inner border:
Apply a strip of painter’s tape along the *inside* of this new inner rectangle. This tape will separate the beige stone frame from the central red shutter area.
Step 2: Painting the Stone Frame
-
Apply the base coat:
Dip your sash brush or a small roller into the warm beige paint. Fill in the area between the two rows of tape completely. Don’t worry about texture yet; just aim for solid coverage. -
Add texture:
While the beige paint is still slightly tacky, I like to take a damp sea sponge dipped in a tiny bit of white paint (or a lighter beige) and dab it randomly over the frame. This mimics natural stone grain. -
Create mortar lines:
Let the beige paint dry to the touch. Calculate where individual stone blocks would meet—usually every 10 to 12 inches. Place thin strips of tape (or cut wider tape into thin strips) across the frame at these intervals to simulate mortar joints. -
Shade the blocks:
Mix a very small amount of the terra-cotta paint into your beige to darken it slightly. Glaze the edges of each ‘block’ near the thin tape lines to add dimension and age. -
Reveal the mortar:
Once the shading is dry, carefully peel away the thin strips of tape that created the mortar lines. The original lighter beige underneath will now look like grout.
Tape Sealing Trick
Before painting your color, brush a light layer of the *base wall color* (white) over the tape edge first. This seals the gap and guarantees a razor-sharp colored line.
Step 3: The Central Shutter
-
Remove inner tape:
Gently remove the tape barrier that separated the frame from the center. You now have a blank white rectangle in the middle. -
Retape for sharpness:
Apply fresh tape over the inner edge of your newly painted beige frame. This protects your stone work while you paint the center. -
Paint the center:
Fill the large central rectangle with the terra-cotta paint. Use a roller for a smooth finish, applying two coats if necessary for a deep, rich color. -
Simulate vertical planks:
To make the center look like wood rather than flat wall, wait for the base coat to dry, then run a long vertical strip of thin tape down the exact center. You can add two more strips equidistant from the center if the window is wide. -
Add shadow depth:
Mix a drop of black into a cup of your terra-cotta paint. Using a very dry brush, lightly drag this darker shade along the edges of the vertical tape strips to create a shadow line. -
Create the recess shadow:
Paint a thin line of this darker terra-cotta mix along the top and right side of the inner rectangle (right against the beige frame). This ‘drop shadow’ tricks the eye into thinking the shutter is recessed.
Fixing Bleeds
If paint bleeds under the tape onto the textured wall, don’t wipe it! Let it dry completely, then gently scrape the excess off with a craft knife or touch up with a small brush.
Step 4: Finishing Touches
-
The final reveal:
Slowly peel away all remaining tape carefully, pulling at a 45-degree angle away from the fresh paint to ensure crisp lines. -
Optional baseboard:
If you want to match the image fully, measure a section at the bottom of the wall for a wainscoting effect. Tape a horizontal line about 12 inches from the floor. -
Paint the base:
Paint this lower section with the same terra-cotta color used for the shutter. You can also scribe vertical lines into the wet paint with a tool to mimic large foundation blocks. -
Clean up edges:
Inspect your work for any paint bleed. Use a small artist’s brush and your original white wall paint to touch up any areas where the color escaped the tape lines.
Step back and enjoy the warmth and depth this simple painted illusion brings to your space


Chevron Zigzag Pattern Using Tape Guides
Transform a plain wall into a high-end architectural feature using little more than paint, tape, and patience. This geometric chevron design mimics the look of custom wood paneling with striking dark grout lines, creating dramatic movement and texture in any room.
Step-by-Step Guide
Materials
- High-quality painters tape (0.25 inch width recommended)
- Painter’s tape (1 inch width for borders)
- Laser level or long spirit level
- Measuring tape and pencil
- Base wall paint (Dark charcoal or black, matte finish)
- Top coat paint (Cream or light beige, eggshell finish)
- Faux wood glaze or translucent stain (warm oak tone)
- Glazing medium
- Paint rollers (foam and medium nap)
- Wide bristle brush (for wood graining)
- Clean rags
- Utility knife or box cutter
Step 1: Preparation & Base Coat
-
Preparing the surface:
Start with a clean, dry wall. Fill any existing holes and sand them smooth, as the geometric pattern will highlight imperfections. -
Applying the dark base:
Paint the entire wall with your dark charcoal or black paint. This color will eventually become the ‘grout’ lines between your chevron planks, so ensure solid coverage. -
Drying time:
Allow this dark base coat to dry completely, preferably overnight. The tape needs to adhere firmly without pulling up any tacky paint.
Clean Lines Pro Tip
For the crispest possible lines, peel the tape slowly at a sharp 45-degree angle while the top coat is still slightly tacky to avoid chipping dry paint.
Step 2: Mapping the Chevron
-
Finding the center:
Measure the width of your wall and mark the exact vertical center line using a laser level or a plumb line from ceiling to floor. -
Establishing vertical guides:
Decide on the width of your chevron ‘planks’ (e.g., 24 inches wide). Mark vertical lines outwards from your center line at equal intervals to create columns. -
Marking peaks and valleys:
Resulting in a zigzag, mark the height intervals for your peaks. For a 45-degree angle, the vertical distance between points should equal half the column width. -
Connecting the dots:
Lightly sketch your zigzags with a pencil to ensure the pattern flows correctly before committing with tape.
Step 3: Taping the Pattern
-
Applying the tape lines:
Apply the 0.25-inch specific tape over your pencil lines. These thin strips will preserve the dark base color. -
Cutting sharp corners:
Where the tape strips meet at the peaks and valleys, overlap the tape slightly. Use a sharp utility knife to gently trim the excess overlap to create a perfectly sharp point. -
Sealing the edges:
I always run a credit card or putty knife firmly over all tape edges to prevent paint bleed-under. -
The lock-in coat:
Lightly brush a small amount of the dark base paint over the tape edges. This seals the tape—if any paint bleeds, it will be the base color and invisible.
Level Up: 3D Effect
Add actual thin wooden trim pieces over every third dark line. This mixes flat paint with real dimension for an incredibly convincing architectural illusion.
Step 4: Creating the Wood Effect
-
Applying the base wood tone:
Roll on the cream or light beige top coat over the entire wall, covering the masked areas. You may need two coats for full opacity. -
Mixing the glaze:
Mix your glazing medium with the warm oak stain or darker beige paint. The ratio is usually 4 parts glaze to 1 part paint to keep it translucent. -
Brushing on texture:
Working in one chevron column at a time, brush the glaze mixture on vertically. While wet, drag a dry bristle brush through it to simulate wood grain. -
Varying the pressure:
Alter your pressure slightly as you drag the brush to create natural variations, knots, and streaks found in real timber. -
Check directionality:
Ensure the ‘grain’ follows the vertical orientation of the imaginary planks, regardless of the zigzag angle.
Step 5: The Reveal
-
Removing the tape:
Crucially, remove the tape while the final glaze layer is still slightly tacky, not fully cured. Pull the tape slowly at a 45-degree angle away from the fresh paint. -
Touching up:
Inspect the reveal lines. If any cream paint bled onto the dark lines, use a fine artist brush and the dark base paint to crisp up the edges.
Step back and admire how perfectly your new geometric feature wall commands the room
BRUSH GUIDE
The Right Brush for Every Stroke
From clean lines to bold texture — master brush choice, stroke control, and essential techniques.
Explore the Full Guide
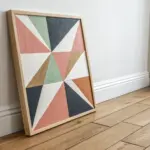
Triangle Scatter for a Modern Geometric Pop
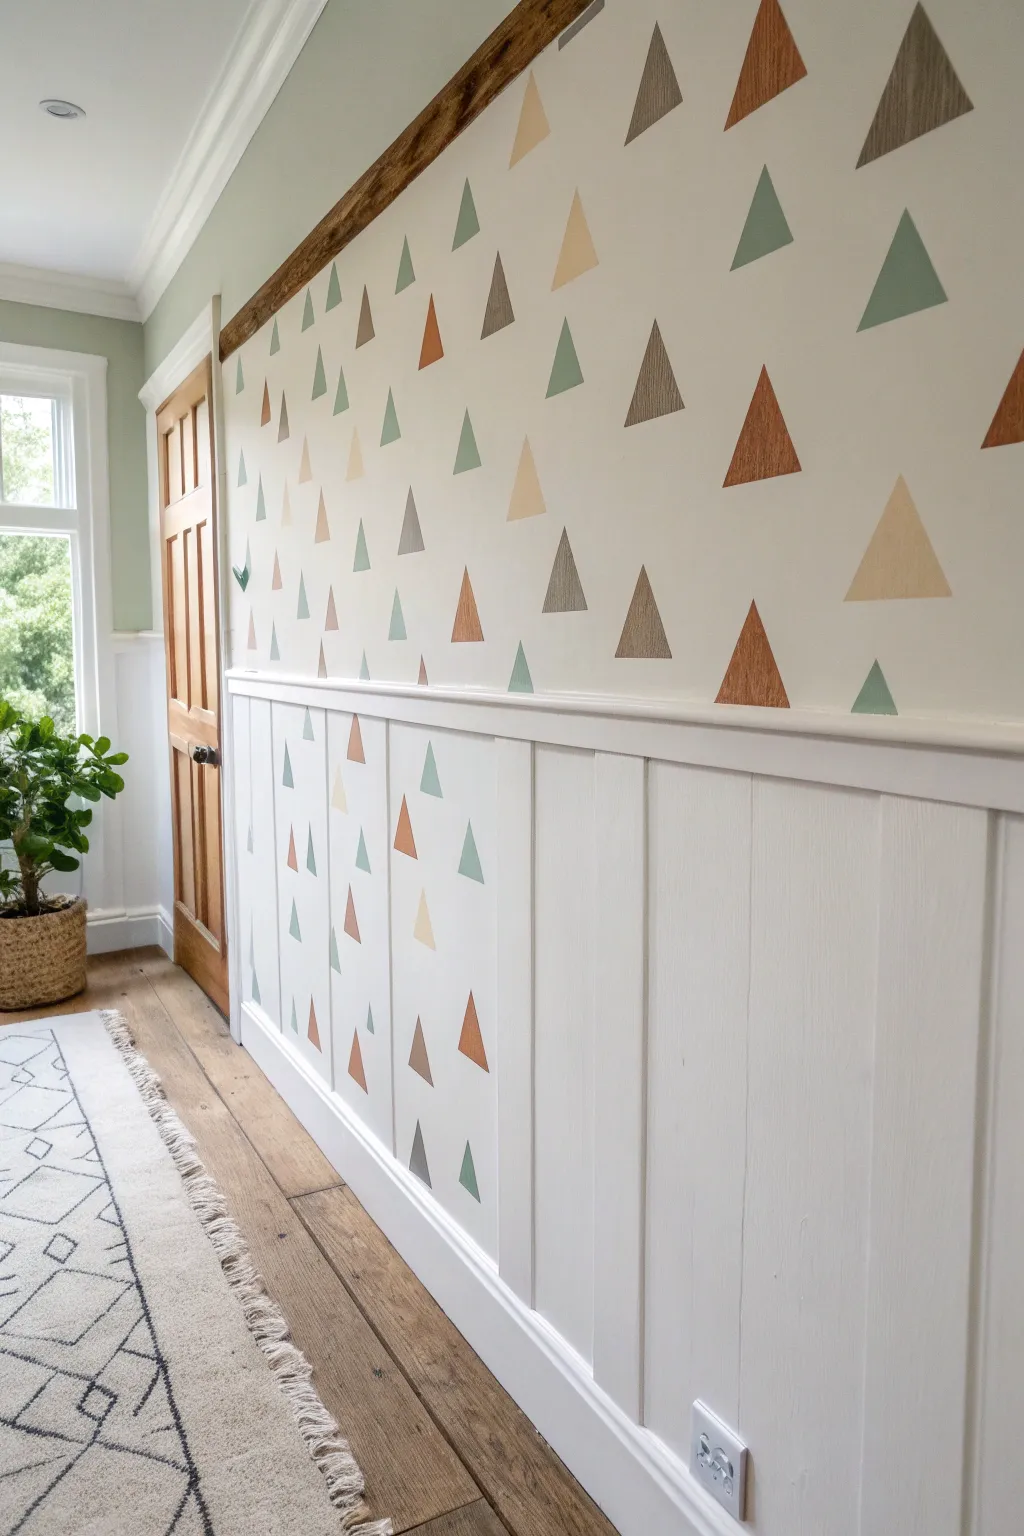
Transform a plain hallway or bedroom wall into a playful, modern feature with this scattered triangle design. Using a simple masking tape technique and a palette of earthy, muted tones creates a look that is both structured and wonderfully random.
Step-by-Step
Materials
- Interior wall paint (base color, e.g., warm white)
- Sample pots of accent paints (terracotta, sage green, slate grey, beige)
- Painter’s tape (1-inch width works best)
- Small foam roller or 1-inch angular sash brushes
- Measuring tape
- Pencil
- Utility knife or craft precision blade
- Plastic drop cloth
- Damp rag for clean-up
Step 1: Preparation and Base Coat
-
Clear and Protect:
Start by clearing the area against the wall. Lay down a plastic drop cloth to protect your flooring and tape it securely to the baseboards or wainscoting edge. -
Clean the Surface:
Wipe down the wall with a damp cloth to remove dust and oils. If you have existing wainscoting like the example, ensure the top ledge is clean and dust-free. -
Apply Base Color:
If your wall isn’t already the desired background shade, apply two coats of your base interior paint. Allow this to cure completely—ideally for at least 24 hours—before applying any tape.
Bleed-Through Blues?
If paint seeped under the tape, wait for it to dry fully. Then, scrape lightly with a razor blade to remove the bump, and paint over it with the base wall color using a fine artist brush.
Step 2: Creating the Stencils
-
Plan Your Spacing:
Visualize the density of your pattern. The example uses a random scatter, but generally, triangles are spaced about 6-10 inches apart to avoid clutter. -
Tape the Triangle Outline:
Tear off three strips of painter’s tape. Create a triangle shape on the wall by overlapping the ends of the tape strips. Focus on making the *inside* empty space the shape you want to paint. -
Refine the Corners:
To get sharp points, the tape strips will overlap significantly. Use your thumbnail or a plastic card to burnish the edges of the tape down firmly to prevent bleed-under. -
Trim the Excess:
I like to use a precision craft knife to very gently trim away the excess tape tails at the corners where they overlap, just to keep my visual workspace clean, though this is optional. -
Repeat the Process:
Repeat this taping process across the entire wall. Vary the slight rotation of the triangles if you want a quirky look, or keep them all upright like the reference image for a uniform ‘forest’ feel. -
Check density:
Step back frequently to check the balance of your whitespace. It is easier to add more tape shapes now than to try and paint fill-ins later.
Step 3: Painting the Motifs
-
Seal the Edges:
For razor-sharp lines, brush a very thin layer of your *base wall color* over the tape edges first. This seals the gap so any paint that bleeds underneath is invisible. -
Assign Colors:
Decide on your color distribution. Moving randomly is best to avoid clumps of the same color. -
Paint the Darker Tones:
Start with your darkest color (like the slate grey or dark sage). Using a small 1-inch brush or foam pouncer, fill in the designated triangles. Use a light hand to avoid pushing paint under the tape. -
Paint the Warm Tones:
Switch brushes and move to your terracotta or rust colors. Apply two thin coats rather than one thick one for better coverage. -
Finish with Neutrals:
Fill the remaining taped triangles with your beige or lighter neutral gold tones. -
Let Dry Slightly:
Allow the paint to set until it is tacky but not fully dry. This usually takes about 30 to 60 minutes depending on humidity.
Metallic Accent
Swap one of the neutral colors for a metallic gold or copper paint. It catches the light beautifully and adds a touch of unexpected glamour to the rustic geometric theme.
Step 4: The Big Reveal
-
Remove Tape:
Carefully peel the tape off at a 45-degree angle. Pulling slowly ensures you don’t peel up any of the base paint. -
Touch Up:
Inspect your triangles. If you have any minor bleeds, use a tiny artist’s paintbrush and your base wall color to clean up the edges.
Step back and admire how a few simple rolls of tape and sample pots turned a blank space into a custom mural
Diamond Grid for a Clean, Graphic Look
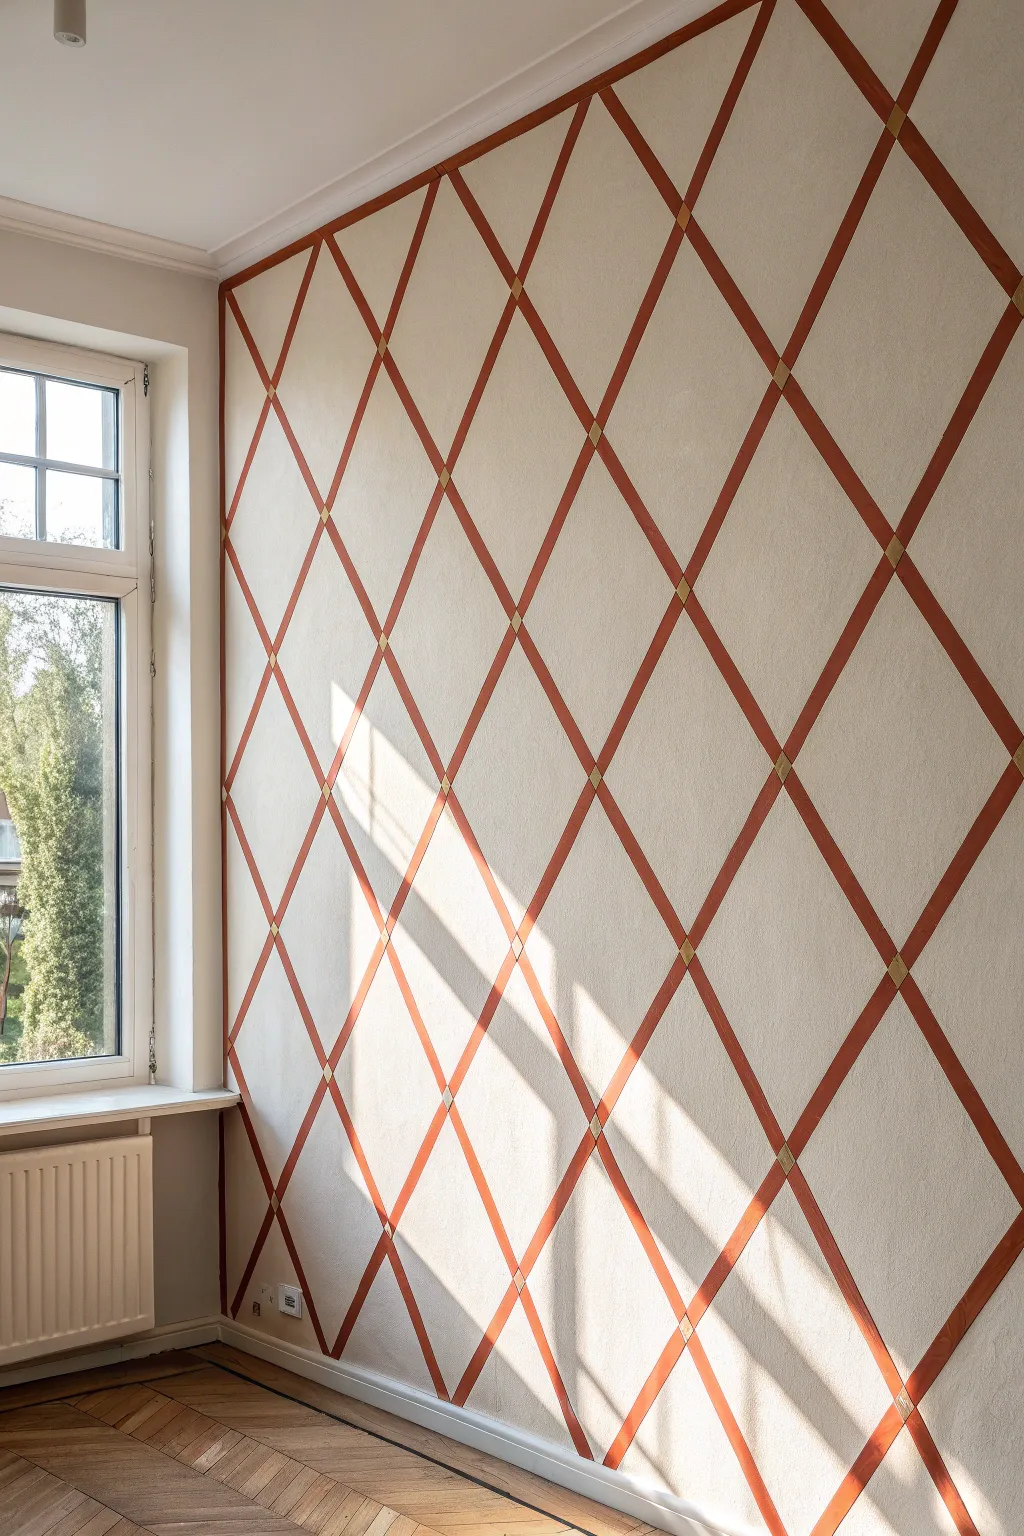
Transform a plain wall into a striking architectural feature with this large-scale diamond grid pattern. The warm, rusty orange lines paired with subtle gold intersections create a sophisticated graphic look that feels both classic and modern.
Step-by-Step Tutorial
Materials
- Cream or off-white latex wall paint (base coat)
- Rust-orange or terracotta latex paint (grid lines)
- Metallic gold paint (small container for accents)
- Painter’s tape (1-inch width works best)
- Measuring tape
- Long level or laser level
- Pencil
- Small foam roller
- Small artist’s brush (flat tip)
- Paint tray
- Drop cloth
Step 1: Preparation and Base
-
Prepare the workspace:
Clear the area in front of the wall and lay down a drop cloth to protect your floors, specifically those beautiful wood ones if you have them. Tape off the baseboards and ceiling line for clean edges. -
Apply the base color:
Roll on two coats of your creamy off-white base paint. Allow the first coat to dry completely before applying the second to ensure a rich, even finish. Let this cure for at least 24 hours so tape won’t peel it off later.
Step 2: Mapping the Grid
-
Decide on diamond size:
Measure the total width and height of your wall. To get the look shown, you want elongated diamonds, so your vertical spacing should be roughly double your horizontal spacing. -
Mark the center:
Find the vertical center of your wall and mark it lightly with a pencil at the top and bottom. This will ensure your pattern is symmetrical and doesn’t end awkwardly on one side. -
Mark horizontal points:
Starting from your center line at the ceiling, measure outwards in equal increments (e.g., every 12-16 inches) and mark along the top edge. Do the same along the bottom floor edge. -
Mark vertical points:
Along the left and right sides of the wall, mark equal vertical increments. These should be larger than your horizontal ones (e.g., every 24-32 inches) to stretch the diamond shape. -
Connect the dots diagonally:
Using a long straightedge or a laser level as a guide, lightly draw diagonal pencil lines connecting your top marks to your side marks. Repeat for the opposite diagonal direction to create the full lattice grid.
Seal Textured Walls
For bumpy walls like plaster, lightly caulk the tape edge with clear acrylic caulk before painting. It creates an impenetrable barrier for crisp lines.
Step 3: Taping the Pattern
-
Apply the tape:
Now comes the patient part. Apply painter’s tape along your pencil lines. Important: Place the tape *outside* the pencil line on both sides of the future painted stripe. You want the space between the tape strips to be the width of your final orange line. -
Check stripe width:
Since you are painting grid lines rather than filling shapes, you should have two strips of tape running parallel for each diagonal line, with a narrow gap (about 1 inch) in between them for the paint. -
Handle intersections:
Where the lines cross, your tape will overlap. Don’t worry about cutting it yet; just ensure your parallel tape lines are continuous across the whole wall. -
Seal the edges:
Run a credit card or a putty knife firmly over all tape edges. This is crucial to prevent paint bleed on textured walls. -
Base coat seal:
I like to quickly brush a tiny bit of the *base* wall color over the tape edges first. This seals any gaps with the base color, so if any paint bleeds under, it’s invisible.
Double Visual Depth
Mix a tiny drop of dark brown into your orange paint and hand-paint a very thin shadow line on one side of each grid strip for a 3D trellis effect.
Step 4: Painting and Details
-
Paint the grid lines:
Using your small foam roller or a sash brush, fill in the gaps between the tape with the rust-orange paint. Apply two light coats rather than one heavy one to avoid ridge buildup. -
Remove the tape:
Peel off the tape while the final coat is still slightly tacky. Pull at a 45-degree angle slowly to reveal your crisp grid lines. -
Create the gold intersections:
Once the orange lines are fully dry, you’ll add the metallic detail. Locate every intersection where the lines cross. -
Tape the accents:
Use four small pieces of tape to border the square intersection, or freehand it if you have a steady hand. The goal is to paint a small gold square or diamond right where the orange lines meet. -
Paint the gold accents:
Using a small flat artist’s brush, fill in these intersection points with metallic gold paint. It adds a subtle shimmer that mimics nail heads or upholstery tacking. -
Touch up:
Inspect your lines for any bleed-through. Use a tiny artist brush and your original base color to erase any mistakes and ensure lines are razor sharp.
Step back and admire how this elegant geometric grid adds immediate warmth and structure to your room

PENCIL GUIDE
Understanding Pencil Grades from H to B
From first sketch to finished drawing — learn pencil grades, line control, and shading techniques.
Explore the Full Guide
Crisscross Lines for an Easy Statement Wall
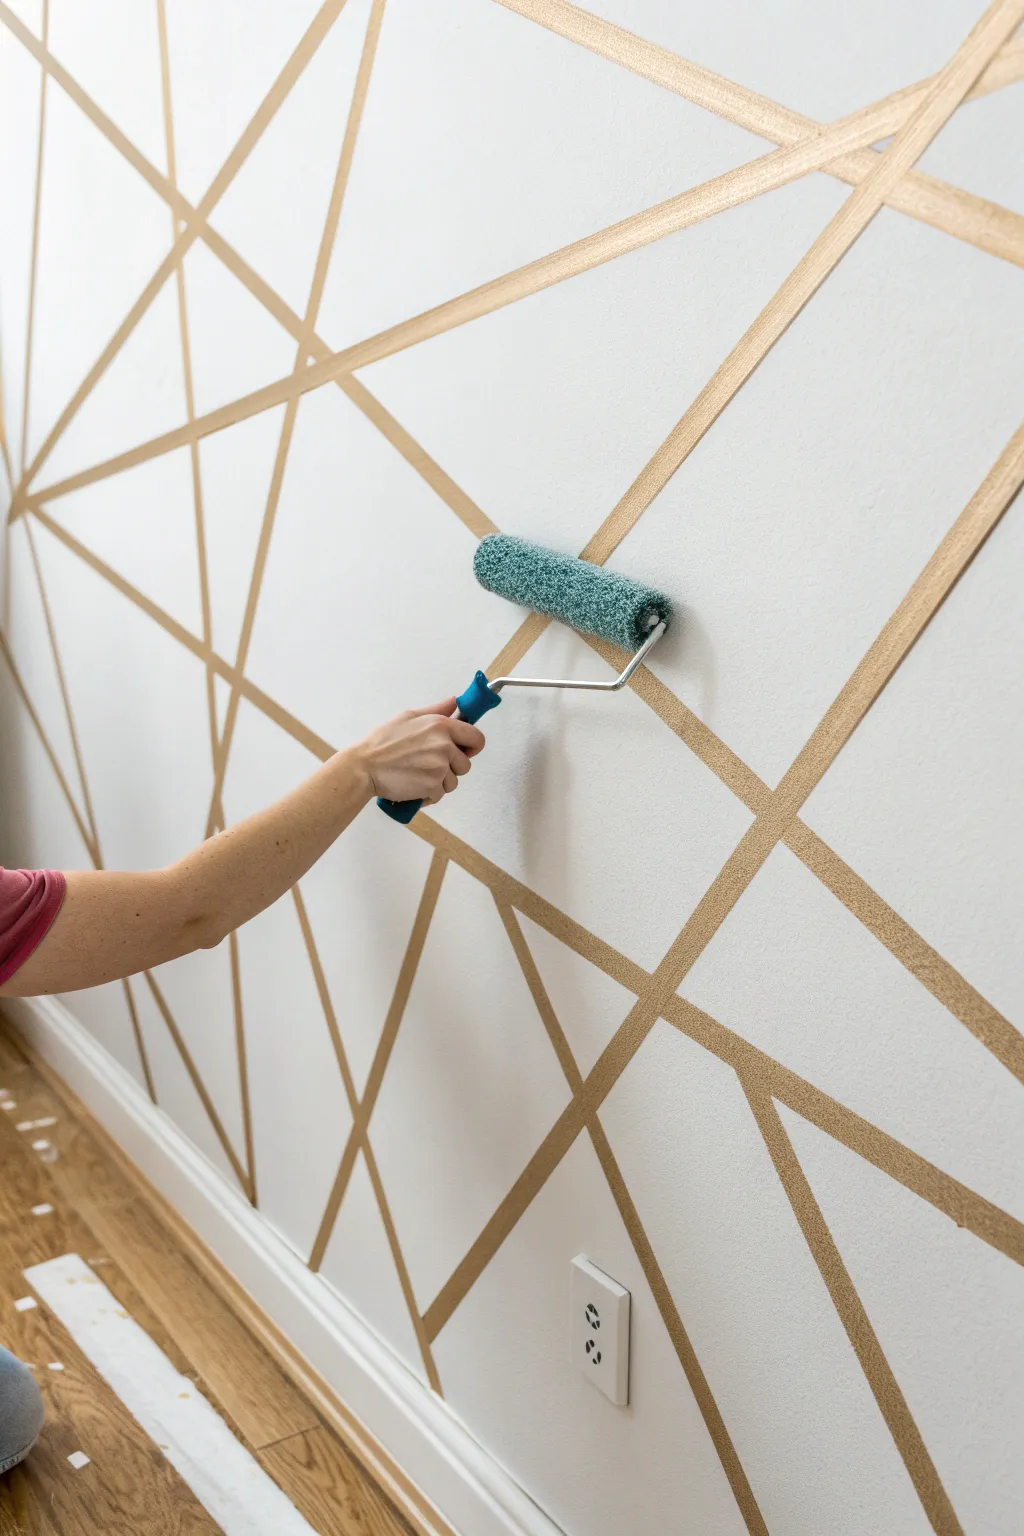

Transform a plain white wall into a modern masterpiece with this striking geometric accent design. By using metallic gold tape or paint strategically masked off, creates a high-end, architectural look that adds depth and movement to any room.
Detailed Instructions
Materials
- Interior wall paint (white or light neutral base)
- Metallic gold paint (for the lines)
- High-quality painter’s tape (1-inch width)
- Paint roller and tray
- Small artist’s brush (for touch-ups)
- Drop cloth
- Measuring tape (optional)
- Level (optional)
- Clean rag
- Utility knife
Step 1: Preparation and Base Coat
-
Clear and Clean:
Start by clearing the wall area. Move furniture away and lay down your drop cloth to protect the flooring. Wipe the wall down with a clean, damp rag to remove dust, ensuring a smooth surface for adhesion. -
Apply Base Color:
If your wall isn’t already the desired background color, apply two coats of your white or light neutral interior paint. Allow the wall to dry completely—I recommend waiting at least 24 hours so the tape doesn’t peel up the fresh paint later.
Step 2: Creating the Gold Grid
-
Plan Your Pattern:
Visualize the geometric design. The beauty here is in the random, intersecting angles. You don’t need a strict grid; focus on creating triangles and trapezoids of varying sizes. -
Tape the First Angle:
Apply your first strip of painter’s tape diagonally across the wall. Start from a corner or edge and run it all the way to an opposing side for a bold foundation line. -
Build the Geometry:
Place additional long strips of tape that intersect the first line. Crisscross them to create large shapes. Press the edges of the tape down firmly with your finger or a plastic card to prevent bleed-through. -
Vary the Angles:
Mix up your angles—some should be steep, others shallow. Avoid making perfect squares or 90-degree angles to keep that dynamic, shattered-glass aesthetic. -
Fill the Gaps:
Look for large open spaces and break them up with shorter strips of tape that connect two existing lines. This adds complexity to the design without making it too busy. -
Seal the Edges:
Run your finger or a clean cloth firmly over every inch of tape again. This is the most crucial step for crisp lines. For extra security, you can paint a very thin layer of the *base* wall color over the tape edges to seal them.
Bleeding Lines?
If paint bled under the tape, wait for it to dry fully. Then, place a detailed piece of tape along the correct line edge and use a tiny brush to touch up the error with the correct color.
Step 3: Painting the Lines
-
Painting Strategy:
There are two ways to achieve the look in the image. If you want *gold lines* on a white wall (easier method), you should have painted the whole wall gold first, then taped, then painted white. However, the image shows a white wall being rolled over. This implies a ‘reverse’ tape job or simply painting the lines themselves. -
The Reveal Method (Gold Lines):
To match the photo perfectly, we are actually creating negative space or painting the lines. If you used gold tape, you are done! If painting: Use a small roller or brush to paint the *spaces* between the tape if you want the tape lines to remain the original wall color. -
The Overlay Method (Recommended):
To get the look exactly as shown where the lines are gold: You actually paint the gold *over* the tape lines? No, that peels off. The secret: Paint the specific area where the line will be gold first. Let dry. Apply tape *over* the gold. Paint the whole wall white. Peel tape to reveal gold. -
Alternative: Painting Between:
For the specific visual of rolling white paint: Assume the gold lines are already on the wall (masked off) or you are rolling a top coat over a pattern. Let’s stick to the most reliable method for readers: The Paint-Over Technique. -
Correct Process for Image Accuracy:
First, paint the wall your metallic gold color wherever you plan to have lines. You don’t need to paint the whole wall, just wide swaths where the lines will go. -
Masking the Gold:
Once the gold paint is fully cured, apply your painter’s tape directly over the gold swaths in your geometric pattern. The tape now protects the gold line. -
Top Coat Application:
Now, use your roller with the white (top coat) paint. Roll over the entire wall, covering both the white spaces and the tape. -
Second Coat:
Apply a second coat of white paint to ensure the gold underneath is fully hidden and the coverage is even.
Add Texture
For a more tactile look, use a metallic gold texture paint or even gold leaf for the lines instead of standard metallic latex. This catches the light beautifully.
Step 4: The Grand Reveal
-
Timing the Removal:
Do not wait for the paint to fully dry! While the final coat is still slightly tacky (usually about 30-60 minutes after painting), begin removing the tape. -
Peel Carefully:
Pull the tape slowly at a 45-degree angle away from the line. This helps cut the paint film cleanly without pulling up chunks of your new white wall. -
Touch Ups:
Once all tape is removed, you see your crisp gold lines. Use a small artist brush to fix any tiny bleeds or rough spots where the white paint might have crept under.
Step back and admire the sophisticated, modern dimension you’ve added to your space with just a bit of tape and creativity
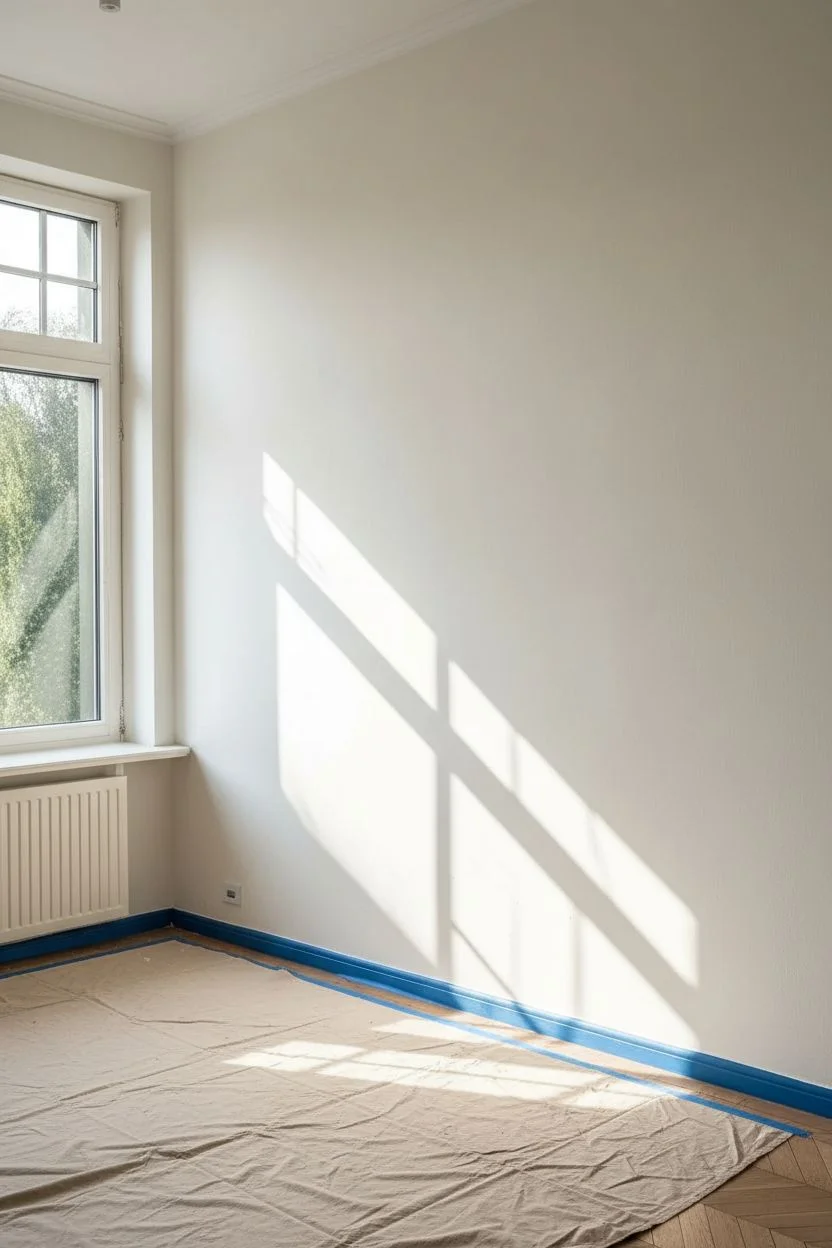
Herringbone Tape Layout That Feels Tailored
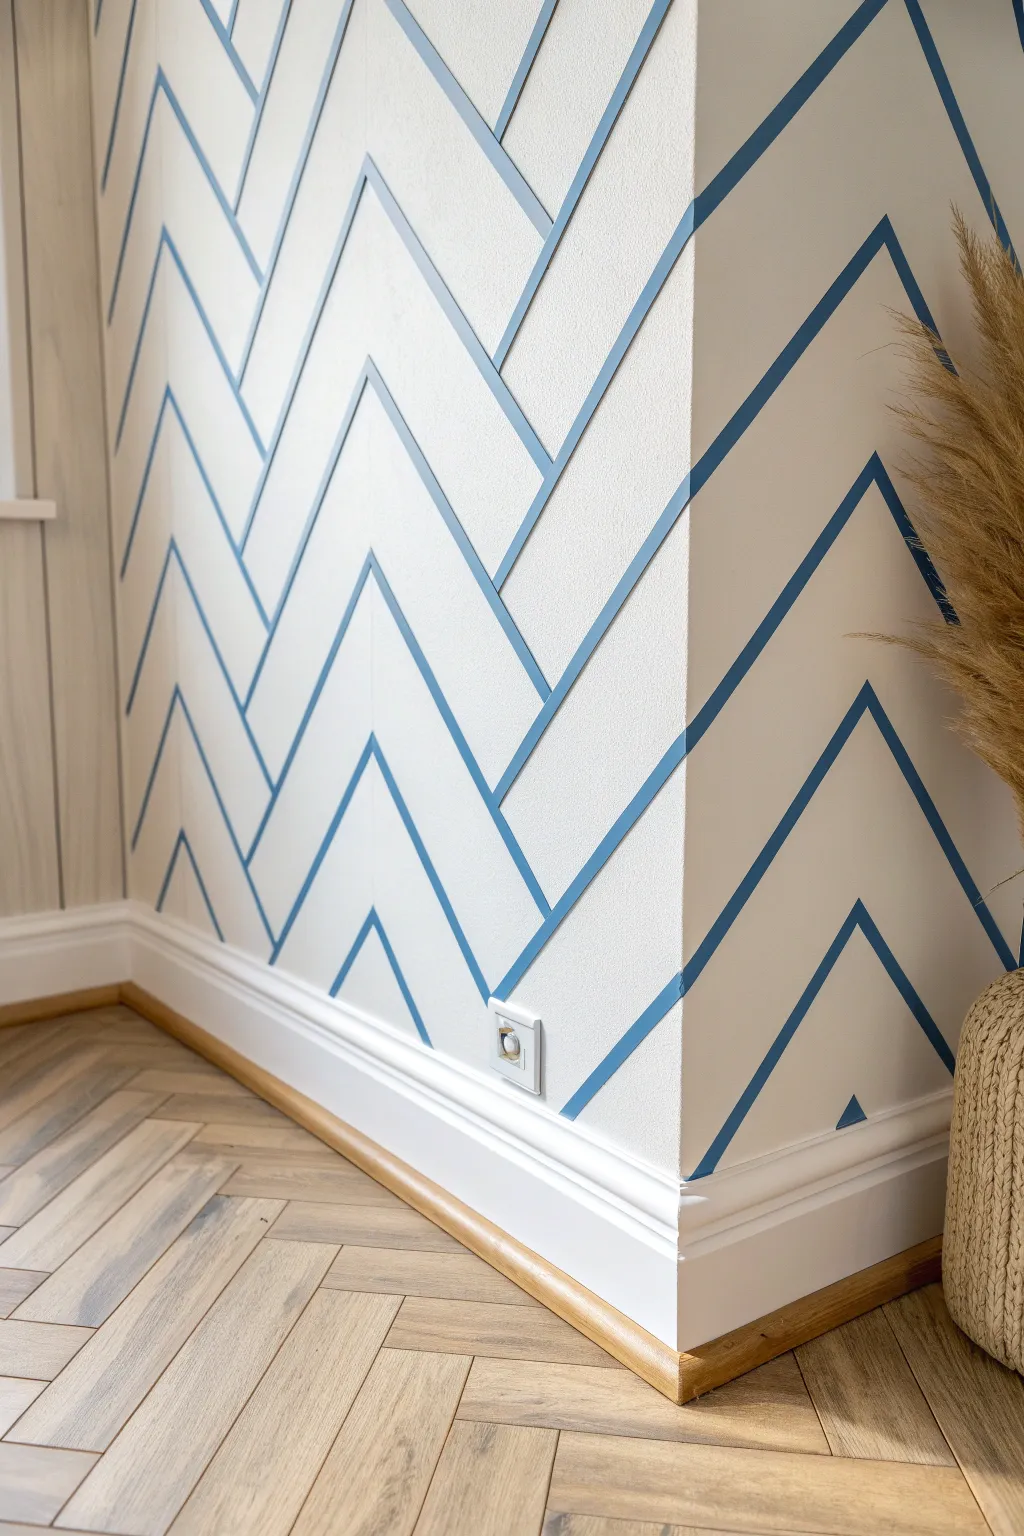
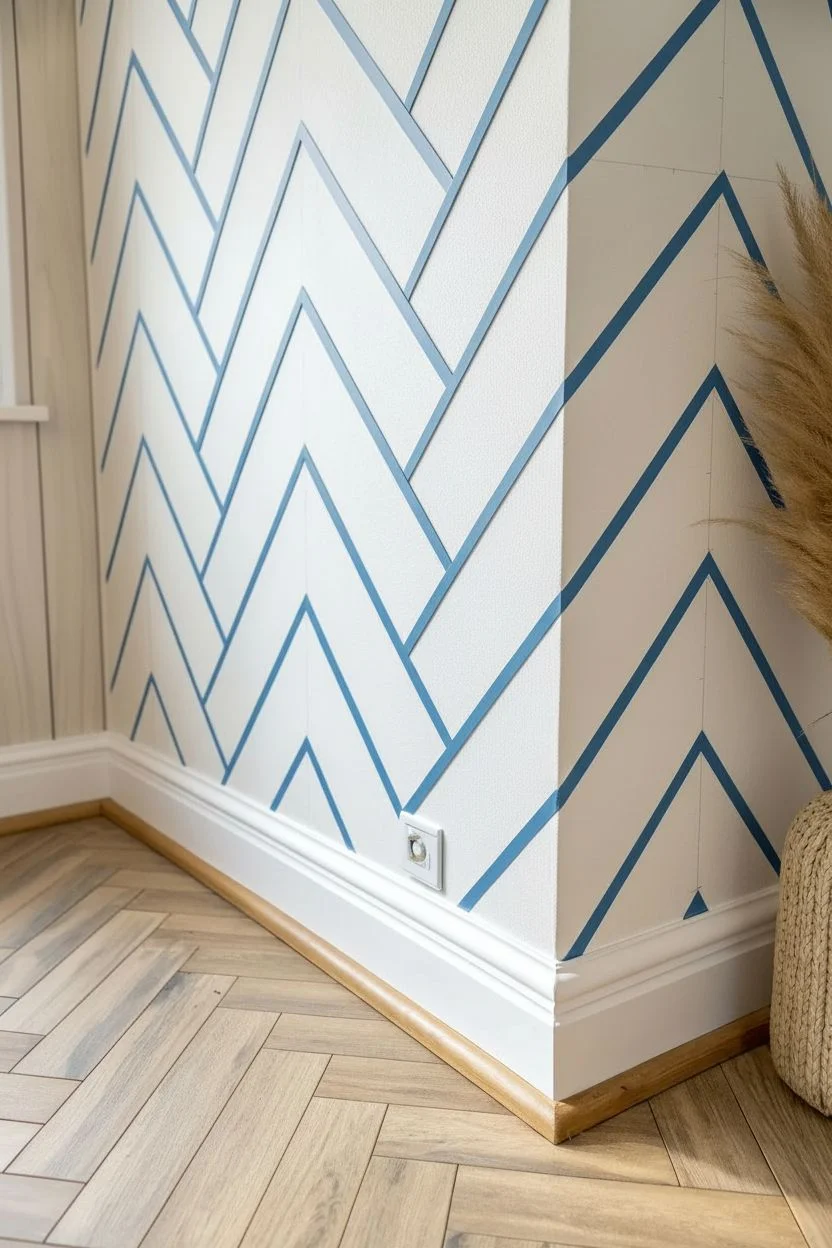
Elevate a plain white corner with this tailored herringbone pattern that adds striking geometric interest without overwhelming the space. By carefully applying masking tape to create crisp, clean lines, you can achieve a custom wallpaper look using just paint.
How-To Guide
Materials
- High-quality painter’s tape (1/4 inch width)
- White base wall paint (matched to existing wall)
- Blue accent wall paint (matte finish suggested)
- Laser level or long spirit level
- Measuring tape
- Pencil
- Detail paint brush (1-inch angled sash brush)
- Small foam roller
- Utility knife or sharp blade
- Putty knife or credit card
Step 1: Planning and Layout
-
Prepare the surface:
Ensure your wall is clean, dry, and painted with your desired base color—in this case, a clean, crisp white. If you recently painted the base coat, let it cure for at least 24 hours before applying any tape to prevent peeling. -
Mark vertical guides:
Using a laser level or spirit level, lightly draw vertical pencil lines from the ceiling to the floor. Space these lines evenly, about 12 to 16 inches apart, depending on how wide you want your herringbone columns to be. -
Establish the V-points:
On every vertical line, measure and mark small ticks at regular intervals (e.g., every 8 inches). These ticks will be the points of your ‘V’ shapes. Ensure the ticks on adjacent vertical lines are offset exactly halfway between each other to create the staggered zig-zag effect. -
Begin taping the first zig-zags:
Start applying your 1/4 inch painter’s tape. Connect the ticks diagonally to form the first set of parallel diagonal lines. It acts as the negative space, so the tape represents the white gaps in the final design. -
Complete the tape pattern:
Continue taping the opposing diagonals to complete the chevron or herringbone pattern. Maintain consistent spacing between parallel strips of tape; this spacing determines the thickness of your blue lines.
Tape Removal Tip
To avoid peeling up the base paint, pull the tape slowly towards yourself, keeping it close to the wall surface rather than pulling it straight out into the room.
Step 2: Painting the Design
-
Seal the tape edges:
Once your tape design is fully applied, run a putty knife or a credit card firmly over all tape edges. This ensures a tight seal and prevents paint bleed. -
Apply the ‘bleed prevention’ trick:
Brush a very light coat of your *base wall color* (white) over the edges of the tape. This seals the tape with the base color, so if any paint seeps under, it matches the wall and won’t be visible. -
Let the seal dry:
Allow this sealing coat to dry completely. Since it’s a thin layer, it should only take about 30–60 minutes. -
Paint the blue lines:
Using a small foam roller or a detail brush, carefully paint the blue accent color into the spaces between your tape strips. I find a small brush gives me better control near corners and baseboards. -
Apply a second coat:
For a bold, solid color like the blue shown here, you will likely need a second coat. Wait for the first coat to dry to the touch before applying the second for full opacity. -
Wait for paint to set slightly:
Let the final coat of blue paint dry until it is tacky but not fully hardened, usually about an hour.
Add Metallic Flair
Swap the matte blue paint for a metallic gold or silver paint for a glamorous, high-end Art Deco vibe that catches the light.
Step 3: The Big Reveal
-
Remove the tape:
Slowly and carefully peel off the painter’s tape at a 45-degree angle. Pulling while the paint is still slightly rubbery helps ensure a crisp line and prevents the dried paint from chipping. -
Clean up straight lines:
Inspect your lines closely. If there are any tiny bleeds or rough spots, use a very small artist’s brush and your base white paint to touch them up. -
Erase pencil marks:
Gently erase any visible pencil guide marks that weren’t covered by paint. A white eraser works best to avoid smudges. -
Final inspection:
Step back and check the full pattern from a distance to ensure uniformity. The finished result should look like intricate, custom-painted wallpaper.
Enjoy your sophisticated new accent wall knowing you created a designer look for the cost of a can of paint.


Shattered Glass Polygons for a Trendy Accent Wall
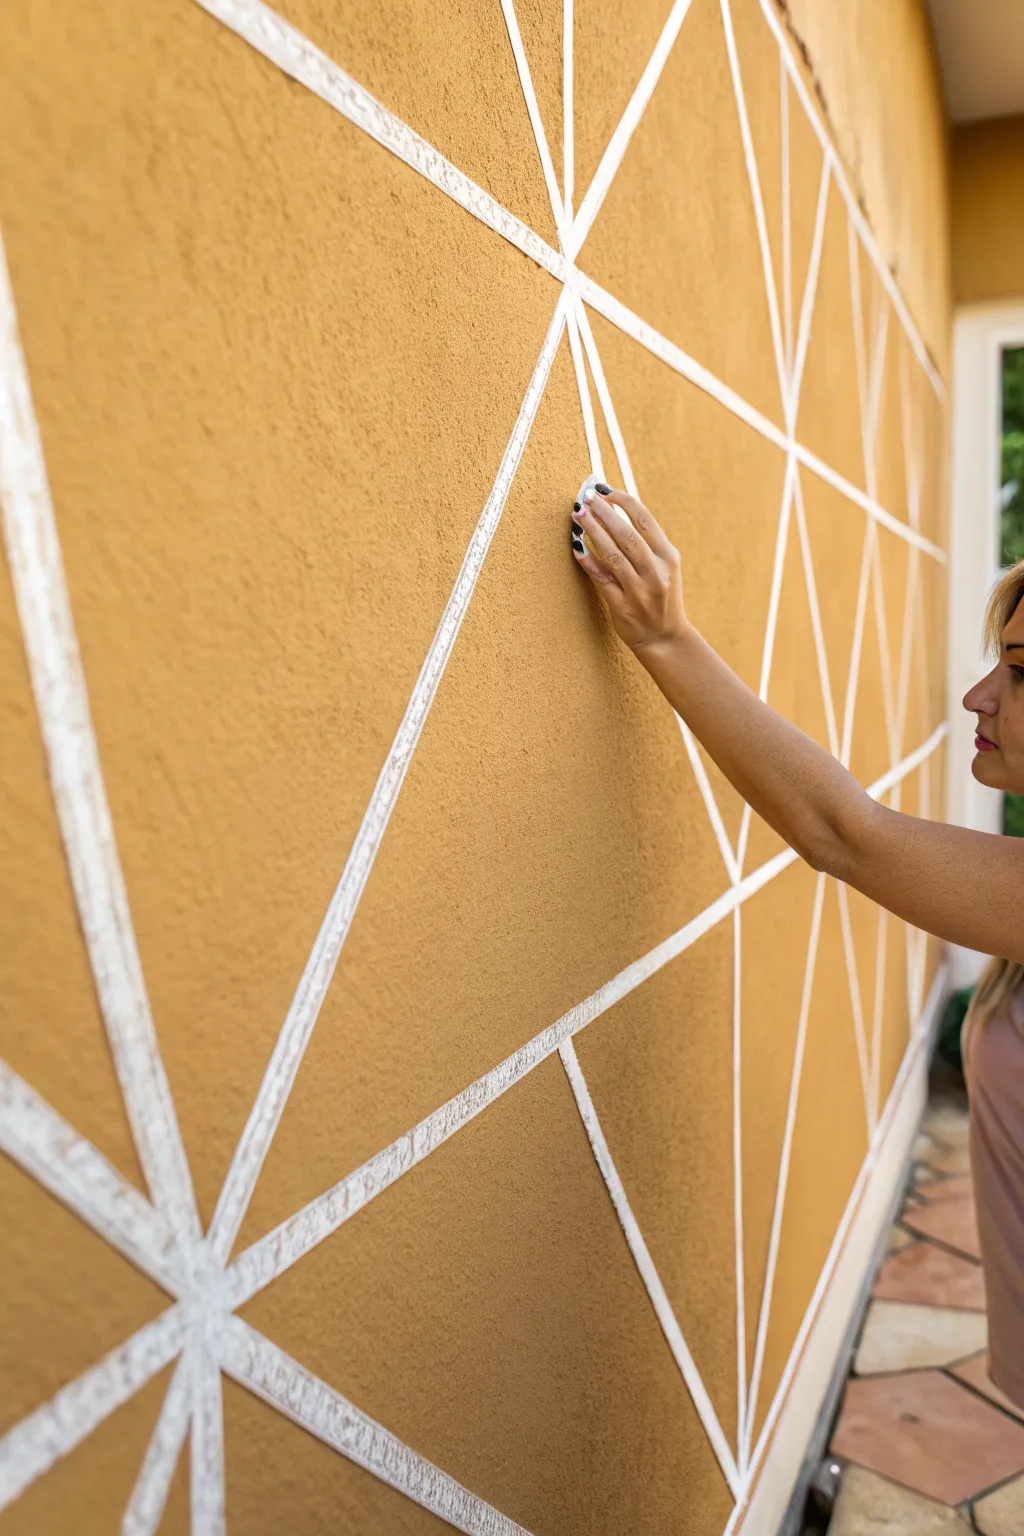
Transform a plain wall into a modern geometric masterpiece using the tape resist technique. This project creates a stunning shattered glass effect by revealing crisp white lines against a textured, warm ochre background.
Detailed Instructions
Materials
- Painter’s tape (1-inch width works best)
- White base coat paint (interior latex)
- Top coat paint (Mustard or Ochre color)
- Paint roller and tray
- Paintbrush (angled sash brush for edges)
- Drop cloth
- Damp rag
- Putty knife or credit card
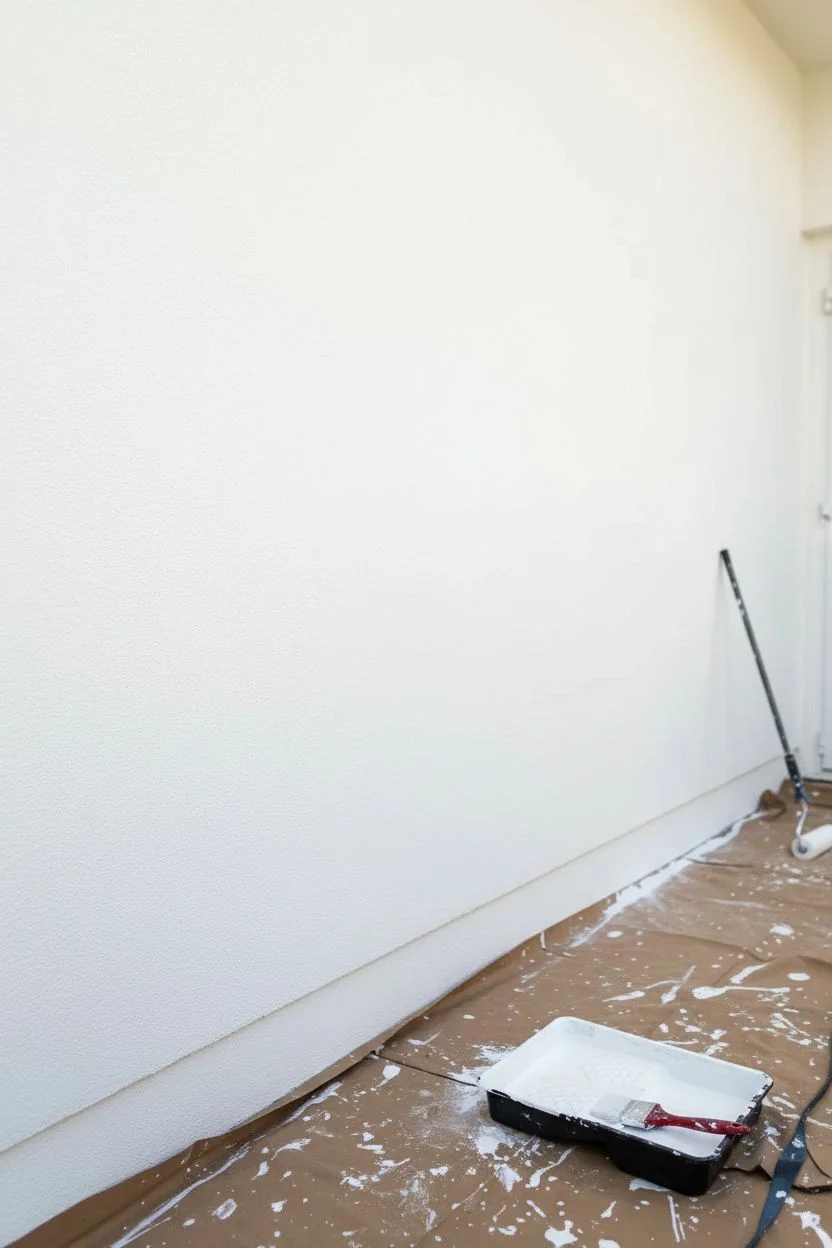
Step 1: Preparation & Base Coat
-
Prep the workspace:
Clear the area against the wall you intend to paint. Lay down a drop cloth to protect your flooring from potential drips and splatters. -
Clean the wall:
Wipe down the wall surface with a damp rag to remove dust and dirt. This ensures the tape adheres properly and the paint goes on smoothly. -
Apply the base color:
your lines will be white, so ensure your wall is painted white first. If it’s already white, touch up any scuffs. If not, apply a coat of white interior latex paint and let it dry completely, ideally for 24 hours.
Bleeding Lines?
If paint seeped under the tape, wait for it to dry fully. Use a straight edge or ruler and a tiny brush with your base color to paint a straight line over the mistake.
Step 2: Creating the Design
-
Start the tape pattern:
Begin placing long strips of painter’s tape diagonally across the wall. Start from a corner or edge to anchor your design. -
Build triangles:
Cross the initial long strips with shorter pieces of tape to create various triangle and polygon shapes. Don’t overthink the pattern; randomness is key to the shattered glass look. -
Check spacing:
Step back occasionally to view the wall as a whole. Ensure you have a good mix of large and small shapes without any one area looking too cluttered or too sparse. -
Seal the edges:
Once you are happy with the layout, run your finger or a putty knife firmly along the edges of every piece of tape. This is crucial to prevent paint bleed-under. -
The bleeding trick:
For razor-sharp lines, I like to brush a very light layer of the *base* color (white) over the tape edges first. This seals any tiny gaps with white paint so the top color won’t seep through.
Peel Perfect
Don’t wait until the paint is 100% dry to peel the tape! Dry paint can bond to the tape and rip off in chunks. Peel while the wall is still slightly damp.
Step 3: Painting & Reveal
-
Cut in the edges:
Use an angled sash brush to carefully paint the mustard top color along the ceiling line, baseboards, and corners where the roller can’t reach. -
Roll the first coat:
Using a roller, apply the mustard paint over the entire wall, covering the tape completely. Use a ‘W’ motion for even coverage. -
Apply second coat:
Allow the first coat to dry to the touch (check your paint can for specific times), then apply a second coat for full, rich color saturation. -
Wait briefly:
Let the final coat of paint set for about 30 to 60 minutes. You want the paint to be tacky but not fully cured. -
Begin tape removal:
Start peeling the tape off slowly. Pull the tape away from the wall at a 45-degree angle. This angle helps cut through the paint film cleanly. -
Work carefully:
As you intersect other pieces of tape, take your time. If the paint starts to lift or pull, score the edge gently with a utility knife before continuing to pull. -
Touch ups:
Inspect the lines closely. If a little paint managed to bleed through, use a small artist’s brush and white paint to tidy up the lines.
Enjoy the dramatic transformation of your space with these crisp, clean architectural lines
Mix Thin and Thick Tape Lines for Pinstripe Drama
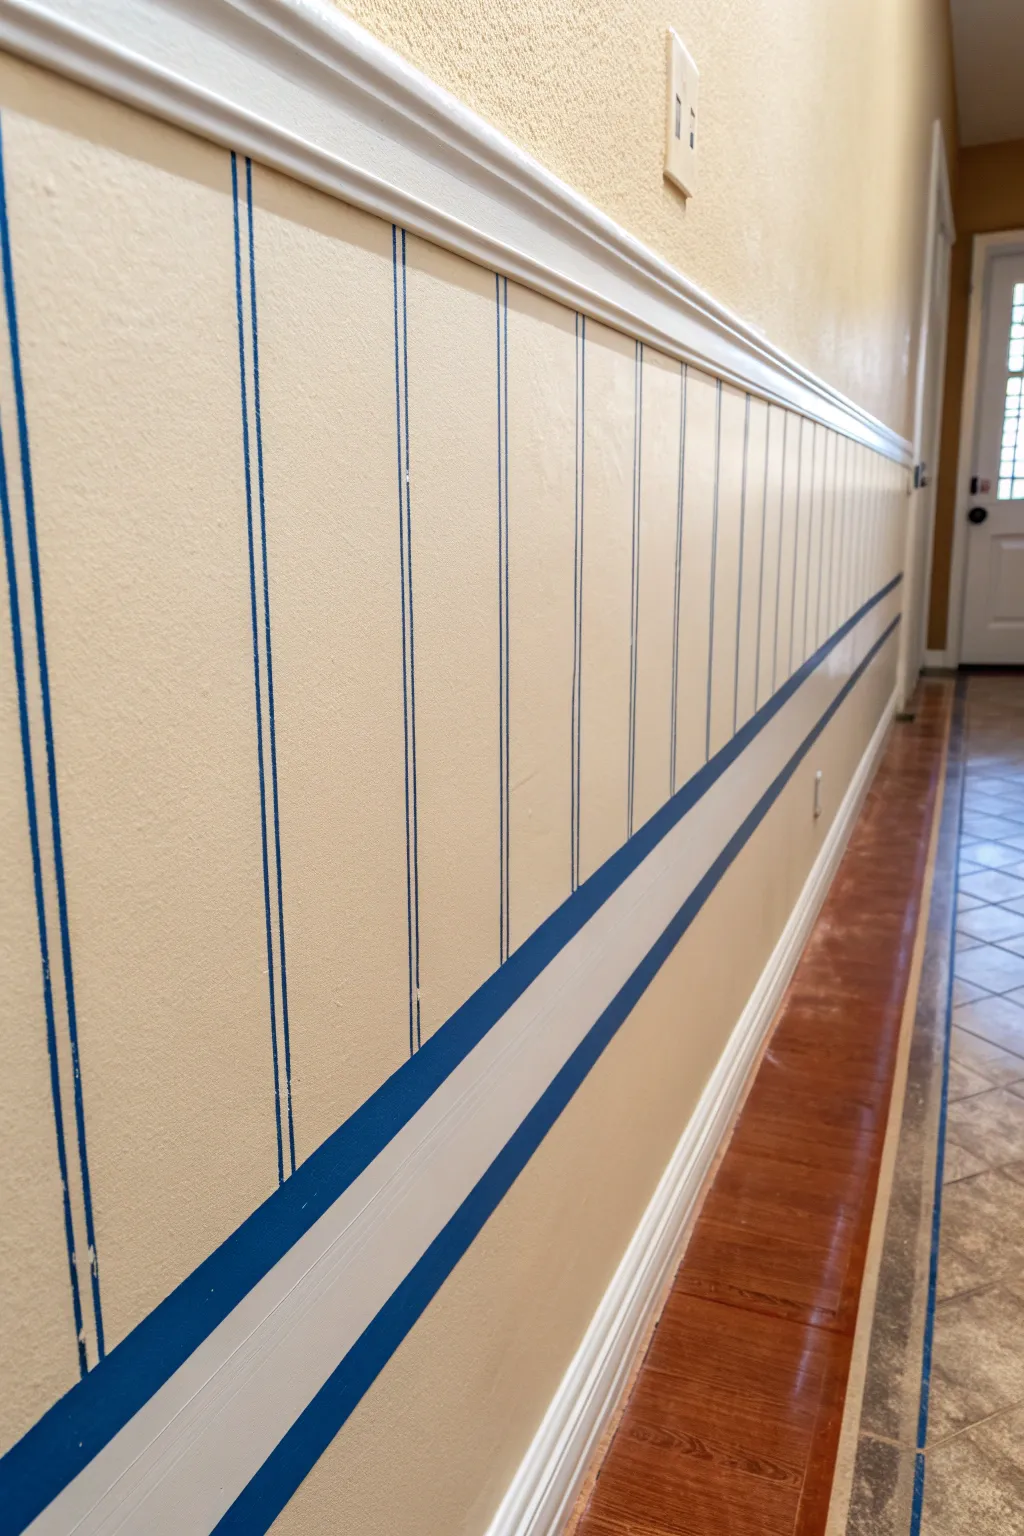
Transform a plain hallway into a sophisticated space by combining vertical pinstripes with bold horizontal banding. This project uses varying widths of painter’s tape to create a crisp, tailored look that mimics the appearance of high-end beadboard or custom wainscoting.
How-To Guide
Materials
- Cream or beige satin wall paint (base coat)
- Navy blue semi-gloss latex paint
- High-quality blue painter’s tape (0.94 inch width)
- High-quality blue painter’s tape (1.88 inch width or wider for spacing)
- Laser level or 4-foot bubble level
- Tape measure
- Pencil
- Small foam roller and tray
- 1-inch angled sash brush
- Putty knife or credit card
- Drop cloths
- Damp rag
Step 1: Preparation and Base Coat
-
Clean the surface:
Wipe down the wall area below the chair rail with a damp rag to remove dust and grime, ensuring a clean surface for tape adhesion. -
Apply the base color:
Roll two coats of your cream or beige satin paint onto the wall section. Let this dry completely for at least 24 to 48 hours; fresh paint needs to cure so it doesn’t peel off with the tape later.
Step 2: Creating the Vertical Pinstripes
-
Mark vertical intervals:
Using a tape measure, lightly mark pencil ticks along the bottom of the chair rail every 6 to 8 inches, depending on how dense you want your stripes. -
Project guidelines:
Set up a laser level aligned with your first pencil mark to project a perfectly straight vertical line down to the floor. -
Apply the first strip:
Apply a strip of the thinner (0.94 inch) painter’s tape directly along the laser line. This tape represents the space *between* the thin blue lines shown in the photo. -
Create the stripe gap:
Place a second piece of tape parallel to the first, leaving a very narrow gap (about 1/8 to 1/4 inch) between them. This tiny gap will become your vertical blue pinstripe. -
Seal the edges:
Run a putty knife or credit card firmly over the edges of the tape near the gap to prevent paint bleed. -
Repeat across the wall:
Continue moving your laser level to each mark, applying paired tape strips to create those narrow painting gaps across the entire length of the hallway.
Seal with the Base Color
Before applying blue, paint the edges of your tape with the cream wall color. This seals the tape and ensures any ‘bleed’ is invisible.
Step 3: Taping the Horizontal Band
-
Establish the lower band height:
Measure a few inches up from the baseboard (or where you want the thick stripe to begin) and use the laser level to project a horizontal line. -
Mask the horizontal borders:
Apply a long strip of tape horizontally. Place a second strip parallel to it, leaving a wide gap (about 4 inches) for the main horizontal feature. -
Protect the vertical stripes (optional):
I find it helpful to place small pieces of tape over the vertical gaps where they intersect the horizontal band area if you want the horizontal band to sit ‘on top’ visually.
Crooked Vertical Lines?
Walls are rarely perfectly plumb. Trust your laser level, not the corners of the room, or your stripes will look tilted.
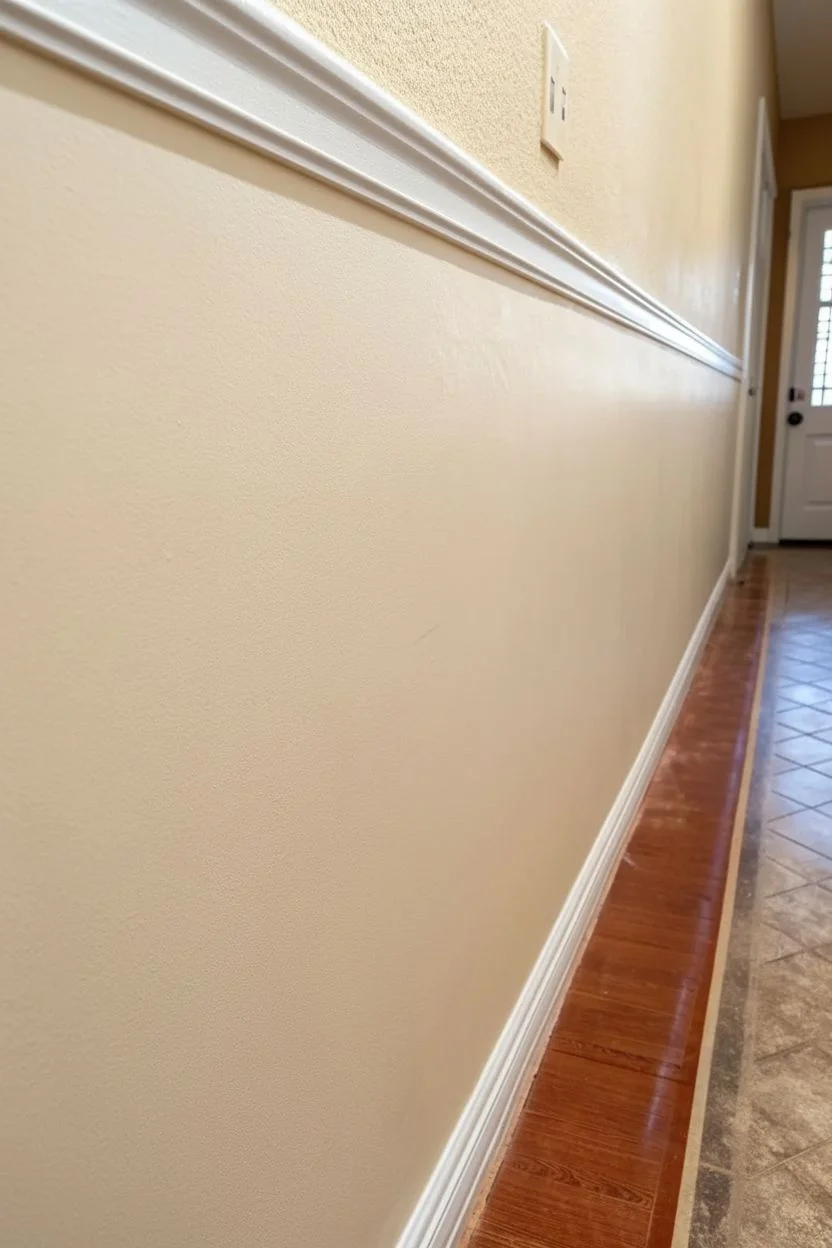
Step 4: Painting and Reveal
-
Seal with base color:
Brush a very light coat of your *base* wall color (the cream) over the tape gaps first. This clever trick seals the edge; if any paint bleeds under, it matches the wall. -
Apply the accent color:
Once the seal coat is dry, use a small foam roller or brush to apply the navy blue paint into the vertical pinstripe gaps and the horizontal band borders. -
Paint the horizontal center:
If your design includes a white stripe inside the blue band (as seen in the photo where the thick stripe is white with blue edges), paint that center section white now, using additional tape to mask the blue borders if necessary. -
Apply a second coat:
Lightly apply a second coat of blue to ensure solid, opaque coverage without brush strokes. -
Remove tape while damp:
Slowly peel back the tape at a 45-degree angle while the final coat of paint is still slightly tacky to the touch, which helps ensure a crisp line. -
Touch ups:
Inspect your work closely. Use a tiny artist’s brush to fix any small bleeds or uneven spots once the paint is fully dry.
Step back and admire how a few rolls of tape and contrasting paint have added instant architectural interest to your hallway
High-Contrast Monochrome for a Bold Graphic Wall
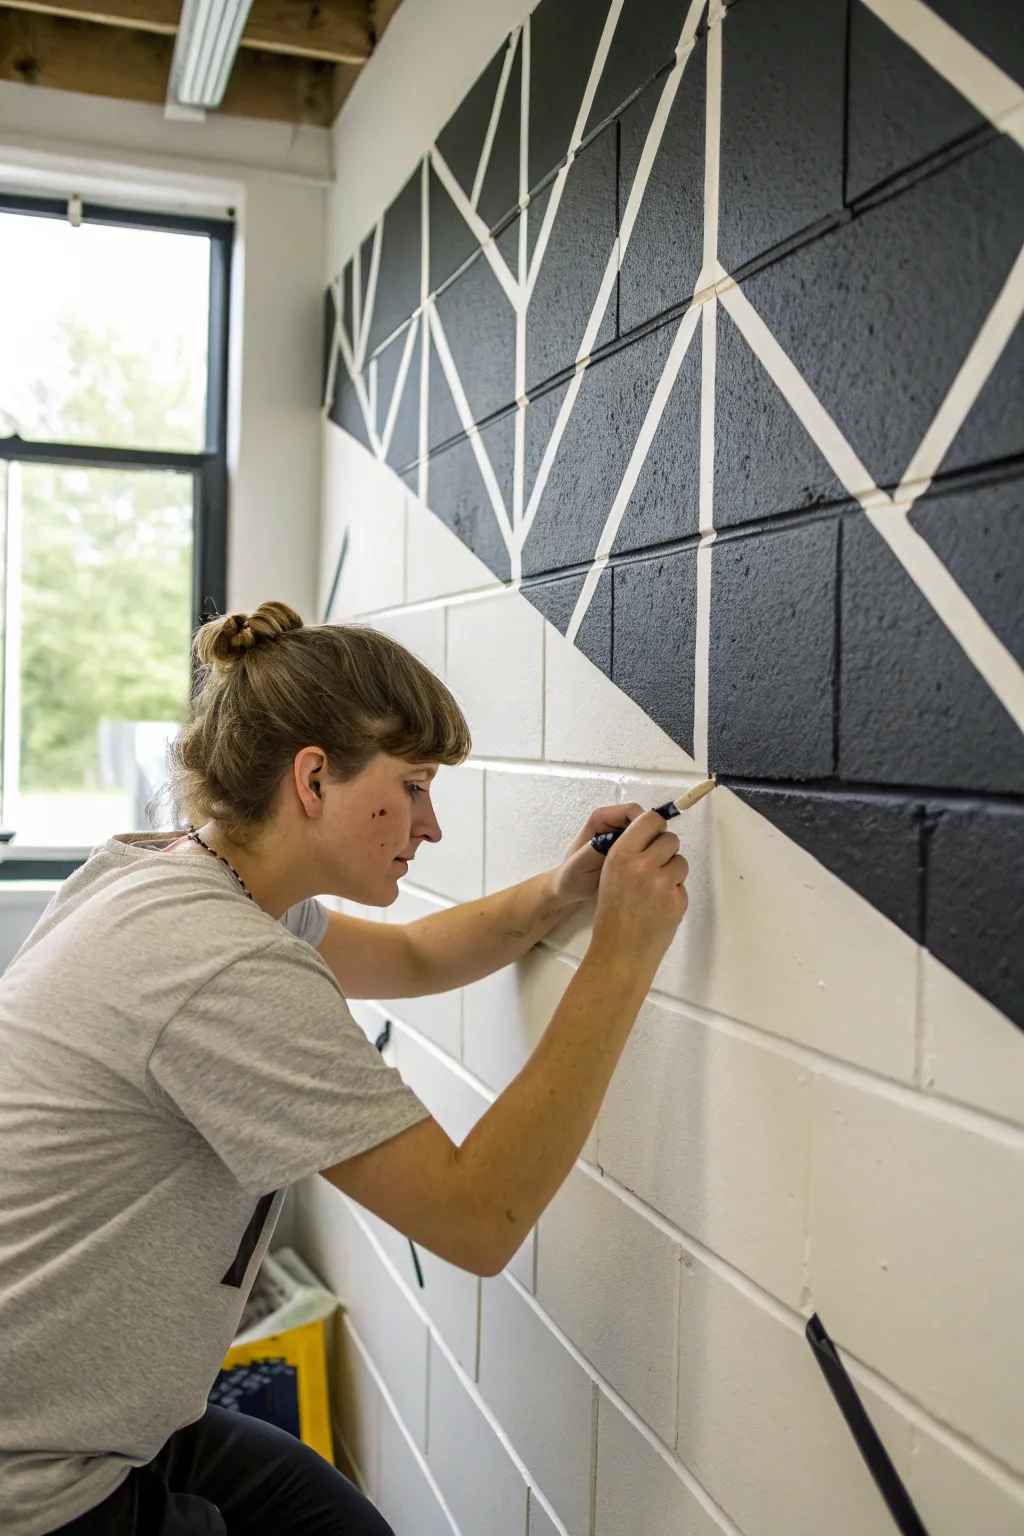
Transform a plain cinder block wall into a striking visual statement with this high-contrast geometric mural. By using the natural grid of the blocks alongside sharp masking tape lines, you’ll create a bold black-and-white design that feels both modern and industrial.
Detailed Instructions
Materials
- High-quality painter’s tape (1-inch width)
- White latex wall paint (base coat)
- Black latex wall paint (accent color)
- Paint rollers (medium nap for textured walls)
- Angled sash brush (2-inch)
- Small fine-point artist brush (for touch-ups)
- Drop cloths
- Ladder or step stool
- Damp rag
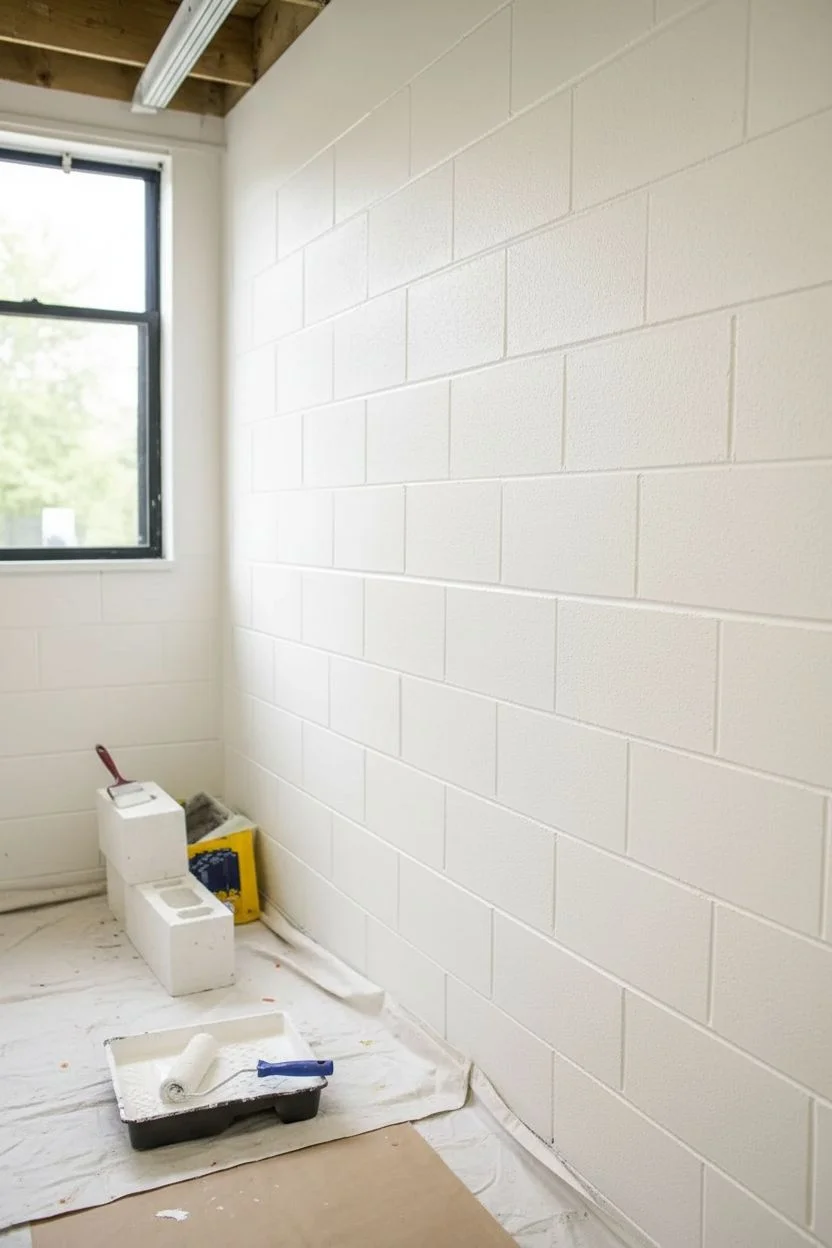
Step 1: Preparation and Base Coat
-
Clean the surface:
Begin by thoroughly cleaning your cinder block wall. These textured surfaces hold dust easily, so wipe it down with a damp rag or stiff brush to ensure your paint adheres properly. -
Protect the area:
Lay down drop cloths along the base of the wall to catch any drips or splatters, securing them with tape if necessary to keep them from sliding. -
Apply the white base:
Roll a coat of fresh white paint over the entire wall area. Even if the wall is already white, a fresh coat ensures a clean, uniform backdrop for your graphic design. -
Work into the grooves:
Use your brush to push the white paint into the deep grout lines and mortar joints between the blocks. I prefer to do this before the roller to ensure no gray mortar peeks through. -
Let it dry completely:
Allow the base coat to dry for at least 24 hours. Because you will be applying tape directly to this paint, it must be fully cured to prevent peeling later.
Seal the Texture
On rough cinder blocks, paint bleeds easily. Always ‘seal’ your tape edges with a clear matte medium or the base wall color before applying your accent color.
Step 2: Taping the Design
-
Plan your diagonal:
Visualize a large diagonal line splitting the wall. This project uses a ‘half-painted’ aesthetic where the top portion is geometric and the bottom remains white. -
Apply the primary tape lines:
Start applying long strips of painter’s tape diagonally across the blocks. Instead of random placement, try to intersect the corners of the cinder blocks to create cohesive triangles. -
Create the triangle grid:
Add additional tape lines to form a series of connecting triangles. Vary the sizes, but keep the angles consistent for a sharp, architectural look. -
Press down firmly:
Run your finger or a plastic scraper firmly along every edge of the tape. This is crucial on textured cinder blocks to prevent the black paint from bleeding under the tape. -
Seal the edges:
For razor-sharp lines, brush a very thin layer of your *white* base paint over the tape edges. This seals any tiny gaps in the tape with white paint, so the black paint won’t bleed.
Metallic Accent
For a luxe industrial vibe, paint one or two random triangles in metallic gold or copper instead of black to catch the light.
Step 3: Painting and Finishing
-
Cut in the black sections:
Using your angled sash brush, carefully paint the black sections inside your taped triangles. Focus on the edges near the tape first. -
Fill the texture:
Cinder blocks are porous. You may need to dab or stipple the brush to get the black paint into the tiny pits of the concrete surface. -
Roll the larger areas:
If your triangles are large enough, use a small mini-roller to fill in the centers of the black shapes for a smoother finish. -
Refine the mortar lines:
Take special care where the tape crosses the deep mortar joints. You might need a smaller artist brush to paint deep into the groove without getting paint on the ‘white’ side of the tape. -
Apply a second coat:
Once the first black coat is dry to the touch, apply a second coat to ensure a solid, opaque black with no streaks. -
Remove the tape:
Pull the tape off slowly at a 45-degree angle while the second coat of paint is still slightly tacky. This helps ensure the paint doesn’t chip. -
Touch up imperfections:
Inspect your lines. If any black paint bled through, use a small artist brush and white paint to tidy up the edges for a crisp finish.
Step back and admire how a simple roll of tape turned a basic wall into a modern masterpiece
3D Shadow Box Illusion with Double Tape Outlines
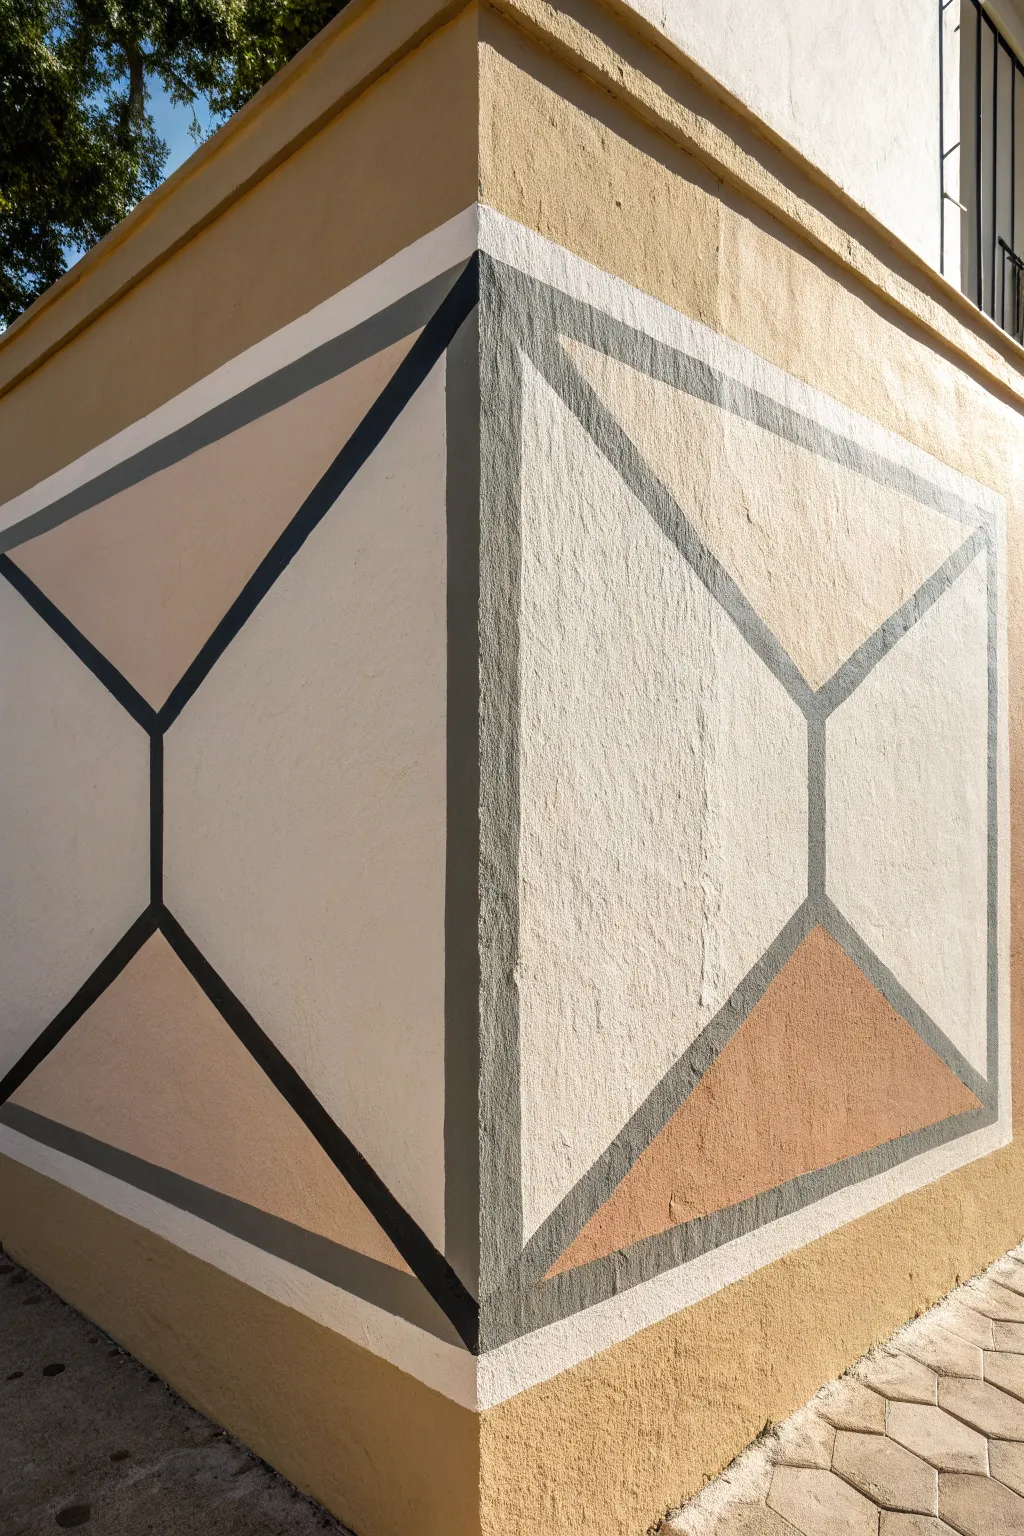
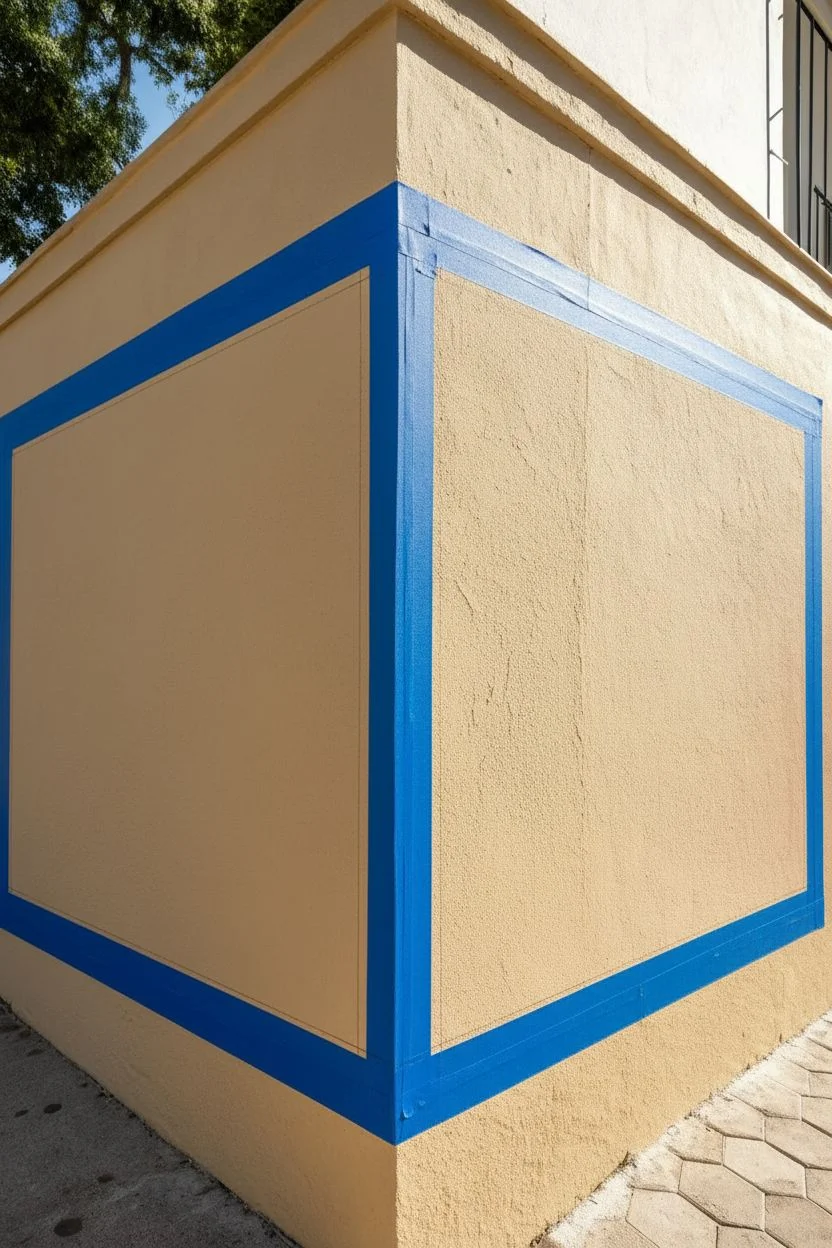
Transform an ordinary corner into an architectural statement piece with this clever 3D illusion. Using simple geometric shapes and careful taping, you’ll create depth that makes your wall appear to fold inward like a shadow box.
Step-by-Step Guide
Materials
- Painter’s tape (1 inch and 2 inch widths)
- Laser level (optional but helpful)
- Measuring tape
- Pencil
- Base wall color paint (light beige/cream)
- Shadow color paint (dark charcoal or soft black)
- Accent color paint (terracotta or warm tan)
- Small foam roller
- Angled sash brush
- Clean rag
Step 1: Planning and Taping Boundaries
-
Clean surface:
Begin by wiping down your designated wall corner with a damp cloth to remove dust and oils, ensuring the tape adheres perfectly. -
Measure the square:
Decide on the height of your mural. Measure equal distances out from the corner on both walls to determine the width of your square ‘panels’ so the design looks symmetrical. -
Mark the perimeter:
Use a pencil and level to lightly mark the outer square boundary on both wall faces. Connect these marks to create a large rectangle that wraps around the corner. -
Tape the outer frame:
Apply wide painter’s tape along the outside of your pencil lines to frame the entire work area. Press the edges firmly to seal.
Bleeding Lines?
If paint bleeds, wait for it to fully cure. Re-apply tape along the original line and lightly paint the correct color over the bleed. The new layer covers the mistake perfectly.
Step 2: Creating the Geometric Framework
-
Mark the center point:
Find the vertical center of your design right at the crease of the corner. Mark a point roughly one-third of the way up from the bottom and one-third down from the top. -
Create the X shape:
Run tape from the top outer corners of your box diagonally down to meet in the middle of the wall crease. Repeat for the bottom corners, creating a large ‘X’ shape that spans both walls. -
Tape the inner vertical:
Place a vertical strip of tape directly over the corner crease, connecting the top and bottom V-shapes you just created. This forms the ‘back’ of your 3D box. -
Seal the tape:
Run a clean credit card or putty knife over all tape edges. I always take an extra moment here to burnish them down, which prevents paint bleed later. -
Locking layer:
Paint a very thin layer of your existing base wall color over the tape edges. This bleeds the base color under the tape, sealing it so your new colors will have crisp lines.
Pro Tip: Thickness Matters
Varying line thickness changes the effect. Keep the dark outline consistent (about 0.75″ to 1″)—if it’s too thin, the 3D effect gets lost; too thick, and it looks cartoonish.
Step 3: Painting the Illusion
-
Paint the side triangles:
Identify the large triangles on the left and right sides of your design. Paint these with your lightest base color (if different from the existing wall) or a soft cream. -
Paint the accents:
Paint the top or bottom triangles with your terracotta or warm tan accent color. This shading helps reinforce the perspective that light is hitting specific planes. -
Remove tape (Phase 1):
While the paint is still slightly tacky, carefully peel back the tape used for the internal geometry. Leave the outer perimeter tape in place. -
Dry time:
Allow these painted sections to dry completely, preferably overnight, as you will need to apply fresh tape directly onto this new paint.
Step 4: Adding the Bold Outlines
-
Retape the lines:
To create the thick dark grey outlines, apply two lines of tape parallel to each geometric seam you painted, leaving a 1-inch gap between them. -
Detailing the corners:
Ensure the tape intersects cleanly at the corners. You may need to use an X-Acto knife to trim tiny tape overlaps so your painted lines have sharp points. -
Paint the skeleton:
Fill in these 1-inch gaps with your dark charcoal or black paint. Use a small artist brush for the tight corners and a sash brush for the longer straightaways. -
The final reveal:
Slowly peel away all remaining tape at a 45-degree angle. Pull gently to reveal your crisp, architectural framework. -
Touch ups:
Inspect the corner crease. If paint pooled there, use a tiny brush and your base color to sharpen the vertical line for a professional finish.
Step back and enjoy the depth this striking modern illusion adds to your room.
Wraparound Corner Pattern That Continues onto the Next Wall
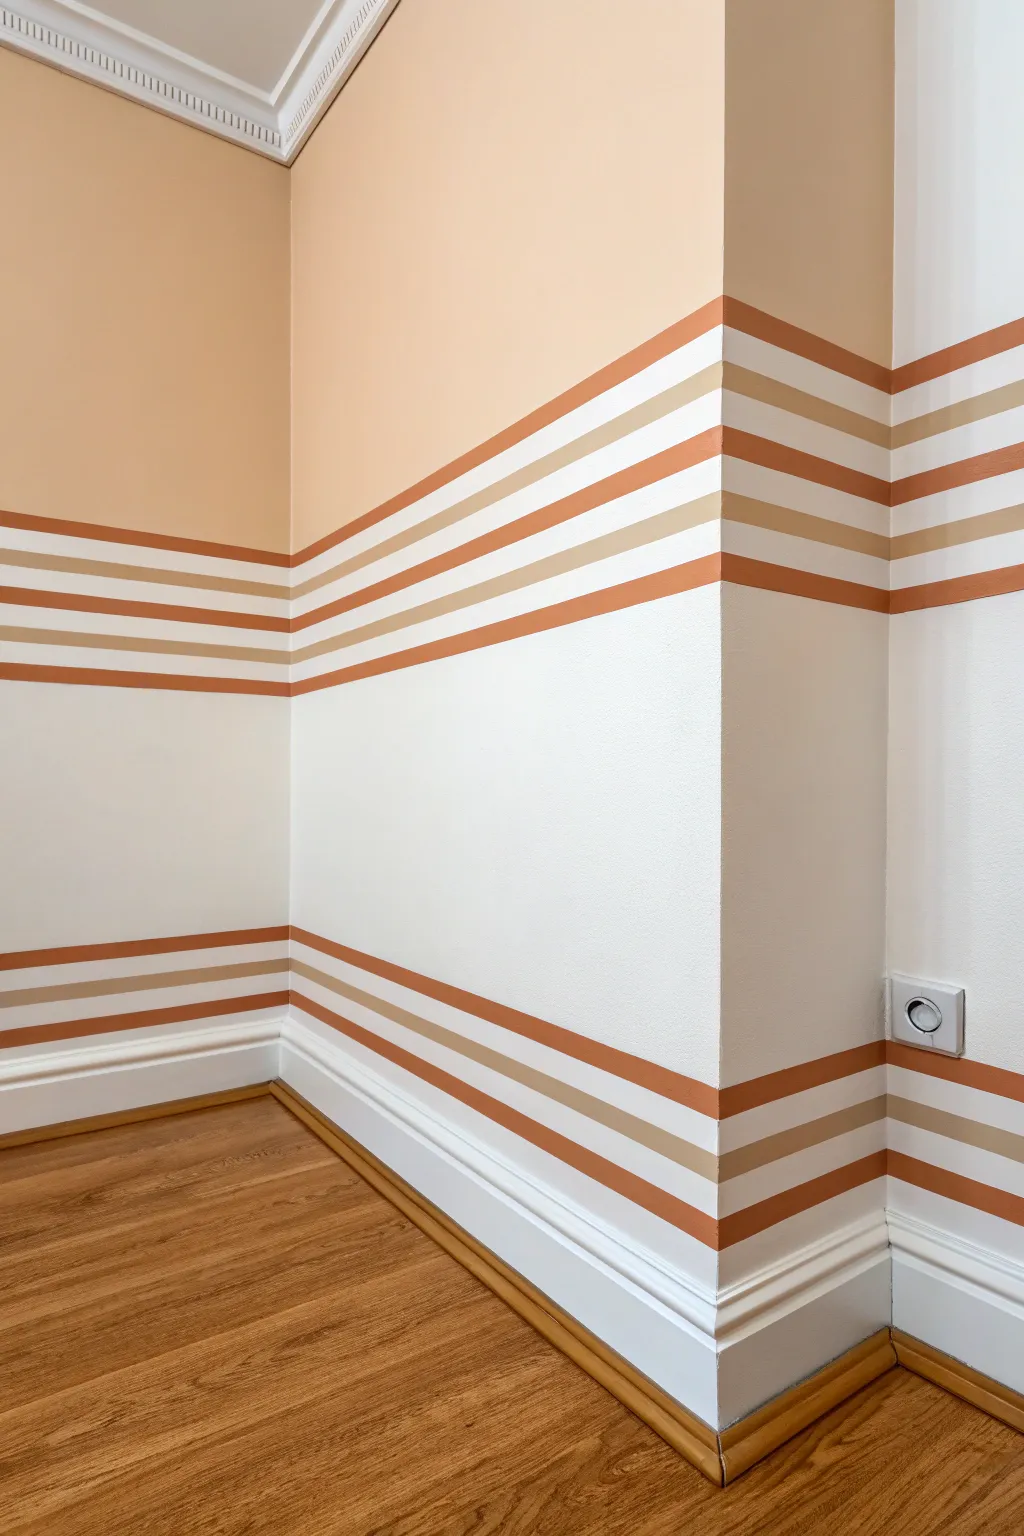
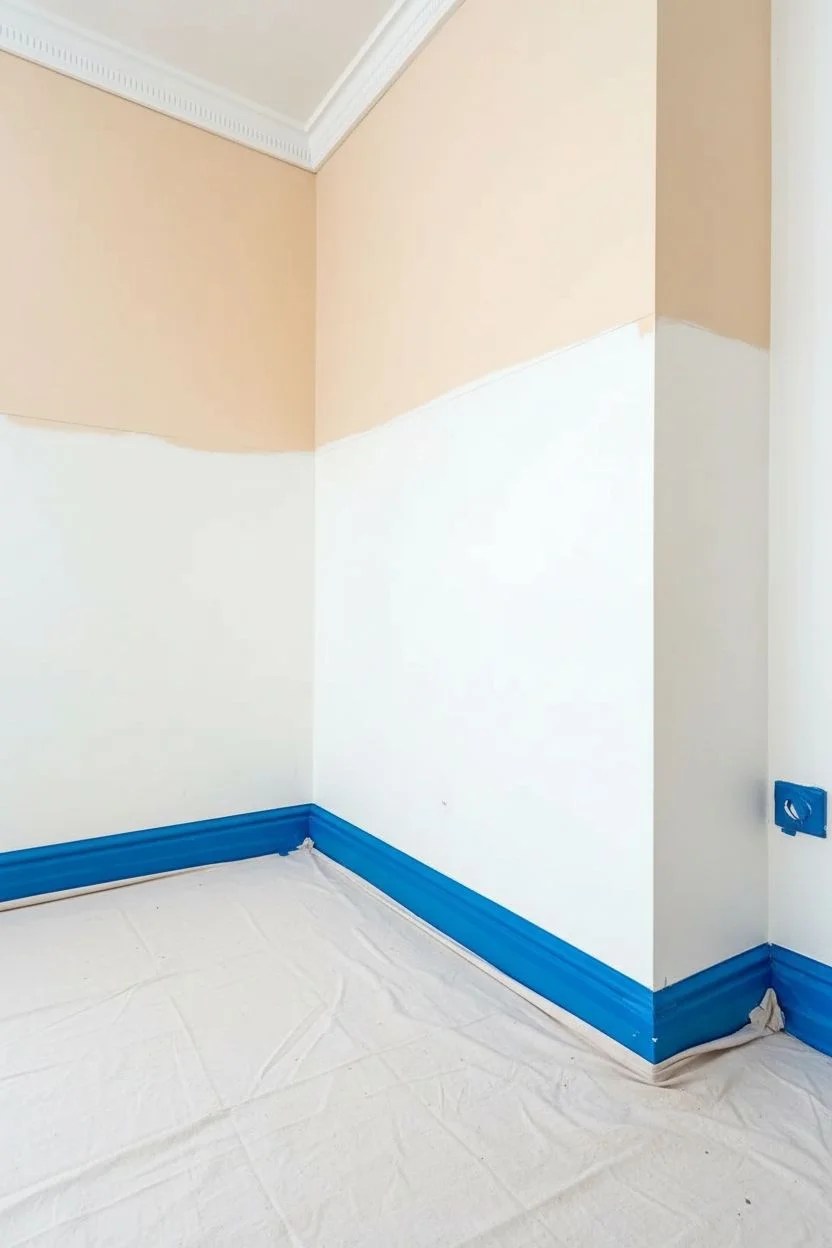
Transform a plain corner into a dynamic architectural feature with this precise stripe design that seamlessly wraps around walls. By alternating earthy terracotta and beige tones against crisp white, you create a sophisticated rhythm that feels both retro and exceptionally modern.
Step-by-Step
Materials
- High-quality painter’s tape (frog tape or similar precision tape)
- Laser level or long spirit level
- Pencil
- Measuring tape
- Paint roller (microfiber nap)
- Small angled sash brush
- White latex wall paint (base color)
- Terracotta/Rust orange latex paint
- Beige/Tan latex paint
- Peach/Blush latex paint (for upper wall)
- Paint tray and liners
- Drop cloths
Step 1: Preparation & Base Coat
-
Clean surface:
Begin by removing any dust or grease from your walls with a mild detergent solution. Clean walls ensure the tape adheres perfectly, preventing bleed-through later. -
Protect the area:
Lay down drop cloths to protect your flooring. Use tape to mask off your baseboards carefully, pressing down the edges firmly. -
Apply white base:
Paint the entire lower section of the wall (up to where your top stripe will end) with your crisp white base color. Extend this white area slightly higher than the final design to ensure coverage. -
Dry thoroughly:
Allow the white base coat to dry completely, ideally for at least 24 hours. Fresh paint can peel off with tape if it hasn’t cured enough.
Bleed-Through Blues?
If paint bleeds under tape, wait for it to fully dry. Then, place a piece of tape over the colored stripe and lightly touch up the white area with a tiny artist brush.
Step 2: Mapping the Stripes
-
determine height:
Decide where the transition between the upper peach wall and the striped section will occur. Mark this horizontal line lightly with a pencil. -
Set the laser level:
Position your laser level to project a continuous horizontal line around the corner. This tool is invaluable for ensuring your stripes wrap seamlessly without diving up or down. -
Measure stripe intervals:
Starting from your top line, measure downwards to mark the stripes. The pattern consists of: a thick rust stripe, a gap, a thin beige stripe, a gap, and a thin rust stripe. Replicate this grouping for the bottom set near the floor. -
Mark specific widths:
For accuracy matching the photo: make the thick rust stripes about 2-3 inches wide, the thin stripes about 1 inch wide, and leave roughly 1.5 inches of white space between them.
Metallic Accent
Swap the beige stripe for a metallic gold or copper paint. It catches the light beautifully on corners and adds a touch of unexpected glamour.
Step 3: Taping & Sealing
-
Apply tape lines:
run your painter’s tape along the OUTSIDE of the areas you want to paint. This means you are taping over the areas that will remain white. -
Check the corners:
Pay special attention to the inner and outer corners. Press the tape firmly into the corner groove with a putty knife or fingernail so paint doesn’t bridge the gap. -
Seal the edges:
Here is a crucial trick: lightly brush a small amount of your WHITE base paint over the edge of the tape that will receive the colored paint. This seals the tape and ensures any bleed is white-on-white, keeping your final lines razor-sharp. -
Let seal dry:
Wait about 30-60 minutes for this sealing layer to dry to the touch.
Step 4: Painting the Design
-
Paint upper wall:
While your stripe area is masked off, paint the upper portion of the wall in the peach/blush tone. Use an angled brush for cutting in at the ceiling and near the top stripe line. -
Paint terracotta stripes:
Using a small roller or brush, fill in the designated wider stripes and the thin bottom stripe with the terracotta/rust paint. Two light coats are better than one heavy one to avoid ridges. -
Paint beige stripes:
Using a separate clean brush, carefully fill in the thin middle stripes with the beige/tan paint. work slowly near corners to avoid accidental drips onto neighboring wet stripes. -
Second coat:
Apply a second coat to all colored stripes once the first is dry to the touch, ensuring rich, opaque color saturation.
Step 5: The Reveal
-
Timing is key:
Do not wait for the paint to fully cure. Removing tape while the paint is slightly tacky (usually about an hour after the final coat) helps prevent peeling. -
Peel carefully:
Slowly pull the tape off at a 45-degree angle away from the painted edge. Maintain a steady, slow pace. -
Touch up:
Inspect your lines. If any tiny bleeds occurred, use a small artist’s brush and your base white paint to correct them once the colored paint is fully dry.
Step back and admire how this simple addition completely redefines the geometry of your room.


Have a question or want to share your own experience? I'd love to hear from you in the comments below!