
Monsters are my favorite thing to draw when I want instant freedom—because there’s no “wrong” anatomy when you’re inventing a creature from scratch. Here are 21 monster drawing ideas that start super classic and gradually get weirder, so you can pick the vibe that fits your sketchbook today.
Classic One-Eyed Monster
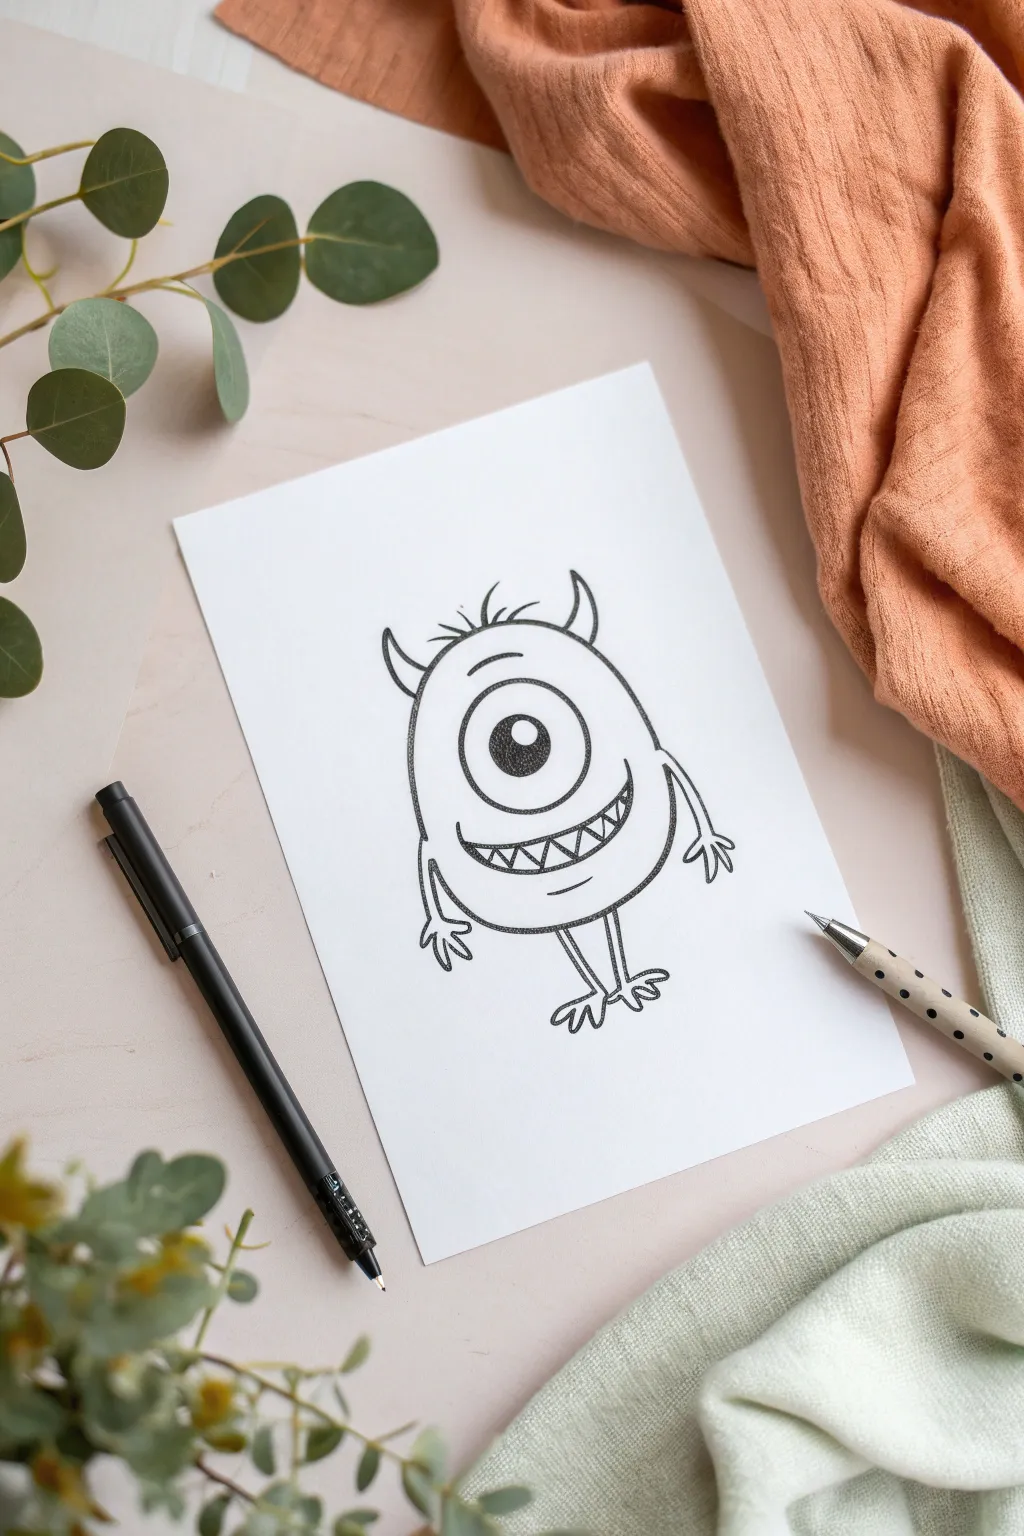
This classic one-eyed monster combines simple shapes with goofy details for a character that’s more cute than scary. This project focuses on clean line work and creating a distinct personality through minimal features.
How-To Guide
Materials
- White drawing paper or cardstock
- Pencil (HB or 2B)
- Eraser
- Fine-tip black marker or pen (0.5mm)
- Thick black marker (1.0mm or brush pen)
Step 1: Drawing the Base Form
-
Start the body:
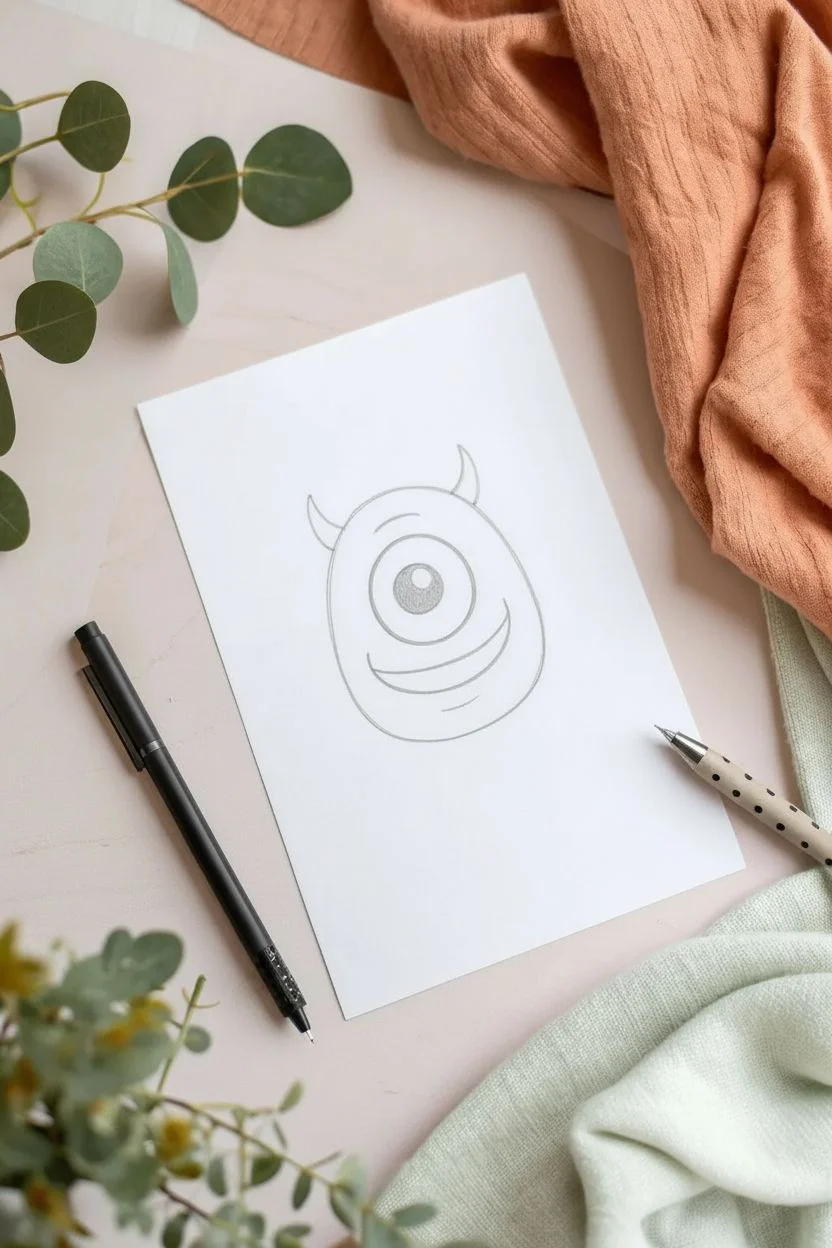
Begin by sketching a large, rounded egg shape in the center of your paper. The bottom should be slightly flatter than the top to give the monster some weight. -
Add the eye frame:
In the upper middle section of the body, draw a large circle. This will form the outer rim of the monster’s single eye, giving it that classic cyclops look. -
Draw the eyeball:
Inside the first circle, draw a slightly smaller circle. Keeping it centered creates a focused stare, but you can shift it slightly for a goofier expression. -
Detail the pupil:
In the upper-left quadrant of the inner circle, draw a small circle for the highlight. Then, draw a medium-sized circle around it for the pupil. -
Sketch the mouth:
Draw a wide, upward-curving line below the eye for the smile. Connect the ends with a deeper U-shape underneath to open the mouth.
Uneven Circles?
If drawing perfect circles is tricky, trace a bottle cap or coin for the eye. It guarantees a perfectly round cyclops look every time.
Step 2: Adding Features and Limbs
-
Add teeth:
Inside the open mouth shape, draw a series of small triangles pointing up from the bottom lip and down from the top lip to create a jagged, toothy grin. -
Create the horns:
Sketch two small, curved triangular shapes on top of the head. Curve the left one slightly left and the right one to the right. -
Draw hair tufts:
Between the horns, add three or four short, spiky lines sticking straight up for messy hair. -
Sketch the arms:
Draw thin, noodle-like lines extending from the sides of the body. I usually keep these quite simple to contrast with the round body. -
Add the hands:
At the end of each arm, draw three pointy fingers. They should look a bit jagged, like little claws. -
Draw the legs and feet:
Extend two thin lines down from the bottom of the body. Finish each with a three-toed foot, spreading the toes out for balance.
Make It Pop
Add thicker line weight to the bottom of the body and feet. This ‘grounding’ line makes the character feel heavy and solid on the page.
Step 3: Inking and Refining
-
Ink the main outline:
Using your thicker black marker, trace over the main body shape and the outer eye circle. Use confident, smooth strokes. -
Ink the details:
Switch to your finer pen for the teeth, fingers, toes, and hair details. This line weight variation makes the drawing more dynamic. -
Fill the pupil:
Carefully color in the pupil with the black marker, leaving that small white highlight circle completely empty for a shiny effect. -
Add texture marks:
Draw a small curved line under the mouth for a chin dimple and a tiny curve above the eye for an eyelid crease. -
Erase guidelines:
Wait until the ink is completely dry to avoid smudging. Then, gently erase all your initial pencil sketches.
Now you have a charmingly monstrous friend ready to hang on the wall


Fuzzy Horned Monster Mascot
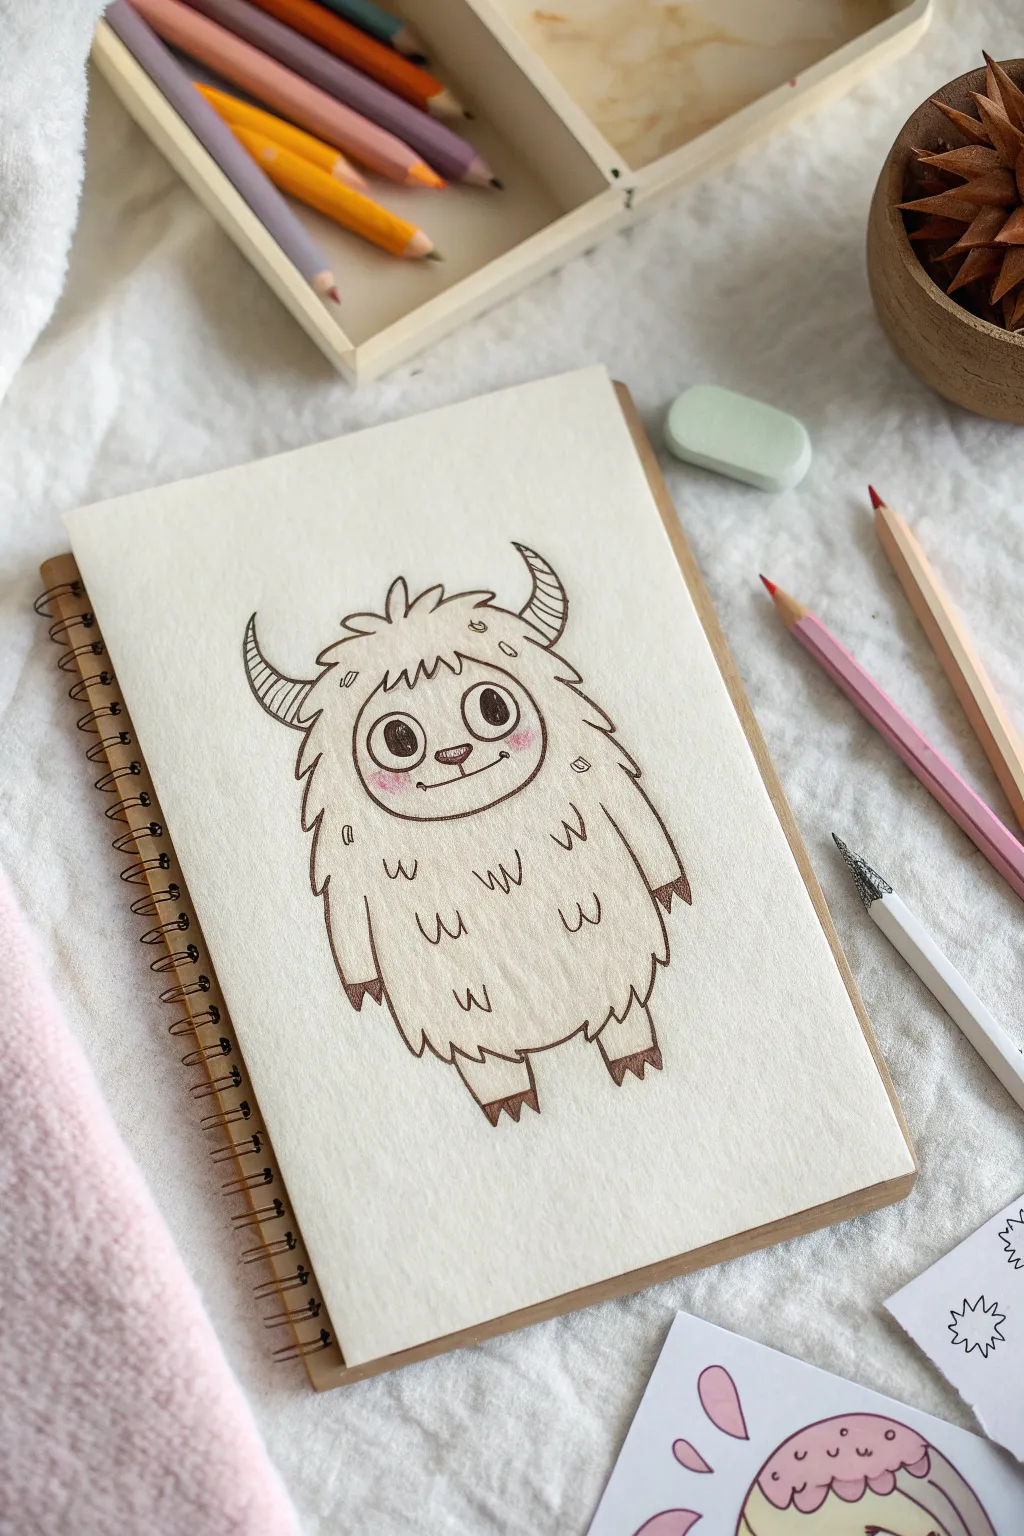
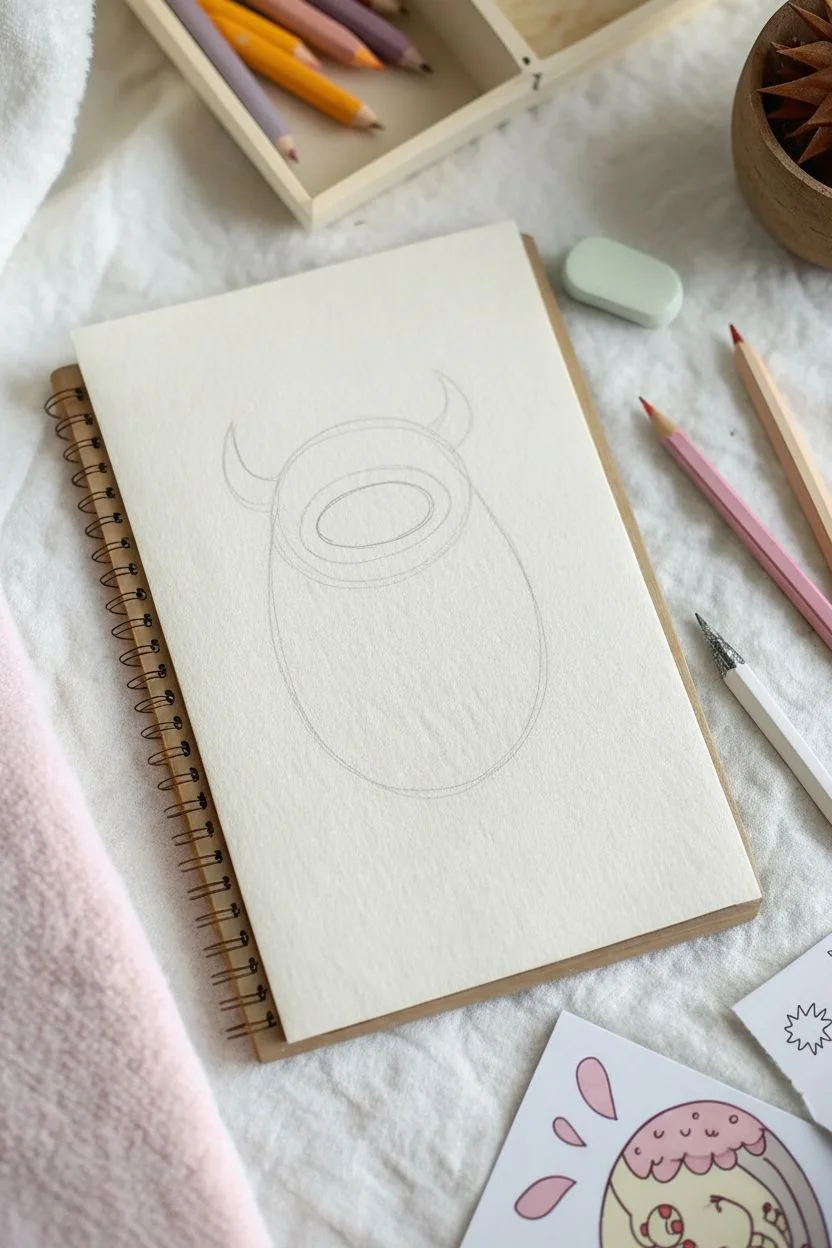
This endearing little creature features a simple egg-shaped body covered in shaggy fur, topped with striped horns and an innocent expression. It’s a perfect beginner-friendly character sketch that relies on gentle curves and repeated textures to cute effect.
Step-by-Step
Materials
- Spiral-bound sketchbook or heavy drawing paper
- Brown fine-liner pen or dark brown colored pencil
- Light pink colored pencil (for cheeks)
- HB pencil (for initial sketching)
- Eraser
- Pencil sharpener
Step 1: Basic Structure
-
Sketch the body shape:
Start by lightly drawing a large, elongated oval shape with your HB pencil. This egg-like form will be the main body of your monster. -
Outline the face area:
Inside the top half of the body oval, draw a smaller, horizontal oval. This will become the face window where the fur pauses. -
Add horn guides:
Pencil in two curved triangles pointing upward from the top sides of the head. These will serve as guides for the horns.
Uneven Eyes?
If the eyes look wonky, draw a light horizontal line across the face first. Rest both eye circles on this line to ensure they stay level with each other.
Step 2: Drawing the Features
-
Draw the eyes:
Inside the face oval, draw two large circles side-by-side. Add smaller circles inside them for highlights, then color the pupils dark brown, leaving the highlights white. -
Add the nose and mouth:
Place a small, flattened oval between the eyes for the nose. Simply draw a gentle, wide ‘U’ shape directly beneath it connecting to the nose for a smiling mouth. -
Define the head fur:
Switch to your brown pen or dark pencil. Trace over the top of the face oval using jagged, saw-tooth lines to create bangs that hang slightly over the forehead. -
Detail the horns:
Outline the horn shapes you sketched earlier. Draw slightly curved horizontal lines across them to create a striped texture.
Make It Unique
Give your monster a different personality by changing the horn shape to antlers, or swap the claws for rounded paws to make it look even friendlier.
Step 3: Fur and Limbs
-
Create the fuzzy outline:
Go over the main body outline with your brown tool. Instead of a smooth line, use short, outward-flicking strokes to make the monster look shaggy. -
Add tufts on top:
Connect the space between the horns with a few larger tufts of hair pointing straight up. -
Draw the arms:
Sketch two simple arms hanging down the sides. Keep the lines sketchy and add three small, triangular claws at the ends of the hands. -
Draw the legs:
At the bottom of the body, draw two short, stubby legs. Finish the feet with three triangular claws similar to the hands. -
Texture the body:
Fill the empty space on the body with scattered ‘w’ or ‘m’ shapes. These small marks suggest layers of thick fur without needing to draw every hair.
Step 4: Finishing Touches
-
Clean up sketch lines:
Once your ink or dark pencil lines are secure, gently erase the initial light pencil guides so only the character remains. -
Apply blush:
Take your light pink colored pencil and lightly shade two circular spots on the cheeks, just below the outer corners of the eyes. -
Soften the blush:
I like to smudge the pink pencil slightly with my finger to blend it into the paper for a softer, warmer look. -
Add final details:
Add a few tiny floating lines or dots around the face or horns to give the drawing a little extra movement and personality.
Now you have a charming little monster buddy ready to guard your notebook pages


Stitched-Up Square-Head Monster
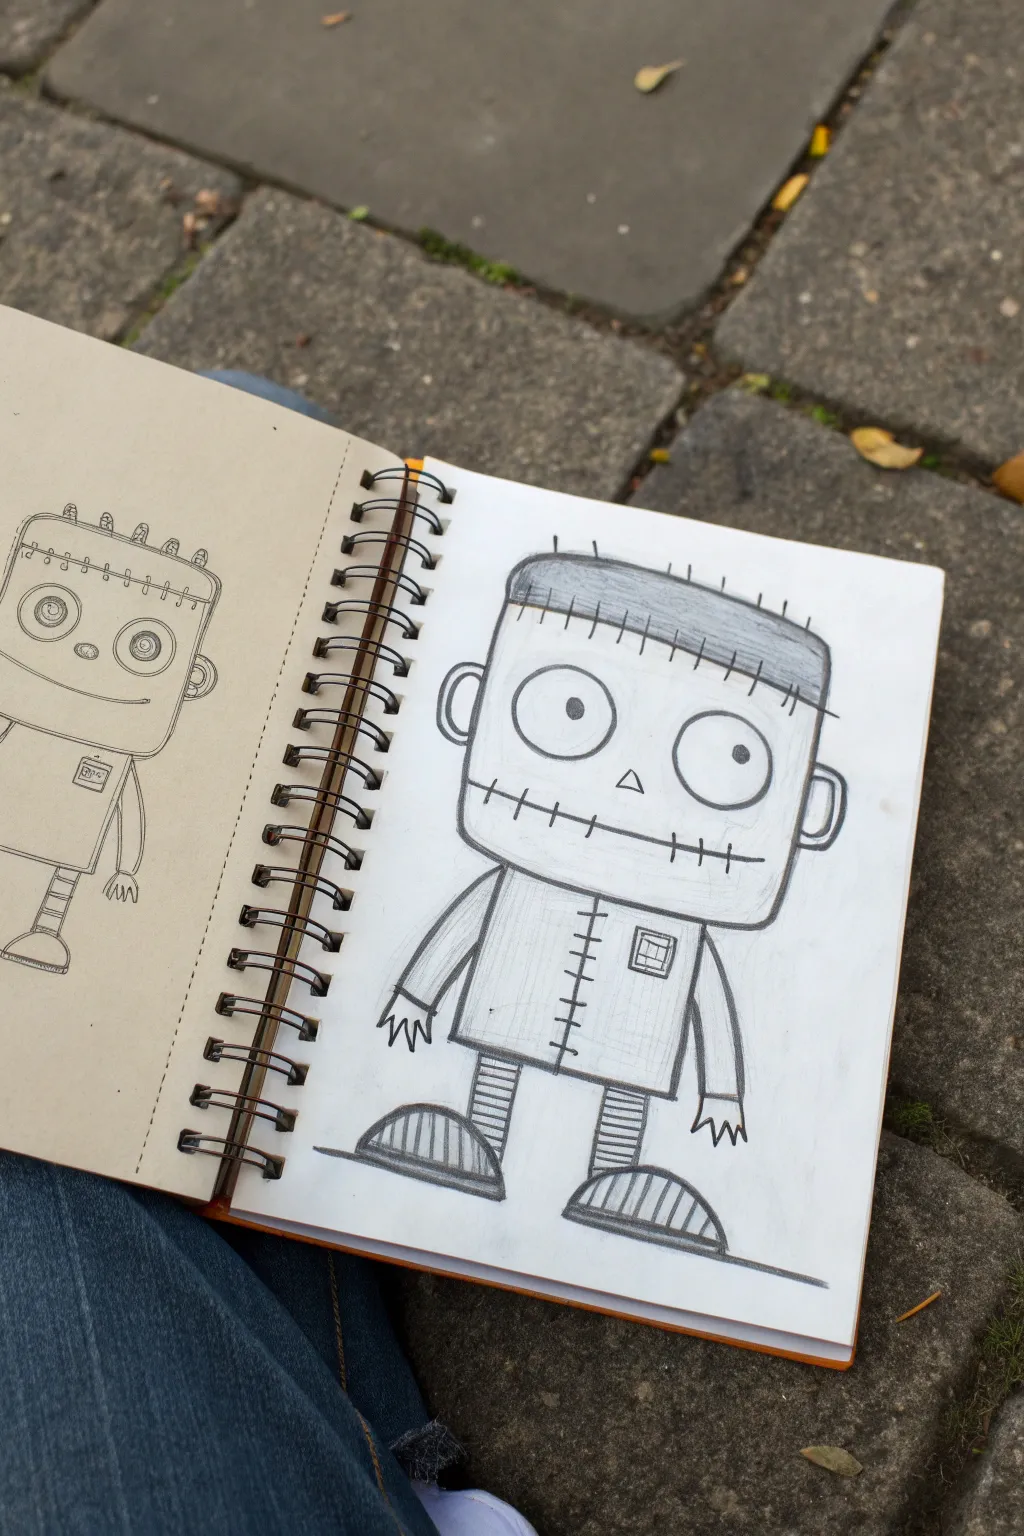
Embrace the charmingly spooky vibe with this cartoonish, box-headed monster sketch. Using simple geometric shapes and bold pencil strokes, you’ll create a stitched-up quirky character perfect for Halloween or just for fun.
Step-by-Step Tutorial
Materials
- Sketchbook or drawing paper
- Soft graphite pencil (2B or 4B) or charcoal pencil
- Eraser
- Fine-tip black marker (optional for outlining)
- Blending stump (optional)
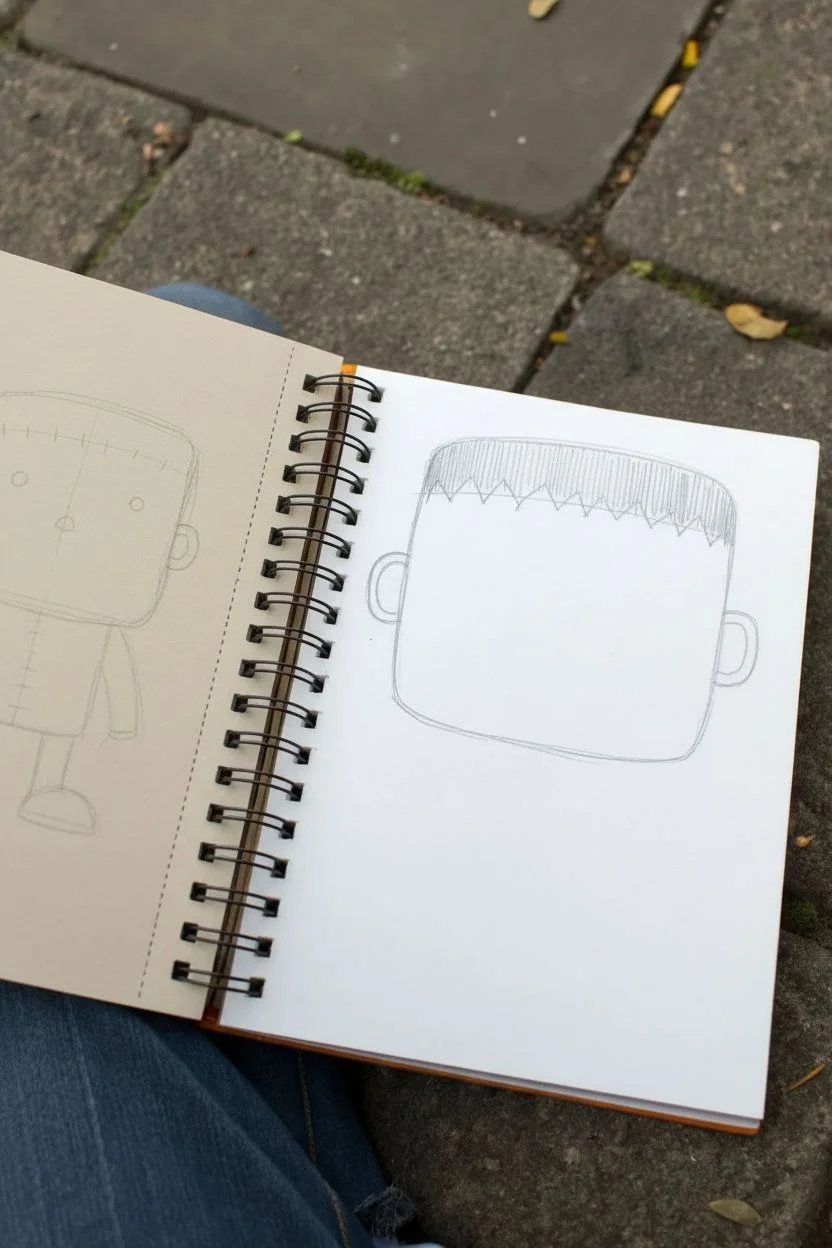
Step 1: Building the Head
-
Draw the main shape:
Start by drawing a large, soft square in the center of your page. Keep the corners rounded rather than sharp to give it a friendlier, cartoonish feel. -
Add the forehead:
Draw a horizontal line across the top quarter of the square. This will separate the forehead/hair area from the face. Make this line slightly curved to suggest volume. -
Sketch the hair:
Above that separation line, shade in the ‘hair’ area using vertical strokes. Don’t worry about being too neat; a little texture adds character to the monster’s buzz cut. -
Add hair spikes:
Draw several tiny, vertical lines poking out from the very top of the head for a spiky, unkempt look.
Line Variance
Vary your pressure. Pressing harder on the ‘shadow side’ (usually the right or bottom) adds instant weight and dimension to your drawing without complex shading.
Step 2: Designing the Face
-
Place the eyes:
Draw two large circles in the middle of the face area. Space them out generously. Inside each circle, add a small, solid black dot for the pupil. Place the pupils slightly off-center or looking in different directions for a goofy expression. -
Add the nose:
Sketch a tiny triangle right between and slightly below the eyes for a simple nose. -
Draw the stitched mouth:
Draw a long horizontal line across the lower part of the face. Cross it with several short vertical hash marks to create the classic ‘stitched’ appearance. -
Add forehead stitches:
Go back to the forehead line you drew earlier and add similar vertical hash marks all along it, reinforcing the assembled look. -
Draw the ears:
On each side of the head, draw a C-shape (one forward, one backward) to create simple, jug-handle ears.
Uneven Circles?
If your eye circles look lopsided, don’t erase! Go over them again loosely several times. The sketchy, multiple-line look fits the monster theme perfectly.
Step 3: Drawing the Body
-
Outline the torso:
Draw a trapezoid shape extending downward from the head. The top should be narrower (the neck area) and widen slightly at the bottom. -
Add the arms:
Sketch two curved tubes coming from the ‘shoulders.’ They should hang loosely at the sides. Keep the lines simple. -
Draw the hands:
At the end of each arm, draw simple shapes for hands with three jagged, triangular fingers pointing downward. -
Detail the jacket:
Draw a vertical line down the center of the torso. Add horizontal hash marks across this line to mimic the stitching on the face. Add a small square patch on the right side of the chest with a grid pattern inside it.
Step 4: Legs and Finishing Touches
-
Draw the legs:
extending from the bottom of the torso, draw two short, rectangular legs. Fill them with horizontal stripes to look like striped socks or robot tubing. -
Sketch the feet:
Draw large semi-circles at the bottom of the legs for feet. Draw vertical lines inside these semi-circles to give the shoes a textured, heavy tread look. -
Thicken the lines:
go over your main outline lines with heavier pressure on your pencil. This brings the character forward and makes him pop off the page. -
Add shading:
Lightly shade the sides of the head and the body to give them a bit of metallic or cylindrical roundness. I find that smudging this shading slightly with a finger helps softer the look. -
Ground the character:
Draw a simple horizontal line underneath the feet so your monster isn’t floating in mid-air.
Now you have a delightfully grumpy little monster to guard your sketchbook pages


Three-Eyed Monster With Wild Expressions
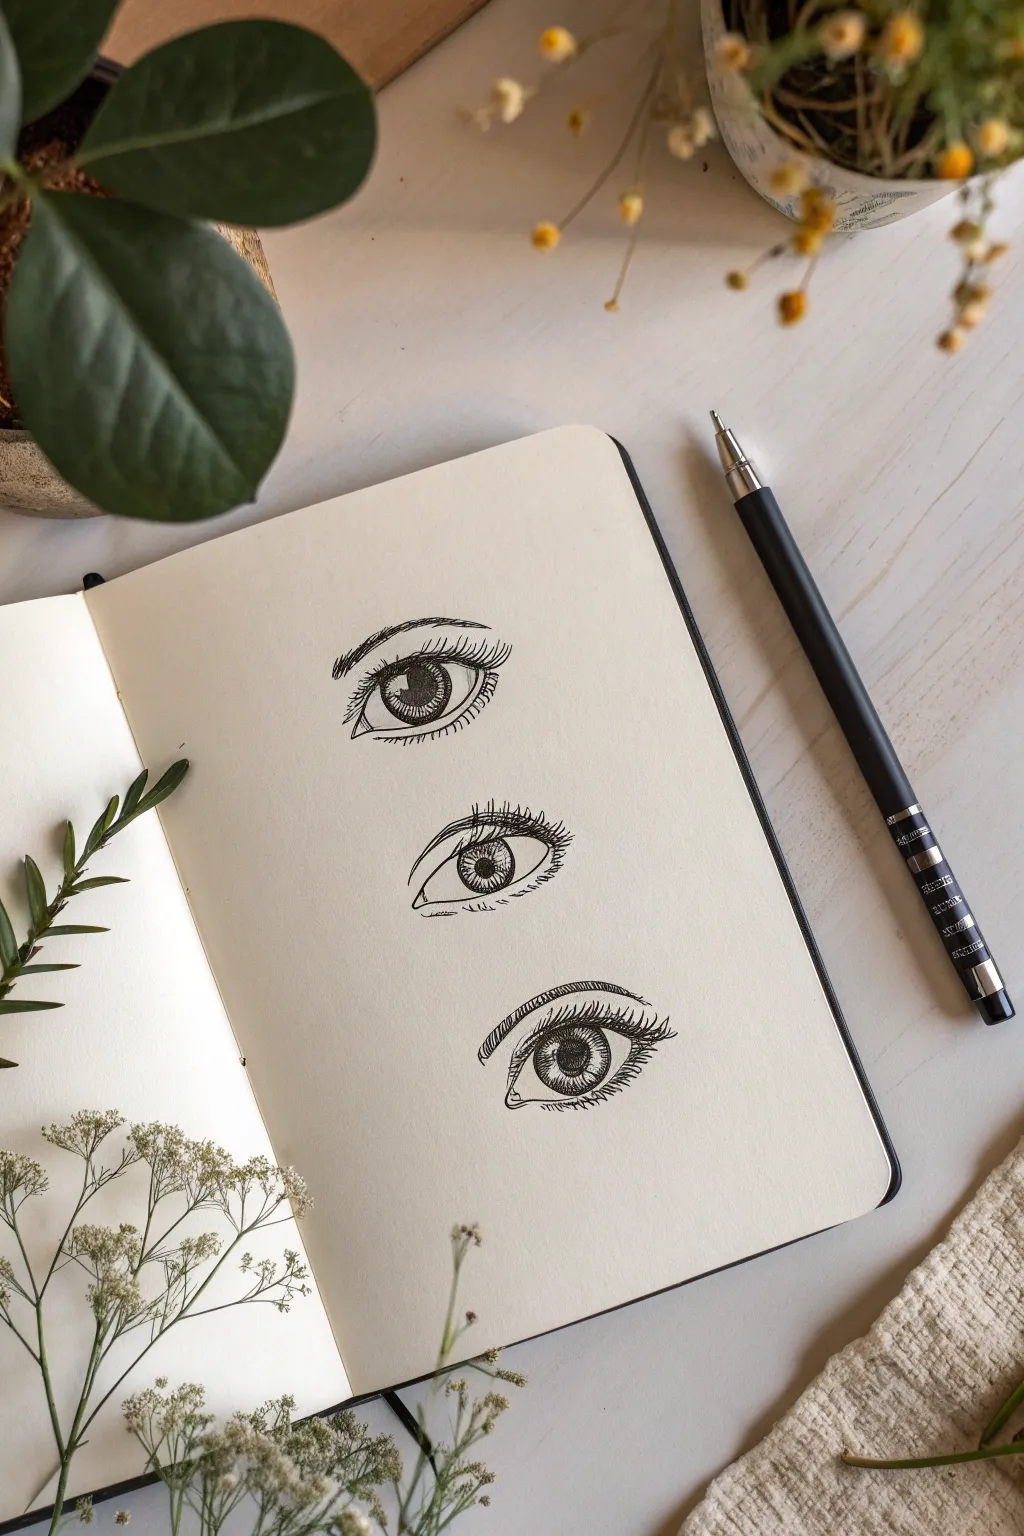
This tutorial guides you through sketching a column of three realistic eyes, creating a surreal and unsettling ‘monster’ effect through repetition and subtle variation. The result is a clean, illustrative ink drawing that focuses on texture and precise linework.
Step-by-Step Guide
Materials
- Smooth sketchbook paper (cream or white)
- Black fine-liner pen (0.3mm or 0.5mm)
- Graphite pencil (HB or 2B for sketching)
- Kneaded eraser
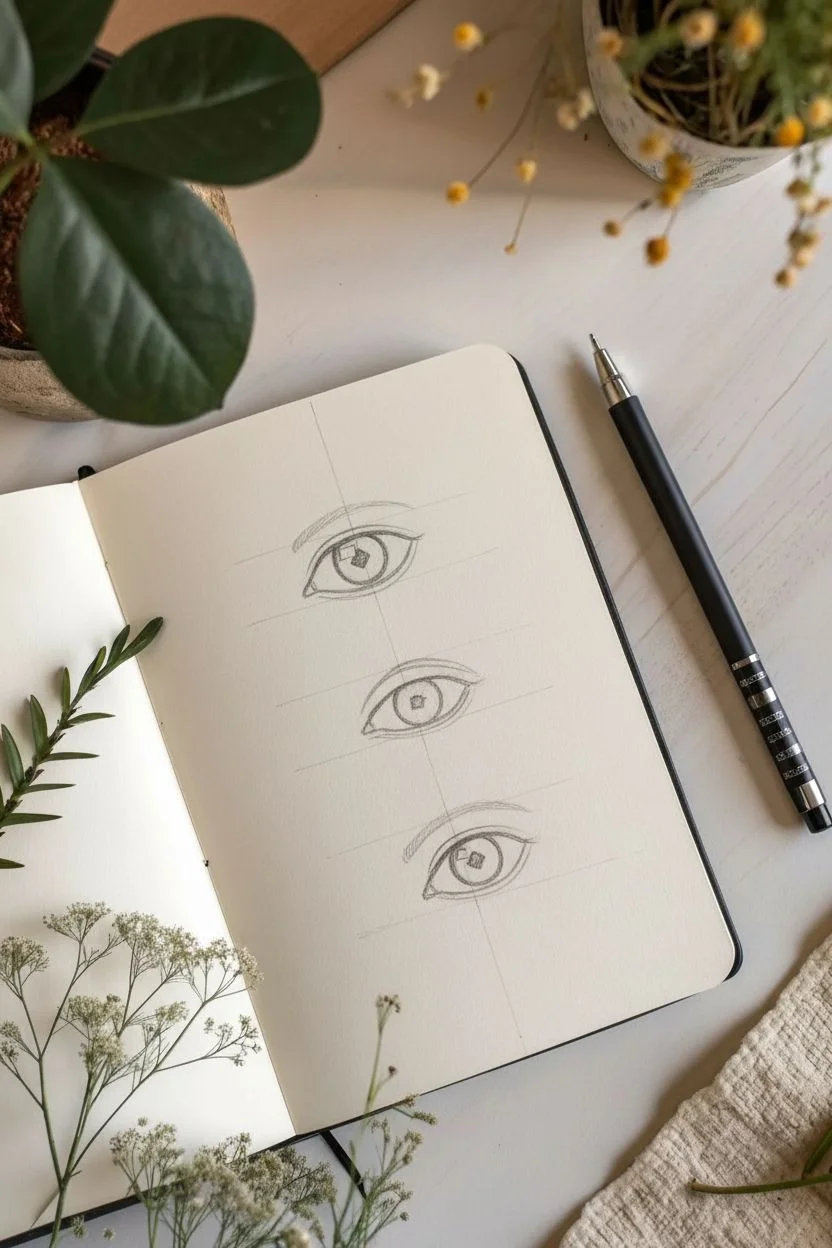
Step 1: Planning and Sketching
-
Establish the vertical axis:
Lightly draw a straight vertical line in the center of your page with your pencil. This will serve as the anchor to keep all three eyes perfectly aligned. -
Mark eye positions:
Make three horizontal marks across your axis line where each eye will sit. Space them evenly, leaving enough room for eyelashes and eyebrows between them. -
Outline the top eye shape:
For the top eye, sketch a classic almond shape. Make the upper lid curve more pronounced than the lower lid. -
Outline the middle eye shape:
Sketch the middle eye slightly narrower or squinting. Varied expressions give the ‘monster’ more personality. -
Outline the bottom eye shape:
Draw the bottom eye similar to the top one, perhaps looking slightly off to the side to break the symmetry. -
Define the irises:
Draw perfect circles for the irises within each almond shape. Ensure the top and bottom of the iris are slightly cut off by the eyelids to avoid a shocked expression. -
Add pupil and highlight:
In the center of each iris, draw a smaller circle for the pupil. Add a tiny square or circle ‘glint’ of light in the upper corner of each pupil—keep this consistent across all three.
Keep it Sharp
Rotate your fine-liner occasionally as you draw. This helps keep the nib from wearing down on one side, ensuring your lash lines remain crisp and tapered.
Step 2: Inking the Details
-
Trace main outlines:
Using your black fine-liner, carefully go over your pencil outlines for the eyelids. Use a confident, single stroke for the upper lid to give it weight. -
Fill the pupils:
Color in the pupils completely black, leaving the tiny highlight white. -
Detail the iris texture:
Draw fine, radiating lines from the pupil outward toward the edge of the iris, like spokes on a wheel. I prefer to make these lines slightly jagged to mimic natural muscle fibers. -
Add iris shading:
Darken the outer ring of the iris with stippling or cross-hatching to give the eye depth. -
Draw the upper lashes:
flick your pen upward and outward from the upper lash line. Start thick at the base and lift your pen quickly to create tapered, realistic lashes. Clump one or two together for a natural look. -
Add lower lashes:
Draw much shorter, sparser lashes on the bottom lid. Be careful not to make them too spider-like; less is more here. -
Create the crease:
Draw a thin, floating line above each uppercase lid to indicate the eyelid crease. This adds instant dimensionality. -
Inking the eyebrows:
For the top and bottom eyes, sketch eyebrows using short, hair-like strokes following the direction of growth. Leave the middle eye without a brow, or just a hint of shading, to make the stack feel alien. -
Add subtle shading:
Use very light hatching or stippling in the corners of the eyeball (the sclera) to suggest roundness. -
Final Cleanup:
Wait at least five to ten minutes for the ink to fully cure, then gently erase all remaining pencil guidelines with your kneaded eraser.
Go Heterochromatic
Instead of black ink for the irises, use watercolor pencils or markers to give each eye a different colored iris—perhaps red, yellow, and purple for a monstrous vibe.
Now you have a striking, surreal sketch that turns the familiar human eye into something wonderfully strange

PENCIL GUIDE
Understanding Pencil Grades from H to B
From first sketch to finished drawing — learn pencil grades, line control, and shading techniques.
Explore the Full Guide
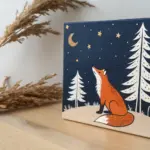
Bear-Body Forest Monster

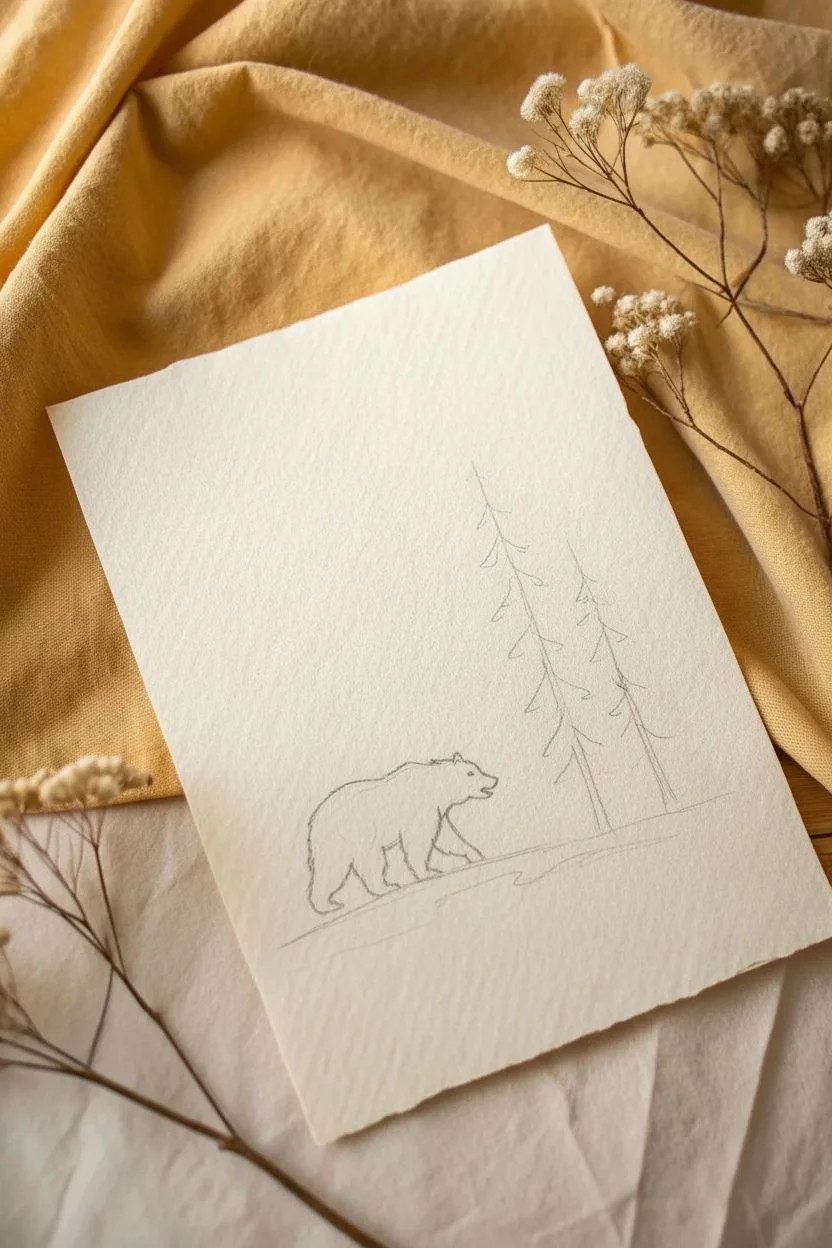
This striking ink illustration combines the heavy, powerful silhouette of a bear with delicate pine trees to create a moody, nature-inspired scene. The high contrast of black ink on cream-colored textured paper gives it a timeless, almost woodcut aesthetic.
Detailed Instructions
Materials
- Heavyweight textured paper (cold press or handmade cotton paper)
- Fine liner pens (sizes 005, 01, 03, and 05)
- Pencil (HB or 2H)
- Kneadable eraser
- Reference photos of grizzly bears and pine trees
Step 1: Conceptual Sketch
-
Establish the horizon:
Begin by lightly sketching a sloping ground line about one-third of the way up from the bottom of your paper. This doesn’t need to be perfectly straight; a slight unevenness adds to the natural feel. -
Outline the bear:
Sketch the basic shape of the bear walking uphill. Focus on the heavy hump of the shoulders and the low-hanging head. Don’t worry about fur texture yet, just get the solid mass of the animal down. -
Place the trees:
To the right of the bear, lightly draw vertical lines to indicate where the two main pine trees will stand. Position the taller one slightly behind the shorter one to create depth. -
Mark the star field:
Using your pencil tip, gently tap a few positions for the stars in the upper left quadrant. This helps balance the visual weight of the trees on the right.
Smudge Alert
Textured paper holds ink longer than smooth paper. Place a scrap sheet of paper under your drawing hand to prevent oils or smudging as you work across the page.
Step 2: Inking the Pine Trees
-
Start the tree trunks:
Switch to your 03 pen. Draw the trunks of the trees, keeping the lines somewhat jagged and broken rather than perfectly straight rulers. This mimics the texture of bark. -
Add the branches:
Using a 01 pen, start adding branches from the top down. Use a scribbling, zigzag motion that gets wider as you move down the tree. Leave gaps between layers of branches to keep the tree looking airy. -
Darken the foliage:
Go back over the underside of the branches with the 005 pen to add dense needles. I like to concentrate on the bottom edges of the branch clumps to suggest shadow and volume. -
Ground the trees:
At the base of the trees, use short, upward strokes to simulate grass and undergrowth blending into the tree roots.
Step 3: Rendering the Bear
-
Outline the fur:
Using the 03 pen, trace over your pencil sketch of the bear. Instead of a solid line, use short, jagged strokes to create the illusion of rough fur along the back and legs. -
Fill the silhouette:
This is the most critical step for contrast. Use a series of dense, hatched lines to fill in the bear’s body. You want it dark, but leave tiny slivers of paper showing through to suggest texture. -
Define the limbs:
Ensure the legs in the foreground are slightly darker or have denser hatching than the legs in the background. This subtle difference helps separate the limbs visually. -
Detail the face:
Switch to your 005 pen for the face. Carefully define the snout and perhaps a small open mouth. Keep the eye area dark and mysterious.
Make it Monstrous
To lean into the ‘monster’ theme, extend tree roots directly from the bear’s paws/back, making it look like the creature is physically stripping the forest from the earth.
Step 4: Final Landscape Details
-
Create the ground texture:
Underneath the bear and trees, use horizontal hatching strokes. Make these strokes darker and closer together right under the bear’s feet to ground it firmly. -
Add a reflection suggestion:
Below the main ground line, add a few lighter, horizontal squiggle lines. This suggests a wet surface or perhaps a misty reflection without drawing a full body of water. -
Ink the stars:
Take your 01 pen and carefully dot the stars you marked earlier. Vary the pressure slightly so some stars appear slightly larger or brighter than others. -
Clean up:
Wait at least 15 minutes for the ink to fully dry. Once safe, gently erase your initial pencil marks with the kneadable eraser to reveal the crisp black ink.
Now you have a moody, atmospheric piece of wilderness art ready to display
Monster Idea Grid: 30 Tiny Doodles on One Page
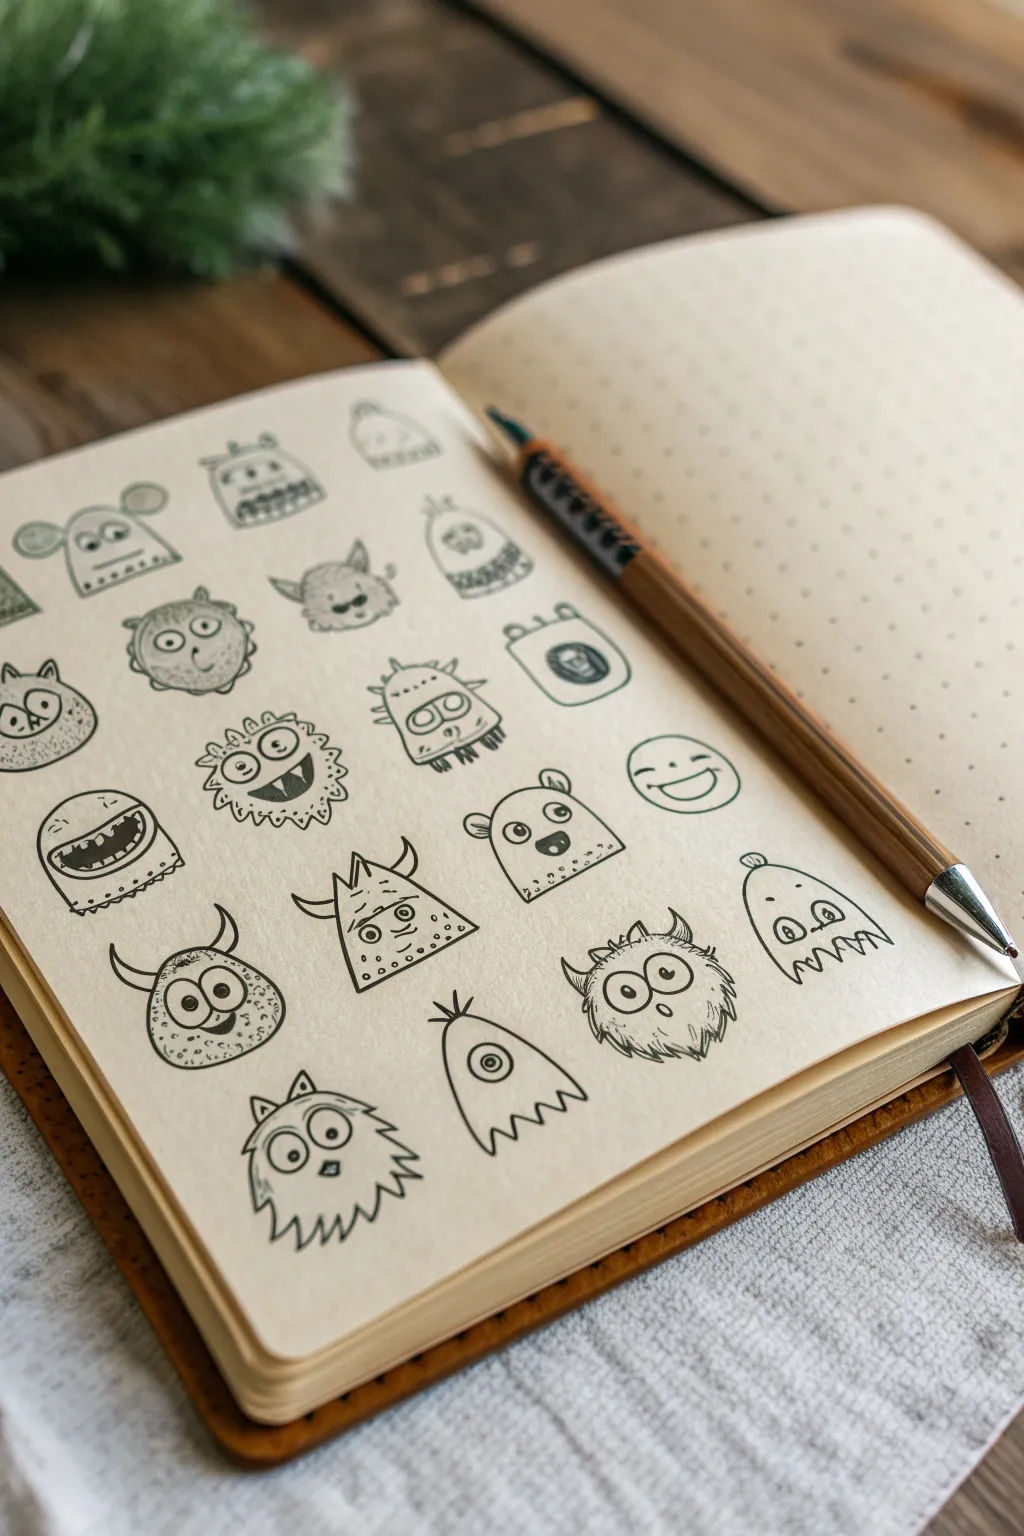
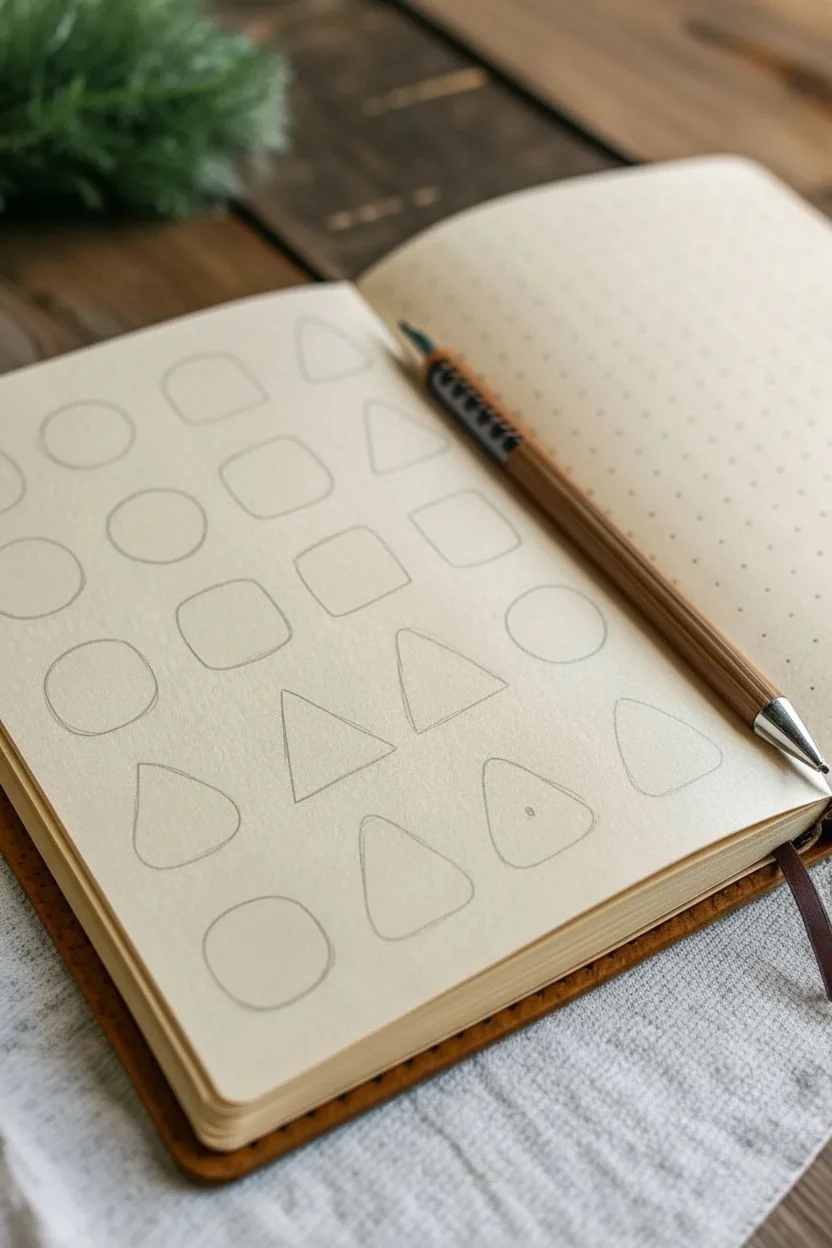
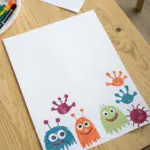
This project is the perfect cure for artist’s block, filling a single dot-grid page with a charming collection of tiny creature doodles. Using simple shapes as a starting point, you’ll create a cohesive yet diverse gallery of quirky monsters that showcases how much character you can pack into a few square inches.
Step-by-Step
Materials
- A5 Dot Grid Notebook (cream or ivory paper recommended)
- Fine Liner Pen (0.3mm or 0.5mm, black ink)
- Pencil (HB or H for light sketching)
- Eraser
Step 1: Setting the Layout
-
Define the grid:
Visualize a grid of 4 columns and 5-6 rows on your left-hand page. You don’t need to draw actual boxes, but mentally spacing them out helps. Use the dot grid as a guide to keep your imaginary rows aligned. -
Draft base shapes:
With your pencil, lightly sketch simple geometric shapes centered in these invisible grid slots. Draw circles, rounded squares, triangles, beans, and gumdrop shapes. Vary the shapes so no two neighbors look exactly the same.
Shape Shifting
Stuck on ideas? Draw the alphabet ‘A’ through ‘Z’ lightly in pencil and turn each letter shape into a monster body.
Step 2: Developing Characters
-
Add first personalities:
Starting with the top left shape, ink a pair of distinctive eyes. Try a single large cyclops eye for one, and tiny beaded eyes for another to build variety immediately. -
Give them mouths:
Draw mouths that convey different emotions. A jagged line suggests a grimace, an open oval with teeth looks surprised, and a simple curved line creates a happy grin. -
Incorporate appendages:
Add ears, horns, or antennae. For the rounder shapes, try small bear-like ears or long, pointy horns. I like to give the triangular shapes wide, protruding ears to balance their silhouette. -
Detail the textures:
Use your fine liner to suggest texture on the monsters’ bodies. Add small dots for bumpy skin, tiny ‘v’ shapes for fur, or horizontal stripes. Keep these details minimal so the drawing doesn’t get cluttered. -
Refine the outlines:
Go over the main outline of your first few monsters with a slightly heavier hand or a second pass of the pen to make them pop against the page.
Step 3: Expanding the Horde
-
Create the spiky friends:
Move to the next row. For one monster, draw spikes radiating outward like a sunburst. This creates a ‘pufferfish’ style creature that contrasts nicely with smoother monsters. -
Draw the ghost types:
Use gumdrop shapes to create ghost-like monsters. drawing a wavy bottom edge instead of feet gives them a floating appearance. -
Add a weary traveler:
Draw a monster with sagging eyes and a flat mouth to introduce a ‘bored’ or ‘tired’ emotion to the mix. -
The triangle staring contest:
Find a triangular base shape and give it two large eyes right in the center, touching each other. Add small horns on the corners to complete this classic look. -
Furry textures:
For a ‘hairy’ monster, don’t draw a solid outline. Instead, use short, quick strokes all around the perimeter to simulate fur, then add big wide eyes in the middle. -
The gentle giant:
devote one spot to a square-ish monster with a wide, toothy grin that takes up most of its body. Small, stumpy feet at the bottom make it look heavy and grounded.
Color Pop
After the ink dries, use a single highlighter color to add accent spots, blush on cheeks, or fill in just the horns for a stylistic pop.
Step 4: Finishing Touches
-
Check for gaps:
Look at the page as a whole. If any monsters feel too ‘white’ or empty compared to the others, add a few freckles or small patterns to their bodies to balance the visual weight. -
Ink the final details:
Finish inking any remaining pencil marks. Make sure features like pupils are completely filled in with solid black ink. -
Erase guidelines:
Once the ink is completely dry (give it a good five minutes to be safe), gently erase the underlying pencil sketches. -
Add subtle shading:
Optional: Use minimal hatching (tiny parallel lines) on the bottom or side of some monsters to give them a slight 3D volume.
Now you have a lively reference sheet of critters ready to be expanded into larger illustrations


Have a question or want to share your own experience? I'd love to hear from you in the comments below!