If you want a Mother’s Day gift that feels genuinely sentimental (and actually doable with a wiggly kid), toddler handprints, footprints, and fingerprints are pure magic on canvas. I’m sharing my go-to ideas that keep the process simple for little hands while still turning out keepsake-worthy art you’ll want to hang up.
Footprint Butterfly Keepsake
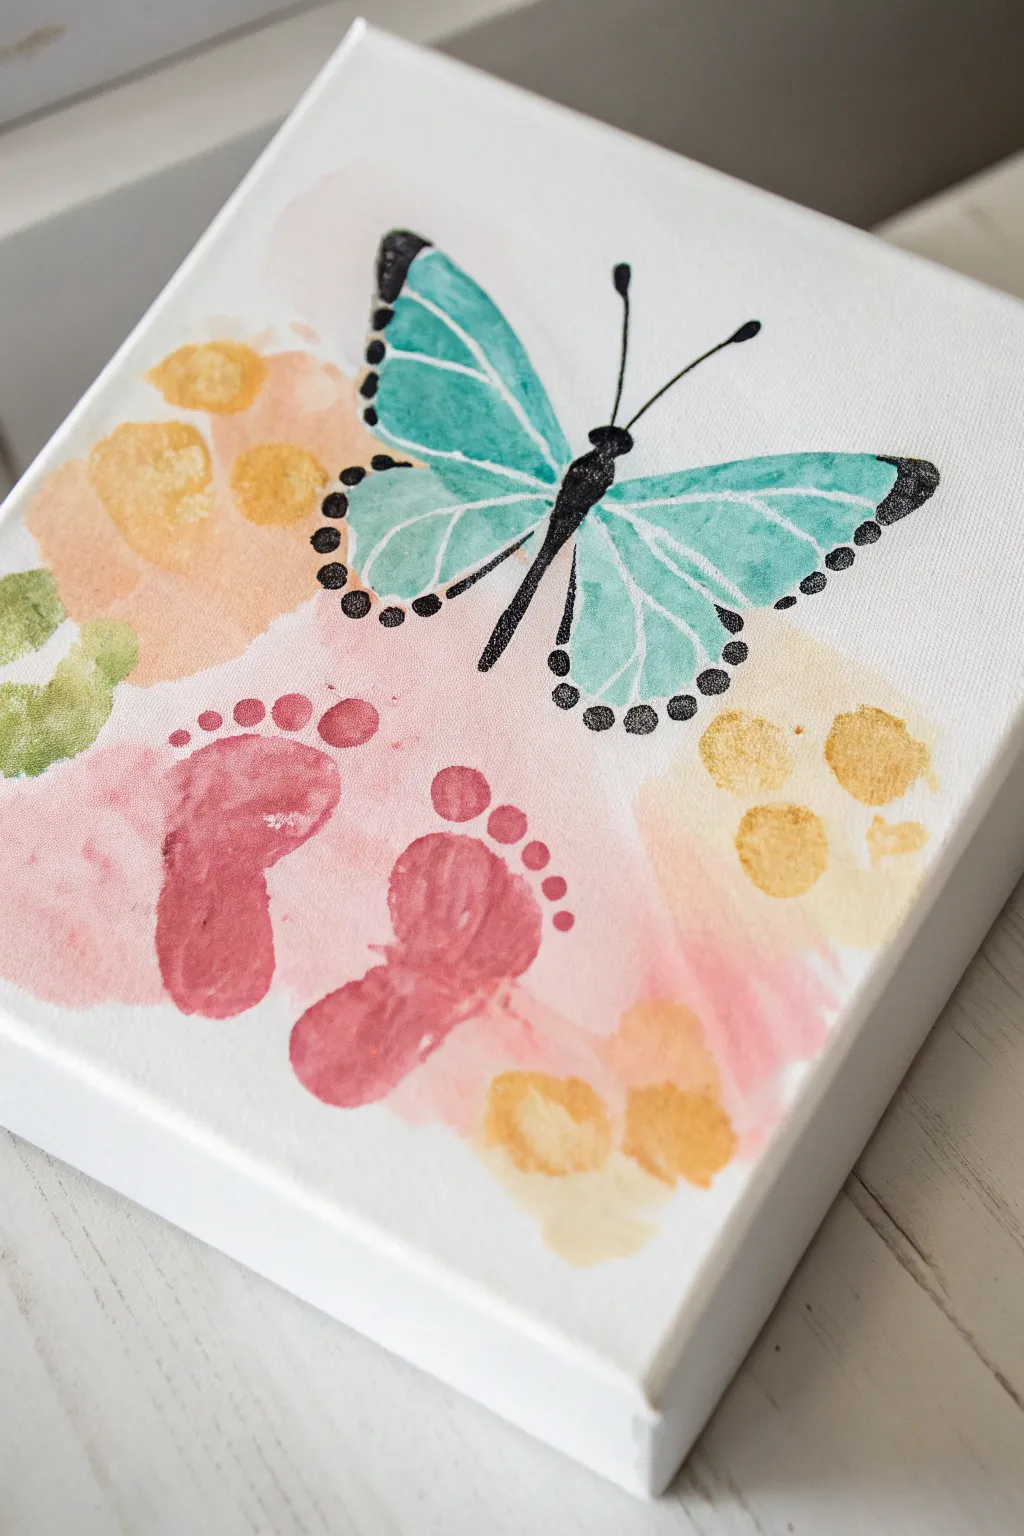
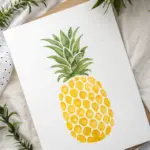
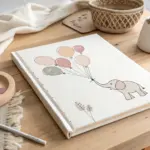
Capture your little one’s tiny steps in a beautiful way with this delicate footprint art piece. Combining soft pastel washes with a bold butterfly illustration, this canvas turns simple footprints into a cherished Mother’s Day memory.
Detailed Instructions
Materials
- Small square canvas (e.g., 8×8 or 10×10 inches)
- Acrylic paints (pink, teal/turquoise, black, white, yellow, pale orange)
- Wide flat paintbrush
- Medium round paintbrush
- Fine detail paintbrush or black paint marker
- Water cup and paper towels
- Baby wipes (essential for clean-up!)
- Disposable plate or palette
Step 1: Creating the Background Wash
-
Prepare your colors:
Start by squeezing out small amounts of pink, yellow, and pale orange paint onto your palette. You want these to be very soft, so mix in a generous amount of white if your colors are too vibrant right out of the tube. -
Add water for transparency:
Dip your wide brush into water and mix it with your pale pink paint. The consistency should be thin and fluid, almost like watercolors, to create that dreamy, washed-out look seen in the background. -
Apply pink splotches:
Gently dab the watery pink paint onto the lower-left and center areas of the canvas. Keep the edges irregular and soft; don’t paint distinct shapes, just organic clouds of color. -
Layer in the yellow tones:
Rinse your brush and repeat the process with the pale yellow or orange paint. Apply these distinct splotches in the upper-left and lower-right corners. It’s okay if the wet colors bleed slightly into the pink; this adds to the artistic effect. -
Create the green accents:
Mix a tiny bit of green with plenty of water and white paint. Dab a few soft spots on the far left edge, overlapping slightly with the pink area for visual interest. -
Let the background dry:
Allow the canvas to dry completely before moving on. This step is crucial so the footprints don’t bleed into the background colors. You can use a hair dryer on a low setting to speed this up.
Step 2: Stamping the Footprints
-
Prepare the foot paint:
Squeeze out a fresh dollop of pink paint. This time, don’t water it down as much—you want it opaque enough to show the distinct toe shapes. -
Paint the first foot:
Using a sponge brush or wide brush, coat the bottom of your toddler’s left foot evenly. Ensure you get paint on all the toes. -
Stamp the left footprint:
Firmly press the painted foot onto the lower-left quadrant of the canvas, angled slightly outward. Press down on the toes gently to ensure a good print, then lift straight up. -
Clean and repeat:
Wipe that messy foot immediately with baby wipes! Then, repeat the painting process on the right foot and stamp it next to the first one, angled slightly to the right. -
Dry the prints:
Wait for the heavy pink paint of the footprints to dry fully. If you rush, you risk smudging the prints while painting the butterfly.
Smudge Savior
If a wiggling foot creates a blurry print, don’t panic. Let it dry, paint over the mistake with a small patch of white paint to mask it, let that dry, and re-stamp.
Step 3: Painting the Butterfly
-
Sketch the wings:
Using a very light pencil touch or a thin brush with diluted teal paint, outline the shape of two large butterfly wings in the upper center of the canvas. -
Fill in the wings:
Fill the wing shapes with distinct teal or turquoise paint. I like to leave thin white veins unpainted, or paint over the teal with thin white lines while it’s still slightly wet for a blended look. -
Paint the body:
Using pitch black paint and a detail brush, paint a slender, elongated oval between the two wings for the butterfly’s body. -
Add the antennae:
With the finest tip of your brush (or a paint pen), draw two thin lines extending from the head. Add tiny dots at the very ends. -
Outline the wings:
Carefully trace the outer edge of the teal wings with black paint. Vary the line thickness slightly to make it look organic. -
Create the dotted border:
Dip the back end (the handle tip) of a paintbrush into black paint. Use this as a stamp to create uniform black dots along the lower edges of the wings. -
Add white highlights:
Once the teal paint is dry, use a fine brush with white paint to sharpen the veins inside the wings, giving them structure and brightness. -
Final touch-ups:
Look over your canvas. If the footprints look a bit light in spots, you can very carefully dab a little extra pink paint to define a toe or heel, but keep the natural texture visible.
Add Some Sparkle
Mix a tiny pinch of fine iridescent glitter into the teal paint before filling in the butterfly wings for a magical shimmer that catches the sunlight.
Display this sweet artwork on a nursery shelf or wrap it up as a heartfelt gift for Grandma


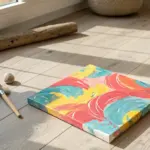
Handprint Flowers in a Vase

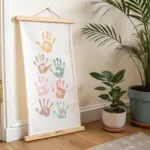
This bright and joyful project captures your little one’s handprints forever in a vibrant display. The scattered arrangement of colorful prints on a crisp white background makes for a modern and sentimental Mother’s Day keepsake.
Step-by-Step
Materials
- White framed canvas or art paper (approx 11×14 inches)
- Non-toxic acrylic craft paints (Red, Orange, Yellow, Green, Purple, Teal, Pink)
- Foam brushes or large paintbrushes
- Paper plates or palette
- Baby wipes or damp paper towels
- Protective table cover
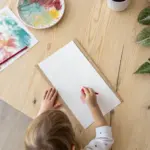
Step 1: Preparation and Setup
-
Prepare the workspace:
Cover your table with a protective cloth or newspaper. This project can get messy, so having baby wipes instantly accessible is crucial before you start painting any hands. -
Select your canvas:
Choose a pre-framed white canvas or a sturdy piece of white cardstock that you plan to frame later. The white frame in the photo really makes the colors pop. -
Prepare the palette:
Squeeze out small amounts of each paint color onto a paper plate. You want a rainbow selection: deep red, bright orange, sunshine yellow, lime green, teal, purple, and magenta.
Step 2: Creating the Handprints
-
Start with the center:
Decide roughly where the prints will go. Unlike a strict circle, this design is a bit organic and scattered, which is perfect for toddlers. I like to start near the middle to ensure good spacing. -
Apply the first color:
Using a foam brush, paint your child’s palm and fingers with the orange paint. Ensure a generous, even coat but avoid globs that will smear. -
Press the first print:
Guide their hand gently onto the canvas, pressing down on the palm and each individual finger to get a clear impression. Lift straight up to avoid smudging. -
Clean and switch colors:
Immediately wipe the hand clean with a baby write or wash with soap and water before moving to the next color. -
Add the red print:
Paint the hand with the deep red or maroon color. Place this print slightly above and to the left of the orange one to start building the cluster. -
Add the yellow print:
Using the yellow paint, place a print below the orange one. Orient the fingers slightly outward to create that radiating ‘bouquet’ feel. -
Create the green print:
Apply the lime green paint. Stamp this handprint to the left side of the bunch. This adds a nice contrast since it mimics leaves in a real bouquet. -
Add the lavender print:
Use a soft purple or lavender shade. Place this print higher up on the left side, angled outwards. -
Stamp the teal print:
Paint the hand with the teal or blue-green shade. Place this one larger and lower on the canvas, anchoring the bottom left of the design. -
Place the purple print:
Using a slightly deeper purple, place a print at the bottom right. This balances out the teal print on the other side. -
Finish with orange-red:
For the final touch, use an orange-red or terra cotta color on the right side to fill in any remaining large gaps.
Wiggle Proofing
Tape the canvas or paper down to the table using painter’s tape. This prevents the artwork from sliding around while you are trying to wrangle slippery, paint-covered toddler hands.
Step 3: Finishing Touches
-
Check for gaps:
Step back and look at the arrangement. If it feels too empty on one side, you can add one more print, but negative white space is part of the charm here. -
Let it dry completely:
Allow the canvas to dry flat for at least 2-3 hours. The thicker parts of the paint where the palm pressed down will take the longest. -
Optional: Add names or dates:
Once fully dry, you can use a fine-tip marker to write the child’s name and the year in a bottom corner, keeping the memory specific to this moment in time.
Make it a Flower
Once the handprints are dry, paint simple green stems coming down from each ‘hand flower’ gathered into a painted bow at the bottom to turn the floating prints into a bouquet.
Hang this colorful masterpiece on the wall to brighten up the room with a reminder of how small those hands once were


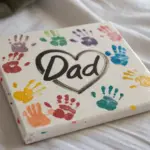
Handprint Heart for Mom
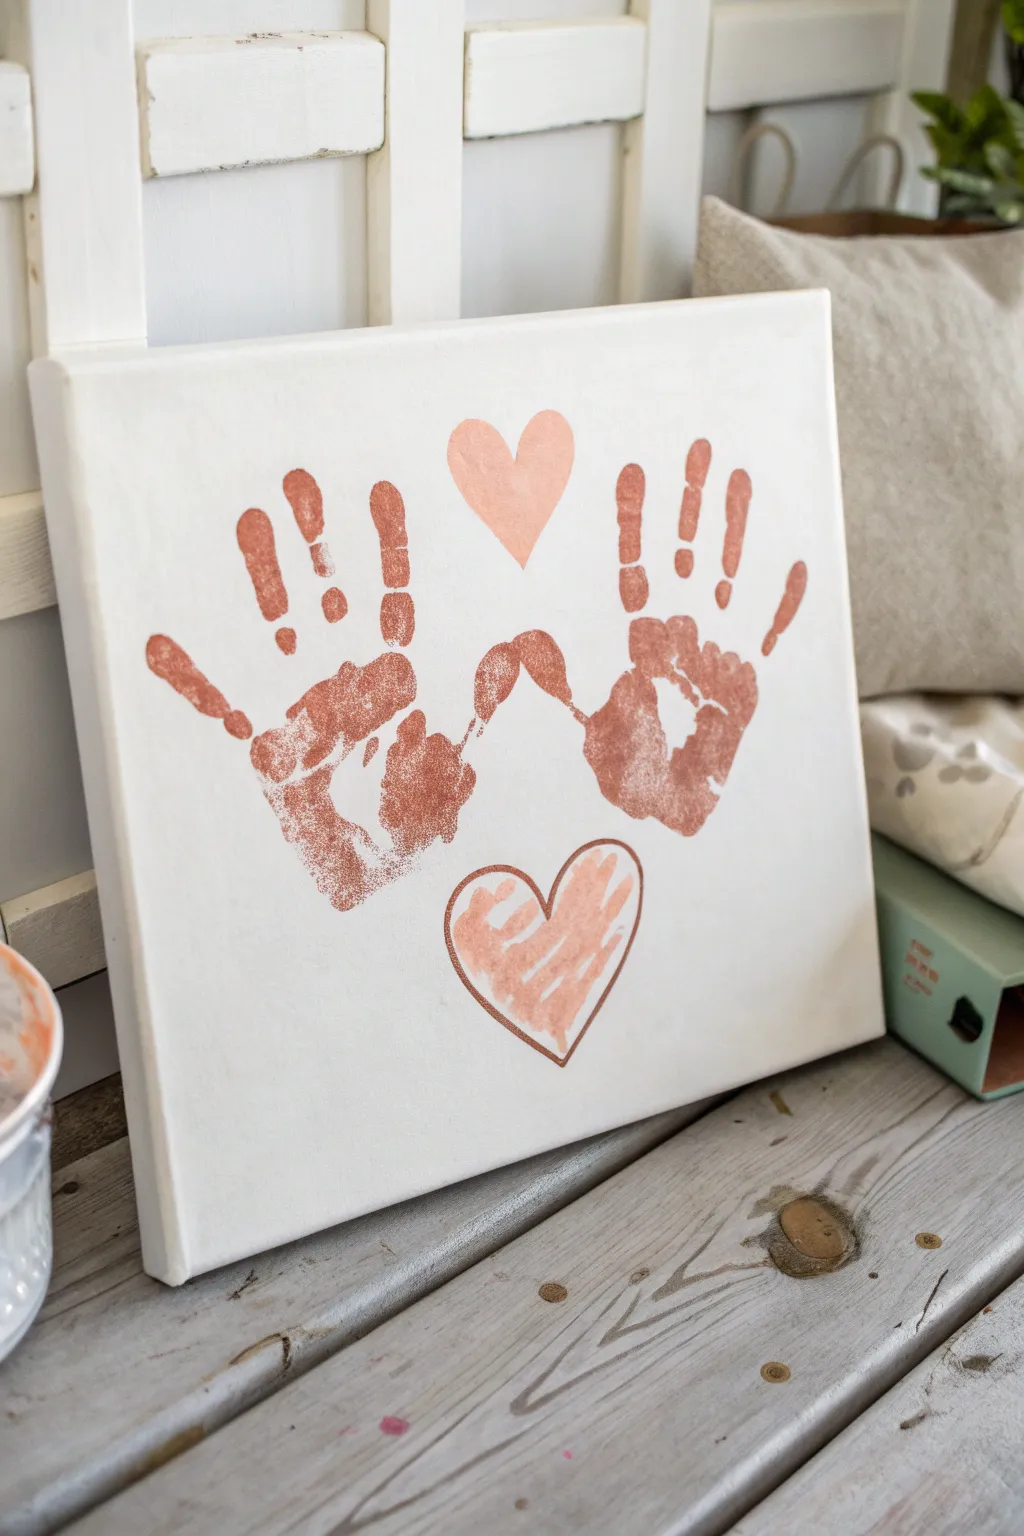
Capture a fleeting moment in time with this sweetly simple canvas art that transforms little hands into a gesture of love. Using warm, earthy tones like terra cotta or coral, this project combines messy fun with a clean, modern aesthetic perfect for Mom’s decor.
Step-by-Step Tutorial
Materials
- White stretched canvas (8×10 or 11×14 inches)
- Terra cotta or coral acrylic craft paint
- Medium flat paintbrush
- Small round paintbrush
- Paper plate or palette
- Baby wipes or damp paper towels
- Pencil (optional)
Step 1: Preparation
-
Set the Stage:
Clear a workspace and cover it with newspaper or a plastic tablecloth. Set your canvas flat on the surface. -
Pre-clean Hands:
Ensure your toddler’s hands are clean and dry before starting. This helps the paint adhere better and keeps the print crisp. -
Prepare the Paint:
Squeeze a generous amount of terra cotta or coral paint onto your paper plate. You want a puddle large enough to coat a toddler’s entire palm.
Smudged Print Rescue
If a hand slides and smudges, turn it into a ‘shadow’ effect by painting a second, cleaner print over it in a darker shade once dry.
Step 2: Creating the Handprints
-
Paint the Left Hand:
Use the medium flat brush to apply an even layer of paint to the child’s left hand. Coat the palms and fingers thoroughly, but try not to make it so thick that it drips. -
Position the First Print:
Guide the child’s hand to the left side of the canvas. Orient the hand at a slight angle, so the fingers point up and outward, and the thumb points inward toward the center. -
Press and Lift:
Press down firmly on the palm and each finger to ensure good contact with the canvas texture. Lift the hand straight up quickly to avoid smudging. -
Clean Between Prints:
Immediately wipe the left hand clean with baby wipes before moving on. I always keep the wipes right next to me to grab instantly. -
Paint the Right Hand:
Repeat the painting process with the child’s right hand, ensuring good coverage on the pads of the fingers. -
Create the Connection:
Position this hand on the right side, mirroring the first one. Aim to have the thumbs almost touching or slightly overlapping in the center to suggest a connection. -
Final Press:
Press firmly and lift cleanly. Let the handprints dry completely for about 15-20 minutes before adding the details.
Step 3: Adding the Heart Details
-
Paint the Top Heart:
Using the small round brush and the same paint color, freehand a simple, solid heart in the space directly above the fingertips. -
Fill the Top Heart:
Fill in the shape carefully. It doesn’t need to be geometrically perfect; a slightly organic shape adds to the charm. -
Outline the Bottom Heart:
Below the wrist area of the handprints, use the small round brush to paint the outline of a larger heart. -
Add Scribble Texture:
Instead of filling this bottom heart solidly, use a dryer brush technique. Dip your brush lightly in paint, wipe a bit off, and gently scribble back and forth inside the outline. -
Layer the Scribbles:
Continue scribbling inside the bottom heart until it has a nice, textured fill that looks a bit like a child’s crayon drawing. -
Final Touches:
Check the canvas for any stray smudges. If you find one, you can usually touch it up with a tiny bit of white paint once everything is dry. -
Sign and Date:
Don’t forget to write the child’s name and the year on the back or bottom corner of the canvas so Mom remembers exactly when those hands were this small.
Make it Shine
Mix a tiny amount of gold glitter into the paint for the hearts, or trace the outline of the bottom heart with a gold paint pen.
Allow the entire piece to dry overnight before gifting it to make sure the thickest parts of the paint are fully set


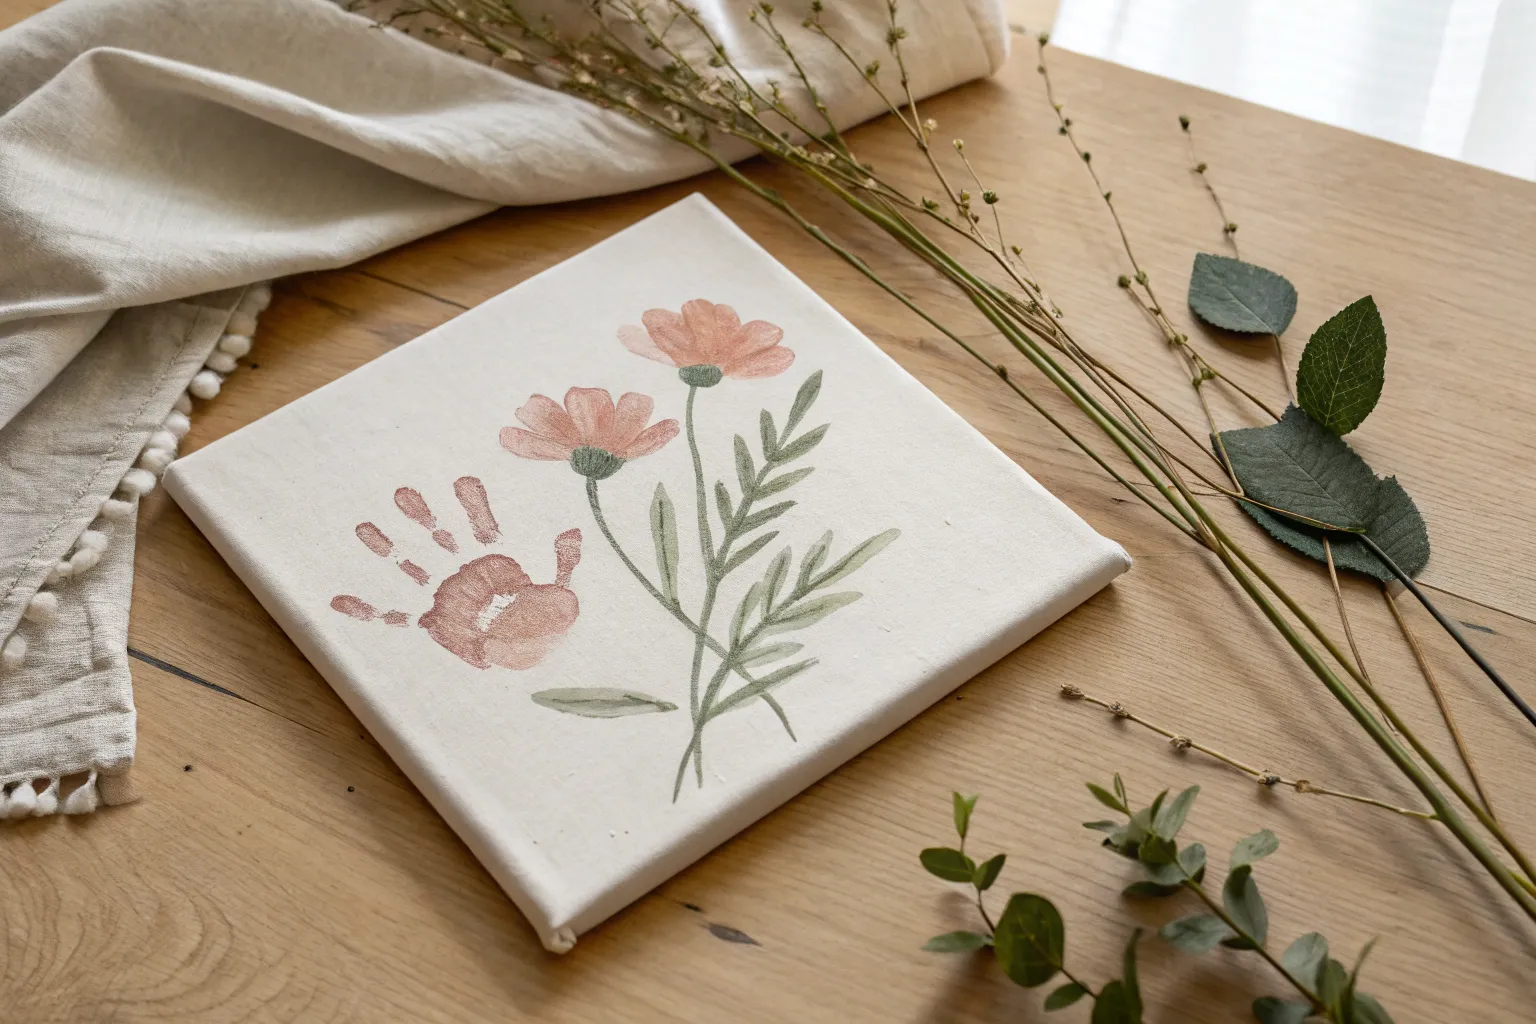
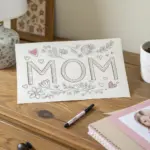
Handprint Wreath Around Mom’s Name
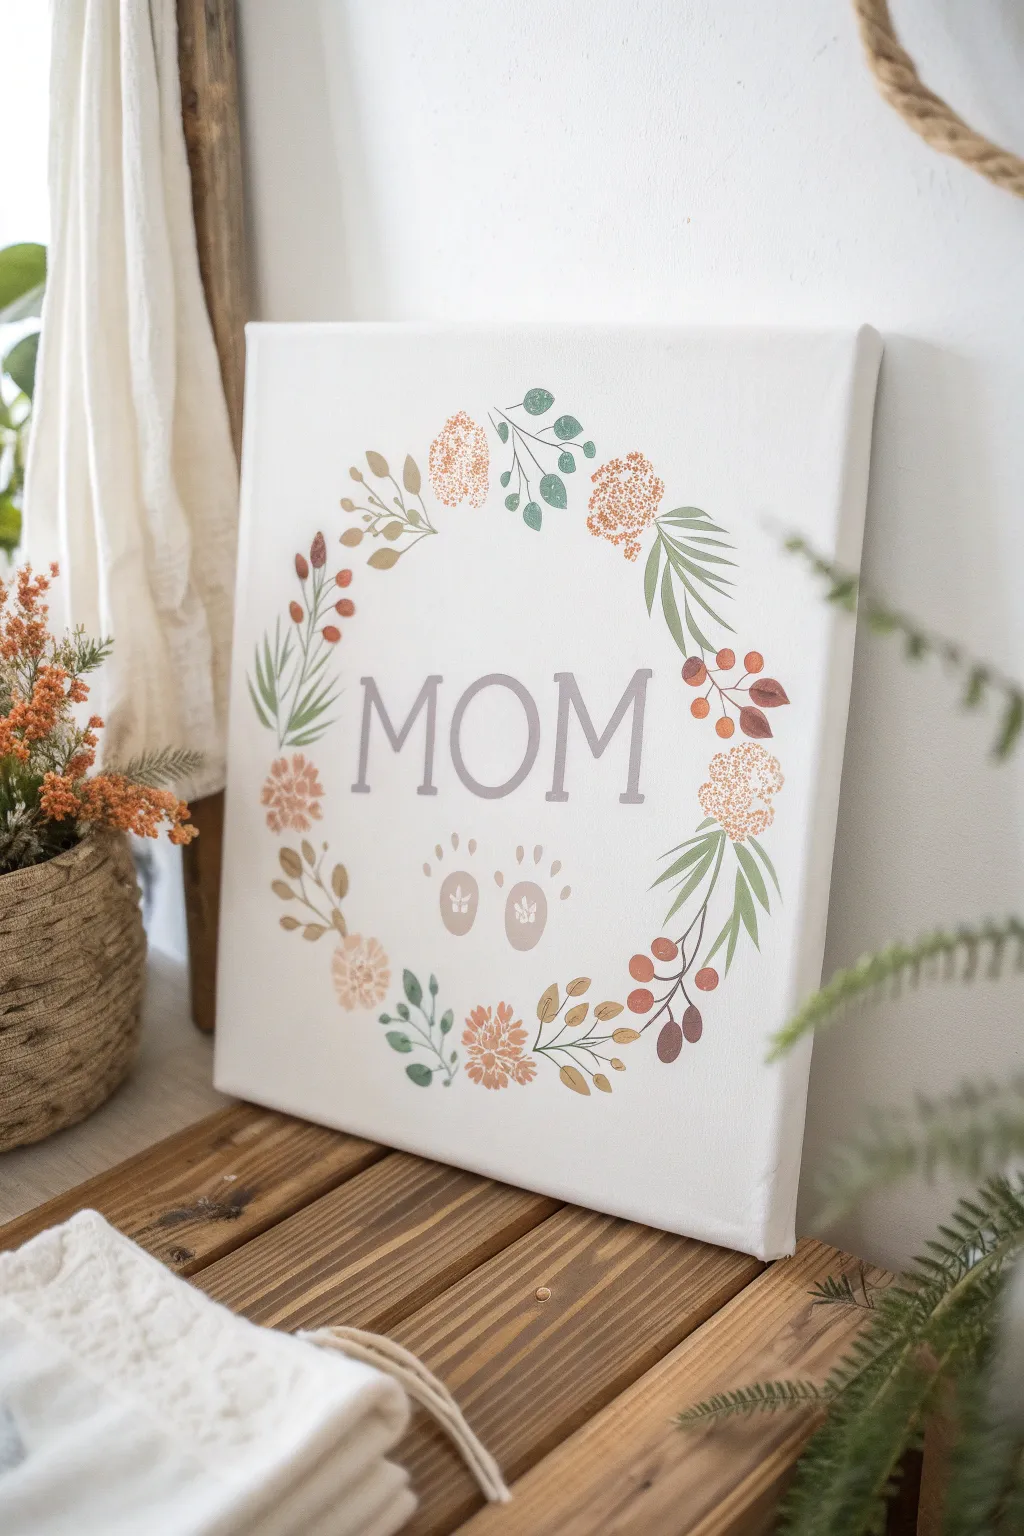
This sweet, minimalist project combines a beautiful botanical wreath with tiny footprint accents to create a lasting keepsake for Mom. The design features soft earth tones and muted greens surrounding a simple, centered text, making it a perfect addition to modern home decor.
Step-by-Step Guide
Materials
- Square stretched canvas (10×10 or 12×12 inches)
- Acrylic paints (muted sage green, dusty rose, burnt orange, brown, grey)
- Letter stencils (approx. 2 inches high)
- Stencil brush or sponge dabber
- Small round brushes (sizes 2 and 4)
- Small flat brush
- Pencil
- Paper plate or palette
- Baby wipes (essential for the footprints)
Step 1: Planning the Layout
-
Establish the center:
Begin by lightly finding the center of your canvas. You can do this by using a ruler to make a very faint ‘x’ or just eyeballing a central point where the word ‘MOM’ will eventually sit. -
Sketch the circle:
Lightly sketch a large circle around your center point with a pencil. This doesn’t need to be perfectly dark or solid; it’s just a guide for where the floral elements will grow from to ensure the wreath shape remains round.
Smudged the paint?
Don’t panic! Since the background is white, you can wait for the mistake to dry completely, then paint over it with white acrylic paint. It acts just like correction fluid.
Step 2: Painting the Text
-
Position the stencils:
Arrange the stencils for ‘MOM’ in the dead center of your sketched circle. Use small pieces of painter’s tape to hold them securely in place so they don’t shift while painting. -
Apply the grey paint:
Load a stencil brush or sponge dabber with a soft grey acrylic paint. Dab the excess paint off onto a paper towel until the brush is almost dry; this prevents paint from bleeding under the stencil edges. -
Fill in the letters:
Gently pounce the paint over the stencils using an up-and-down motion. Apply a second coat if needed for opacity, then carefully peel away the stencils while the paint is still slightly tacky.
Level Up: Texture
Mix a tiny bit of baking soda into your flower paint colors. This creates a fluffy, raised texture that makes the blooms pop off the canvas for a 3D effect.
Step 3: Adding the Footprints
-
Prepare the paint:
Mix a soft beige or taupe color for the footprints. You want a neutral tone that complements the floral colors without overpowering the text. -
Stamping the feet:
Paint the toddler’s feet (or use a stamp if the child is wiggly) and press them directly beneath the word ‘MOM’ in the center bottom area. I find it easiest to do one foot at a time, wiping clean immediately after. -
Let it dry:
Allow the footprints and text to dry completely before starting the surrounding wreath to avoid smudging your hard work.
Step 4: Painting the Floral Wreath
-
Start with main vines:
Using a small round brush and sage green paint, create thin, curved lines that follow your pencil circle guide. Leave some gaps; the vines don’t need to be a continuous solid line. -
Add large leaves:
Paint elongated, willow-style leaves stemming from your vines using the same green. Vary the angles so they look natural and flowing. -
Paint round leaves:
Switch to a darker, muted teal or blue-green color. Add small stems with rounded, coin-shaped leaves interspersed among the willow leaves for variety in texture. -
Create berry sprigs:
Using a reddish-brown or rust color, paint thin stems that branch out. Add small dots at the ends of these stems to create berries or buds. -
Add the flowers:
Dip a small brush into dusty rose or coral paint. Create loose, impressionistic flower shapes by dabbing small clusters of dots or short strokes together. Place these roughly at the ‘corners’ of your circle to balance the wreath. -
Finer details:
Take a very fine brush and add tiny details like veins on larger leaves or small centers to the flowers using a contrasting color like white or dark brown. -
Final touches:
Step back and look at the wreath as a whole. Fill in any empty-looking gaps with extra leaves or tiny berry dots to ensure the wreath looks full and balanced. -
Erase guides:
Once the paint is absolutely bone dry, gently erase any visible pencil marks from your initial circle sketch.
Hang this lovely piece in a nursery or living room for a customized touch of nature
BRUSH GUIDE
The Right Brush for Every Stroke
From clean lines to bold texture — master brush choice, stroke control, and essential techniques.
Explore the Full Guide
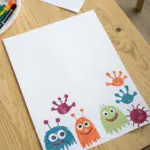
Bubble-Print Background With Handprint Message
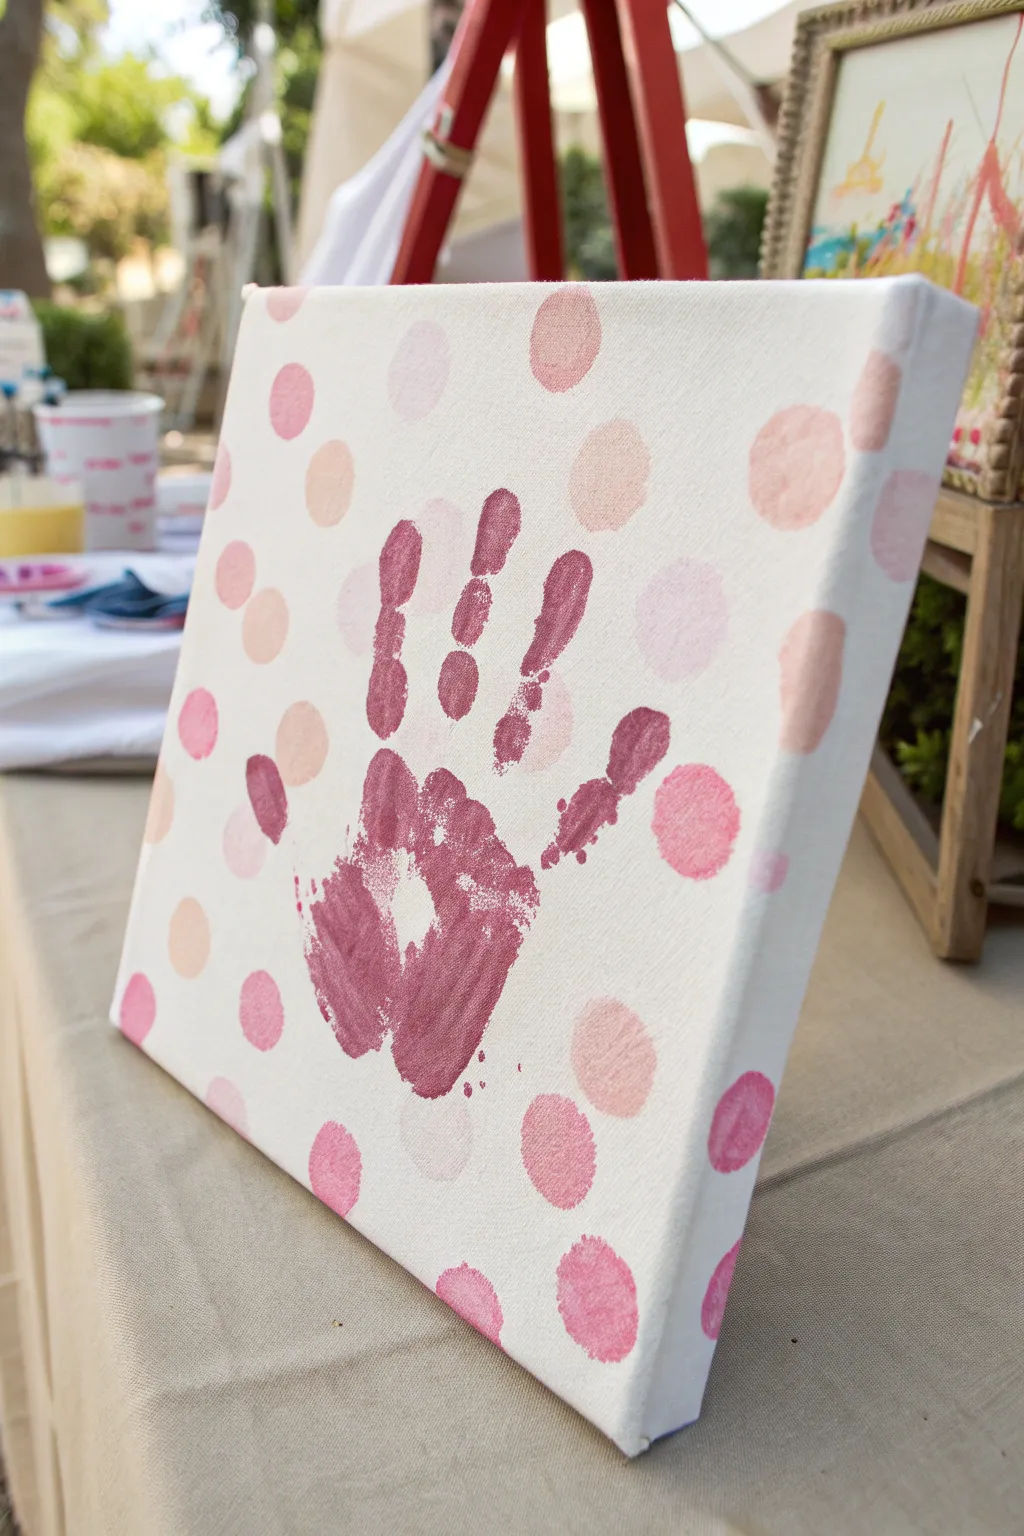
Create a sweet and modern keepsake with this layered canvas art that combines playful polka dots with a personalized touch. By mixing soft pastel bubbles with a bold, contrasting handprint, you’ll produce a professional-looking piece that perfectly captures a moment in time.
Detailed Instructions
Materials
- Small square canvas (8×8 or 10×10 inches)
- Acrylic paints (dark mauve/burgundy, baby pink, peach, white)
- Foam pouncers (round sponge brushes) in various sizes
- Paper plate or palette
- Paintbrush (medium size)
- Baby wipes or damp cloth (for clean up)
Step 1: Creating the Polka Dot Background
-
Prepare your palette:
Squeeze out small amounts of baby pink, peach, and white acrylic paint onto your paper plate. Leave the dark mauve aside for later. -
Mix pastel shades:
Create variety by mixing a tiny bit of white into the pink and peach paints to make lighter versions of each color. You want about 3-4 distinct shades ranging from pale blush to medium pink. -
Load the first pouncer:
Dip a medium-sized round foam pouncer into one of your lighter pink shades. Dab it on a clean part of the plate once or twice to offload excess paint and ensure an even coat. -
Stamp the first dots:
Press the foam pouncer gently onto the white canvas to create a perfect circle. Lift straight up to avoid smearing. -
Vary the placement:
Continue stamping this color randomly across the canvas, leaving plenty of white space between them for other colors. -
Switch colors:
Using a fresh pouncer (or a cleaned and dried one), switch to a peach or light orange shade. Stamp these into some of the empty spaces. -
Add size variety:
If you have a smaller or larger foam pouncer, use it with a different shade of pink. The variation in circle sizes adds visual interest and depth to the background. -
Fill the gaps:
Look for large empty white areas and fill them with your remaining pastel shades. Don’t worry about perfection; overlap is okay, but keeping them separate looks cleaner. -
Let the background dry:
This is crucial: allow the canvas to dry completely before moving to the next phase. You can use a hair dryer on a cool setting to speed this up, or wait about 20-30 minutes.
Clean Edges Trick
Don’t forget the sides! Wrap your polka dot pattern around the edges of the canvas for a gallery-wrapped look that is ready to hang without a frame.
Step 2: Adding the Handprint
-
Prepare the feature color:
Squeeze out a generous amount of the dark mauve or burgundy paint. This darker color ensures the handprint stands out against the pastel background. -
Paint the hand:
Use a medium paintbrush to apply a thick, even layer of the dark paint to the toddler’s palm and fingers. Painting is often better than dipping because it reduces globs that slide around. -
Position the hand:
Guide the child’s hand to the center of the dry canvas. I find it helpful to hover their hand right over the spot before committing to the press. -
Press firmly:
Press down on the center of the palm and gently push down on each finger to ensure a good transfer of paint. -
Lift carefully:
Hold the canvas down with one hand and lift the child’s hand straight up quickly to get a clean print without smudging. -
Immediate cleanup:
Wipe the child’s hand immediately with a baby wipe or wash with soap and water before the acrylic paint dries on their skin. -
Touch up if needed:
If the print is very faint in spots, you can use a small brush to carefully dab a tiny bit of paint into the missing areas, but keeping the natural texture often looks best. -
Final drying:
Let the finished piece sit undisturbed for at least an hour to ensure the thicker paint of the handprint cures completely.
Make it Personal
Once the paint is fully dry, use a fine-tip permanent marker or paint pen to write the year and the child’s name in the corner or on the back of the canvas.
Now you have a charming piece of art that freezes a small hand in time forever


Have a question or want to share your own experience? I'd love to hear from you in the comments below!